
Well, guess it was a matter of time when I would give another shot at this game knowing that the Master mode achievements were awaiting for my return.
F-Zero X is a game I'm certainly most familiar with for a long time, and even have talked about here before a few years ago in two occassions - first simply talking about the game itself, and another as part of talking about crazy techniques from playing with Max Acceleration in the F-Zero games.
So this time, the focus will be on what's on the tin: Aiming to beat all the cups in F-Zero X in Master difficulty, where the limits of your reflexes and steering will be put to test...thanks to the absurdly fast CPU racers awaiting for you.
Dealing with the catch of the analog stick
A little something to mention before going deep into it is that these wouldn't have been possible for me to pull off with my current controller had it not been for the ability to tweak the sensitivity of the analog stick in the emulators I used.
Simply put, F-Zero X is a game that relies in your steering precision to make turns at high speed, as trying to turn too hard while going too fast will break your grip - something that's more likely if you play with a machine with E Grip stat like Blood Hawk. But unless you have an original N64 controller with an intact analog stick, a hall effect controller or something that you know lets you work with precise movements [Gamecube and Xbox 360 controllers for example...as long as they aren't worn out with drift and the sort], you WILL fail to keep your machine stable when steering at high speeds.
That's why tweaking the sensitivity is important, as it lets you do the smaller movements easier while locking you out from the higher analog stick range and preventing you from slipping out more frequently. The one downside is that you WILL have to rely on side attacks a lot for sharp turns, but it is a tradeoff I was willing to take to be able to drive the machine otherwise.
If you can't beat them, take them out
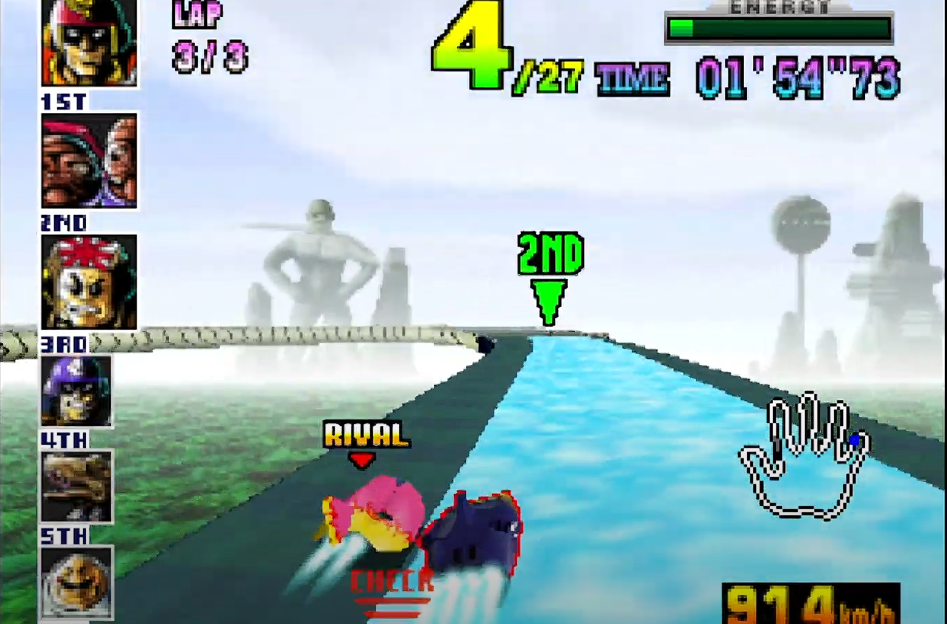
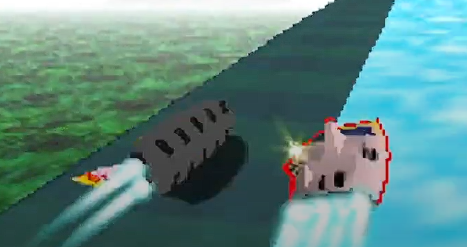
A key aspect of F-Zero X is how the combat is not only enabled through your side attack moves, but also encouraged through two ways: The first one is the dedicated Death Race mode that challenges you to get rid of 29 racers in a simple track, but the other one is how eliminated racers work on the Grand Prix.
See, anyone you eliminate or gets eliminated in a race, whether a random CPU or even those few racers dangerously close to you instandings, will get no points at the end of a race.
So...if you have a CPU racer that's ahead of you by a handful of points or nearby you, you may want to try and take them out for good in a race. Should you do that and finish the race, they should plummet down hard in positions, enough to no longer be a nuisance for you...unless they happen to have THAT much of an advantage at you that it isn't enough, but it is up to you to aim for good positions to prevent that from happening.
Or if you have more races left, KO them again and see if that does get rid of them for good.
Due to the high speeds the CPUs can naturally reach compared to you who have to rely on boosts and clean lines, they may end up overtaking you often in some of the tougher courses - and that's where you go for the good ol' kill at them. If you can take them out early before they speed ahead and maybe end up unable to catch them later, that is.
So yeah, you see that rival over there? Now you don't.
The dangerous highlights
With how there's a whopping 24 tracks in the base game, plus 12 more in the japan-exclusive 64DD expansion, you can get a total of 36 tracks to go through across 6 cups...so I'll try to summarize things up through some particular track highlights. Mainly the ones that gave me the most trouble or are noticeably more dangerous to race on than the rest.
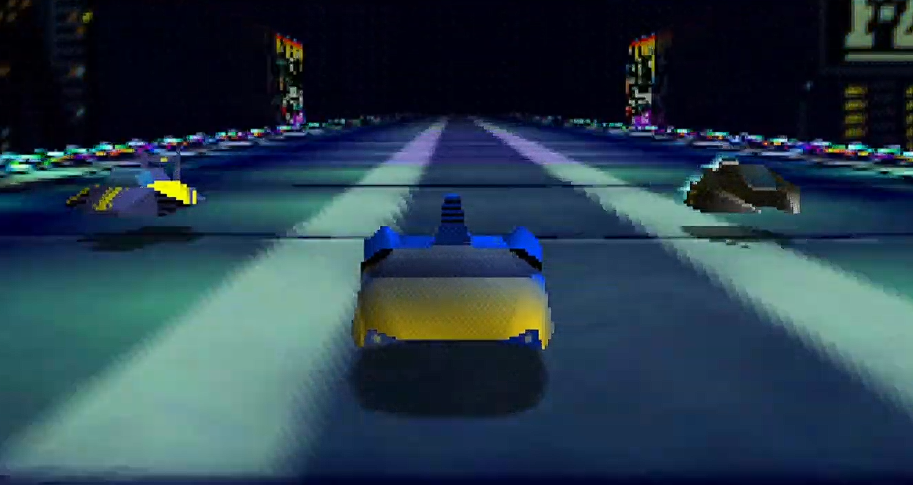
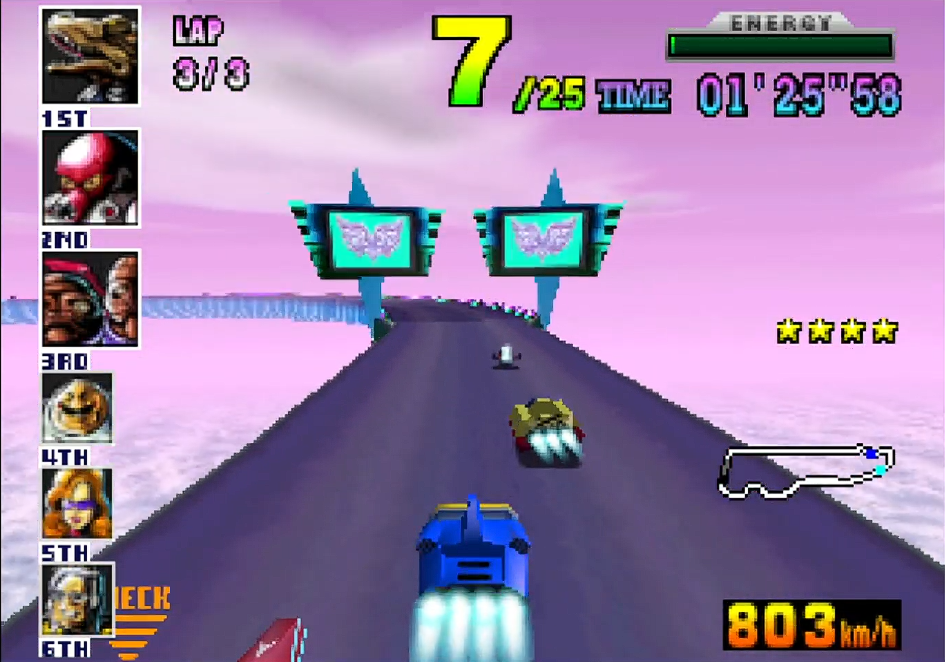
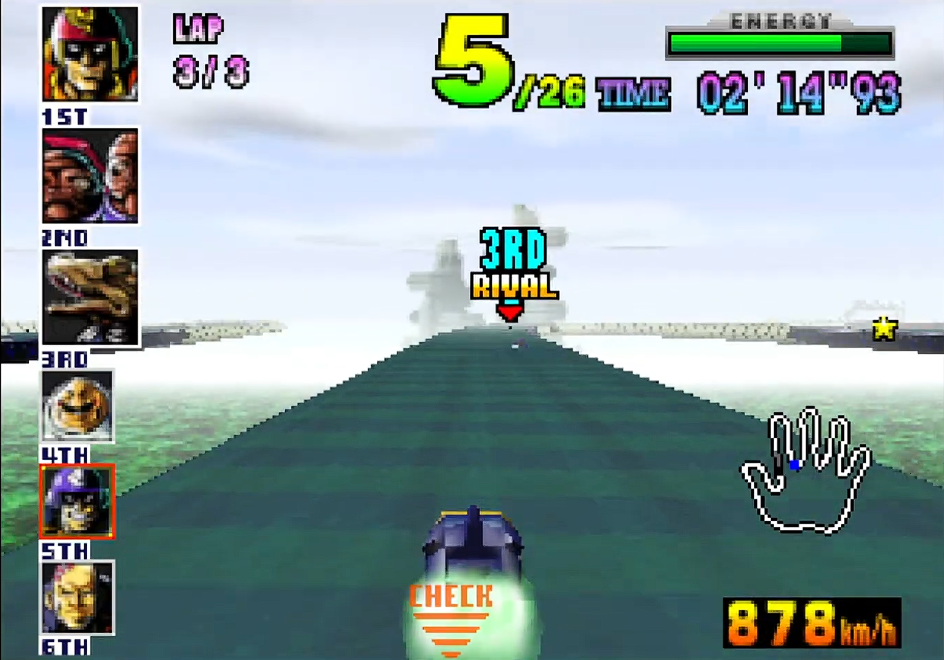
Jack Cup: Big Blue
Now, there's definitely other tracks on the first cup that can turn troublesome if not handled with the right approach, like Silence's drag race esque nature requiring you to hit all the boosts you can, Devil Forest's sharp turns demanding quick reflexes, and Port Town having some sudden back-to-back turns to then go into a big jump, those are all tracks where I can either reach the top for or at least manage to an extent. Even Sand Ocean's Pipe track has become more manageable.
So I'd say that the second place in this cup goes to Silence due to the precision required to go fast enough and get first. But my first place choice for Jack Cup is definitely Big Blue: Cylinder.
If you try to go too fast while on an area that's bending outward...there's a good chance you'll get launched off and die, losing a life or even the run if on your last chance.
Cylinder messes with you hard due to how you NEED to try and counteract by aiming for the sides that bend inside instead of outside to use your boosts, as those CPUs will not wait for you no matter what in Master difficulty. Take that stress-inducing threat always behind the risk and couple it with an ending where you have to quick turn several times quickly, and you have quite a troublemaker for the first cup of the game.
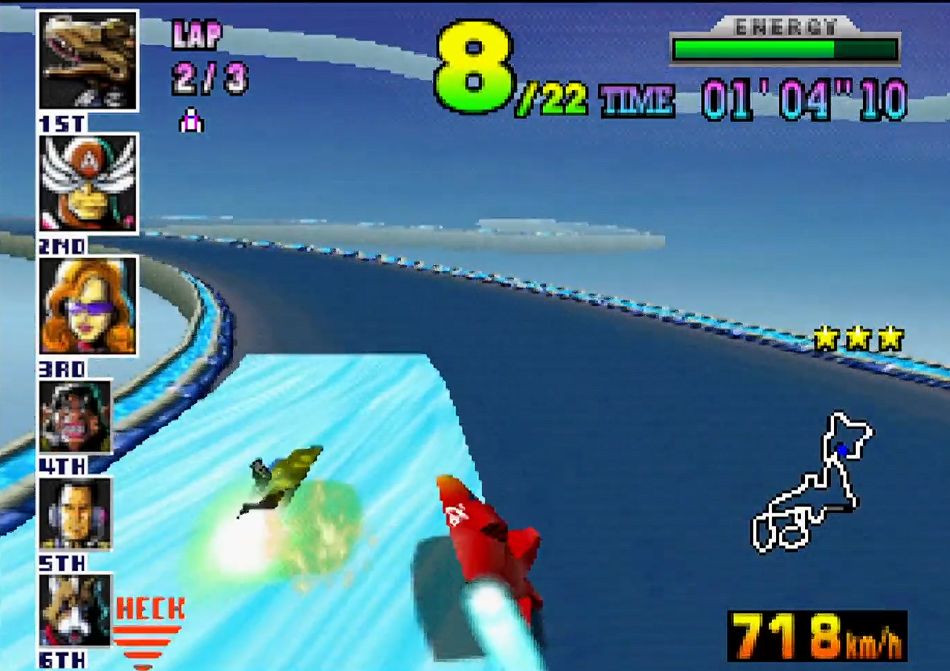
Queen Cup: White Land
Dangerous Steps is a very fitting subtitle for this one, because one mistake on that thin path will be your demise.
The pressure will be on having to keep up with the rest of the racers while avoiding a slip up is magnified by this one track being at the very end of the cup. Some jumps where you'll want to gain speed with but watch out to not land on someone else, a section of the track that's thin yet wall-less, and then more jumps to be mindful of, its either trading off your health for more speed or trying to play it safer to at least finish the race.
It has more solid track than Big Blue, but as the CPUs also take the chance to speed away when possible, taking risks with the booster after the first lap feel mandatory...which is why it becomes nerve-wrecking to think about a wrong bump on that thin road ending your run, or even a bump with another car if you've exhausted all your health.
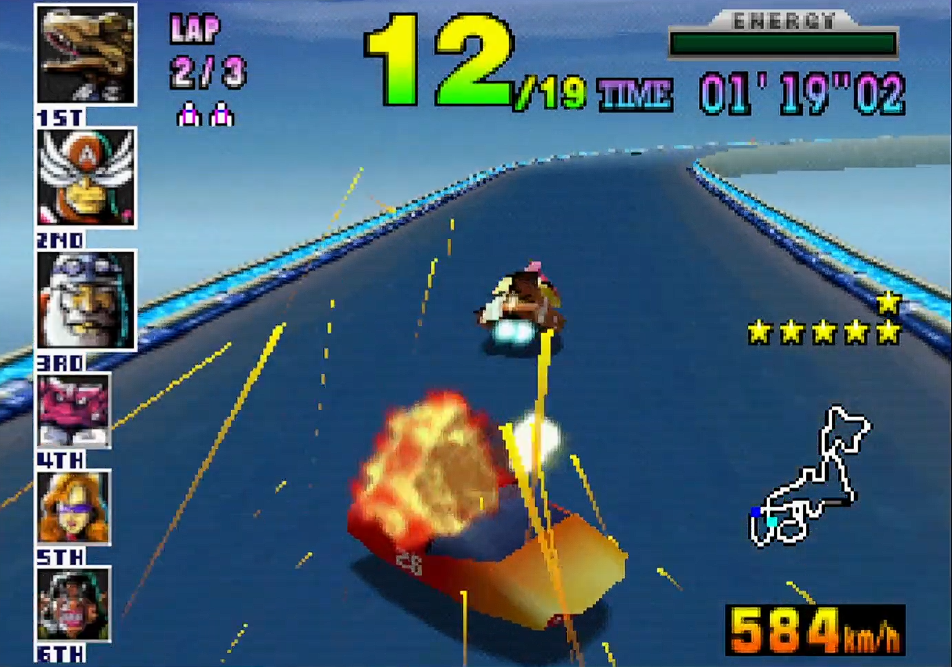
King Cup: Sector B
I guess that the fastest summary I can give this one is that its...somewhat similar to White Land. A loop into a wall-less curve, and the need to push yourself to have a chance against the other racers. The catch is that there's also THIS area where the track bends and leaves you upside down.
And yes, if you try to go too fast in here, you will also fall off. So you'll have to manage your speed here and boost away in every other area if you want to succeed.
Joker Cup: Port Town 2 and Big Hand
If for some reason, your biggest fear in this game are tracks with tons of sudden curves...then that sure sounds like a super specific fear, but uhh...I don't want to alarm you- IS THAT PORT TOWN 2
Despite the track being practically walled all around and flat until the jump that comes near the starting line, it is a pretty tough track to deal with due to how all of that road is fairly thin, causing that managing turns as much as you can something important, as trying to ride the walls away from the pit lanes will quickly drain your energy until you explode.
On the other hand, Big Hand is a track that's shaped like...well, a hand, but mixes things up brutally with a big curved straight with ice on the middle to then throw you at those sharp corners with wall-less straights between each curve. To say that you'll need nerves of steel to overcome it is an understatement, more so when THIS is the final track of the final cup of the game.
...Unless you figure out a way to play the Japan-exclusive 64DD expansion, which grants you two more cups to play with - and they are overall even tougher than anything before it.
DD1 Cup: Big Blue 3
Honorable mention to Silence 3 and Sand Ocean 3 - those would have been here at top for sure with how both force you to control your speed to avoid a certain demise with the way the physics work. It is something that you may pick up with them the moment you see them in action or even try them out, but if there's a track that is far more difficult due to its designed complexity, its Big Blue 3
Big Blue 3 is a track so complex that even the CPUs will tend to fall off throughout the race. That's the only mercy you'll get on this one.
With an unique music track mixing rock and traditional japanese instruments, it is a truly technical track with a lot of thin paths, the pit lanes being always relegated to the sides in thin patches, and a few super harsh turns without walls awaiting for your soul.
If you can survive this track at a decent position after a good GP run overall, then you may have won your ticket to freedom. Good luck on doing that, though. Below is a timestamped video where you can see my surviving attempt at this track went like, getting 15th due to a lot of other racers dying, and yet securing the 1st place overall thanks to my efforts beforehand.
https://youtu.be/btjN2_VEiXE?si=kkkuPKSYVHF7G8-e&t=1124
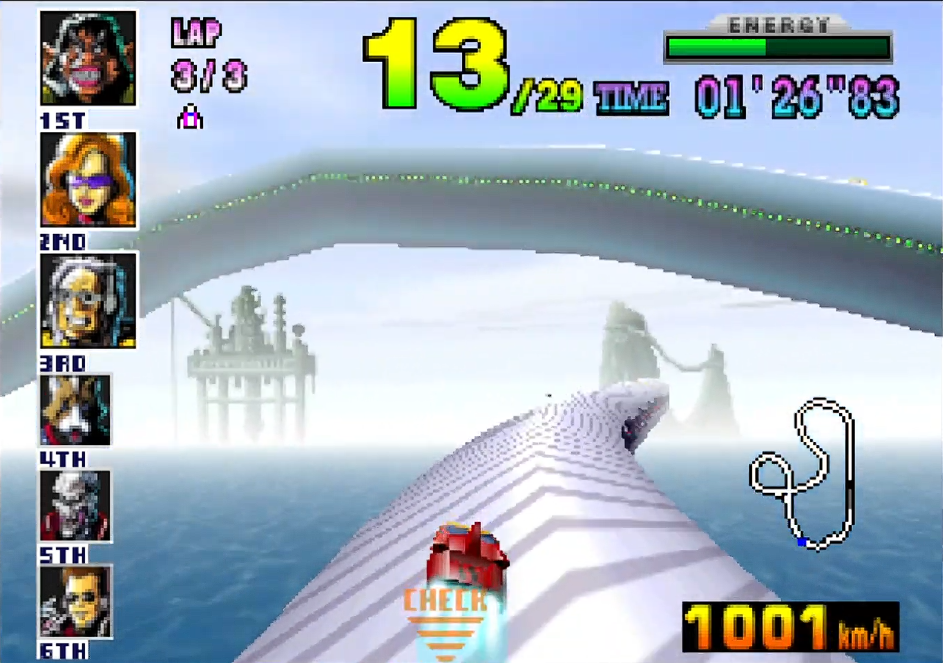
DD2 Cup: Fire Field 3
I'd like you to see a small clip.
https://www.youtube.com/watch?v=jFTcB1oLggk
Being launched off the road and landing below is NOT what usually happens. If you try to go too fast over there, you WILL get launched...but most likely get launched off-course and die.
So...yeah, welcome to another track with a speed limit section. The rest of the track also requires a cool head to drive through the burning field, as there's banked wall-less sections and sharp turns to be wary of. Another track where I have to settle with a middle position due to the risks of speeding being mandatory for success.
DD2 Cup: White Land 3

Honorable mention to the last track of the cup, Big Foot, which has a fairly long curved straight with ice in the middle that's nerve-wrecking to cruise through - and while the curves afterwards are fairly sharp, they are entirely walled...so you can use the slider strat if using a machine suitable for it and drift through those turns for free speed [which is what I did with Blood Hawk].
White Land 3 however is overall more finicky as a track, as there's more wall-less straights with ice, some particularly sharp turns, a few jumps and bumps near a road with landmines...driving through this track is already a challenge in itself, let alone being willing to risk immediate death by speeding through the boosts just to see if you can catch up with the top racers.
Highest I could get on my DD2 Cup completion on this track was a humble 14th place...where similar to Big Blue 3, was also because the total racer count was whittled down to just 18 due to the jump pads and landmines eating through the CPU racers.
https://youtu.be/3UMFcDD1oow?si=gdrbjW0WDNn1qBJM&t=789
And...what's next?
Wave Race Blue Storm, most likely.
I probably will mention some of the stuff I ended up pulling off with Wave Race 64 to end my journey with it, as it basically leads to my first impressions with Blue Storm and how, despite it being a noticeably tougher game to jump into at a first glance, instead felt like a new challenge that I was looking to be able to fight with thanks to my experience with the previous game.
Although you'll have to be careful with your temper should you want to tackle the harder Championships...
But hey, that's the story to tell another day. Until then-
See you next time, and thanks for reading.

Spanish translation with DeepL. All screenshots were captured by myself.
Español
Bueno, supongo que era cuestión de tiempo que volviera a probar este juego, sabiendo que los logros del modo Maestro estaban esperando mi regreso.
F-Zero X es un juego con el que estoy muy familiarizado desde hace mucho tiempo, e incluso he hablado de él aquí hace unos años en dos ocasiones: primero simplemente hablando del juego en sí, y otra vez como parte de una conversación sobre técnicas locas para jugar con la aceleración máxima en los juegos de F-Zero.
Así que esta vez, nos centraremos en lo que dice la lata: El objetivo es ganar todas las copas en F-Zero X en dificultad Master, donde se pondrán a prueba los límites de tus reflejos y tu habilidad al volante... gracias a los pilotos de la CPU absurdamente rápidos que te esperan.
Lidiar con el problema del joystick analógico
Antes de profundizar en el tema, hay que mencionar que no habría sido posible lograrlo con mi mando actual si no fuera por la posibilidad de ajustar la sensibilidad del joystick analógico en los emuladores que utilicé.
En pocas palabras, F-Zero X es un juego que se basa en la precisión de tu dirección para tomar curvas a alta velocidad, ya que si intentas girar demasiado bruscamente mientras vas demasiado rápido, perderás el control, algo que es más probable si juegas con una máquina con estadísticas E Grip como Blood Hawk. Pero a menos que tengas un mando original de N64 con un stick analógico intacto, un mando con efecto Hall o algo que te permita realizar movimientos precisos (por ejemplo, los mandos de Gamecube y Xbox 360, siempre que no estén desgastados por el drift y cosas por el estilo), NO podrás mantener la máquina estable al girar a altas velocidades.
Por eso es importante ajustar la sensibilidad, ya que te permite realizar movimientos más pequeños con mayor facilidad, al tiempo que te impide acceder al rango más alto del joystick analógico y evita que te salgas de la pista con más frecuencia. La única desventaja es que tendrás que recurrir mucho a los ataques laterales para realizar giros bruscos, pero es una compensación que estaba dispuesto a aceptar para poder conducir la máquina de otra manera.
Si no puedes vencerlos, elimínalos
Un aspecto clave de F-Zero X es que el combate no solo se habilita a través de tus movimientos de ataque lateral, sino que también se fomenta de dos maneras: la primera es el modo Death Race, que te reta a eliminar a 29 corredores en una pista sencilla, pero la otra es cómo funcionan los corredores eliminados en el Gran Premio.
Verás, cualquiera que elimines o sea eliminado en una carrera, ya sea una CPU aleatoria o incluso aquellos pocos corredores peligrosamente cerca de ti en la clasificación, no obtendrá puntos al final de la carrera.
Así que... si tienes un corredor de la CPU que está por delante de ti por unos pocos puntos o cerca de ti, es posible que quieras intentar eliminarlo definitivamente en una carrera. Si lo haces y terminas la carrera, debería caer en picado en la clasificación, lo suficiente como para que ya no sea una molestia para ti... a menos que tenga tanta ventaja sobre ti que no sea suficiente, pero depende de ti aspirar a buenas posiciones para evitar que eso suceda.
O si te quedan más carreras, elimínalo de nuevo y comprueba si eso lo elimina definitivamente.
Debido a las altas velocidades que las CPU pueden alcanzar de forma natural en comparación con vosotros, que tenéis que depender de los impulsos y las líneas limpias, es posible que os adelanten a menudo en algunos de los circuitos más difíciles, y ahí es donde debéis ir a por ellos. Si podéis eliminarlos pronto, antes de que se adelanten y quizá acabéis sin poder alcanzarlos más tarde, claro.
Así que sí, ¿veis a ese rival de ahí? Ahora ya no está.
Los puntos destacados peligrosos
Con unas 24 pistas en el juego base, más 12 adicionales en la expansión 64DD exclusiva para Japón, puedes conseguir un total de 36 pistas para recorrer en 6 copas... así que intentaré resumir las cosas a través de algunos puntos destacados de pistas concretas. Principalmente las que me dieron más problemas o que son notablemente más peligrosas para correr que el resto.
Jack Cup: Big Blue
Ahora bien, hay otras pistas en la primera copa que pueden resultar problemáticas si no se abordan con el enfoque adecuado, como la naturaleza de carrera de aceleración de Silence, que requiere que aproveches todos los impulsos posibles, las curvas cerradas de Devil Forest, que exigen reflejos rápidos, y Port Town, con algunas curvas repentinas consecutivas que dan paso a un gran salto. Todas ellas son pistas en las que puedo alcanzar la cima o, al menos, manejarlas hasta cierto punto. Incluso la pista Pipe de Sand Ocean se ha vuelto más manejable.
Así que diría que el segundo puesto de esta copa es para Silence, debido a la precisión que se requiere para ir lo suficientemente rápido y quedar primero. Pero mi elección para el primer puesto de la Jack Cup es, sin duda, Big Blue: Cylinder.
Si intentas ir demasiado rápido en una zona que se curva hacia fuera... hay muchas posibilidades de que salgas disparado y mueras, perdiendo una vida o incluso la carrera si es tu última oportunidad.
Cylinder te complica mucho las cosas, ya que TIENES que intentar contrarrestar el efecto a