Greetings dear community, I hope you are having a happy Thursday full of the best energies to achieve everything you have planned.
Saludos apreciada comunidad, espero que estén pasando un feliz jueves cargado de las mejores energías para lograr todo lo que tienen planificado.
In this season when it is so hot, our gardens need a little more care, most of the plants I have at home are cacti and succulents, even they also deserve special care. Gardens give us peace of mind and are capable of changing our vibrations in a positive way. In honor of them, I made a cute felt bag with a small garden.
En esta temporada cuando está haciendo tanto calor, nuestros jardines necesitan un poco más de cuidado, la mayoría de las plantas que tengo en casa son cactus y suculentas inclusive ellas también merecen un especial cuidado. Los jardines nos brinda tranquilidad y son capaces de cambiar nuestras vibraciones de forma positiva en honor a ellos, elaboré un tierno bolso en fieltro con un pequeño jardín.
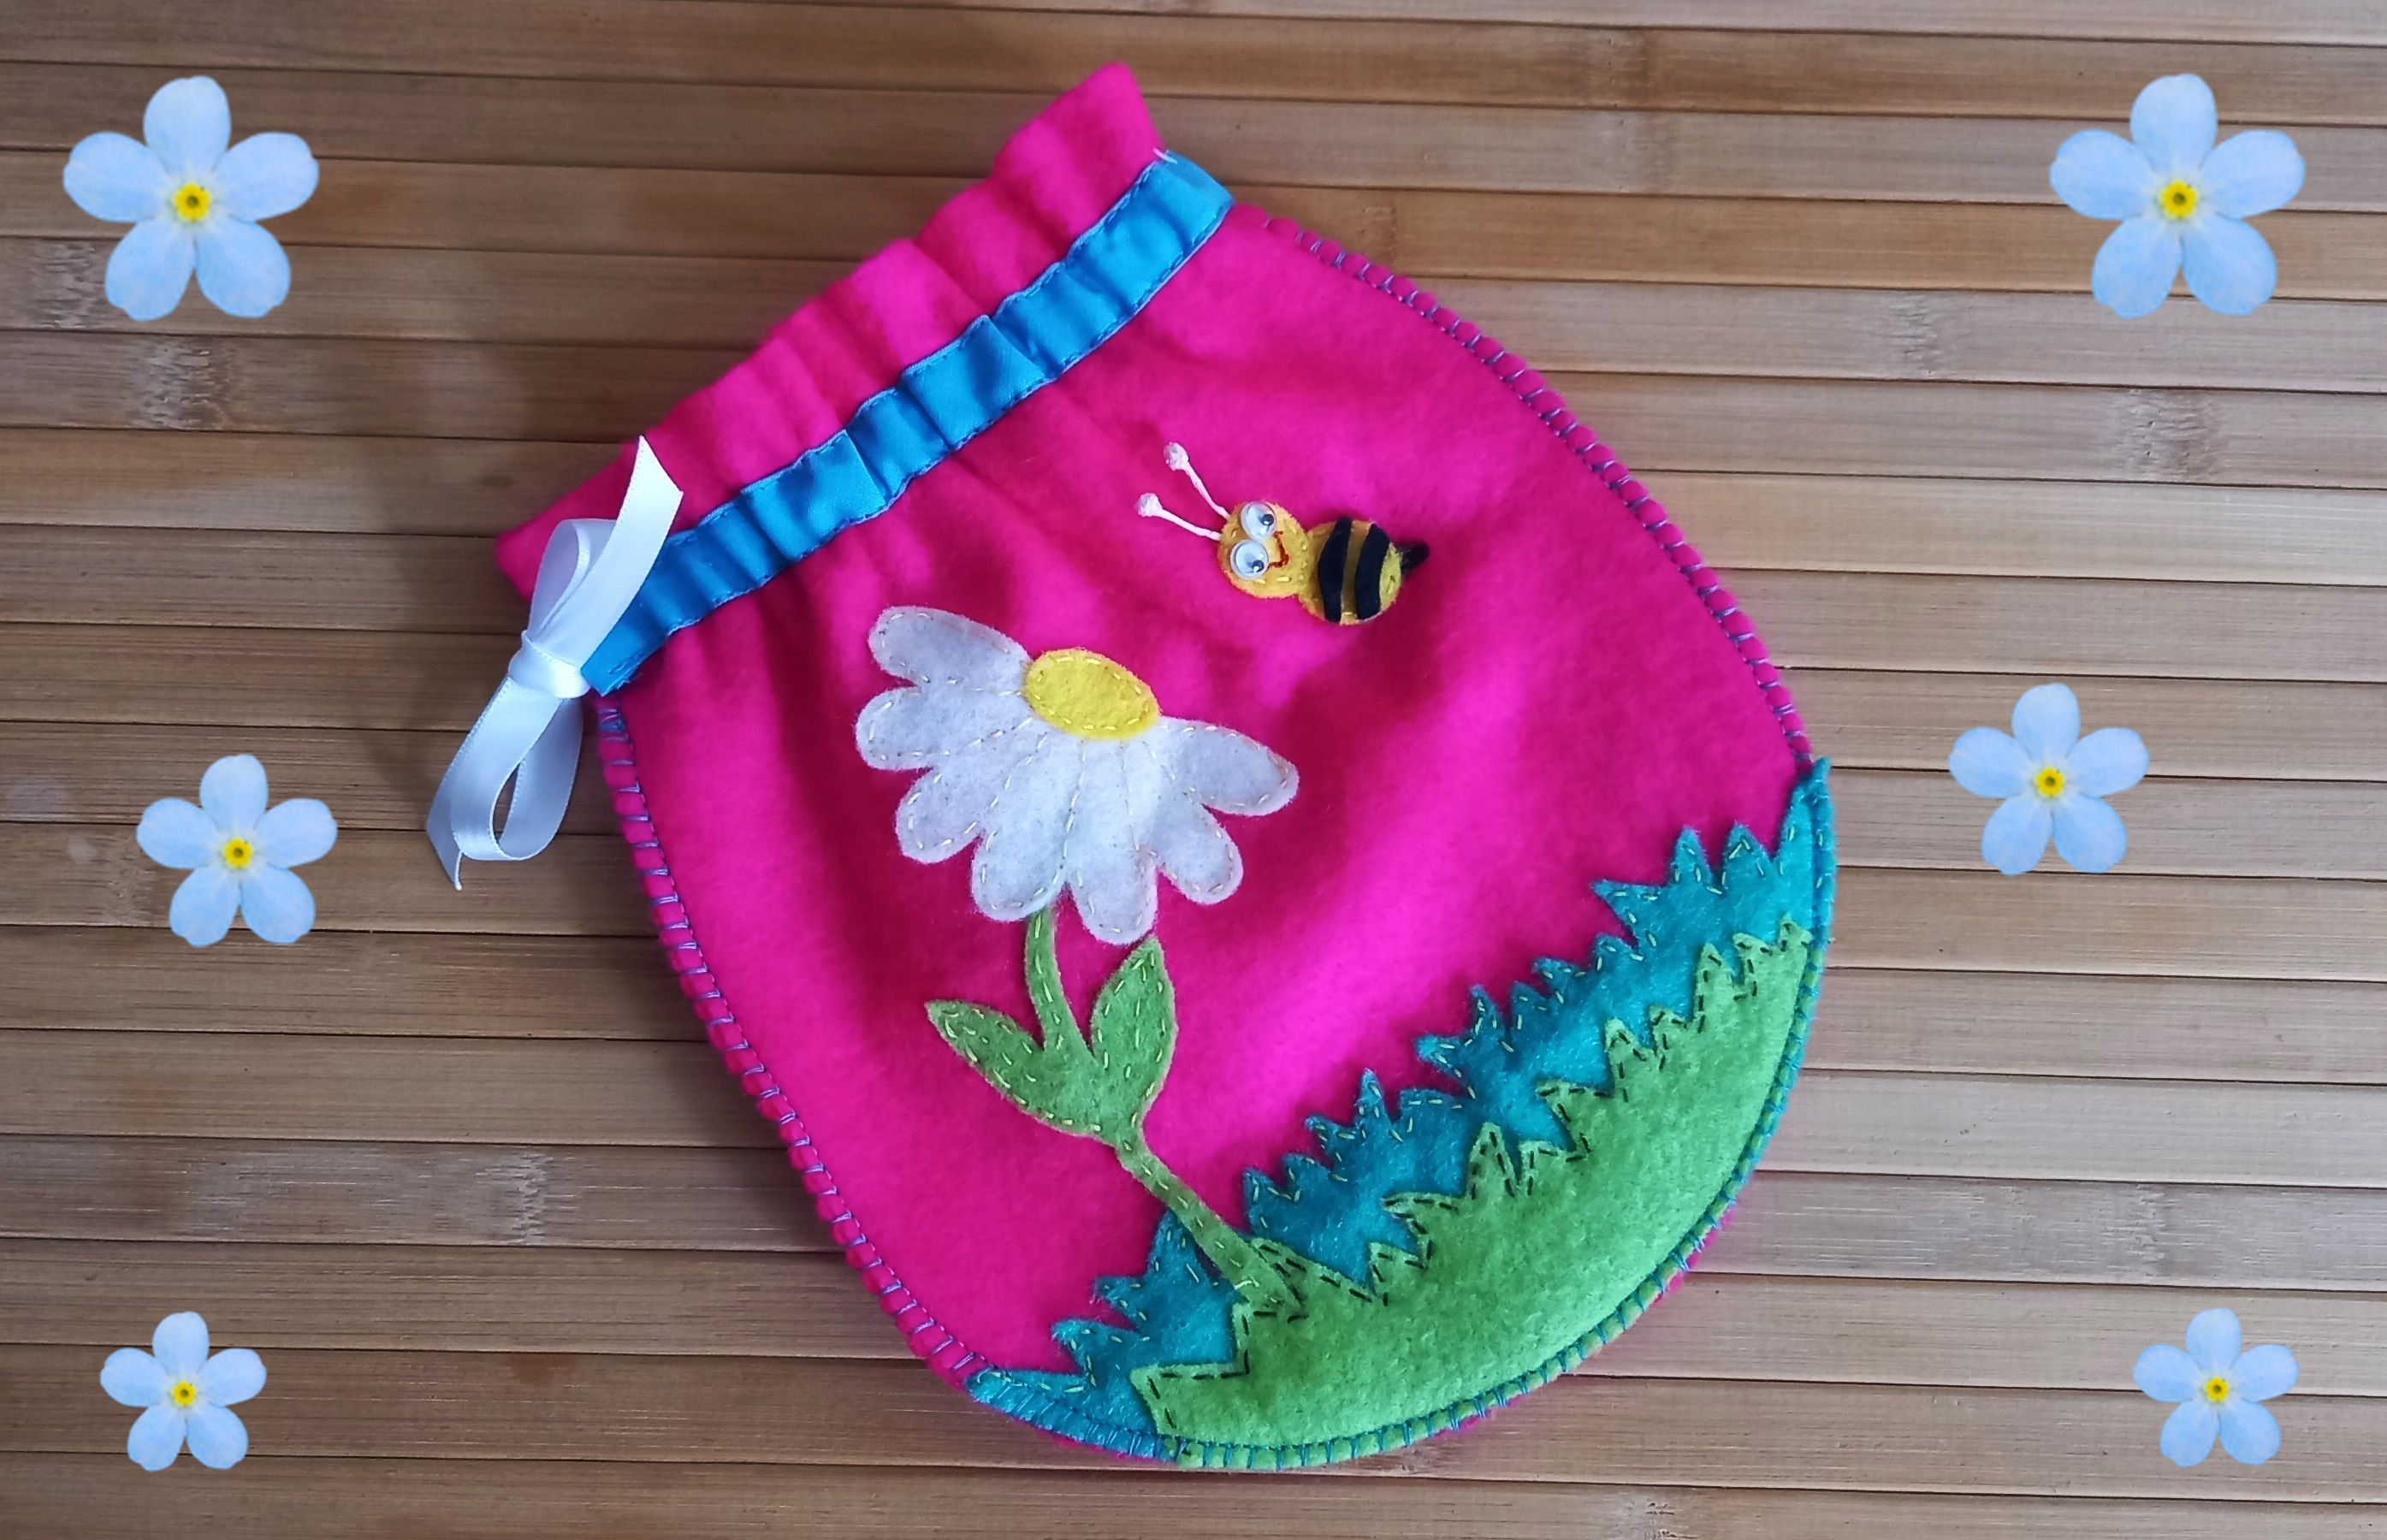
This bag is ideal for party favors, to store the bows or our jewelry, for this activity we can also invite the princesses of the favorite house to participate and thus spend some time sharing with them in a creative activity.
Este bolso es ideal para los cotillones de las fiestas, para guardar las moñeras o nuestra bisutería favorita, para esta actividad también podemos invitar a las princesas de la casa a participar y así pasar un rato compartiendo con ellas en una actividad creativa.
Materials:
Fuchsia, yellow, black, white and two shades of green felt yarn of different colors mobile eyes pistils blue bias white satin ribbon pins Cold sylicon Needle Scissor Sewing machine For the mold: pencil, paper and scissorsMateriales:
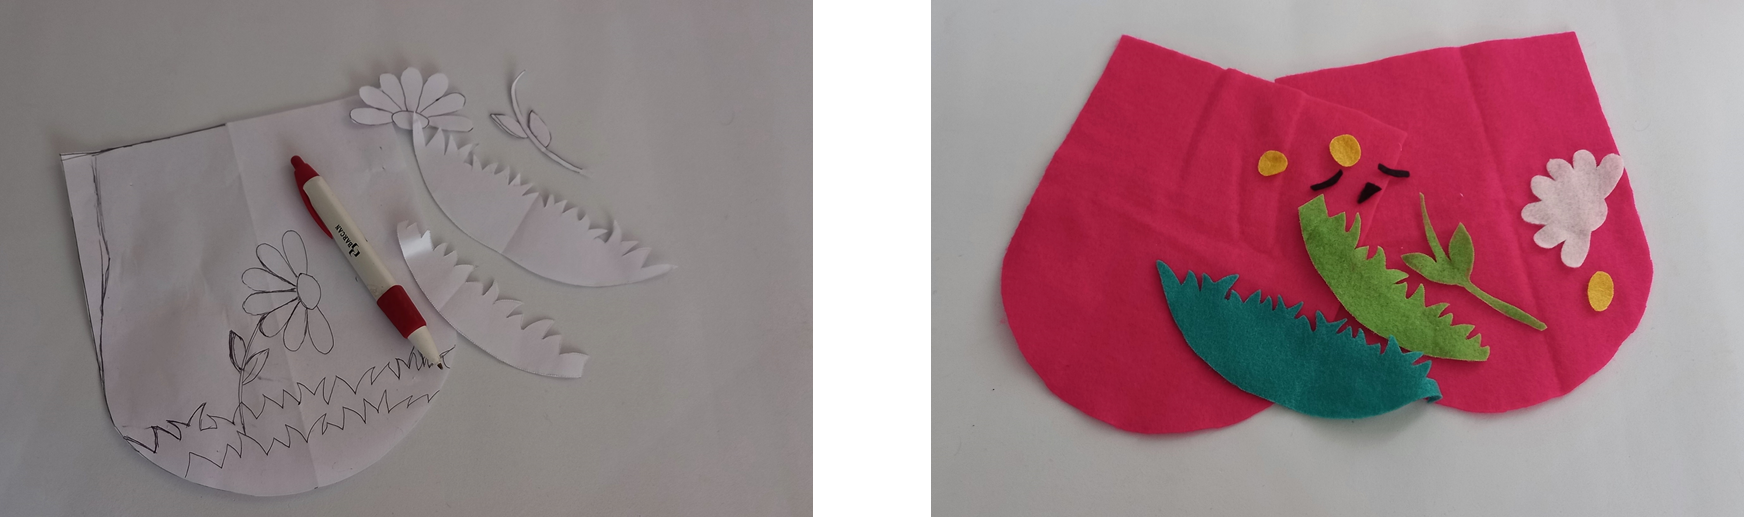
Fieltro fucsia, amarillo, negro, blanco y dos tonos de verde Hilo de diferentes colores Ojitos móviles Pistilos Bies azul Cinta de raso blanca Alfileres Silicón frío Aguja Tijera Máquina de coser Para el molde: lápiz, papel y tijera🌸 First we make the mold with the desired measurements, we cut out all the figures that are going to decorate the bag, then with the help of a marker we transfer all the molds to the felt and with the help of scissors we cut out each one, the scissors we use to the felt must be different than for the paper and, thus, avoid losing the edge.
>🌸 Primero elaboramos el molde con las medidas deseadas, recortamos todas las figuras que van a decorar el bolso, luego con la ayuda de un marcador transferimos todos los moldes para el fieltro y con la ayuda de una tijera recortamos cada uno, la tijera que utilicemos para el fieltro debe ser distinta que para el papel y, así evitar que pierdan el filo.
___
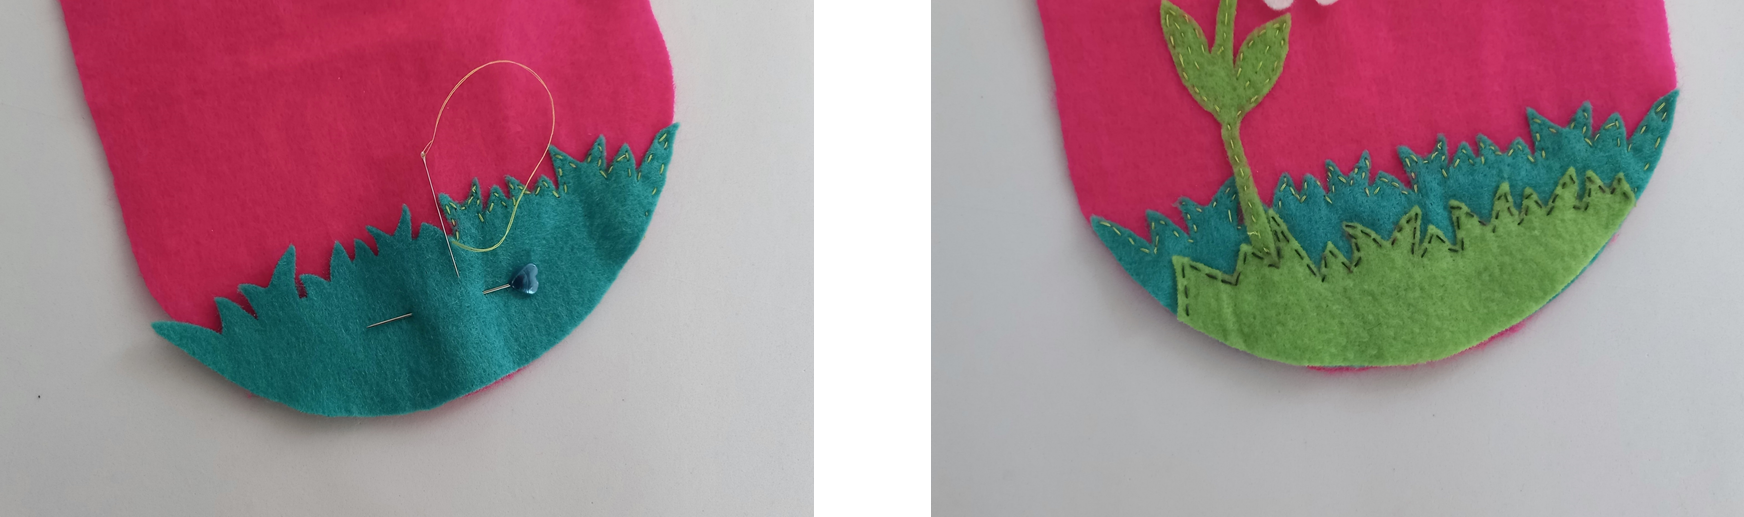
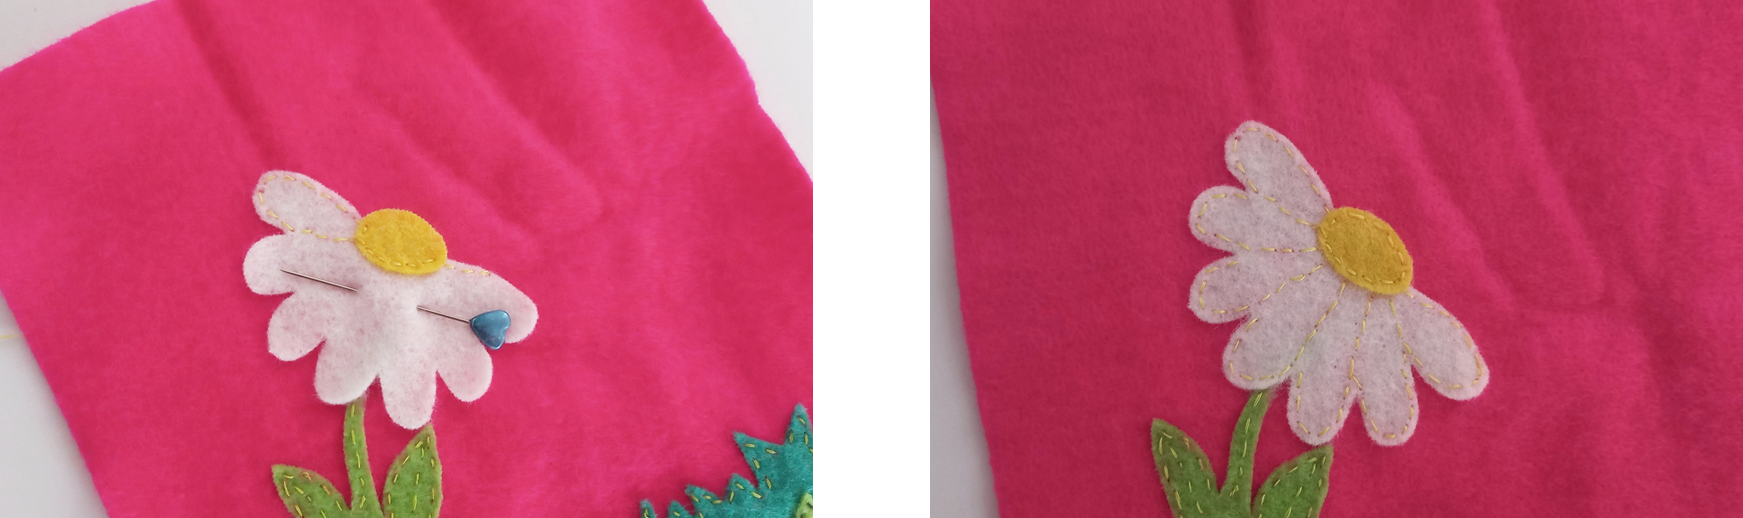
🌸 Now we will begin to decorate the bag, for the grass I used two shades of green to make it contrast, first we will embroider the back part with thread in another shade of green so that it stands out, then we will embroider the front part and take advantage of placing the stem of the flower, which I edged with a shade of thread similar to felt, since I didn't like how it looked with a different shade.
>🌸 Ahora comenzaremos a decorar el bolso, para el pasto yo utilicé dos tonos de verde para que hicieran contraste, primero bordaremos la parte posterior con hilo en otro tono de verde para que resalte, luego bordaremos la parte delantera y aprovechamos de colocar el tallo de la flor, la cual borde con un tono de hilo parecido al fieltro, ya que no me gustó como lucia con un tono diferente.
___
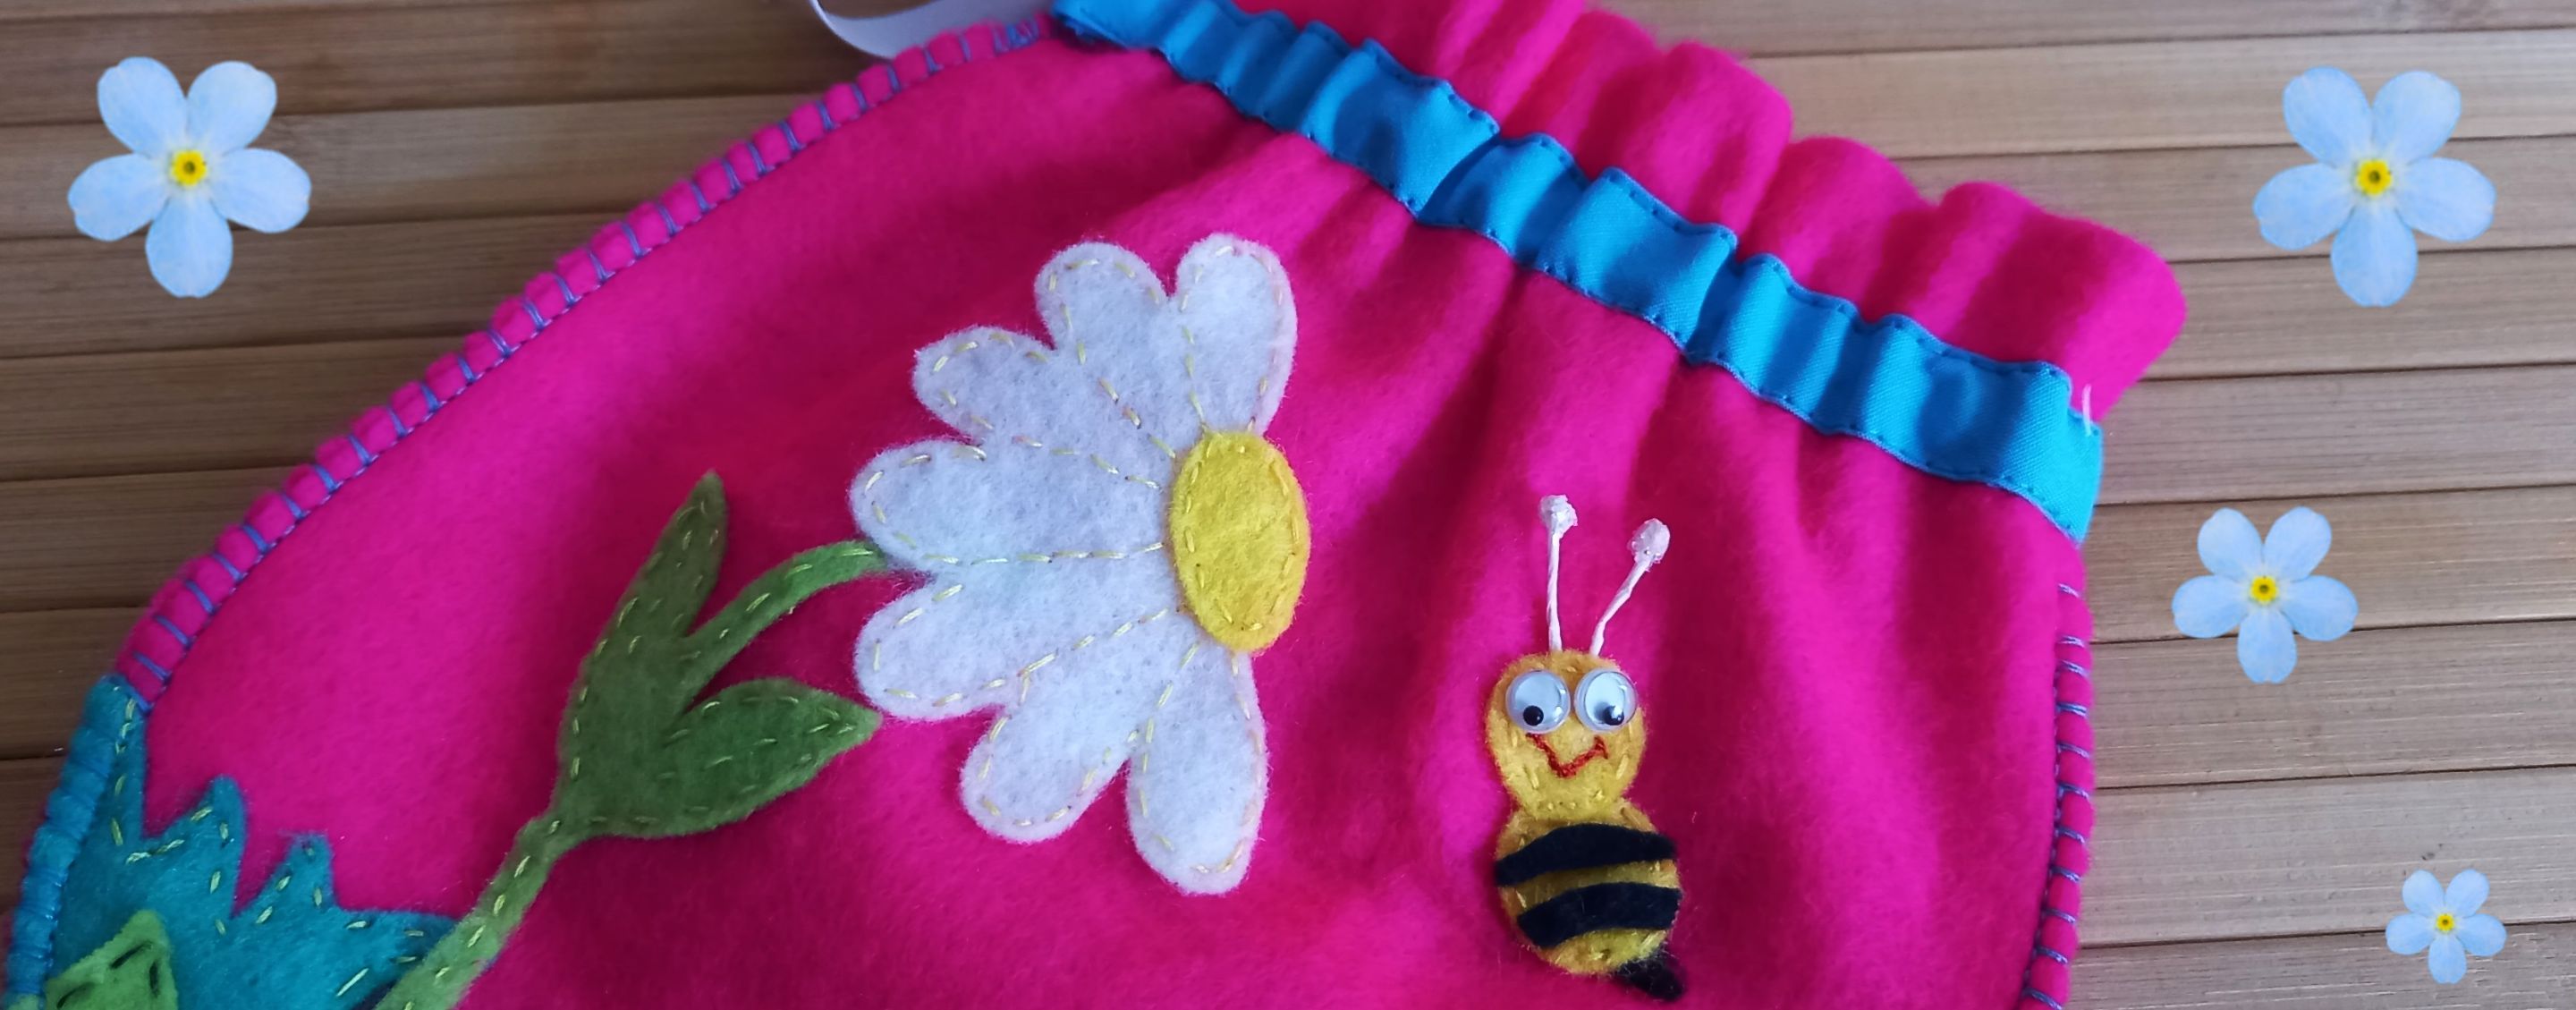
🌸 I cut the flower out of white felt and to define its petals I used yellow thread, after embroidering the petals we put the center in yellow so that it stands out, you can also decorate it with rhinestones, beads or seed beads.
>🌸 La flor la recorté en fieltro blanco y para definir sus pétalos utilicé hilo amarillo, luego de bordar los pétalos le colocamos el centro en amarillo para que resalte, también lo puedes decorar con pedrería, canutillos o mostacillas.
___
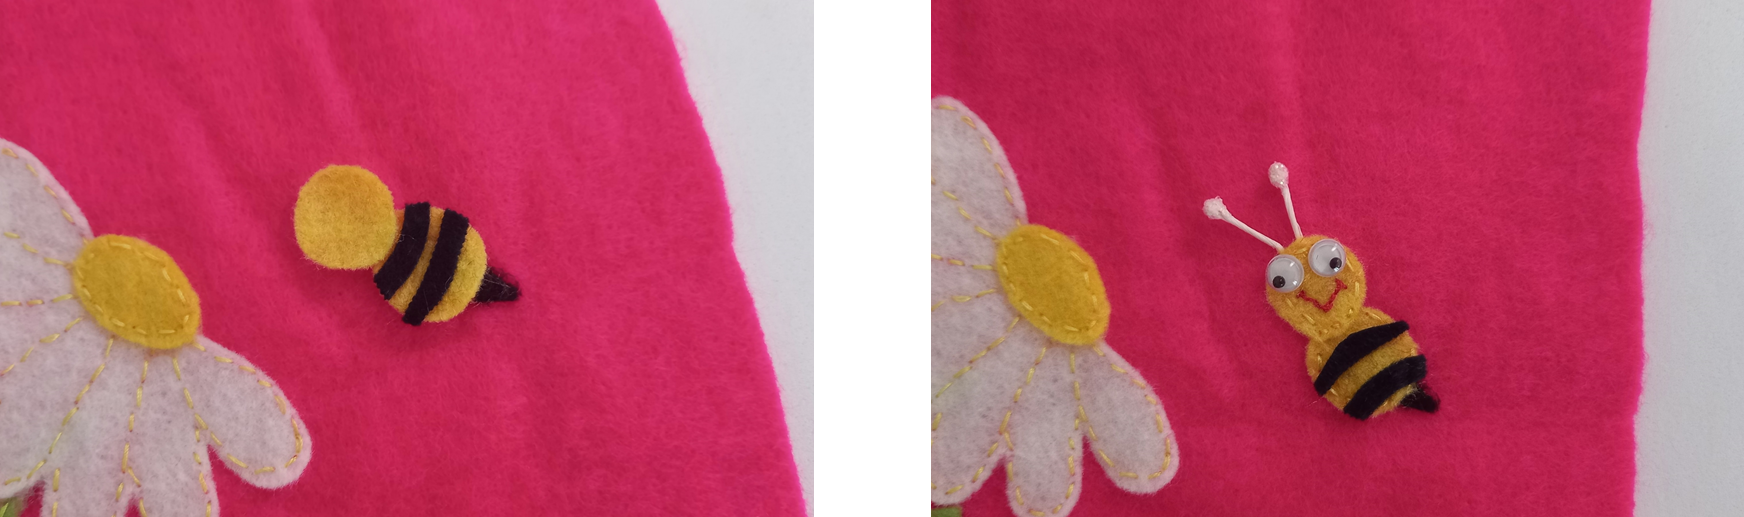
🌸 As the flower could not be alone in this tender garden, I made a cute little bee to keep her sweet company, we embroidered the outline of her body and we put the black stripes, a smiling mouth since this is a happy little bee, the little eyes and the antennae with the pistil and, thus, the little bee is ready to have fun in the garden.
>🌸 Como la flor no podía estar sola en este tierno jardín, elaboré una linda abejita para que le hiciera dulce compañía, bordamos el contorno de su cuerpo y le colocamos las rayitas negras, una boca sonriendo ya que esta es una abejita feliz, los ojitos y las antenitas con el pistilo y, así ya está lista la abejita para divertirse en el jardín.
___
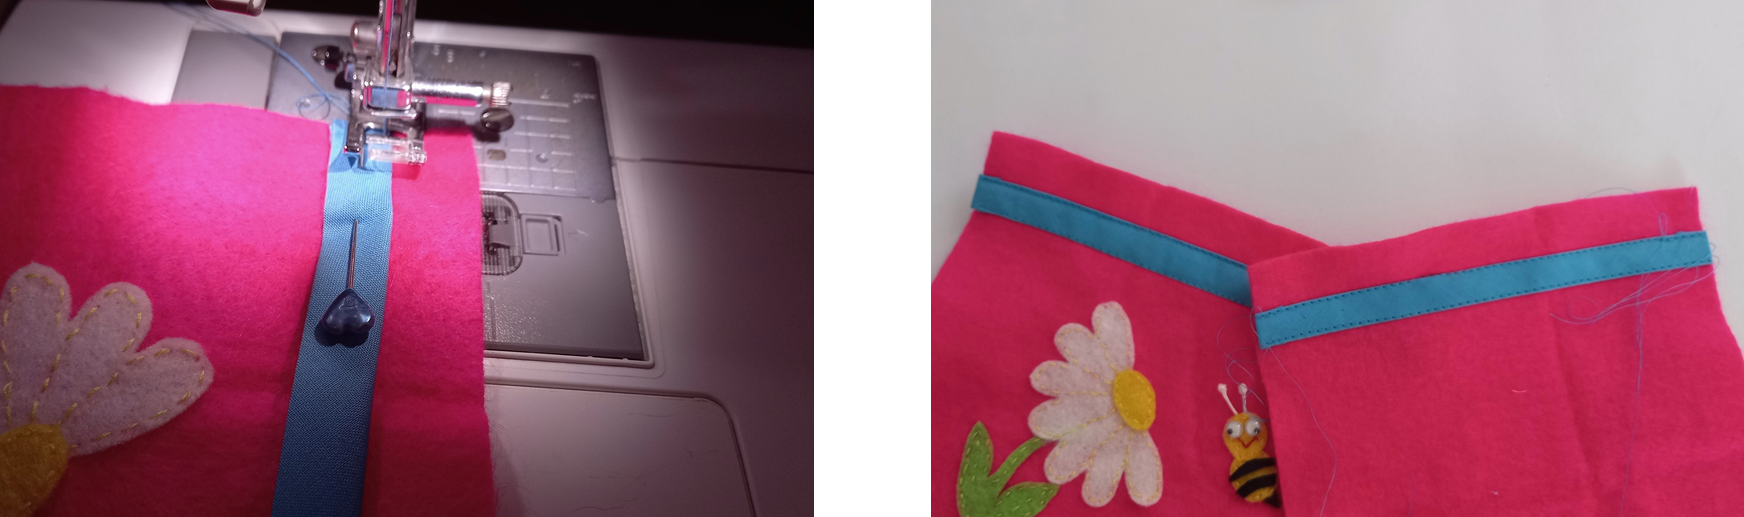
🌸 In the upper part we sew the bias to the front and back piece, which will be the channel to place the tape and be able to close the bag, I did it with the sewing machine but you can also do it by hand.
>🌸 En la parte superior le cosemos el bies a la pieza delantera y posterior, el cual será el canal para colocarle la cinta y poder cerrar el bolso, yo lo hice con la máquina de coser pero también lo puedes hacer a mano.
___
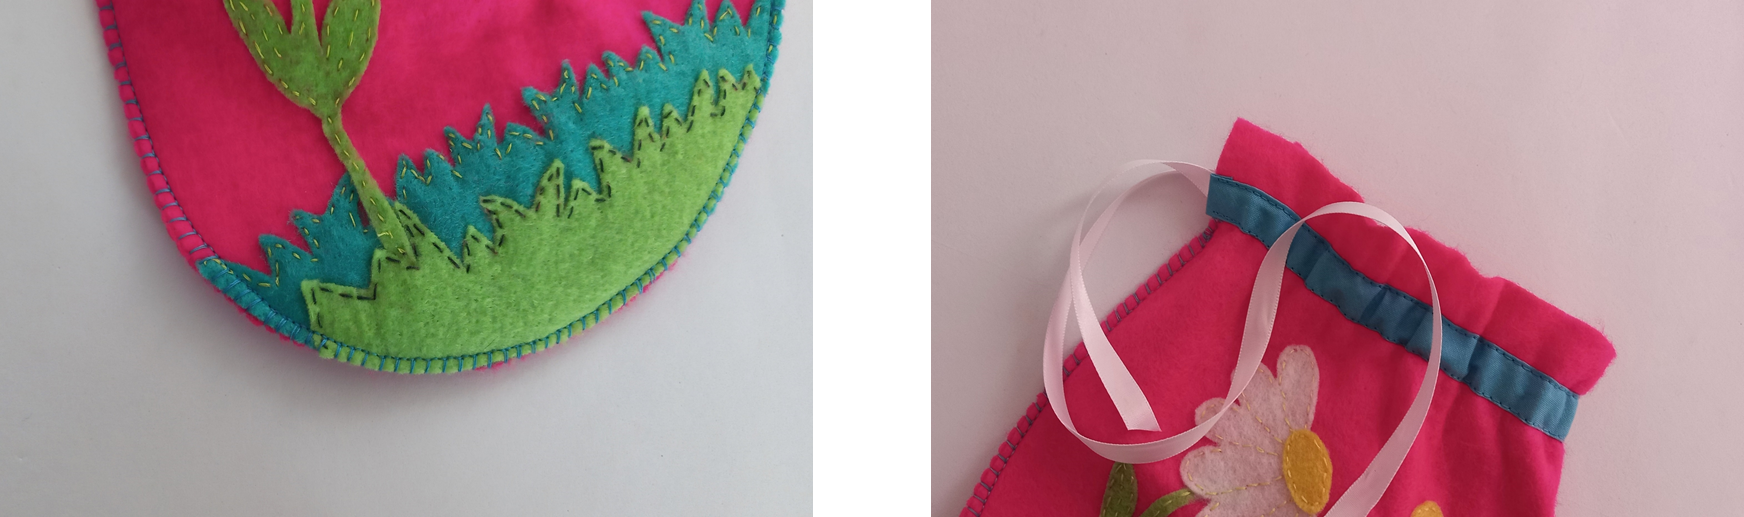
🌸 Once the bag is decorated and the bias is placed, we can join the front to the back by sewing the entire contour, I liked the idea of sewing it with thread of the same color as the bias, then with the help of a hair hook we introduce the ribbon satin.
>🌸 Ya decorado el bolso y colocado el bies, podemos unir la parte delantera a la posterior cosiendo todo el contorno, me gustó la idea de coserlo con hilo del mismo color que el bies, luego con la ayuda de un gancho de cabello introducimos la cinta de raso.
___
###
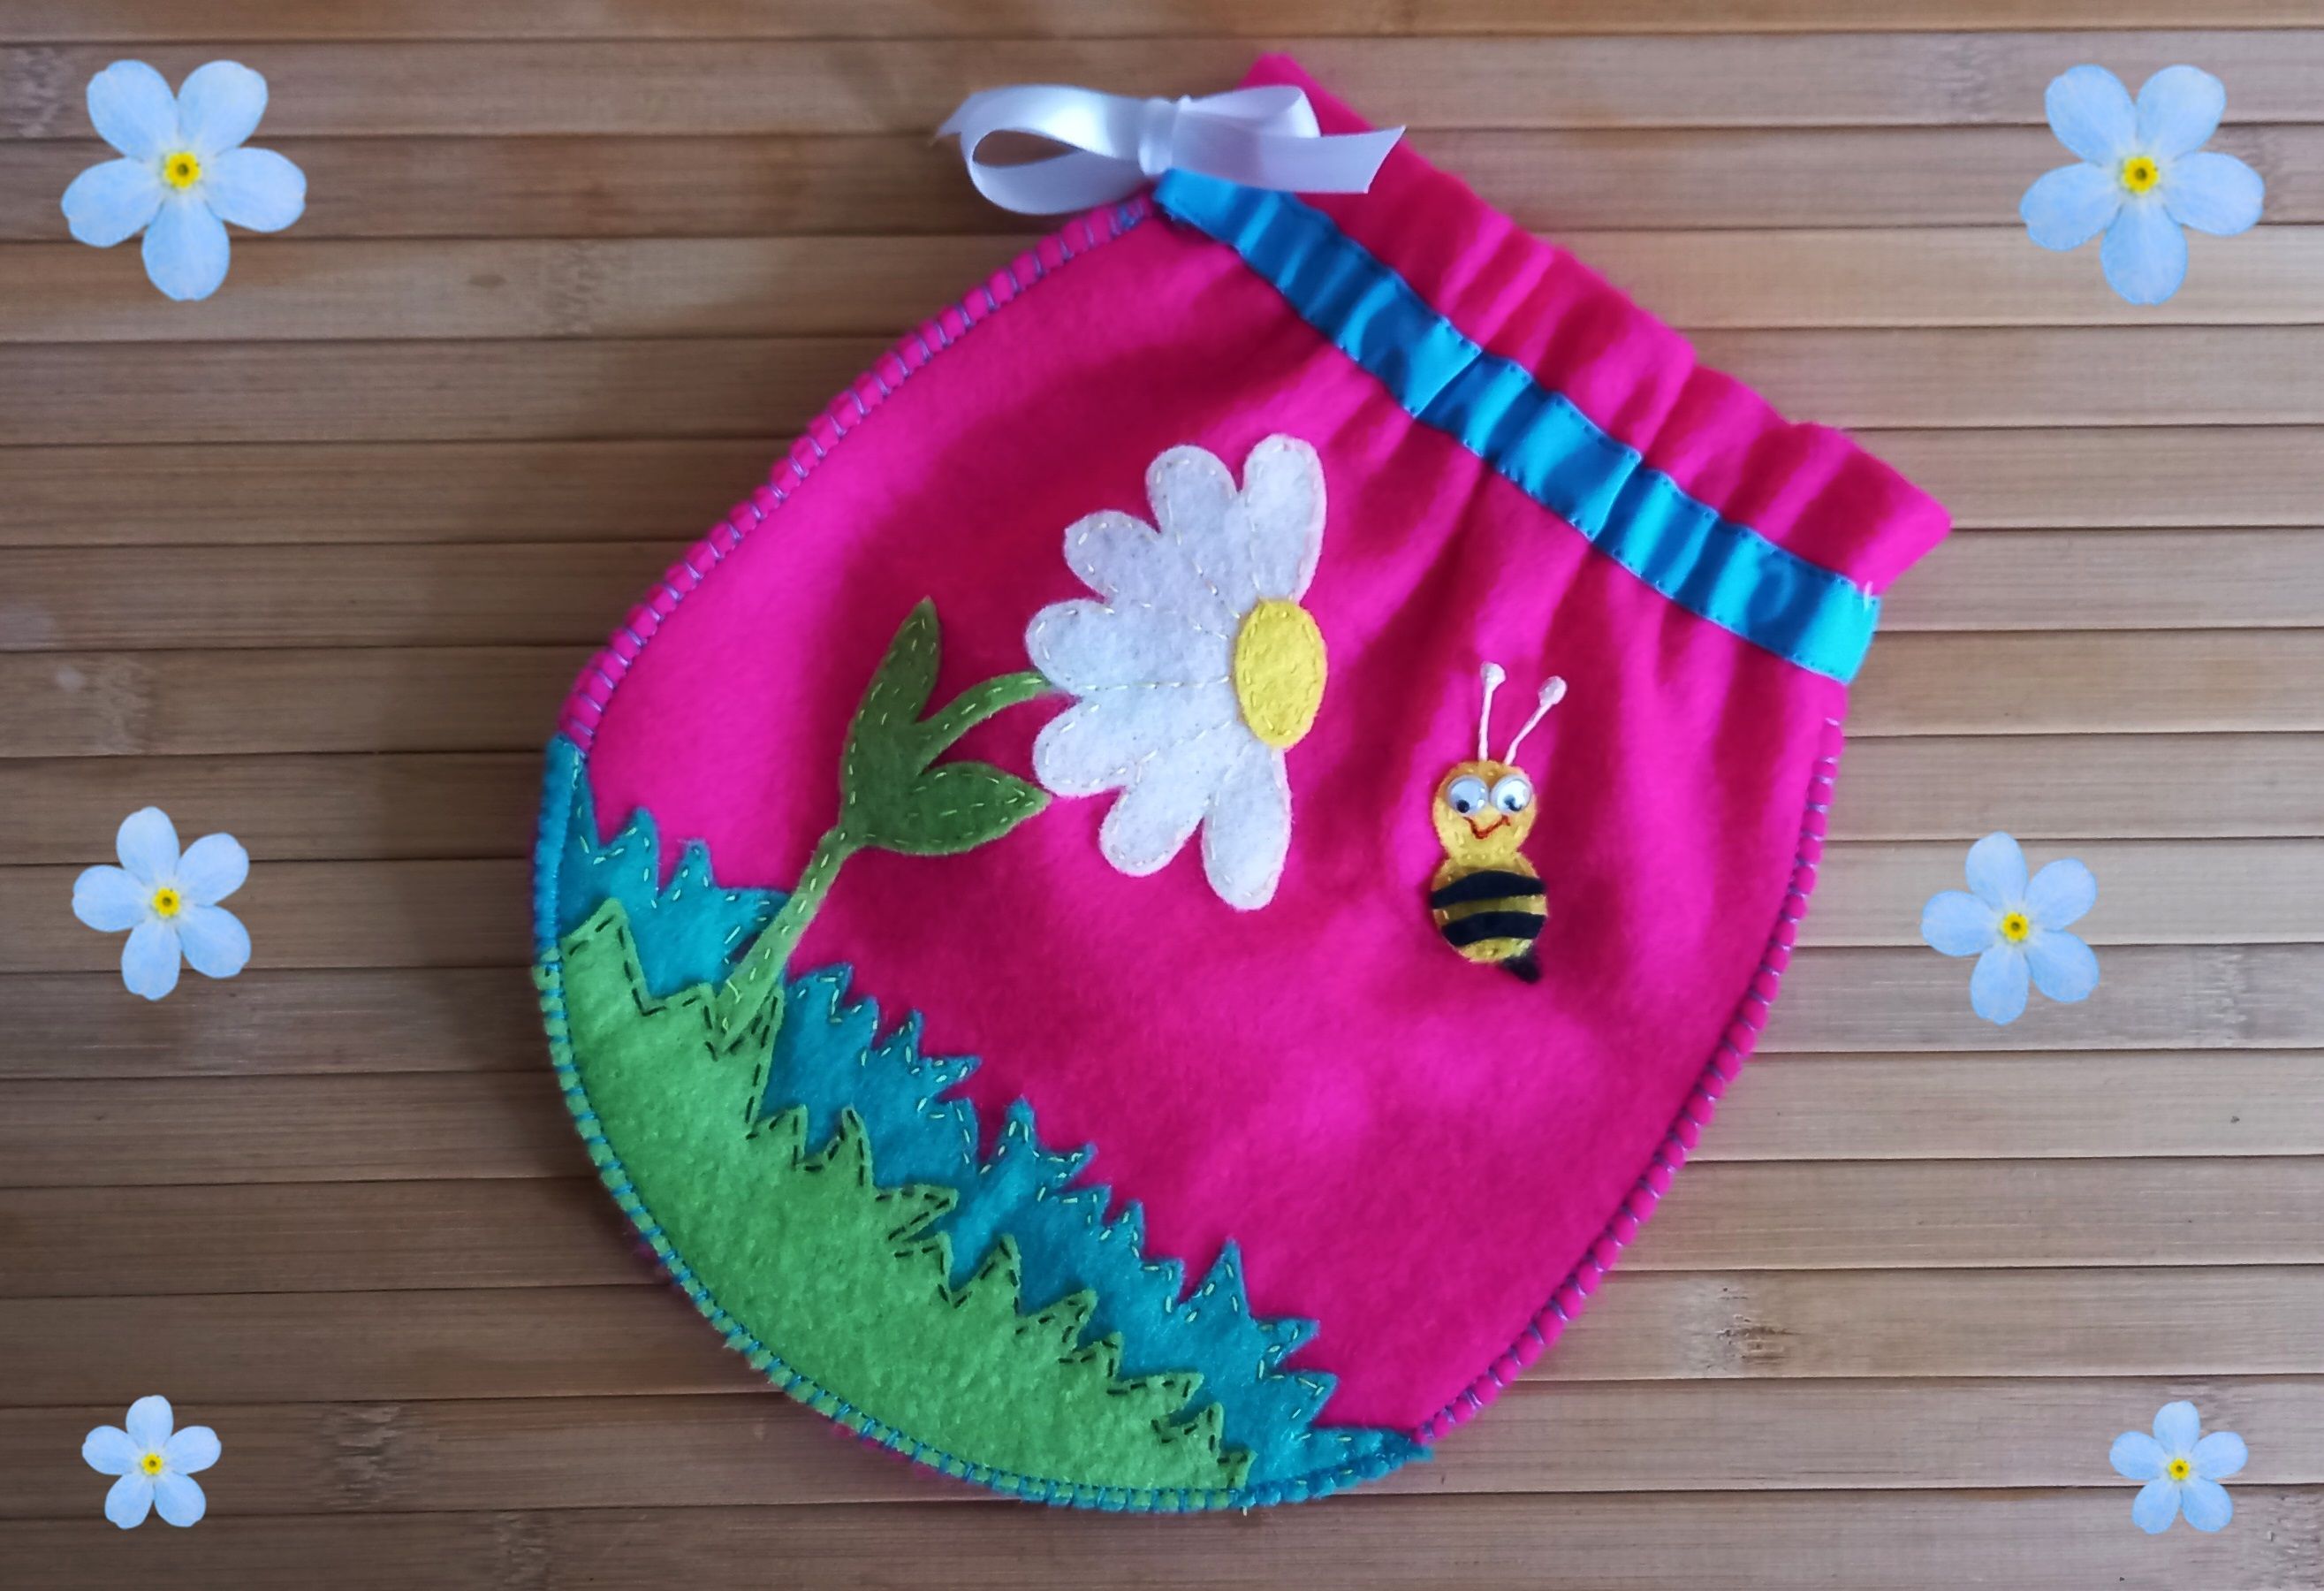
This is what the cute bag looks like! / ¡Así luce el tierno bolso!
Thanks for joining me, we keep reading... 😉
Gracias por acompañarme, nos seguimos leyendo... 😉
___
Las fotografías son de mi autoría / tomadas con mi celular Samsung Galaxy A12 / Editadas con PhotoScape y PowerPoint
Para traducir al inglés utilicé el traductor de Google