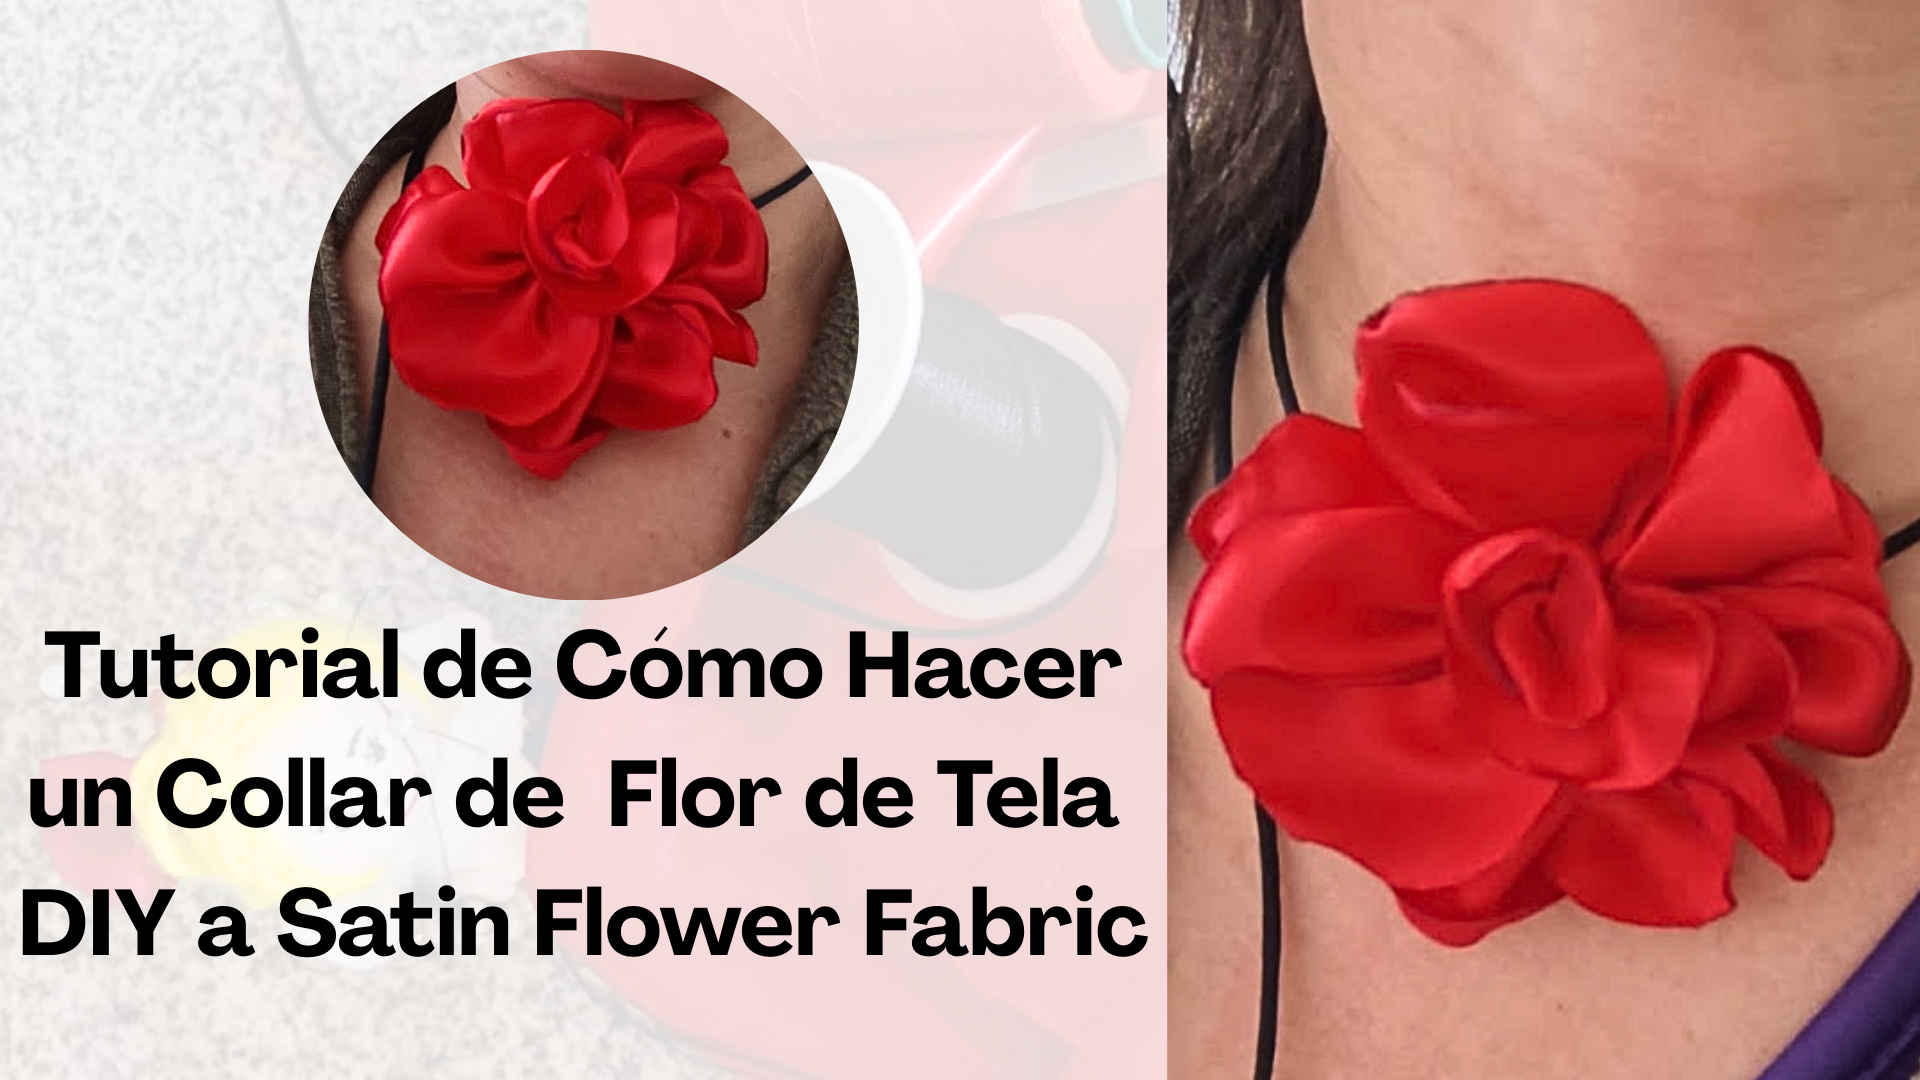
Muy feliz día hivers, creativos y amantes de las costuras, paso a paso volviendo a los hilos y agujas. Hoy les traigo un tutorial de como hacer un collar de flores muy distinto al que les he compartido otras veces, este es más simple y rápido de hacer, ideal para quienes empiezan en el mundo de las putadas.
Very happy day hivers, creatives and sewing lovers, step by step going back to threads and needles. Today I bring you a tutorial on how to make a flower necklace very different from the one I have shared with you other times, this one is simpler and faster to make, ideal for those who are starting in the world of needlework.
---
---
---
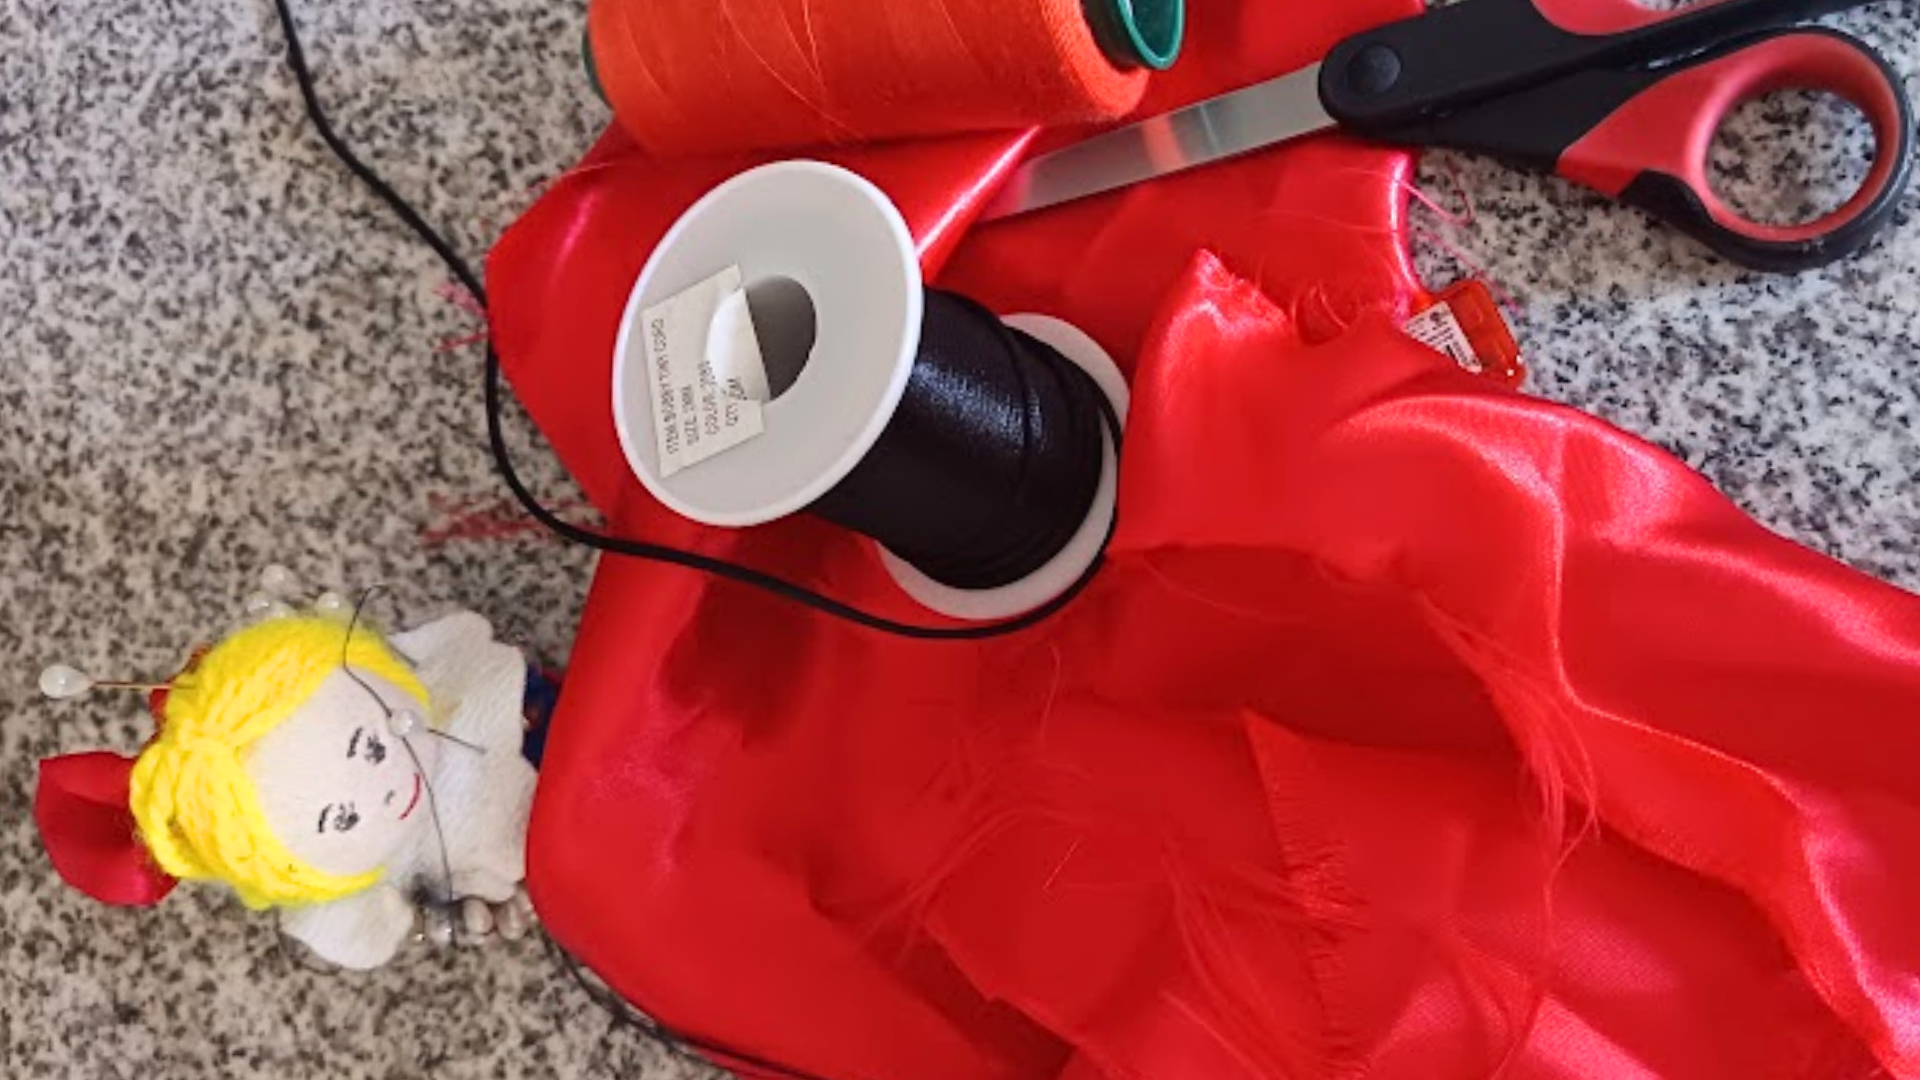
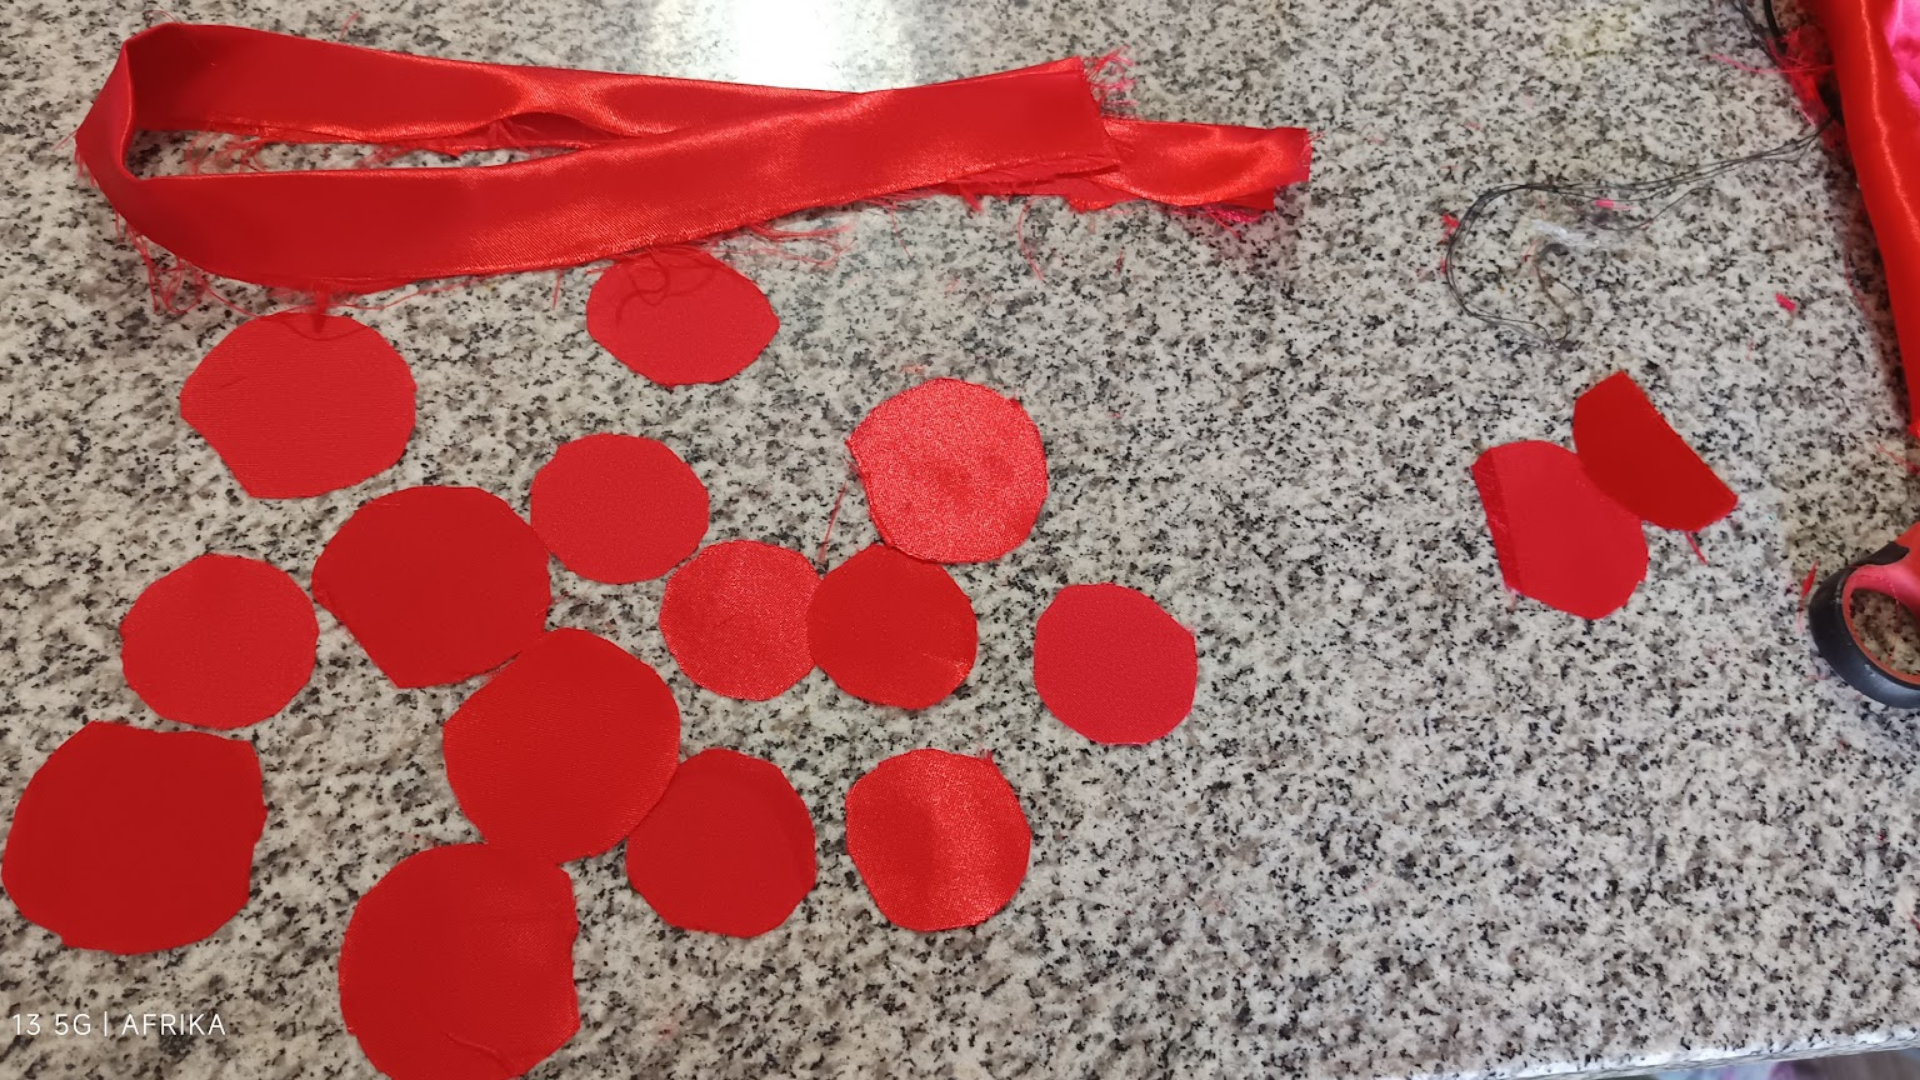
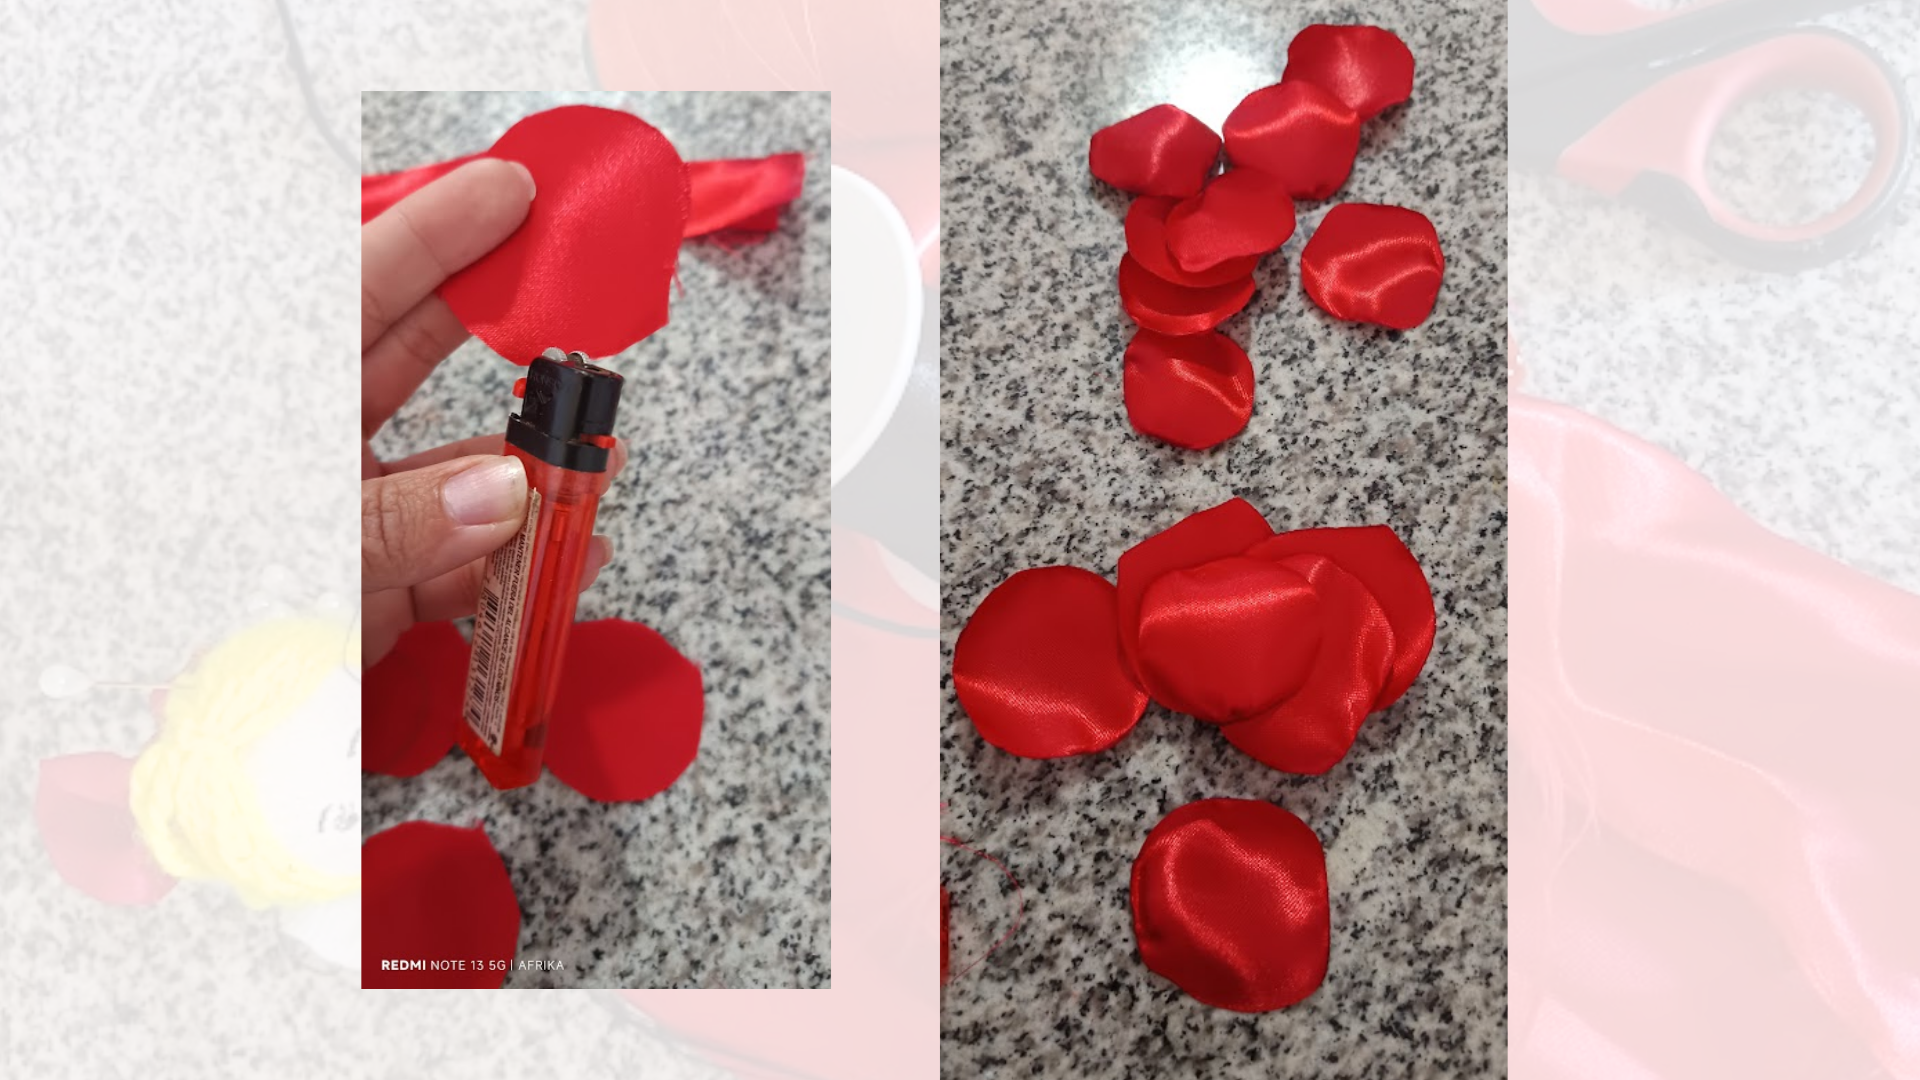
Los materiales usados fueron: un cuarto de tela satinada, tu elige el color, un metro de cordón satinado o encerado para que sea la parte del collar donde cuelga la flor, tijeras, aguja, hilo, un encendedor y un lápiz para marcar, los 14 círculos que forman los pétalos, una vez cortados, con mucho cuidado les quemamos los bordes a todo, así la tela no se deshilacha y le da un toque más prolijo y limpio.
The materials used were: a quarter of satin fabric, you choose the color, a meter of satin or waxed cord for the part of the necklace where the flower hangs, scissors, needle, thread, a lighter and a pencil to mark the 14 circles that form the petals, once cut, we carefully burned the edges of everything, so the fabric does not fray and gives a neater and cleaner touch.
---
---

---
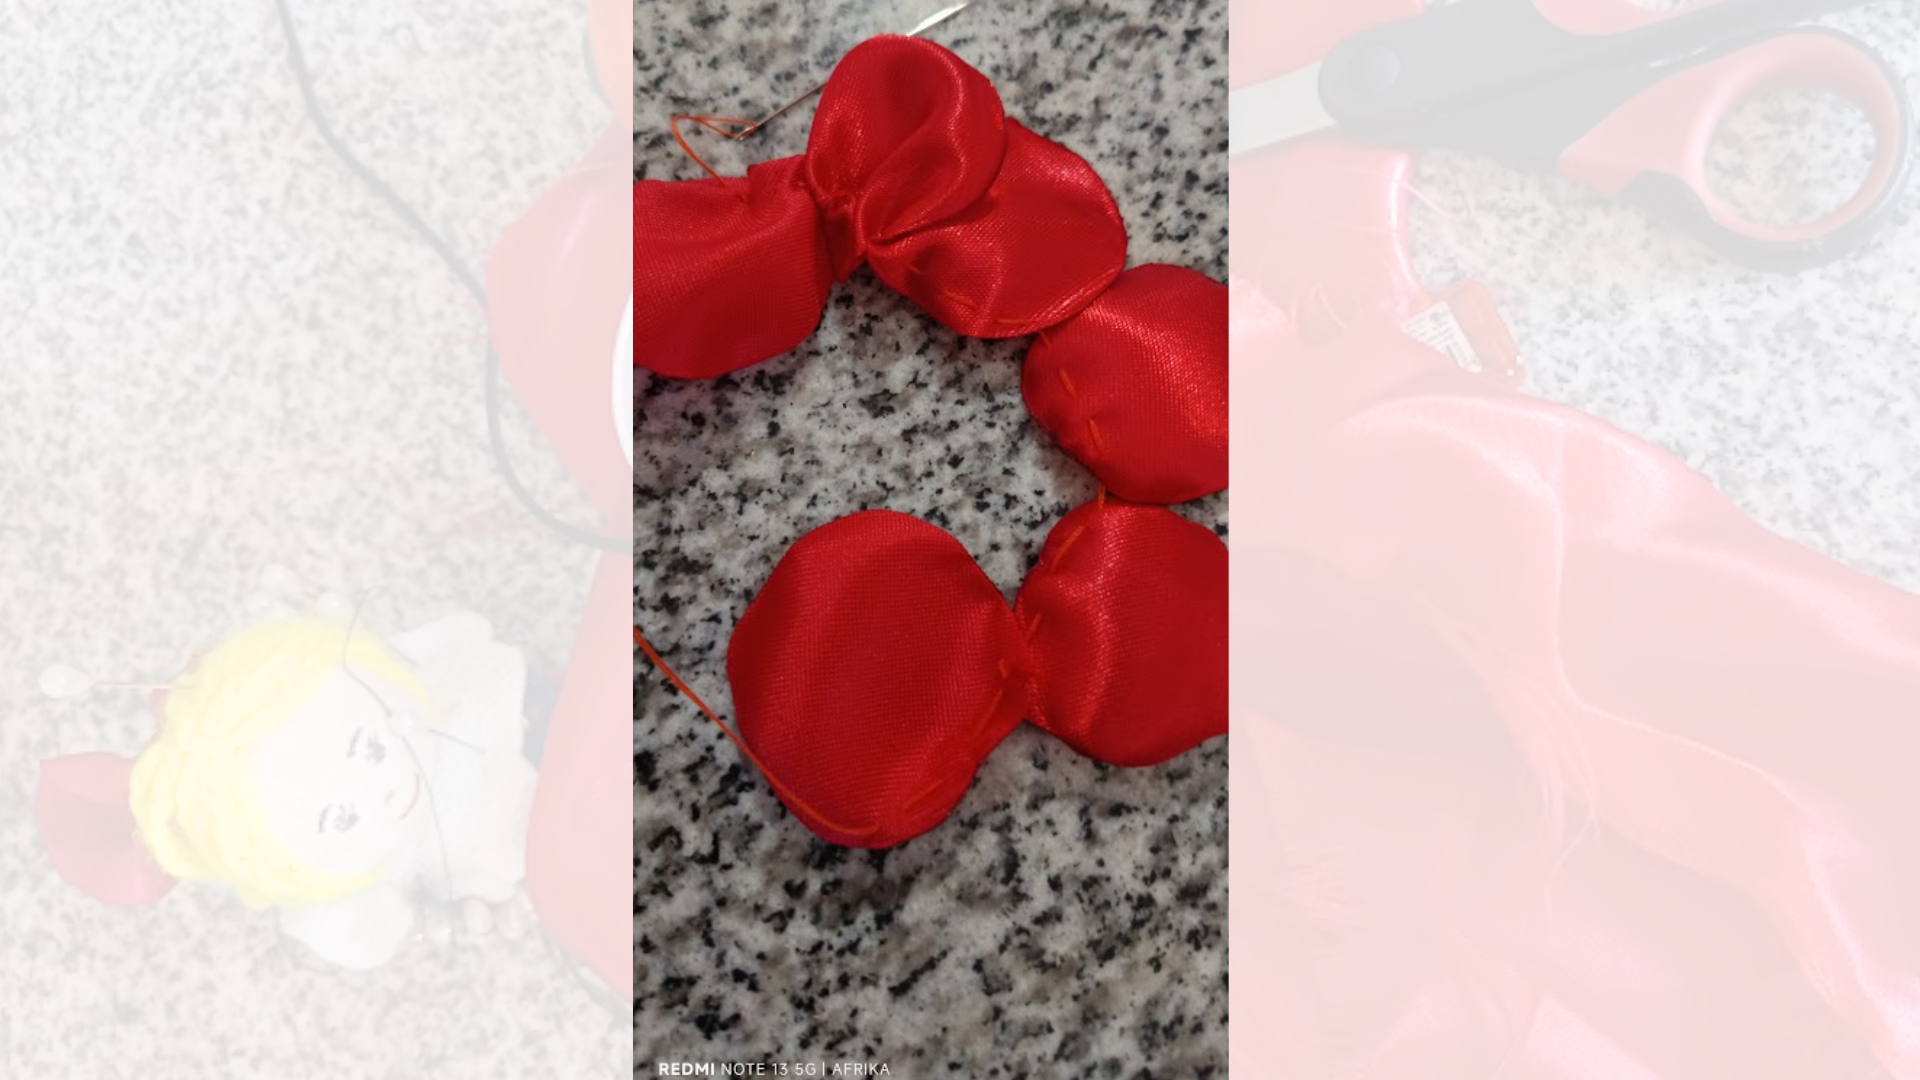
Luego, con hilo y aguja vamos juntando los círculos por uno de los bordes, de forma lineal tal como indica la imagen. Una vez todos enfilados, fui apretandolos de forma circular, dejando lo brillante en la parte de arriba y así fui dándole forma de flor, es importante tener paciencia e ir petalo por petalo e ir cosiendo, afirmando en la parte trasera.
Then, with thread and needle we join the circles by one of the edges, in a linear way as shown in the image. Once all the circles were lined up, I tightened them in a circular shape, leaving the shiny part on the top and thus I gave it the shape of a flower. It is important to have patience and sew petal by petal and sew, tightening the back part.
---
---
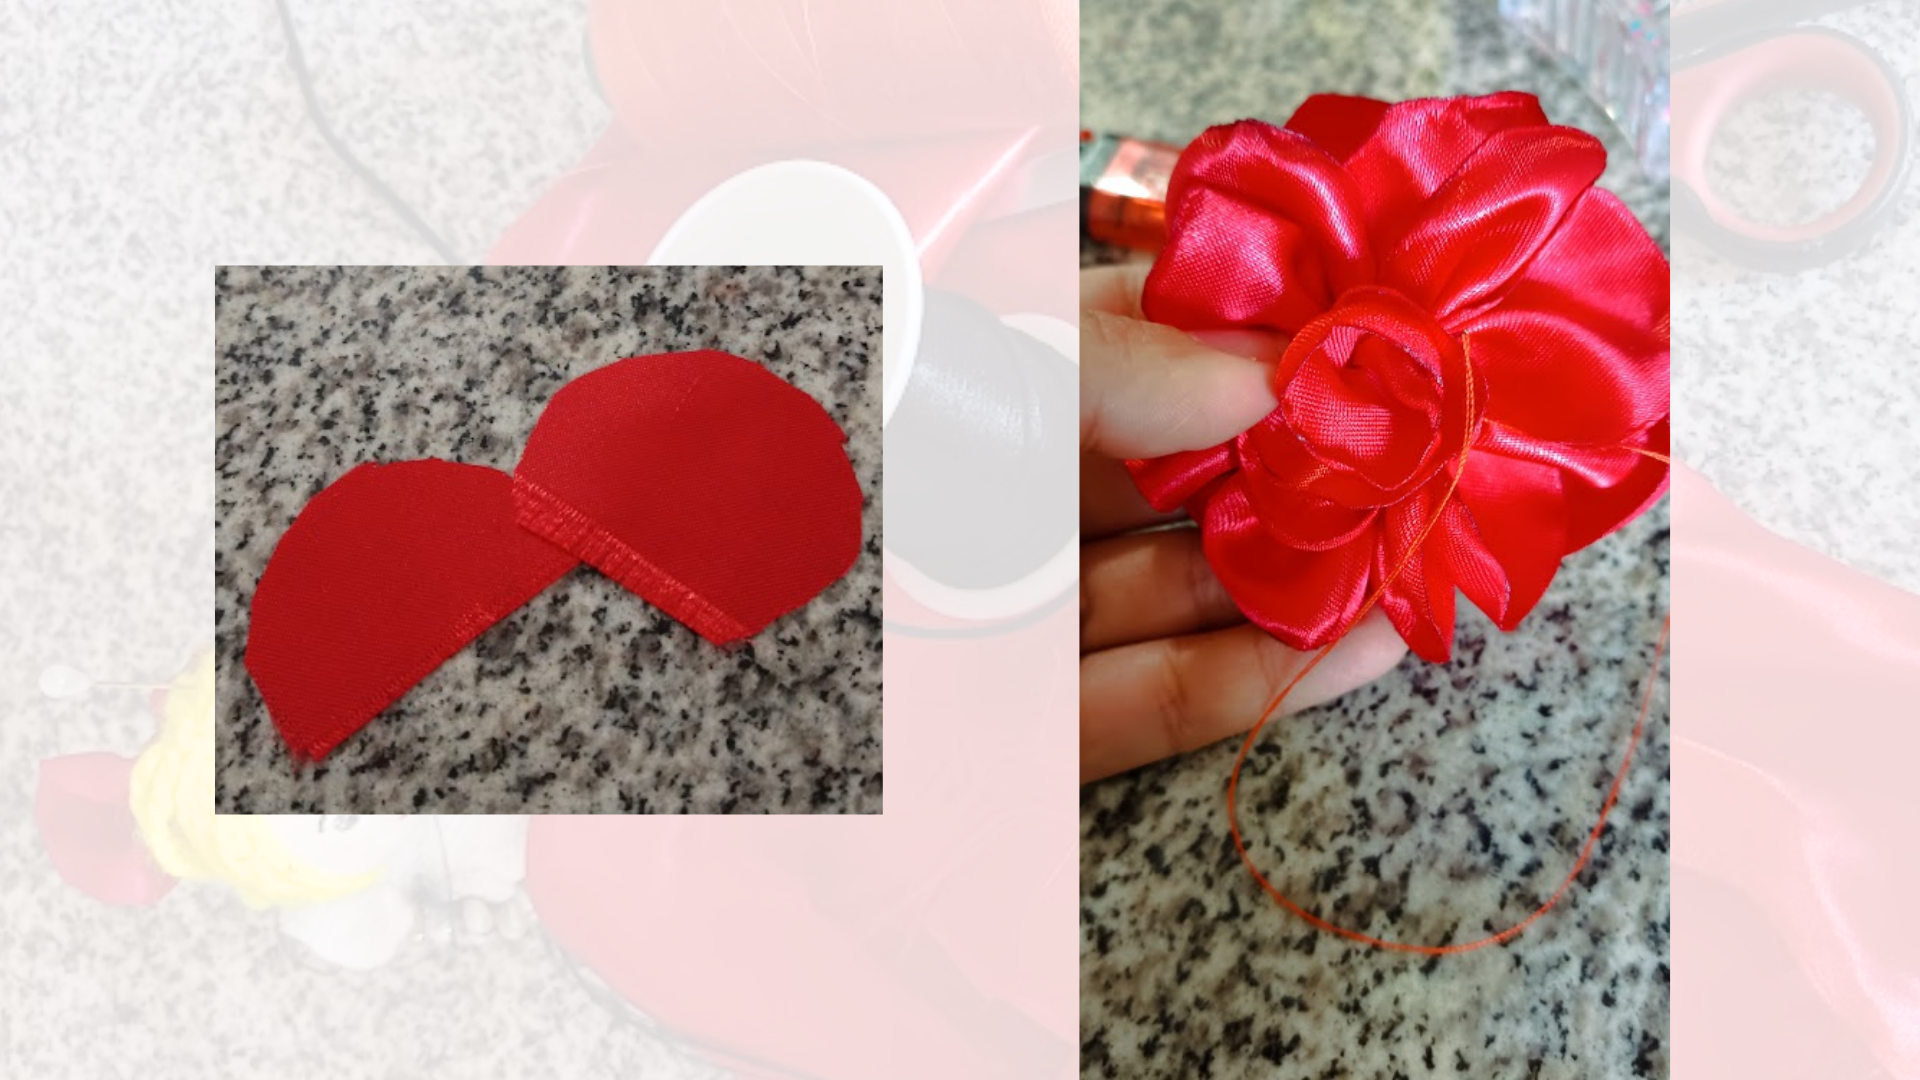
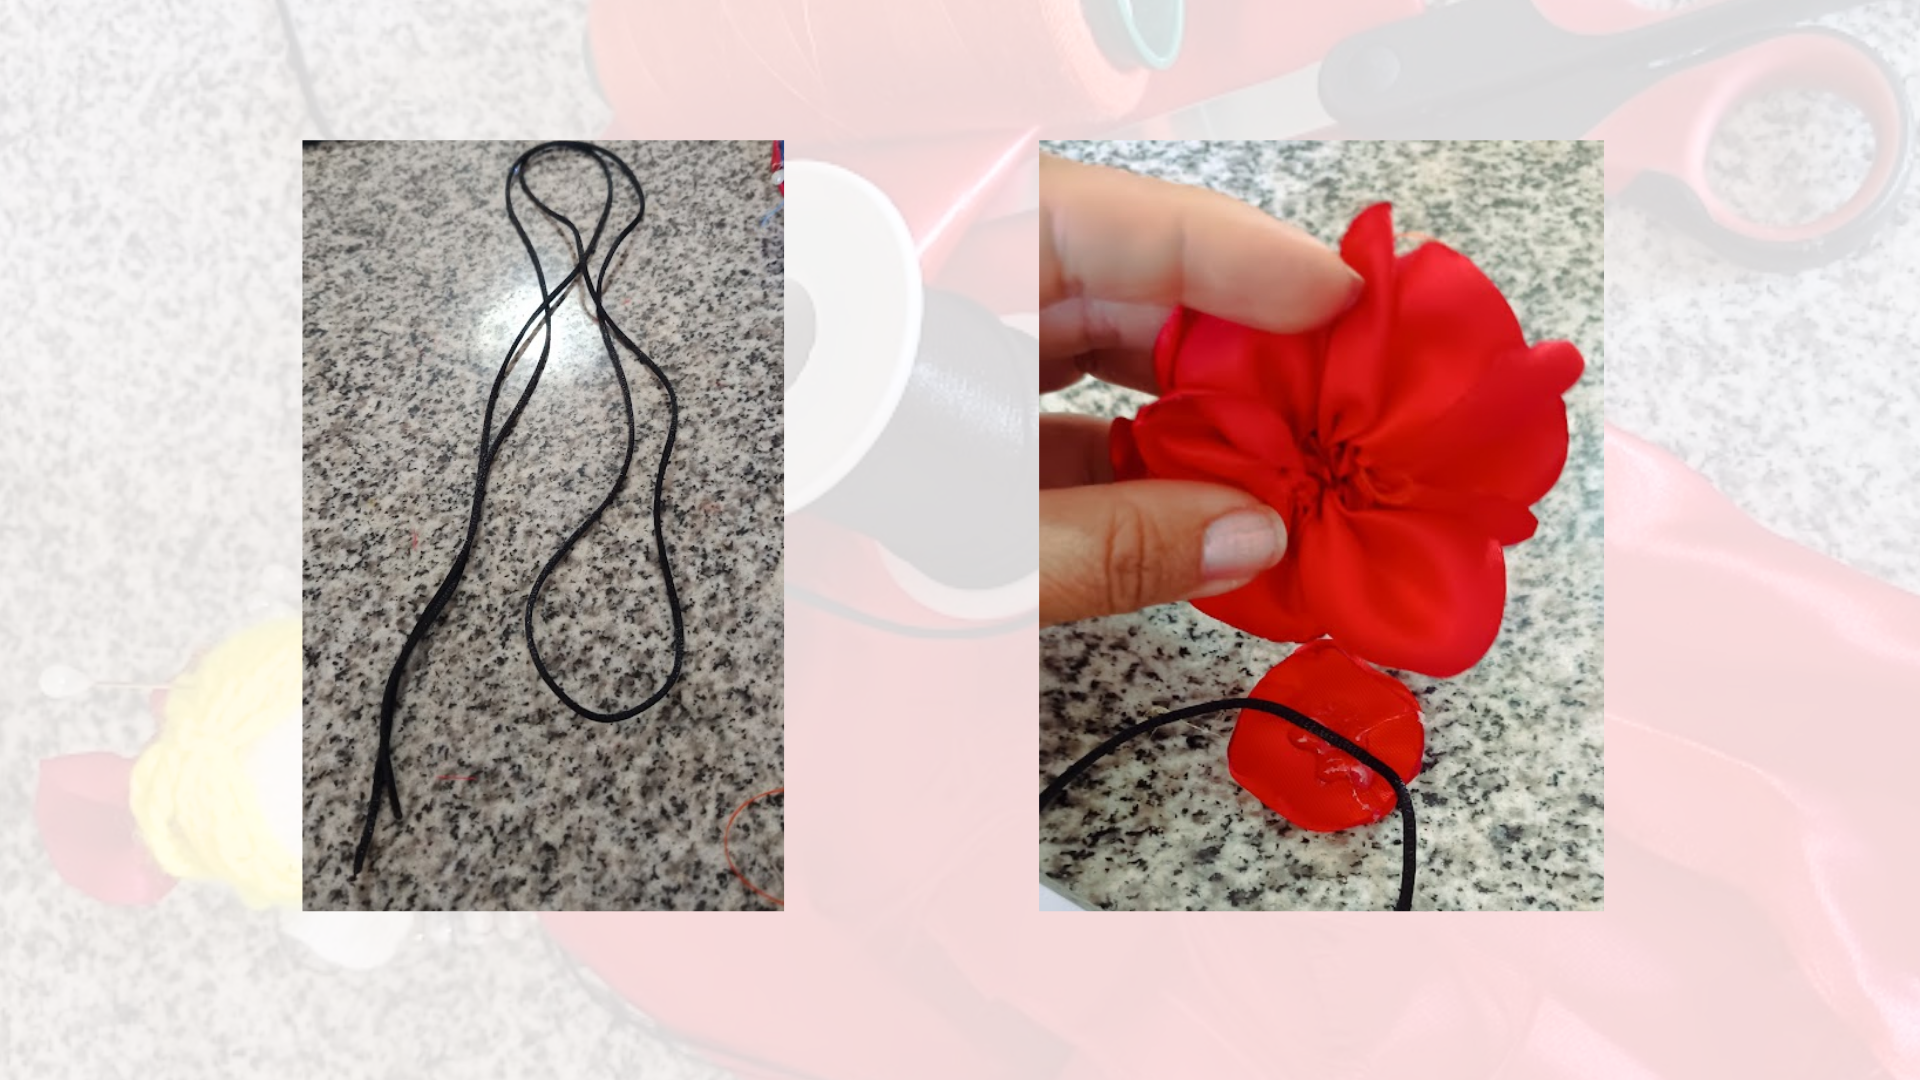
Ya con la gran parte de la flor armada, vamos a cortar un par de círculos más, uno para el centro o capullito de la flor, a éste lo doblé por la mitad, después lo enrolle quedando una forma de caracol y luego lo cosí en la pieza grande justo en el centro. Y, el otro es el que vamos a usar como unión entre el cordón y la pieza principal con unos toques de pegamento de tela o tambien silicon frío o caliente, cualquiera de los 2 sirve.
Once we have the main part of the flower assembled, we are going to cut a couple more circles, one for the center or bud of the flower,
I folded it in half, then I rolled it into a snail shape and then I sewed it on the big piece right in the center. And, the other one is the one that we are going to use as a union between the cord and the main piece with a few touches of fabric glue or hot or cold silicone, any of the 2 works.
---
---
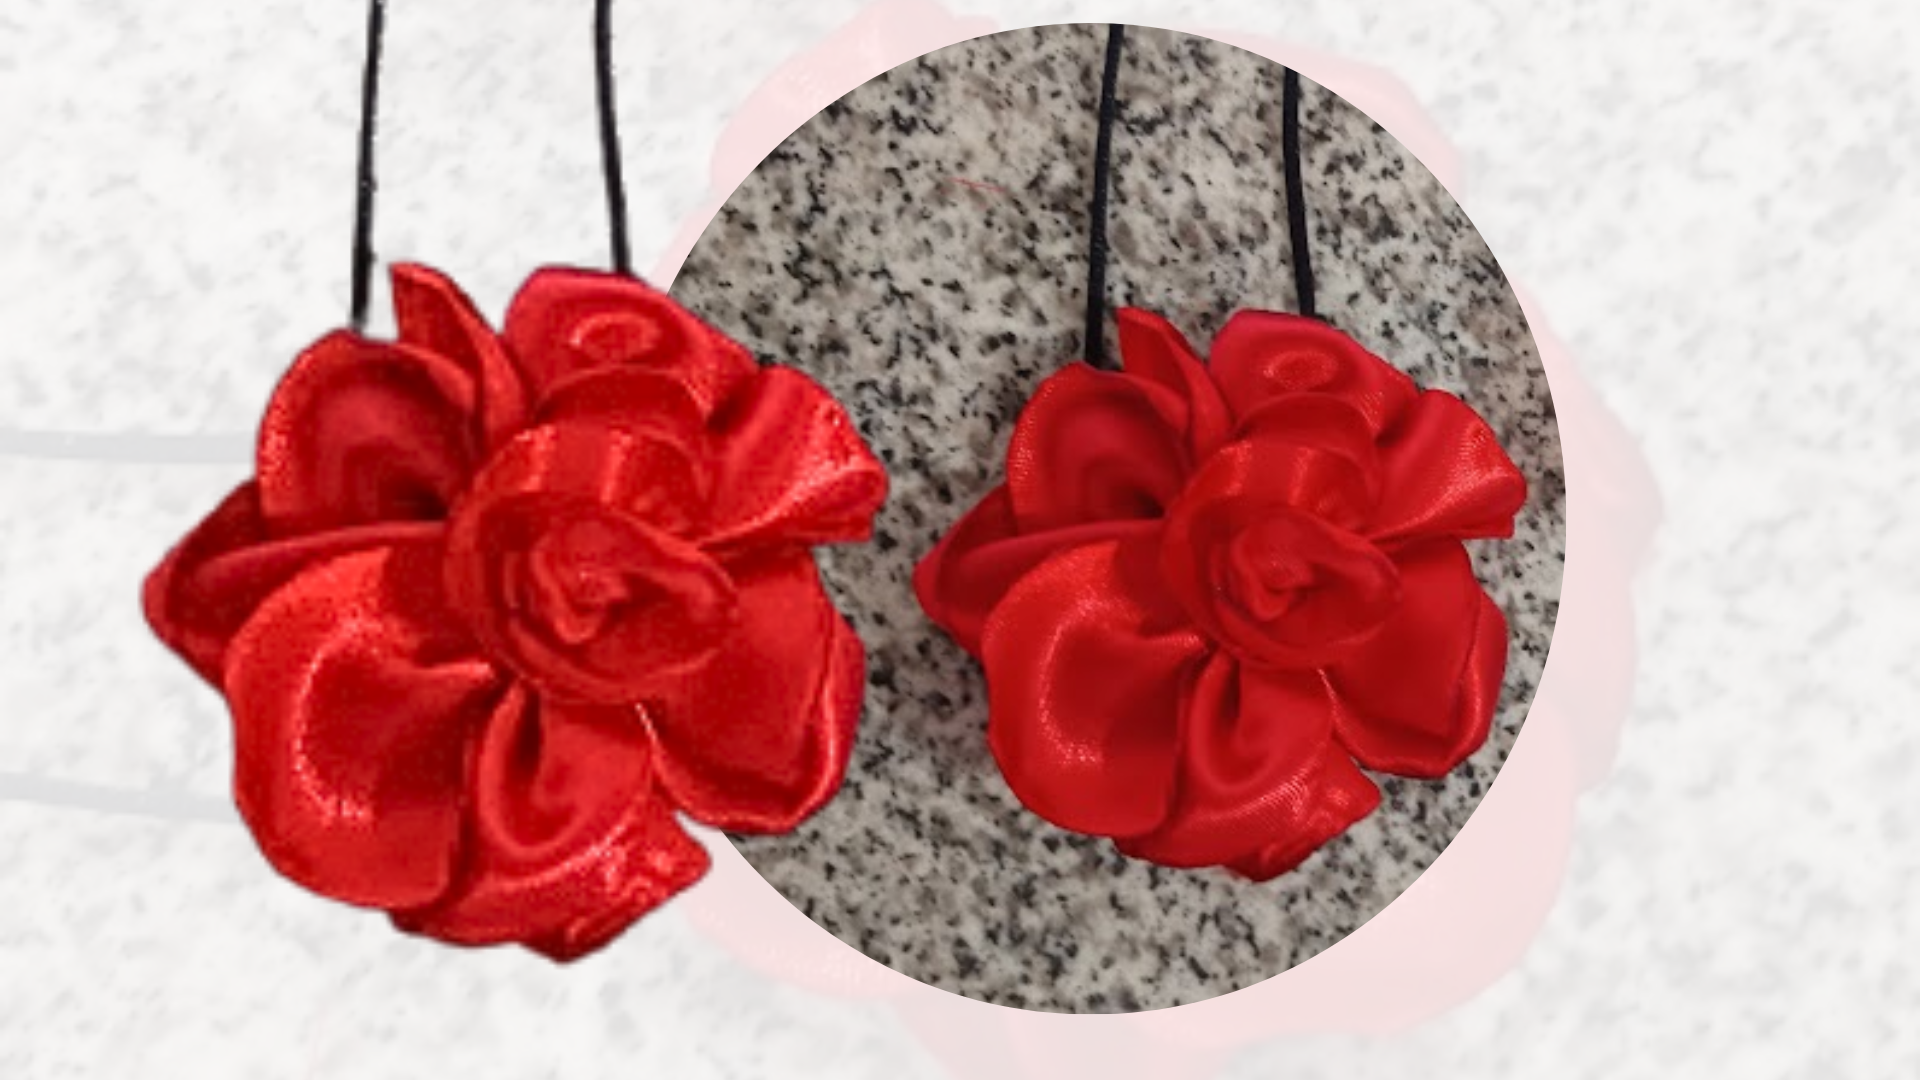
Finalmente queme las puntas del cordón, así quedó lista la flor collar, lista para ser lucida y dar el toque chic de todo el outfit ¿Qué les parece? Las fotos son registro personal con un redmi 13, editadas en Canva. Gracias River si llegaron hasta aca ¿En cual ocasión usarían esta flor?
Finally I burned the ends of the cord, so the flower necklace was ready to be worn and give the chic touch to the whole outfit. What do you think? The photos are personal record with a redmi 13, edited in Canva. Thank you River if you made it this far, on what occasion would you wear this flower?
---
---
#
[AFRIKA](https://www.instagram.com/afrikalienzo/?hl=es)