DIY✂️ | → 🛍️Make your own paper bags for your business ‼️✨[ES|EN]

@anne002 · 2025-08-30 03:00 · Hive Diy

InShot_20250428_094855367.gif

🧶Bienvenido al mundo del DIY conmigo,un placer saludarles ☺️✨🎨. | 🧶Welcome to the world of DIY with me, a pleasure to greet you ☺️✨🎨.

Si estás empezando el mundo del 💗✨Emprendimiento✨💗y no se te ocurre alguna idea para guardar y hacer tus entregas de una manera Simple Sencilla y Bonita te traigo la solución ,pues pensando hace días que quería personalizar mejor mi manera de hacer los pedidos pues se me ocurrió hacer bolsitas de papel bond y de manera sencilla y con materiales que tengas en casa ,poco a poco podemos empezar nuestro emprendimiento y una manera de hacerlo es empezar con lo que tenemos en casa y un poco de creatividad y por supuesto para esto no hay límites , también puedes personalizarlas con stickers adhesivos con el nombre de tu marca o emprendimiento se verían muy bellas de esta manera,con el tiempo se que iré mejorando mi manera de hacer las entregas de ropa y me ha gustado mucho esta idea de estas bolsitas.

_

If you are starting in the world of 💗✨Entrepreneurship✨💗and you can't think of any ideas to store and make your deliveries in a Simple, Easy and Beautiful way, I bring you the solution, because thinking for days that I wanted to better personalize my way of making orders, it occurred to me to make bond paper bags and in a simple way and with materials that you have at home, little by little we can start our business and one way to do it is to start with what we have at home and a little creativity and of course for this there are no limits, you can also personalize them with adhesive stickers with the name of your brand or business, they would look very beautiful this way, over time I know that I will improve my way of making clothing deliveries and I really liked this idea of these bags.

_

Si te gusta mucho este tipo de manualidades te va a gustar puedes hacer bolsitas de diferentes tamaños incluso una grande por supuesto deberás tener suficiente material como papel láminas de papel bond para que salgan así de grandes ,en este caso haré mi primera bolsita con dos hojas de papel bond y le he colocado un sello de cartulina y los bordes se los he hecho con la tijera de formas ustedes pueden hacerlas de diferentes colores pintarlas y como más deseen adornarlas aqui depende de su creatividad también,pero antes de que te cuente el proceso completo los invito a que anoten los materiales .😌

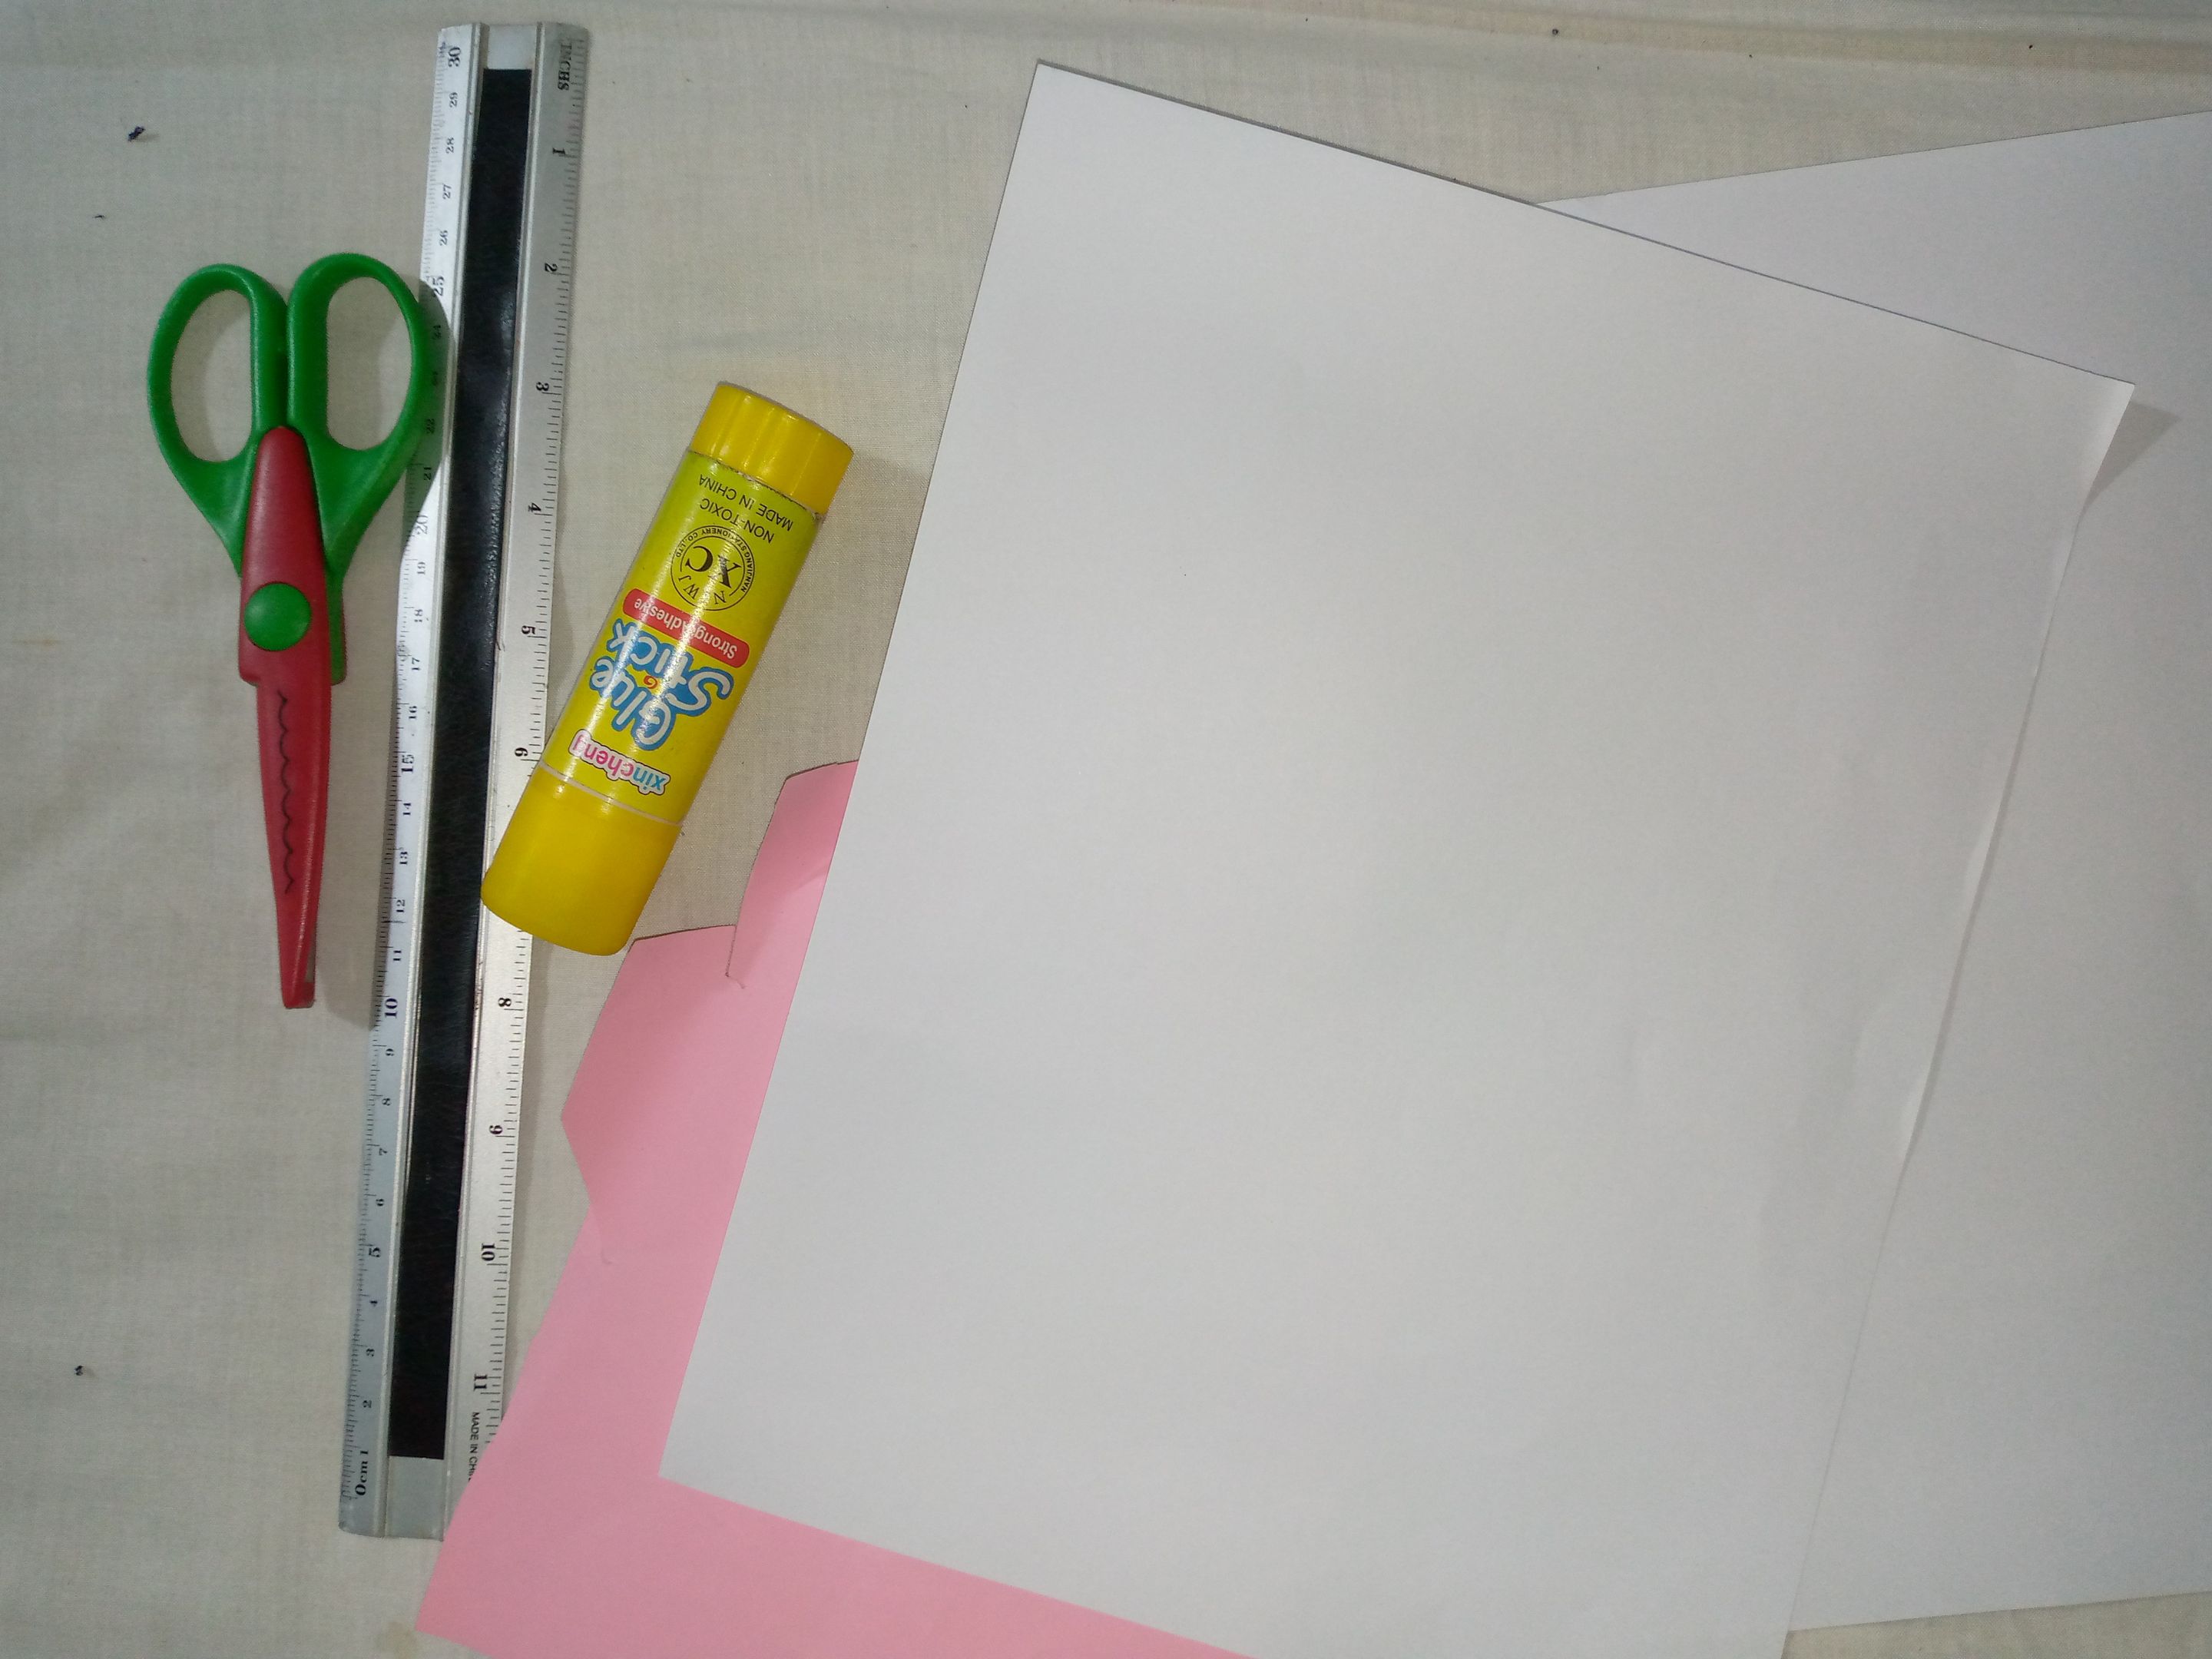
If you really like this type of crafts you will like it, you can make bags of different sizes, even a large one, of course you must have enough material such as paper or sheets of bond paper so that they come out that big, in this case I will make my first bag with two sheets of bond paper and I have placed a cardboard stamp on it and I have made the edges with the shaped scissors, you can make them in different colors, paint them and however you want to decorate them, here it depends on your creativity too, but before I tell you the complete process I invite you to write down the materials. 😌

Picsart_25-08-29_17-03-39-999.jpg

@anne002_20250723_195546_0000 (1).png


IMG_20250829_111534_411.jpg

@anne002_20250723_195546_0000 (1).png

_

Materiales: | Materials:

_

Español English
•Trozos de cartulina escolar •Pieces of school cardboard
•Pega en barra •Glue stick
•2 hojas blancas de papel bond •2 white sheets of bond paper
•Regla •Ruler
•Tijera con formas •Shaped scissors

@anne002_20250723_195546_0000 (1).png

_

Pasos a seguir: | Steps to follow:

_

![IMG_20250829_112215_934.jpg](https://files.peakd.com/file/peakd-hive/anne002/EoH1GCLf5VLTcbLEoSWYwtVmN5hUBxe3gcP9PedA95DVMFPCPBScRRzPGXTHrEfBVqN.jpg)
![IMG_20250829_112322_019.jpg](https://files.peakd.com/file/peakd-hive/anne002/EoGzqpjPnTv9Yb7i8adeC6Vy9GYruDD4Ya3zerDkKn4Vco8iAk94KtasyBAVveuV7dq.jpg)
![IMG_20250829_112525_298.jpg](https://files.peakd.com/file/peakd-hive/anne002/EoiWiKJZb6cQqnBoR3HYyLALfBteFt4FxoLX8jZzSpXXHVbtFTbYLLtSybp8EK6zN6M.jpg)
![IMG_20250829_112607_762.jpg](https://files.peakd.com/file/peakd-hive/anne002/Ep1XwwCTkQsPZoKTNuDY77onPt5yDM9ecV7RNSrDRMtCgQskiZuEyk6Fu5iWFfiso8v.jpg)

Paso 01

Para comenzar con el proceso voy a estar tomando los dos pliegos de hoja de papel y simplemente lo colocaré en una superficie plana para poder hacer bien los dobleces entonces como tenemos dos vamos a unir ambas piezas de papel del lado izquierdo con la pega en barra alrededor de 1 cm vamos a pegar dejamos secar el pegamento y por el lado derecho vamos a estar doblando hacia adentro 1 cm también aproximadamente y vamos a pegarlo la idea es unir ambos pliegos para poder sellar nuestra bolsa y nos quede cerradita de ambos costados una vez hicimos esto pasaremos a medir la parte de abajo de la bolsa y para ello tomaremos nuestra regla y vamos a medir 5 cm hacia arriba para poder pasar a doblar una aleta de papel.

Step 01

To begin the process I'm going to take the two sheets of paper and simply place them on a flat surface so I can make the folds properly. So since we have two, we're going to join the two pieces of paper on the left side with the glue stick, about 1 cm apart. We're going to glue it, let the glue dry, and on the right side we're going to fold it inwards about 1 cm too, and we're going to glue it. The idea is to join the two sheets together so we can seal our bag and have it closed on both sides. Once we've done this, we'll move on to measuring the bottom of the bag. To do this, we'll take our ruler and measure 5 cm up so we can fold a flap of paper.


![IMG_20250829_112215_934.jpg](https://files.peakd.com/file/peakd-hive/anne002/EoH1GCLf5VLTcbLEoSWYwtVmN5hUBxe3gcP9PedA95DVMFPCPBScRRzPGXTHrEfBVqN.jpg)
![IMG_20250829_112754_702.jpg](https://files.peakd.com/file/peakd-hive/anne002/Eoc912EjmmKM46zctcxeJBVXH4pjHsRccAXp1qaPDRpSH52Cu8ukkkVCfmse5DhK9tw.jpg)
![IMG_20250829_112846_133.jpg](https://files.peakd.com/file/peakd-hive/anne002/EogPqg7QTTQrhoS4AAR9SYKMexEbU1fTNoi8JDJeQ525mJLWTVL6Lc4ZvAABqQYFy4g.jpg)
![IMG_20250829_112927_337.jpg](https://files.peakd.com/file/peakd-hive/anne002/EogQi8i5VPYHhLGaxR7fhYV5Jcq1cNj5ifHWh4MFdWFTFhmBVuotJoHruJHGbdnsdPA.jpg)

Paso 02

Procedemos a doblar entonces la pieza de abajo con los 5 cm con ayuda de nuestros dedos para no maltratar nuestro papel,doblamos hacia arriba luego la abrimos y de los costados de esa pieza vamos a abrir una aleta en forma triangular ,hacemos lo mismo con el lado izquierdo luego llevamos la aleta de papel de abajo hacia el medio de los triángulos igual con la aleta de arriba la llevamos hacia el medio y nos queda nuestra base de la bolsa.

Step 02

To begin the process I'm going to take the two sheets of paper and simply place them on a flat surface so I can make the folds properly. So since we have two, we're going to join the two pieces of paper on the left side with the glue stick, about 1 cm apart. We're going to glue it, let the glue dry, and on the right side we're going to fold it inwards about 1 cm too, and we're going to glue it. The idea is to join the two sheets together so we can seal our bag and have it closed on both sides. Once we've done this, we'll move on to measuring the bottom of the bag. To do this, we'll take our ruler and measure 5 cm up so we can fold a flap of paper.


![IMG_20250829_112934_638.jpg](https://files.peakd.com/file/peakd-hive/anne002/EonmW2EJ7AChqqPM7C8FofKXVDDrjhxgH6iyDtonZiqgrGMo6SFDovHs8E49t6GBmMS.jpg)
![IMG_20250829_113015_300.jpg](https://files.peakd.com/file/peakd-hive/anne002/EoiY6MpR8hvNSE2ApcN5Y5534uV4uiEhmG8UqGHhm13QBchHqd3wajApTSpinUpxptH.jpg)
![IMG_20250829_113242_217.jpg](https://files.peakd.com/file/peakd-hive/anne002/EonnSYE8Ja6x3QSLUBYuSfffH94o95fi87Hux7CbXL1fKZ2BhwuK3MSrzQyikEpiLP2.jpg)
![IMG_20250829_113450_312.jpg](https://images.hive.blog/DQmeqx66MF6cMFLUWqPvqVUWL9pd88StyEpK953pYKfqqgF/IMG_20250829_113450_312.jpg)

Paso 03

Como siguiente paso no dejaremos estas aletas sin pegar así que las abrimos y con el pegamento en barra por el borde de los pliegos de abajo echamos nuestra pega y lo pegamos con cuidado dejamos secar , después vamos a estar doblando las partes de los costados de la bolsita hacia adentro y lo presionamos con los dedos también hacemos lo mismo con el otro lado y lo presionamos hacia arriba ,es momento de abrir con sumo cuidado ls bolsita y marcar los pliegues por dentro también de esta manera le damos forma a la bolsa.

Step 03

As a next step we will not leave these flaps unglued so we open them and with the glue stick along the edge of the bottom folds we put our glue and glue it carefully, let it dry, then we will be folding the parts of the sides of the bag inwards and press it with our fingers. We also do the same with the other side and press it upwards. It is time to carefully open the bag and mark the folds inside. This way we also give shape to the bag.


![IMG_20250829_113456_616.jpg](https://images.hive.blog/DQmW4PvoeuhhFBpibrCSErCnokhbr75ttqwz16DfszXT6gA/IMG_20250829_113456_616.jpg)
![IMG_20250829_113650_203.jpg](https://files.peakd.com/file/peakd-hive/anne002/EoiXEnYnAE8EHowyQAsyBQR7WrEEBoJtFVGrMynvQUQYUsxj1ZA4EvgvnNqmQYLBF7o.jpg)
![IMG_20250829_113702_956.jpg](https://images.hive.blog/DQmbq2fFngeUGxaKs3jRM63H6nQ7Zv4eP9AXuTCUkwbdUoU/IMG_20250829_113702_956.jpg)

IMG_20250829_113826_550.jpg

Paso 04

Como último paso doblamos completamente la pieza de la base hacia arriba para terminar la bolsa luego tomaremos un trozo de nuestra cartulina escolar para hacer el sello que le mencioné que haríamos ,para ello usamos el mismo molde de nuestro envase de pegamento en barra para hacer el círculo y con nuestras tijeras de formas lo vamos a sacar por todo el contorno lo recortamos y así vamos a ubicarlo donde queramos ,yo lo coloqué en el frente de mi bolsita para luego poder doblarla y pegarla.

### Step 04 As a last step we fold the base piece completely upwards to finish the bag then we will take a piece of our school cardstock to make the seal that I mentioned we would make, for this we use the same mold from our glue stick container to make the circle and with our shaped scissors we are going to take it out around the entire outline we cut it out and so we are going to place it where we want, I placed it on the front of my bag so I could then fold it and glue it.


@anne002_20250723_195546_0000 (1).png

_

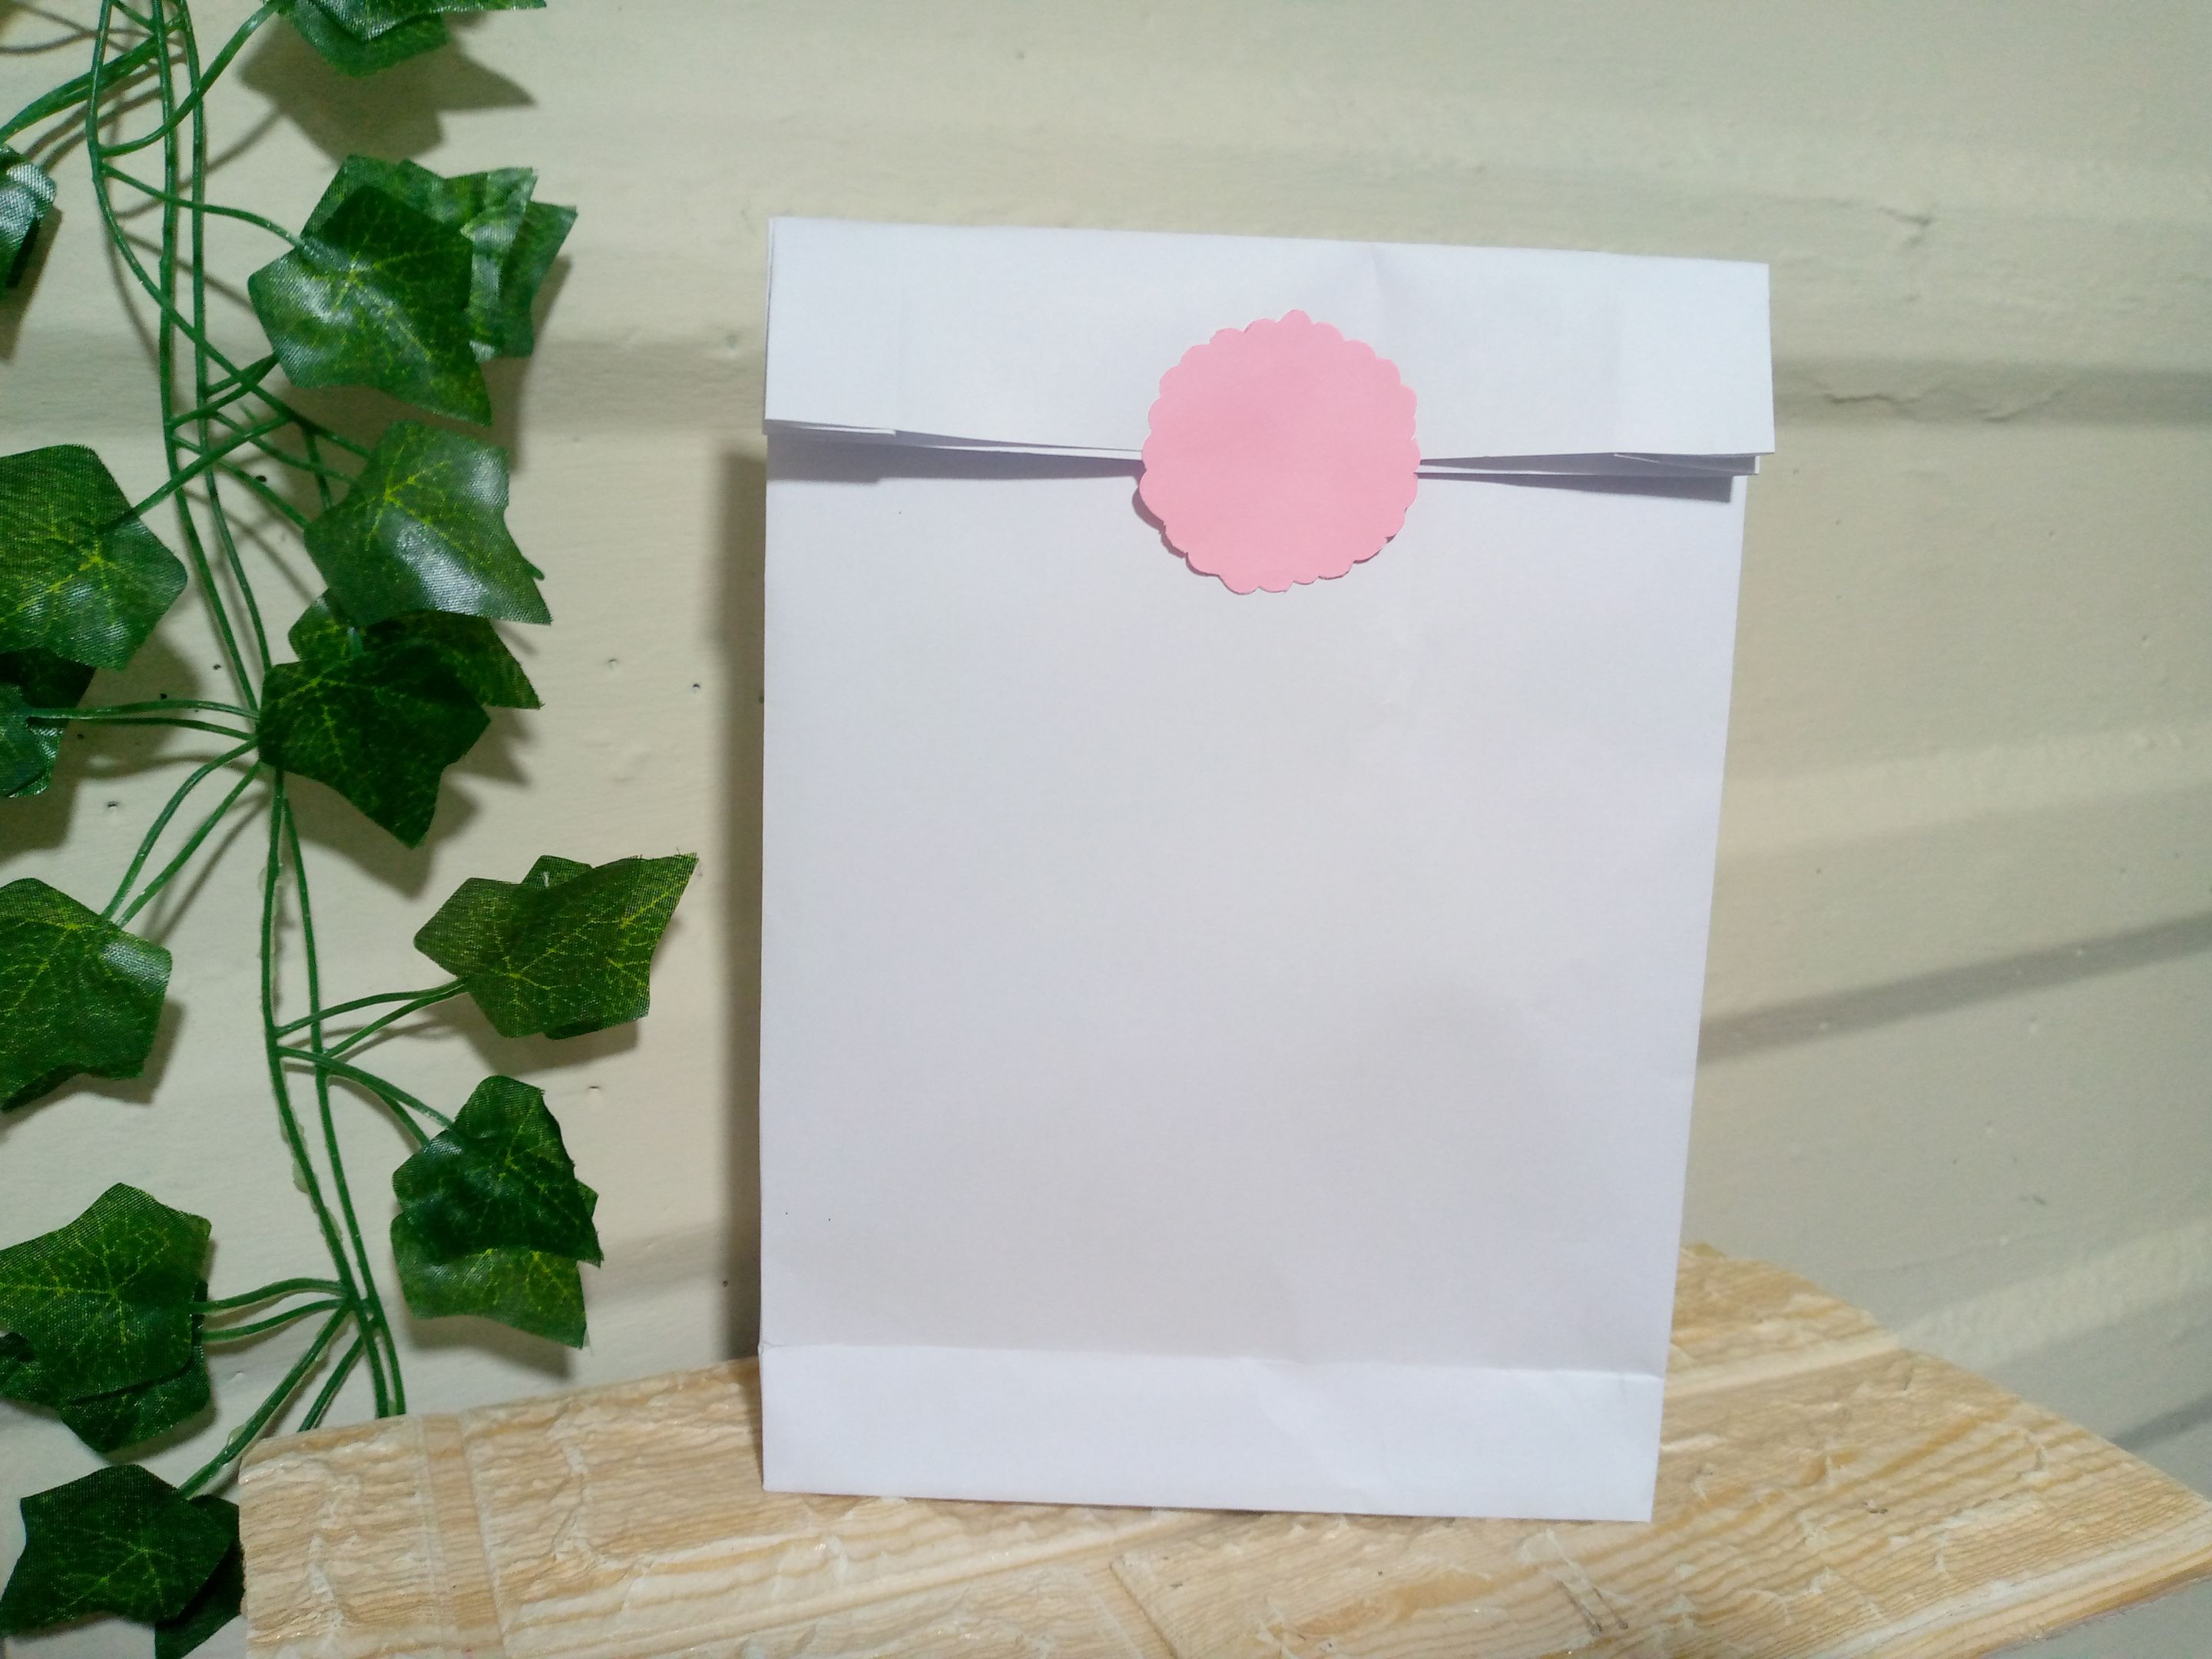
Resultado: | Result:

_

Estos son los resultados finales así nos queda nuestra hermosa bolsita súper sencilla lista para poder meter nuestros pedidos y entregarlos,puedes hacer muchas de estás y tenerlas guardadas para cuando se te presente una ocasión de poder entregar tu bolsita ya las tienes listas y preparadas,en mi caso haré varias de esta manera igual otras más grandes para meter más cosas y más pedidos, cuéntame que tal he parecido hacer bolsitas en la comodidad de tu hogar?..🛍️😉

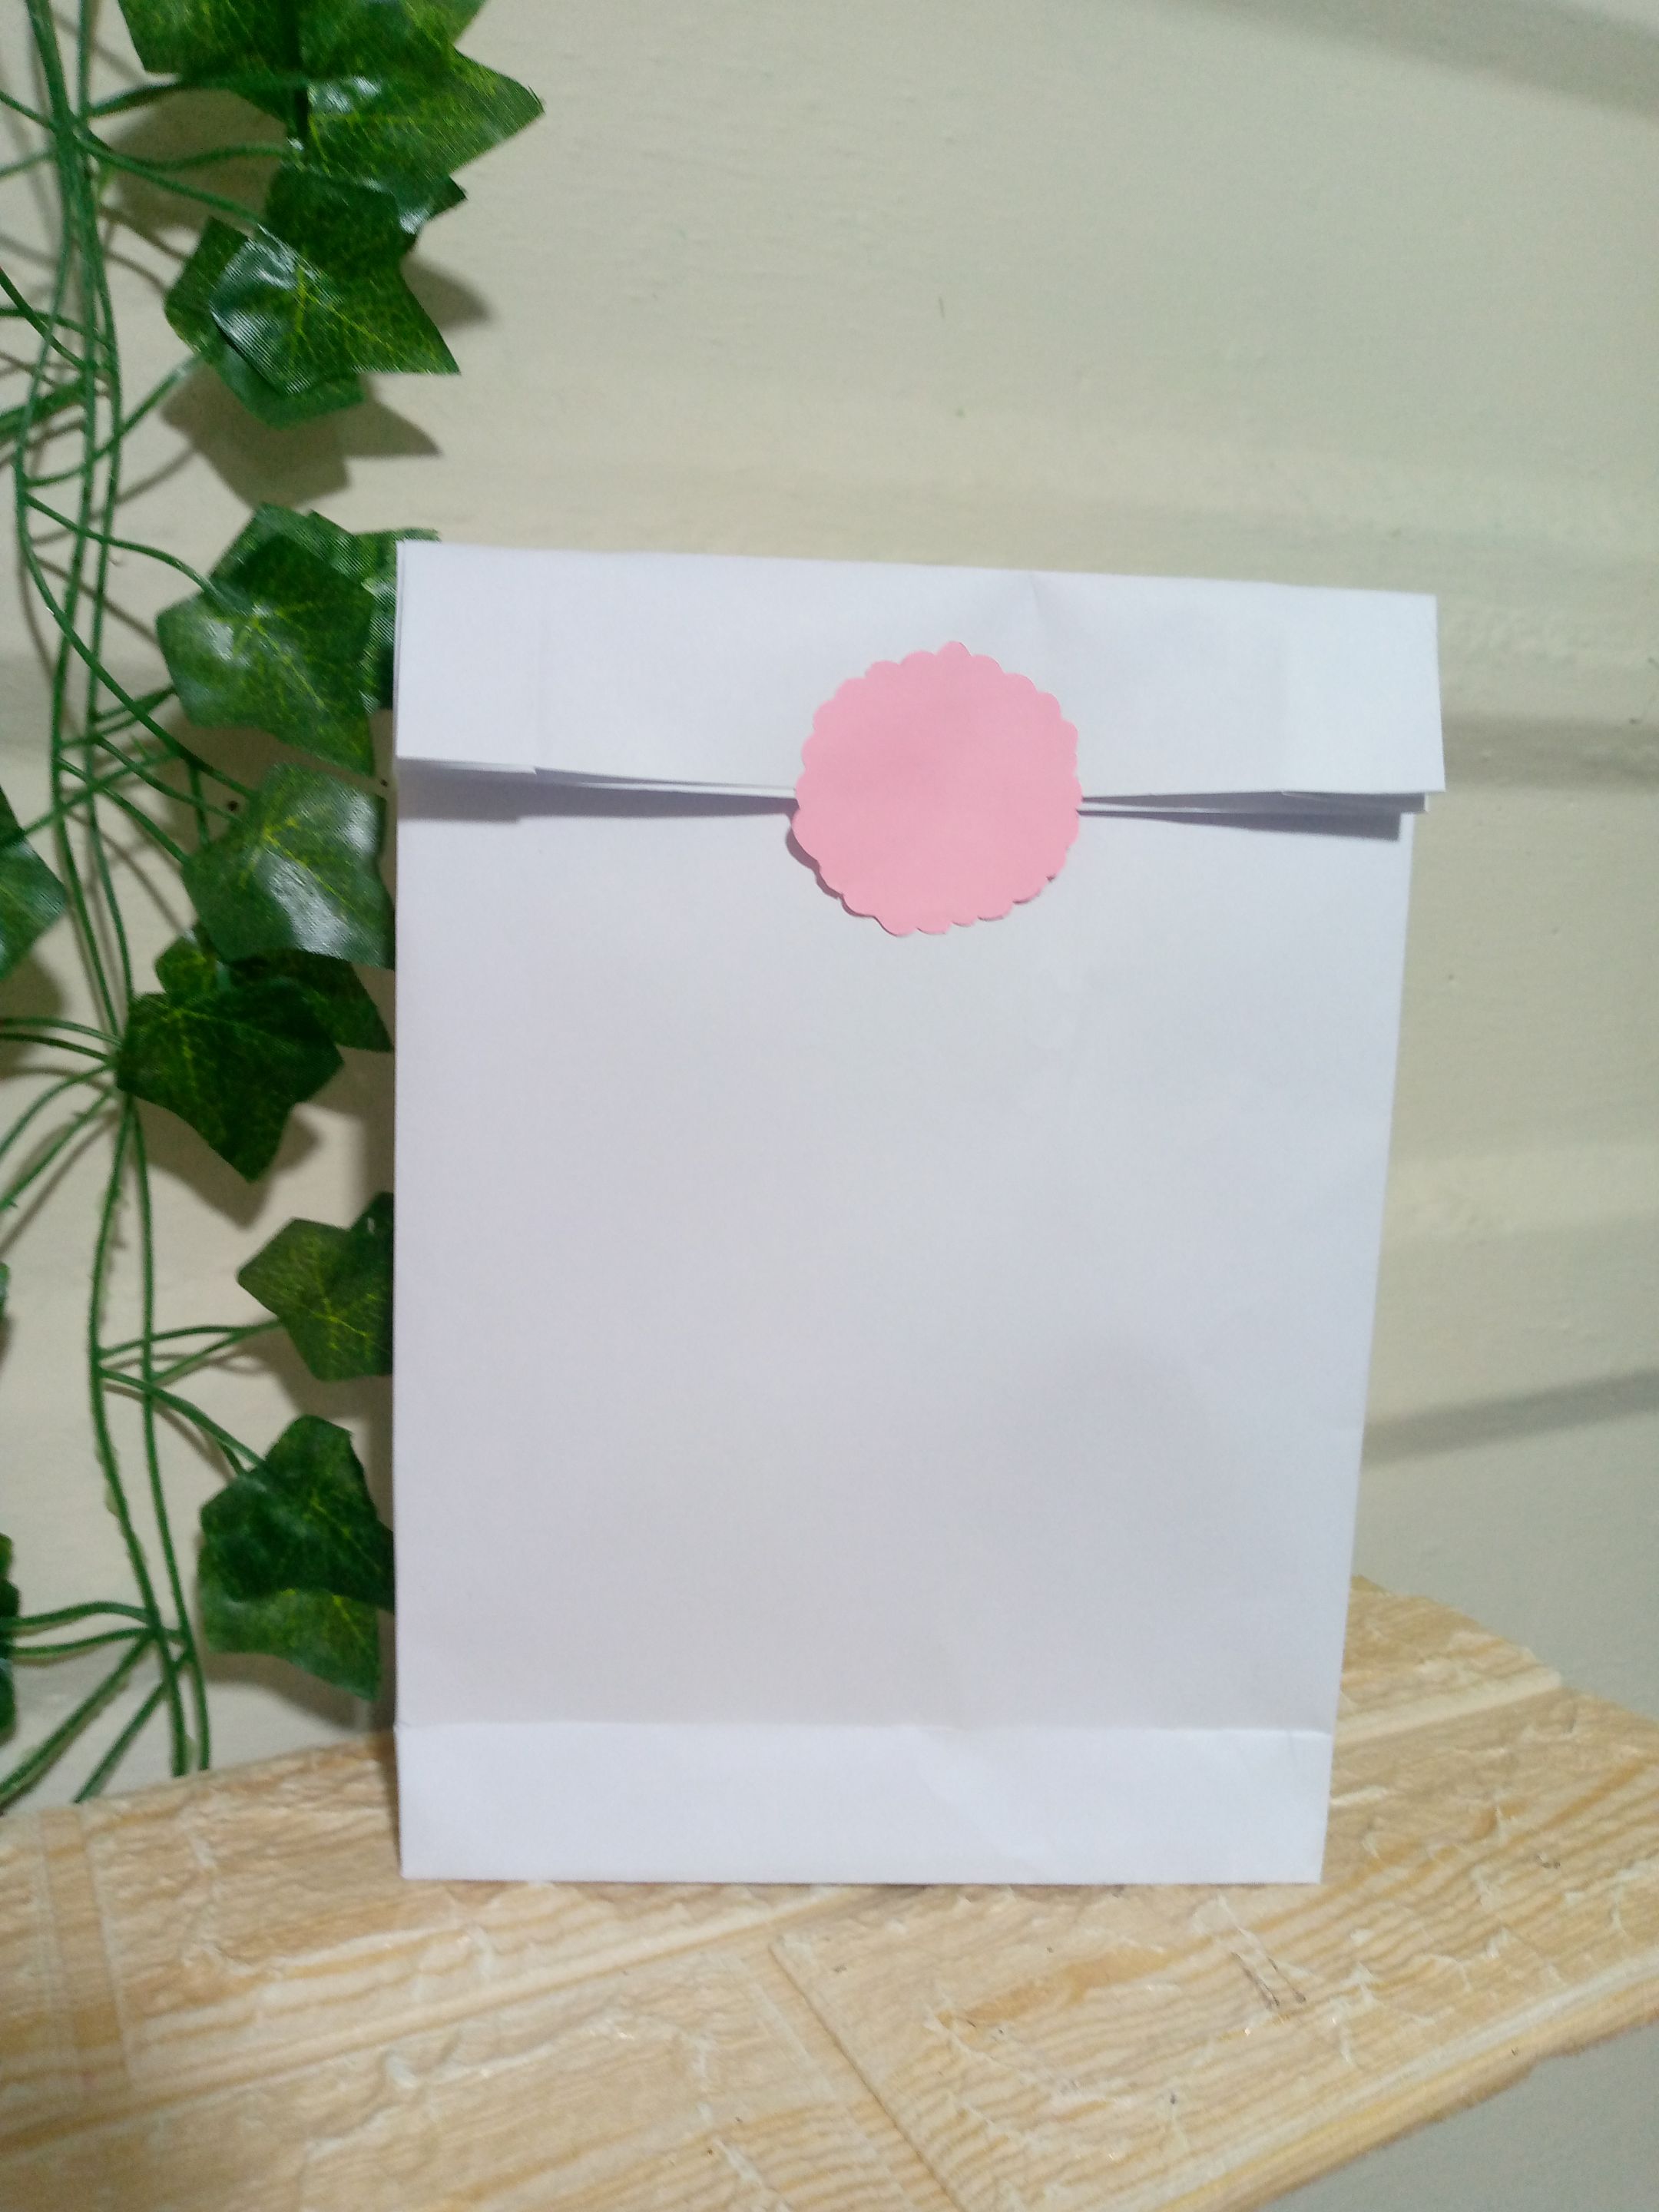
These are the final results, this is how we have our beautiful, super simple little bag ready to put our orders in and deliver them. You can make many of these and have them saved for when you have an occasion to deliver your bag, you already have them ready and prepared. In my case, I will make several of them this way, as well as other larger ones to put more things and more orders in. Tell me how I found making bags in the comfort of your home? ..🛍️😉

IMG_20250829_114156_952.jpg

IMG_20250829_114208_920.jpg

IMG_20250829_115418_613.jpg

IMG_20250829_115449_569.jpg

Con esto me despido de ustedes deseando poder encontrarnos en otro tutorial de ideas y manualidades que puedes hacer en casa y que te facilitan la vida ,hasta pronto amigos 👋🏻😊los quiero mucho.❤️

With this I say goodbye to you, hoping to meet again in another tutorial of ideas and crafts that you can do at home and that make your life easier. See you soon, friends. I love you very much. ❤️

@anne002_20250723_195546_0000 (1).png

_

Creando las cosas con amor🌷♥️ | Creating things with love🌷♥️

_

_

Imágenes:de mi autoria | Edición:Canva® y PicsArt © | Traductor:Traductor de Google | Dispositivo:TecnoSpark 8C.

_

_

Images:my own work | Edited by:Canva® and PicsArt © | Translator:Google Translate |Device:TecnoSpark 8C .

_


Tarjeta De Agradecimiento Emprendimiento Ilustrado Rosa_20250817_224544_0000.png


#spanish #paperbags #craft #hivediy #doityourself #recycling #handmade
Payout: 0.000 HBD
Votes: 151
More interactions (upvote, reblog, reply) coming soon.