🪡🧥Make a fashionable women's sweater with a gathered front🖤🧵[ES•EN]

@anne002 · 2025-07-22 12:03 · NeedleWorkMonday

Miniatura thumbnail para youtube vlog video ruta de viaje en bali turismo a_20250721_152001_0000.png

!Hola hermosa comunidad !un placer saludarles después de unos días de ausencia estoy de vuelta con un bonito proyecto costuril que quise pasar compartiendo con ustedes.🧵🪡

Hello beautiful community! It's a pleasure to greet you. After a few days of absence, I'm back with a beautiful sewing project that I wanted to share with you.🧵🪡

Picsart_24-11-11_14-38-52-418 (1).jpg

Hoy quiero enseñarte a hacer este suéter con fruncido en la parte delantera,si te has preguntado como hacer este tipo de suéter llegaste al tutorial indicado porque estaré compartiendo te el proceso sencillo de cómo hacerlo ,recuerda que mis proyectos costuriles siempre son sencillos y prácticos de una manera que puedas entenderlos y así cuando vayan a coser sus prendas se les haga mucho más fácil el proceso,mi objetivo principal es que aprendas junto conmigo a elaborar prendas de vestir de la manera más fácil y puedas compartir con los demás lo que has aprendido en mis tutoriales,le doy gracias principalmente por tomarse el tiempo mis queridos amigos de #needleworkmonday por el tiempo que dedican en leerme y con esto quiero dar inicio al proceso sencillo de este lindo suéter de dama ,espero los resultados finales le gusten mucho tanto como a mi.

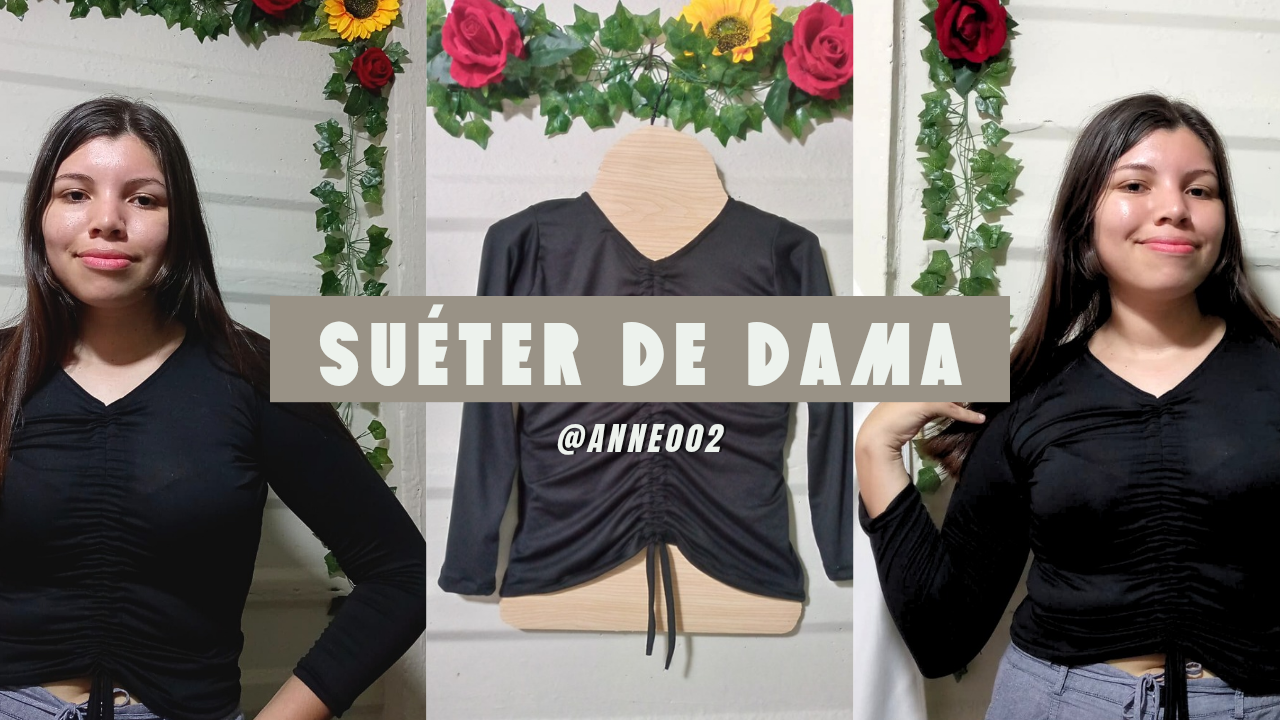
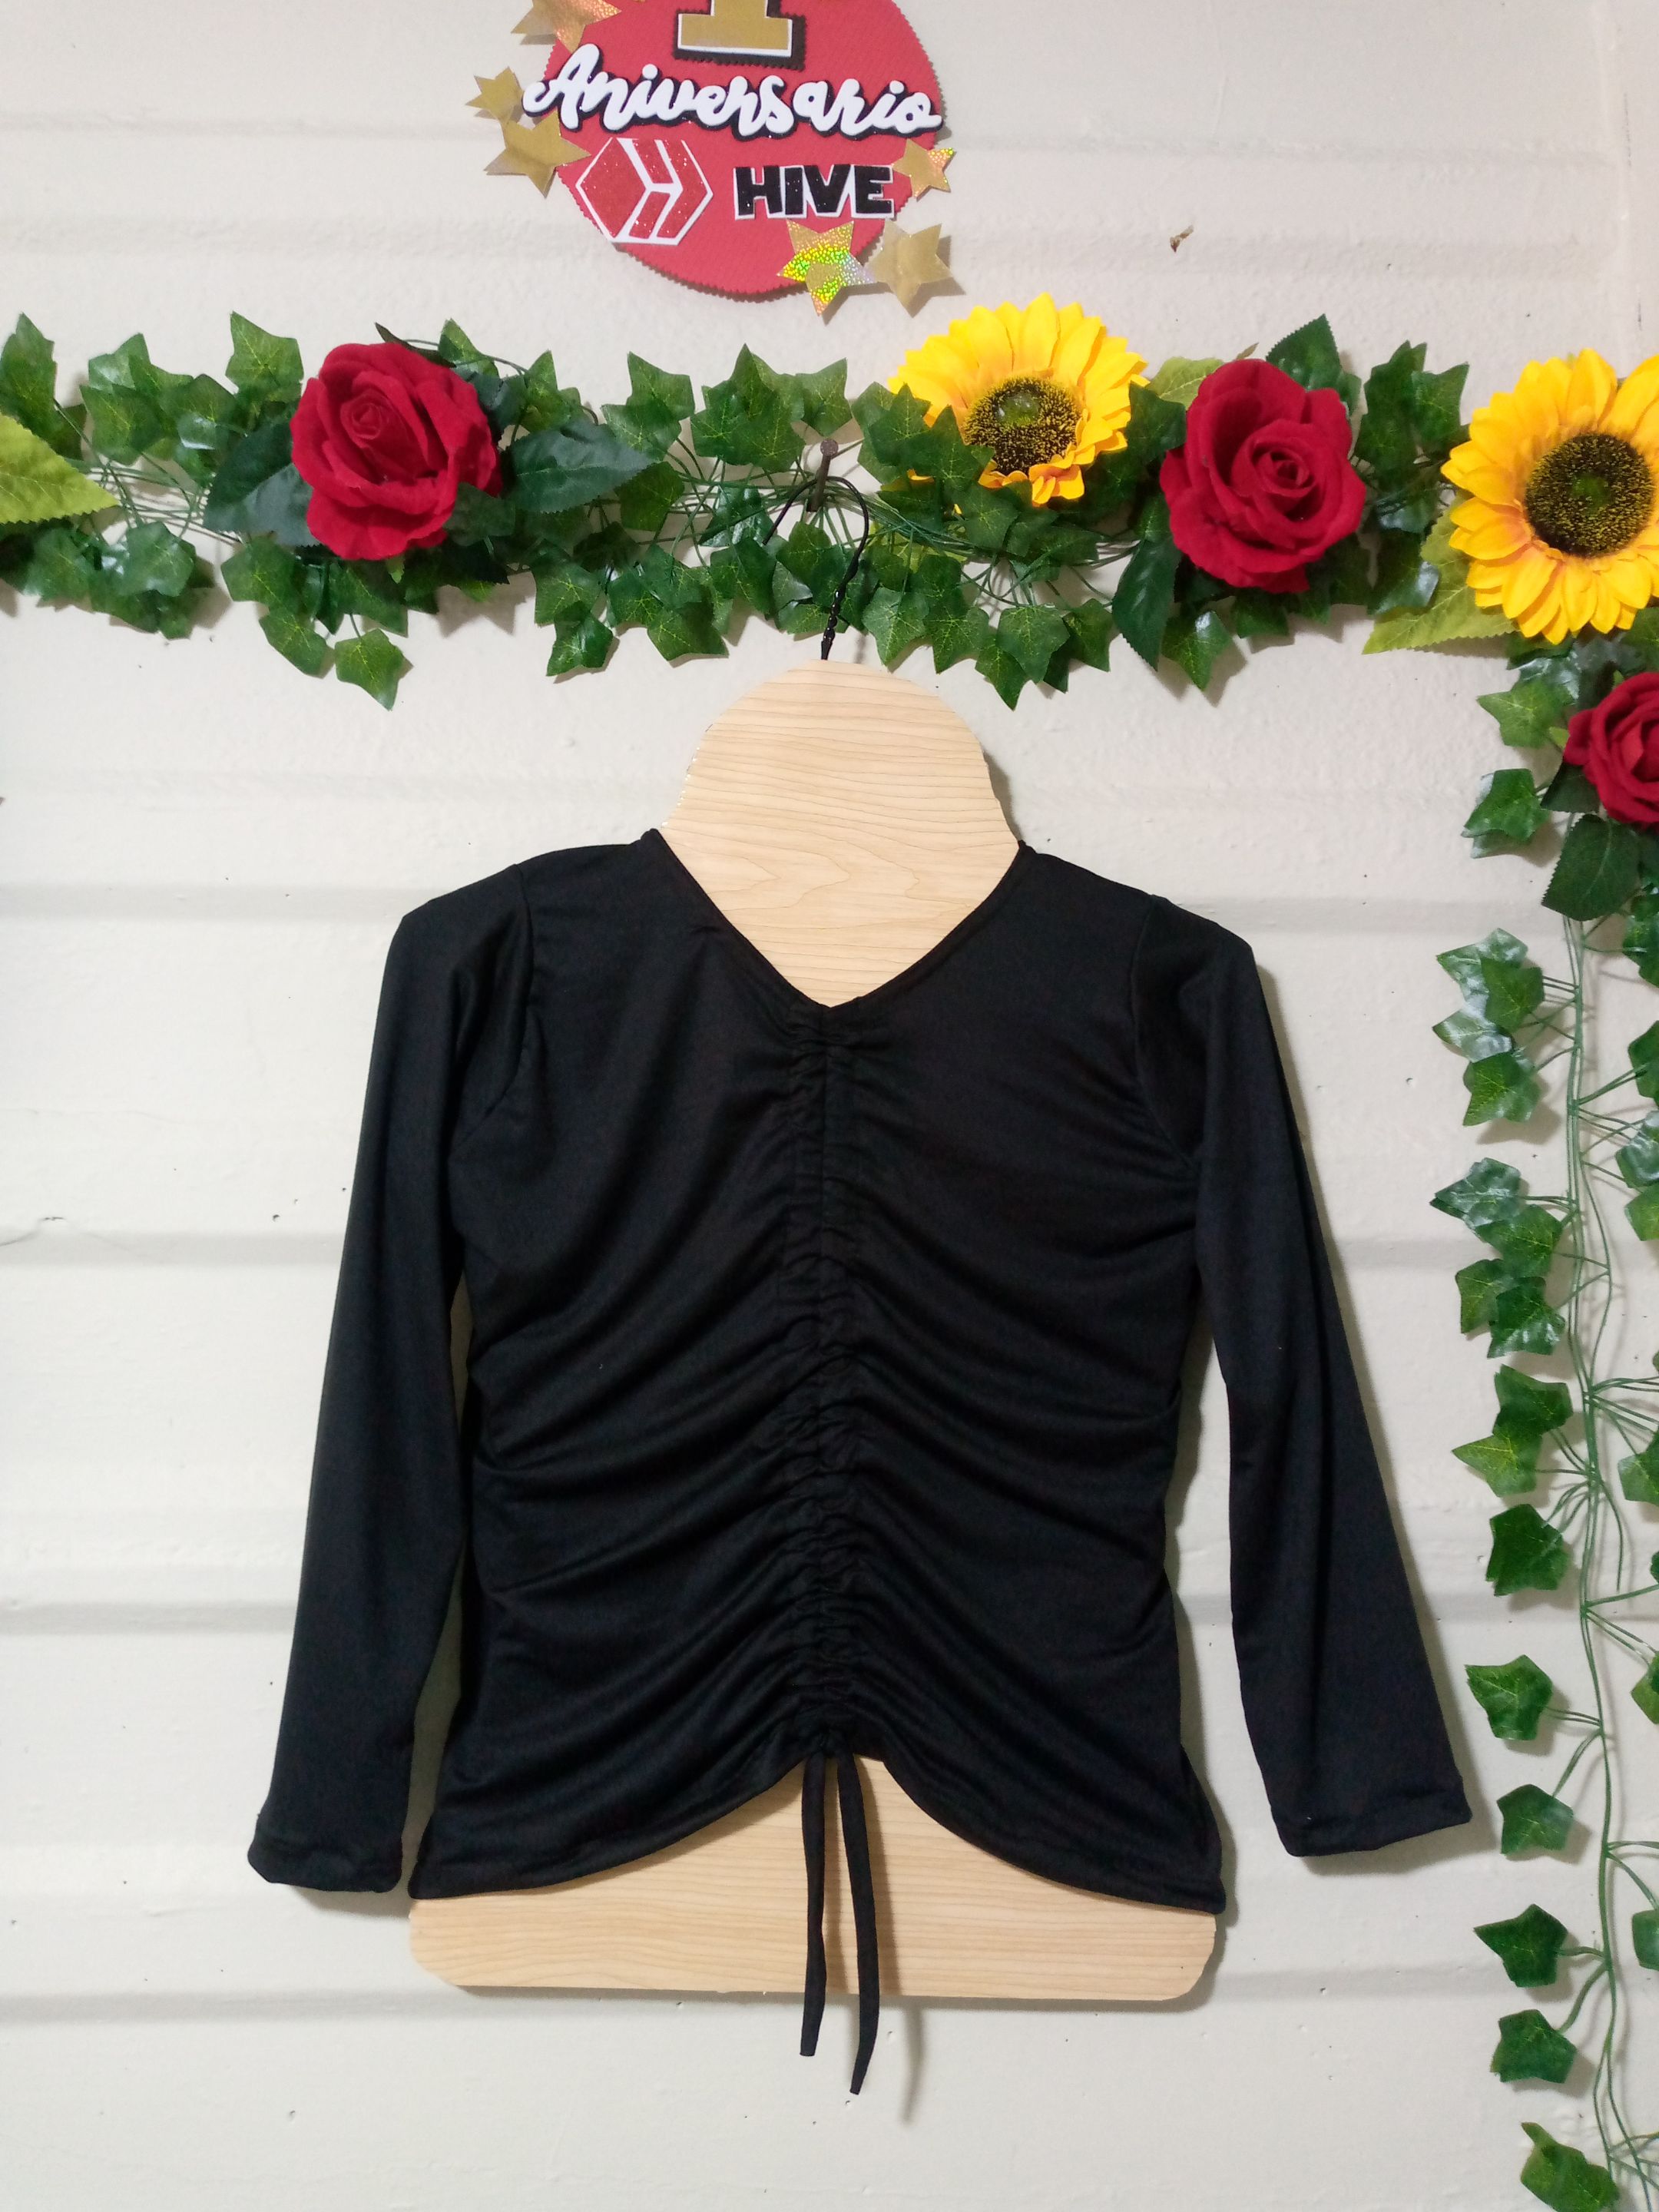
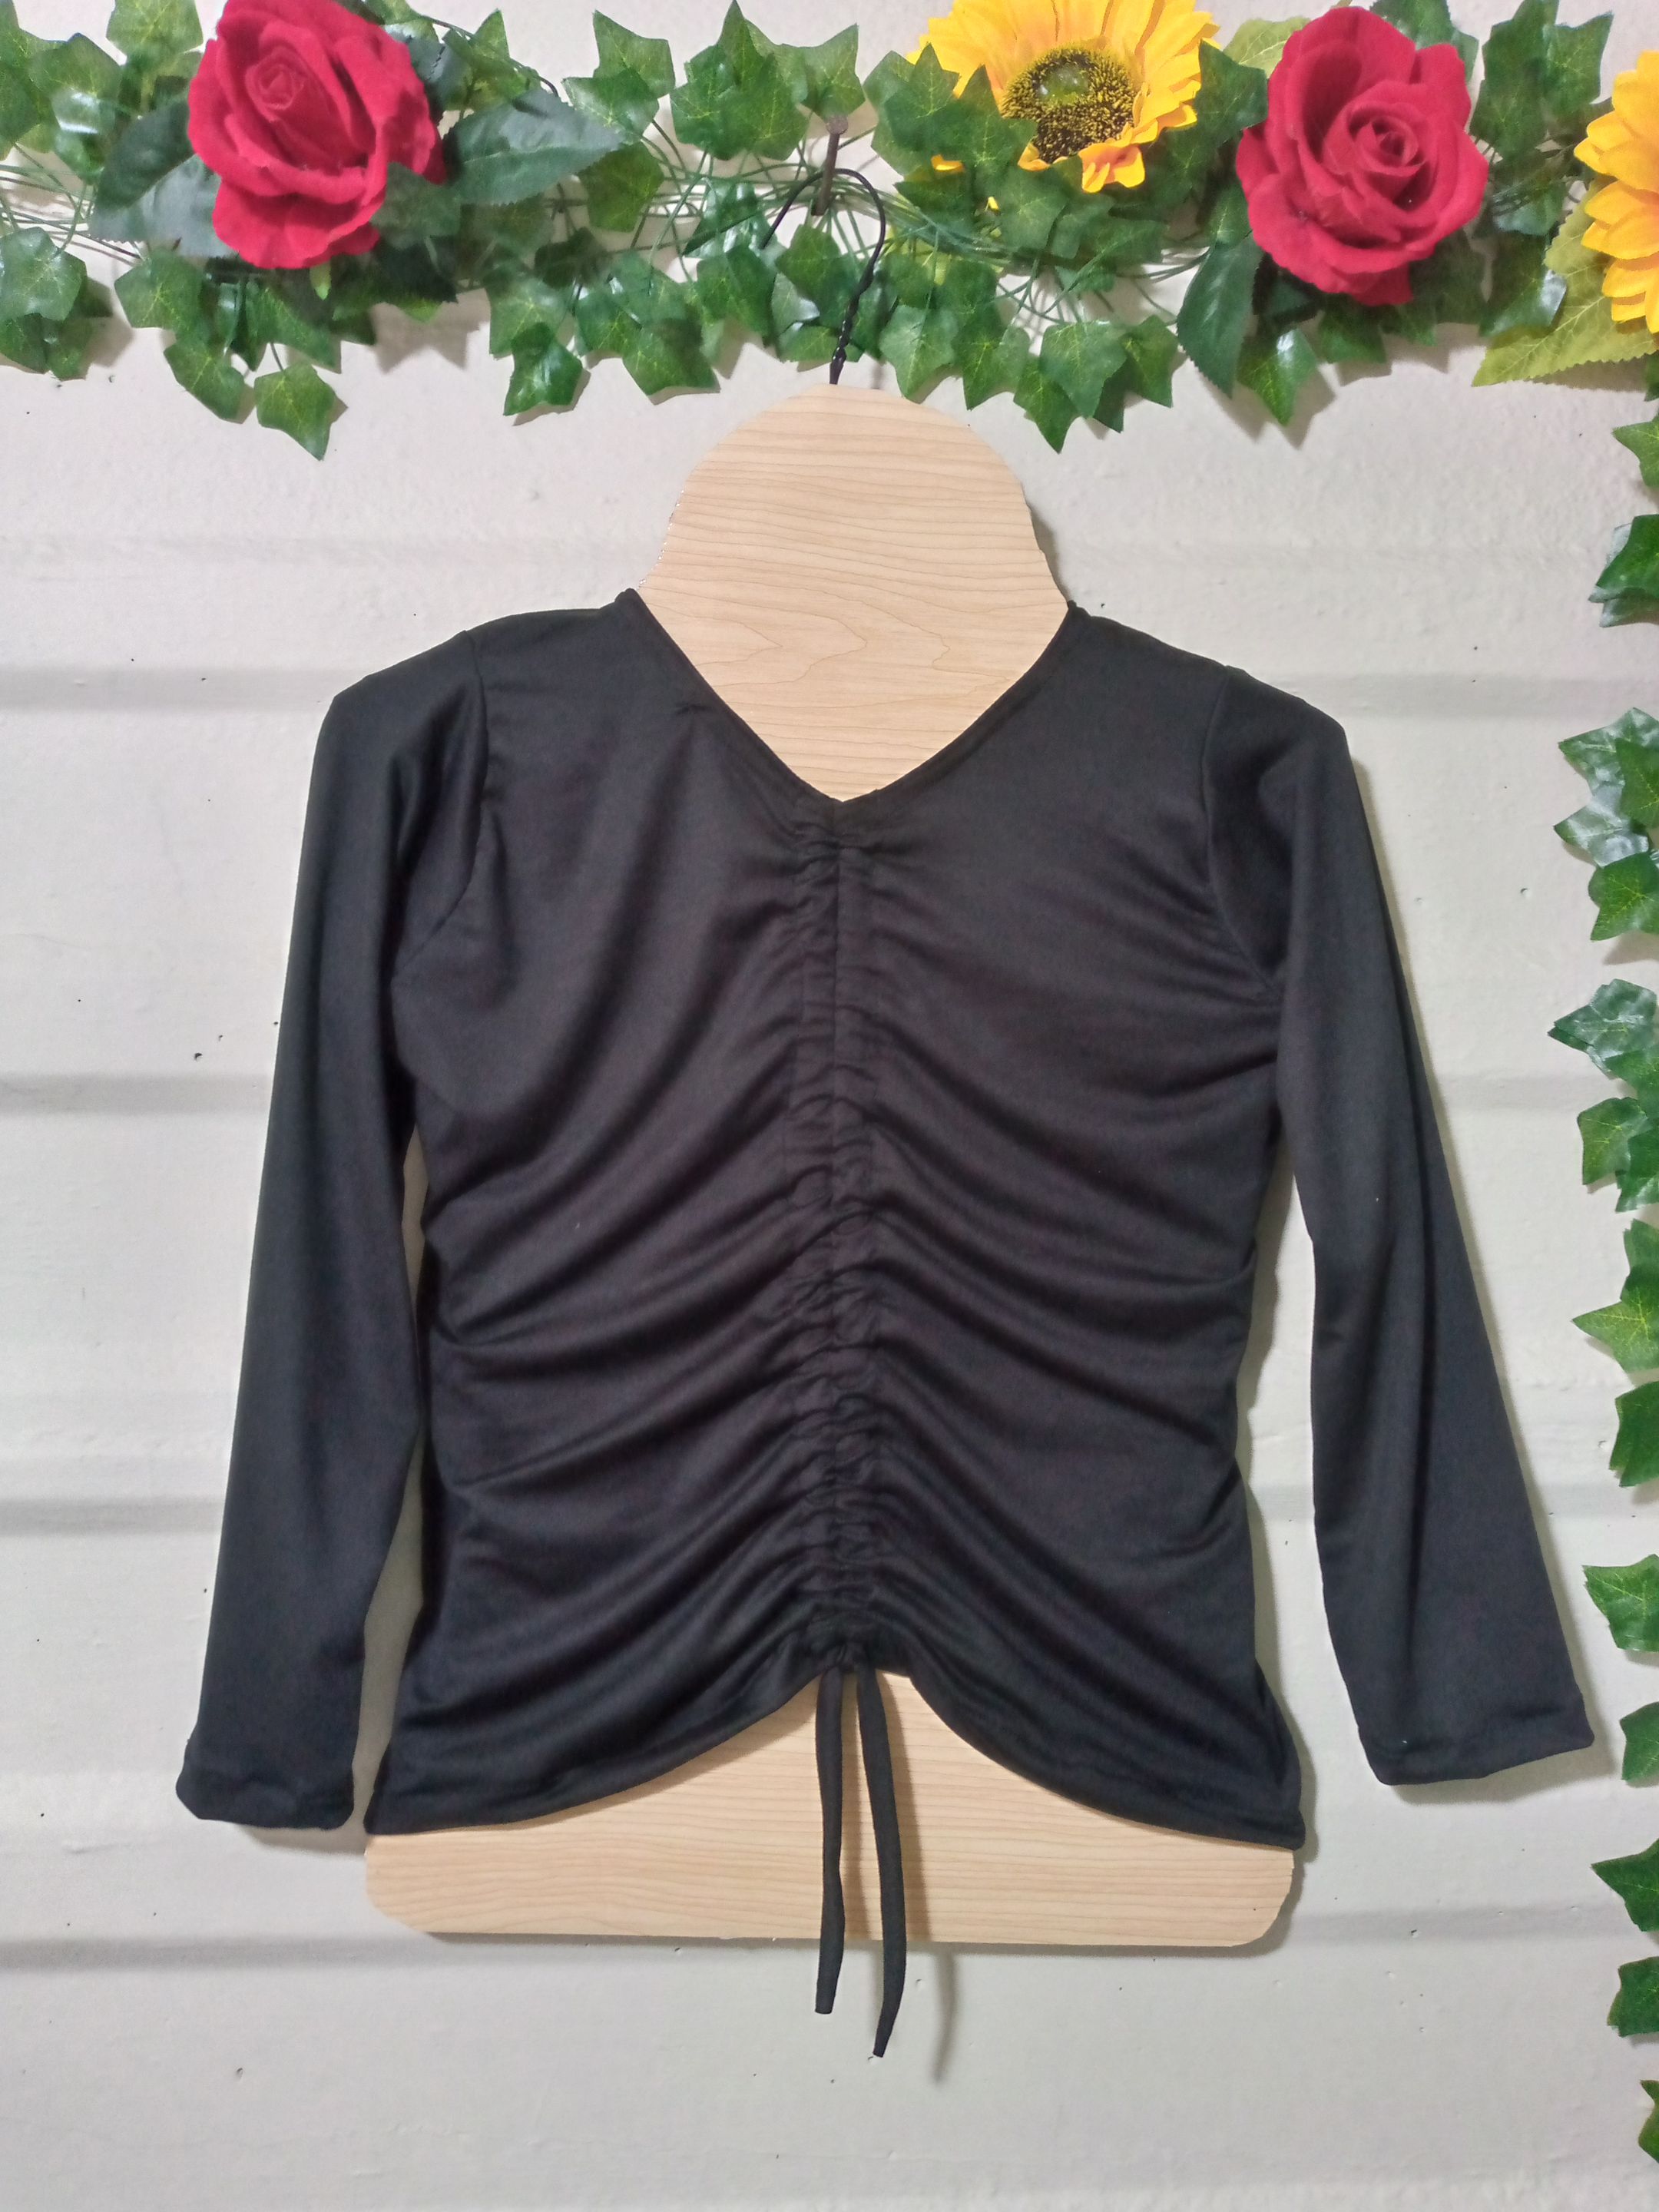
Today I want to teach you how to make this sweater with gathering in the front, if you have wondered how to make this type of sweater you came to the right tutorial because I will be sharing with you the simple process of how to do it, remember that my sewing projects are always simple and practical in a way that you can understand them and so when you go to sew your garments the process will be much easier, my main objective is that you learn with me how to make clothing in the easiest way and you can share with others what you have learned in my tutorials, I thank you mainly for taking the time my dear friends of #needleworkmonday for the time you spend reading me and with this I want to start the simple process of this cute women's sweater, I hope you like the final results as much as I do.

¡Manos a la costura!👏🏻🪡🧵

Let's get sewing!👏🏻🪡🧵


IMG_20250721_110806_766 (1).jpg

Picsart_24-11-11_14-38-52-418 (1).jpg

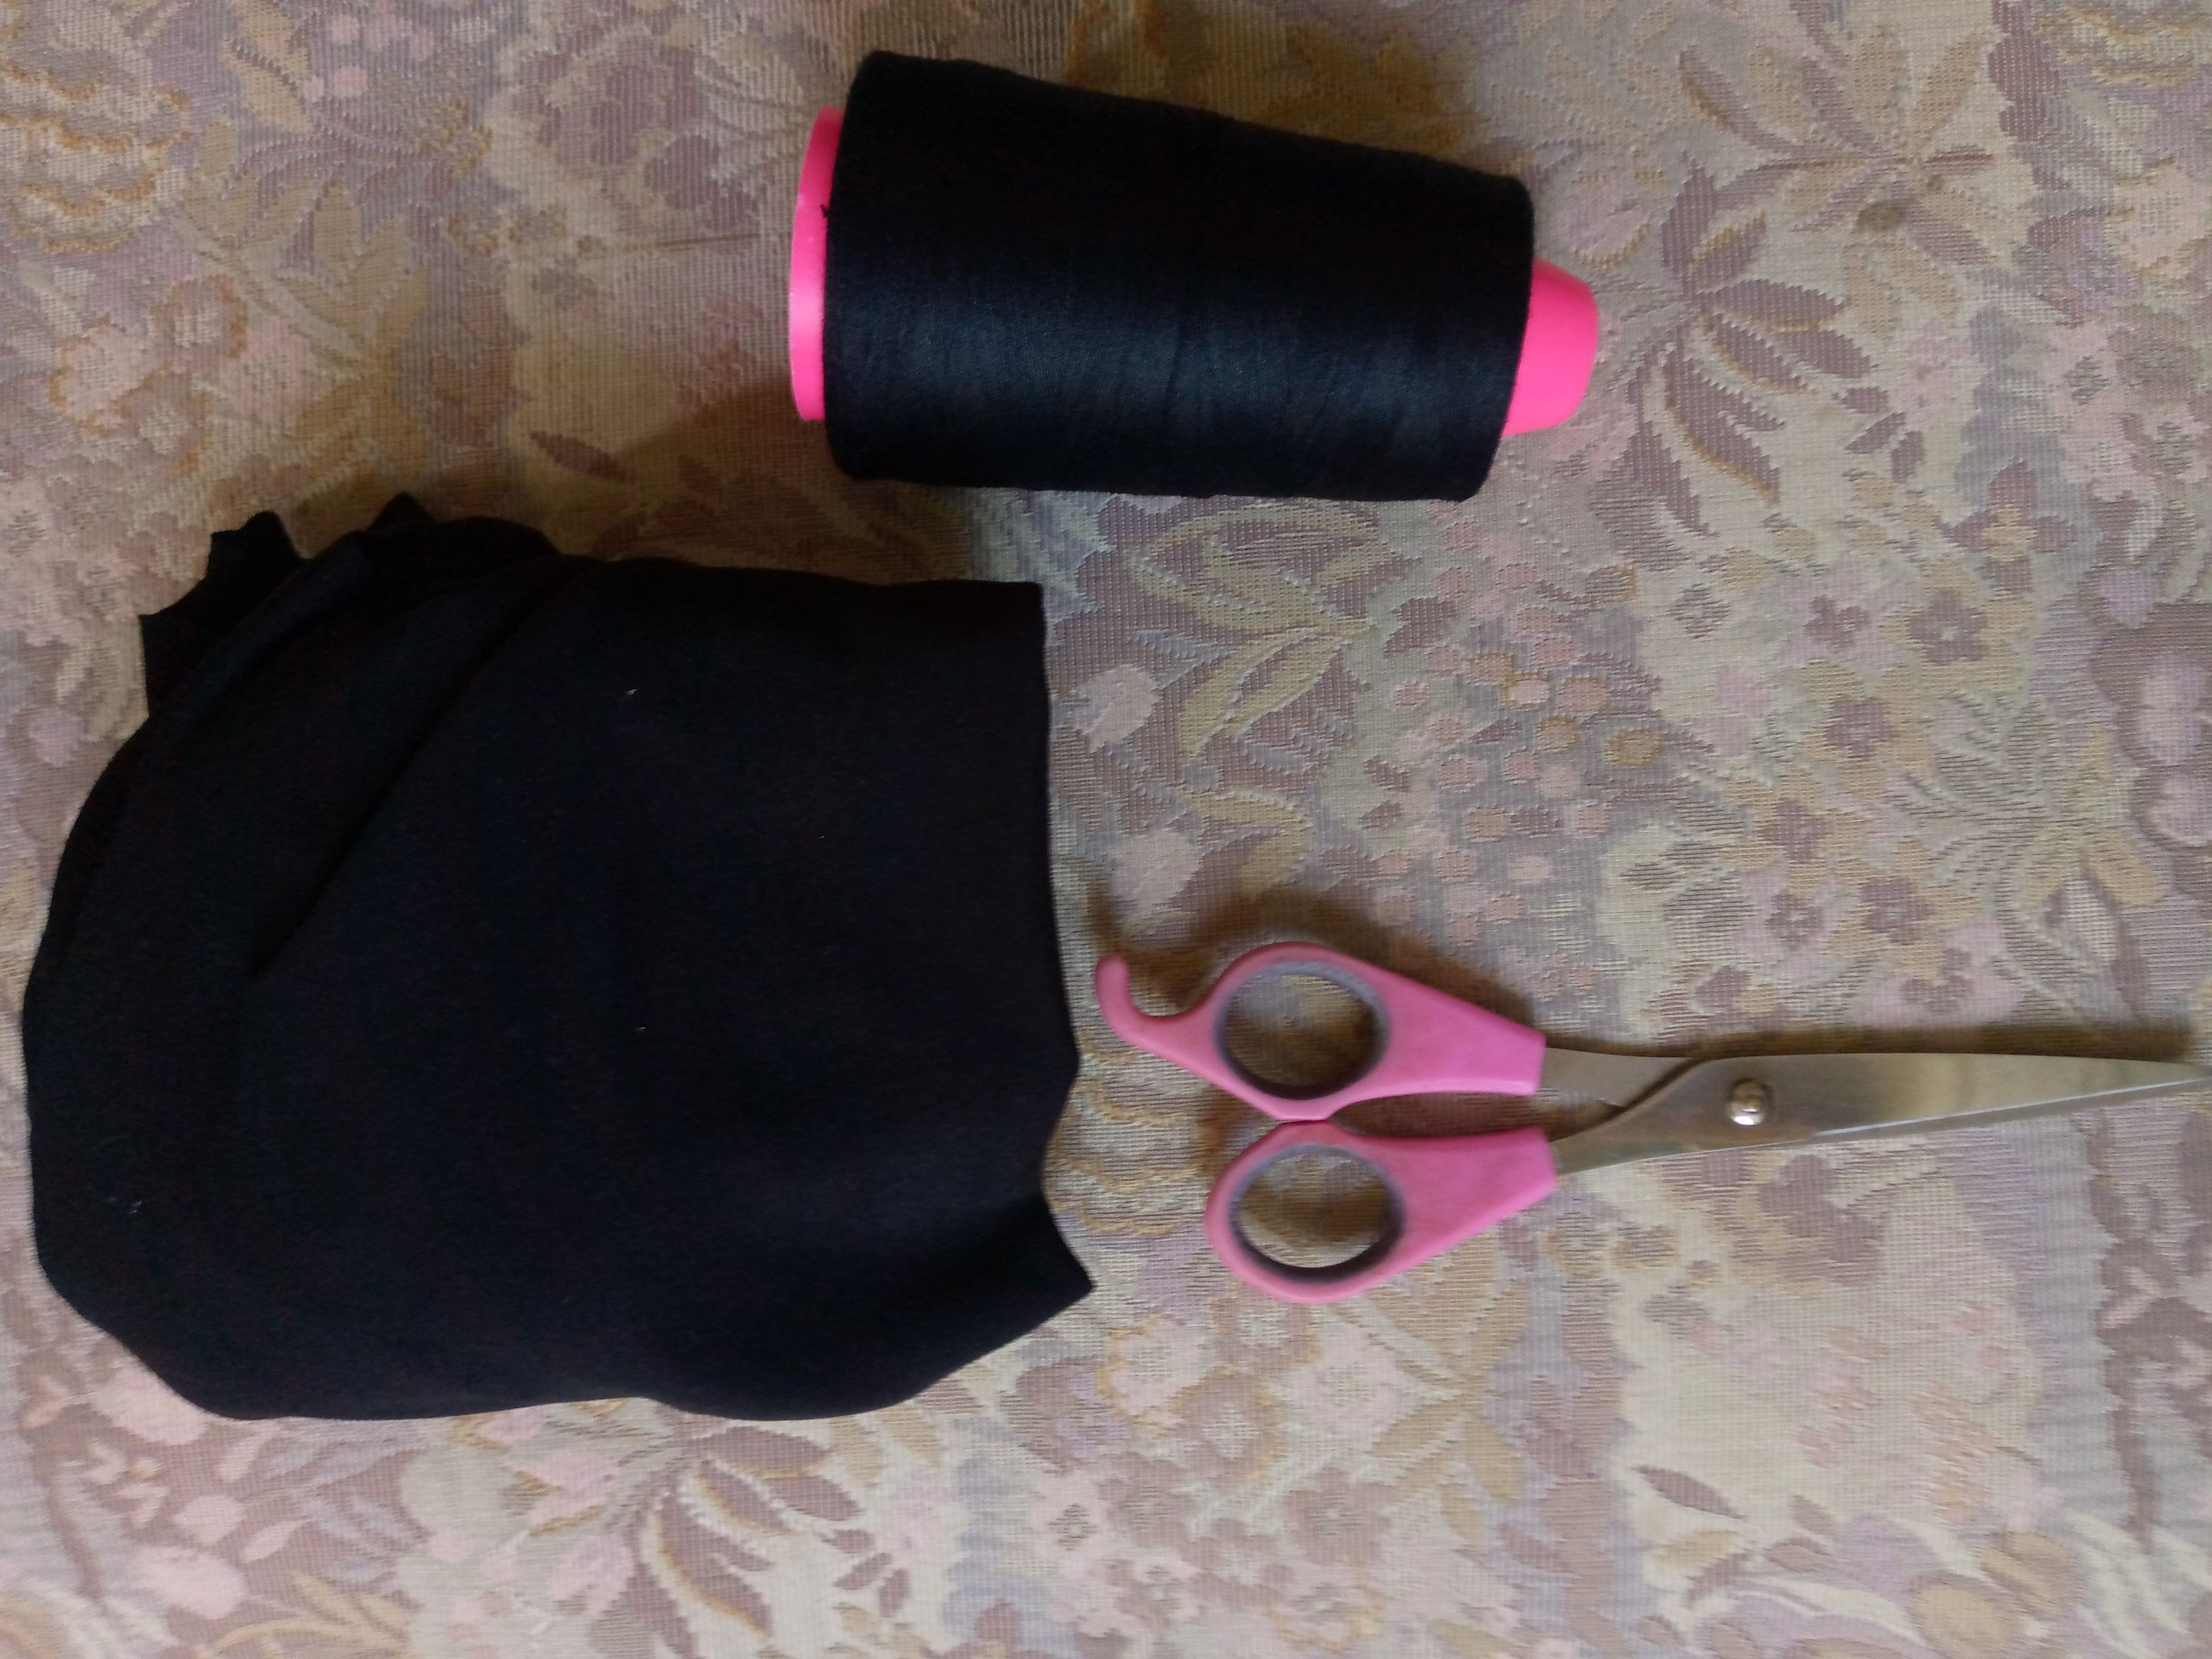
Materiales:// Materials:

  • Utilizaremos 70 cm de tela microdurazno (yo escogí negra🖤)
  • Máquinas de coser(Trabajaré con la máquina sencilla y la overlock)
  • Hilo y tijera
  • Herramienta pasa cinta
  • Una medida de una prenda como referencia para cortar las piezas del suéter

  • We'll be using 70 cm of micro peach fabric (I chose black🖤)
  • Sewing machines (I'll be working with the standard machine and the overlock)
  • Thread and scissors
  • Tape cutter
  • A garment measurement as a reference for cutting the sweater pieces

Picsart_24-11-11_14-38-52-418 (1).jpg

Pasos a seguir://Steps to follow:

![IMG_20250721_111008_748.jpg](https://files.peakd.com/file/peakd-hive/anne002/EoeDw8Q8j1Udjz4zarftW2WxtFWobevFtRYdkJLMAgHamSo8XD25NRZQafZVdnihe6U.jpg)
![IMG_20250721_111056_982.jpg](https://files.peakd.com/file/peakd-hive/anne002/Eoke6rai1jo1cPC6AmfBgnALFgj2wFiZBxZp51zdKaX8xHh6HswYFTpGeWeCC1NnFRy.jpg)
![IMG_20250721_111215_941 (1).jpg](https://files.peakd.com/file/peakd-hive/anne002/Eou6HdsyUHRvnqAjRBWzYmi4V35QL67npwSkVzRrvZhWc9CwrvHnyQEdnDigY3AxaXU.jpg)
![IMG_20250721_111301_445 (1).jpg](https://files.peakd.com/file/peakd-hive/anne002/Eq366wtFjDDPJKMt9MA65rnRuBJHPSKAWybicJTGmGPzzkkKDLmrb7JUdhdeFWknrfF.jpg)

Paso 01

Está es la parte que más nos gusta el corte de las piezas del suéter,en este caso yo tomé una medida como referencia para cortar las piezas correspondientes , corté las dos mangas en este caso no las corté largas solamente después de la mitad del brazo (manga tres cuarto) corté el bias del cuello y la tira para el cordon que pasa por la parte delantera de la blusa y hacer el fruncido, corté las piezas delanteras con corte en el medio dejando 2 cm demás luego corté la pieza de atrás del talle.

Step 01

This is the part that we like the most about cutting the pieces of the sweater, in this case I took a measurement as a reference to cut the corresponding pieces, I cut the two sleeves in this case I did not cut them long only after the middle of the arm (three-quarter sleeve) I cut the bias of the neck and the strip for the cord that goes through the front of the blouse and make the gathering, I cut the front pieces with a cut in the middle leaving 2 cm extra then I cut the back piece to the waist.


![IMG_20250721_120210_276.jpg](https://files.peakd.com/file/peakd-hive/anne002/Eorys1BnztorAdEFjp9HJBhWfU6qQpG4yYat6RFuucCaA8VWWeqpM5R4W8gw91bnuMv.jpg)
![IMG_20250721_120929_068.jpg](https://files.peakd.com/file/peakd-hive/anne002/Ep1YGbd6pZfeag1T9mmuGG7JE1ciynQ8BZRpVhoevdgwSTTNUcvMmfPiLJNt4cdqkB4.jpg)

IMG_20250721_121129_844.jpg

Paso 02

Tomaré las piezas del talle delantero y coseré el borde de este luego coseré la parte de los hombros con costura overlock y costura recta , después pasaremos a abrir la parte de los hombros porque estaremos ubicando nuestra manga a la sisa con un alfiler luego cosemos con costura recta y overclock la manga,hacemos el mismo paso con la otra manga para armar primeramente estás piezas.

Step 02

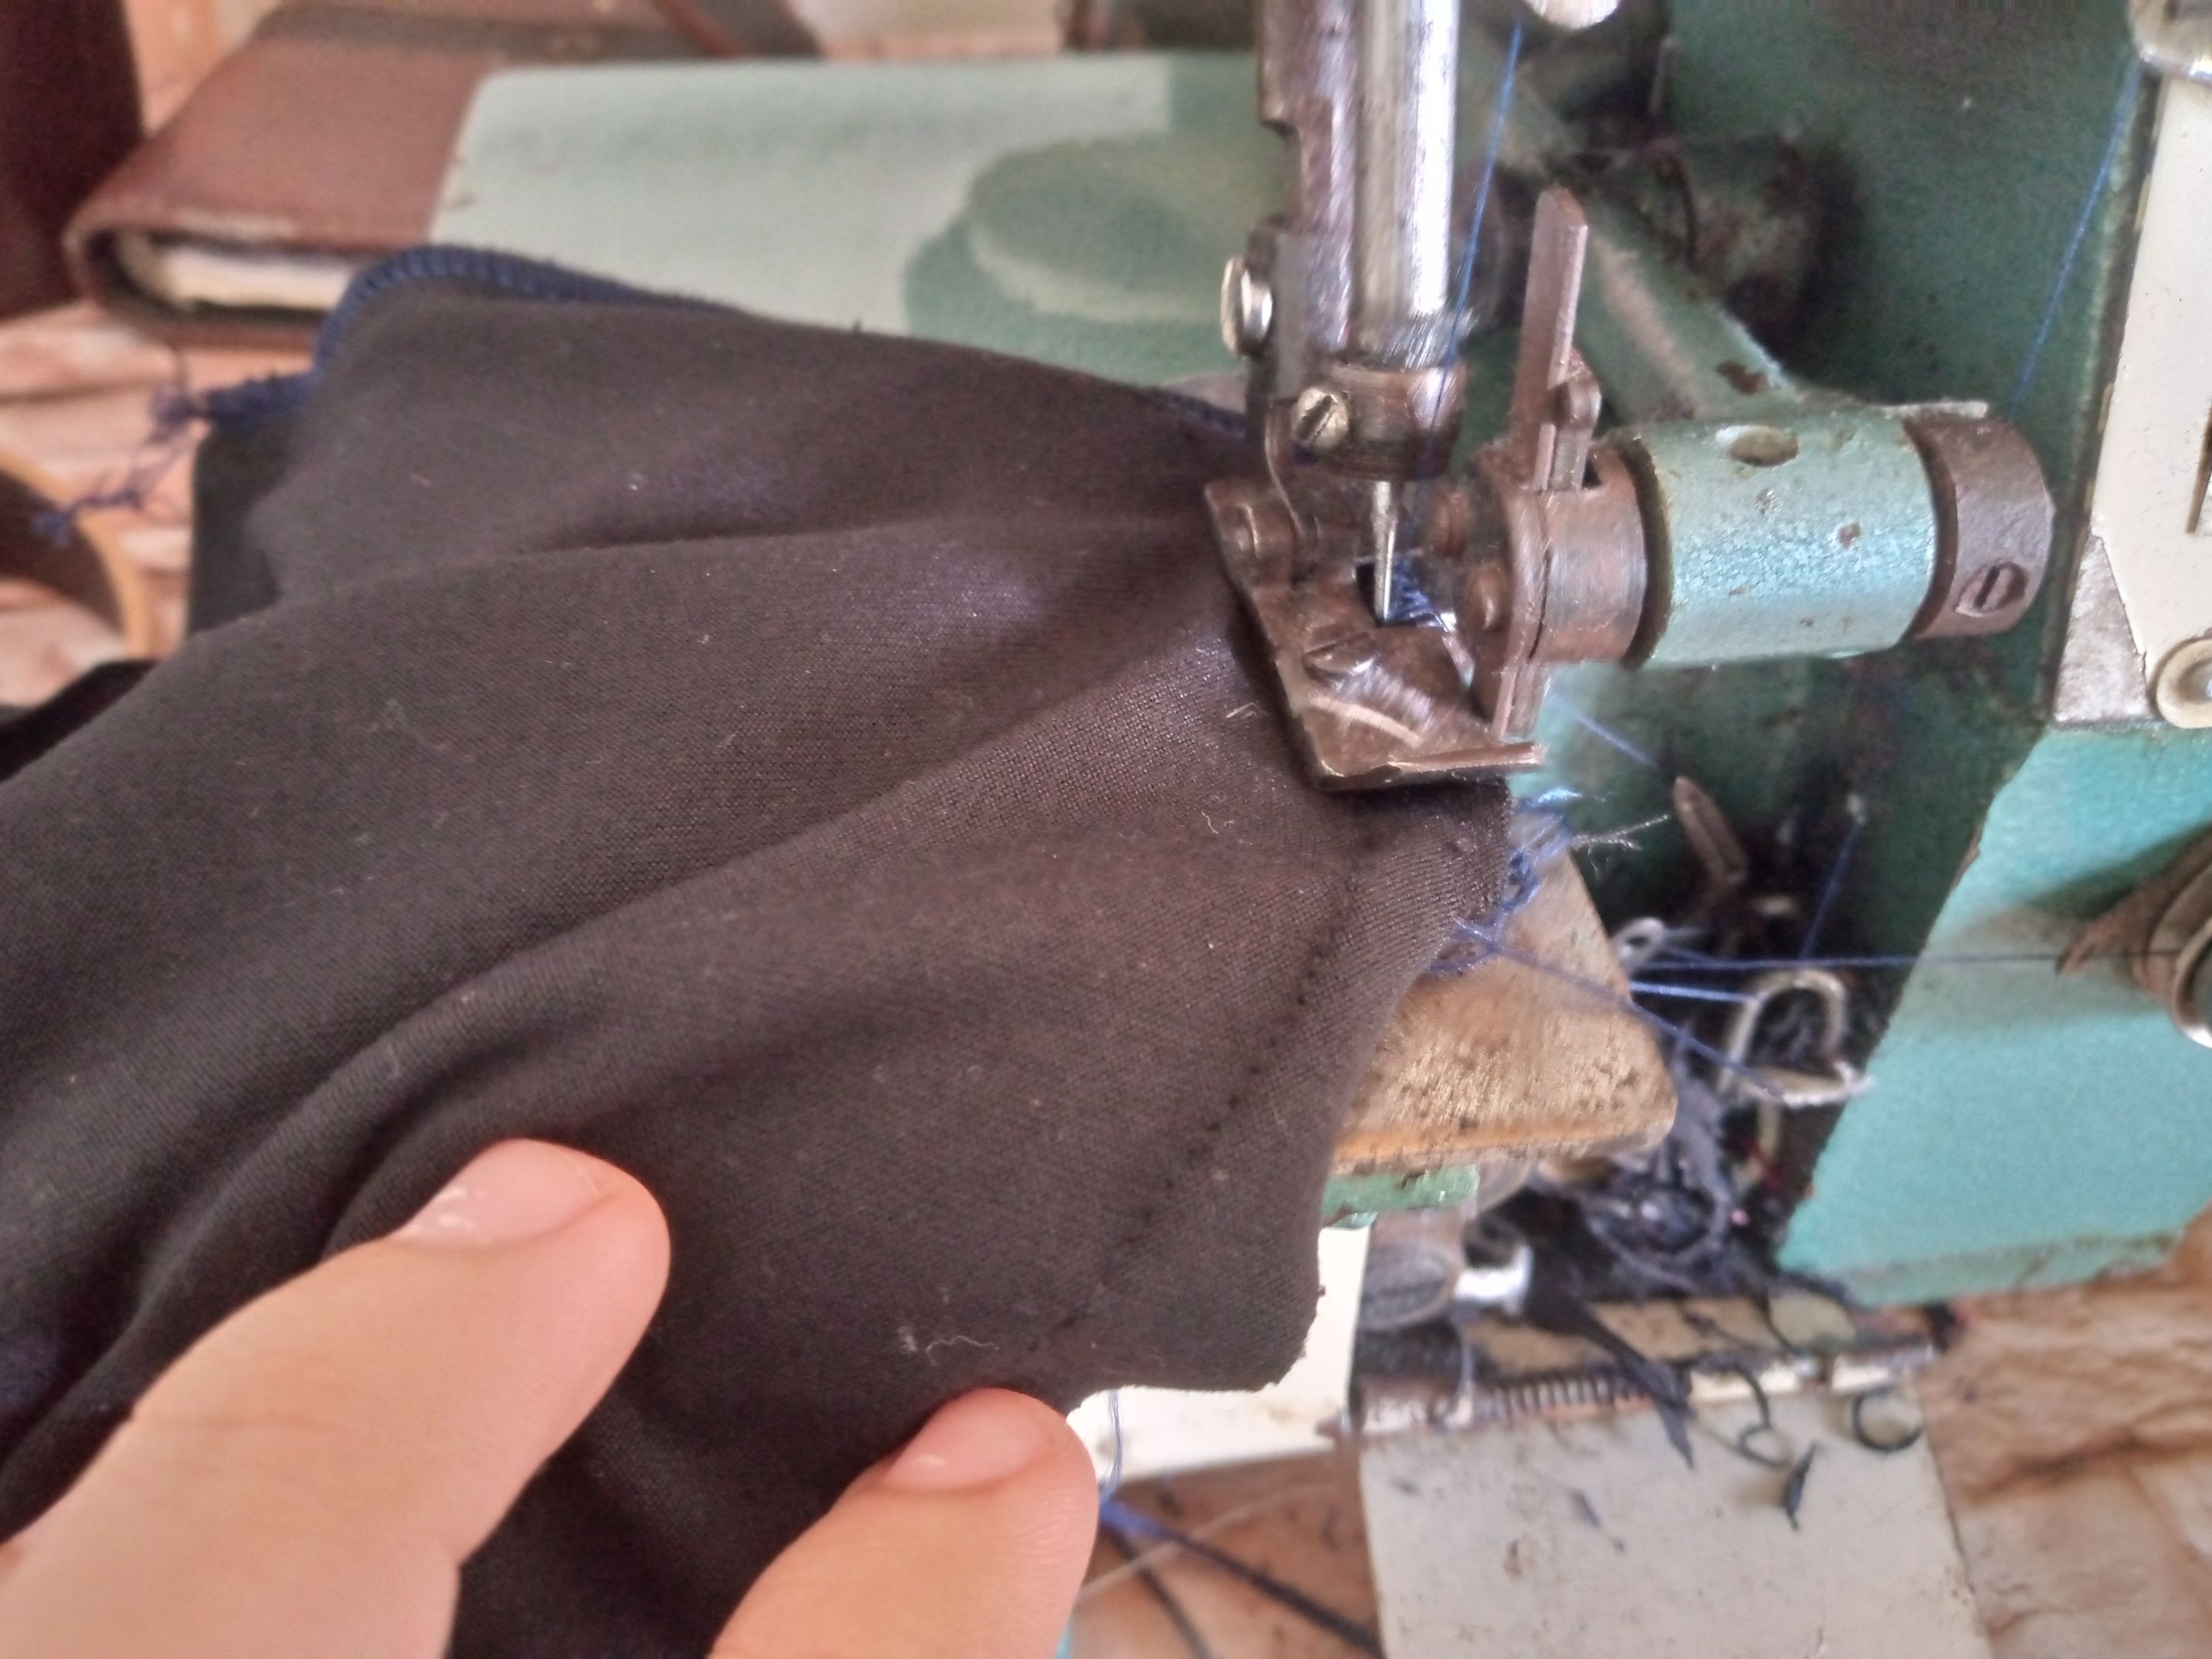
I will take the pieces of the front waist and sew the edge of it, then I will sew the shoulder part with an overlock seam and a straight seam, then we will open the shoulder part because we will be placing our sleeve to the armhole with a pin, then we sew with a straight seam and overlock the sleeve, we do the same step with the other sleeve to first assemble these pieces.


![IMG_20250721_122754_361.jpg](https://files.peakd.com/file/peakd-hive/anne002/Eonif9SsHTkdJLRw7uN1SN4D75VzoCe3H67tCKk3yWBiEp41r8i1JbZu14wVqycxp4b.jpg)
![IMG_20250721_123451_860.jpg](https://files.peakd.com/file/peakd-hive/anne002/Eokd5Dmic9zirpFuwiupcHmEkthpYkJyW1nQfnJpSdVhGgHb3dyj7Kdn9edwYR9qxfT.jpg)
![IMG_20250721_124629_374.jpg](https://files.peakd.com/file/peakd-hive/anne002/Ep7v5hqgm6mUbxFuznG4iANBHsoLws1FgdKyD3VuBn8amBxkcqC19zuQ2WRiMsKw9zD.jpg)
![IMG_20250721_124639_549.jpg](https://files.peakd.com/file/peakd-hive/anne002/Ep7v3cy1fmdh7PWvdhUQorFJNV2UugMoaqcpLeekZLeZ3w7wM8YC3oD1KLu9Hk7jCkU.jpg)

Paso 03

Pasaremos después a coser o unir la parte de los costados del sueter con costura overlock y recta , bajaremos a la parte de abajo y cosemos el ruedo luego lo doblamos hacia adentro aproximadamente 2 cm de ancho o 1.5 dependiendo del ancho que te guste hacer tu ruedo, entonces cosemos después nuestra tira larga con costura recta y la volteamos ,es momento de coser después el bias por la parte de adentro de una punta del cuello hasta la otra punta y le pasamos doble costura,uniremos las piezas del sueter adelante dejando hacia adentro 2 cm para coser entonces la parte donde insertaremos nuestro cordón.

Step 03

We will then move on to sewing or joining the sides of the sweater with an overlock and straight seam, we will go down to the bottom and sew the hem then we will fold it inwards approximately 2 cm wide or 1.5 depending on the width you like to make your hem, then we will sew our long strip with a straight seam and turn it over, it is time to then sew the bias on the inside of one end of the neck to the other end and we will double sew it, we will join the pieces of the sweater in front leaving 2 cm inwards to then sew the part where we will insert our cord.
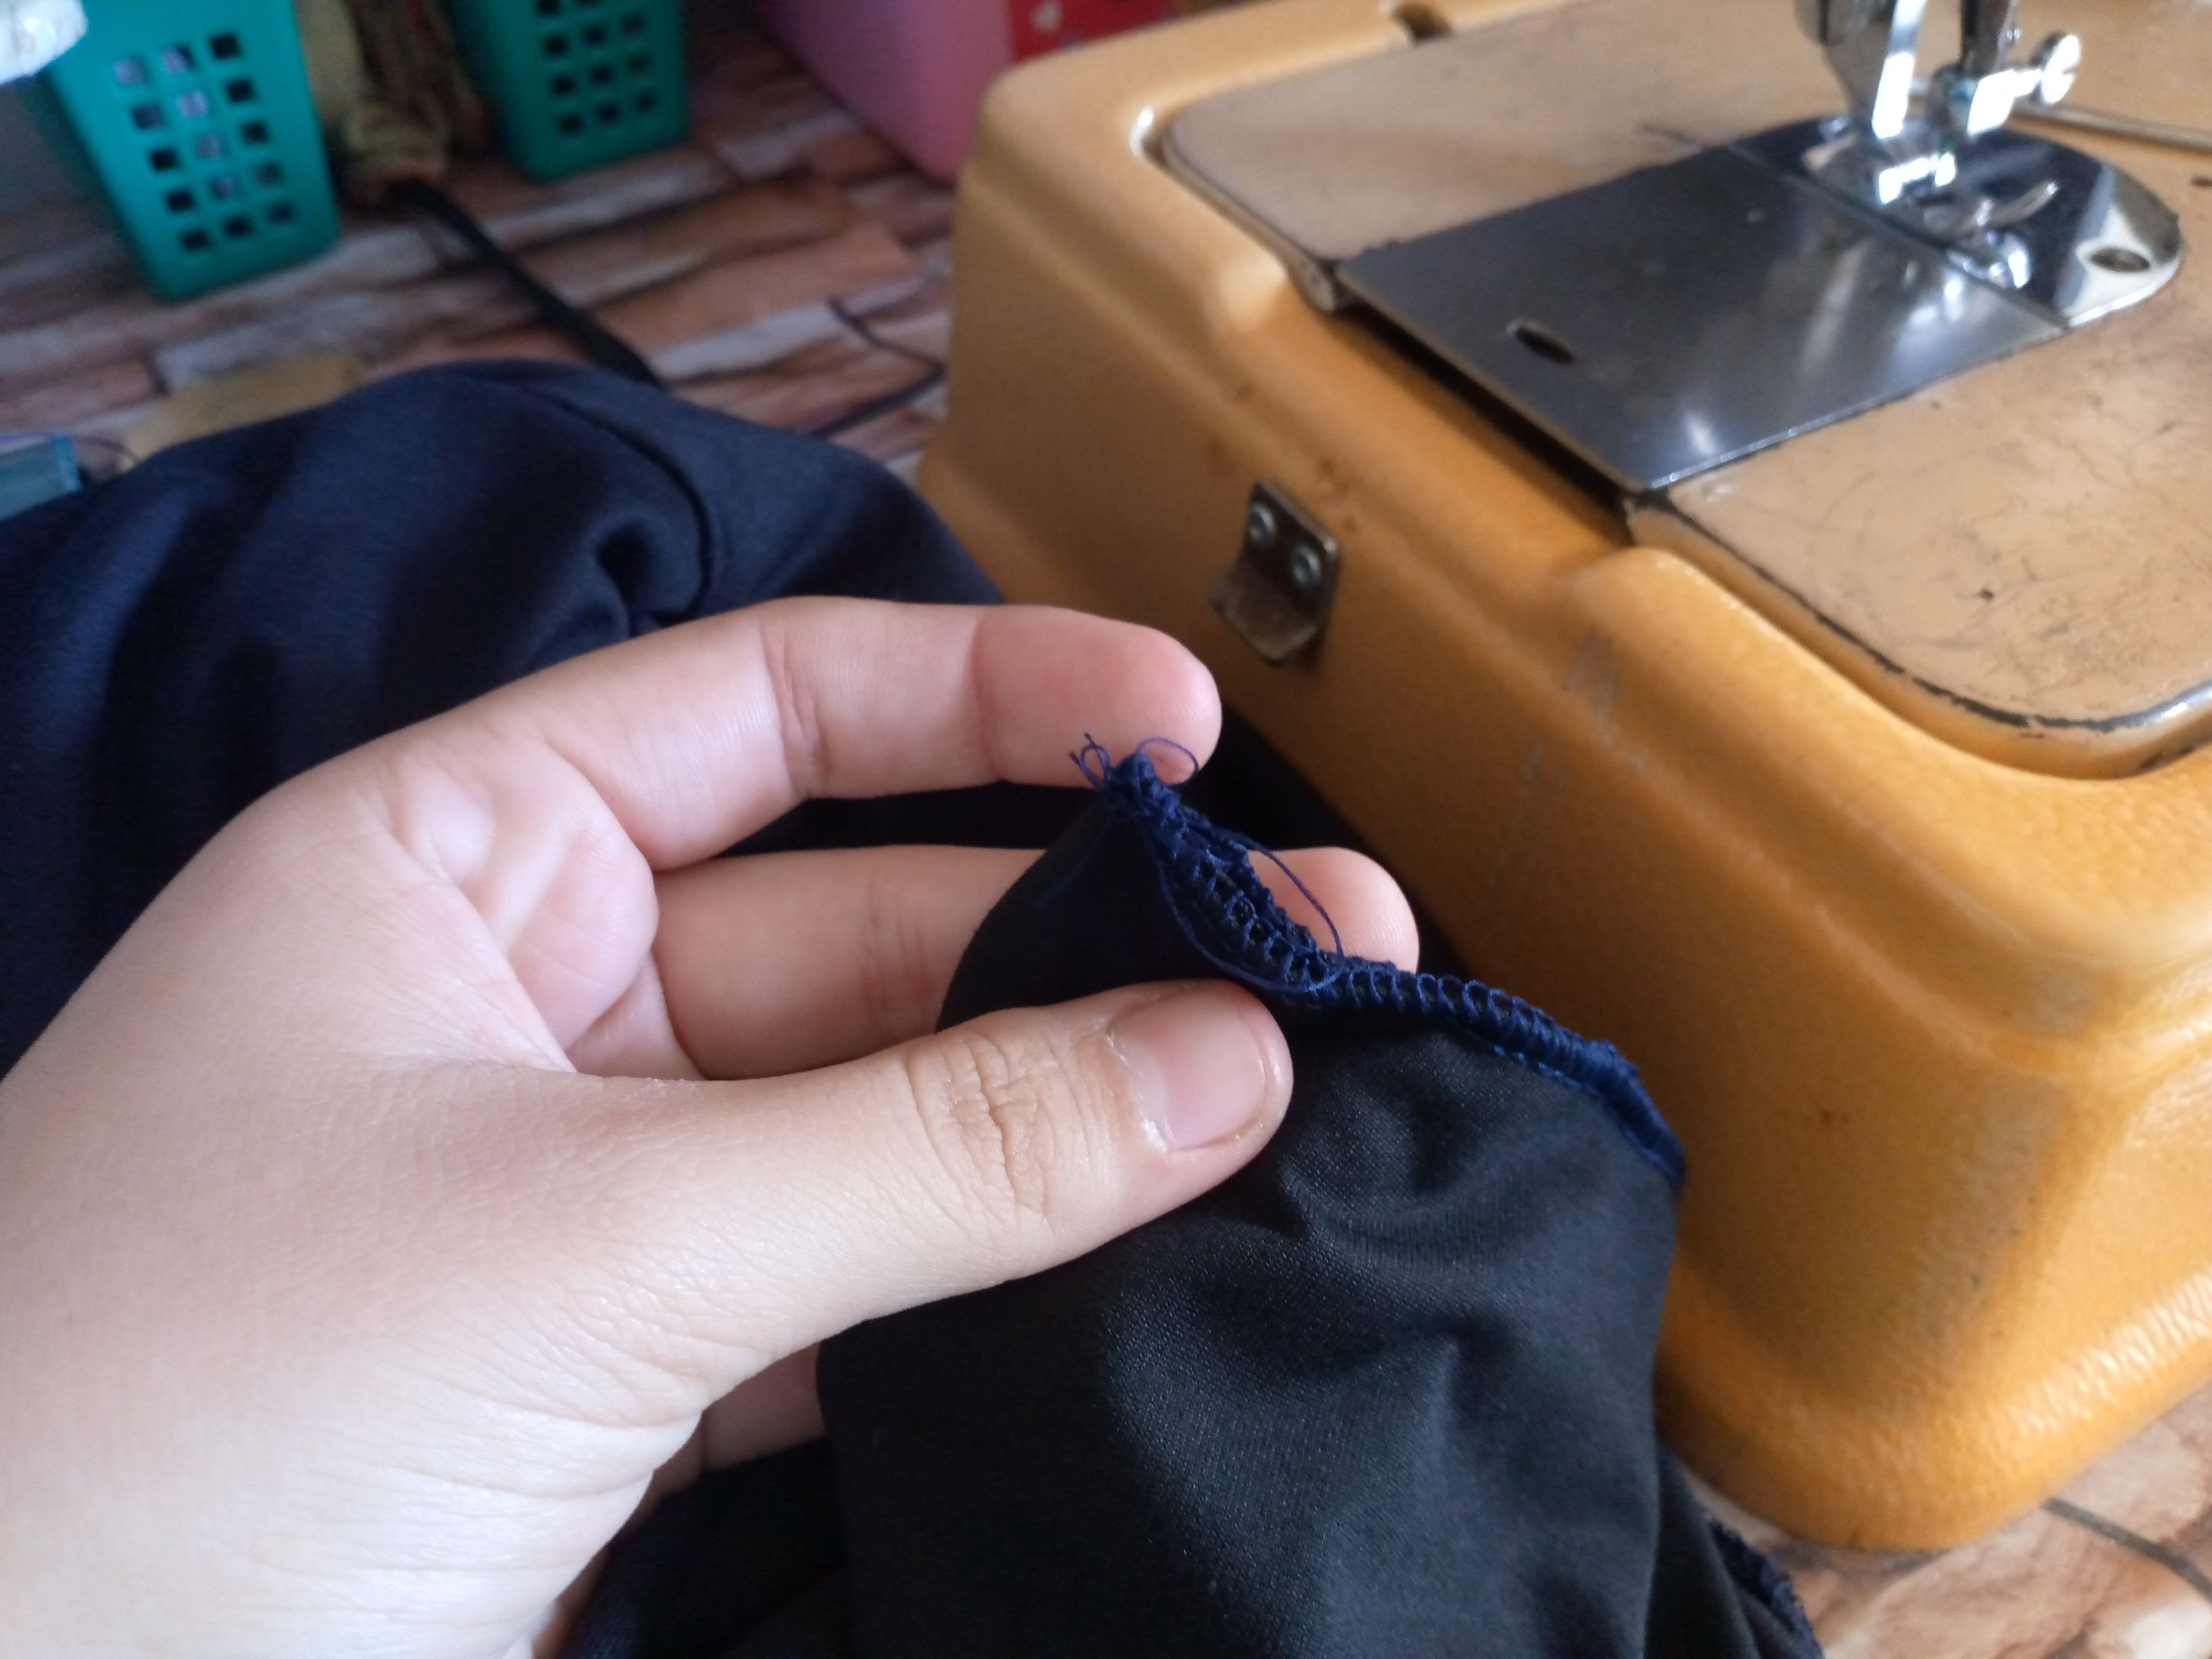

IMG_20250721_125239_554.jpg

Paso 04

Por último he cosido el borde de las mangas para coser también el ruedo de cada una de ellas ,le pasaré costura overlock y hacemos nuevamente un dobladillo hacia adentro de 2 cm de ancho y así terminamos nuestro suéter.

### Step 04 Finally, I sewed the edge of the sleeves to also sew the hem of each of them, I will overlock it and make a 2 cm wide hem inwards again and thus we finish our sweater.


Picsart_24-11-11_14-38-52-418 (1).jpg

Resultado:// Result:

Bueno mis amigos estos son los resultados finales de mi suéter 😍🖤así se ve como queda 🥰espero te haya gustado mucho este trabajo sencillo ,a mi me encanta mucho este tipo de suéter porque te hacen resalta mas tu figura y puedes usarlos con faldas y pantalón puedes usarlo largo y corto ,es multiuso y por eso me encanta mucho,con esto me despido de ustedes espero haya sido de su agrado este tutorial y les deseo un bonito día para todos ustedes,nos vemos en otro próximo tutorial.🥺🥰

Well my friends these are the final results of my sweater 😍🖤this is how it looks 🥰I hope you really liked this simple work, I really love this type of sweater because they make your figure stand out more and you can wear them with skirts and pants you can wear it long and short, it is multipurpose and that is why I love it so much, with this I say goodbye to you I hope you liked this tutorial and I wish you all a nice day, see you in another next tutorial.🥺🥰

IMG_20250721_130216_785.jpg

IMG_20250721_130214_826.jpg

IMG-20250721-WA0009 (1).jpg

Picsart_24-11-11_14-38-52-418 (1).jpg

**_

Creando las cosas con amor 🌷❤️

🦋✨Todas las imágenes de esta publicación son de mi autoria ,📱tomadas con mi celular TecnoSpark8C |📸Fotos editadas en PicsArt y Canva. Texto traducido en el traductor de Google.

_**

**_

Creating things with love 🌷❤️

_**

**_

🦋✨ All the images in this publication are my author ,📱taken with my TecnoSpark8C cell phone |📸Photos edited in PicsArt and Canva. Text translated in Google Translate.

_**


Neutral Simple Minimalist Lifestyle Blogger YouTube Channel Art _20250625_130338_0000.png


#needlework #sewing #sueter #spanish #art #handmade #tutorial #needleworkmonday
Payout: 0.000 HBD
Votes: 435
More interactions (upvote, reblog, reply) coming soon.