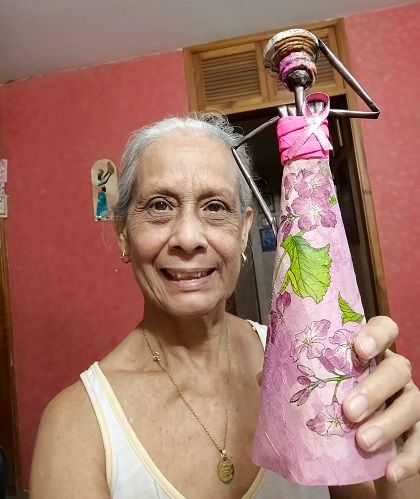
We continue with Pink Month, and this time I am supporting the Creative Papercraft community in their Pink Month initiative to mark World Breast Cancer Day. To do so, I bring you a beautiful African woman, made mainly from different types of paper, such as cardboard and napkins.
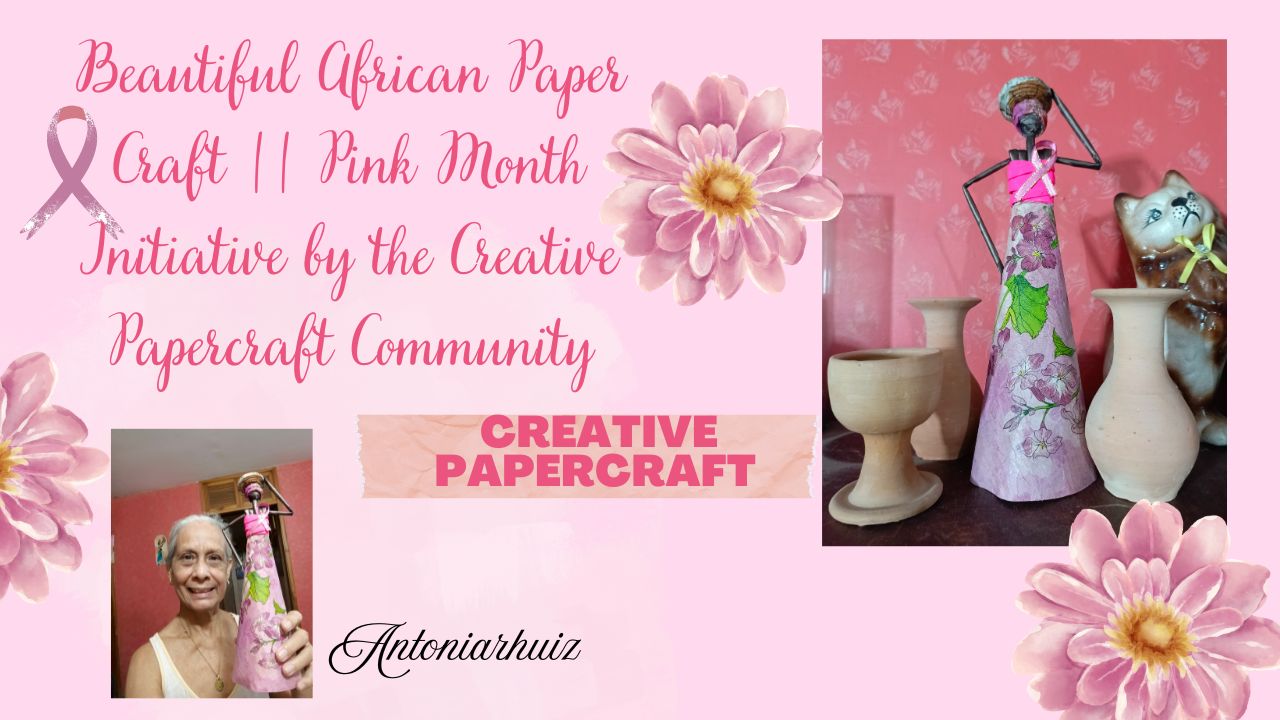
I was inspired by the color pink to create this beautiful African woman, a symbol of the breast cancer awareness campaign, which is promoted every year with the aim of preventing or detecting this disease early.
---
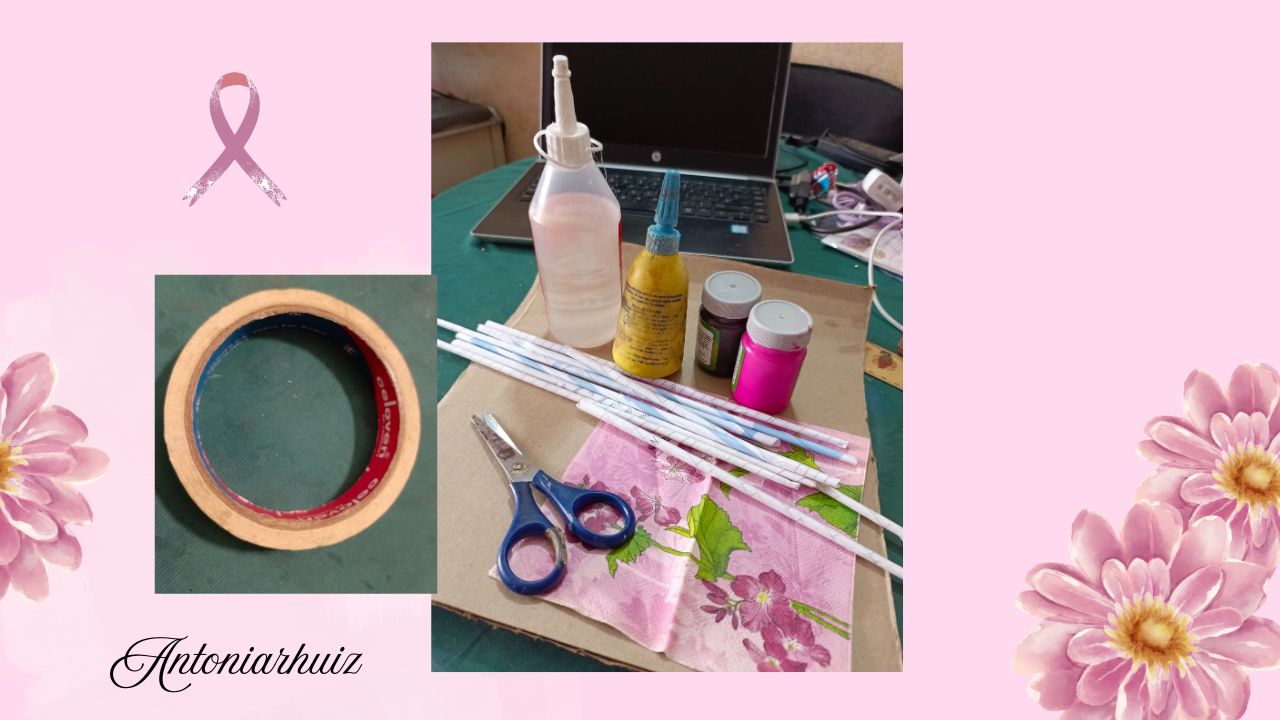
**To make it, I used: paper tubes or straws, pieces of decorative napkins, school glue, liquid silicone, scissors, a small piece of pink ribbon, neon pink acrylic paints, and umbala from the African line.**
---
Next, we follow these steps:
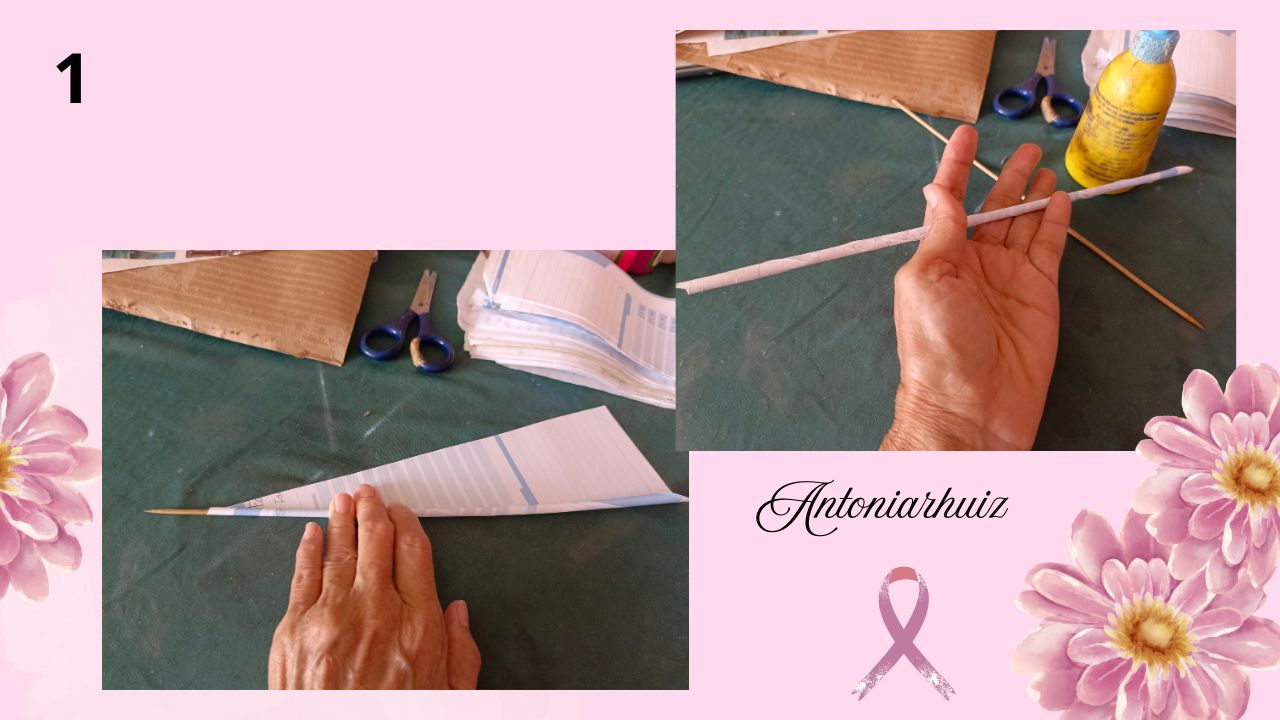
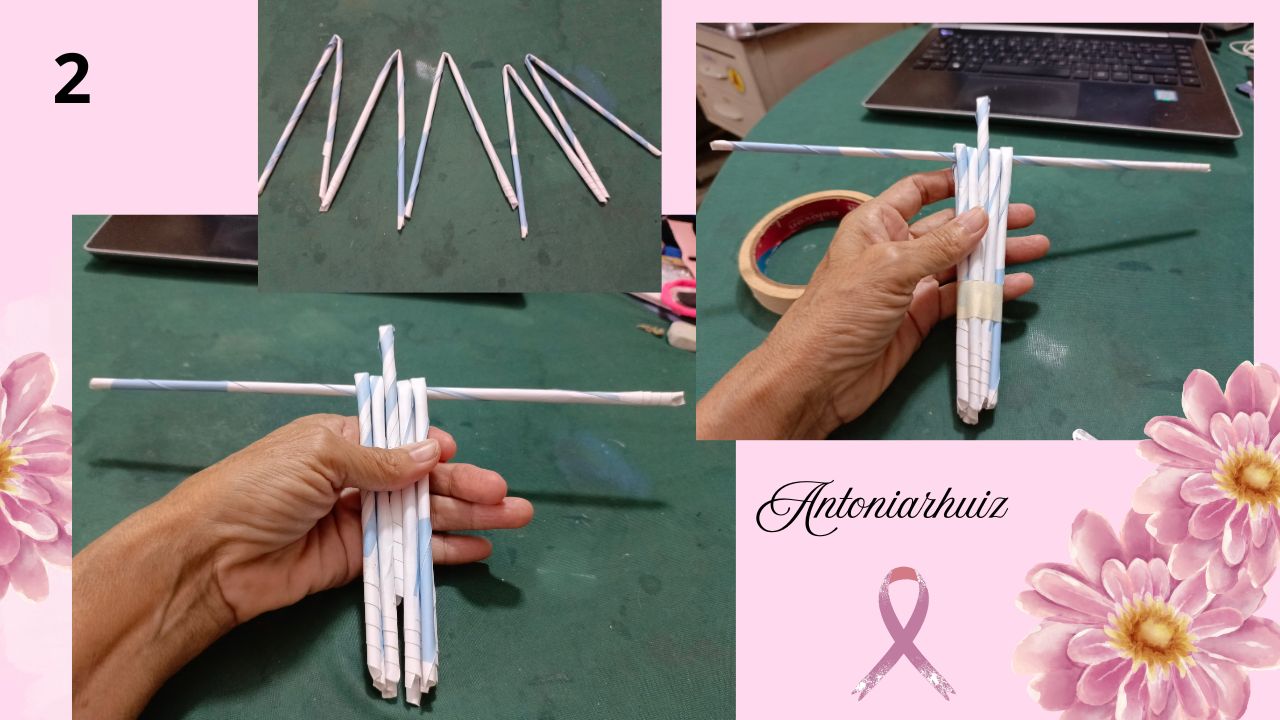
1- The first thing is to make the straws; I have already shown this step before. We roll a strip of paper around a wooden stick. We need 13 straws.
---
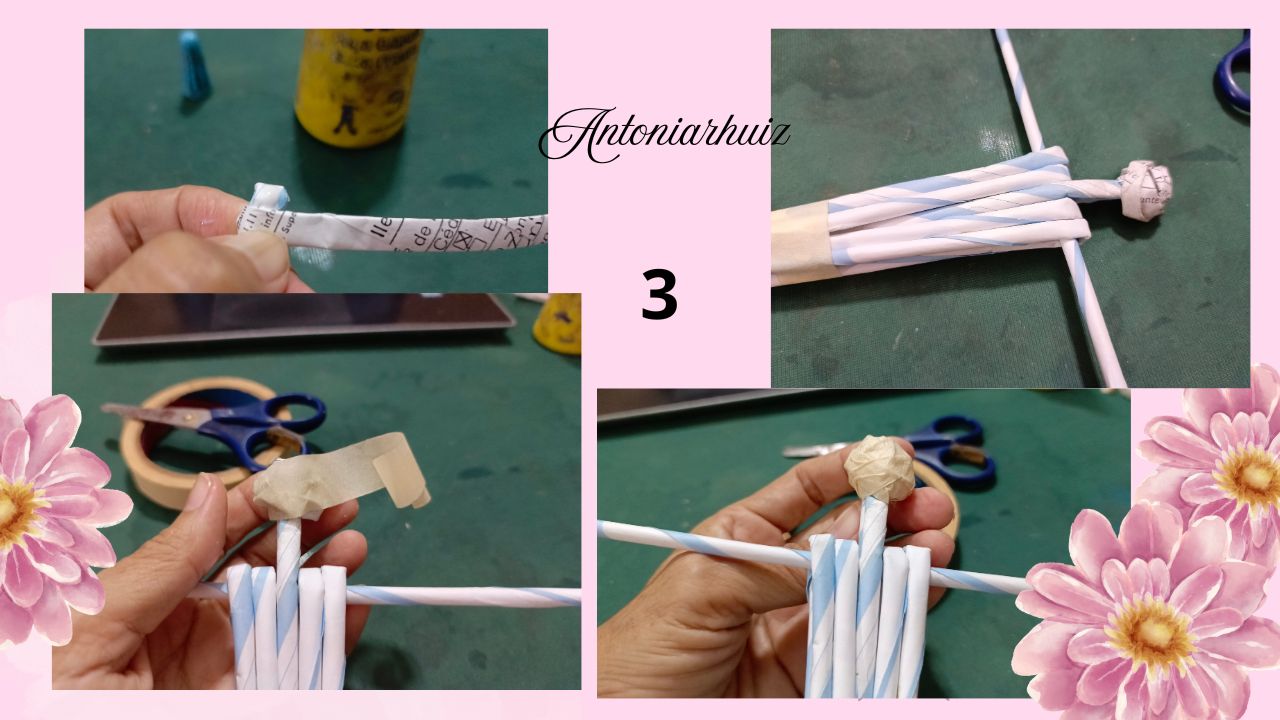
2- We fold five paper sticks in half and assemble them on a stick horizontally, so that they are perpendicular, but the middle stick should stick out a little. Next, we tie or secure them with a strip of adhesive tape. This forms the body.
---
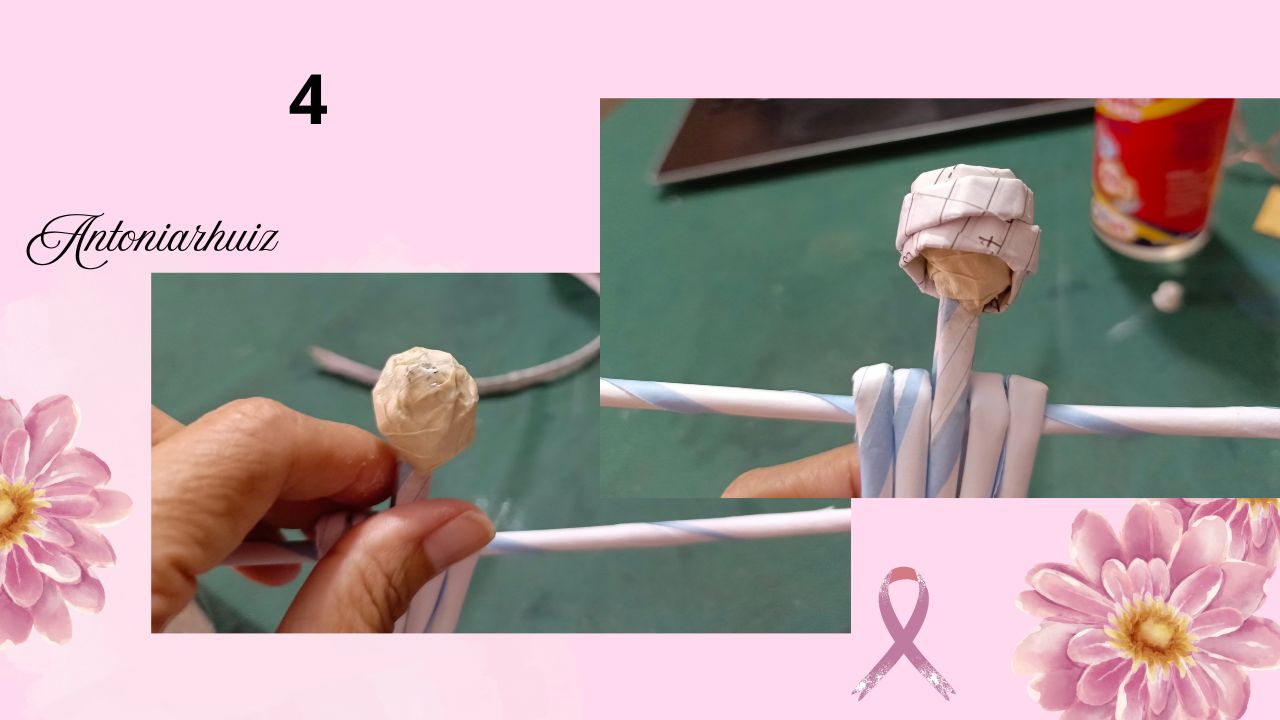
3- Roll one or two sticks around the end of the stick that sticks out to form a small ball. Then wrap it with adhesive tape. This forms the African woman's head.
---
4- Flatten a stick to form a strip. Roll it up and stick it to the doll's head to make the turban or scarf.
---
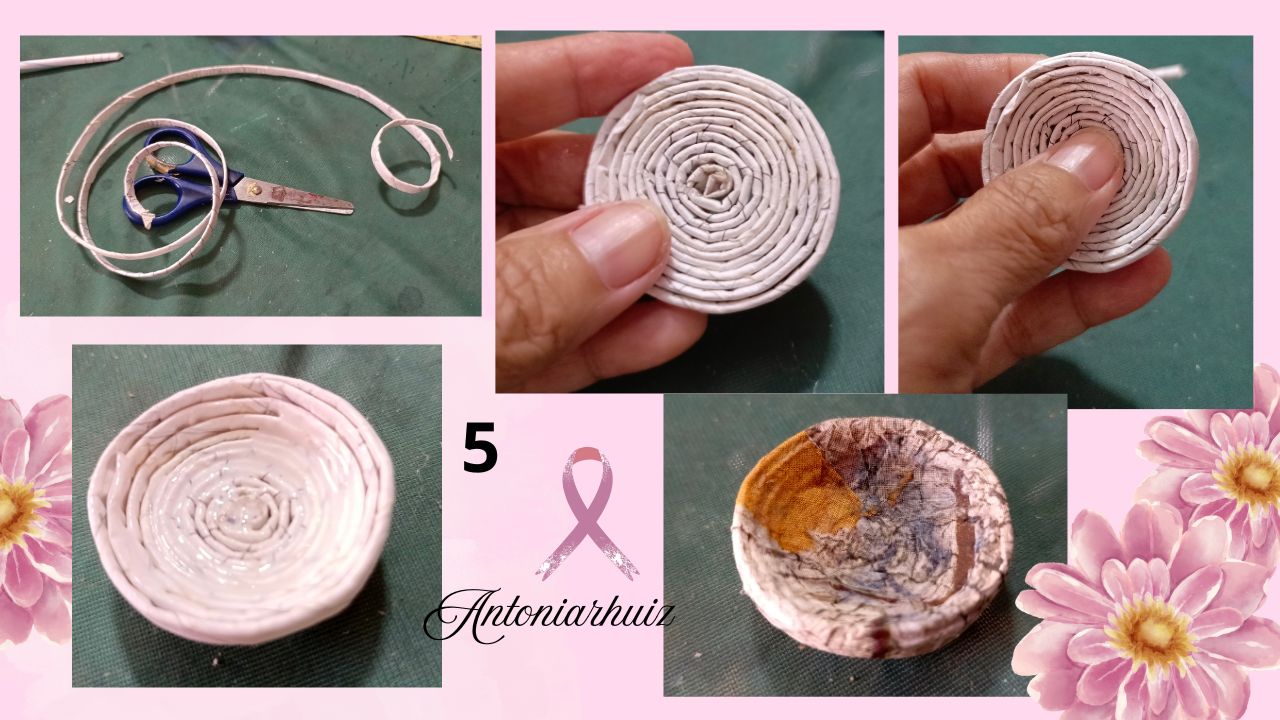
5- Join four sticks to make the basket, rolling them until they form a circle. Glue them and press down a little in the center to give it depth. Glue a napkin on to decorate it; do not use paint.
---
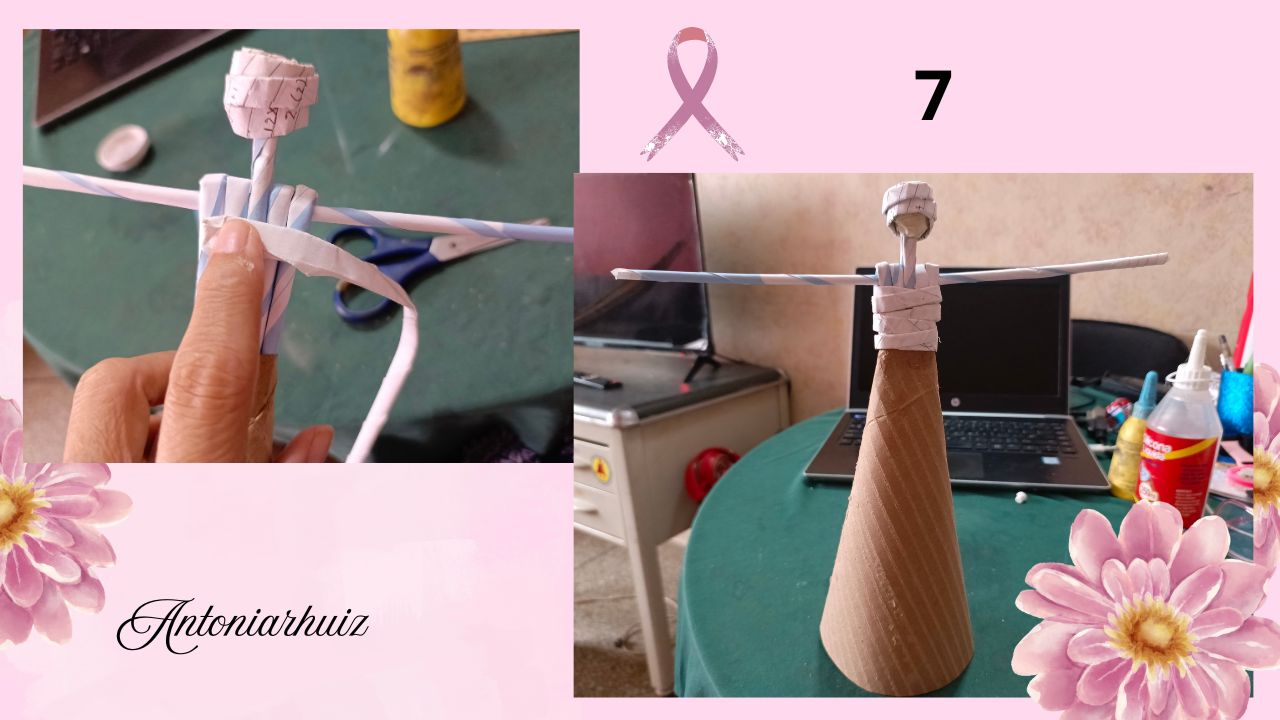
6- Start by removing the first layer of cardboard. Make a cone with that layer. Shape the base until you achieve the desired size. Then, remove the tip and apply glue to insert the body.

---
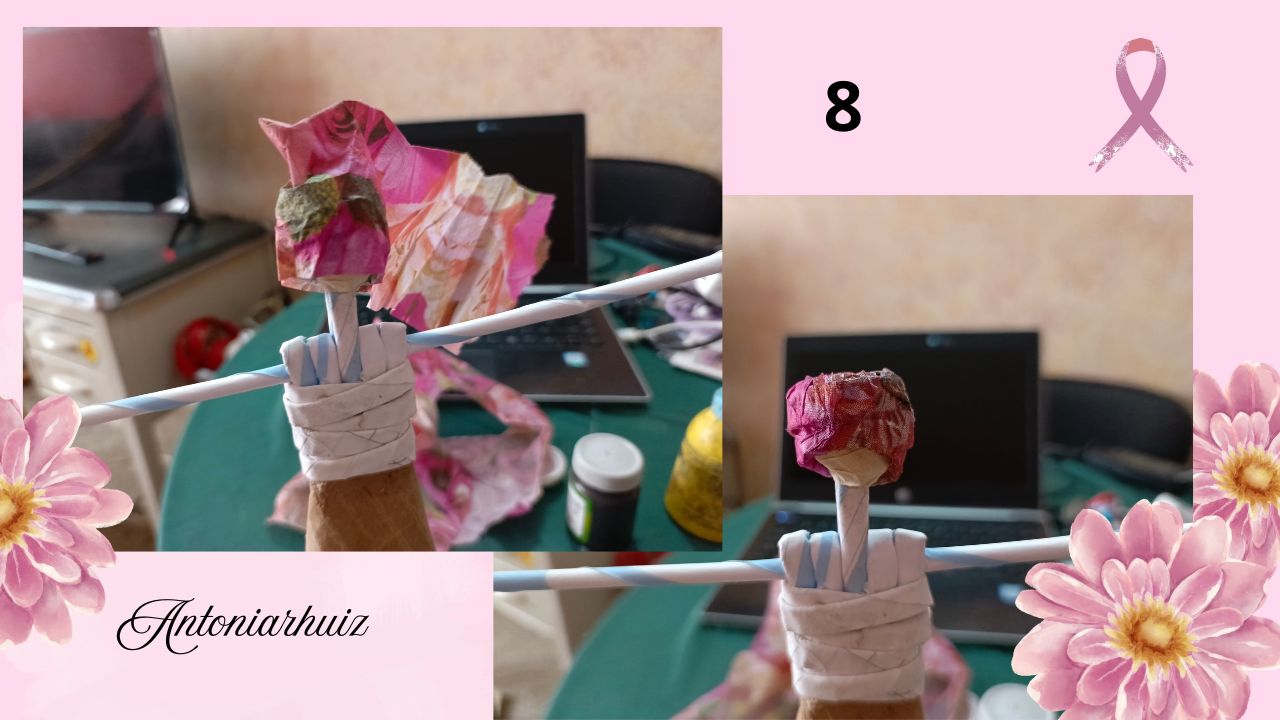
7- Continue gluing a flat stick around the bust to finish the dress.
---
8- Glue the decorative napkin to the turban.
---
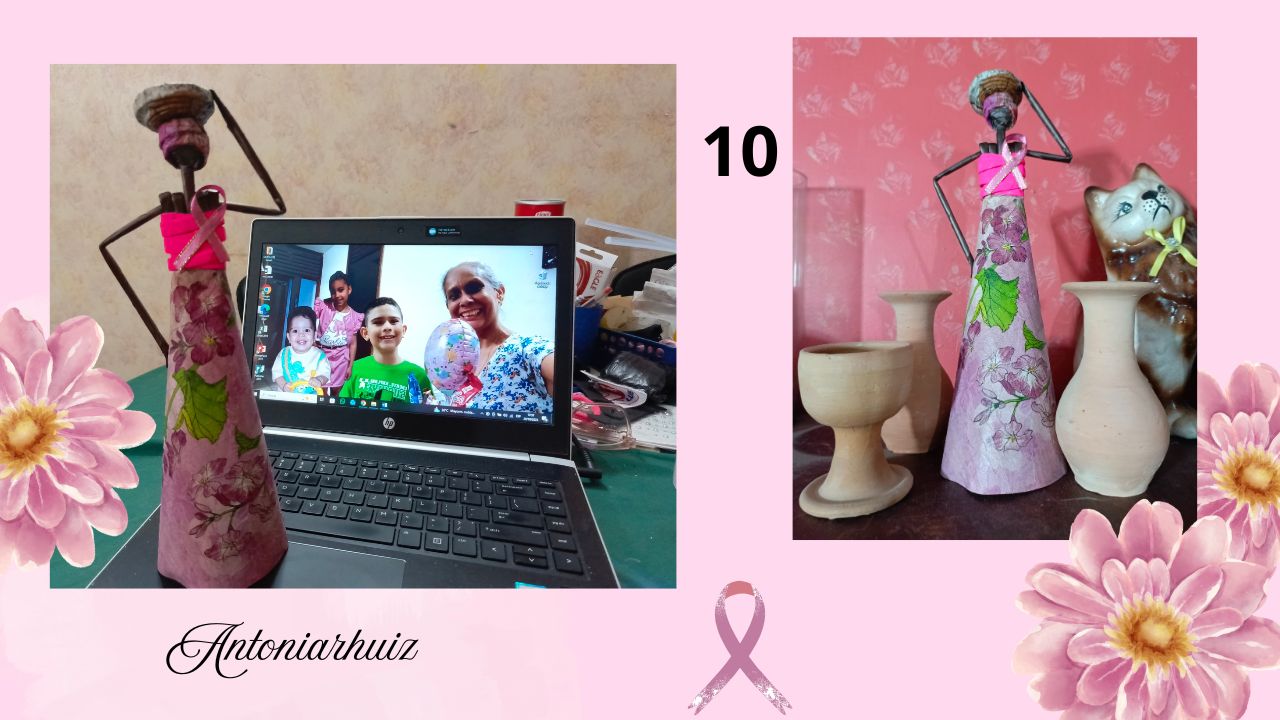
9- Paint the skin with umbala paint and the top with neon pink. Glue the napkin to the skirt.

---
10- Glue the basket to the head and bend the arms into the desired position. To finish, attach the pink ribbon.
---
Initially, I thought about painting the entire dress and turban, but then I decided to replace it with a napkin. I think it's more practical and the result is beautiful.
---
>! [SPANISH]
Seguimos en el mes rosa y, esta vez, apoyo a la comunidad Creative Papercraft en su iniciativa del mes rosa con motivo del Día Mundial del Cáncer de Mama. Para ello, les traigo una bella africana, básicamente hecha con papel en diversas presentaciones, como cartón y servilletas.
Me inspiré en el color rosa para elaborar esta linda africana, símbolo de la campaña de concienciación sobre el cáncer de mama, que se promueve cada año con el propósito de prevenir o detectar esta enfermedad de forma temprana.
Para hacerla he utilizado: tubos o pitillos de papel, trozos de servilletas decorativas, pega escolar, silicona líquida, tijera, un pedacito de cinta rosa, pinturas acrílicas de color rosa neón y umbala de la línea africanas.
A continuación, seguimos los pasos siguientes:
1- Lo primero es hacer los pitillos; este paso ya lo he mostrado antes. Enrollamos una tira de papel con un palito de madera. Necesitamos 13 pitillos.
2- Doblamos cinco palitos de papel por la mitad y los montamos sobre un palito en horizontal, de modo que queden perpendiculares, pero el palito del medio debe sobresalir un poco. A continuación, amarramos o sujetamos con una tira de papel adhesivo. Así queda formado el cuerpo.
3- Enrollamos un palito o dos en la punta del palito que sobresale para formar una pelotita. Luego, lo envolvemos con cinta adhesiva. Así queda formada la cabeza de la africana.
4- Aplanamos un palito para formar una tira. La enrollamos y la pegamos en la cabeza de la muñeca para hacer el turbante o el pañuelo.
5- Unimos cuatro palitos para hacer la cesta, enrollando hasta que se forme un círculo. Pegamos y hundimos un poco en el centro para darle profundidad. Le pegamos servilleta para decorar y no usamos pintura.
6- Comenzamos quitando la primera capa del cartón. Hacemos un cono con esa capa. Le damos forma a la base hasta conseguir el tamaño deseado. Luego, quitamos la punta y ponemos pega para introducir el cuerpo.
7- Seguimos pegando un palito plano alrededor del busto para terminar el vestido.
8- Pegamos la servilleta decorativa en el turbante.
9- Pintamos la piel con la pintura umbala y el top con el color rosa neón. Pegamos la servilleta a la falda.
10- Pegamos la cesta en la cabeza y doblamos los brazos en la posición deseada. Para terminar, le colocamos el lazo de la campaña rosa.
Inicialmente pensé en pintar todo el vestido y el turbante, pero luego se me ocurrió sustituirlo por una servilleta. Me parece más práctico y el resultado es bonito.
Fotos propias Edición Canva Traductor Deepl Cumaná, Venezuela 2025