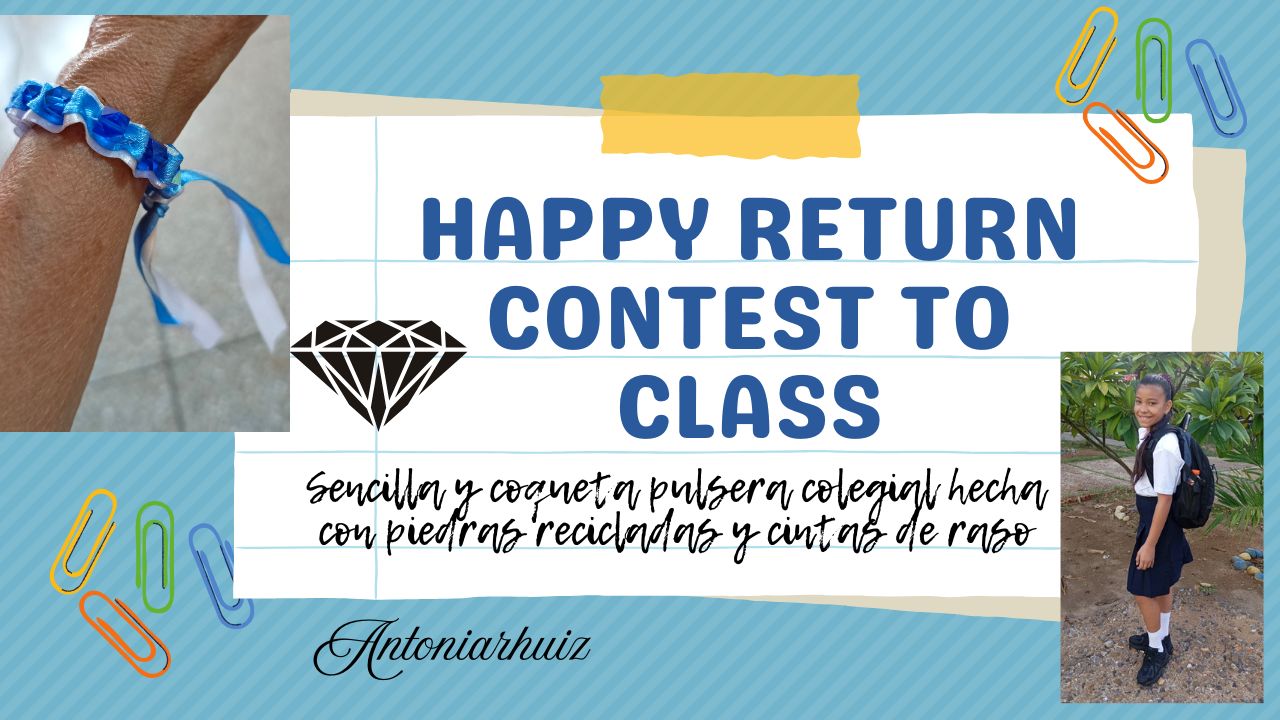
Saludos, comunidad. El concurso de #jewelry está a punto de terminar, pero quiero invitar a @neilamarcano y a @wendyth16. Las clases acaban de empezar y se me ocurrió hacerle una pulsera coqueta a mi nieta, que ha pasado a cuarto de primaria, para que la luzca con el uniforme del colegio.
#
Para este inicio de año escolar, preparé, casi a última hora, una pulsera hecha con cintas y piedras recicladas de otra pulsera. La elaboración de este bonito accesorio no lleva mucho tiempo, pues es sencillo y sumamente fácil. Es una pulsera que realicé en colores blanco y azul, que son los tonos alusivos a la etapa escolar, y no requiere usar pegamento ni otros materiales como trancas, por ejemplo.
Me gustan los accesorios sencillos; creo que menos es más, pero bueno, es cuestión de preferencias. Para hacerla solo se necesitan pocos materiales, que normalmente tenemos en casa. ¿Quién no ha desechado una pulsera o una coleta con perlas o bolitas de bisutería? Obviamente, este material debe estar en buen estado.
### Pulsera colegial hecha con material reciclado y cintas de raso.
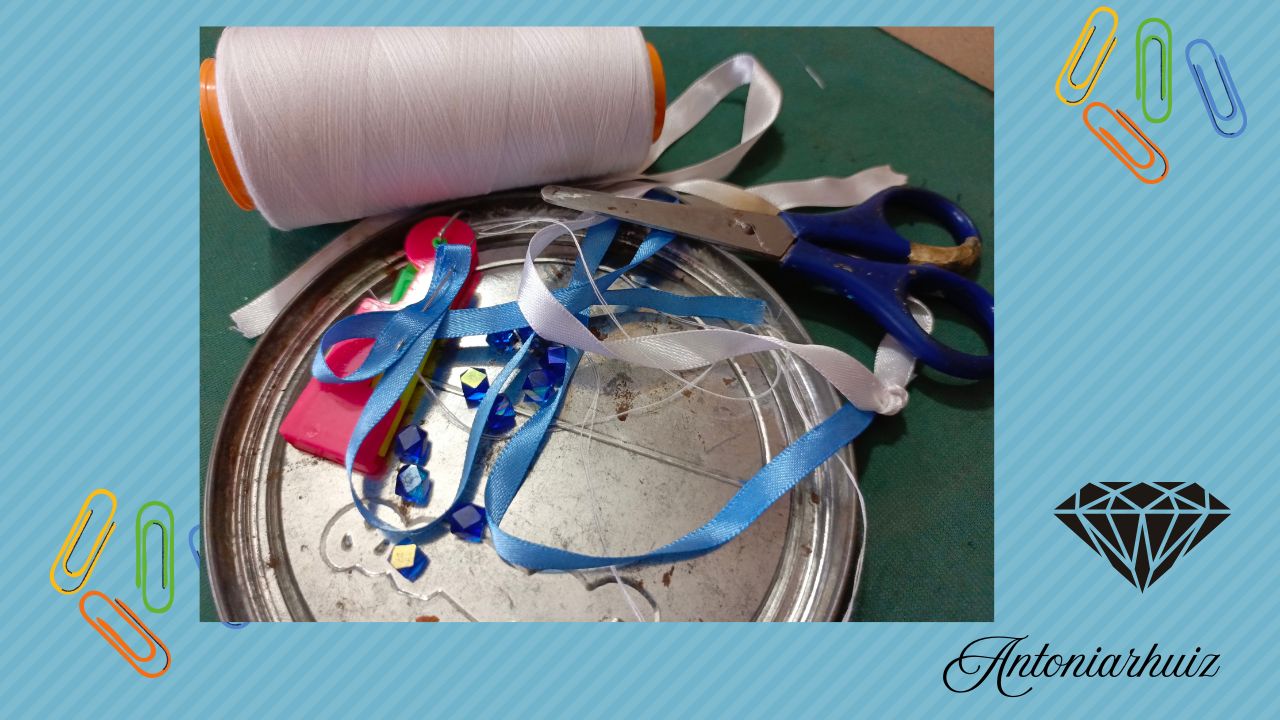
**Es la primera vez que hago este accesorio, por lo que las medidas del largo de las cintas son una estimación para que sobre y no falte. Para hacerla necesitamos: 70 cms de cinta blanca de raso de 1 cm de ancho, 70 cms de cinta azul de raso de 0,5 cm de ancho, 10 cuentas recicladas de bisutería, hilo blanco de coser, una aguja y una tijera.**
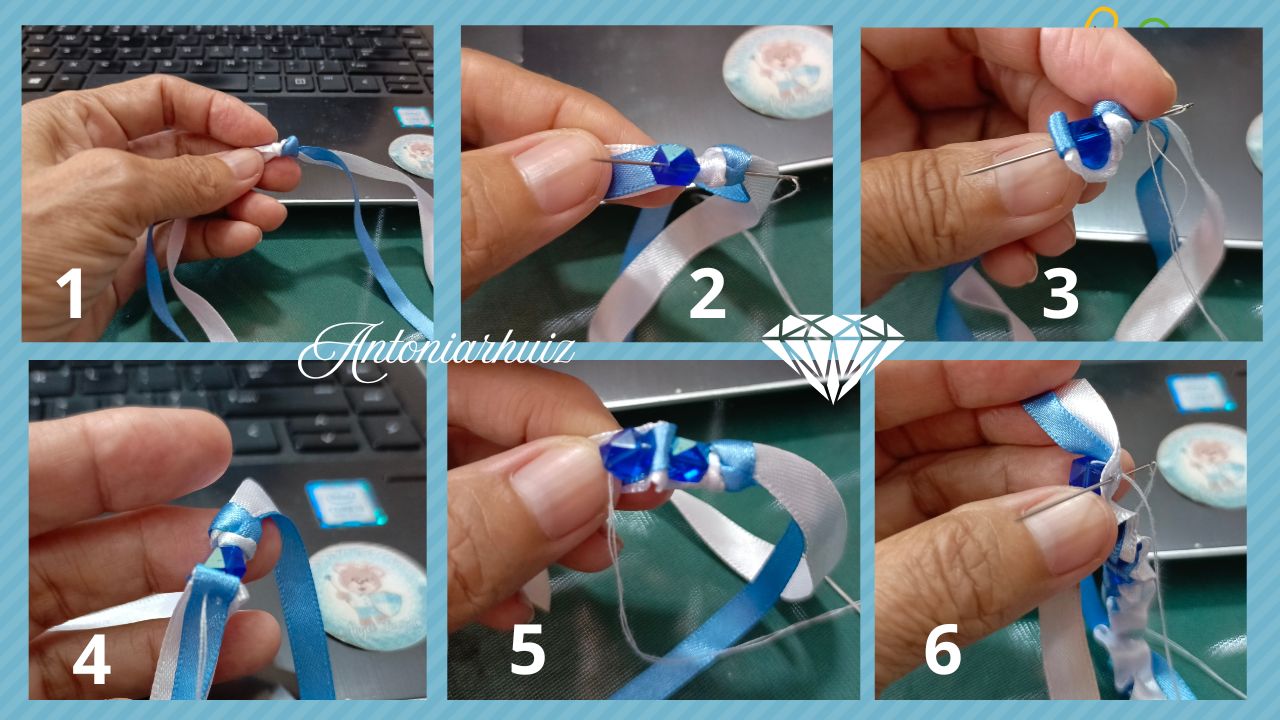
Para empezar, calculamos el sobrante de cinta que servirá para hacer el nudo de amarre. A continuación, hacemos un nudo para colocar la primera cuenta. Después de pasar la cuenta por la aguja, hacemos un pliegue con las cintas y damos un punto de sujeción. Repetimos este proceso hasta la última cuenta. Cuando llegamos a la última cuenta, hacemos un nudo como al principio. Así terminamos esta pulsera.
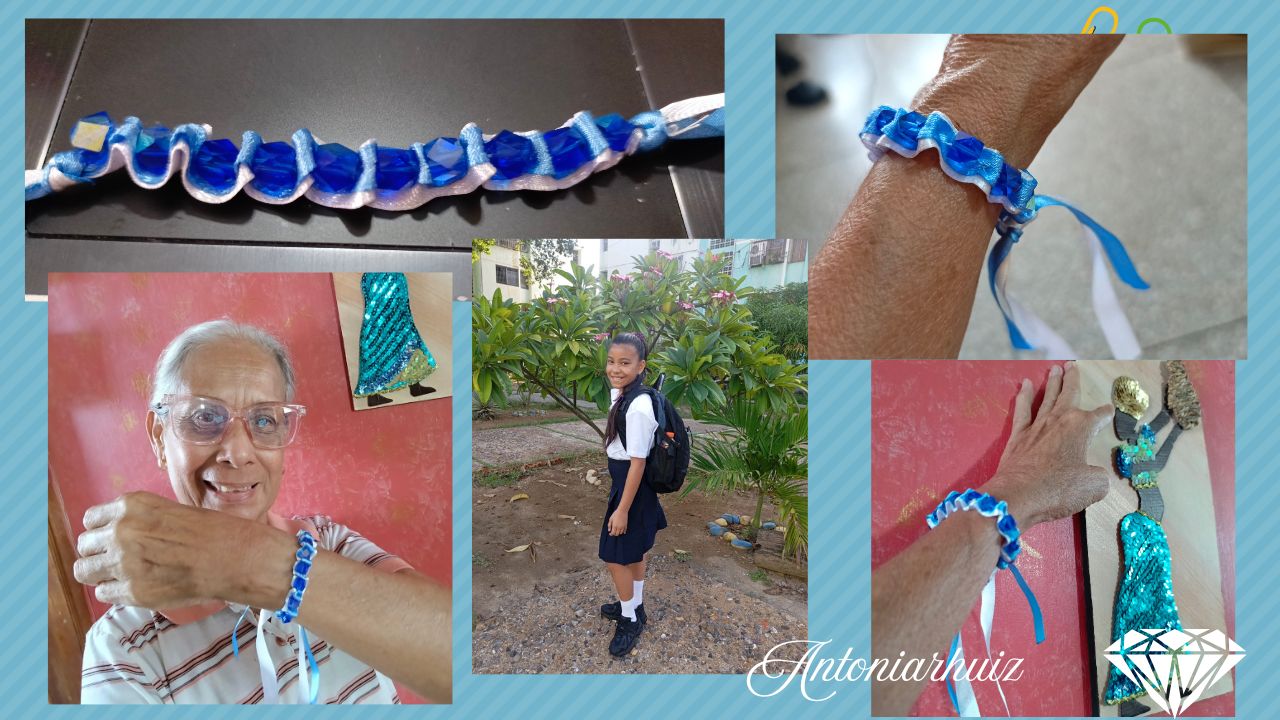
Puedo decir que quedé satisfecha con este proyecto, a pesar de que lo hice al cálculo, no me sobró tanta cinta. Espero que mañana pueda entregarle la pulsera a mi nieta. Hasta aquí mi participación. Bendiciones.
---
>! [ENGLISH]
Greetings, community. The #jewelry contest is about to end, but I want to invite @neilamarcano and @wendyth16. Classes have just started, and I thought of making a cute bracelet for my granddaughter, who has moved up to fourth grade, to wear with her school uniform.
For the start of the school year, I made a bracelet at the last minute using ribbons and stones recycled from another bracelet. This pretty accessory doesn't take long to make, as it's simple and extremely easy. I made the bracelet in white and blue, which are colors associated with school, and it doesn't require glue or other materials such as clasps.
I like simple accessories; I believe that less is more, but hey, it's a matter of preference. To make it, you only need a few materials, which we usually have at home. Who hasn't thrown away a bracelet or a hair tie with pearls or costume jewelry beads? Obviously, this material must be in good condition.
>### School bracelet made from recycled materials and satin ribbons.
>This is the first time I've made this accessory, so the measurements for the length of the ribbons are an estimate to ensure there is enough and no shortage. To make it, we need: 70 cm of white satin ribbon 1 cm wide, 70 cm of blue satin ribbon 0.5 cm wide, 10 recycled jewelry beads, white sewing thread, a needle, and scissors.
To begin, we calculate the excess ribbon that will be used to make the knot. Next, we make a knot to attach the first bead. After threading the bead onto the needle, we fold the ribbons and secure them with a stitch. We repeat this process until we reach the last bead. When we reach the last bead, we make a knot as we did at the beginning. This completes the bracelet.
I can say that I was satisfied with this project. Even though I did it by calculation, I didn't have much ribbon left over. I hope I can give the bracelet to my granddaughter tomorrow. That's all from me. Blessings.
Fotos propias Edición Canva Traductor Deepl Cumaná, Venezuela 2025