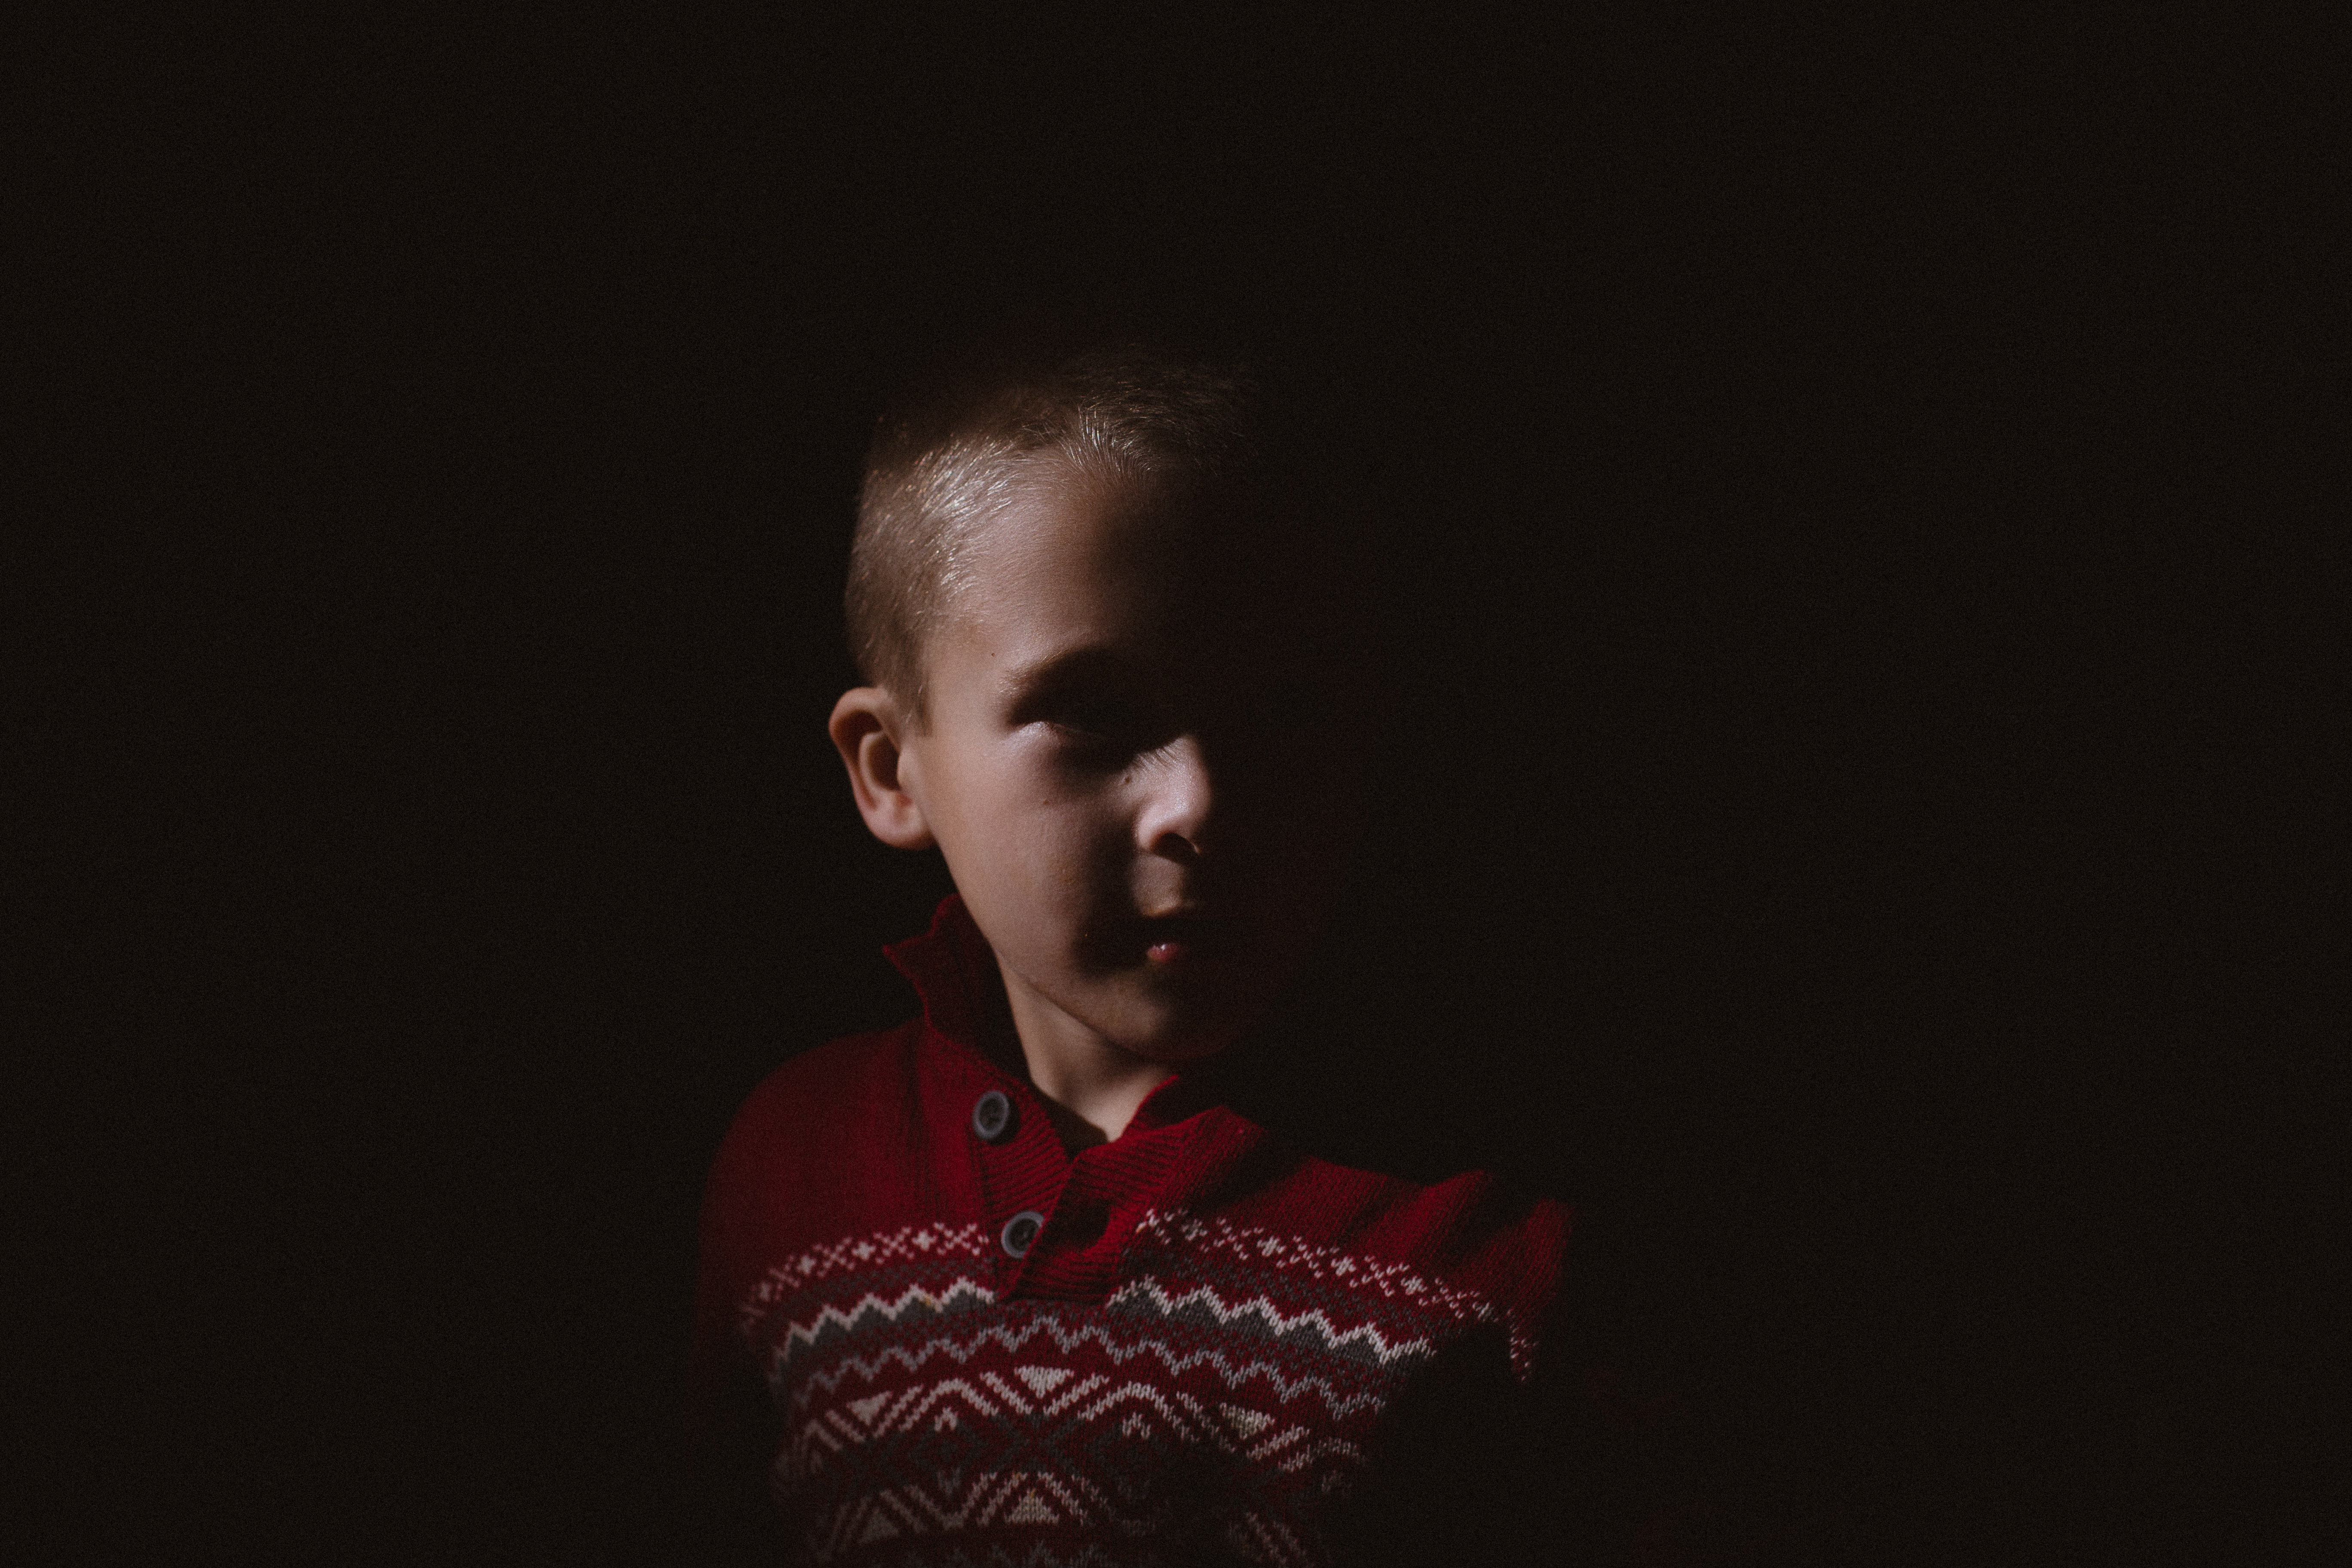
Hey everyone! So today I'm going to go through how I take portraits with a side-lighting snoot. I really enjoy taking dark and moody portraits of individuals, and this one is of my son Caiden. So here is the final product, after editing.
So first off, you are probably wondering what a snoot is. I had no idea until I read about it somewhere online a few years ago. Simply put, it's a cone-shaped device that transforms your flash into a spotlight. It gives you a really direct yet soft light on your subject, and can create a unique lighting setup on the fly. I have the link to Amazon at the bottom if you'd like to know more about it.
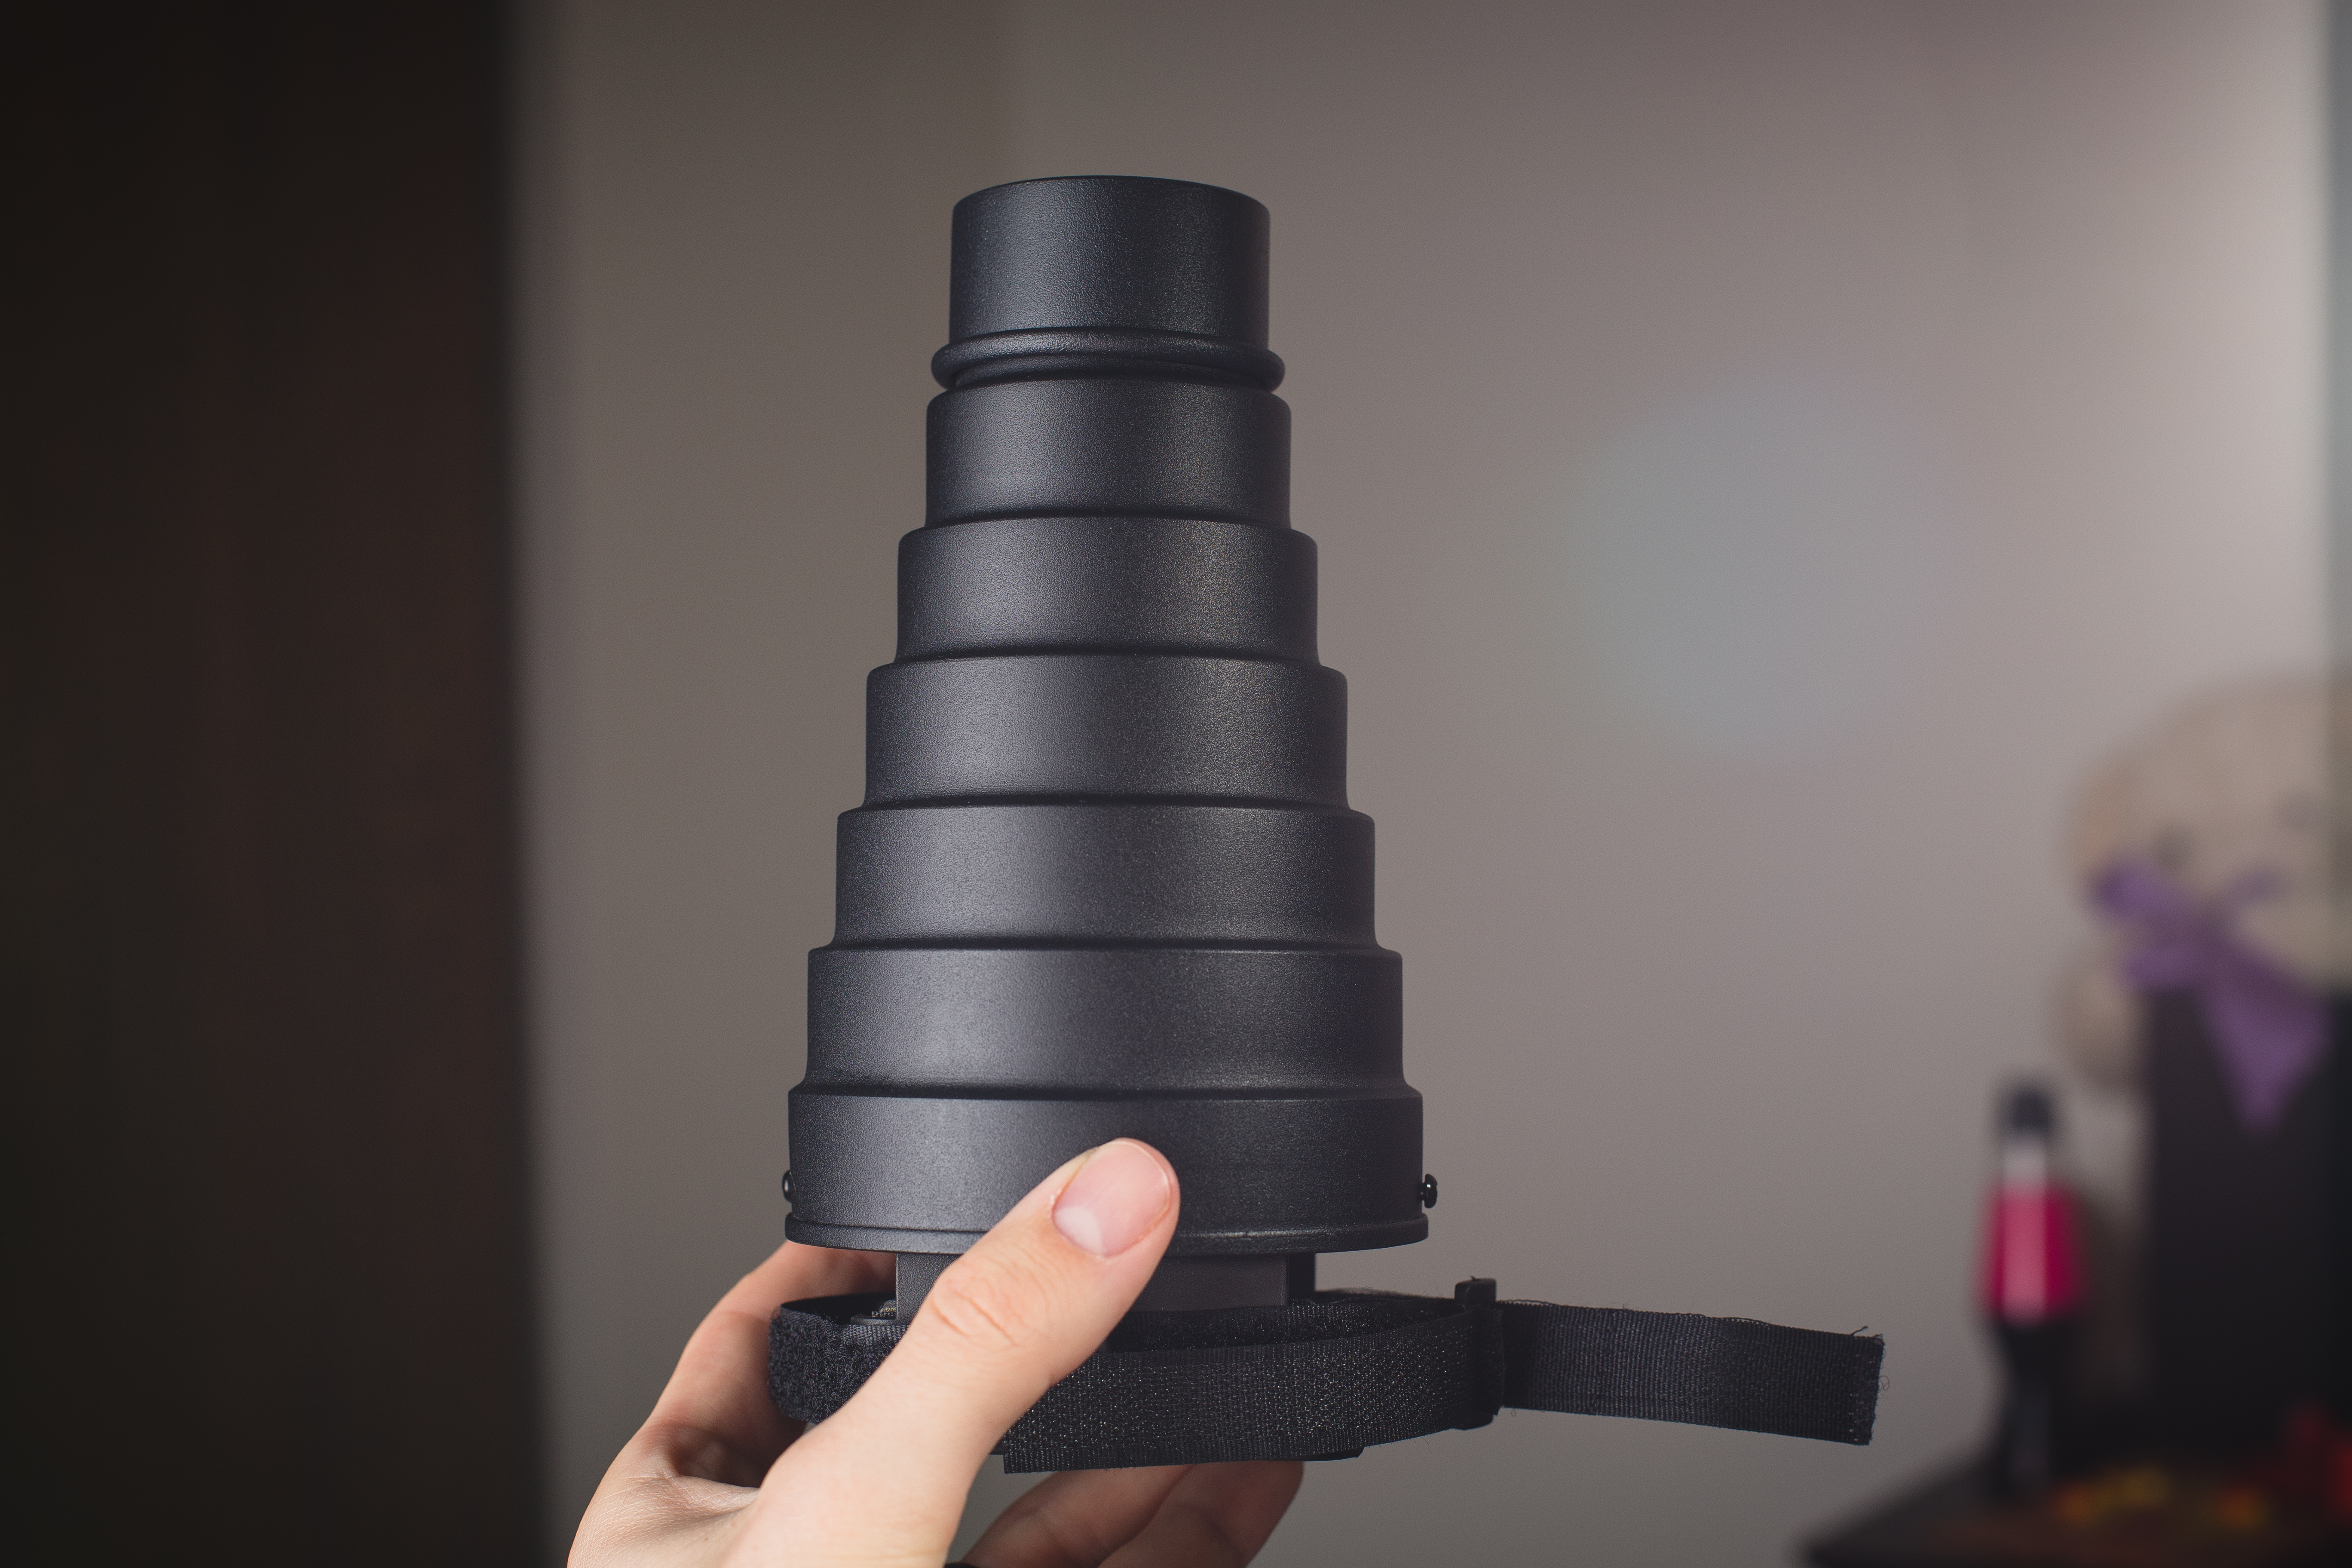
So, as you may have guessed, here is my lighting setup below. I'm running a Canon flash connected to a Yongnuo wireless flash trigger (link at bottom), with the snoot connected to it. 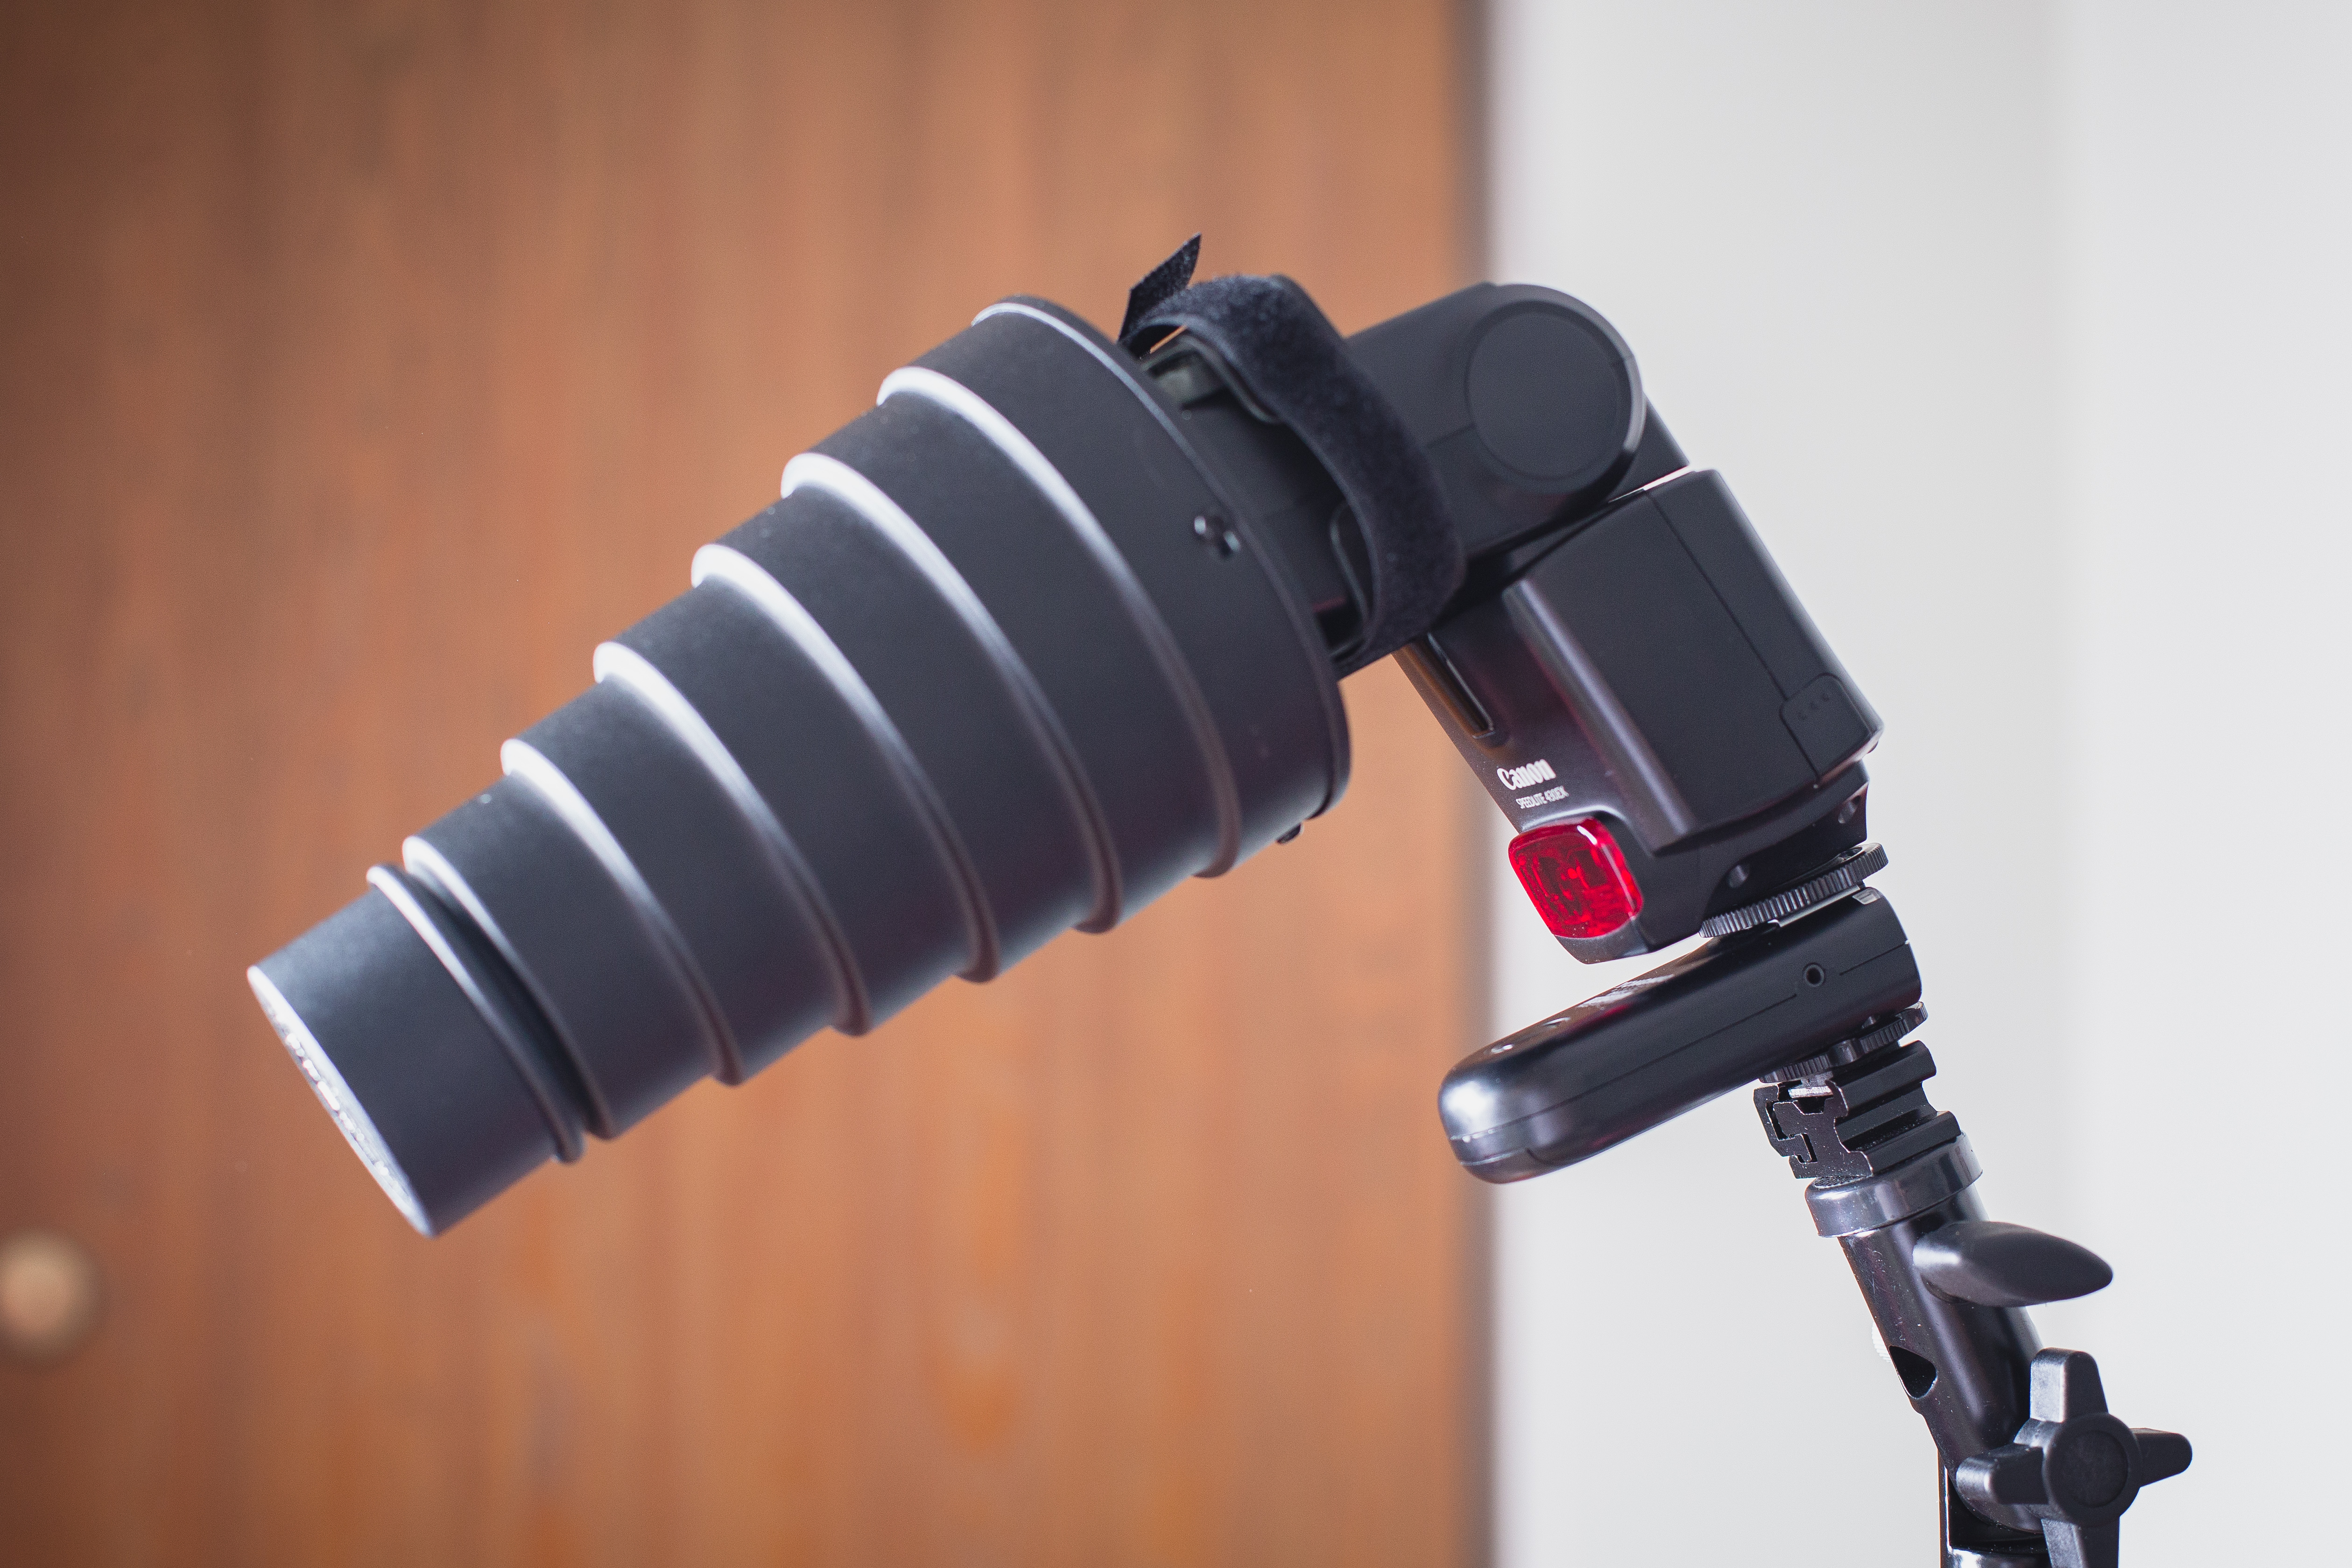
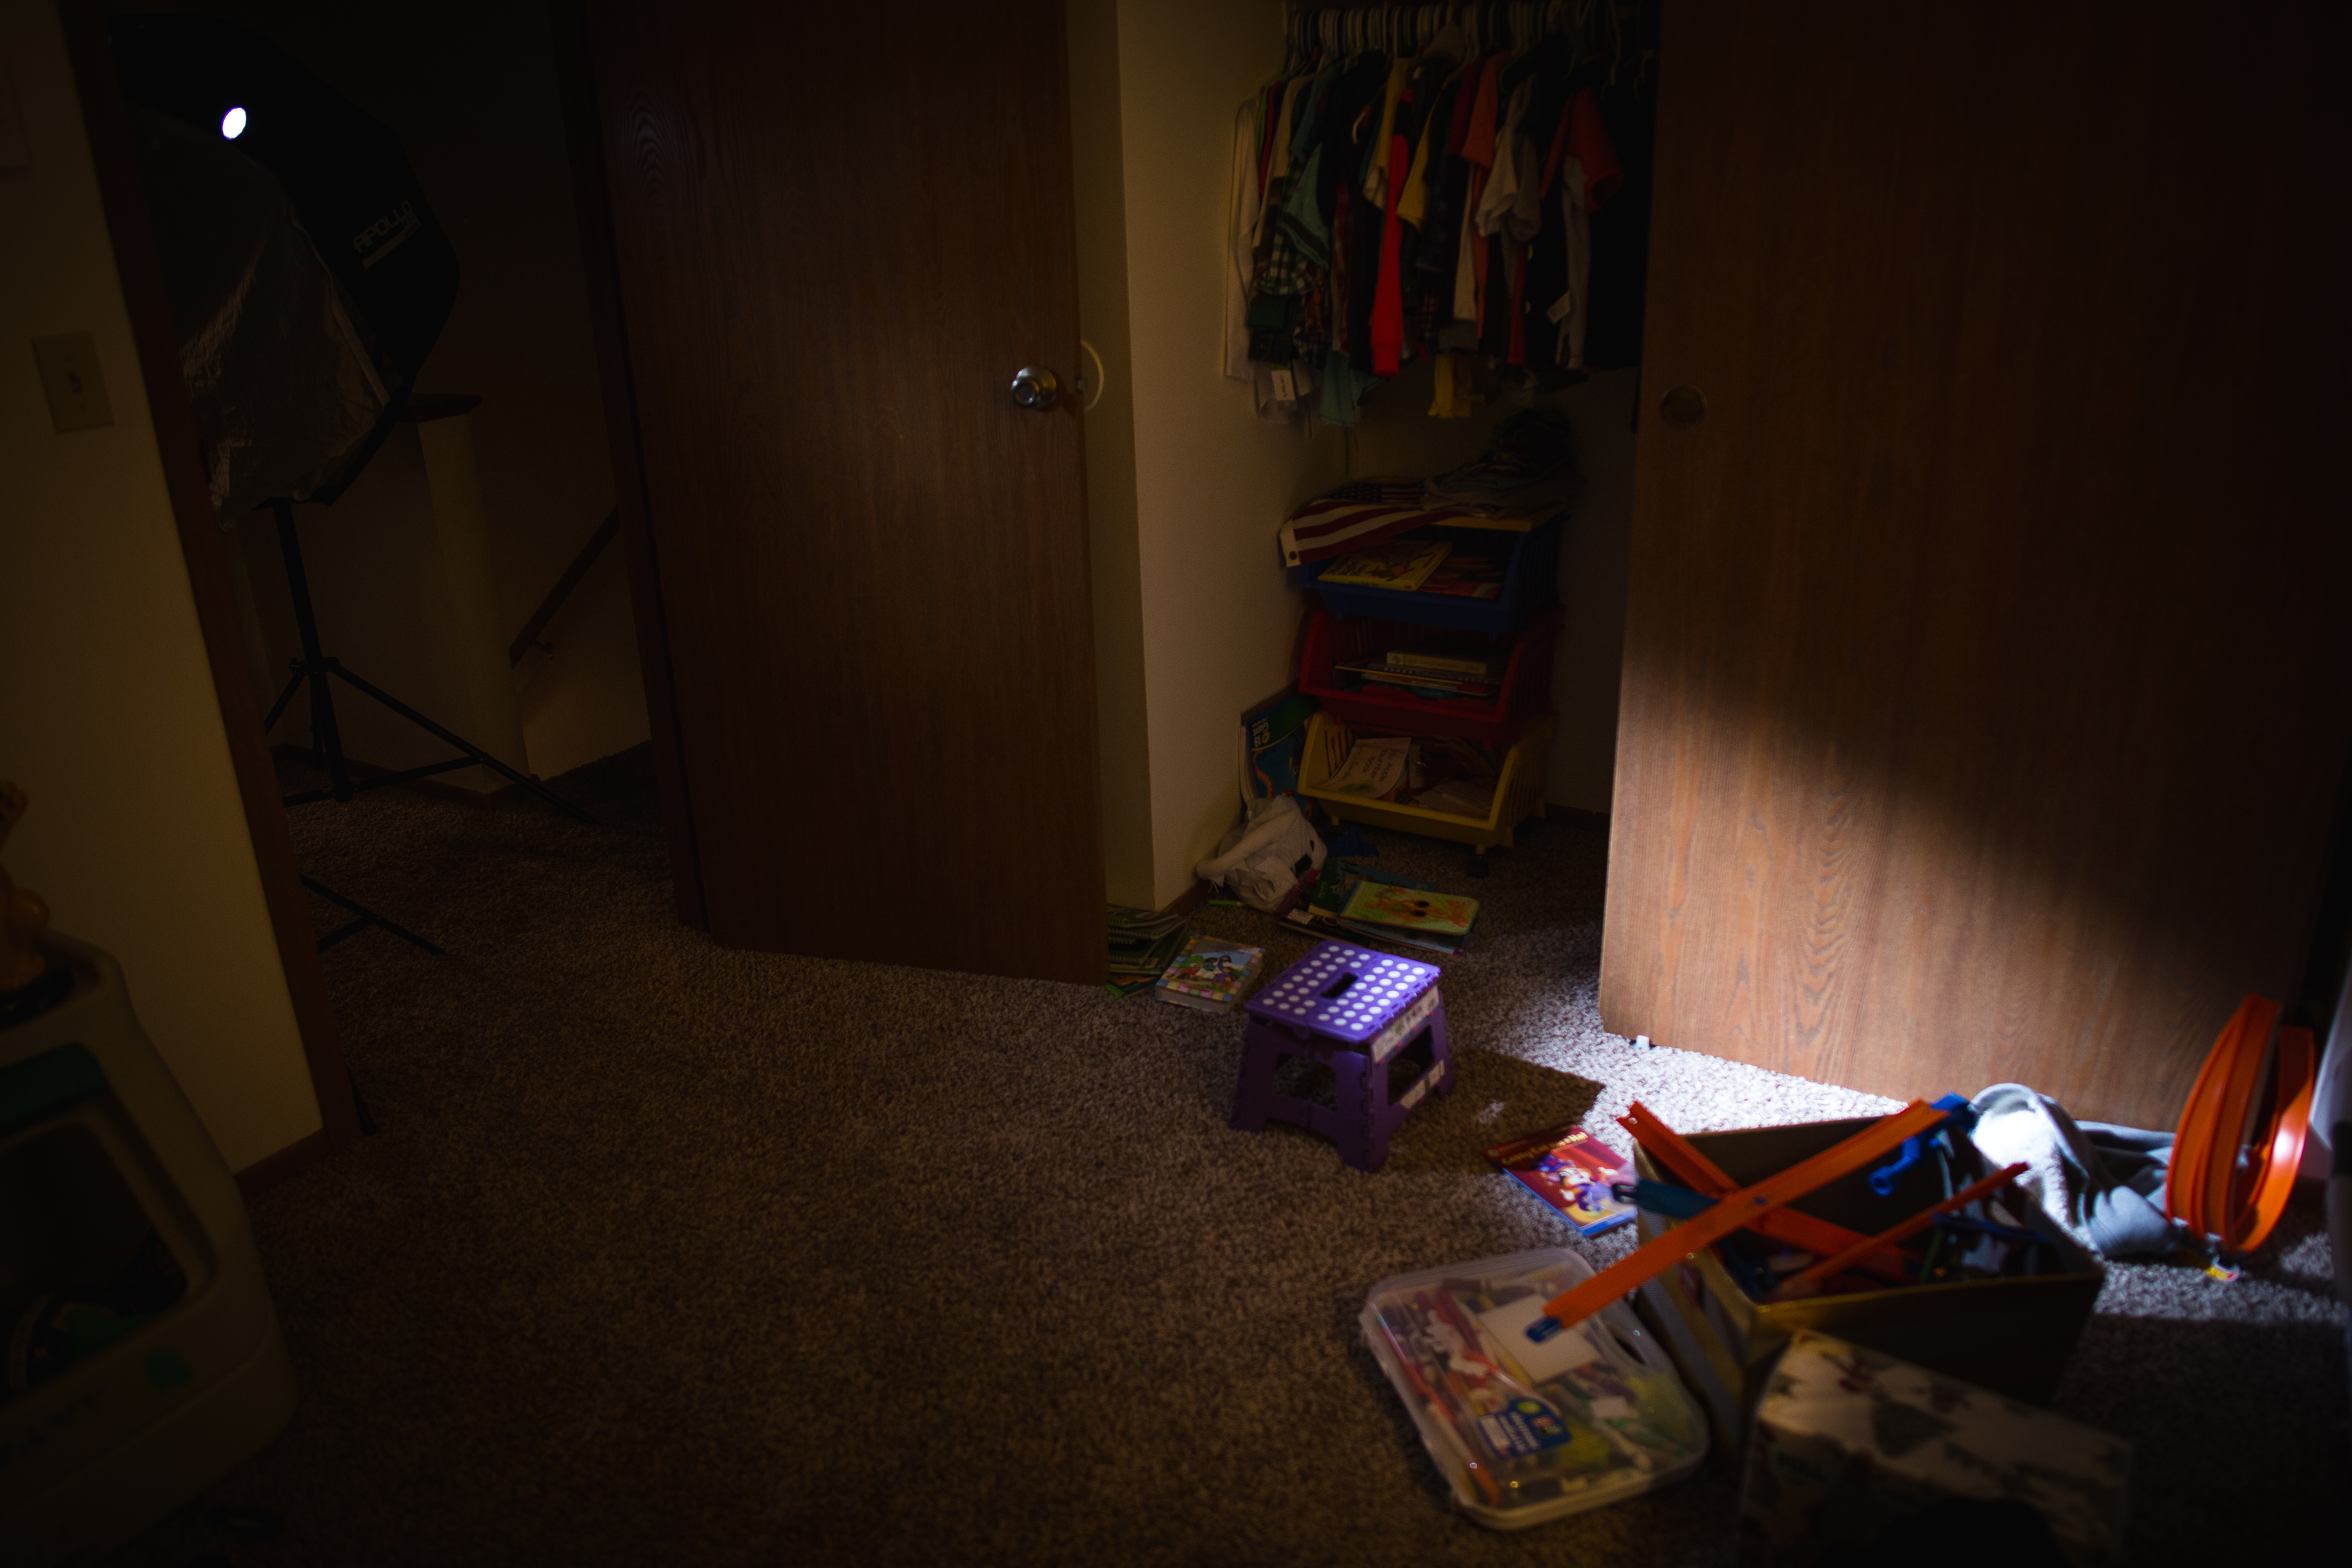
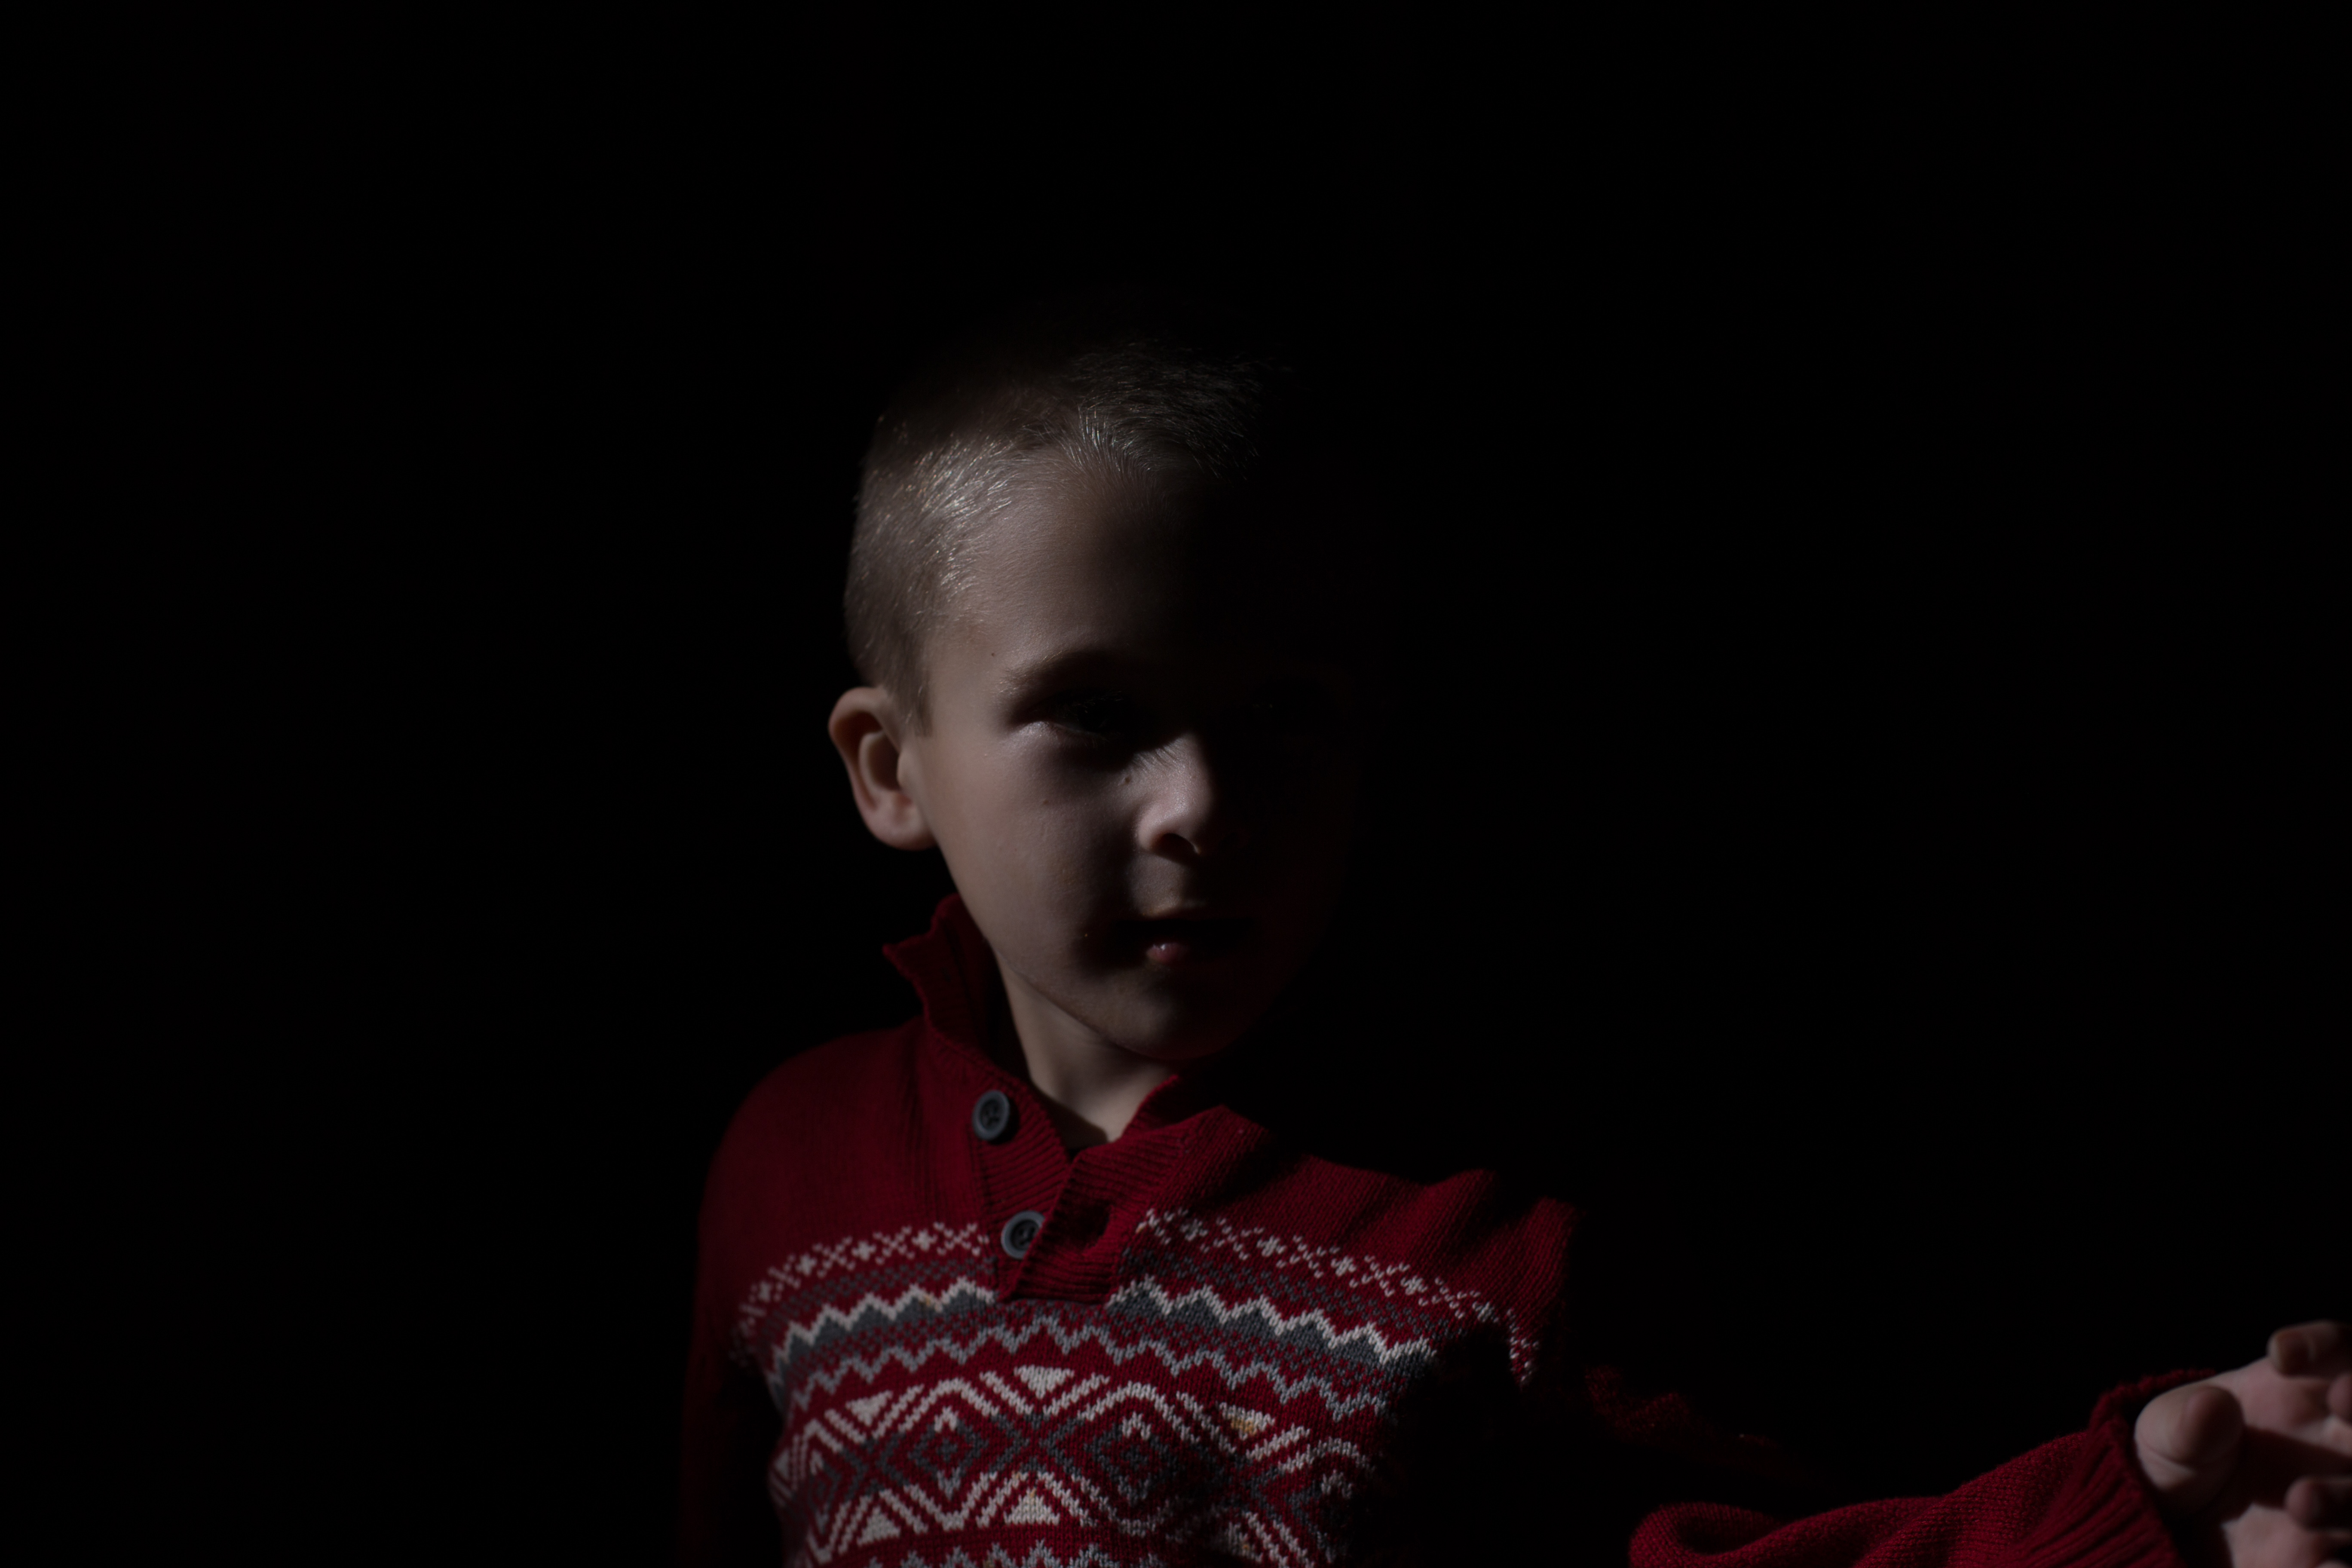
As you can see, this was taken in Caiden's room. You might see the other big softbox by the door. I tried taking a portrait in his room with that, but I was unhappy with the results. I then opted to go just with the snoot lighting up the right side of his face. I had him sit on the little purple chair with the snoot shooting down on the side of his face (I couldn't keep him in the room very long since he was tired of taking pictures, so I just took this shot without him). Even though his room is a mess and his closet is a few feet behind him, the snoot effectively just lights up his face and you can't see anything else. **I did turn off his room light, use the flashlight on my phone on his face to get focus, and then turned that off and took the picture so the only light is coming from the flash.
So here is the original image. As you can see, he was actually about to point at something and this was a test shot, but since most kids don't pose well this ended up being my favorite and most sincere photo. I simply used a brush in Lightroom to sever his arm out. If anyone is interested in the actual editing in Lightroom, let me know and I can show you exactly what I did for this photo.
Original:
 Edited:
LINKS:
Snoot: https://www.amazon.com/StudioPRO-Speedlight-Modifier-Portrait-Photography/dp/B00HYMAWMS/ref=sr_1_4?ie=UTF8&qid=1513882056&sr=8-4&keywords=snoot
Wireless Flash Trigger: https://www.amazon.com/YONGNUO-RF-603C-II-C3-Wireless-Remote-Trigger/dp/B00JVEXRE2/ref=sr_1_5?ie=UTF8&qid=1513882106&sr=8-5&keywords=yongnuo+wireless+flash
Manual flash that automatically connects to aforementioned triggers: https://www.amazon.com/IV-Wireless-Speedlite-Fujifilm-Panasonic/dp/B00PGTOX26/ref=sr_1_3?ie=UTF8&qid=1513884271&sr=8-3&keywords=yongnuo+wireless+flash
Thanks for reading!