New week new update. It’s been a while since I shared my land strategy, but here we are again. A couple of months back I posted about my land plan that I divided into three phases (previous post):
- Phase 1: Go wide – obtain more plots.
- Phase 2: Activate all land with max cards.
- Phase 3: Go deep – improve output with better units and optimizations.
Well, last week I finally finished phase 2 and moved right on into phase 3. Let’s dive into how it’s going.
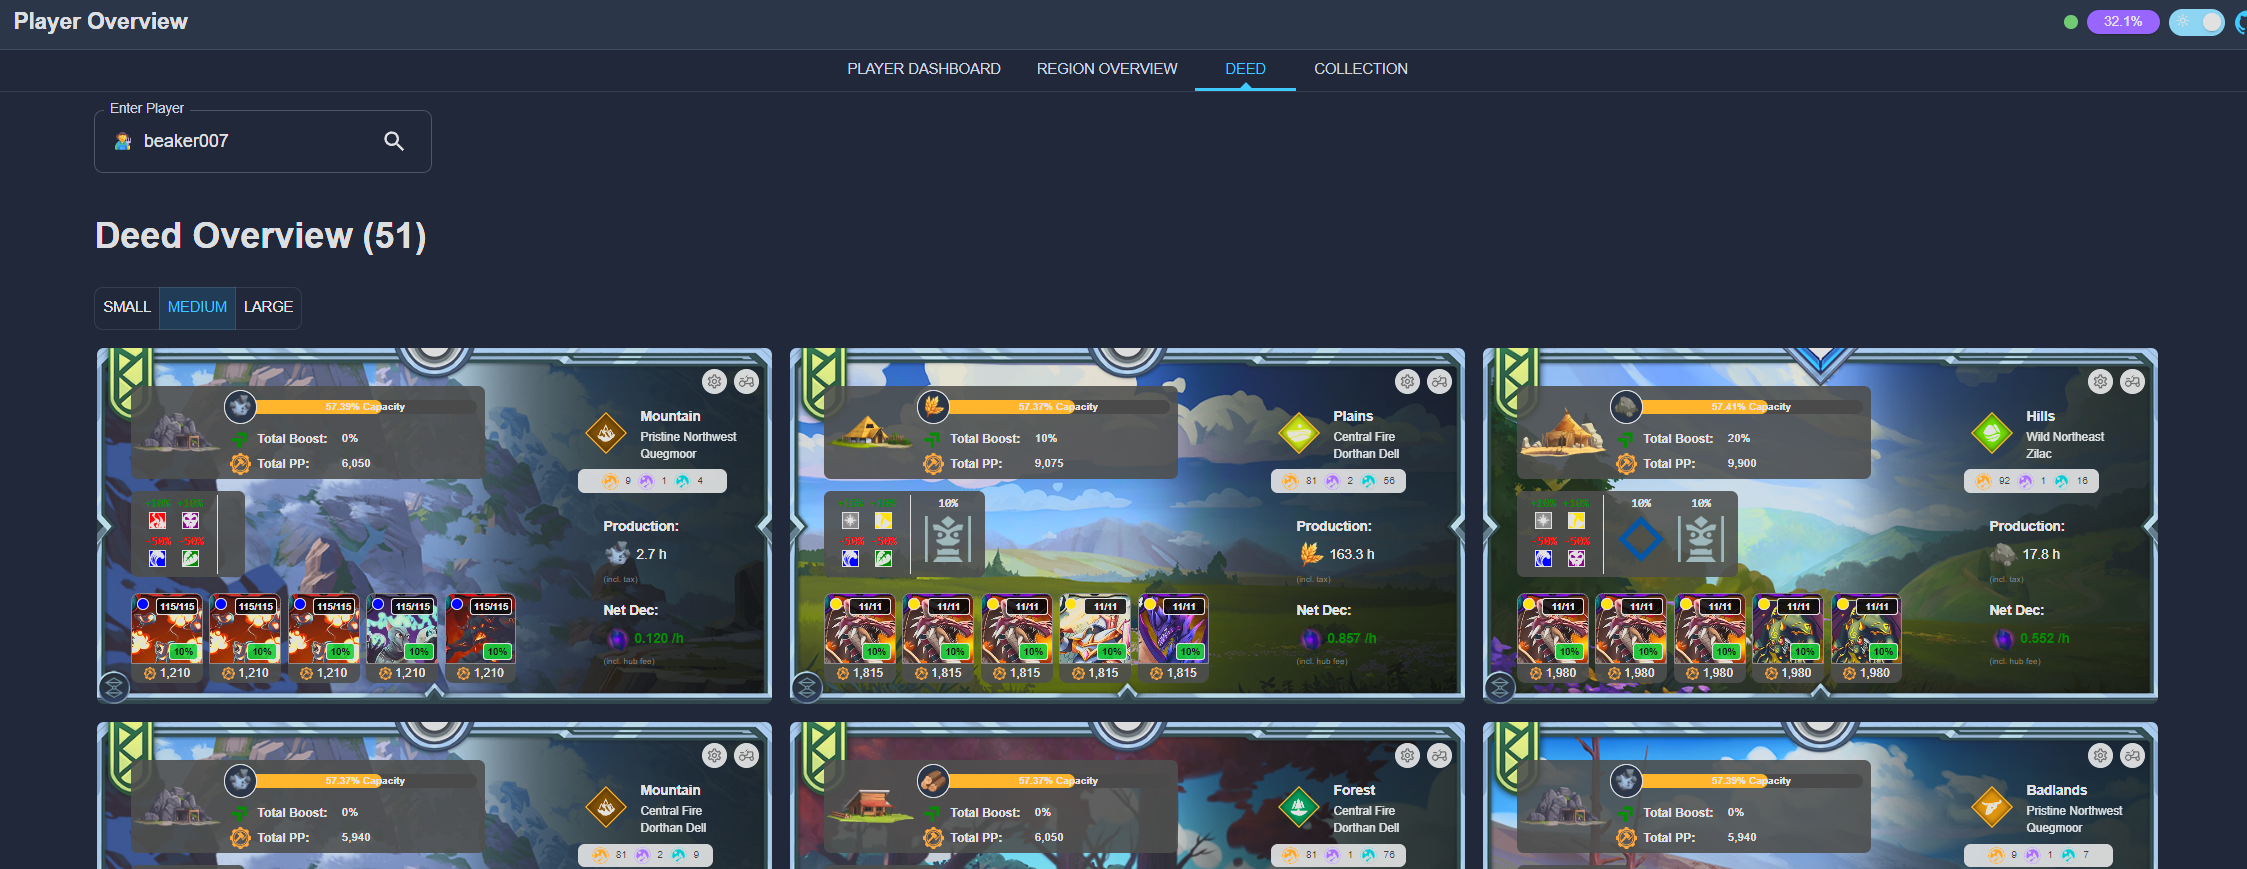
Phase 2 Complete – All Plots Activated
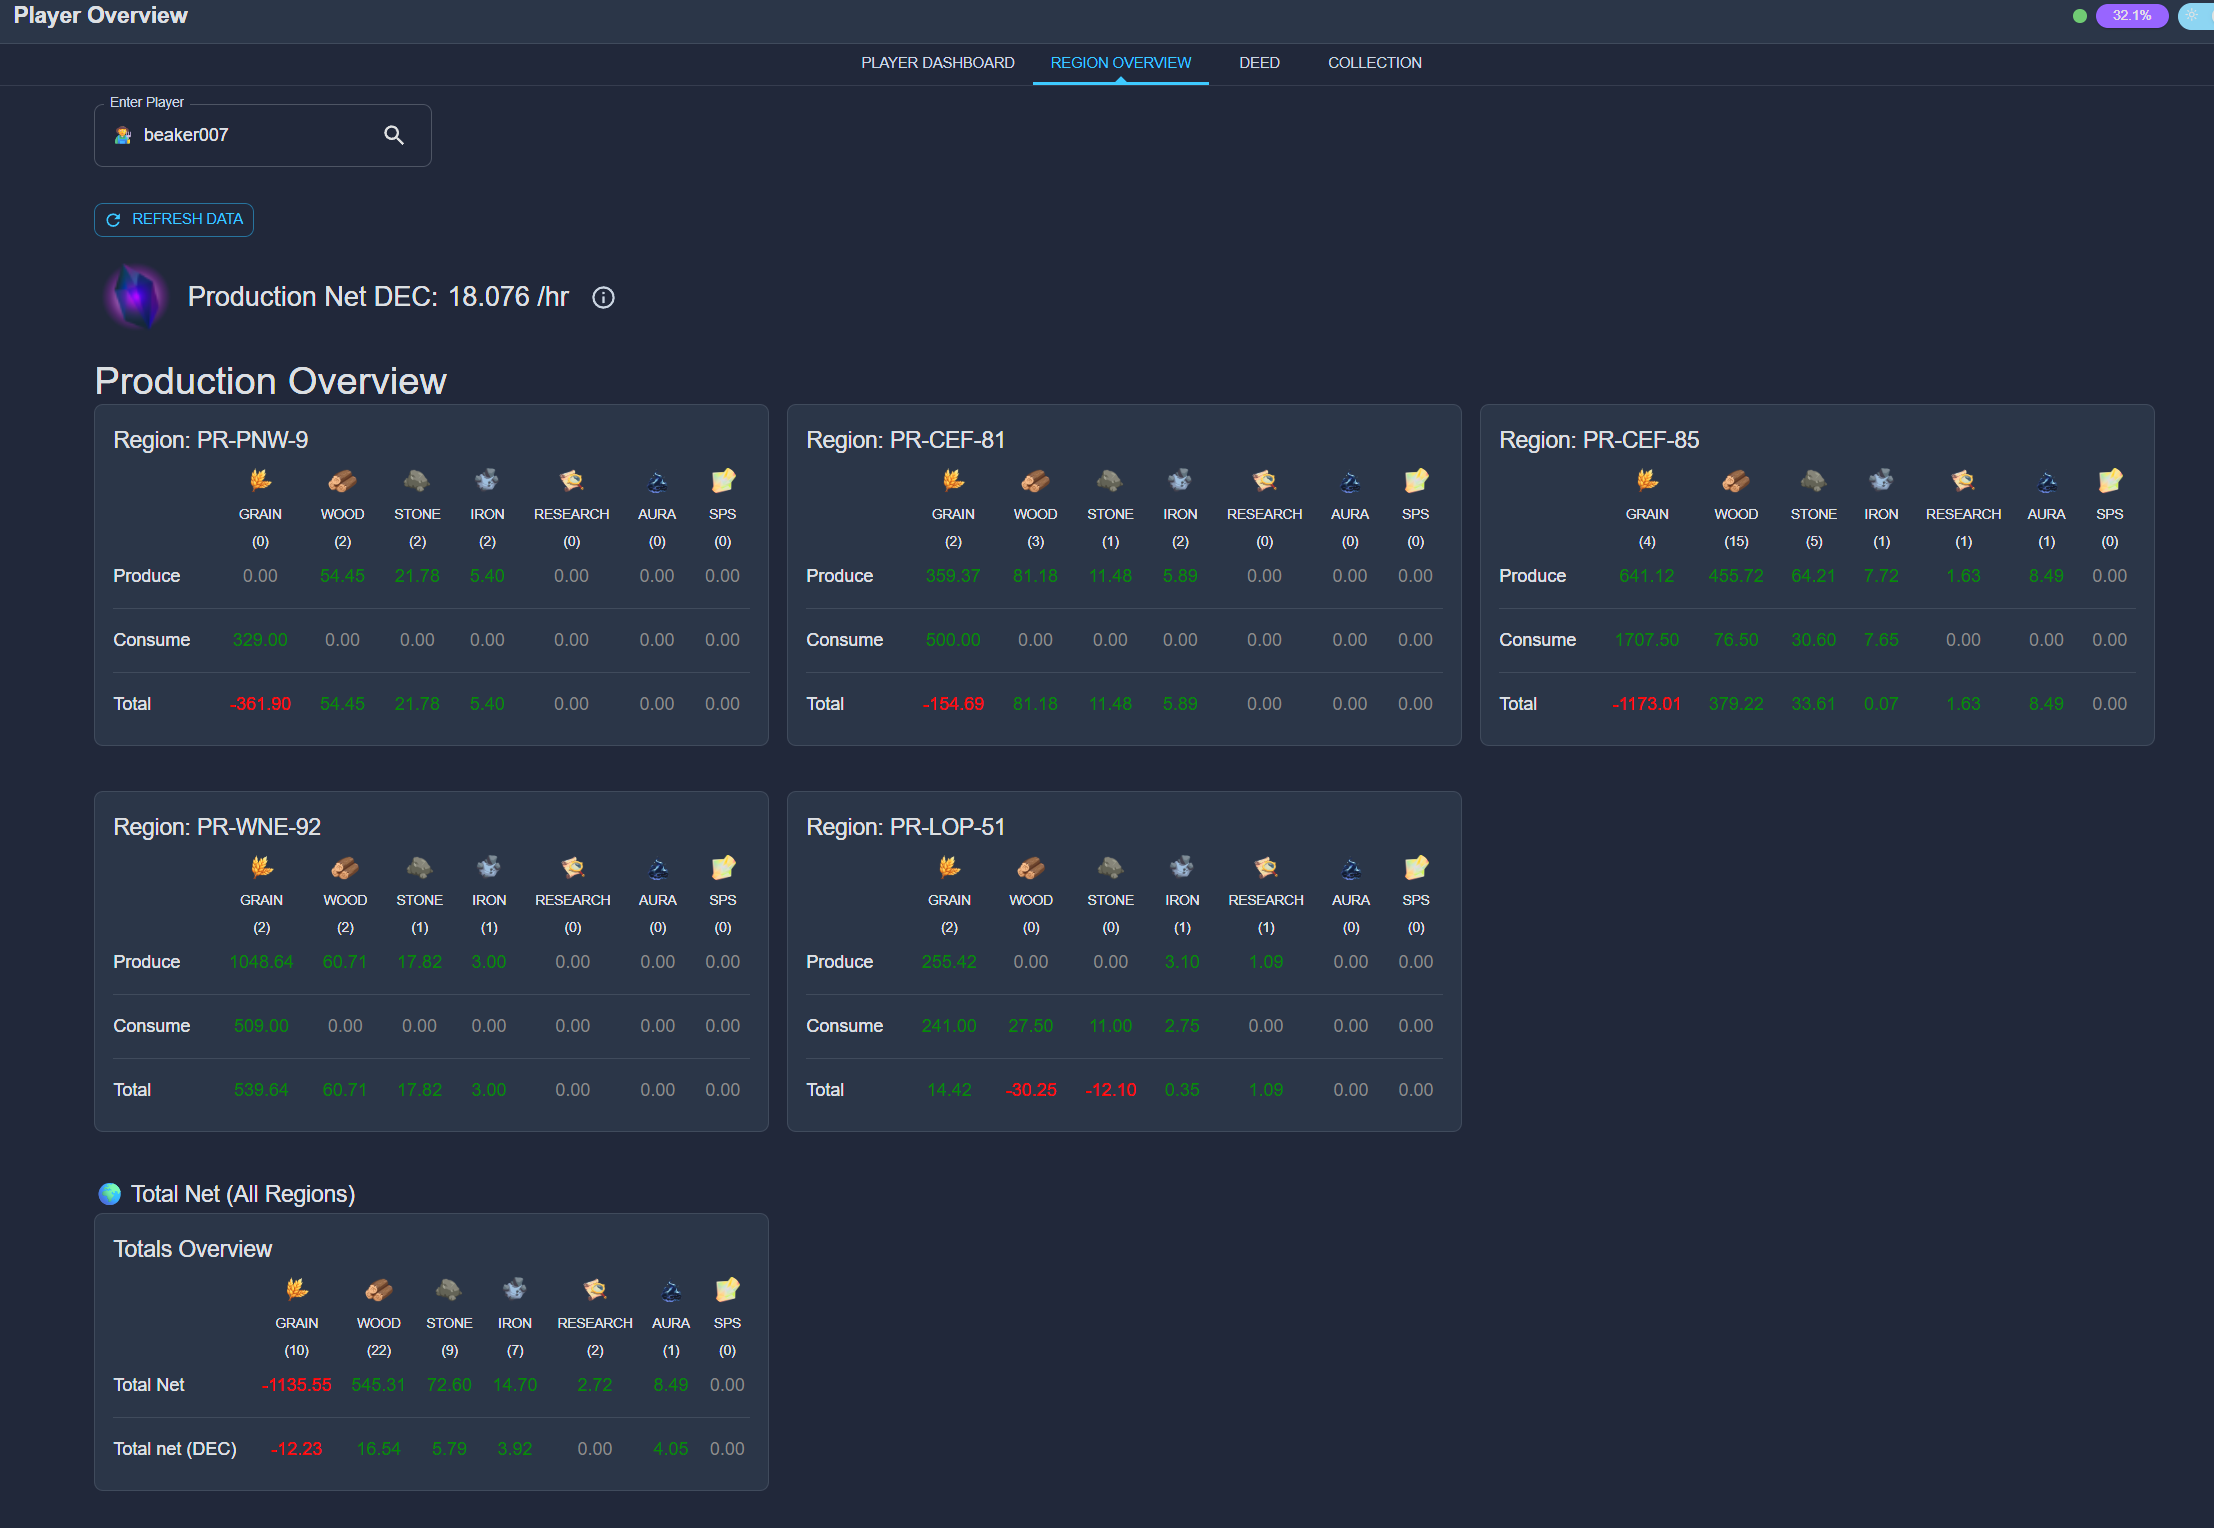
As you can see from the screenshot below, all my land is now fully staked out. That’s 51 plots in total. It took time and consistency, but I kept adding each month to my pile until I hit the point where everything was covered.
Now, I’ll be honest. When I started implementing this strategy, I realized it might not have been the smartest approach. In fact, some might even call it dumb. But hey, it’s my strategy, and I stuck with it.
Why dumb? Well, the reality is that with better cards (which usually come at a higher price) you can save a lot of staked DEC. That DEC could then be used elsewhere, and in many cases, those better cards would also give you a higher output at the same time. So, locking everything down with whatever card I had just to get all land “green” might not be the most efficient use of resources.
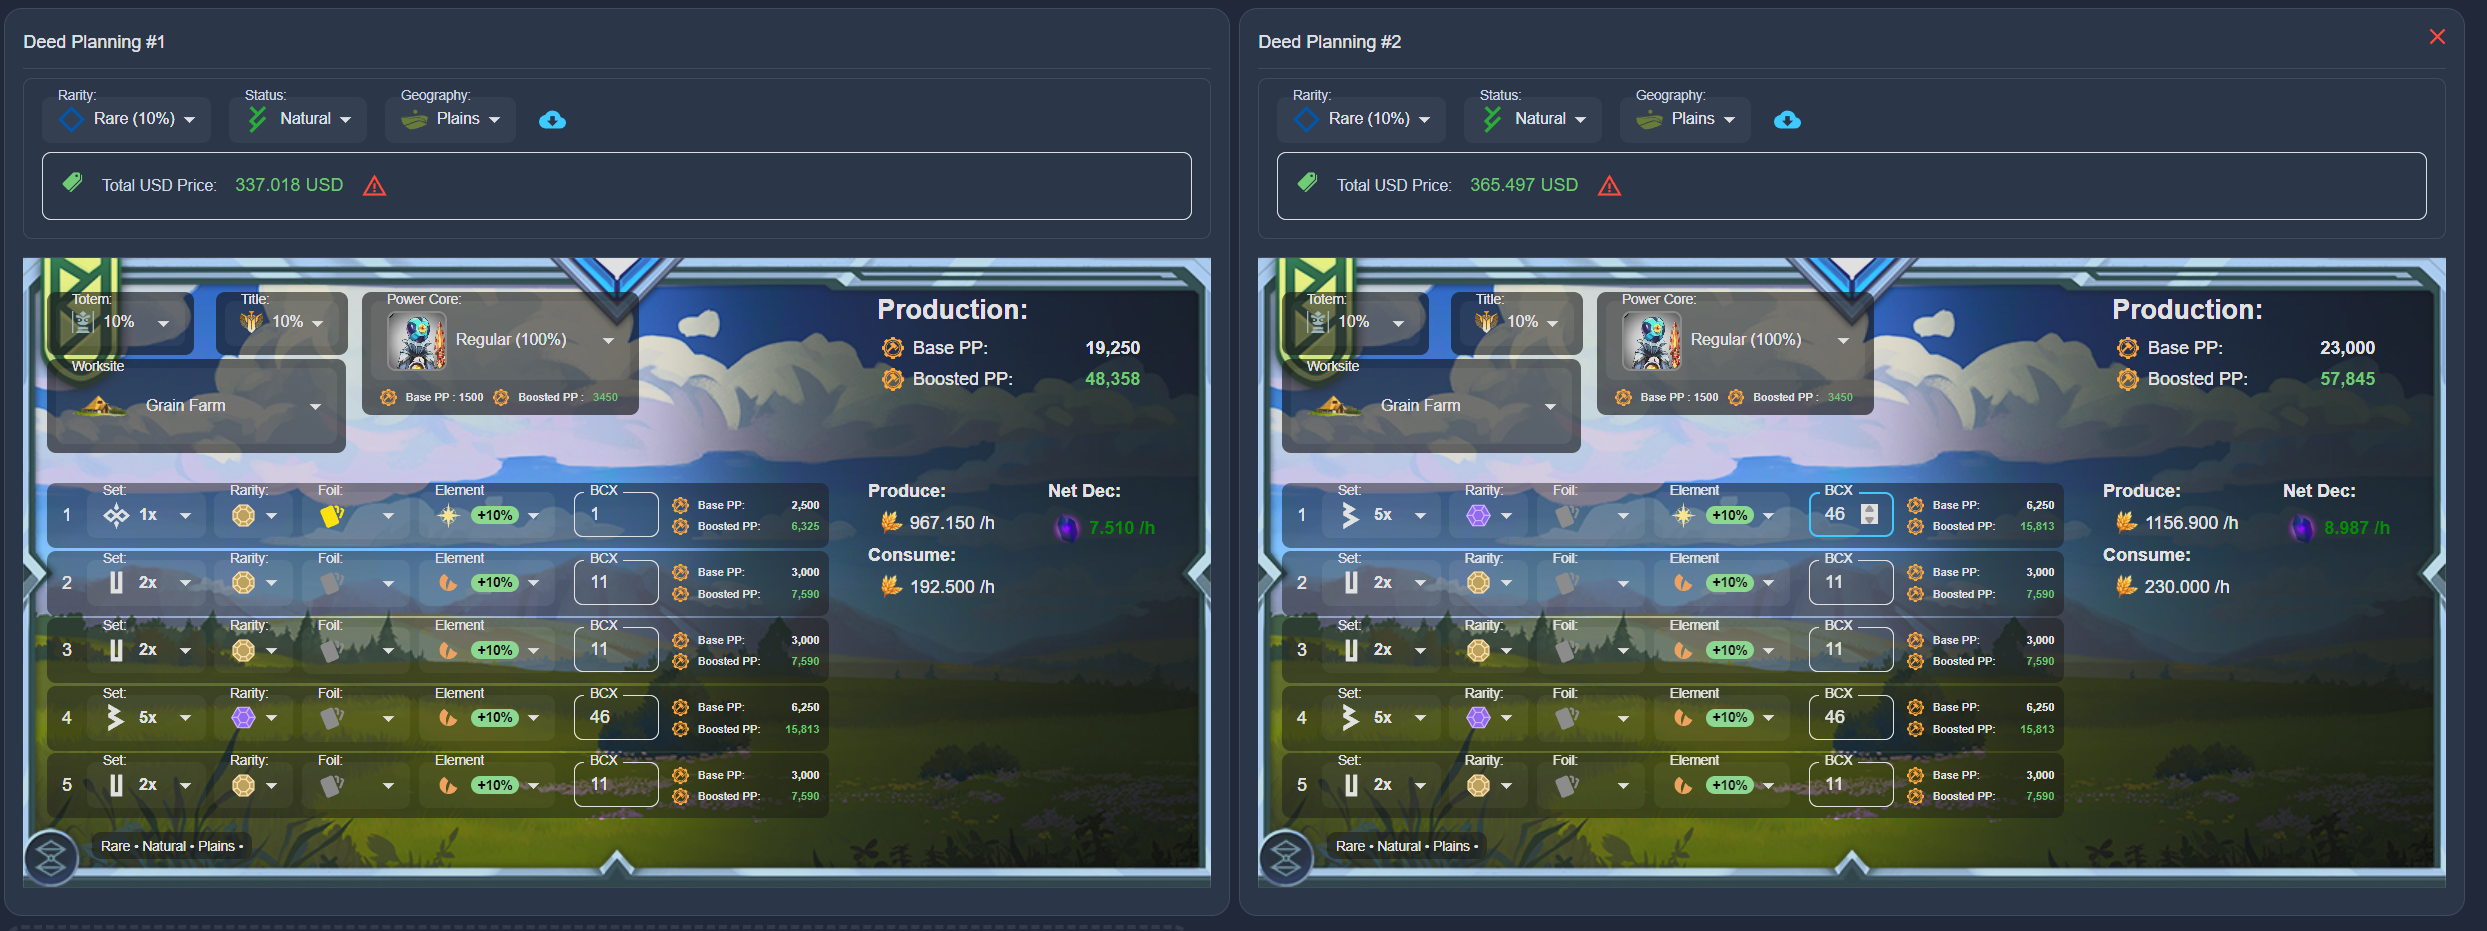
Here is a example when i place a 2 BCX gold epic card on the plots less staked DEC and similar production output:
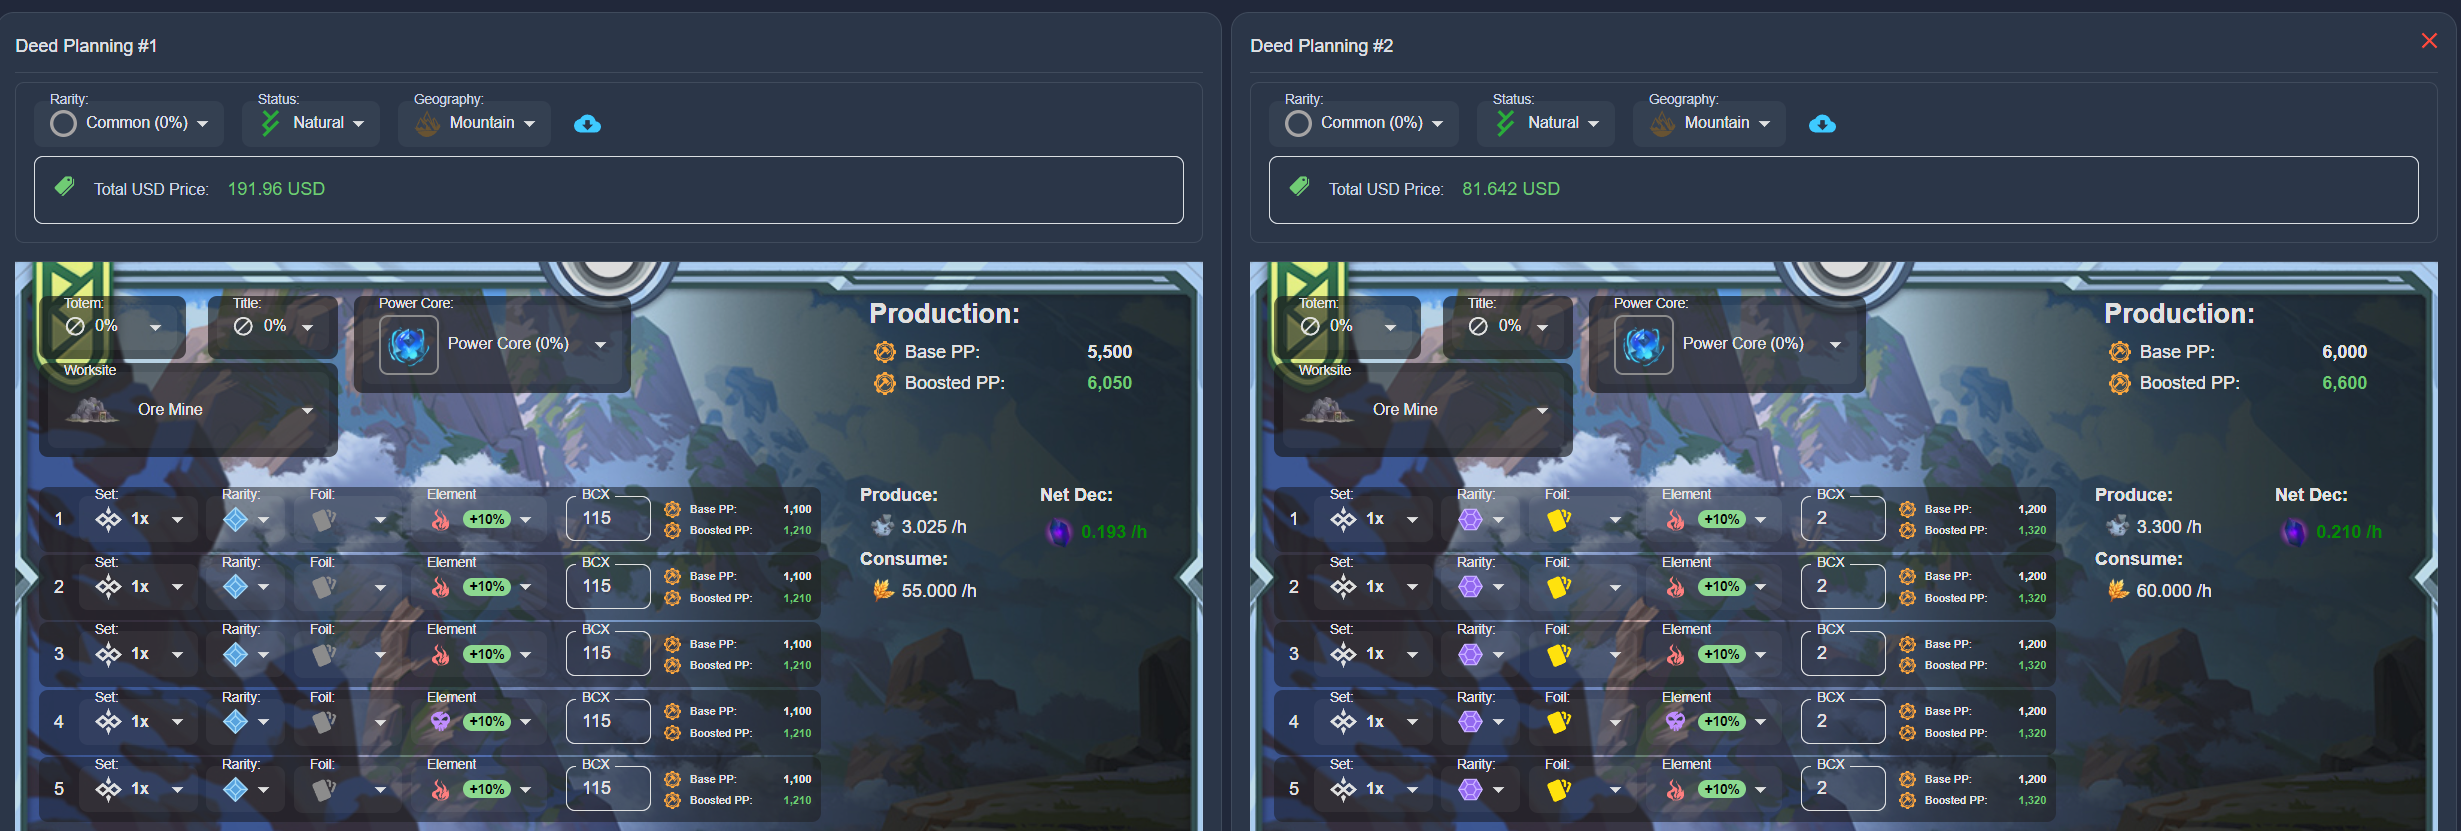
191$ vs 81$


But I couldn’t help myself. might a bit of OCD. Something about having empty plots or unassigned cards just bothers me. I wanted to get to the point where everything was activated before moving to the optimization step.
Rectification after a discovered bug (i used 50K staked DEC per max card of course its 10K staked DEC per max card). This makes it a bit different see the result now.... might be that my strategy is not that bad after all 🤣
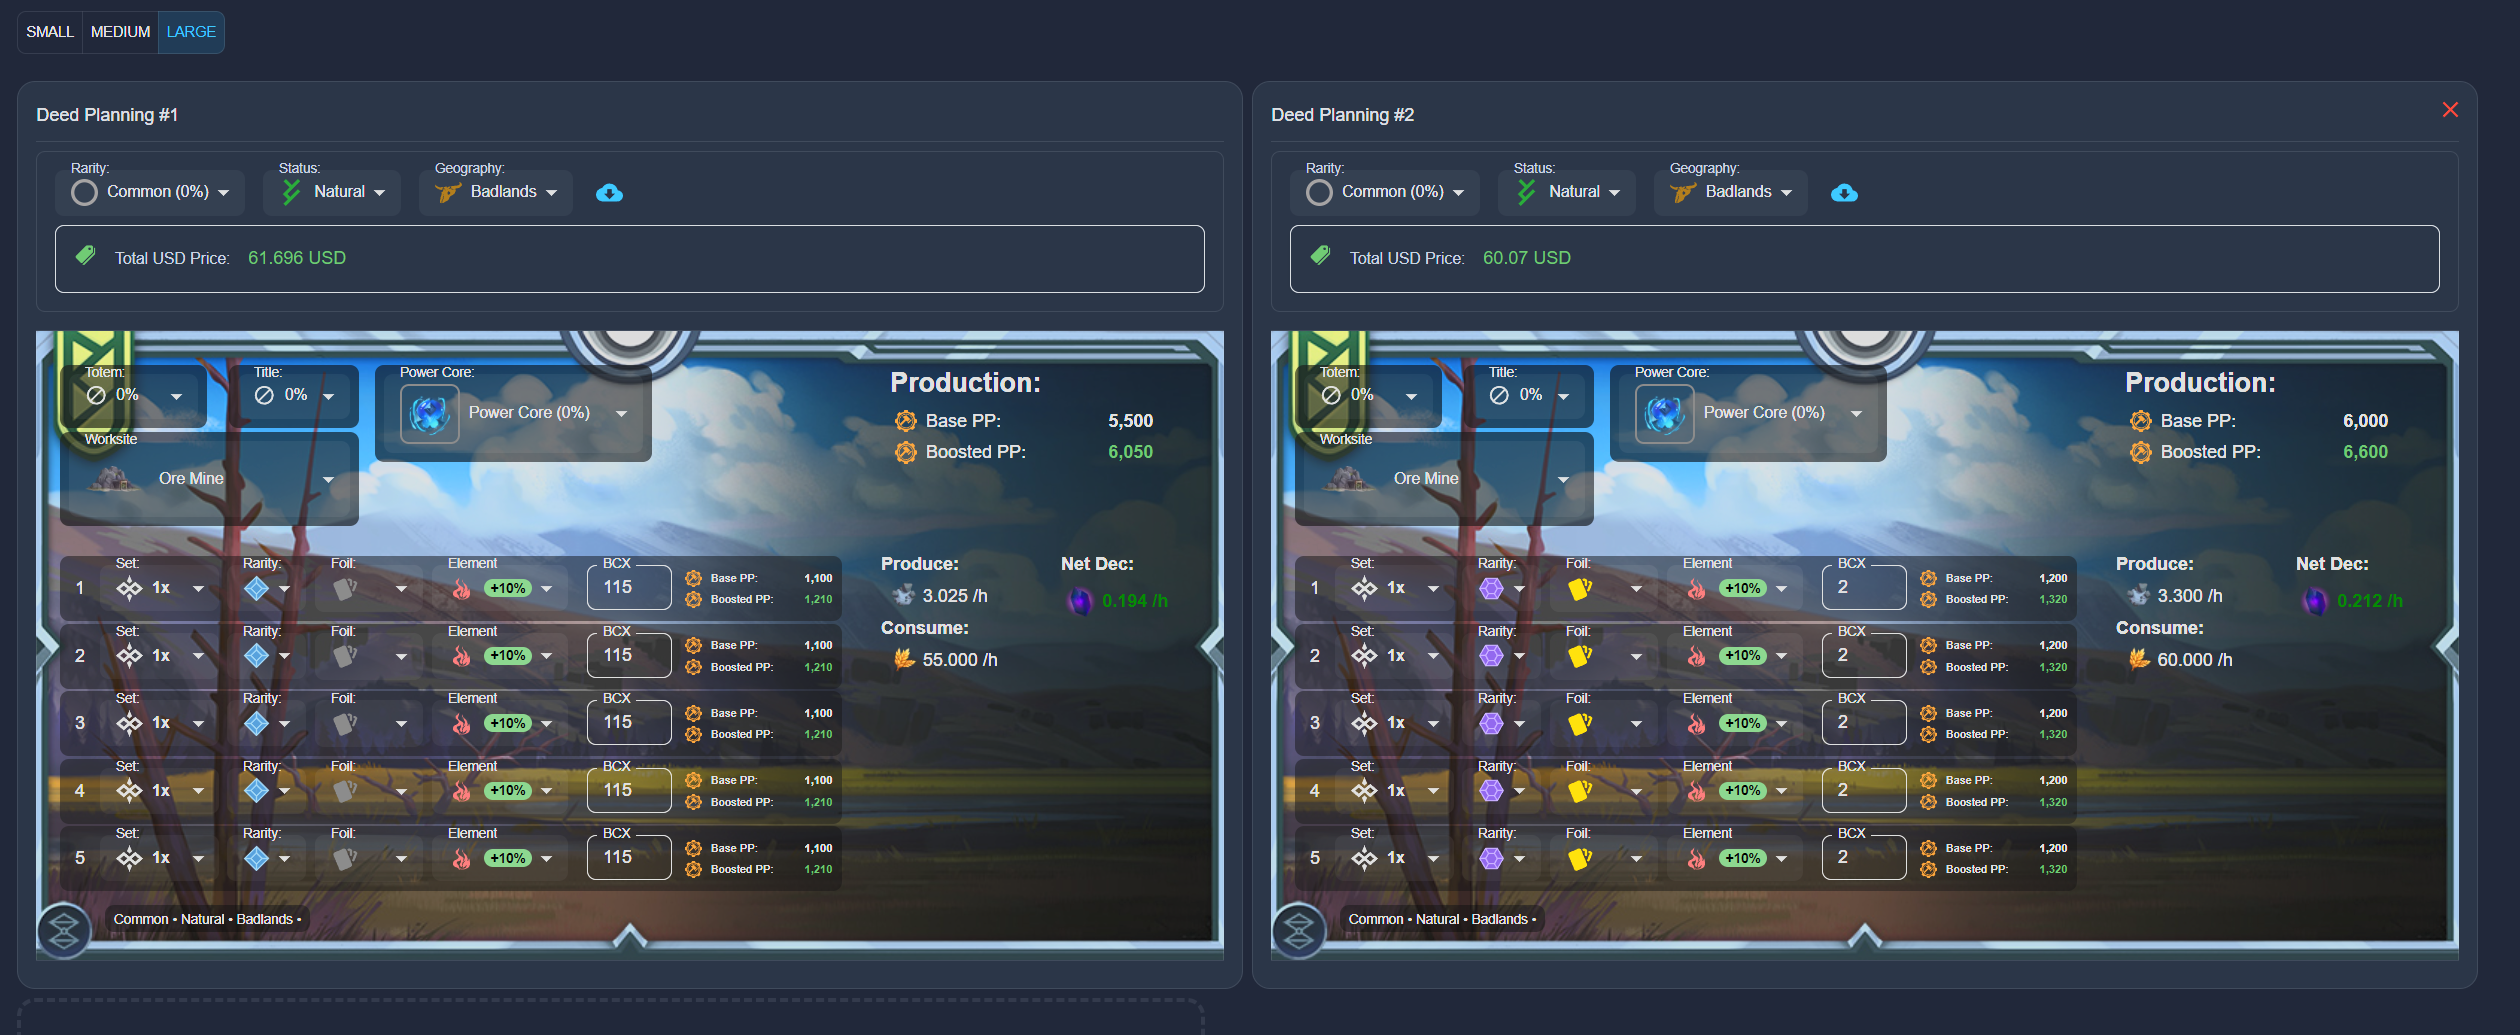
61$ vs 60$


Why This Strategy Might Not Be the Best
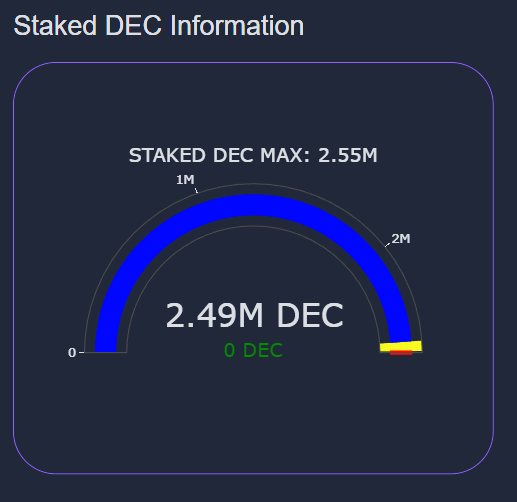
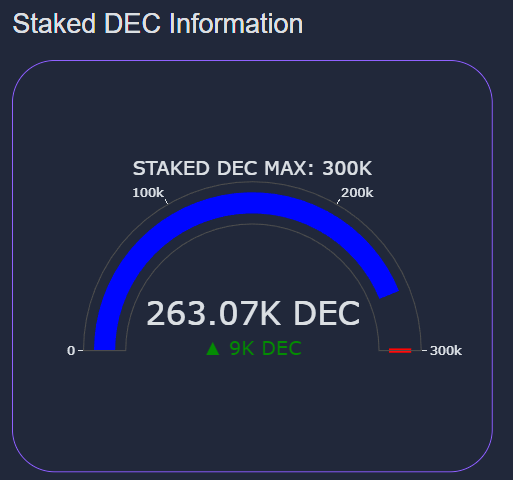
To put it in perspective, I’ve seen setups with fewer than 10 plots that are producing just as much—or even more—DEC per hour in resources compared to my 51-plot setup. I’m pushing 2.5 million DEC in staking and only producing around 18 DEC per hour. Yeah… not the most impressive ratio.
Mine strategy with 51 plots


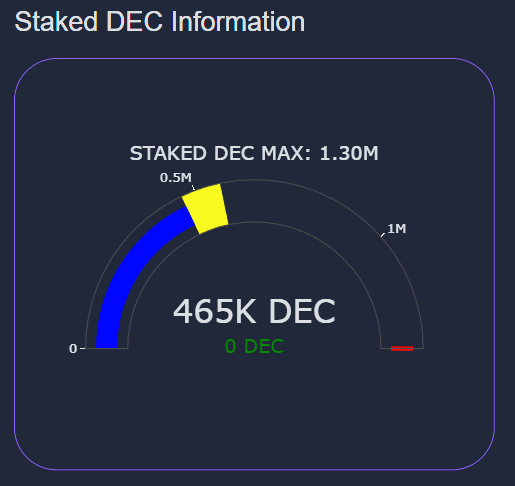
@bobaphet strategy with 6 plots

or even @mori-no-giant he has boosted his plots (26) with perfection:

and there are many more examples.
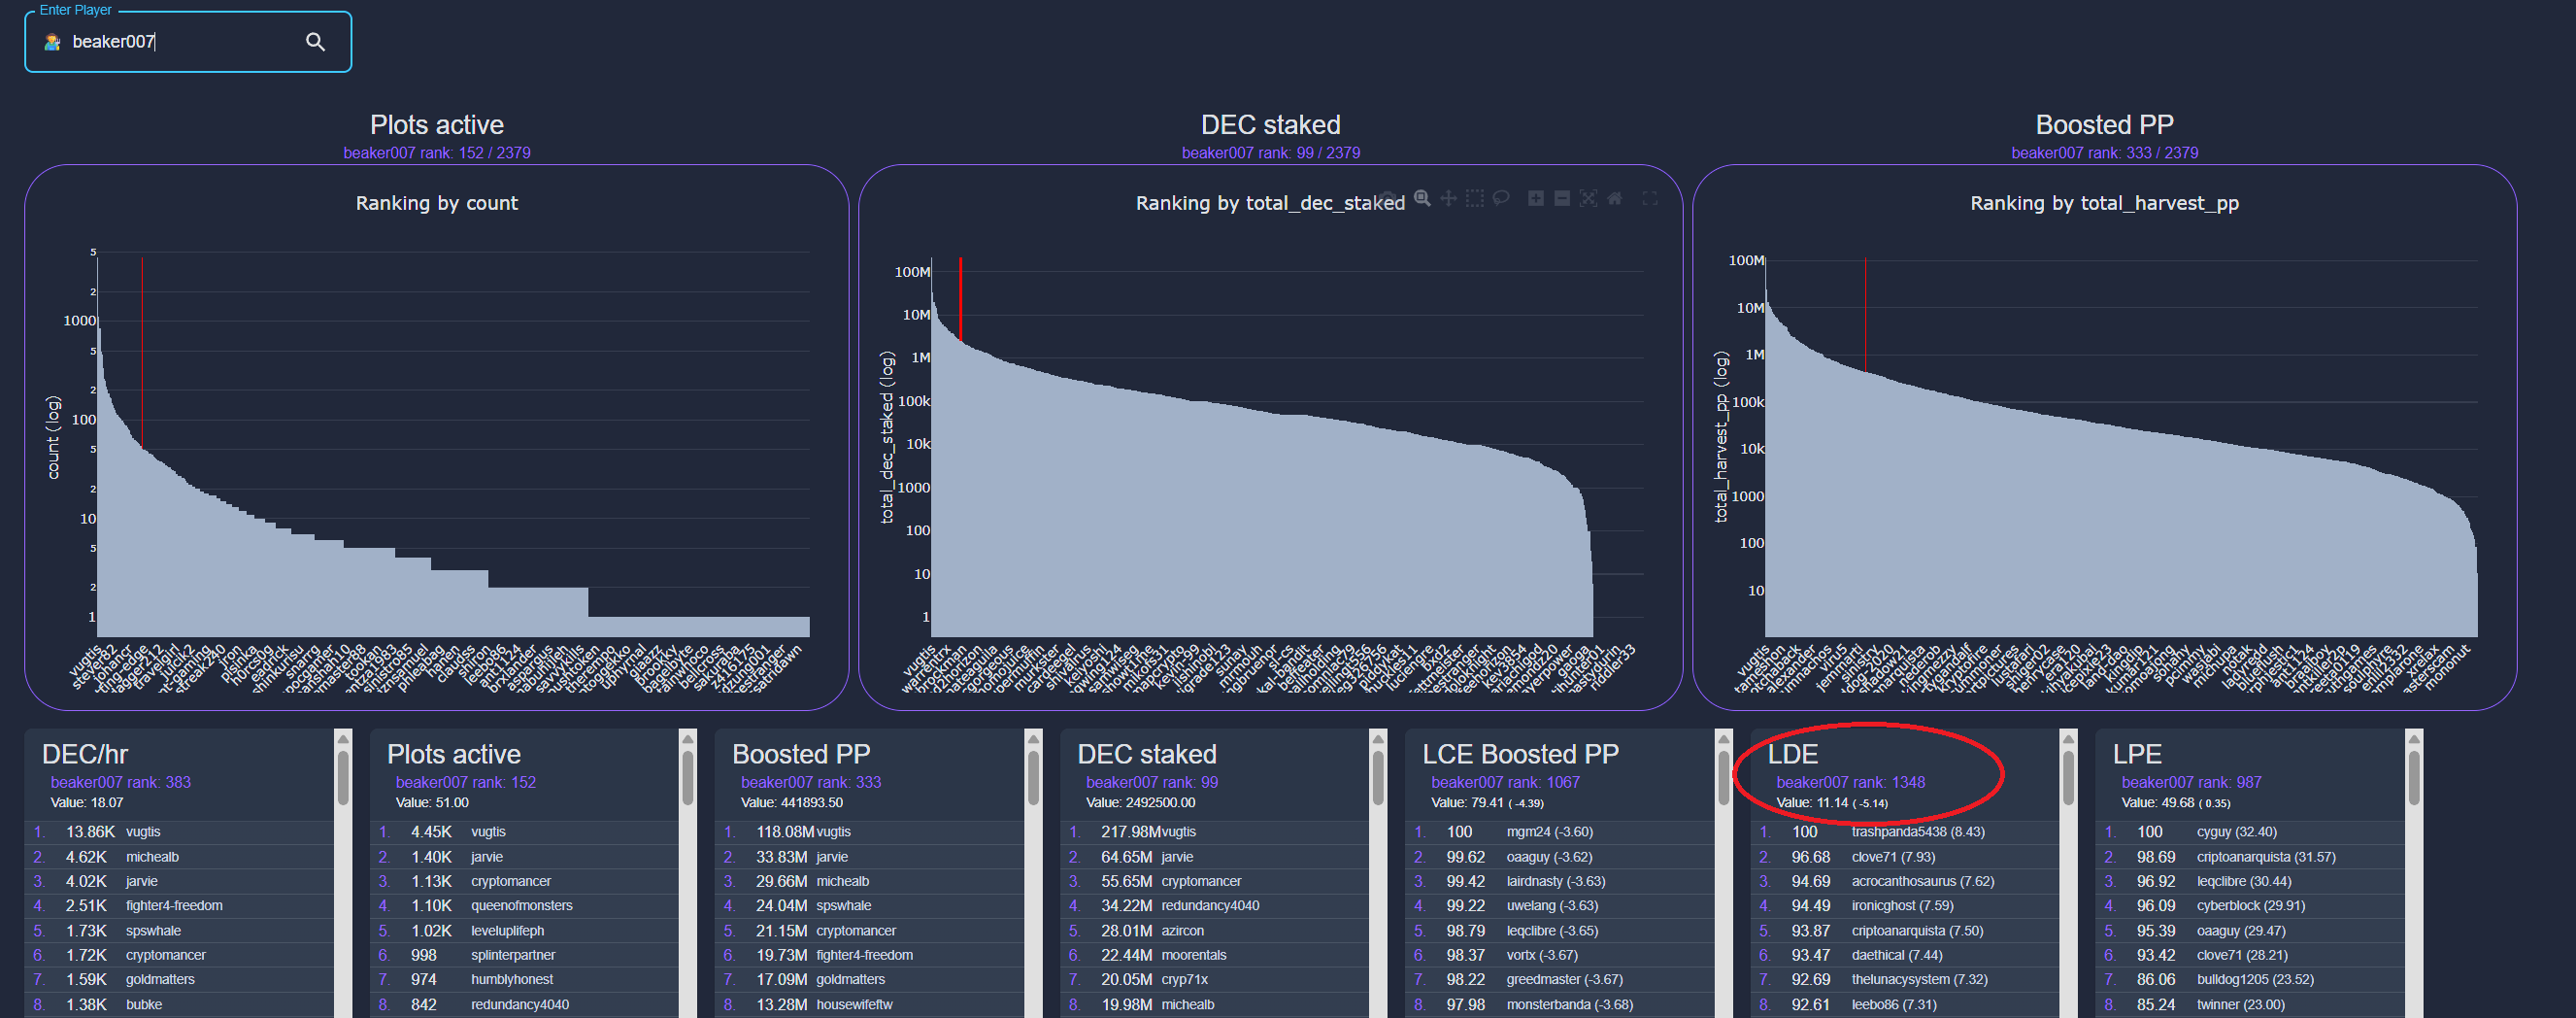
To see you efficiency you can actually see your rank, and the LDE rank of 1348 is not good i can tell you that:
But that’s okay. For me, phase 2 wasn’t about efficiency. It was about completeness. Once I had everything fully staked, I could move forward without the nagging thought of “I still need to cover that plot.” Now, with that hurdle cleared, I can shift focus to real optimization in phase 3.
Starting Phase 3 – Going Deep
So, where do you start when you want to go deep? For me, the answer is simple: I check my weak spots.
Looking at the overview screen, it became clear that grain production was my biggest gap. Grain is essential, and I didn’t want to fall behind. That’s where my first upgrade move came in.
I bought a $35 epic beta card specifically to boost my grain plot.

The card I replaced went on cooldown, but once it’s available again, I’ll assign it to another grain plot. That way, I’m improving overall production step by step.
This is where the land planner tool becomes a game changer. I like to put the “before” and “after” situations next to each other to see exactly what my upgrade does in terms of production. Sometimes the best choice is a gold foil card, other times an older edition card offers more value. It depends on the situation and what I’m trying to achieve.
The Endless Loop
And here’s where phase 3 earns its nickname: the endless loop. There’s always a new card you can buy, always a plot that can be improved, always a slightly better outcome waiting if you shuffle things around.
It’s addictive but also requires discipline. I need to be careful with my spending because while I want to maximize my production, I also have other goals in mind. For example, I’d love to save up for a Keep or maybe another shiny land-related asset. That means balancing upgrades with bigger, long-term investments.
This cycle of identifying weak spots, making targeted upgrades, and testing the results is something I expect to keep doing for a while. It’s less about finishing and more about continuously improving.
So that’s where I’m at right now. Phase 2 is complete, my 51 plots are all active, and I’ve officially entered phase 3. The plan from here is simple:
- Keep analyzing my plots.
- Upgrade weak spots, starting with grain.
- Balance spending between short-term production boosts and long-term goals like Keeps.
I’ll keep posting updates as I progress, and I’m curious to hear what strategies others are following. Do you focus on maximizing a few high-output plots? Do you, like me, get satisfaction from seeing every plot fully staked, even if it’s not efficient? Or maybe you’re somewhere in between?
Drop your thoughts in the comments—I’d love to hear them. Splinterlands land is a long game, and we’re all figuring it out together.
See you all on the battlefield
![]()
Do you also want to be part of this amazing play to earn game consider using my refferal link.