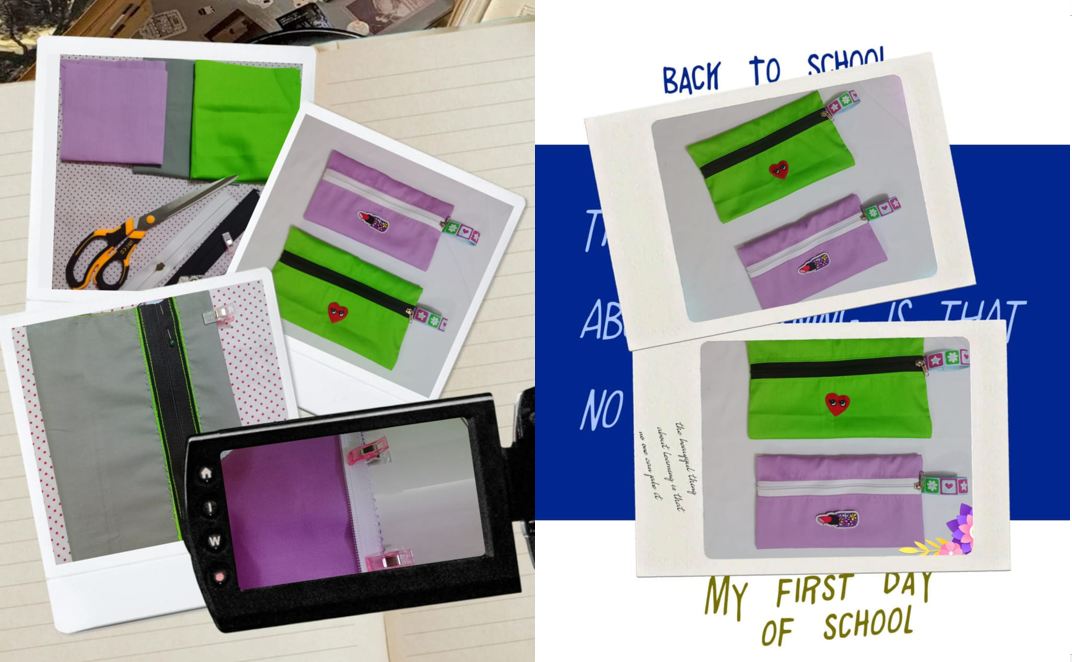

Hello, hello crafter friends and community @hivediy, it is a pleasure to greet you, wishing you have an excellent week with your loved ones, today ends the month of August, a month that in my opinion advanced very quickly and in which I was able to take advantage of to finish some sewing projects, although I still have some pending I have made progress in many of them and only small details are missing, this time I share with you the making of a set of pencil cases for the return to school, we are very close to the return to school and I want to organize my son's things and supplies, to have them ready in time.
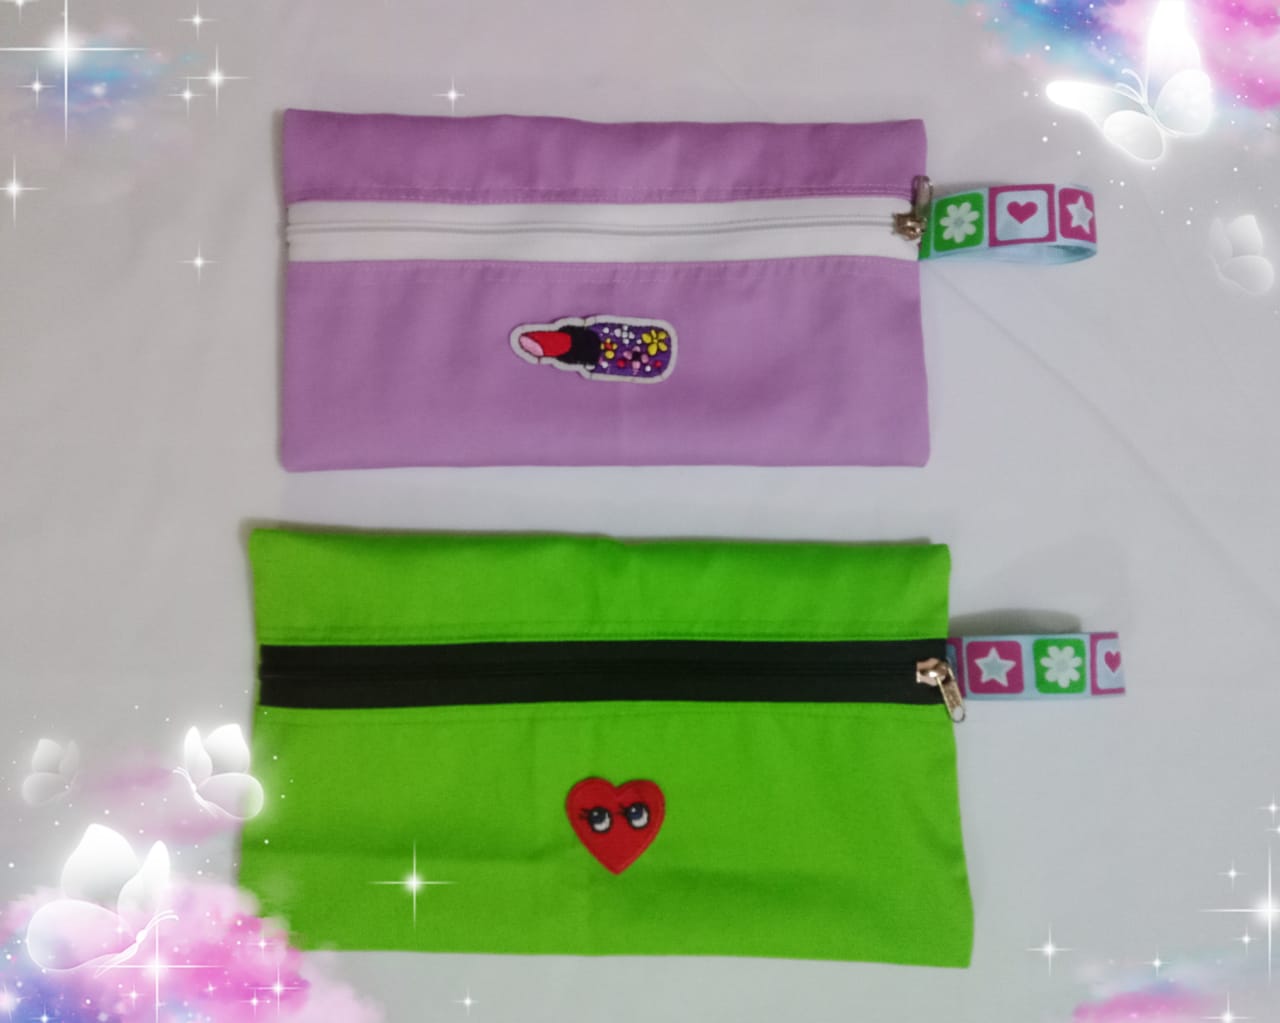
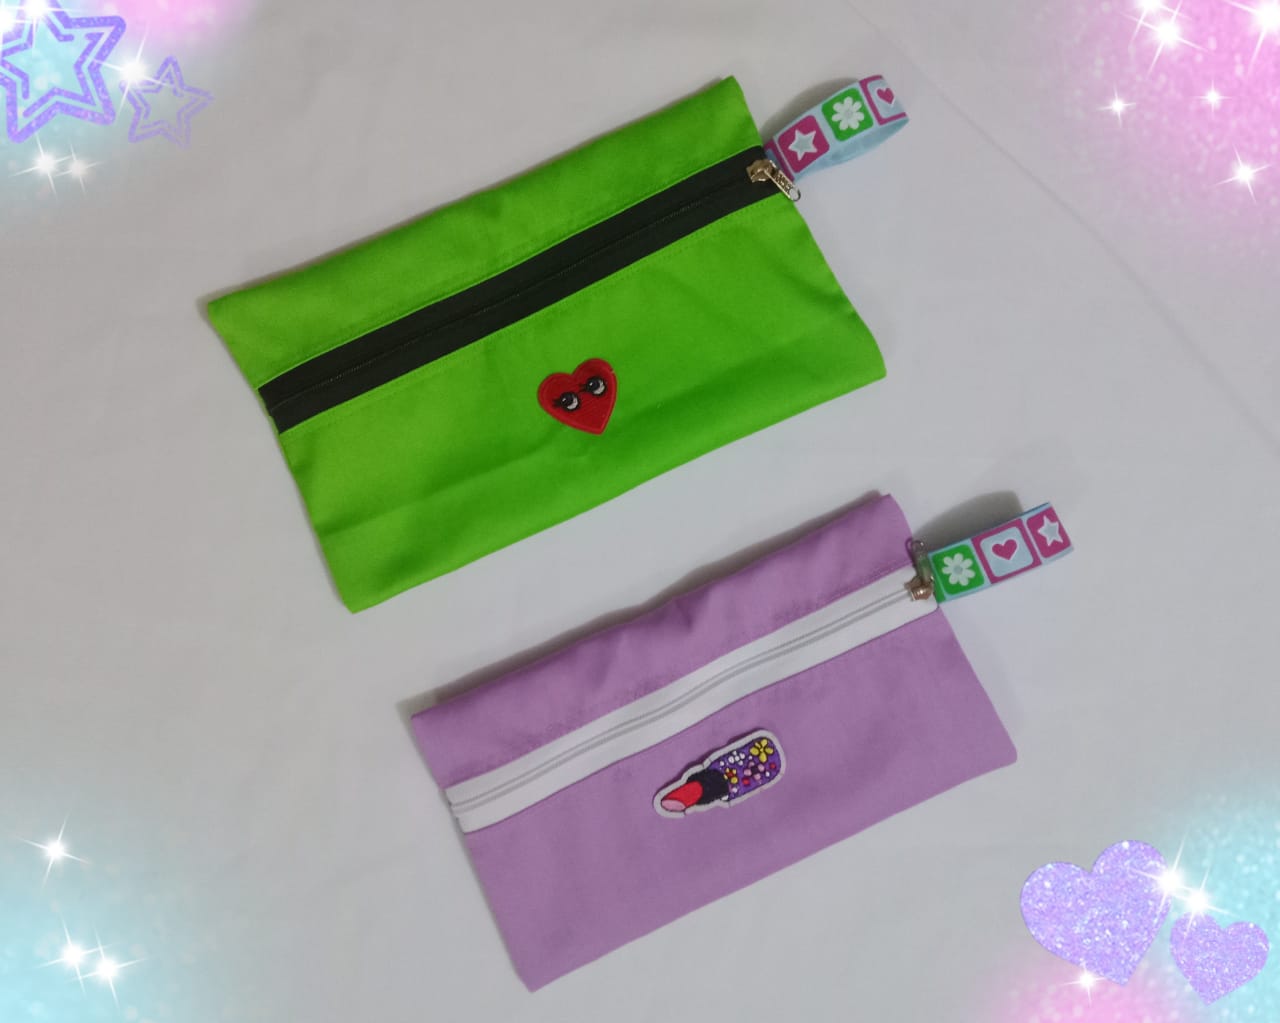
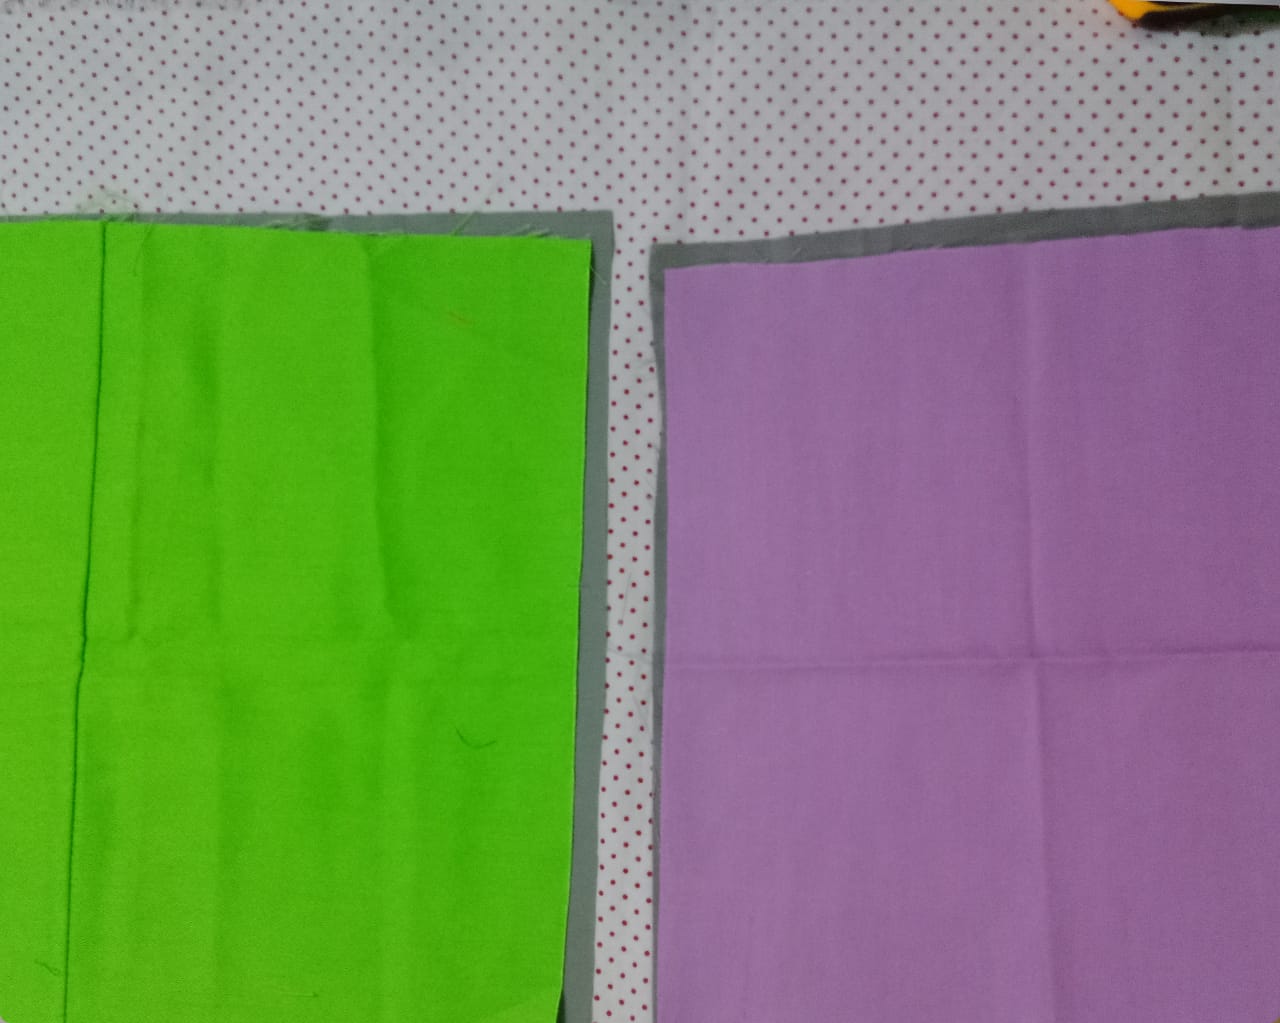
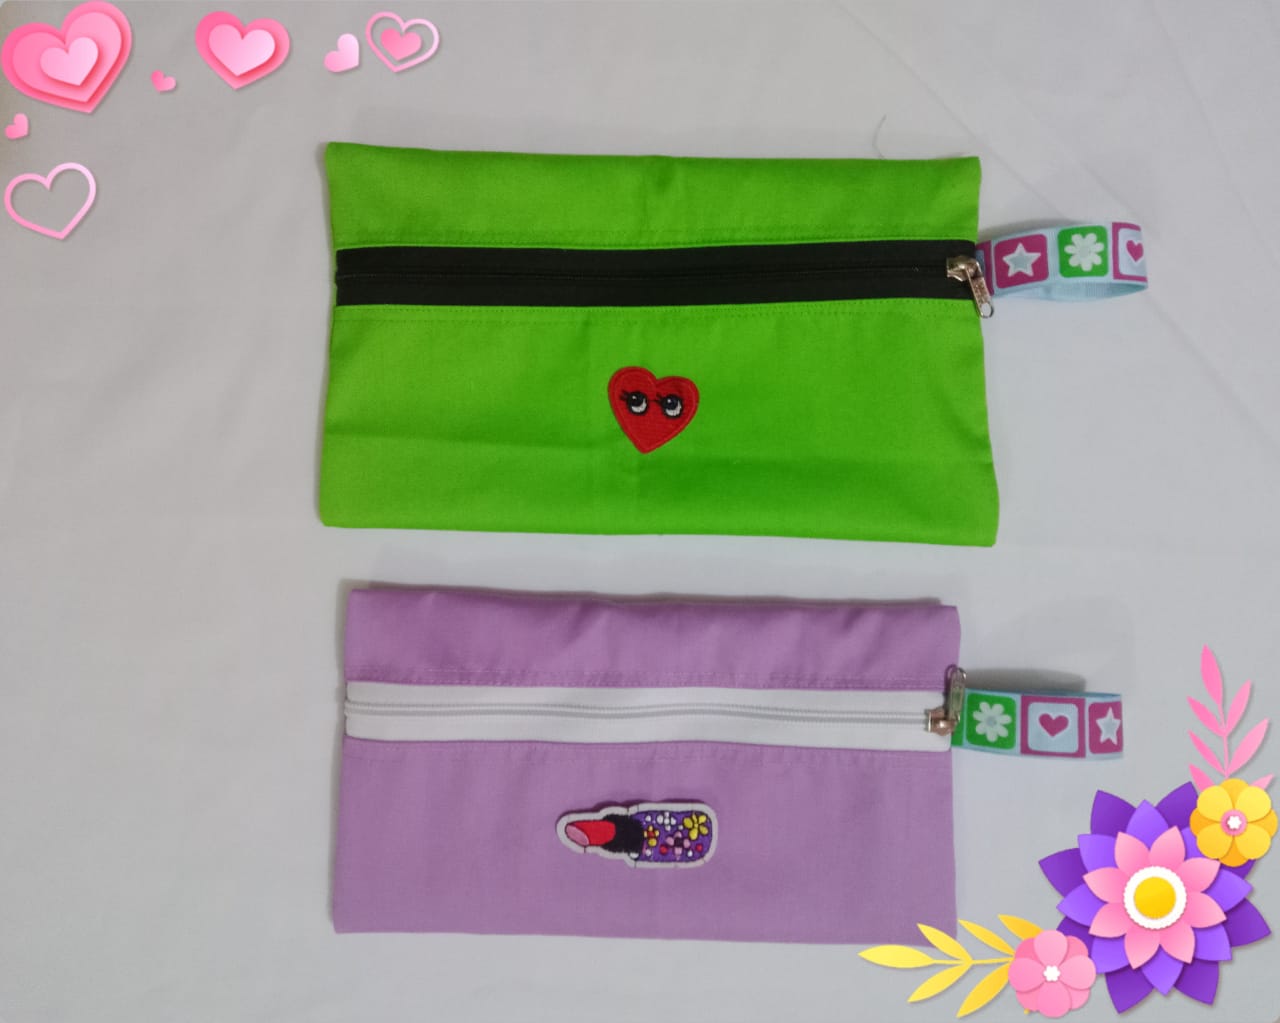
The pencil cases will be given to two teachers who have done a nice job with the children, they are simple and spacious in the colors lilac and green, the lilac one has a white closure and the other has a black closure, I like the combination of green with black, it looks very pretty and elegant, it is also the teacher's favorite, to decorate them I used a lipstick sticker on the lilac pencil case and a heart sticker on the green pencil case; while I was sewing the pencil case I completely forgot to stick the sticker, which must be placed before joining the lining to the main fabric so that the sticker seam is covered with the lining, I completely forgot and I realized at the end when I had finished, because I noticed that the pencil case was missing something and that was the sticker, I tried to sew it with a hand stitch but I didn't like it because the seams would be a little visible, so I decided to use hot silicone, it is perhaps not the best option but it was the one I considered most appropriate so that the threads would not be visible, I invite you to join me in the elaboration process.

Hola, hola amigos artesanos y comunidad @hivediy, es un placer saludarles deseando que tengan una excelente semana en unión de sus seres queridos, hoy finaliza el mes de agosto un mes que a mi parecer avanzó muy rápido y en el cual pude aprovechar para terminar algunos proyectos de costura, aunque todavía tengo algunos pendientes he avanzado en muchos de ellos y sólo faltan pequeños detalles, en esta ocasión les comparto la elaboración de un set de cartucheras para la vuelta a clases, ya estamos muy cerca de la vuelta a clase y quiero ir organizando las cosas y los útiles de mi hijo, para tenerlos listos con tiempo.
Las cartucheras serán para obsequiar a dos profesoras que han hecho un lindo trabajo con los chicos, son sencillas y amplias en los colores lila y verde, la de color lila tiene cierre blanco y la otra lleva un cierre negro, me gusta la combinación de verde con negro se ve muy bonita y elegante, además es la favorita de la maestra, para decorarlos utilicé un sticker de labial en la cartuchera lila y un sticker de corazón en la cartuchera verde; mientras cosía la cartuchera olvidé por completo pegar el sticker, el cual se debe colocar antes de unir el foro a la tela principal para que la costura del sticker quede cubierta con el forro, lo olvidé por completo y me di cuenta al final cuando ya había terminado, porque noté que a la cartuchera le faltaba algo y eso era el sticker, intenté coserlo con puntada a mano pero no me gustó, porque se iban a ver un poco las costuras, así que decidí usar silicón caliente, no es tal vez la mejor opción pero fue la que consideré más apropiada para que no se vieran los hilos, les invito me acompañen en el proceso de elaboración.

---
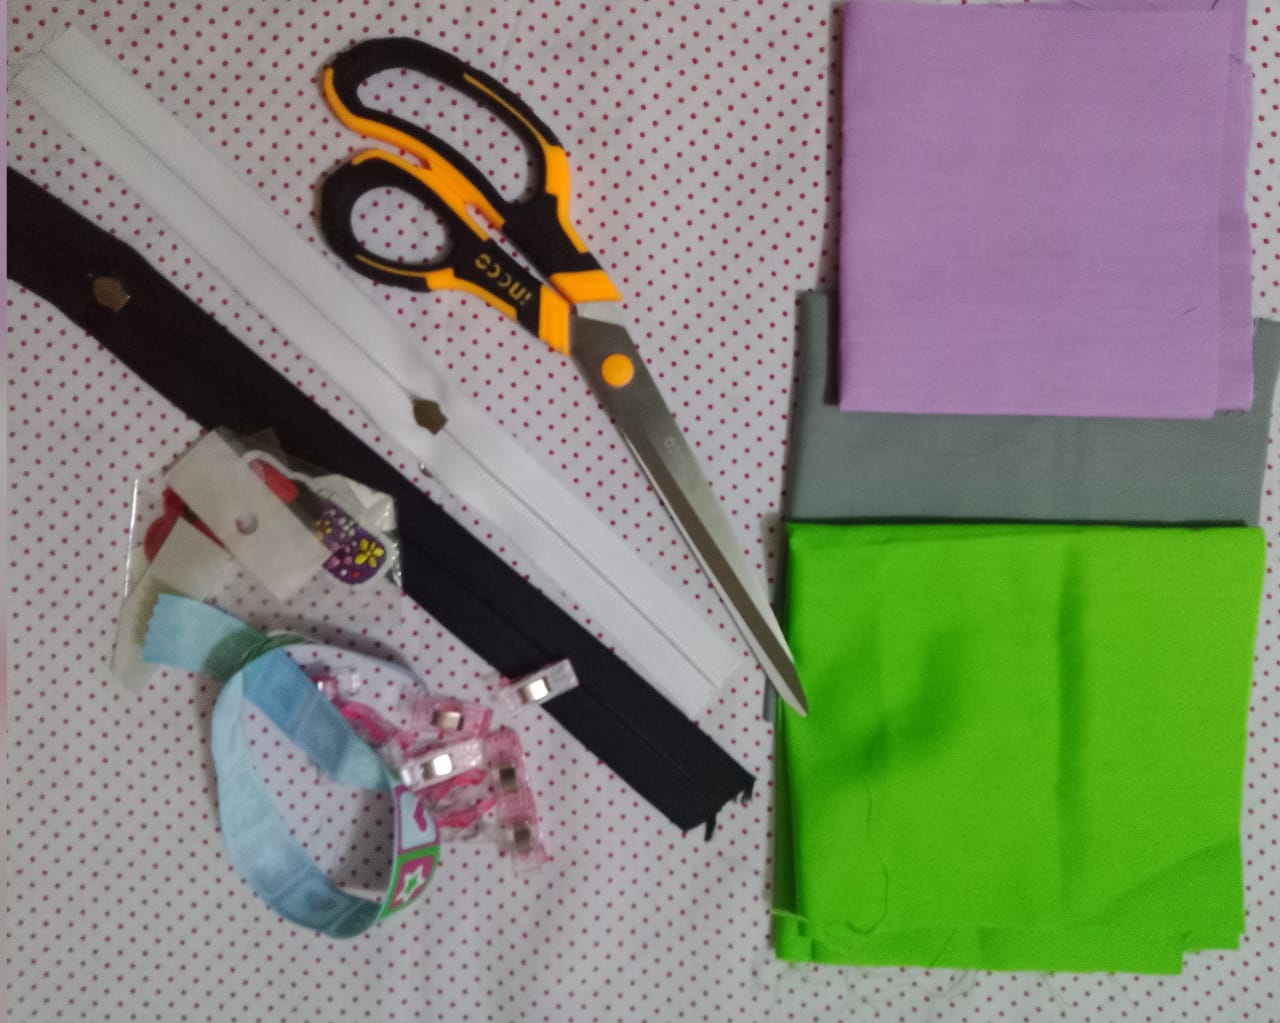
**The materials used were:**
Denim fabric
Dacron fabric
Zipper
Slider
Soap
Scissors
Tape
Tweezers
Pins
Stickers
**Los materiales usados fueron:**
Tela dril
Tela dacrón
Cierre
Slaider
Jaboncillo
Tijera
Cinta
Pinzas
Alfileres
Stickers

---
**Elaboration**
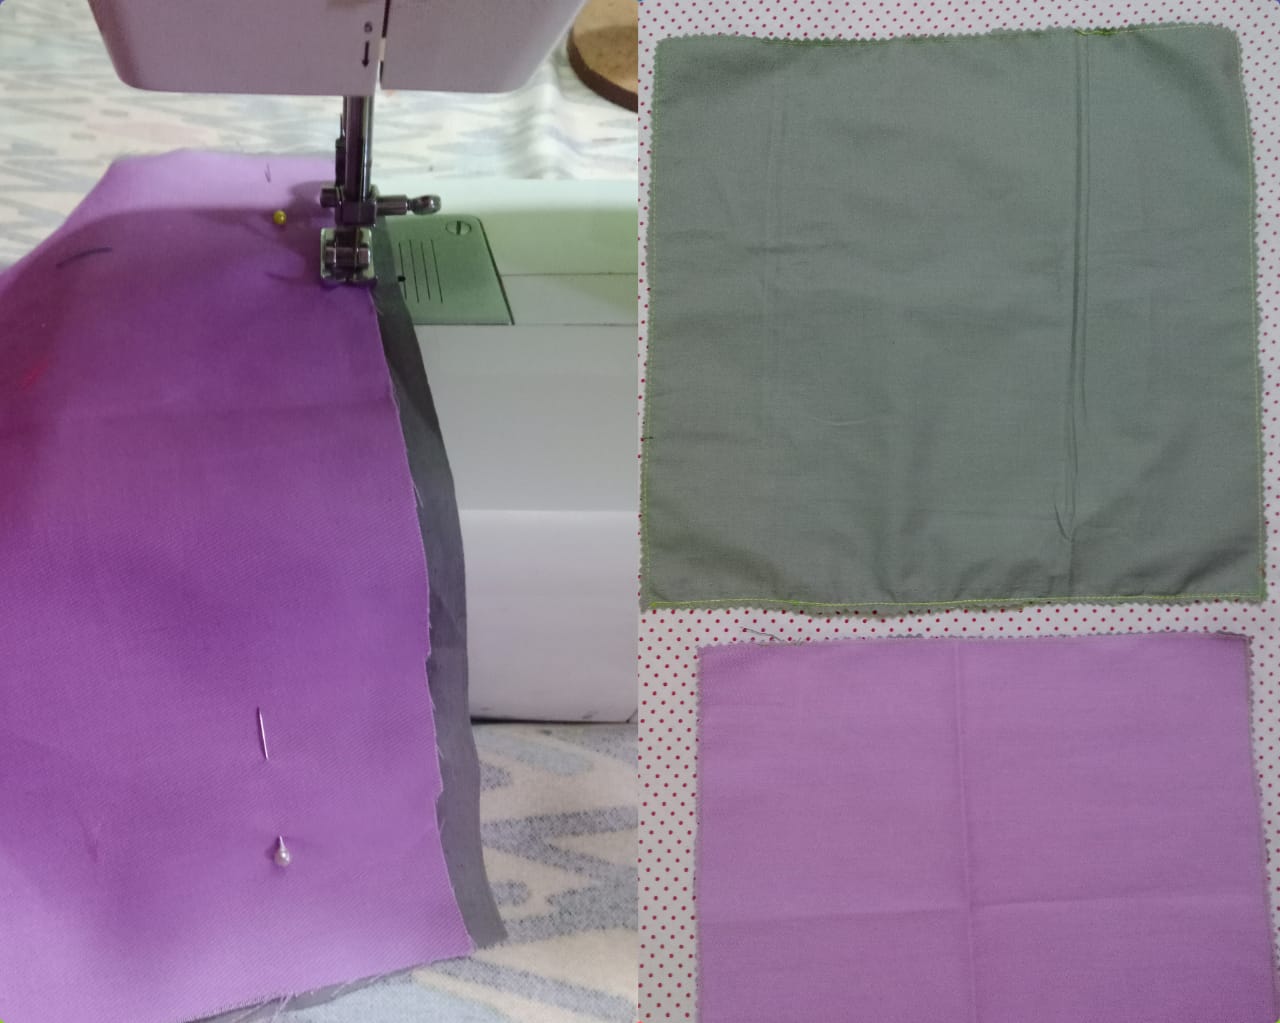
Once I had organized the materials, I cut two rectangles of different sizes out of denim (main) and Dacron (lining) fabric. Then, I placed the fabrics right side up against the wrong side, pinned them together, sewed all the way around, and removed the excess fabric. When the pieces have lining, I like to cut it larger because I sew better that way.
**Elaboración**
Organizados los materiales corté dos rectángulos de diferentes tamaños en tela dril (principal) y dacrón (forro), luego enfrenté revés con revés de las telas, sujeté con alfileres, cosí por todo el contorno y retiré el sobrante de telas, cuando las piezas llevan forro, me gusta cortarlo más grande porque así coso mejor.
---
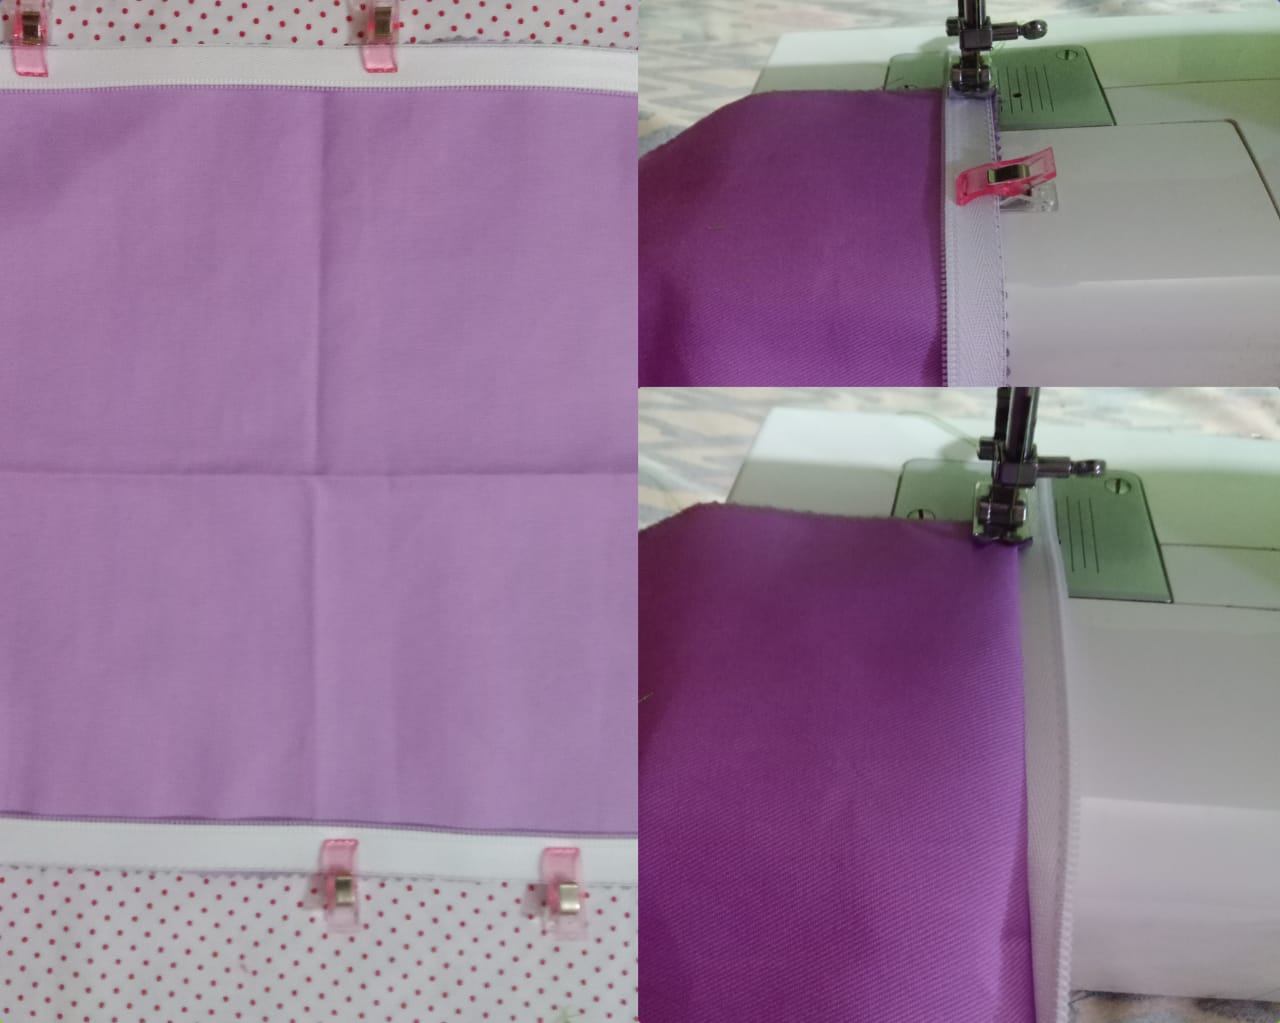
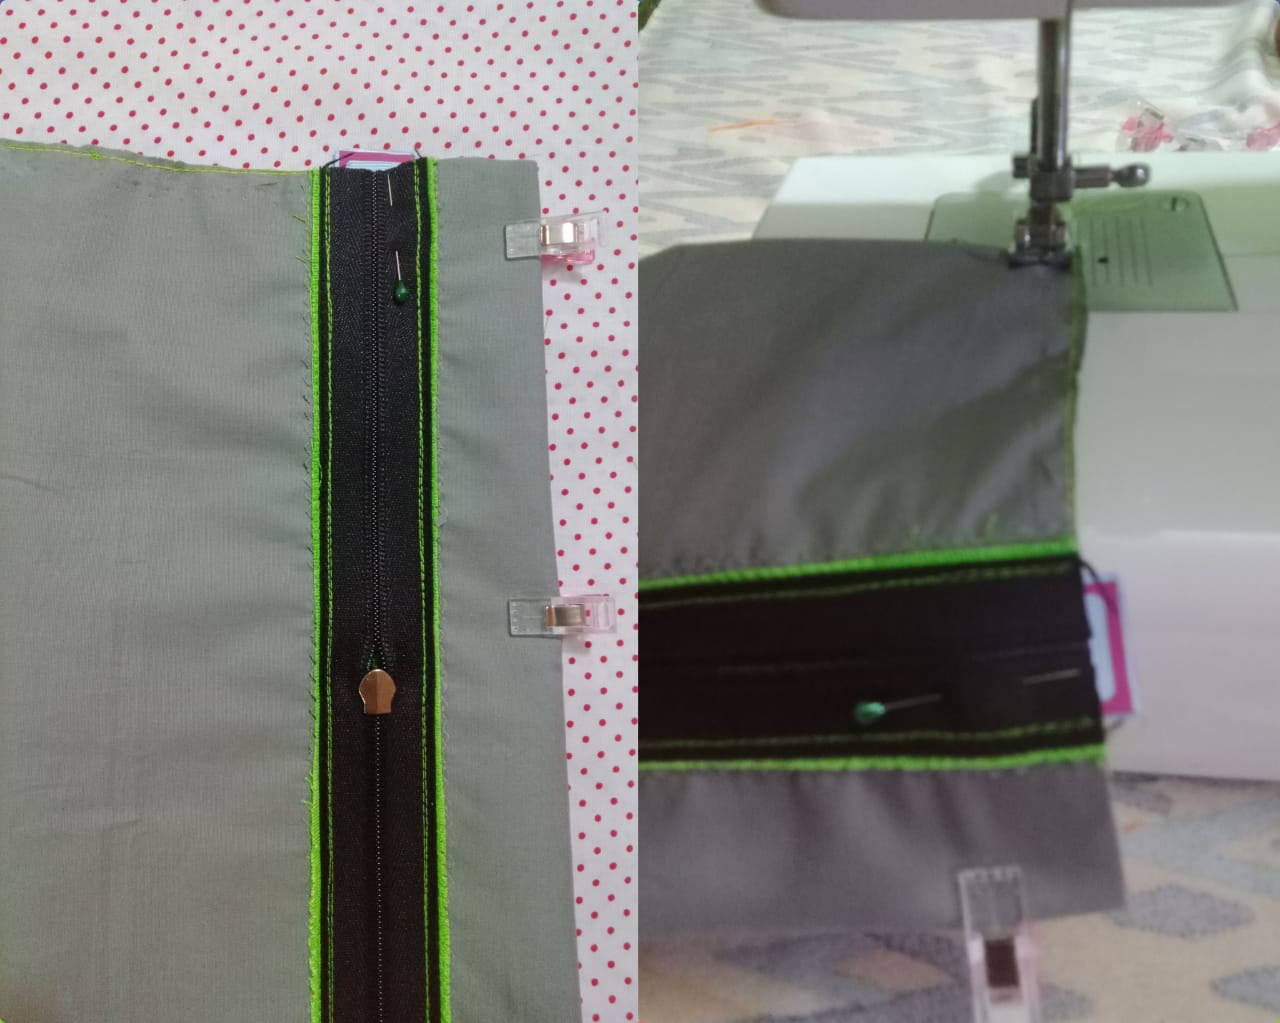
To glue the closure, I faced the main fabric and the back of the closure right sides together, so that when turned over the right sides would be facing up. I sewed with a straight stitch, then turned over and re-stitched. I glued the other side of the closure in the same way.
Para pegar el cierre efrenté por el derecho la tela principal y la parte trasera del cierre, para queal voltear queden los derechos hacia arriba, cosí con puntada recta luego volteé y repisé, de la misma forma pegué el otro lado del cierre.

---
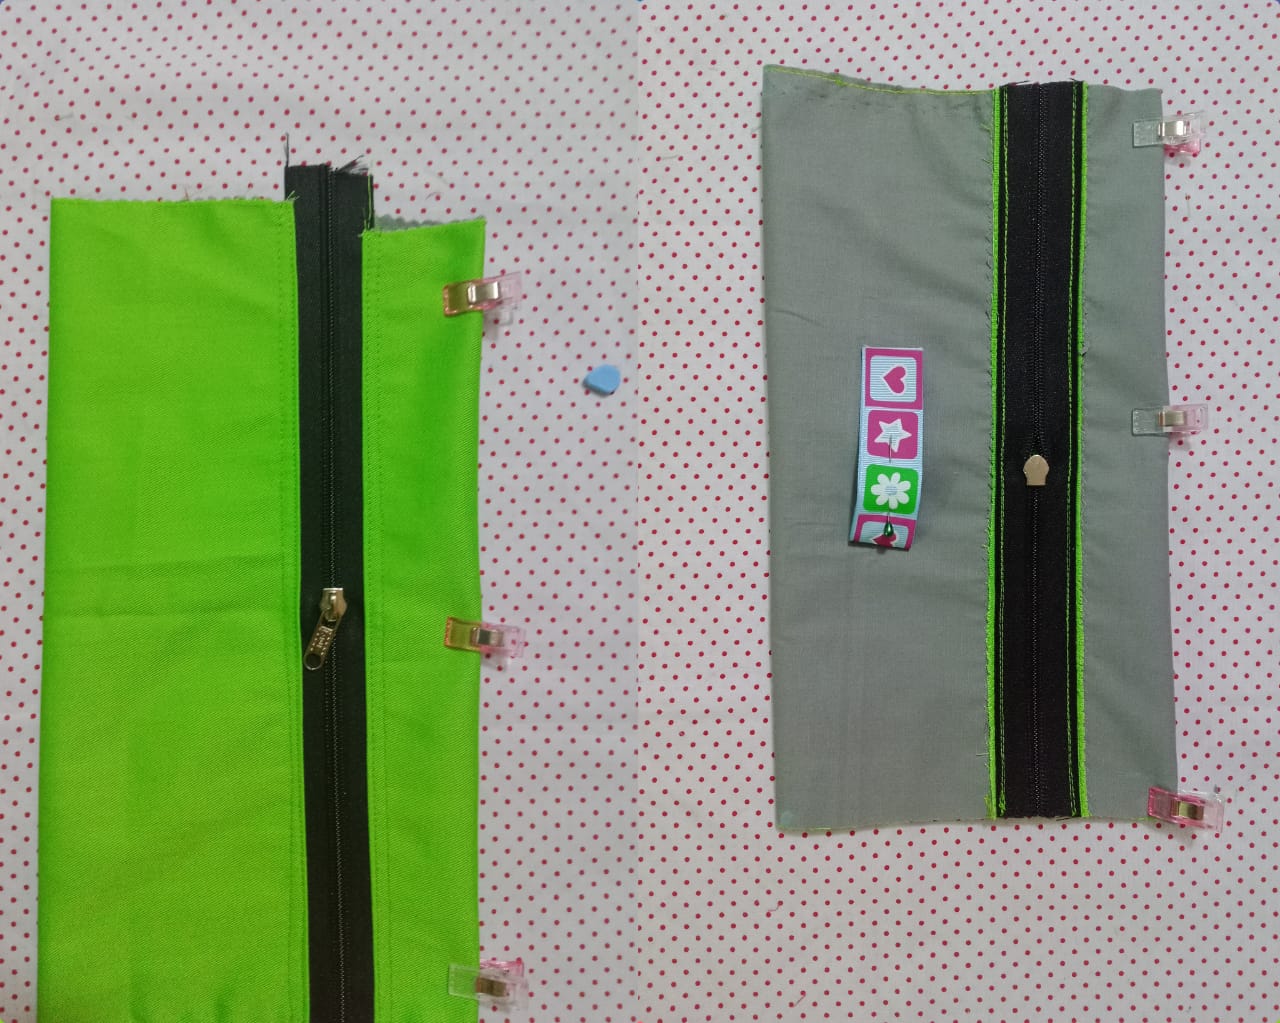
Once the closure was attached, I placed the slider, turned the pouch inside out, making a fold of approximately three (3) centimeters at the top. At one end, I placed a ribbon that will serve as a hanger and support for opening and closing the pouch.
Pegado el cierre, coloquée el slaider, volteé la cartuchera por el revés, haciendo un doblez de aproximadamente tres (3) centímetros en la parte superior, en uno de los extremos coloqué una cinta que servirá de colgadero y soporte para abrir y cerrar la cartuchera.

---
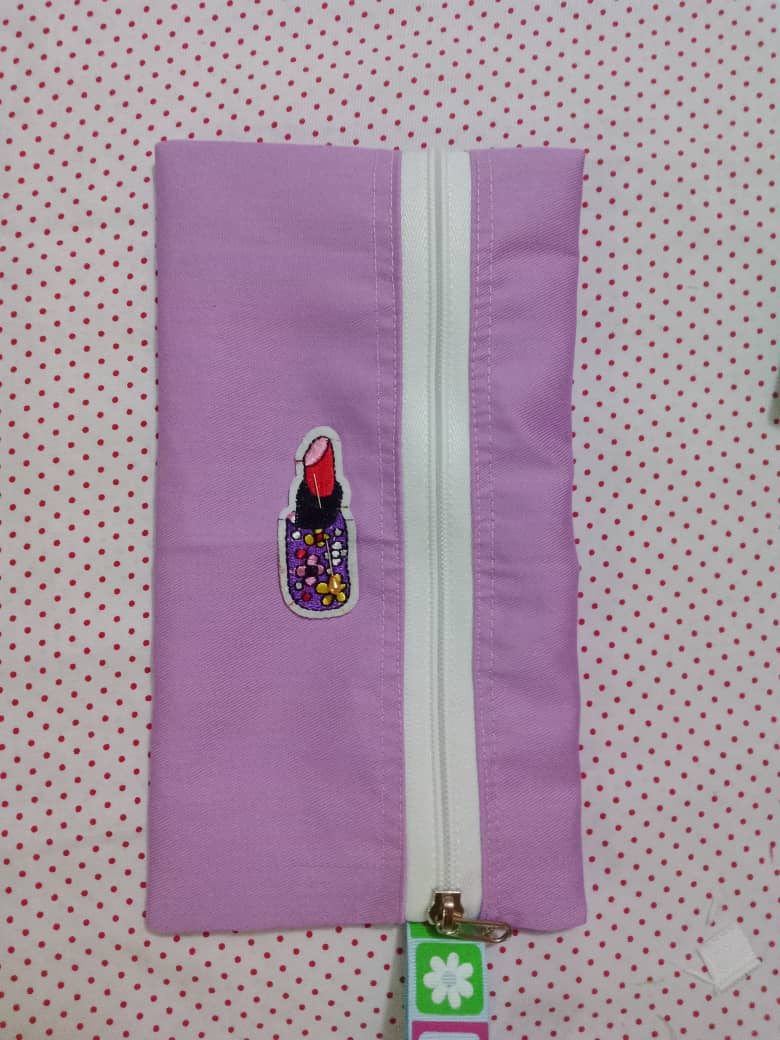
The last step was to close the sides with a straight stitch, leaving a margin of approximately one (1) centimeter to reinforce with a zigzag stitch. I turned the pencil case right side out and, using hot glue, glued the sticker in the center. This completes the pencil case.
El último paso fue cerrar los laterales con puntada recta, dejando un margeen de aproximadamente un(1) centímetro para reforzar con costura zigzag, volteé la cartuchera por el derecho y con silicón caliente pegué el sticker en el centro, así están terminadas las cartucheras.

---
I hope this tutorial is useful. It is recommended to use stiff fabrics and combine them according to each person's taste.
Espero el tutorial les sea de utilidad, es recomendable usar telas rígidas y combinarlas de acuerdo al gusto de cada persona.


---
**Blessings!**
**Bendiciones!**
---
**
See you later!
Hasta luego!
**
---
Translated with https://www.deepl.com/translator
All images are my own.
Todas las imágenes son de mi autoría.
#diy
#neoxian
#spanish
#hivediy
#manualidades
#crafts
#handmade
#sewing
#creative
#tutorial
Payout: 0.000 HBD
Votes: 388
More interactions (upvote, reblog, reply) coming soon.