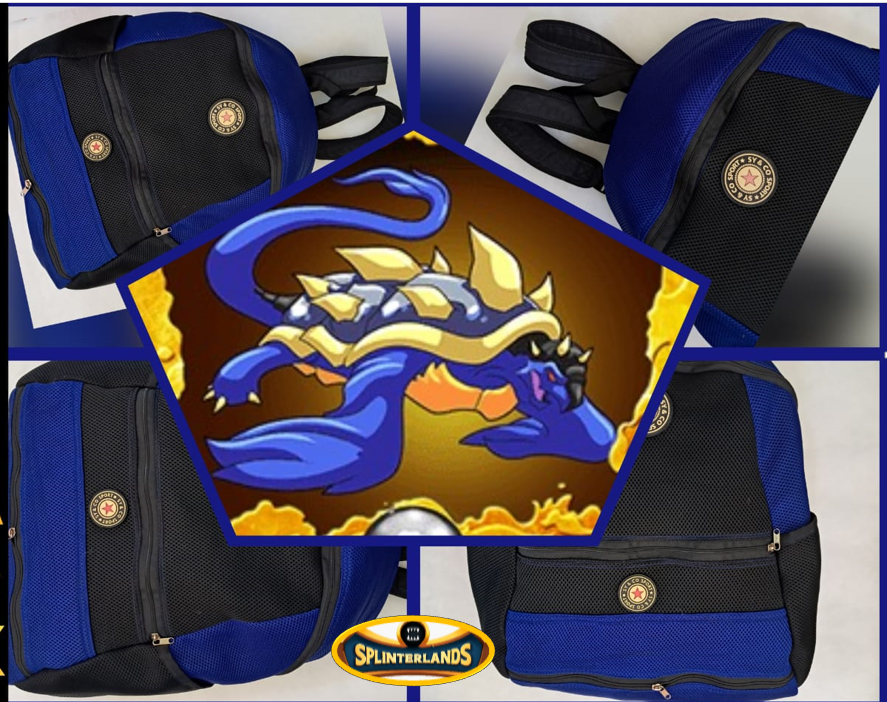

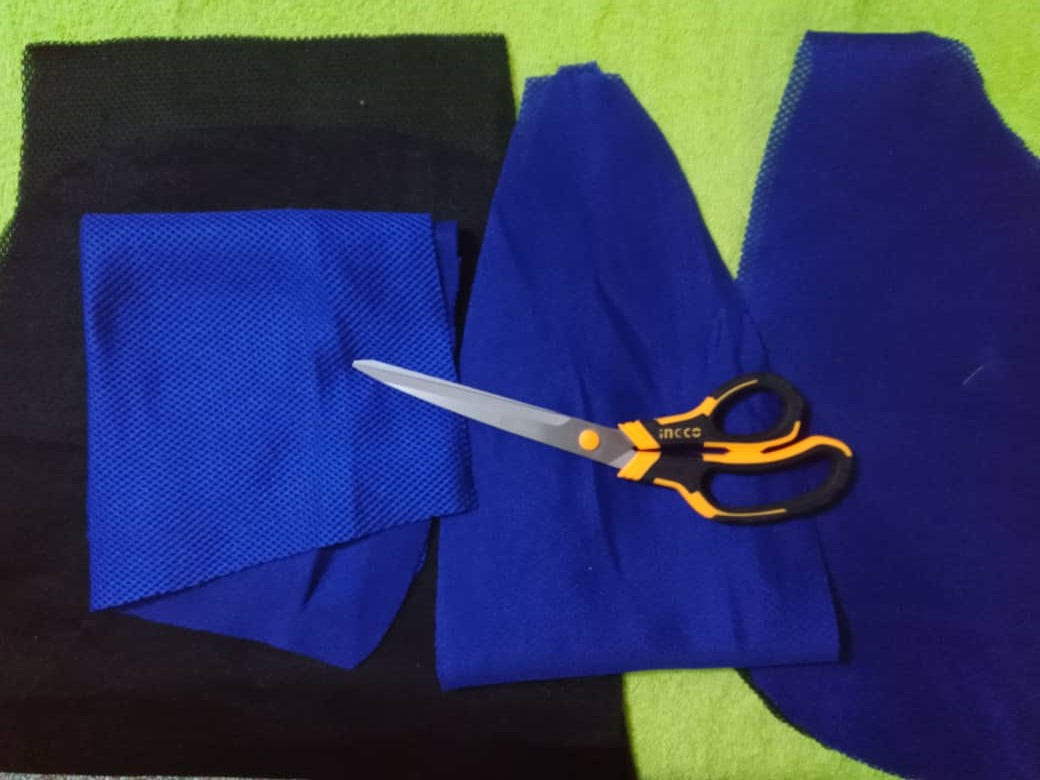
Hello, hello friends who love threads and needles, it is a pleasure to greet you and share a new sewing project, I am taking advantage of my son's school holidays to finish several projects that I have pending, including making backpacks, the lunchbox, among others, that my son needs for the return to school, this time I share with you the making of a backpack in royal blue and black inspired by the Splinterlands character [**Spineback Turtle**](https://www.splintercards.com/alpha_core_spineback-turtle), backpack is made with sandwich mesh fabric, I have previously commented that this fabric is one of my favorites for its durability and ease of sewing, in previous projects I have used waterproof fabric which is very good, but it is not available, I have also used canvas and although it is good and has an average thickness it tends to fray very quickly and the other factor is that to sew it is somewhat complicated because of the plastic layer it has and it regularly tends to break the needles.
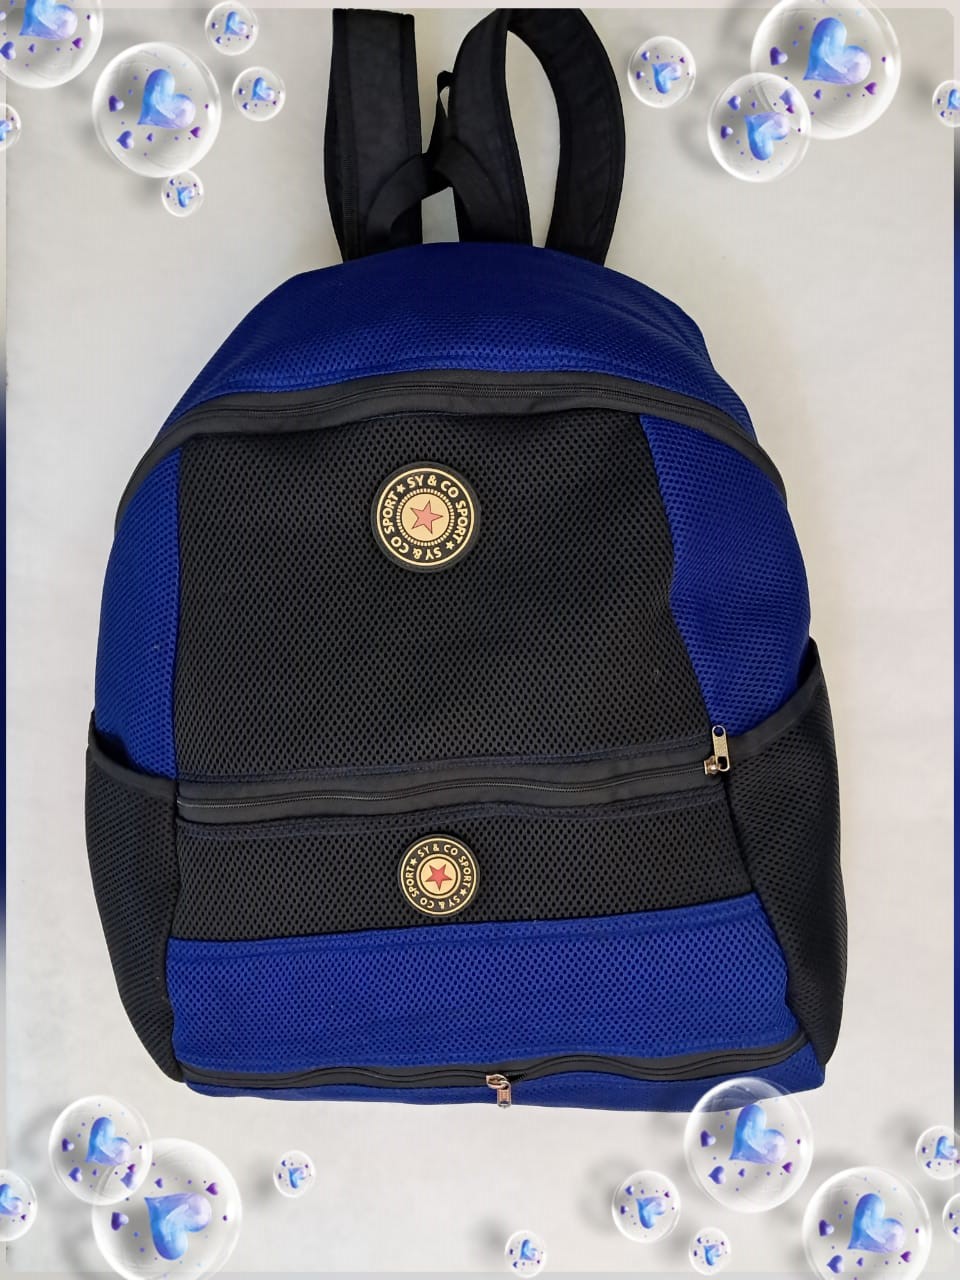
Since the sandwich mesh fabric was recommended to me, I have used it in different projects and it has become one of my favorites because besides being easy to sew, it is a durable fabric and the price is affordable, the bag is large and roomy, ideal for carrying school supplies, it can also be used when we take a short trip, on the sides it has pockets and in the front it has two pockets as well; the handles I used are recycled from a bag that was made with a fabric known as "wet fabric" this fabric is excellent but it is not currently available on the market, the most similar is taslan fabric with the difference that it is thinner, the handles of the bag were in very good condition and I took advantage of them to place it on this bag, which allowed me on the one hand, to save time and on the other hand also save on expenses, because to make the handles you must buy poly foam, the sliders and the poly tape, I invite you to accompany me in the elaboration process.

Hola, hola amigos amantes de los hilos y las agujas es un placer saludarles y compartir un nuevo proyecto de costura, estoy aprovechando las vacaciones escolares de mi hijo para terminar varios proyectos que tengo pendiente, entre ellos hacer los morrales la lonchera entre otros, que necesite mi hijo para la vuelta a clase, en esta oportunidad les comparto la elaboración de un morral en color azul rey y negro inspirado en el personaje de Splinterlands [**Spineback Turtle**](https://www.splintercards.com/alpha_core_spineback-turtle), morral está hecho con tela malla sándwich, he comentado anteriormente que esta tela es una de mis favoritas por su durabilidad y facilidad al coserla, en proyectos anteriores he usado tela impermeable que es muy buena, también pero no se consigue, también he usado loneta y aunque es buena y tiene un grosor promedio tiende a deshilacharse muy rápido y el otro factor es que para coserla es un tanto complicado por la capa de plástico que tiene y regularmente tiende a romper las agujas.
Desde que me recomendaron la tela malla sándwich la he usado en diferentes proyectos y se ha convertido en una de mis preferidas porque además de ser sencilla para coser, es una tela duradera y el precio es accesible, el bolso es grande y amplio, ideal para llevar los útiles escolares, también puede usarse cuando hacemos un viaje corto, en los lados tiene bolsillos y en la parte delantera tiene dos bolsillos también; las asas que utilicé son recicladas de un bolso que estaba hecho con una tela conocida "tela mojada" esta tela es excelente pero actualmente no se consigue en el mercado, la más parecida es la tela taslán con la diferencia que es más delgada, las asas del bolso quedaron en muy buenas condiciones y las aproveché para colocarla en este bolso, la cual me permitió por un lado, ahorrar tiempo y por el otro ahorrar también en los gastos, pues para hacer las asas se debe comprar poli espuma, las correderas y la cinta poli, les invito me acompañen en el proceso de elaboración.


---

Sandwich mesh fabric (royal blue and black)
Zipper
Slider
Seam cover
Gabardine fabric (for lining)
Pattern
Scissors
Soap
Sewing machine Pins
Clamps

Tela malla sándwich (azul rey y negro)
Cierre
Slider
Tapa costura
Tela gabardina (para el forro)
Molde
Tijera
Jaboncillo
Máquina de coser Alfileres
Pinzas

---

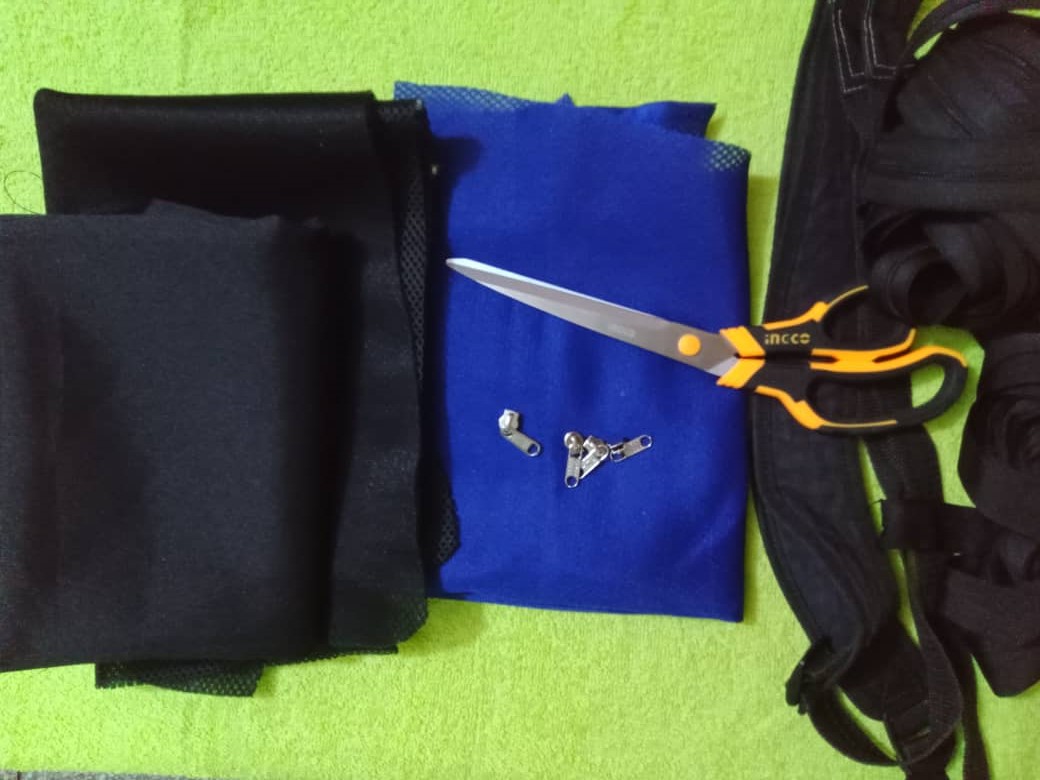
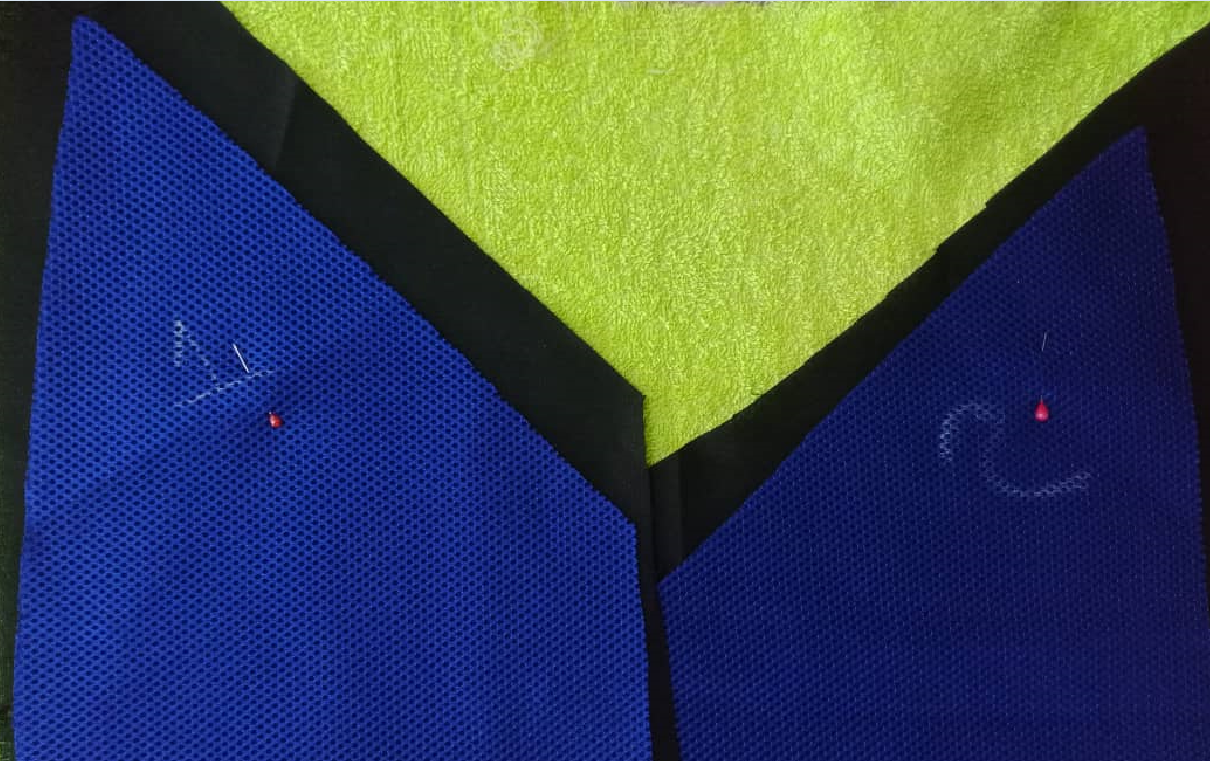
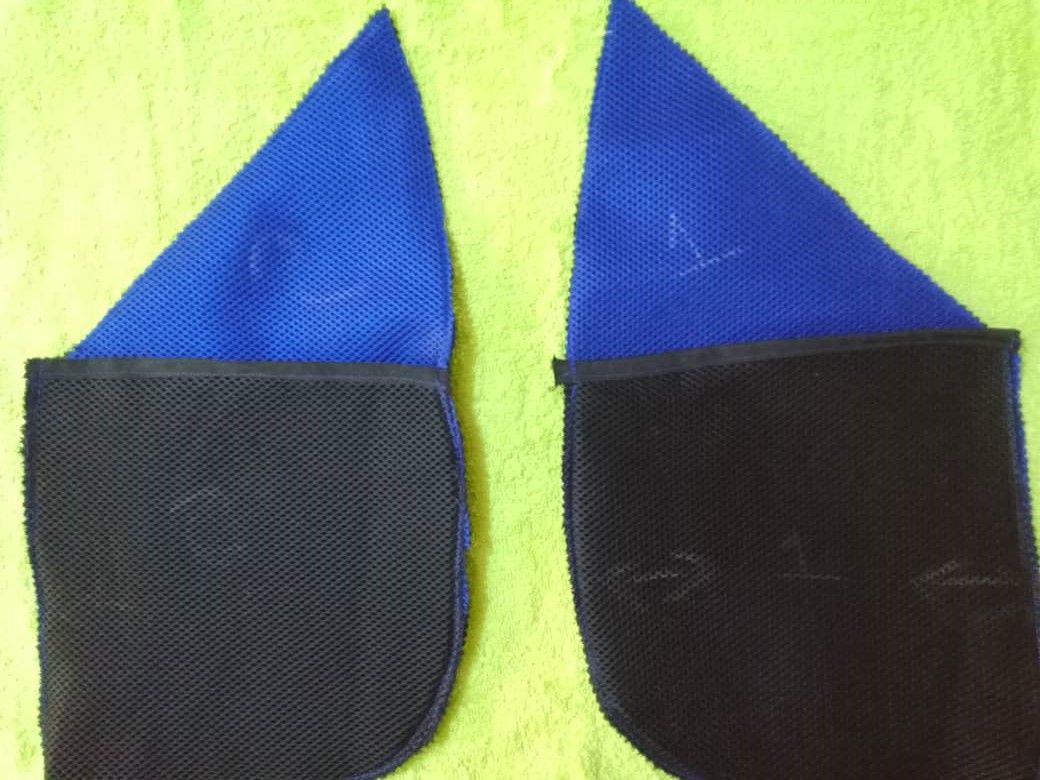
The first step was to cut the bag pieces: the front, back, side pockets, and gusset. I also cut the lining for each of these pieces.

El primer paso fue cortar las piezas del bolso; delantero, posterior, laterales bolsillos y fuelle, también corté el forro de cada una de estas piezas.

---
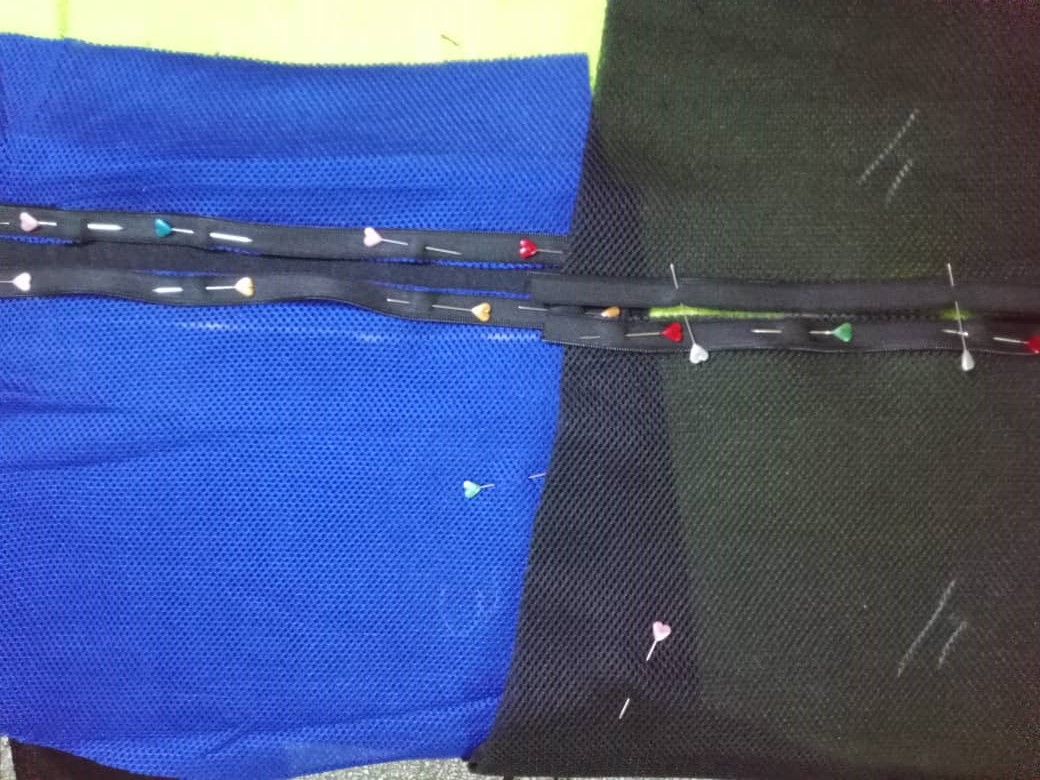
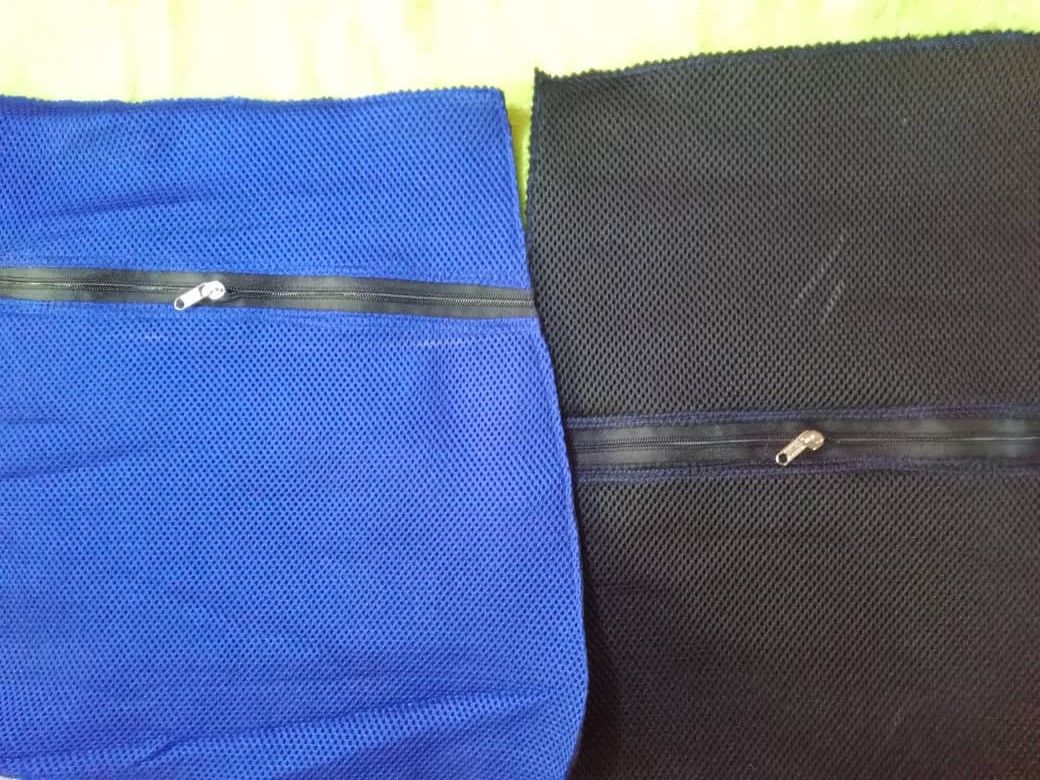
Once the pieces were cut, the next step was to glue the closure to the front pockets. To do this, I made a cut in the front piece and the front pocket. I placed the closure facing the right sides of the fabric with the right sides of the closure. I pinned it, sewed with a straight stitch, then turned and overlocked it. Overlocking gives the seam greater strength and firmness.
Cortadas las piezas, el siguiente paso fue pegar el cierre en los bolsillos delanteros, para ello hice un corte en la pieza delantera y en el bolsillo delantero, coloqué el cierre enfrentando derecho de la tela con derecho del cierre, sujeté con alfileres cosí con puntada recta luego volteé y repise, el repisado le da mayor fuerza a la costura y firmeza.


---
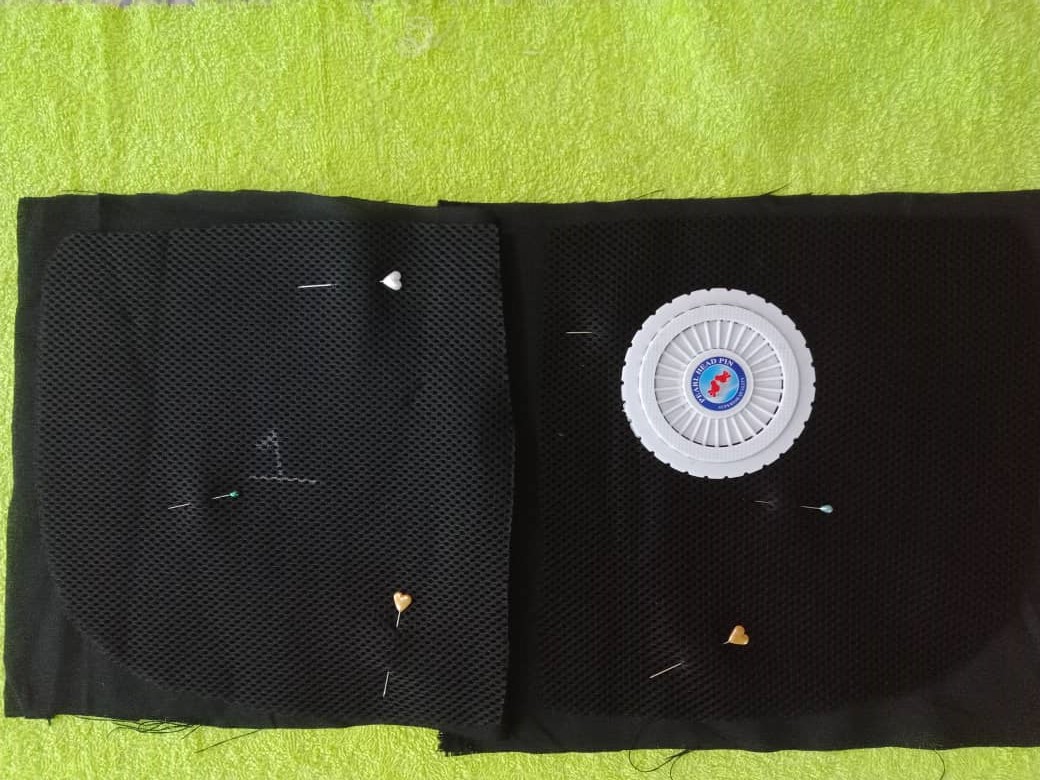
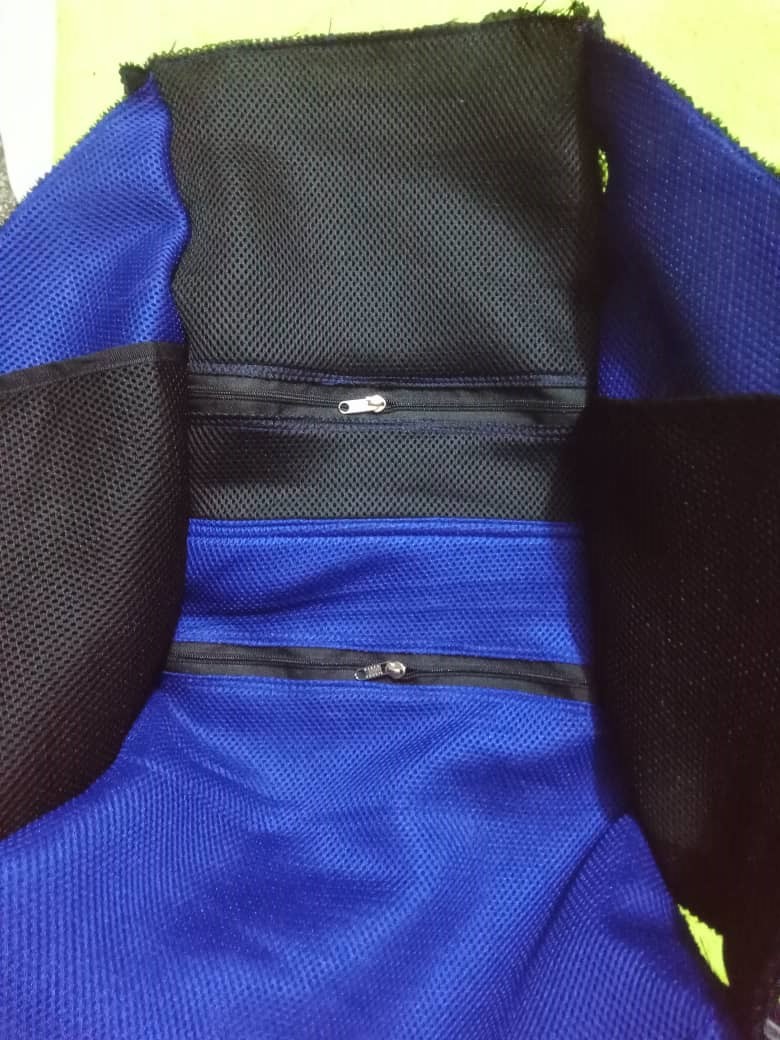
Then I assembled the pockets, sewed the lining, added a bias tape at the top, and then glued the pocket to the sides.
Luego ensamblé los bolsillos, cosí el forro, un sesgo en la parte superior, luego pegué el bolsillo encima de los costados.

---
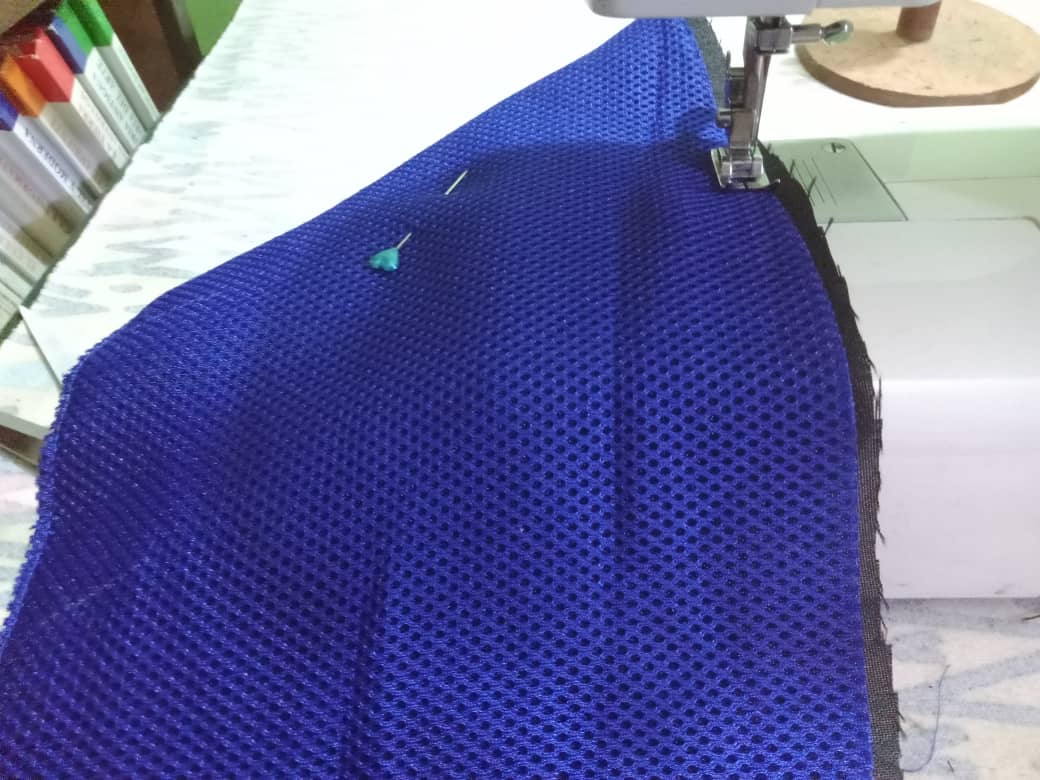
The fourth step was to join the front pocket to the front piece. I faced it right side up, sewed it, then turned it, glued the pocket, and sewed a seam all the way around to secure these pieces and the lining.
El cuarto paso fue unir el bolsillo delantero a la pieza delantera, enfrenté por el derecho, cosí luego giré, pegado el bolsillo, pasé una costura por todo el contorno para asegurar estas piezas y el forro.


---
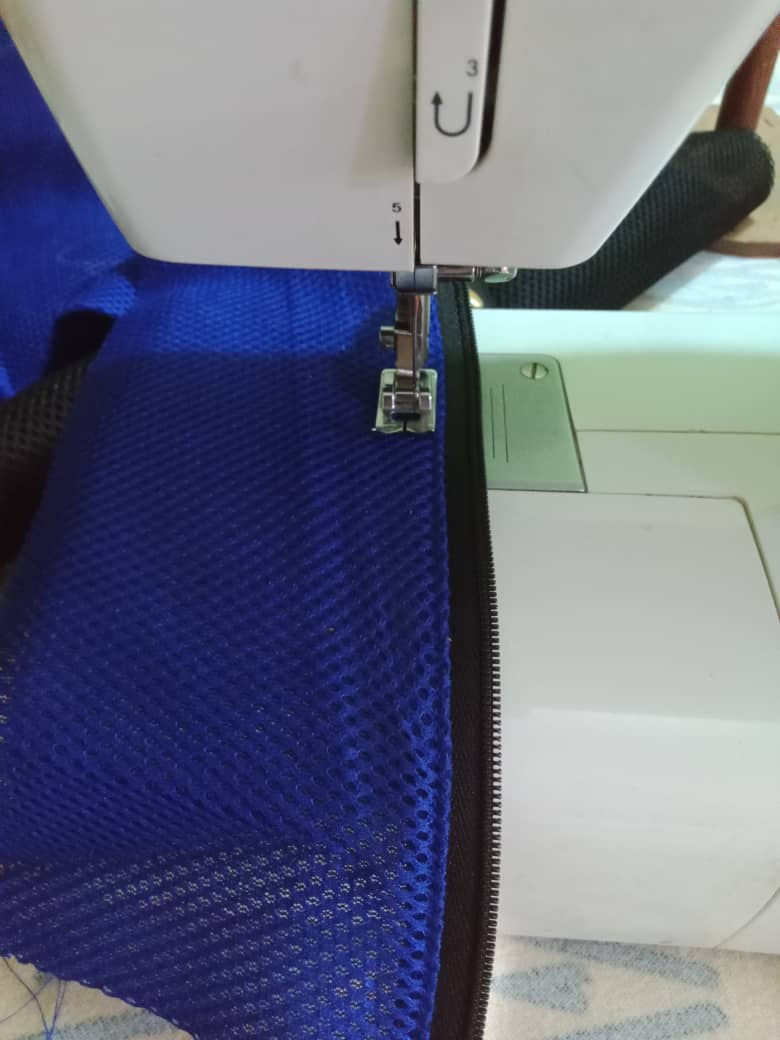
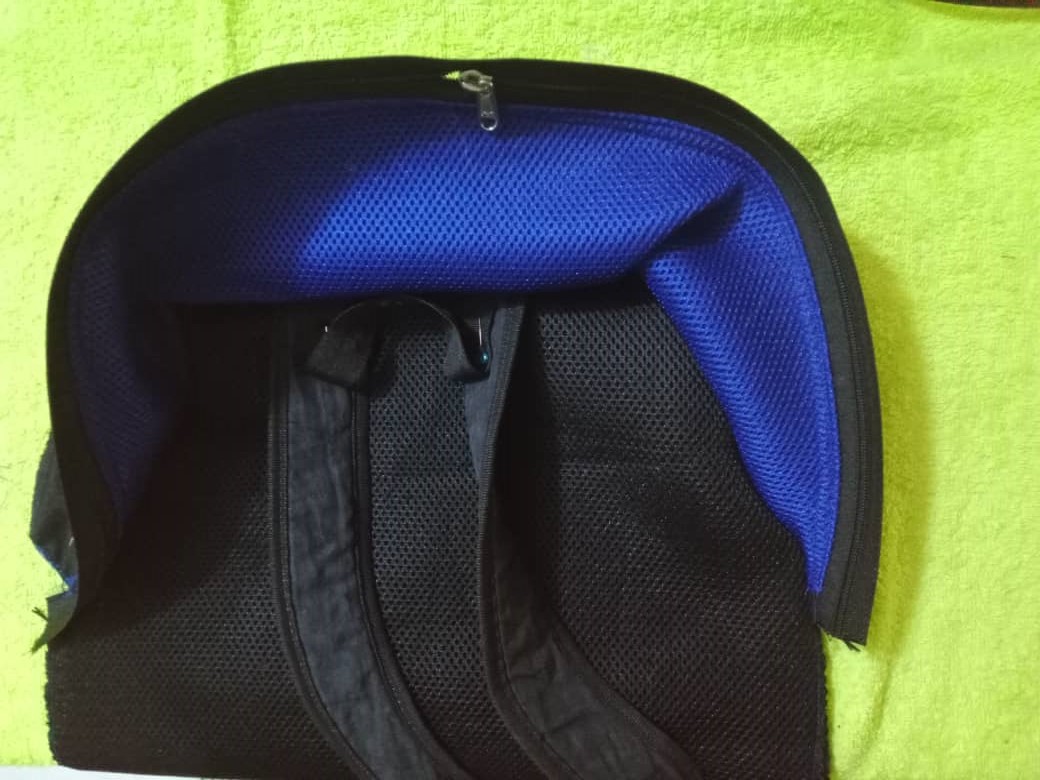
Then I glued the zipper to the gusset. I sewed it without detaching the zipper, as this will be attached to the back and front. I sewed with a straight stitch and overlocked it. I also glued the lining to the gusset.
Luego pegué el cierre al fuelle, este lo cosí sin despegar el cierre, pues este se unirá a la parte posterior y al delantero, cosí con puntada recta y repisé, también pegué el forro al fuelle.

---
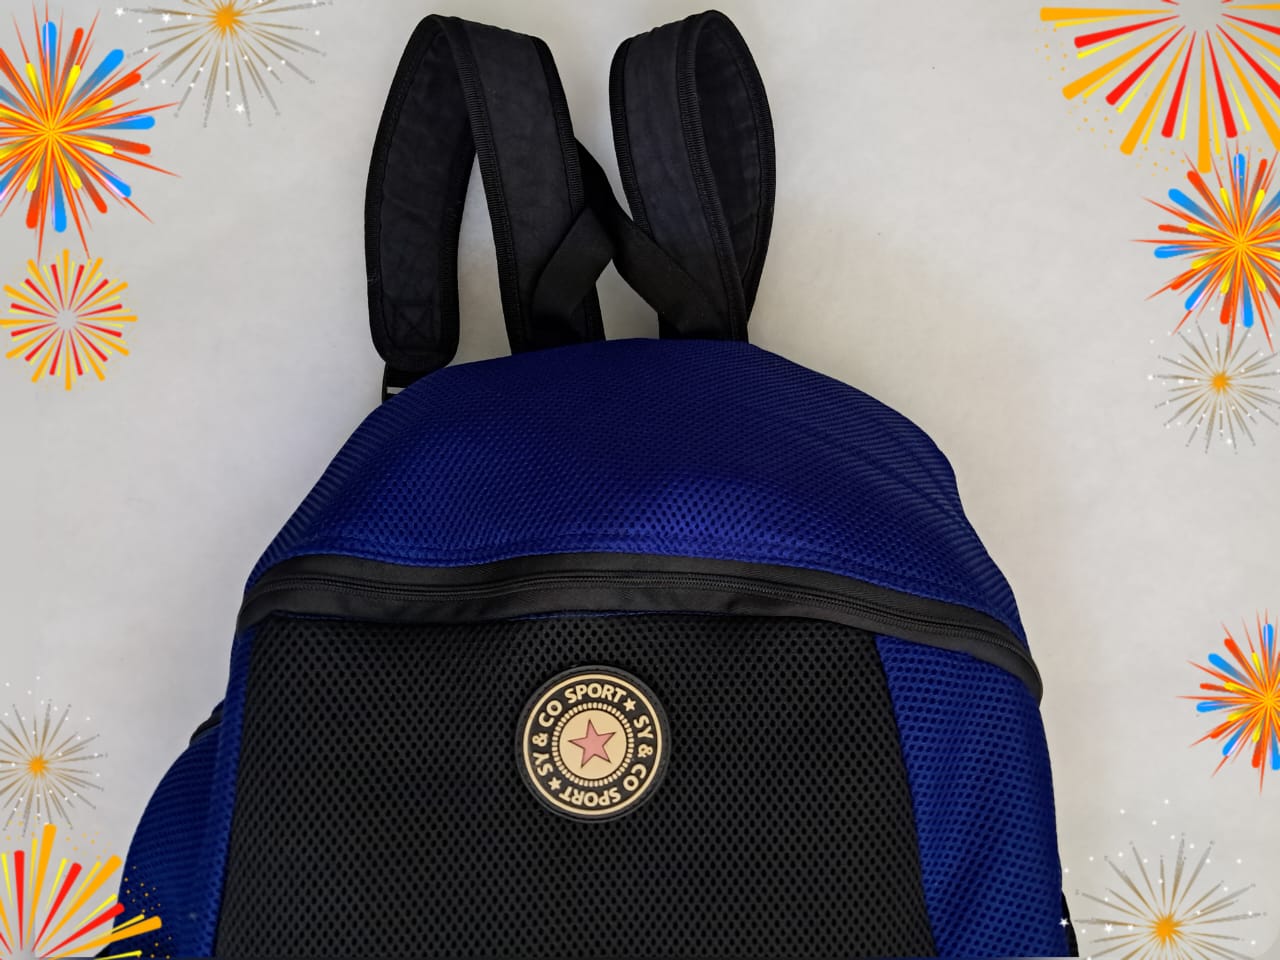
Once the closures were glued and the pieces assembled, I placed the handles and hanger on the back, then attached it to the gusset. When gluing the gusset, I started from the center and worked out to both sides. This way, it's easier to sew and gives us a better view of how it's going to look because it should match the ends of the sides.
Pegados los cierres y ensambladas las piezas, coloqué las asas y colgadero en el posterior, luego lo uní al fuelle, al momento de pegar el fuelle se inicia desde el centro hacia ambos lados, así se cose más cómodo y tenemos una visión más completa de cómo va a quedando porque debe coincidir con los extremos de los laterales.

---
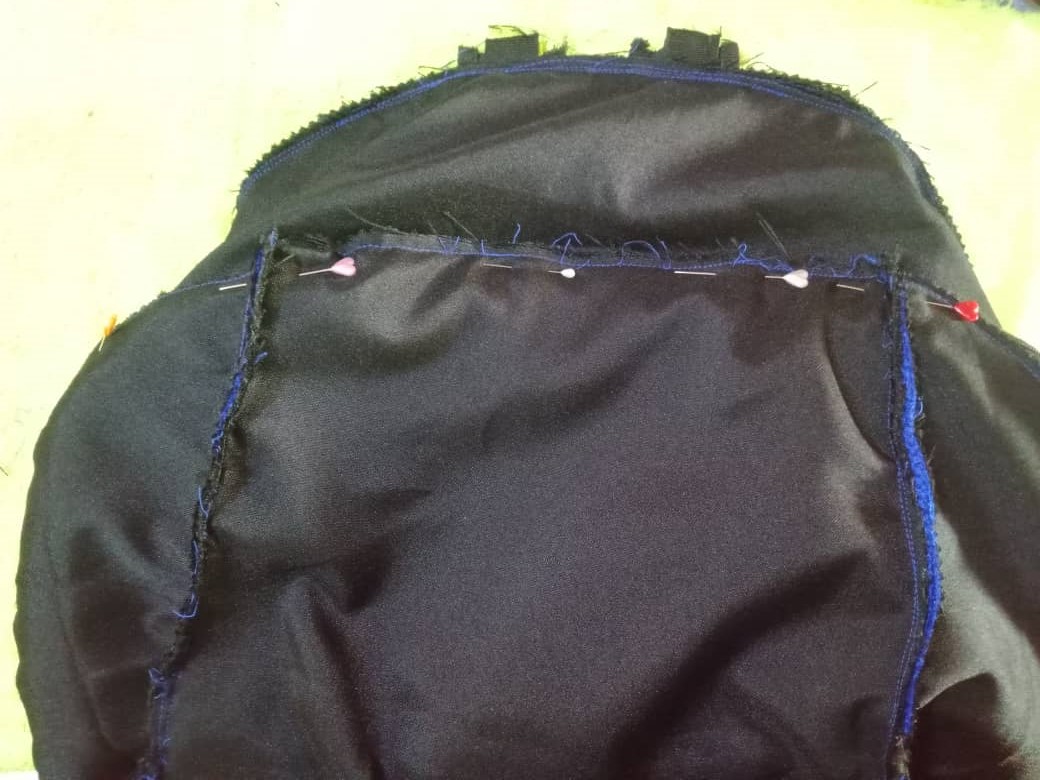
Once the back of the bag was assembled, I moved on to the front, placing the sides starting from the top edge until the entire piece was covered. I secured them with pins and sewed with a straight stitch.
Ensamblado el posterior del bolso, avancé al delantero, coloqué los laterales iniciando desde el extremo de la parte superior hasta cubrir toda la pieza, sujeté con alfileres y cosí con puntada recta.

---
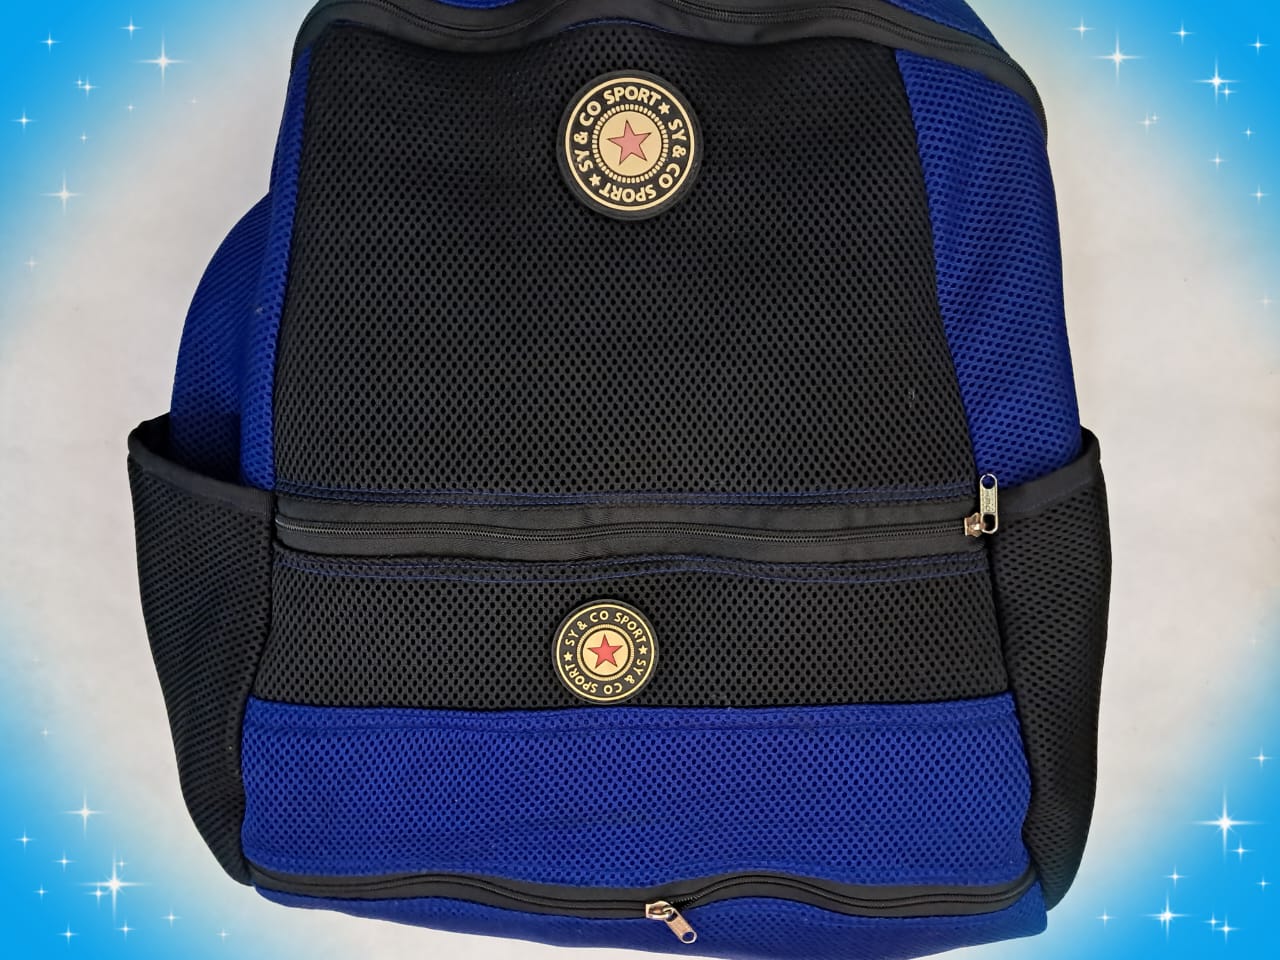
To finish, I faced the front and back right sides together. As the piece is very thick, I held it with tweezers and very carefully made a straight stitch. The thickness of the fabric layers makes sewing a little difficult, but if you do it slowly you get an excellent result. Once I had finished assembling the bag, I glued the seam cover and added some recycled labels. I hope you find this tutorial useful.
Para finalizar enfrenté por el derecho el delantero y posterior, como la pieza queda muy gruesa sujeté con las pinzas y con mucho cuidado pasé puntada recta, el grosor de las capas de tela dificulta un poco la costura, pero si se hace lentamente se obtiene un excelente resultado, terminado el armado del bolso, pegué el tapa costura y agregué unas etiquetas recicladas, espero el tutorial les sea de utilidad.

---


---
Blessings!
Bendiciones!
---
**
See you later!
Hasta luego!
**
---
---
Translated with https://www.deepl.com/translator
All images are my own.
Todas las imágenes son de mi autoría.
#needleworkmonday
#splinterlands
#neoxian
#fanart
#sewing
#creative
#artwork
#handmade
#tutorial
#hive-127911
Payout: 16.540 HBD
Votes: 290
More interactions (upvote, reblog, reply) coming soon.