>Hola #Needleworkmonday. En esta oportunidad quiero compartir con ustedes un proyecto fácil de elaborar como es un tapete pero hecho usando un telar casero. En primer lugar usé cartón grueso para elaborar el telar, una opción accesible y económica para iniciarse en el tejido, además utilicé un palito de pincho o madera la cual adapté como una aguja que me facilitó pasar el hilo entrelazado sin dificultad ganando tiempo. Como experiencia es muy entretenido porque hay que estar alerta por donde hay que pasar el hilo, es repetitivo el proceso, por arriba por abajo, así se va desarrollando todo el proyecto. Improvisar un telar casero y hacer nuestros propios trabajos, todo es cuestión de animarse e intentarlo. Sin más nada que acotar paso a dar detalles para elaborar el telar casero y el tapete. #
Hello #Needleworkmonday. This time, I want to share with you an easy project: a rug made using a homemade loom. First, I used thick cardboard to make the loom, which is an accessible and inexpensive option for beginners. I also used a wooden skewer, which I adapted as a needle to help me pass the intertwined thread through without difficulty, saving time. It's a very entertaining experience because you have to be alert to where to pass the thread. The process is repetitive, up and down, and that's how the whole project develops. Improvising a homemade loom and doing our own work is all a matter of taking the plunge and giving it a try. Without further ado, here are the details for making the homemade loom and the rug.
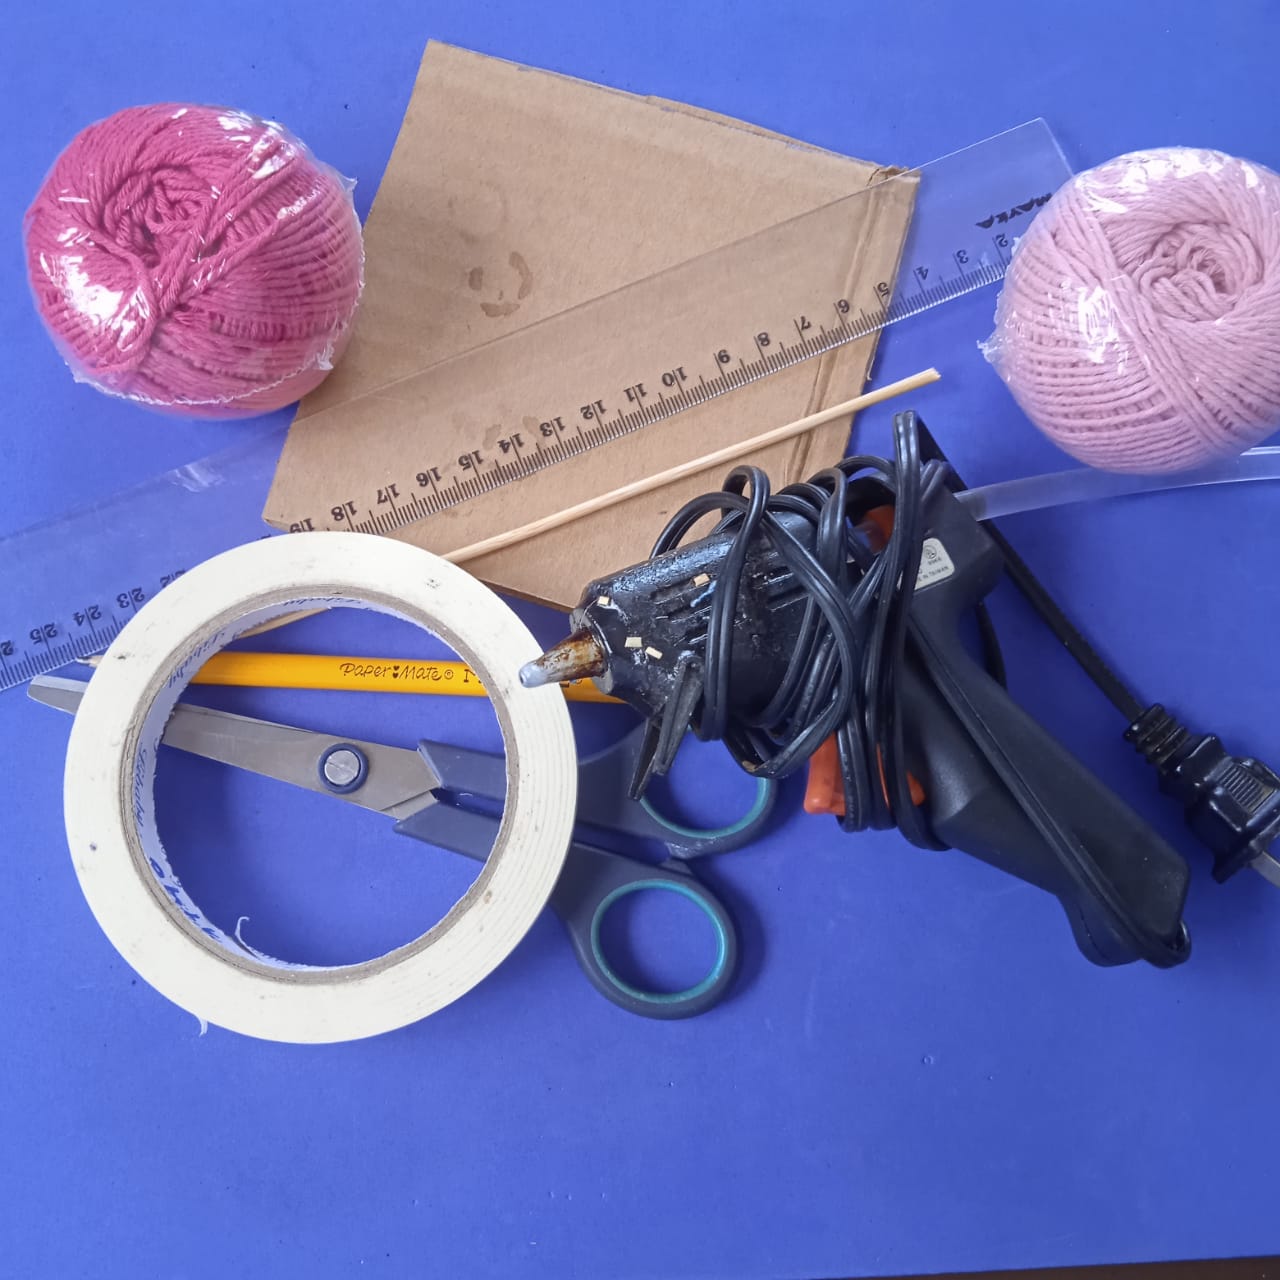
✨***MATERIALS//MATERIALES***✨
* Thick cardboard.
* Silicone.
* Skewer or wooden stick.
* Scissors.
* Pencil.
* Adhesive tape.
* Wick thread.
>* Cartón grueso.
>* Silicón.
>* Palito de pincho o madera,
>* Tijera.
>* Lápiz.
>* Cinta adhesiva
>* Hilo pabilo.
# ✨***STEPS//PASOS***✨
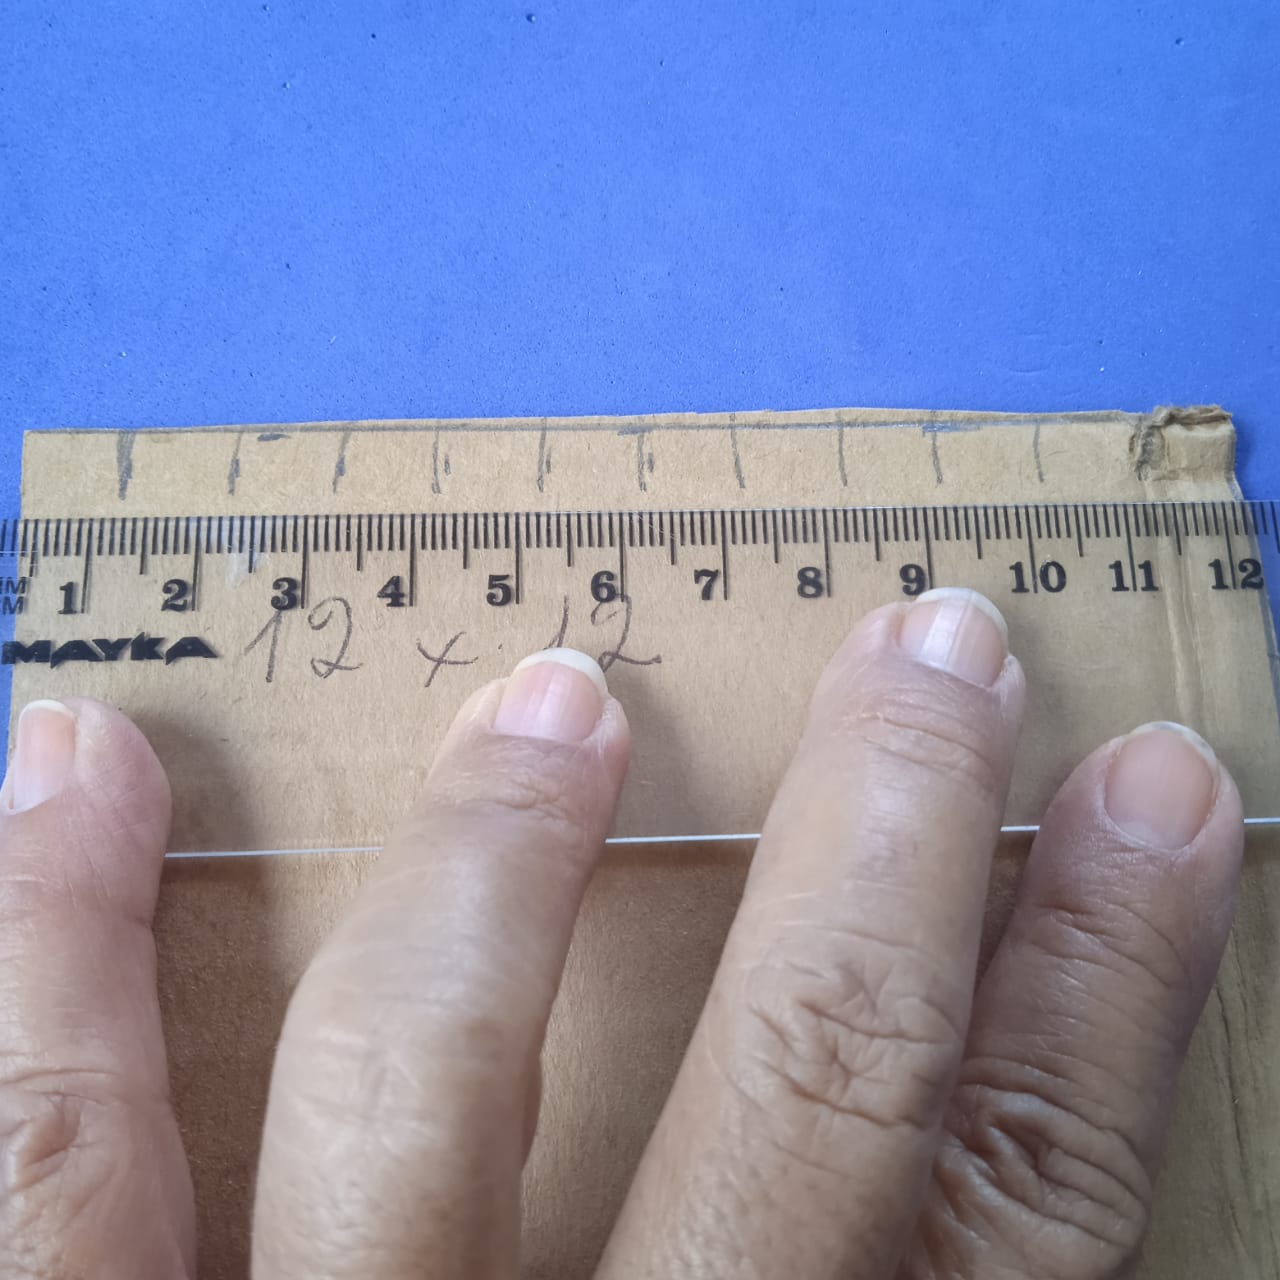
* We will construct the homemade loom as follows: On a piece of thick cardboard, mark 12 cm long by 12 cm wide. At the same time, mark 1 cm along the length of the cardboard, both at the top and bottom.
>* Vamos a construir el telar casero de la siguiente manera: En un cartón grueso marcar 12cm largo por 12cm de ancho. A la vez marcar 1 cm a lo largo del cartón. Tanto en la parte superior como inferior.
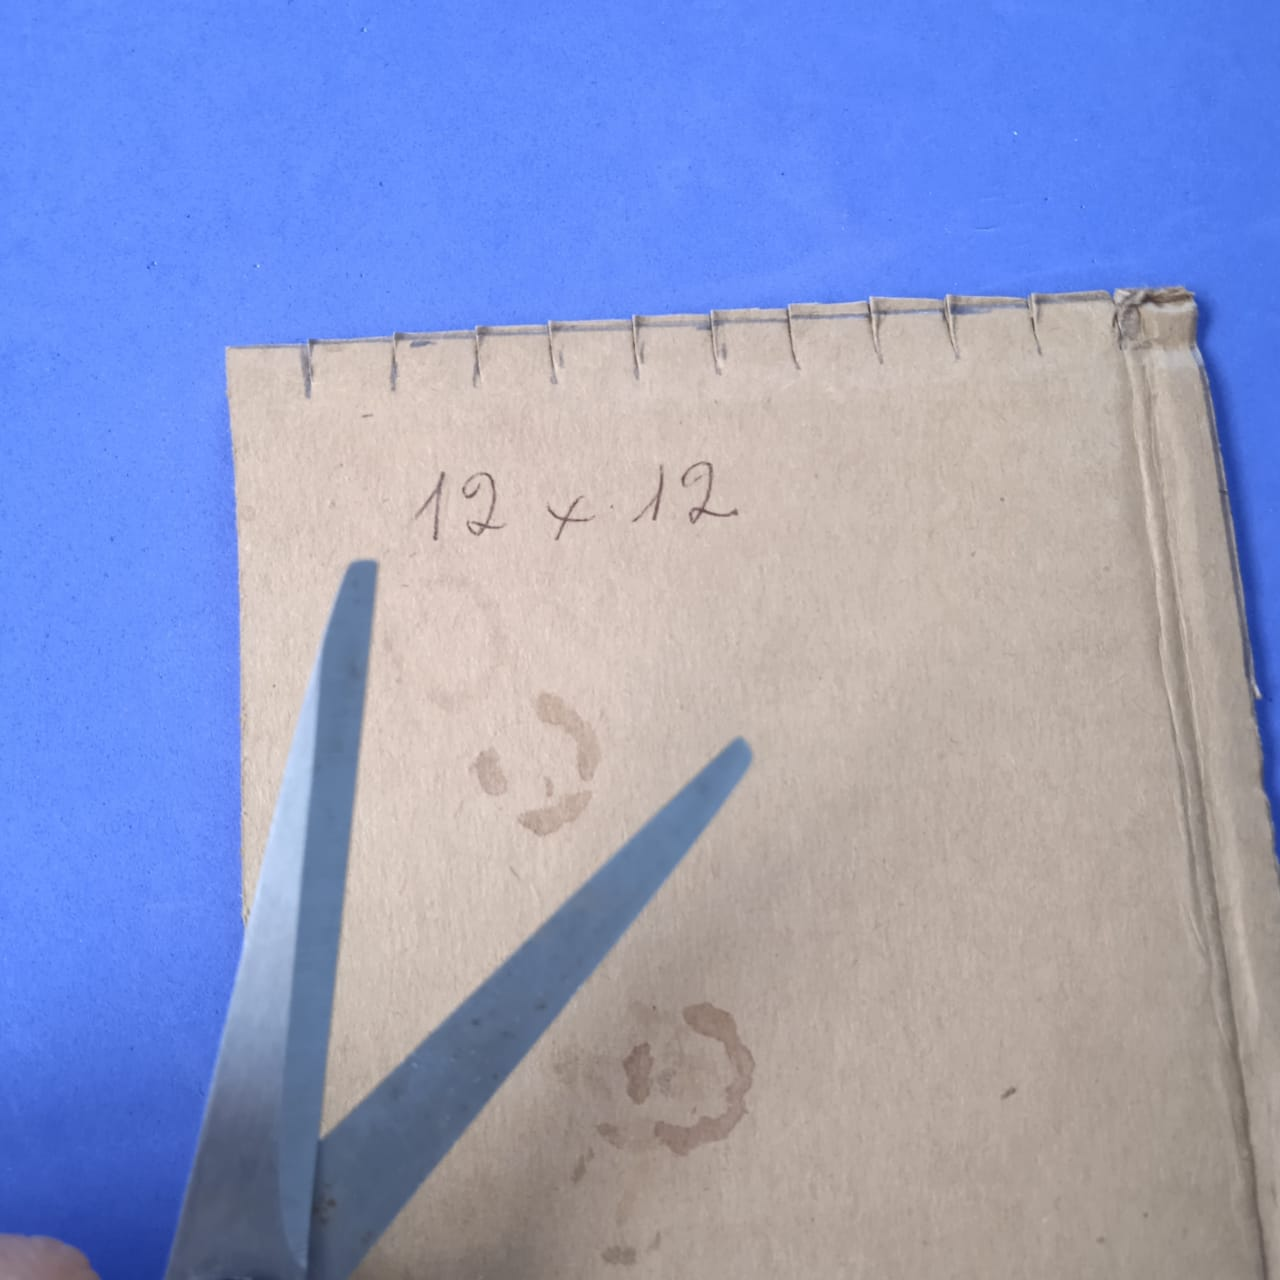
* Make cuts according to the markings.
>* Realizar cortes respectivos a las marcas.
* Cut two pieces of cardboard measuring 1 cm wide by 12 cm long, then glue them to the loom with silicone so that the stick or needle can pass through easily.
>* Cortar 2 piezas de cartón de 1 cm de ancho por 12 cm de largo, luego pegar con silicón al telar, eso es para que pase el palito o aguja con facilidad.
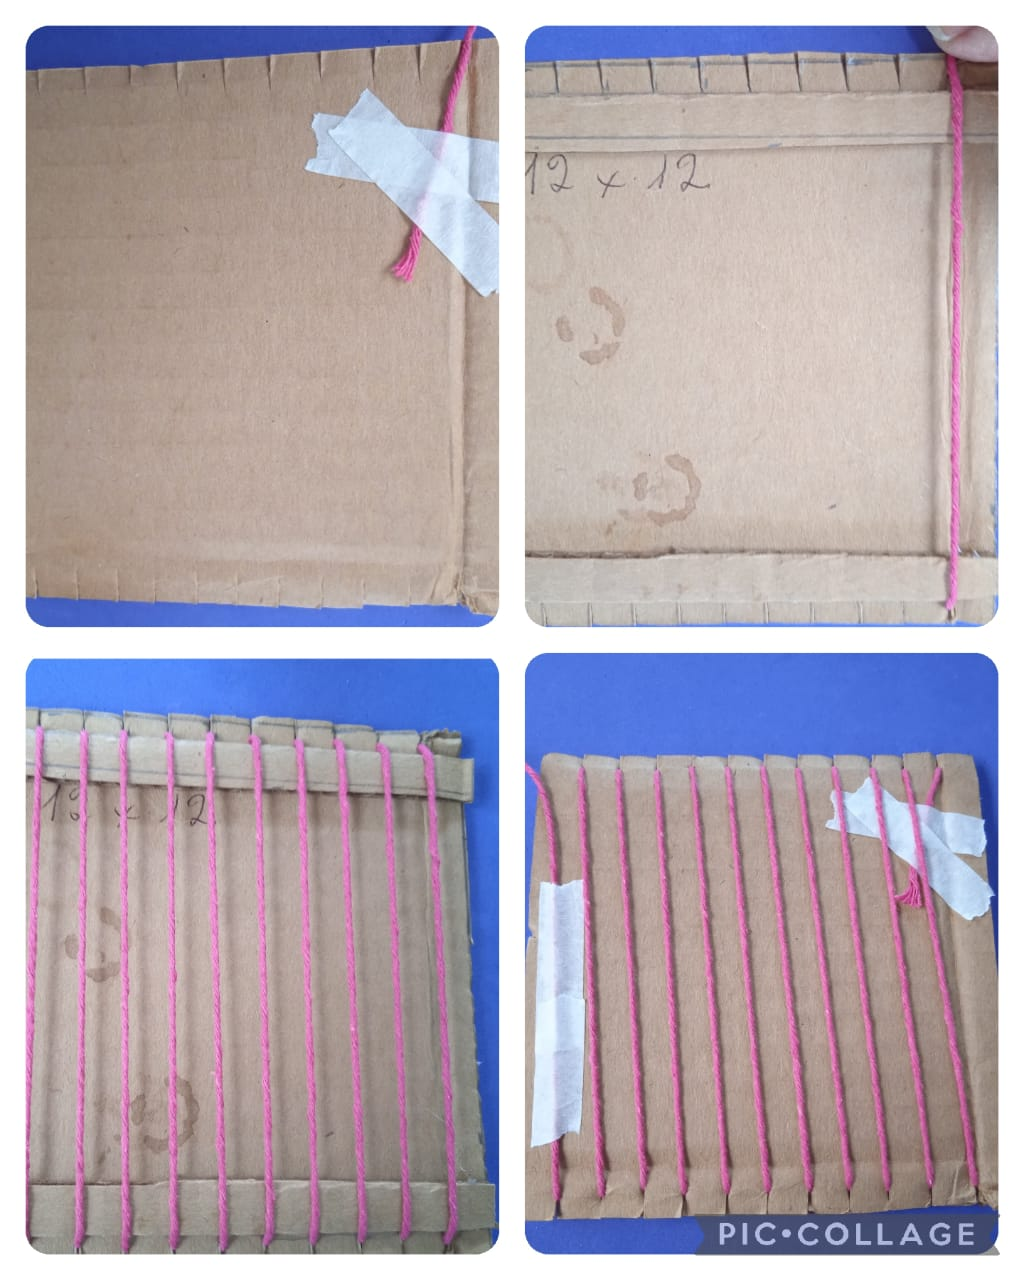
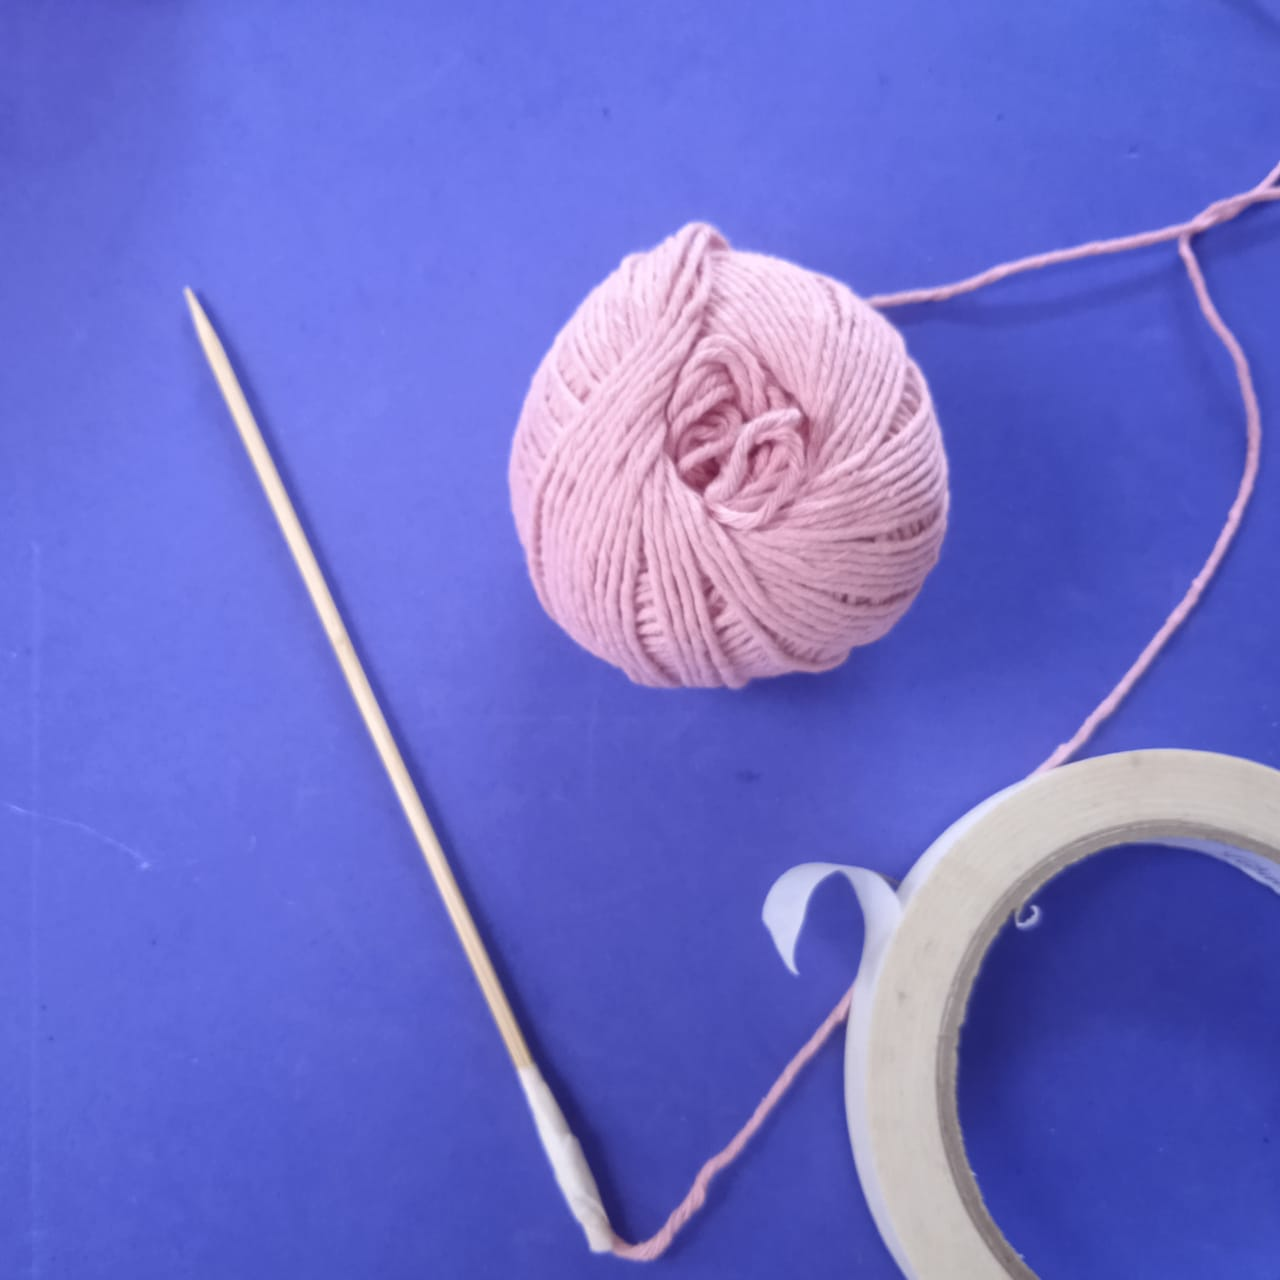
* Tape the string to the wooden stick or skewer, as shown in the photo.
>* Pegar con cinta adhesiva el hilo al palito de madera o pincho, como lo indico en la fotografía.
* Start with the fabric. Pass the needle under and then over each of the threads, then go back in the opposite direction.
>* Comenzar con el tejido. Pasar la aguja por debajo y luego por encima por cada uno de los hilos, luego nos devolvemos en sentido opuesto.
* After covering the entire loom with fabric, tie a simple knot at the end and cut the thread.
>* Después de lograr cubrir todo el telar con el tejido hacer un nudo sencillo en el extremo y cortar el hilo.
* Now, let's go to the back to cut the threads.
>* Ahora, vamos a la parte trasera para cortar los hilos.
✨***FINAL RESULT/ RESULTADO FINAL***✨

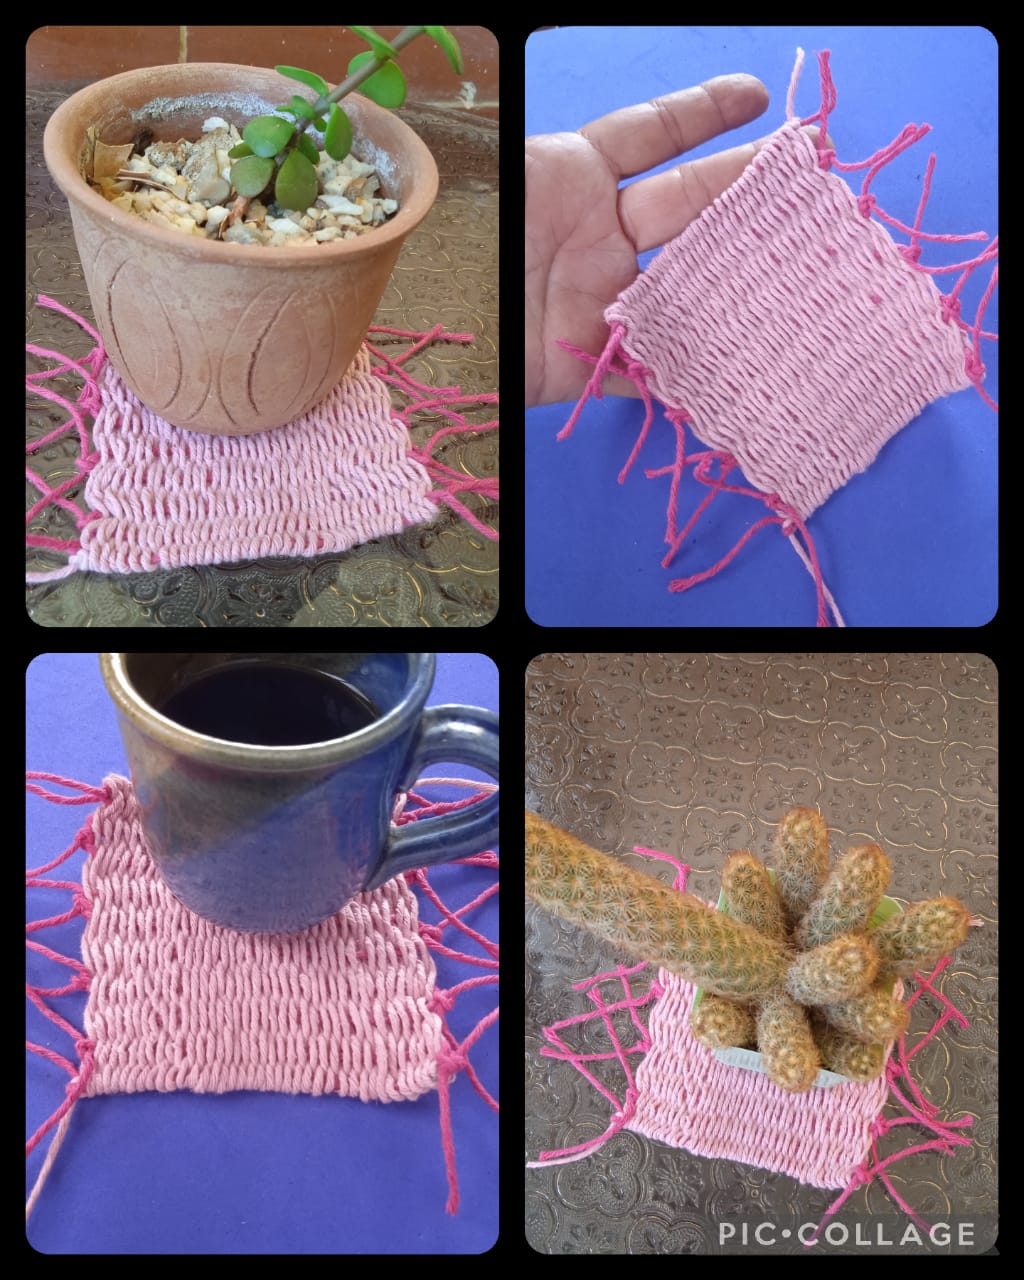
* Weaving with a homemade loom makes the process easier, and we are also making use of a piece of cardboard that serves as a loom. It is a relaxing activity because it allows us to concentrate on the weaving. It is a very pleasant experience because as you progress with the weaving and see the results, you feel how our ancestors made their weavings. I bid you farewell 🖐️ and thank you for your visit and comments.
>* Al tejer con un telar casero facilita el proceso del tejido, además estamos dándole uso a un pedazo de cartón que nos sirve como un telar, es una actividad relajante ya que permite que estemos concentrados en el tejido. Es una experiencia muy placentera ya que a medida que vas avanzando en el tejido y vas viendo el resultado sientes como nuestros antepasados hicieron sus tejidos. Me despido 🖐️ agradeciéndoles su visita y comentarios.

Photos taken with my Xiaomi Redmi 9C. /Fotos tomadas con mi Xiaomi Redmi 9C.
Translated with / Traducido con: DeepL Translator.
Photo collage made with the PicCollage application./Collage de fotos hecha con la aplicación PicCollage.


https://images.hive.blog/DQmc271MrBfjFNDPvxZfgq6orM7JjHsTcTdRcF24VzX6P8q/image.png
https://images.hive.blog/DQmU1a6wohCNLc39tGuGHieWR1FGDh6z7tJNsHntqTgi4Do/image.png
* Secure the beginning of the wick thread to the back with adhesive tape, then pass the thread through each slot, finishing at the back of the cardboard and securing with adhesive tape.
>* Pegar con cinta adhesiva el inicio del hilo pabilo por la parte trasera, luego pasar el hilo por cada ranura, terminar en la parte trasera del cartón pegar con cinta adhesiva.
https://images.hive.blog/DQmZJKZg2rm23ZUumCURXp8UgeiK2YsWGRYPmaCcTkSEcLN/image.png
https://images.hive.blog/DQmNj76M68GFyCRTVVwmgJ3pi7Y8LG68GLbgh7kUQjZr9eU/image.png
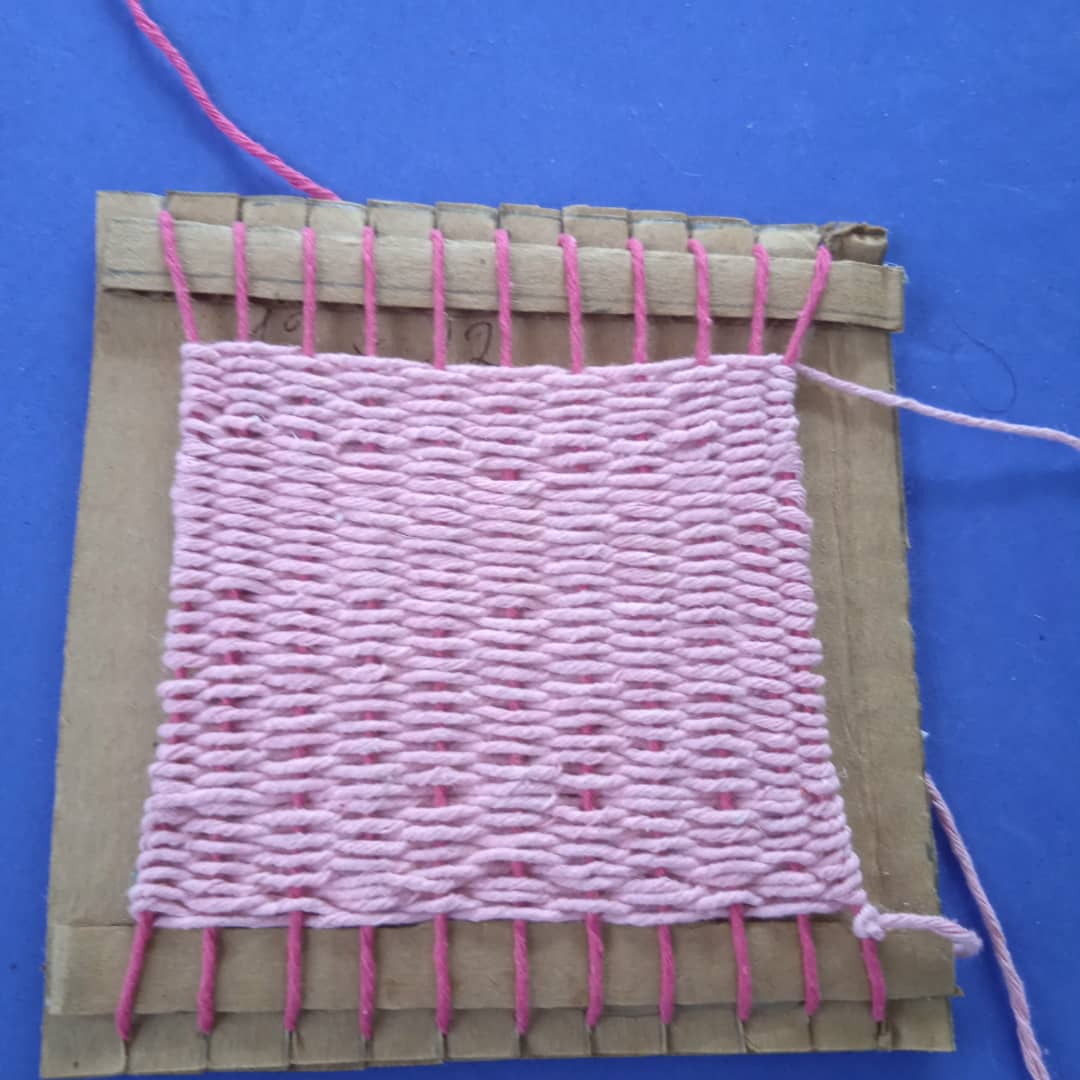
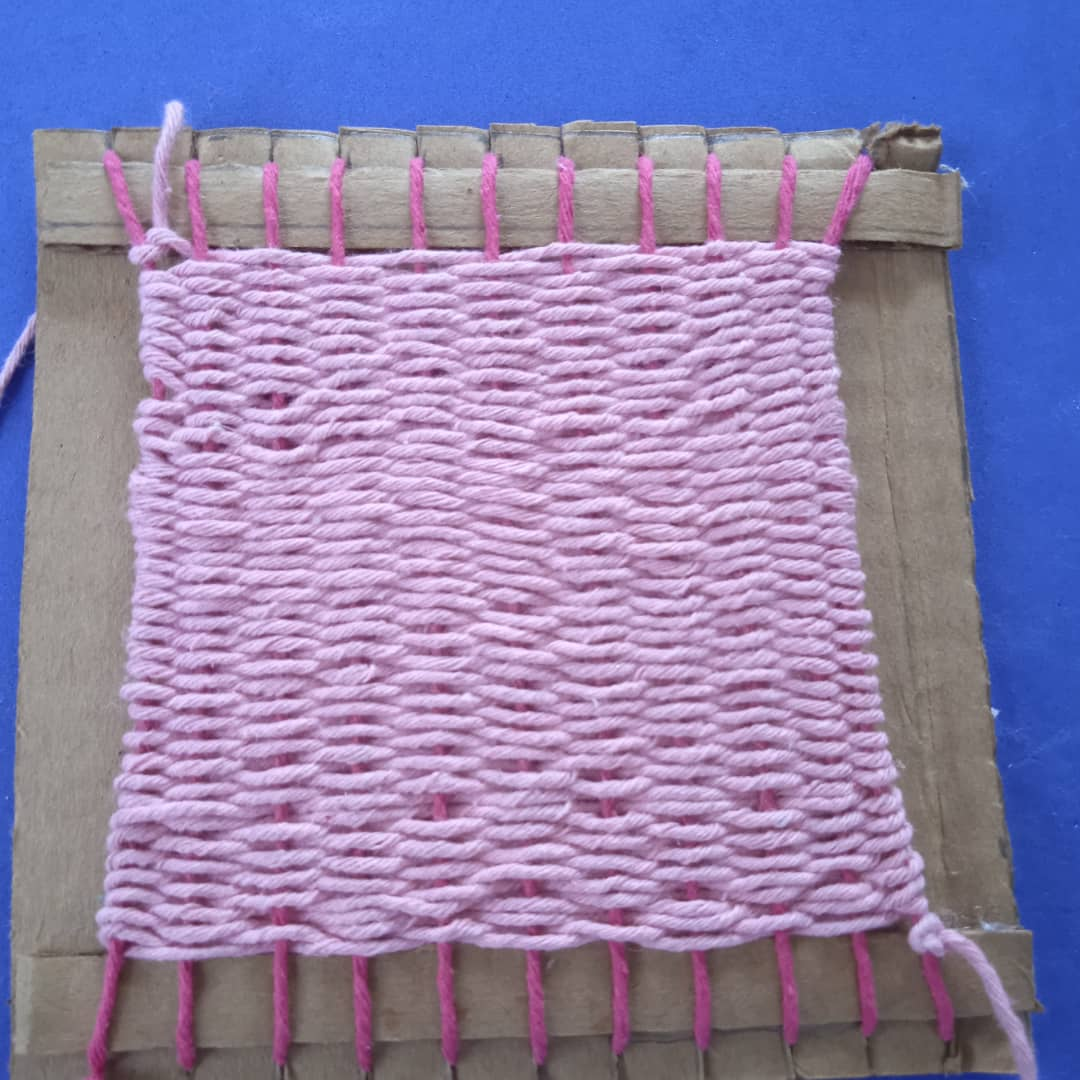
* Continue weaving by passing the thread over and under.
* Evolution of the weave.
>* Continuar el tejido pasando por encima y por debajo del hilo.
>* Evolución del tejido.
https://images.hive.blog/DQmSSiMqkFi3HGMDB4B8iFeXtgpgzLwvfuacLrU8UrcZwXs/image.png
https://images.hive.blog/DQmXBeKU56NkeSgztQJiyn4neMBWoUbmpFEqW7piZ5tpBN7/image.png
* Take the threads two by two to make a simple knot.
* Trim the threads with scissors.
>* Tomar los hilos de dos en dos para hacer un nudo sencillo.
>* Emparejar los hilos con la tijera.
https://images.hive.blog/DQmYtqvXnCobmF26E4wqHj2BaQhV5oGAb7X33vigzDbc2m2/image.png
https://images.hive.blog/DQmf2aA9AYV8vhD9xK8QoxZMx9jok3HMjmedewjP4SdQLAW/image.png
#
#hive-127911
#needlework
#spanish
#tutorial
#diyhub
#build-it
#fabric
#loom
Payout: 5.829 HBD
Votes: 733
More interactions (upvote, reblog, reply) coming soon.