
Hola mi gente creativa de Hive diy, muchos saludos y bendiciones para todos les voy a enseñar hacer unas bolas de navidad con foami para decorar el arbolito, es rápido y muy fácil de hacer.
Hello my creative people of Hive diy, many greetings and blessings to all I am going to teach you how to make some Christmas balls with foami to decorate the tree, it's quick and easy to do.
###
Español:
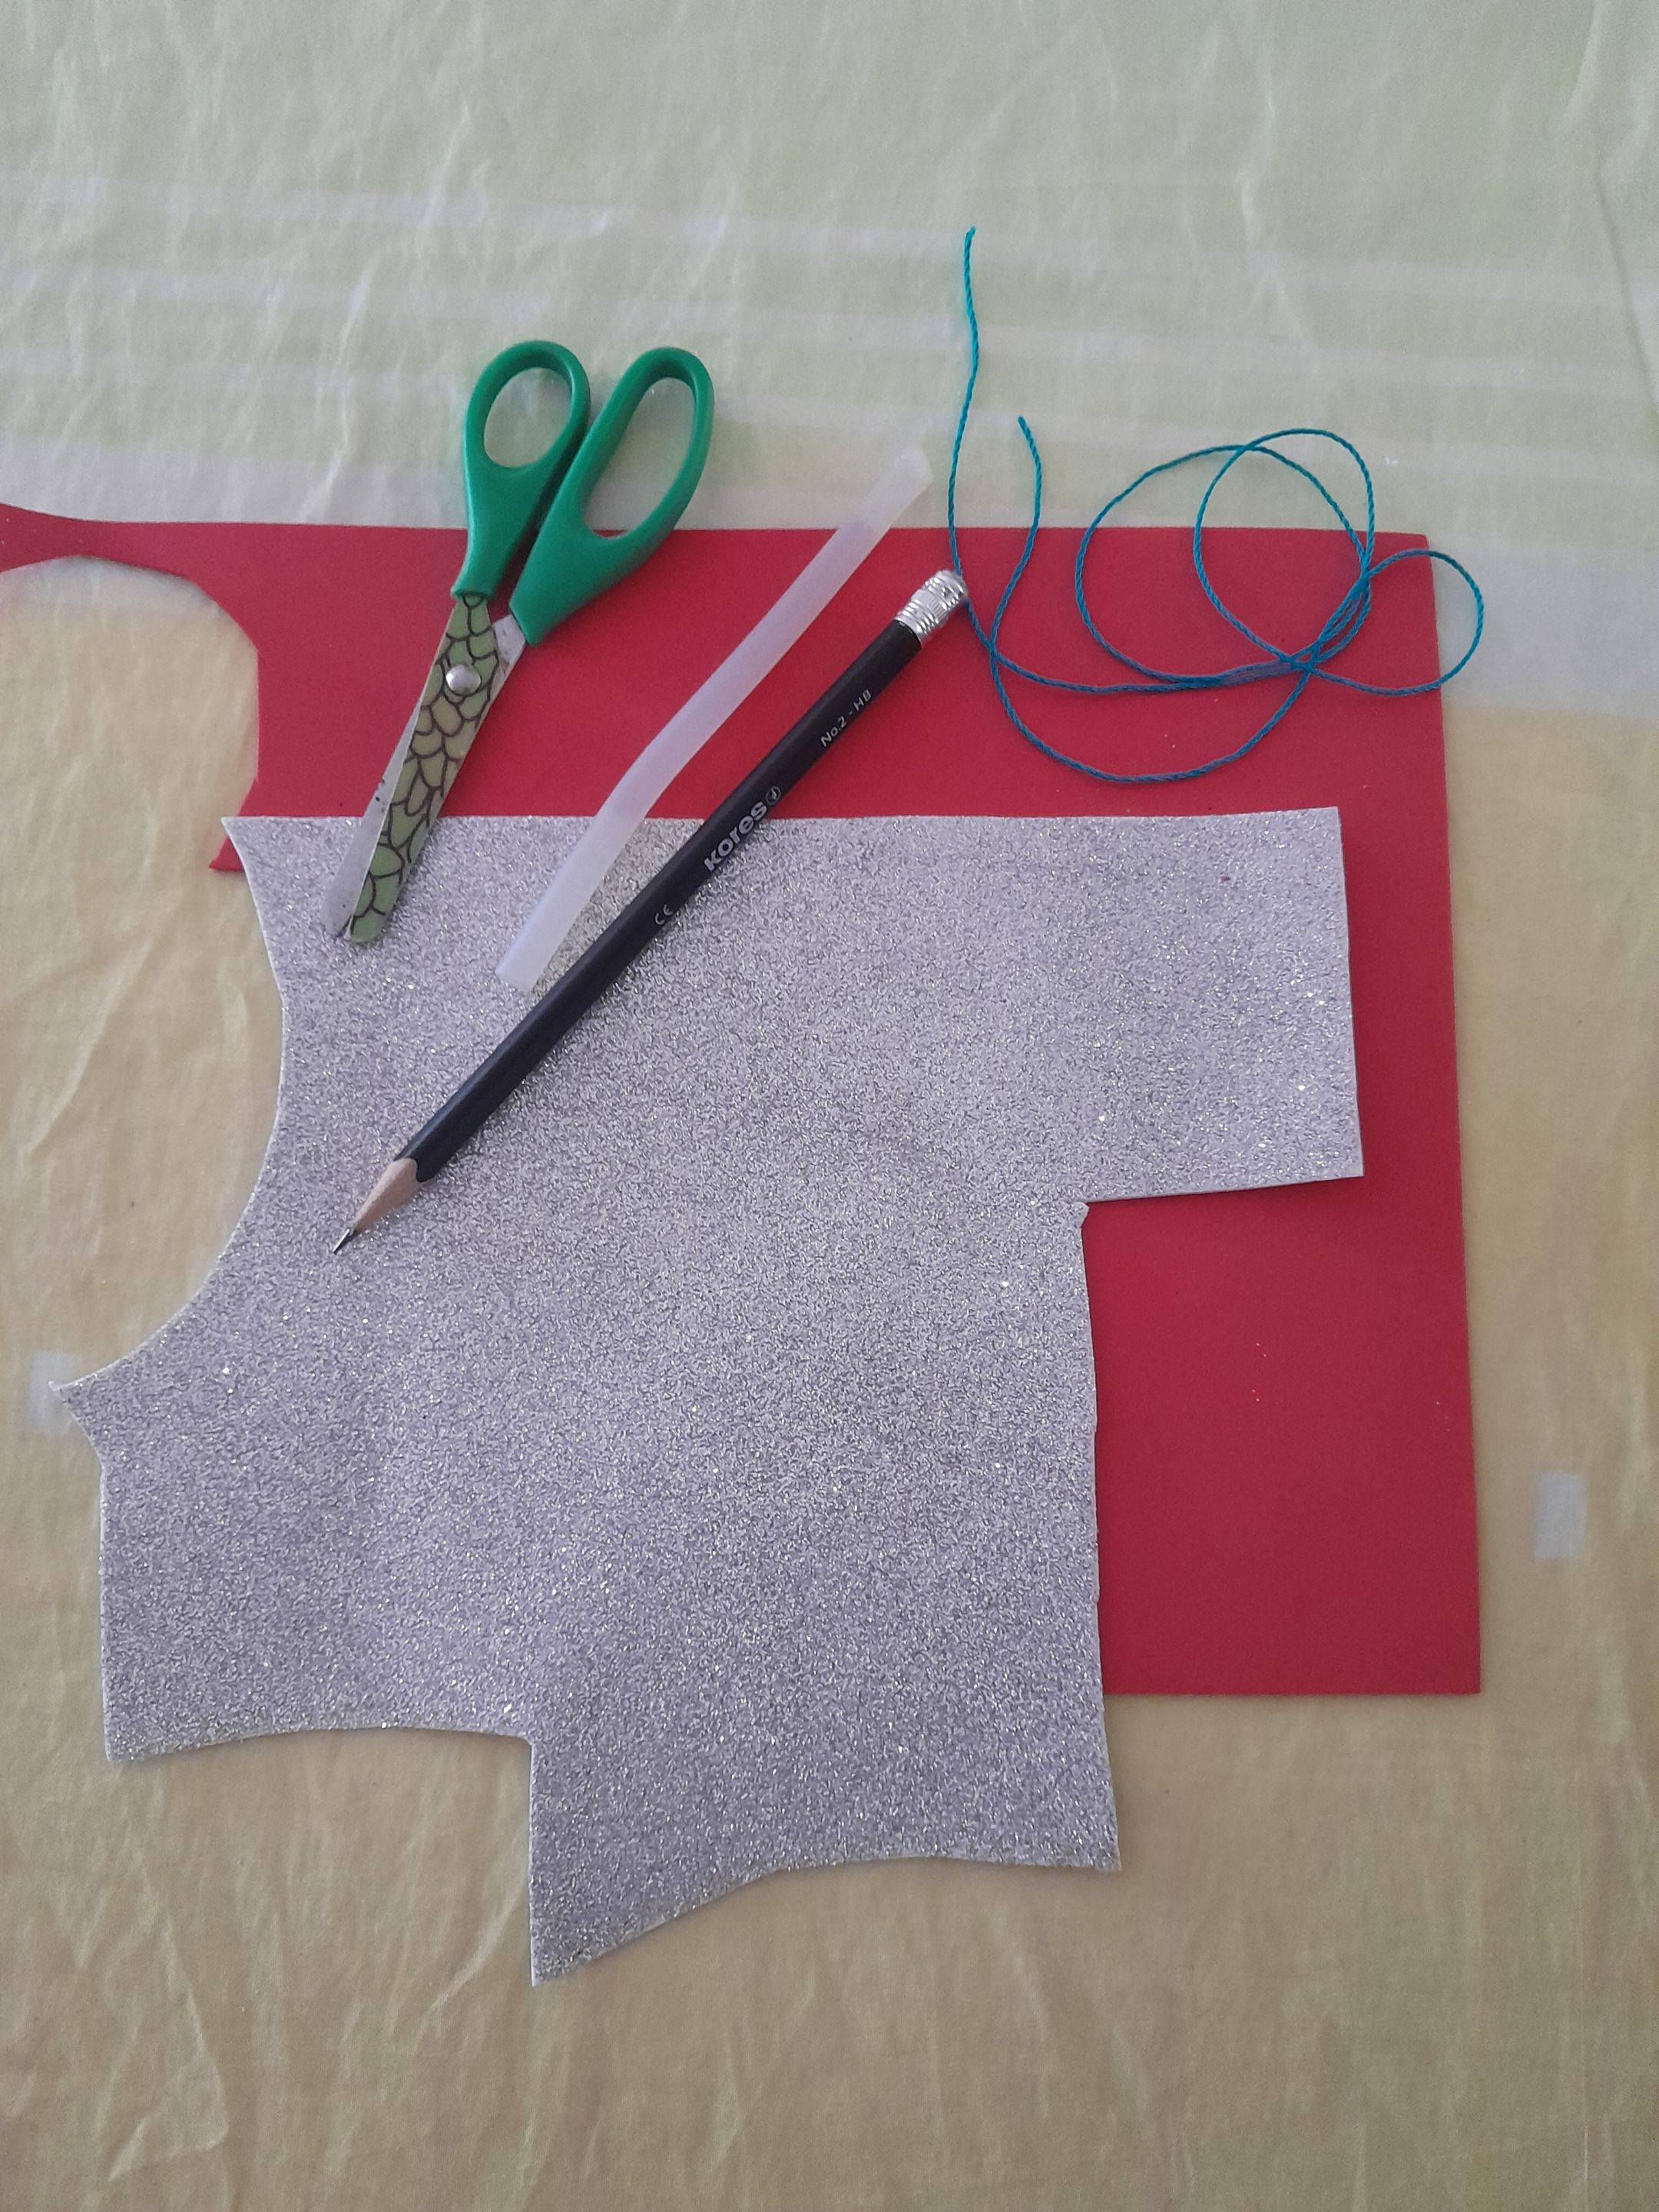
Materiales:
- foami, rojo y plateado.
- Cuerda o naylon.
- **1** barra de silicon.
- Lápiz.
- Tijera.
###
English:
Materials:
- foami, red and silver.
- Rope or naylon.
- **1** silicon stick.
- Pencil.
- Scissors.

###
Español:
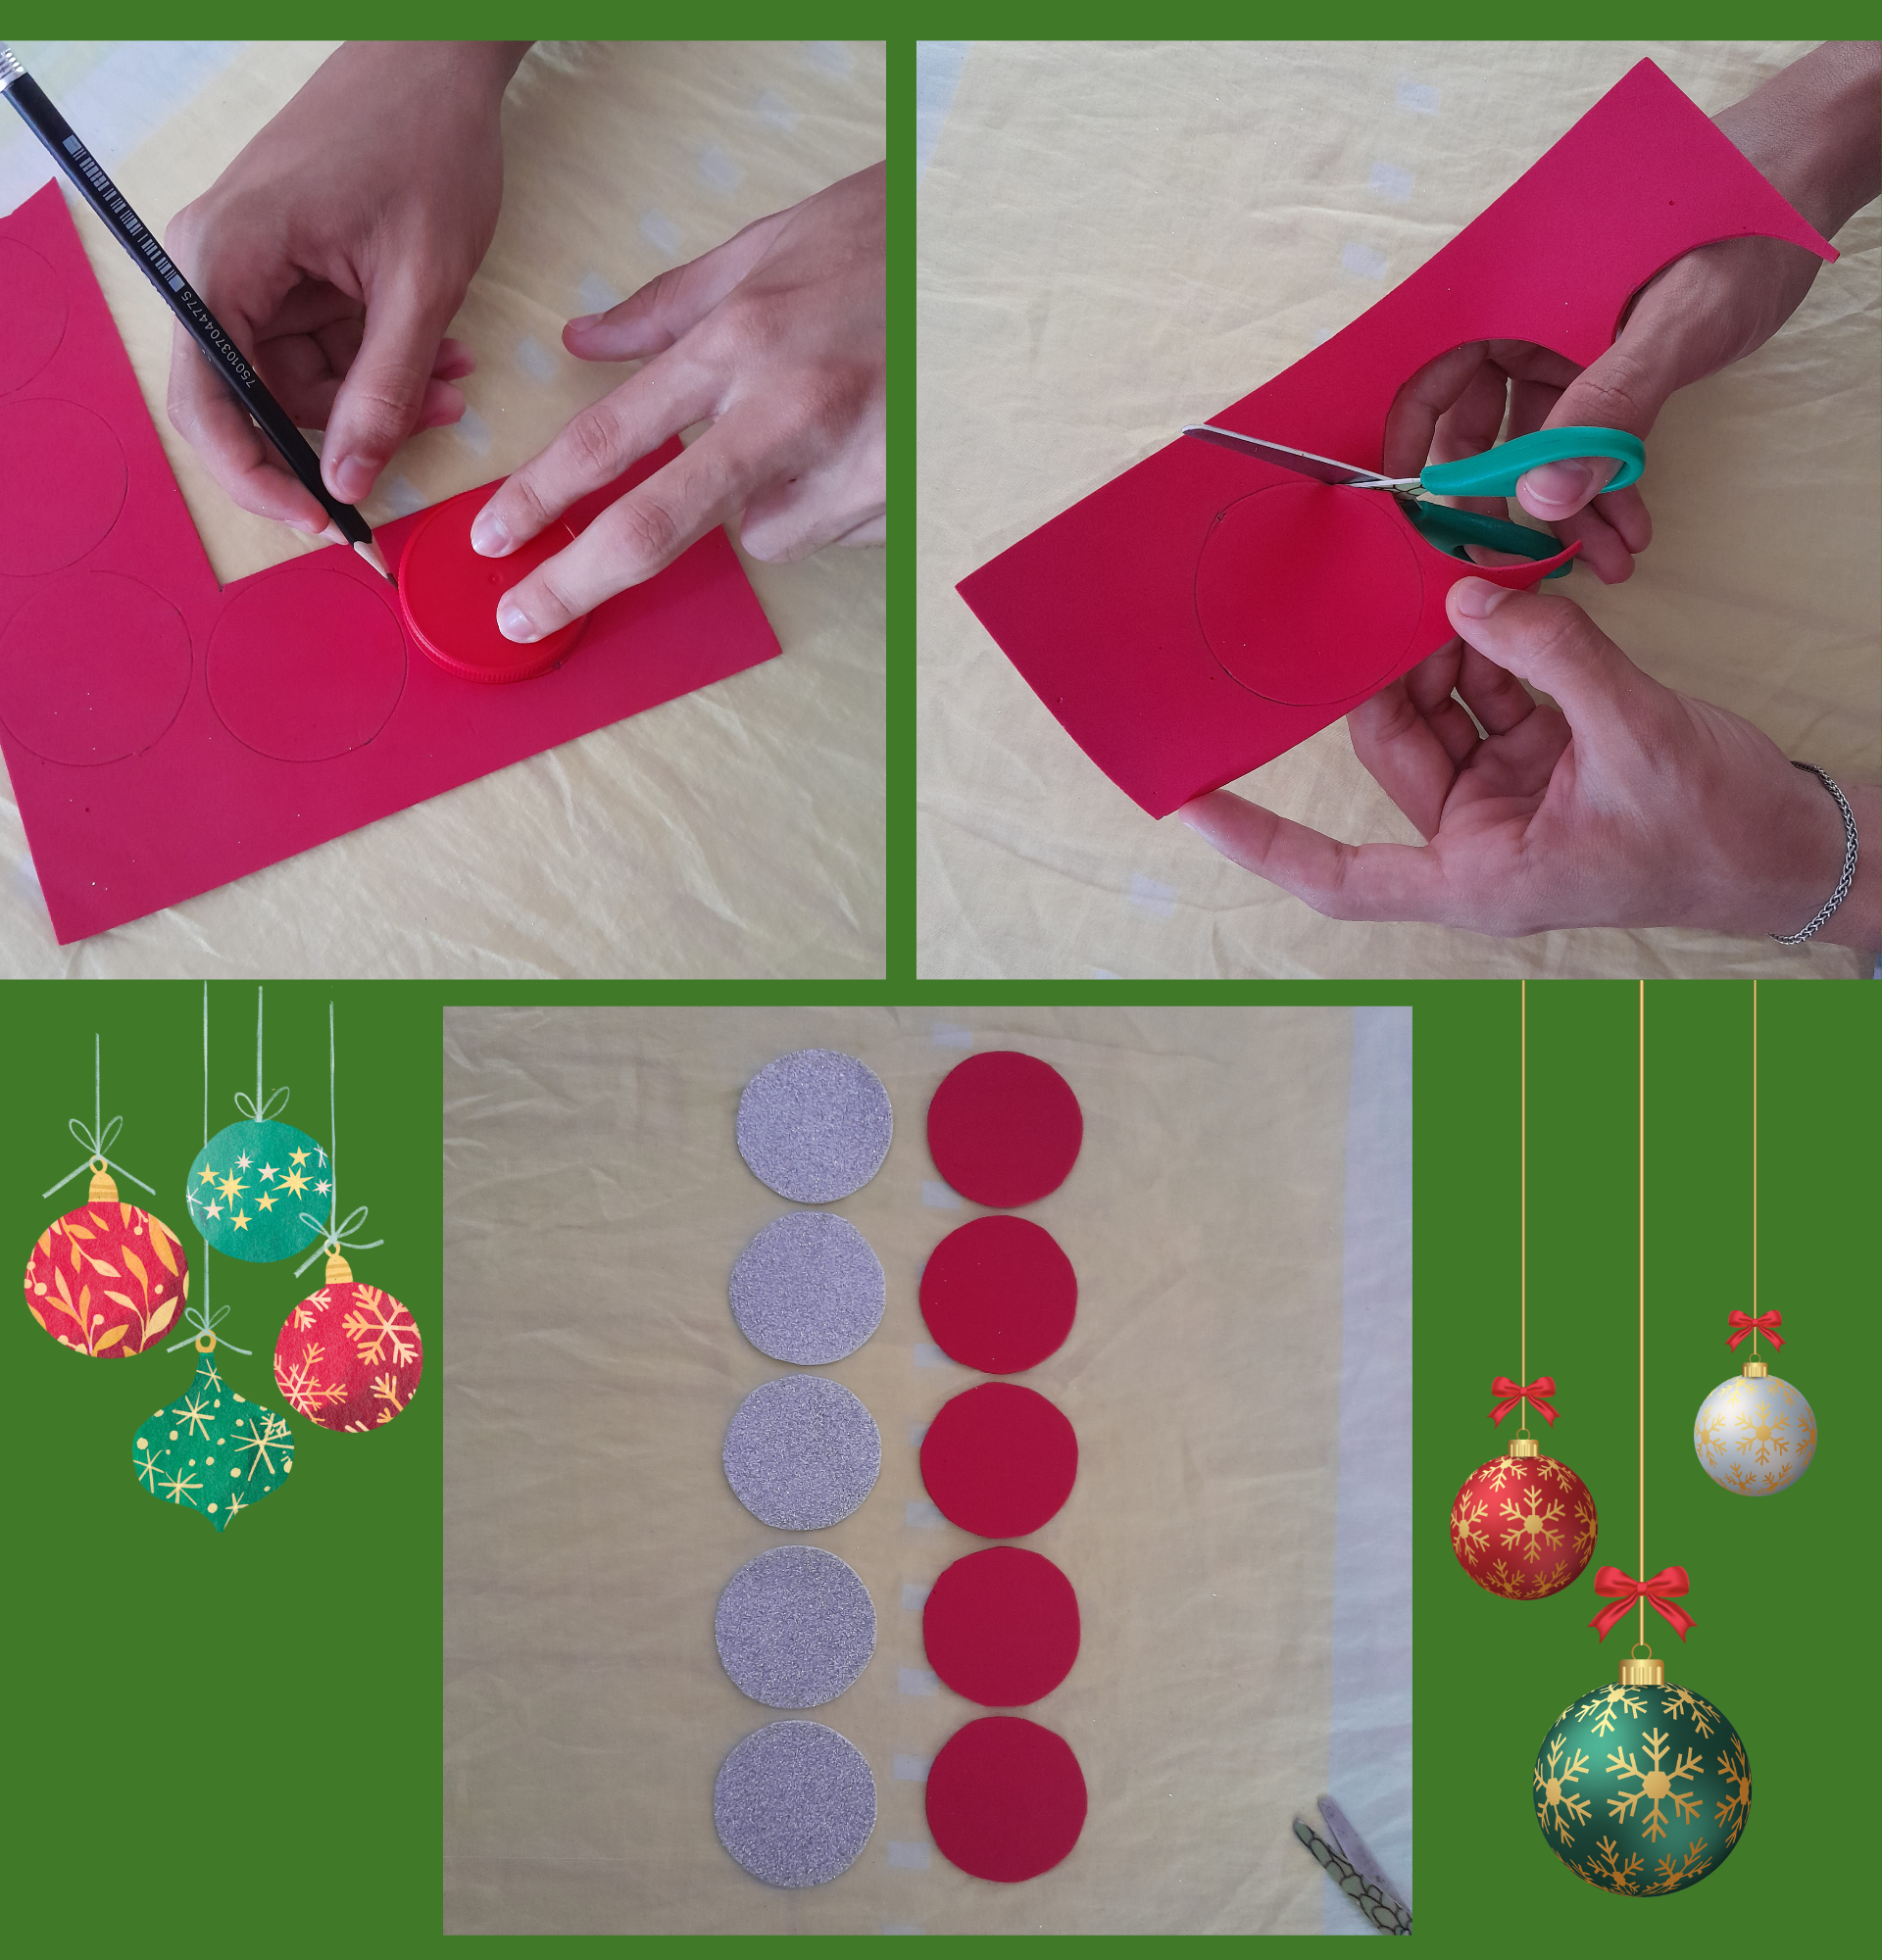
Paso 1:
- Con la ayuda de una tapa de **5** cm de diámetro, marcamos con el lápiz en el foami **10** círculos, **5** rojos y **5** plateados, luego lo recortamos con la tijera.
###
English:
Step 1:
- With the help of a **5** cm diameter lid, we mark **10** circles on the foami with a pencil, **5** red and **5** silver circles, then we cut them out with the scissors.


###
Español:
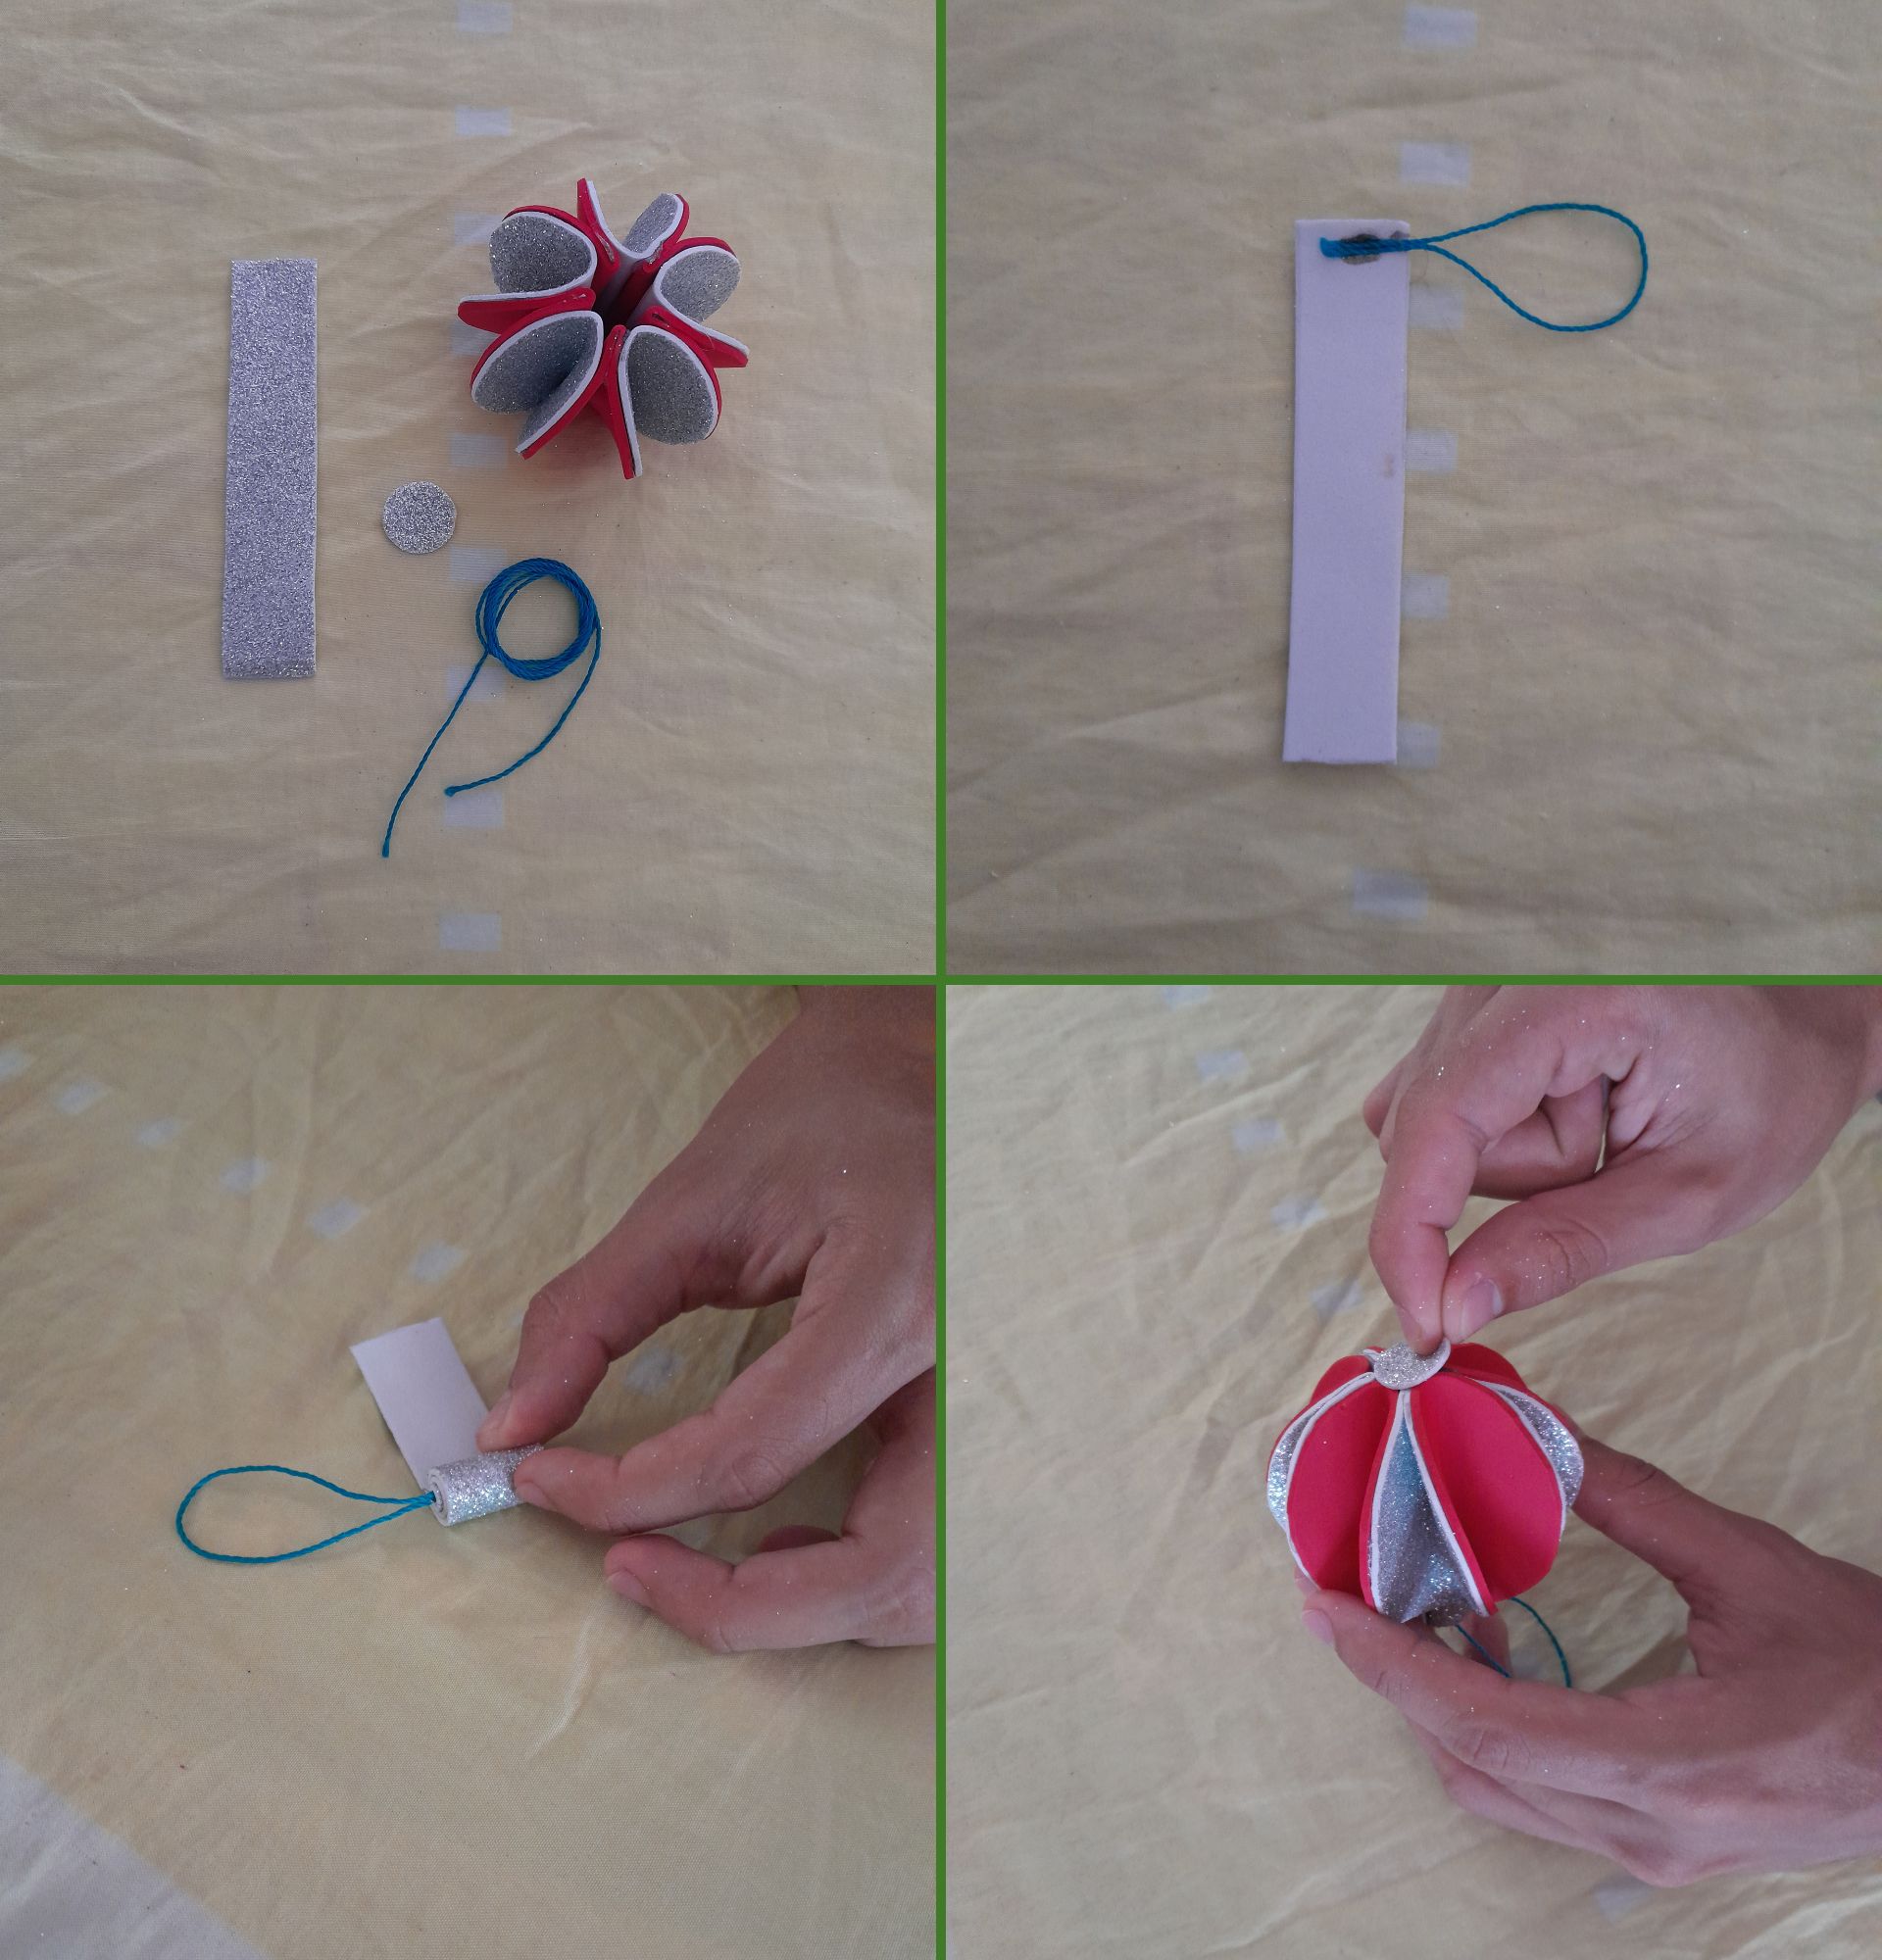
Paso 2:
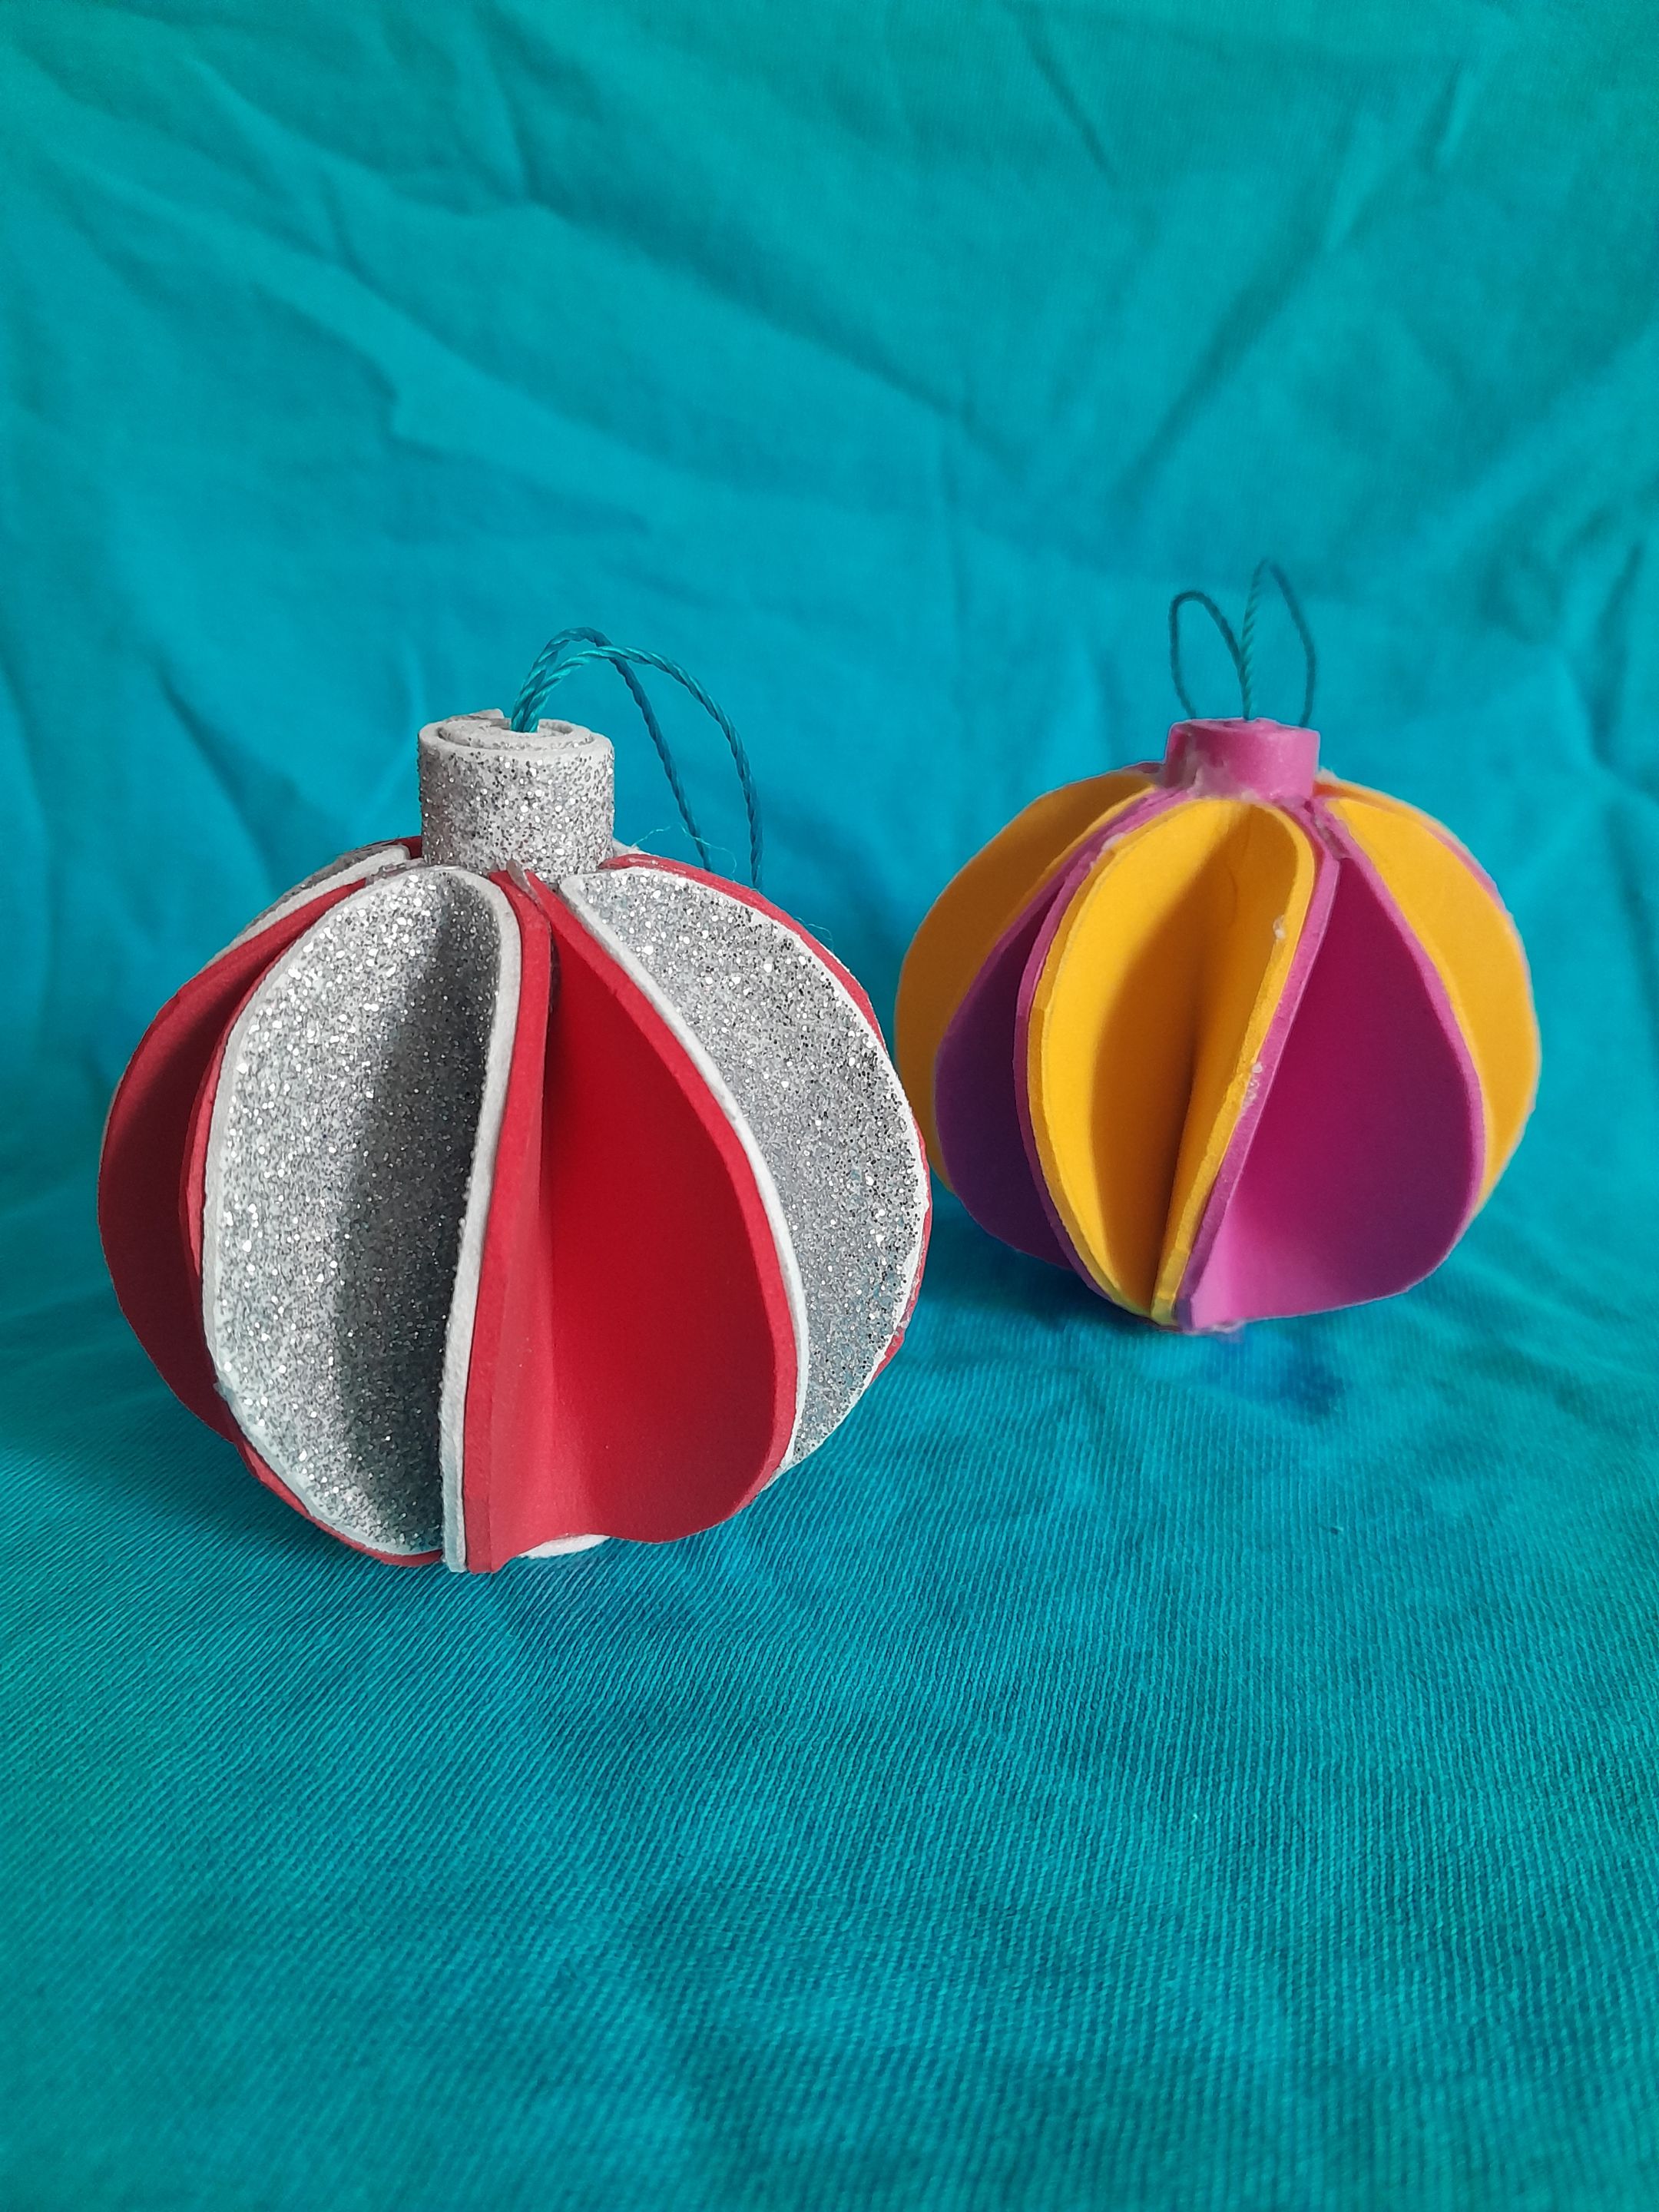
- Aquí tomamos los círculos y vamos doblando en **2** y pegando con silicon caliente uno encima del otro, intercalando los dos colores hasta pegar los **10** círculos, terminando de pegar el ultimo con el primero quedando en forma de esfera. Continuo pegando en la punta hacia dentro del dobles, uno arriba y el otro abajo, quedando de la manera que muestro en la foto.
###
English:
Step 2:
- Here we take the circles and we fold them in **2** and glue with hot silicone one on top of the other, alternating the two colors until we glue the **10** circles, finishing gluing the last one with the first one in the shape of a sphere. I continue gluing in the tip towards the inside of the doubles, one on top and the other on the bottom, remaining the way I show in the photo.

###
Español:
Paso 3:
- Ahora procedo a recortar **1** tira de foami plateado de **2** x **9** cm, y **1** circulo pequeño, luego en la tira de foami pego un pedacito de cuerda en la punta y voy enrollando poco a poco hasta el final de la tira, donde pegamos en el espacio del centro de la bola **1**cm hacia dentro con el silicon y el otro centímetro queda hacia afuera con la cuerda, luego pegamos el circulo en la parte de abajo, terminando así nuestra bella bola de navidad para decorar.
###
English:
Step 3:
- Now I proceed to cut **1** strip of silver foami of **2** x **9** cm, and **1** small circle, then in the strip of foami I stick a little piece of string at the tip and I roll little by little until the end of the strip, where we stick in the space in the center of the ball **1**cm inward with the silicone and the other centimeter is out with the string, then we stick the circle at the bottom, thus finishing our beautiful Christmas ball to decorate.

######
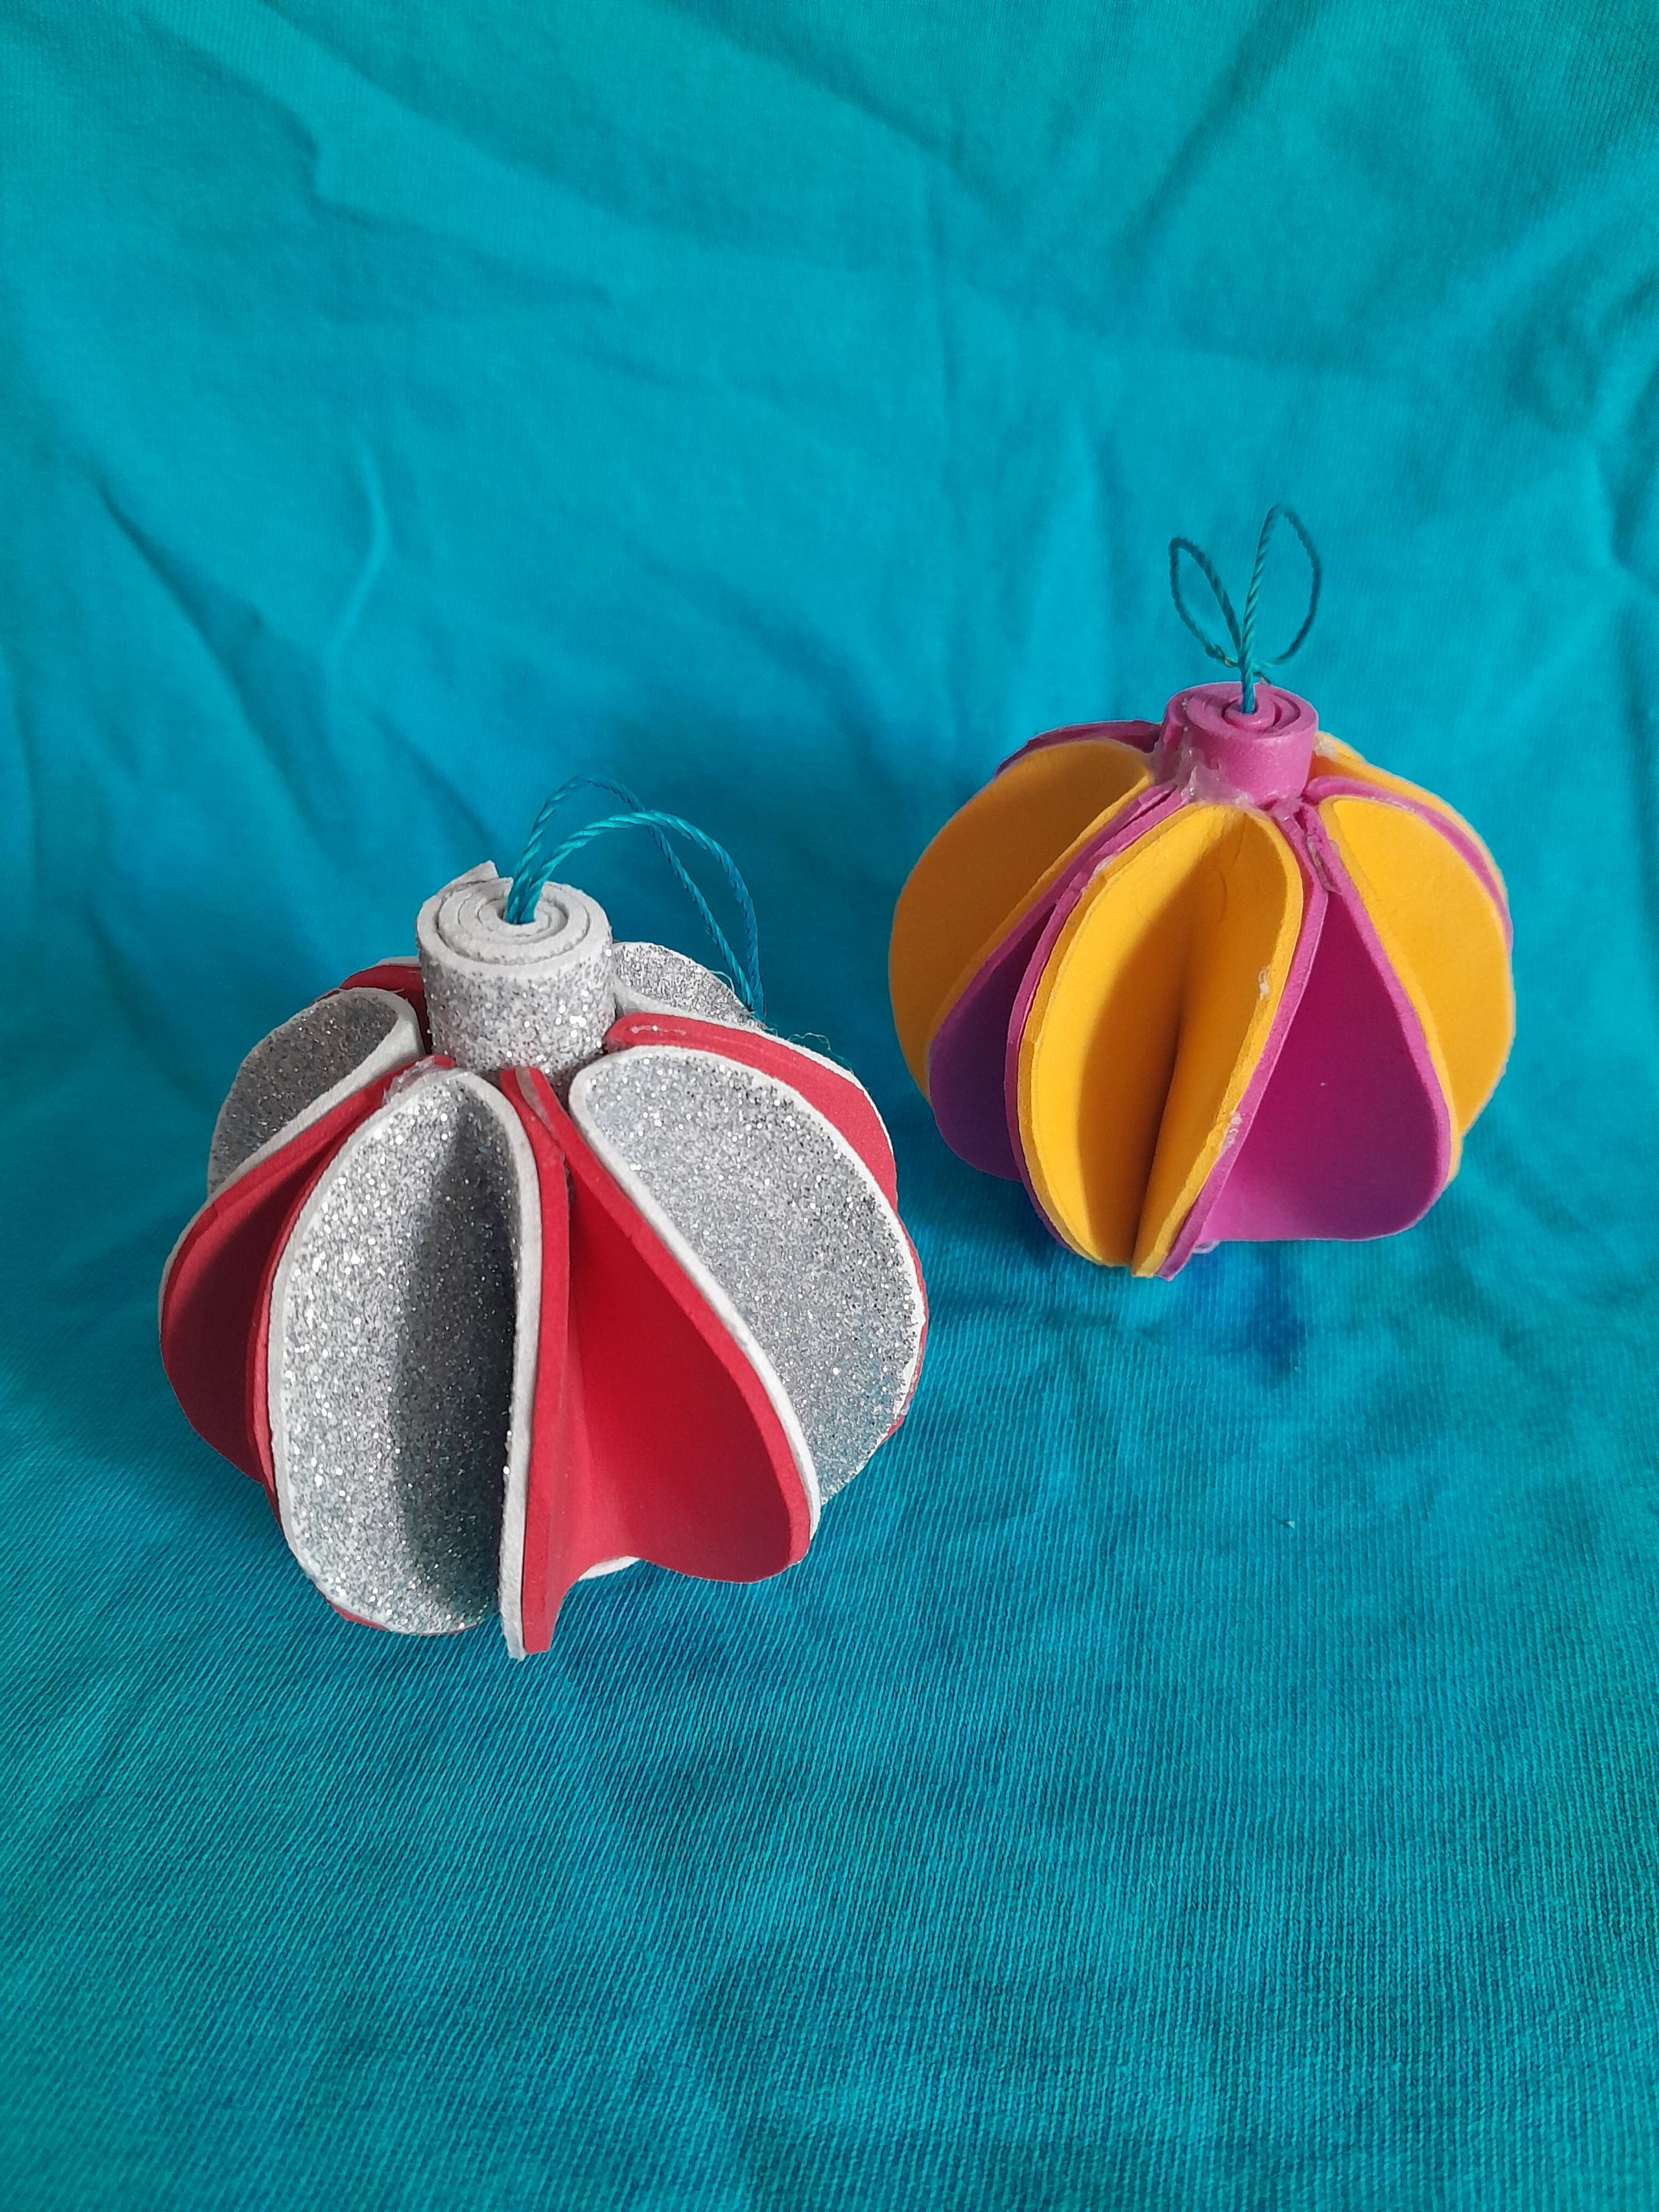
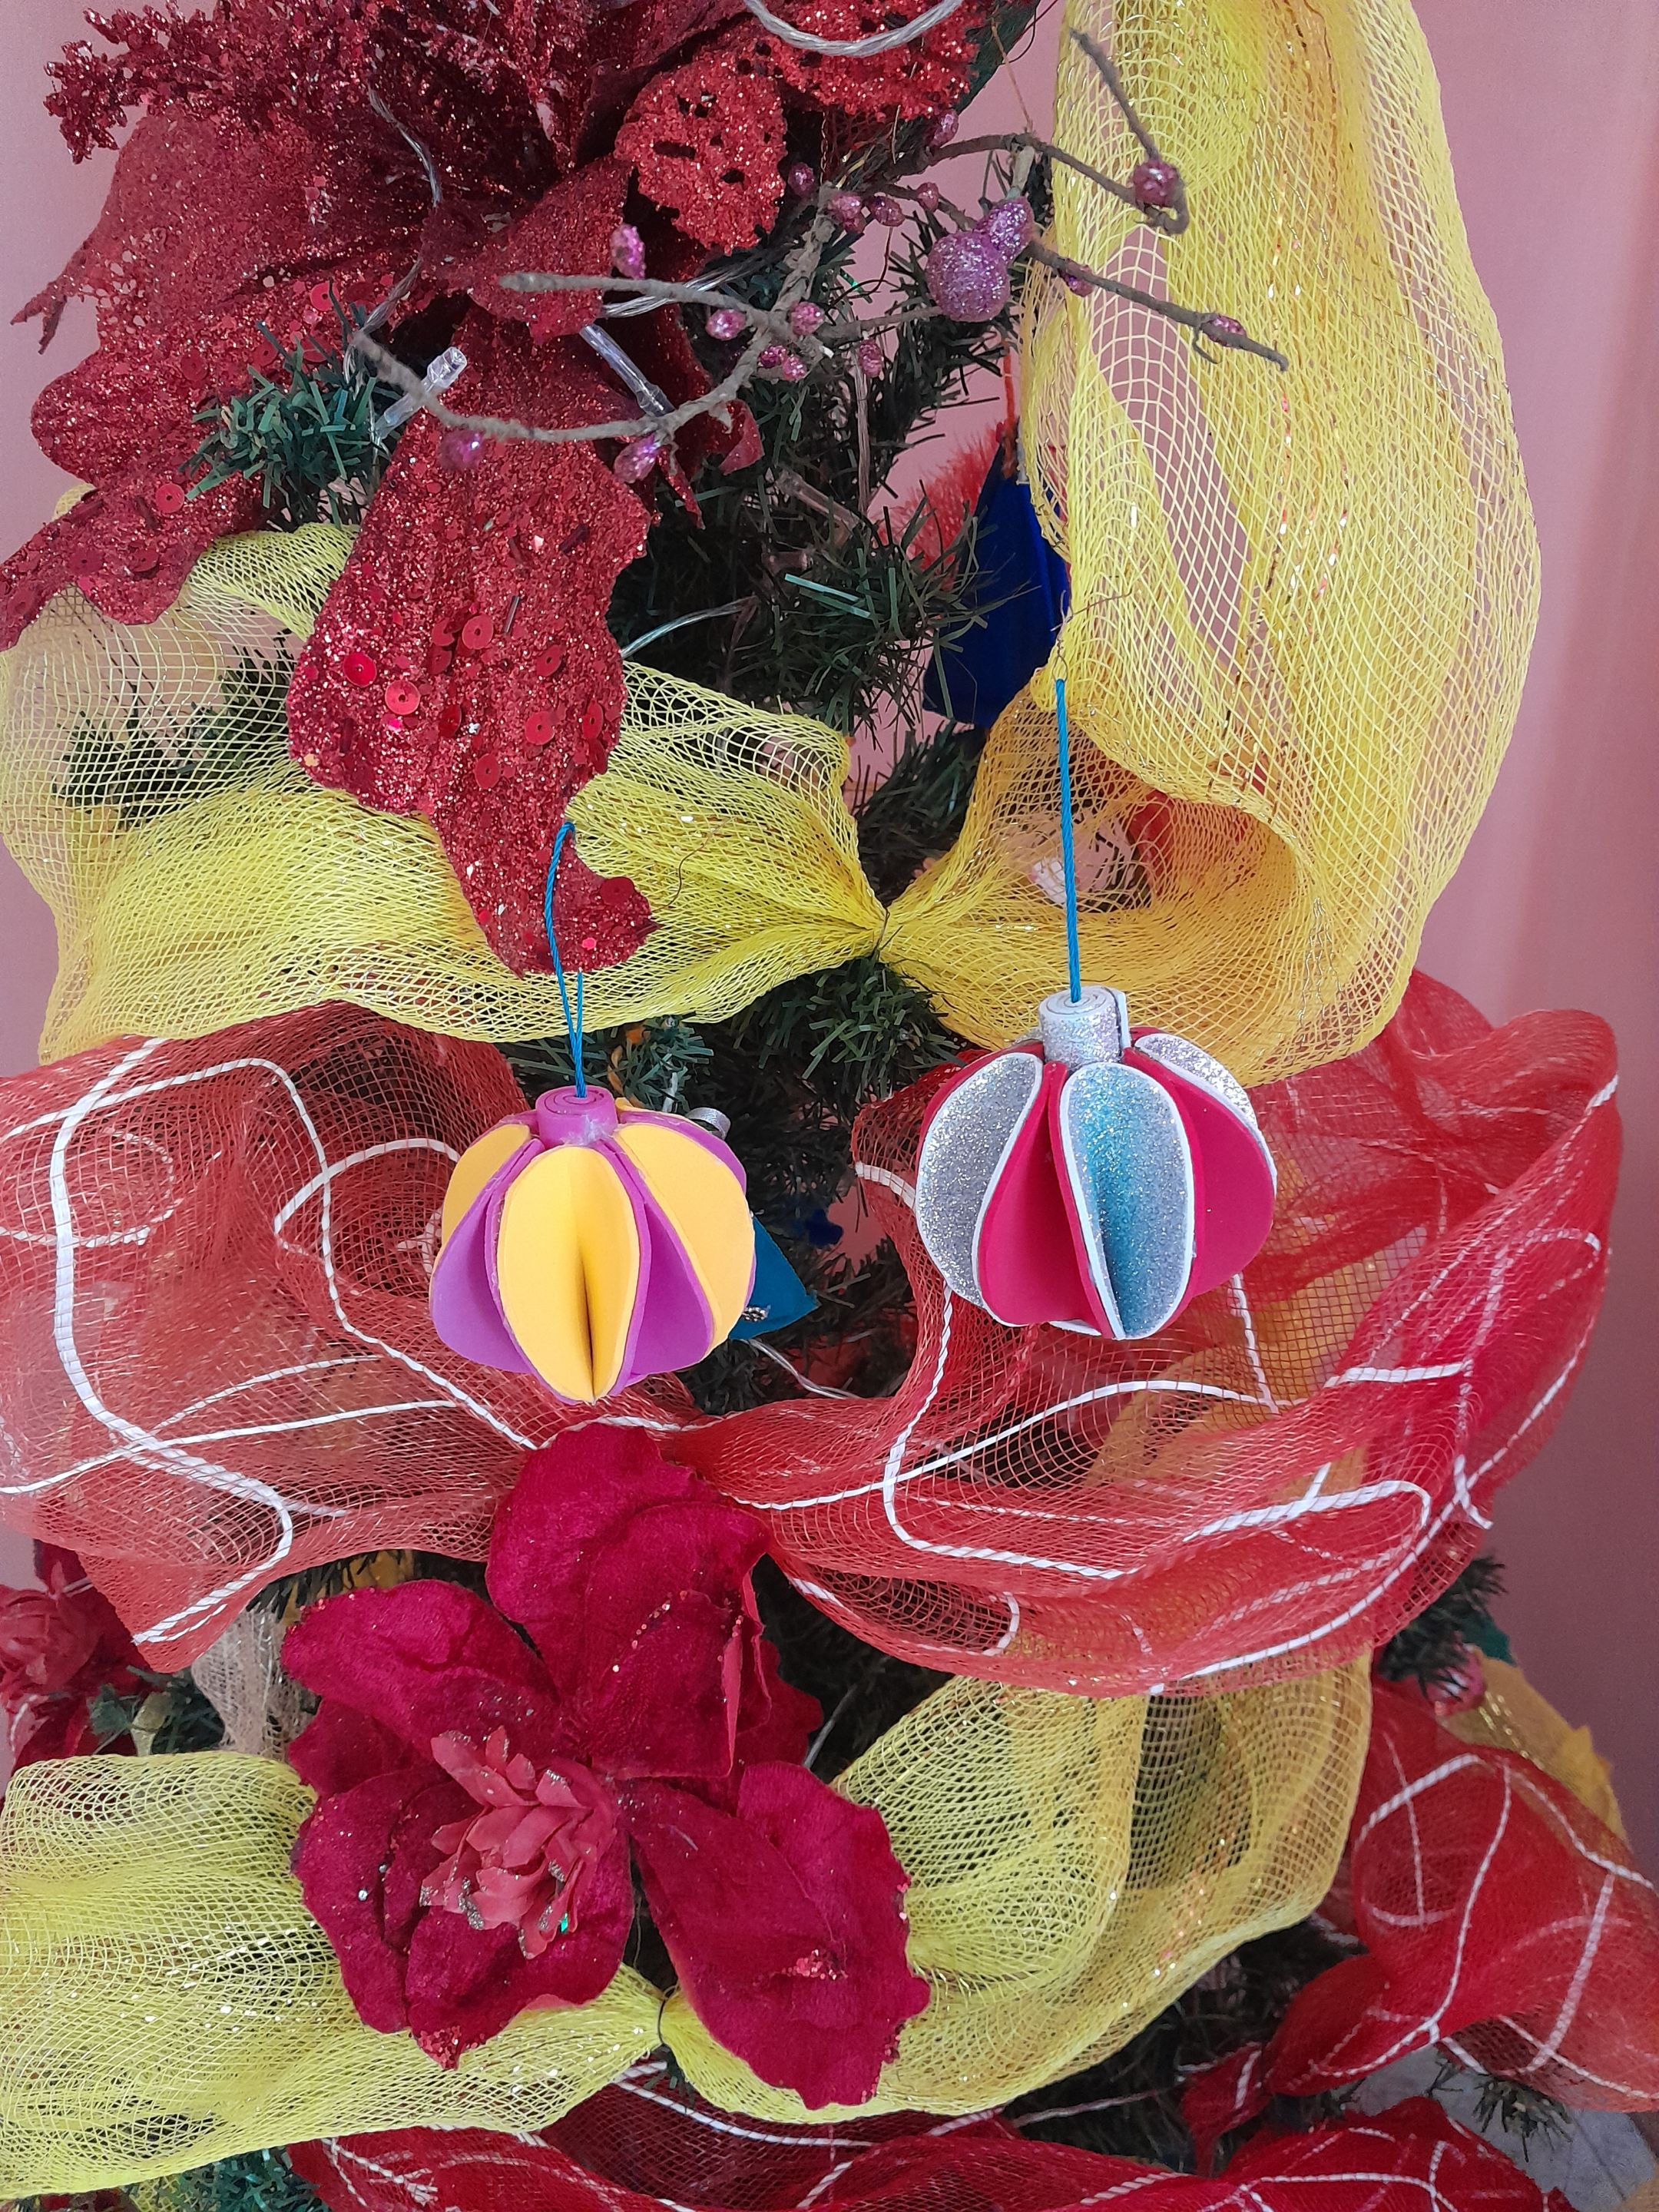
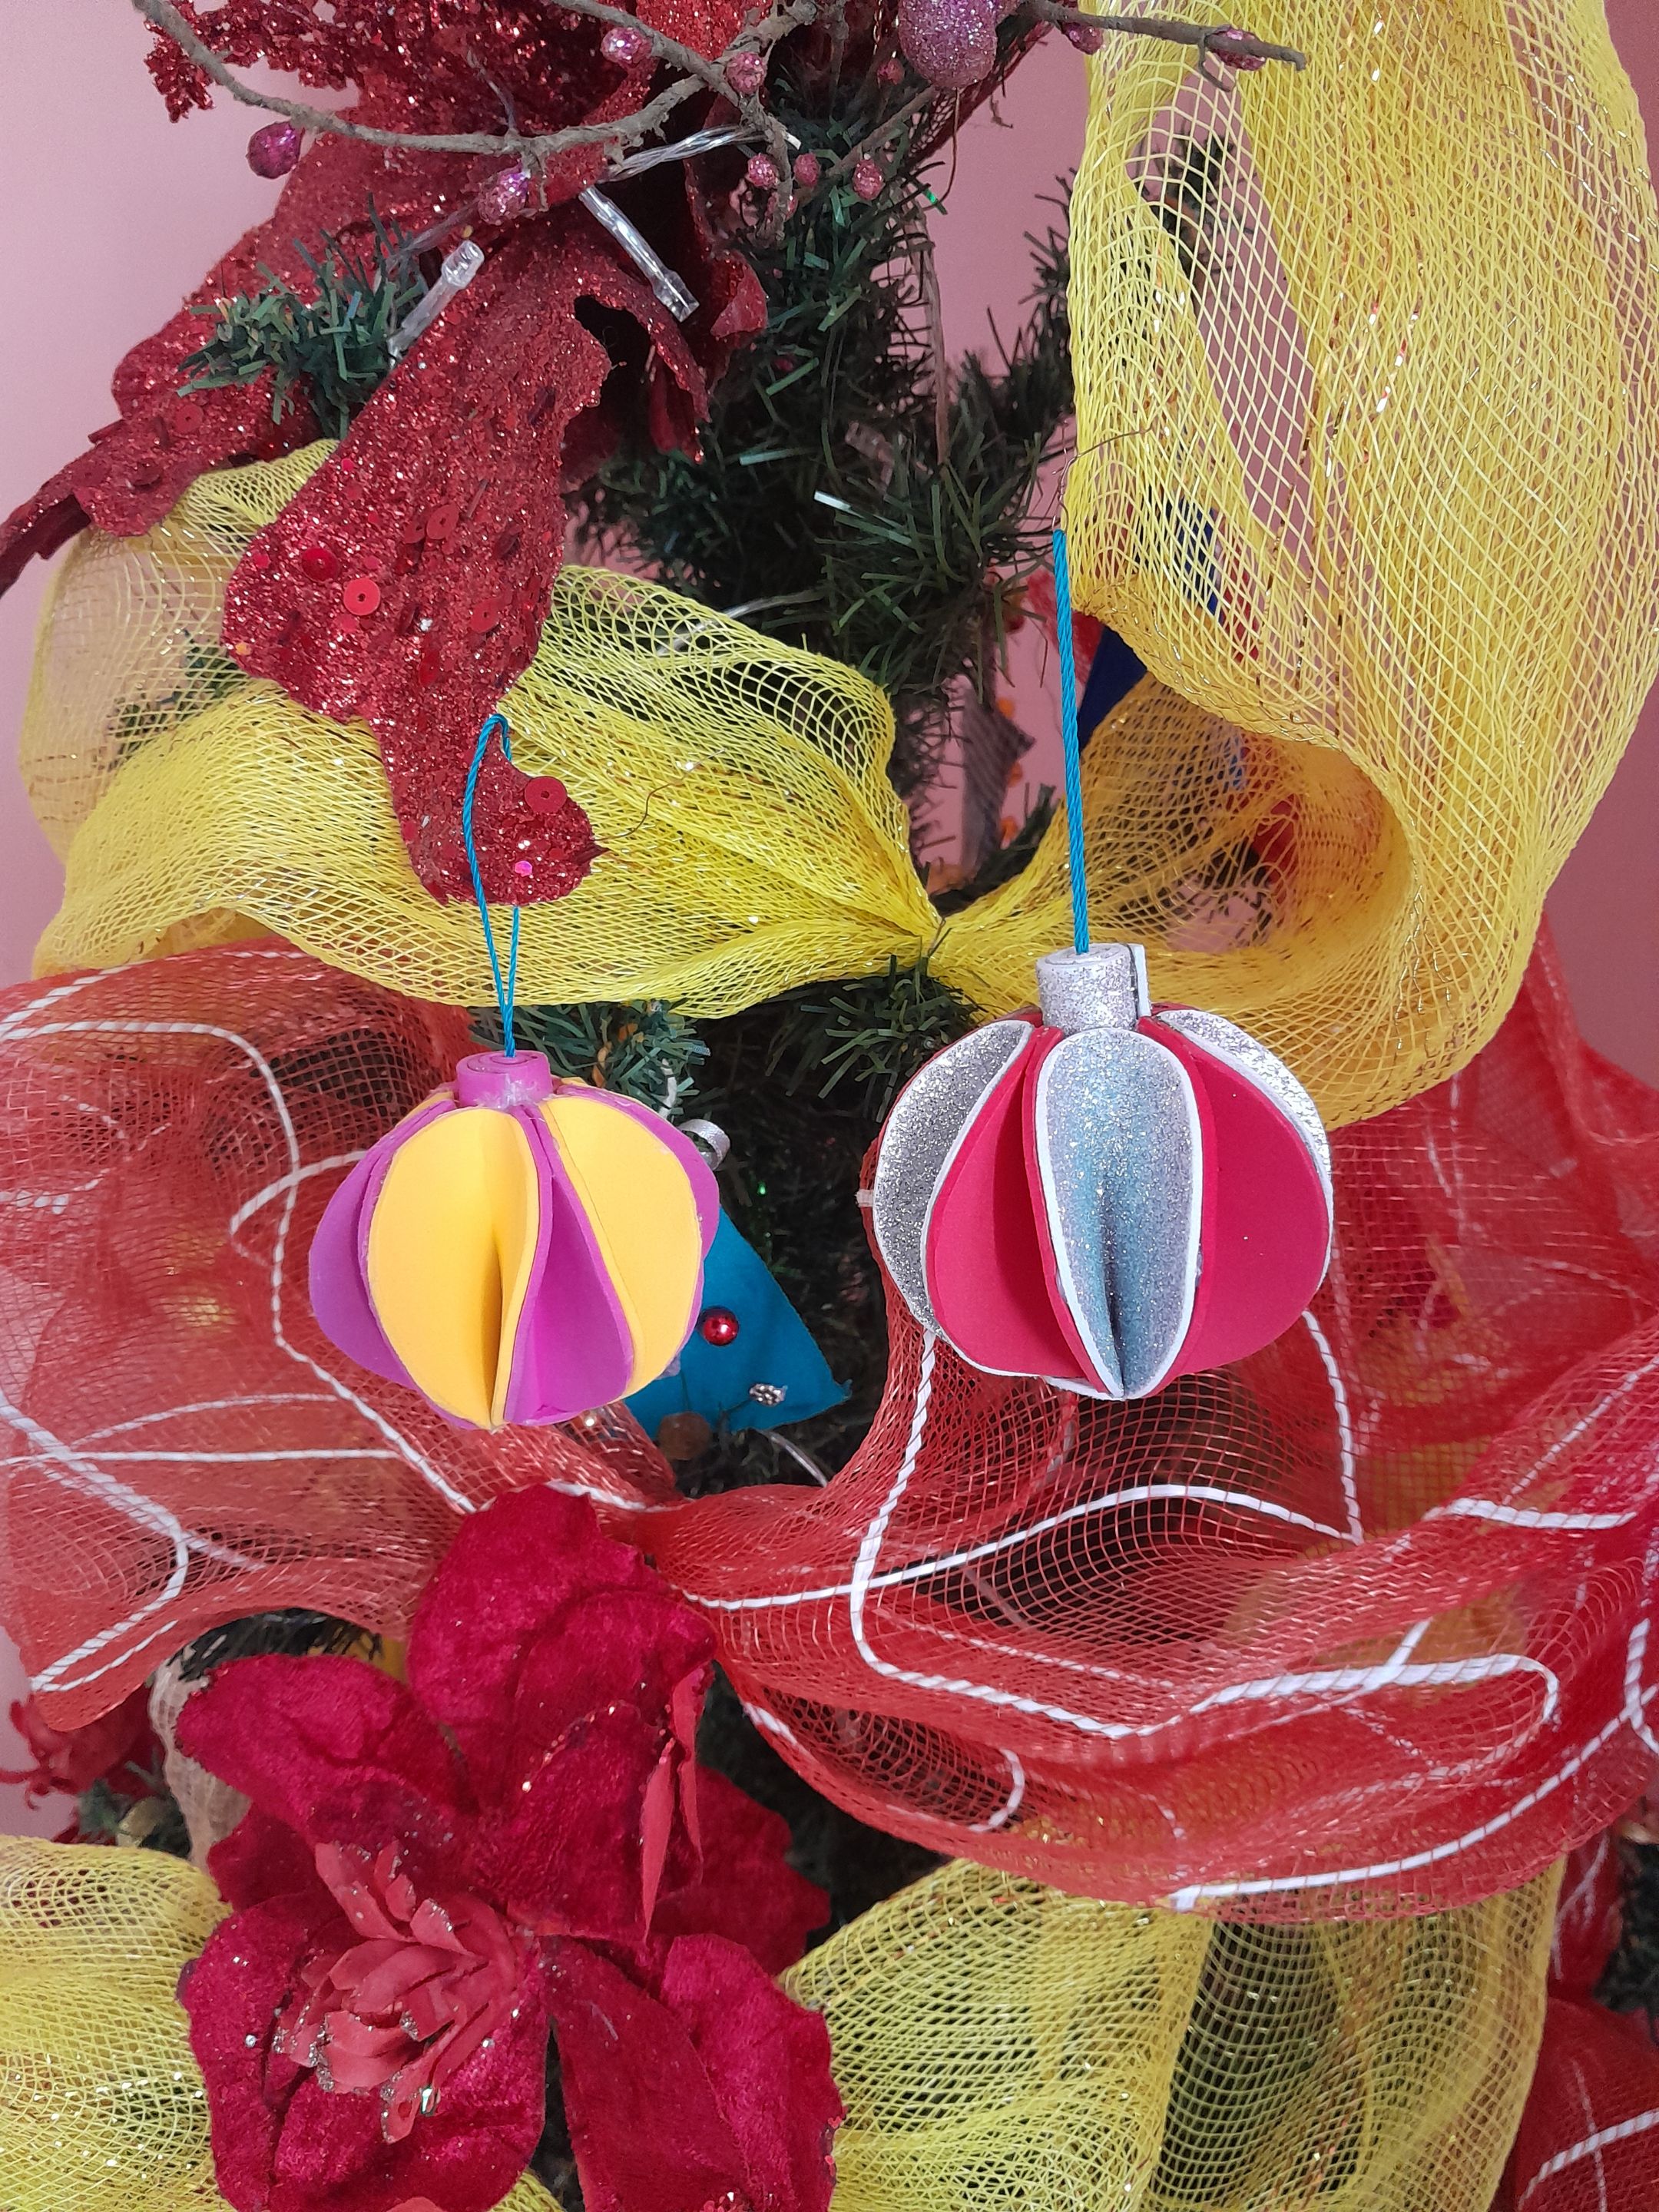
Mi resultado final, espero les haya gustado, que pasen un excelente dia.
> ######
My final result, I hope you liked it, have a great day.
***
######
Todas las fotos son de mi autoría y editadas con Canva.
> ######
All the photos were taken by me and edited with Canva.
#spanish
#tutorial
#manualidades
#hivediy
#diy
#crafts
#handmade
#hacks
Payout: 0.000 HBD
Votes: 61
More interactions (upvote, reblog, reply) coming soon.