ENGLISH.
Greetings, dear Creative Cooking community 😊
Let's get sweet today, let's get sweet today with this recipe I've brought you.
I saw this recipe on an internet channel, and it stole my heart from the moment I saw it. I've always loved Quesillo. When I was a little girl and my mom threw parties, when it was time to share the cake, what I most longed for was Quesillo because Mom made a delicious one. That creamy texture was crazy! I loved it 😍
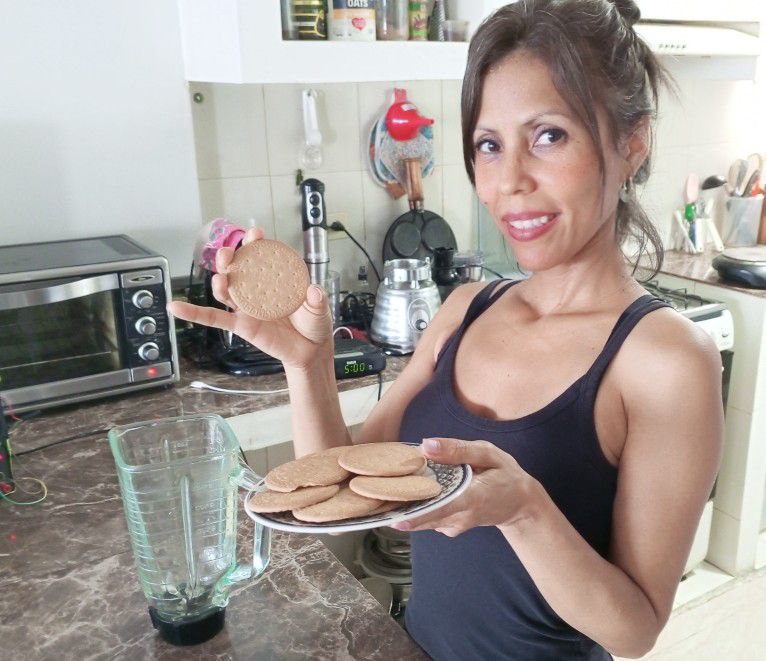
I've rarely made it, and this recipe caught my attention because it's made with Maria cookies, one of my all-time favorites. It also doesn't contain condensed milk, and I couldn't waste the opportunity to make this Quesillo because it seemed like a slightly different and interesting way to prepare it.
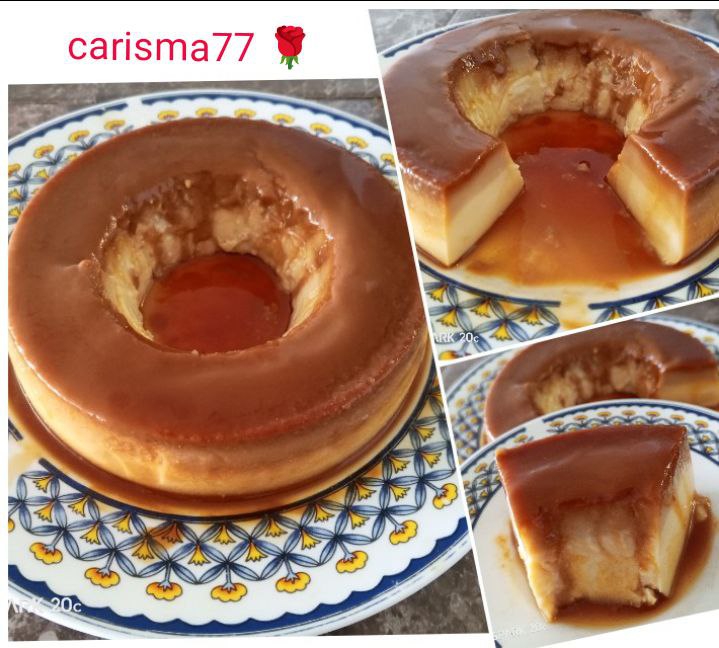
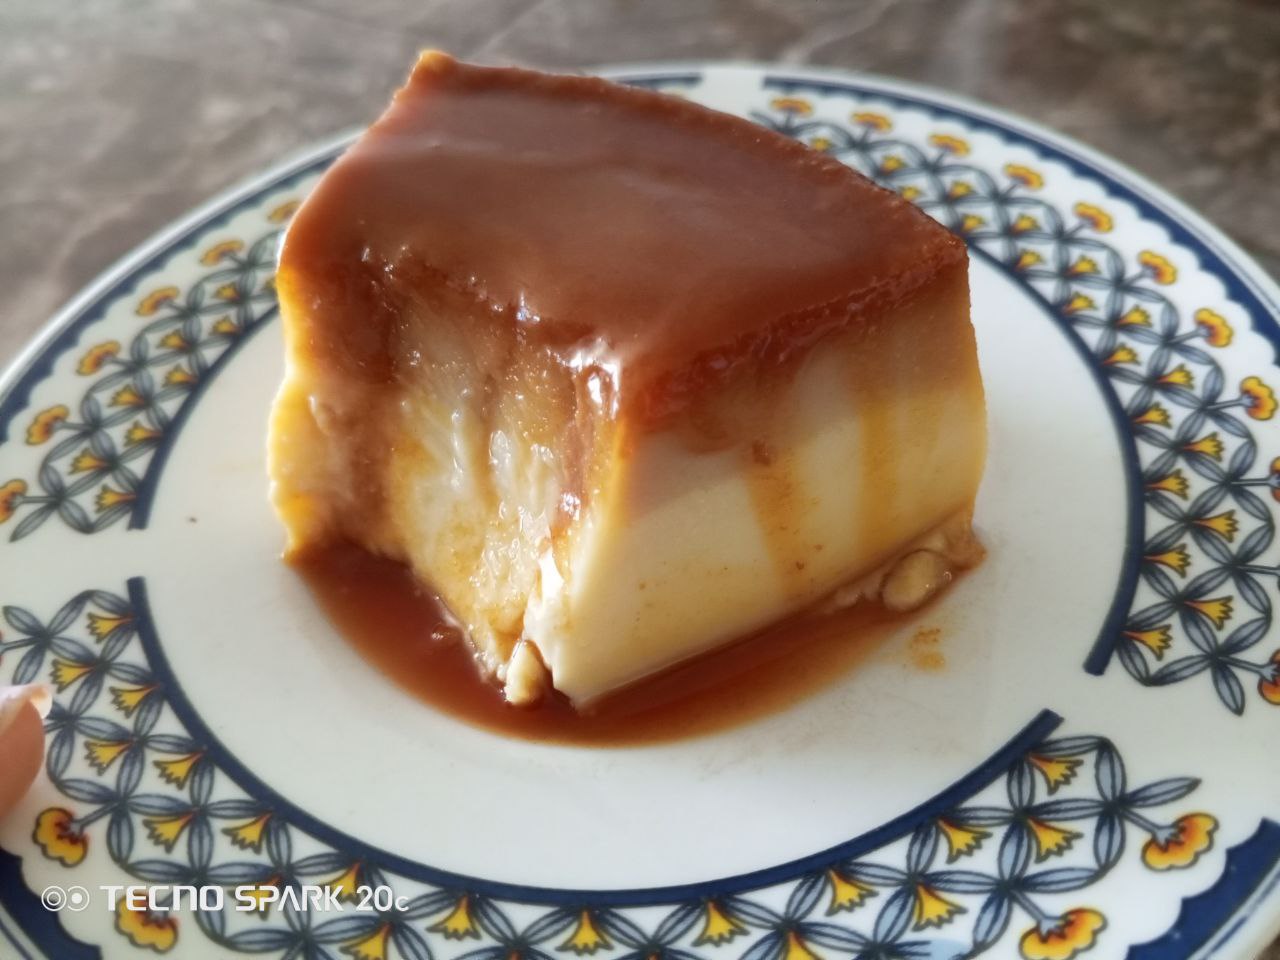
The truth is, it was really worth it because this Quesillo turned out delicious. It has two textures: the top is firm from the cookie, and the bottom is ummmmm creamy!
If you're interested in this recipe, I invite you to make it together! 😉
Ingredients:
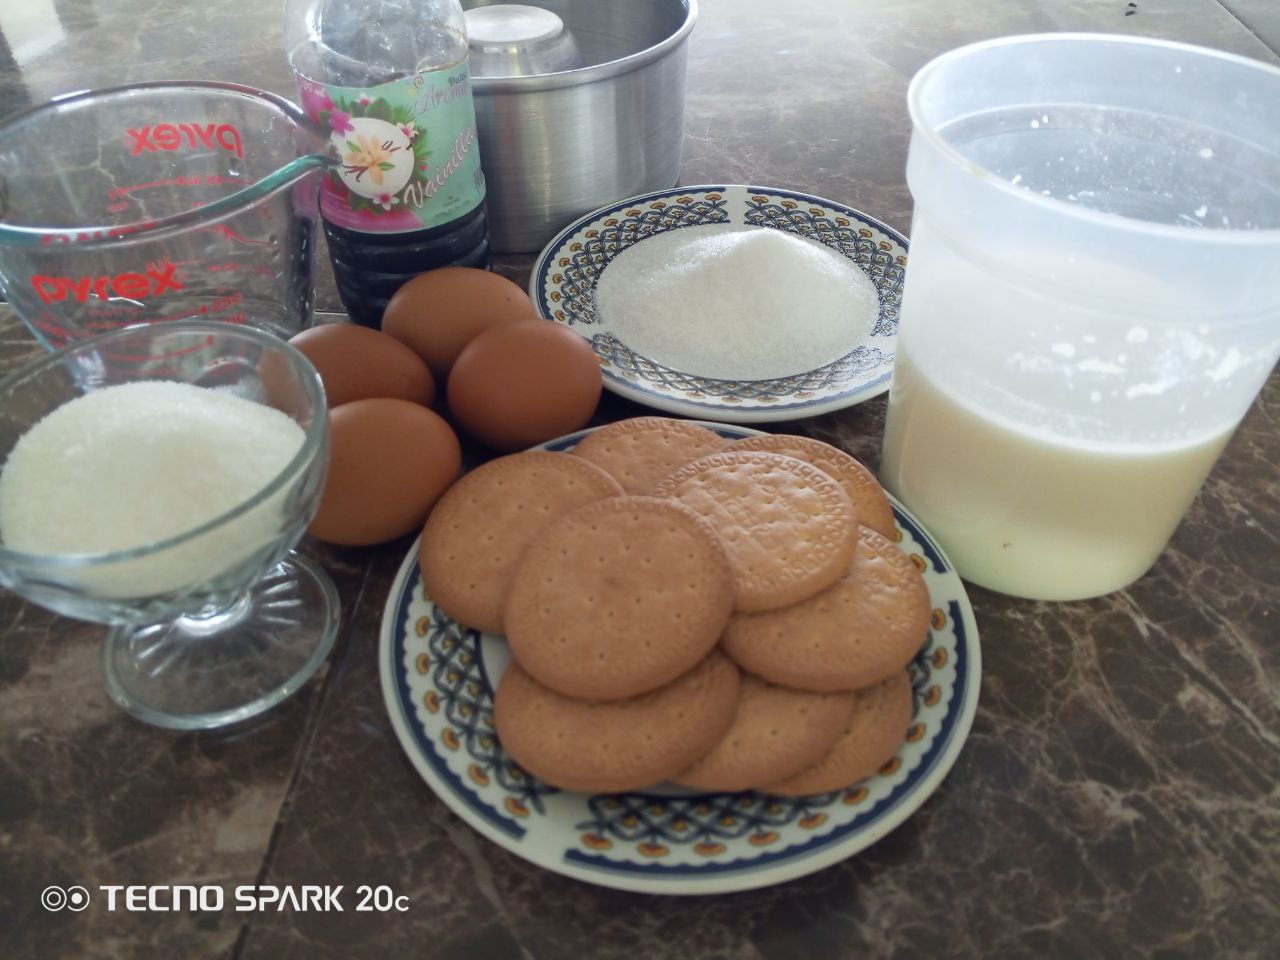
- 4 Eggs
- 400 ml of Milk
- 10 Units of Maria Cookies
- 75 Grams of Sugar
- 1 Tablespoon of Vanilla Extract For the Caramel:
- 75 Grams of Sugar
- 25 ml of water.
Let's get to the preparation:
The first thing we'll do is preheat the oven to 180 degrees.
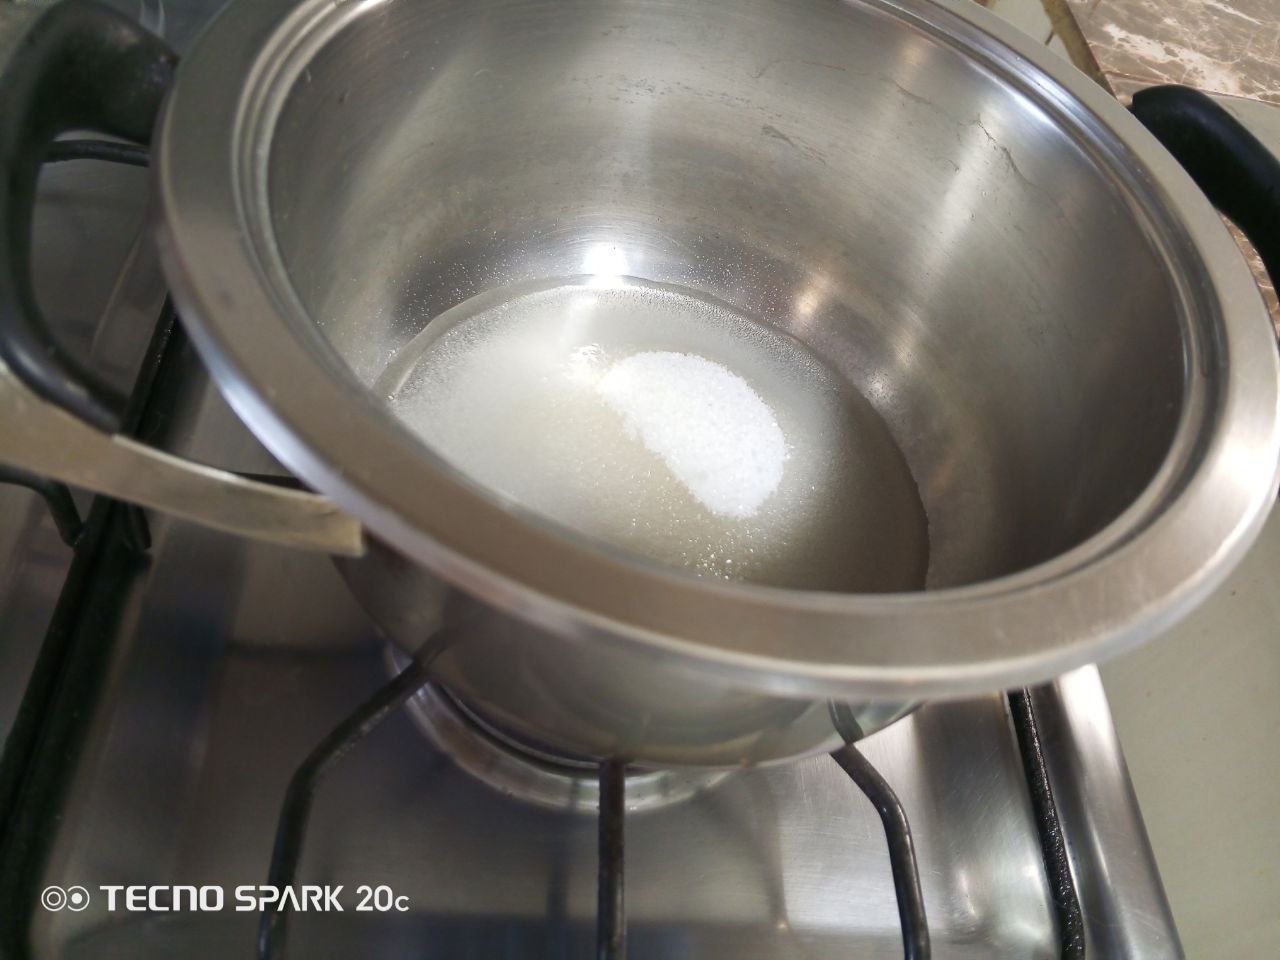
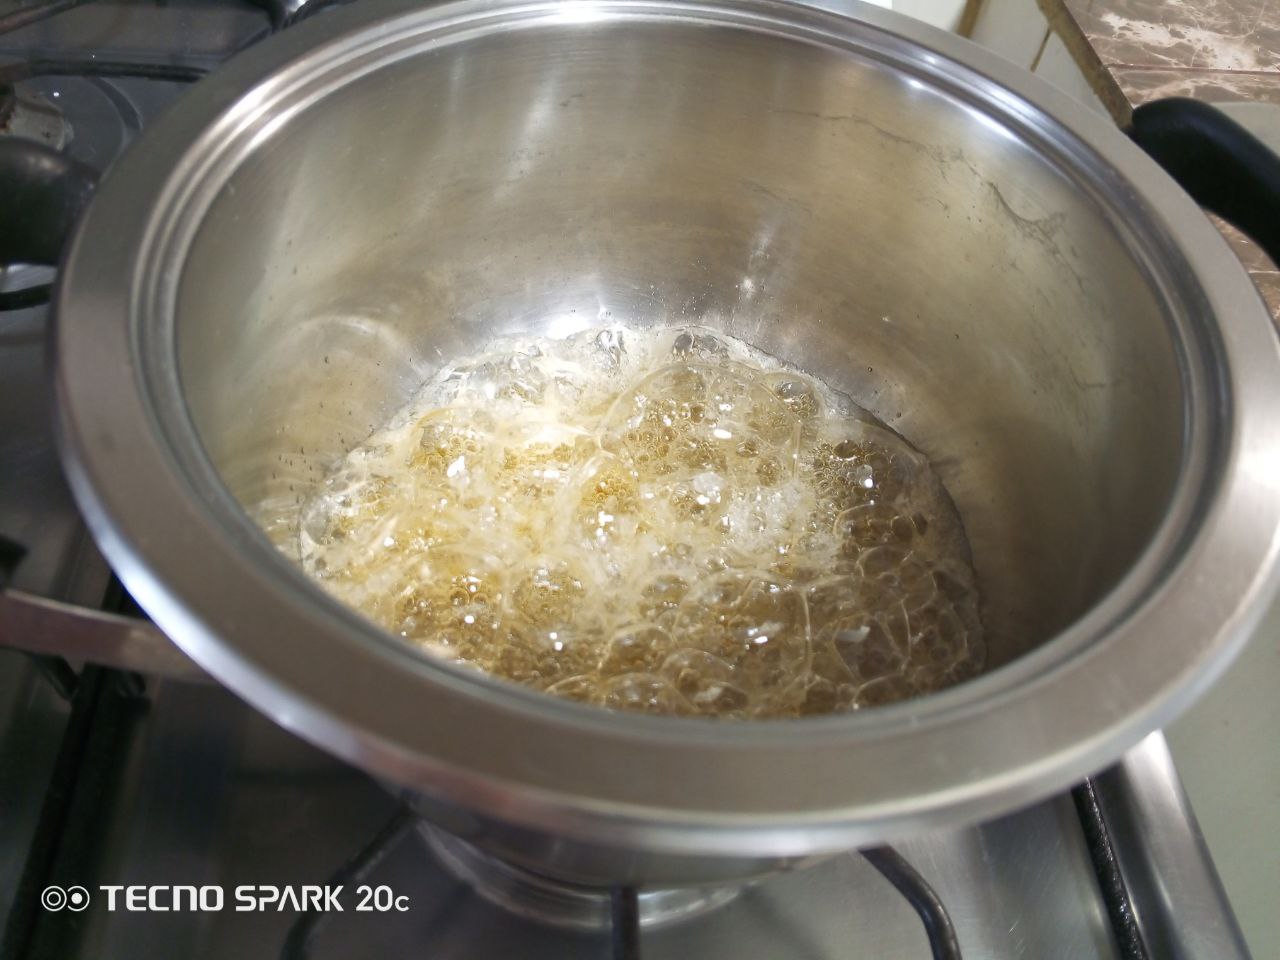
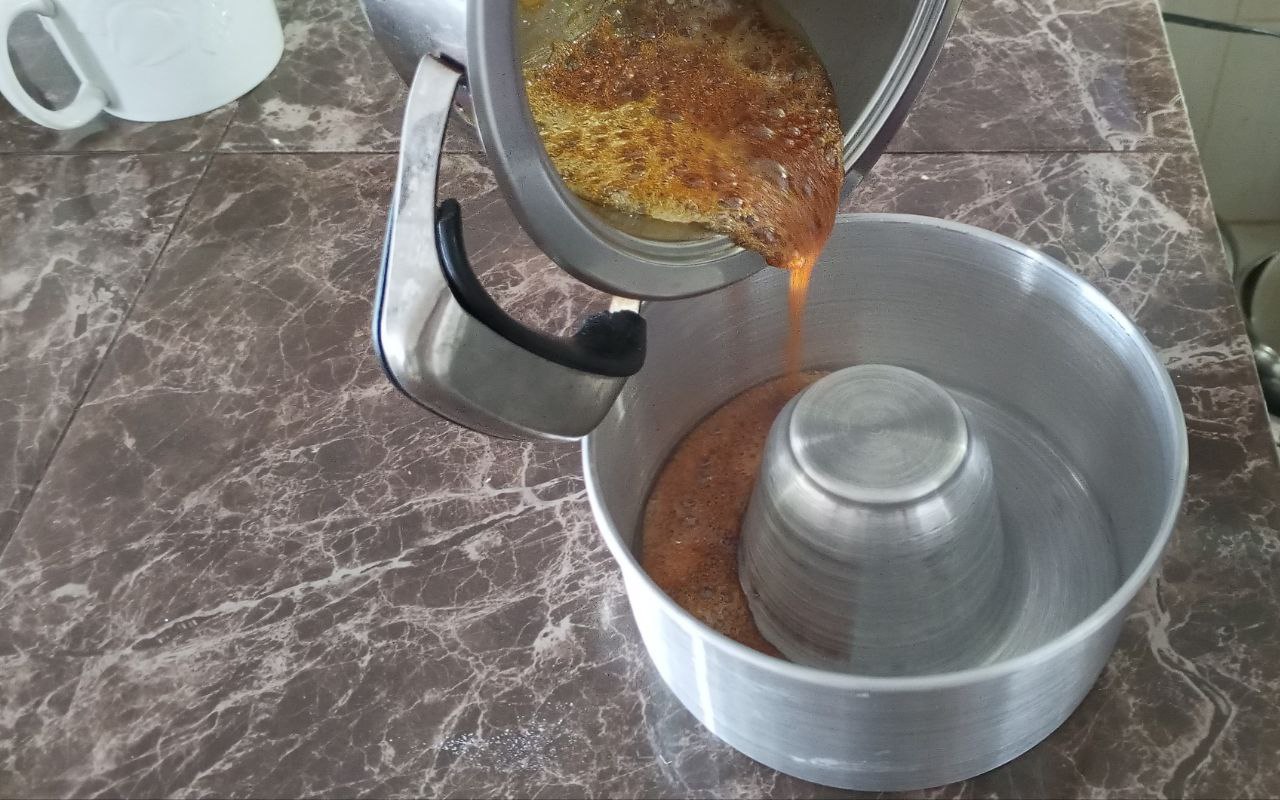
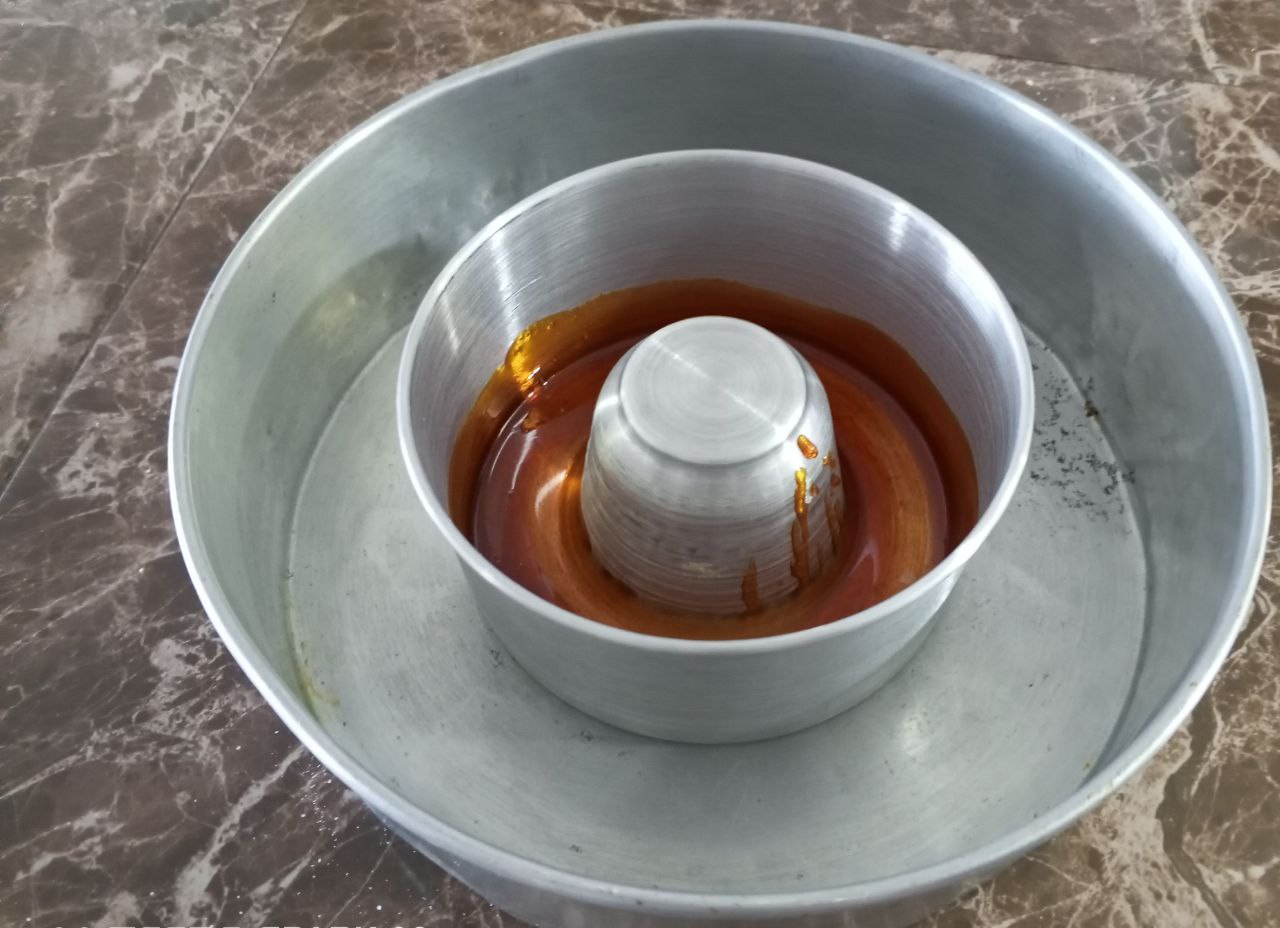
Then we'll make the caramel. We'll pour the 75 grams of sugar into a pot along with the 25 ml of water and let it cook over low heat until the caramel turns golden.
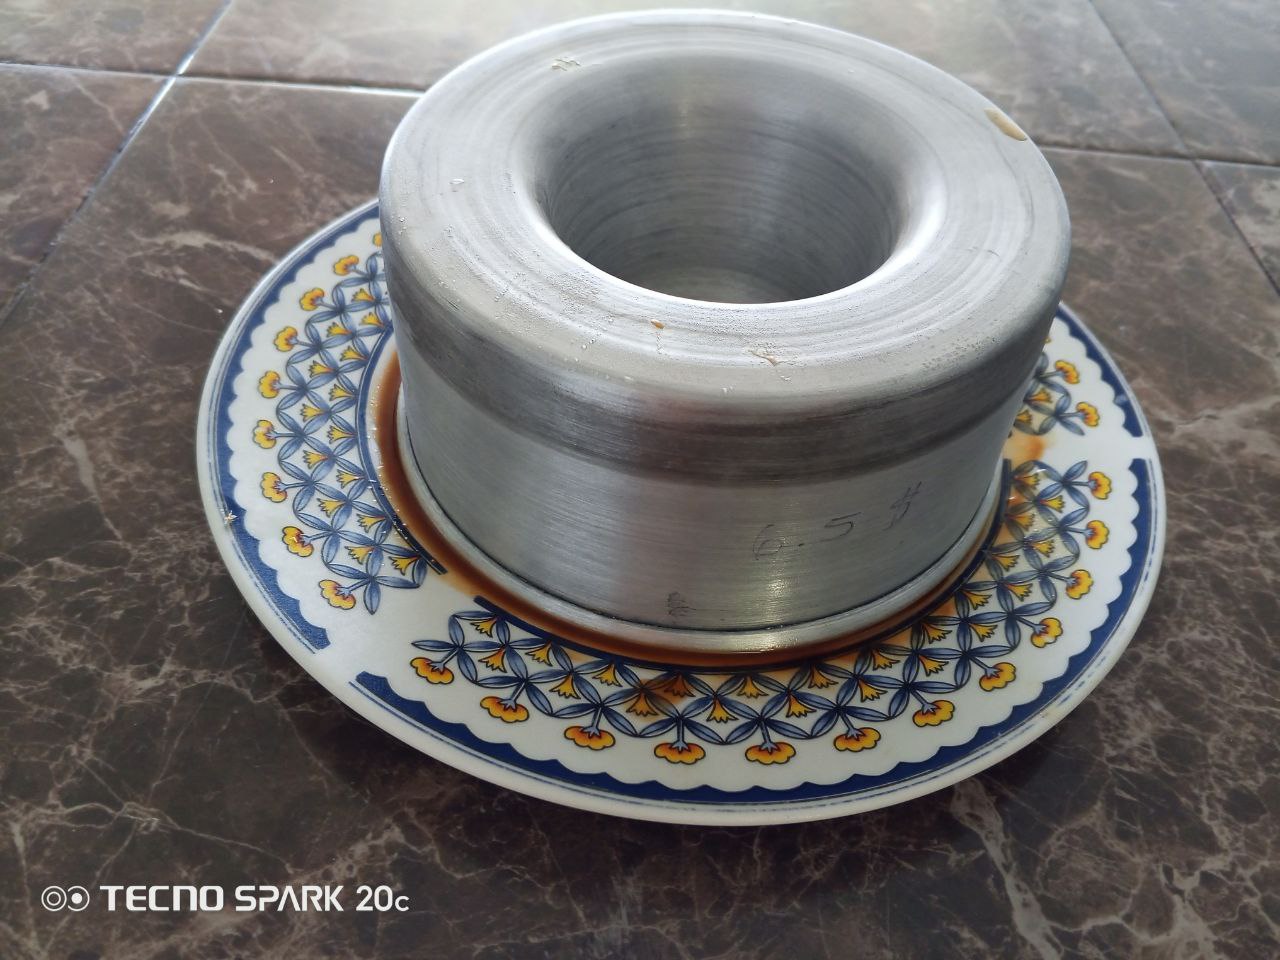
Then we pour the caramel into the mold that we are going to use. We dispersed it a bit on the walls.

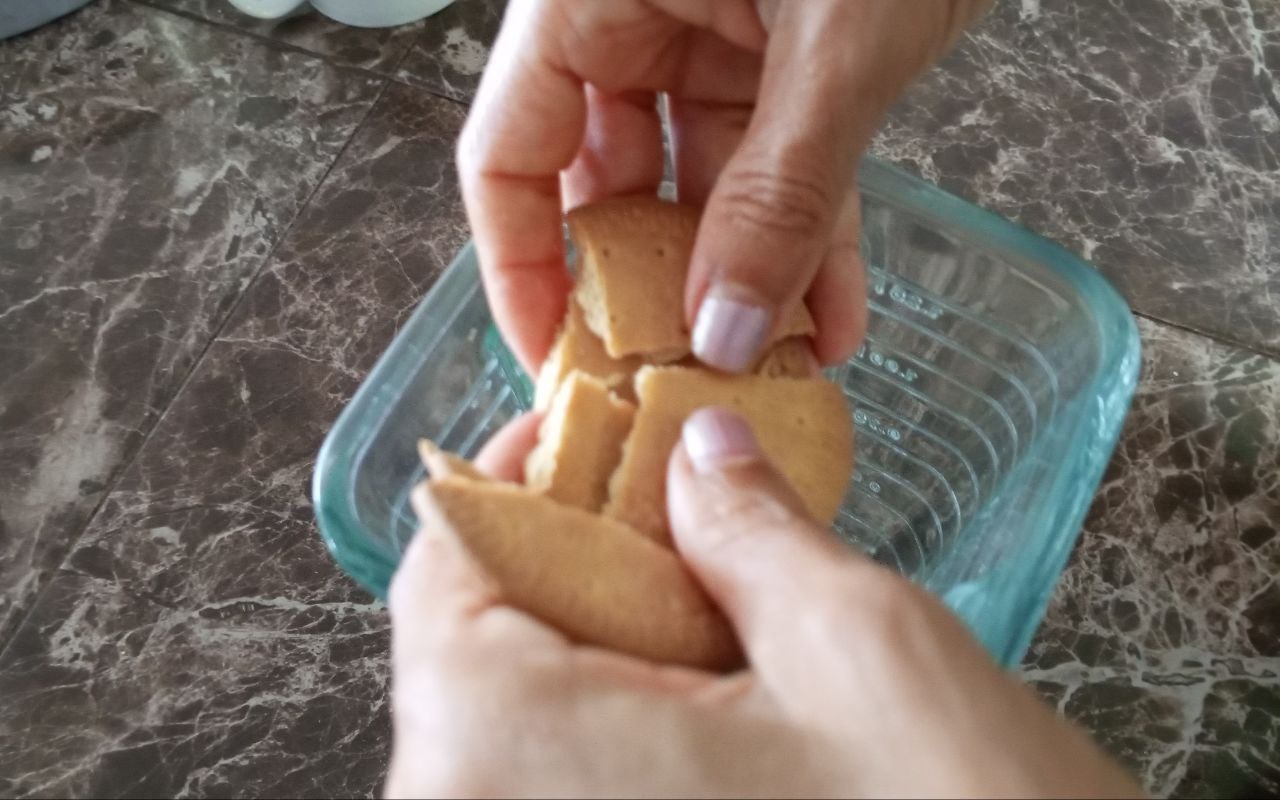
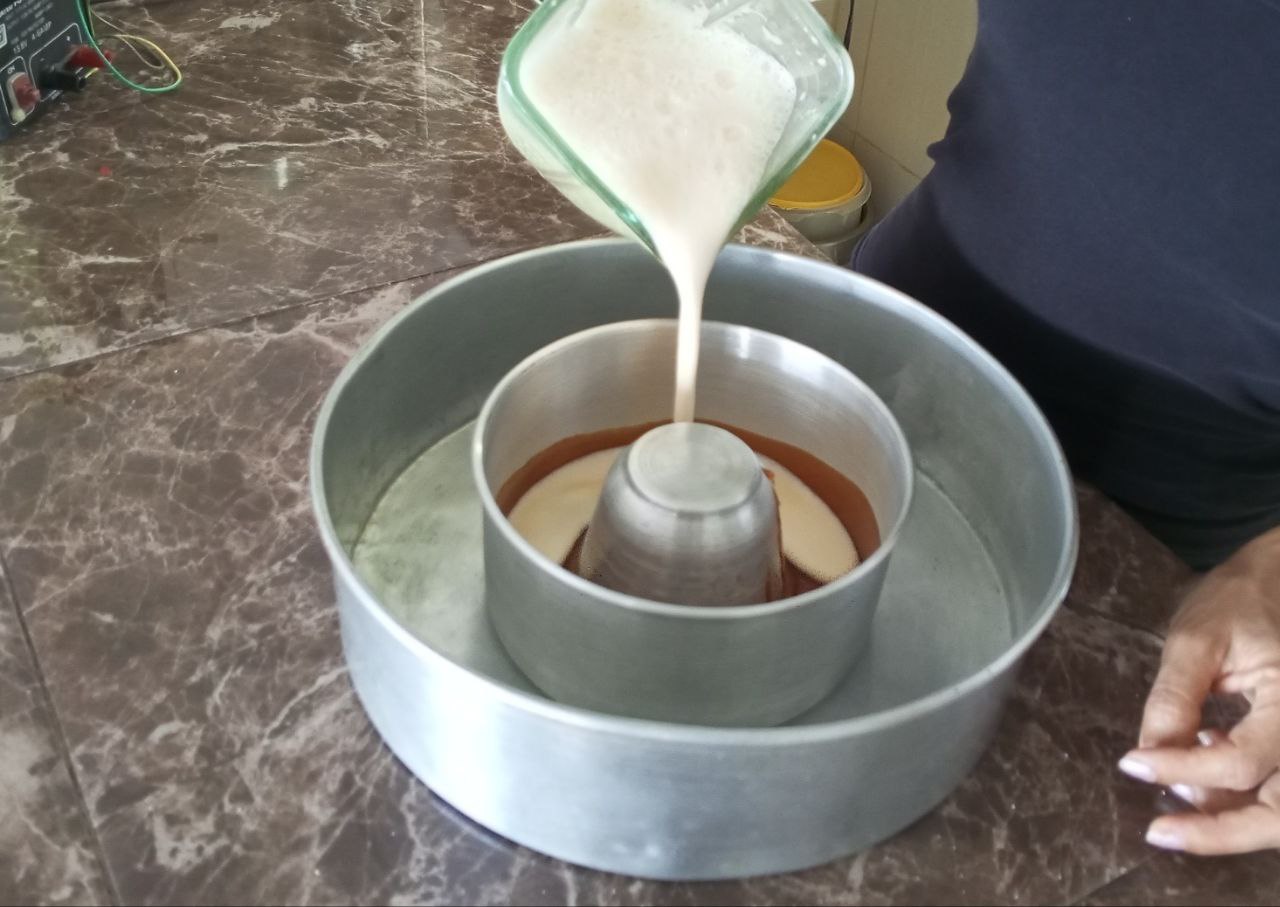
Now we are ready to Make the Quesillo mix. In a blender, add the Maria cookies and chop them up a bit.
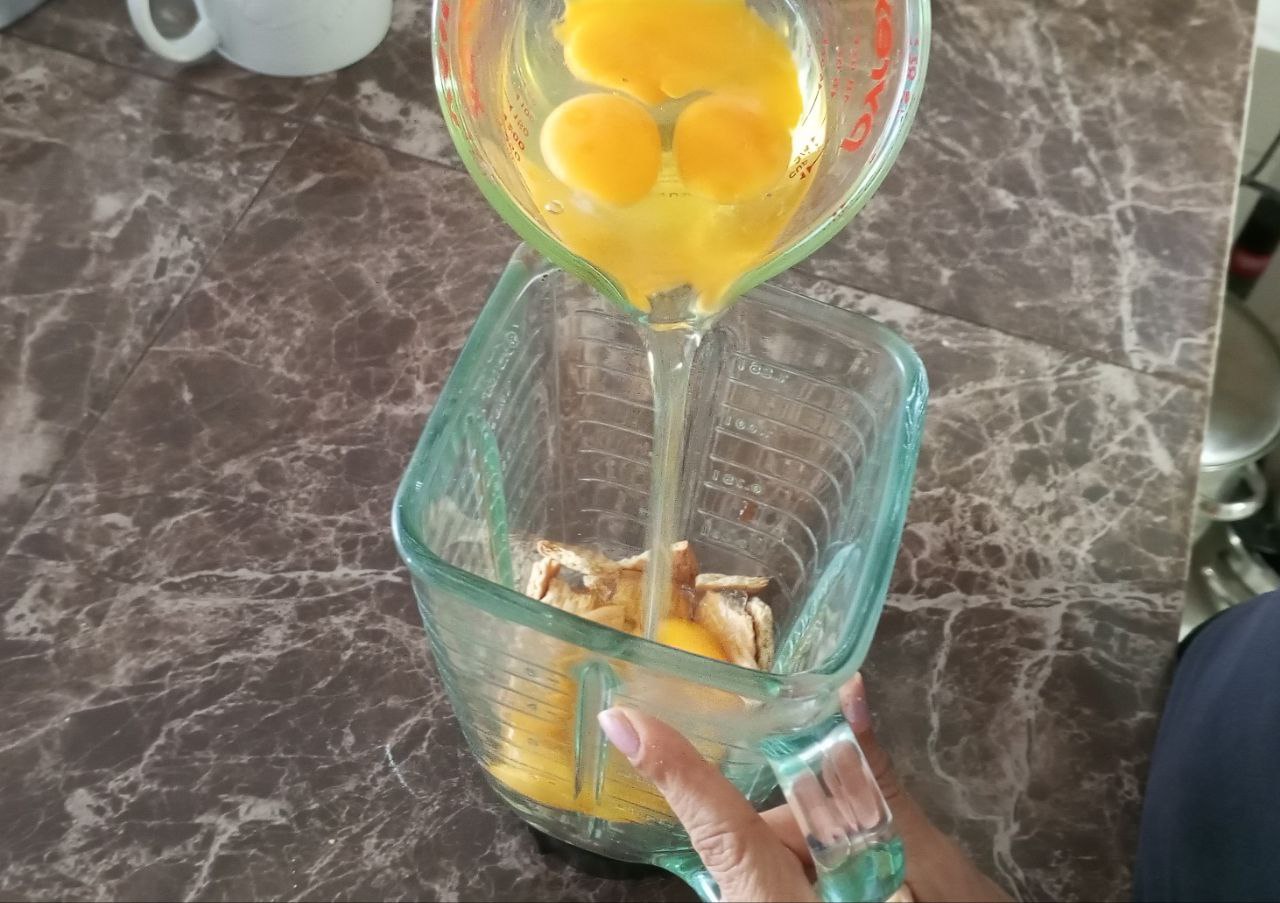
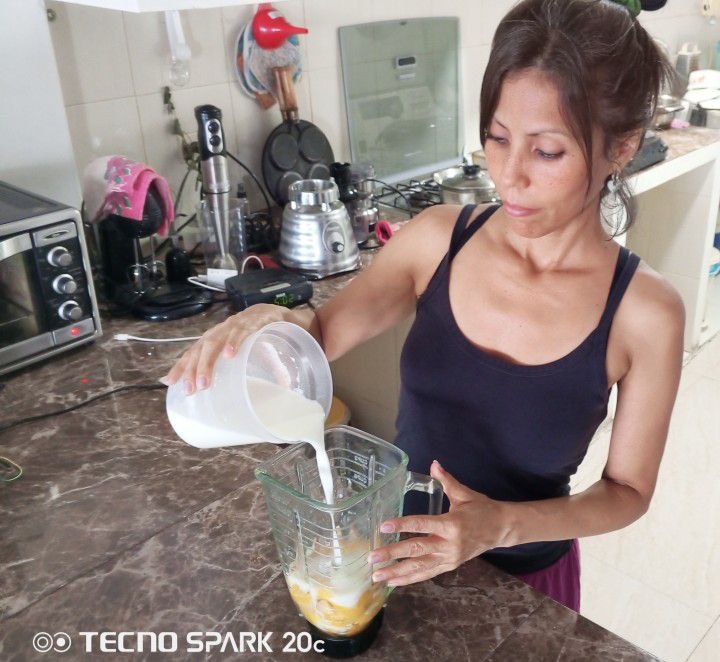
We add the Eggs, Milk.
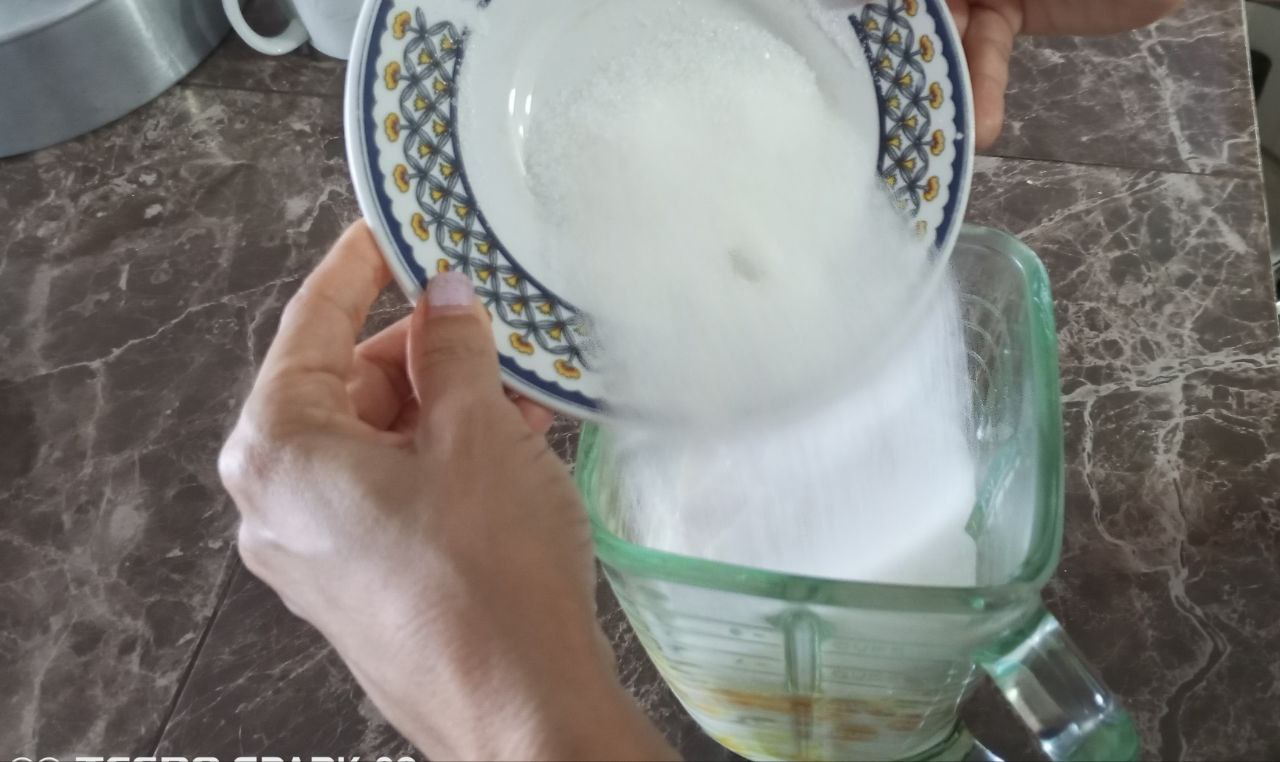
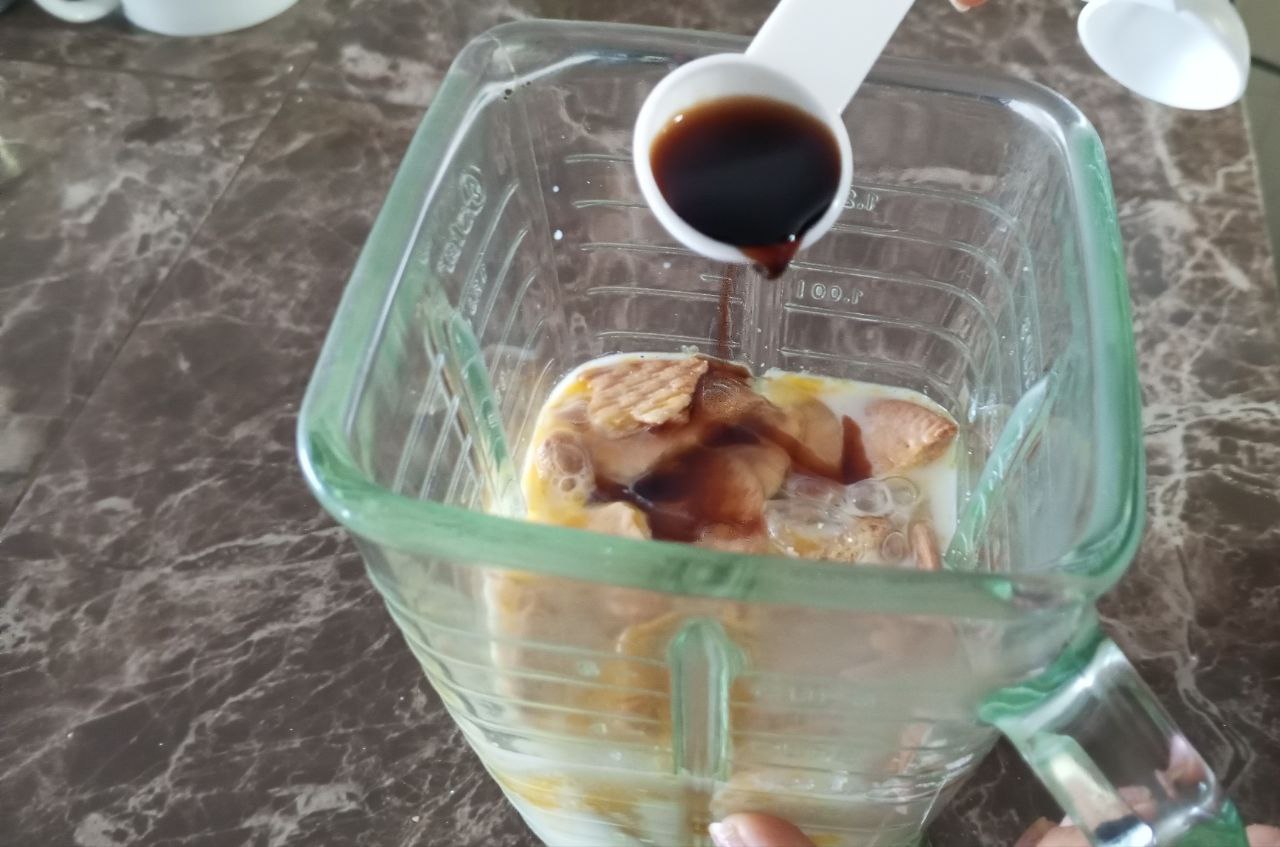
Sugar and Vanilla.
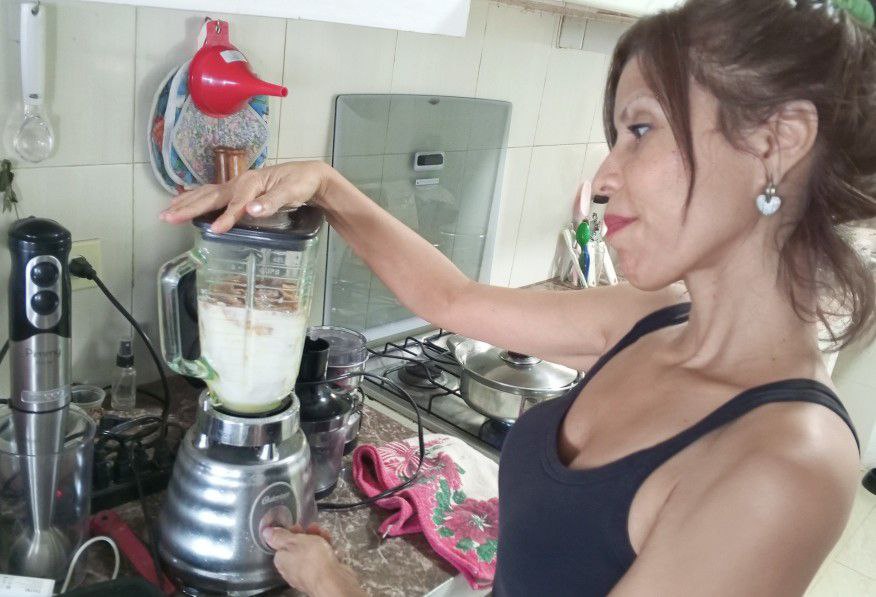
Let's blend Mix at low speed until the mixture is smooth.
Then place the Quesillo Mold on a baking sheet.
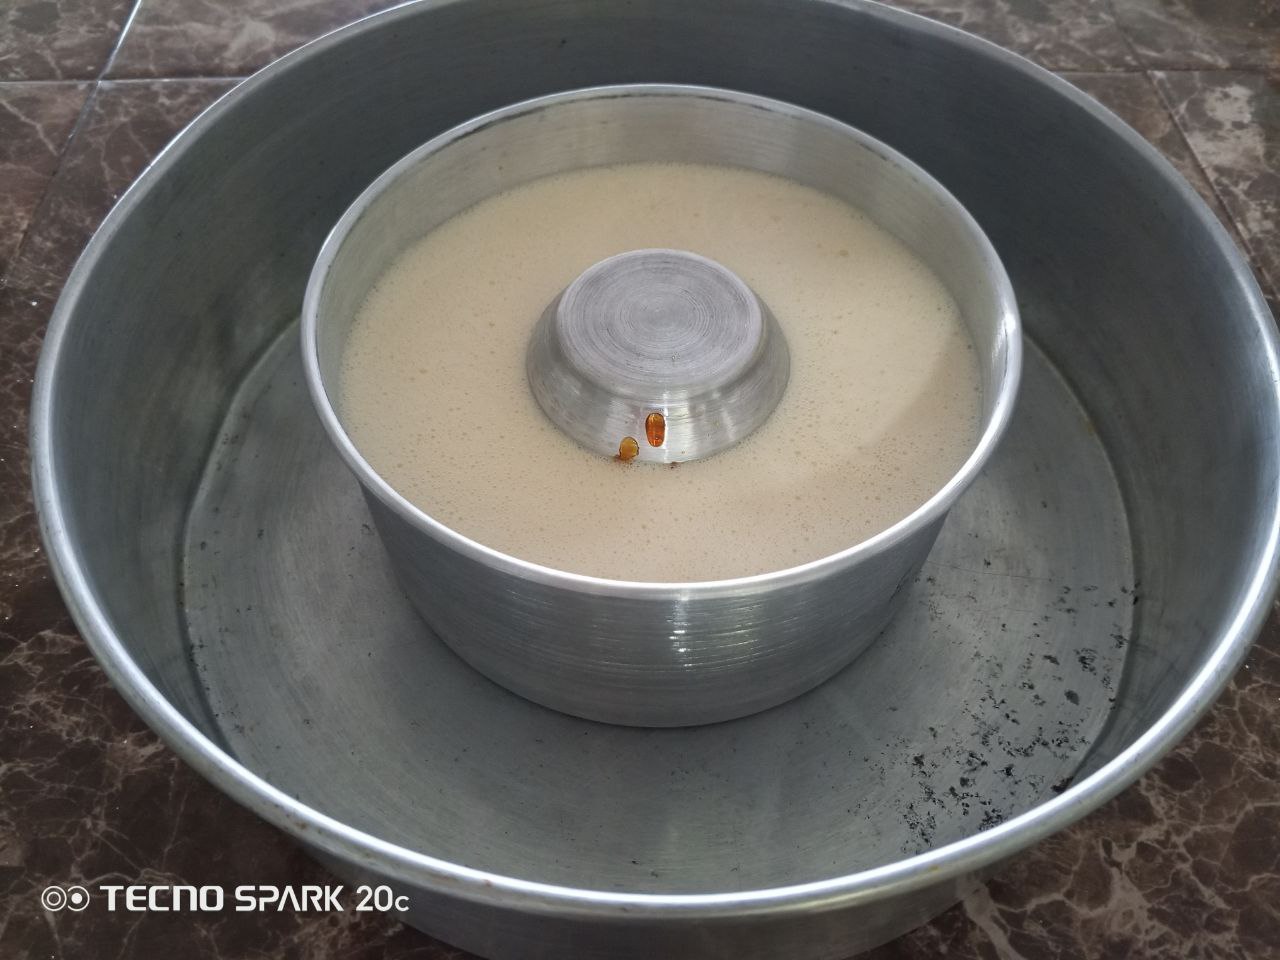
Pour the mixture into the Quesillo mold.
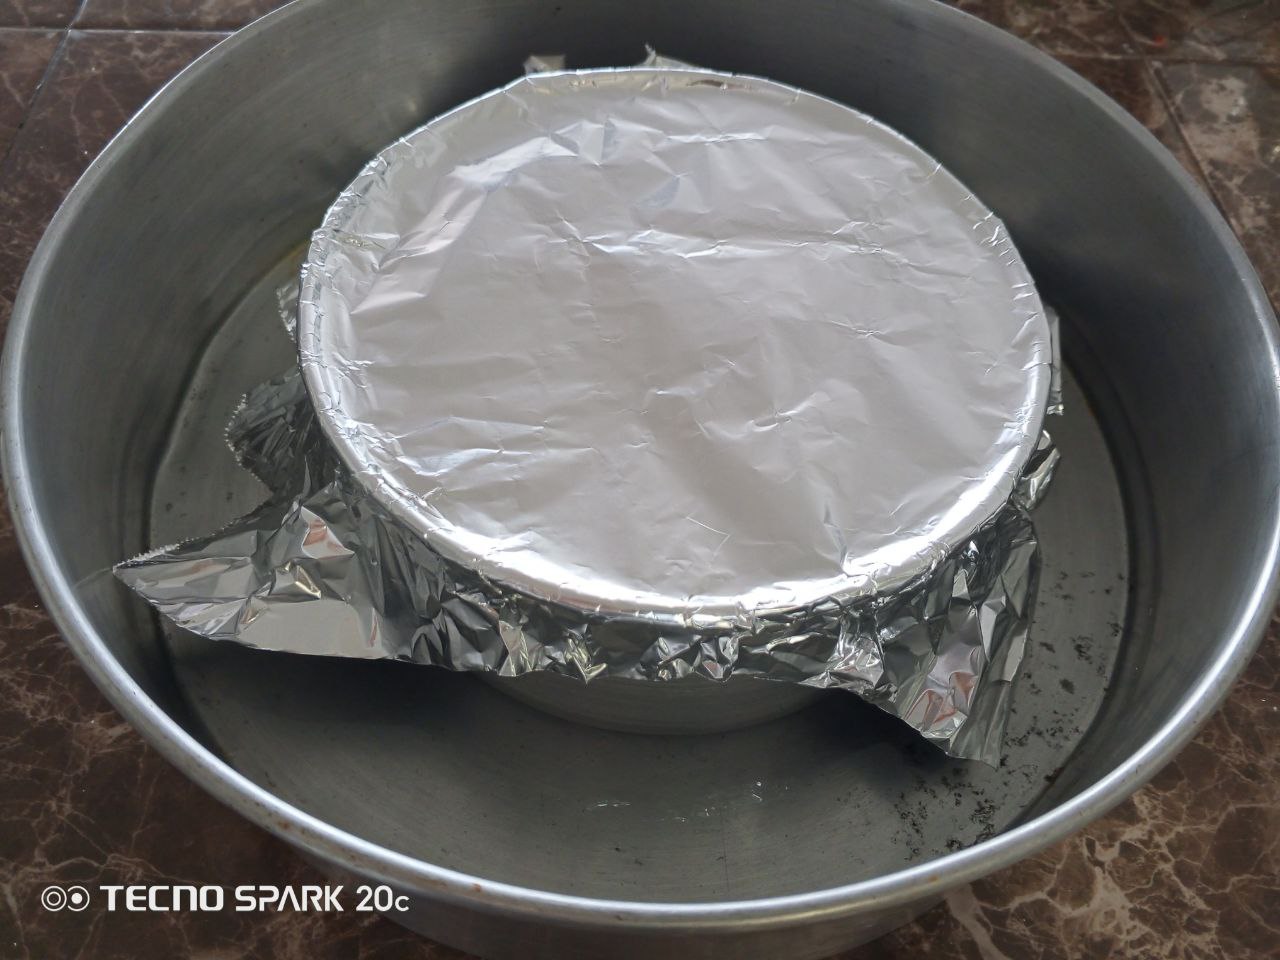
Now we add to the tray Add about 3 inches of hot water to the oven, since we're going to cook our quesillo in a double boiler.
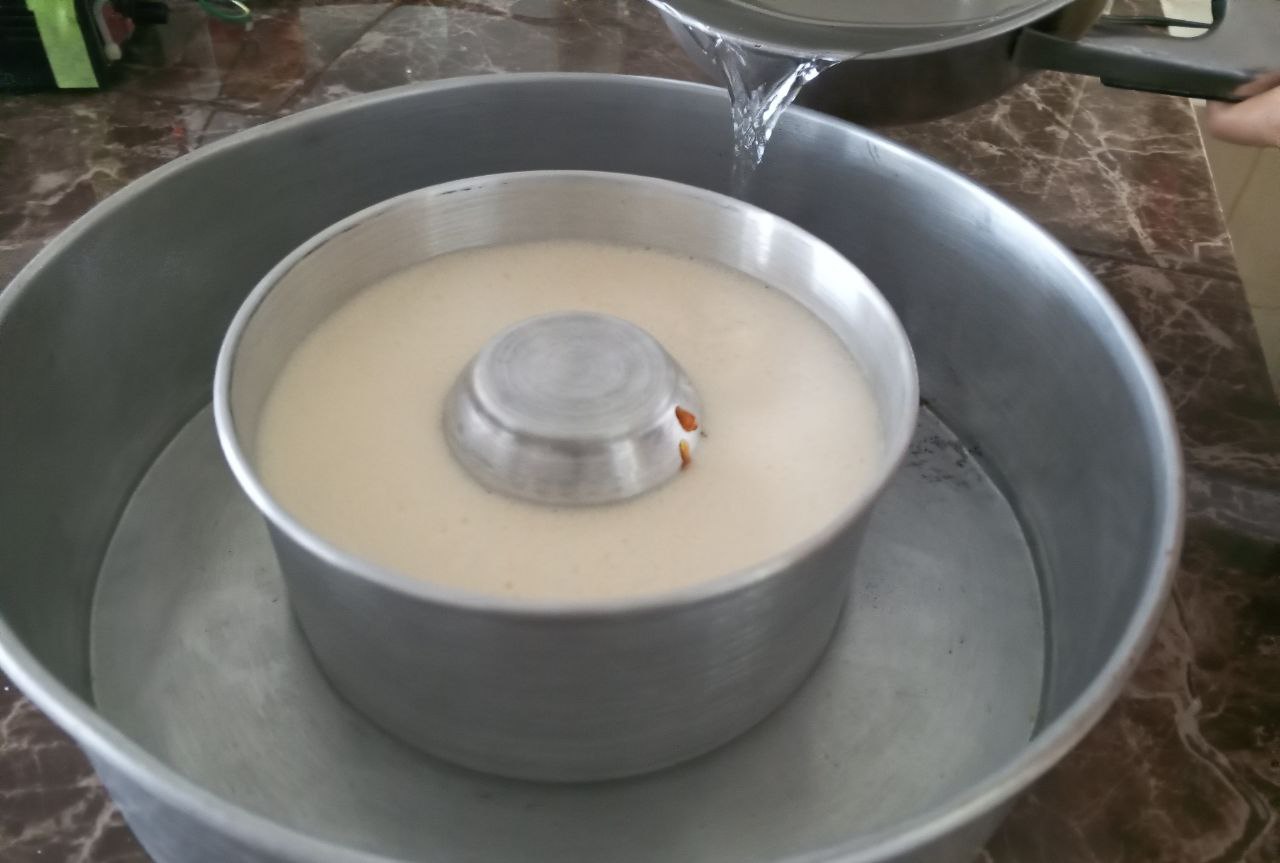
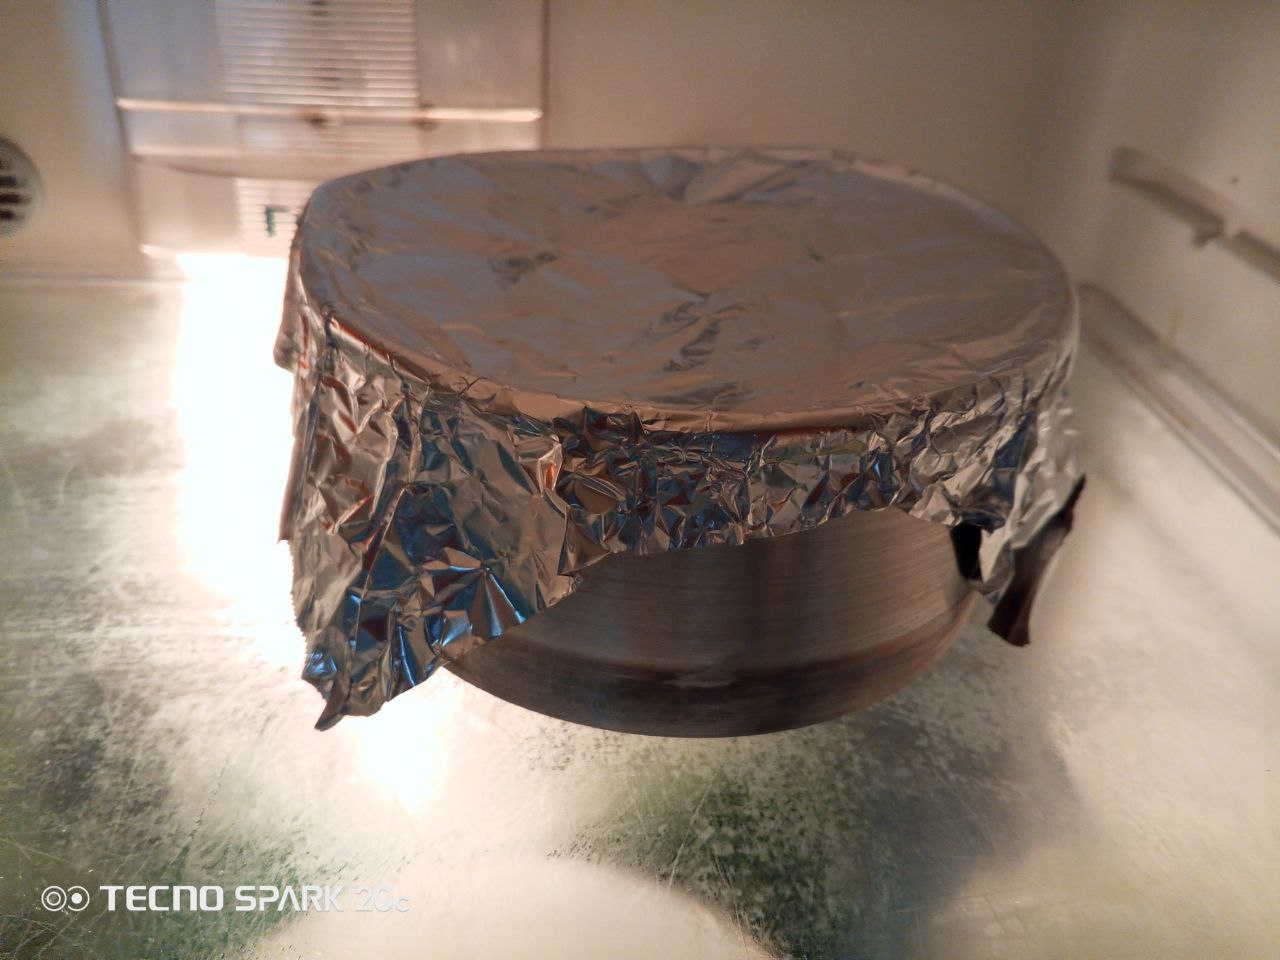
Cover the pan. I used aluminum foil because this pan doesn't have a lid.
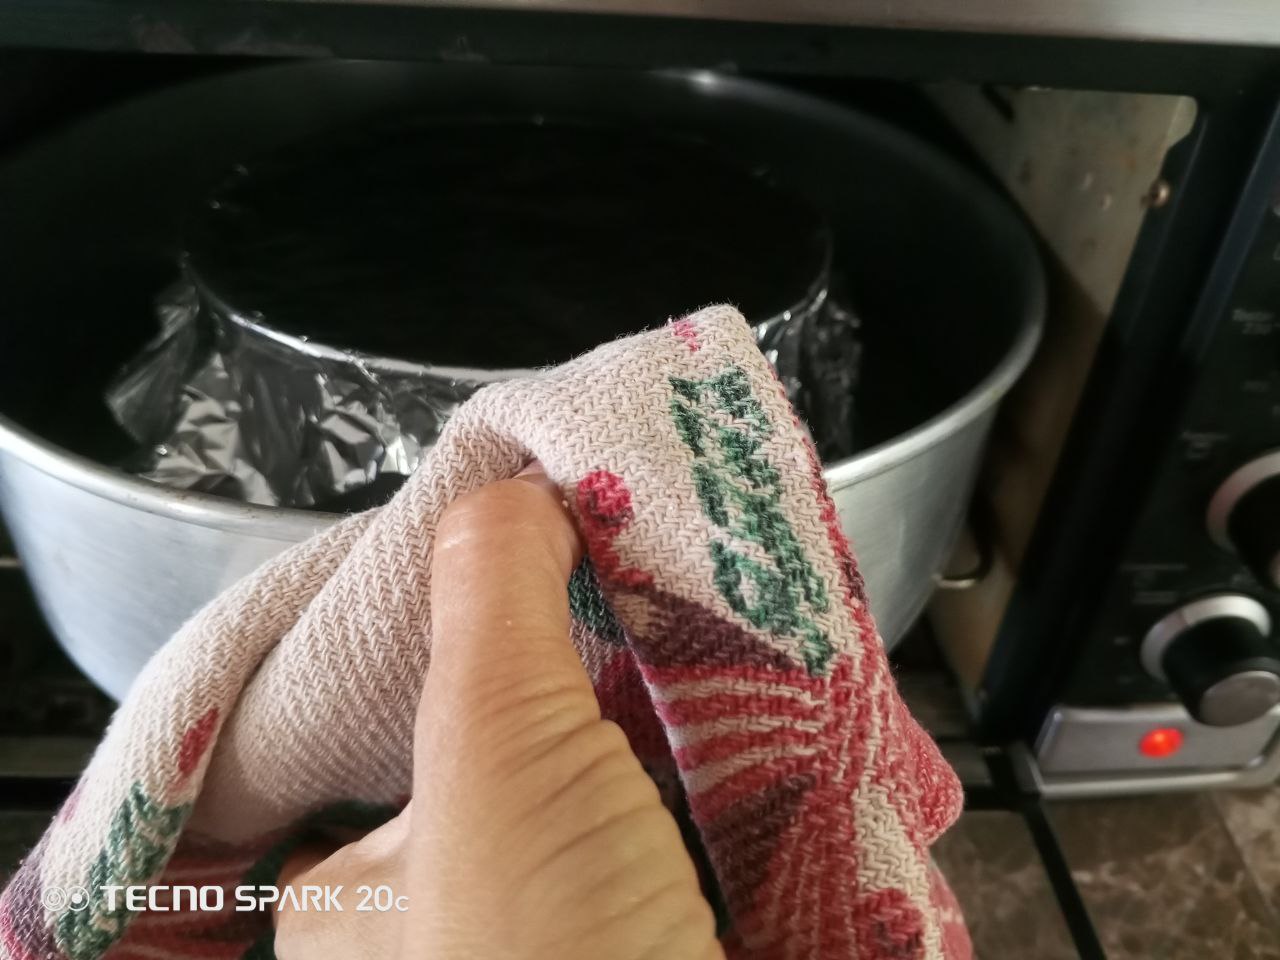
Bake for approximately 1 hour.
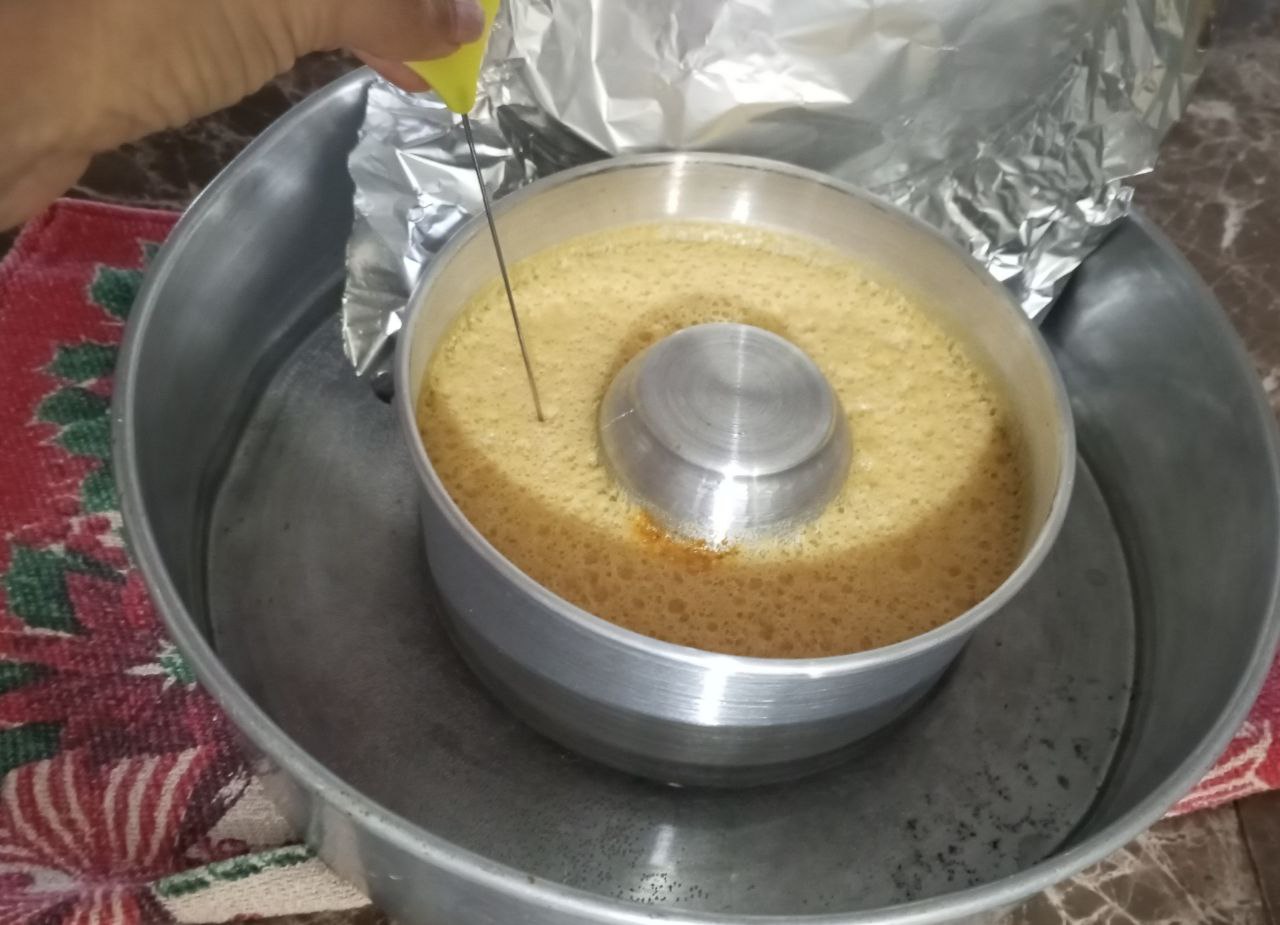
When the time is up, remove the Quesillo and test it with a pastry whisk. It should come out slightly moist.
Let it cool to room temperature and then refrigerate for about 5 hours or overnight. This way, our Quesillo will be firmer.
Take it out of the fridge (I left it overnight) and carefully turn it upside down onto a plate. It's always a good idea to run a knife along the edges of the Quesillo before turning it over and heat it for a few seconds. This makes it easier to release the dessert.
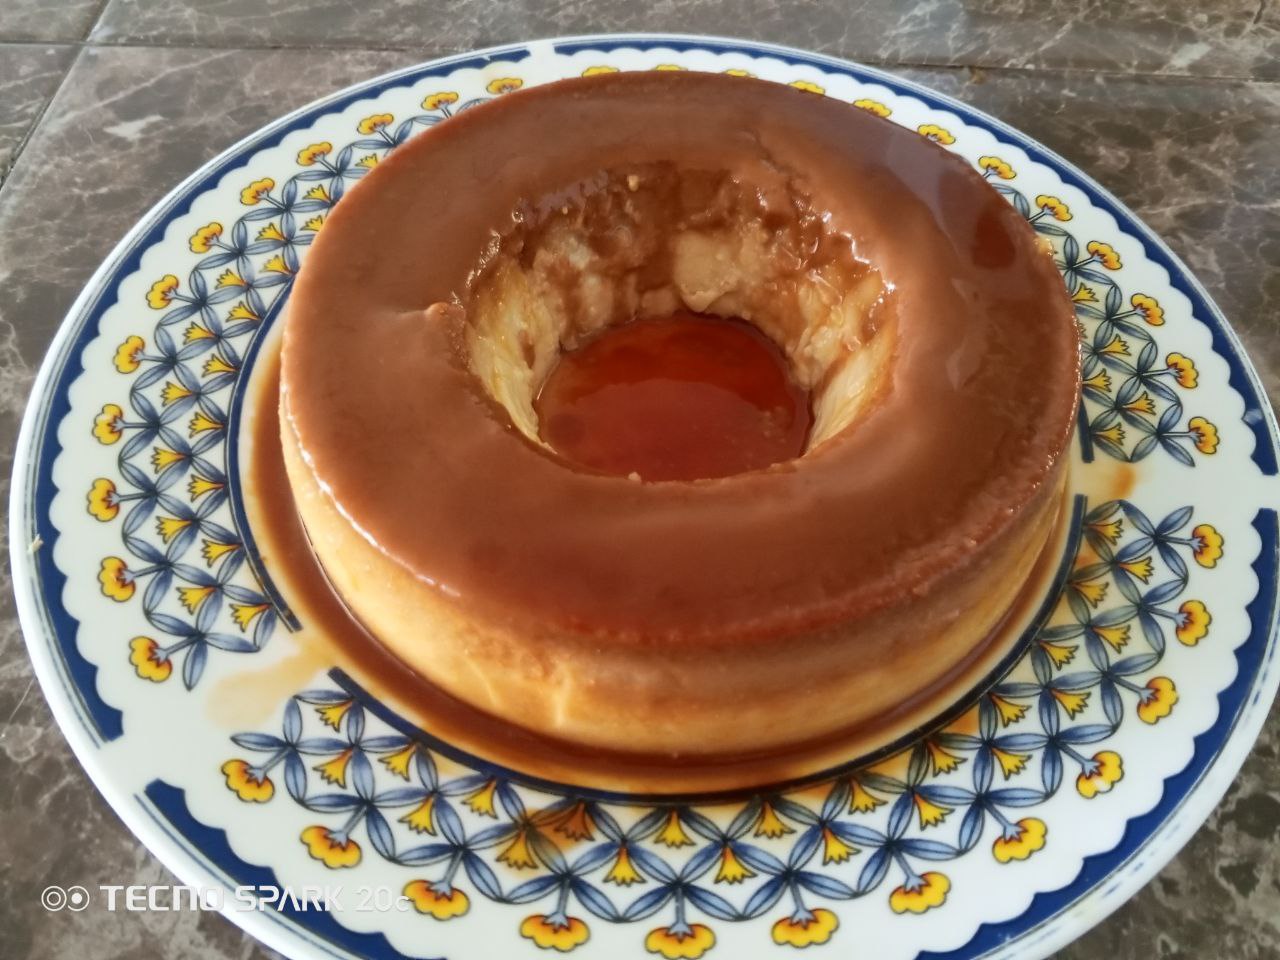
Look how beautiful it turns out! Look at the color! Yum, yummy! 😍 Just cut a piece and enjoy! 😋
Makes: Approximately 7 servings.
Credit for this recipe goes to: “Mi Tarta Preferida” YouTube channel 👌
Thank you for your kind company and support. May the Creator bless you generously. 🙏

Photos of my own taken and edited with my Tecno Spark 20C phone. Microsoft Word separators and shapes. Collage Used: CollageMaker.
ESPAÑOL.
Saludos querida comunidad de la Cocina Creativa 😊
Vamos a endulzarnos hoy, vamos a empalagarnos hoy con esta receta que les he traído.
Esta receta la vi en un canal de Internet y robó mi corazón desde que la vi, siempre me ha encantado el Quesillo, cuando era niña y mi madre hacía fiestas a la hora de repartir la torta lo que yo más anhelaba era el Quesillo porque mamá hacía uno muy exquisito, ¡esa textura cremosa era la locura! me encantaba 😍
Muy pocas veces lo he preparado y esta receta llamó mi atención porque está hecha con Galletas María una de mis preferidas de siempre, además no lleva leche Condensada y no podía desperdiciar el momento de preparar este Quesillo porque me pareció una manera un poco diferente e interesante de prepararlo.
Lo cierto es que realmente valió la pena poner manos a la obra porque este Quesillo quedó muy rico, tiene dos texturas, ¡la de arriba es firme por la Galleta y la de abajo ummmmm cremosa!
¡Si te interesa esta receta te invito a que la hagamos juntos! 😉
Ingredientes:
- 4 Huevos.
- 400 Ml de Leche.
- 10 Unidades de Galleta María.
- 75 Gramos de Azúcar
- 1 Cucharada de Extracto de Vainilla. Para el Caramelo:
- 75 Gramos de Azúcar.
- 25 Ml de Agua.
Vamos con la preparación:
Lo primero que haremos es poner a precalentar el horno a 180 grados.
Luego nos disponemos a hacer el caramelo, echamos los 75 gramos de Azúcar en una olla junto con los 25 Ml de Agua y dejamos cocinar a fuego bajo hasta que el caramelo se ponga dorado.
Luego vertemos el caramelo en el molde que vamos a usar lo dispersamos un poco por las paredes.
Ahora nos disponemos a hacer la mezcla para el Quesillo, en un vaso de Licuadora vamos a echar la Galleta María y las troceamos un poco.
Agregamos los Huevos, la Leche.
El Azúcar y la Vainilla.
Nos disponemos a licuar a velocidad baja hasta que quede la mezcla bien homogénea.
Luego colocamos el Molde para el Quesillo en una Bandeja de Horno.
Vertemos la Mezcla en el molde de Quesillo.
Ahora agregamos a la bandeja de Horno unos 3 dedos de Agua caliente, ya que vamos a cocinar nuestro quesillo a Baño de María.
Tapamos, yo he usado papel aluminio porque este molde no tiene tapa.
Metemos al horno por aproximadamente 1 hora.
Al cumplirse el tiempo, sacamos el Quesillo, hacemos la prueba con la Varilla repostera, y esta debe salir ligeramente húmeda.
Dejamos enfriar a temperatura ambiente y luego metemos a la nevera por unas 5 horas o de un día para el otro, así nuestro Quesillo estará más firme.
Sacamos de la Nevera, yo lo dejé de un día para el otro, y lo volteamos con cuidado en un plato, siempre es bueno antes de voltearlo meter un cuchillo por las orillas del Quesillo y también llevar unos segundos al fuego, esto hace que nuestro postre salga con más facilidad.
Miren que hermoso ha quedado, vean su color, ummmm delicioso! 😍 solo cortemos un trozo y a disfrutarlo! 😋
Rinde: 7 porciones aproximadas.
El Crédito de esta receta es para: canal de YouTube “Mi Tarta Preferida” 👌
Gracias por tu amable compañía y apoyo, el Creador te bendiga generosamente 🙏
image.png (https://files.peakd.com/file/peakd-hive/carisma77/243BXZjPQTXaoEBFcCZJfxZKyxEpsZKrfaipJa4pVn6fHzvExdwB76NRah2iLDM7xnYaj.png)
image.png (https://files.peakd.com/file/peakd-hive/carisma77/ALS5ikNpmM4s2Z4XCaCgziD27KVtixsUHb8gv8RJUv93fic9ynTSAVzWdehUeH8.png)
Fotos de mi propiedad tomadas y editadas con mi teléfono Tecno Spark 20C. Separadores y Figuras de Microsoft Word. Collage Usado: CollageMaker.