Made with Canva Editor
Imagen editada en Canva
Hola, mis queridos amigos de esta bella comunidad, hoy me gustaría mostrarles el trabajo que hice para recuperar la estructura de una silla de mimbre que conseguí el otro día en mi patio, se trataba de unas sillas de mimbre que yo tenía y que fueron deteriorándose con el tiempo, hasta que finalmente pensé que lo mejor sería quitarles todo el resto de mimbre y dejar nada más la estructura para mandarla a reparar en alguna otra ocasión, sin embargo el tiempo fue pasando y realmente hasta lo olvidé, pero el otro día cuando la encontré se me ocurrió la idea de restaurarla yo misma, sin embargo no usaría mimbre sino algunos retazos de tela que yo tenía. >Hello my dear friends of this beautiful community, today I would like to show you the work I did to recover the structure of a wicker chair that I got the other day in my yard, it was about some wicker chairs that I had and they were deteriorating over time, until finally I thought that the best thing would be to remove all the remaining wicker and leave only the structure to send it to be repaired some other time, however time went by and I really even forgot about it, but the other day when I found it the idea came to me to restore it myself, however I would not use wicker but some scraps of fabric that I had.

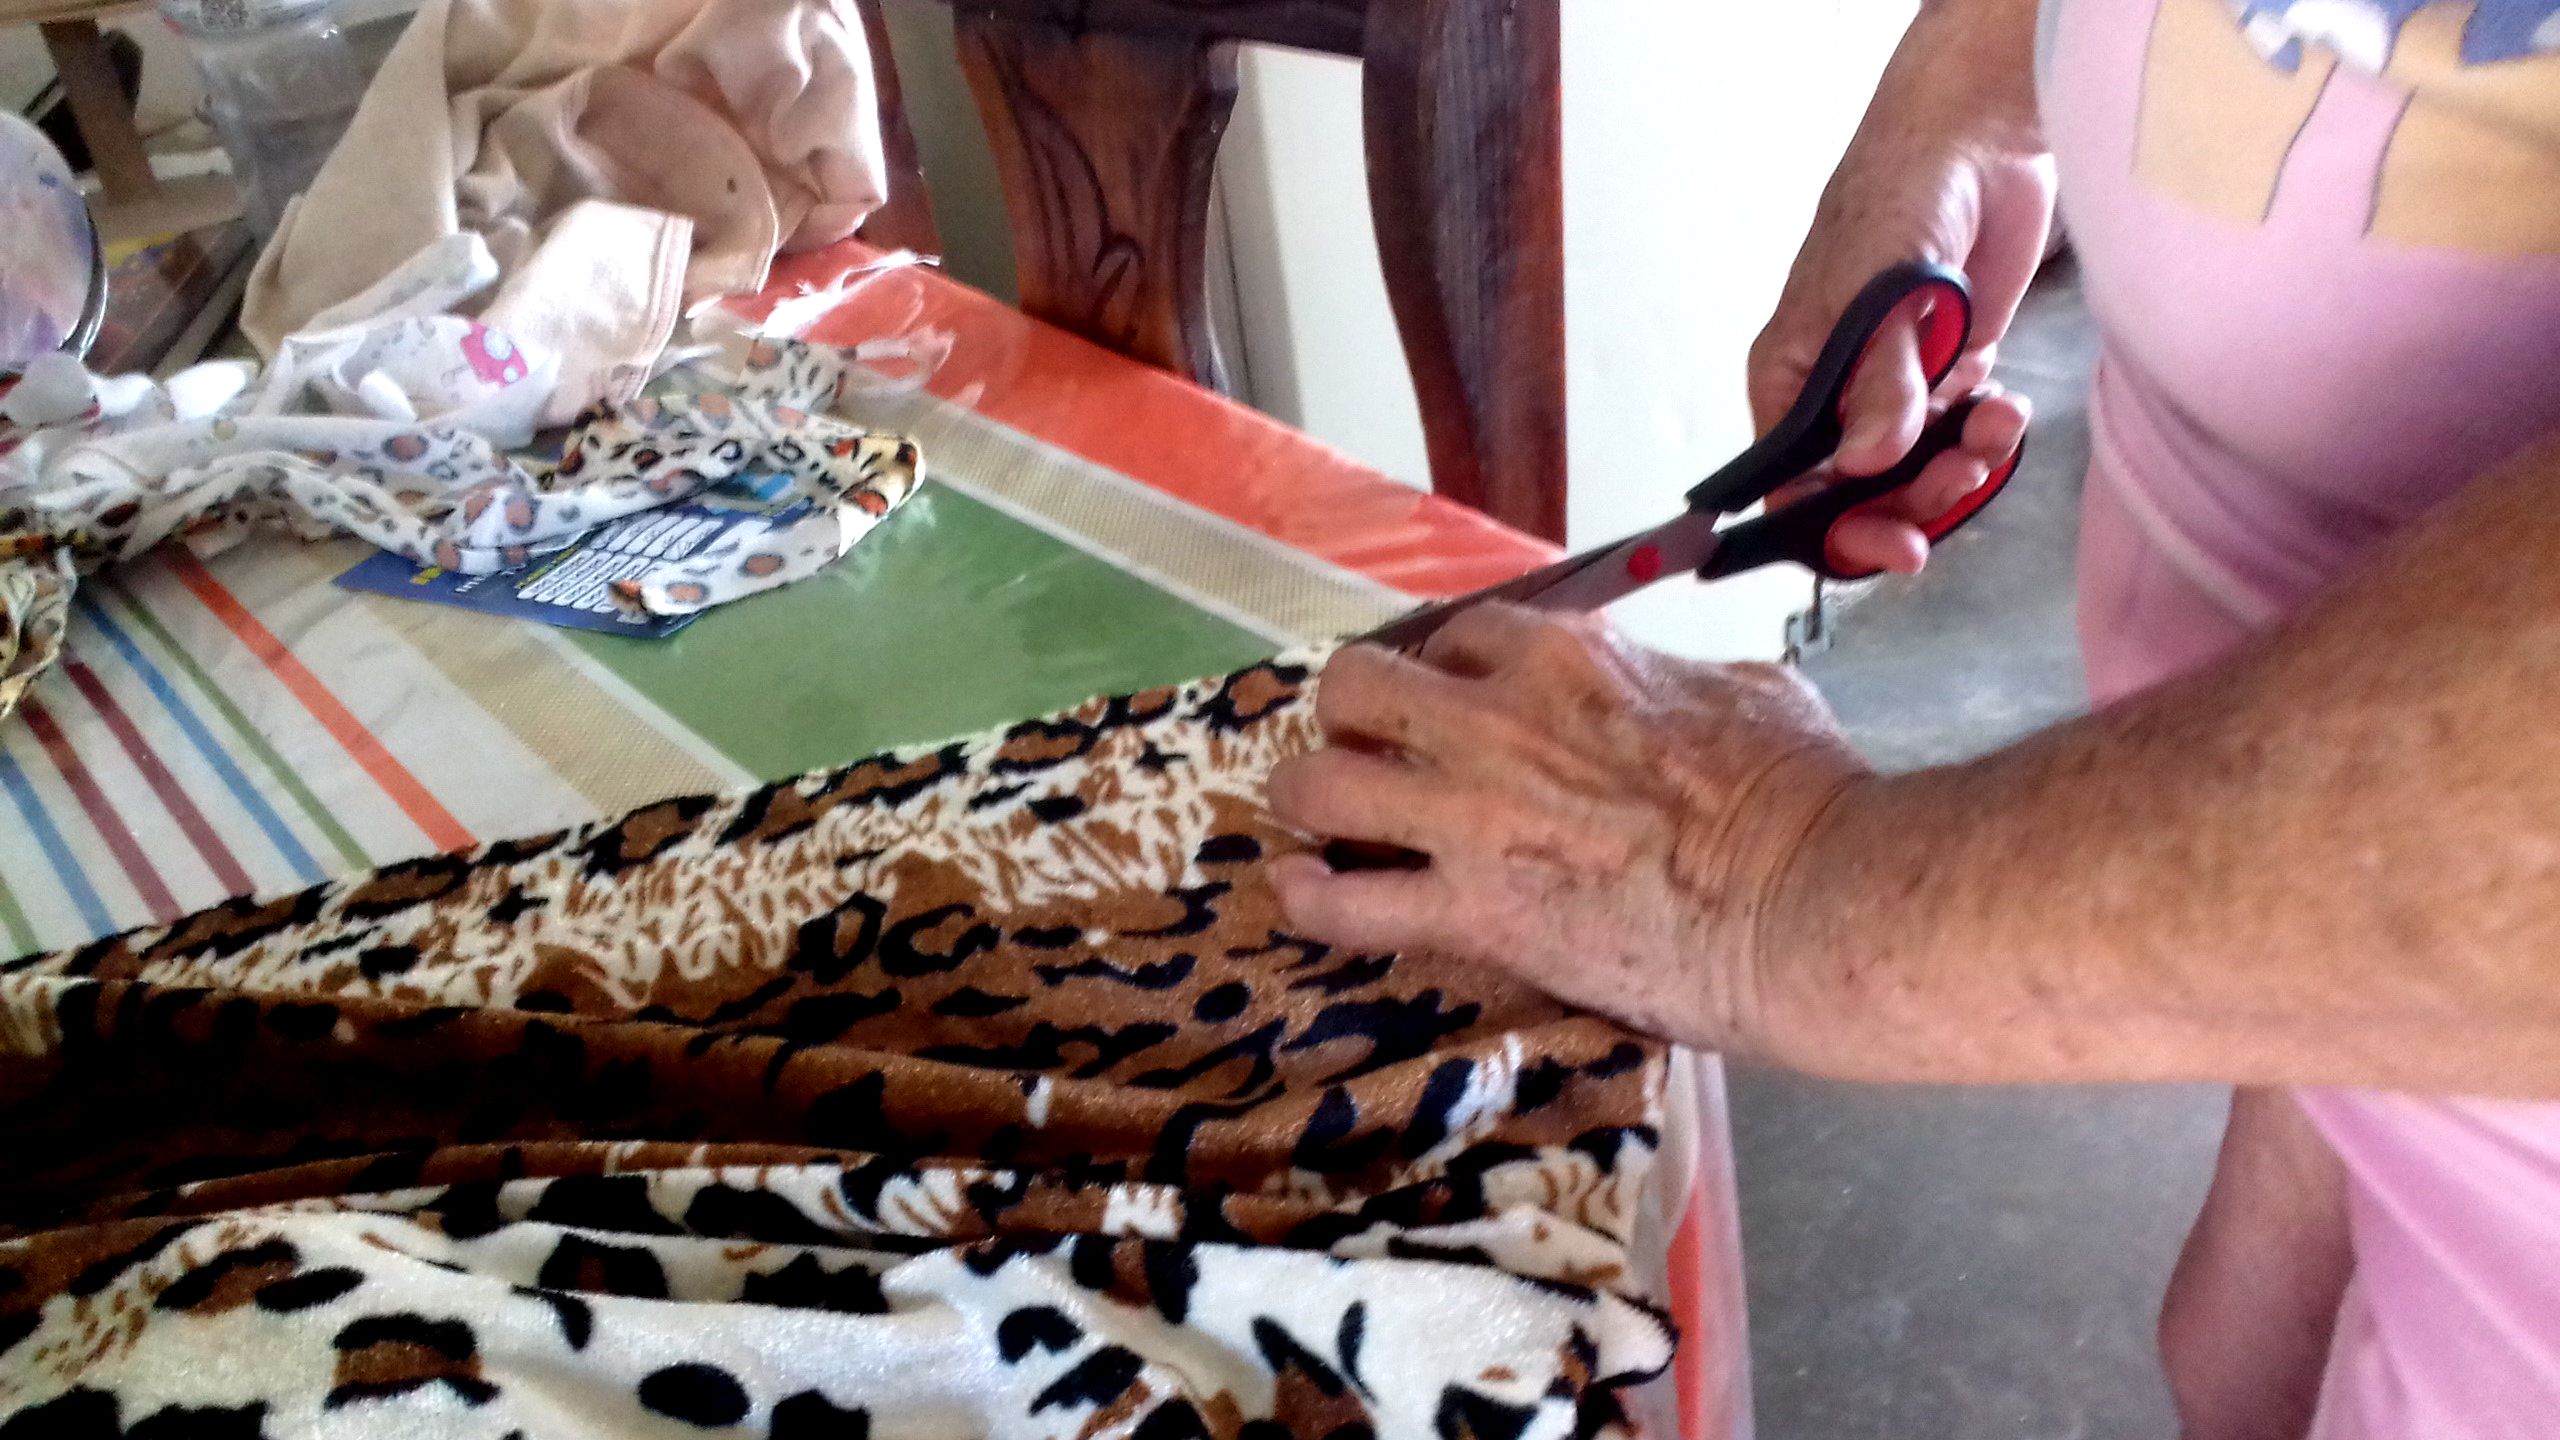
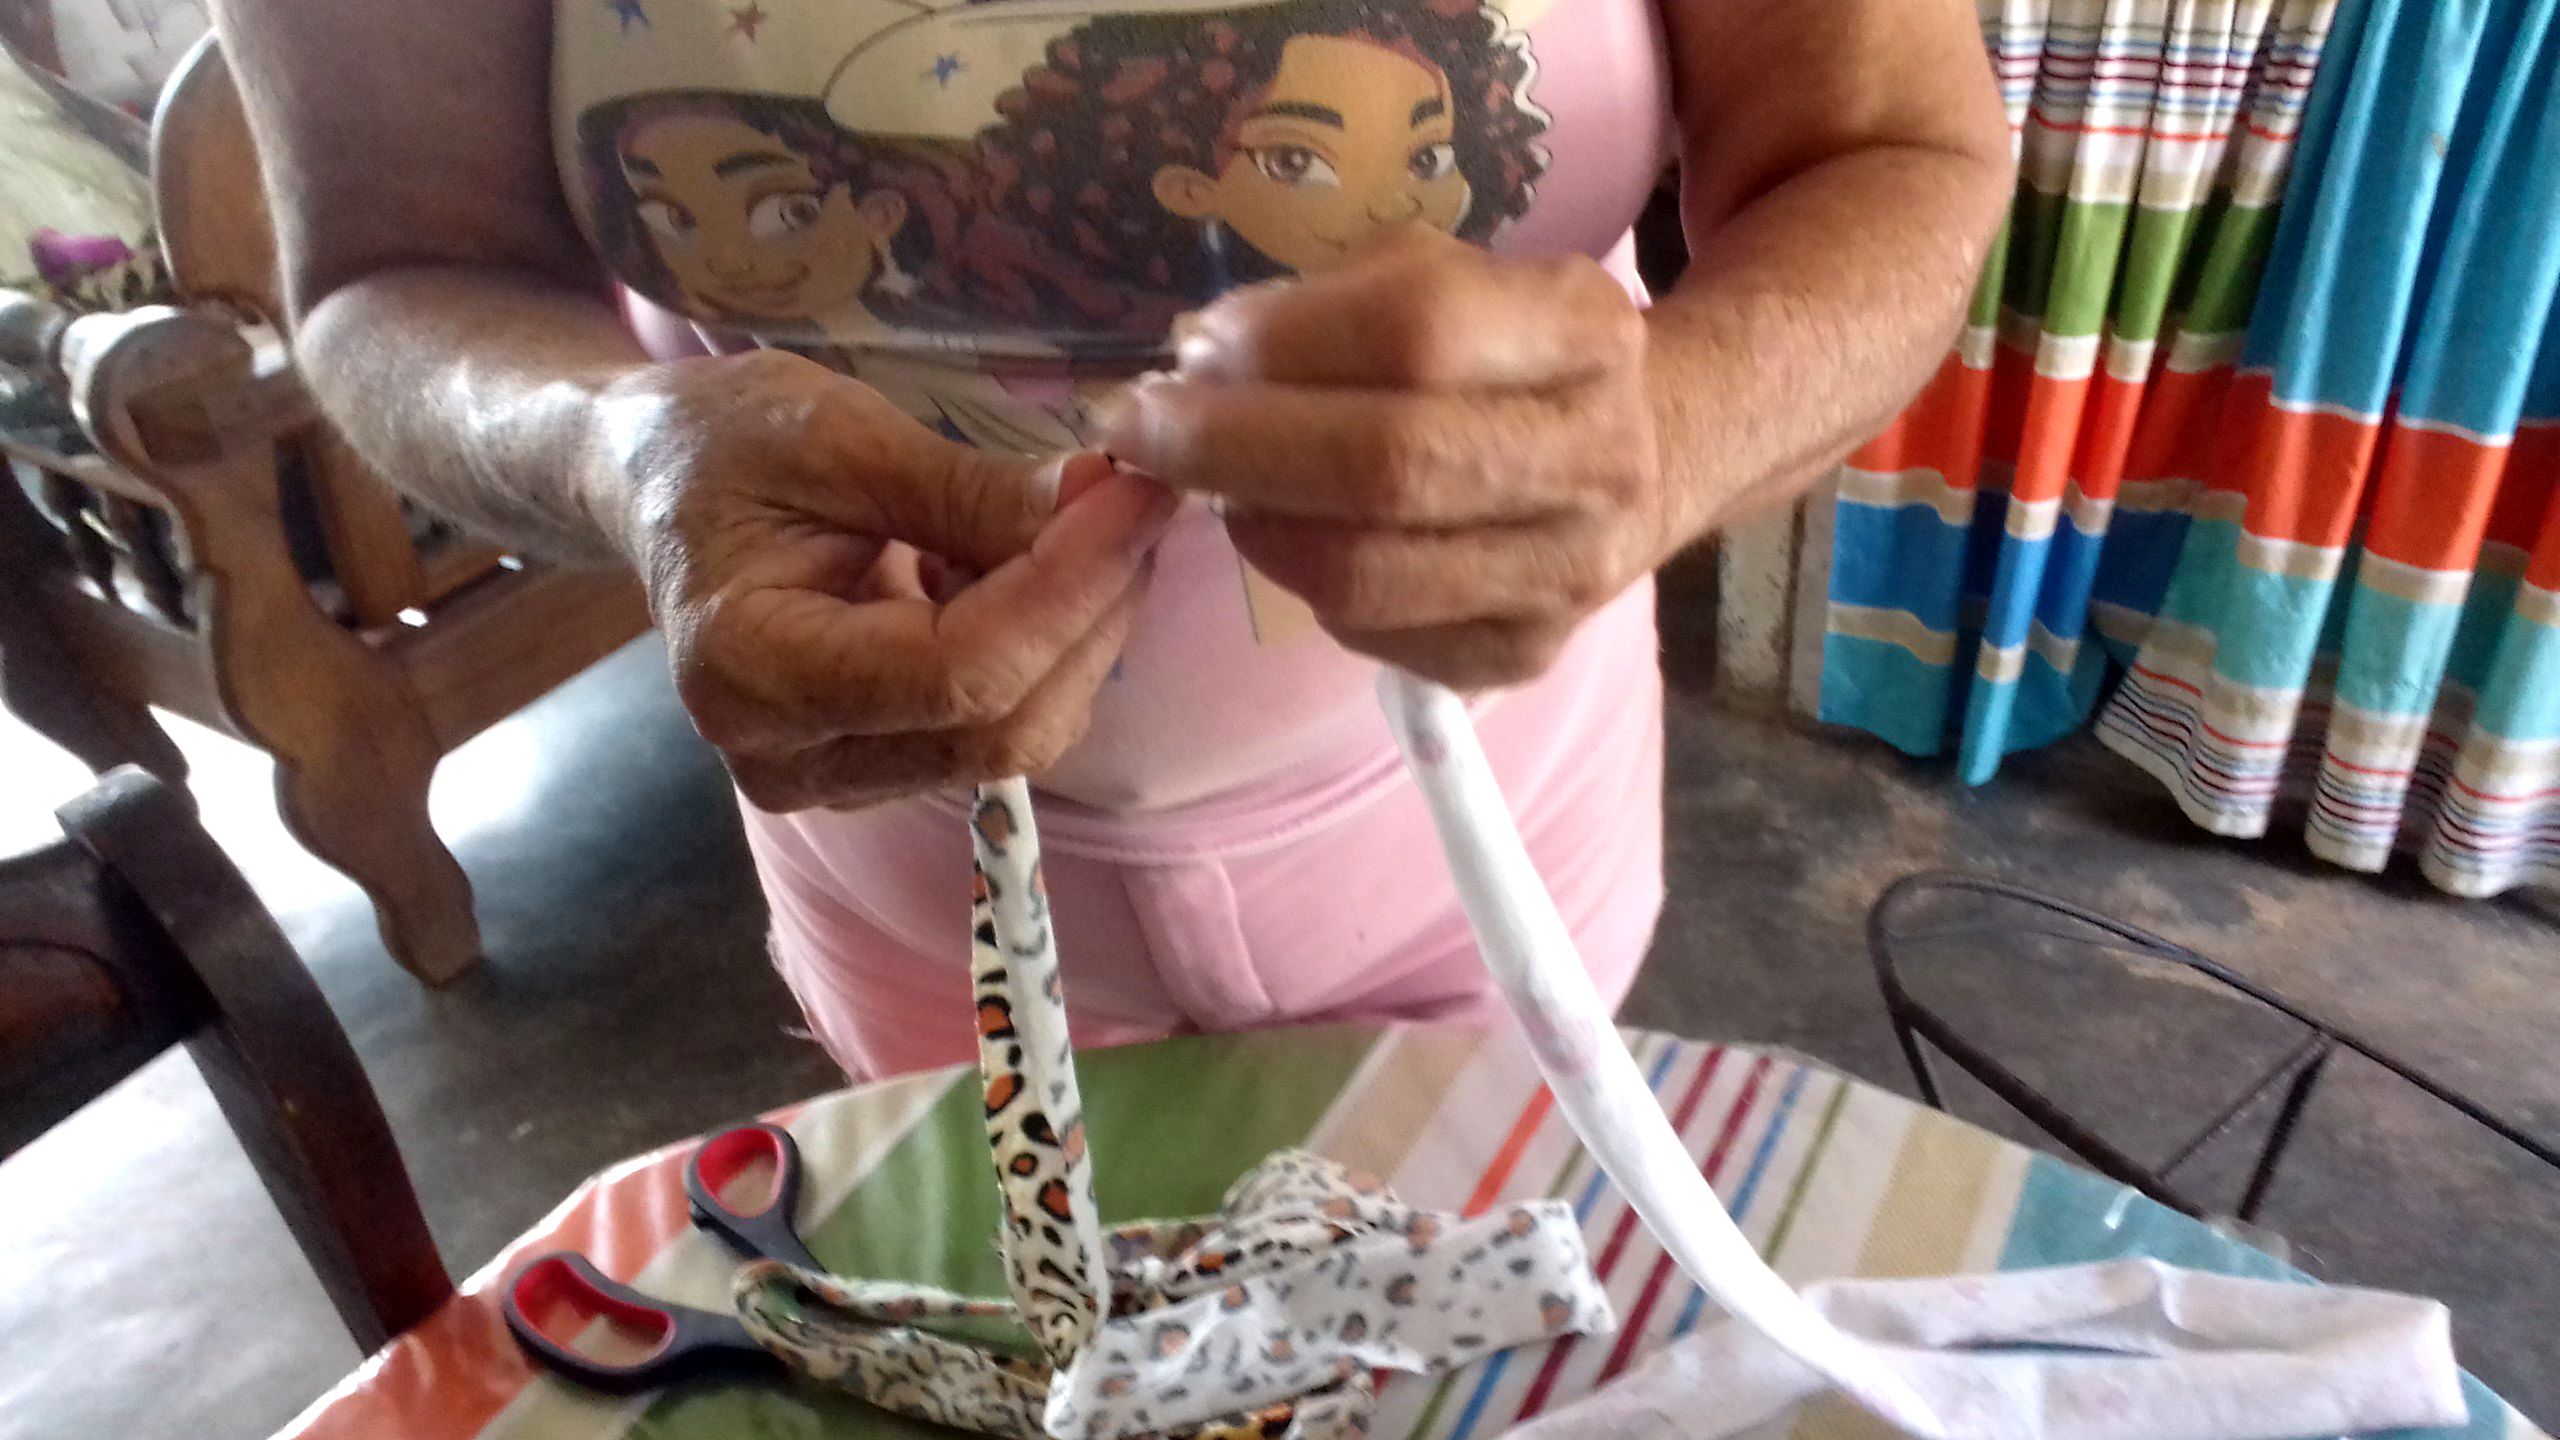
Primero empecé recortando la tela en tiras largas de 3 o 4 centímetros aproximadamente y después empecé a unirlas mediante un nudo fuerte, de esta manera conseguí tiras mucho más largas, en realidad la idea es formar una tira larguísima para poder hacer un tejido o entramado en la silla.
First I started by cutting the fabric into long strips of approximately 3 or 4 centimeters and then I began to join them together with a strong knot. This way I got much longer strips. In reality, the idea is to form a very long strip to be able to make a weave or lattice on the chair.
 |
 |
 |
|---|---|---|
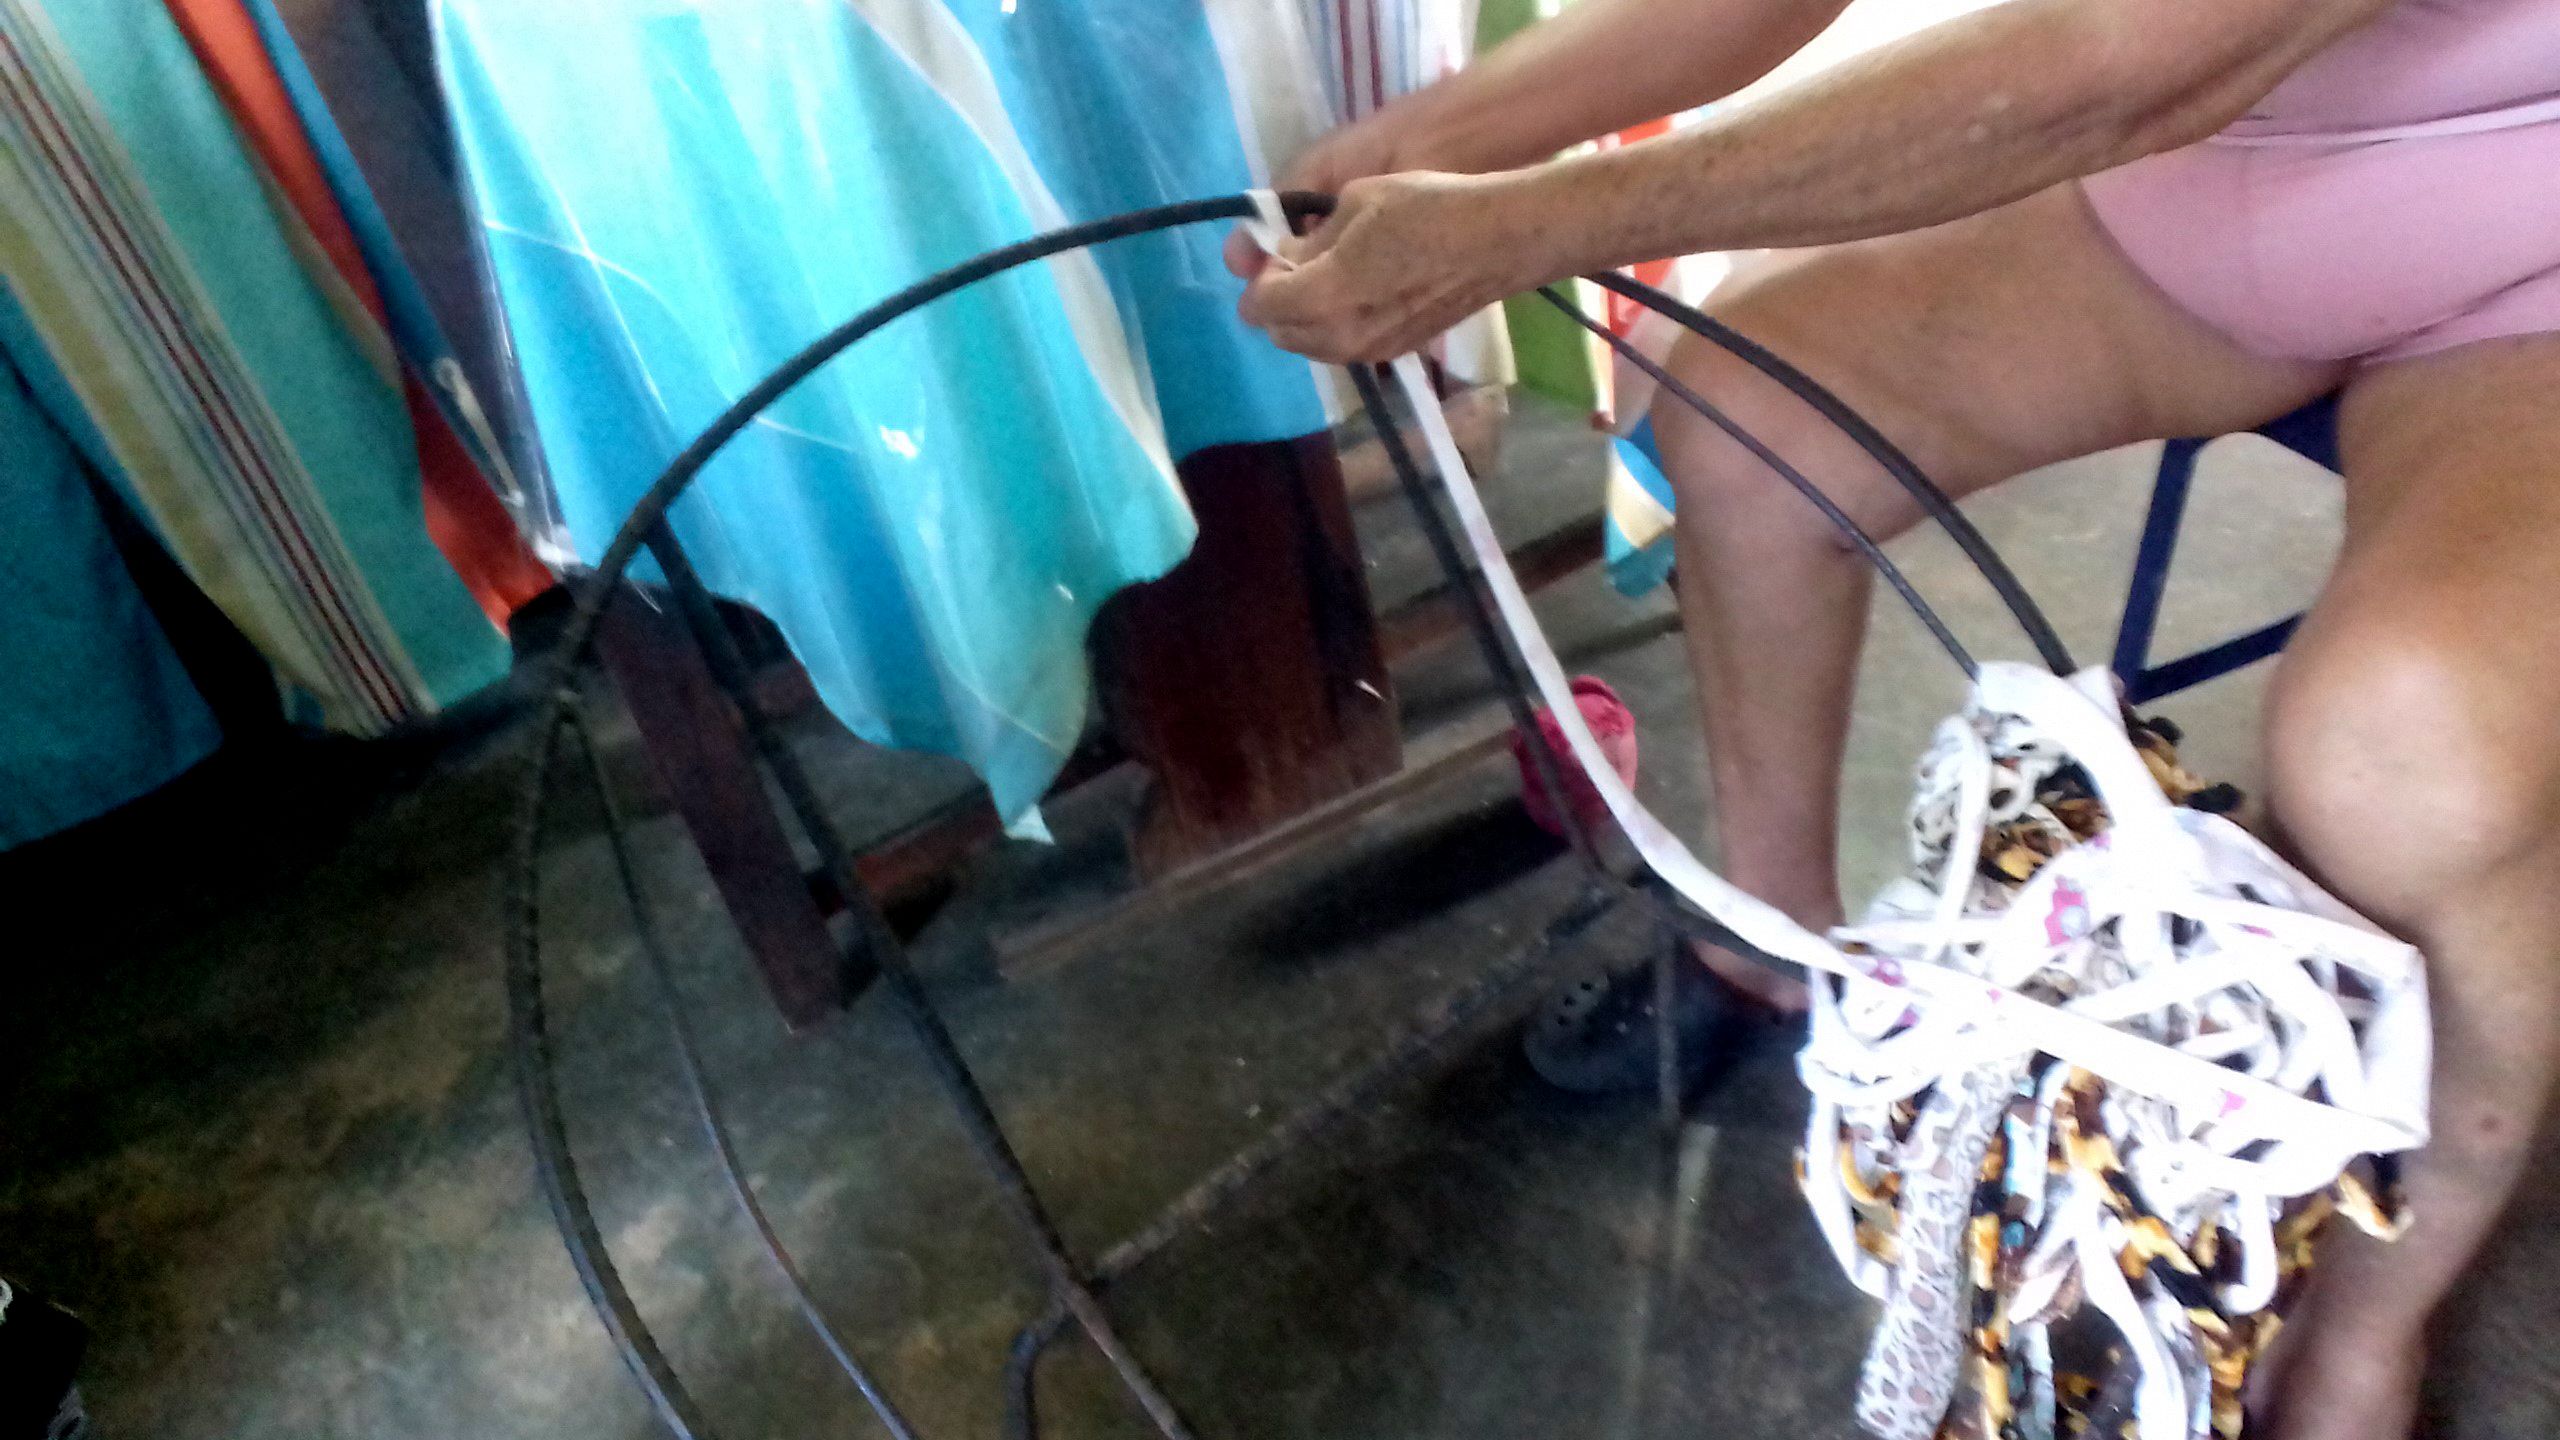
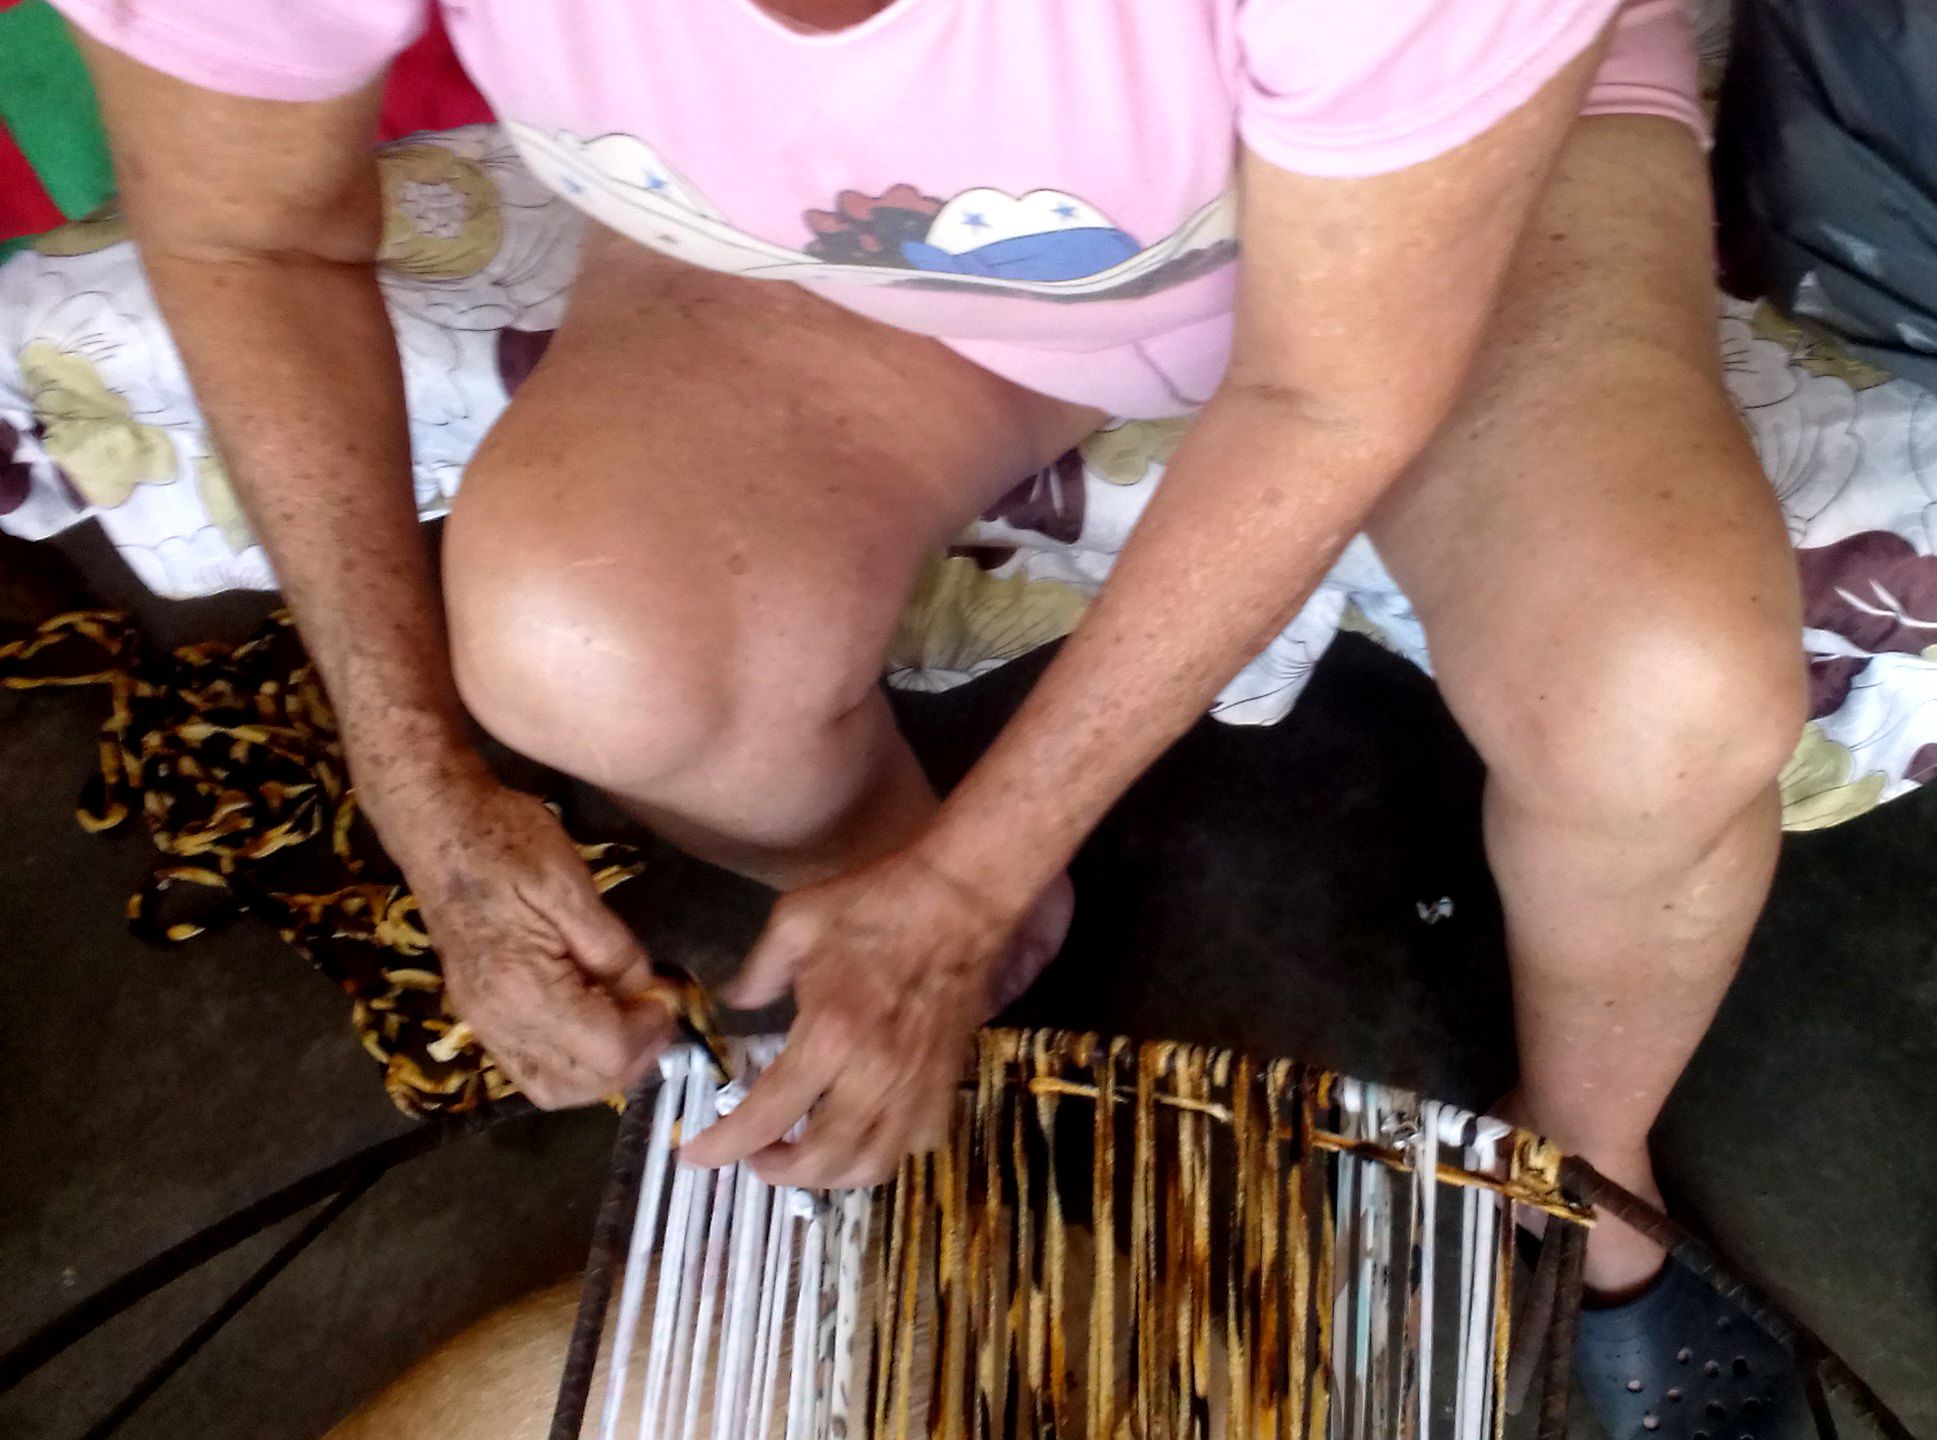
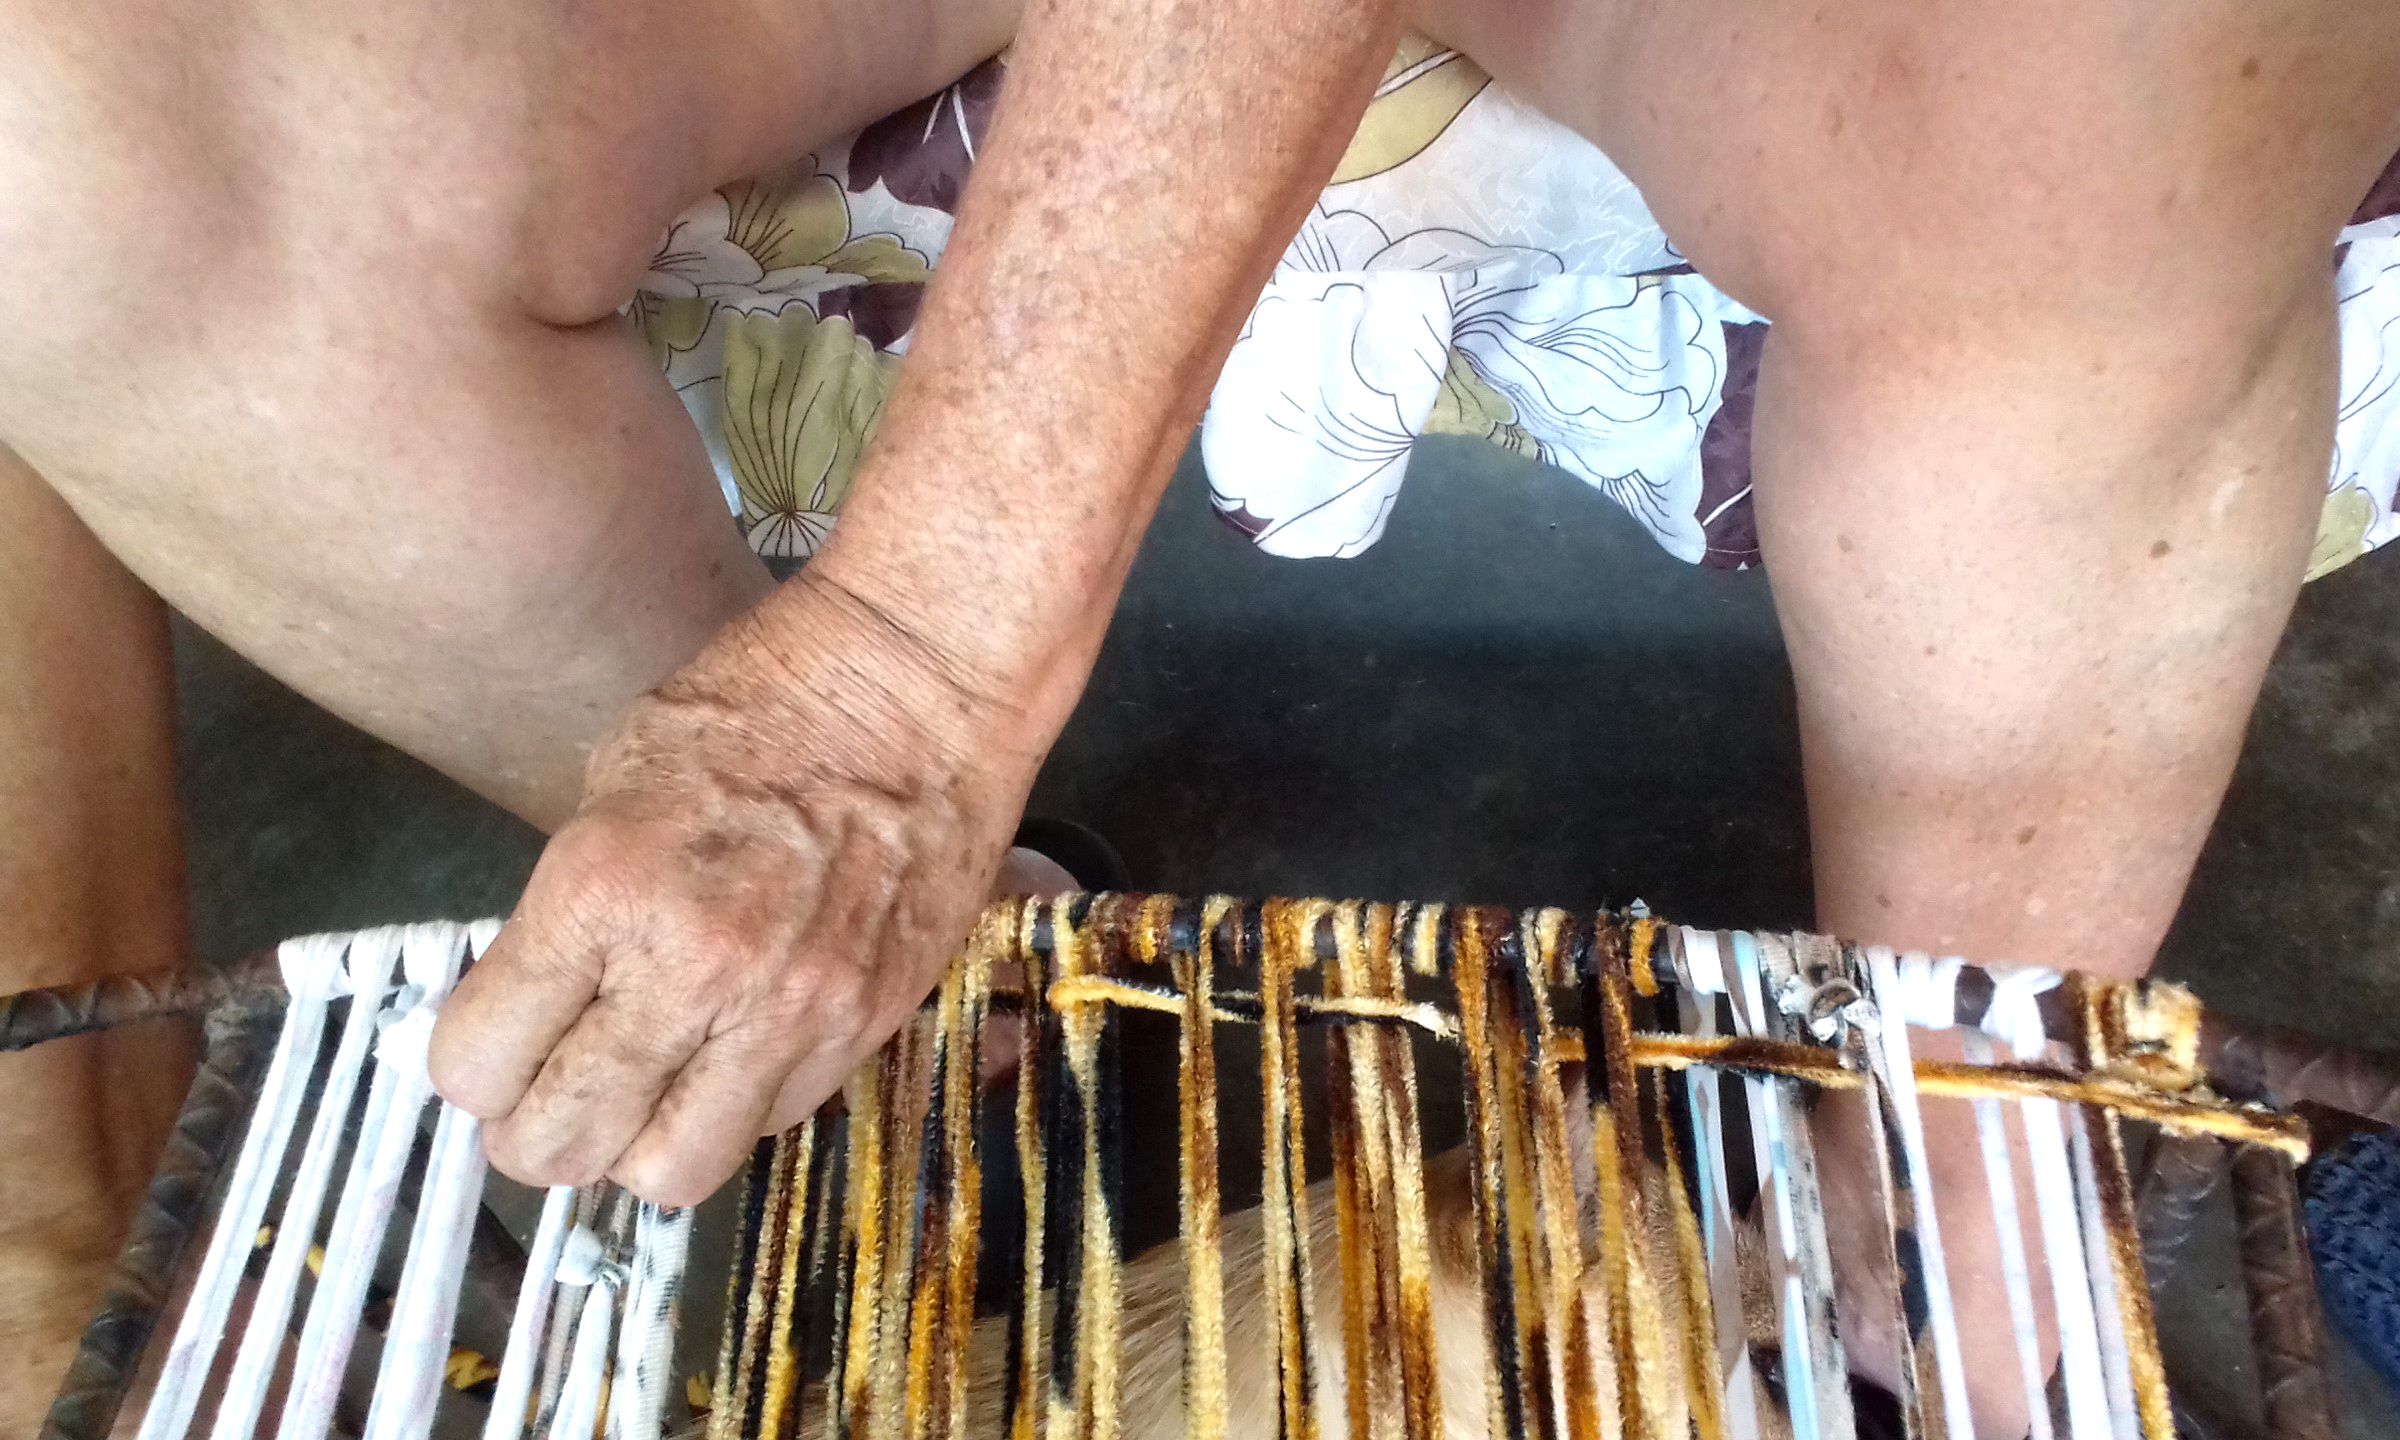
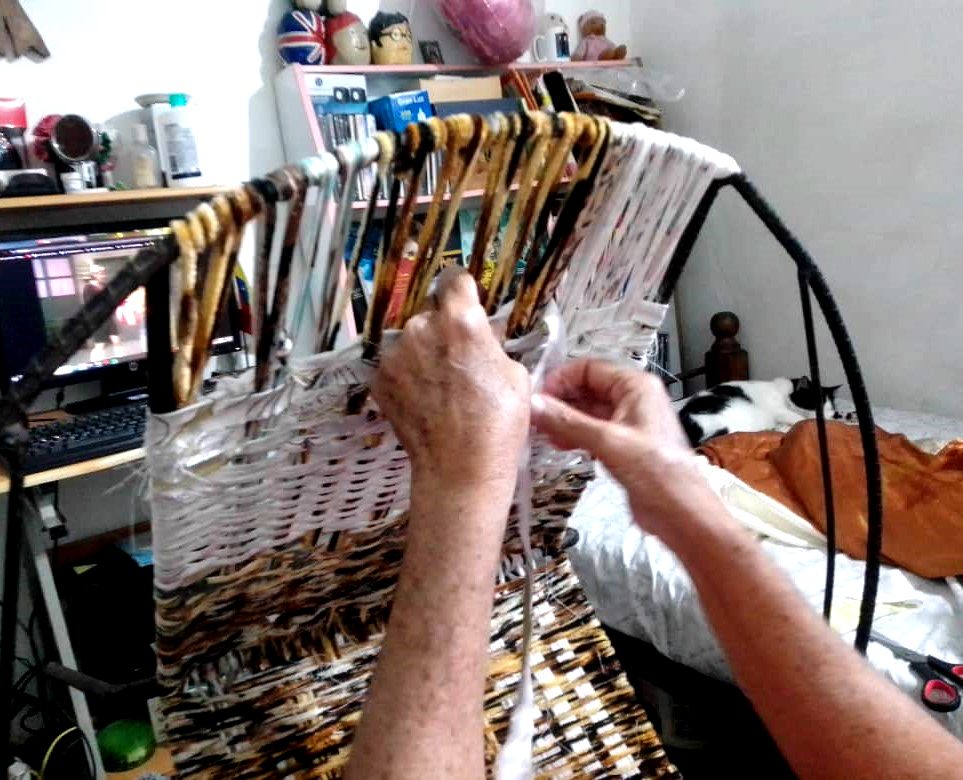
Aquí empecé con el trabajo, la idea es ir amarrando la tira desde la base de la silla hasta el respalda, le doy un par de vueltas en la estructura para que quede bien firme y luego las llevo hacia el respaldar. Es importante estirar bien de modo que las tiras vayan quedando tensas, esto le dará firmeza a la silla, luego, cuando llegué al respaldar volví a llevar las tiras hacia abajo hasta que quedó de esta forma, en vertical.
Here's where I started. The idea is to tie the strip from the base of the chair to the backrest. I wrap it around the frame a couple of times to make sure it's secure, and then I bring it to the backrest. It's important to stretch it well so that the strips remain taut; this will give the chair firmness. Then, when I reached the backrest, I brought the strips down again until it was vertical.
 |
 |
 |
|---|---|---|
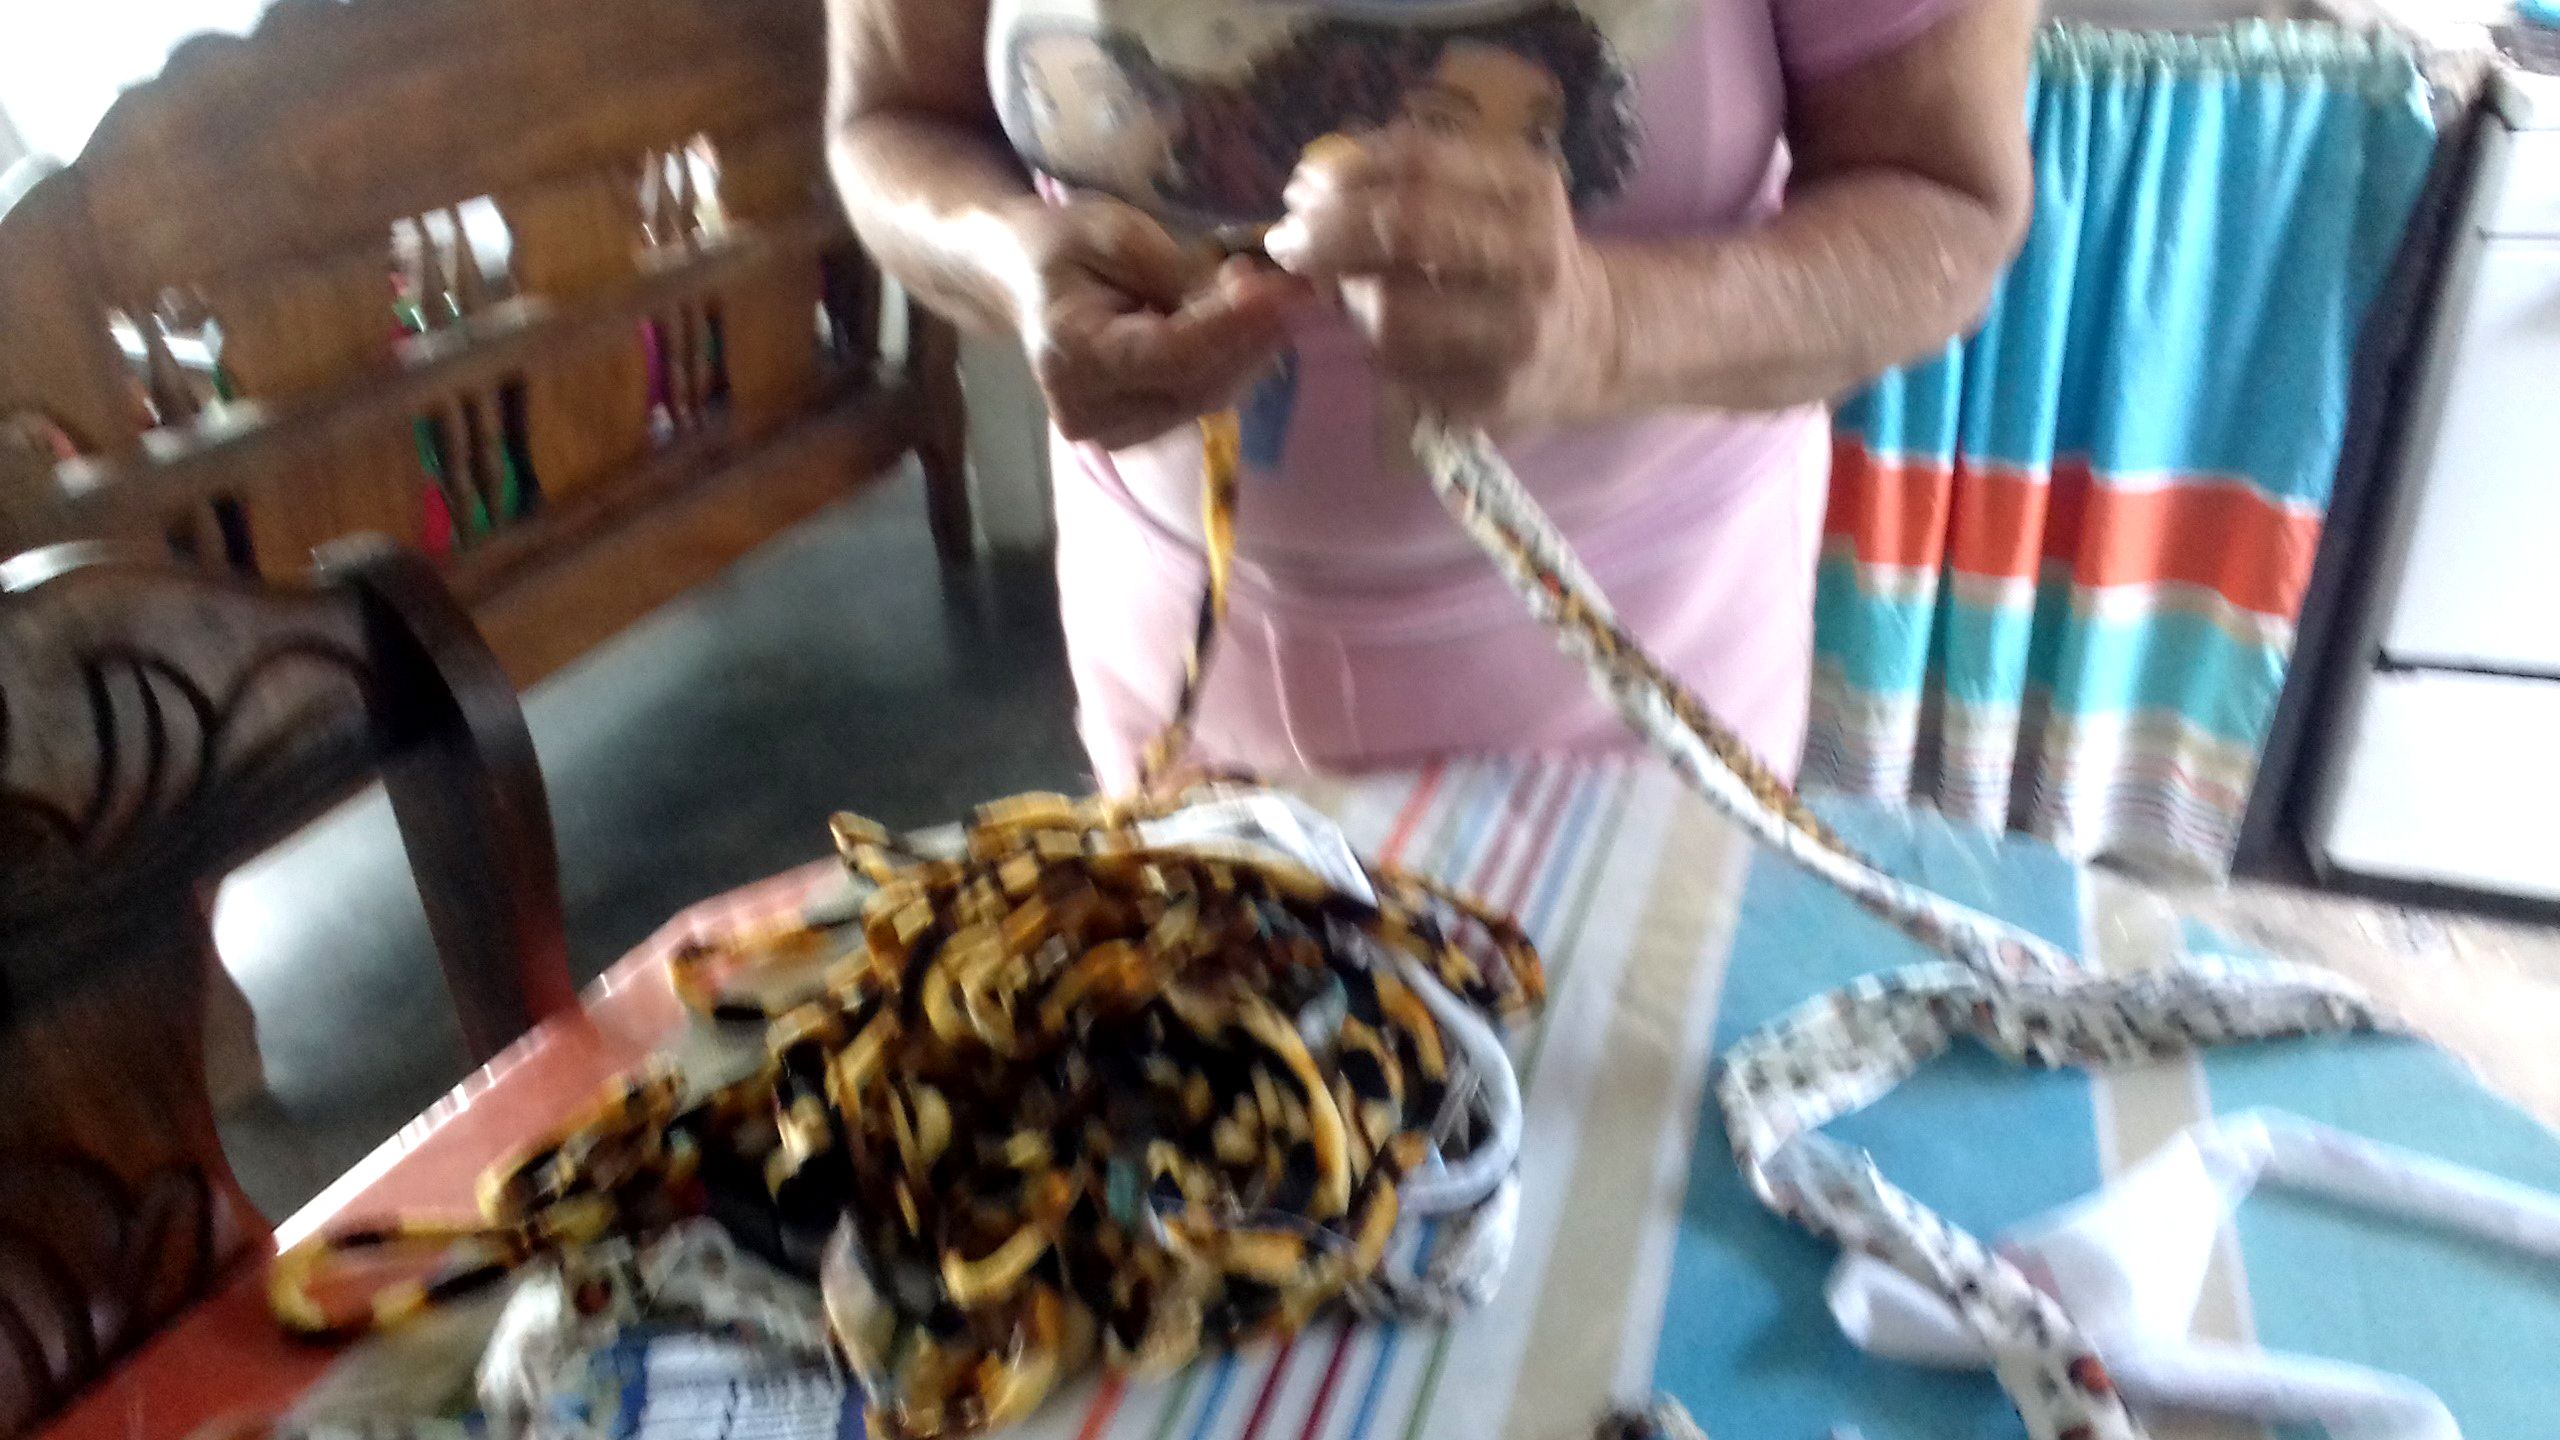
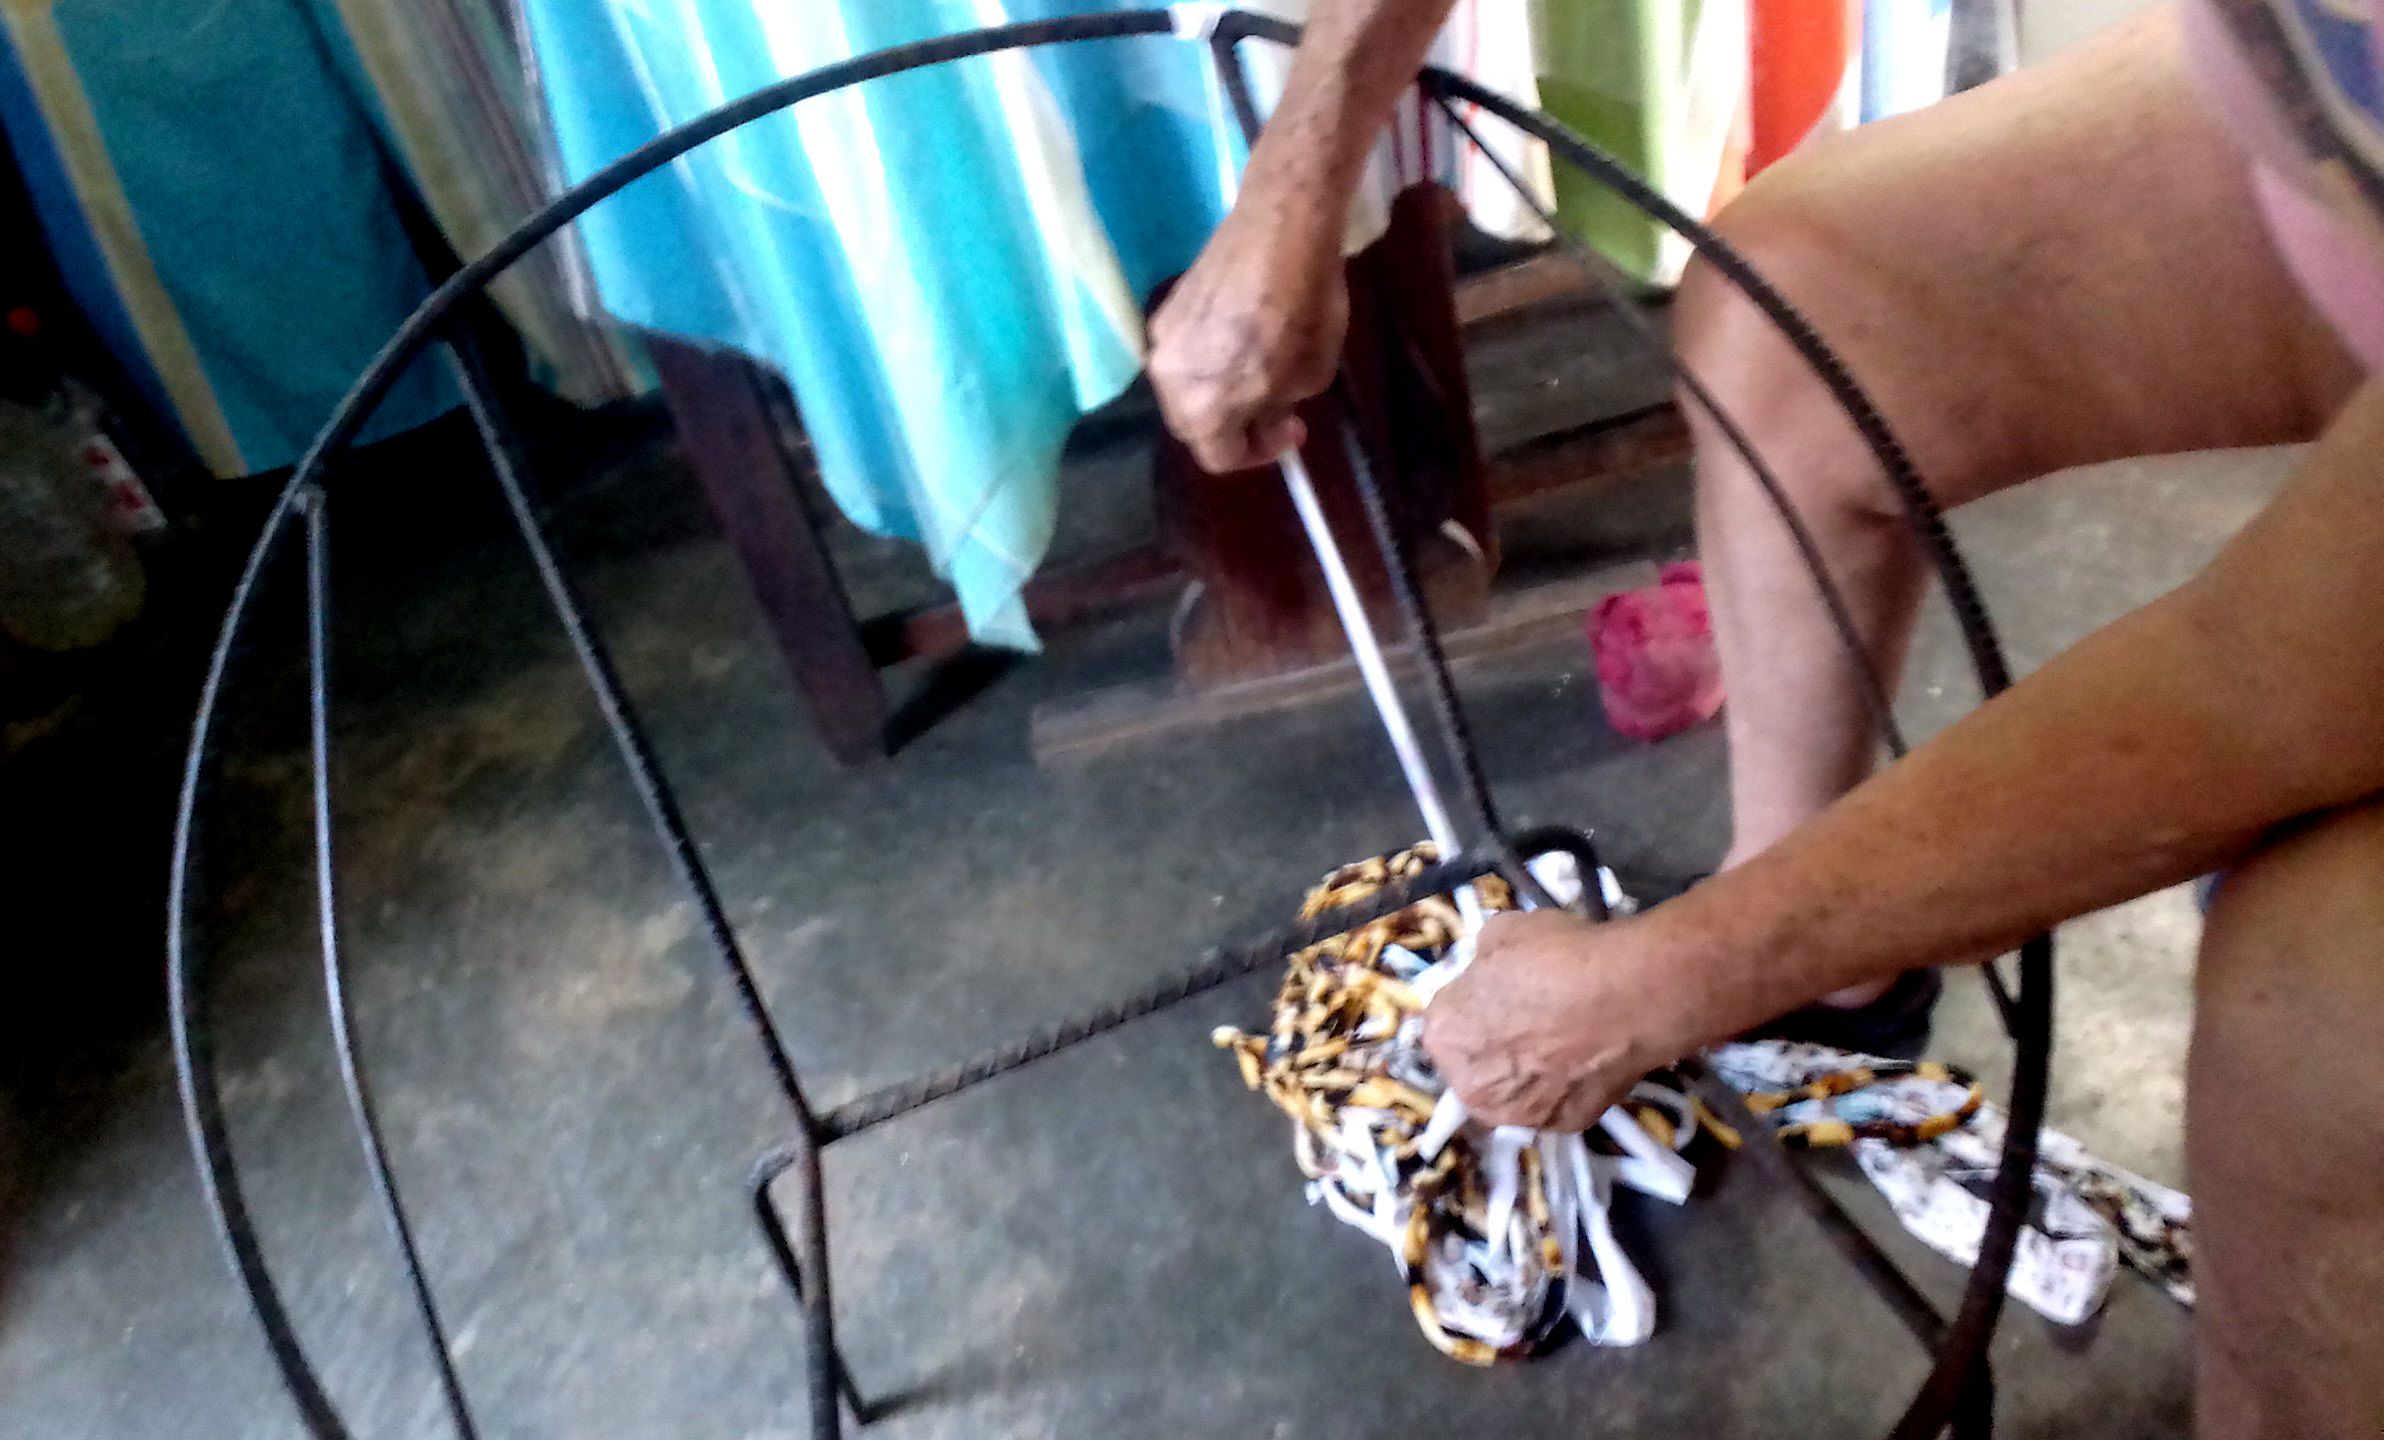
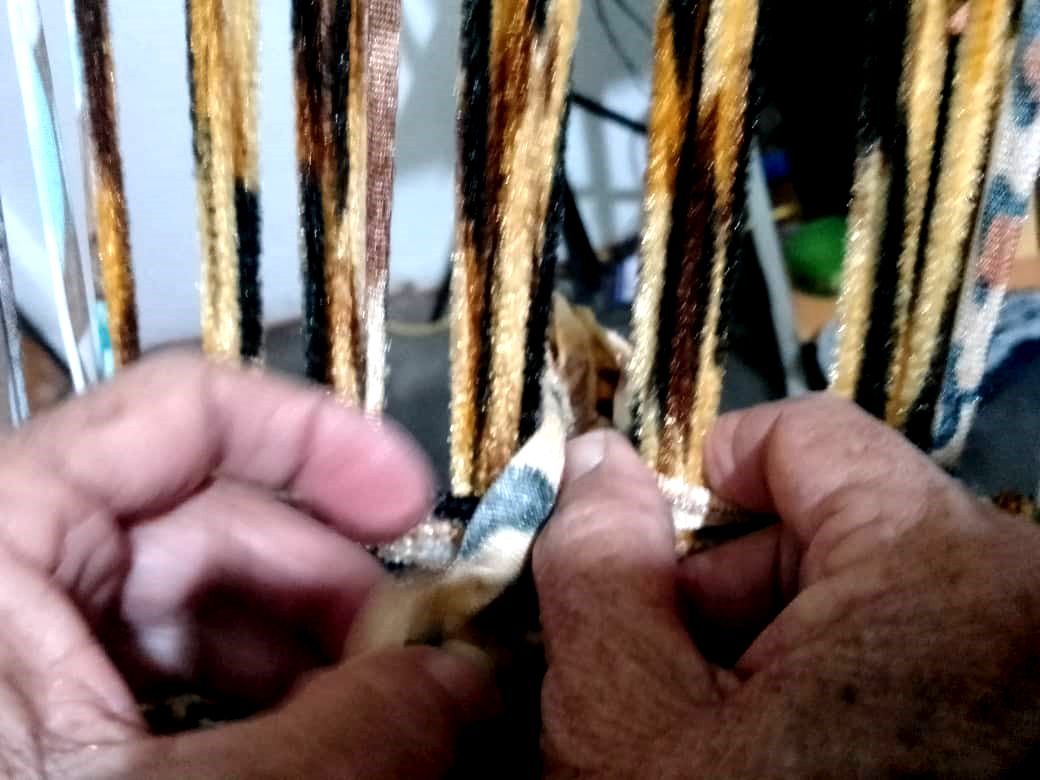
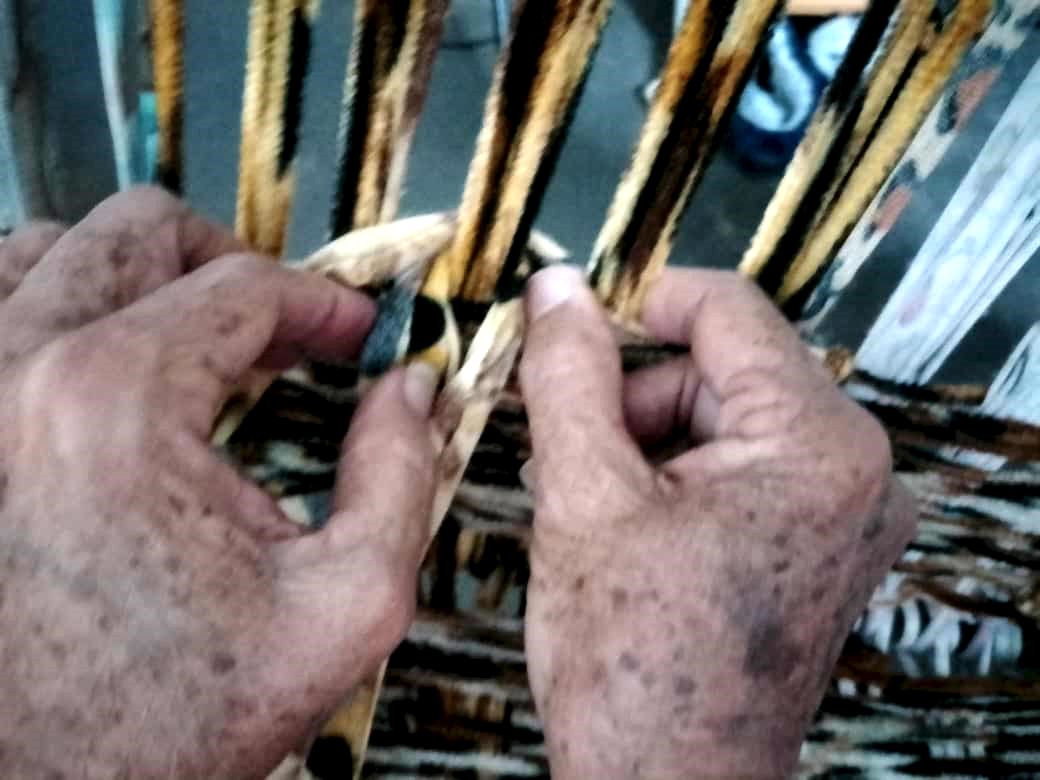
En este punto comencé a hacer el entramado definitivo, el cuál se hace en forma horizontal, traspasando las tiras que até previamente.
At this point I began to make the final weave, which is done horizontally, passing through the strips I tied previously.
 |
 |
 |
|---|---|---|
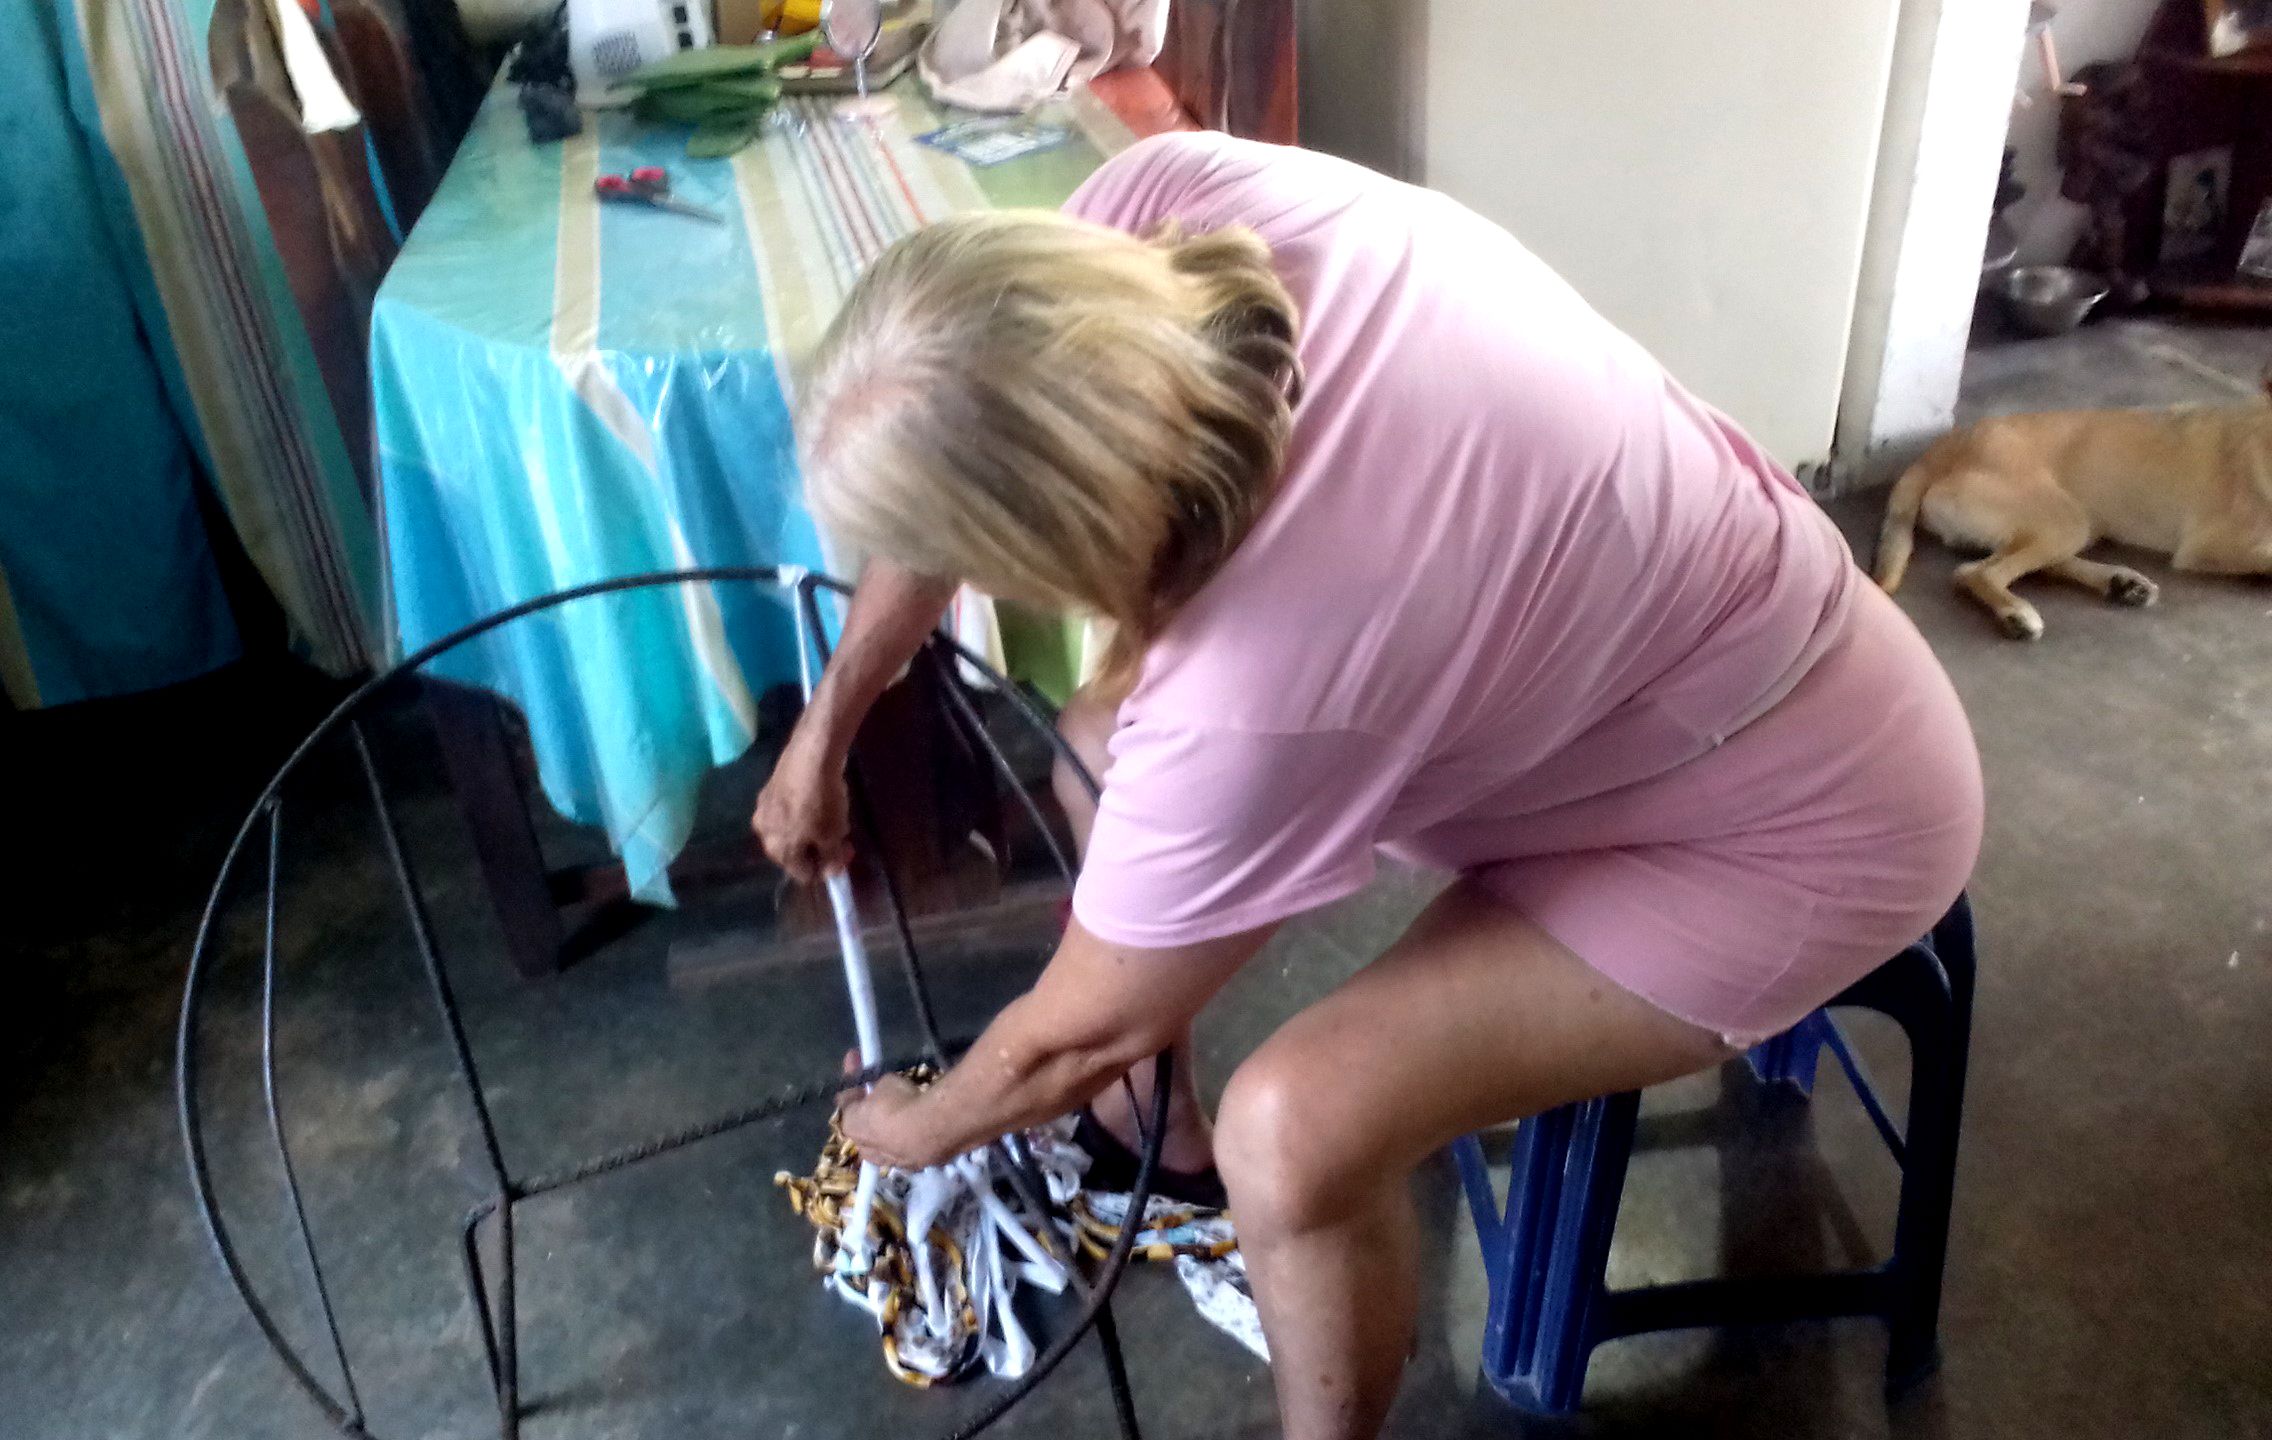
Yo fui pasando las tiras horizontales por debajo de las tiras verticales y luego por encima, luego voy jalando para quede bien firme, de esta manera me aseguro de que no se zafen.
I slipped the horizontal strips under the vertical strips and then over them, then pulled them tight so they were secure. This way I made sure they wouldn't come loose.
 |
 |
|---|---|
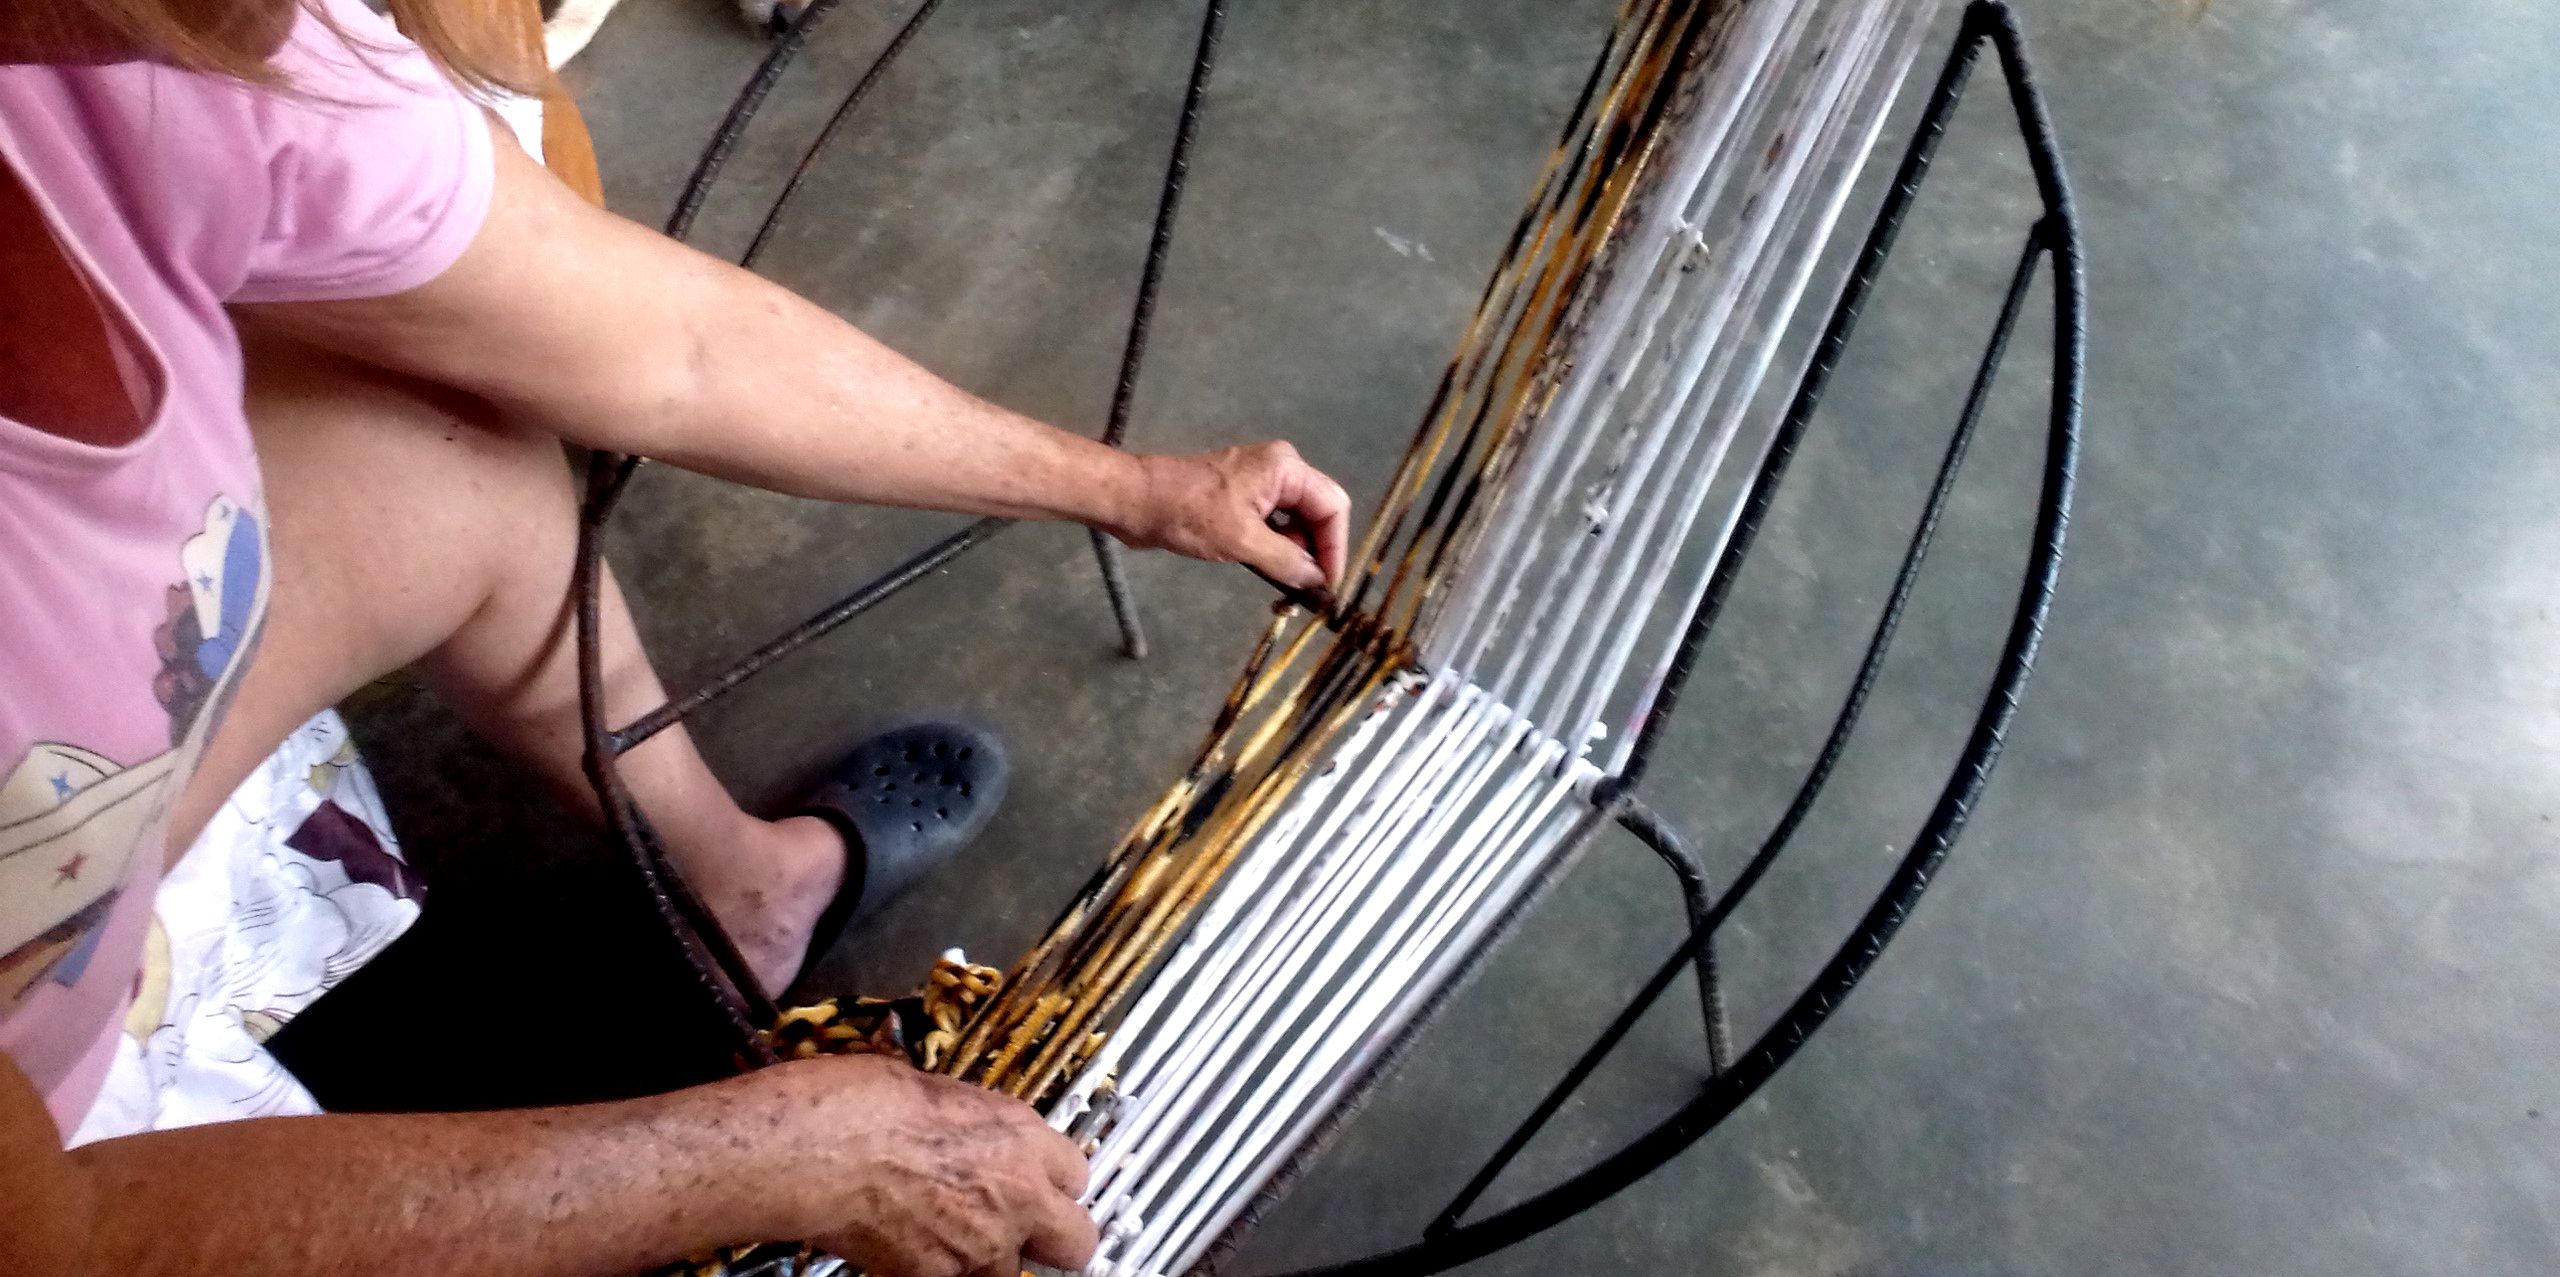
Luego comencé a trabajar en la parte de arriba (el respaldar de la silla) siguiendo la misma técnica de abajo, pasando la tiras por detrás de las verticales y jalando para que queden bien firmes.
Then I started working on the top part (the back of the chair) following the same technique as below, passing the strips behind the vertical ones and pulling so that they are firm.
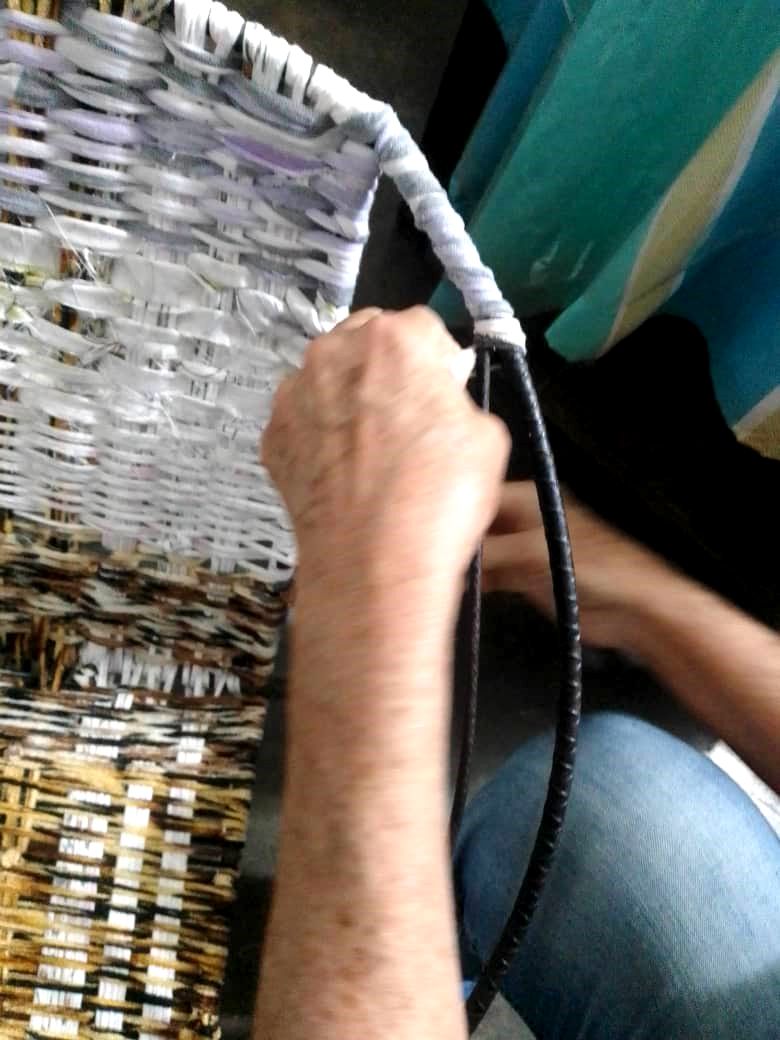
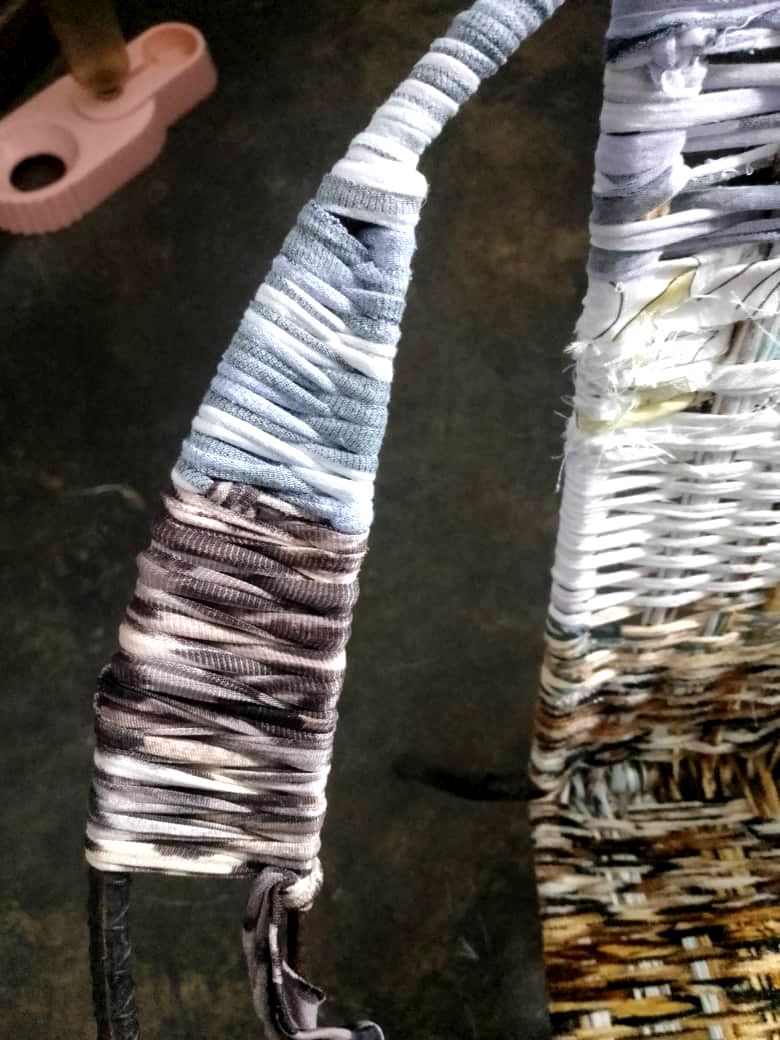
Y finalmente fui envolviendo los reposabrazos de la silla. Este procedimiento es aún más sencillo, se trata de pasar la tira por el medio del reposa brazos (por el medio de los dos barrotes y luego por encima, como se ve en las fotos) La idea es que el diseño vaya quedando así como les muestro en las fotos.
And finally, I wrapped the chair's armrests. This process is even simpler; you just need to thread the strip through the middle of the armrest (across the two bars and then over the top, as shown in the photos). The idea is to have the design look exactly like the one I show you in the photos.
 |
 |
 |
|---|---|---|
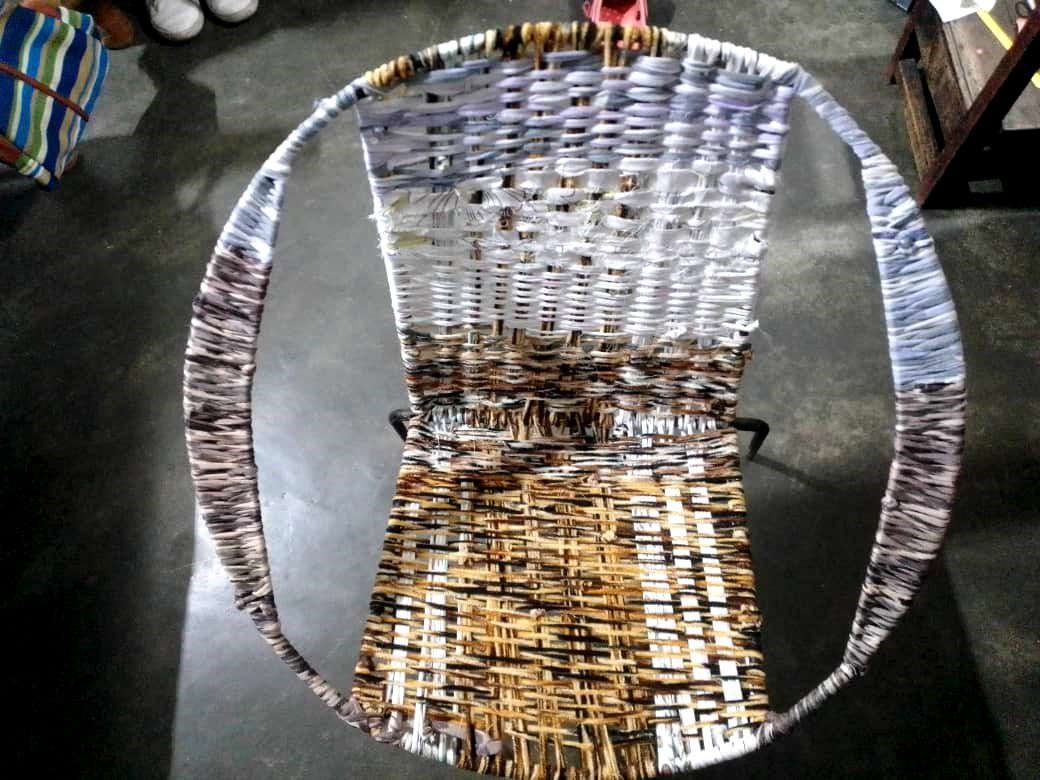
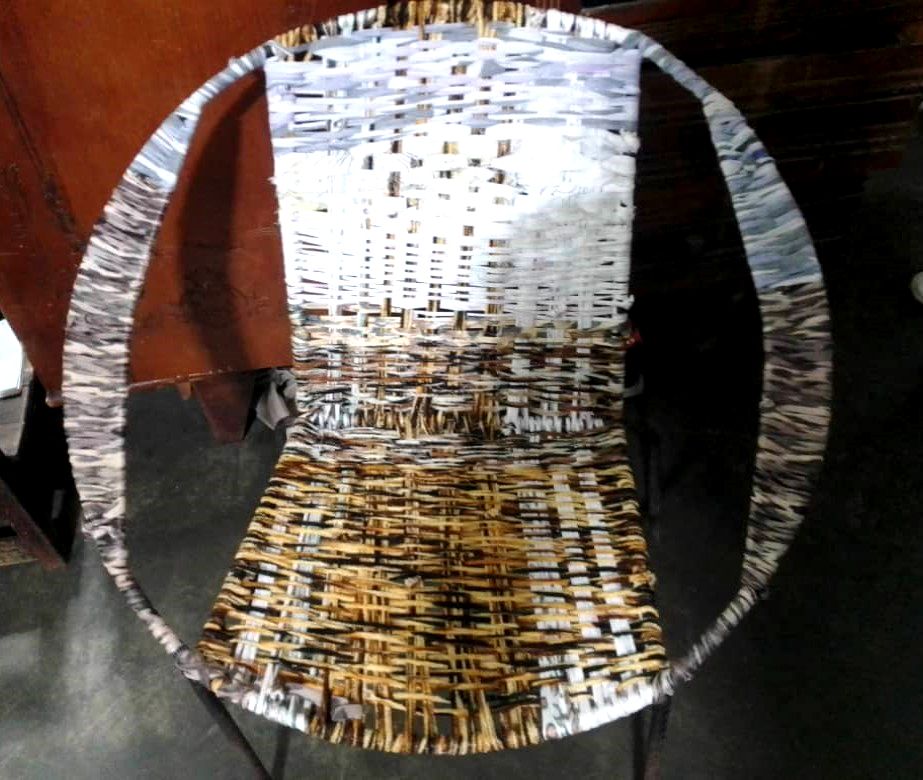
Este es el resultado final, una silla firme, estable y muy bonita, logré recuperarla usando solo retazos de tela, y lo mejor de todo es que me salió completamente gratis porque lo hice yo misma.
This is the final result, a firm, stable and very pretty chair, I managed to recover it using only fabric scraps, and best of all, it was completely free because I made it myself.
 |
 |
 |
|---|---|---|
Muchas gracias por leer mi publicación, espero que se animen a hacer esto en caso de que tengan este tipo de sillas y no sepan que hacer con ellas, el procedimiento es muy fácil de hacer, más de lo que parece.
Thank you so much for reading my post. I hope you're inspired to try this if you have these types of chairs and don't know what to do with them. The process is very easy, even easier than it seems.

Made with Canva Editor
Imagen editada en Canva
The pics on this post are by my own
Las fotografías de este post son de mi propiedad.