Esta publicación también está escrita en español, ¡sigue bajando!
🌷🌷🌷🌷🌷🌷🌷🌷🌷🌷
English
🌷🌷🌷🌷🌷🌷🌷🌷🌷🌷
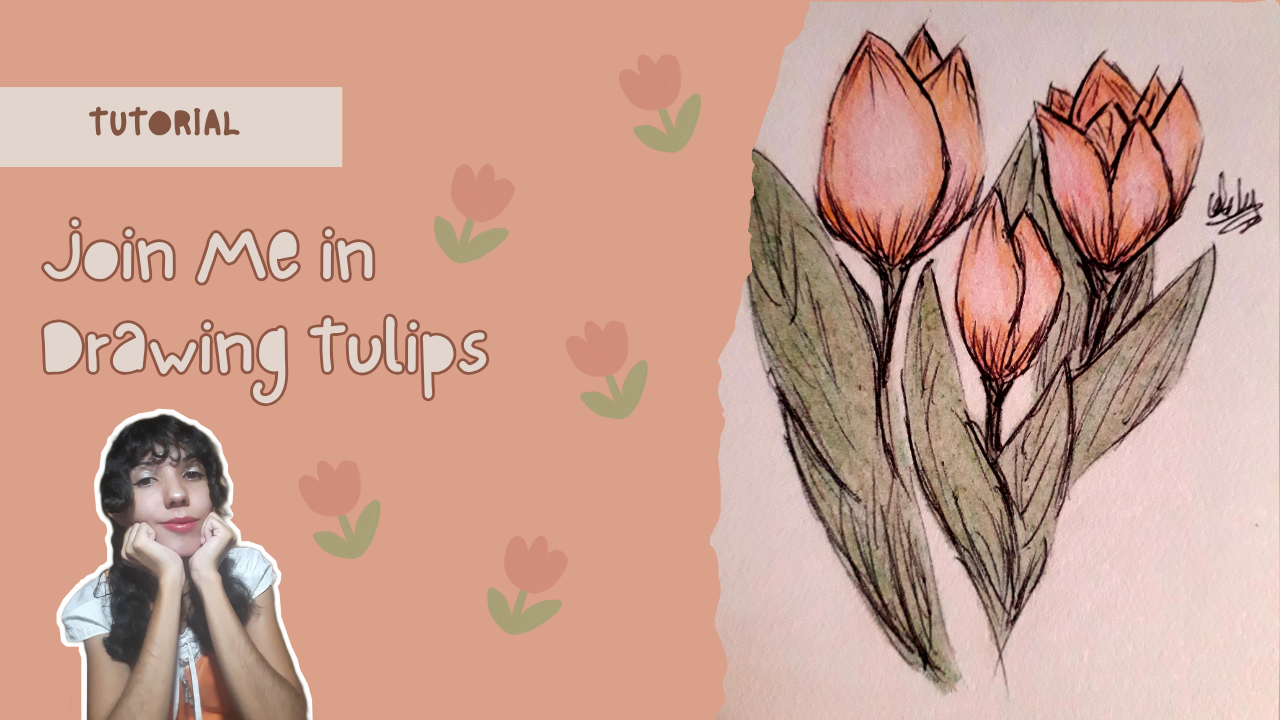
I've always tended to draw people, but recently I asked myself a slightly deeper question. If I love drawing so much, then why not try drawing something I also enjoy and that’s different from what I usually do?
I’ve never been good at drawing flowers, even though I love looking at them. But I believe that anything can change if we truly want it to.
So, I decided to experiment a little while drawing something I like. Maybe this will be a good way to discover more about my style.
Relax with me as I draw these tulips and let’s see what comes out—here we go!
### Materials
- Sketchbook
- Pencil
- Pen
- Eraser
- Warm light pink colored pencil
- Warm brown colored pencil
- Cool dark green colored pencil
- Warm orange colored pencil
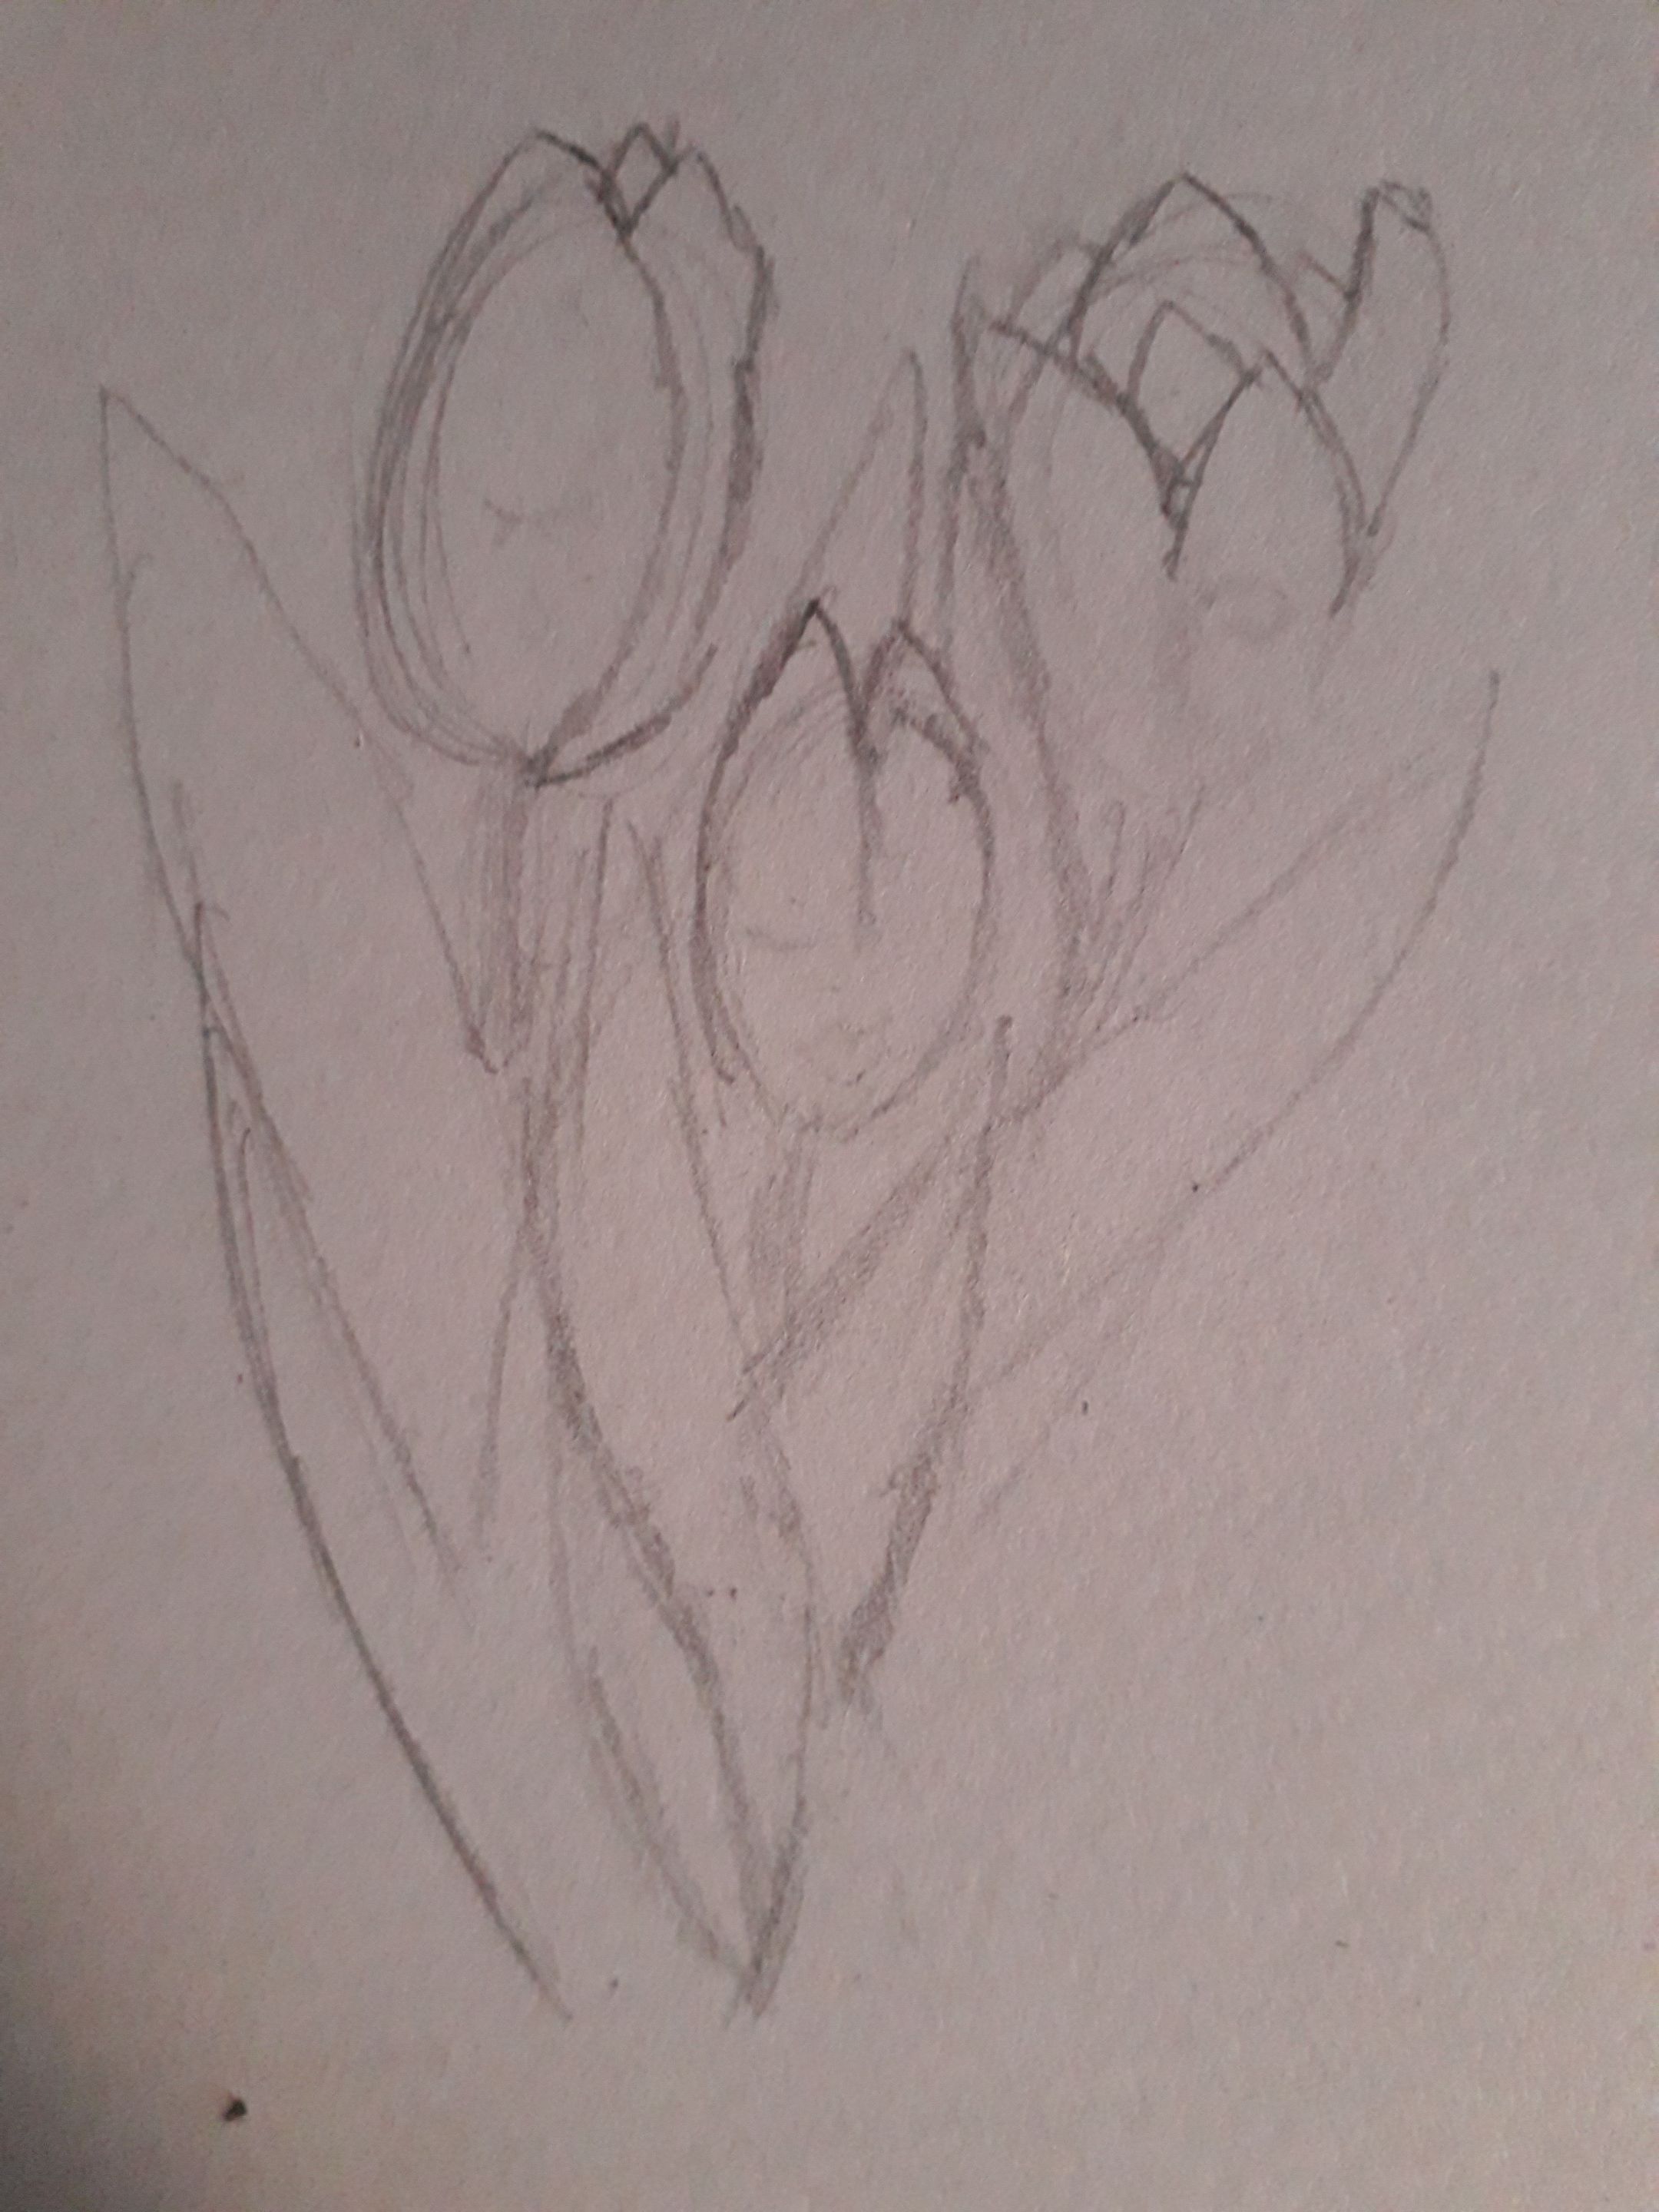
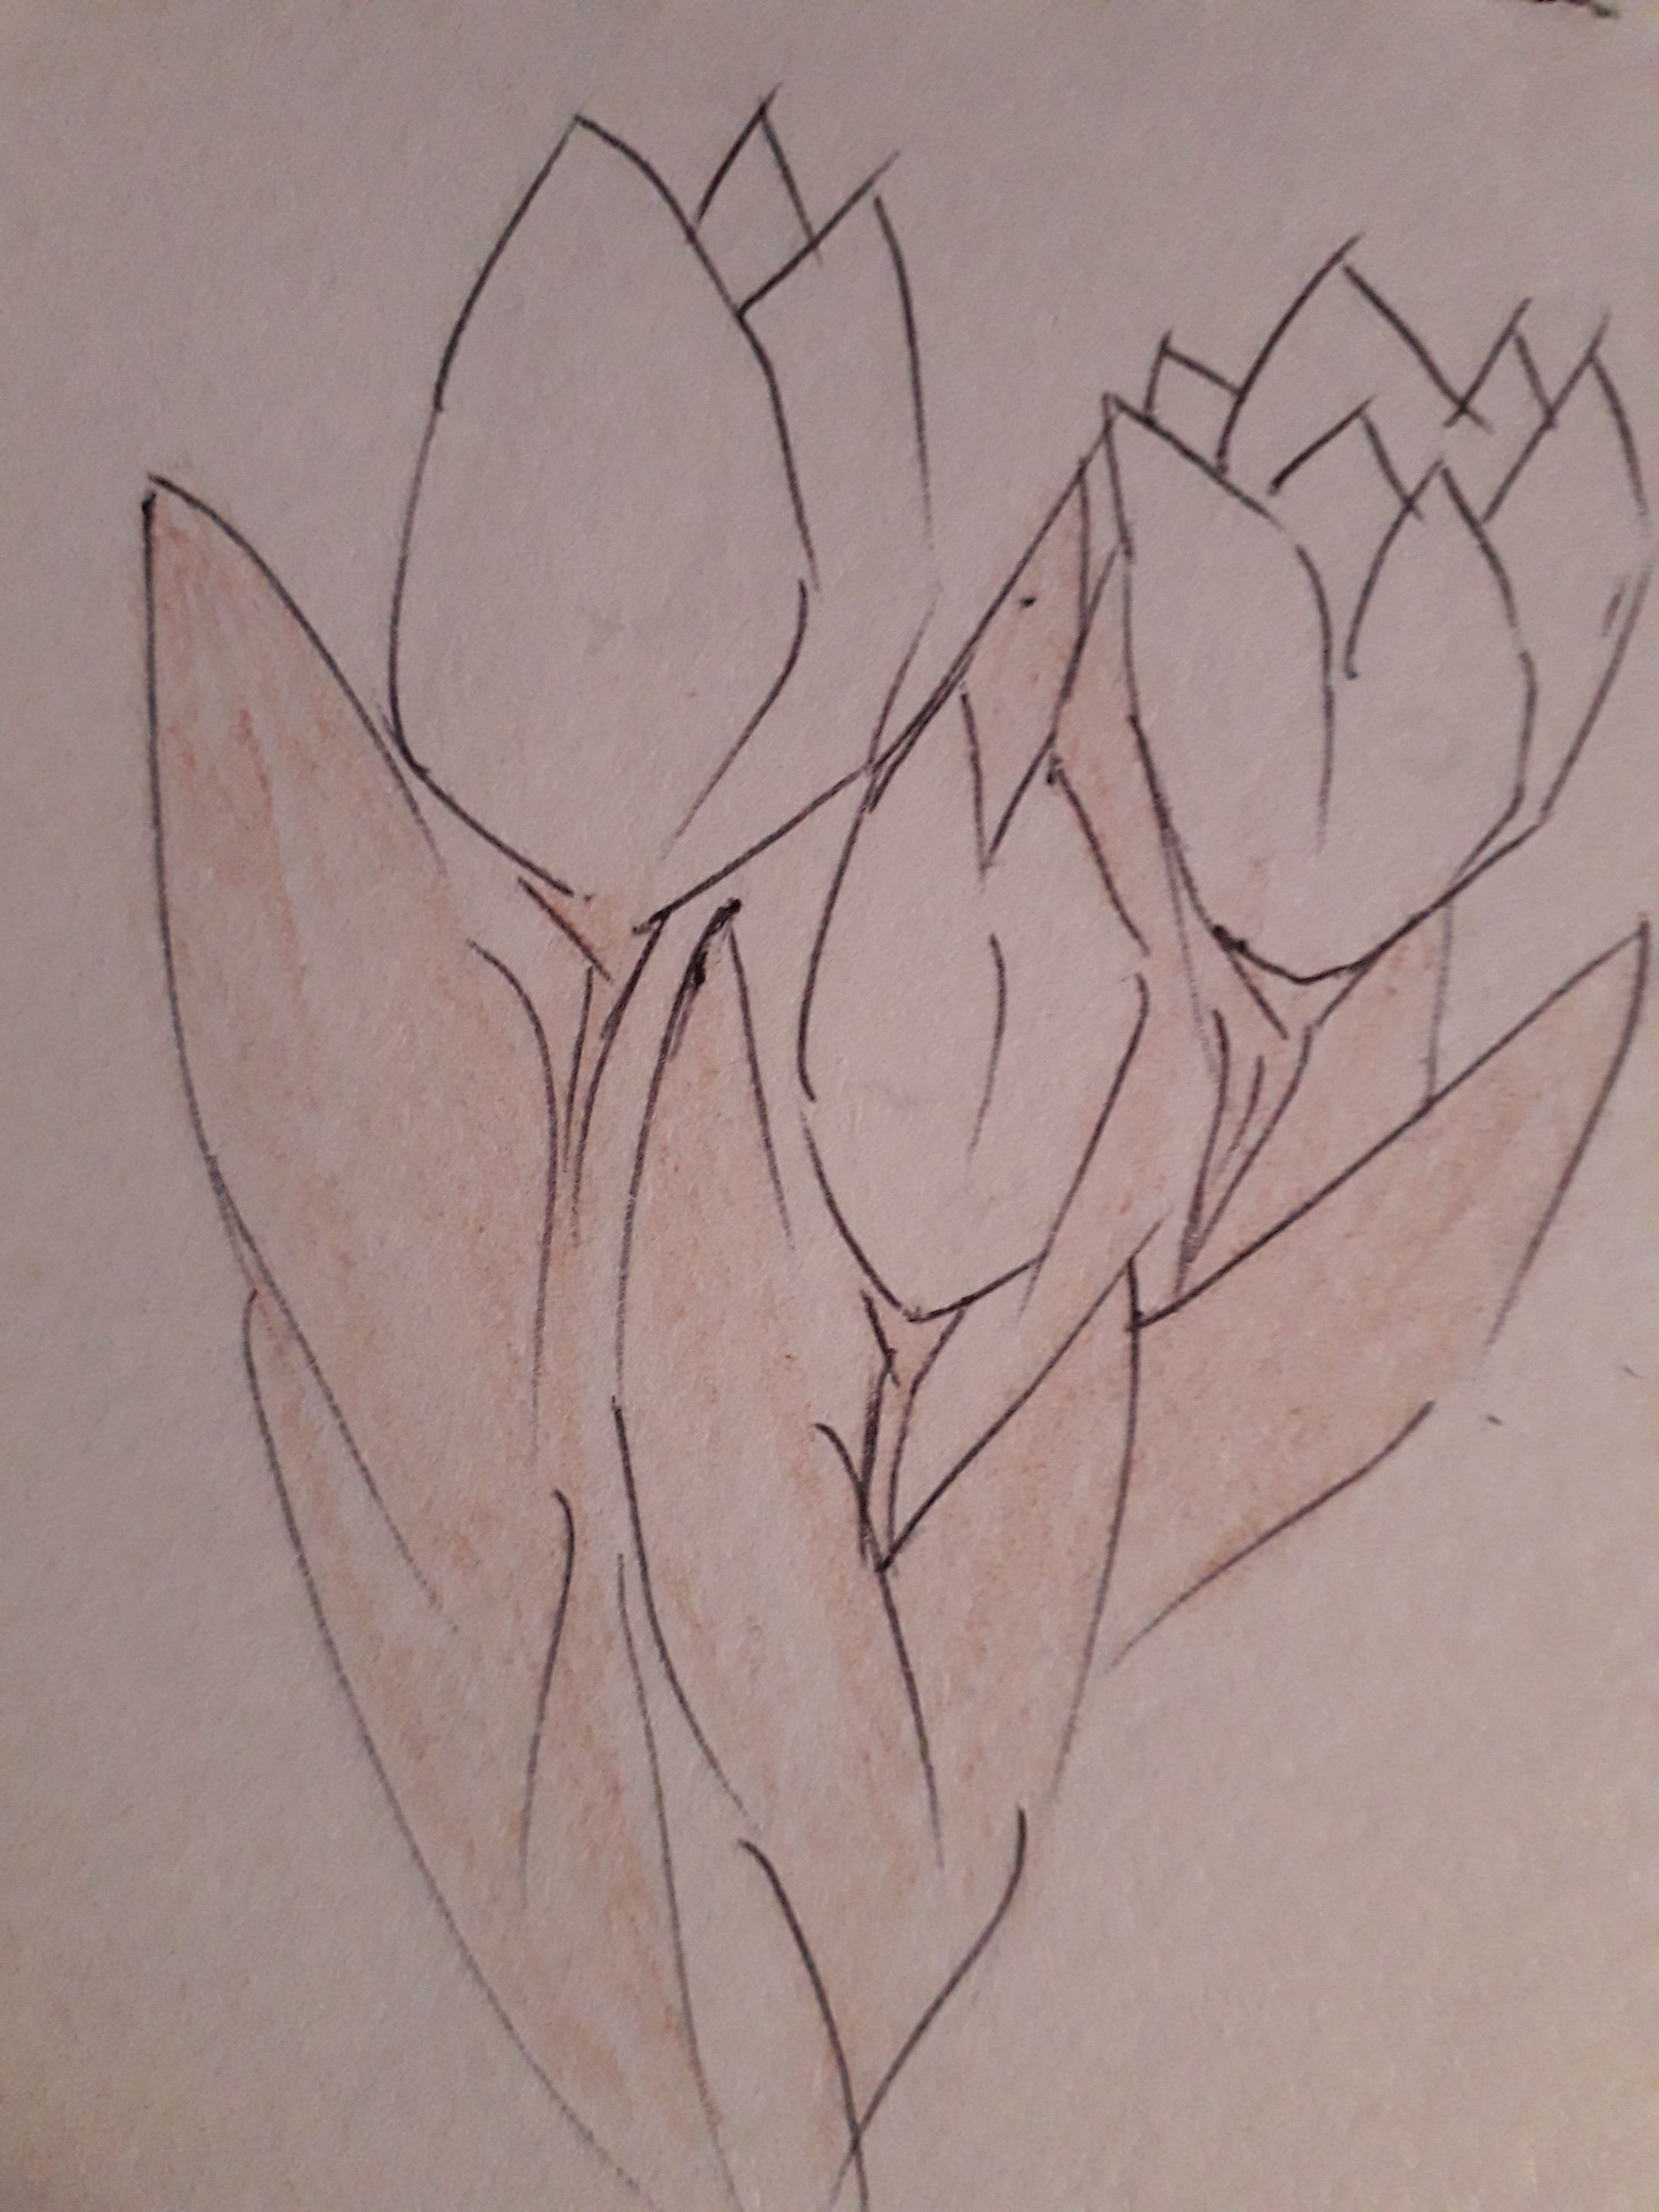
I started by drawing three ovals, then added lines going downward to create the tulip stems. I made several quick, slightly slanted lines, since stems aren’t usually perfectly straight.
From that base, I drew petal-like strokes over the ovals. My idea was to make one tulip closed, one slightly open, and one beginning to bloom. For the leaves, I used similar petal-shaped strokes, but longer, wrapping around the stems. I’m not sure how to explain these shapes, haha, but the important thing is to think about how a tulip looks to you.
Anyway, this doesn’t have to be perfect, for two reasons: first, because it’s a sketch. Second, because what matters in art is enjoying the process, not making it flawless—or at least that’s how I see it.

With a pen, I outlined the most important parts of the sketch using quick, short strokes. What mattered to me was that the tulip shapes were recognizable, nothing more.
After that, I erased the leftover graphite.

-|-|
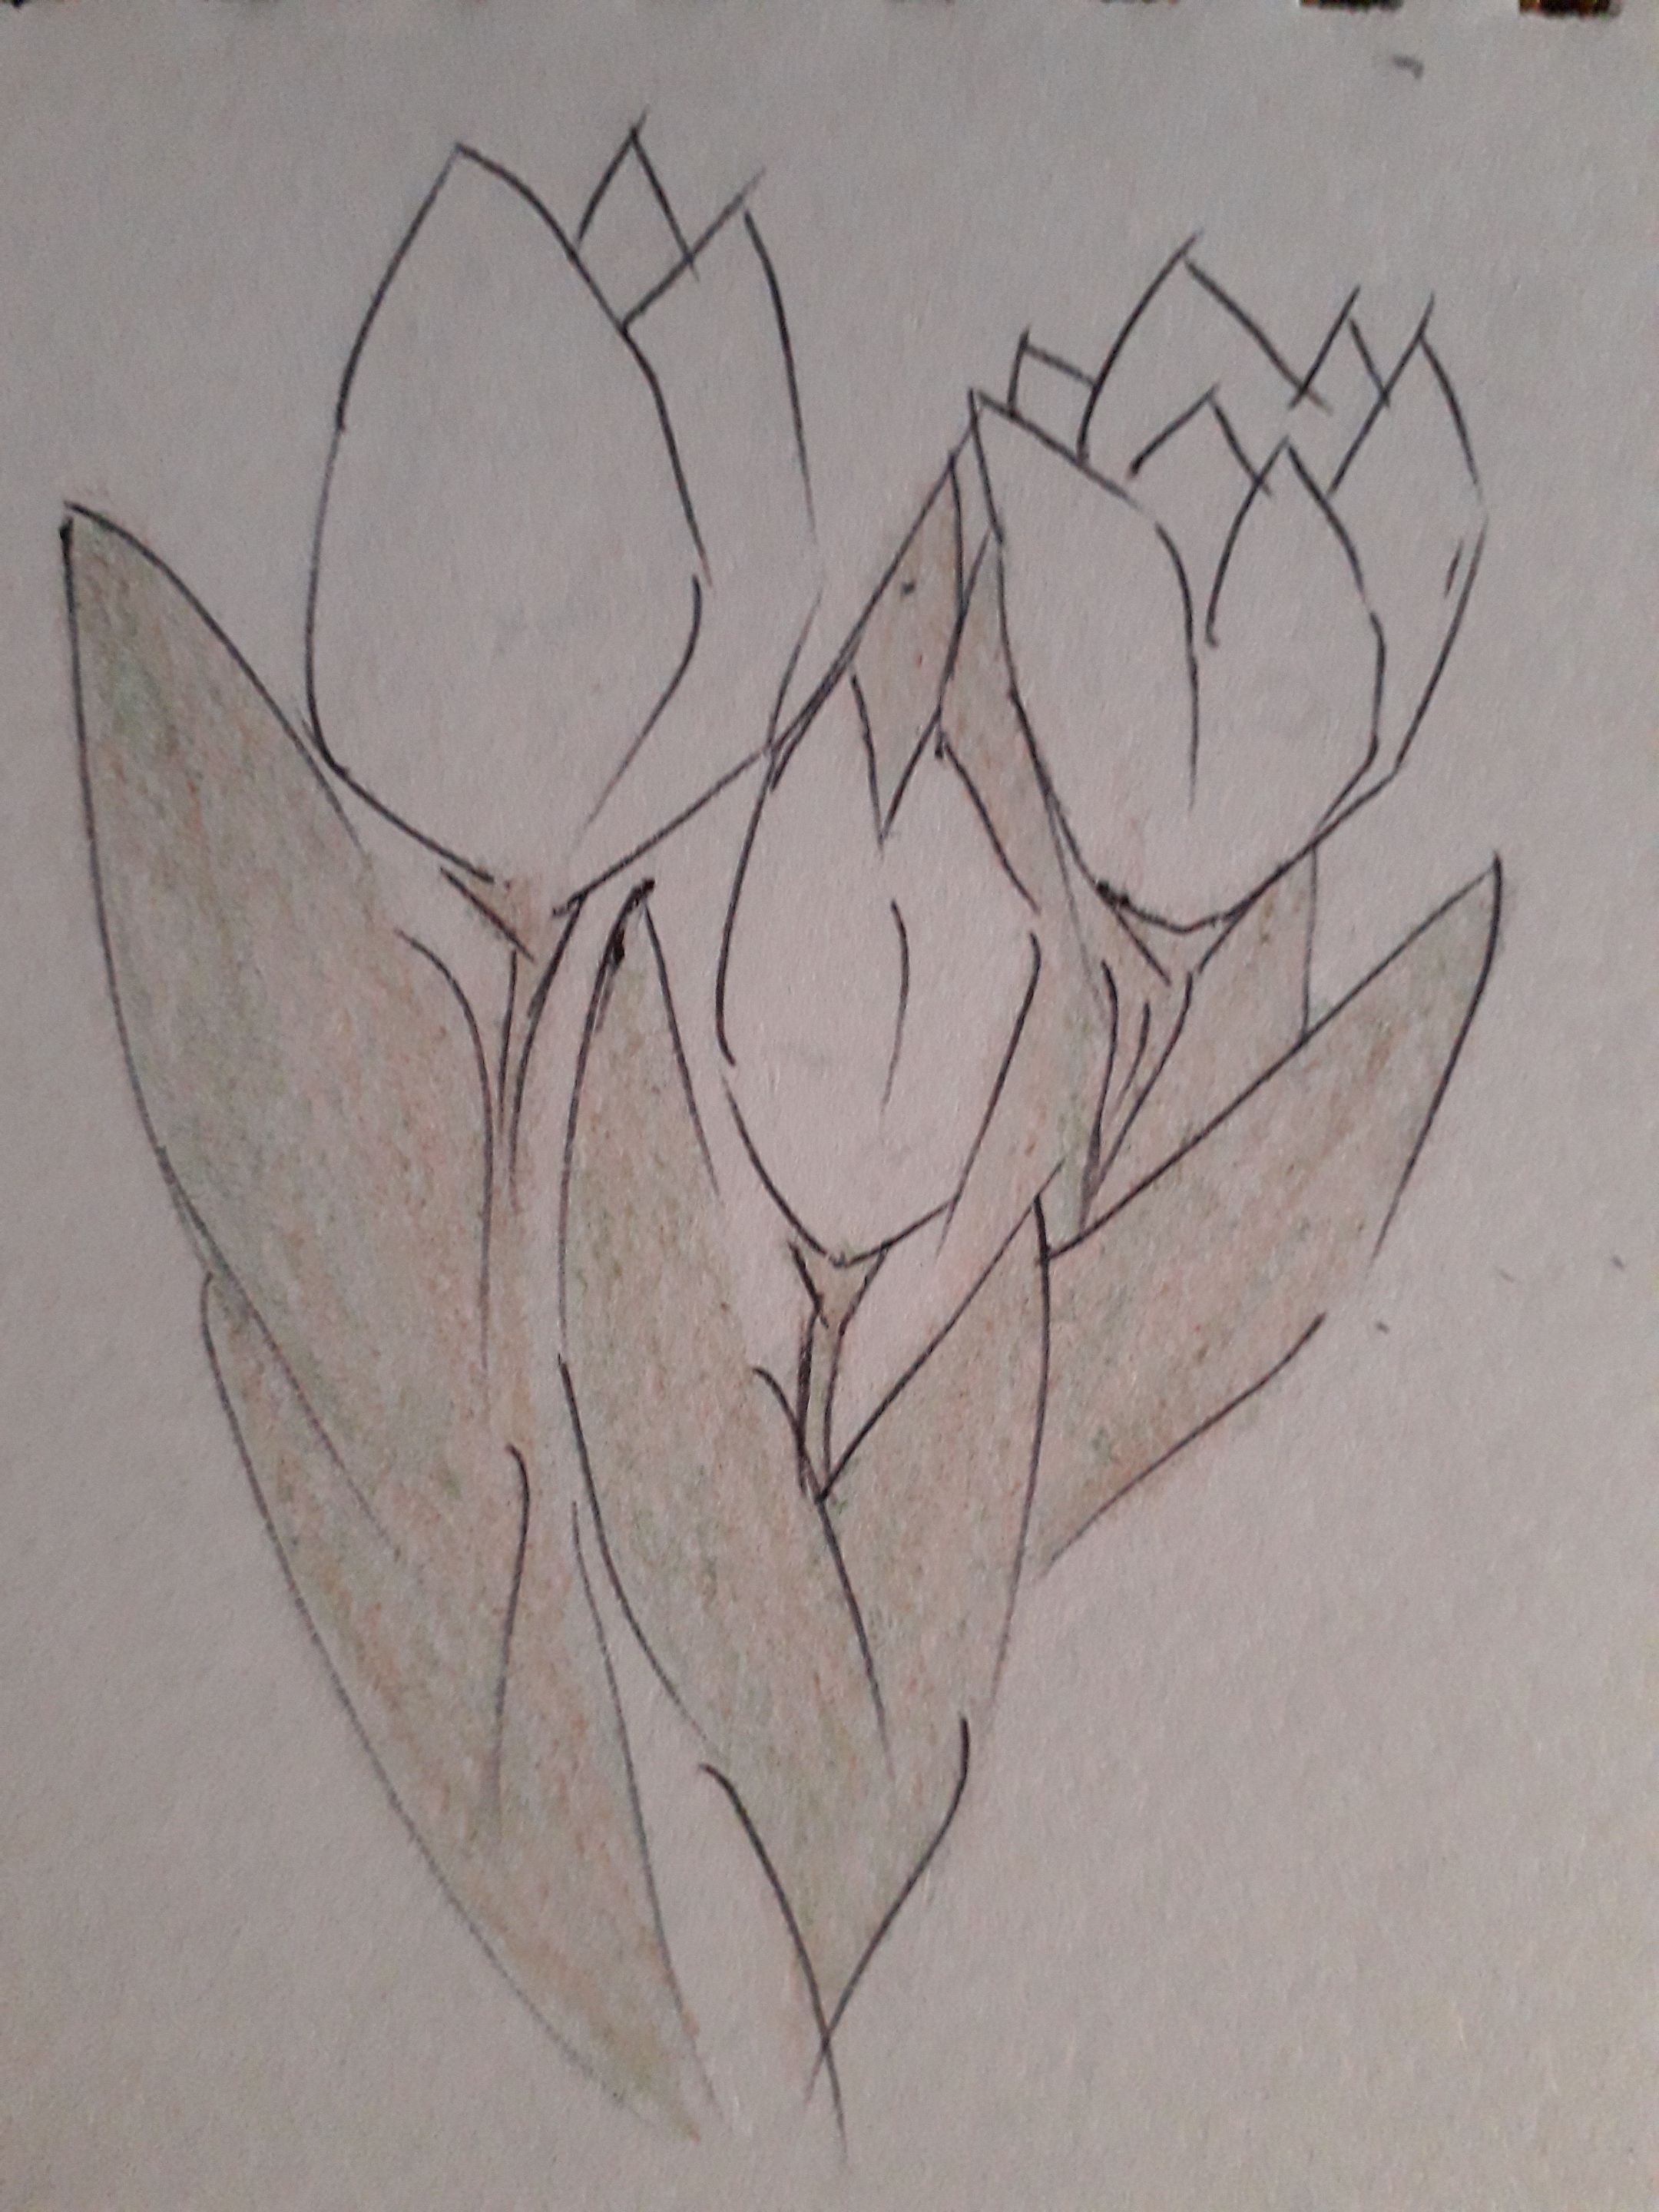
Now it’s time to color, which we’ll do in layers, using subtle strokes, just lightly adding color. First, I applied a warm brown layer to the leaves and stems. Then, I added a layer of cool dark green.
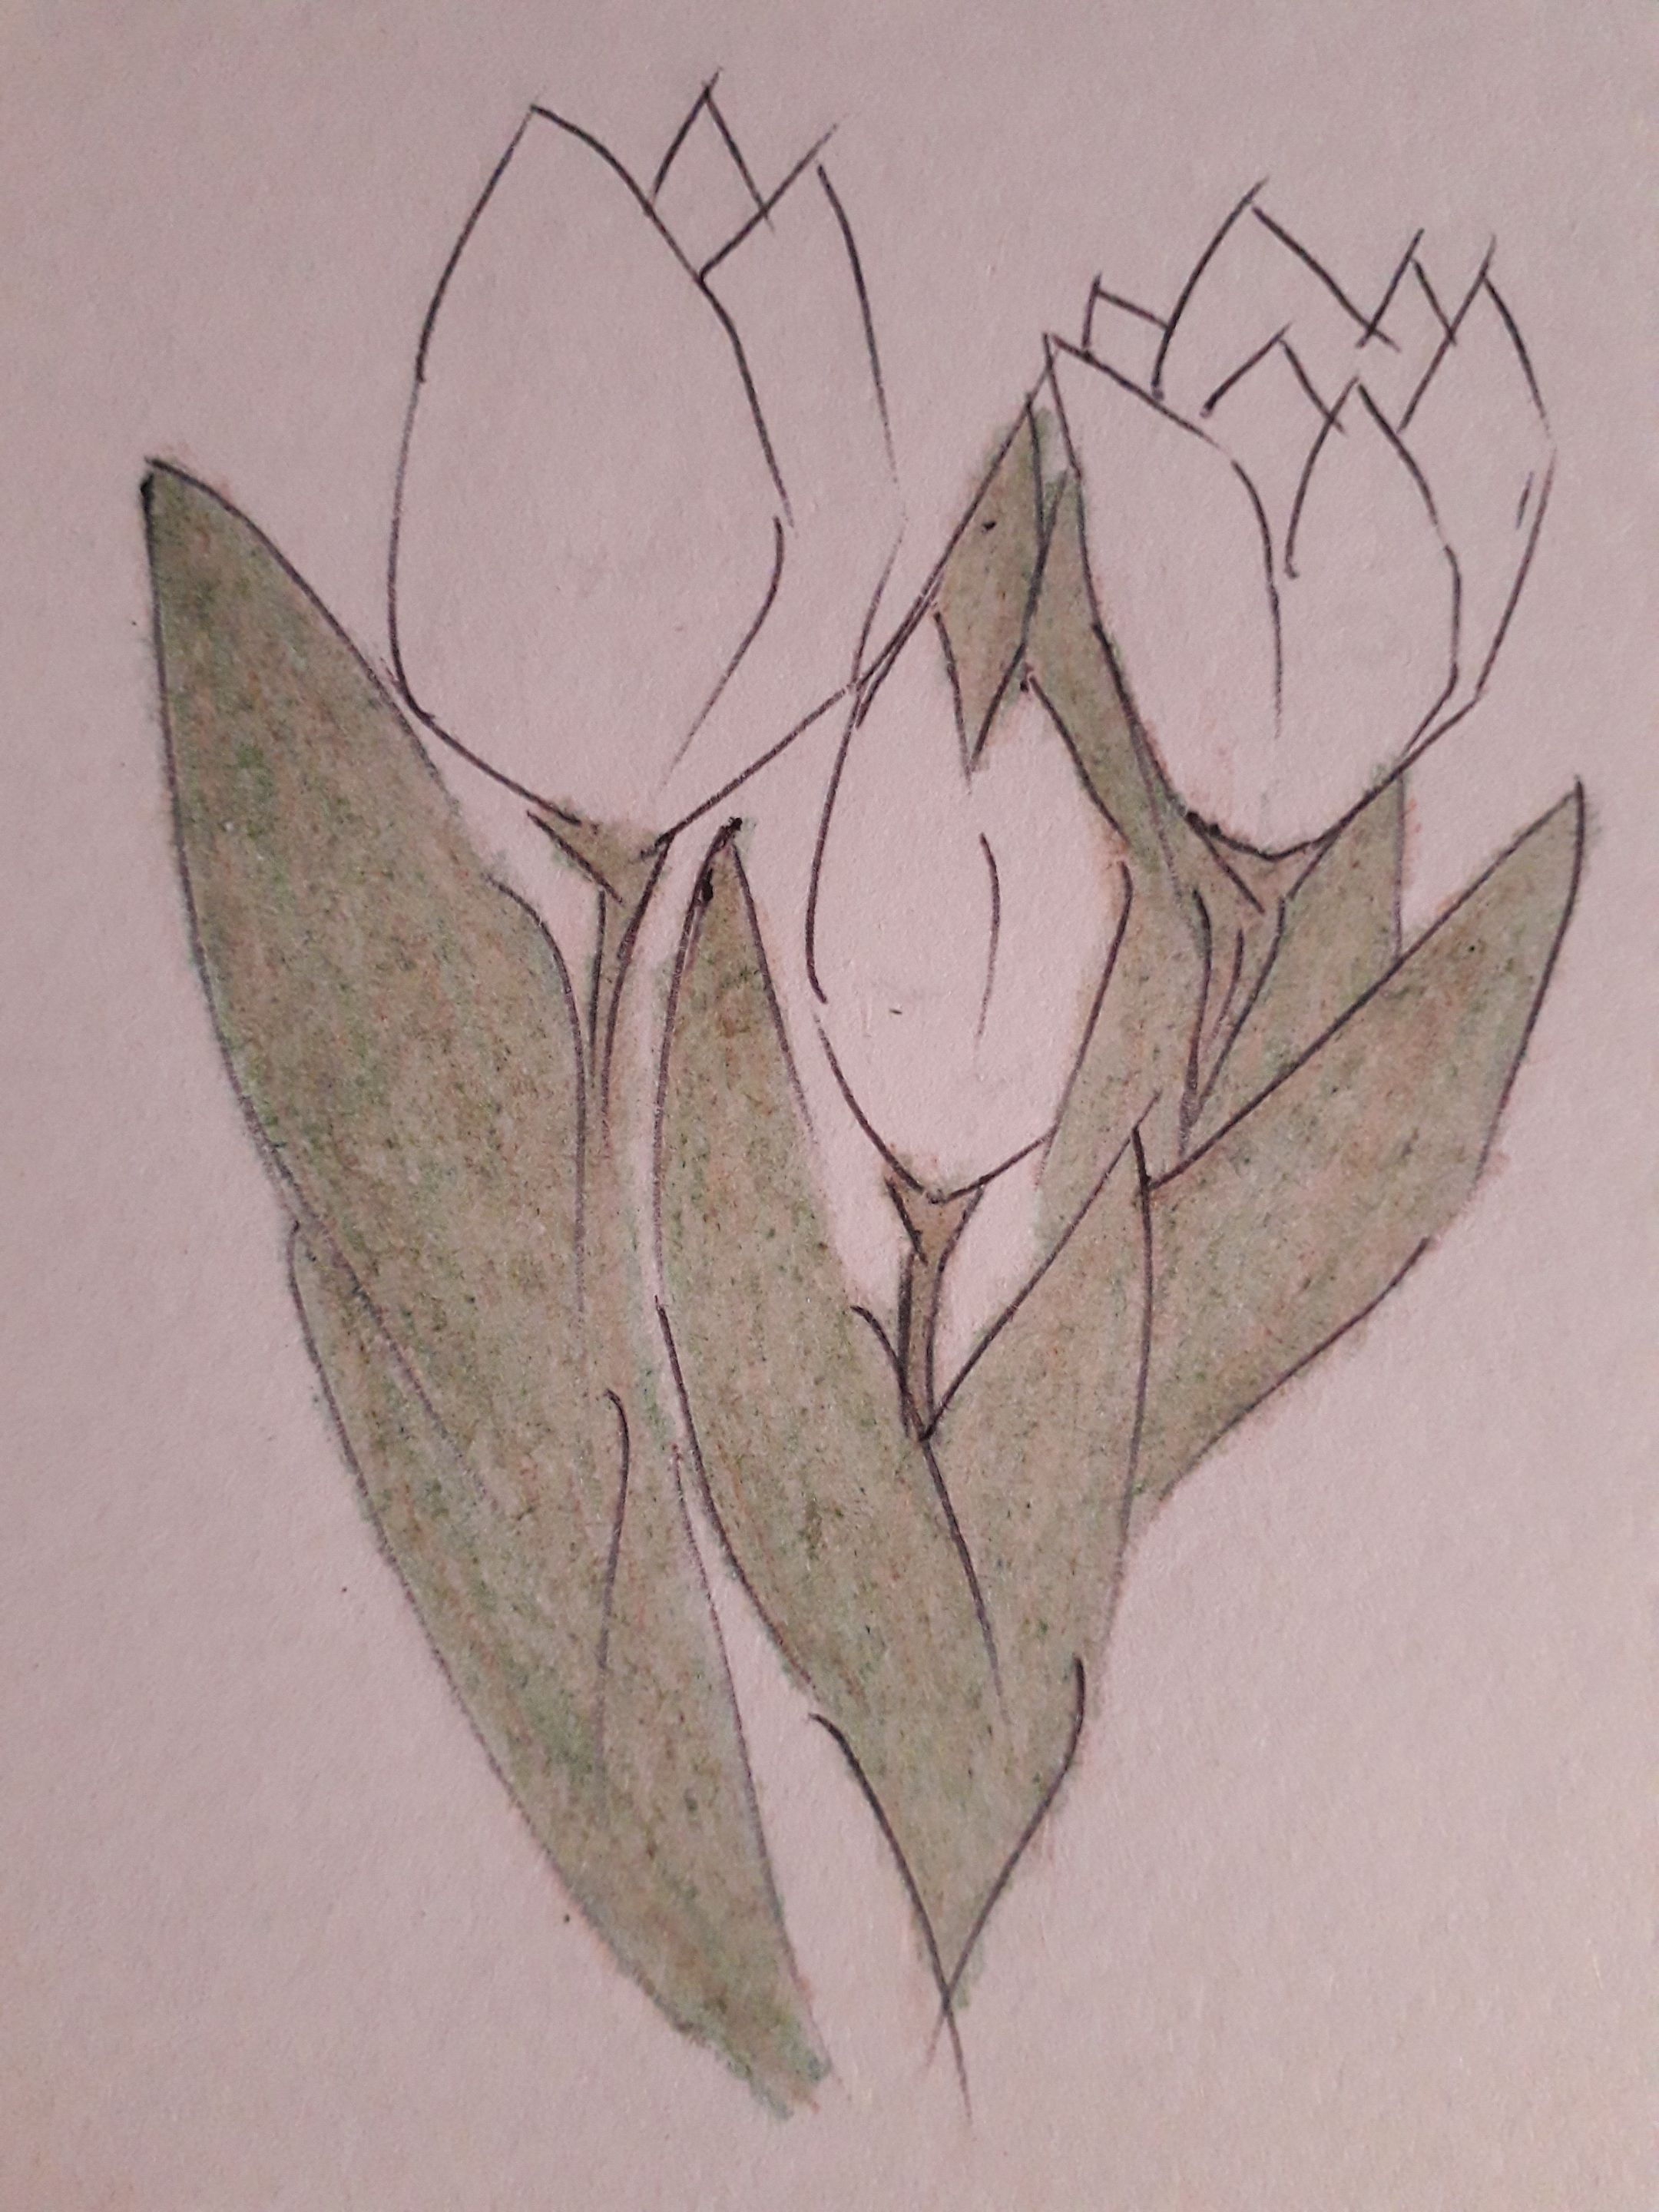
We’ll repeat the previous step as many times as needed until we get the desired final color. As you can see, the resulting color is a warm dark green—really lovely.

-|-|
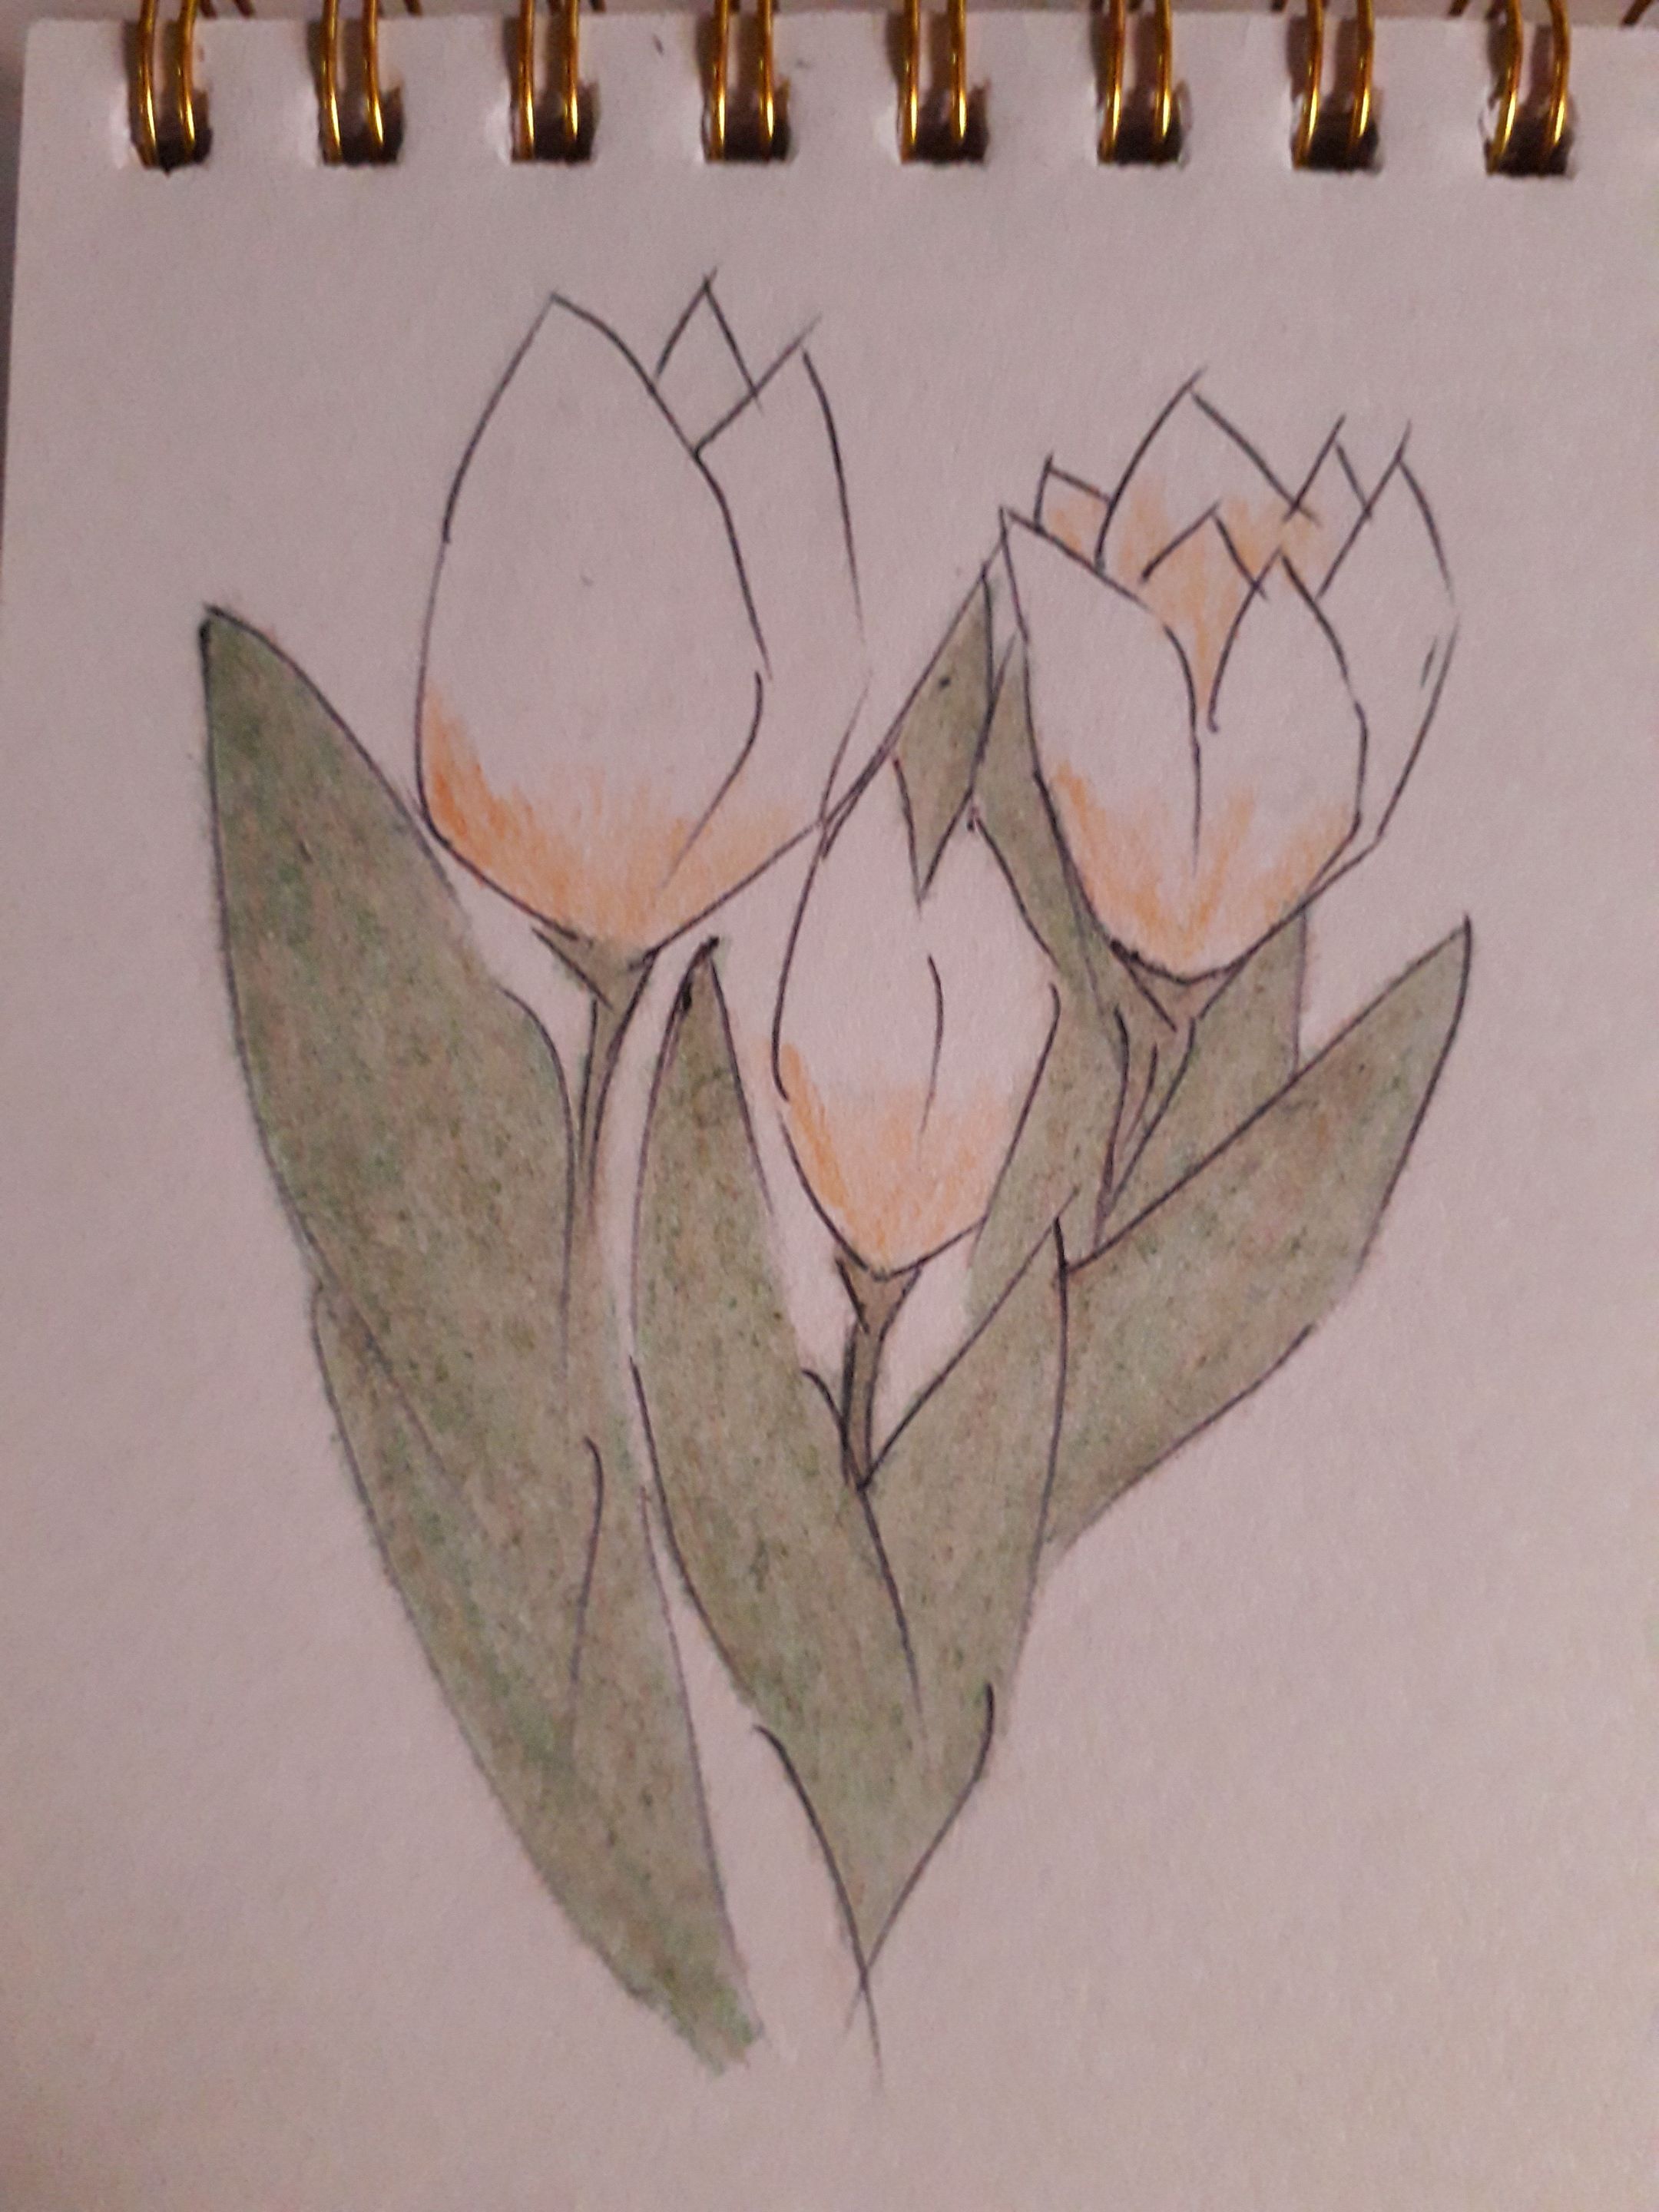
Now comes the moment to paint the flowers.
Following the same process as before, I applied a layer of orange just at the base of the flowers, and also in the center of one of them.
Next, I added a layer of pink.
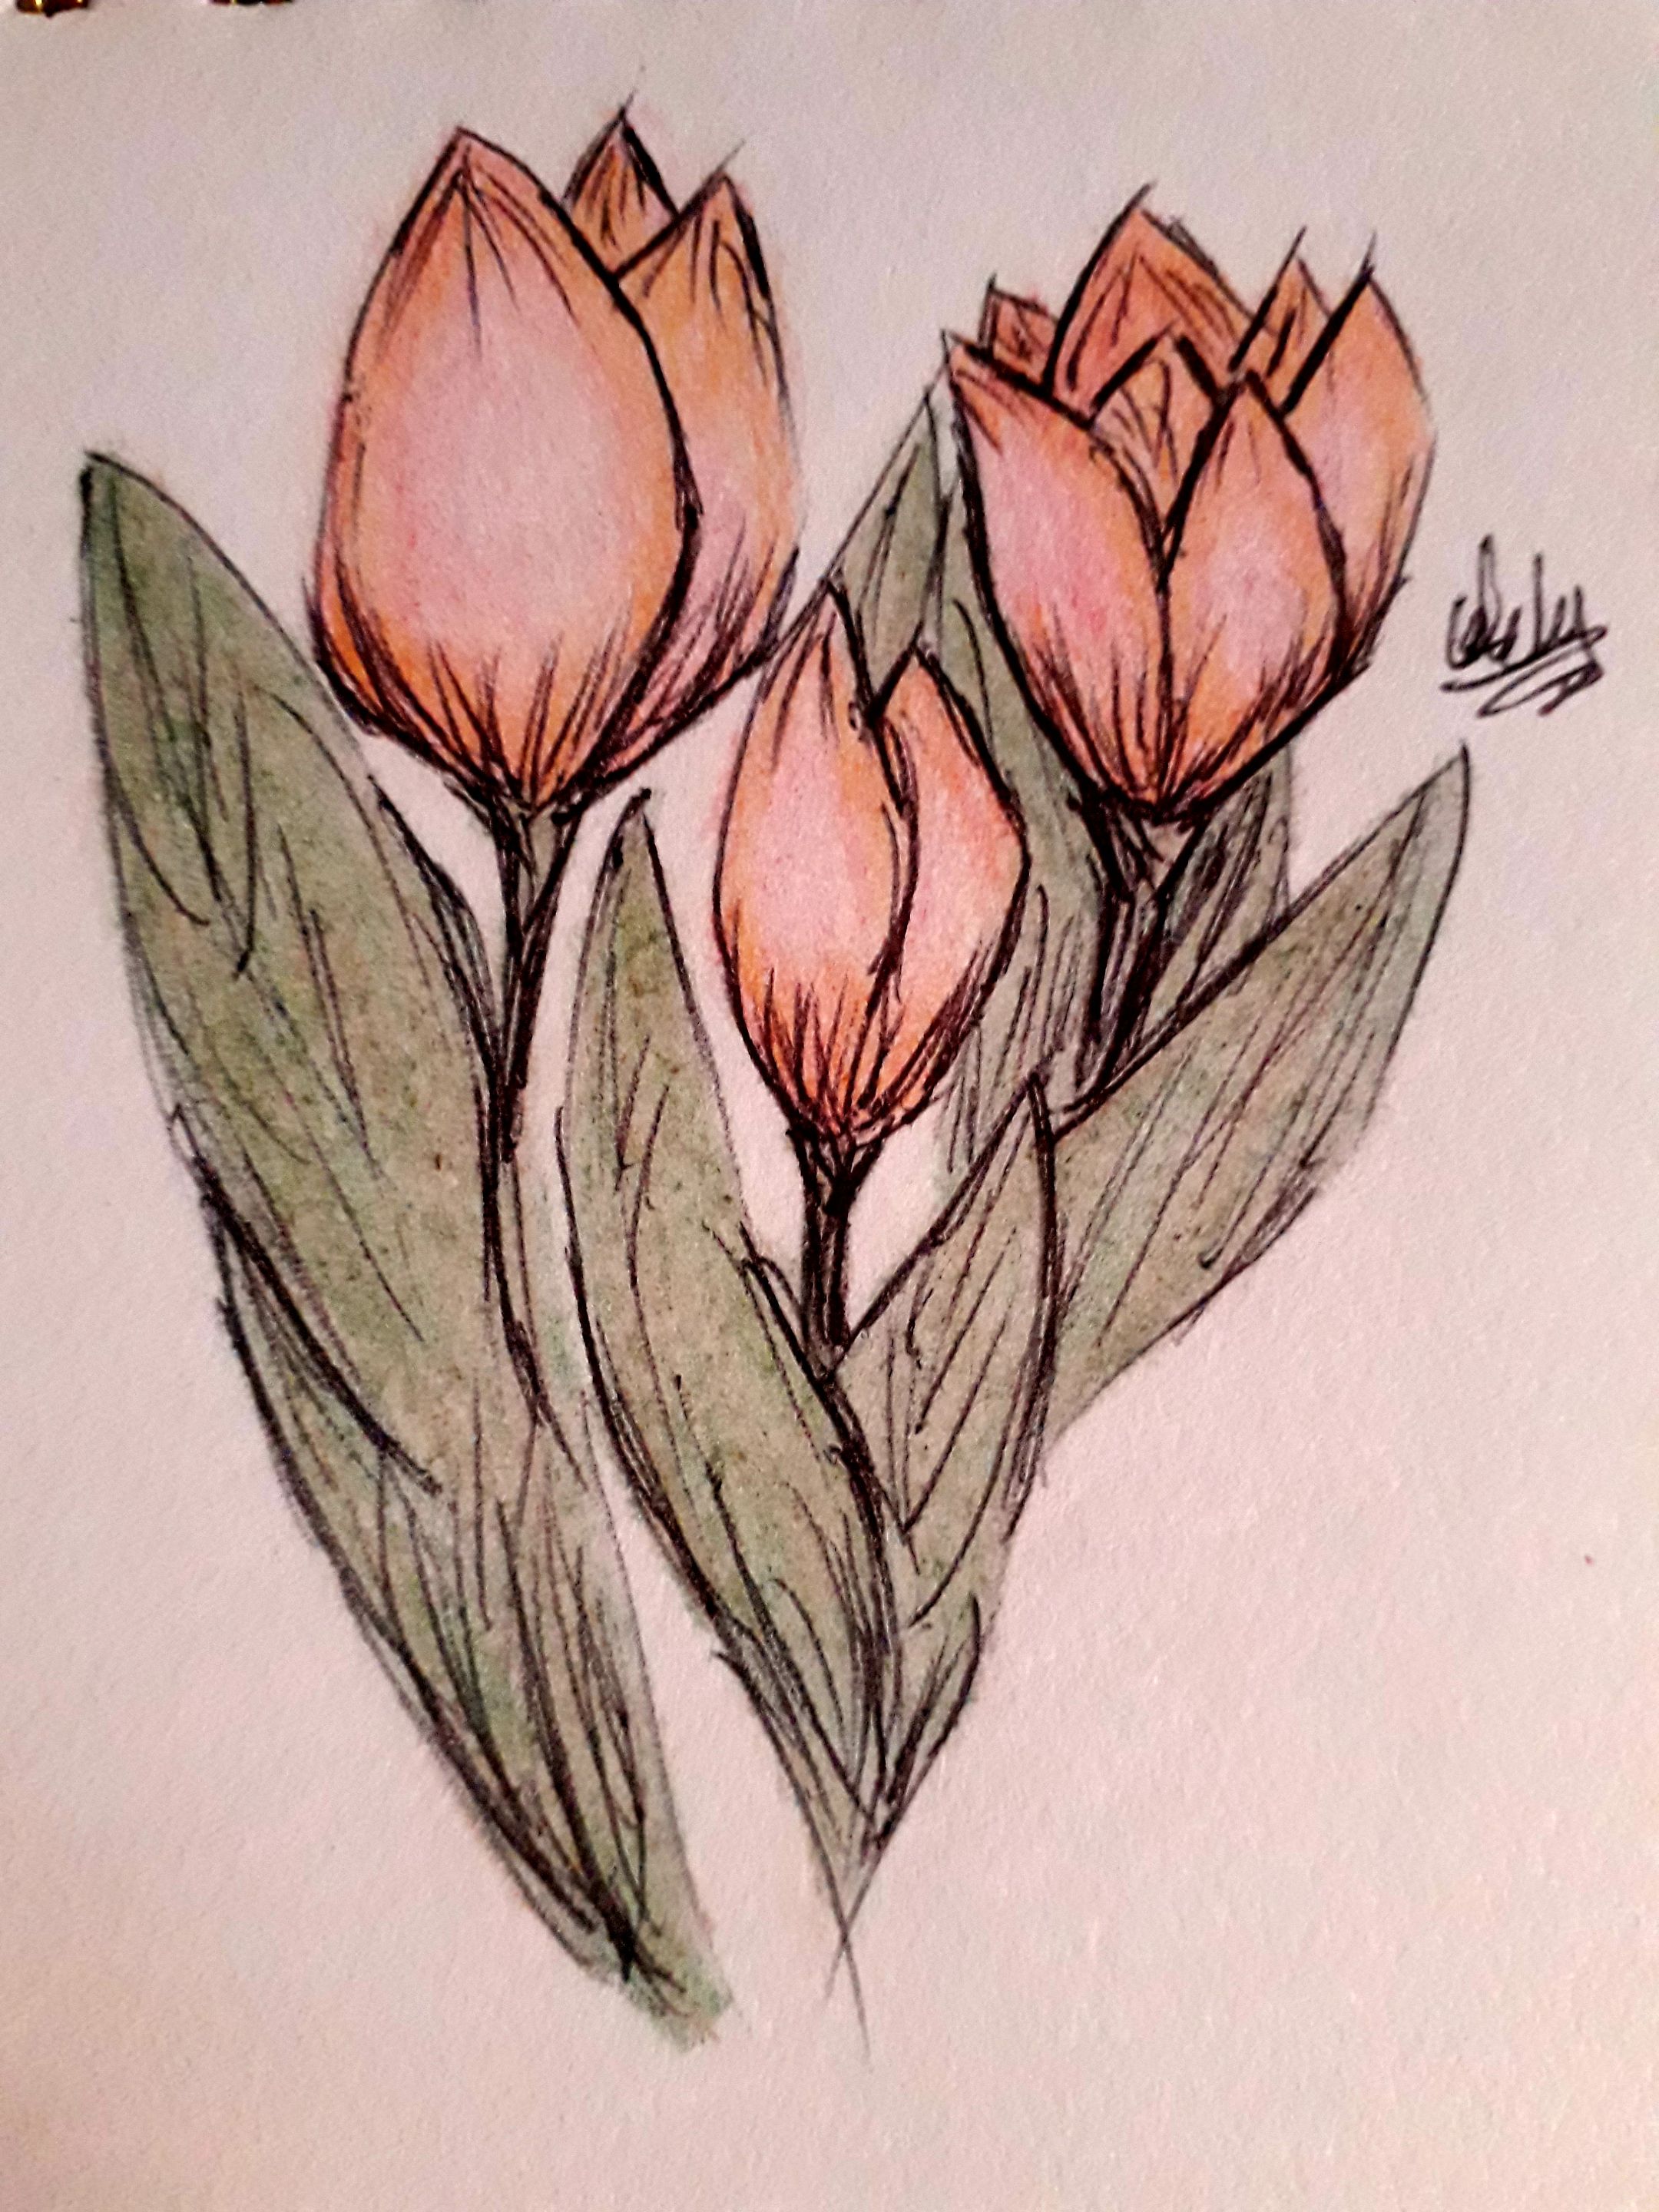
I felt like the second image already looked pretty good, but I wanted to keep adding more color to the flower.
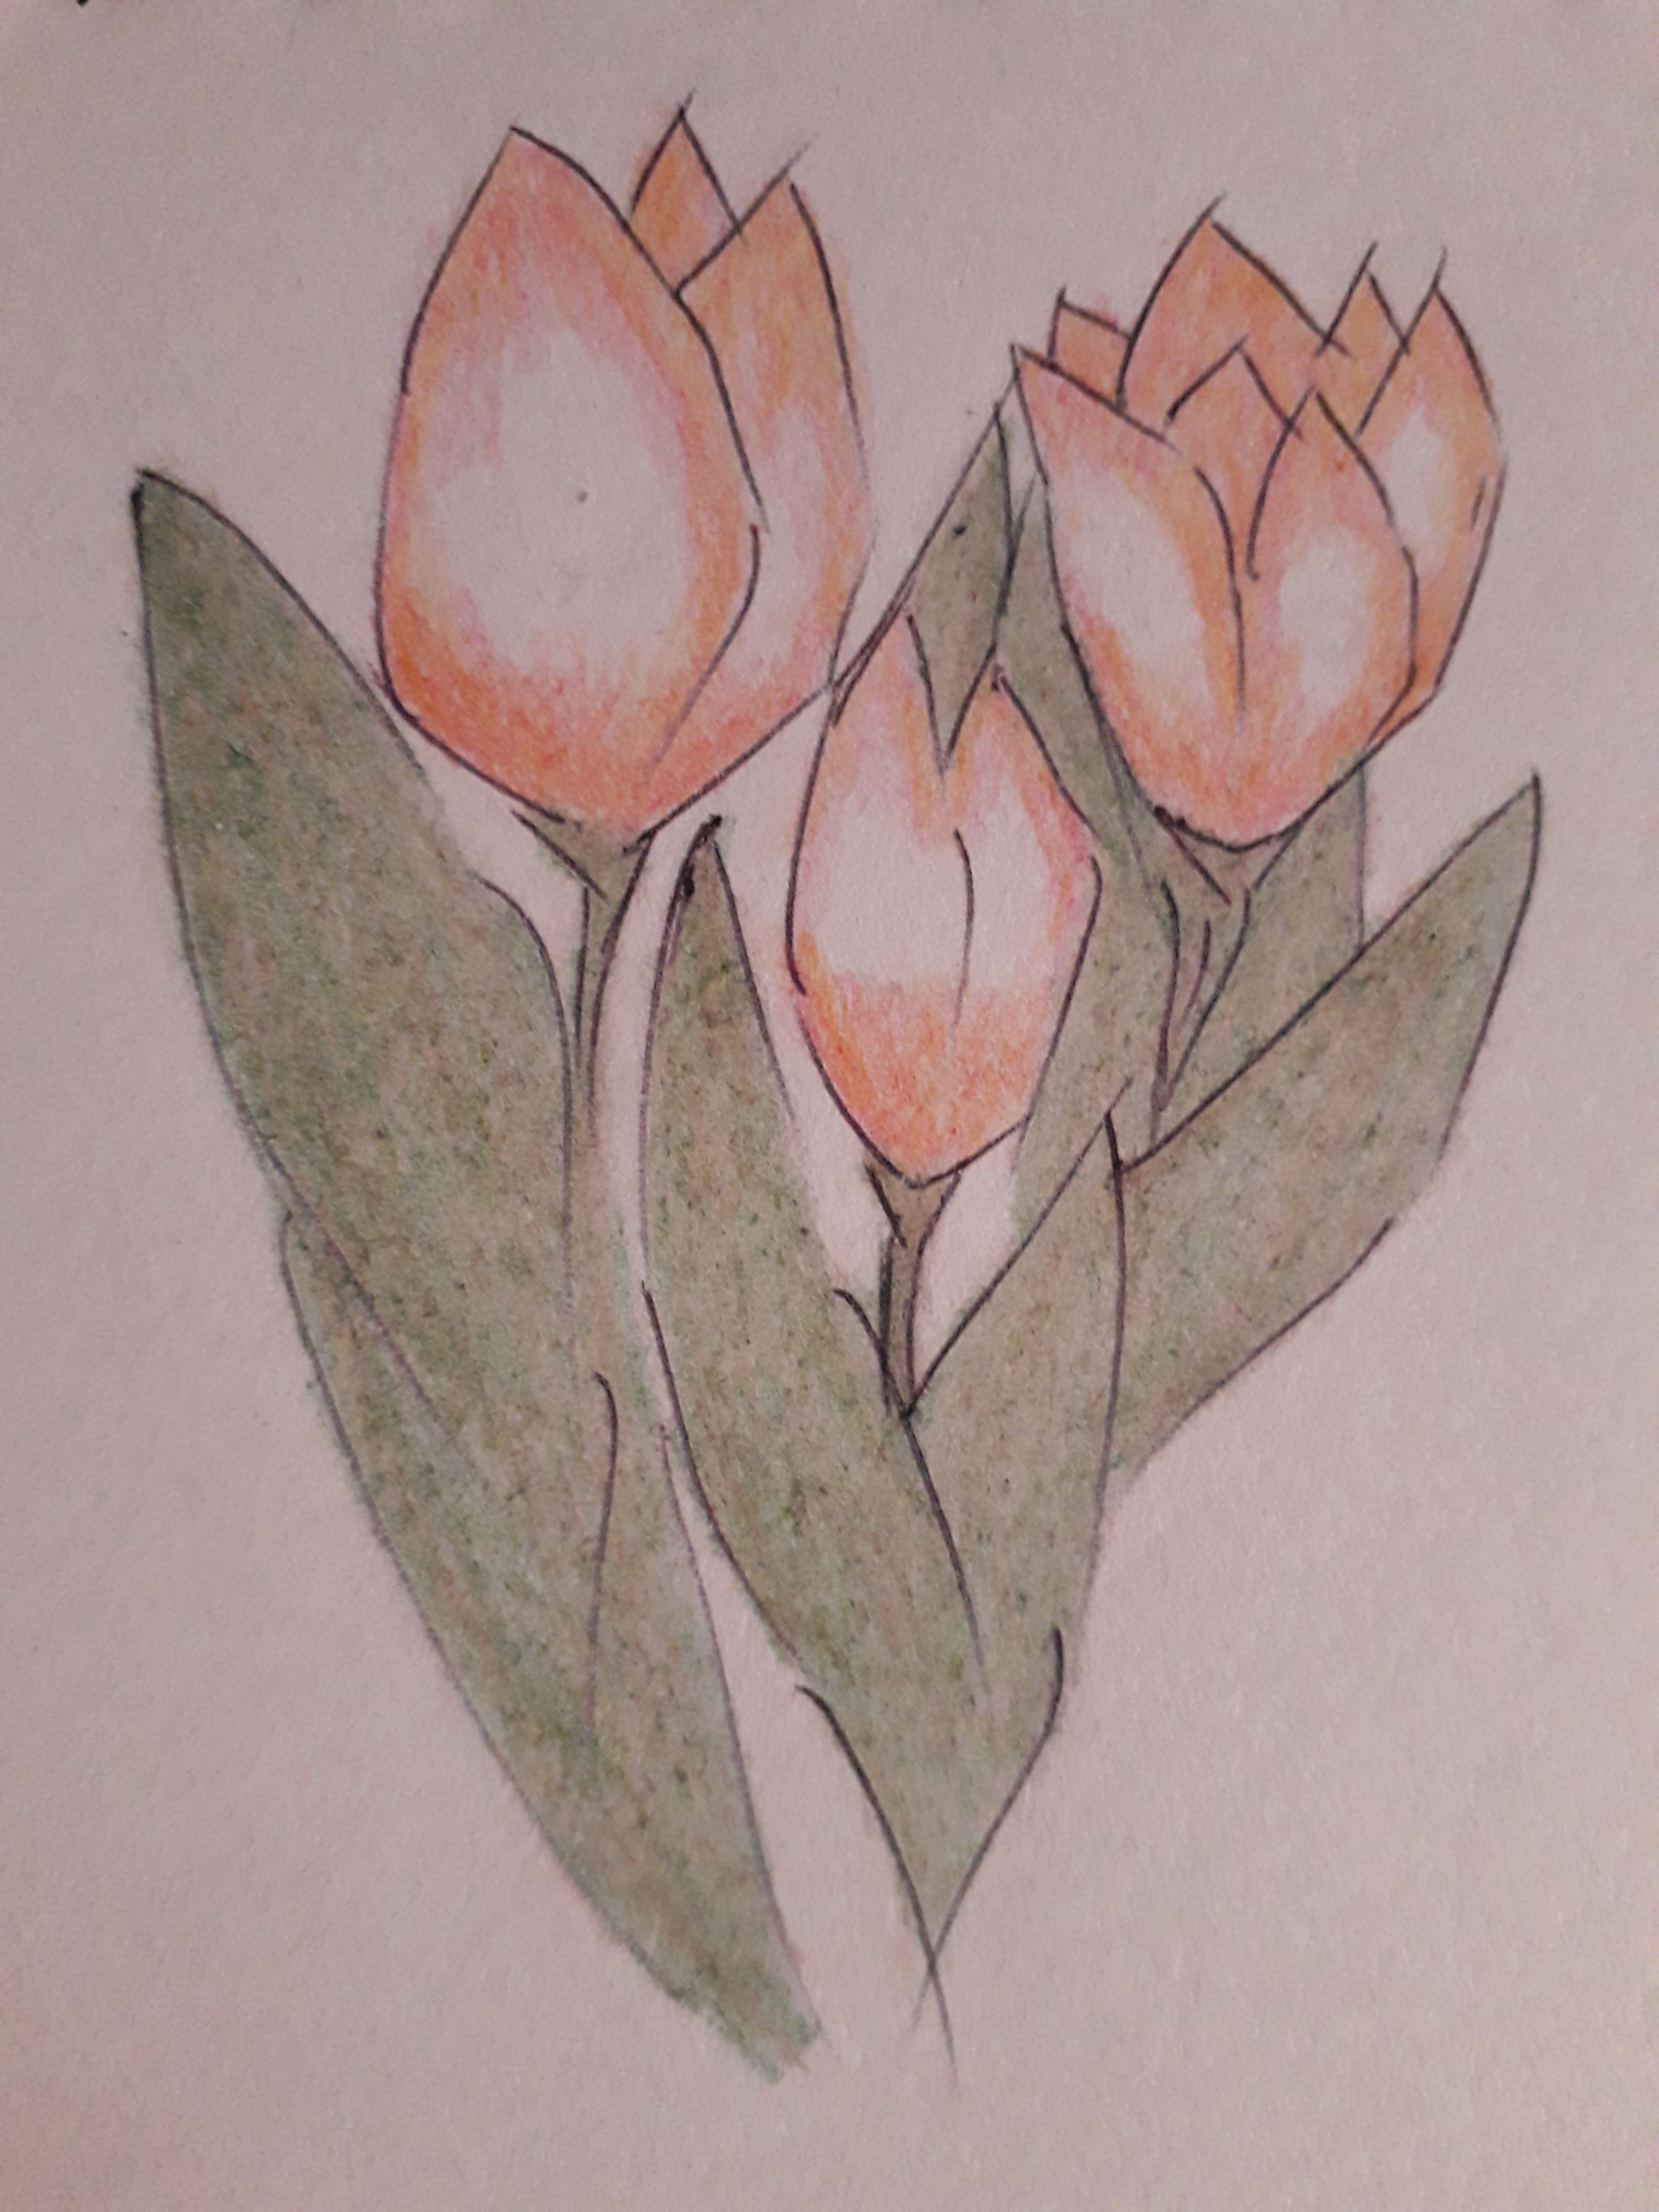
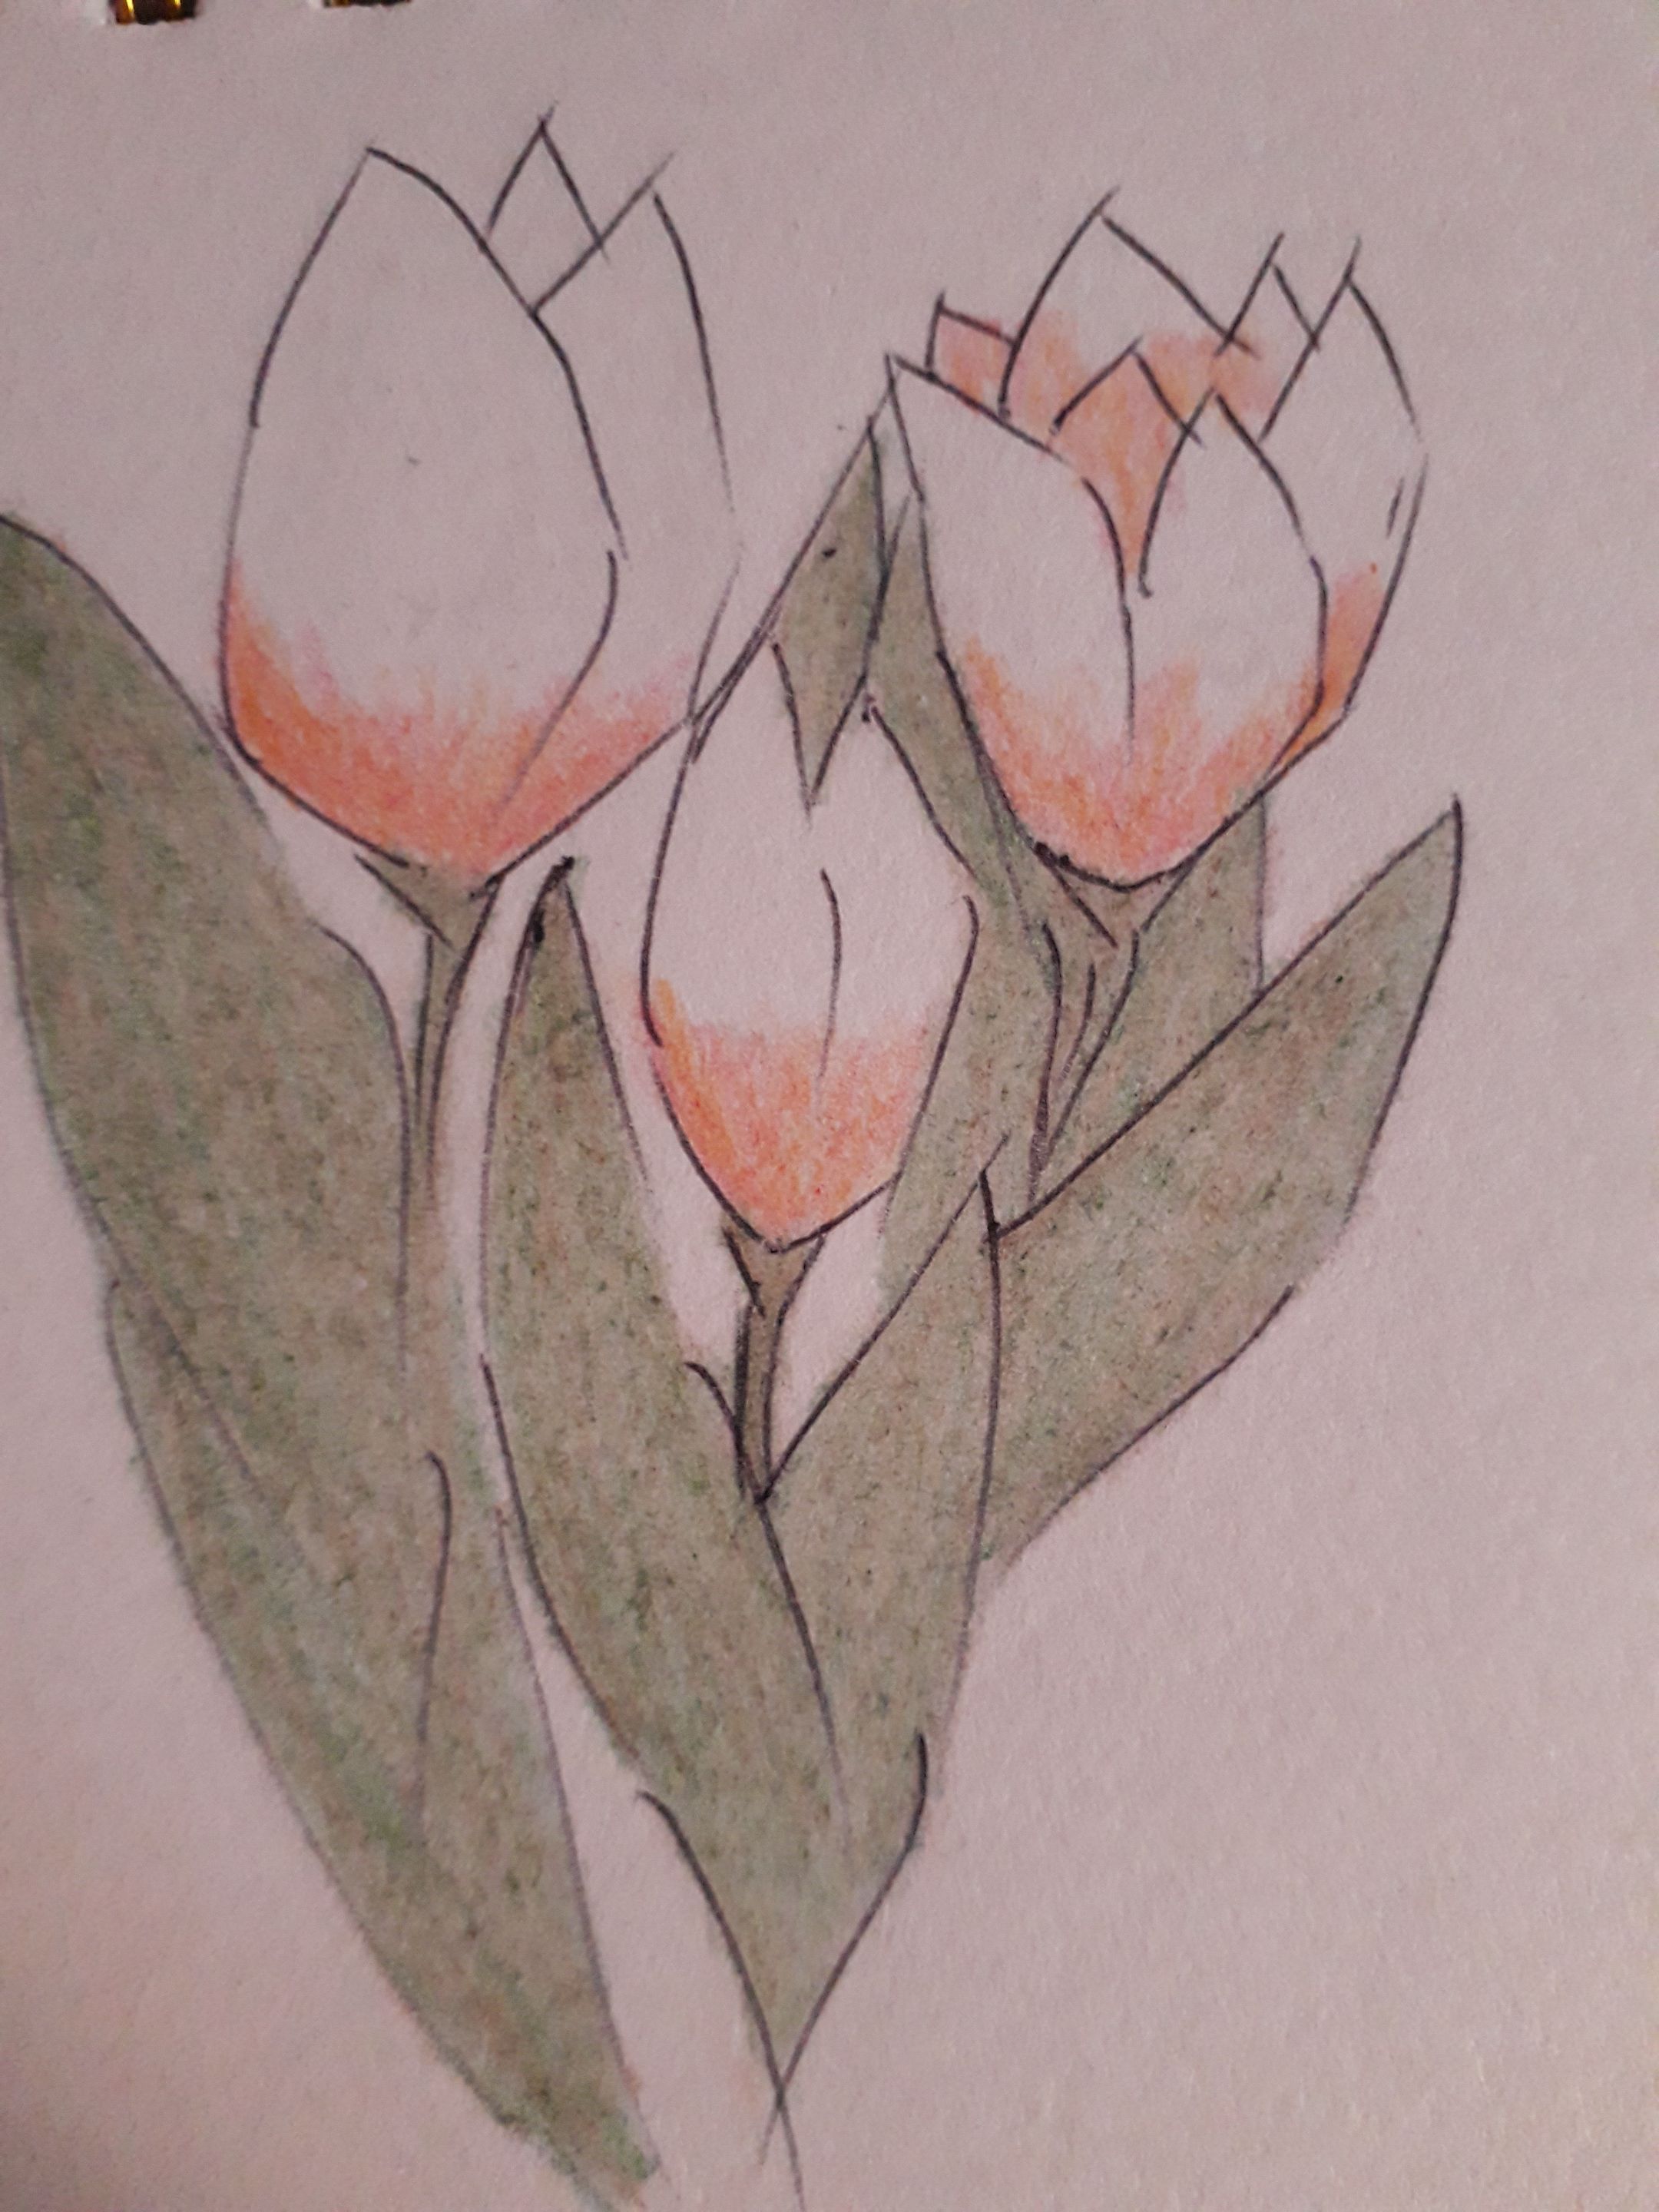
I started spreading the color across the tulip, except for the center, because I wanted to suggest a sense of lighting. As I mentioned earlier, we’ll keep layering colors until we get the tone we’re aiming for.
Then, I added a very soft layer of pink in the center area. This was purely personal preference, and I feel it would’ve looked great if I had left it as it was before too. This tulip style is really pretty, but I wanted to take it a step further—and that brings us to the final step.
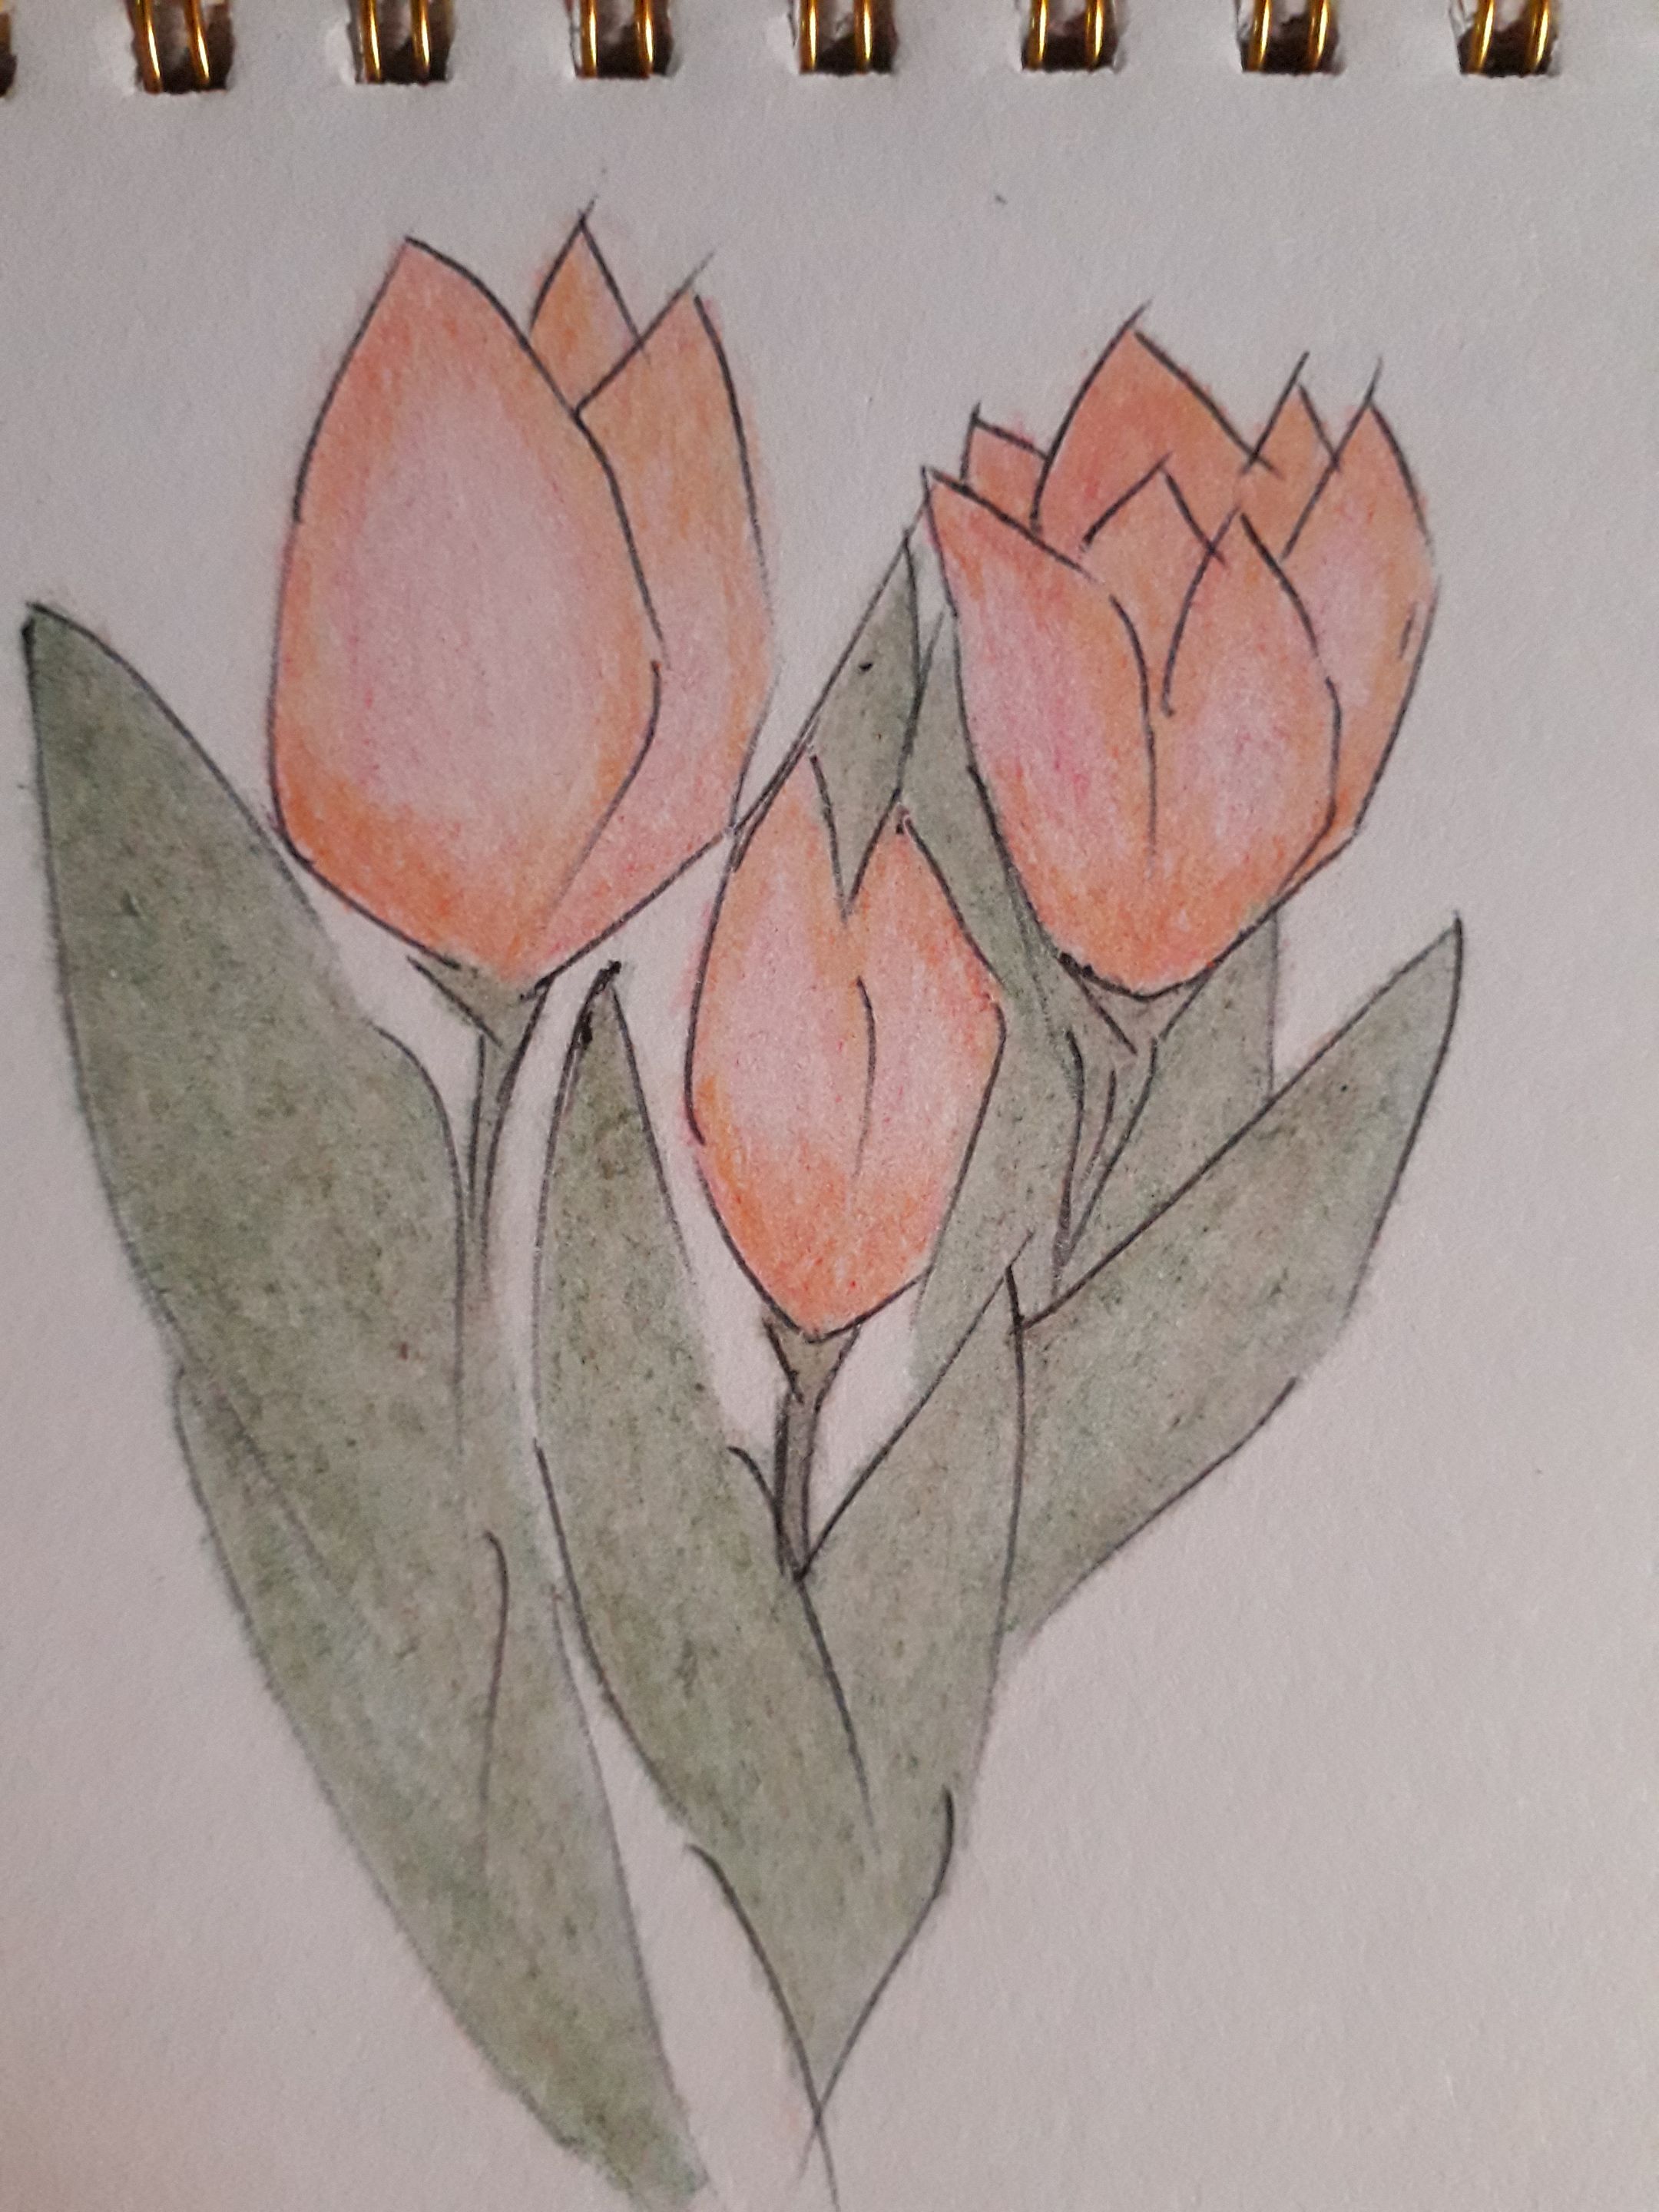
I wanted to give it a different touch, so I used the pen again to make fluid, quick lines that followed the direction of the main strokes, to create shadows.
I really liked how the style completely changed just by using a simple material. I prefer this style—it feels moodier to me, and I love how something as warm and cheerful as tulips can take on a darker tone, at least in my eyes.
And with that, the tutorial comes to an end. I’d love to keep drawing flowers, so I’d be thrilled if you left suggestions in the comments, and I’d also love to hear your thoughts on my drawing, hehe.
That’s all for now—see you in the next post, mwah. (。˃ ᵕ ˂ )⸝♡
🌷🌷🌷🌷🌷🌷🌷🌷🌷🌷
Español
🌷🌷🌷🌷🌷🌷🌷🌷🌷🌷
Clic aquí!
Desde siempre, suelo dibujar personas, pero hace poco me hice una pregunta un poco profunda. Si dibujar me gusta tanto, entonces, ¿por qué no intento dibujar algo que me guste también y que además sea diferente a lo que hago siempre?
Nunca he sido buena dibujando flores, a pesar de que disfruto verlas, pero yo tengo la creencia de que todo puede cambiar si le ponemos el deseo de que cambie.
Así, entonces, decidí experimentar un poco a la vez que dibujaba algo que me guste. A lo mejor, esto será una buena idea para descubrir un poco más mi estilo.
Relájense conmigo también, mientras dibujo estos tulipanes y a ver qué sale, ¡vamos allá!
### Materiales
- Sketchbook
- Lápiz
- Lapicero
- Borrador
- Lápiz de color rosado claro cálido
- Lápiz de color marrón cálido
- Lápiz de color verde oscuro frío
- Lápiz de color naranja cálido

Comencé por dibujar tres óvalos, a los que luego les hice líneas que fueran hacia abajo, para hacer las ramas de los tulipanes. Hice varias líneas rápidas que resultaran un poco oblicuas, ya que las ramas no suelen ser líneas rectas perfectas.
Partiendo de esa base, encima de los óvalos, di trazos con forma de gajitos, para dibujar los pétalos. Mi idea fue hacer un tulipán cerrado, uno un poco más abierto y otro abriéndose. Para dibujar las hojas, di unos trazos con la misma forma de gajo, pero más larga, que envuelva las ramas. No sé cómo explicar estas formas, jaja, pero lo importante es que piensen en la manera en la que se ve un tulipán para ustedes.
De todos modos, esto no tiene que ser perfecto, por dos razones: primero, porque es un boceto. Segundo, porque lo significativo del arte es que les guste hacerlo, no que quede impecable; eso pienso yo, al menos.

Con el lapicero, delineé las formas más importantes del boceto, con trazos rápidos y cortos. Lo relevante para mí era que se entendiera la forma de los tulipanes, sin más.
Después de esto, borré el grafito sobrante.
|
-|-|
Ahora, toca el momento de colorear, cosa que haremos por capas, con trazos sutiles, apenas dando color. Primero, di una capa de color marrón cálido en las hojas y ramas. Luego, di una pasada de color verde oscuro y frío.

El paso anterior lo vamos a repetir tantas veces sea necesario hasta que tengamos el color resultante deseado. Como vemos, el color resultante es un verde oscuro y cálido, bastante bonito.
|
-|-|
Ahora viene el momento de pintar las flores.
Siguiendo el mismo procedimiento anterior, damos una pasada de color naranja en la base de las flores, únicamente, y también en el centro de una de estas.
Luego, la siguiente pasada la damos con color rosa.
Yo sentía que en la segunda imagen ya se veía bastante bien, pero quise seguir añadiendo más color en la flor.

Comencé a esparcir el color por todo el tulipán, excepto el centro, porque quería dar una idea de iluminación. Como les dije anteriormente, se van a dar pasadas de colores simultáneamente hasta que nos quede el color deseado.

Luego, di una pasada de color rosa muy suave en la zona del centro. Esto fue puro gusto personal, y siento que también podría verse perfectamente si lo dejamos como estaba anteriormente. Este estilo de tulipán está muy bonito, pero yo me quería ir un poco más allá, y con eso pasamos al último paso.

Quise darle un toque diferente, así que usé nuevamente el lapicero para hacer líneas fluidas y rápidas que fueran siguiendo la dirección del trazo principal, para hacer las sombras.
Me gustó mucho cómo el estilo cambió totalmente con el uso de un simple material. Prefiero este estilo, ya que lo siento más sombrío, y me encanta la manera en que algo tan cálido y alegre como los tulipanes, puede llegar a verse más oscuro, al menos para mí.
Y con esto, ya sería el final del tutorial. Me gustaría seguir dibujando flores, así que estaría encantada si en comentarios me dieran sugerencias, y también quisiera oír sus opiniones de mi dibujo, jiji.
Sin nada más que añadir, nos vemos en el próximo post, muak. (。˃ ᵕ ˂ )⸝♡
🌷🌷🌷🌷🌷🌷🌷🌷🌷🌷
- English translation Microsoft Copilot
- Traducción al inglés Microsoft Copilot
- Photos used in the post were taken by me, using a Samsung Galaxy J6
- Las fotos usadas en el post fueron tomadas por mí, usando un Samsung Galaxy J6
Posted Using INLEO