Las celebraciones de cumpleaños nunca se acaban y es que aunque unos prefieren dejarlas de un lado, otros como yo las adoran.
Cómo mamá amo celebrar los cumpleaños, creo que es una de los compartir que más me encantan y emocionan, sobre todo porque están llenos de sorpresas.
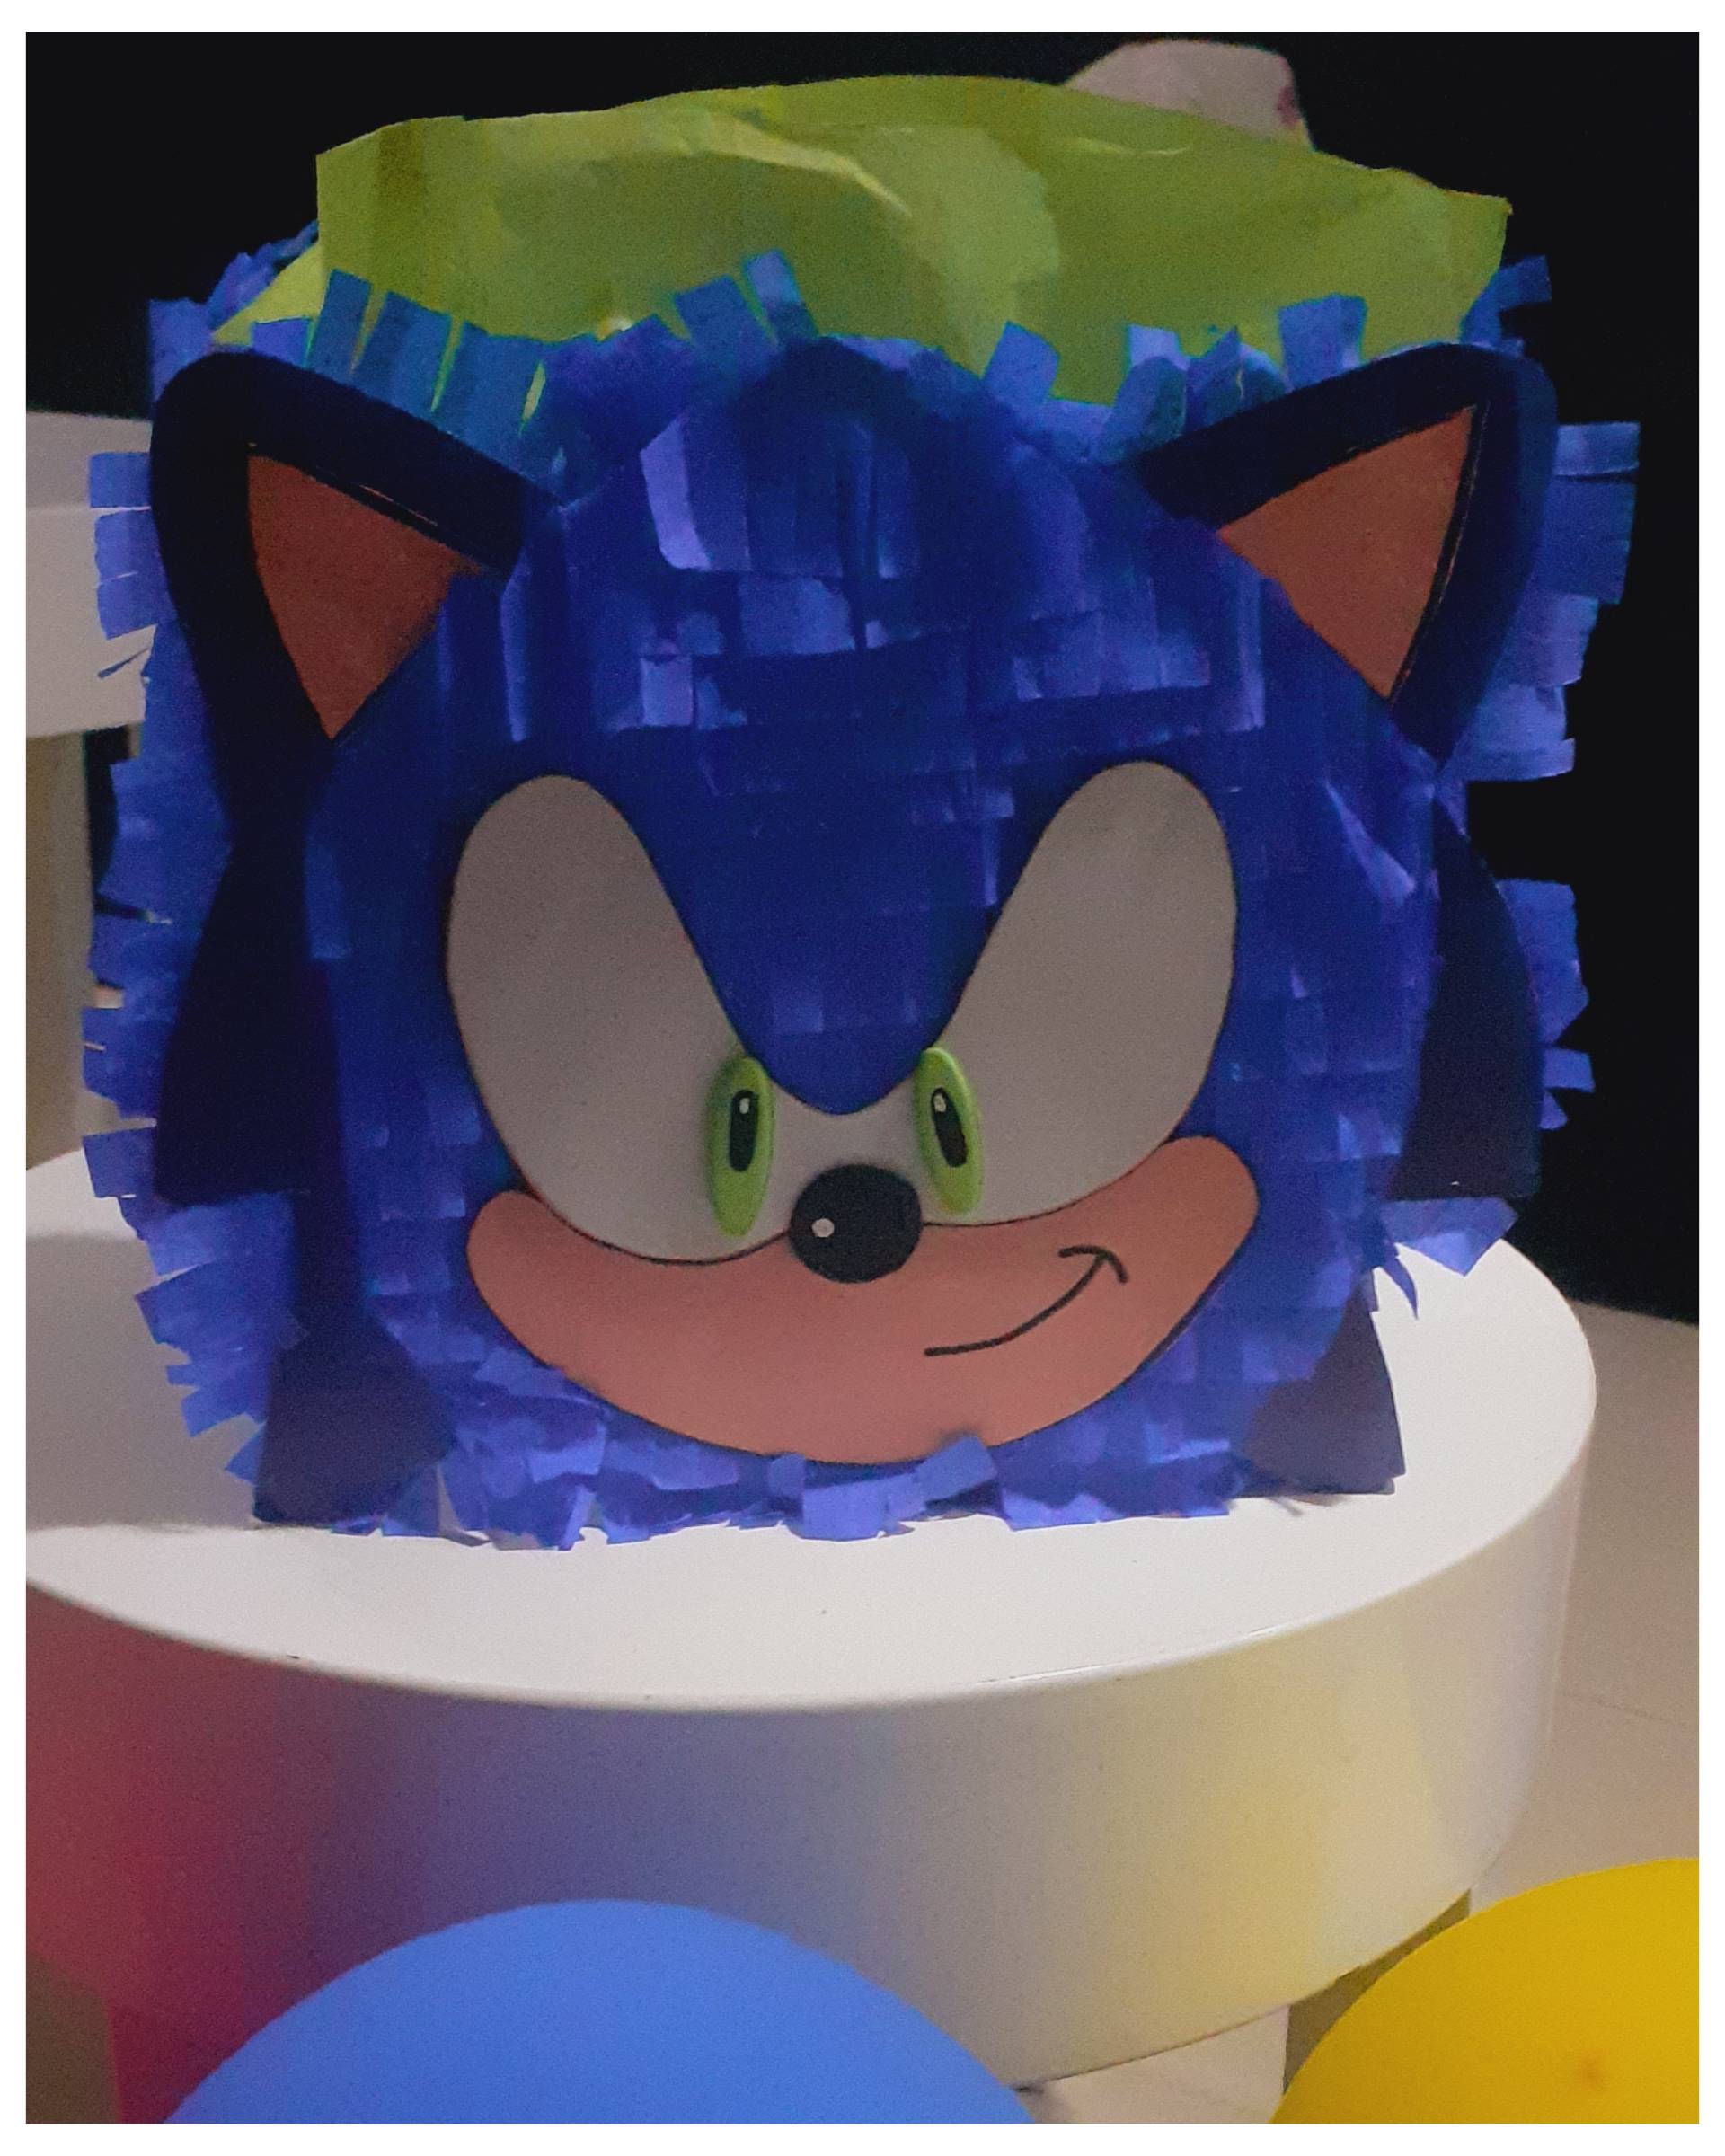
El protagonista de hoy es un **dulcero de Sony**, si ese personaje azul y veloz que está de moda y que a los niños y niñas les encanta, este amiguito es muy pedido en las fiestas de cumpleaños.
Así que hoy les quiero compartir como realize este dulcero, el cual está genial, original y muy útil para guardar golosinas y detalles para los invitados o para el cumpleañero feliz.
Que materiales necesitamos:
🔵 Cartón
🔵 Papel crepe azul
🔵 Papel lustrillo azul
🔵 Papel seda verde
🔵 Foami blanco
🔵 Foami negro brillante
🔵 Foami verde
🔵 Cartulina color piel
🔵 Silicón líquido
🔵 Tijera
🔵 Marcador negro
Cómo lo vamos a elaborar:
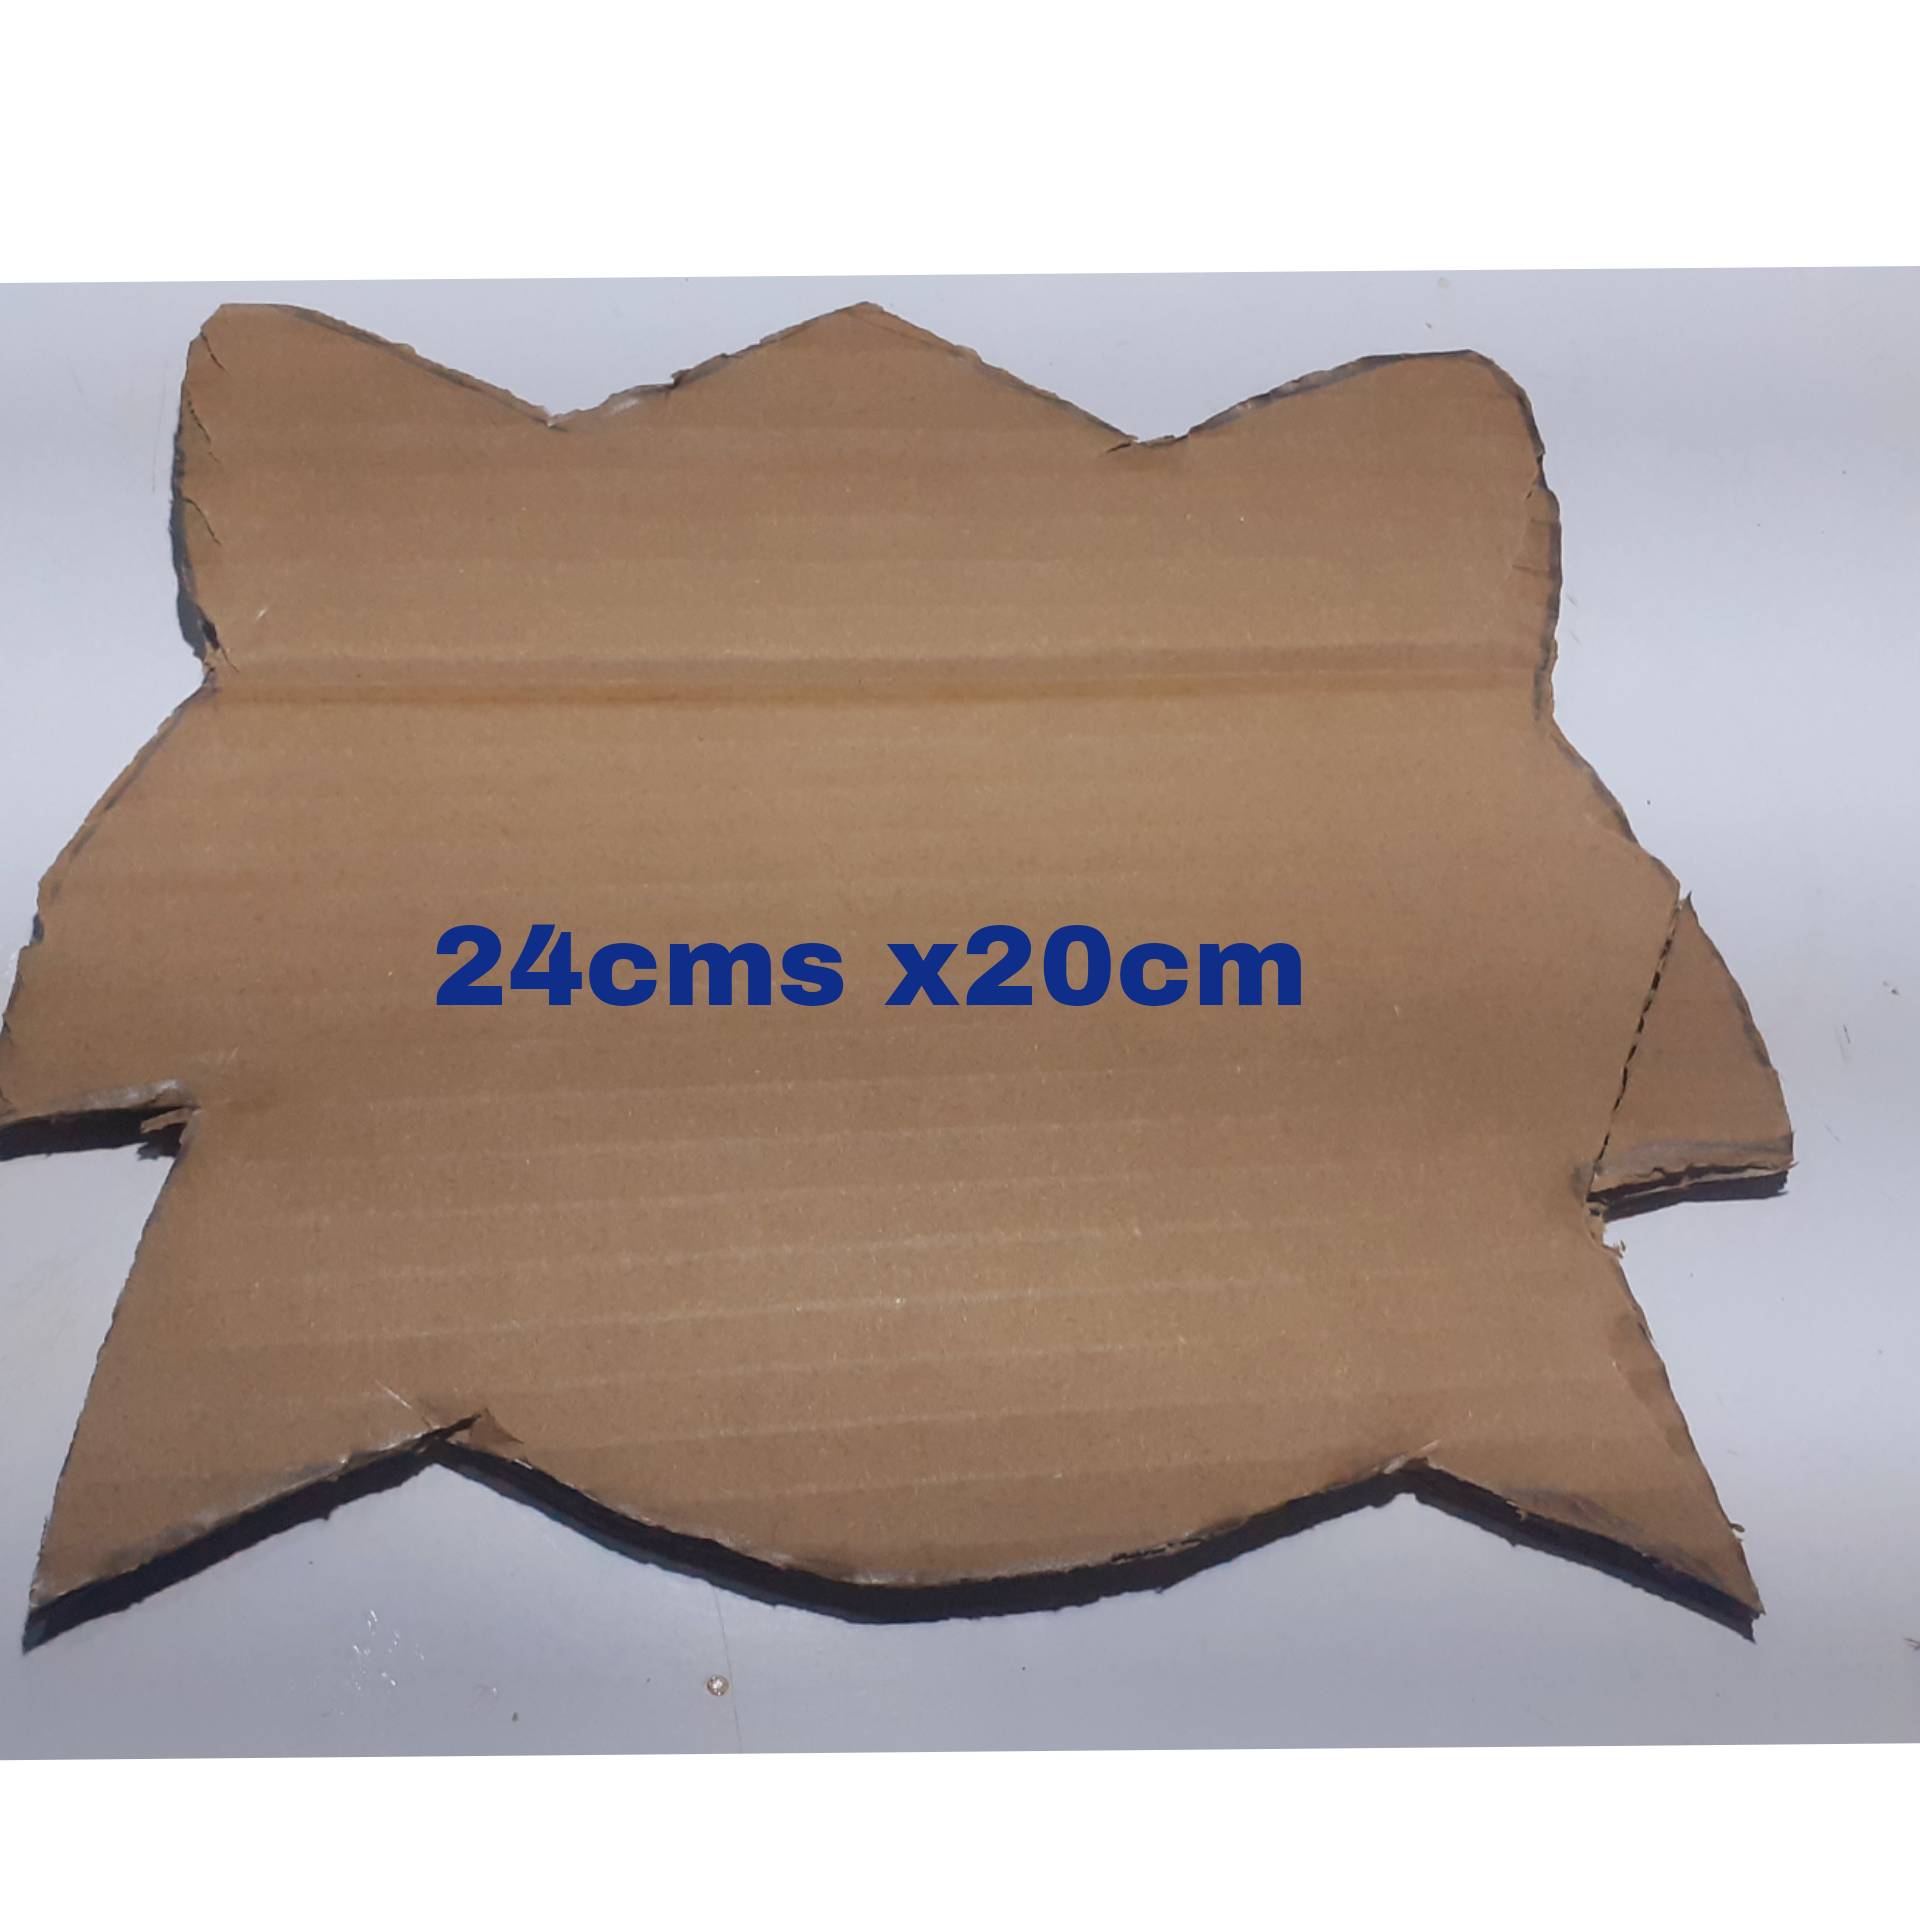
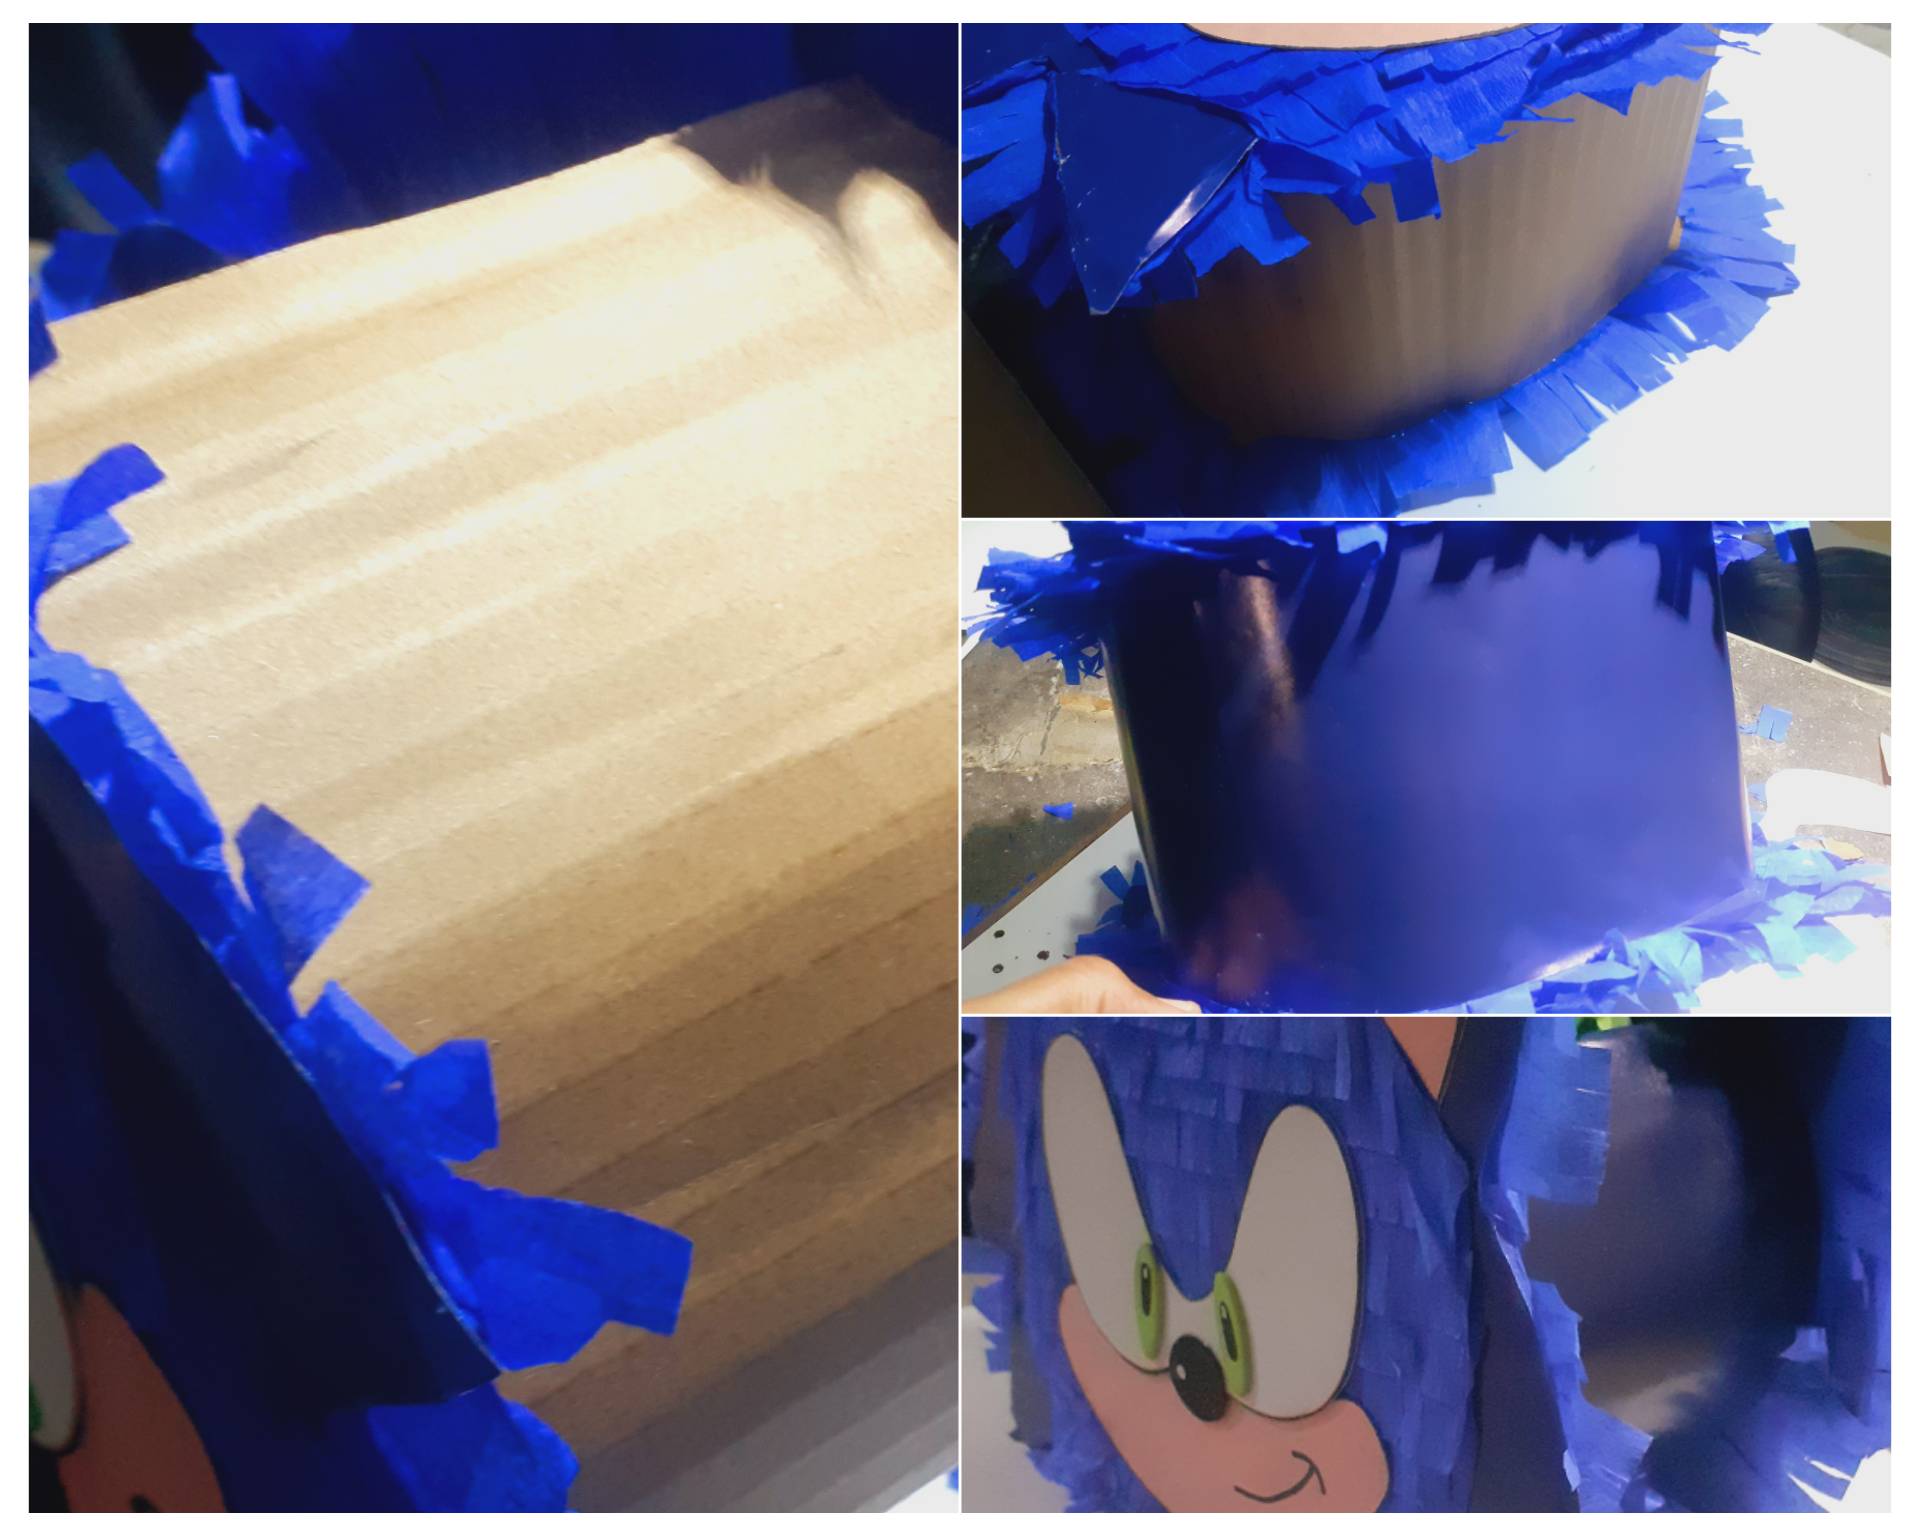
🔵 Transferimos el molde a la piezas de cartón estas miden 24cms x 20cms
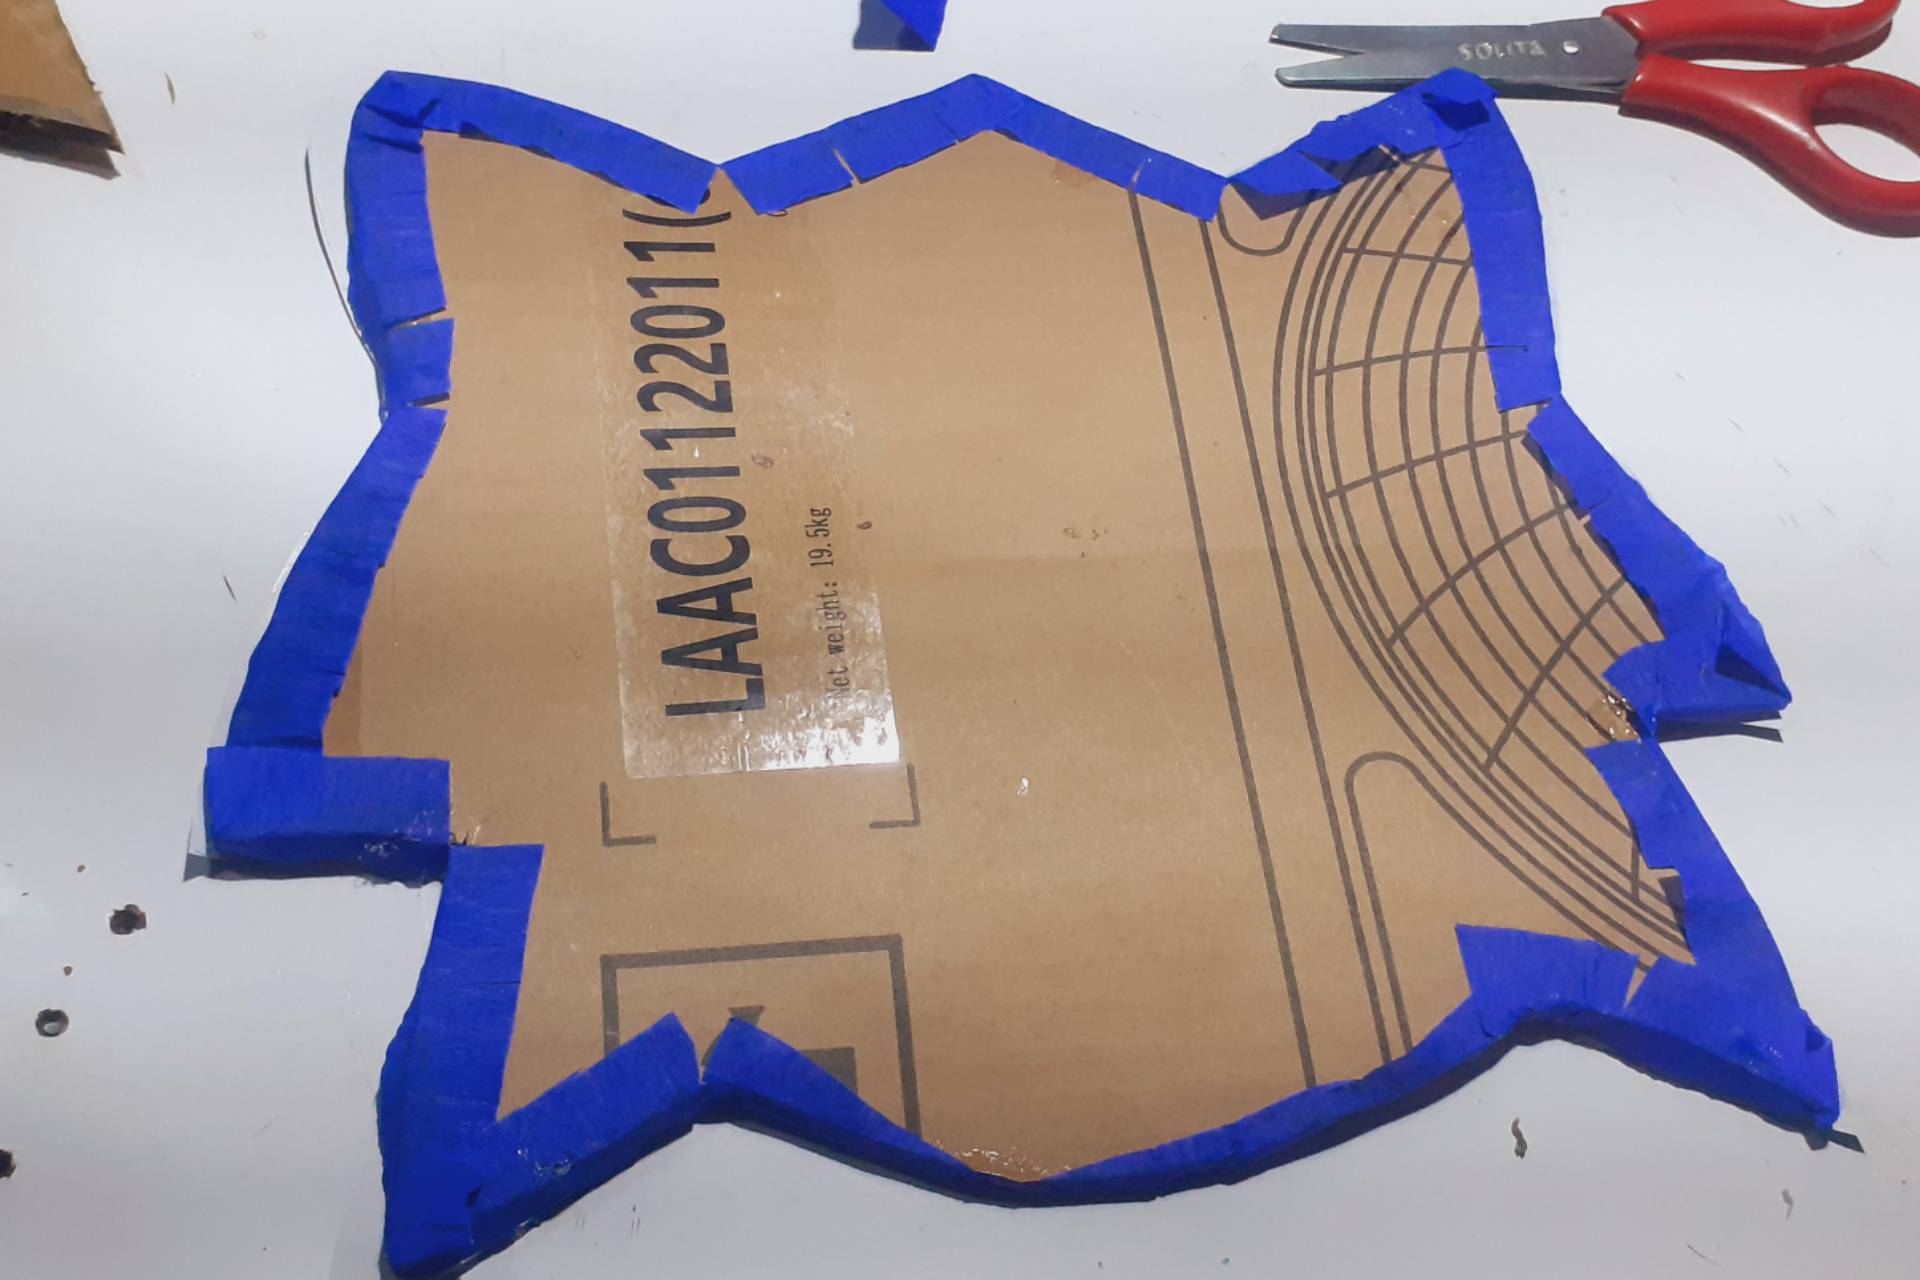
🔵 Cortamos un listón de papel crepe azul de 2 Cms de ancho para cubrir todos los bordes de las piezas de cartón.
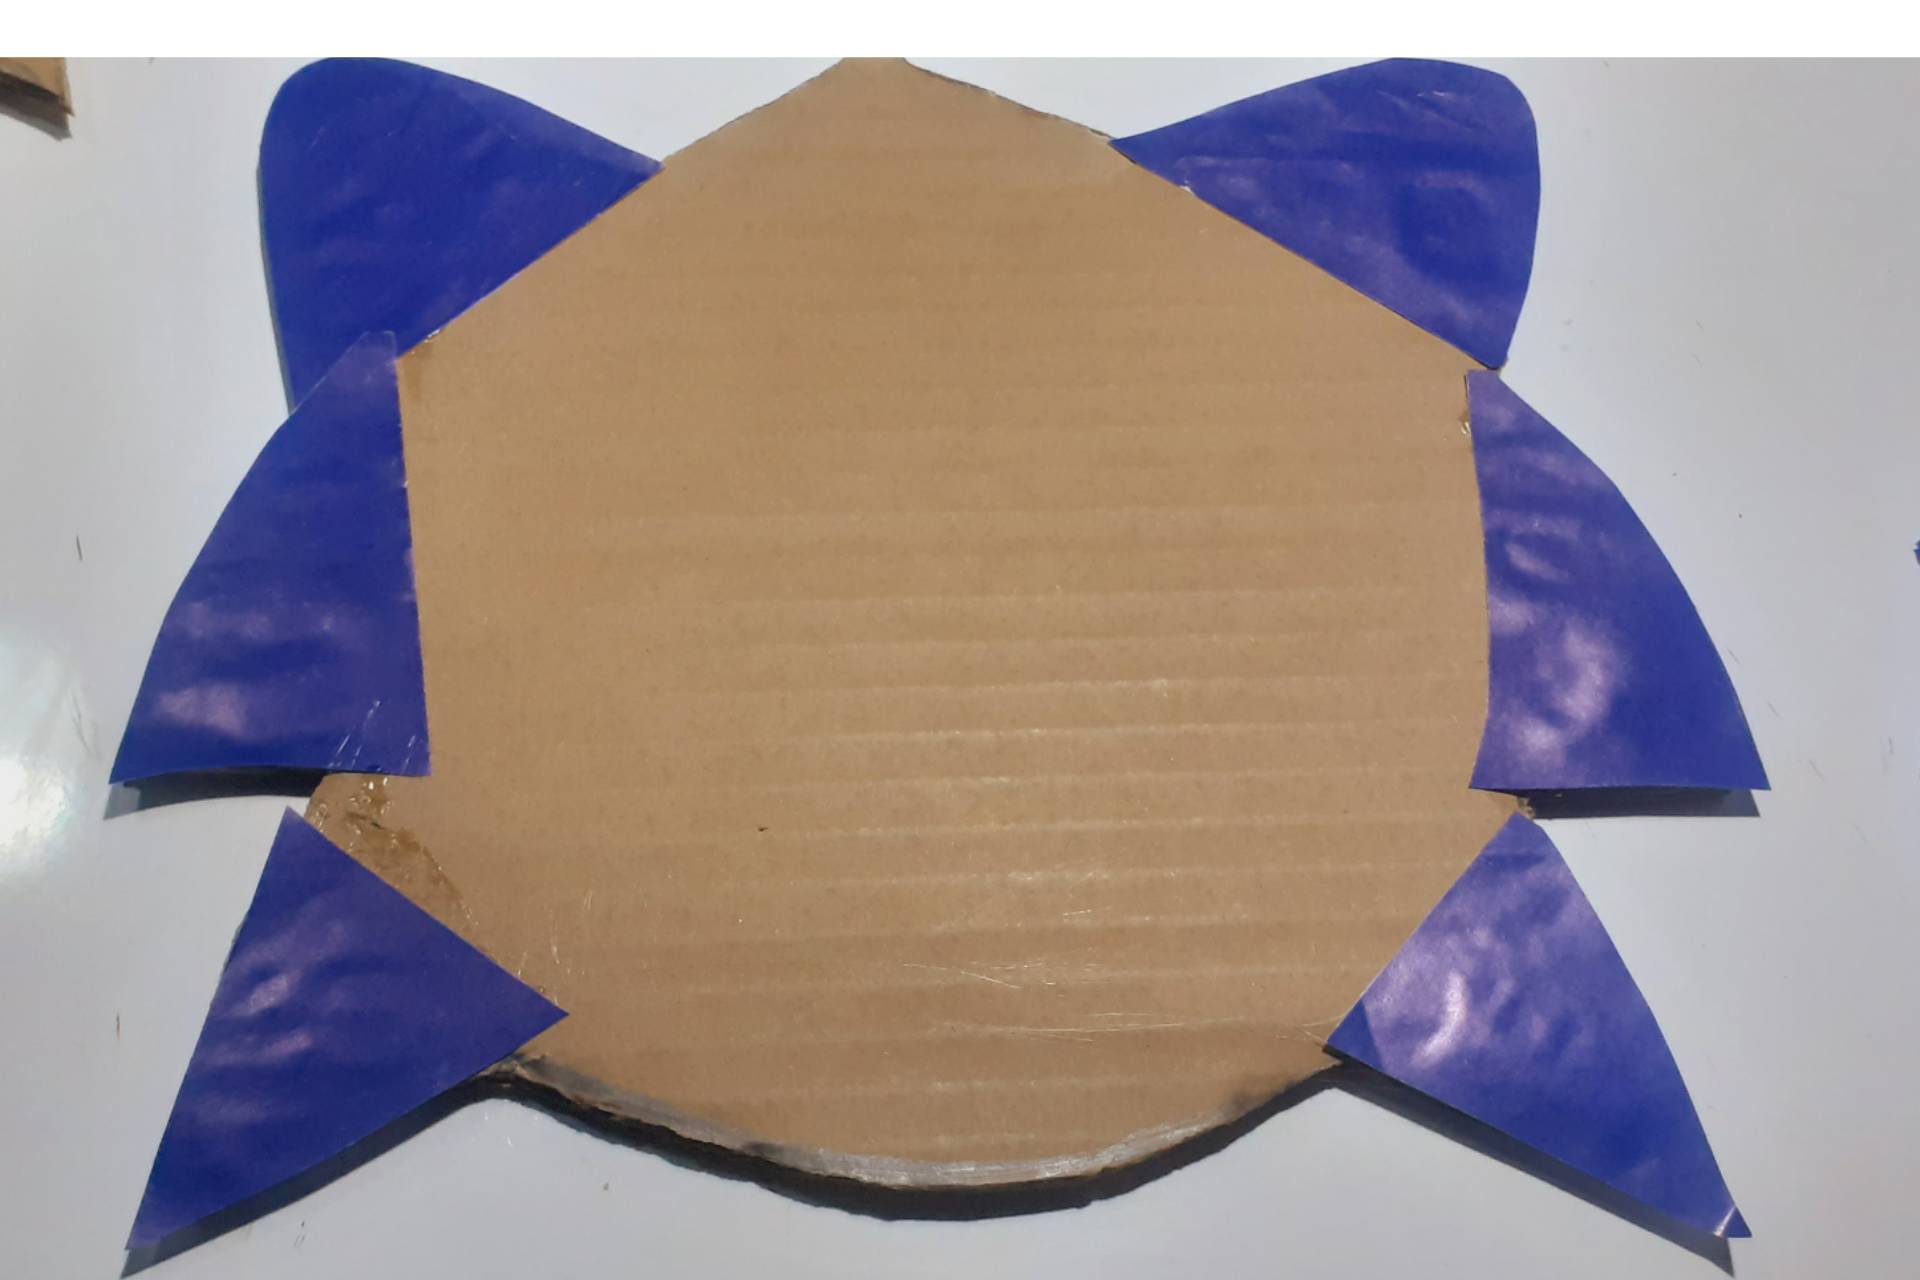
🔵 Recortamos las orejas y la forma de la cara de papel lustrillo azul.
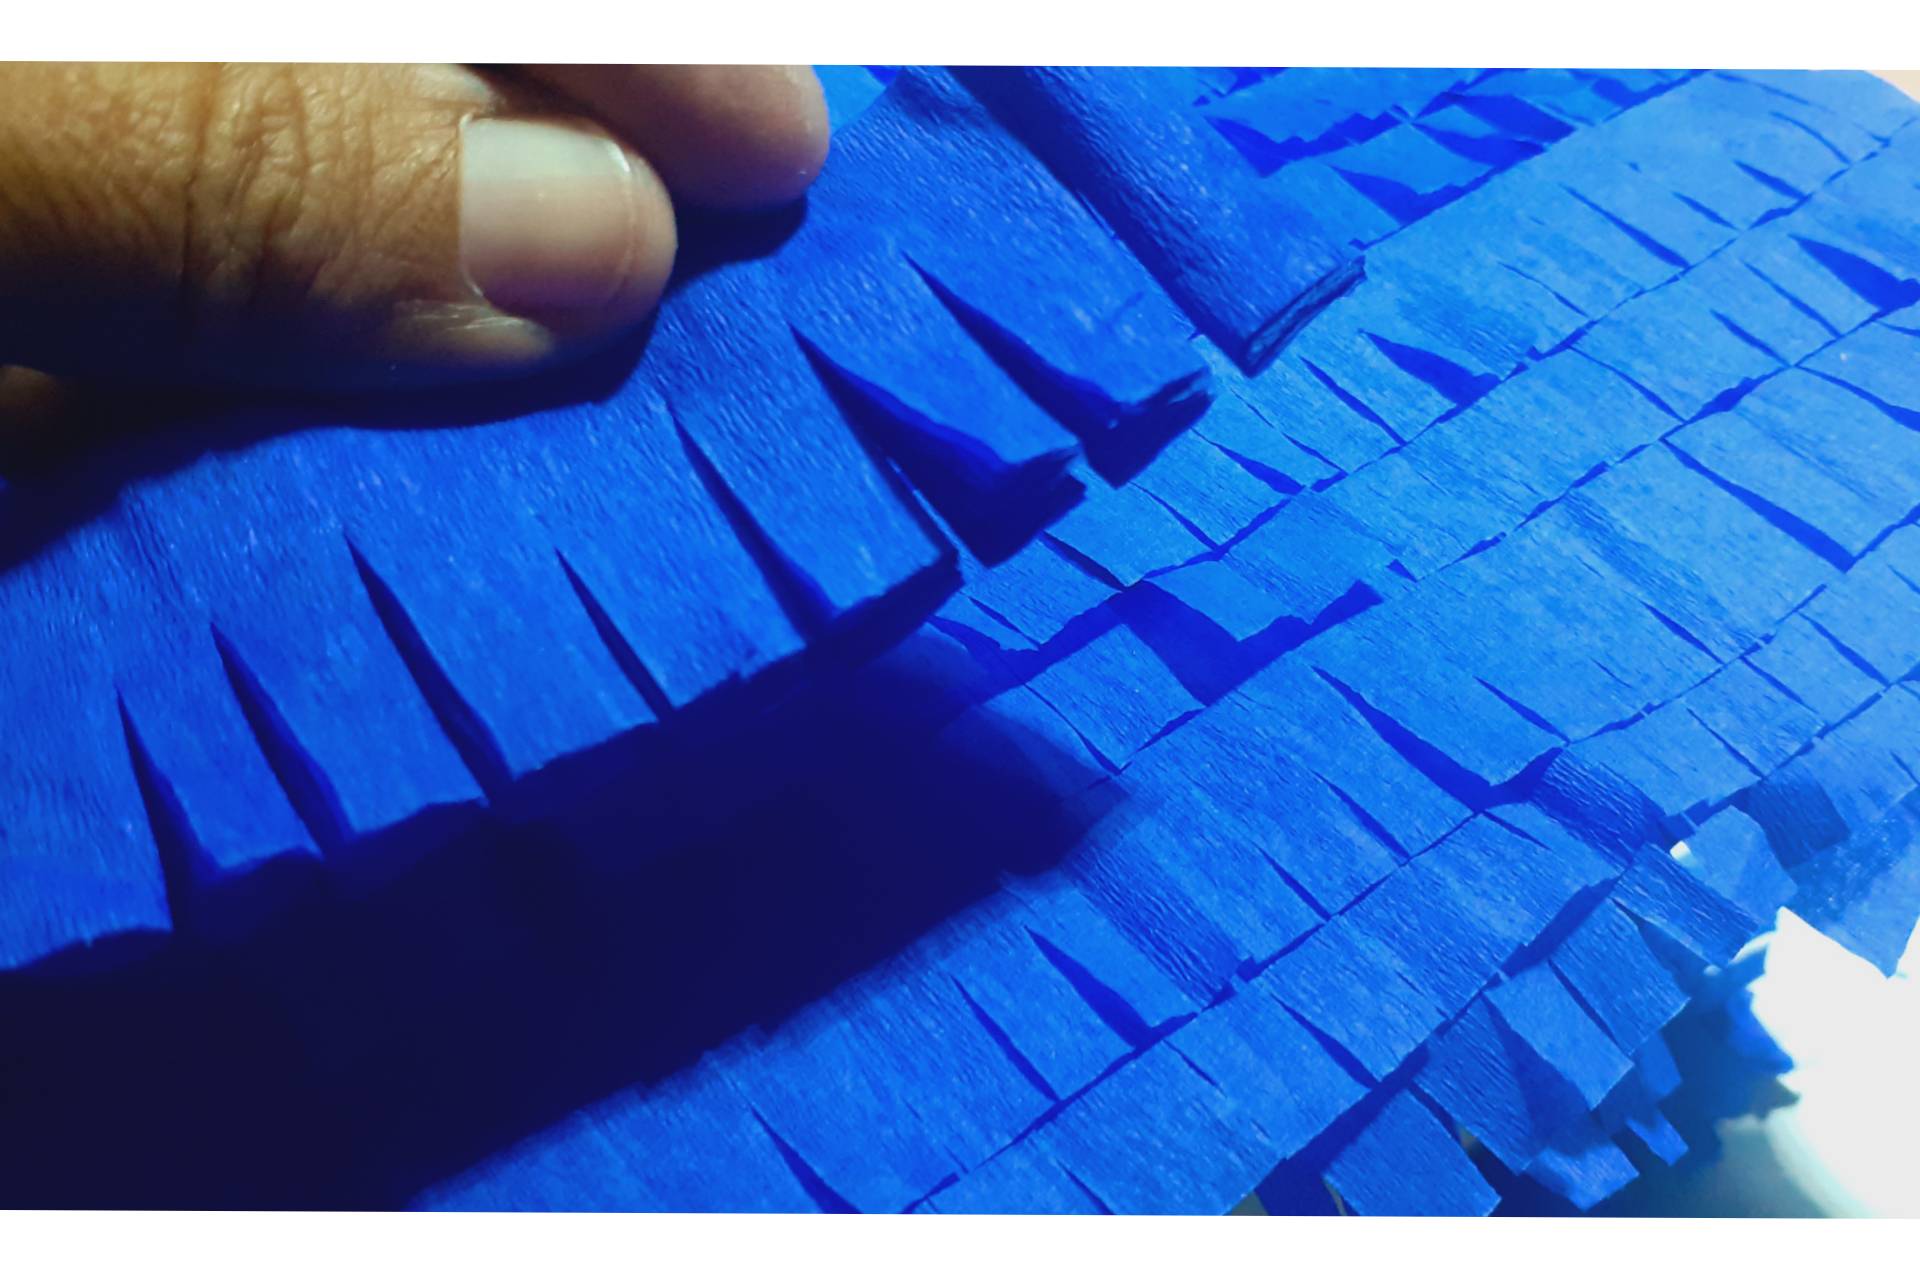
🔵 Cortamos un pliego de 4cms de papel crepe y cortamos líneas de forma vertical, para pegar en las piezas de cartón, comenzamos de abajo hacia arriba.
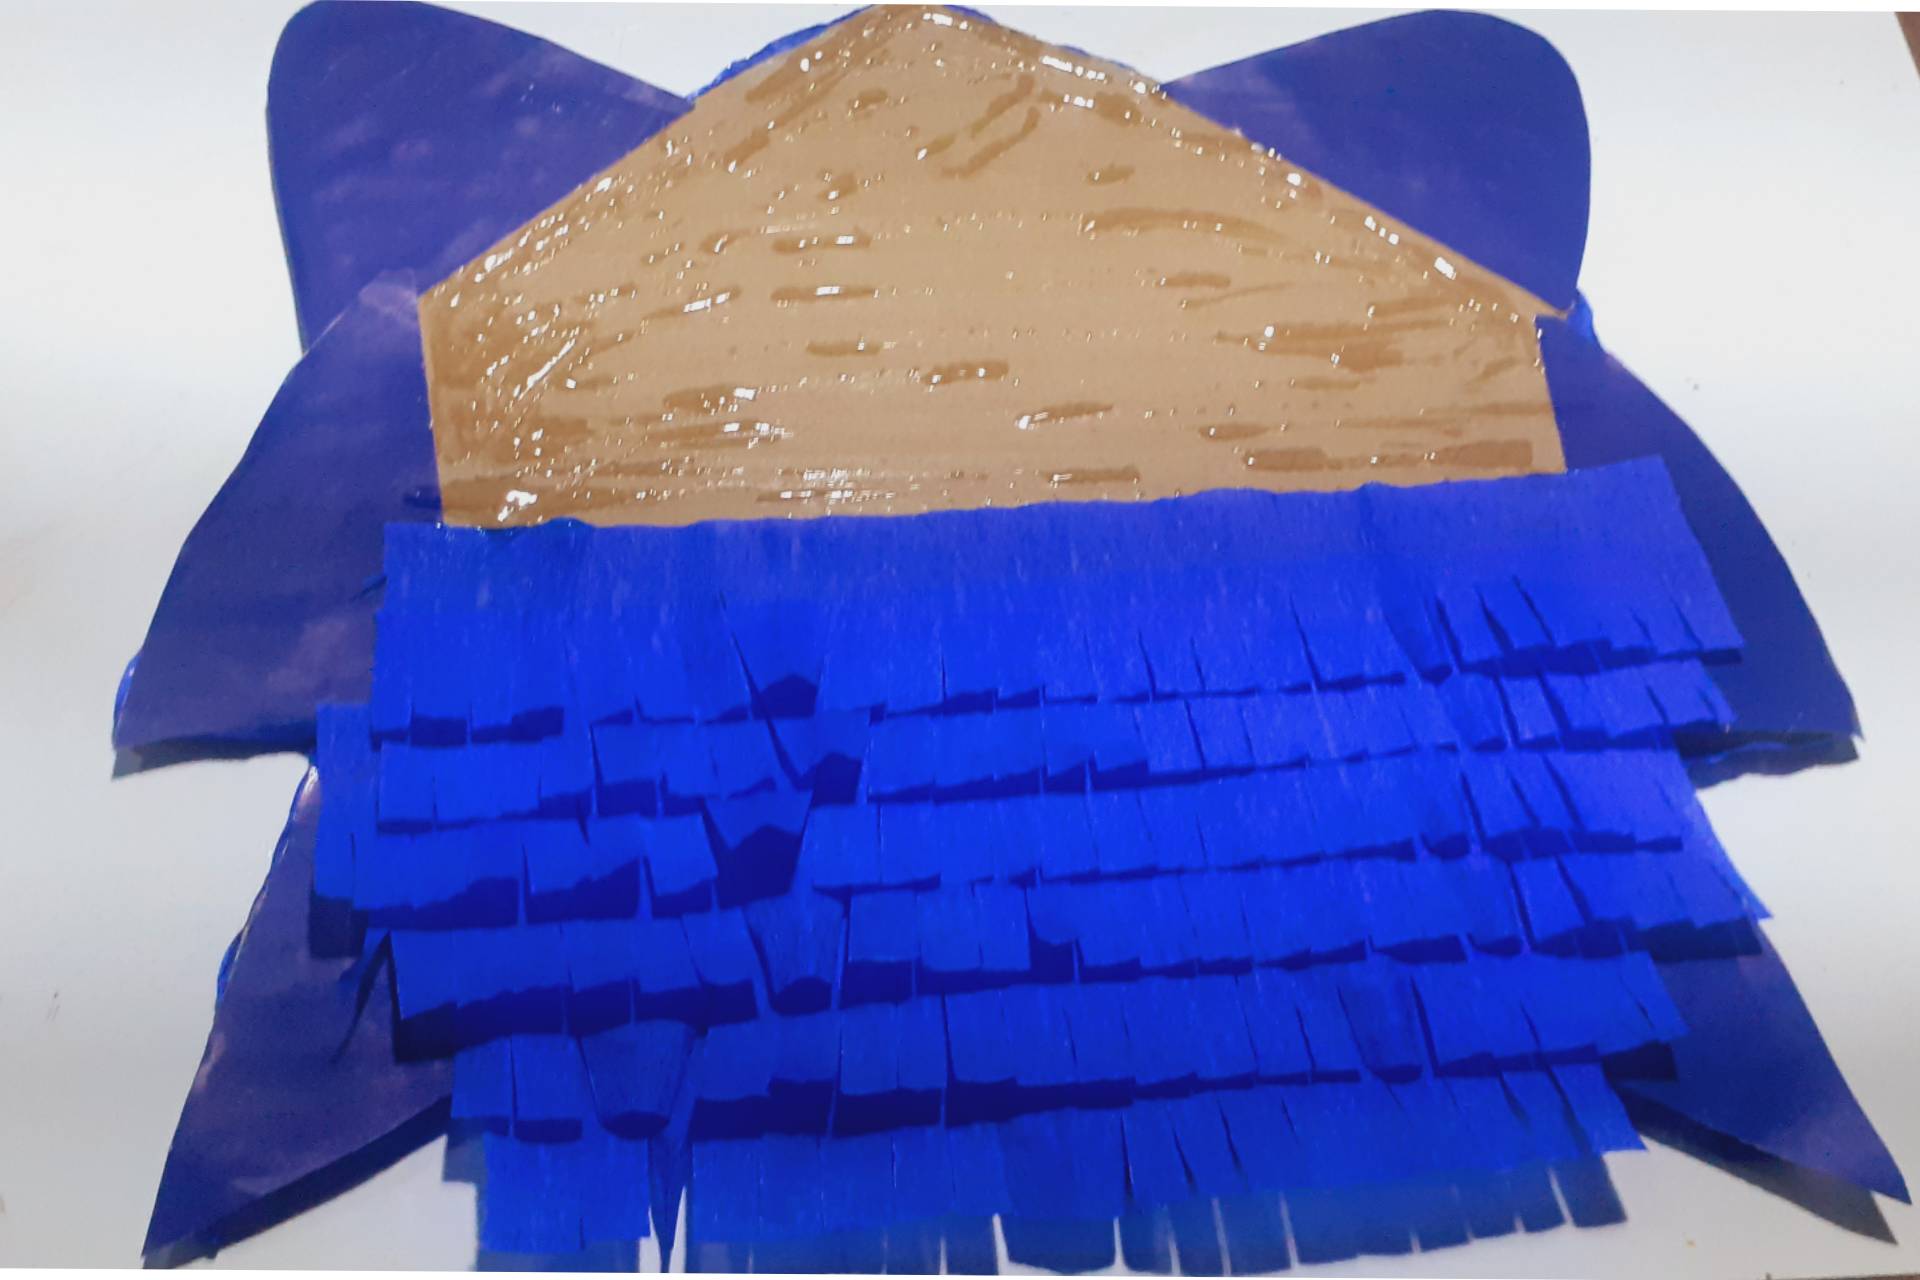
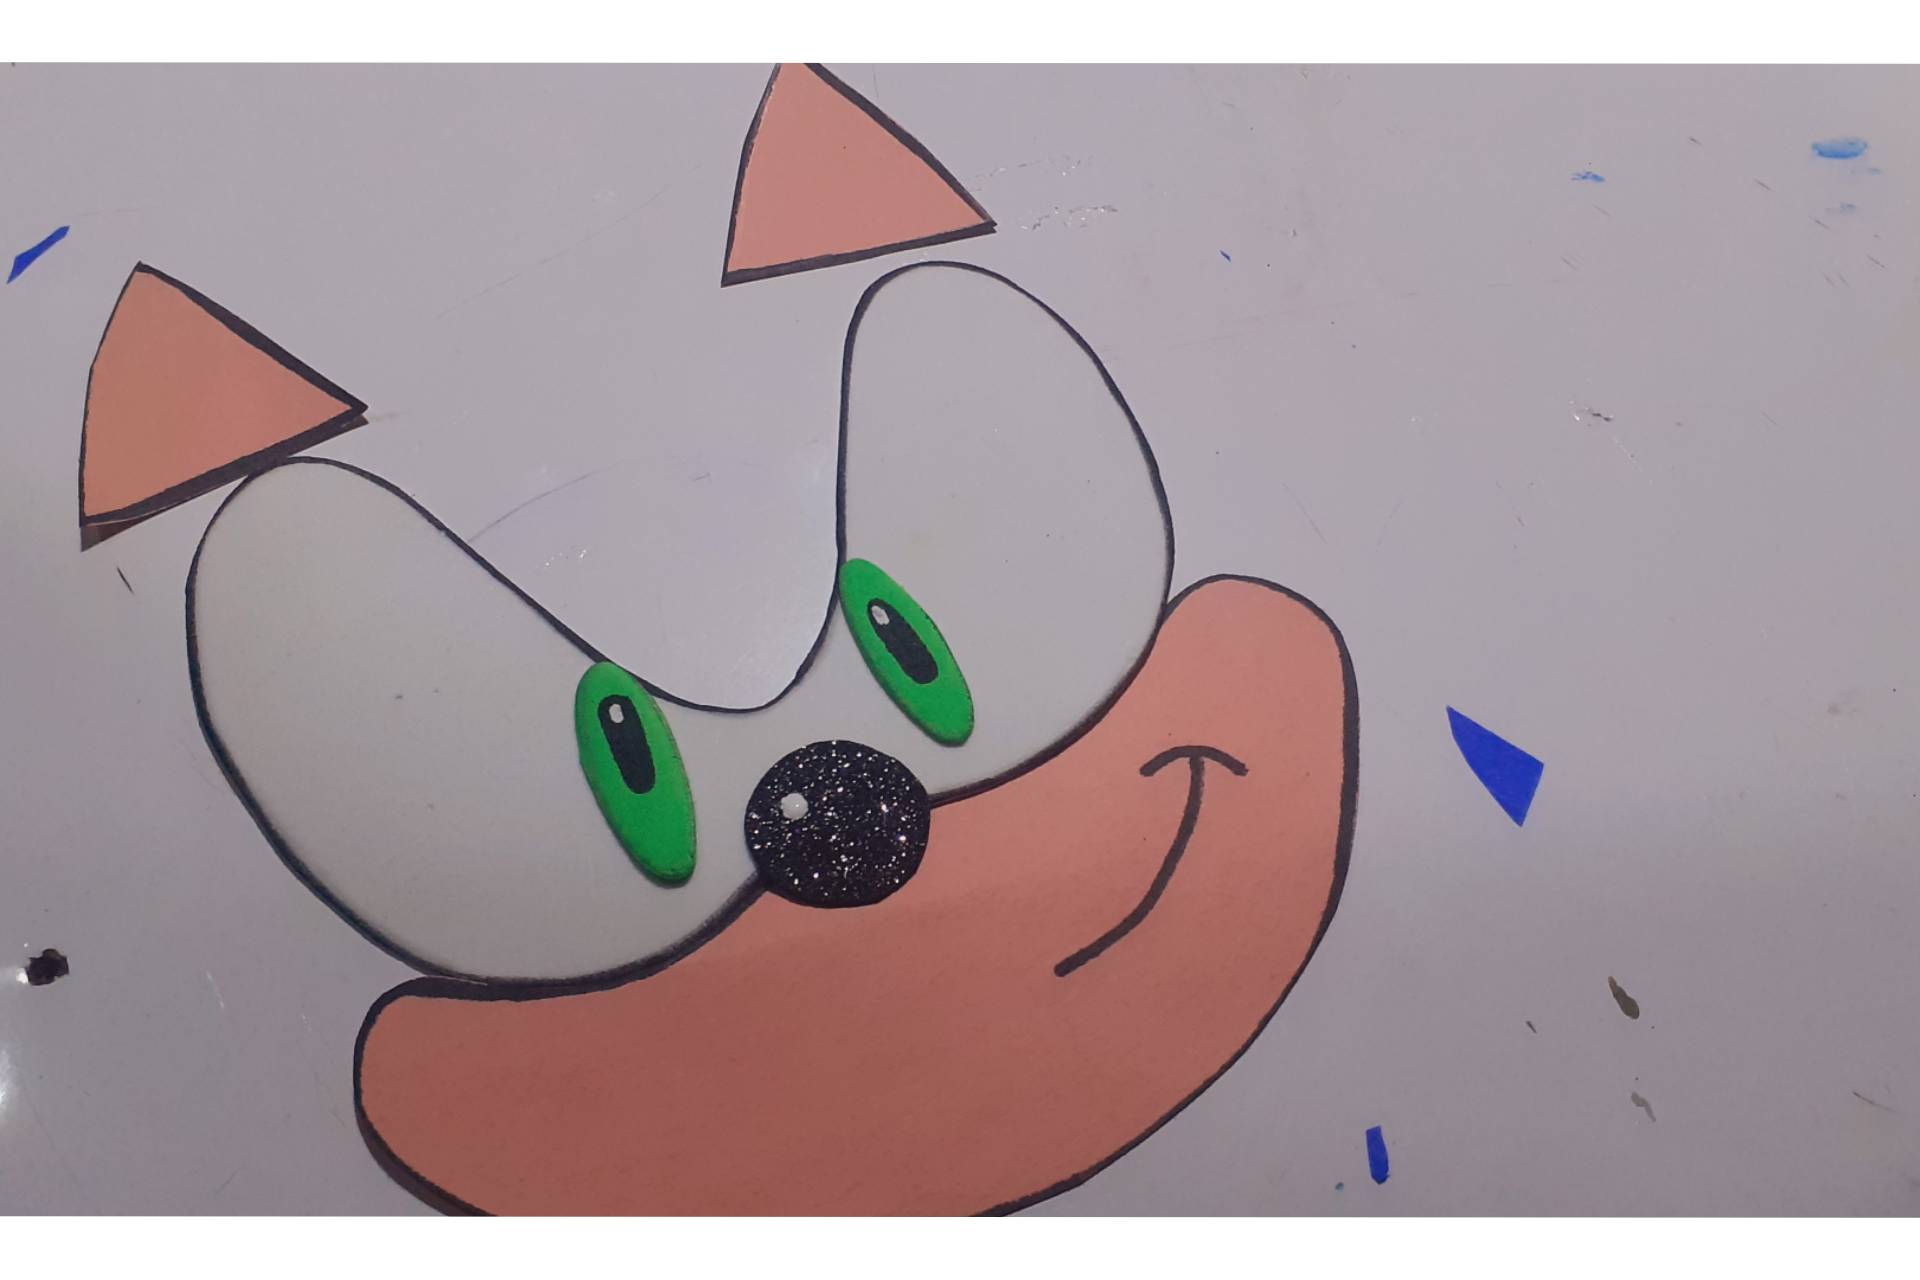
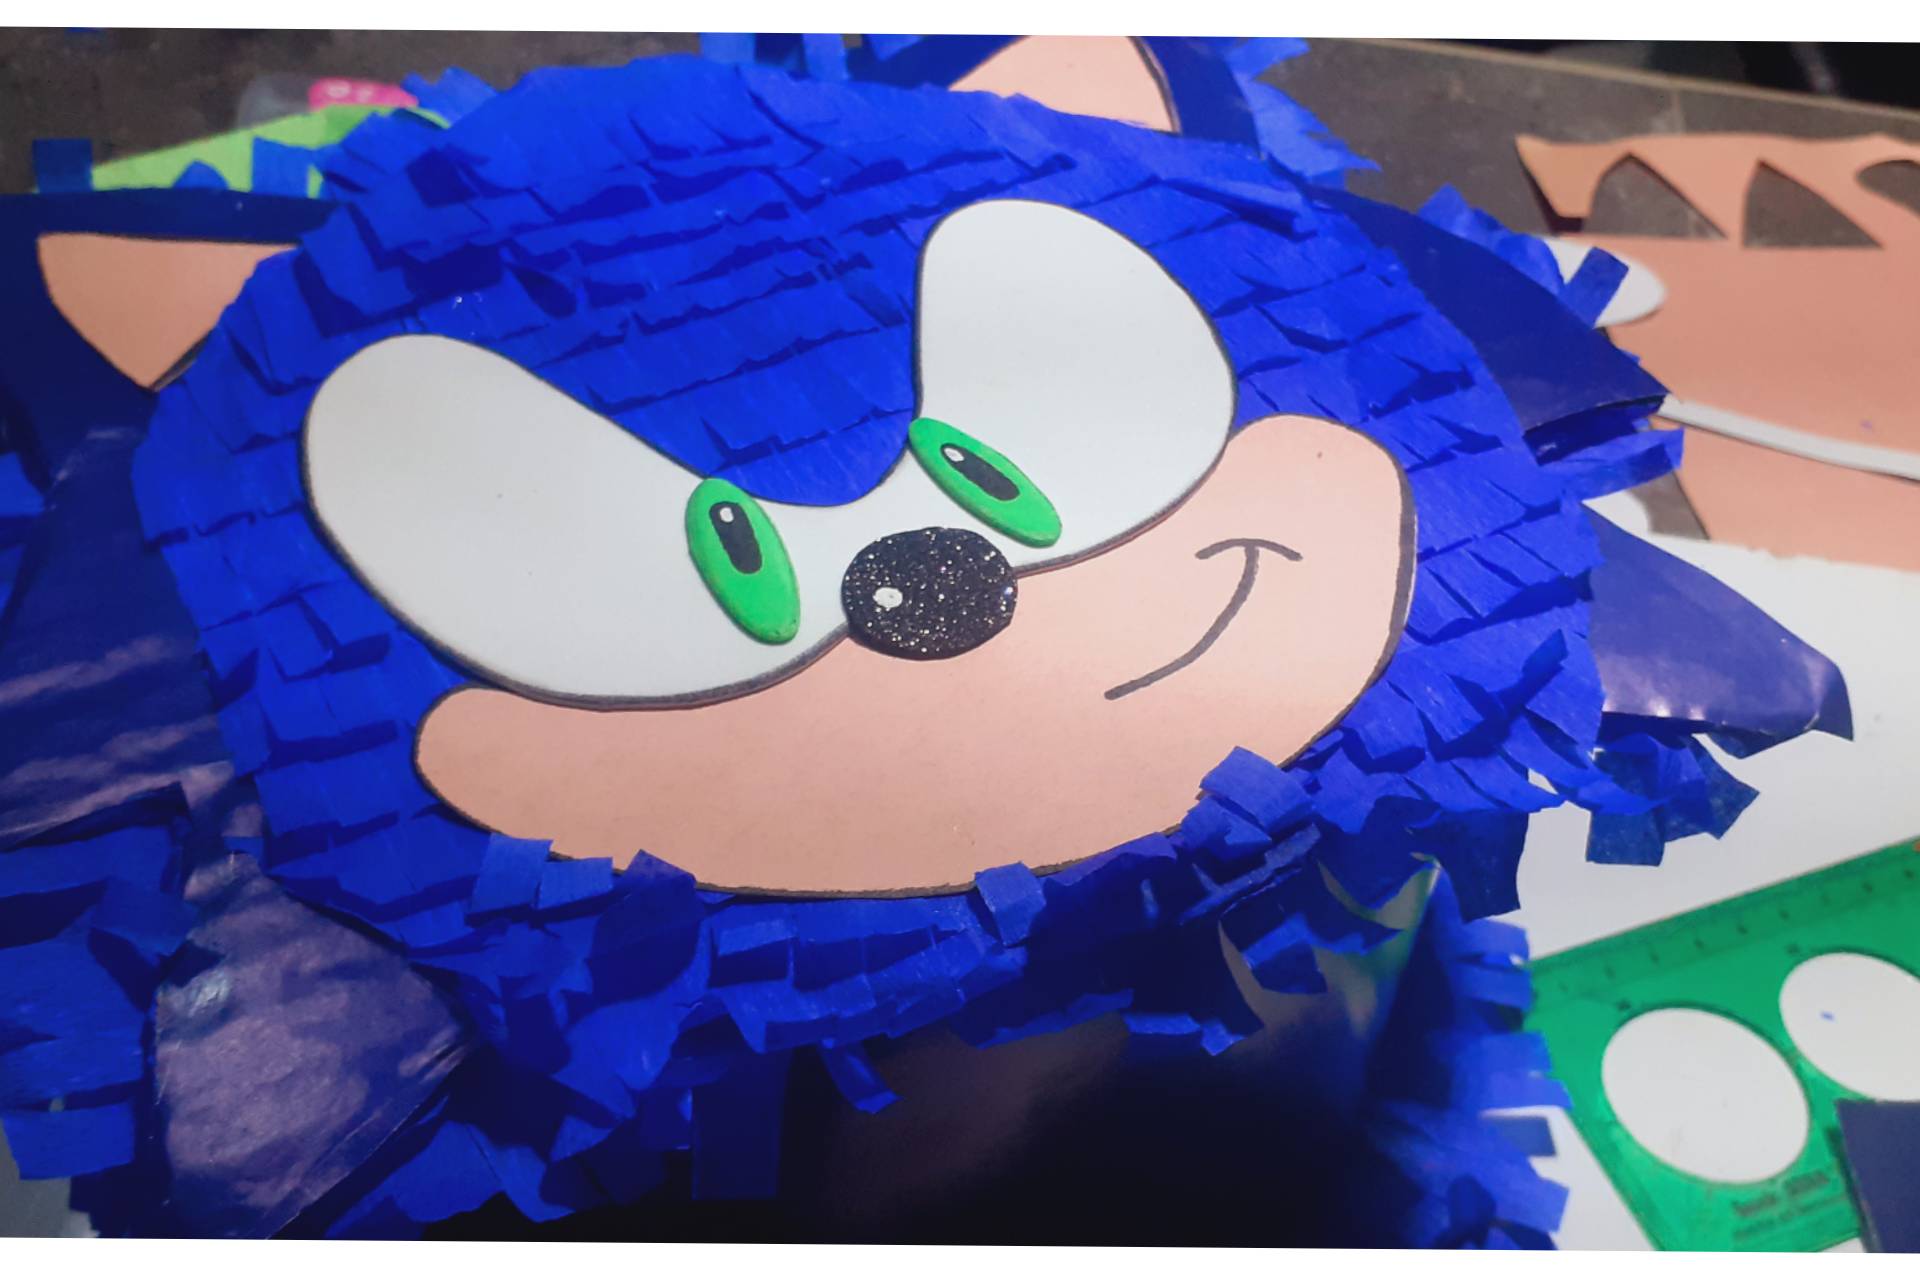
🔵 Recortamos las piezas para decorar la cara en foami y cartulina color piel, pegamos en la parte delantera del cotillón.
🔵 Cortamos una pieza de 25cms de ancho por 45cms de largo, para pegar y unir las dos partes del dulcero, forramos con papel lustrillo azul, con la misma medida.
🔵 Cortamos un cuadrado de 25cmx25cms de papel seda verde y colocamos dentro del dulcero para terminar de decorar.
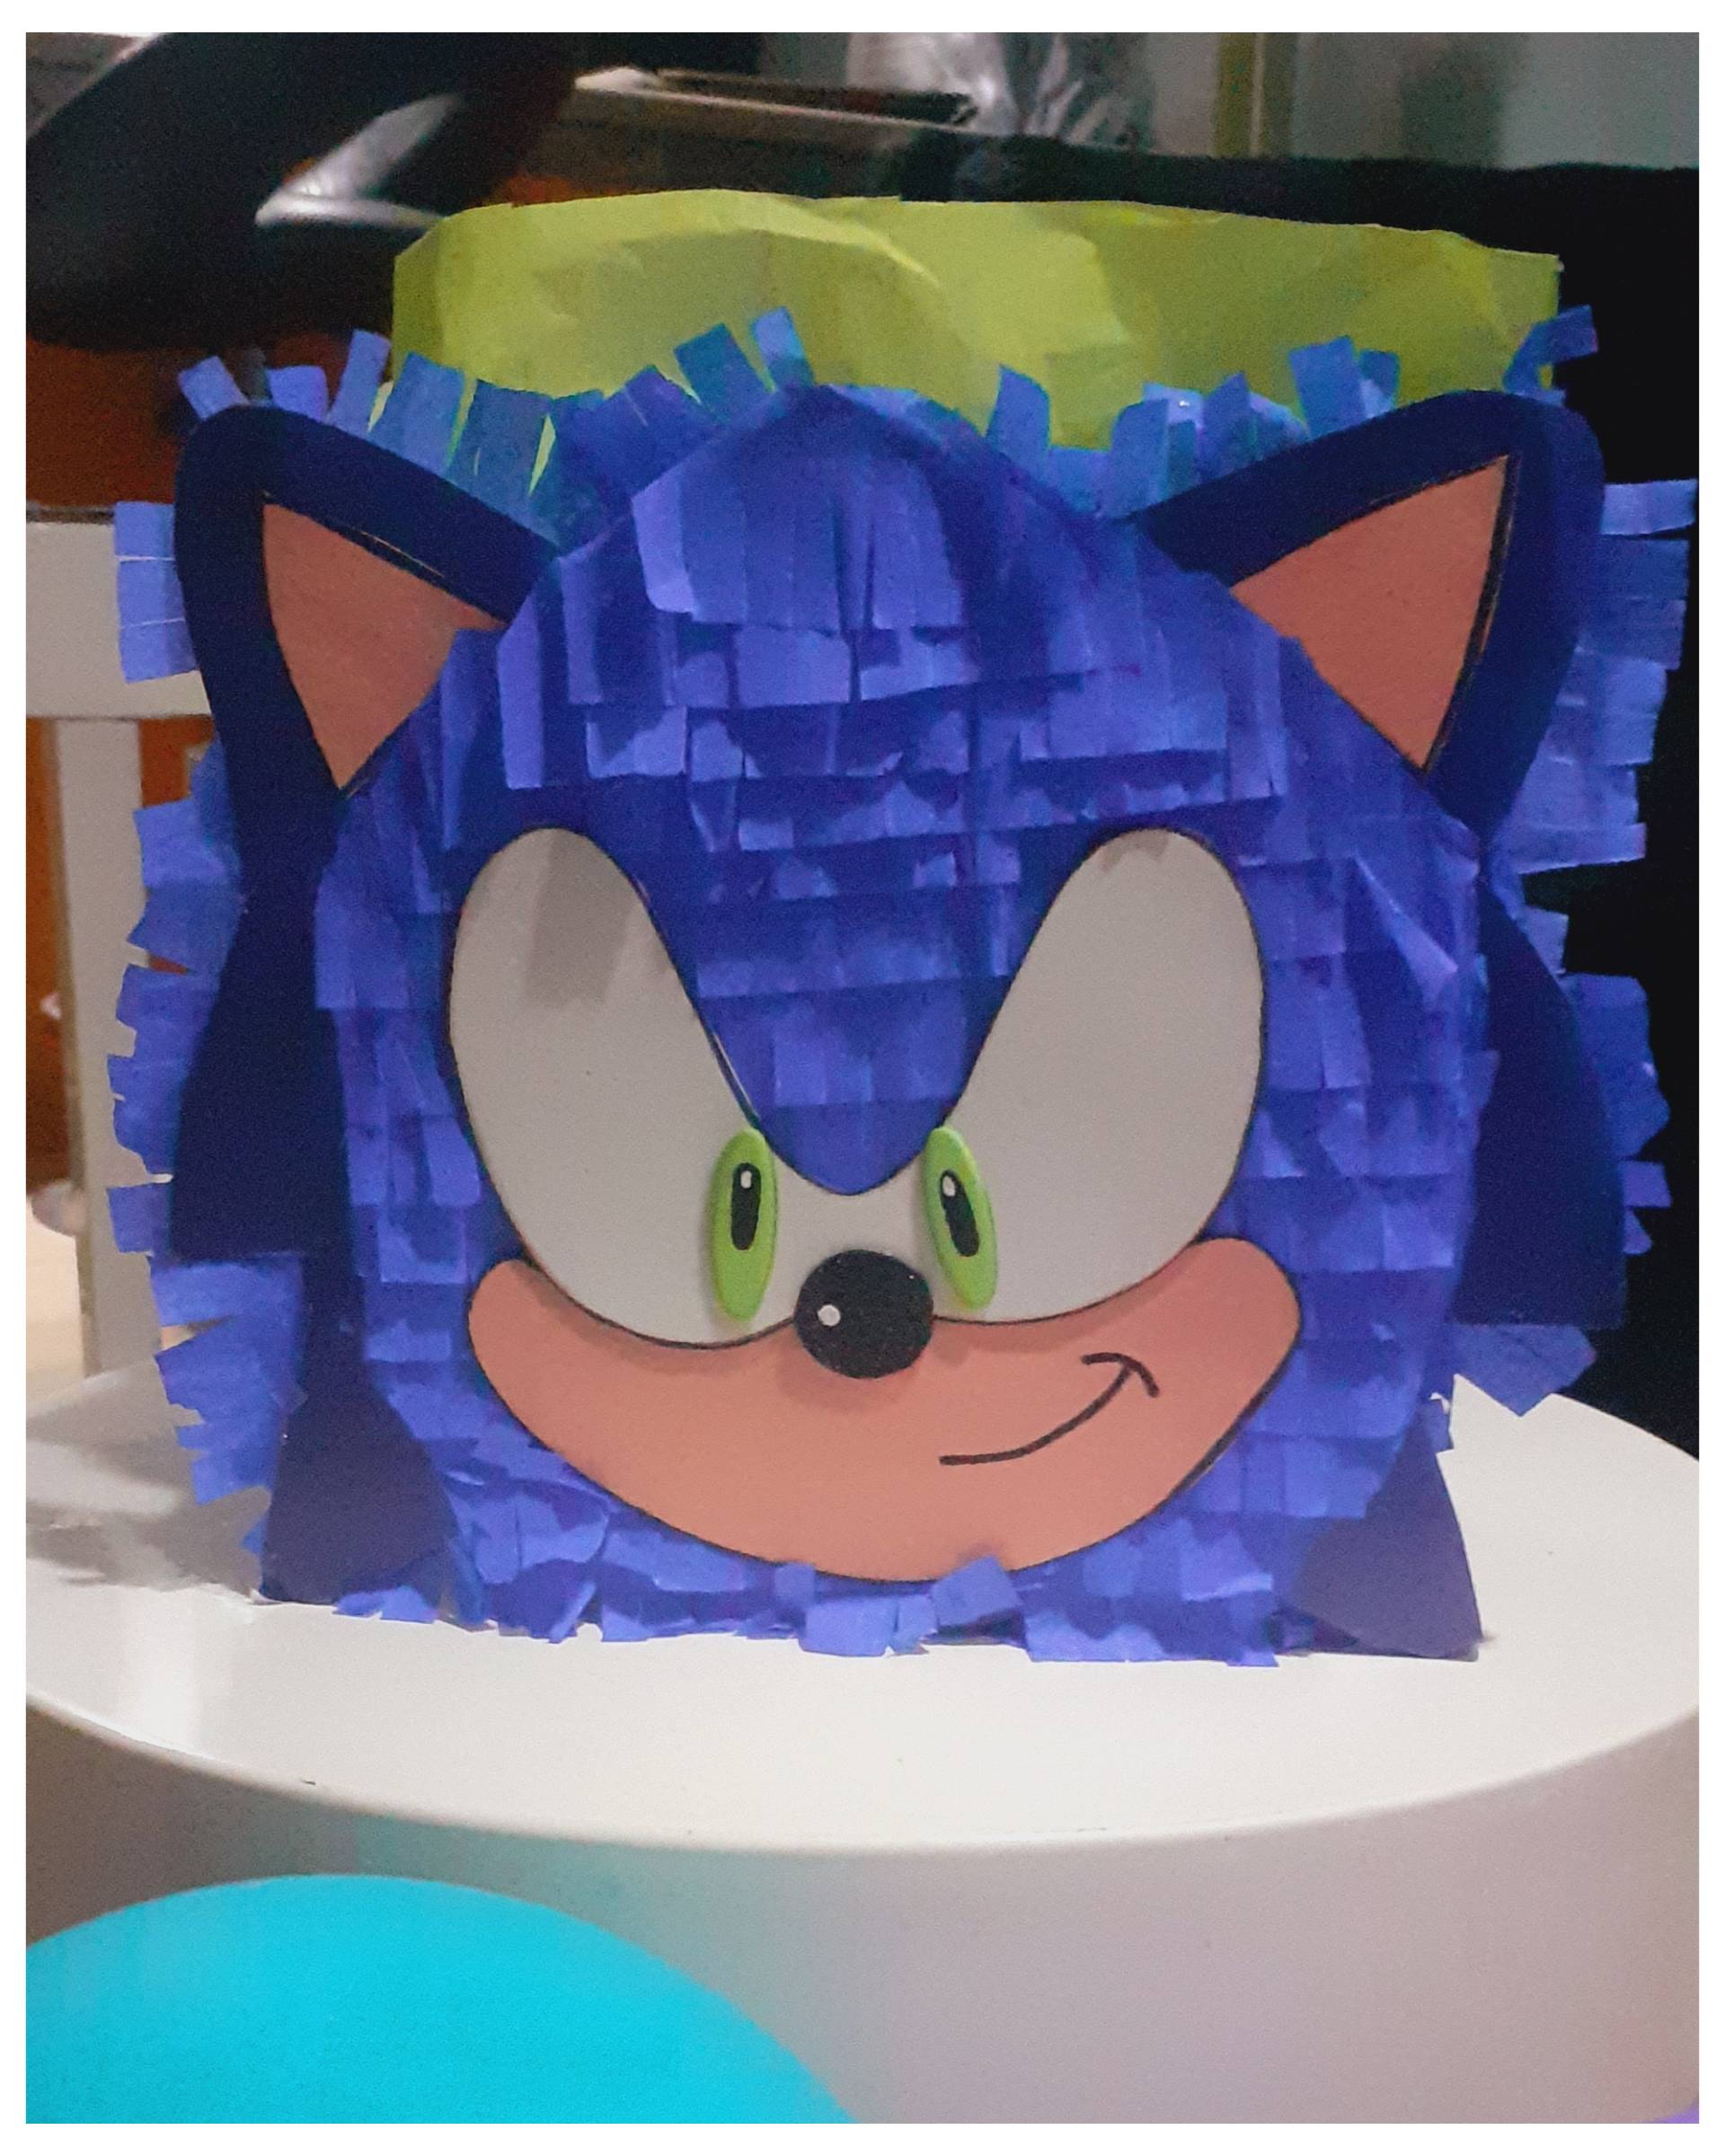
El dulcero quedó hermoso, versátil para utilizar como parte de la decoración y de seguro este será la sensación de la fiesta o del celebrado.
Si te gusta la idea 💡 la puedes realizar, es fácil y práctica para esa celebración especial infantil, dónde todos esperan recibir golosinas y sorpresas.
> ! [English]
> # Sony Candy Store DIY
>Birthday celebrations never end, and although some people prefer to leave them aside, others like me love them.
>
>As a mom, I love celebrating birthdays. I think it's one of the things I love and enjoy most, especially because they're full of surprises.
>
>Today's star is a **Sony candy box**, yes, that fast-moving blue character that's all the rage and that kids love. This little friend is in high demand at birthday parties.
>
>So today I want to share with you how I made this candy box, which is great, original, and very useful for storing sweets and gifts for guests or for the happy birthday boy or girl.
>
>What materials do we need?
>🔵 Cardboard
>🔵 Blue crepe paper
>🔵 Blue glossy paper
>🔵 Green tissue paper
>🔵 White foam
>🔵 Shiny black foam
>🔵 Green foam
>🔵 Skin-colored cardstock
>🔵 Liquid silicone
>🔵 Scissors
>🔵 Black marker
How we are going to make it:
>
>🔵 Transfer the template to the cardboard pieces, which measure 24cms x 20cms.
>
>🔵 Cut a 2 cm wide strip of blue crepe paper to cover all the edges of the cardboard pieces.
>
>🔵 Cut out the ears and the shape of the face from blue glossy paper.
>
>🔵 Cut a 4 cm sheet and cut vertical lines to glue onto the cardboard pieces, starting from the bottom up.
>
>🔵 Cut out the pieces to decorate the face from foam and skin-colored cardstock, and glue them onto the front of the party favor.
>
>🔵 Cut a piece 25 cm wide by 45 cm long to glue and join the two parts of the candy box. Cover with blue glossy paper of the same size.
>
>🔵 Cut a 25 cm x 25 cm square of green tissue paper and place it inside the candy box to finish decorating.
>
>The candy box turned out beautiful and versatile enough to be used as part of the decoration, and it is sure to be the highlight of the party or celebration.
>
>If you like the idea, you can make it yourself. It is easy and practical for that special children's celebration where everyone is hoping to receive candy and surprises.
Photographs of my authorship taken with my Samsung A10 camera phone.
[Traductor](https://www.deepl.com/translator)
Dulcero Sony DIY ESP-ENG
@cirangela
· 2025-10-05 14:55
· Hive Diy
#hivediy
#manualidades
#crafts
#handmade
#original-contest
#candysony
#spanish
Payout: 0.000 HBD
Votes: 120
More interactions (upvote, reblog, reply) coming soon.