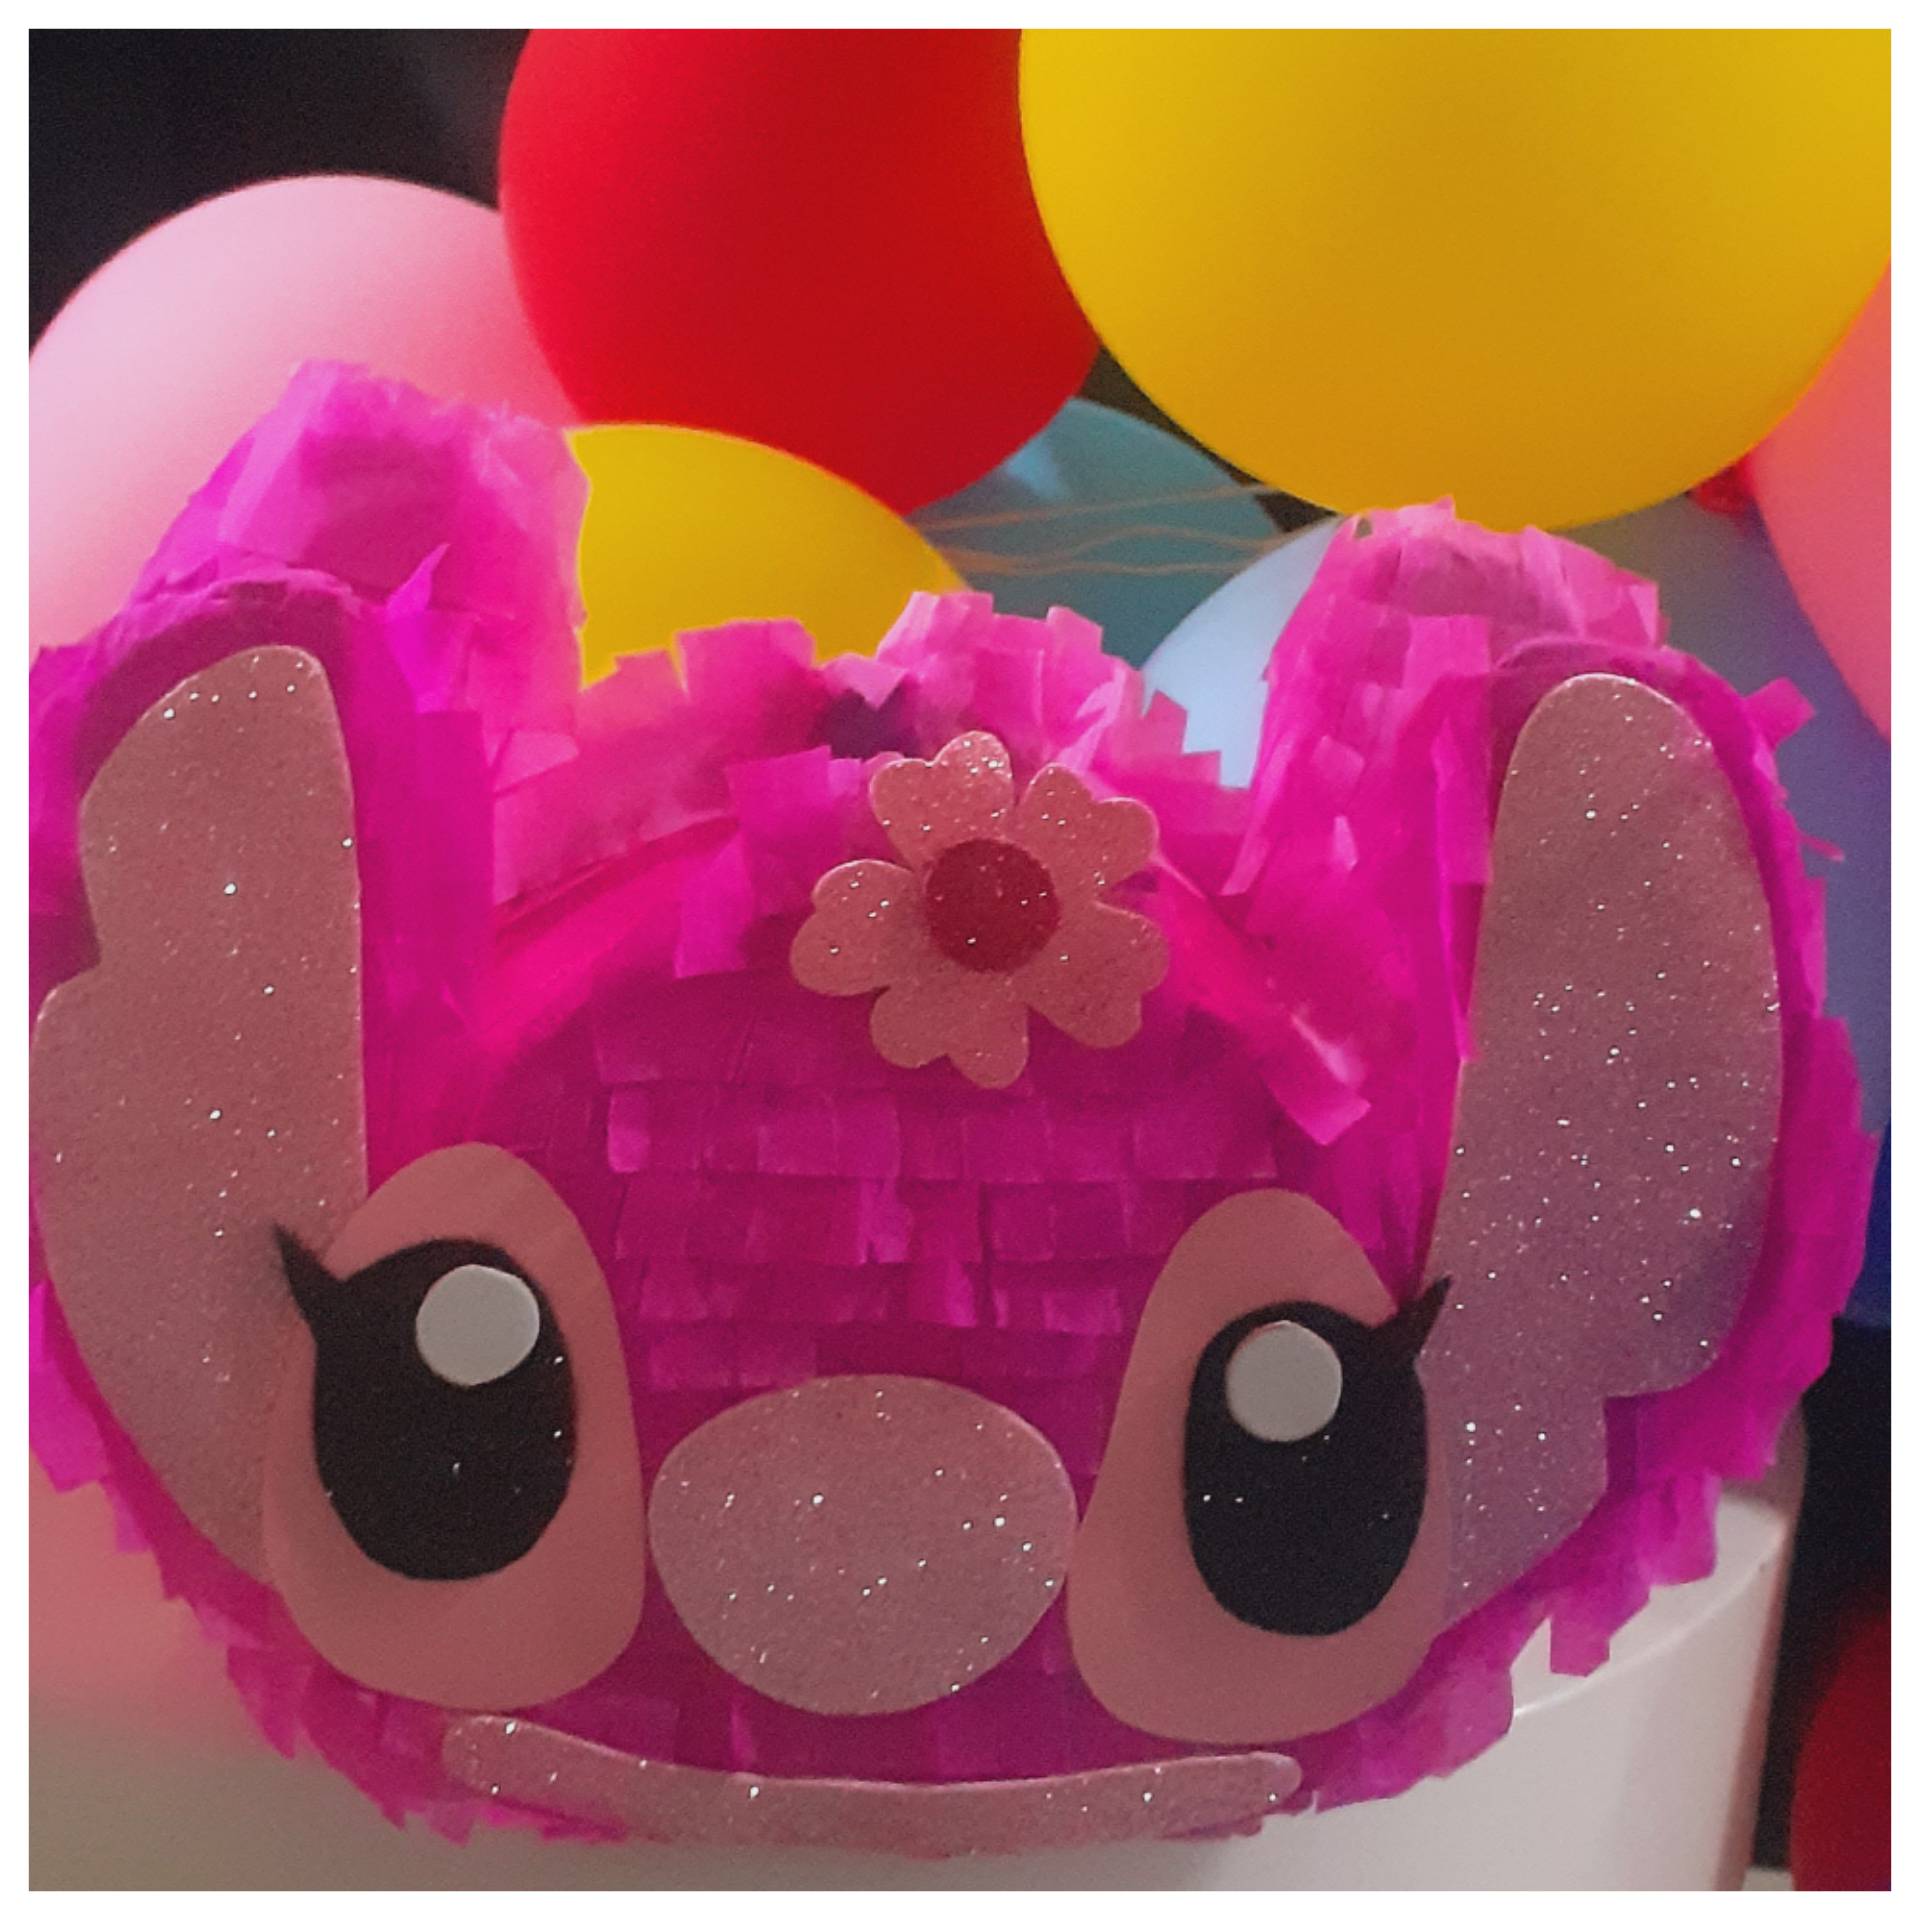
Hola a todos, hoy les traigo una idea genial de esas que podemos utilizar para varias ocasiones, se trata de una mini piñata, en esta oportunidad con la temática de angela de Stitch de Disney.
Creo que este objeto que no pasa de moda en las celebraciones de cumpleaños son las piñatas, es la ilusión del celebrado y de los invitados y tanto los niños como los adultos la disfrutan.
Cómo les dije les traigo una mini piñata, fácil de construir nada complicado y si no eres bueno con las manualidades igual vale la pena intentar.
Que materiales se necesitan:
🪅Cartón
🪅Papel crepe fucsia y rosado
🪅Papel seda morado
🪅Foami rosado brillante
🪅Foami negro brillante
🪅Foami blanco
🪅Cartulina rosada
🪅Silicón líquido
🪅Tijera.
Ahora seguimos los siguientes pasos:
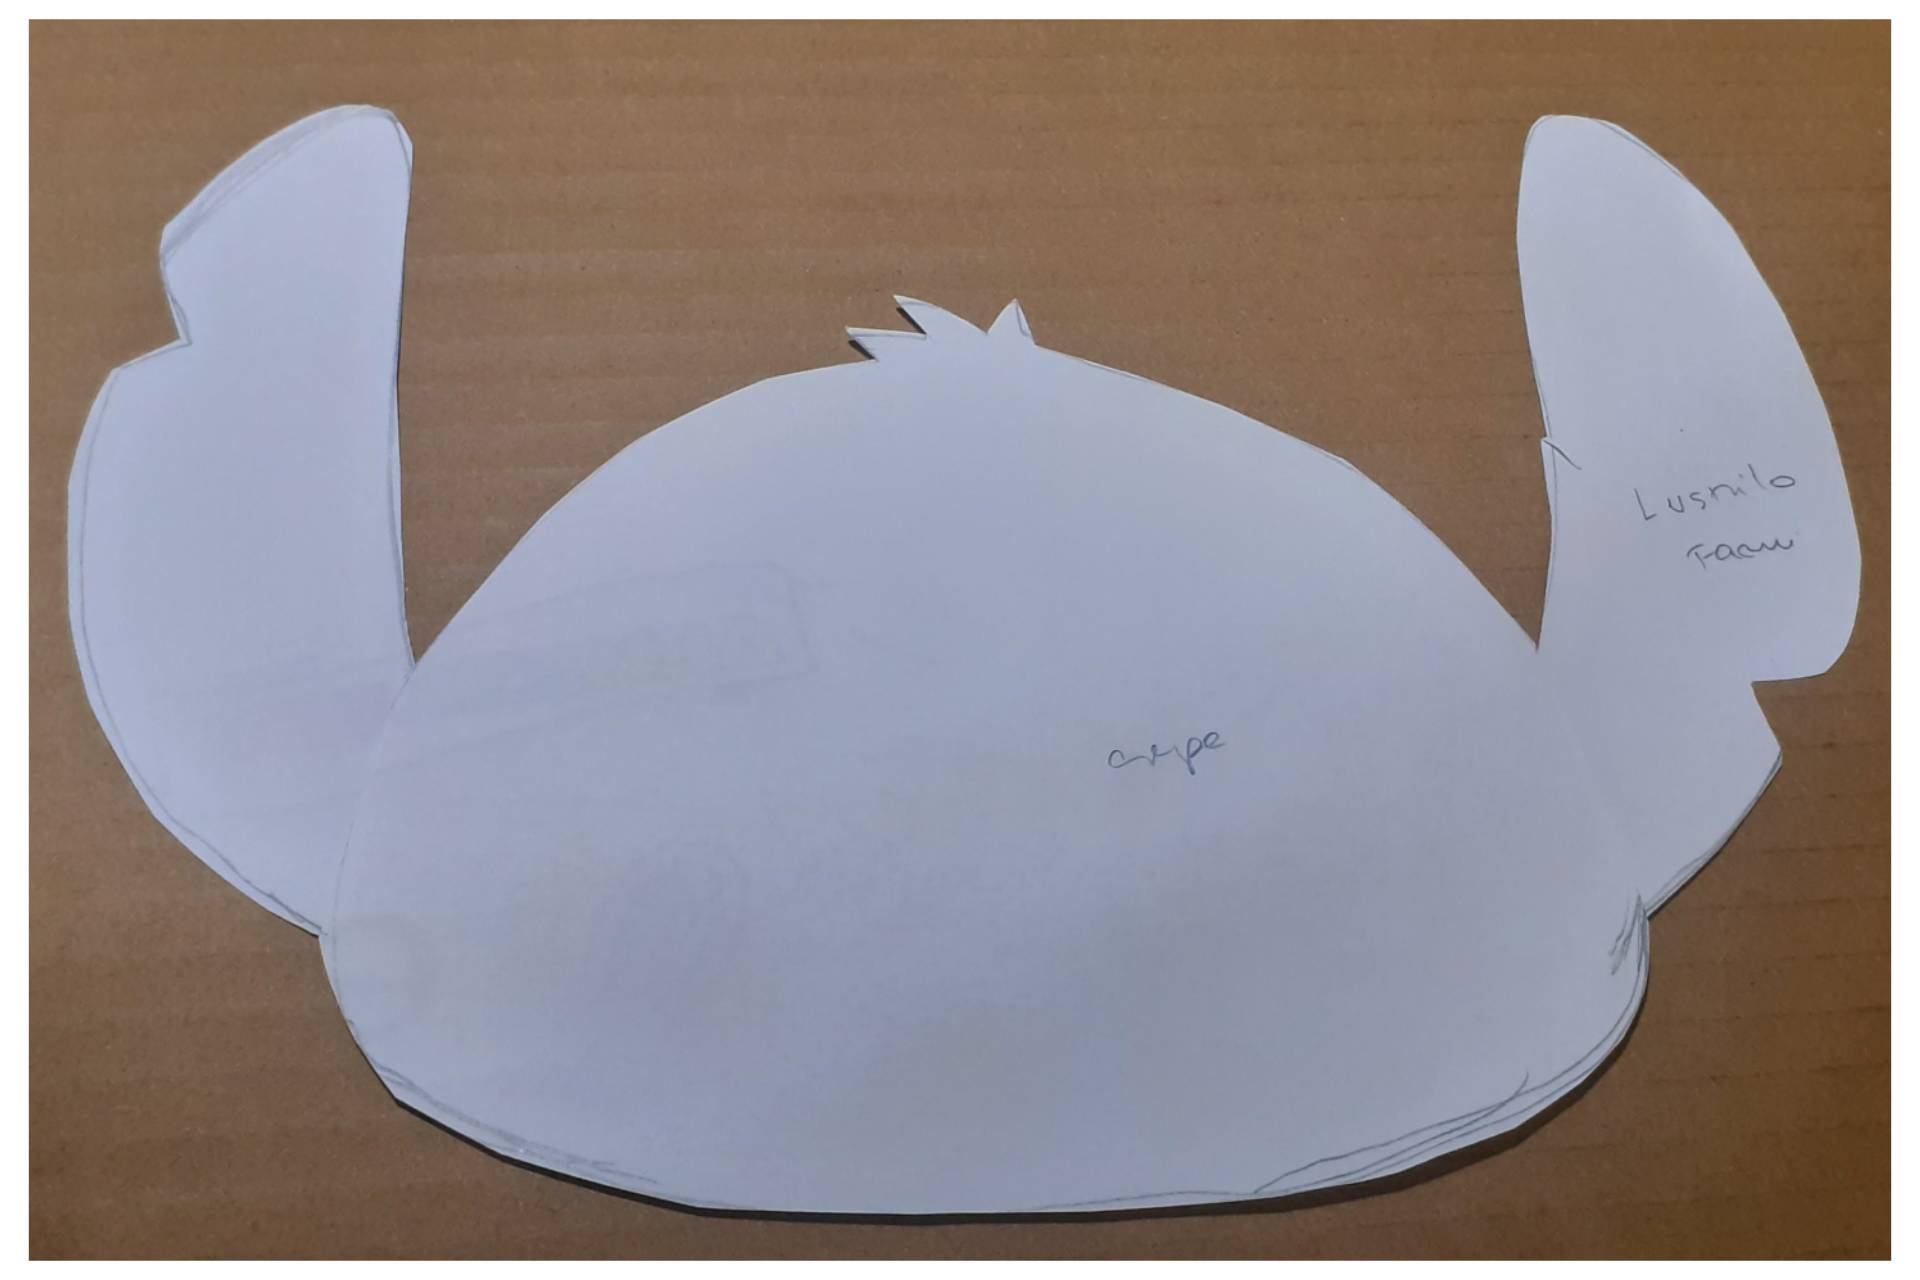
🪅 Realizamos el modelo en hojas blancas y recortamos para obtener los moldes.
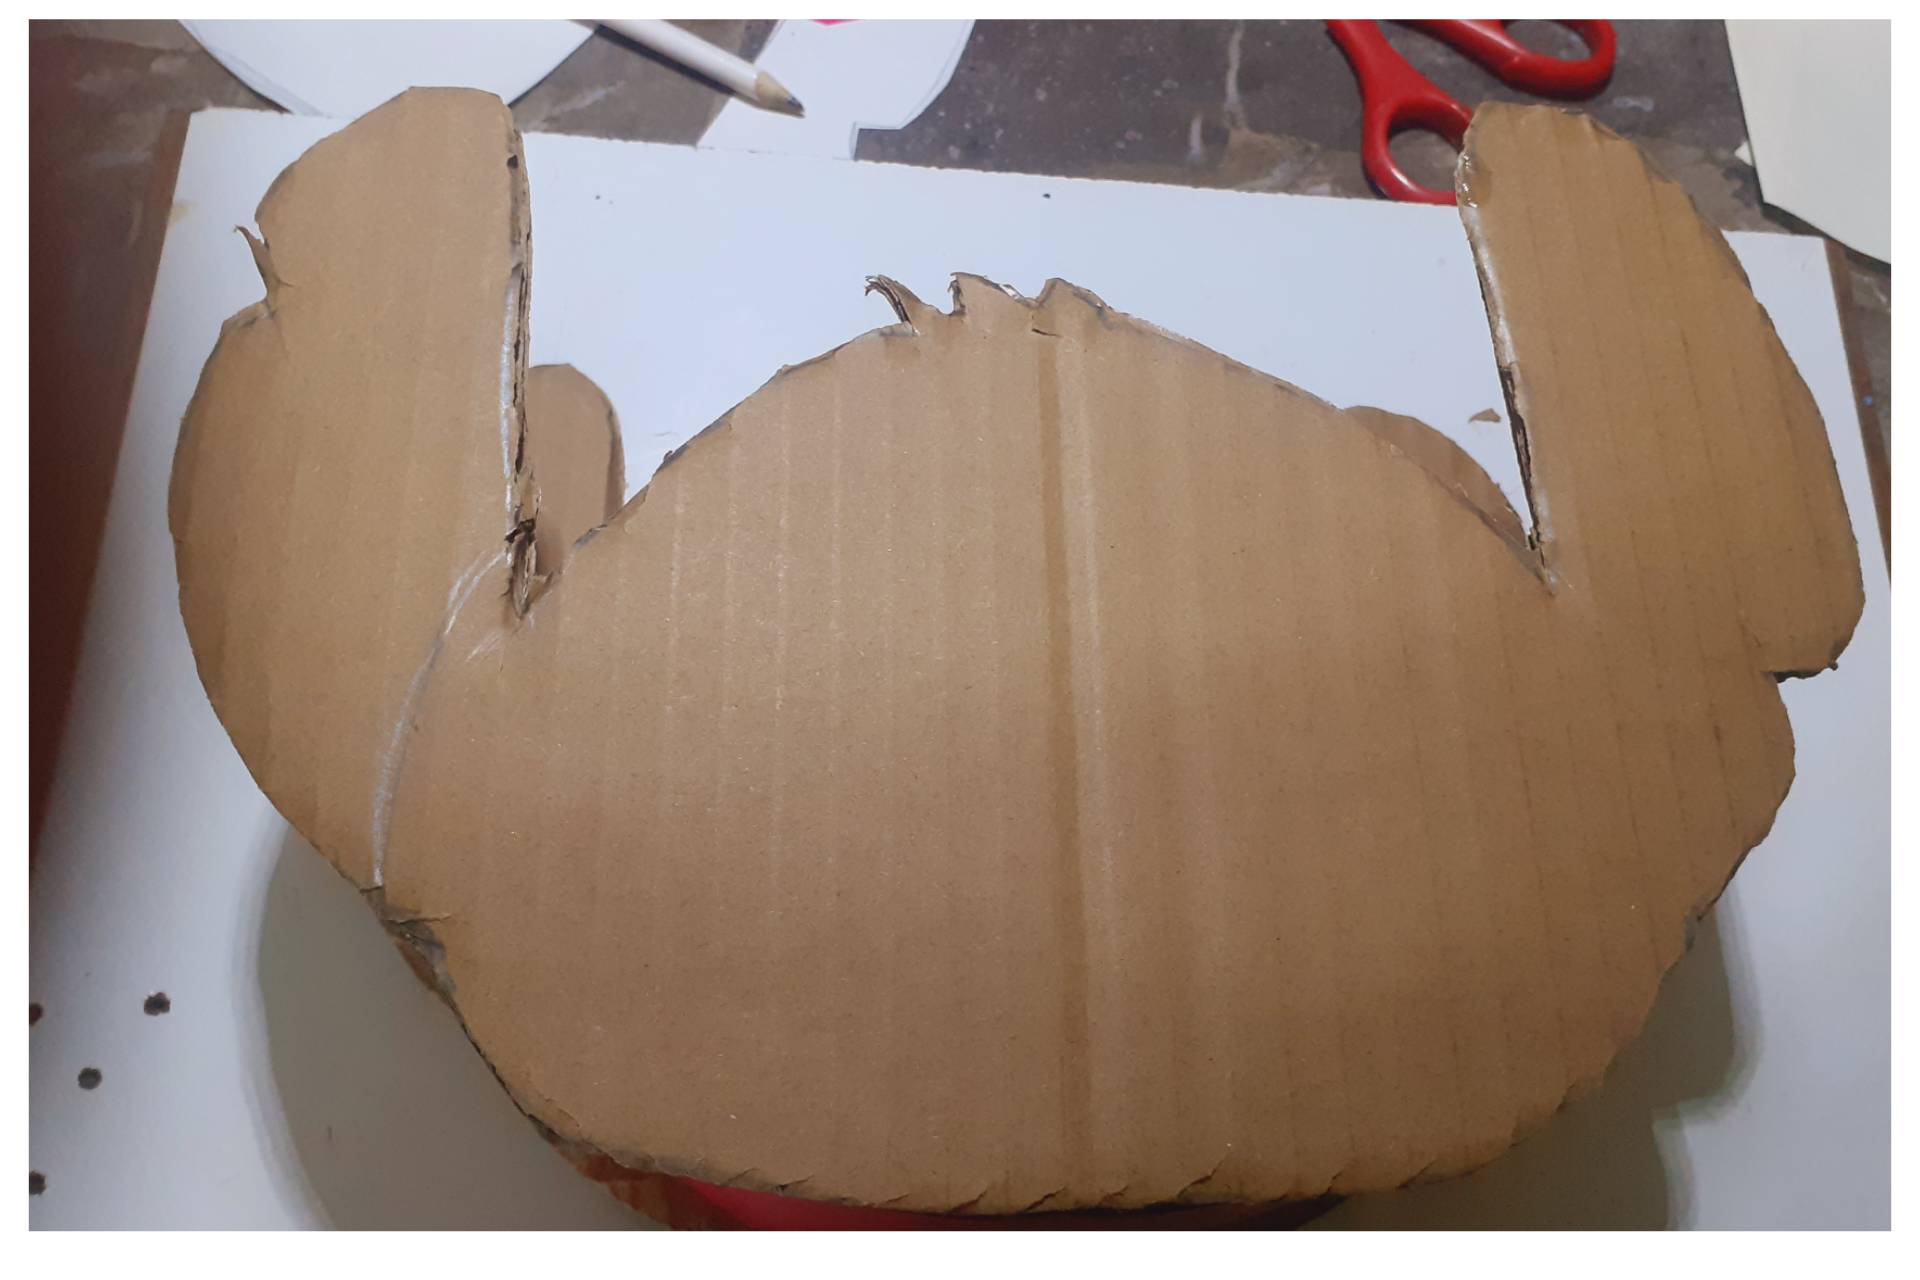
🪅 Trazamos la forma al cartón y recortamos, estás partes miden 28 de ancho por 16 de largo.
🪅 Para unir las dos partes, recortamos un pliego de cartón de 43cms de largo por 10 Cms de ancho y lo pegamos a las partes con silicón, para armar la estructura de la mini piñata.
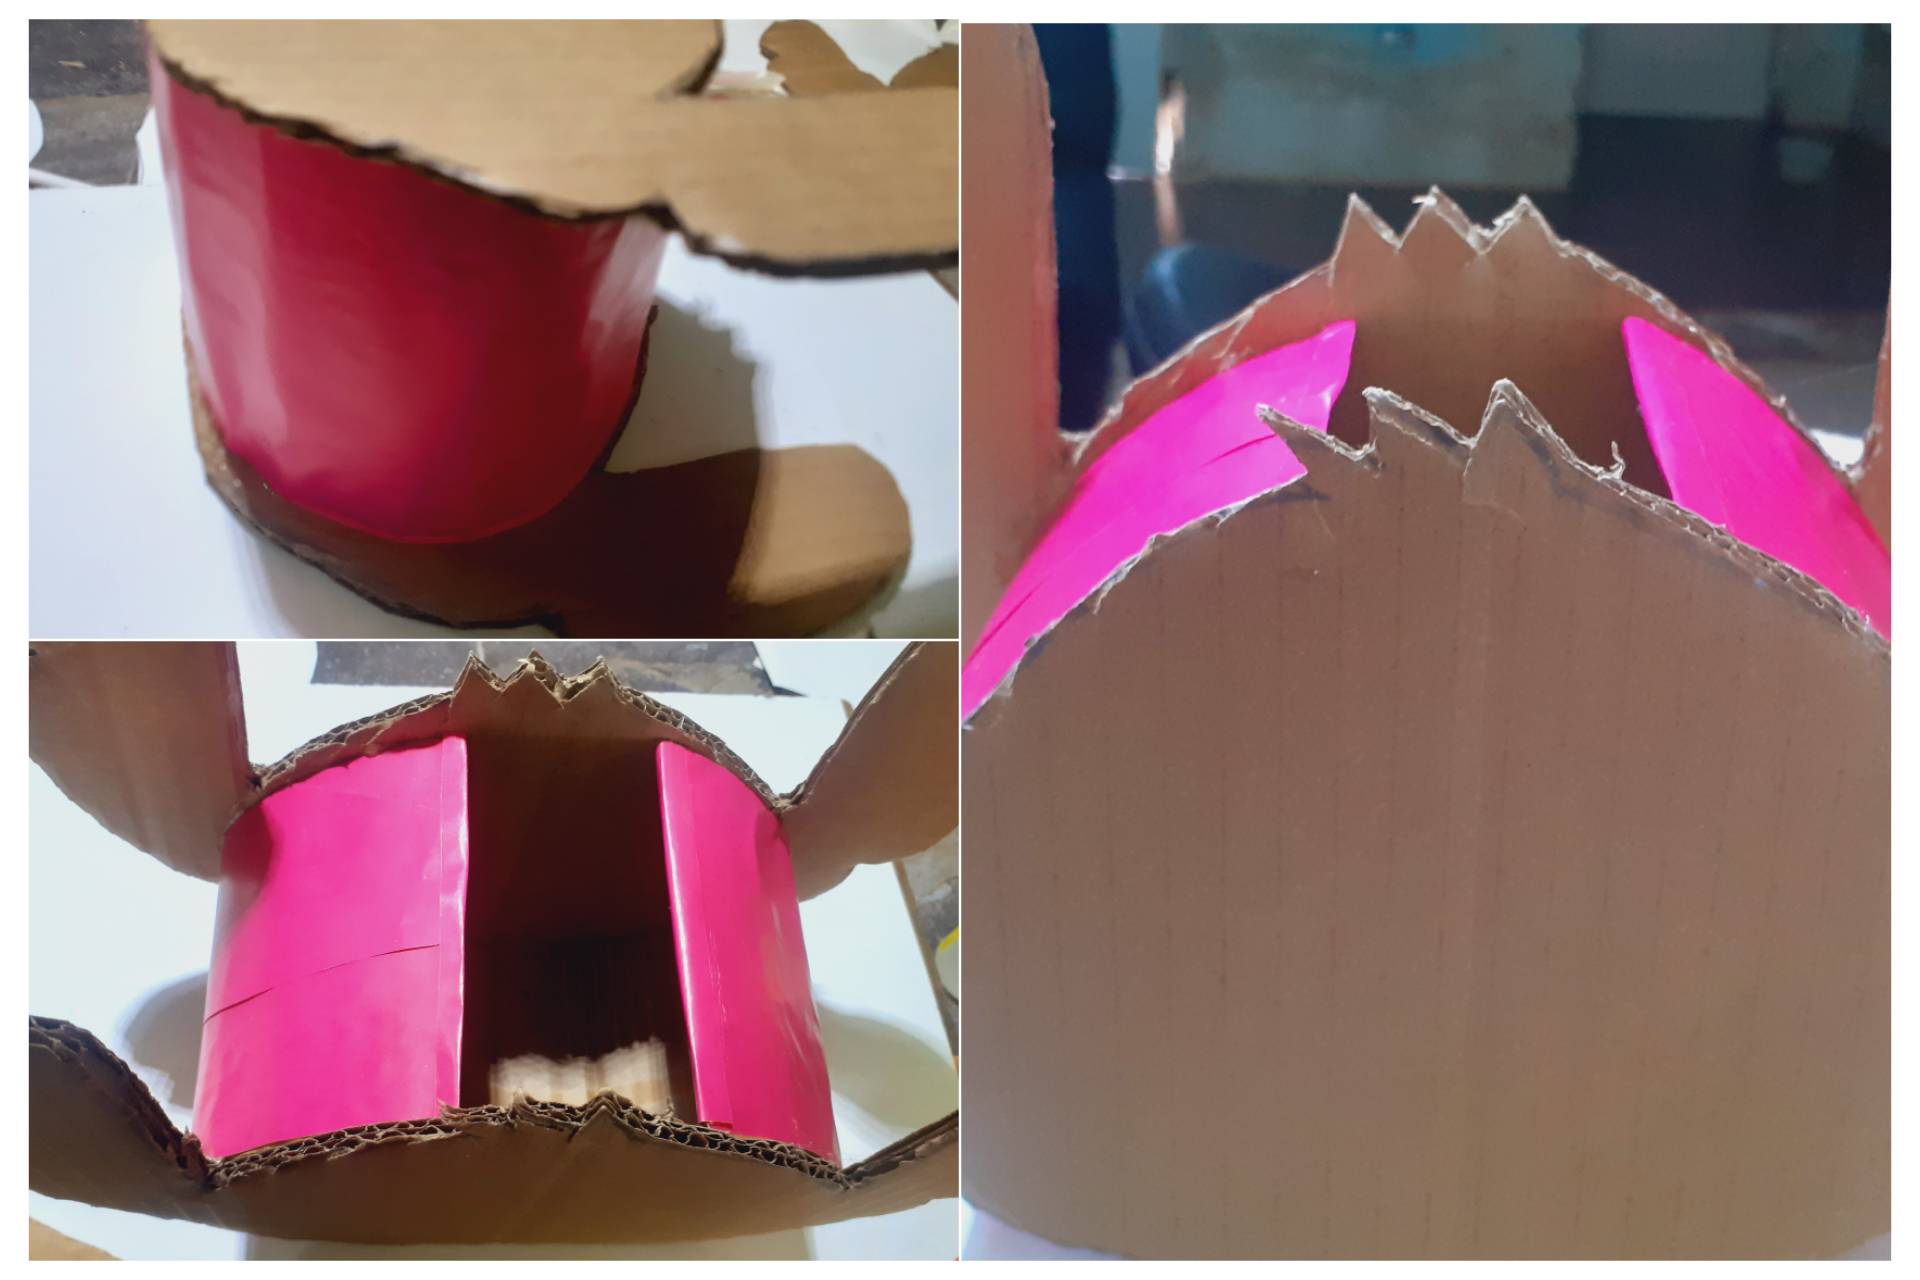
🪅 Recortamos un liston de papel crepe fucsia de 2 Cms, para reforzar y tapar los bordes del cartón.
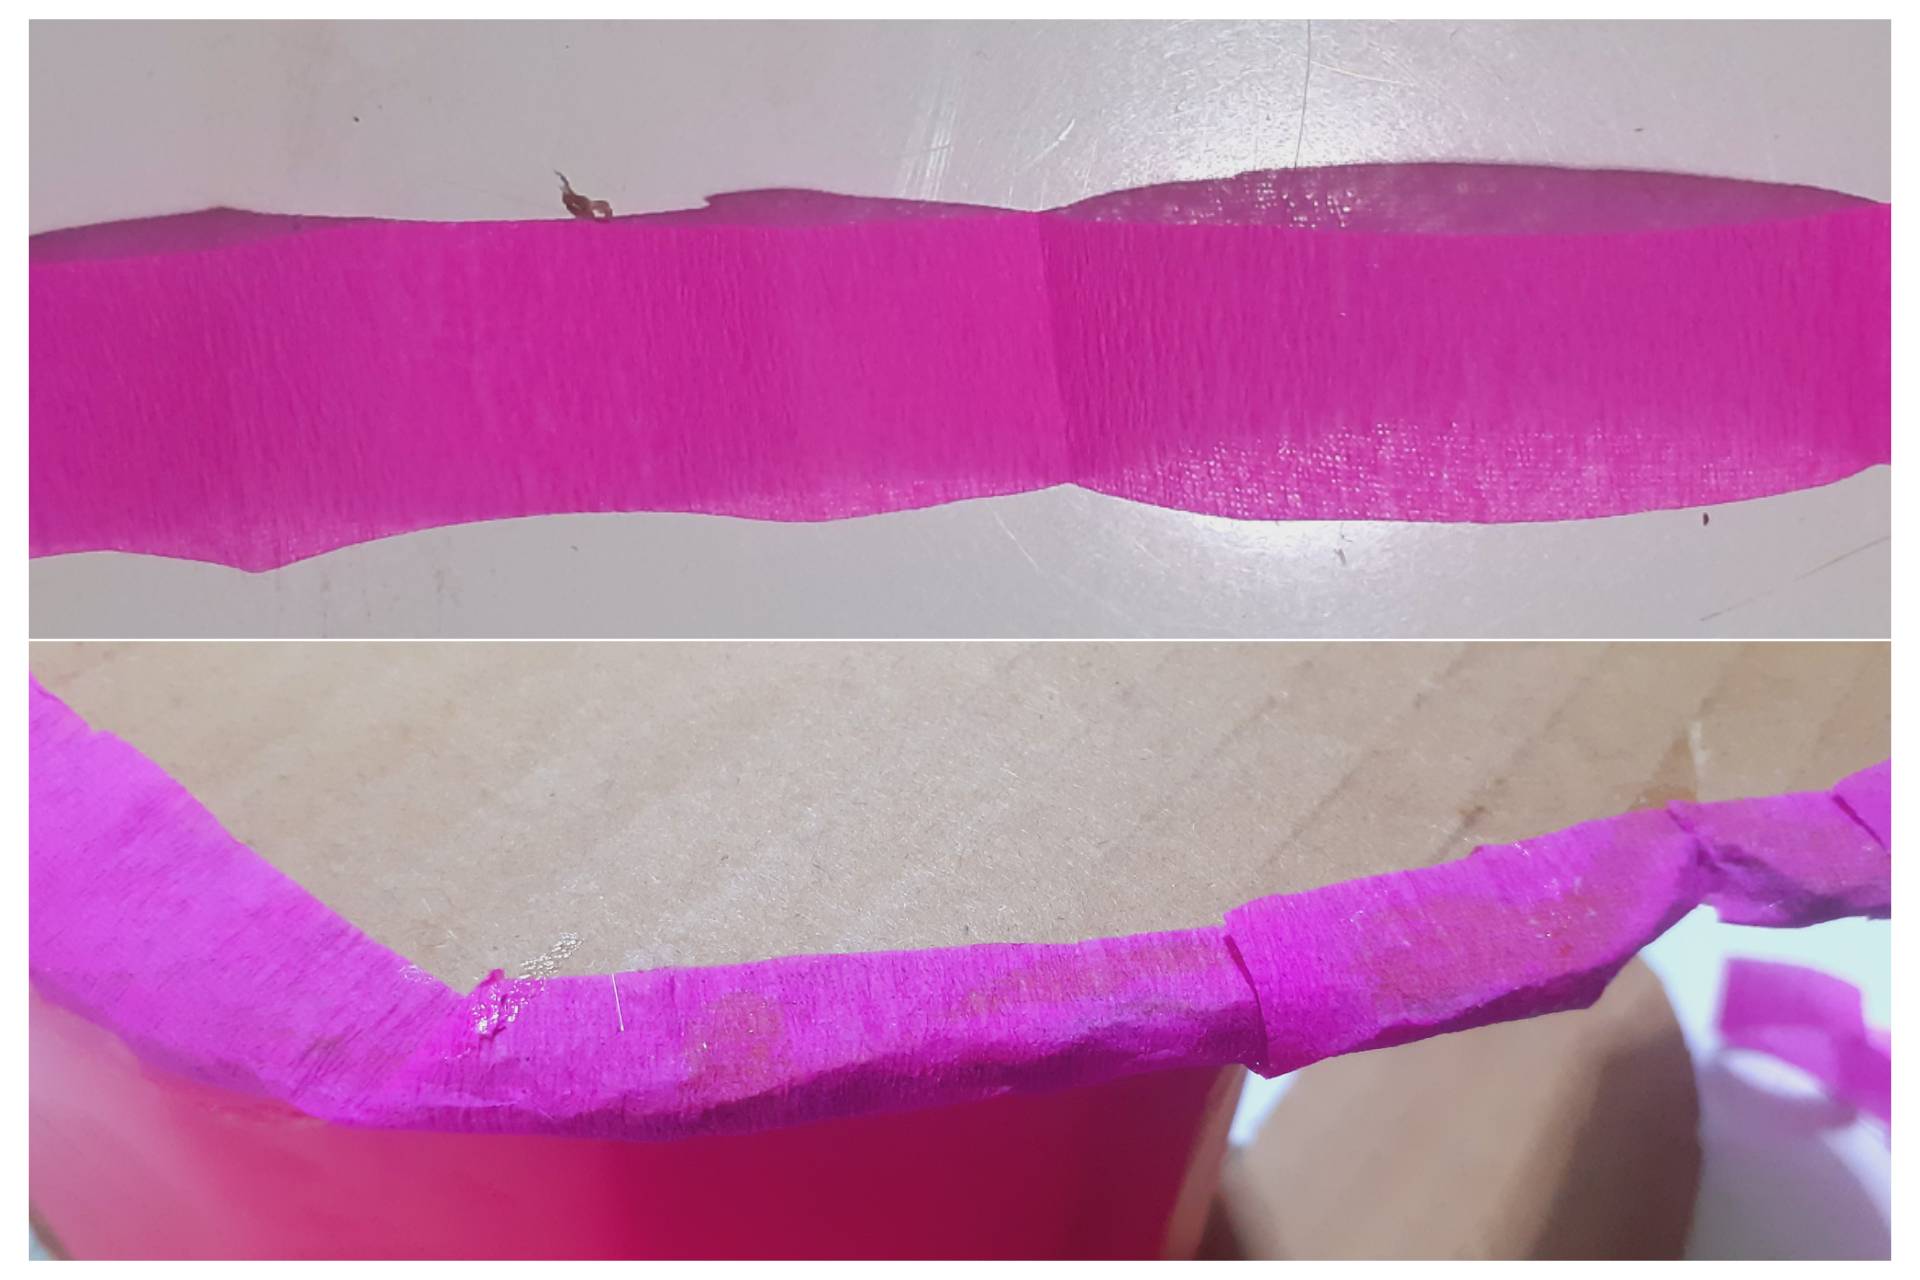
🪅 Recorta otro listones de 3 cms de ancho, realiza pequeños cortes verticales, sin llegar al final del papel y comienza a cubrir las partes de la mini piñata.
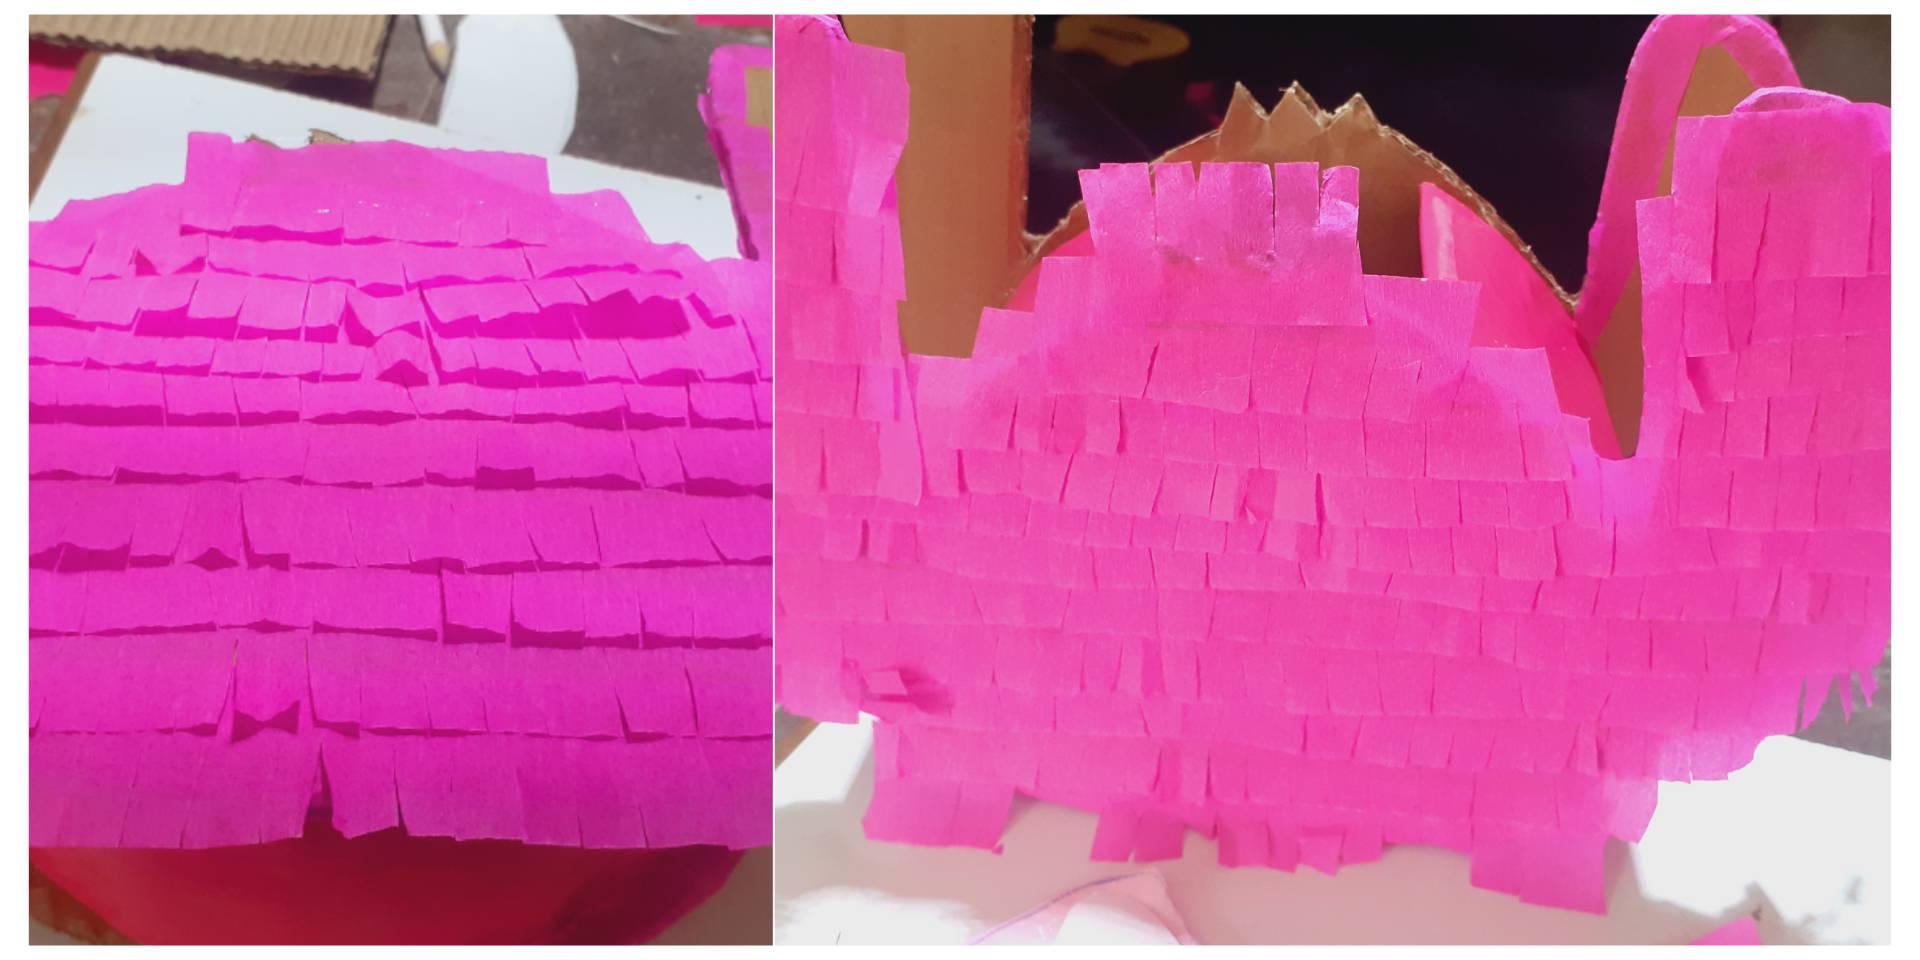
🪅 Comienza a pegar de abajo hacia arriba, para que cada borde valla quedando tapado, hasta llegar a cubrir toda la pieza.
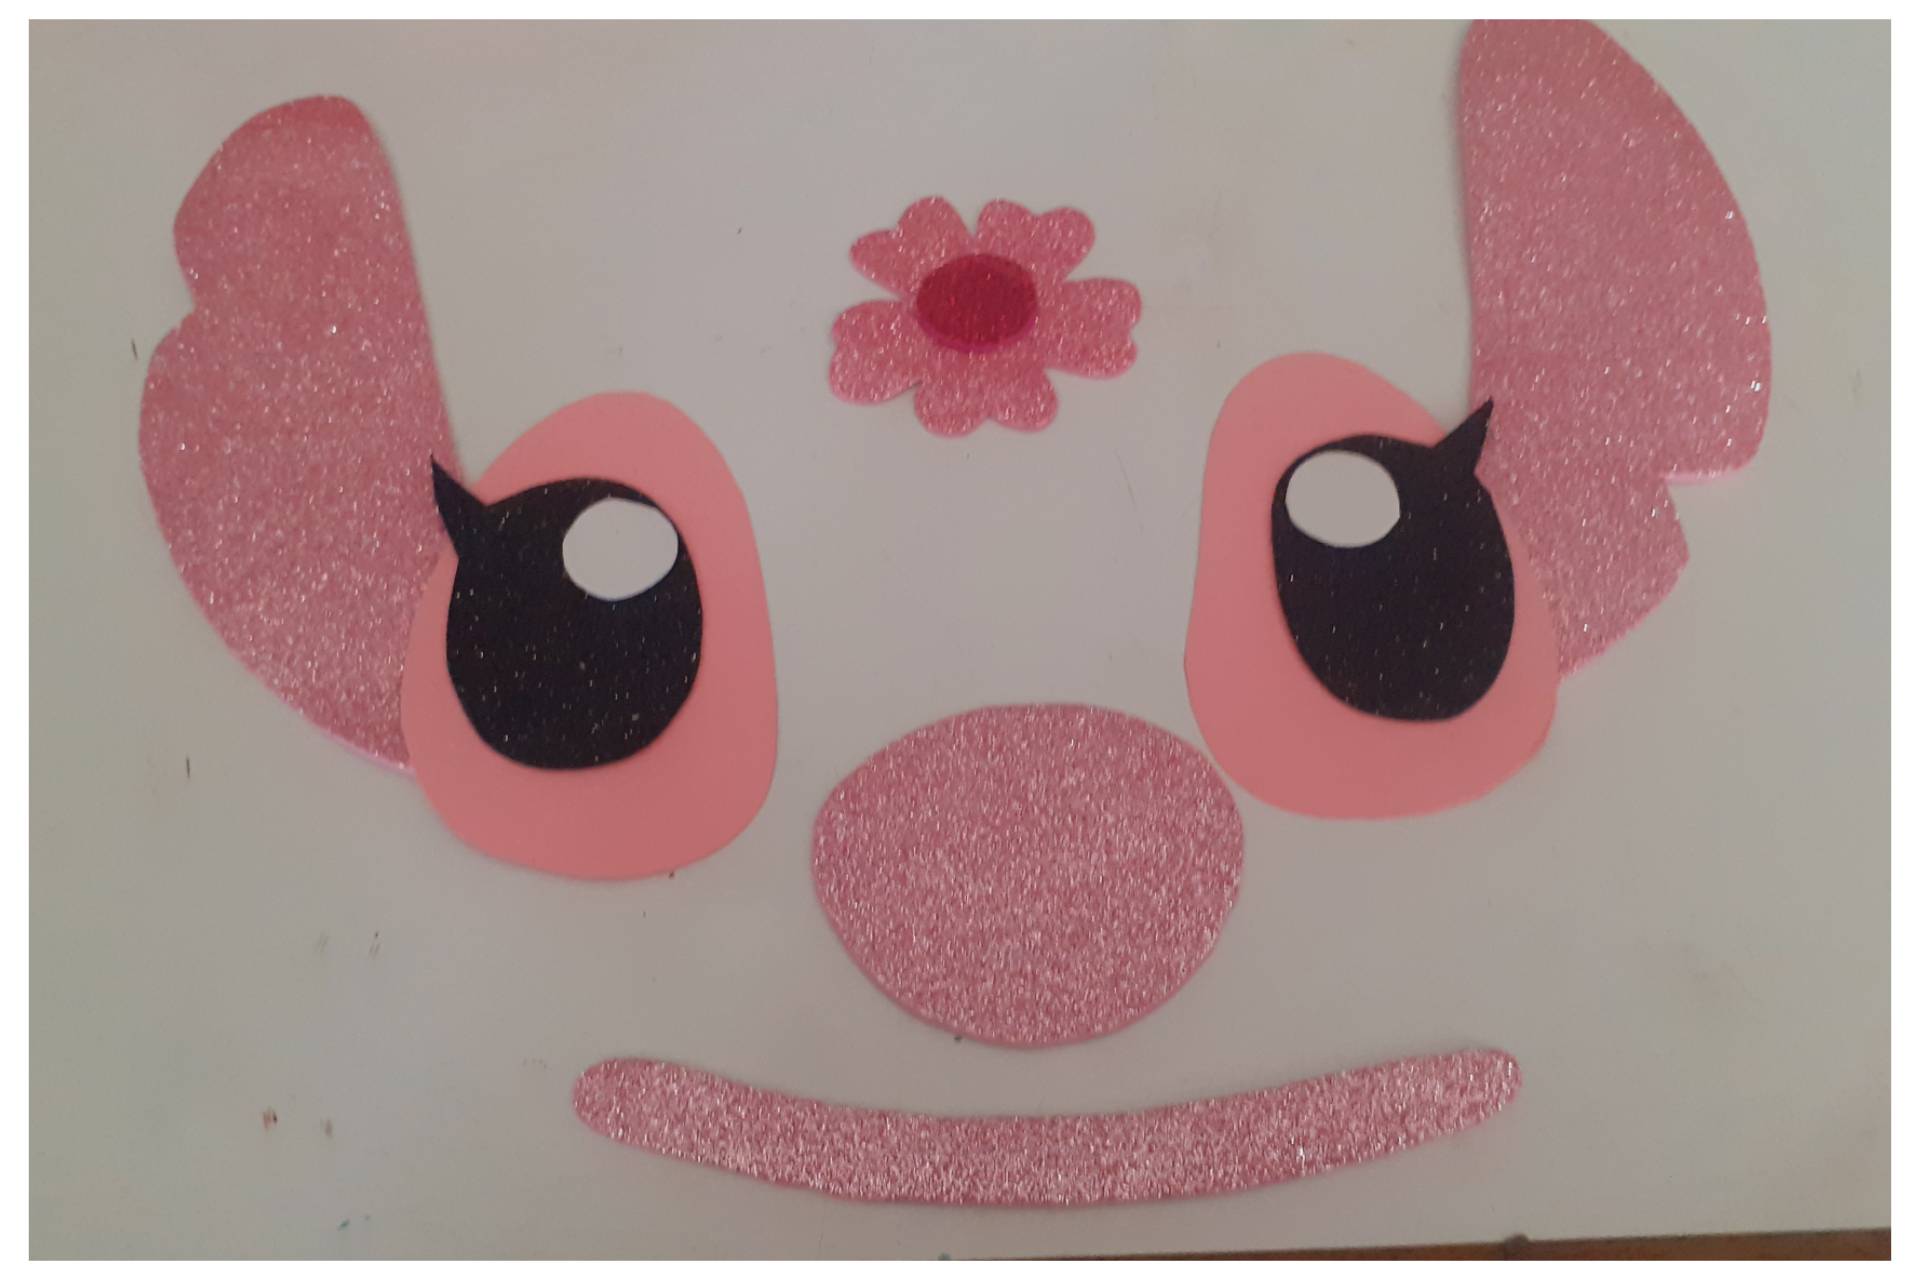
🪅 Para decorar, trazamos y recortamos los moldes en papel, para luego pasar al foami y recortar, recuerden cortar con precisión el foami para que se vea bien y no deforme la figura.
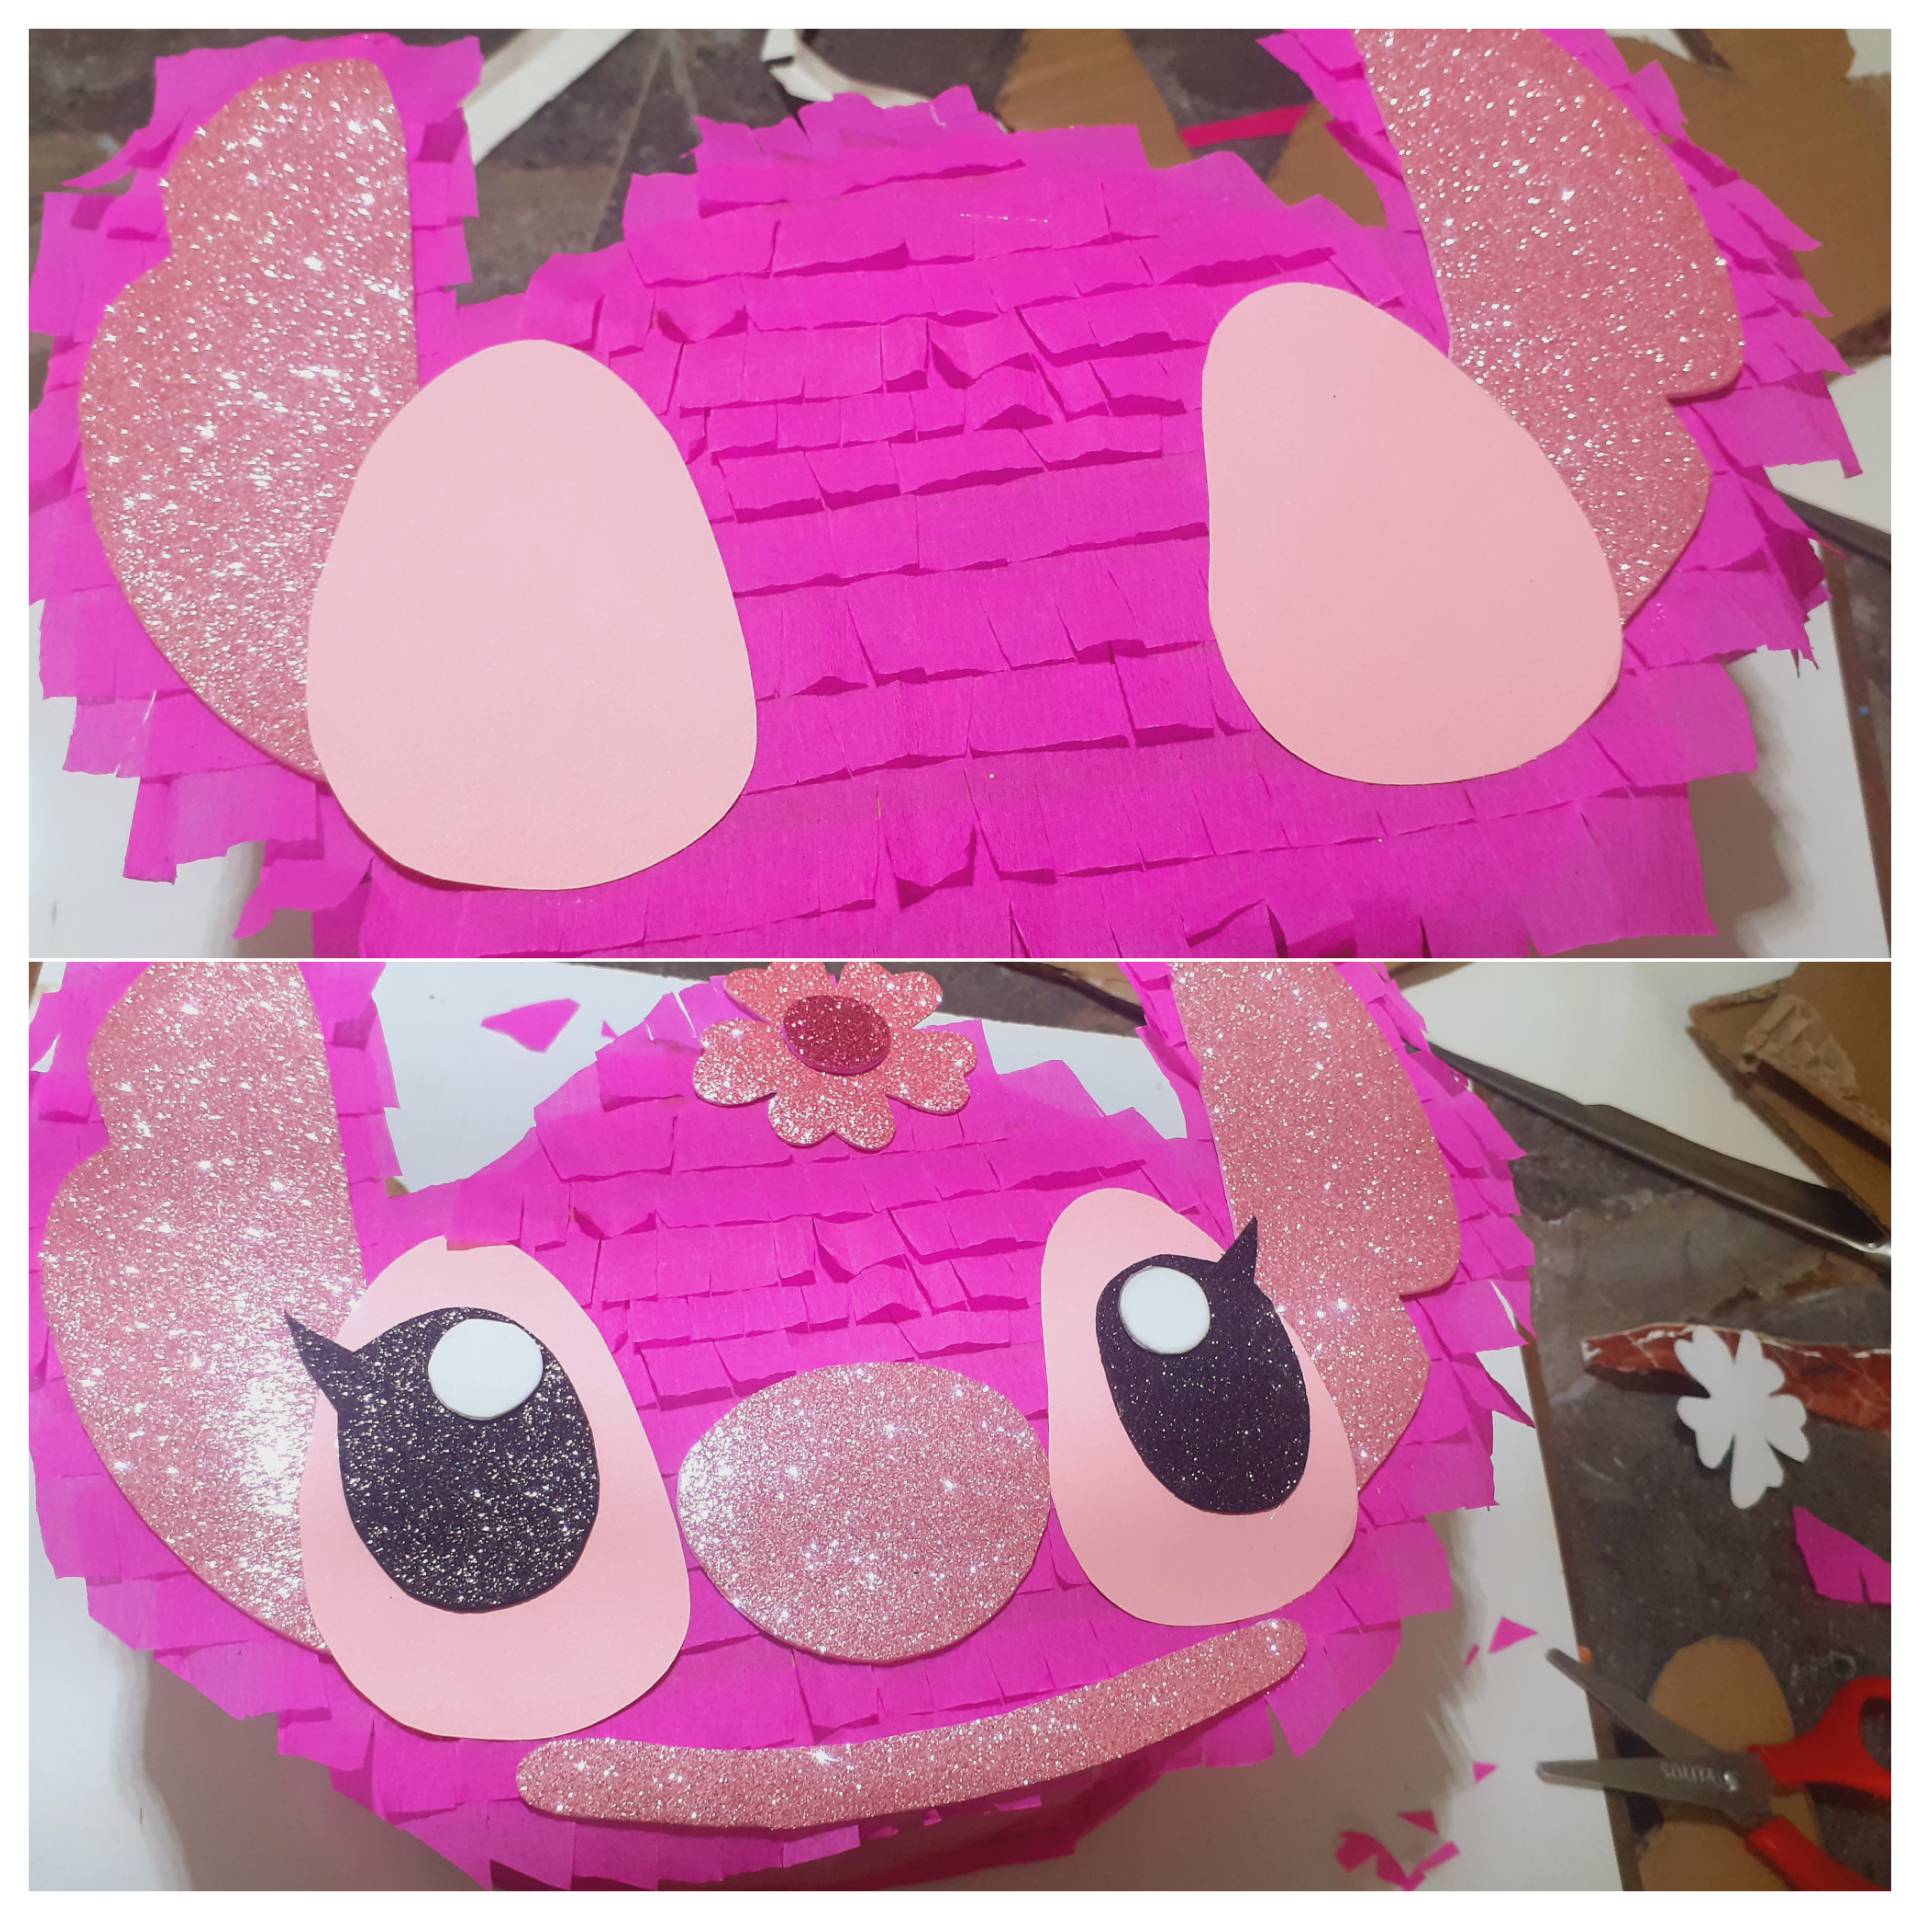
Las piezas miden 13 cm de largo x 5cm de ancho las orejas, los ojos de color rosado miden 9 cm de largo x 5cm de ancho, los negros miden 4cm ancho x 5 cms de ancho, la boca 12 cm de largo x 2 Cms de ancho y la nariz 6cm de diámetro, todas estas piezas van foami y cartulina rosada.
Debemos trabajar el papel con mucho cuidado, ya que si excedemos el silicón, se humedece, deja marca y puede romperse.
Recorta los bordes del papel crepe en los bordes y moldea según la figura, recorta un trozo de papel seda morado y coloca en la parte de adentro, junto con el relleno de su preferencia.
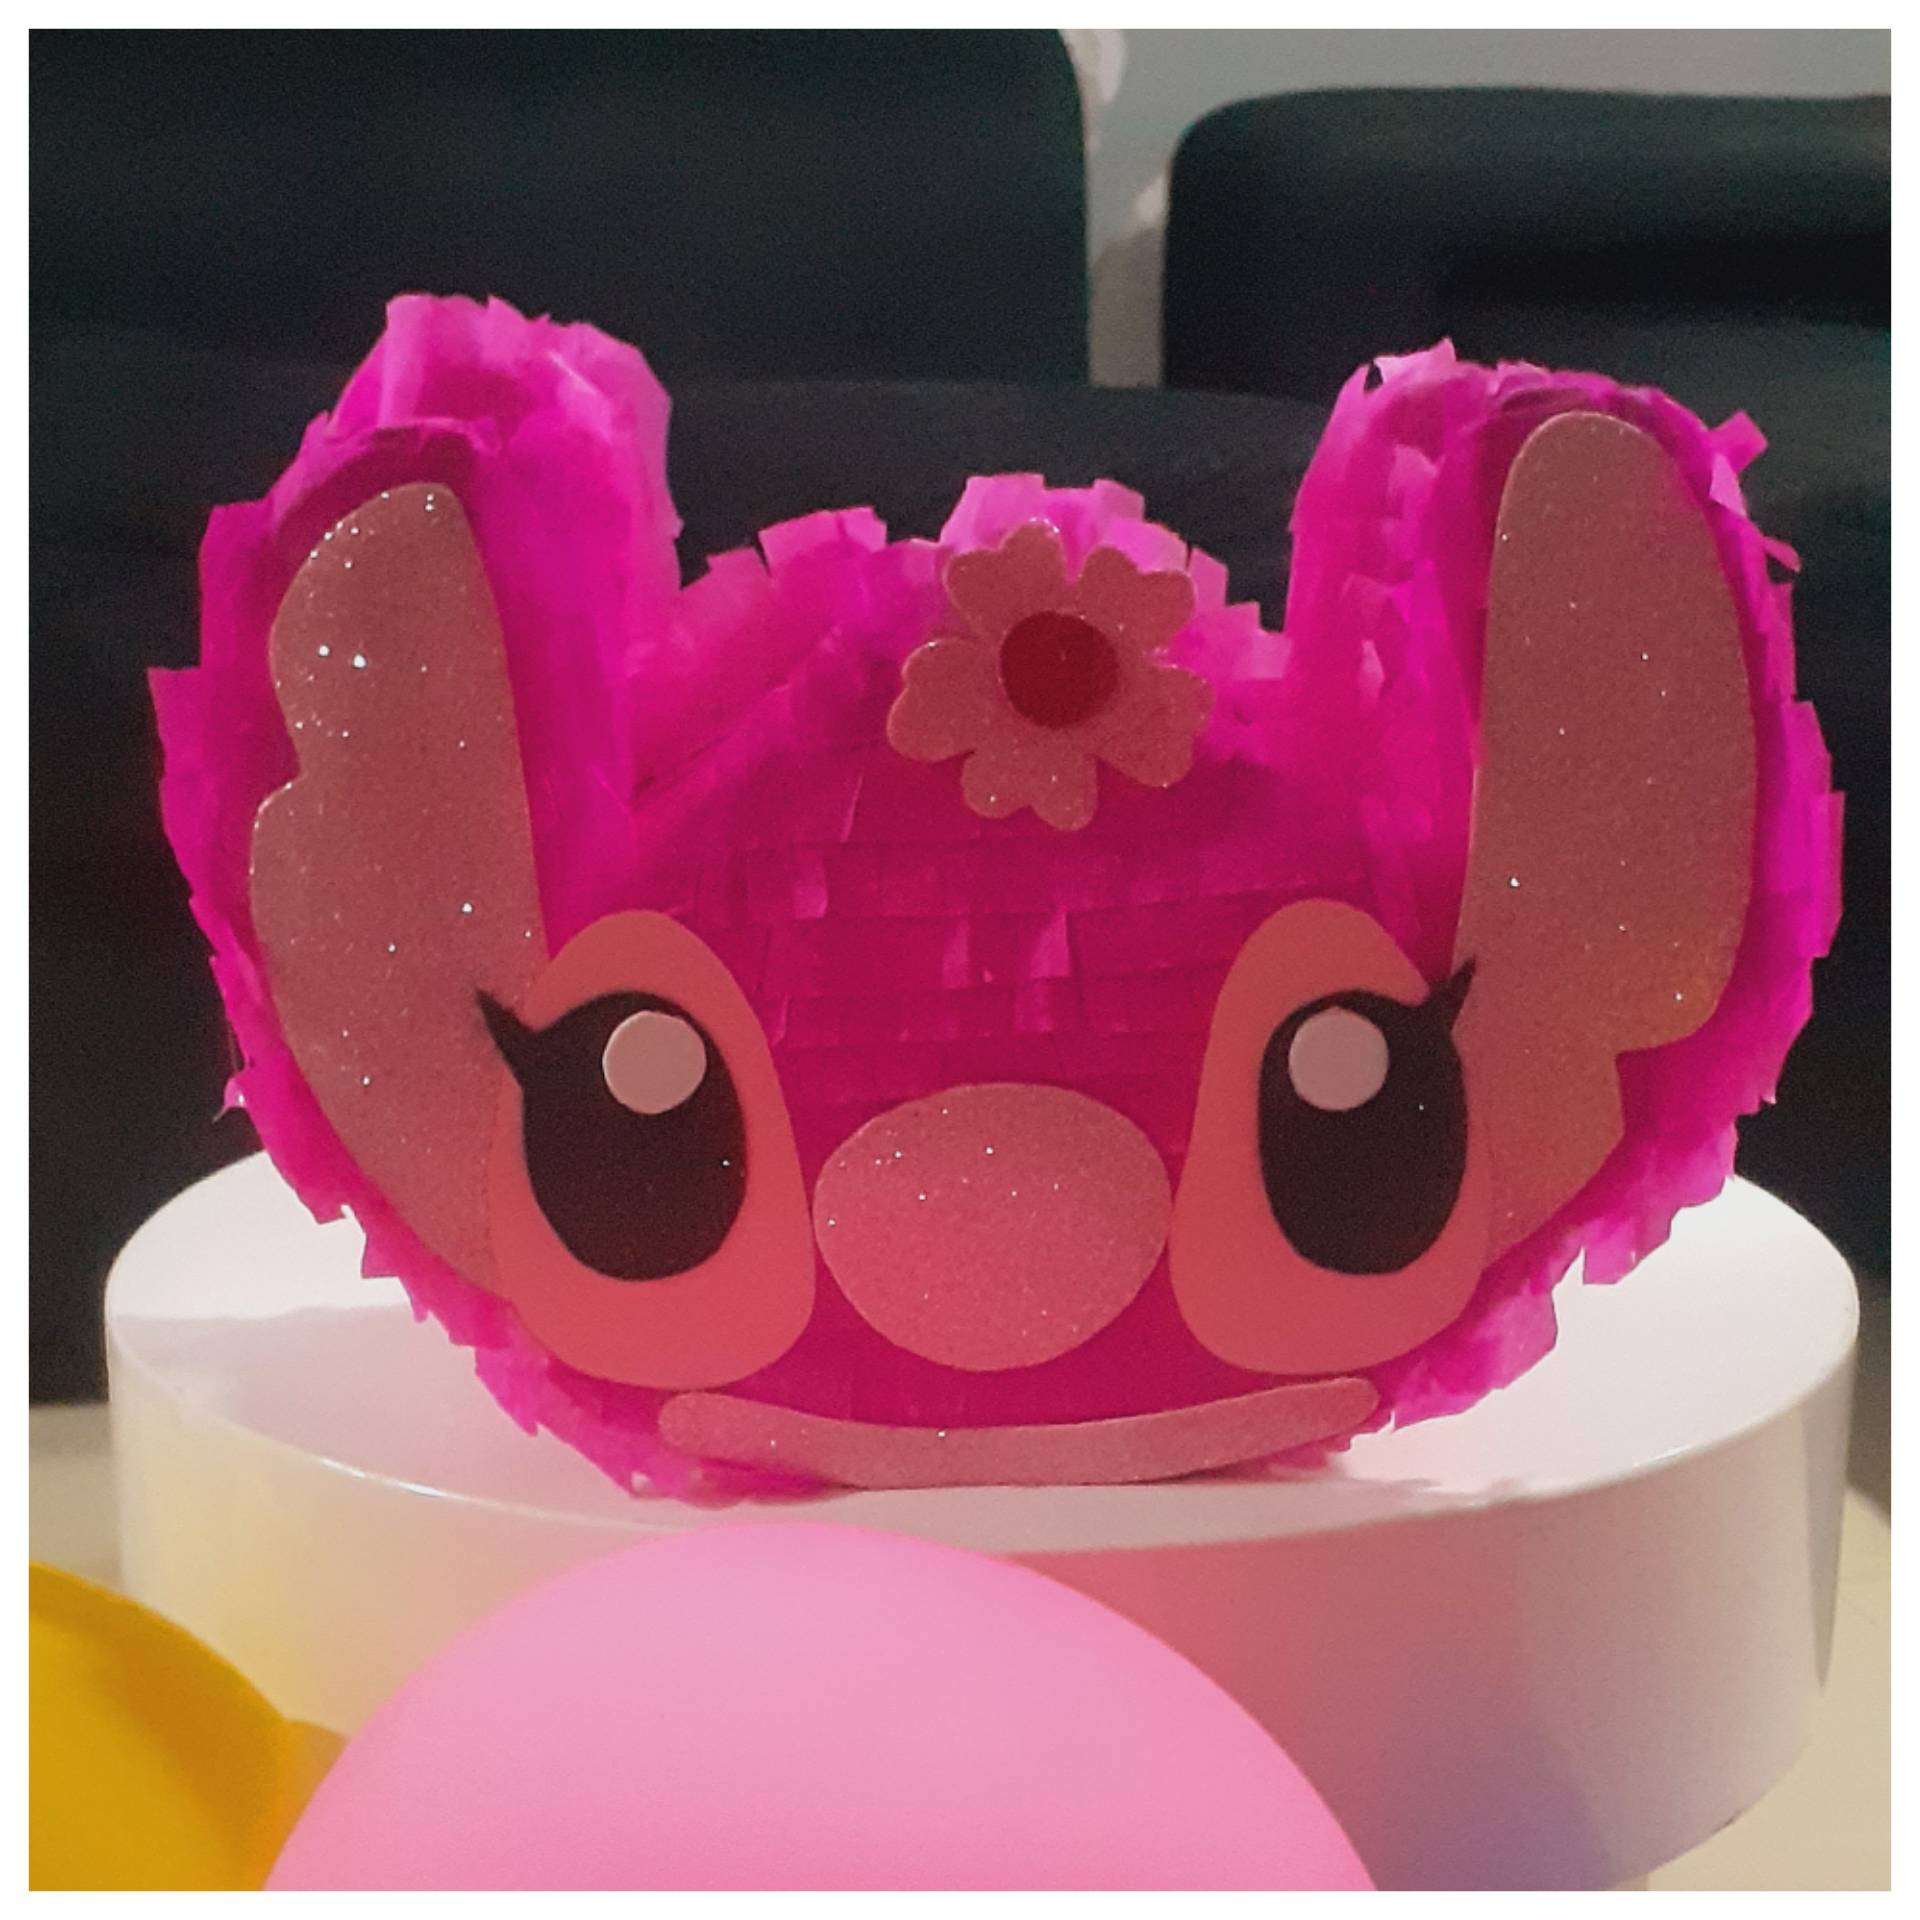
Ya nuestra mini piñata está lista, el cumpleañero estará feliz muy feliz, este personaje esta en tendencia y a mi particularmente me encanta.
El resultado demasiado bello, el color brillante del foami resalta algunos detalles, pero sin exagerar, lo cual es ideal.
Si te a gustado la idea 💡 pongan manos a la obra y a disfrutar de este proyecto, para cualquier ocasión especial, el límite son ustedes, la temática la de su preferencia y la combinación de colores también.
Si se animan y crean algo así de hermoso o mucho más hermoso no duden en compartir.. 🌈👍🪅🎉.
> ! [English]
> # Mini piñata 🪅
>Hello everyone, today I bring you a great idea that we can use for various occasions: a mini piñata, this time with a Disney's Stitch theme.
>
>I think piñatas are a timeless part of birthday celebrations. They bring excitement to the birthday boy or girl and their guests, and both children and adults enjoy them.
>
>As I said, I'm bringing you a mini piñata that's easy to make and not complicated at all. Even if you're not good at crafts, it's still worth a try.
>
>What materials do you need?
>🪅Cardboard
>🪅Fuchsia and pink crepe paper
>🪅Purple tissue paper
>🪅Bright pink foam
>🪅Bright black foam
>🪅White foam
>🪅Pink cardstock
>🪅Liquid silicone
>🪅Scissors.
>
>Now follow these steps:
>
>🪅 Make the model on white sheets of paper and cut out the templates.
>
>🪅 Trace the shape onto the cardboard and cut it out. These pieces should measure 28 cm wide by 16 cm long.
>
>🪅 To join the two pieces, cut a piece of cardboard measuring 43 cm long by 10 cm wide and glue it to the pieces with silicone to assemble the structure of the mini piñata.
>
>🪅 Cut a 2 cm strip of fuchsia crepe paper to reinforce and cover the edges of the cardboard.
>
>🪅 Cut another strip 3 cm wide, make small vertical cuts without reaching the end of the paper, and begin to cover the parts of the mini piñata.
>
>🪅 Start gluing from the bottom up, covering each edge until the entire piece is covered.
>
>🪅 To decorate, trace and cut out the templates on paper, then transfer them to the foam and cut them out. Remember to cut the foam precisely so that it looks good and does not distort the shape.
>
>The pieces measure 13 cm long x 5 cm wide for the ears, the pink eyes measure 9 cm long x 5 cm wide, the black ones measure 4 cm wide x 5 cm wide, the mouth measures 12 cm long x 2 cm wide, and the nose measures 6 cm in diameter. All of these pieces are made of foam and pink cardstock.
>
>We must work with the paper very carefully, because if we use too much silicone, it gets wet, leaves marks, and can break.
>
>Cut the edges of the crepe paper and shape it according to the figure. Cut a piece of purple tissue paper and place it inside, along with the filling of your choice.
>
>Now our mini piñata is ready, the birthday boy or girl will be very happy. This character is very popular right now, and I particularly love it.
>
>The result is so beautiful. The bright color of the foam highlights some details without being over the top, which is ideal.
>
>If you like the idea 💡, get started and enjoy this project. For any special occasion, the only limits are your imagination, your preferred theme, and your choice of color combination.
>
>If you decide to create something this beautiful or even more beautiful, don't hesitate to share it. 🌈👍🪅🎉.
Photographs of my authorship taken with my Samsung A10 camera phone.
[Traductor](https://www.deepl.com/translator)
Mini piñata DIY 🪅 Esp-Eng
@cirangela
· 2025-10-02 00:44
· Hive Diy
#hivediy
#manualidades
#crafts
#handmade
#original-contest
#spanish
Payout: 9.553 HBD
Votes: 158
More interactions (upvote, reblog, reply) coming soon.