Hola a todos, si alguno se recuerda, todavia sigo con la construccion del garage, lo que pasa que lo hao yo solo, sin ayuda de nadie, pues en esta ocacion lo que estoy haciendo es colocando una cruceta en la parte de atras del techo del garage, en donde conectare la corriente electrica, la cual es para alimentar todo lo que seria el garage y para tener la luz en el mismo, aprovechqando en efectuar este trabajo dando que el dia se encuentra nublado y no hace mucho calor.
Teniendo ubicado el lugar en donde colocaria dicha cruceta, la cual la arme, colocando dos caños de 15 x 15 pulgadas, luego lo pinte muy bien de color negro y le agregue los dos conectores de porcelana en donde bajaria el cable con electricidad, asi queda la misma mas comoda.
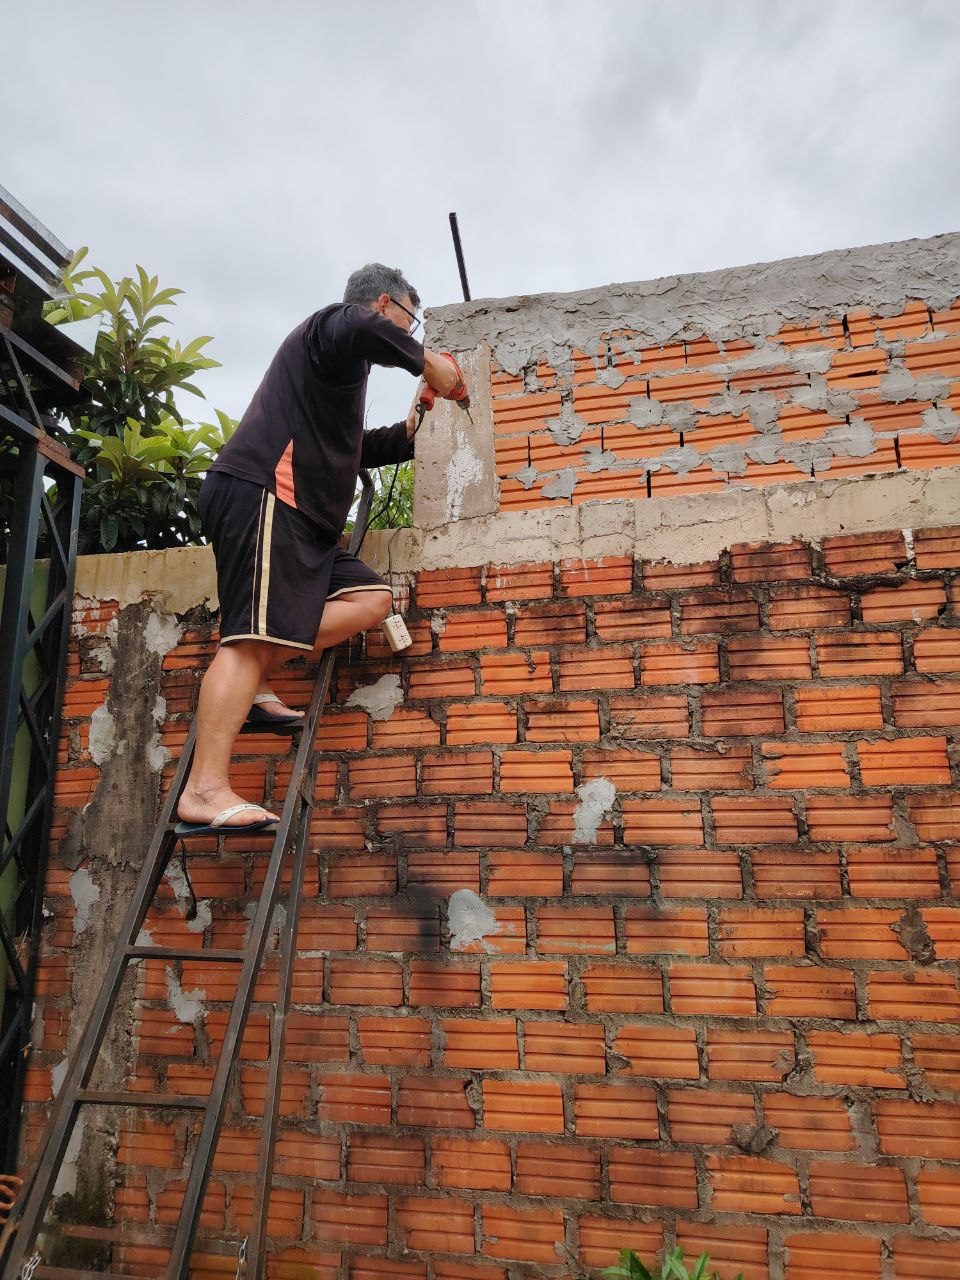
Luego de haber colocado el alargue con electricidad, enchufe el taladro electrico, le coloque la mecha de vidian, que es para perforar hormigon, presente dicha cruceta, marque y luego de perforar, agregue los tarugos, luego la cruceta y los bulones que ajuste muy bien para fijar todo.
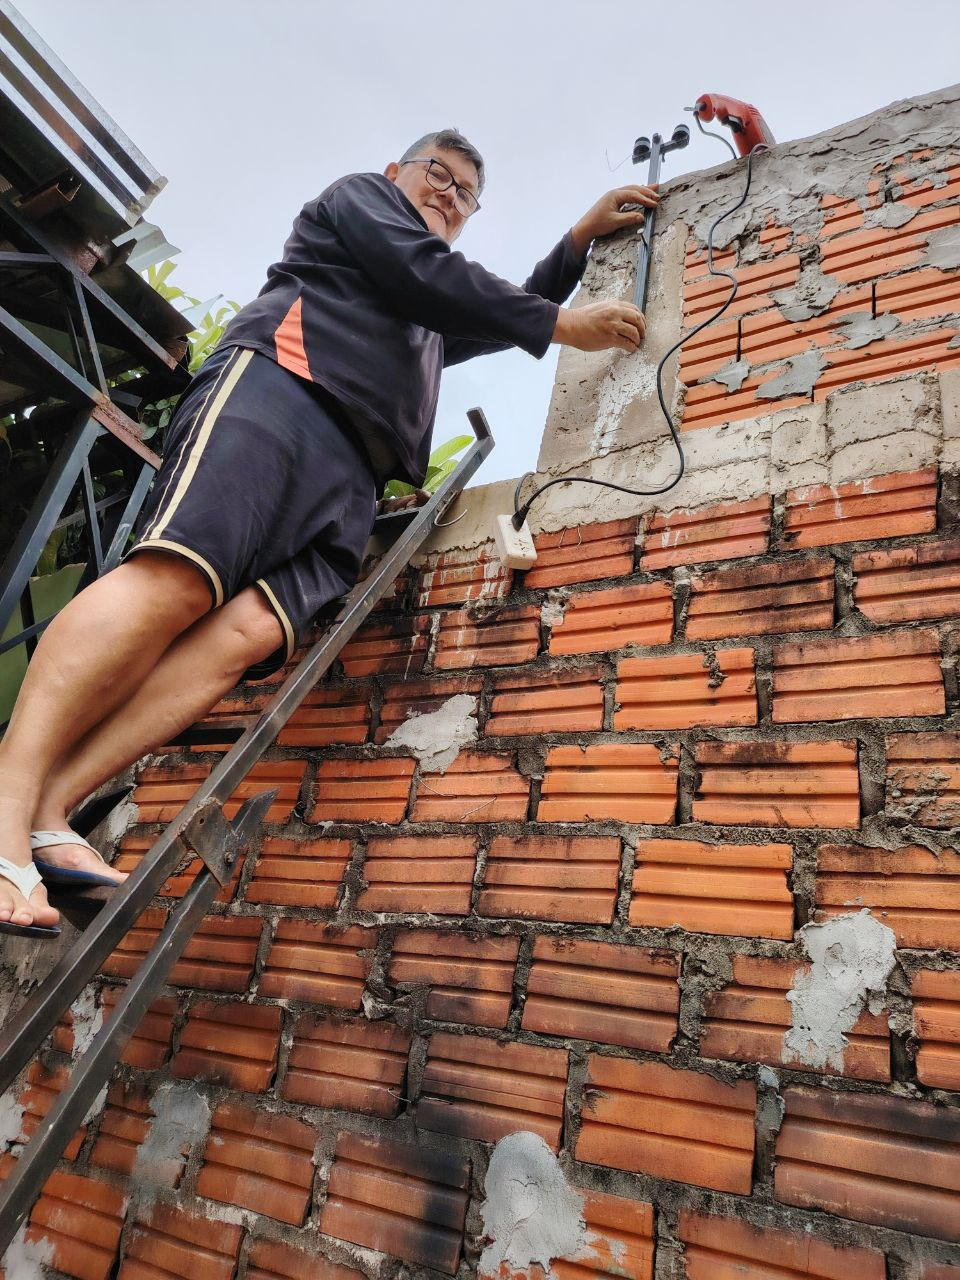
Como lo pueden ver en esta fotografia amigos, trabajando muy comodo con la escalera que es de invencion o sea la arme yo, la verdad muy comoda, asi que ajuste los bulones con una llave, quedando perfectamente amurada dicha cruceta.
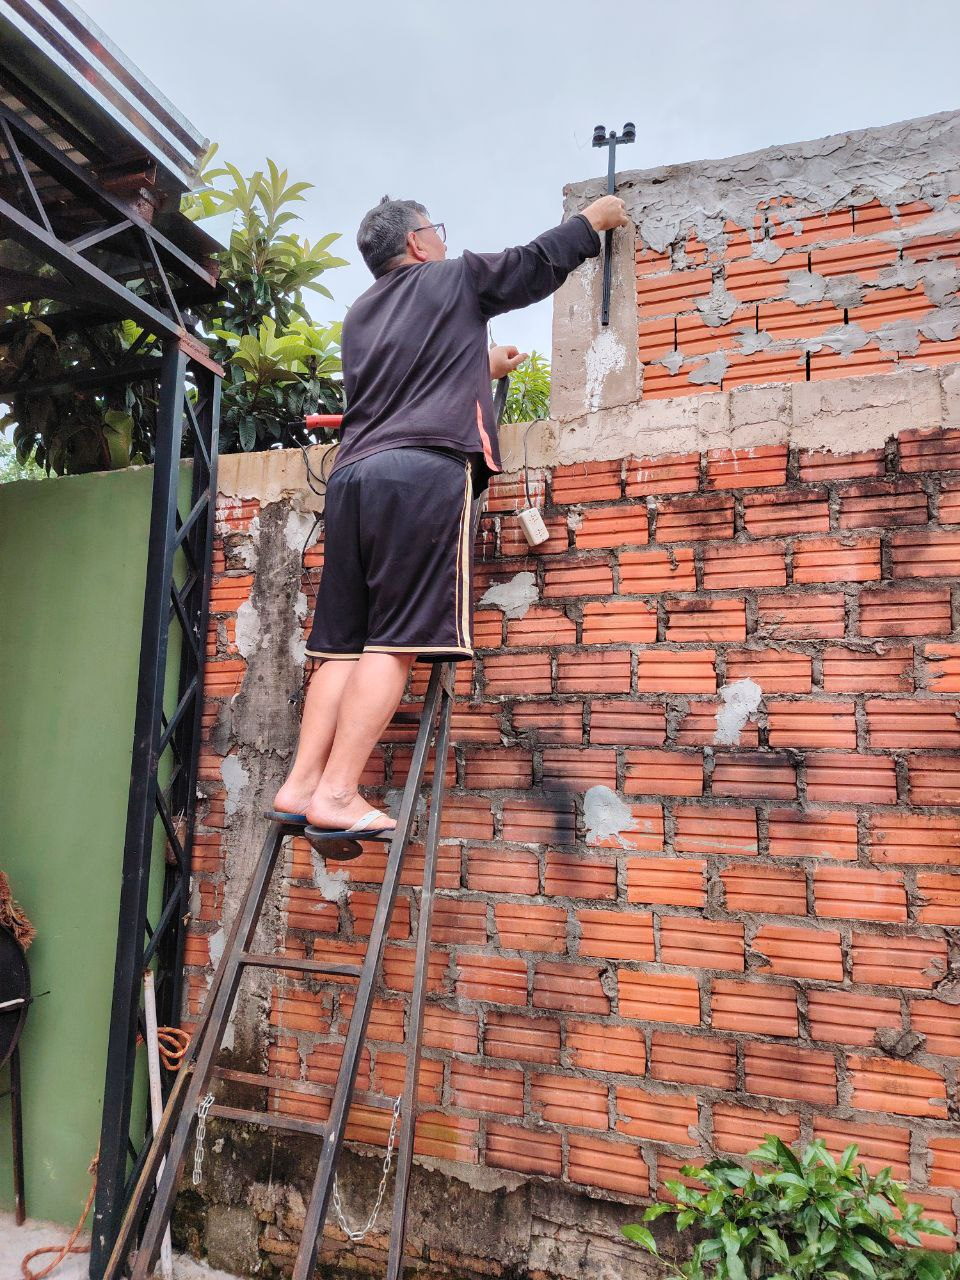
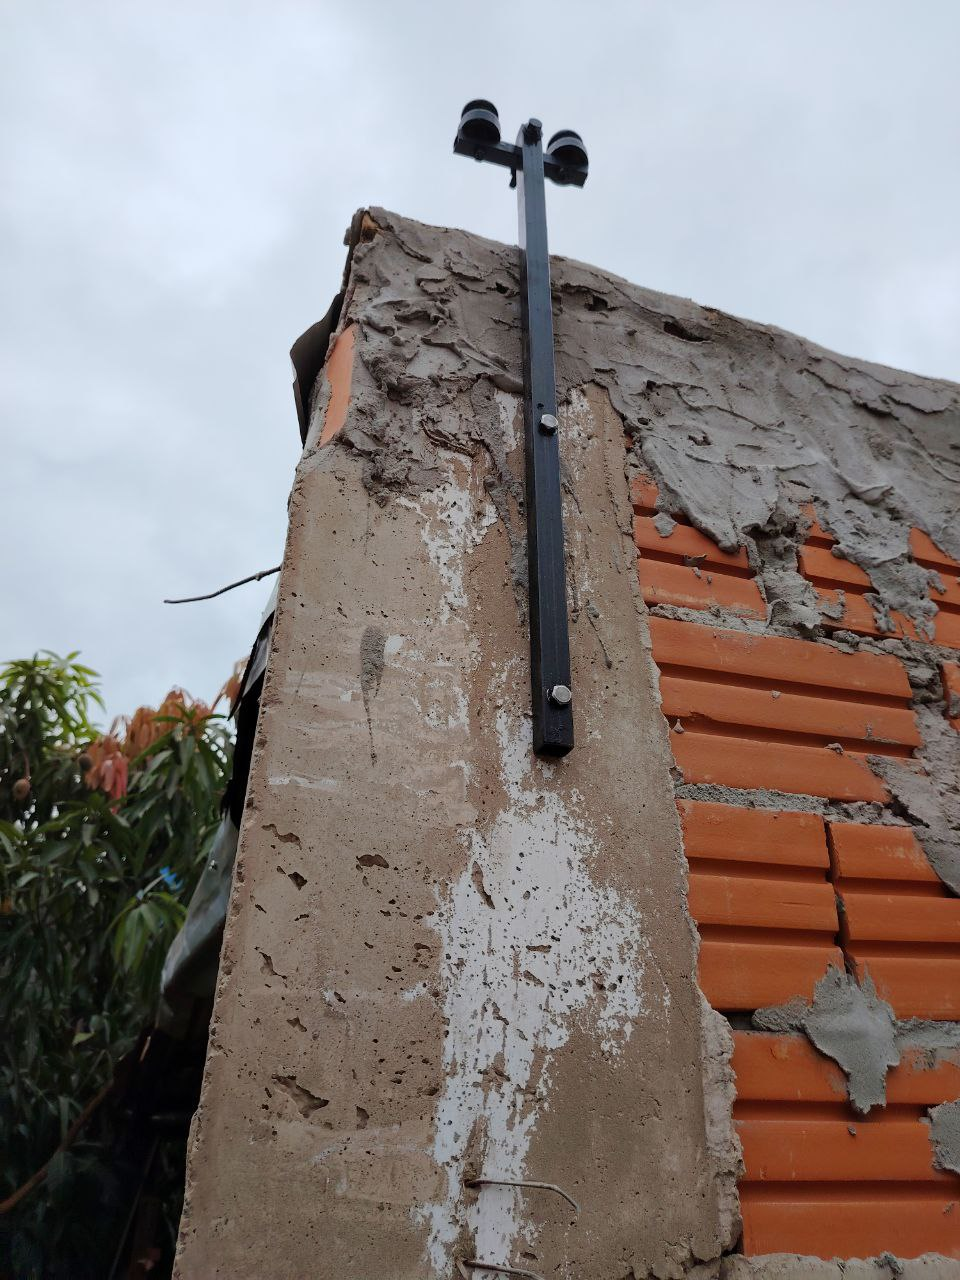
Bueno en esta fotografia, se puede ver muy bien como quedo la misma, amurada sobre la columna de hormigon, lo que pasa que tiene que estar bien asegurada, lo digo por las tormentas tropicales y los fuertes vientos.
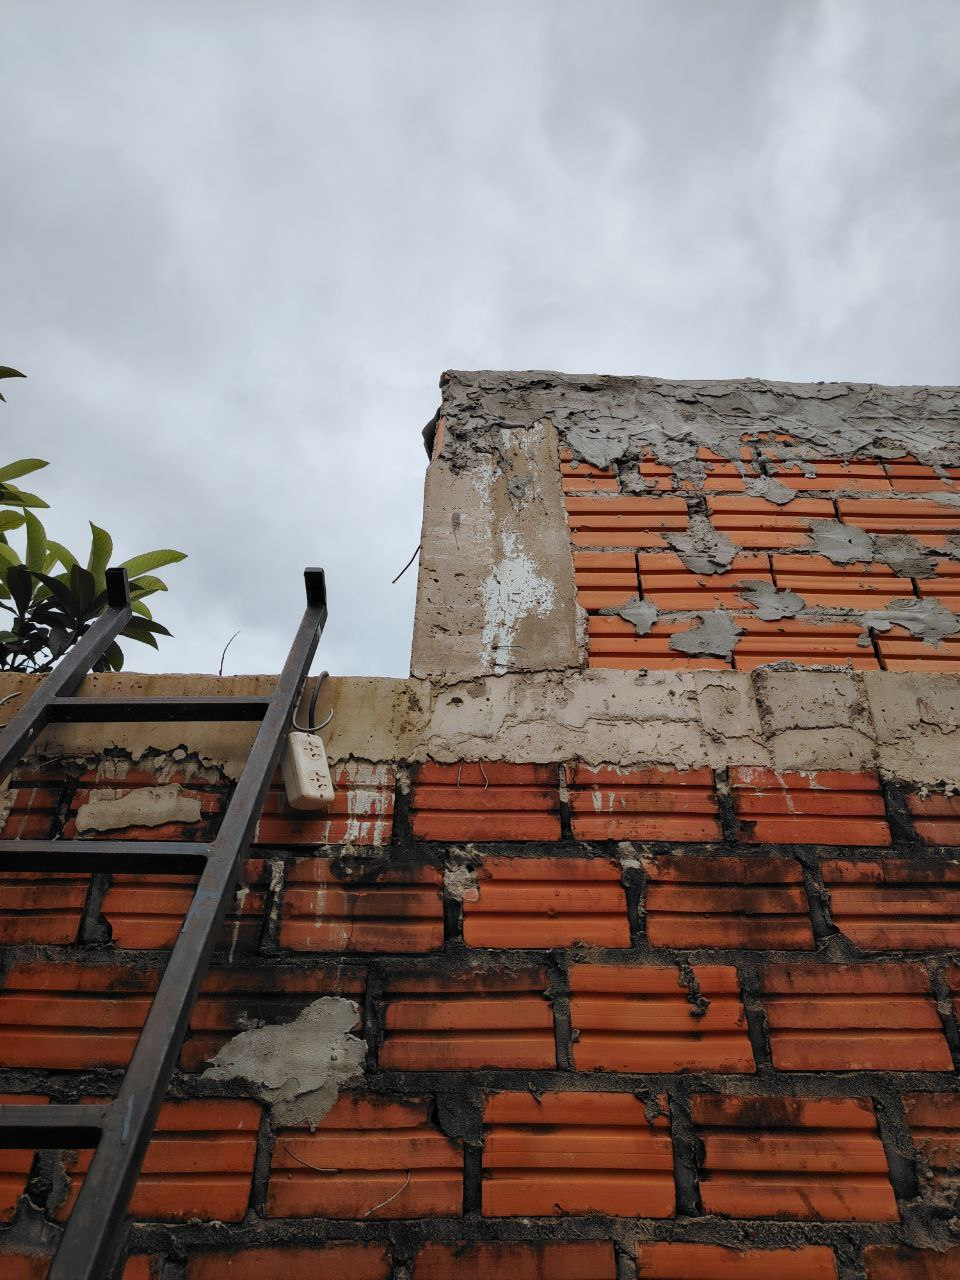
Asi que estando amurada la cruceta, procedi a picar la pared, en donde colocaria el caño currucado, por donde pasaria el cable de electricidad hasta la caja en donde colocaria la llave termica.
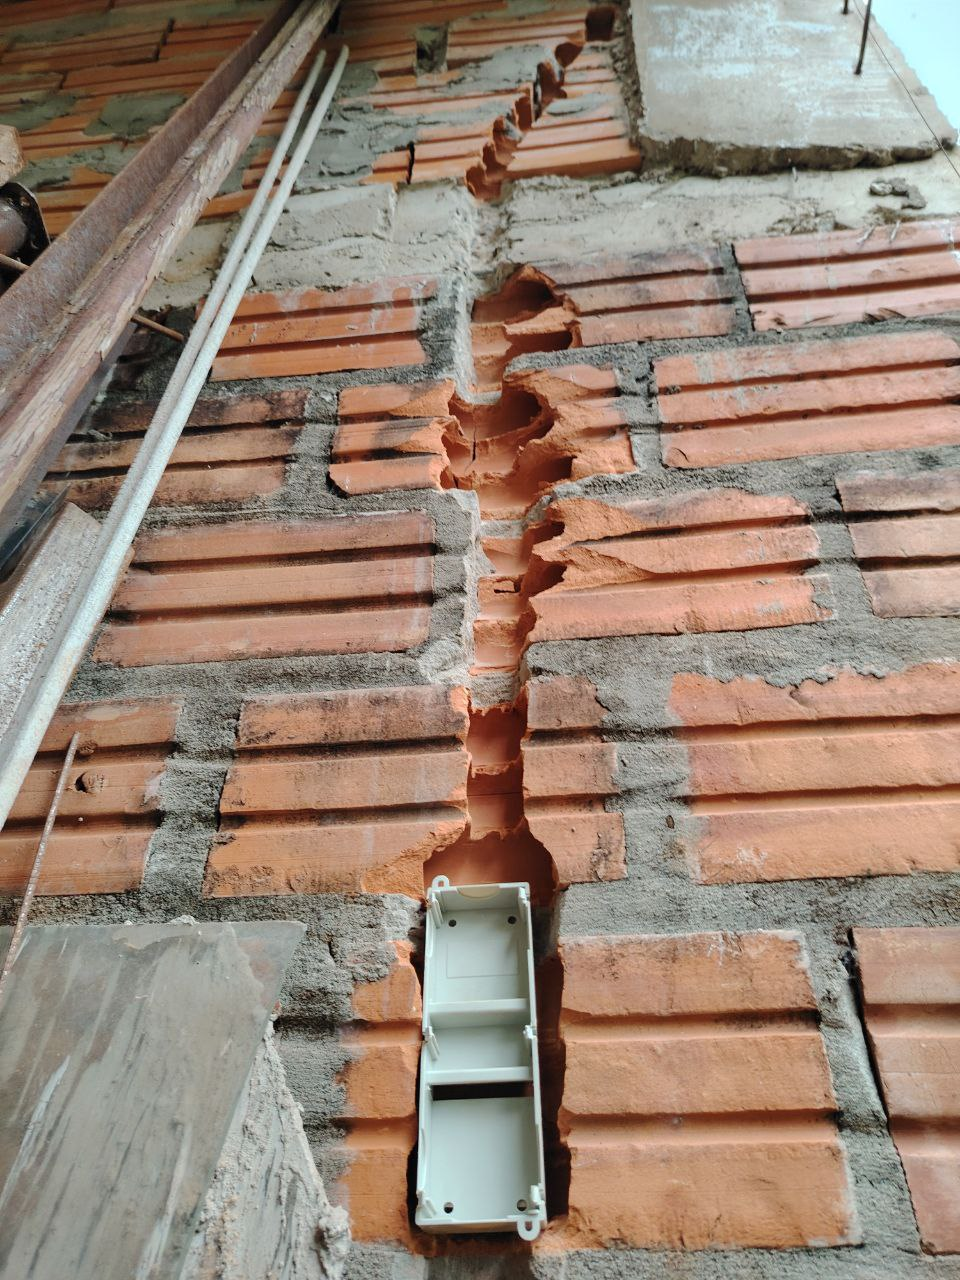
Dicha caja para la llave termica es la que se puede ver en esta fotografia y luego desde la misma se hace el tendido del cableado en donde colocaria los tomas y los puntos o sea la llave para apagar y encendender la luz del garage.
MUCHAS GRACIAS POR SEGUIRME Y LEERME, QUE TENGAN UN EXCELENTE DIA.
ENGLISH
Hello everyone, if anyone remembers, I’m still working on building the garage. The thing is, I’m doing it all by myself, without any help, so this time I’m installing a crossbeam at the back of the garage roof, where I’ll connect the electrical wiring to power everything in the garage and provide lighting. I’m taking advantage of the cloudy weather since it’s not too hot.
Having located the spot where I would mount the crossarm—which I assembled from two 15 x 15-inch pipes—I then painted it black and added two porcelain connectors for the electrical cable to run down, making it more convenient.
After plugging the extension cord into the outlet, plug in the electric drill, attach the masonry bit for drilling concrete, position the bracket, mark the holes, drill them, insert the plugs, then mount the bracket and tighten the bolts securely to hold everything in place.
As you can see in this photo, friends, I’m working very comfortably with the ladder I invented—I built it myself, and it’s really comfortable. So I tightened the bolts with a wrench, and the crossbar is now perfectly anchored.
Well, in this photograph you can see very clearly how it ended up, bolted to the concrete column. The thing is, it has to be really well secured—I’m saying that because of the tropical storms and strong winds.
So, with the crosspiece already mounted, I proceeded to chisel the wall where I would place the curved pipe, thru which the electrical cable would pass to the box where I would install the thermal switch.
That circuit breaker box is the one you can see in this photograph, and from it the wiring is run to where I would install the outlets and switches—that is, the switch to turn the garage light on and off.
Thank you so much for following me and reading my posts. Have an excellent day.