
Cintillo para niñas.
Headband for girls.
Hola amigos, espero que estén muy bien. Deseo que tengan un excelente día hoy y siempre. Yo soy Lelys y quiero darles la bienvenida a mi blog. El día de hoy quiero mostrarles el proceso para decorar un cintillo plástico y convertirlo en un hermoso accesorio para el cabello. Los cintillos son también conocidos como bincha o diadema; los utilizamos para lucir más bellas y para recoger el cabello del frente de nuestra cabeza y tenerla despejada.
Materiales/Materials.
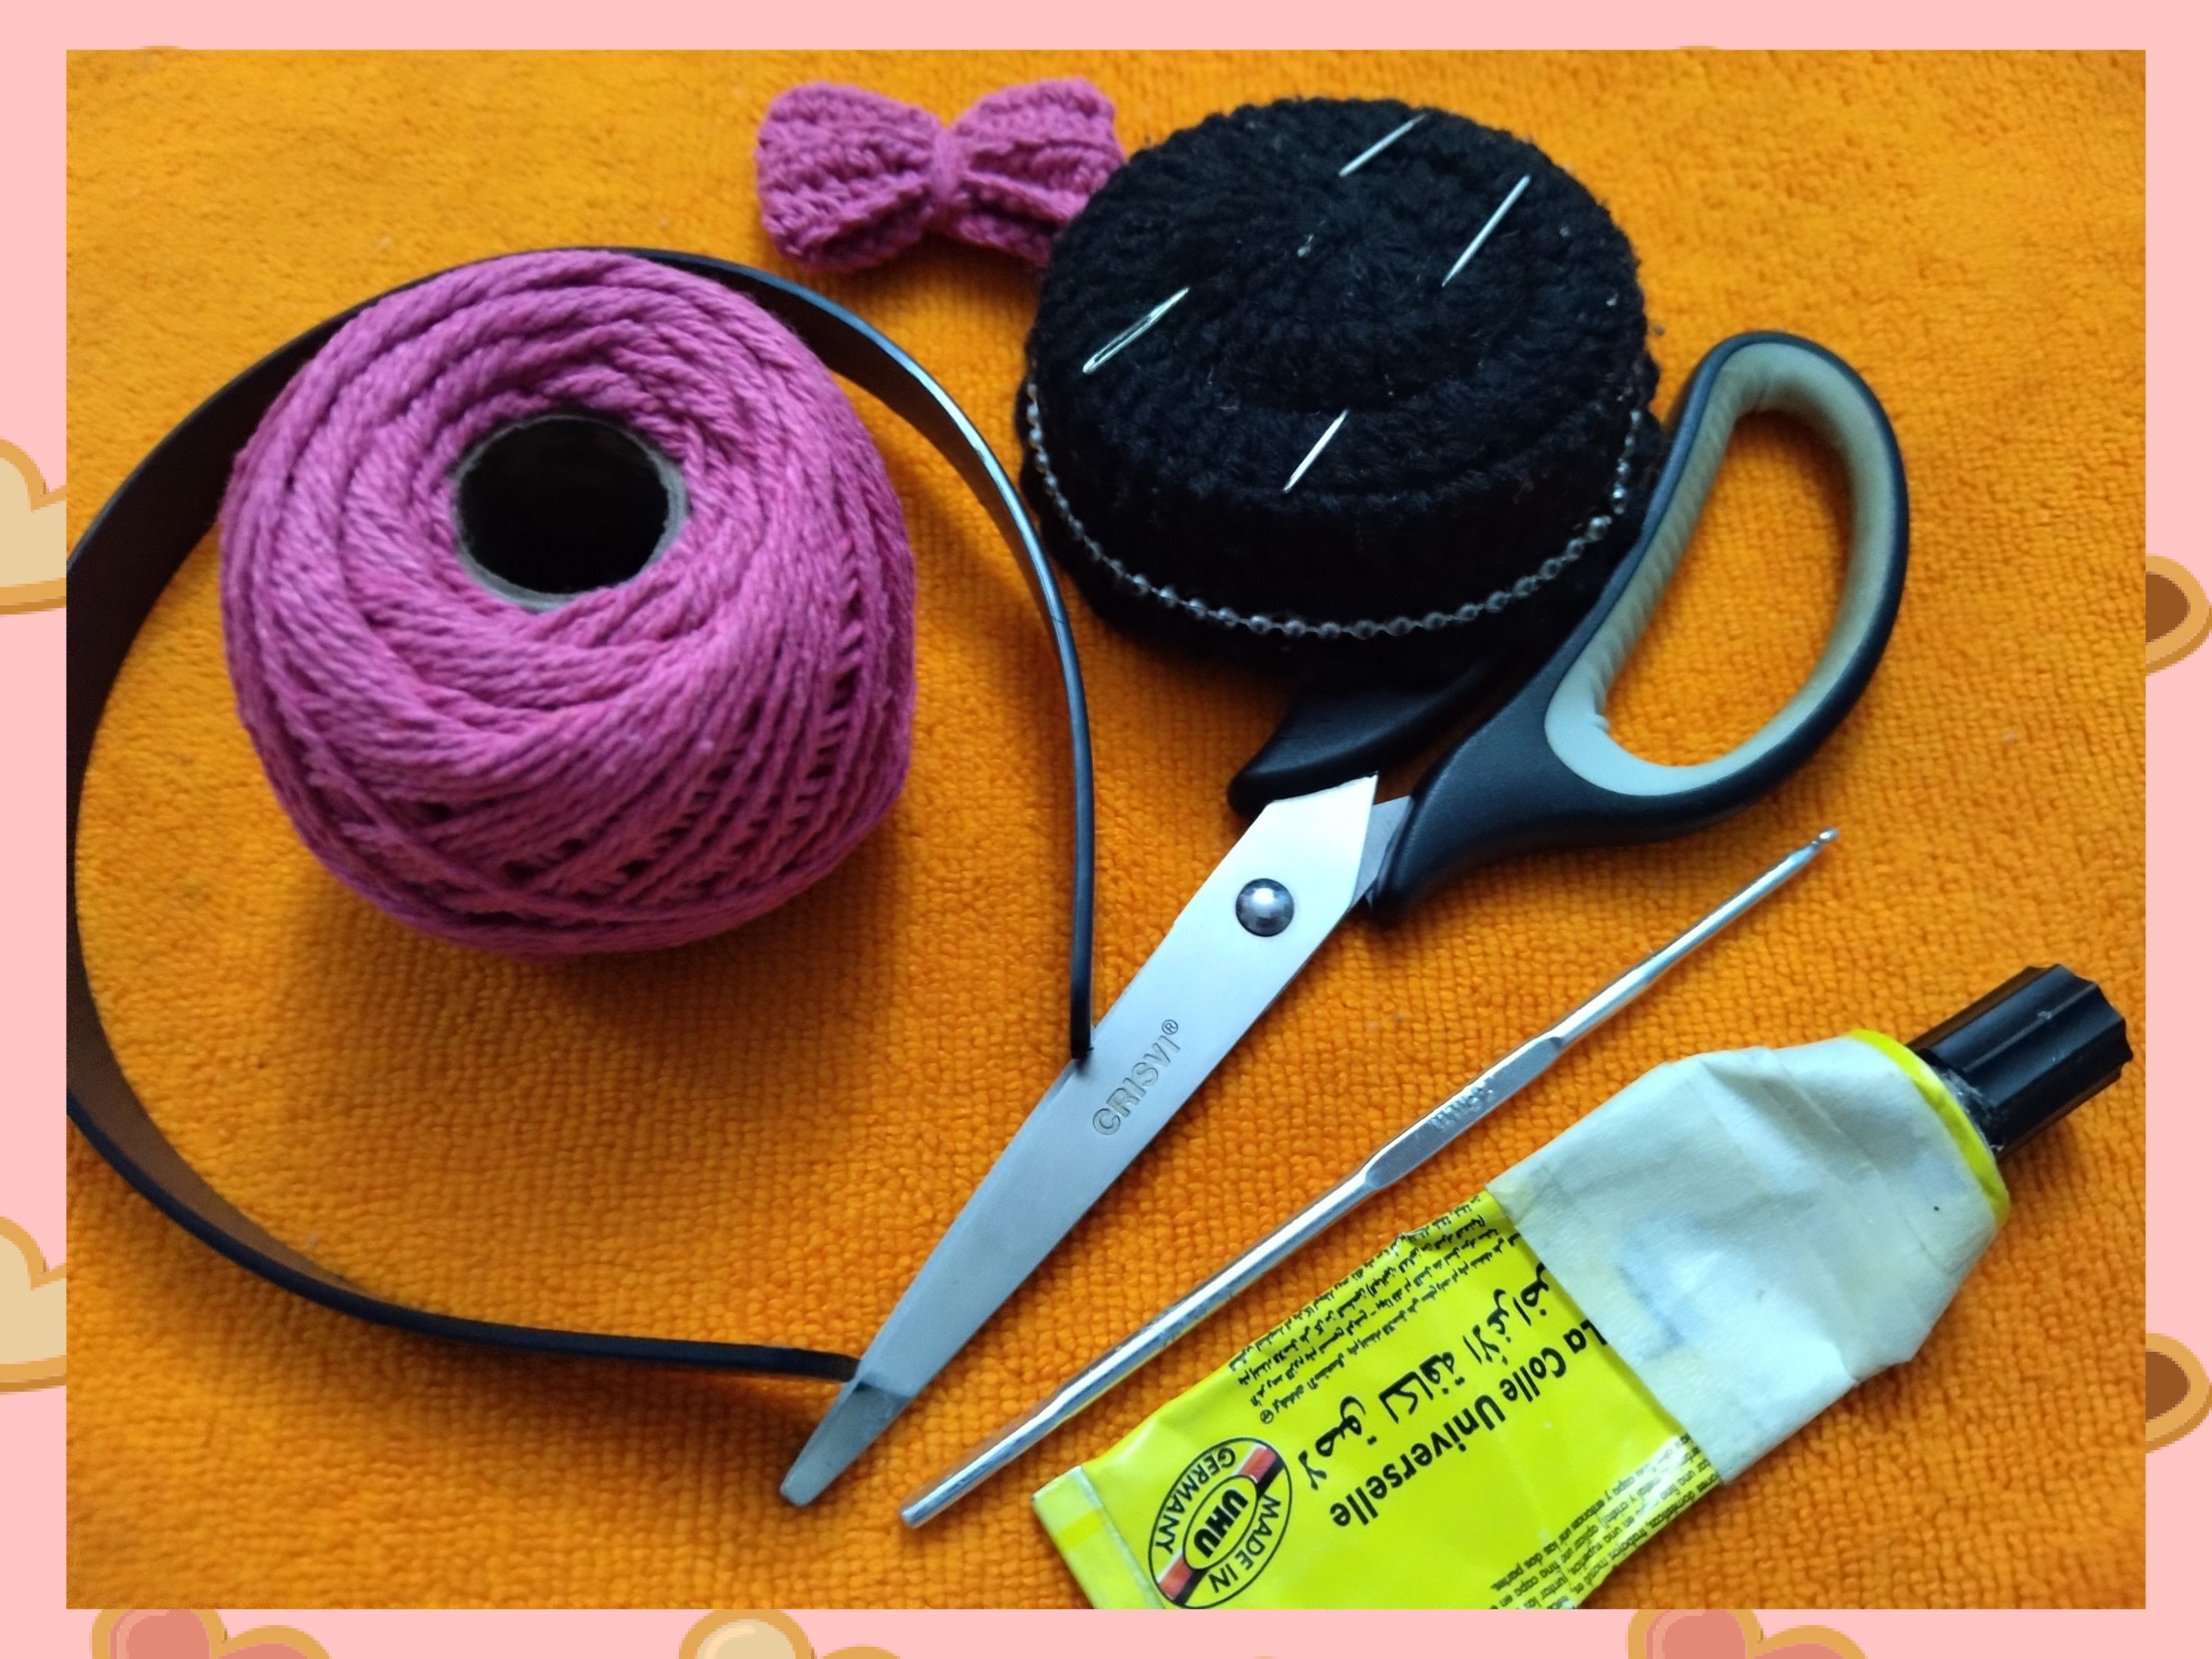
👩🏽🦰 Para realizar este bello proyecto necesité los siguientes materiales: * Hilos pabilos color fucsia. * Lazo tejido con hilo pabilo color fucsia. * Aguja de crochet de 2,25mm. * Cintillo plástico liso de 1,50 cm. * Aguja lanera. * Tijeras. * Pegamento (opcional)
Hello friends, I hope you are very well. I wish you a great day today and always. I am Lelys and I want to welcome you to my blog. Today I want to show you the process to decorate a plastic headband and turn it into a beautiful hair accessory. The headbands are also known as bincha or headband; we use them to look more beautiful and to collect the hair in the front of our head and have it clear.
Materials.
👩🏽🦰 To make this beautiful project I needed the following materials: * Fuchsia colored wick yarn. * Loop woven with fuchsia colored wick yarn. * Crochet needle of 2,25mm. * Plain plastic ribbon of 1,50 cm. * Wool needle. * Scissors. * Glue (optional)
Procedimiento/Procedure.
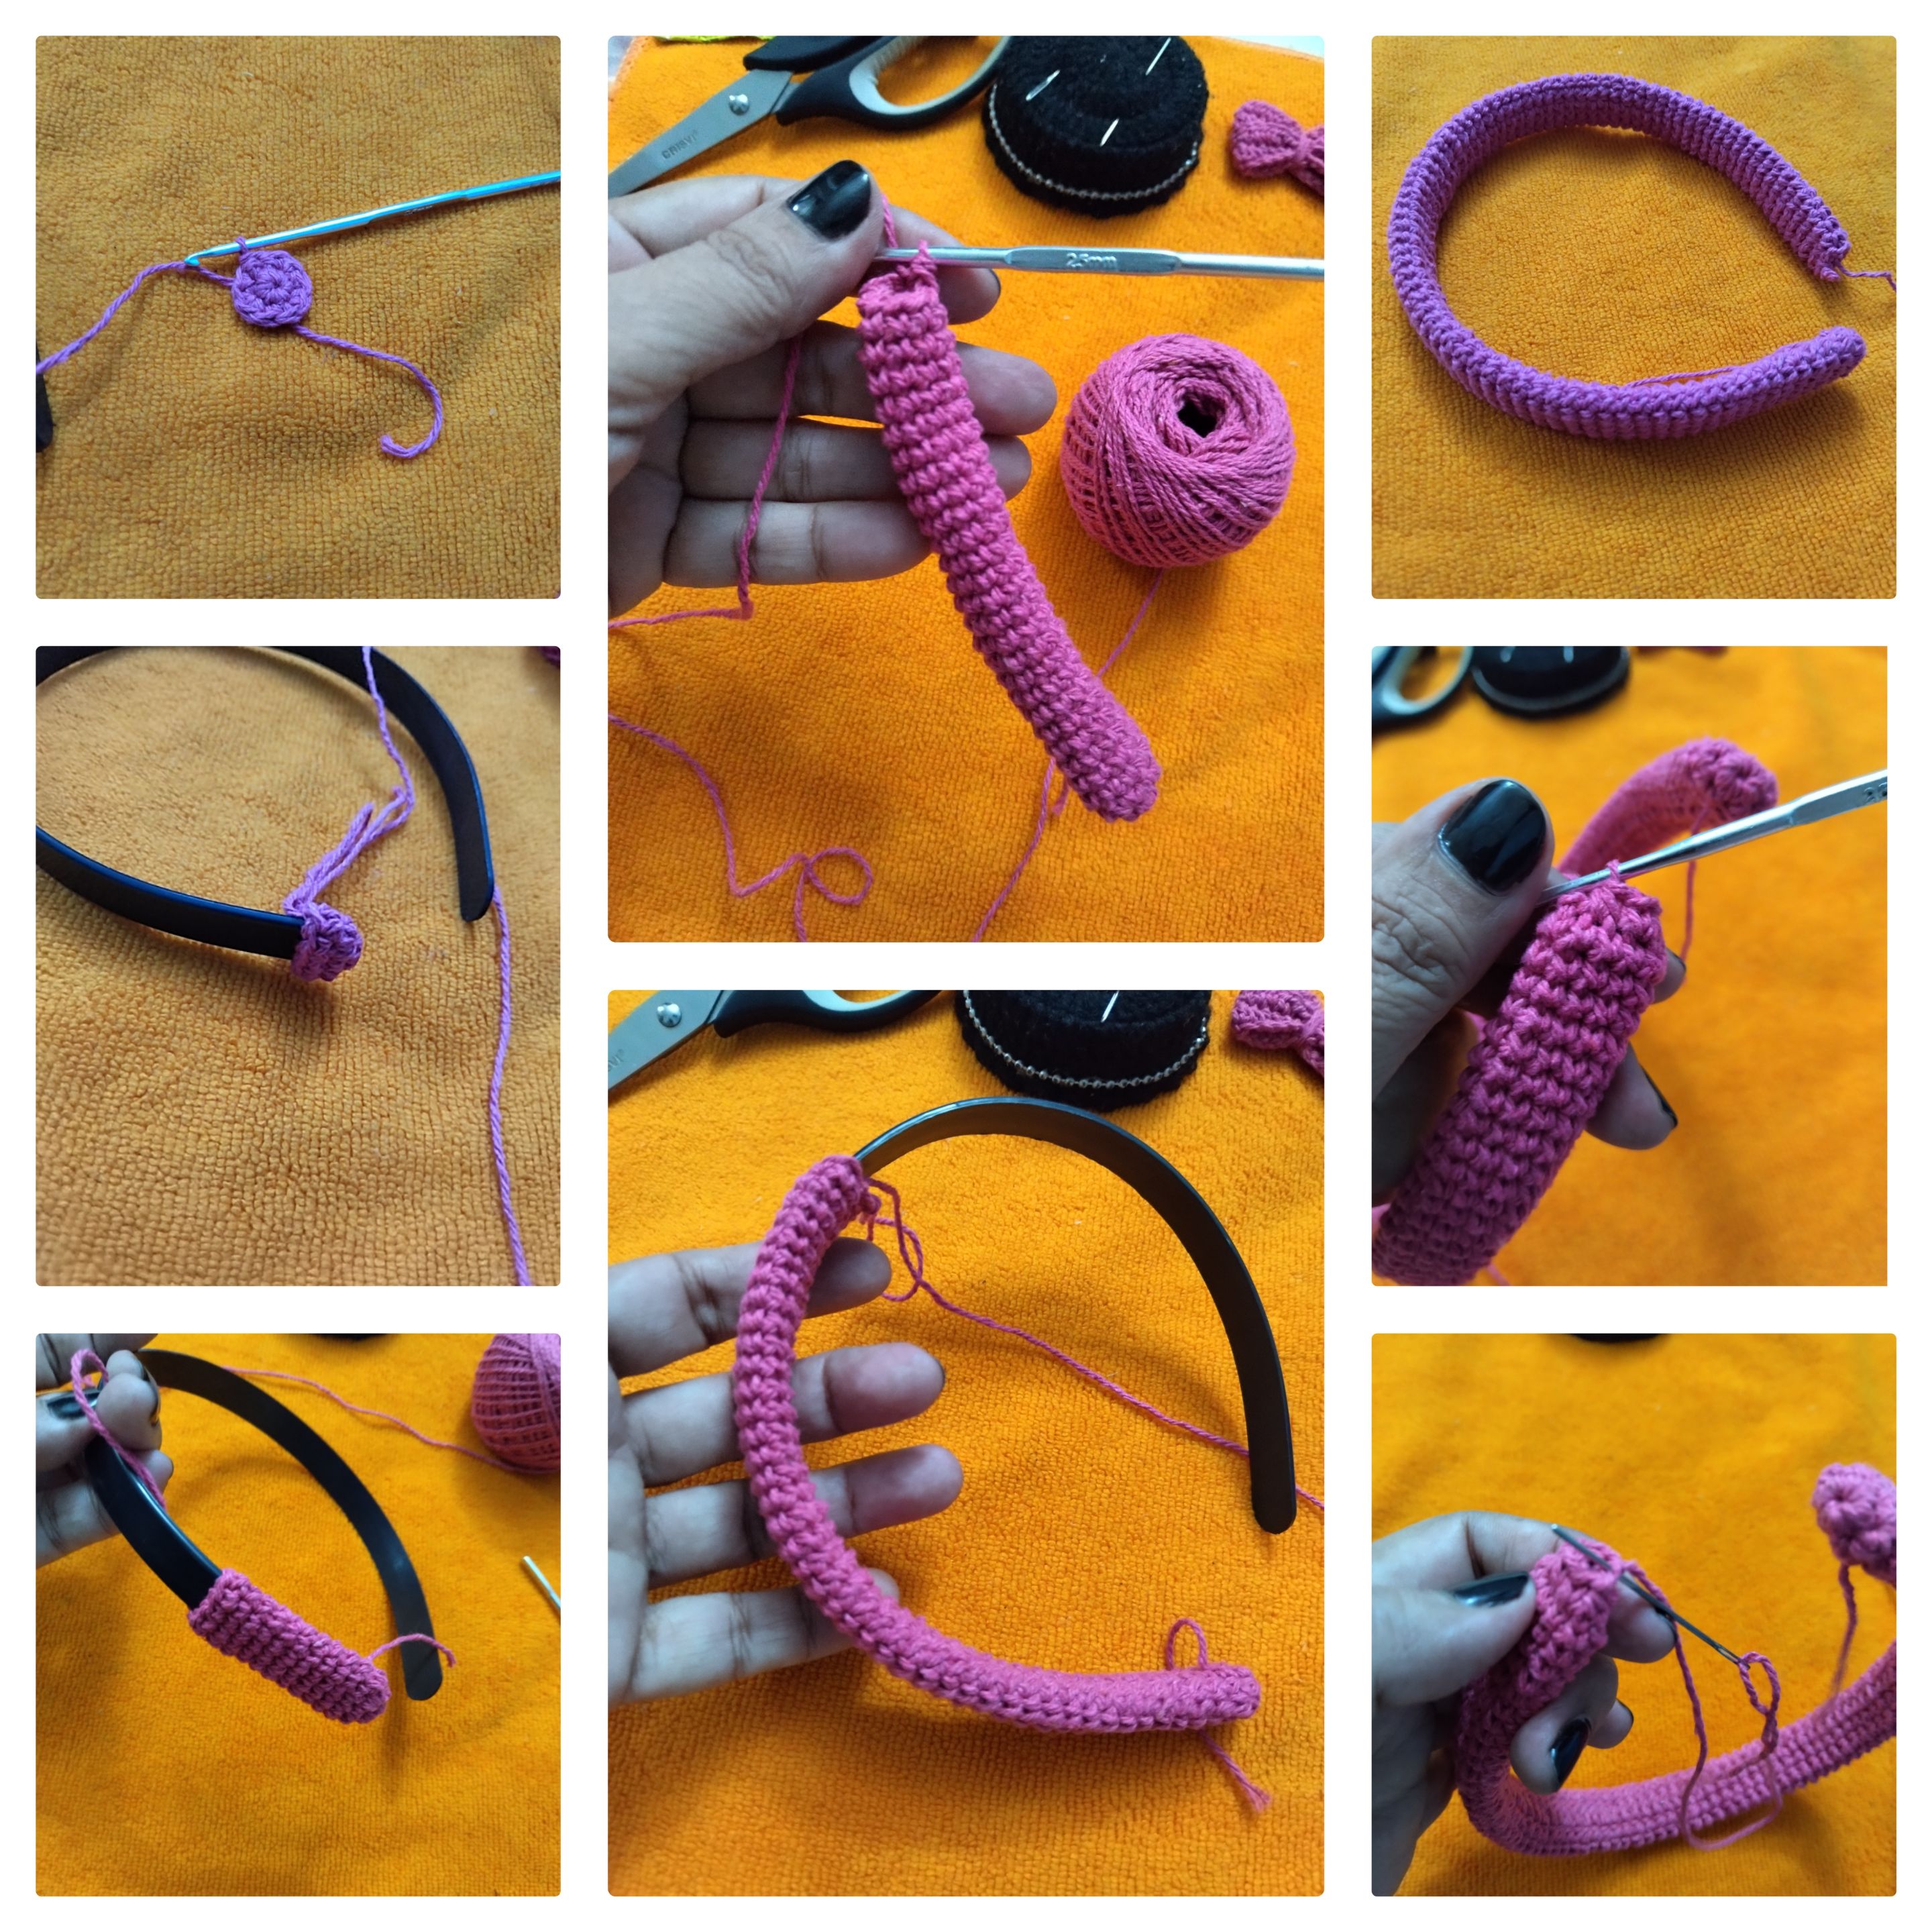
👩🏽🦰 Para elaborar este hermoso cintillo vamos a seguir los siguientes pasos: * Tomamos el hilo pabilo color fucsia y el gancho o aguja de crochet de 2,25mm, iniciamos tejiendo 6pb en un am. Seguidamente tejemos 1pb-1aum en la próxima vuelta. * Vamos a continuar tejiendo 1pb-1aum hasta tener un tejido en forma tubular que cubra todo el cintillo plástico. Les recomiendo ir midiendo. * El cintillo que utilicé para realizar esta muestra es de 1,50cm de ancho. Al principio había tejido 12pb, pero al medirlo me di cuenta que le iba a quedar muy ancho, entonces destejí y comencé de nuevo la vuelta tejiendo 1pb-1aum para tener solamente 9pb por todas las vueltas que tejí. * Una vez terminado el tejido tubular metemos el cintillo con el propósito de que lo cubra totalmente. * En el extremo que nos queda todavía abierto vamos a tejer 1pb-1dism para ir cerrando y terminamos de cerrar los 6pb que quedan con la aguja lanera haciendo un cierre perfecto.
👩🏽🦰 To make this beautiful headband we will follow the following steps: * We take the fuchsia colored wick yarn and the 2.25mm crochet hook or needle, we start by knitting 6pb in one am. Next we knit 1pb-1aum in the next row. * We will continue knitting 1pb-1aum until we have a tubular weave that covers the entire plastic headband. I recommend measuring. * The headband I used to make this sample is 1,50cm wide. At the beginning I had knitted 12pb, but when I measured it I realized that it was going to be too wide, so I unknitted it and started again the round knitting 1pb-1aum to have only 9pb for all the rounds I knitted. * Once the tubular weave is finished, we insert the headband so that it covers it completely. * In the end that is still open we are going to knit 1pb-1dism to close it and we finish closing the remaining 6pb with the knitting needle making a perfect closure.
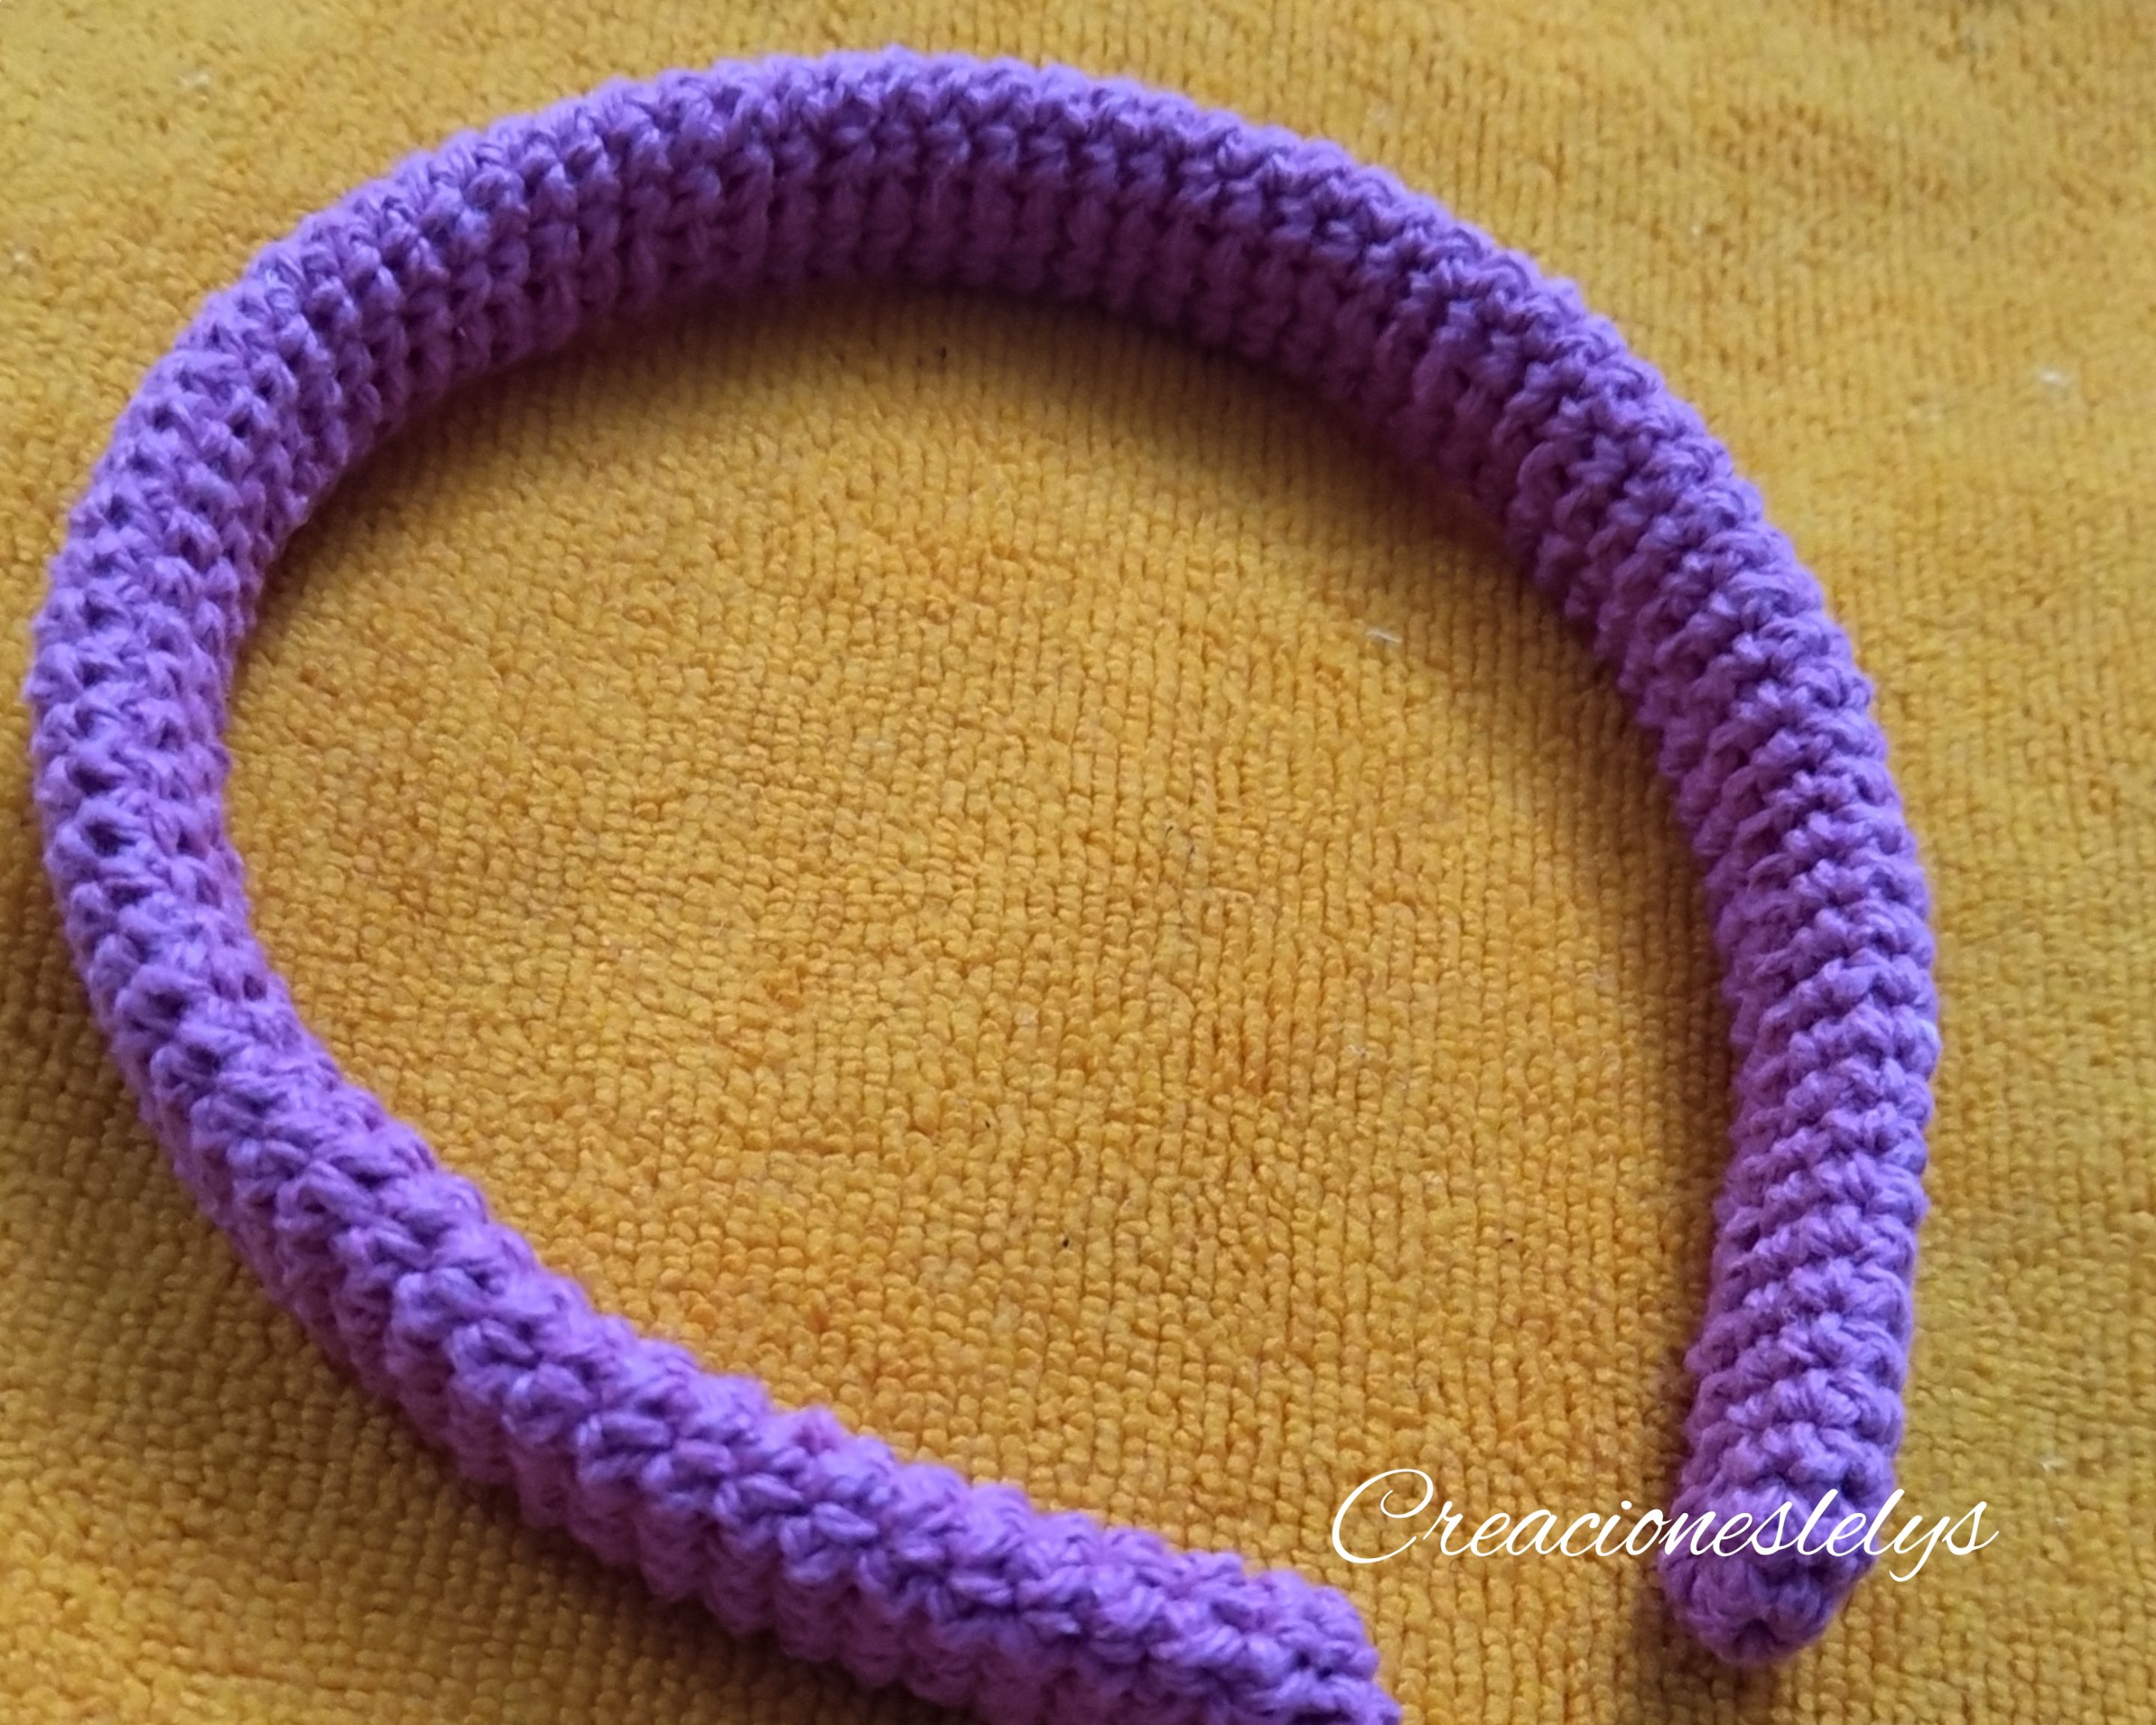
👩🏽🦰 Así debe verse ya forrado totalmente el cintillo. La verdad es que se gasta hilo, pero se ve súper lindo el cintillo forrado.
👩🏽🦰 This is how the headband should look when it is fully lined. The truth is that it uses up yarn, but the lined headband looks super nice.
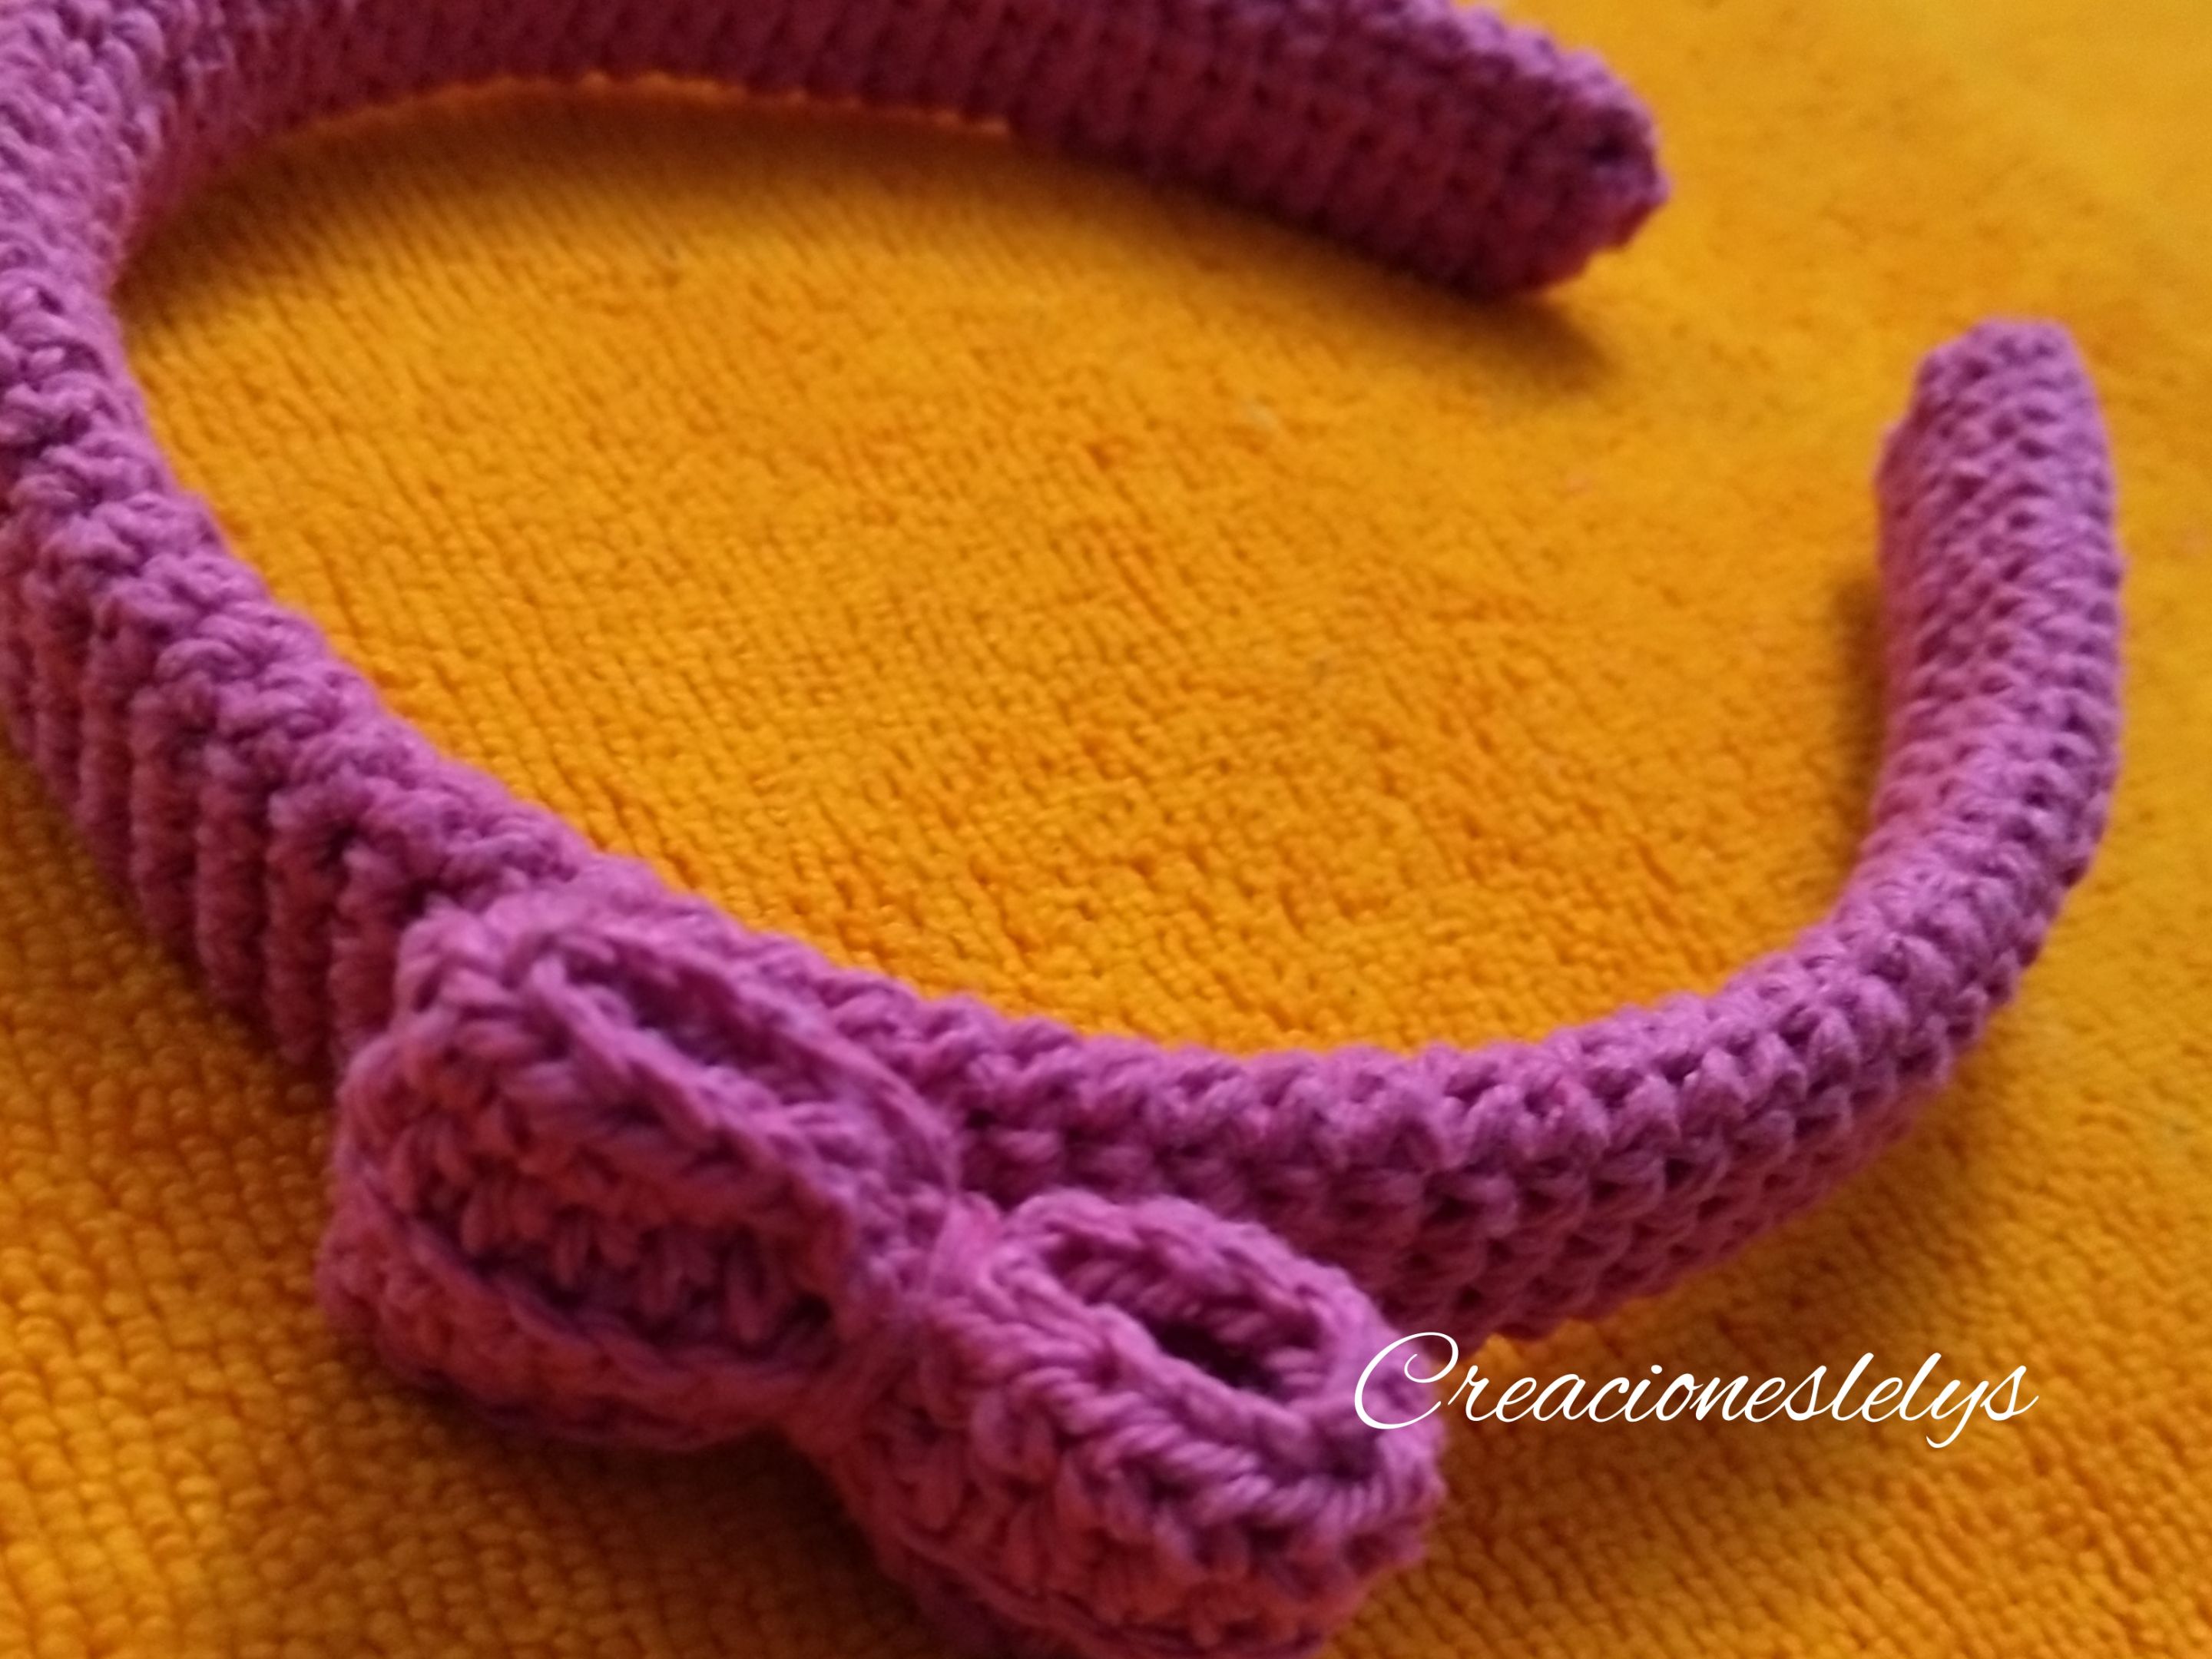
👩🏽🦰 El siguiente paso luego de forrar el cintillo es decorarlo. Hace unos días les compartí que estoy elaborando lazos tejidos para usar en diferentes proyectos, en esta ocasión utilicé unos de los lazos más pequeños. * Tomé el lazo y calculé más o menos la altura en el cintillo donde iba a pegarlo o coserlo. Yo preferí coserlo, pero usar pegamento también es una opción. Ayudándome con la aguja lanera tomé un trocito de hilo fucsia y fui fijando el lazo sobre el forro del cintillo. * Una vez que el lazo quedó fijo corte el hilo y lo escondí por dentro del tejido para que no se vea. Y de esta manera queda terminado este lindo proyecto.
👩🏽🦰 The next step after lining the headband is to decorate it. A few days ago I shared with you that I am making woven ribbons to use in different projects, this time I used one of the smaller ribbons. * I took the ribbon and calculated more or less the height on the headband where I was going to glue or sew it. I preferred to sew it, but using glue is also an option. With the help of the wool needle I took a small piece of fuchsia thread and fixed the bow on the headband lining. * Once the bow was fixed, I cut the thread and hid it inside the fabric so it wouldn't show. And this is the end of this beautiful project.
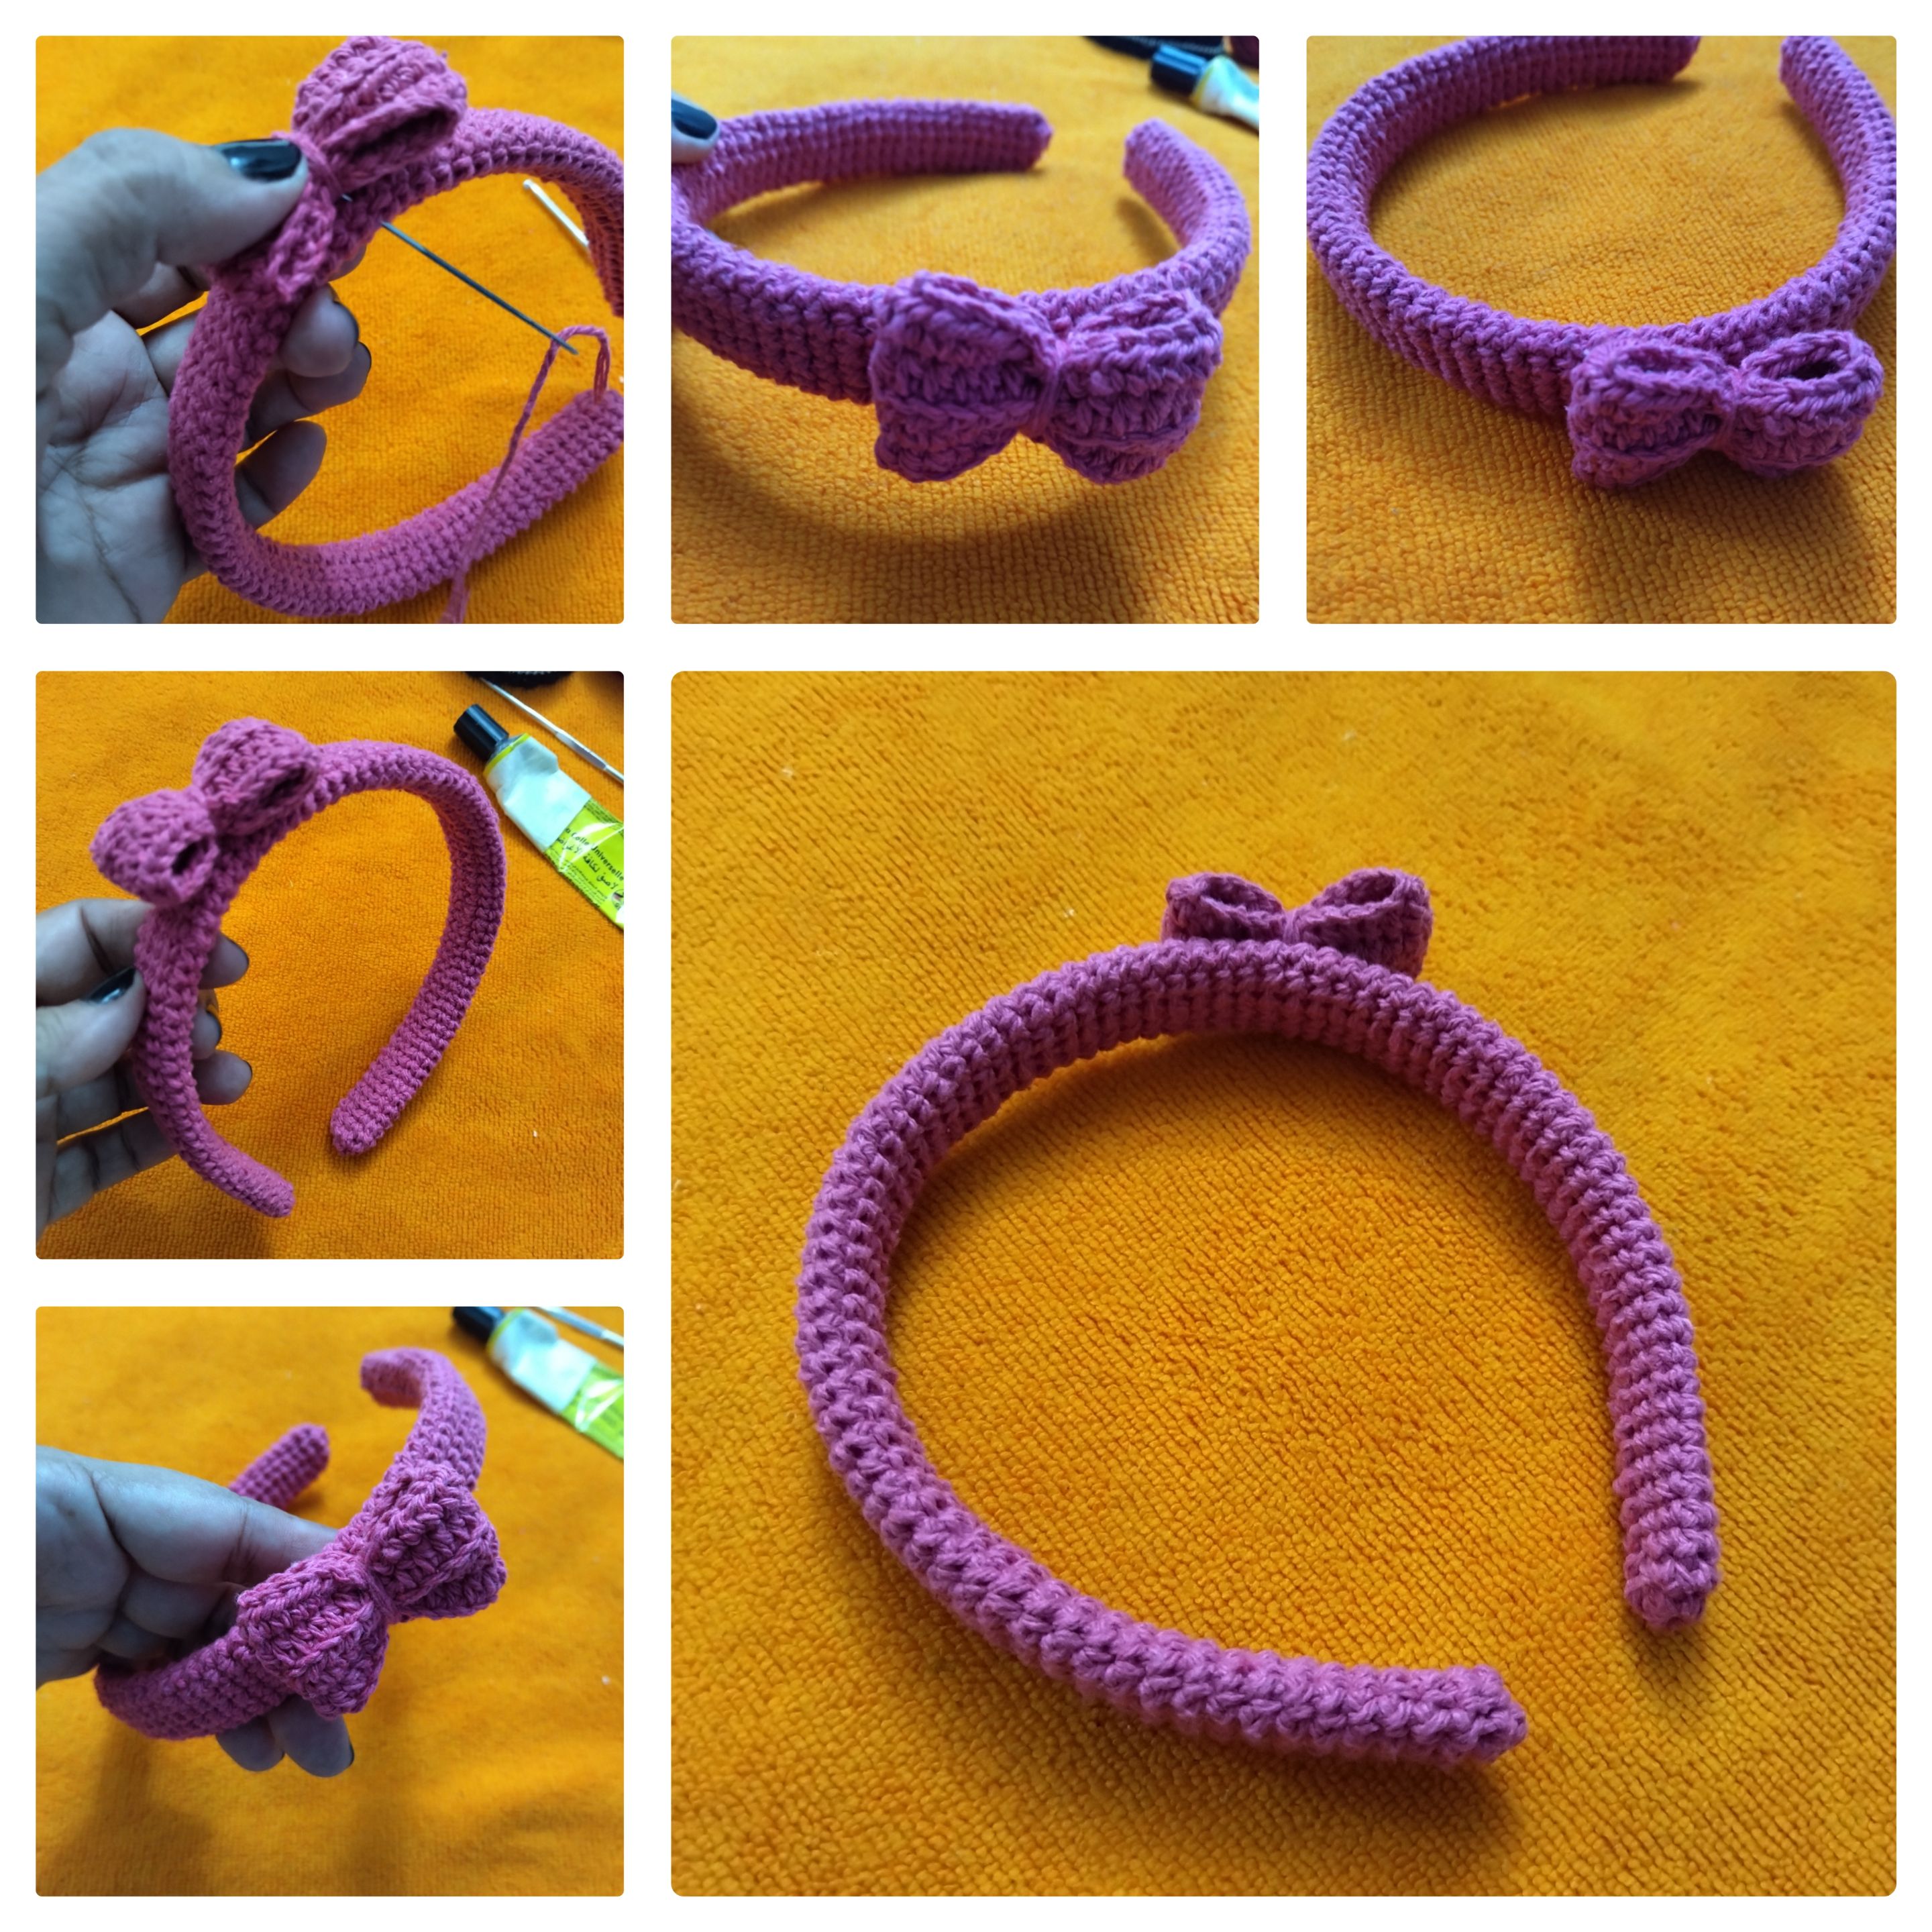
👩🏽🦰 Se ve muy bonito el cintillo. Este cintillo formará parte de un juego de accesorios que estoy preparando para niñas en edad escolar. Espero pronto tener elaborados los demás elementos que formarán el kit. Por ahora seguiré elaborando los lazos para luego empezar a colocarlos en los diferentes materiales que usaré; como pueden ver los lazos más pequeños que estoy tejiendo son para la decoración de los cintillos. ¿Qué les parece este proyecto? ¿Se ve bonito el cintillo? Me gustaría leer tu apreciación, déjame un comentario al respecto.
👩🏽🦰 The headband looks very nice. This headband will be part of a set of accessories that I am preparing for school girls. I hope to have the other elements that will make up the kit ready soon. For now I will continue making the ribbons and then I will start placing them on the different materials I will use; as you can see the smaller ribbons I am knitting are for the decoration of the headbands. What do you think of this project? Does the headband look pretty? I'd love to read your feedback, leave me a comment.
Espero que les haya gustado esta creación. Muchísimas gracias por el apoyo. Todas las fotos son de mi propiedad. Edité con Polish. Usé el traductor de Deelp. Bendiciones 🙏🏽. Hasta un próximo proyecto 💕
I hope you liked this creation. Thank you very much for your support. All photos are my property. I edited with Polish. I used Deelp translator. Blessings 🙏🏽. Until a next project 💕