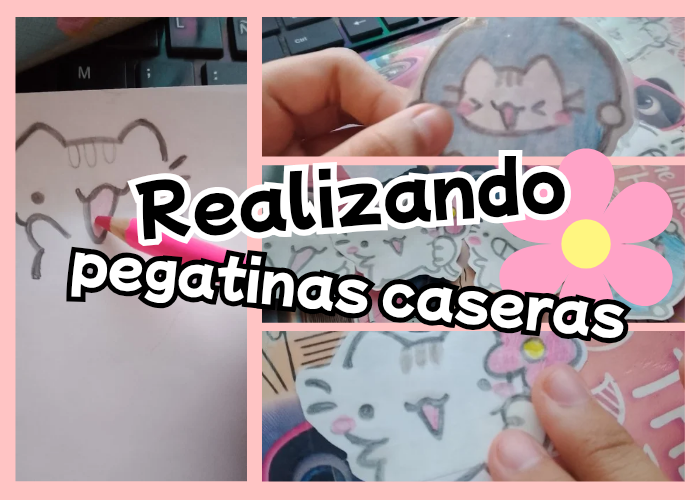
¡Holii hiver's! ¿Que tal? Hoy les voy a enseñar como realicé unas pegatinas hechas en casa con materiales fáciles de conseguir y que sirven para decorar cualquier cosa como: cuadernos, libros, telefonos, filtros y muchas cosas más. No por ser niños no podemos hacer cosas bonitas, solo es cuestión de ir practicando, siempre hago éste tipo de cositas, mi mamá siempre me insiste en hacer actividades así porque dice que puedo motivar mi creatividad. Ahora si, les voy a mostrar el paso a paso para que los que quieran hacer se guíen por éste tutorial sencillo...
Los materiales son: Una hoja blanca tipo carta, creyones de madera, cinta plástica transparente, lápiz de dibujo HB, borrador, tijeras.
Procedimiento
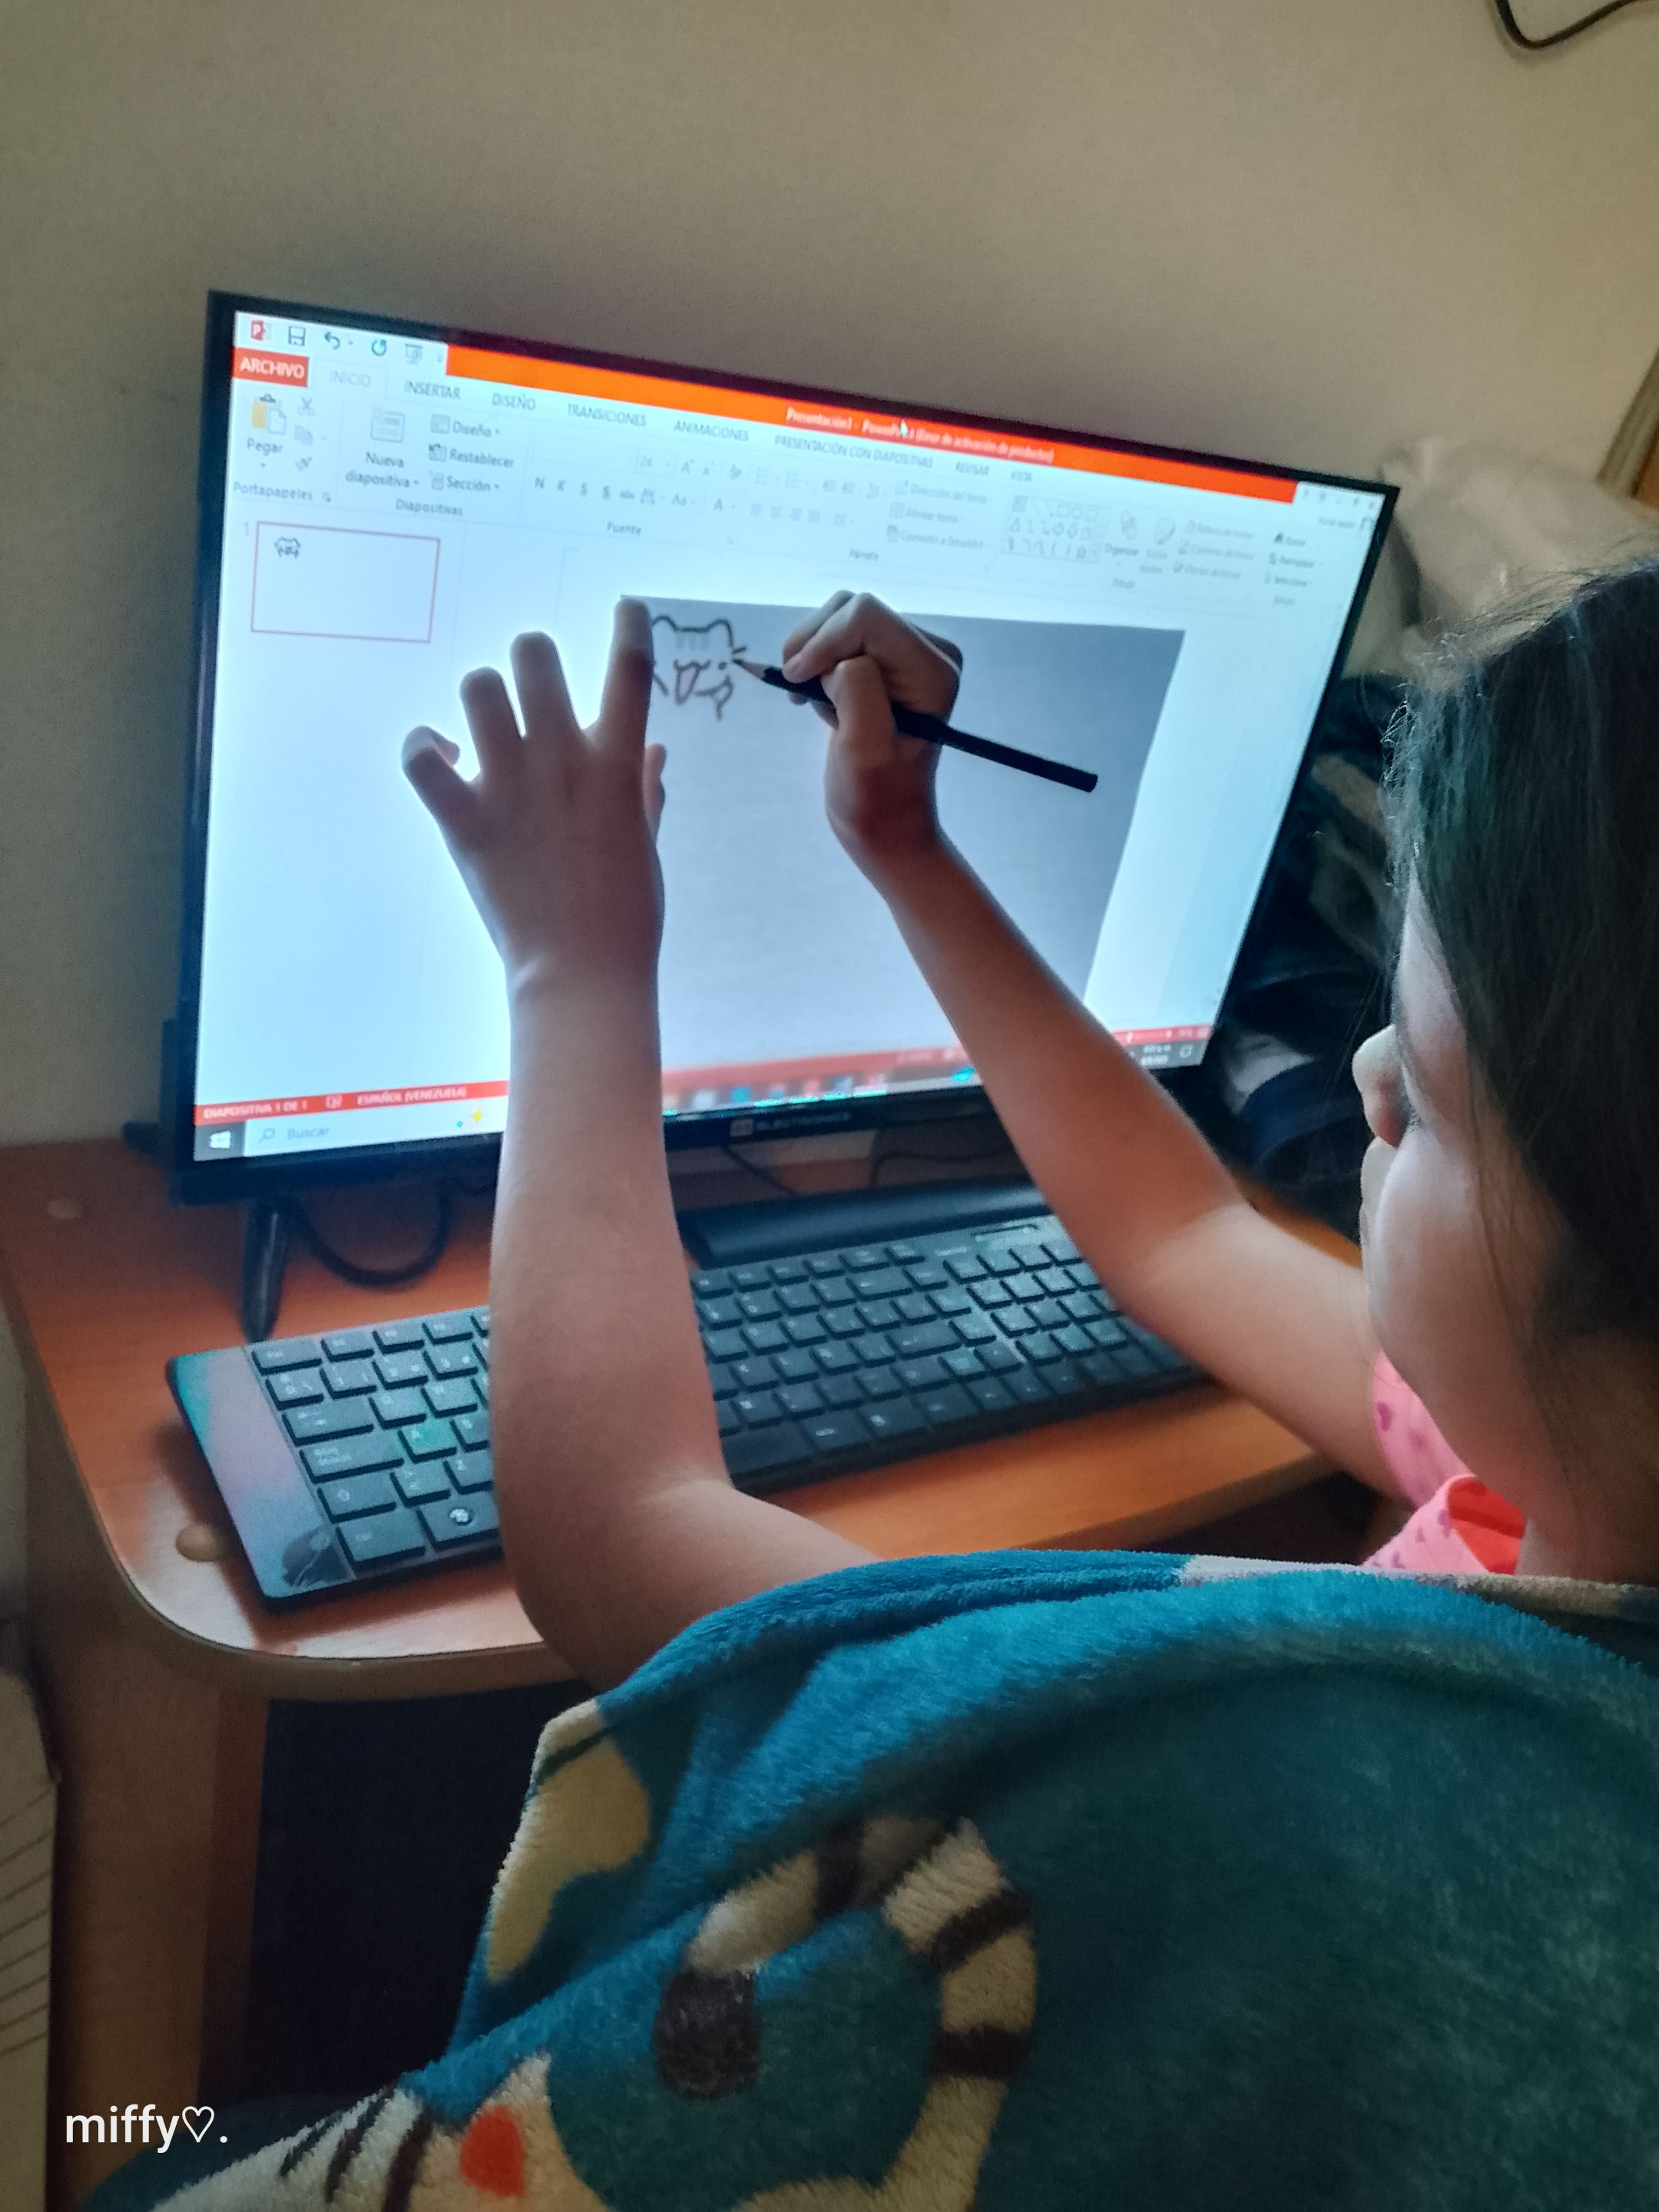
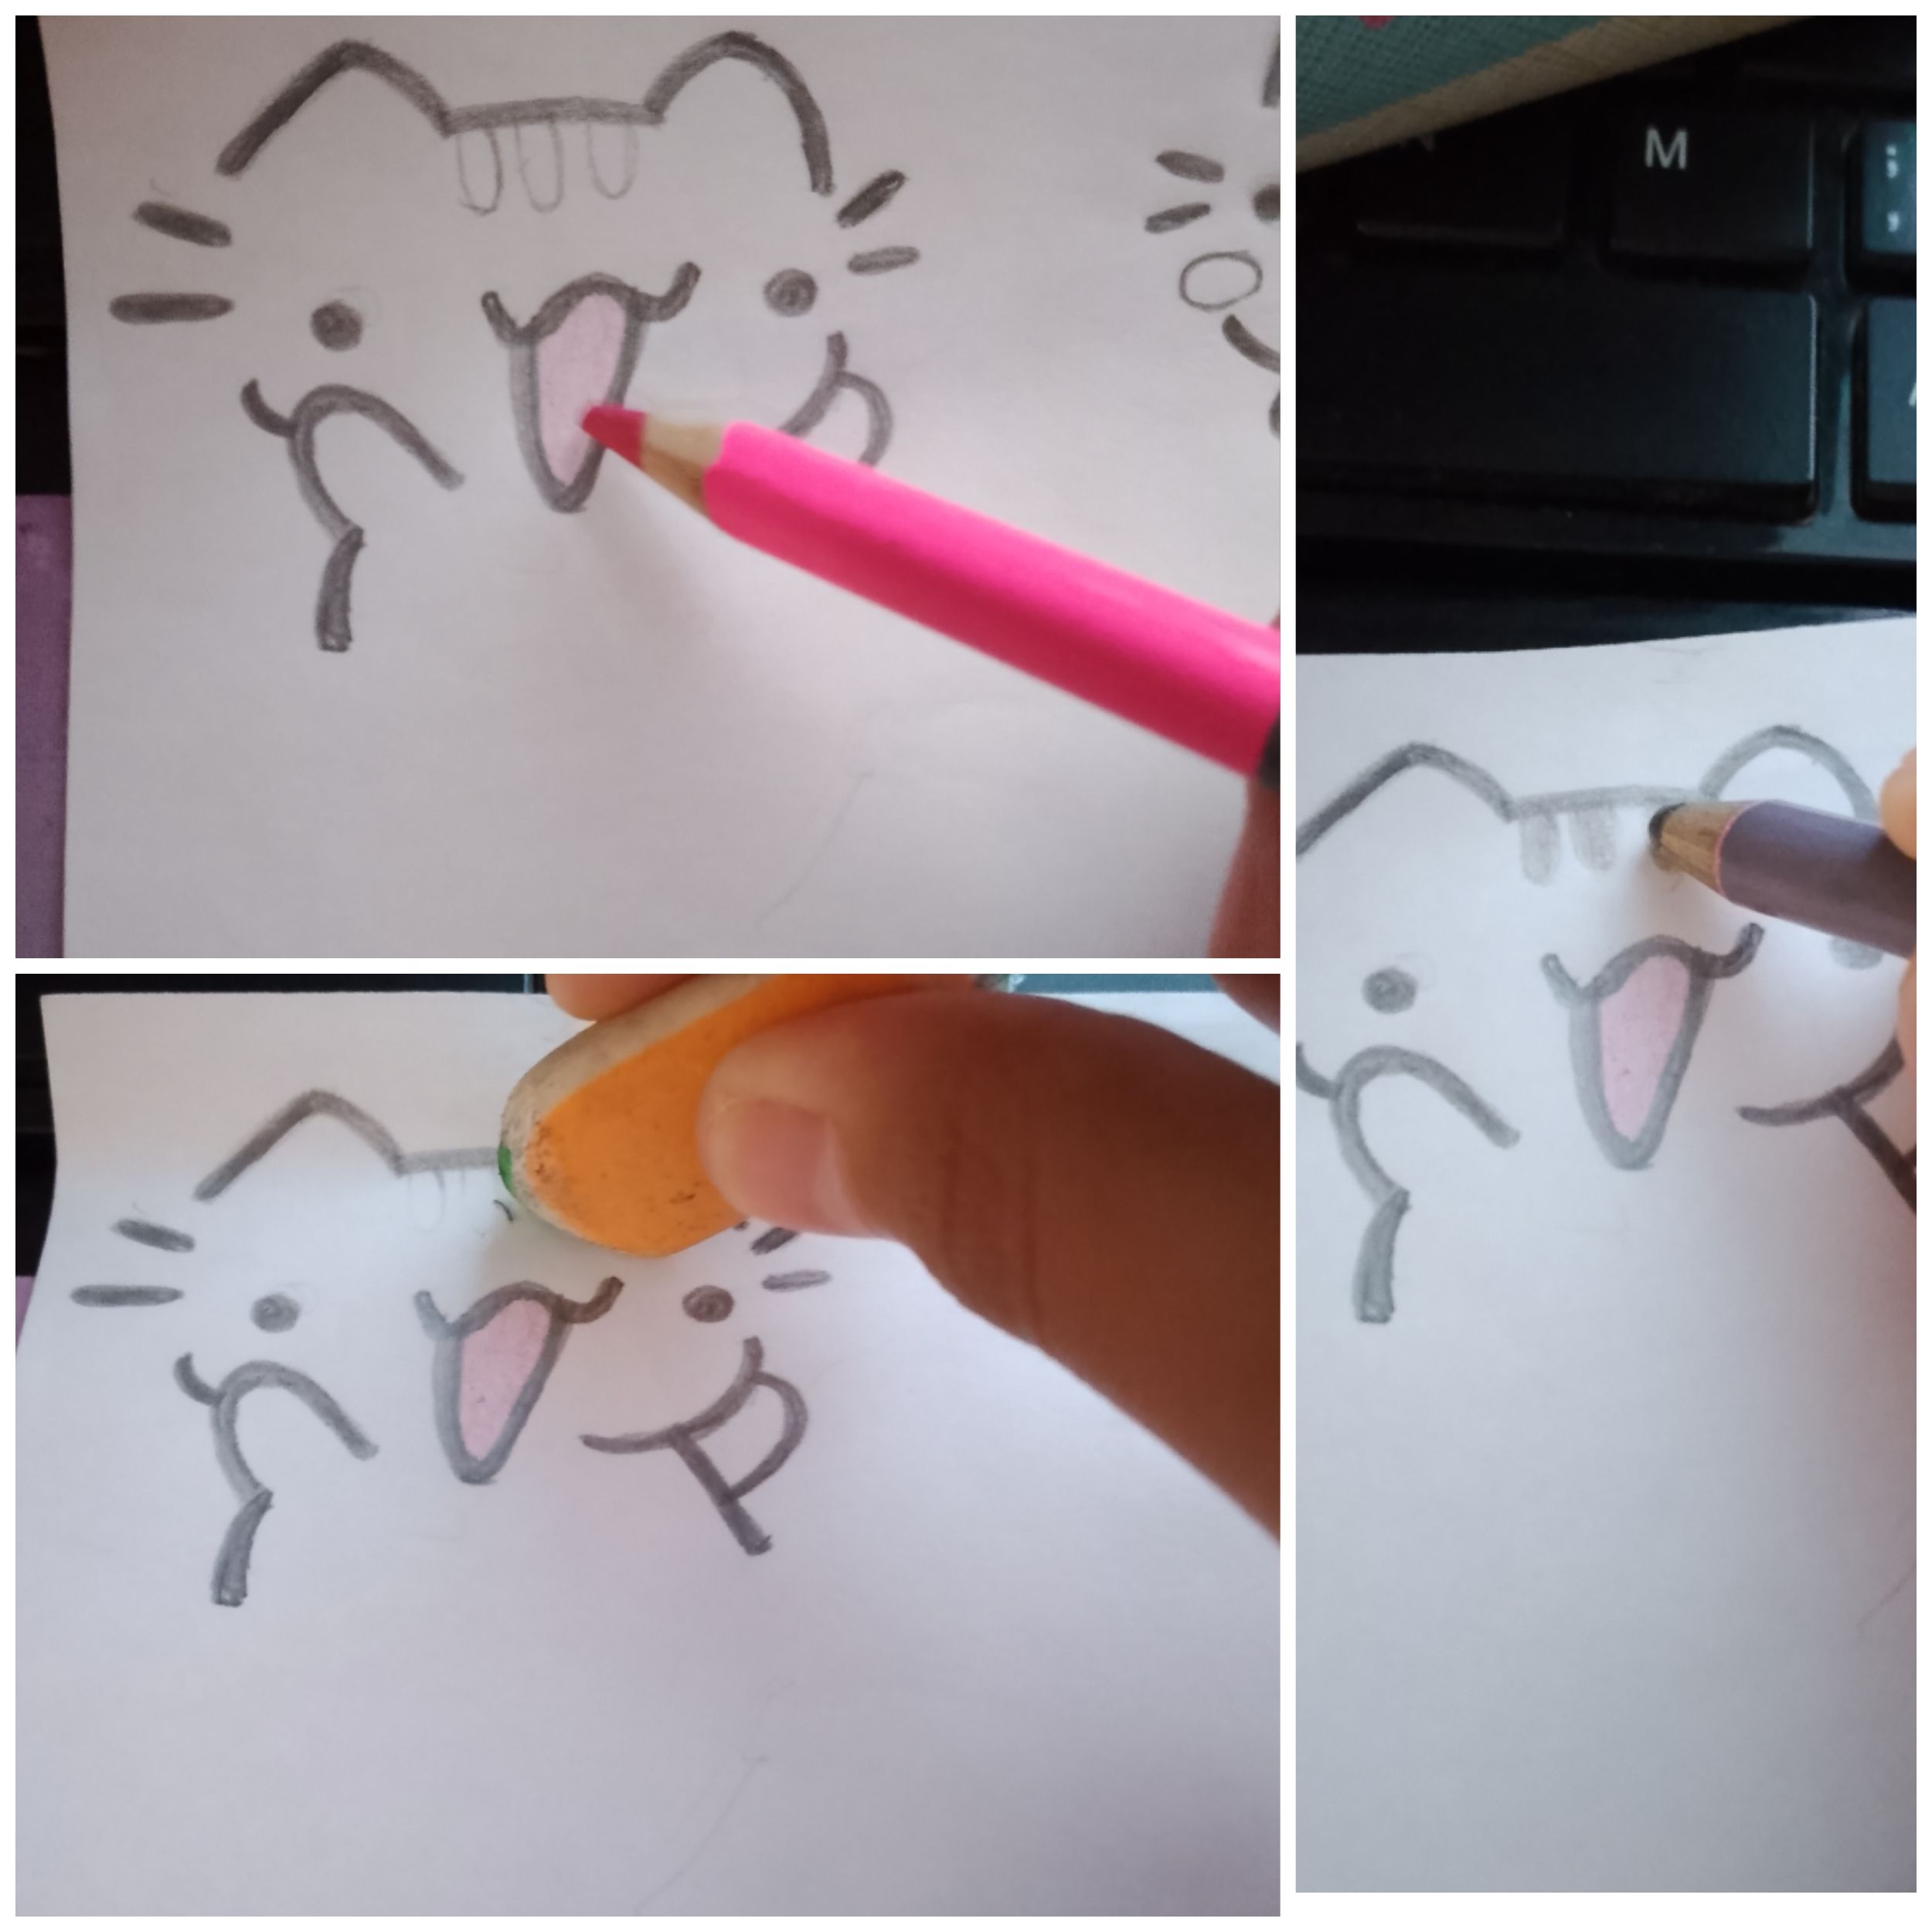
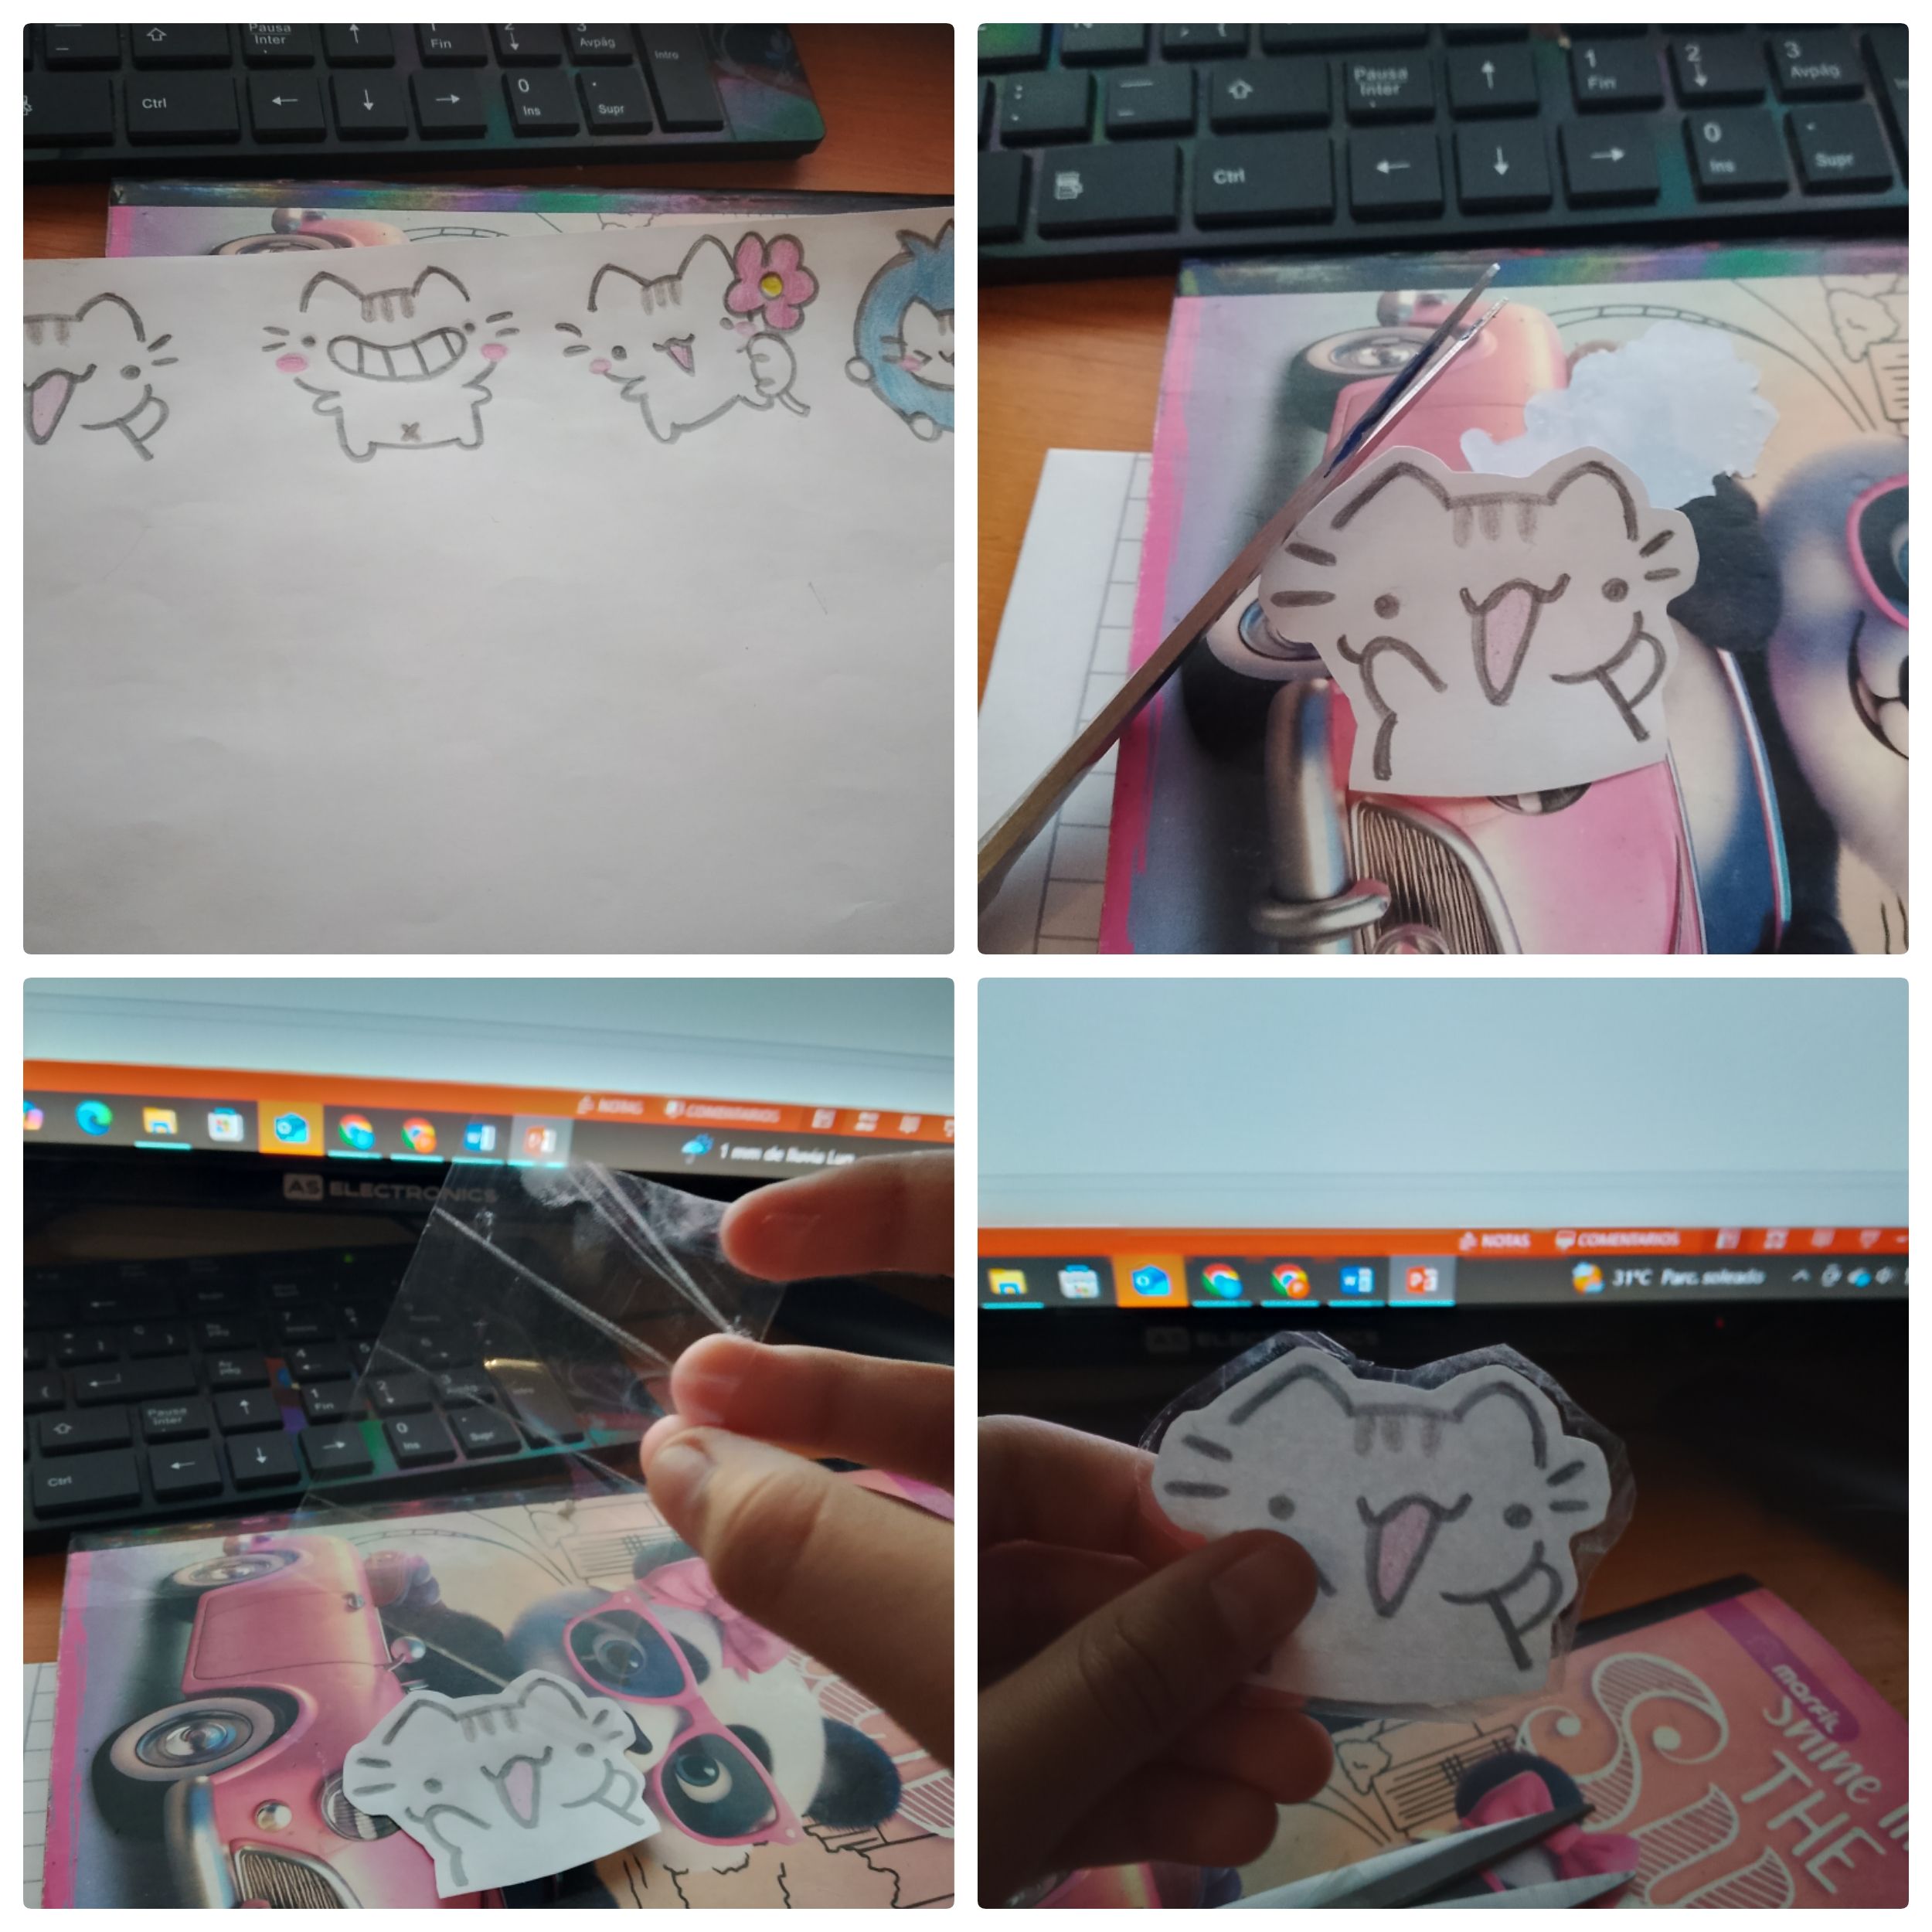
1. Primero elegí varios dibujos en Pinterest y los comencé a calquear en la computadora, siempre haremos los dibujos que más nos gusten, a mí me gustan mucho estos gatitos. 2. Repasé con lápiz todos los dibujos para hacer que el borde fuese mas grueso. 3. Después de repasar todos los bordes de los dibujos, comenzó el coloreado.
4. En el primer dibujo le di color a la boca del gato en un tono rosado claro, eso lo hace ver más tierno, después borre las rayas de la cabeza del gatito y las pinte de gris, borre la parte de las mejillas y las pinte de rosado claro, se ven bonitos. Este mismo procedimiento lo realice con todos los dibujos que había elegido, la idea es tener varias opciones, además me encantan estas etiquetas, siempre tengo varias guardadas porque las uso en mis cuadernos, quedan lindos.
5. Ahora corte los dibujos de los gatos dejando un borde blanco, 6. Después cubri con cinta plástica transparente los dibujos pegados a la parte del frente de un cuaderno para que no se le quite la pega a la cinta. La cinta plástica los protege, quedan muy bonitos.
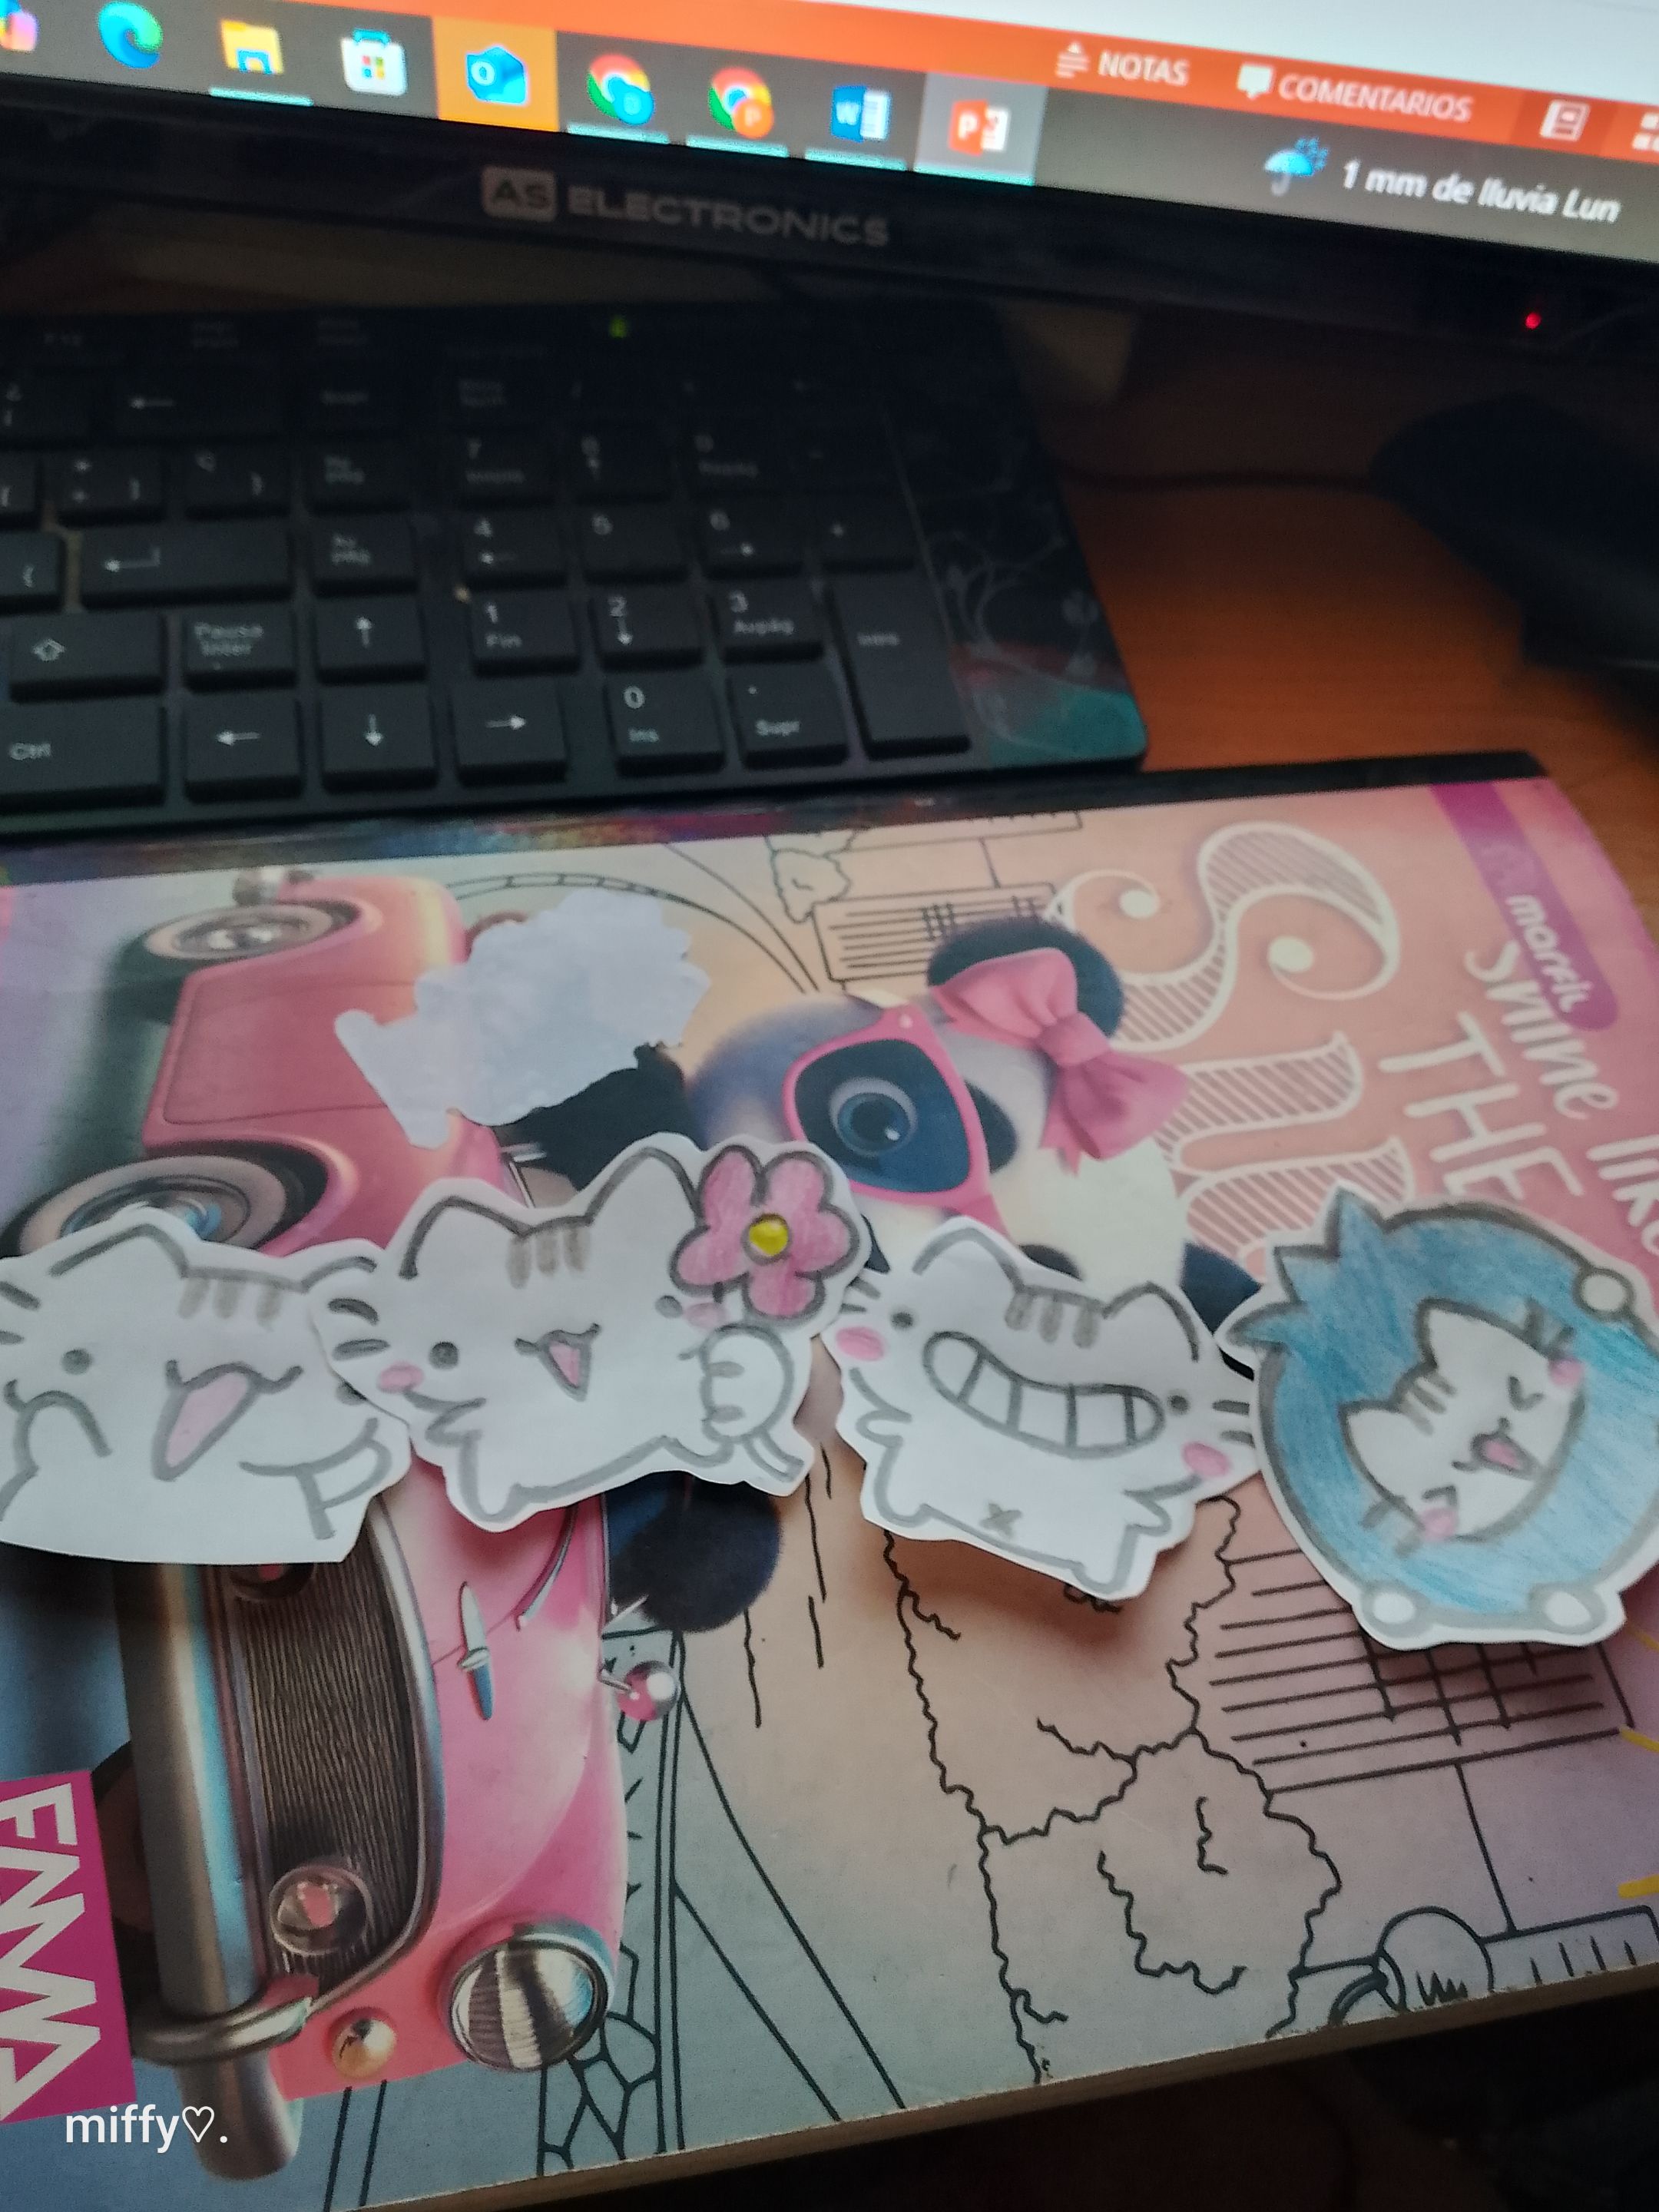
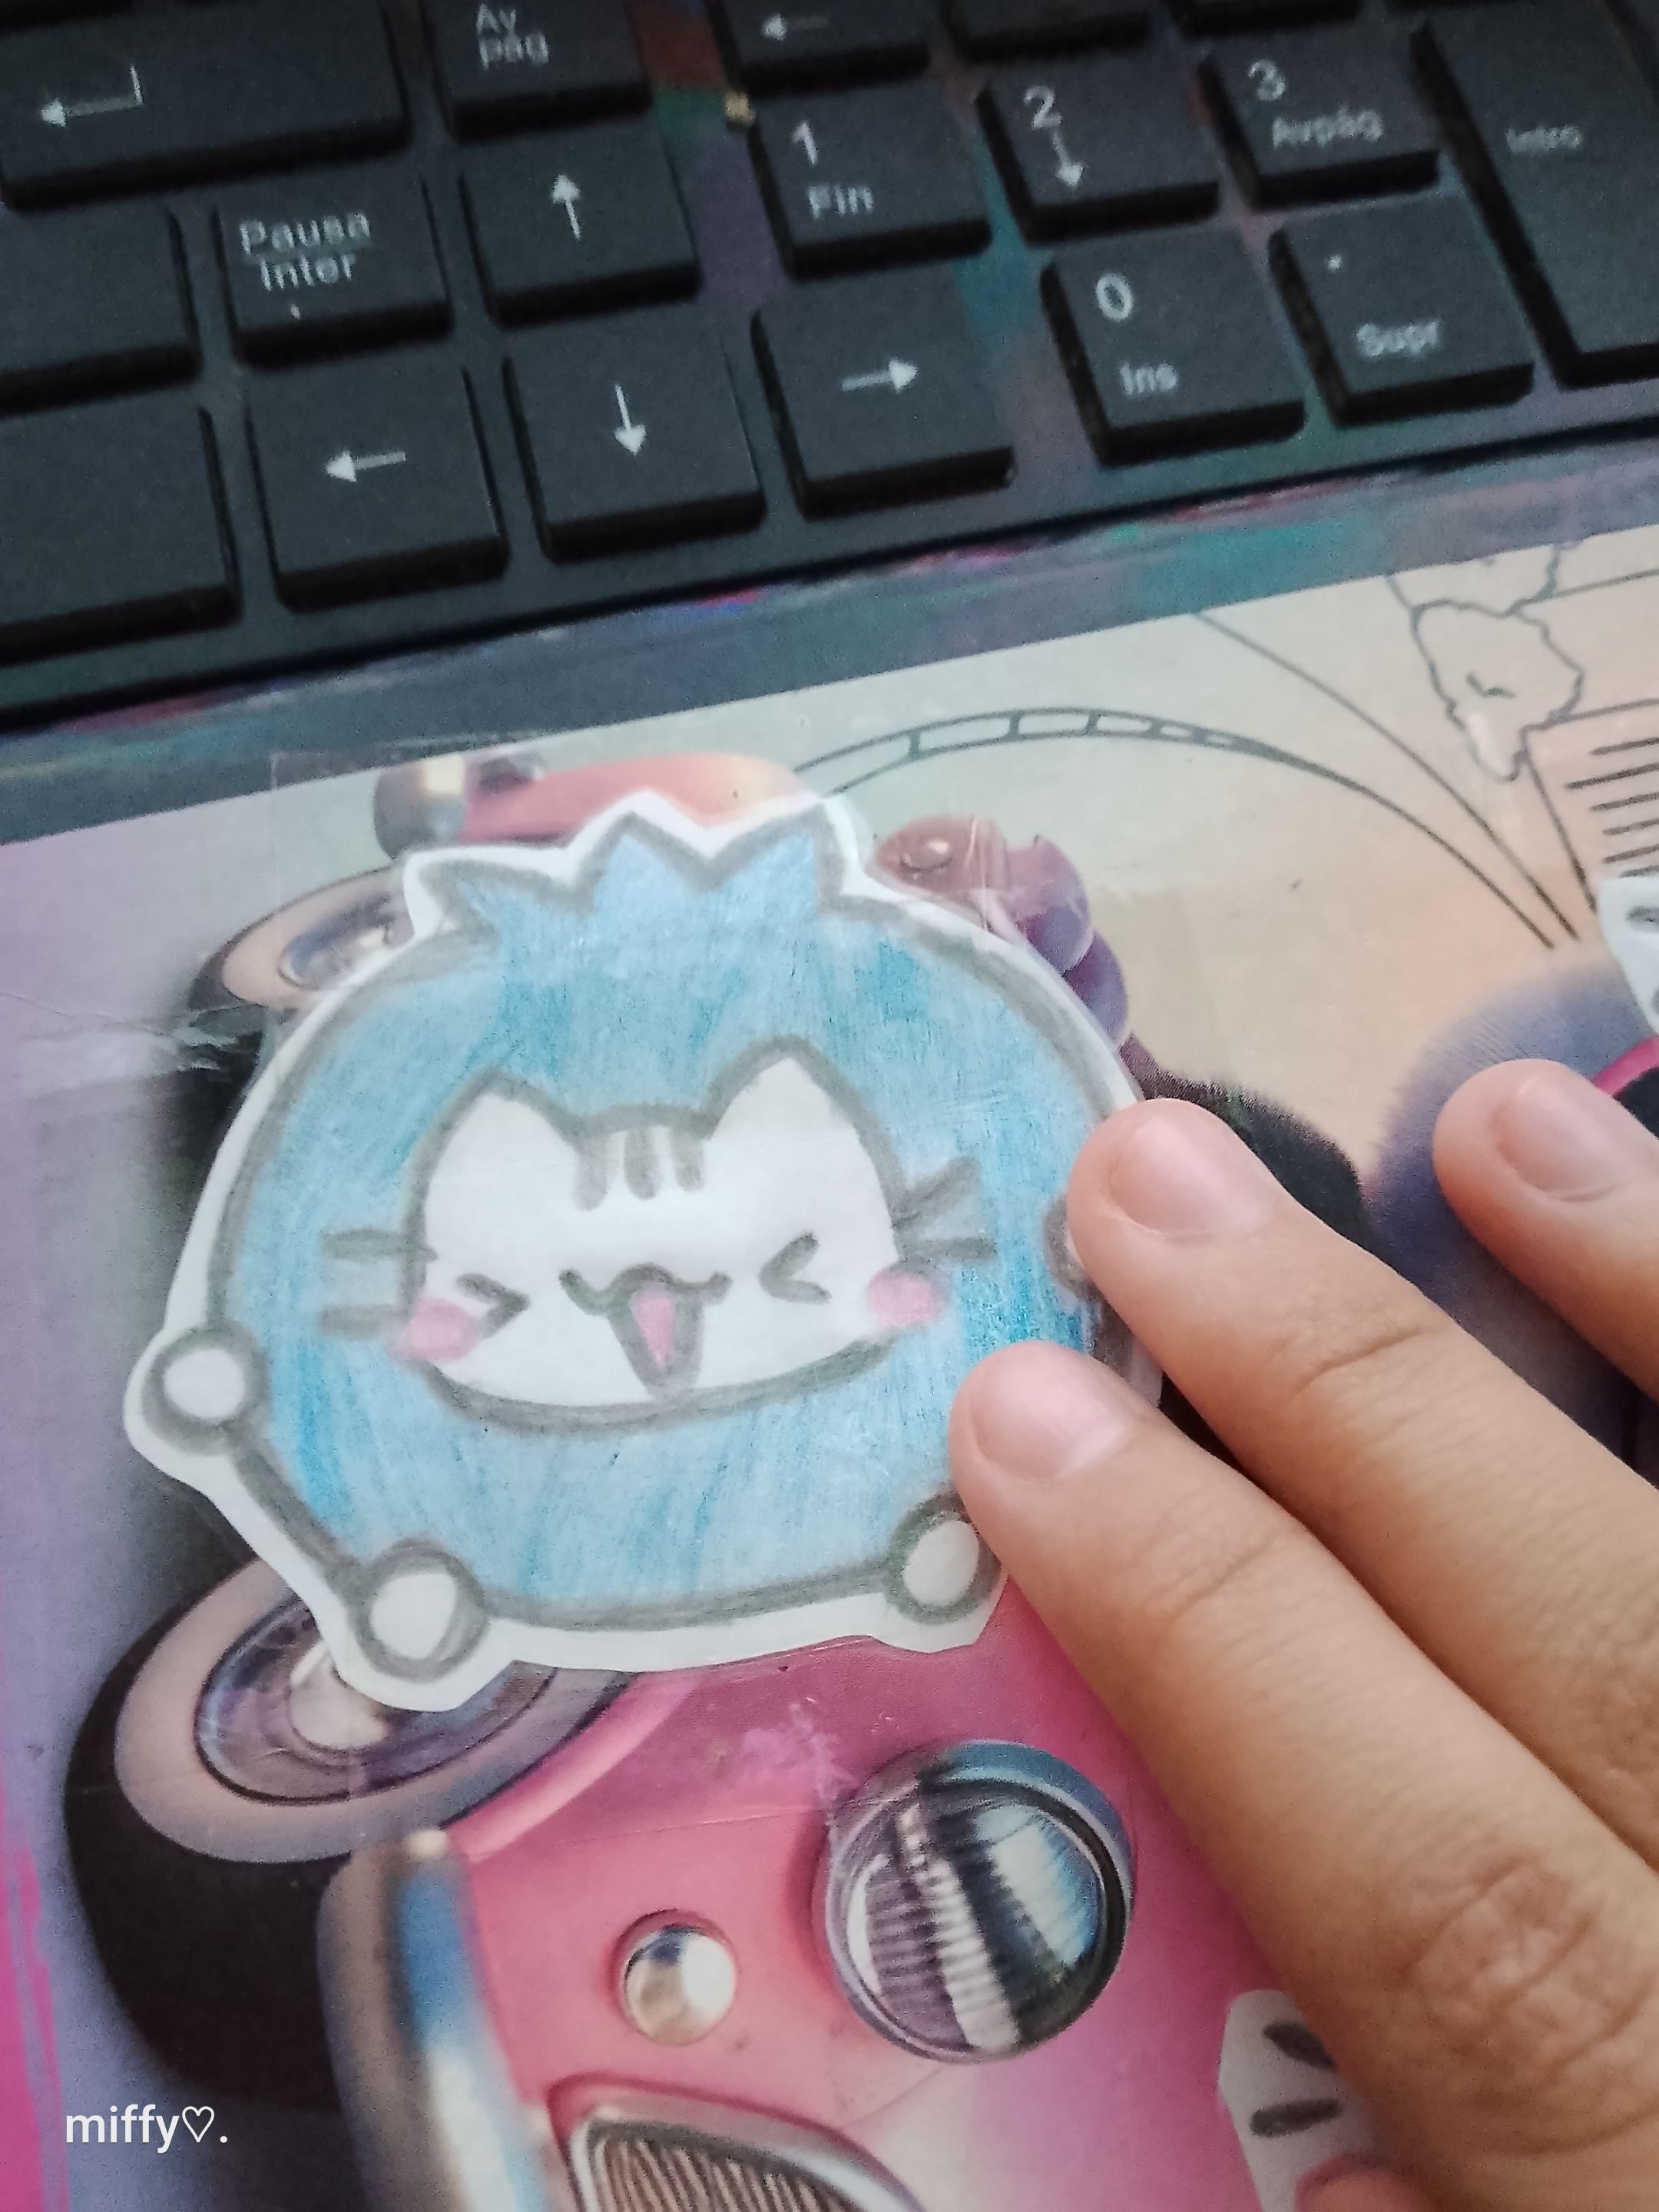
7. Después despegue los dibujos del cuaderno y los corte dejando un borde para que se puedan pegar.
Y ya están listas las pegatinas hechas en casa, con materiales fáciles de conseguir, pueden hacerlo tanto adultos como niños, es una forma de hacer las pegatinas con colores que me gustan, porque cada quien la hace a su gusto. Este proceso no es difícil solo puede tardar un poquito de tiempo, pero va más en la disposición que tenga la persona o el niño en el dia, pero el resultado queda bonito y vale la pena el esfuerzo, siempre hago para mi y para regalar a una de mis primas que le gustan estás pegatinas que hago. Recortar también ayuda mucho para que mejore ésta función en la mano, en mi caso escribo con la derecha y recortó con la izquierda y todavía a mis 11 años los cortes que hago no son perfectos, son un poco chuecos, XD, pero no dejo de hacer cortes, creo que algún día recortare muchísimo mejor. Espero que les guste éste sencillo trabajito que hice en casa en mi tiempo libre.

Chao, nos vemos en la proxima vez...ദ്ദി˶˃ ᵕ ˂ )✧

Hello Hiver's! How are you? Today I'm going to show you how I made some homemade stickers with easy-to-find materials that can be used to decorate anything like notebooks, books, phones, filters, and many other things. Just because we're kids doesn't mean we can't make pretty things, it's just a matter of practicing. I always do these kinds of things. My mom always insists I do activities like this because she says it can inspire my creativity. Now, I'm going to show you the step-by-step instructions so that those who want to make it can follow this simple tutorial...

The materials are: A white letter-sized sheet of paper, wooden crayons, clear plastic tape, an HB drawing pencil, an eraser, and scissors.
Process
1. First, I chose several drawings from Pinterest and began tracing them on the computer. We'll always do the drawings we like the most. I really like these kitties. 2. I went over all the drawings with a pencil to make the edges thicker. 3. After going over all the edges of the drawings, I began coloring.

4. In the first drawing, I colored the cat's mouth in a light pink shade; this makes him look cuter. Then I erased the stripes on the kitten's head and painted them gray. I erased the cheeks and painted them light pink. They look cute. I did this same process with all the drawings I had chosen. The idea is to have several options. I also love these labels. I always have several saved because I use them in my notebooks; they look cute.

5. Now cut out the cat drawings leaving a white border, 6. Then cover the drawings glued to the front of a notebook with transparent plastic tape so that the tape does not come off. The plastic tape protects them; they look very pretty.


7. Then, I peeled the drawings from the notebook and cut them out, leaving a border so they could be glued.

And now the homemade stickers are ready. Made with easy-to-find materials, both adults and children can do it. It's a way to make stickers with colors I like, because everyone can make them their own way. This process isn't difficult; it might just take a little time, but it depends more on the mood of the person or child that day. However, the result is beautiful and worth the effort. I always make these stickers for myself and to give as a gift to one of my cousins who likes them. Cutting also helps a lot to improve this function in the hand, in my case I write with my right hand and cut with my left hand and even at 11 years old the cuts I make are not perfect, they are a little crooked, XD, but I don't stop making cuts, I think that one day I will cut much better. I hope you like this simple little project I did at home in my free time.

Bye, see you next time...ദ്ദി˶˃ ᵕ ˂ )✧
Traductor English translator
Todas las fotografías son de mi propiedad - All photographs are my property.