Hello to my dear Hivers and the dear community of artists #HiveDIY, as always very pleased and excited to be here again, showing you my work made with love and especially for you.
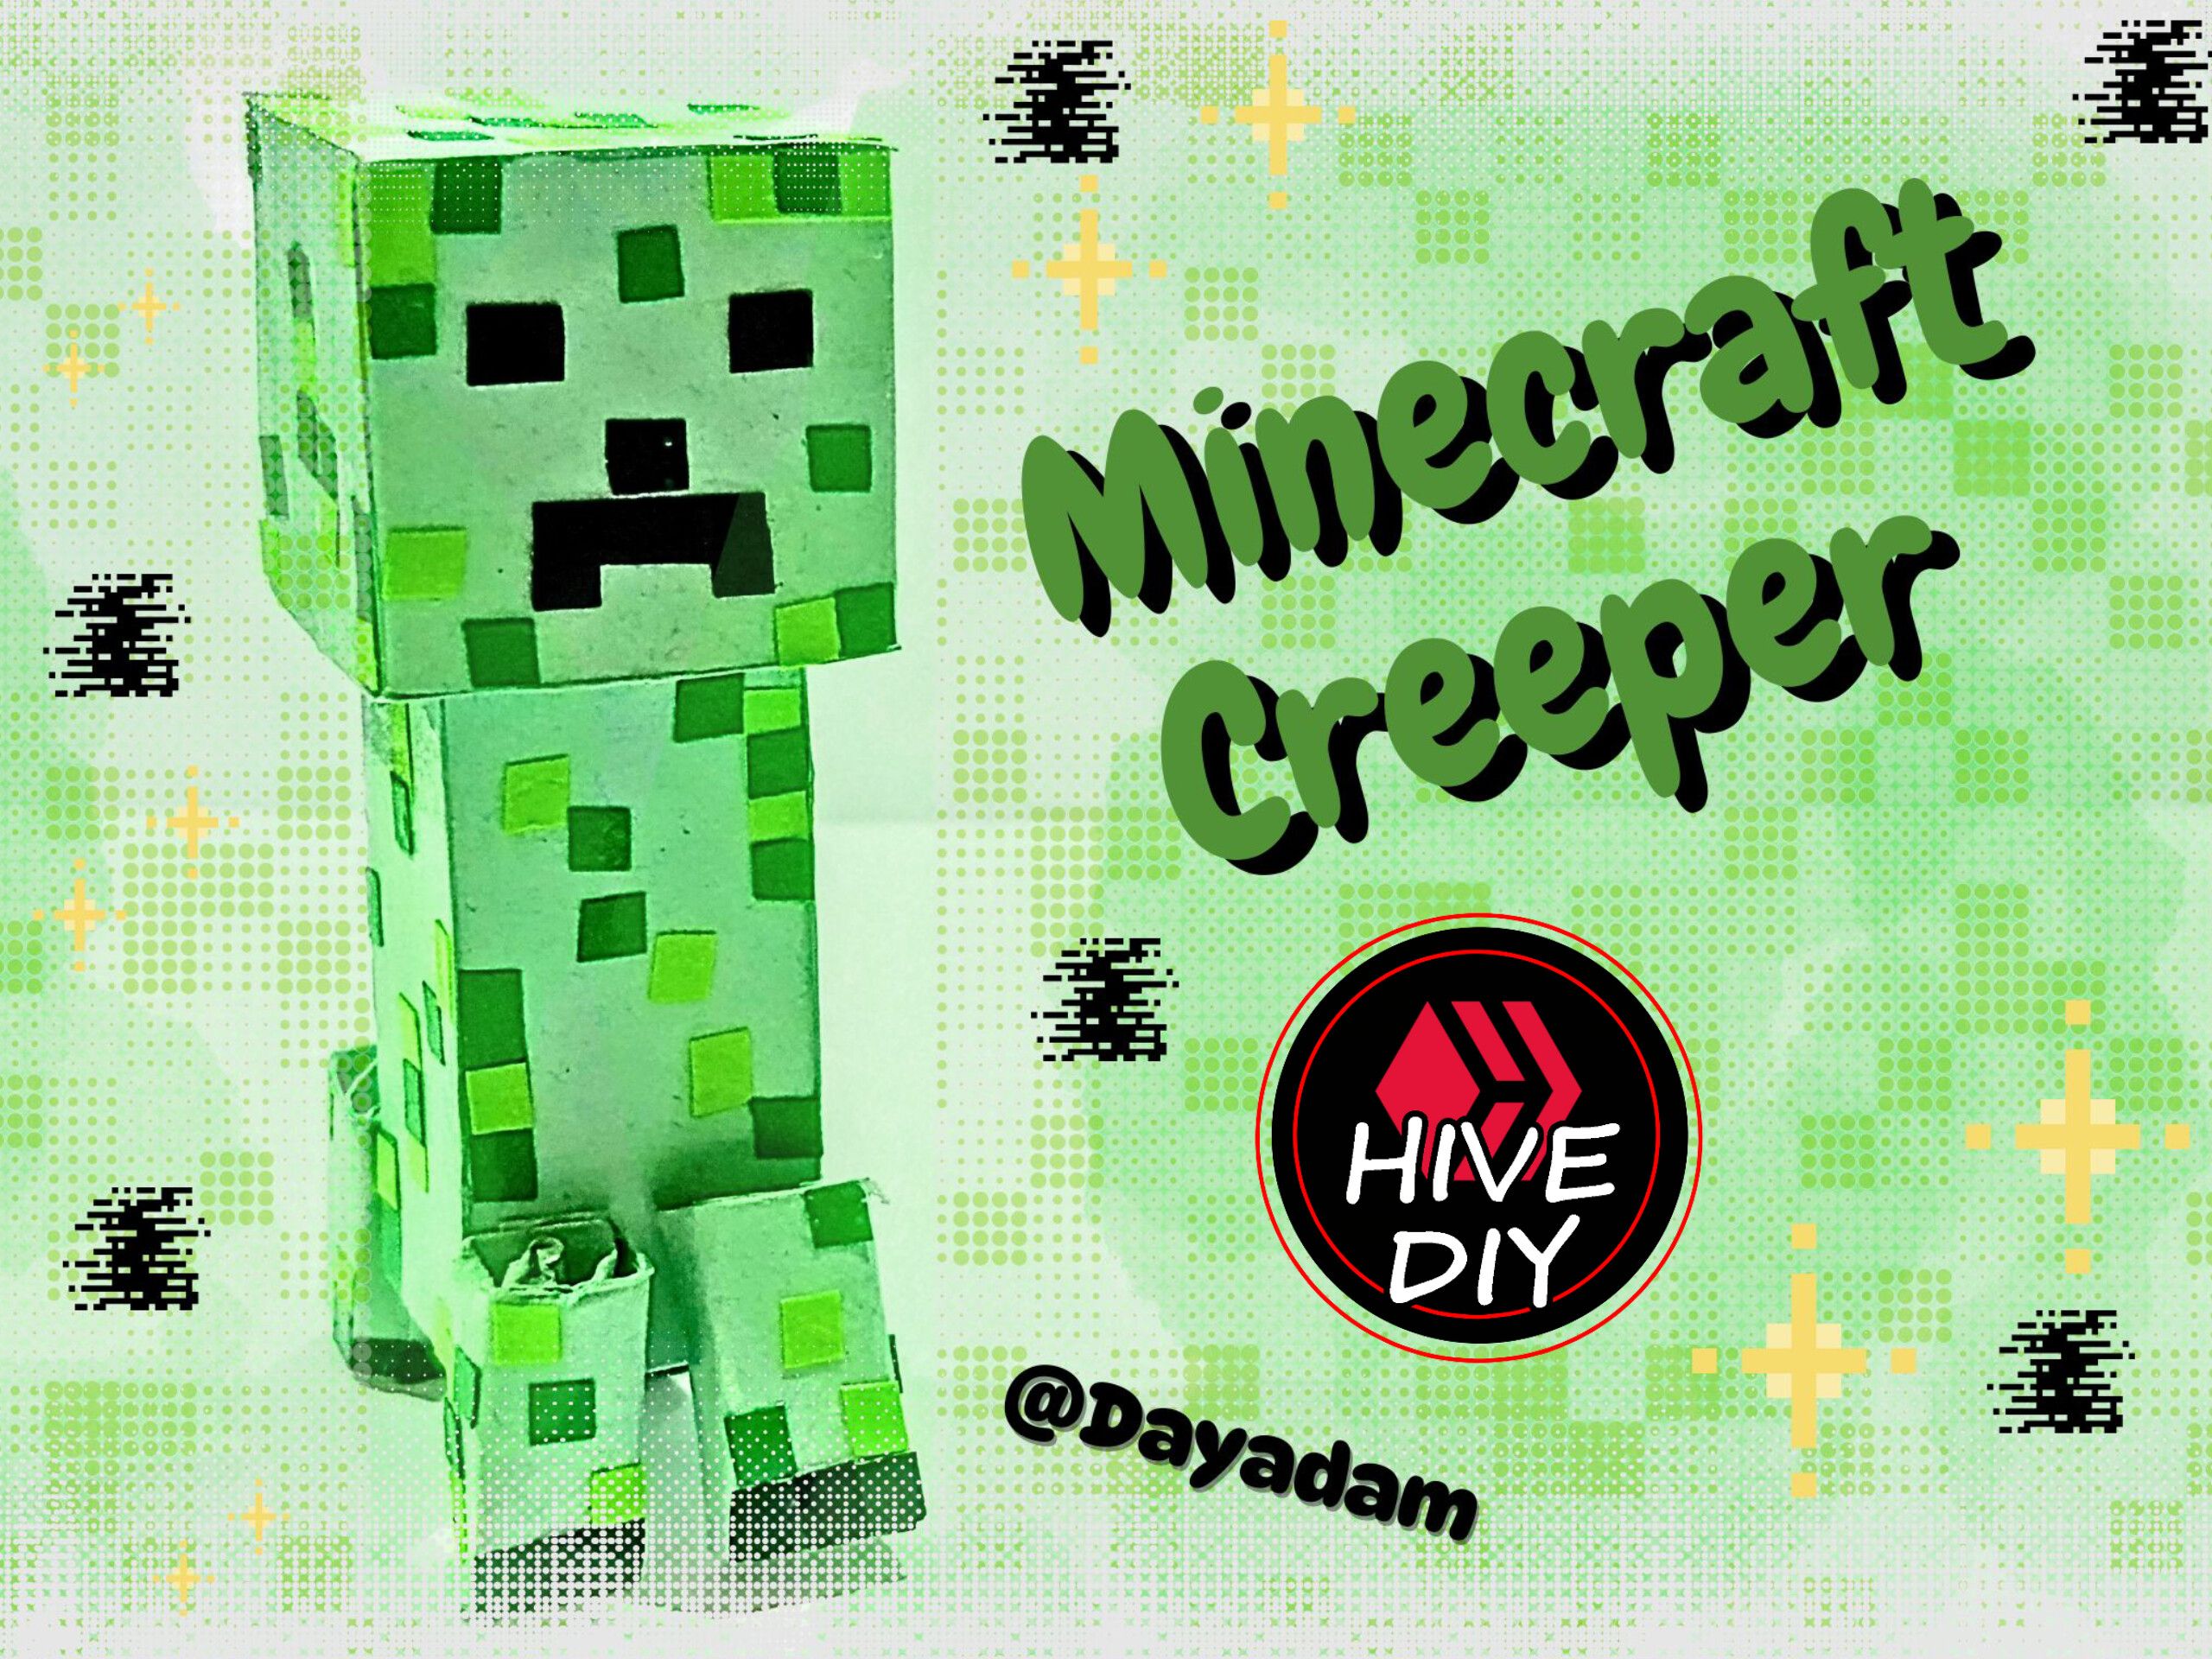
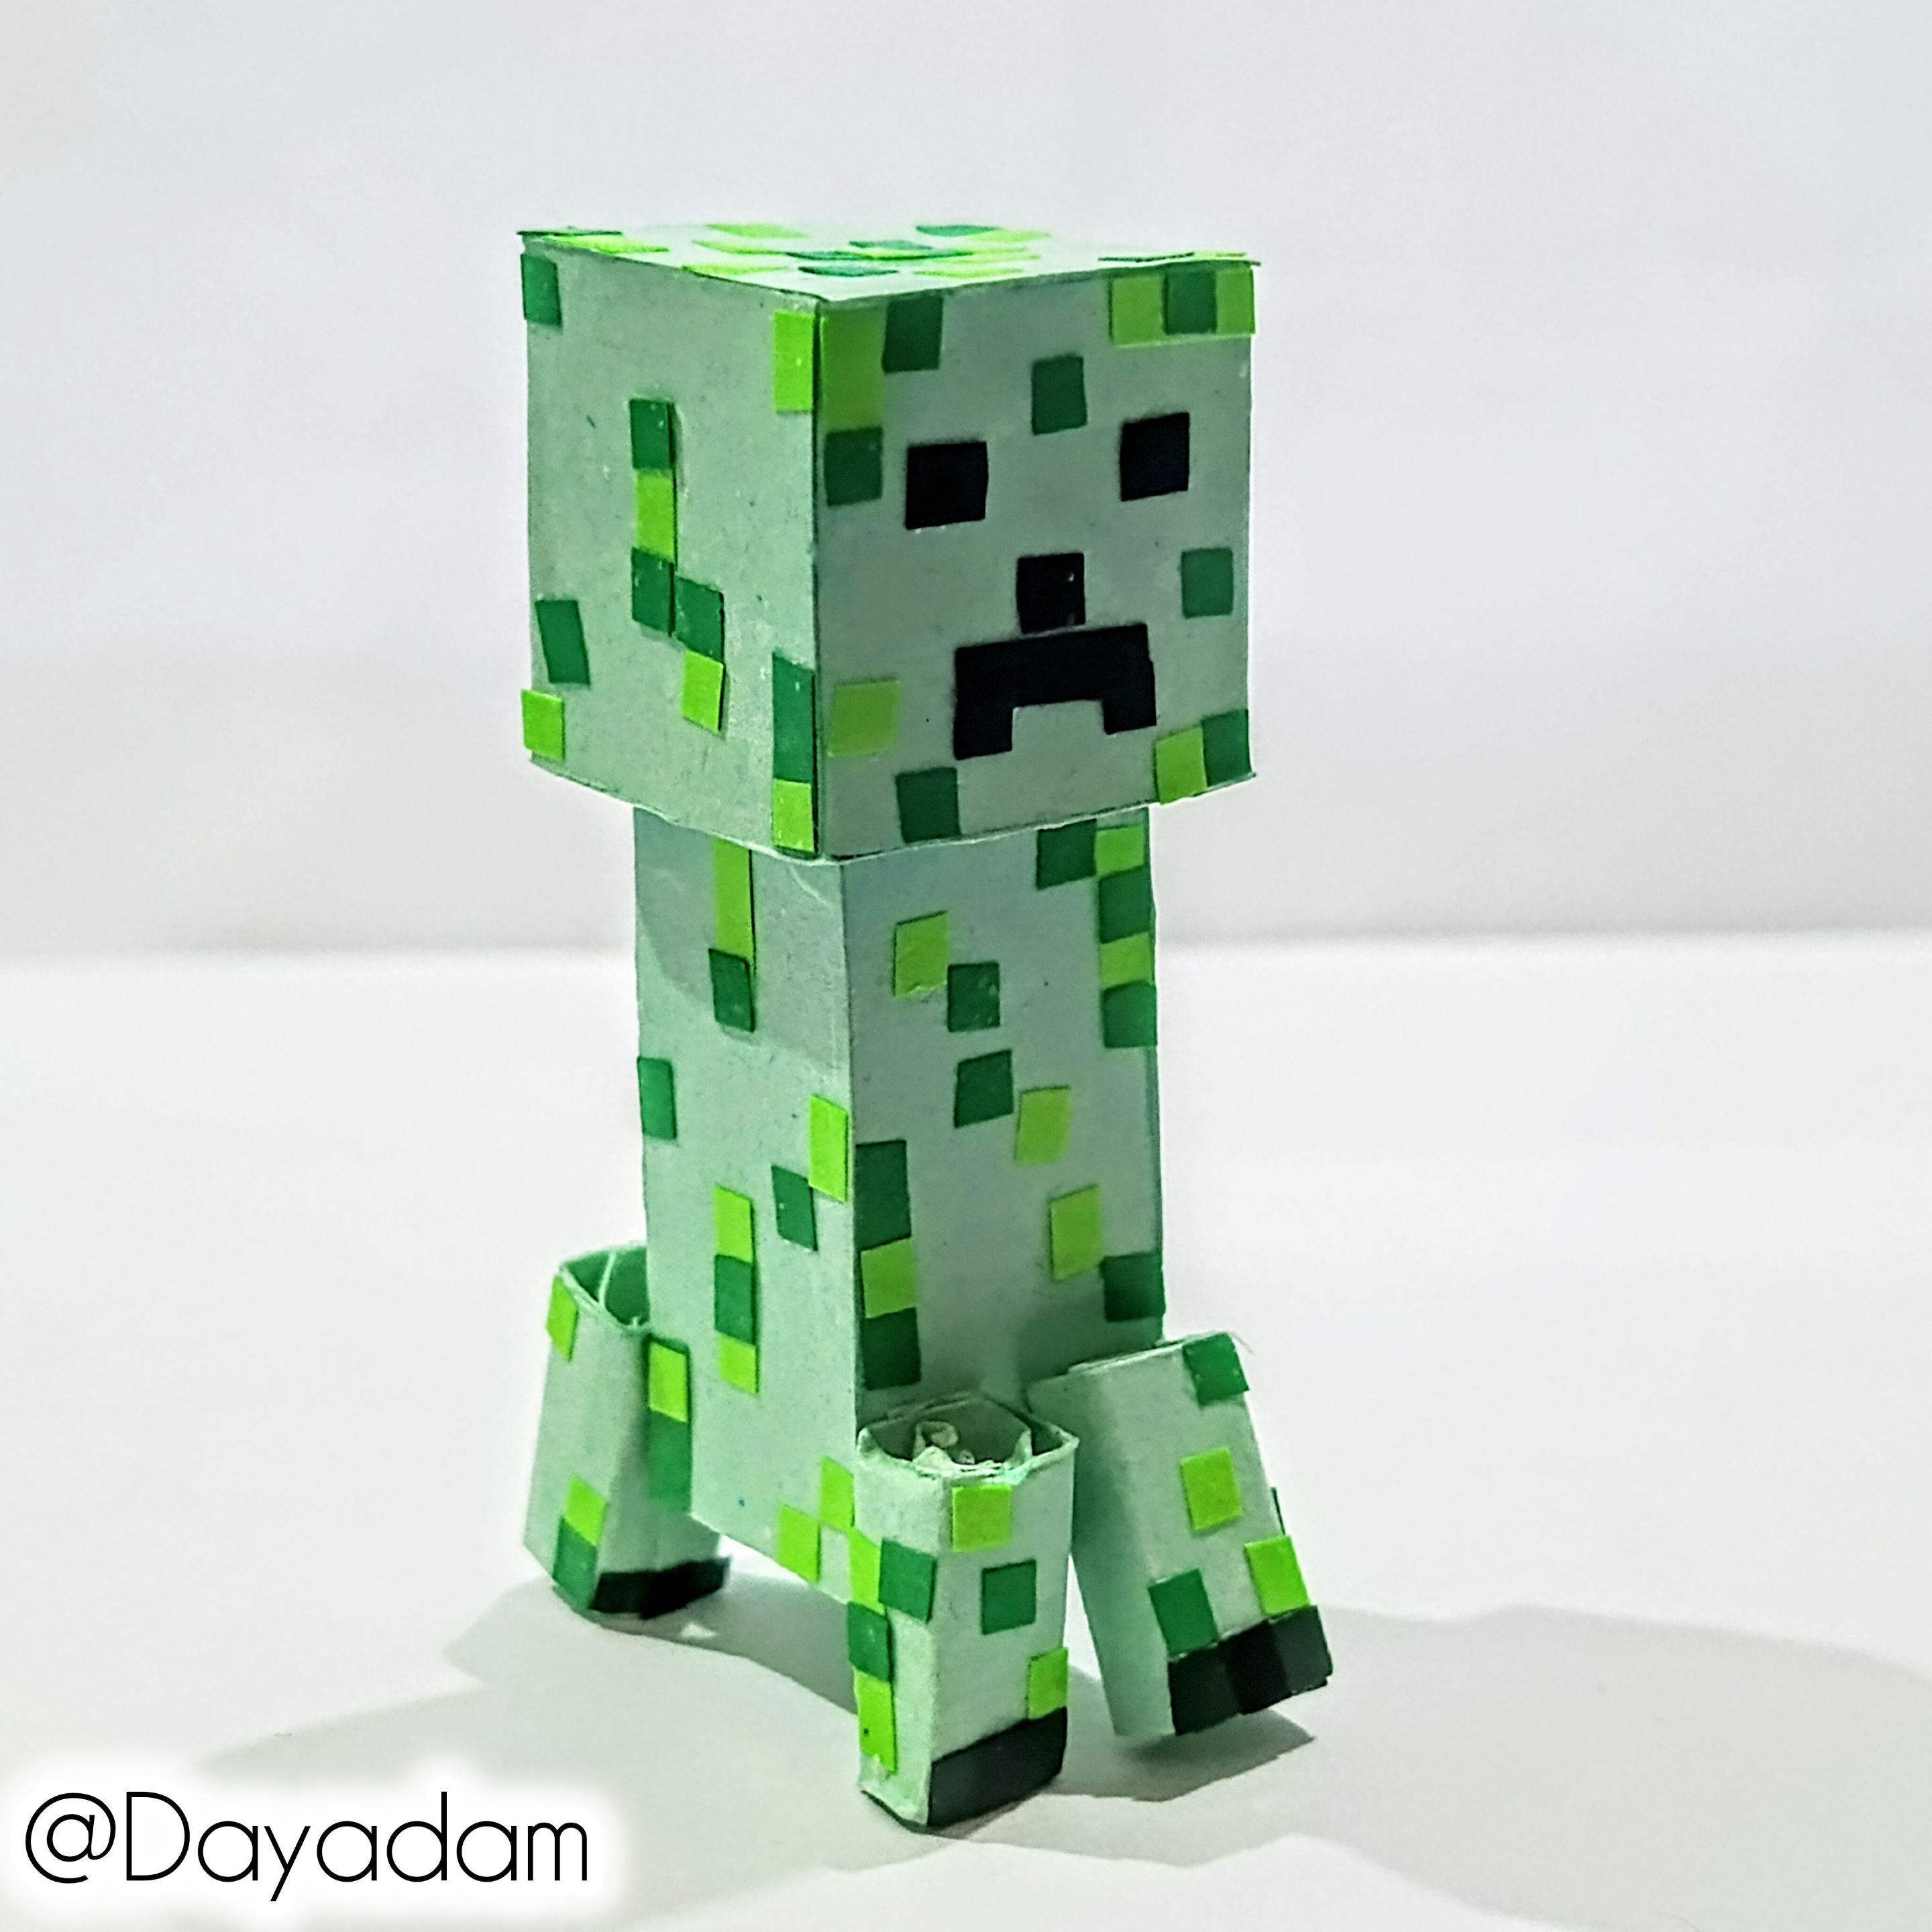
Today, I wanted to bring you a new figure based on the construction video game Minecraft, as requested by the Hive gaming community. This time, I created a 3D Creeper using the quilling technique.
If you would like to see my previous work and leave your opinion, here it is:
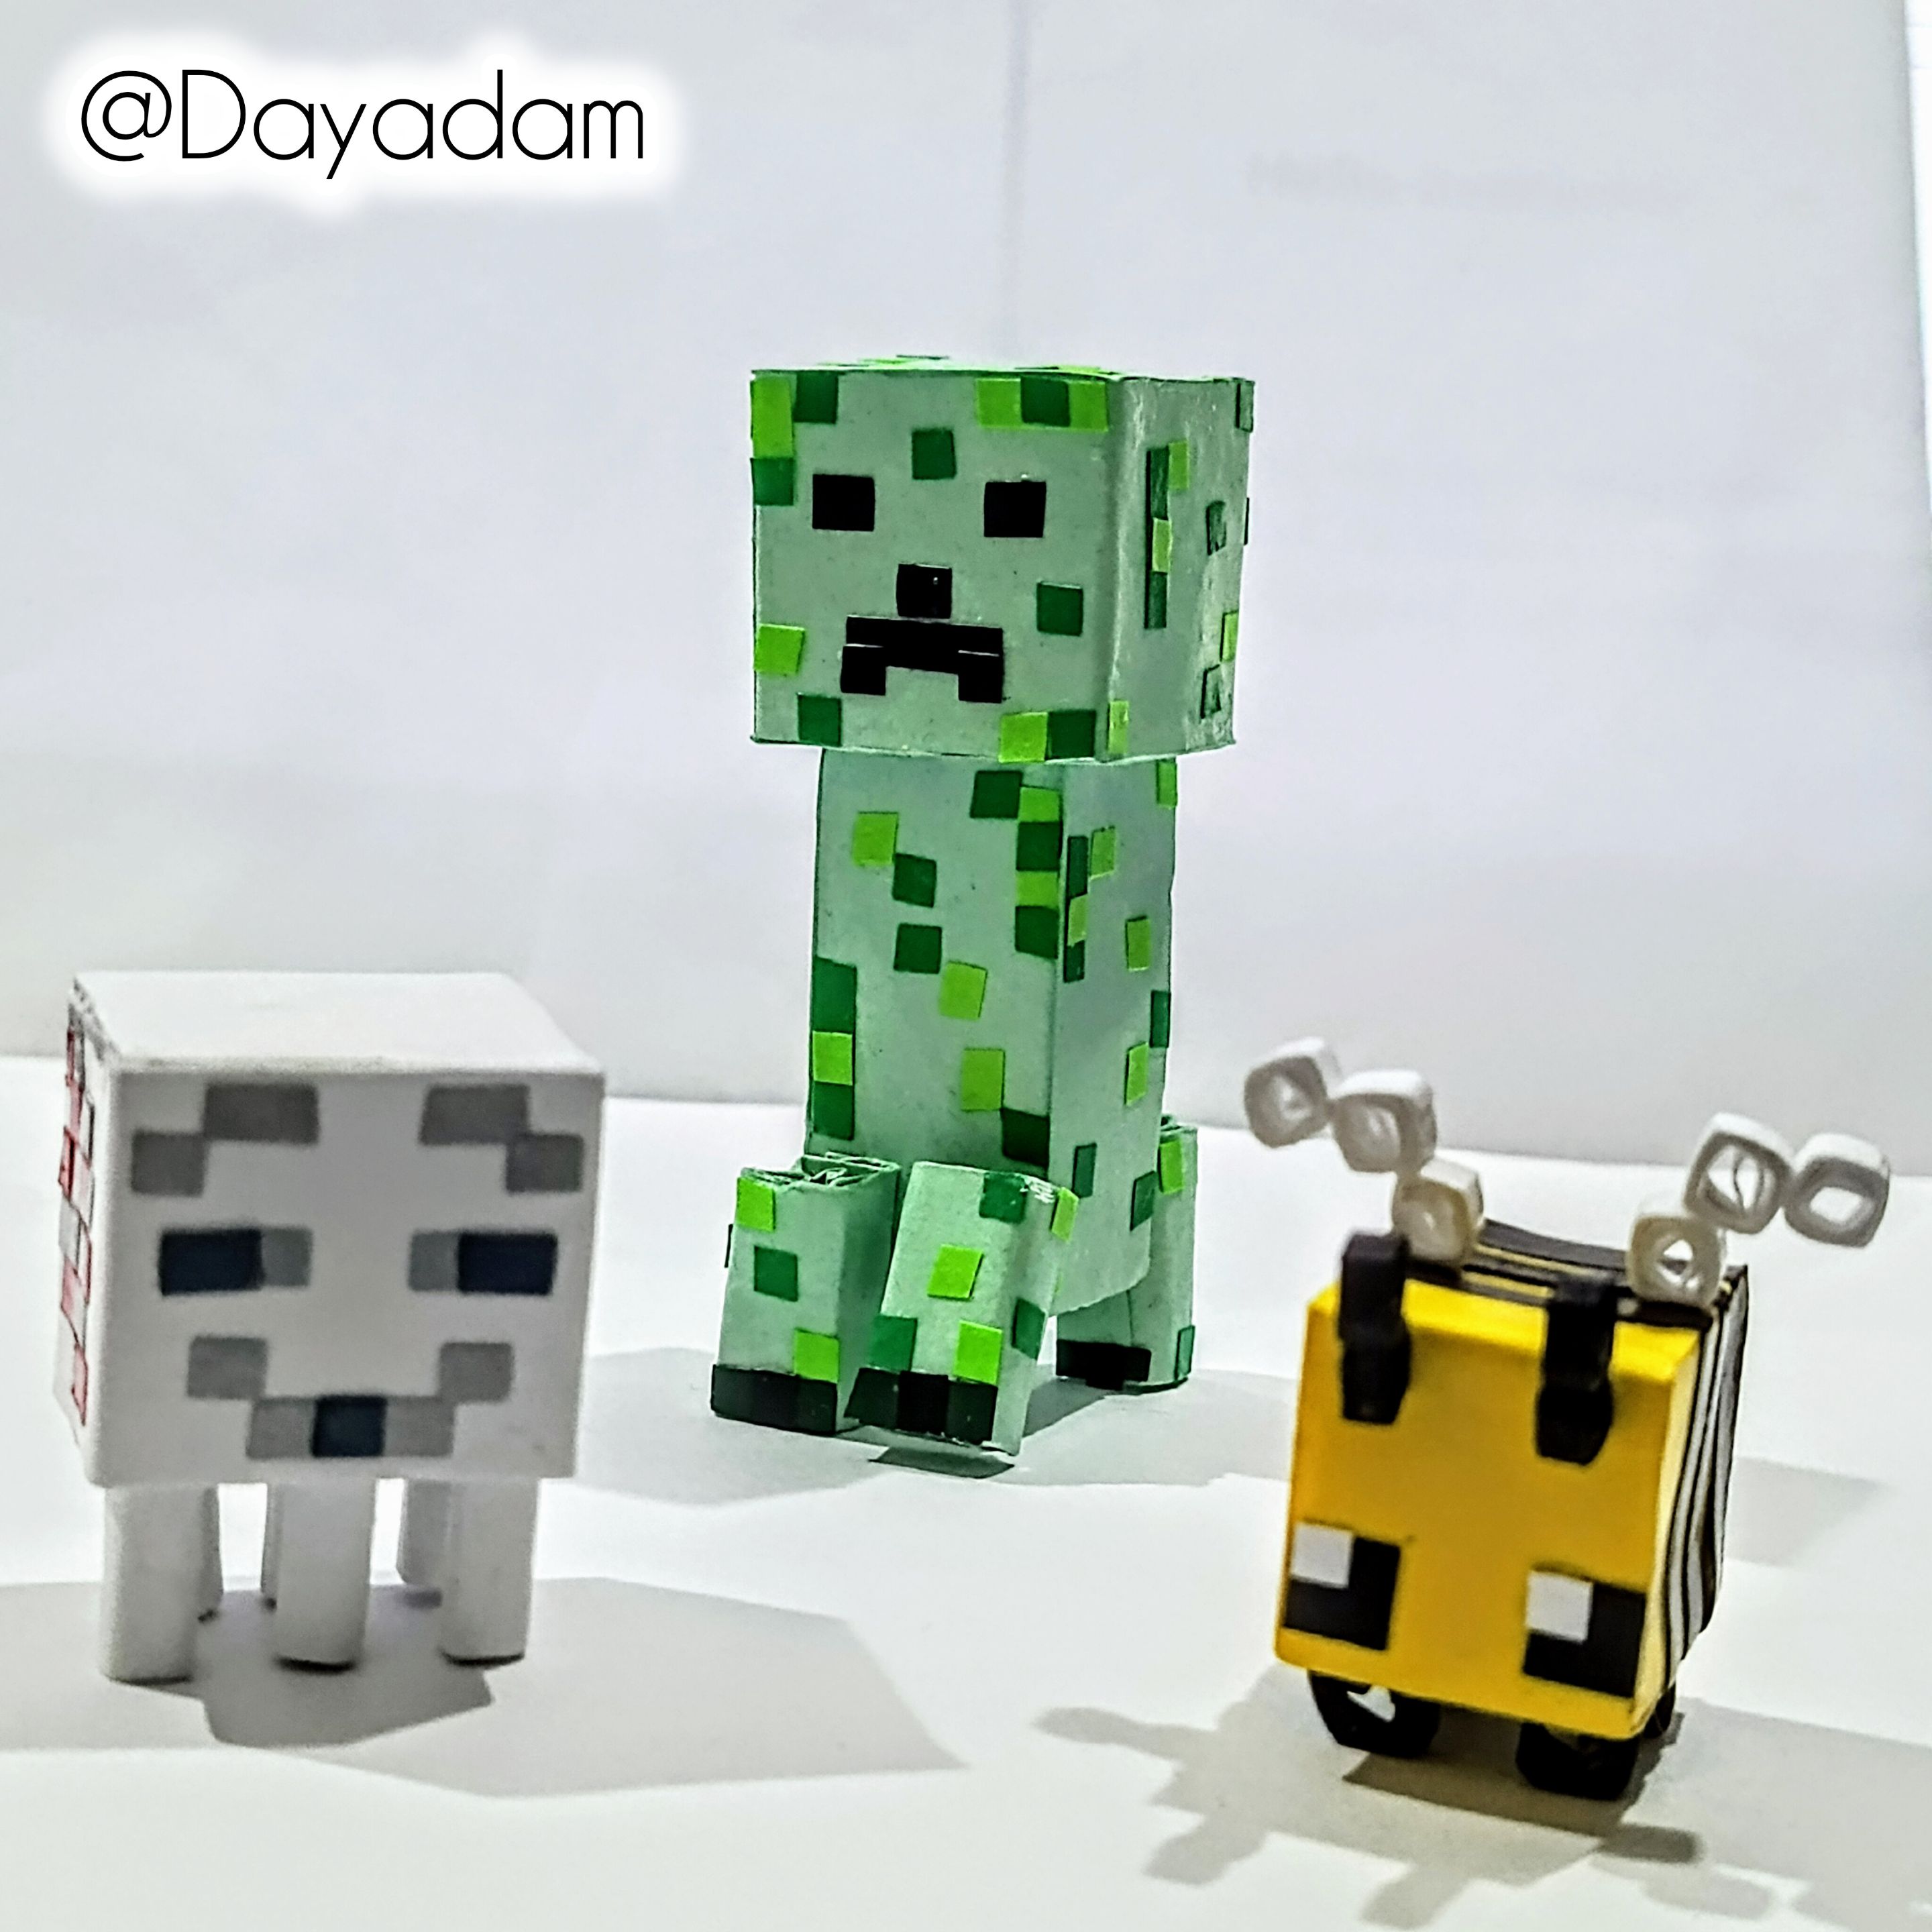
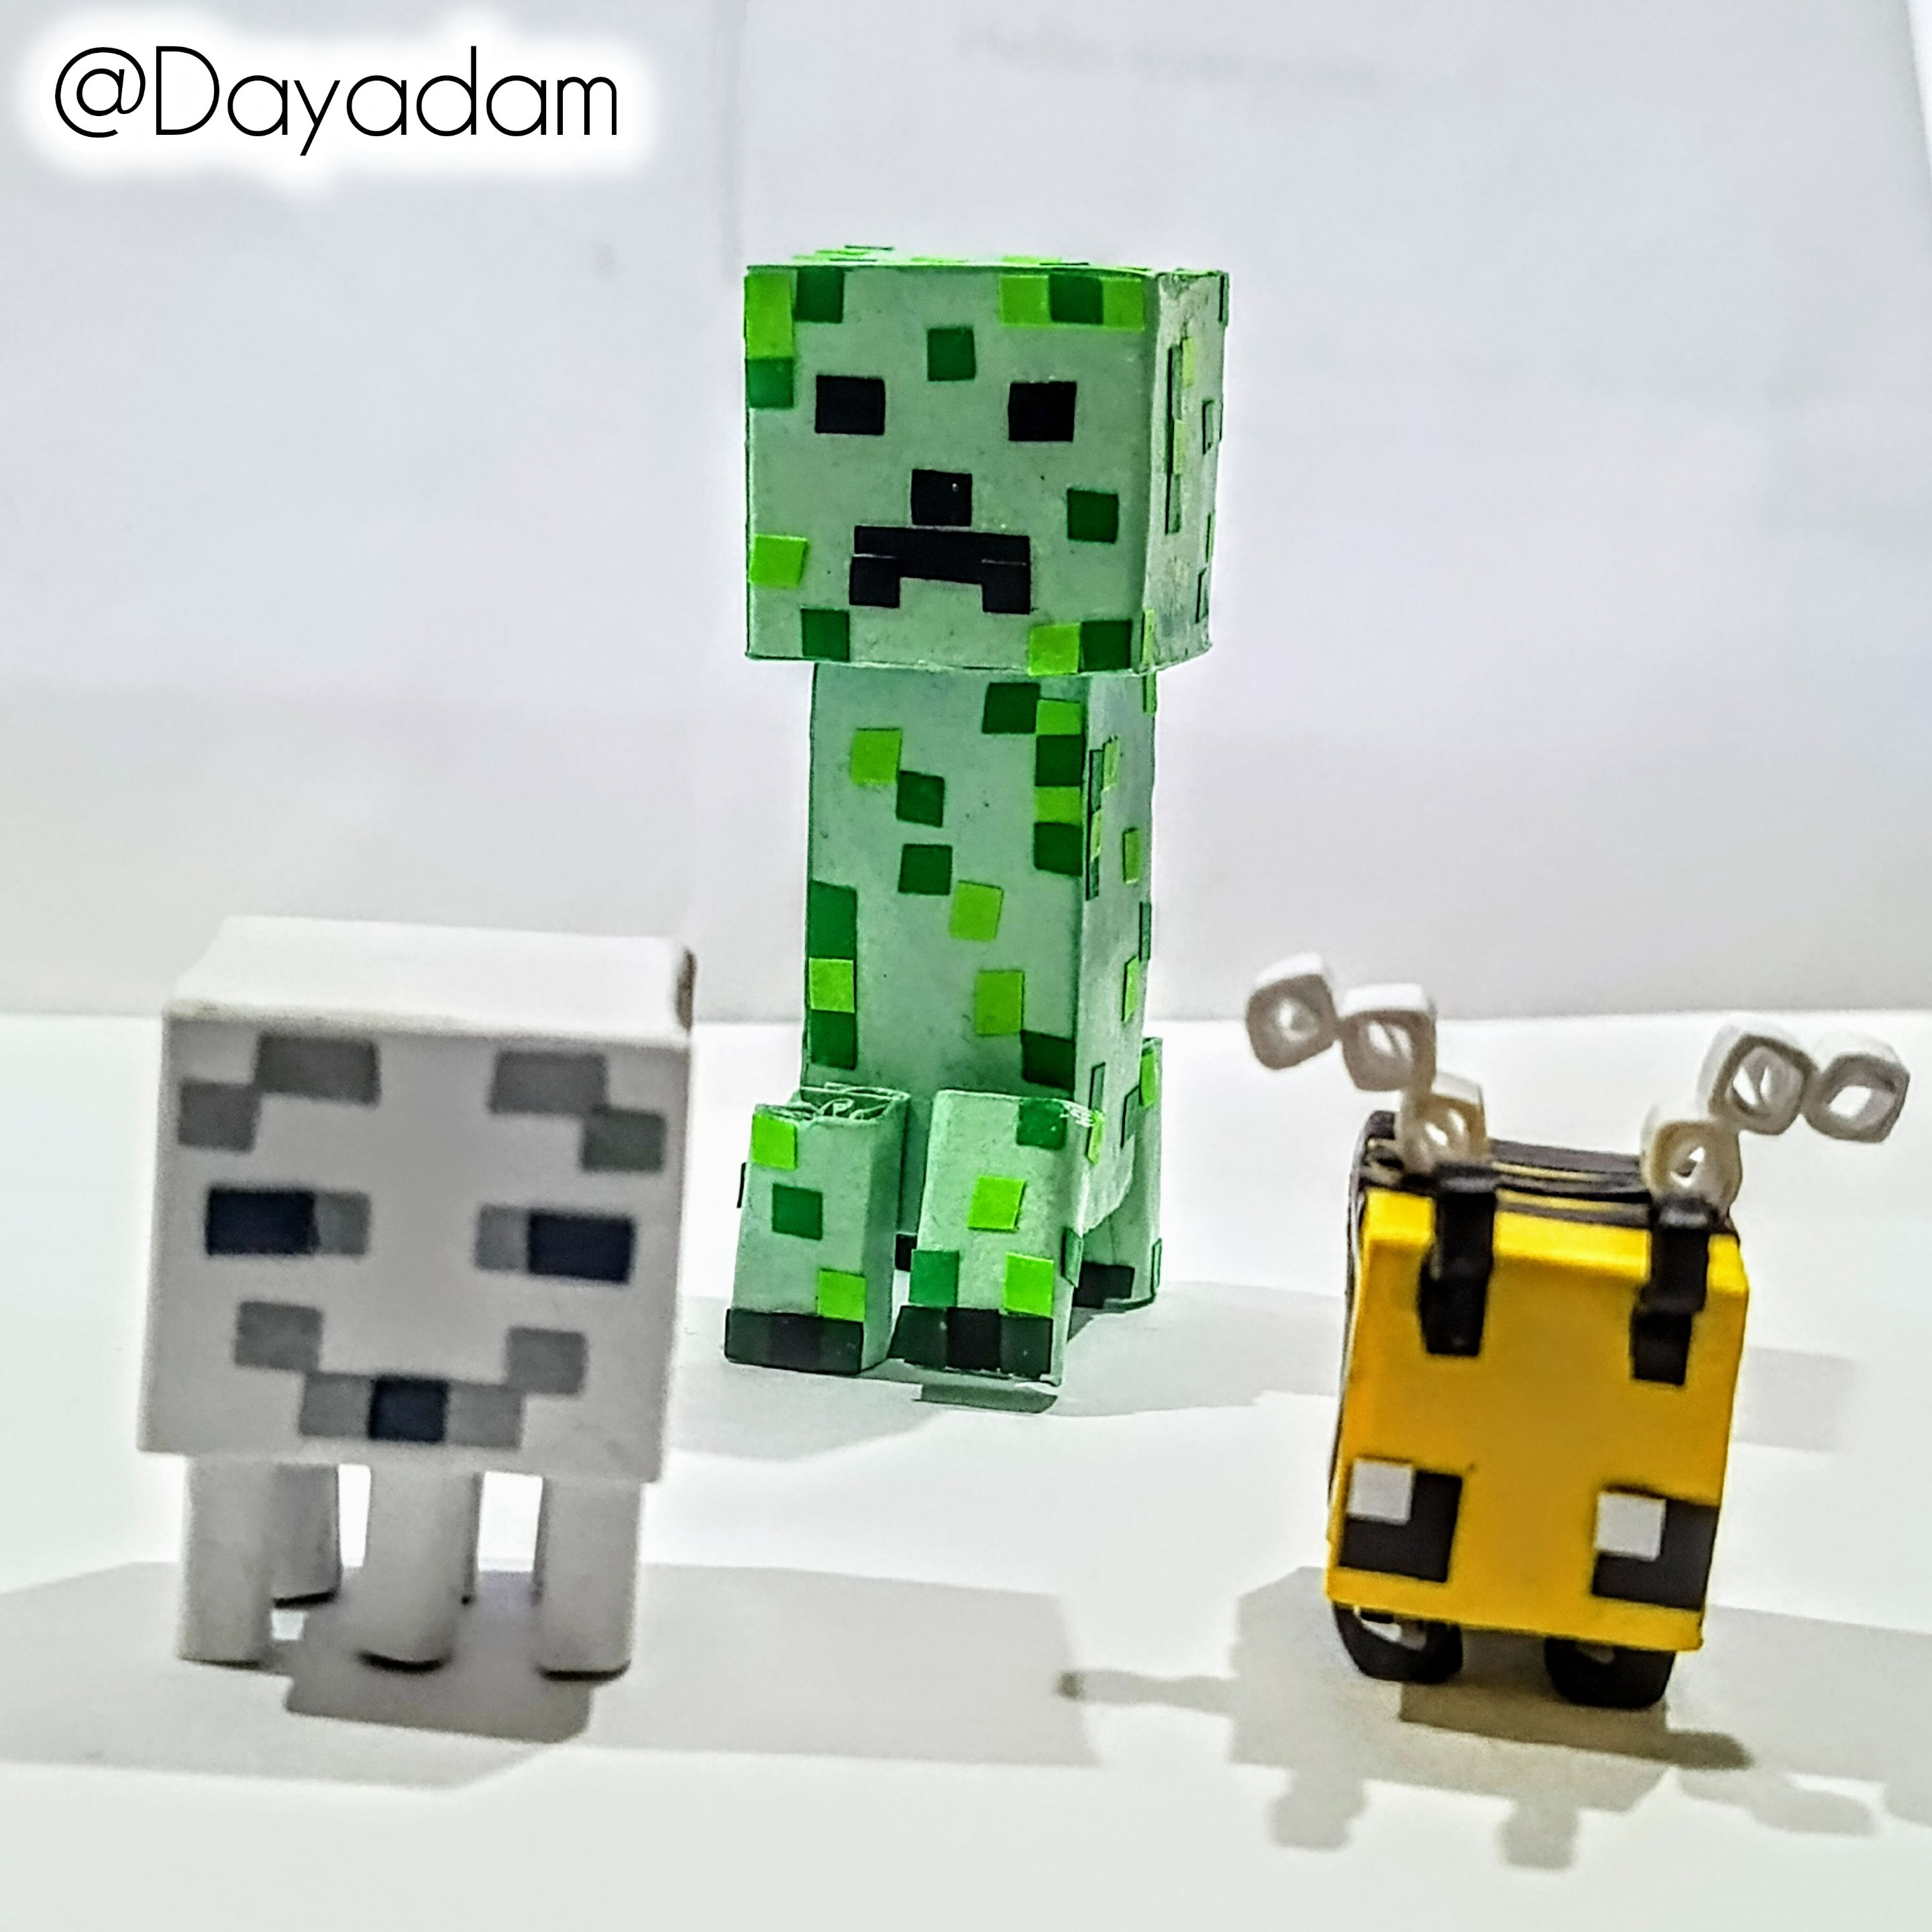
Happy Ghast Minecraft; https://peakd.com/hive-130560/@dayadam/happy-ghast-minecraft-3d-decorative
Minecraft Bee: https://peakd.com/hive-189641/@dayadam/minecraft-bee-3d-decorative-figure.
Hoping you like it, I leave you my creative process:
Let's get started:😃

Hola a Todos...✨
Hola a mis queridos Hivers y a la querida comunidad de artistas #HiveDIY, como siempre muy complacida y emocionada de encontrarme por acá nuevamente, mostrándole mi trabajo hecho con mucho amor y especialmente para ustedes.
Para hoy les quise traer una nueva figura basada en el videojuego de construcción Minecraft, por petición de la comunidad gamers de hive, esta vez lleve a cabo a Creeper en 3D en la técnica de quilling.
Si desean ver mis trabajos anteriores y dejar su opinión por acá se los dejo:
Happy Ghast Minecrast; https://peakd.com/hive-130560/@dayadam/happy-ghast-minecraft-3d-decorative
Abeja Minecrast: https://peakd.com/hive-189641/@dayadam/minecrast-bee-3d-decorative-figure.
Esperando que sea de su agrado, les dejo mi proceso creativo:
Comencemos:😃
 |
 |
|


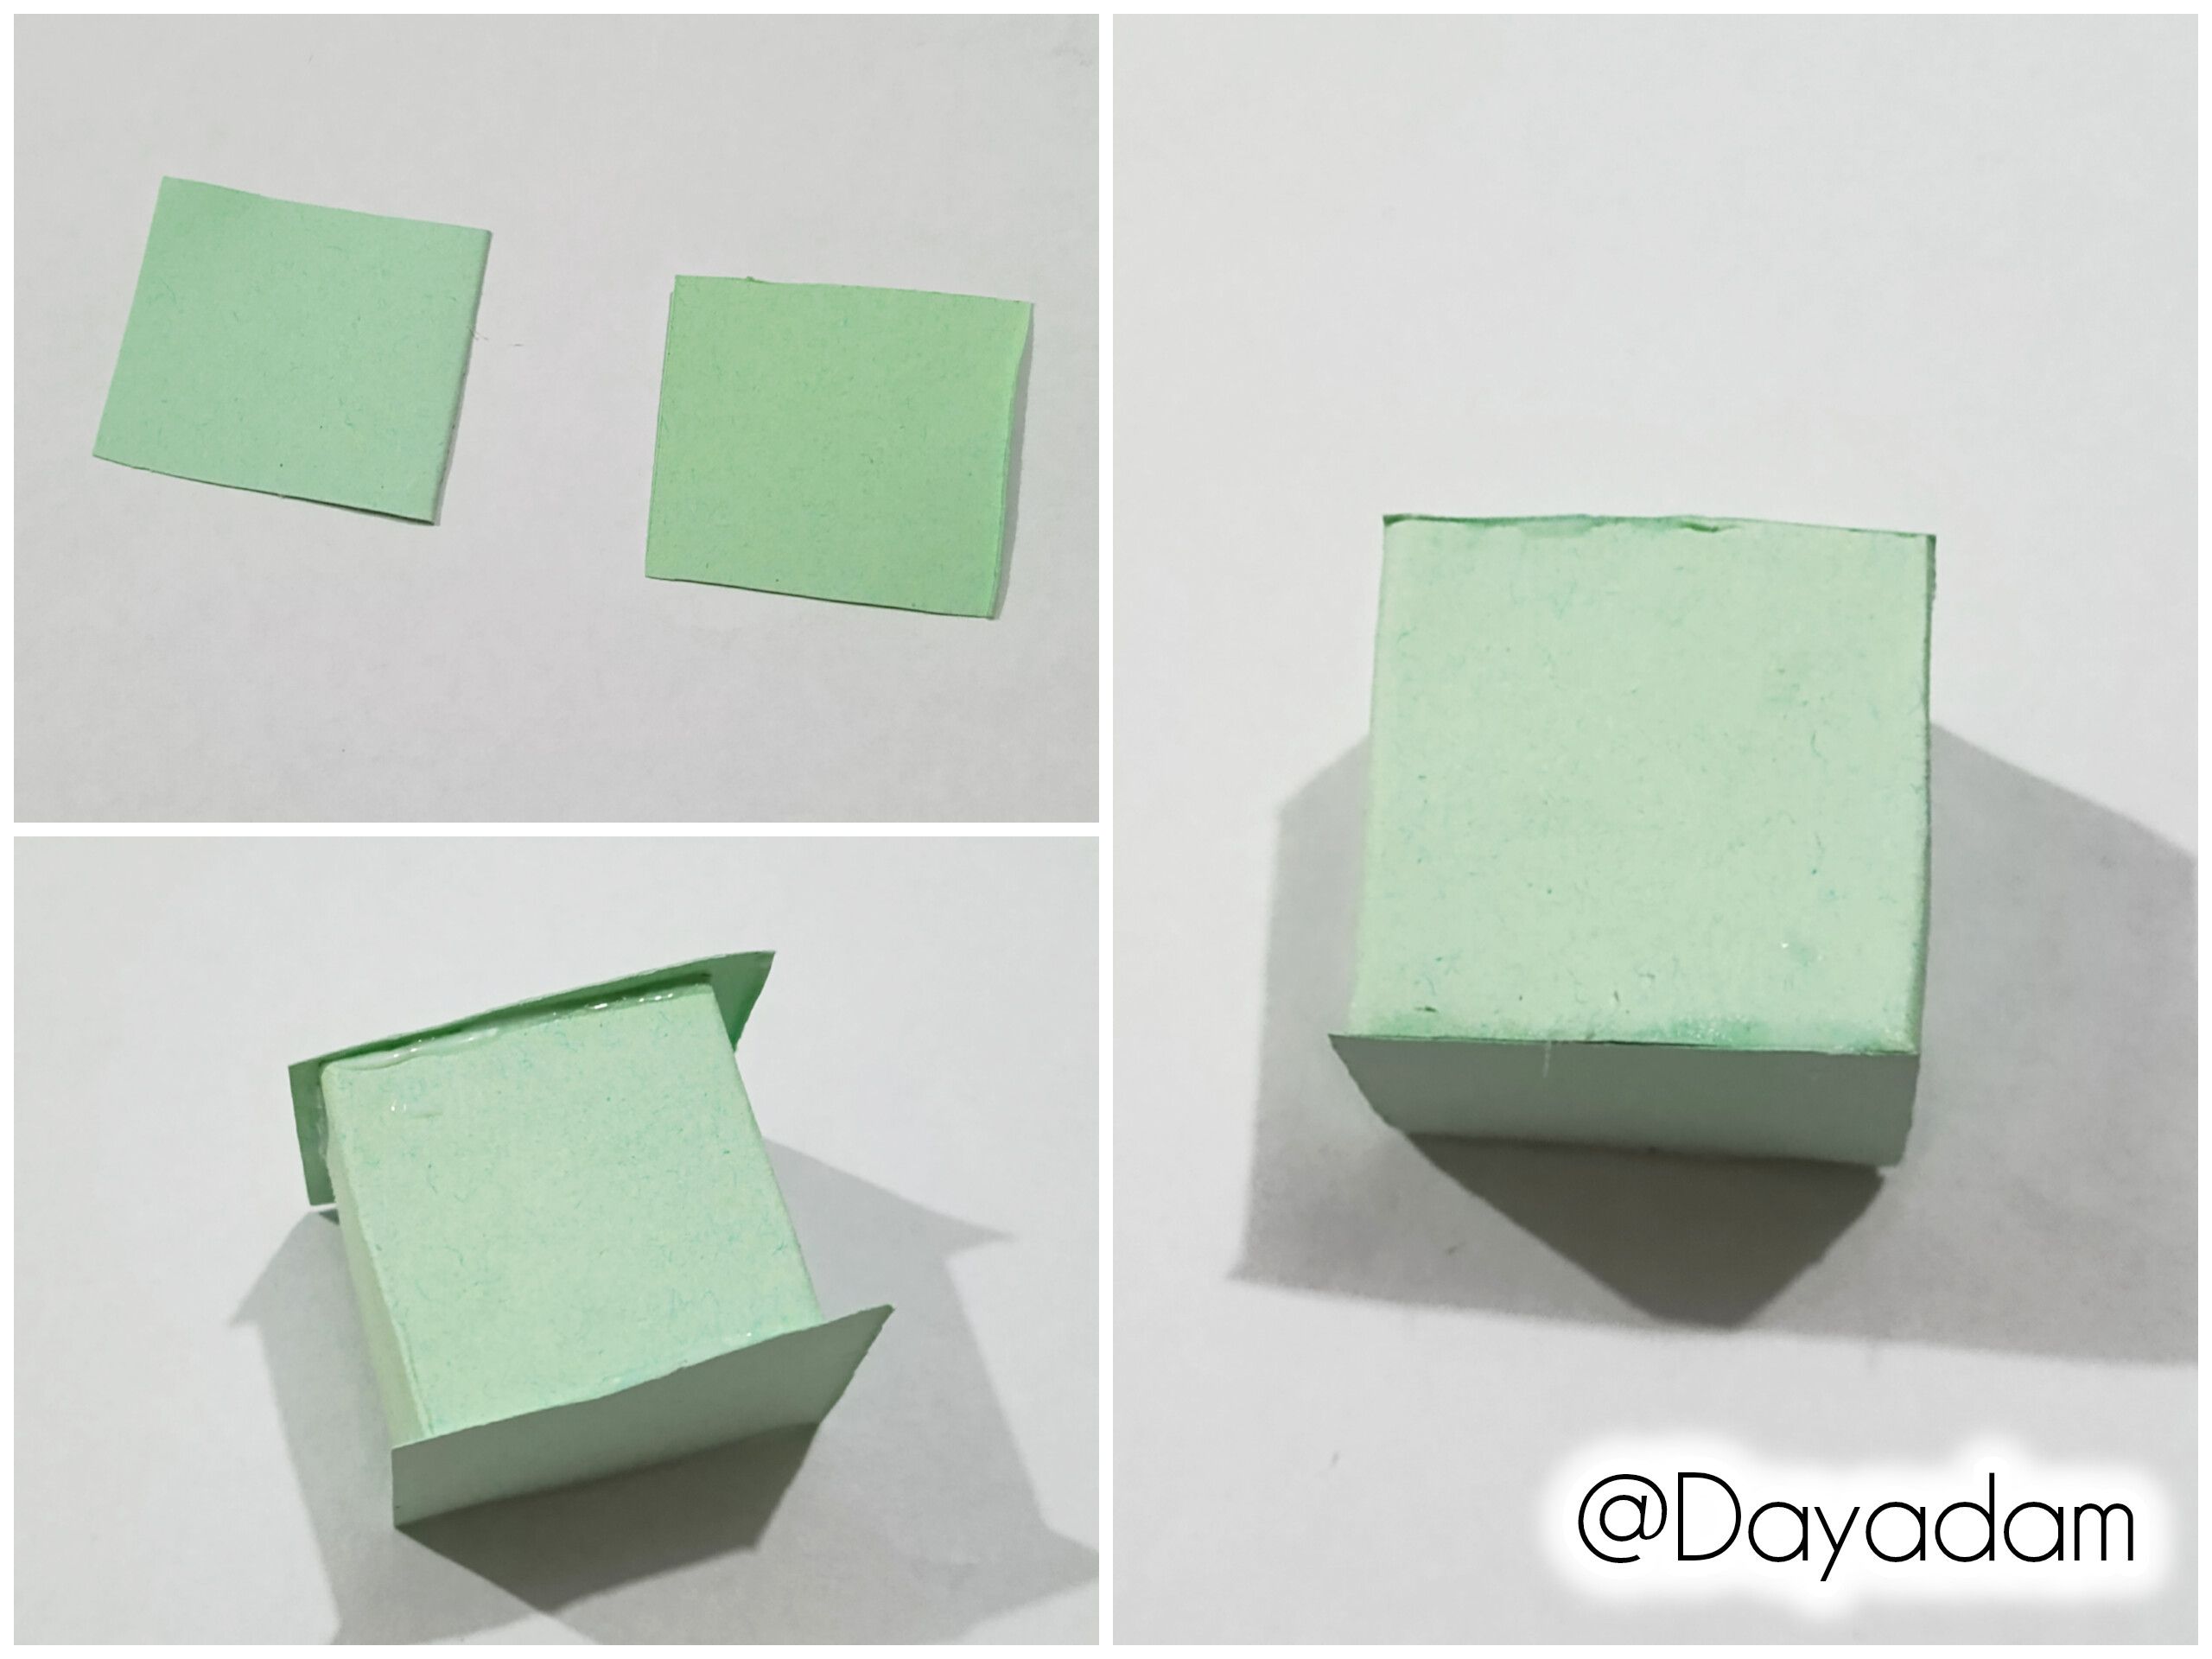
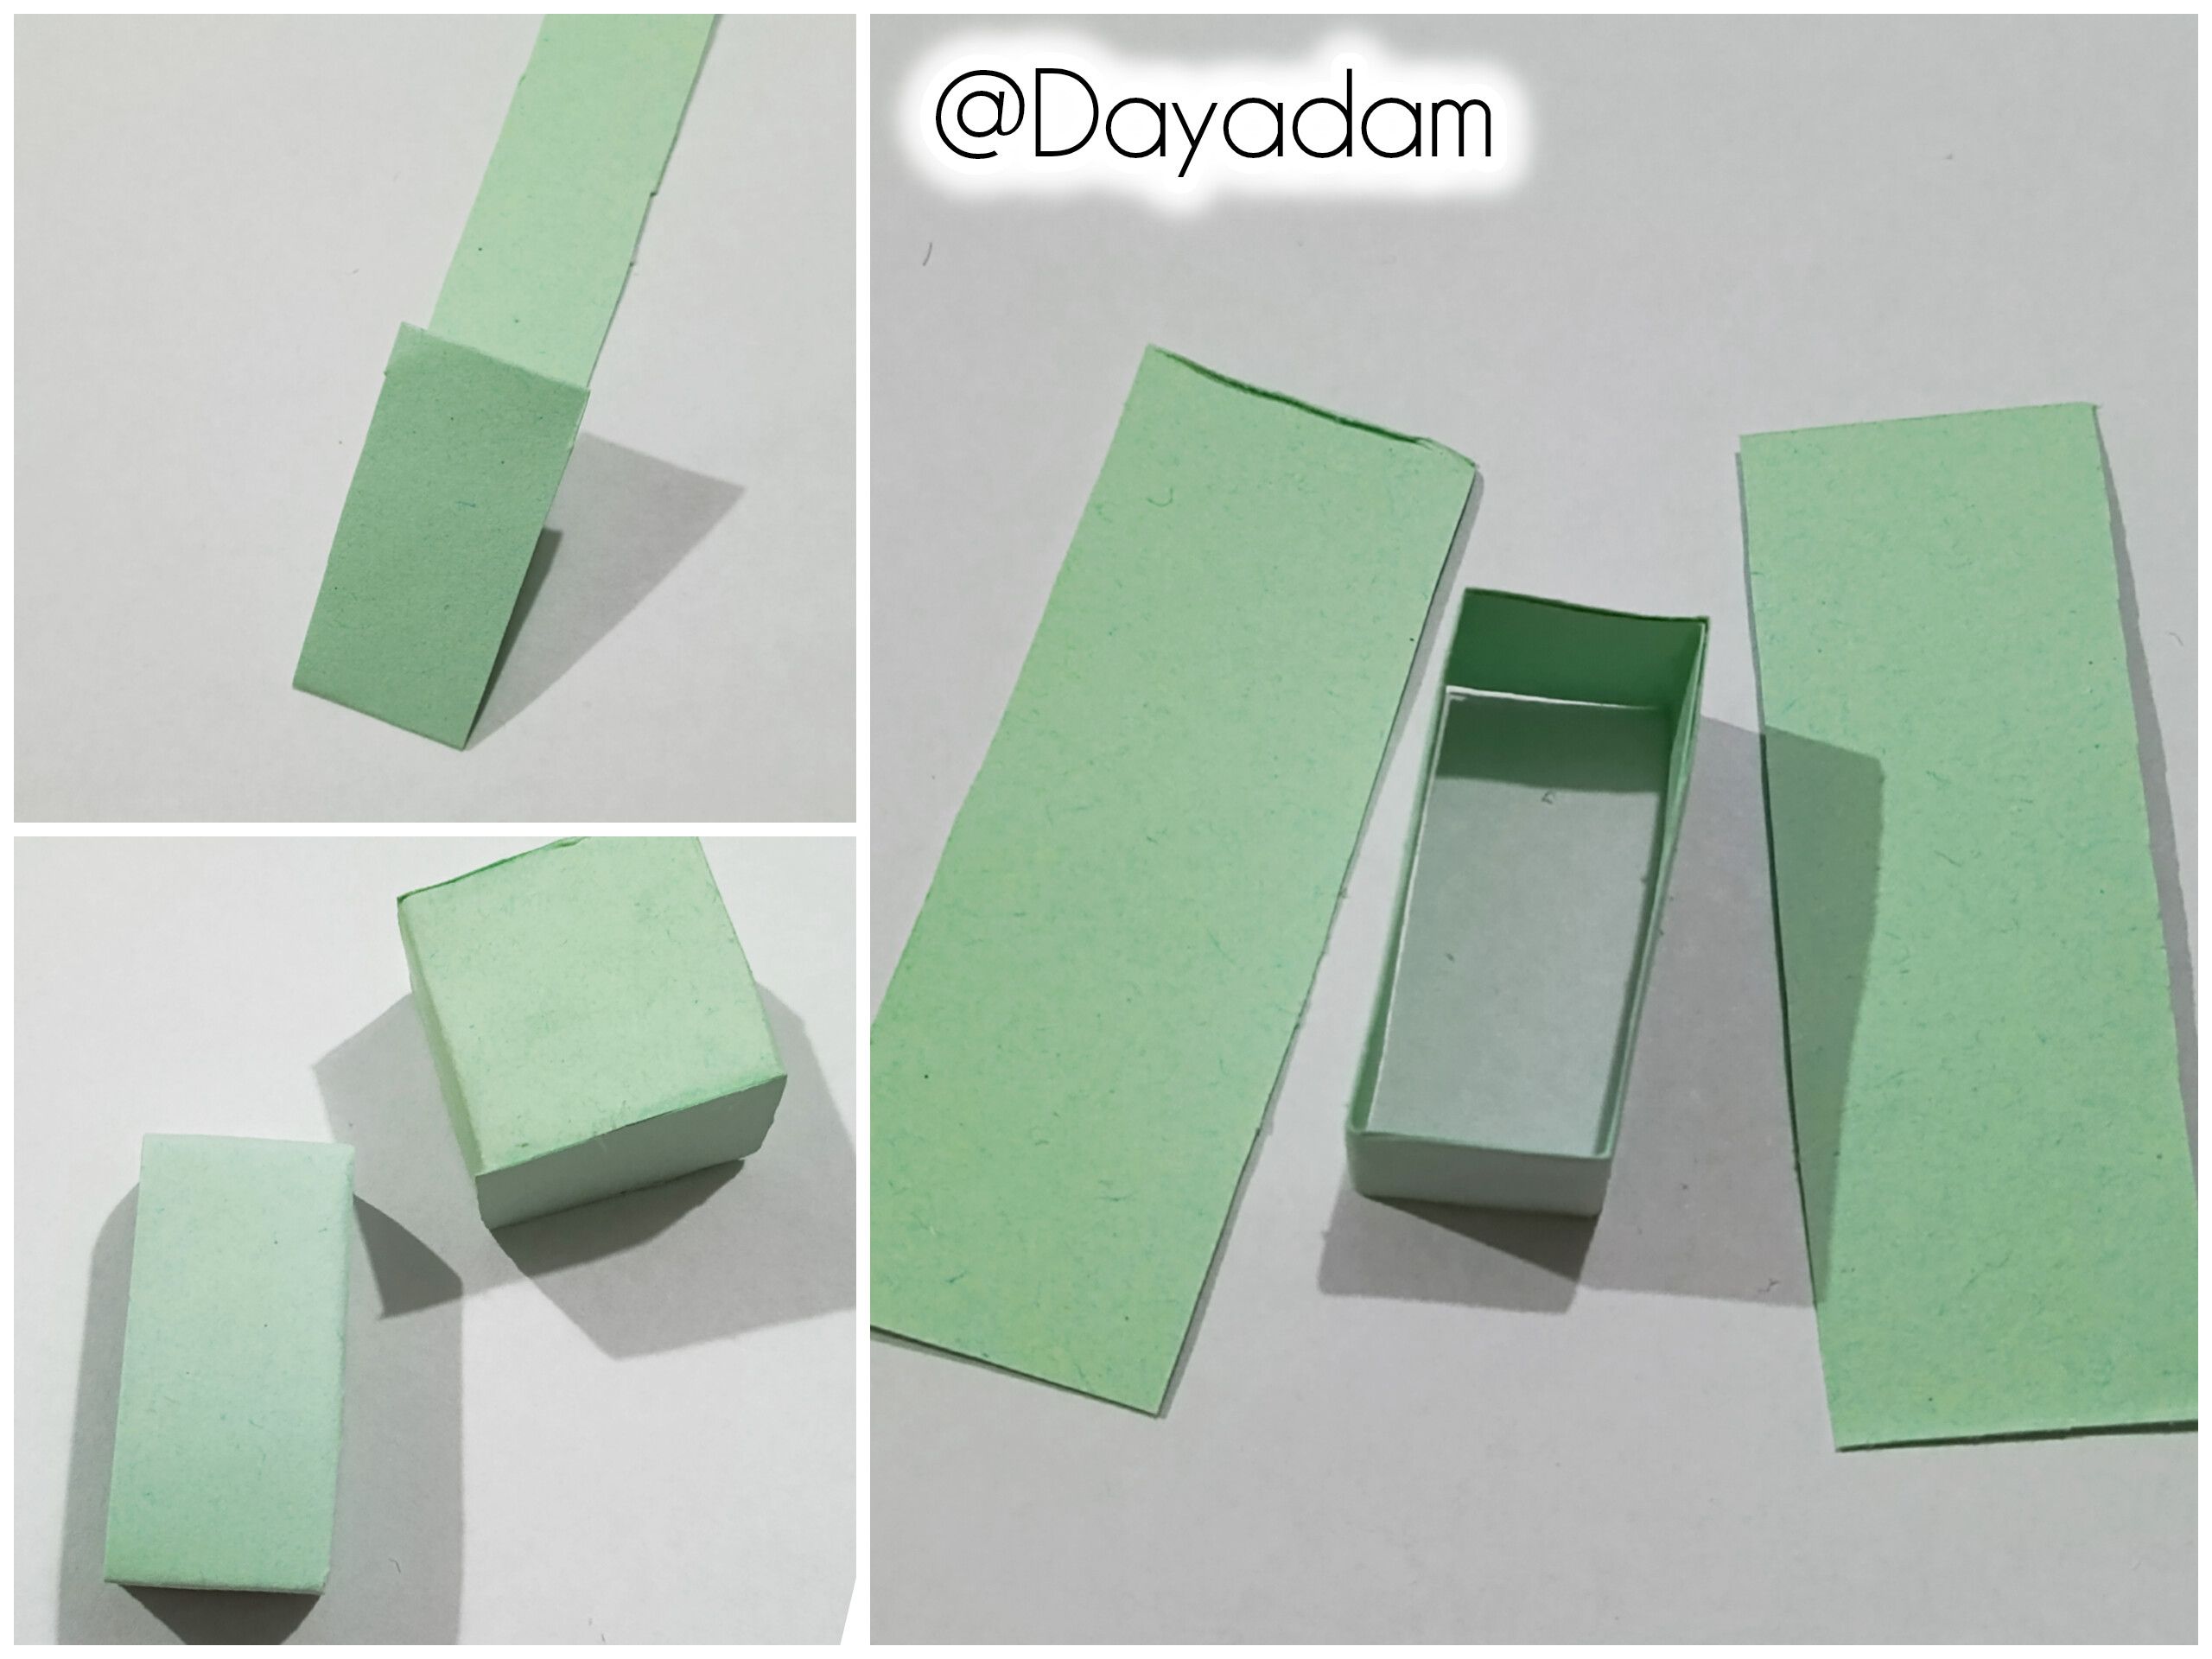
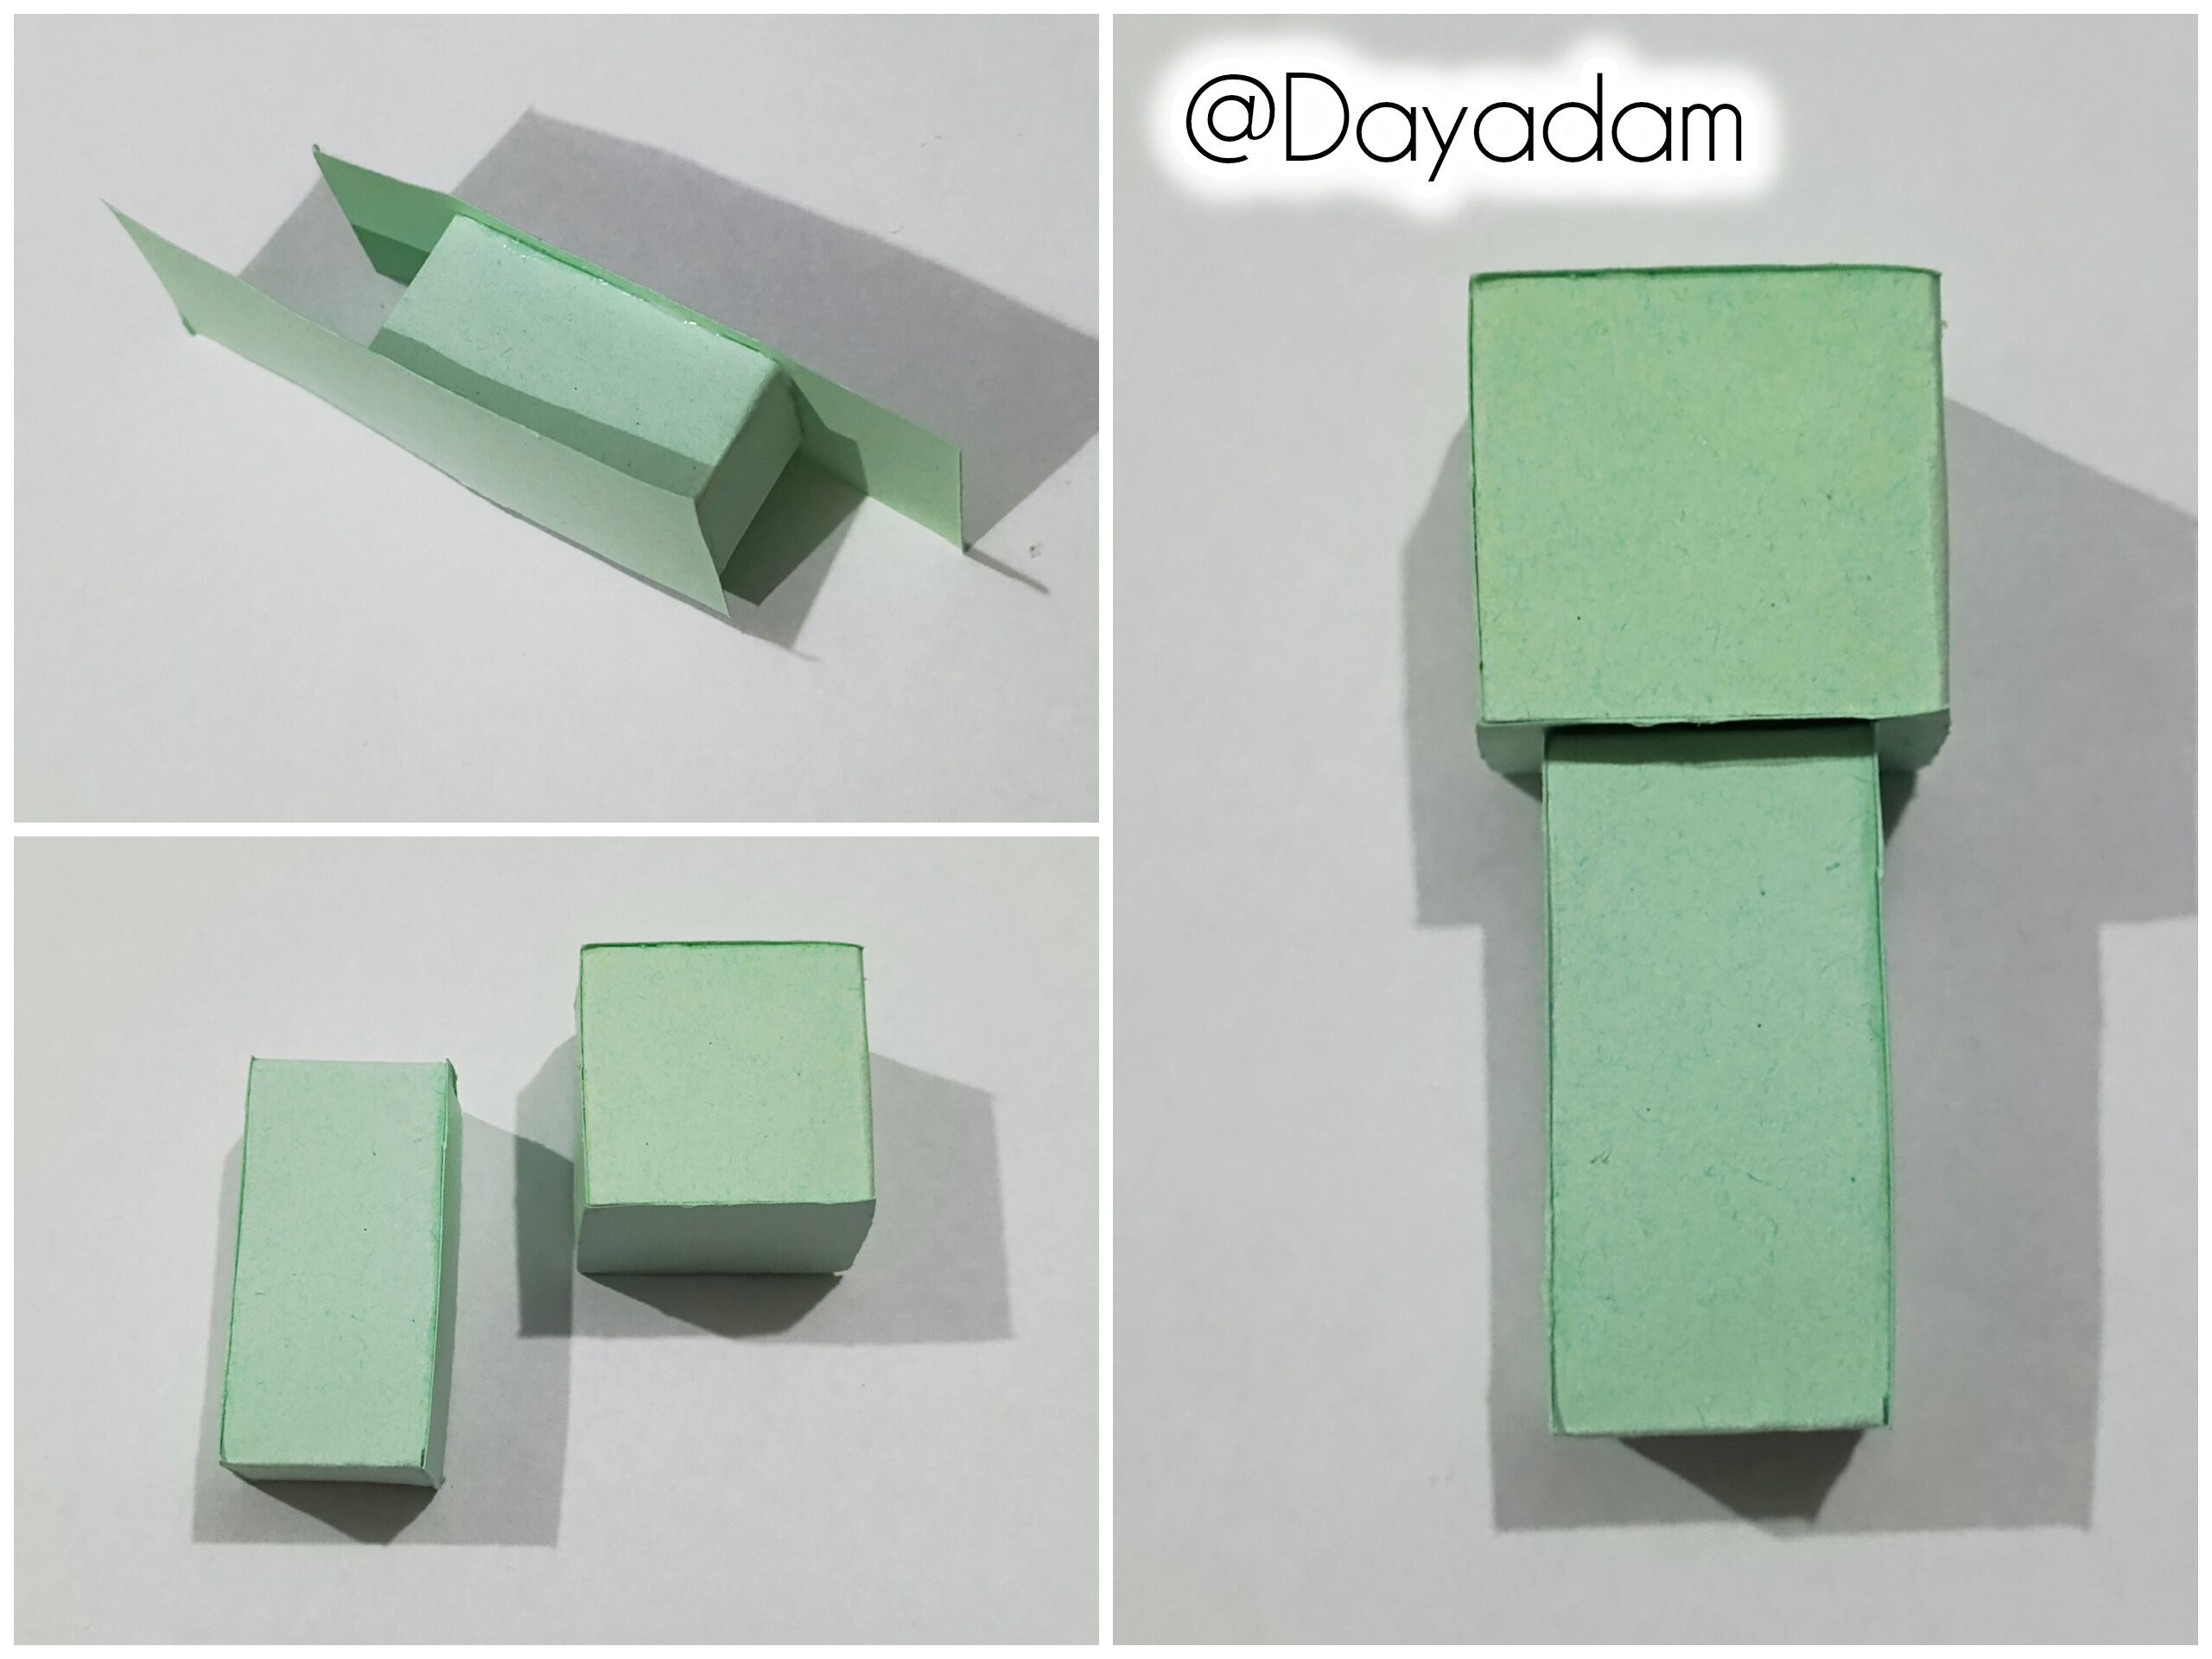
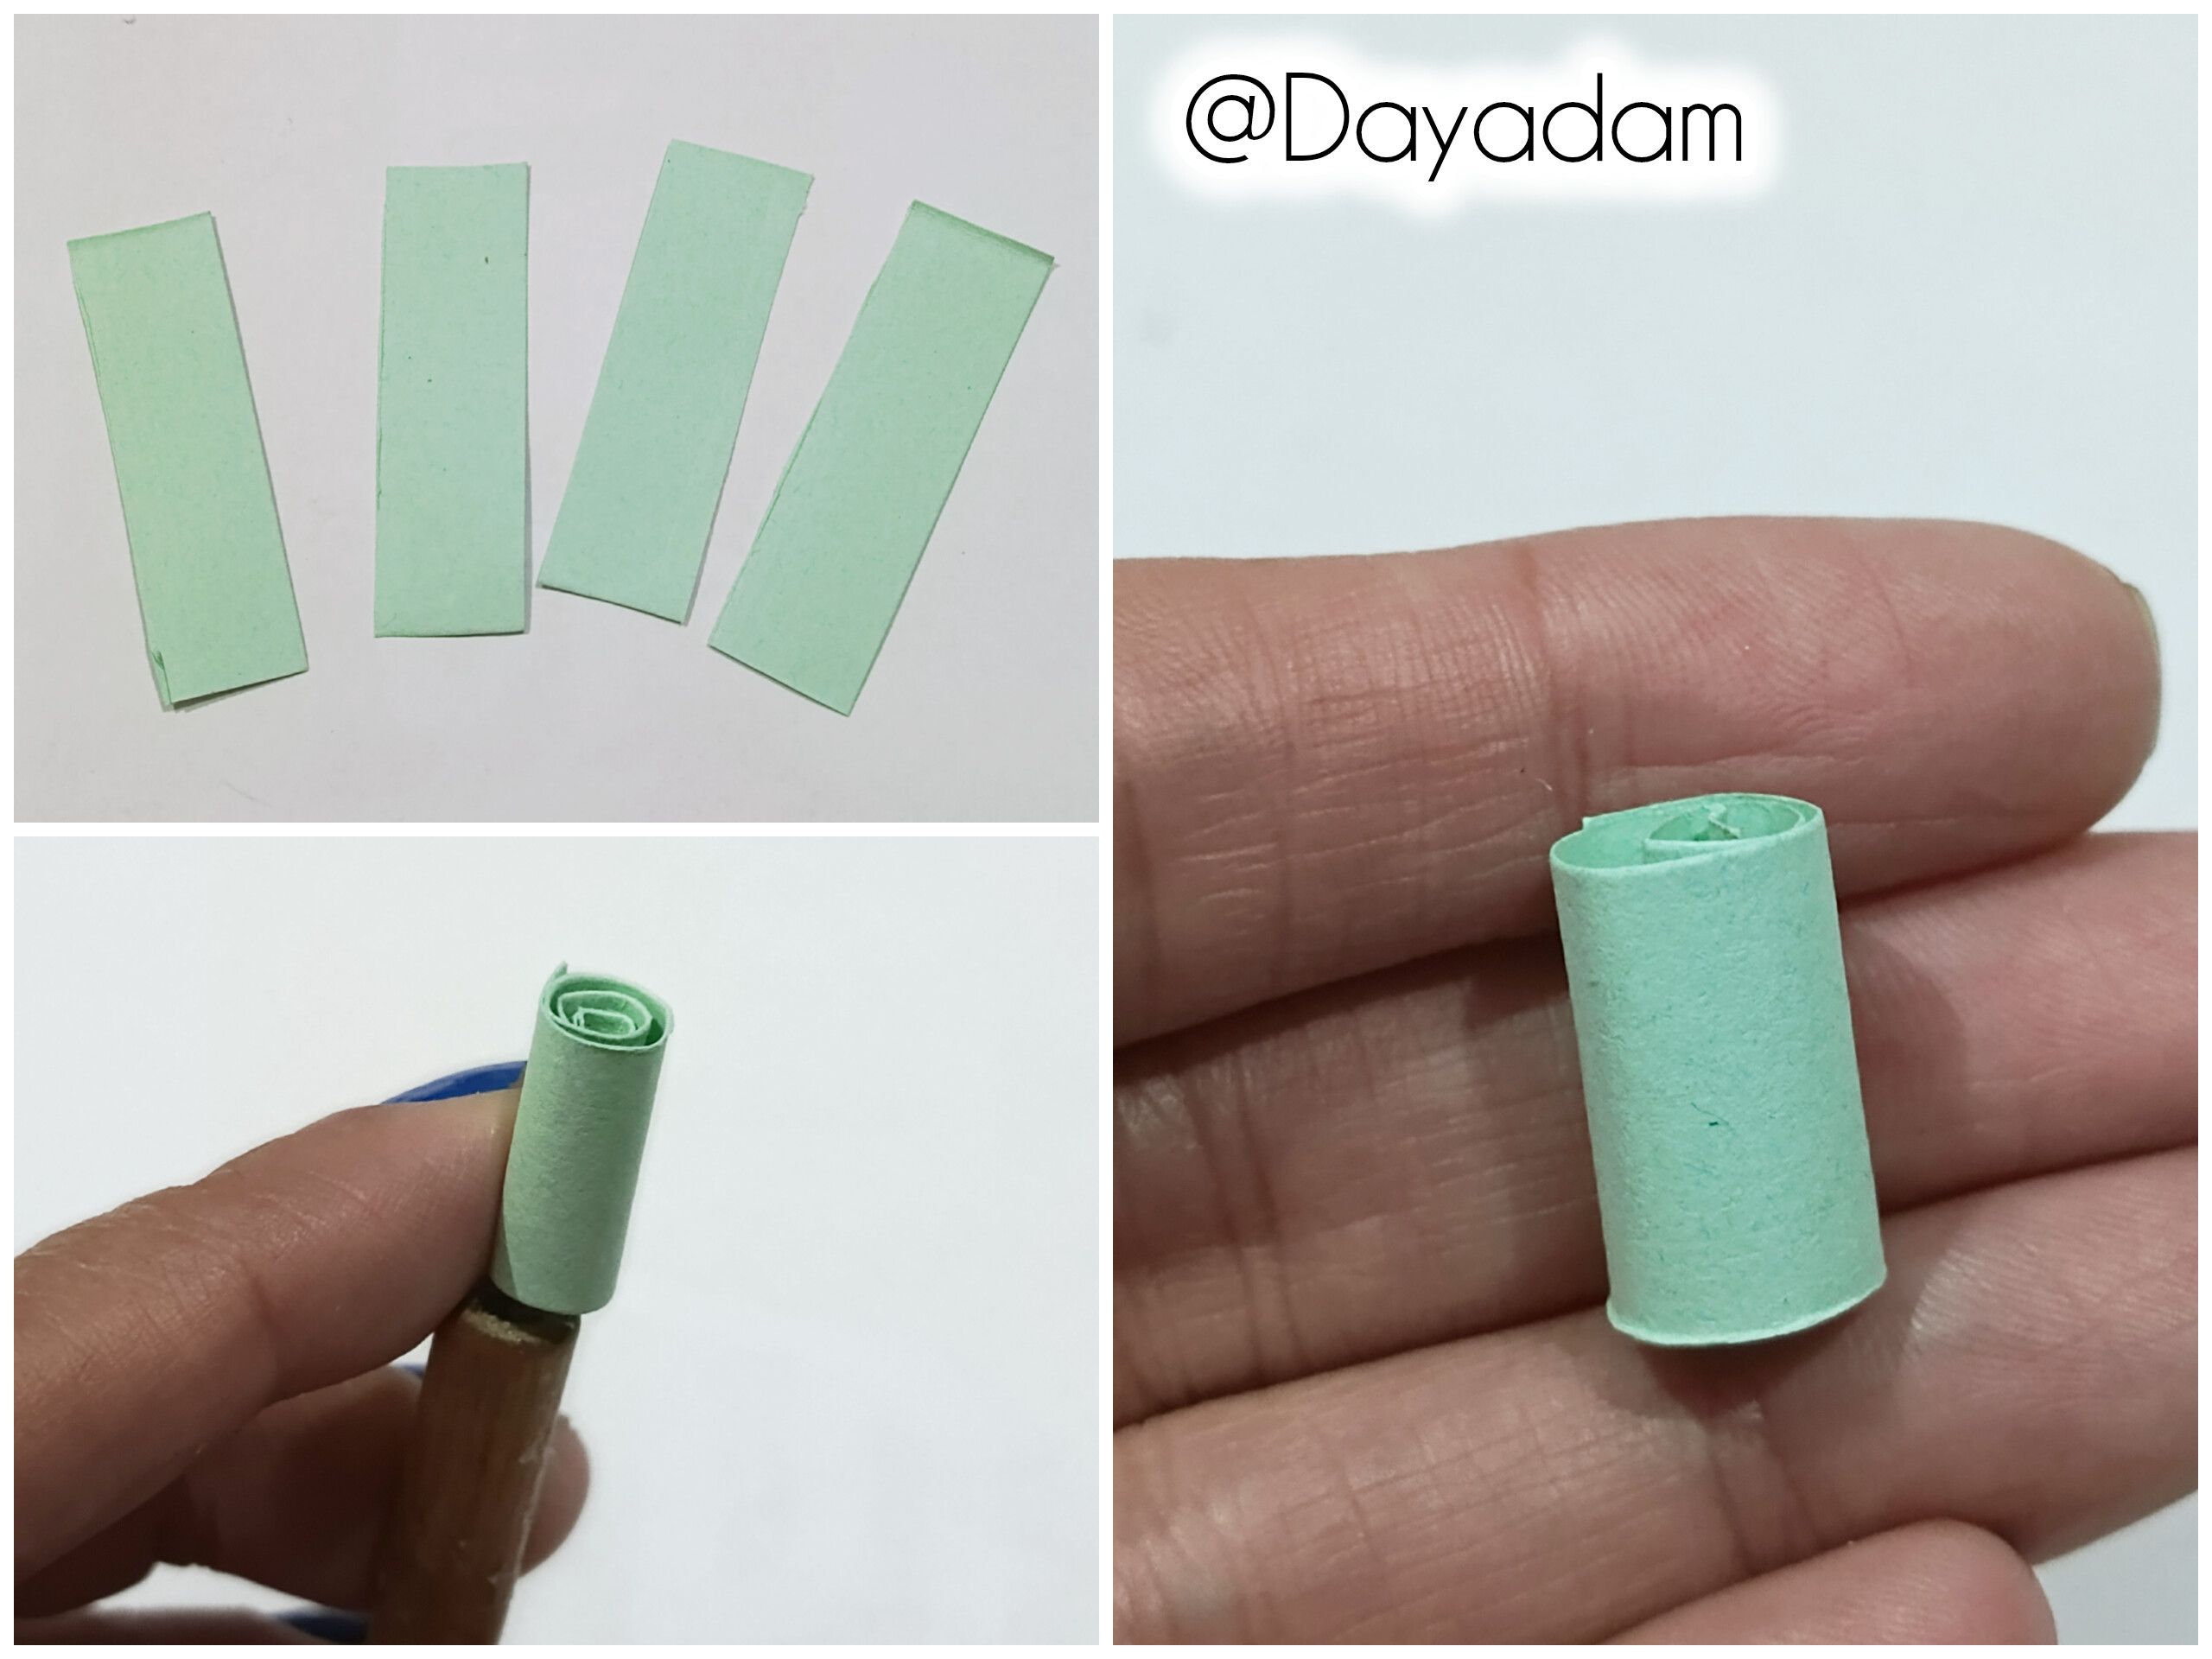
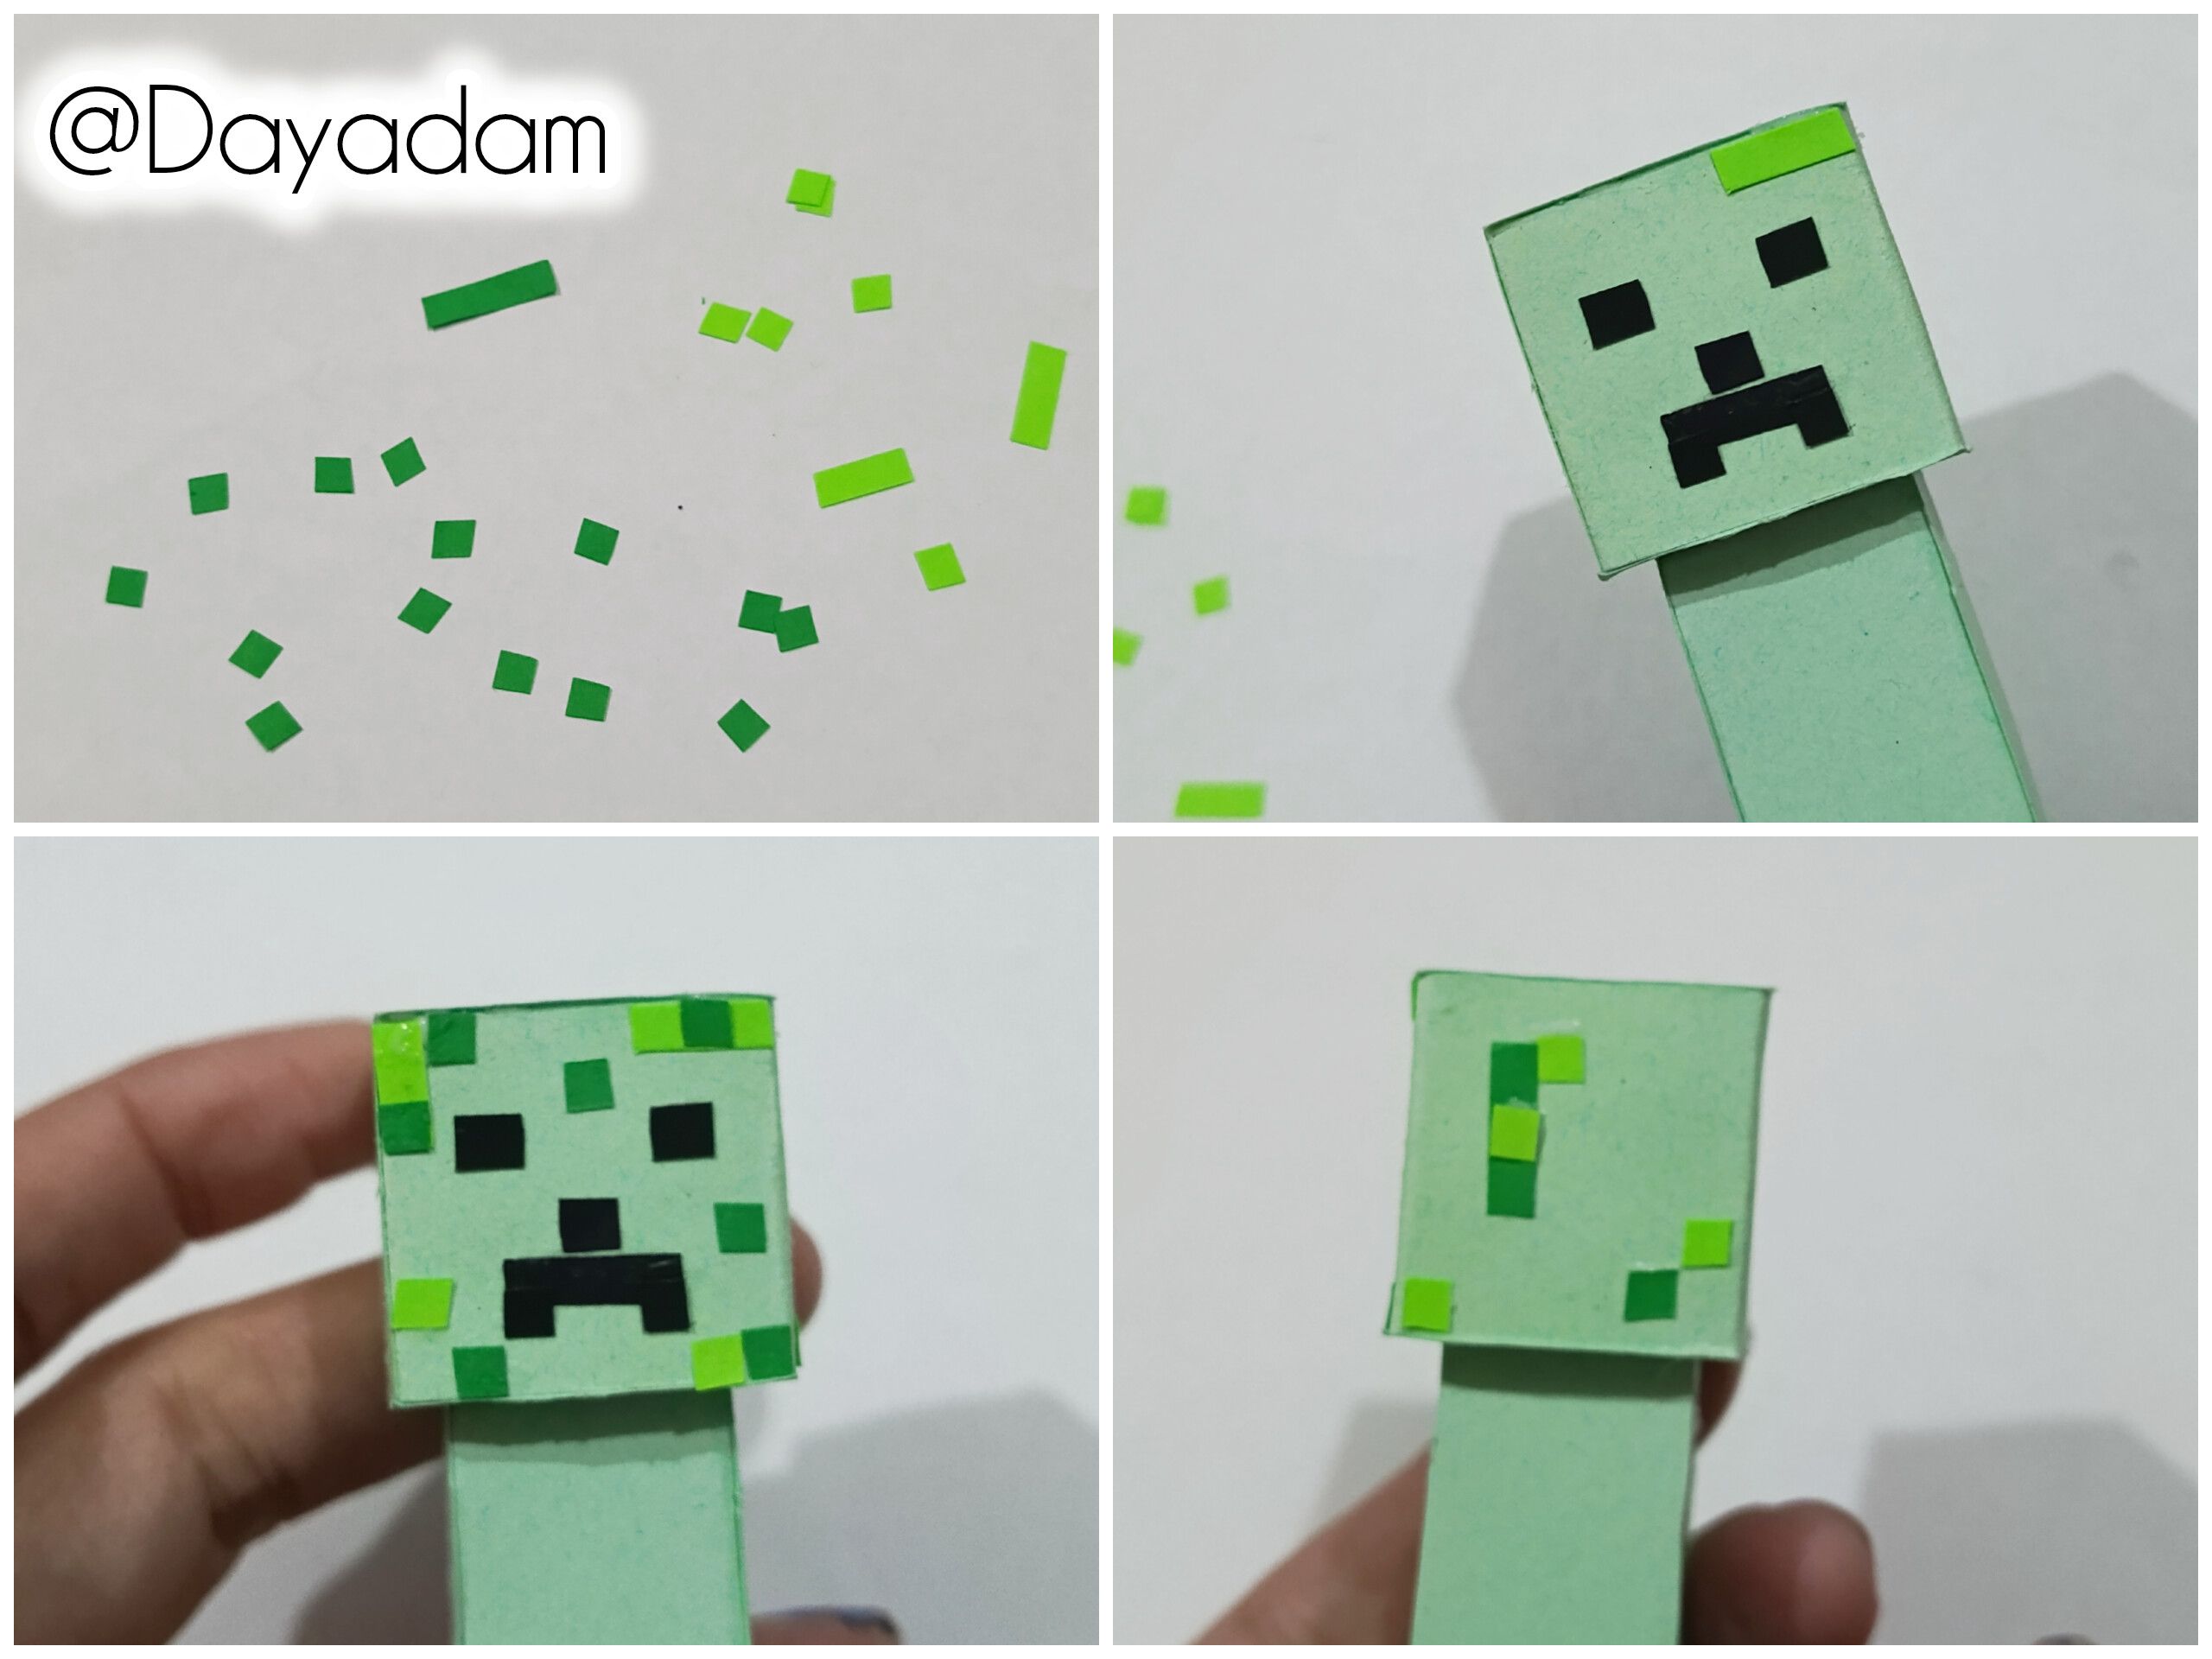
• I started by taking some green cardstock and cutting out a fairly thick strip with scissors. Using the Minecraft figure I had made earlier as a template, I made a square that would be the character's head. Once the square was ready, I glued two pieces of cardstock to the hollow parts with extra-strong white glue, let it dry thoroughly, and then cut off the excess.
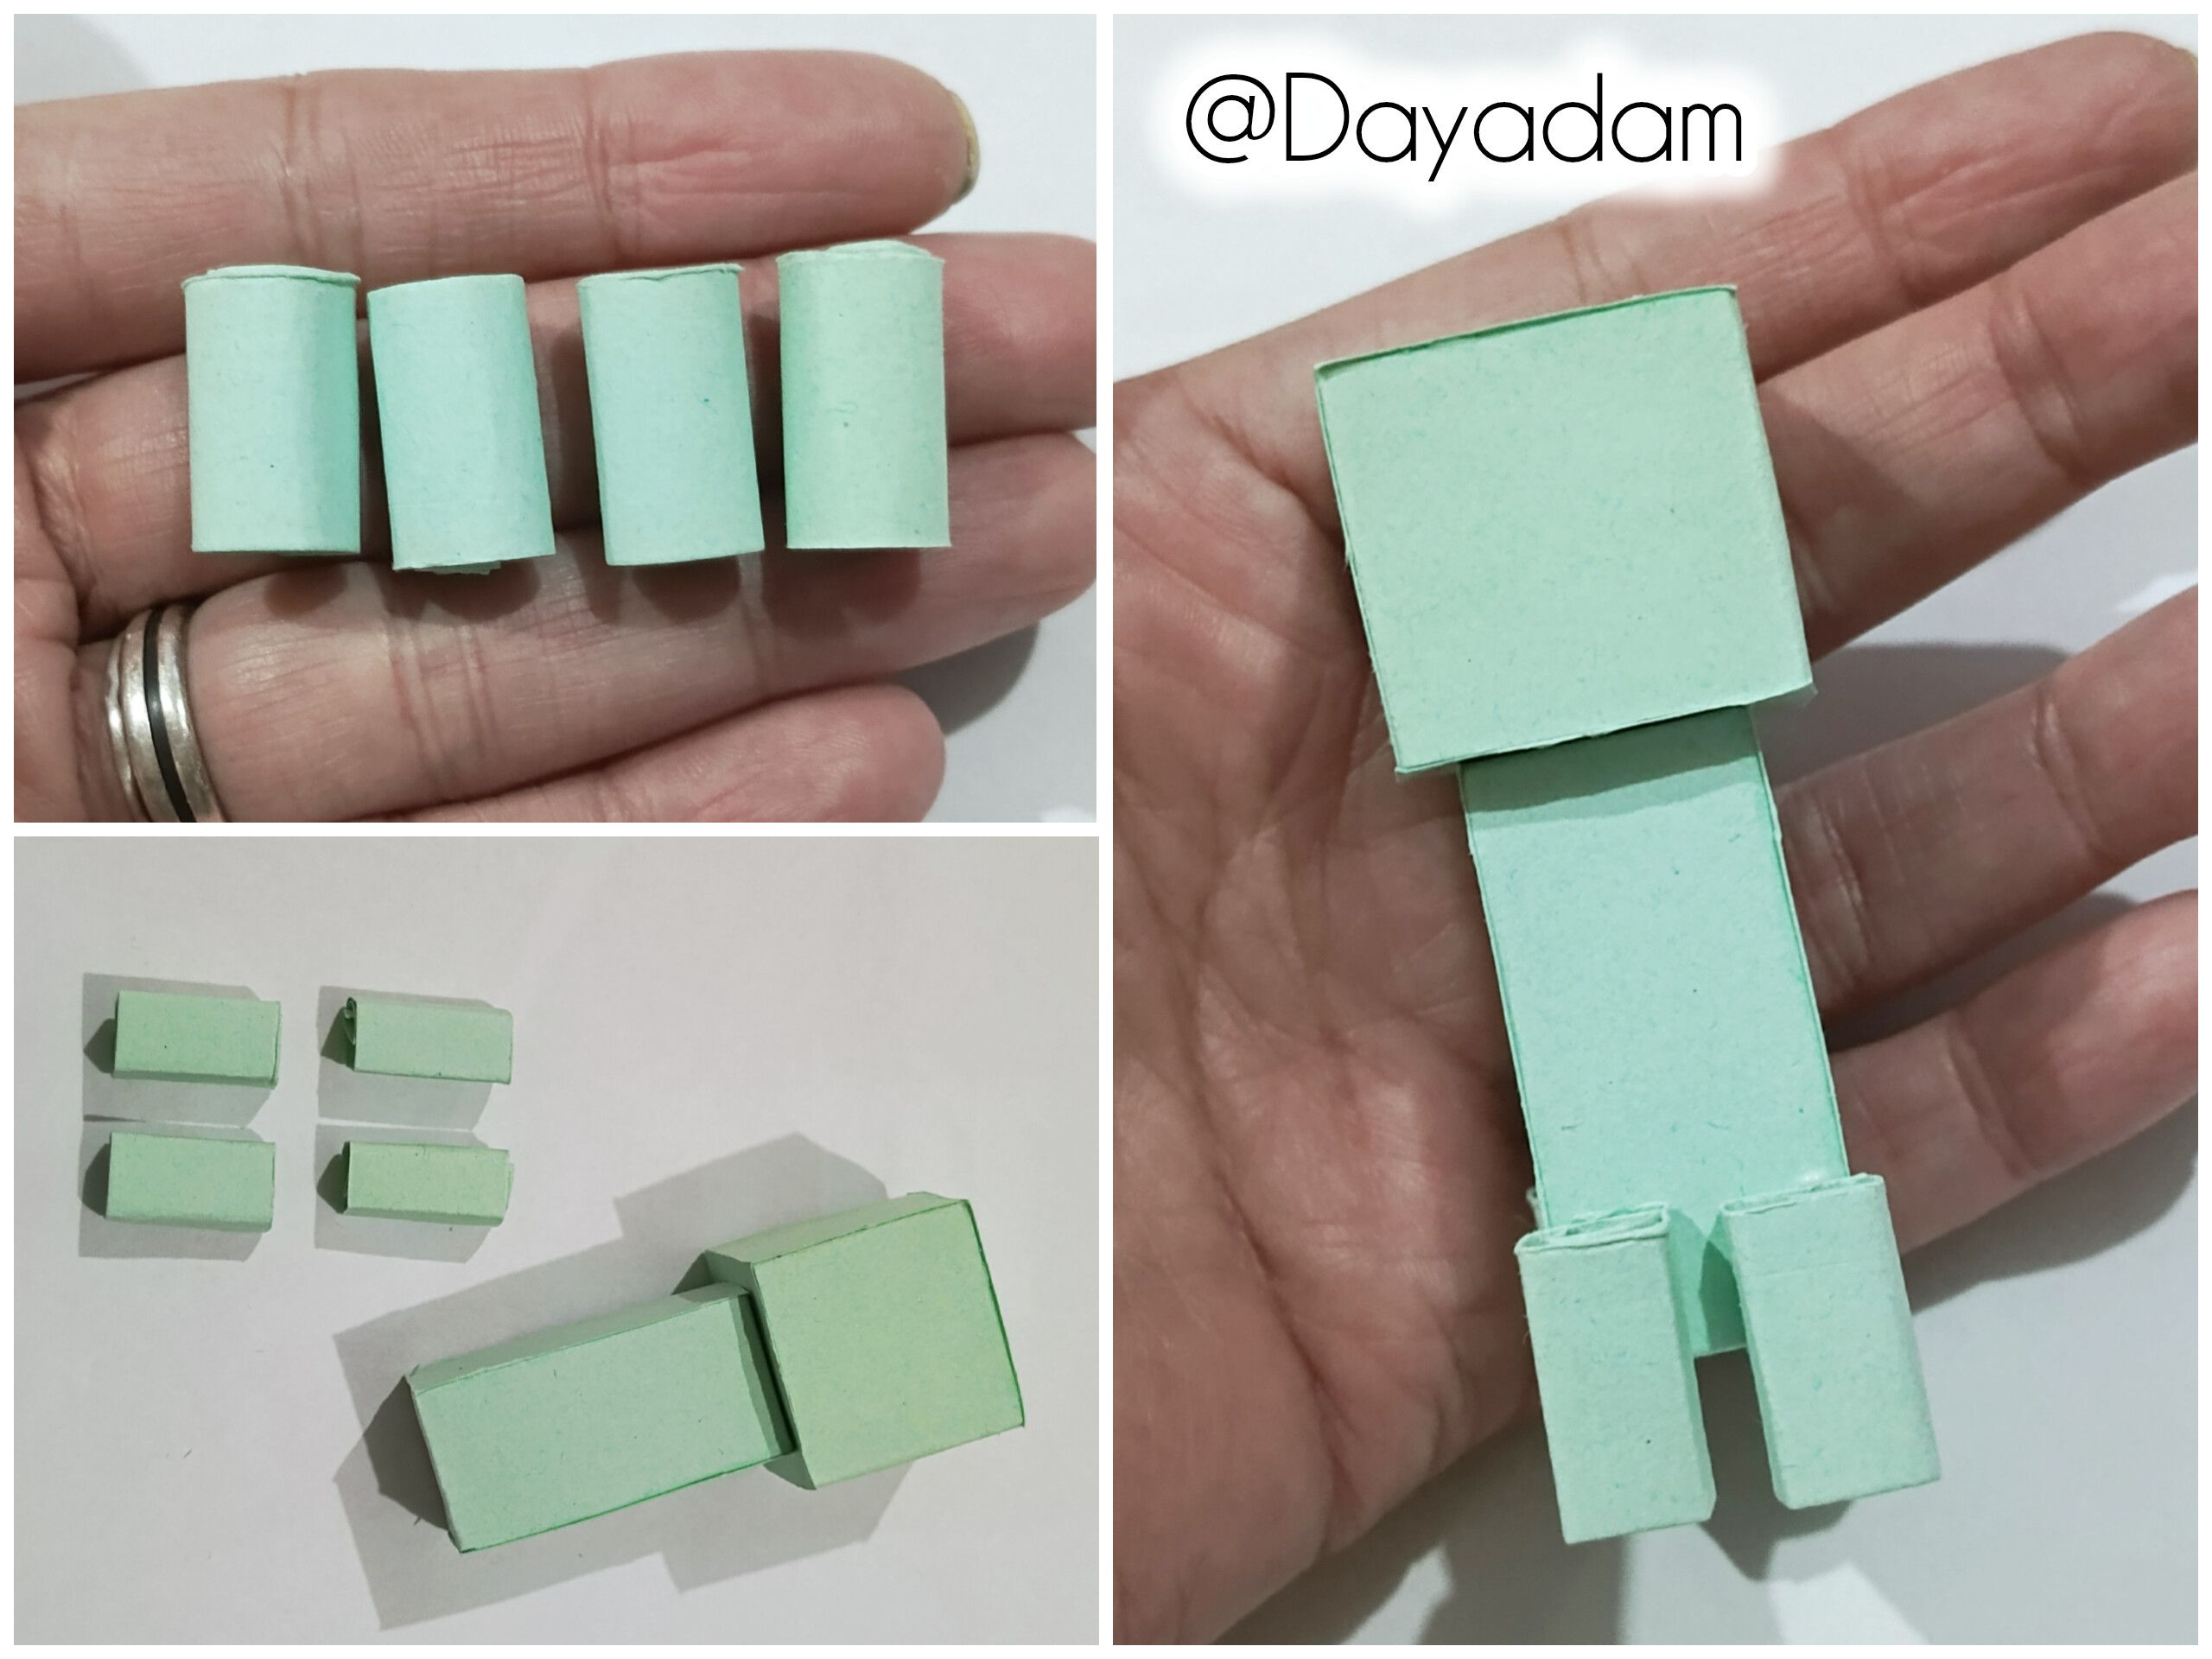
• I cut another smaller strip from the green cardboard. Following the same steps as before, I made a rectangle and glued other strips to the sides to fill in the hollow part until I had a uniform rectangle.
• I then glued both pieces together, with the square as the head and the rectangle as the body of the character.

• Comencé tomando cartulina de color verde, con una tijera recorte una tira algo gruesa, usando como molde la figura de Minecraft que hice con anterioridad, realicé un cuadrado que será la cabeza del personaje. Listo el cuadrado, pegué dos pedazos de cartulina en las partes huecas con pega blanca extra fuerte, deje secar muy bien y luego recorte el sobrante.
• Recorte otra tira más pequeña de la cartulina verde, con esta siguiendo los mismos parámetros anteriores realicé un rectángulo, pegué a los lados otras tiras para rellenar la parte hueca hasta conseguir mi rectángulo uniforme.
• Procedí a pegar ambas piezas, el cuadrado es la cabeza y el rectángulo el cuerpo del personaje.
 |
 |
 |
 |
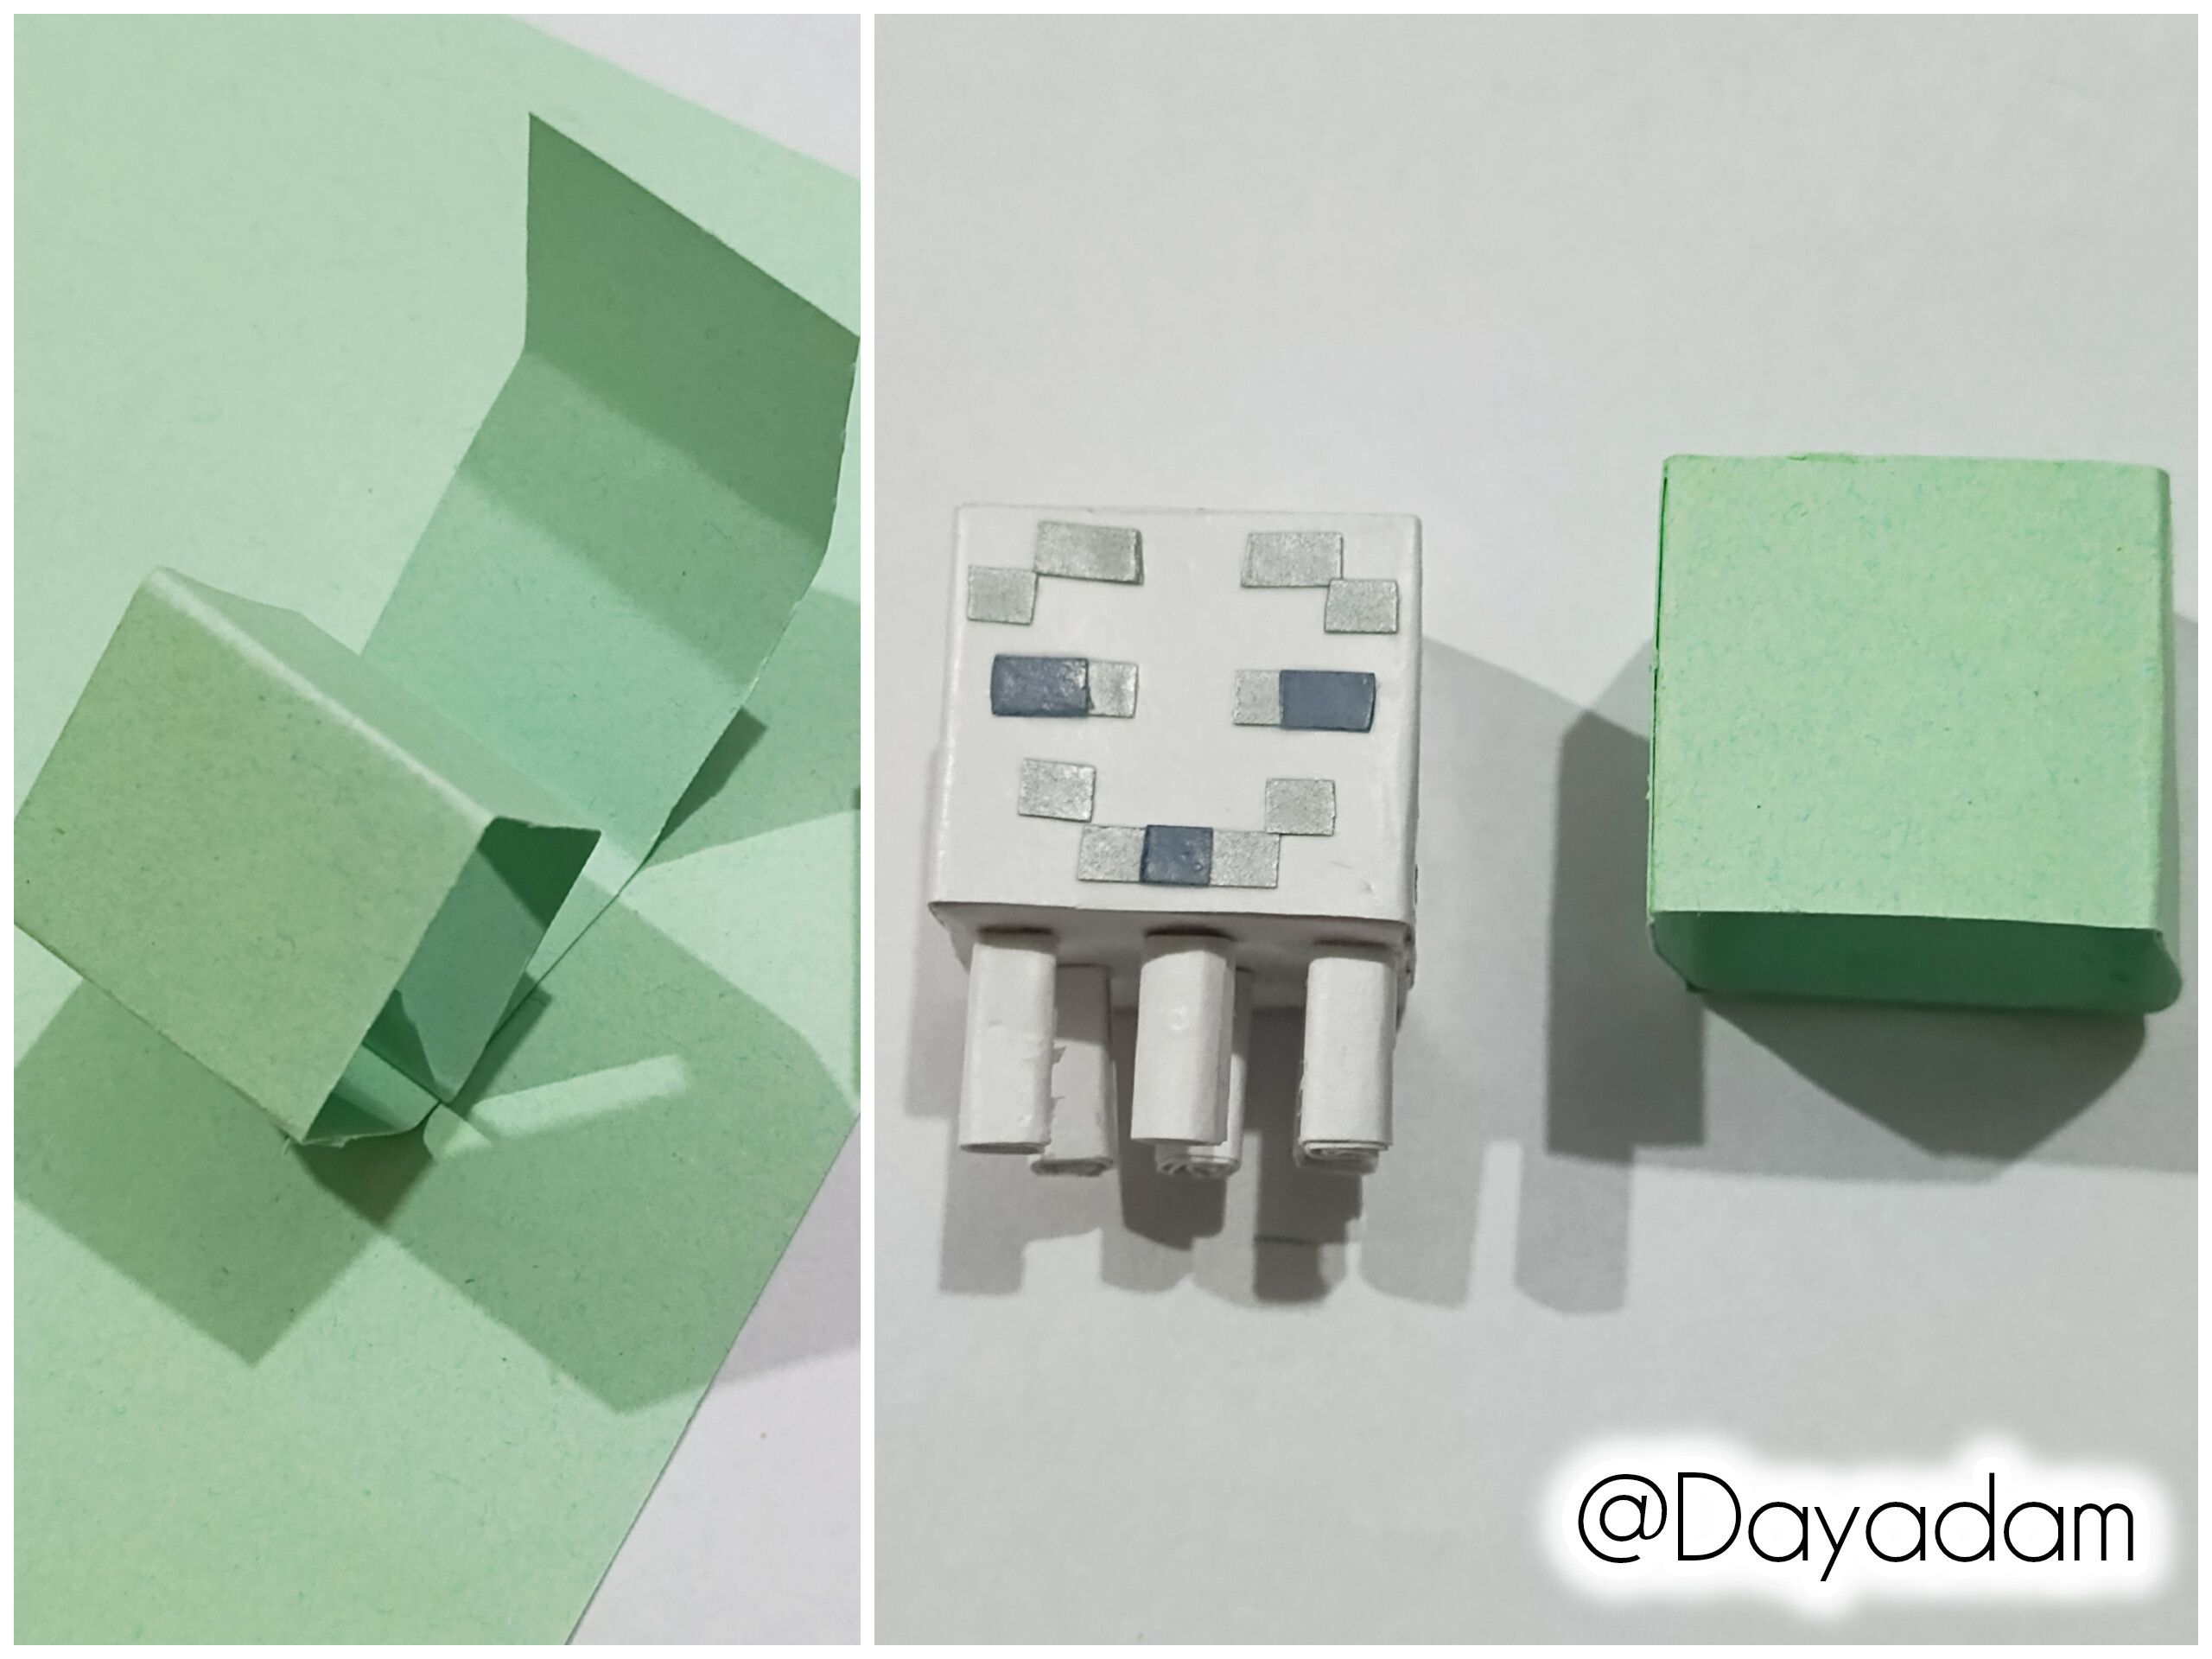
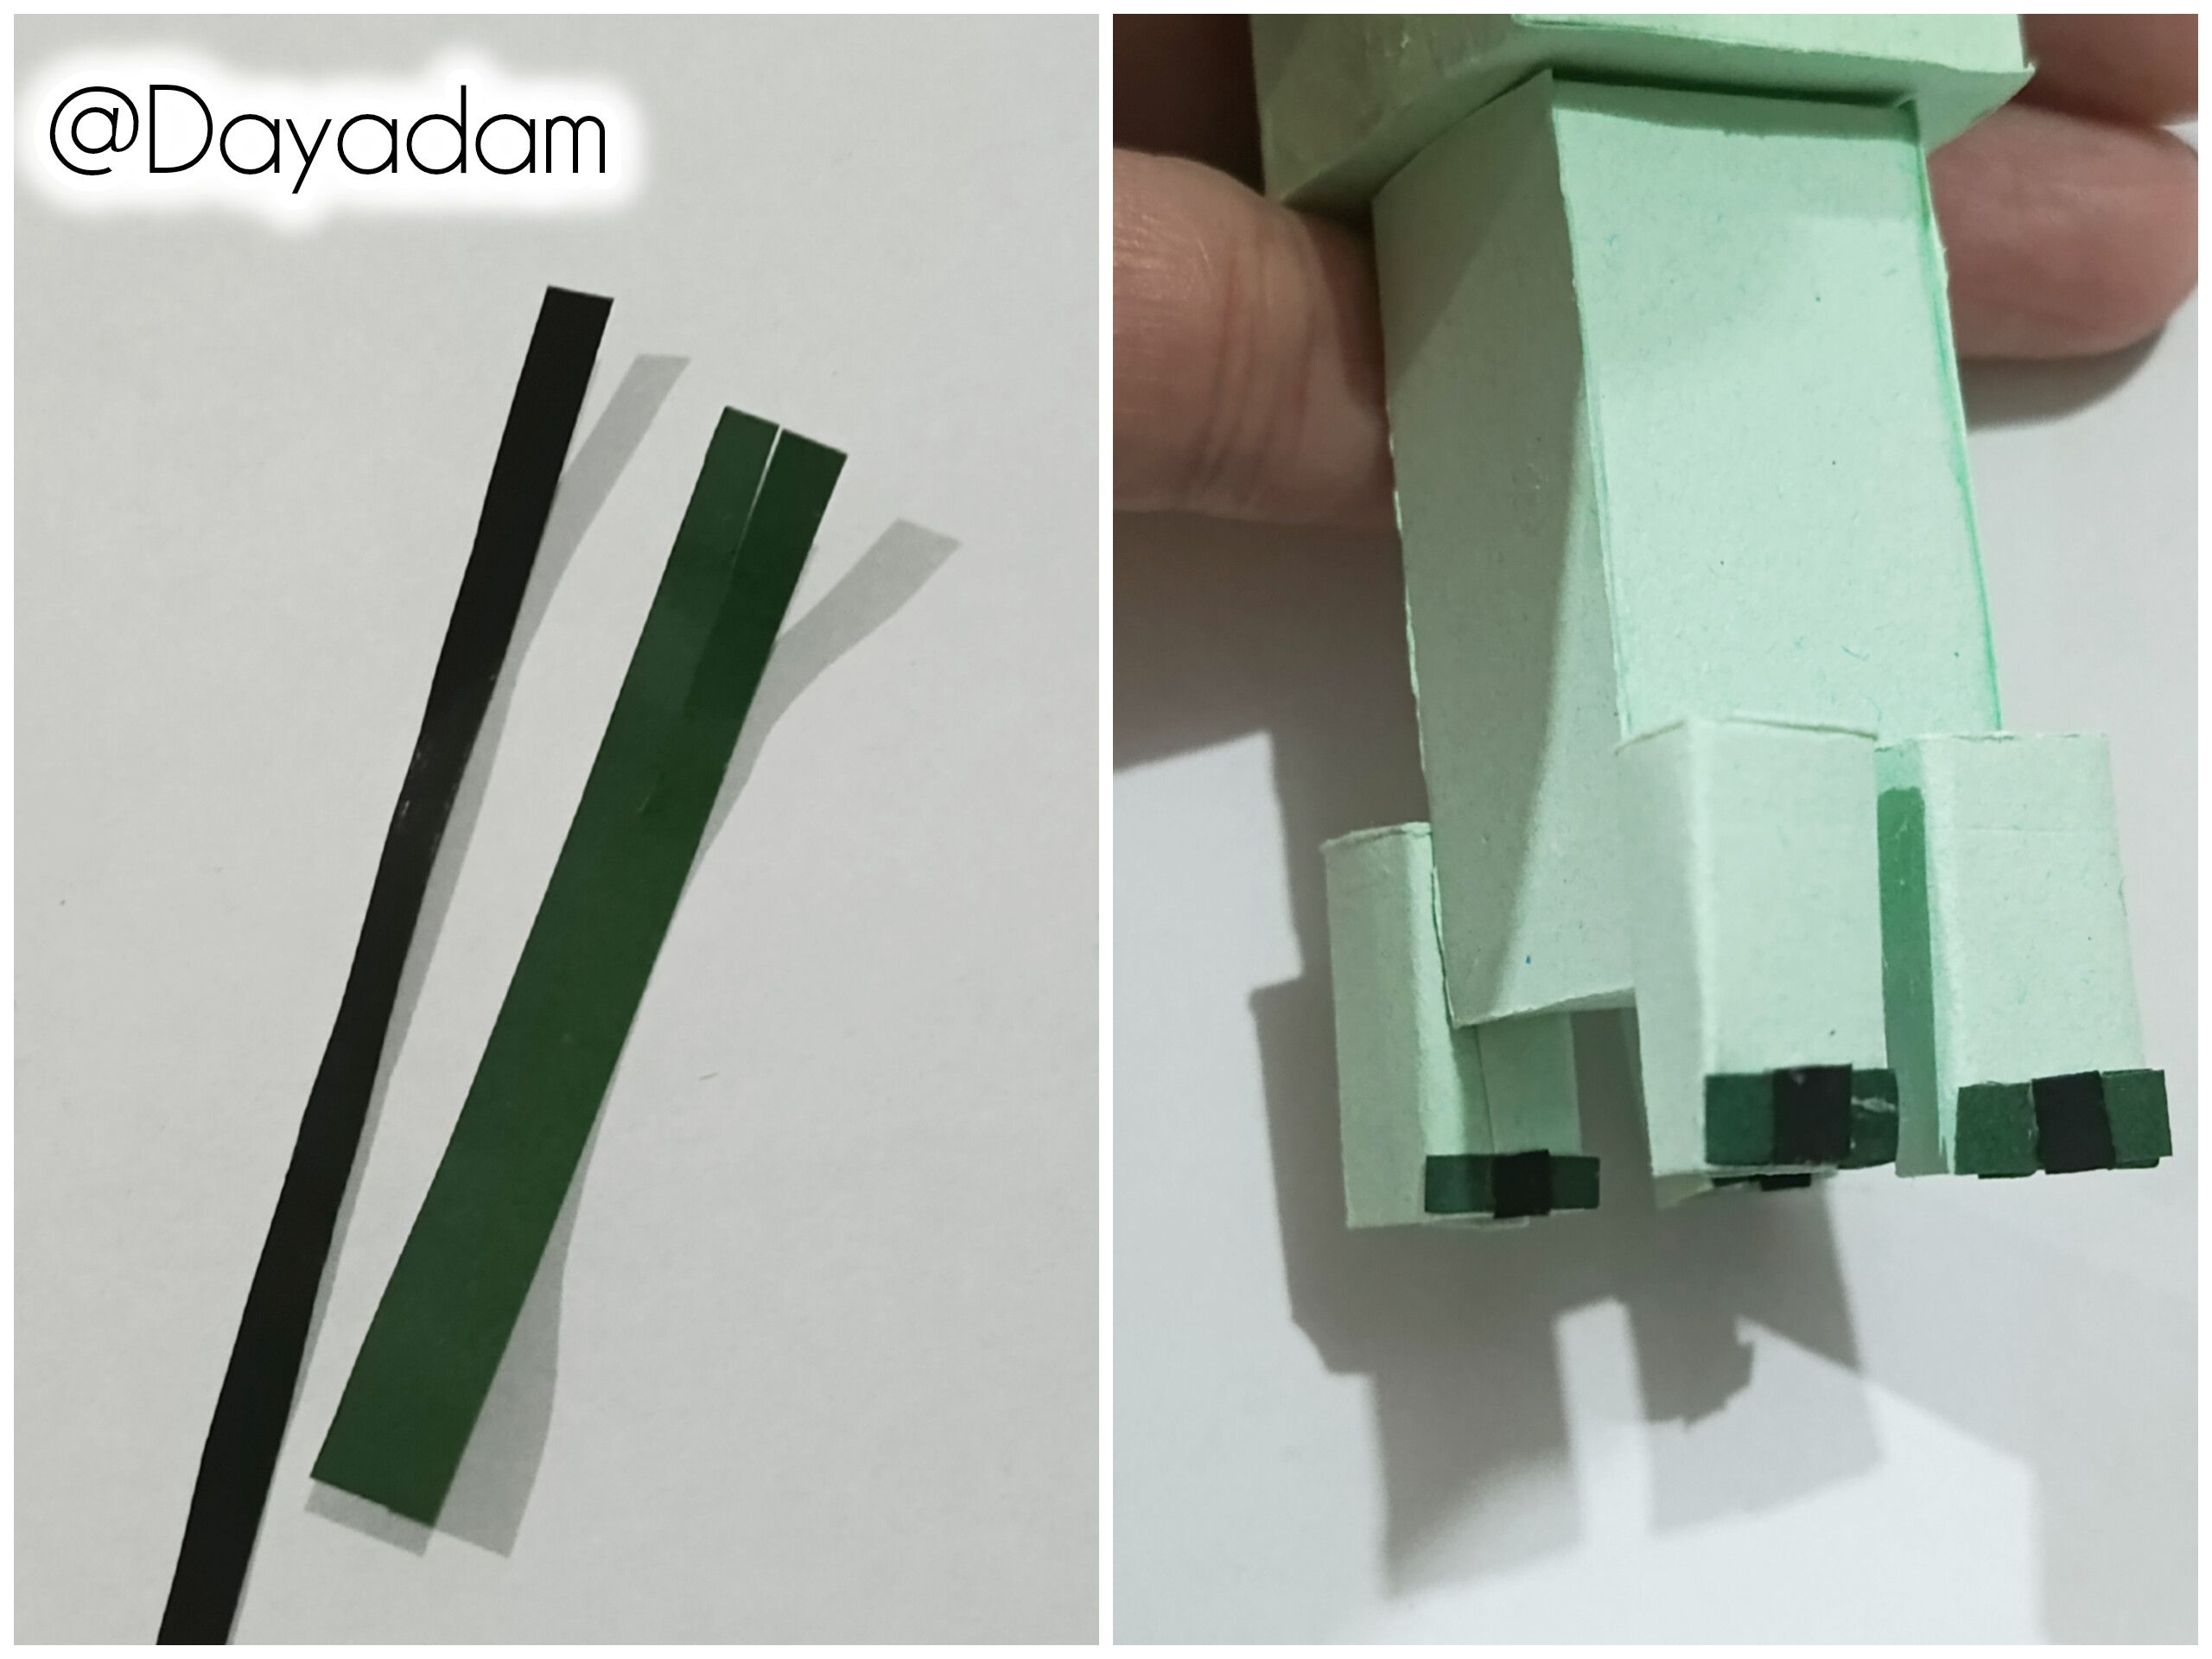
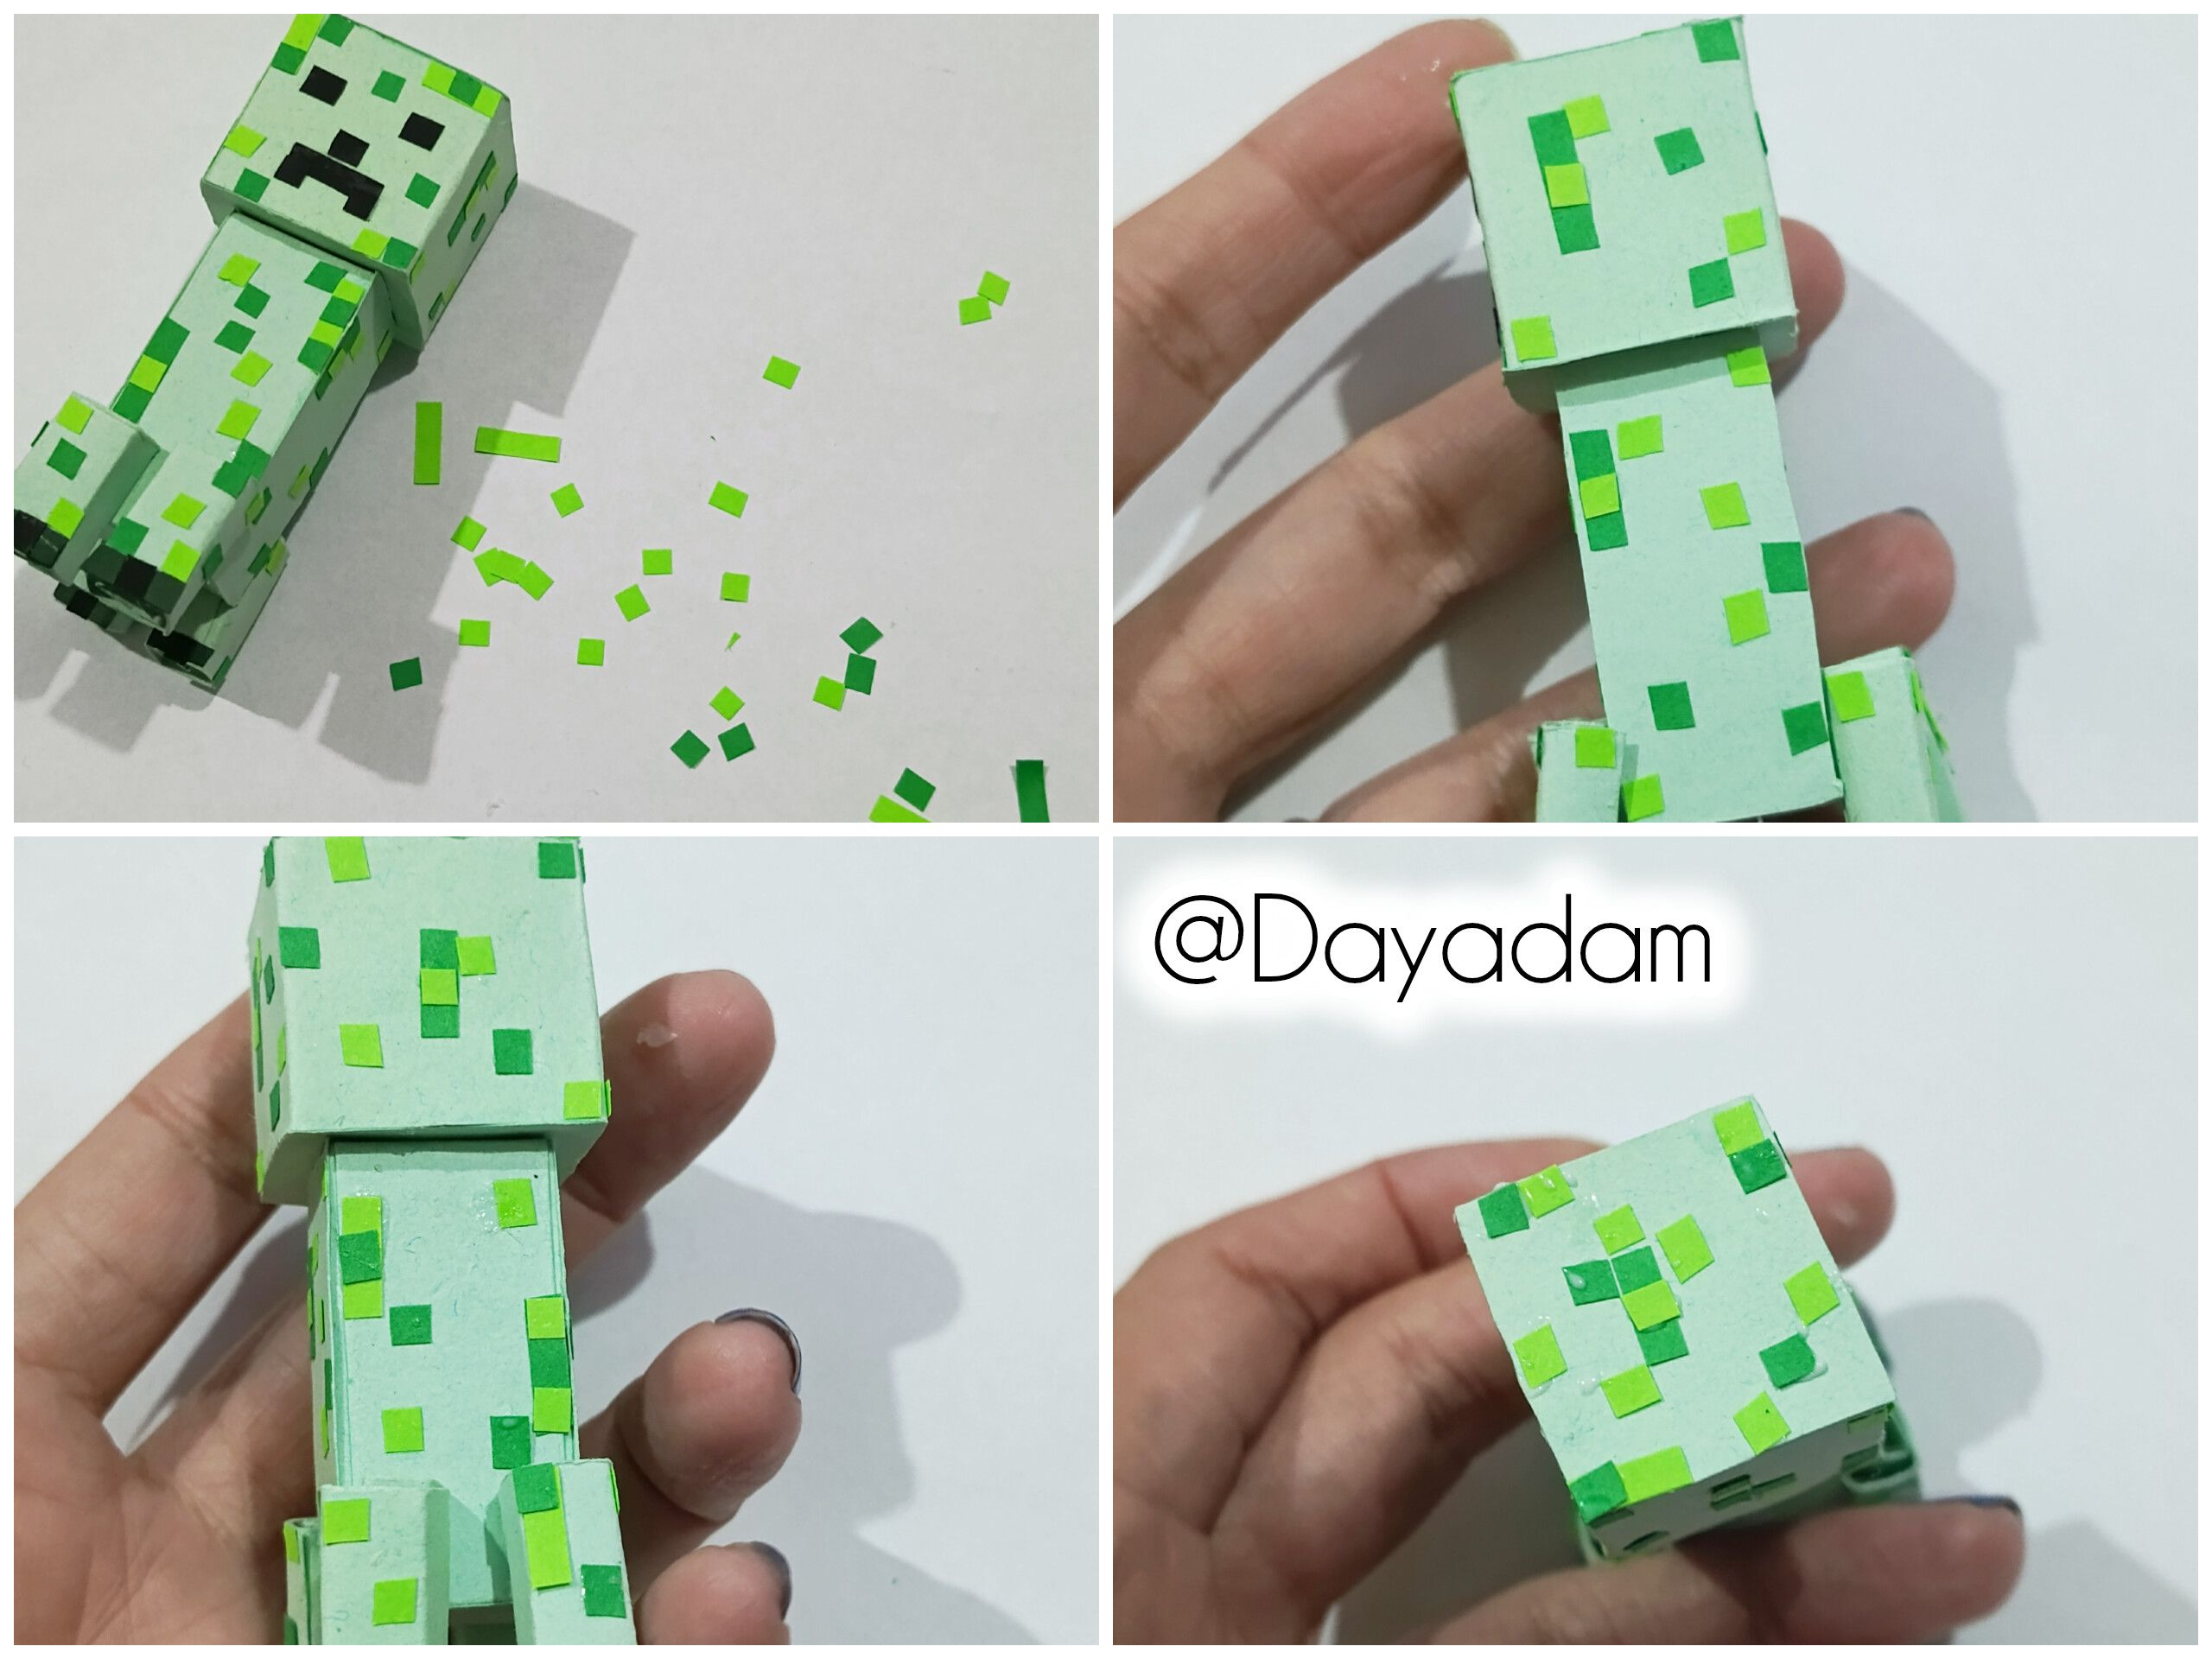
• To make the legs, I cut four rectangular strips and used the quilling needle to roll them into open circles. I then shaped them into squares and glued them to the bottom of the character's body, two at the front and two at the back.
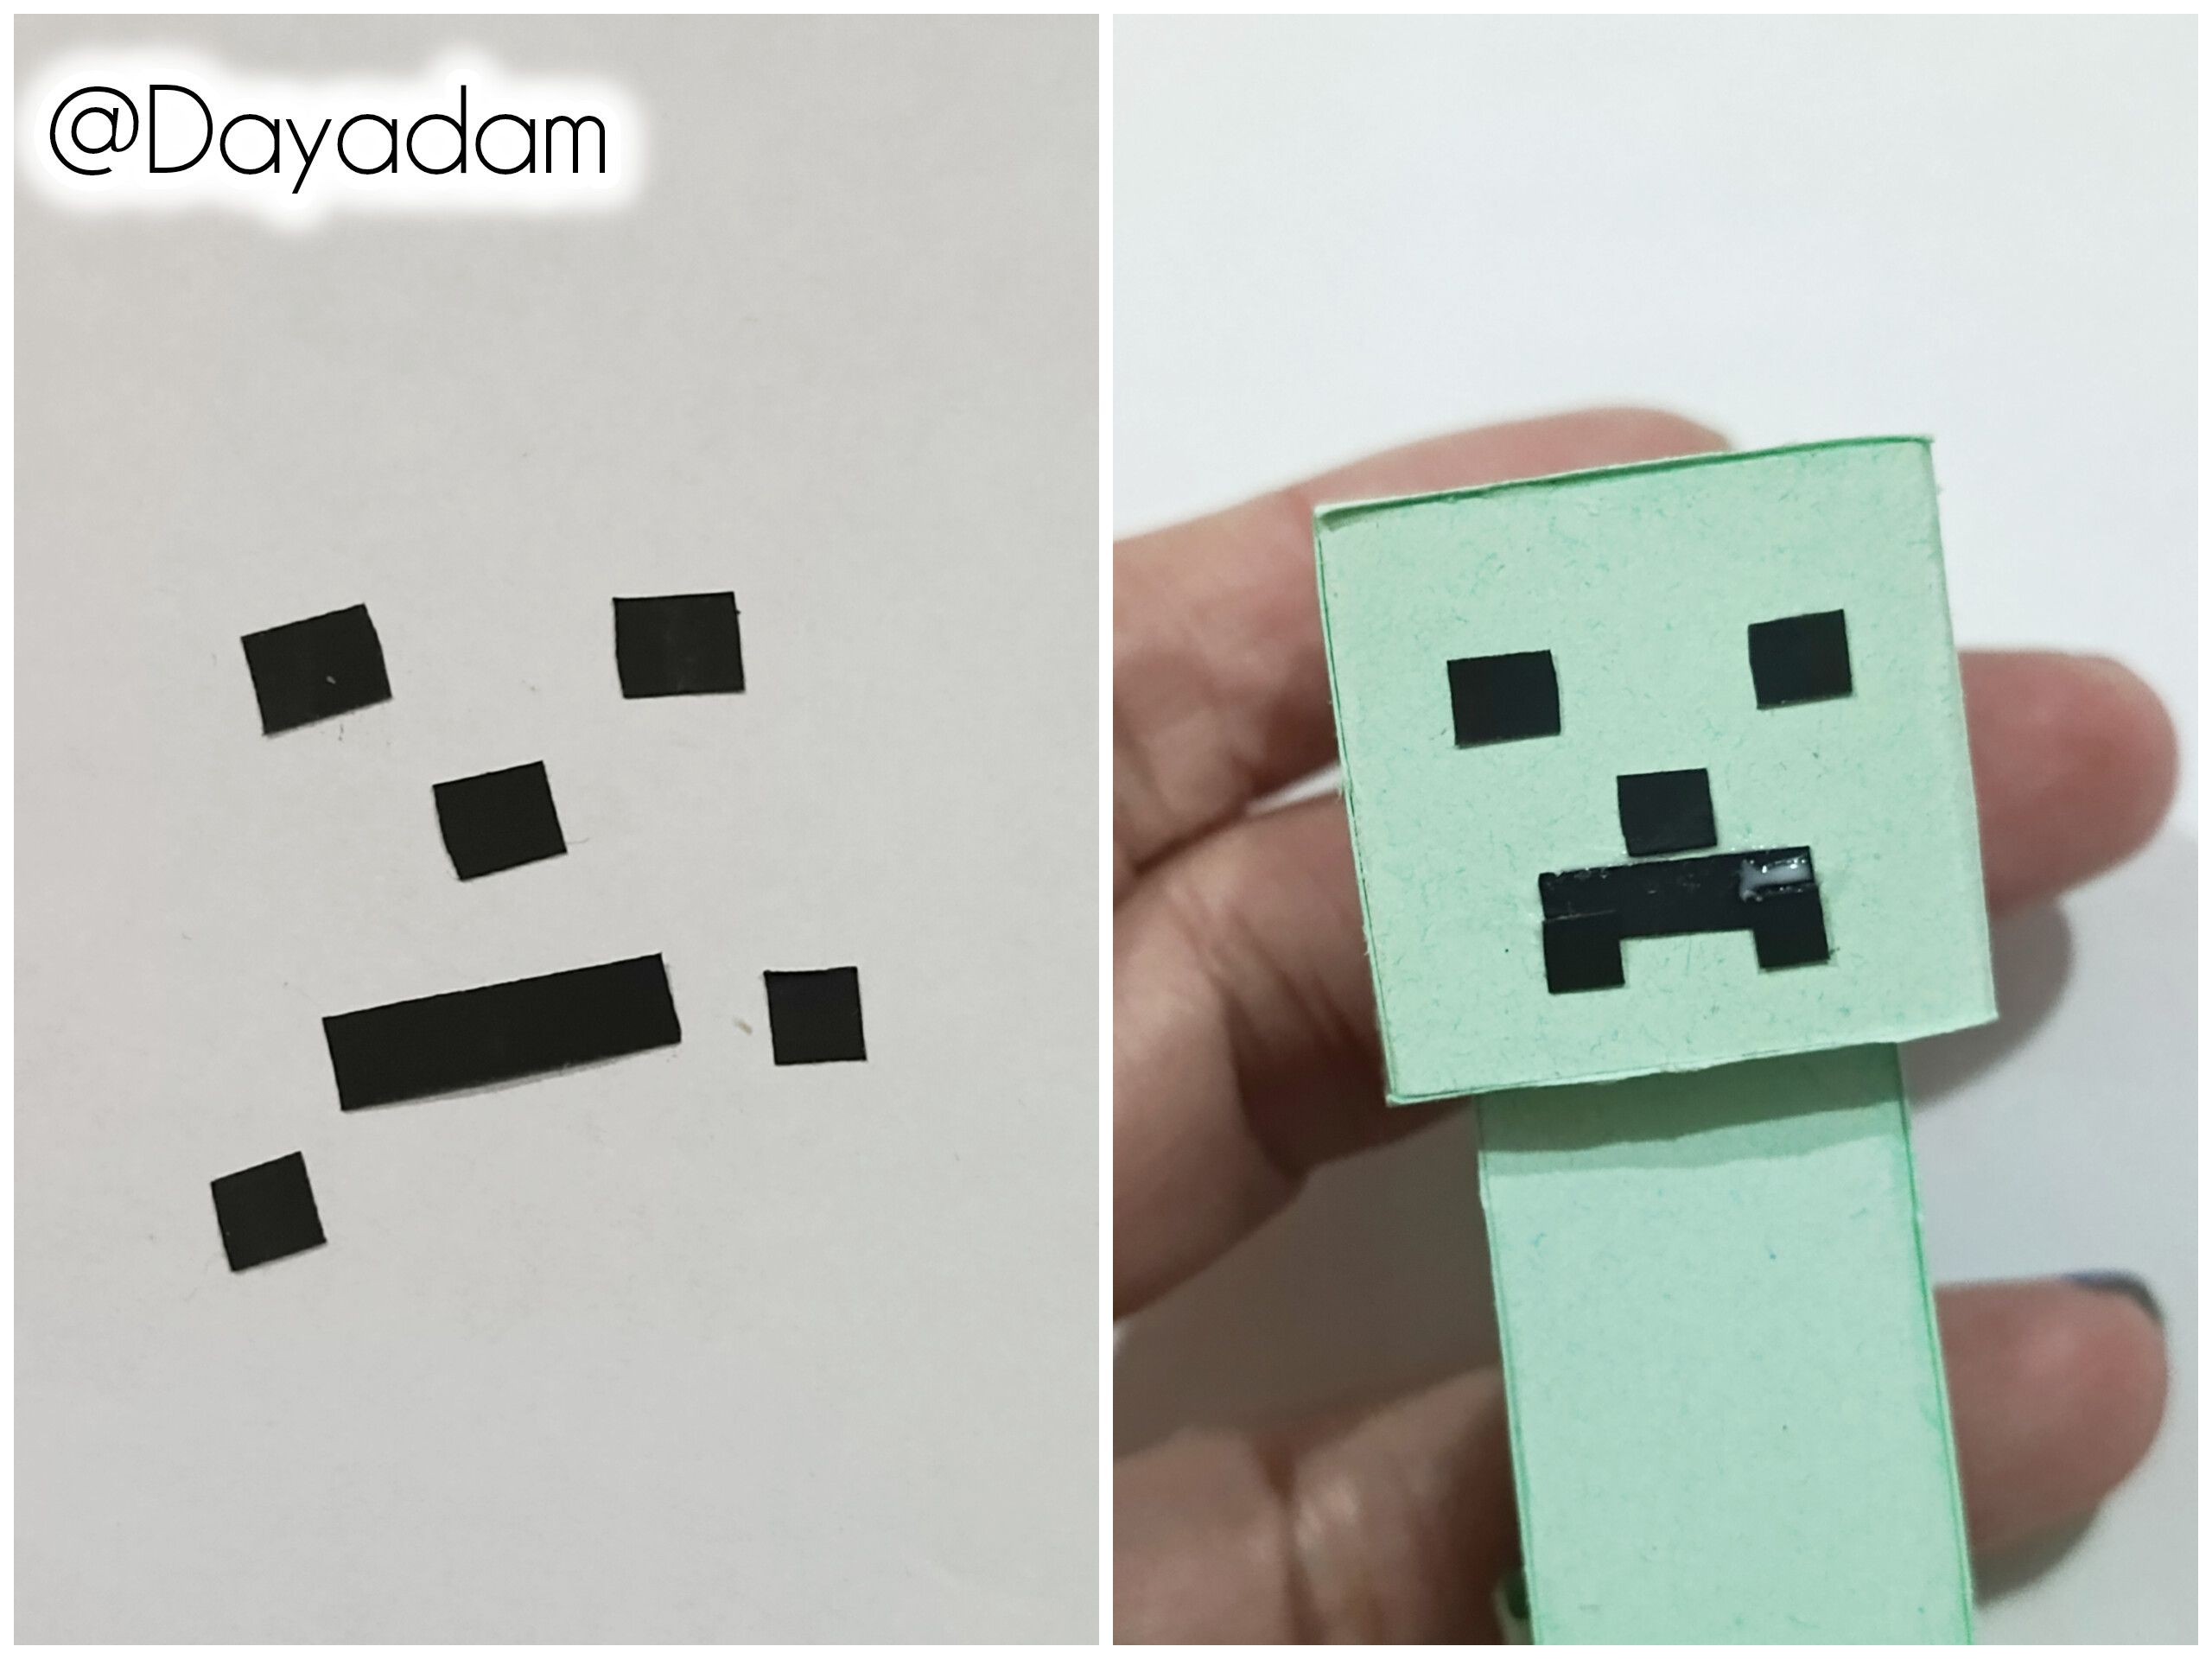
• I made the eyes, nose, and mouth by cutting black strips, as you can see in the image. I glued them to the character's face.
• Para realizar las patas corté cuatro tiras en forma de rectángulo, con la aguja para quilling procedí a enrollarlas formando un círculo abierto, luego los moldee en forma de cuadrado, pegue en la parte de abajo del cuerpo del personaje, dos en la parte delantera y dos en la parte trasera.
• Los ojos, nariz y boca, los realicé cortando tiras de color negro tal y como pueden ver en la imagen. Las pegué en la cara del personaje.
 |
 |
 |
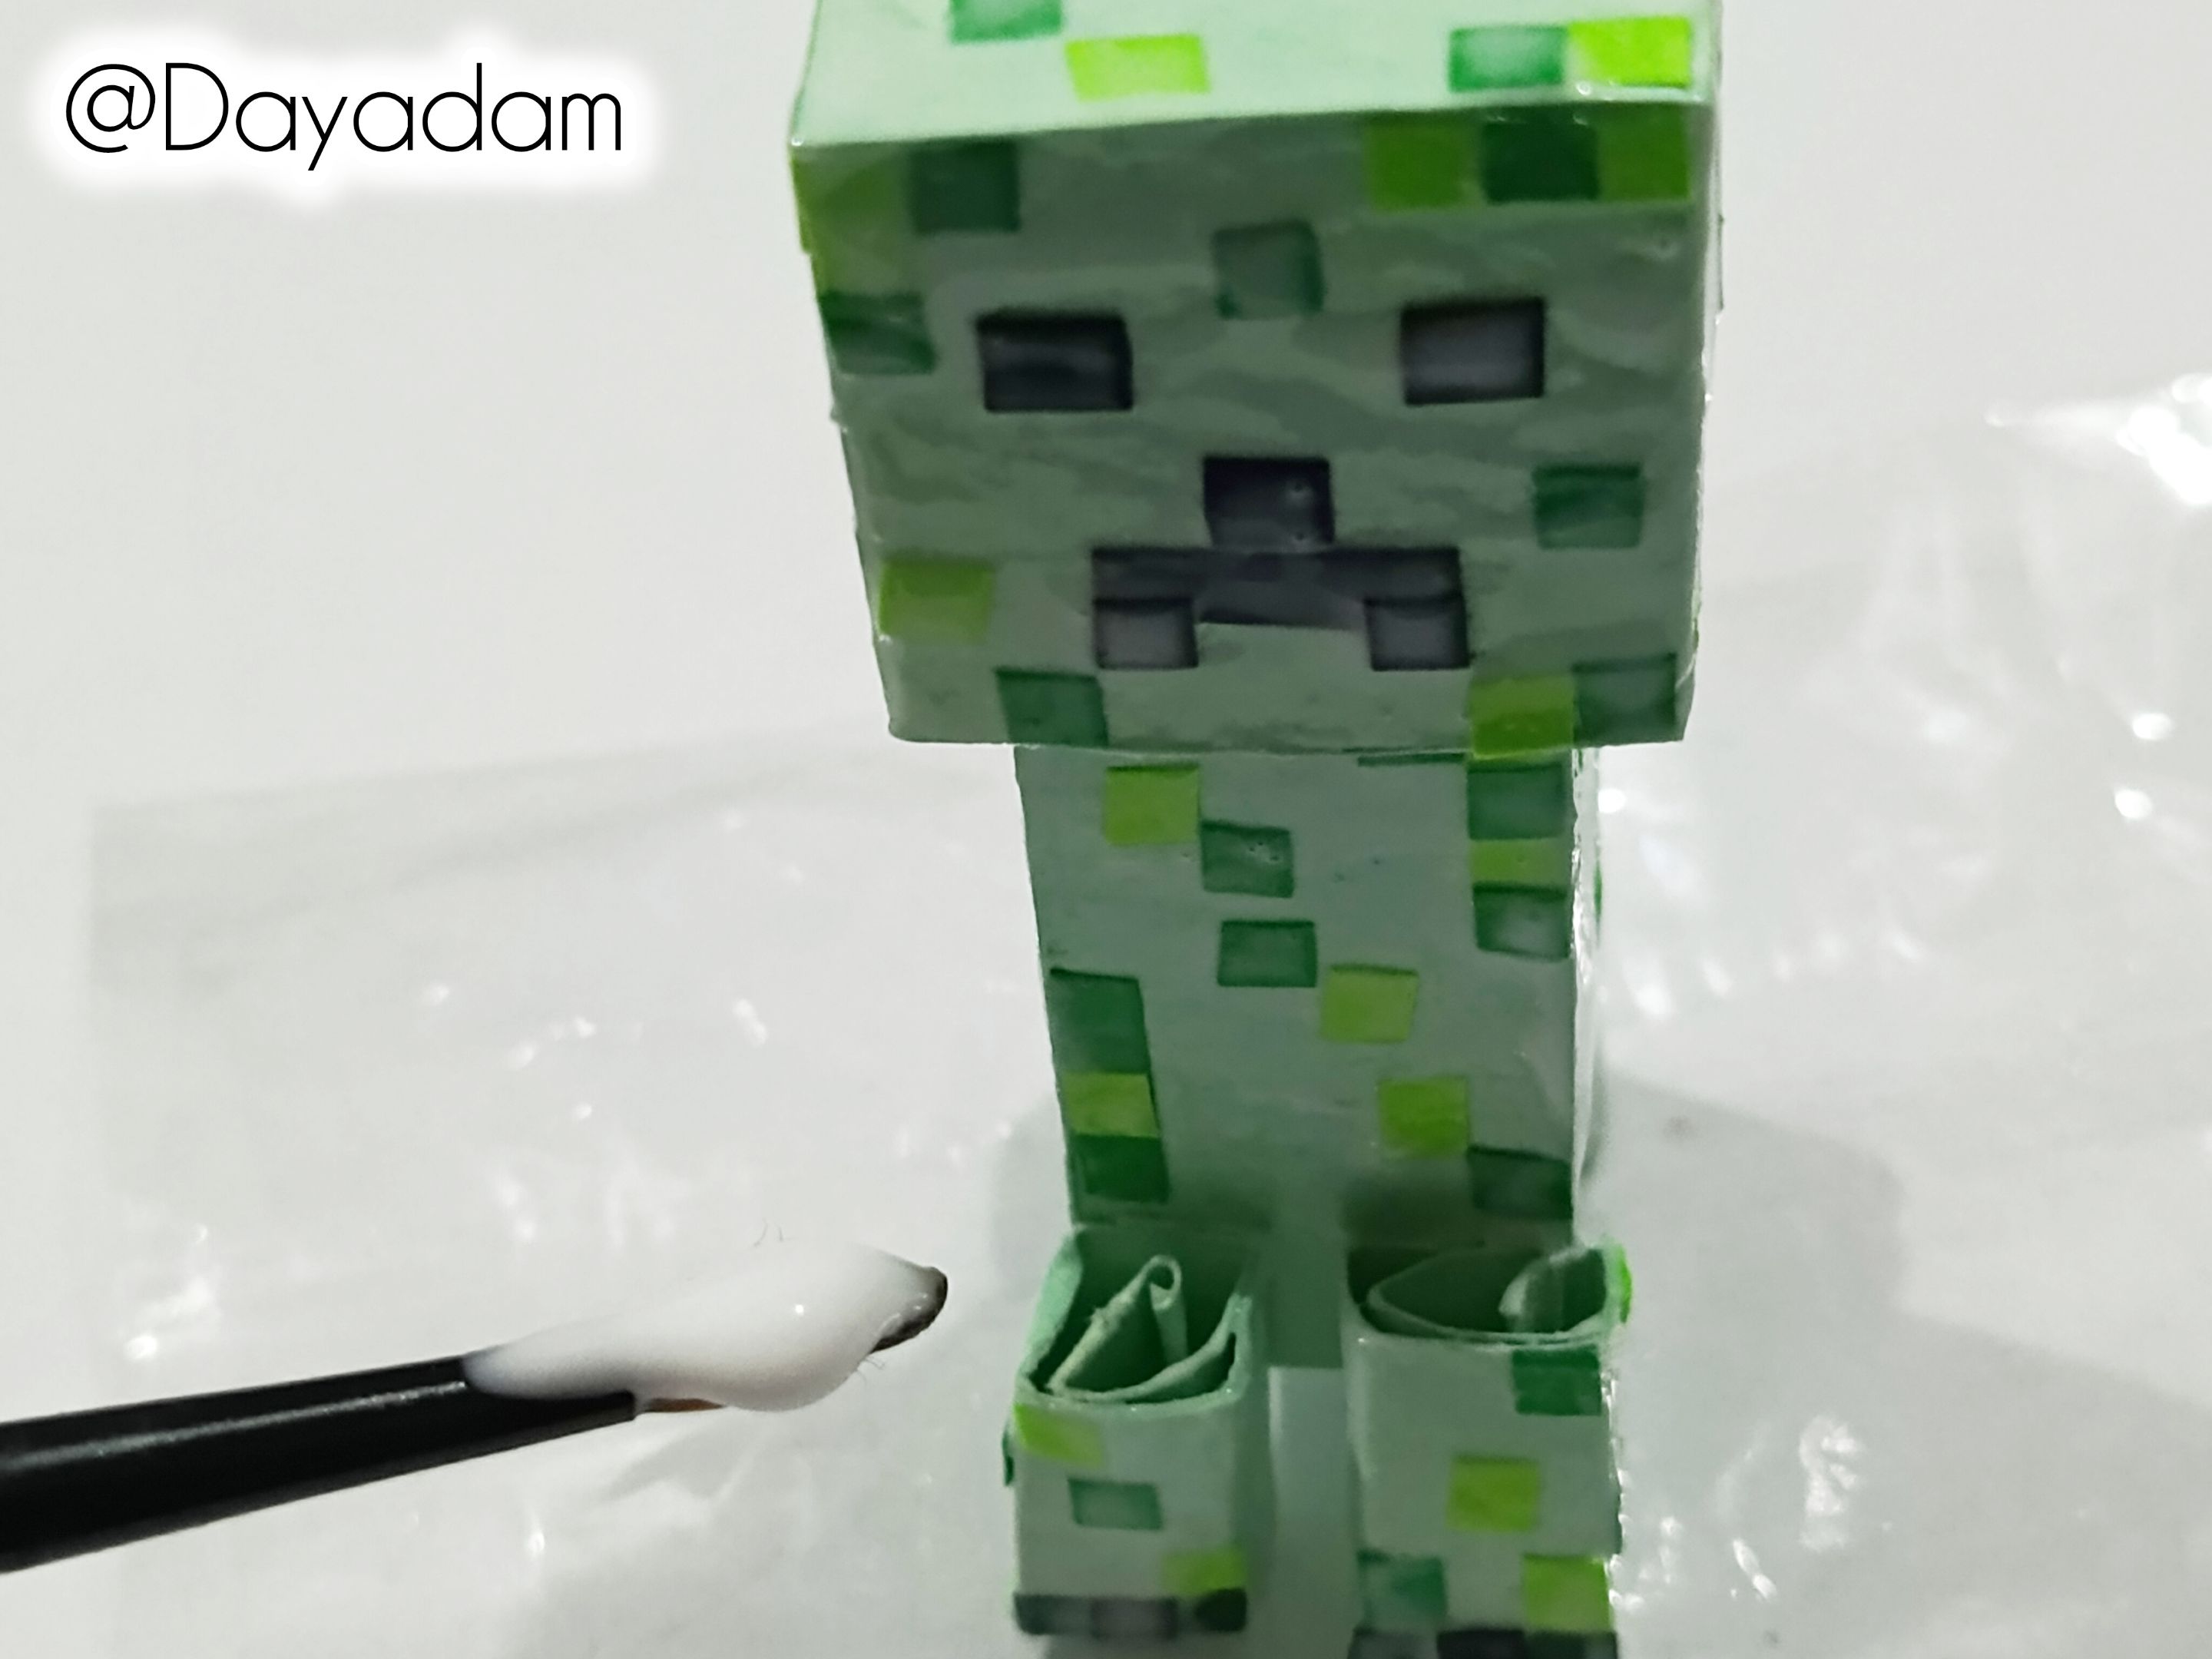
• I made the squares on the legs using dark green and black tape.
• To make the pixels on the body, I cut out lots of squares and rectangles in grass green and apple green using scissors, and stuck them onto different parts of the character's body, head, and legs.
• To finish and protect my work, I applied several layers of extra-strong white glue, allowing each layer to dry before applying the next.
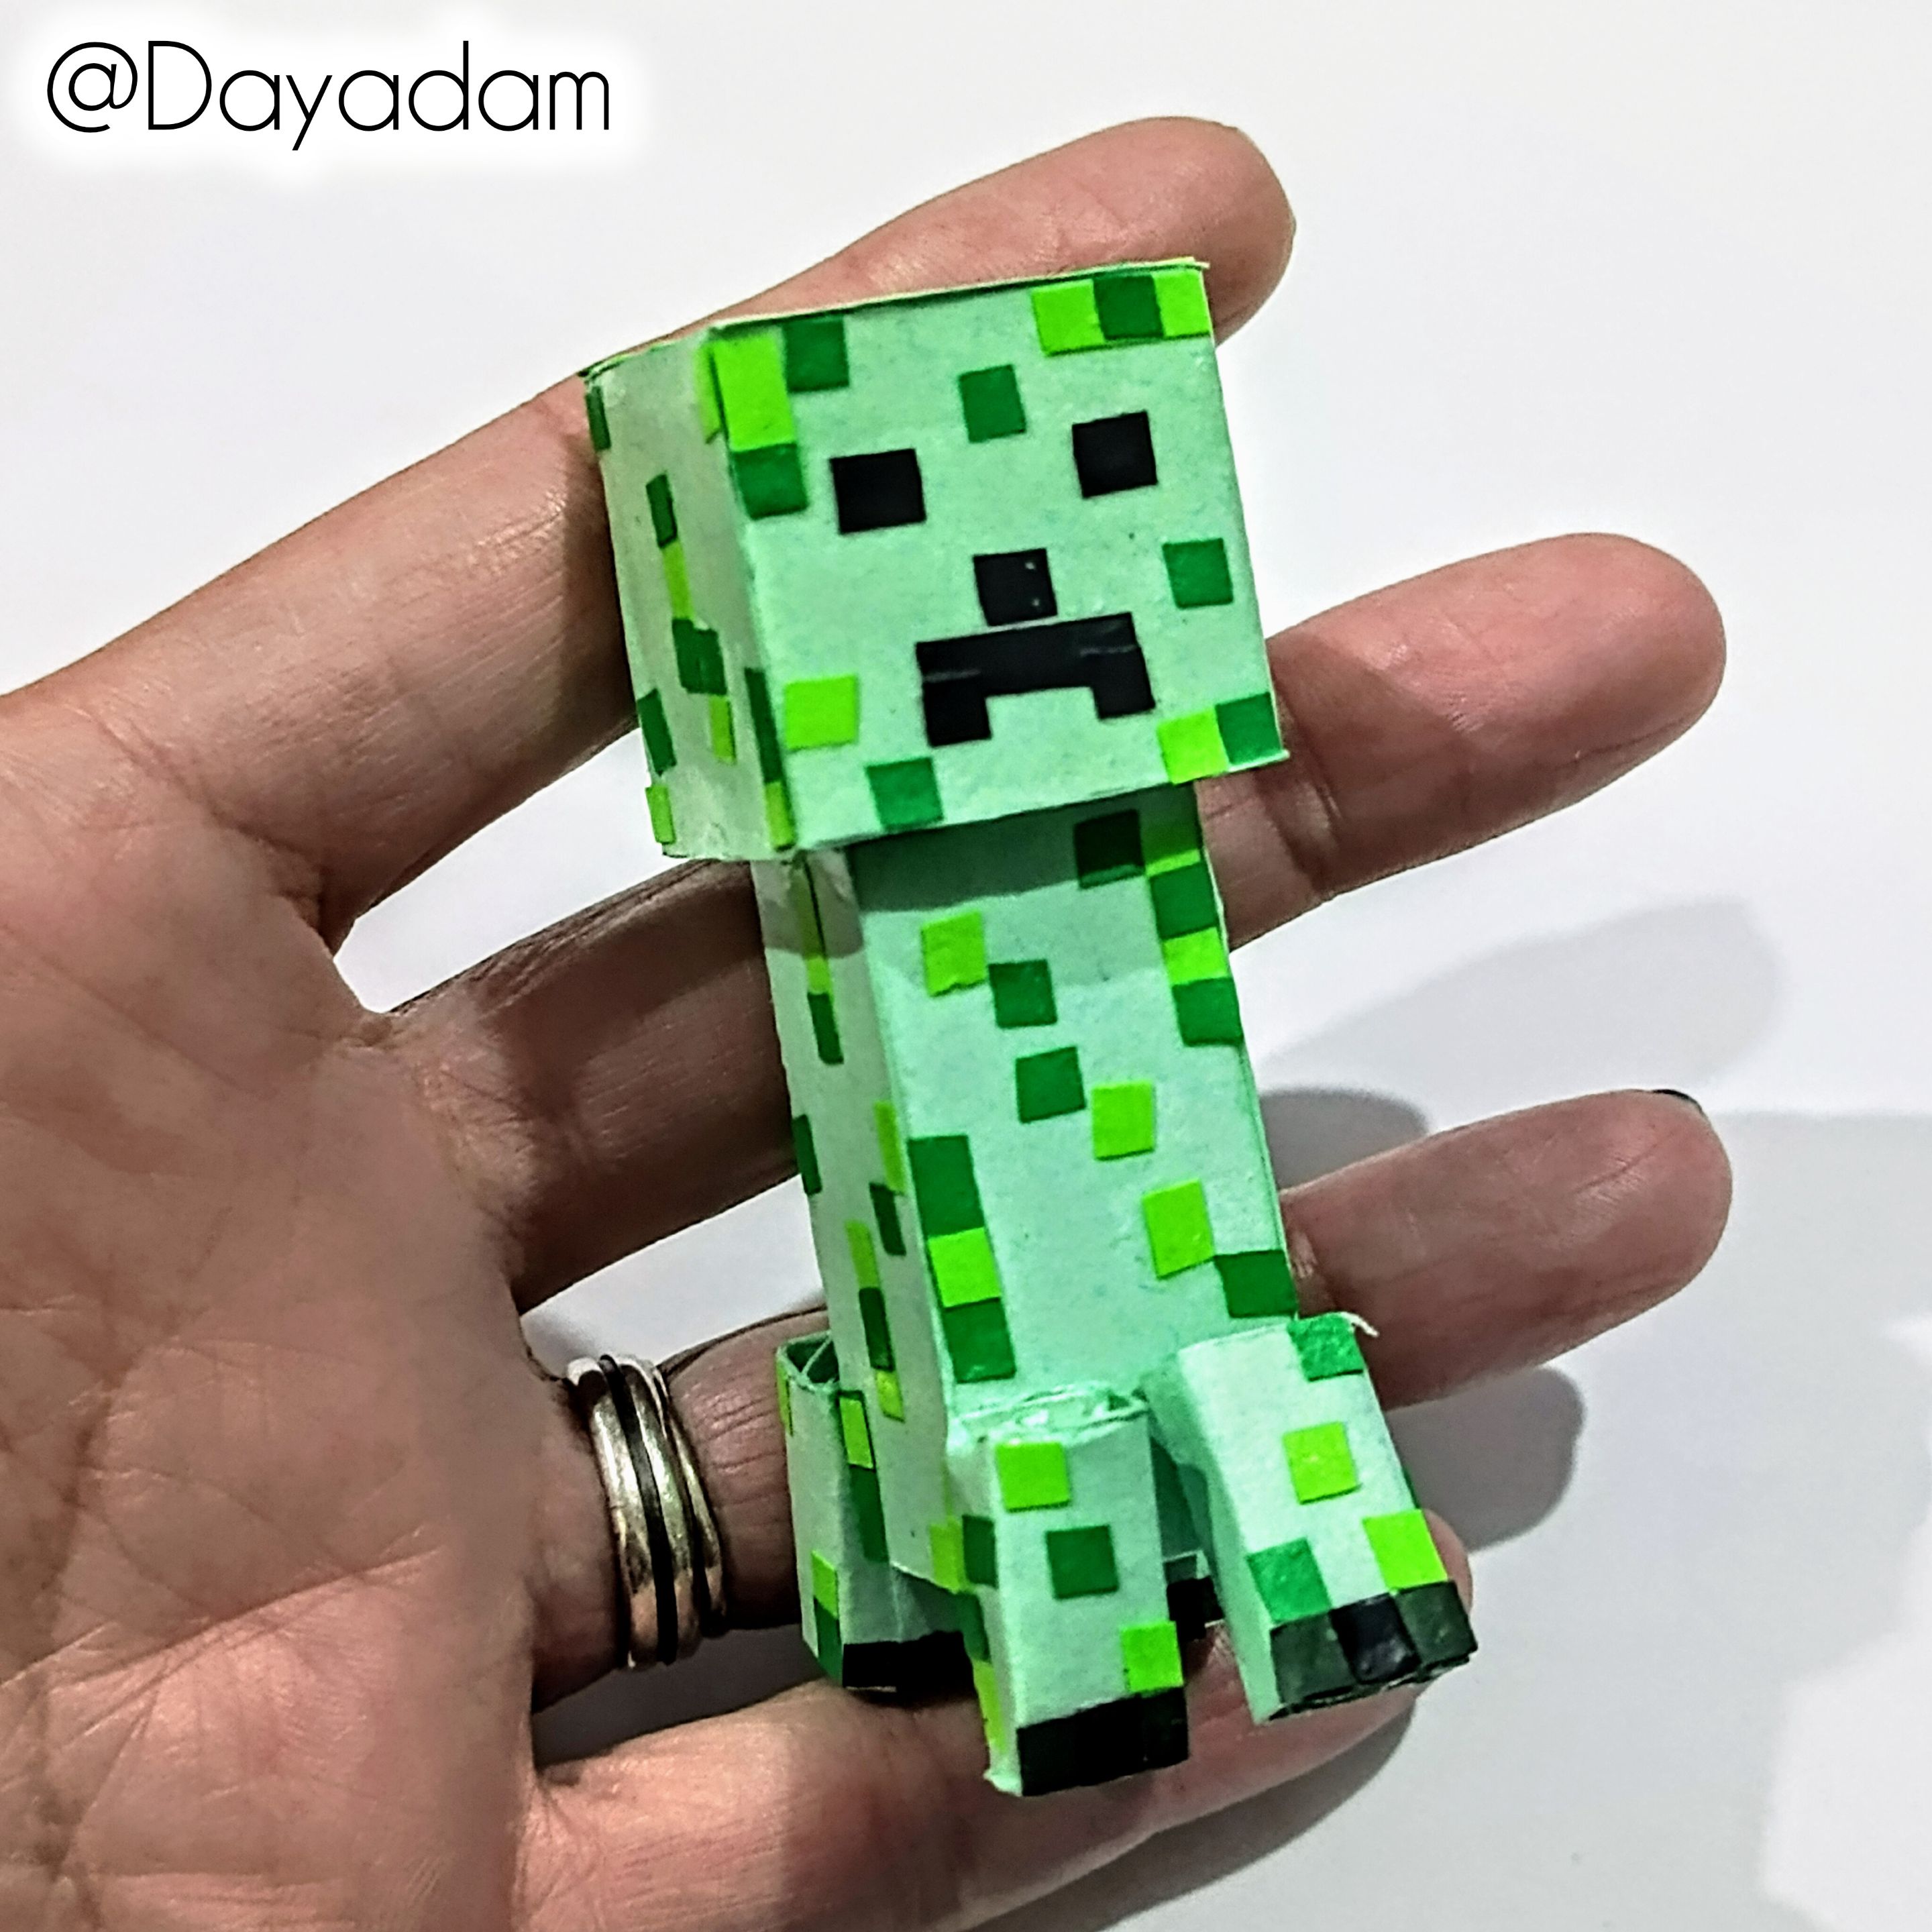
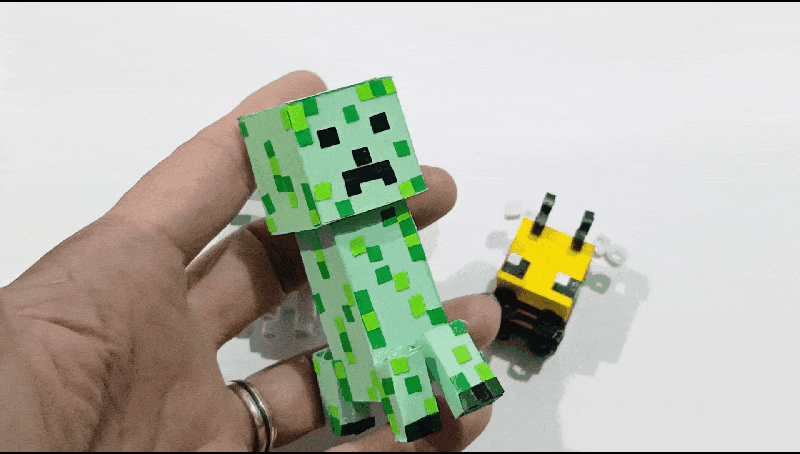
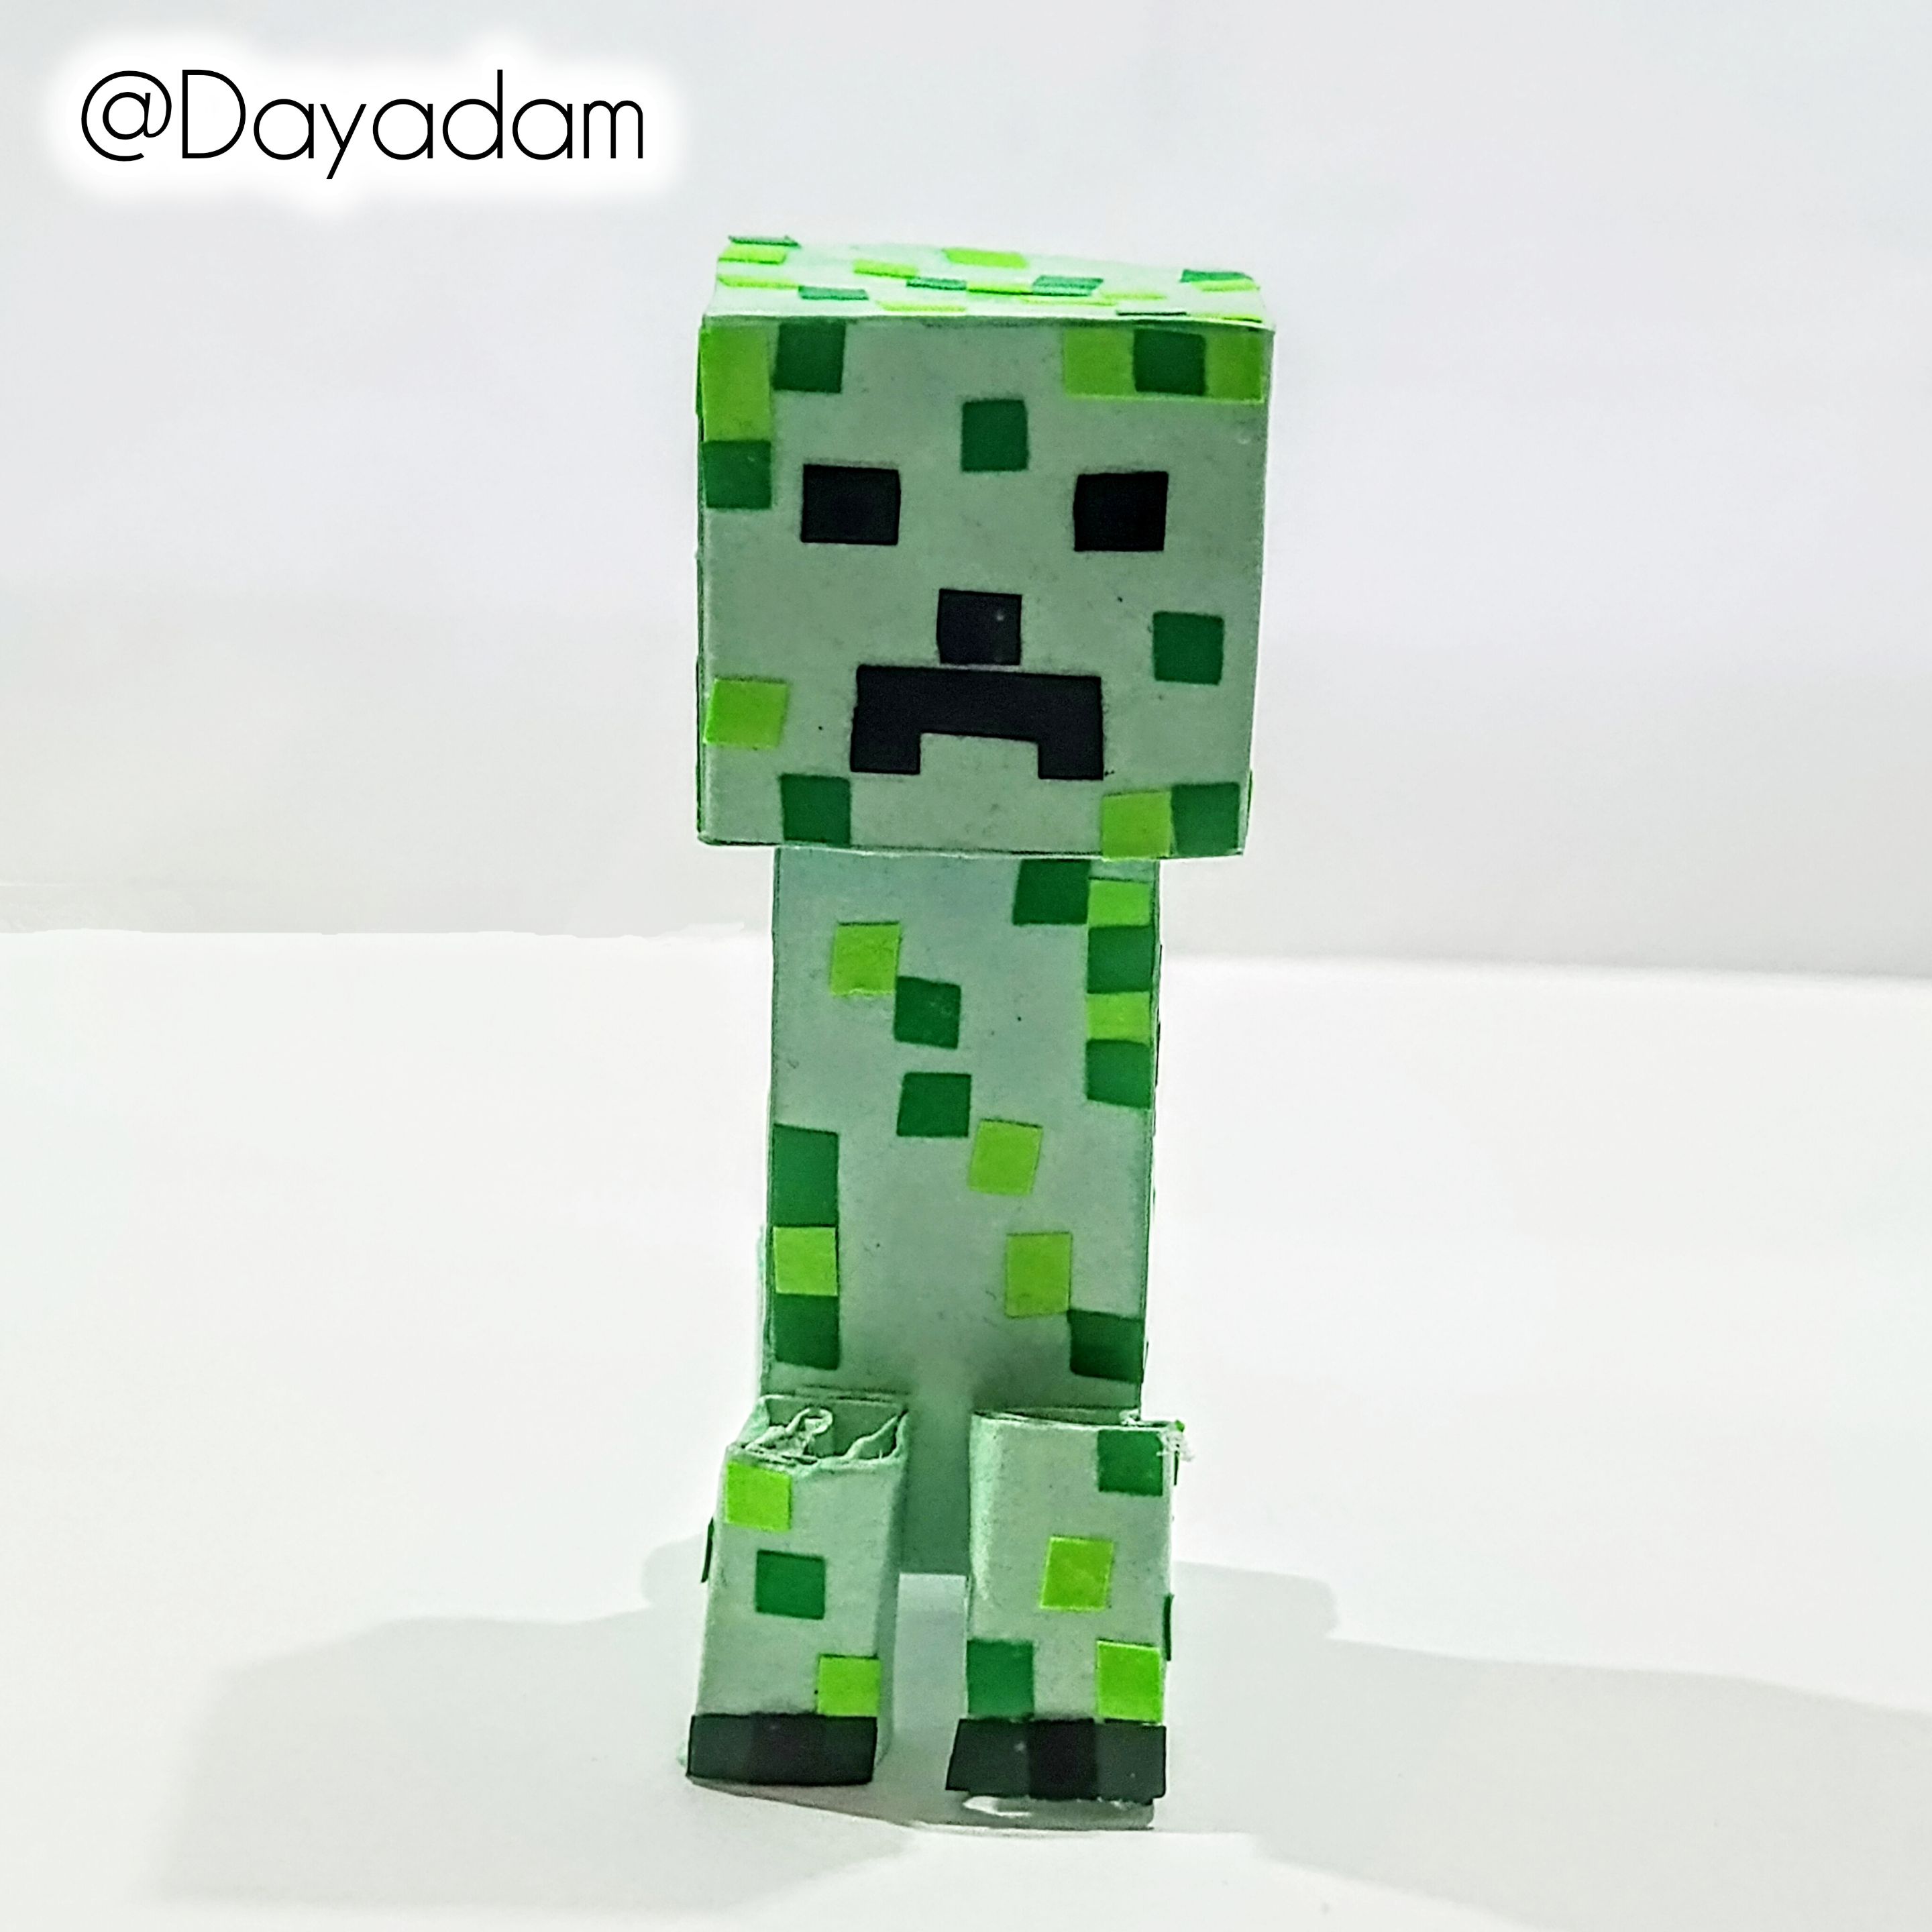
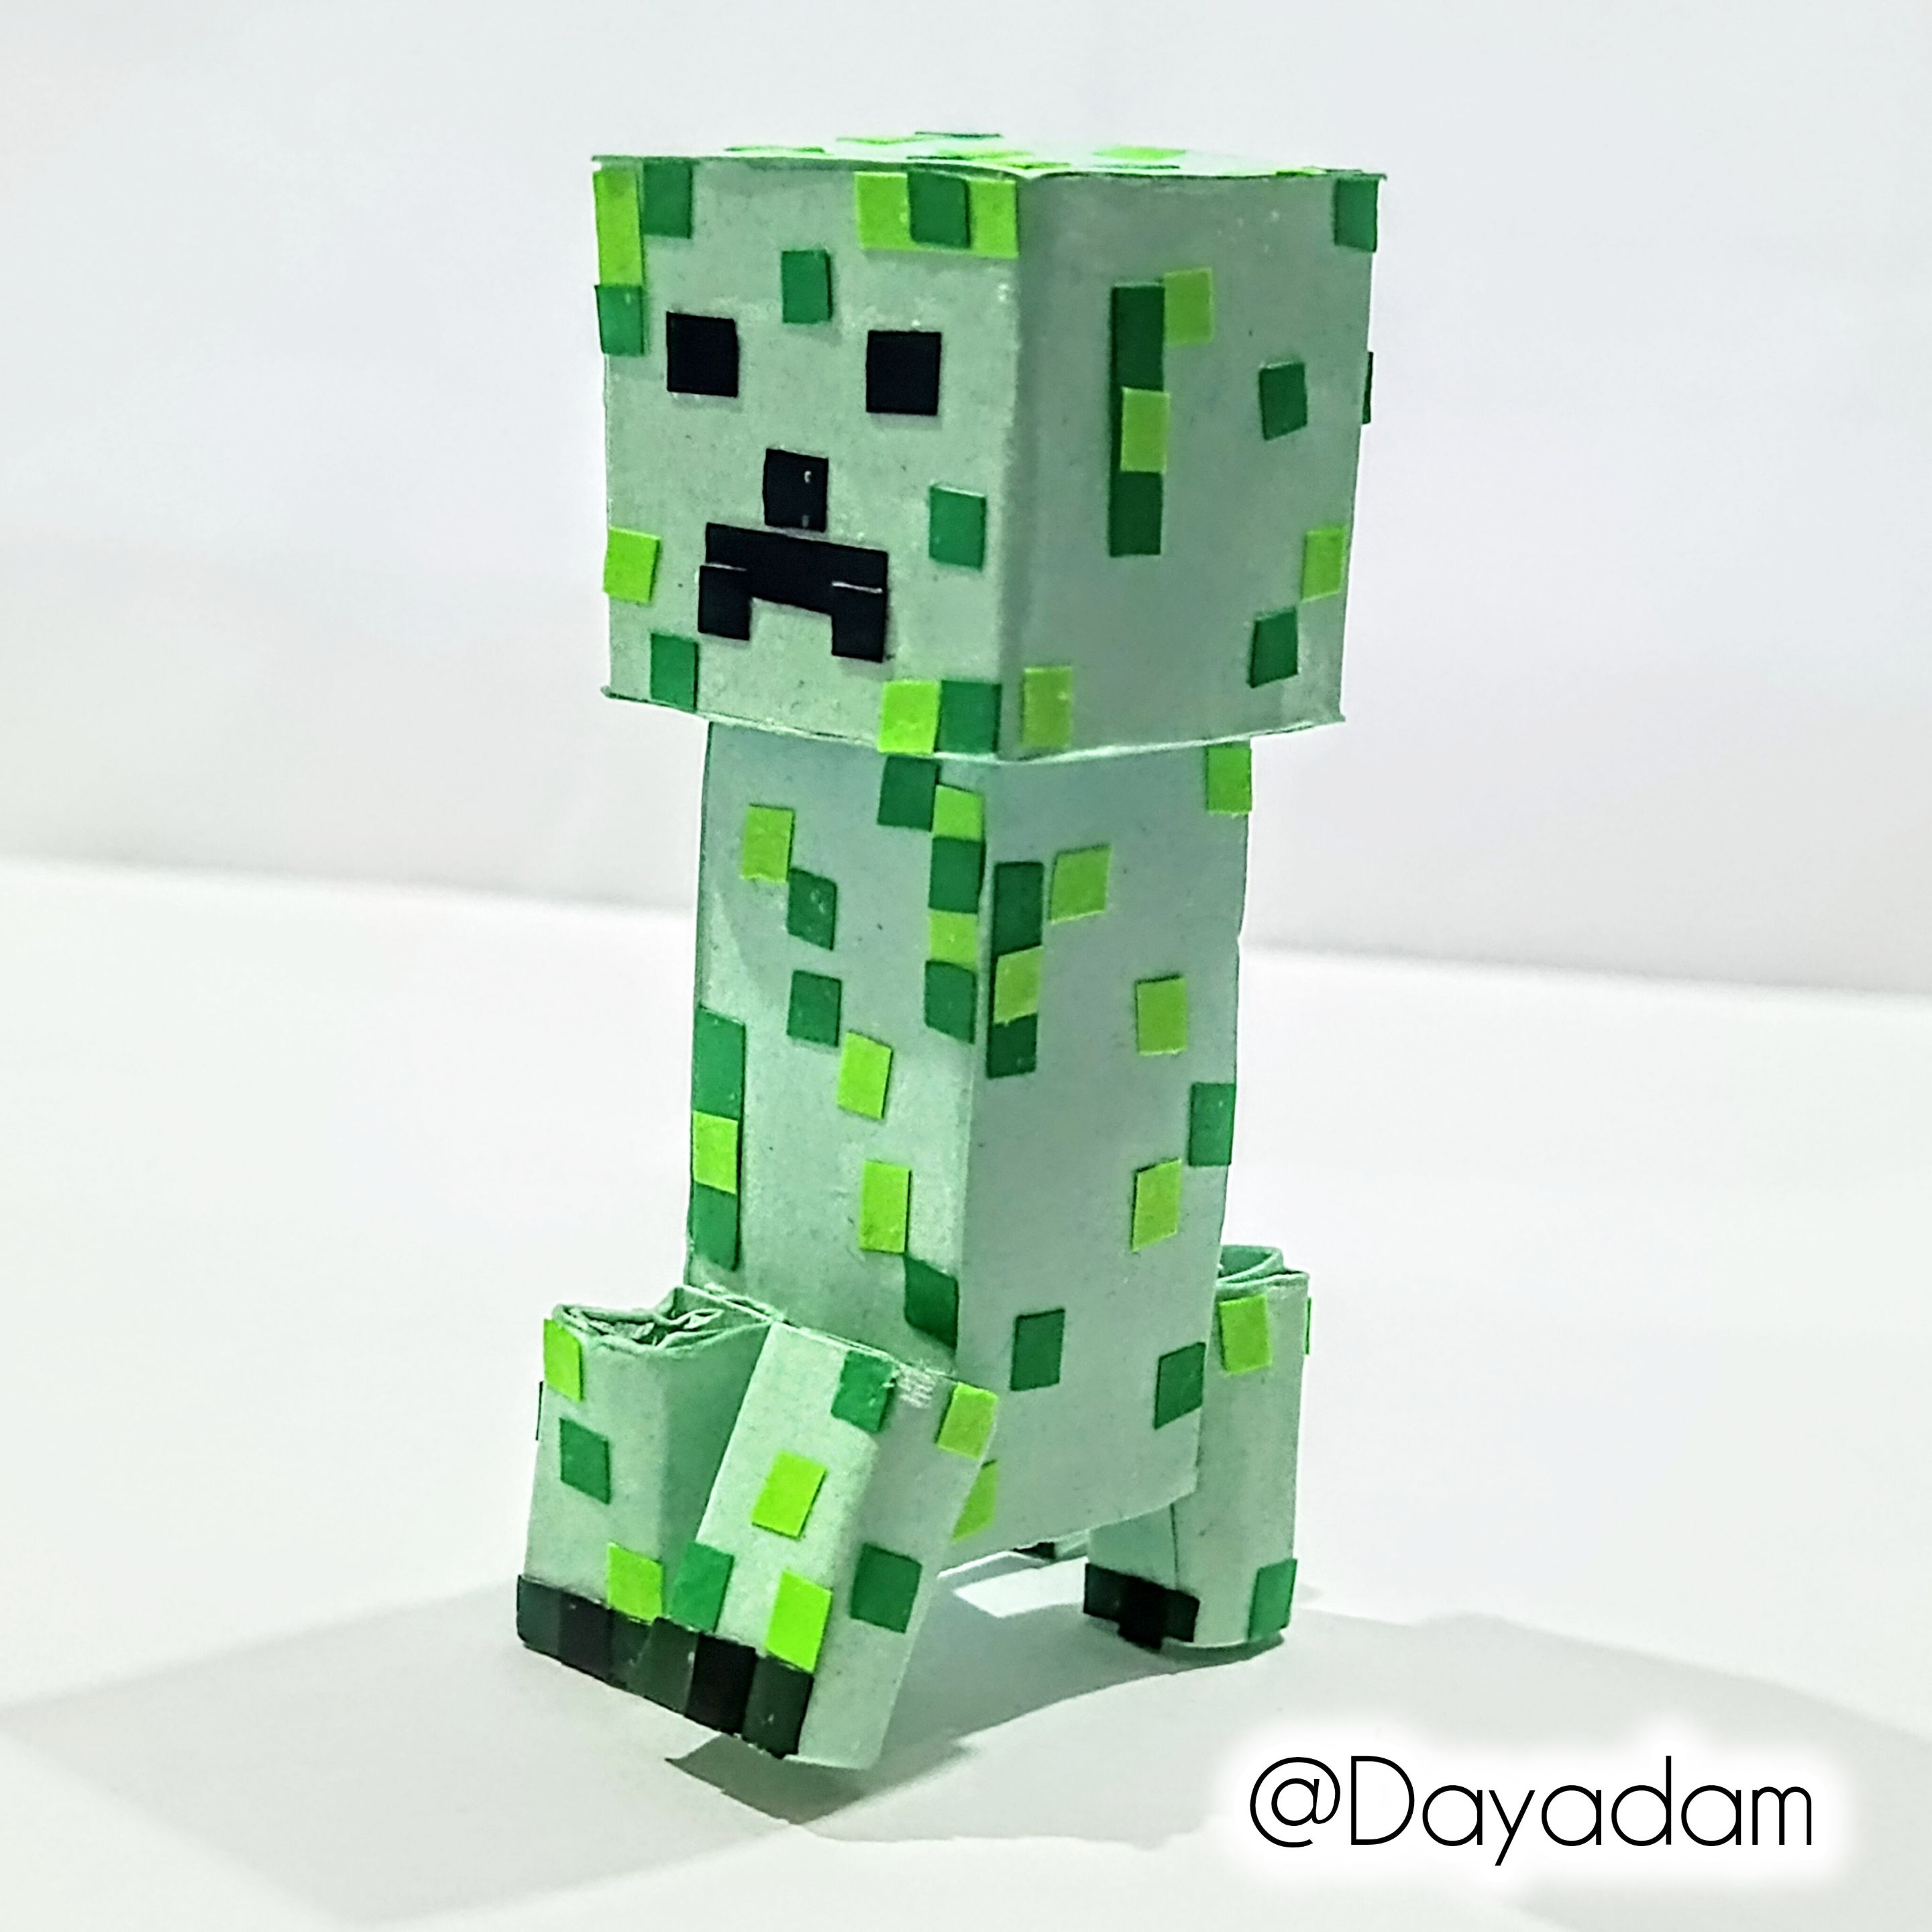
This is how I finished this decorative 3D quilling figure of the character Creeper from the building video game Minecraft.
• Los cuadritos de las patas, los realicé con cintas de color verde oscuro y negras.
• Para hacer los píxeles del cuerpo recorte con una tijera muchos cuadrados y rectángulos verde grama y verde manzana, los fui pegando en diversas partes del cuerpo, cabeza, y patas del personaje.
• Para finalizar y proteger este trabajo que realicé, apliqué varias capas de pega blanca extra fuerte dejando secar entre una capa y otra.
De esta manera finalice esta figura decorativa en 3D en la técnica de quilling del personaje Creeper, del videojuego de construcción Minecrast.
 |
 |
 |
|
 |

|
 |
 |
 |
 |
|
What did you think, did you like it?
I hope you did, I hope you liked my explanation, procedure and photos, I made them with love for you.
"Let out that muse that inspires you, and let your imagination fly".
Thank you all, see you next time ✨.
¿Qué les pareció, les gustó?
Espero que sí, que les haya gustado mi explicación, procedimiento y fotos, los hice con mucho cariño por y para ustedes."Deja salir esa musa que te inspira, y deja volar tu imaginación".
Gracias a todos, nos vemos en la próxima✨
All photos used in this post are of my authorship and have been taken on my personal cell phone a Redmi 9T, edited in InShot and Canva
Banner and separator made by me in Canva
Translated with the help of DeepL
Todas las fotos usadas en este post son de mi autoría y han sido sacadas en mi celular personal un Redmi 9T, editadas en InShot y Canva
Banner y separador hecho por mí en Canva
Traducido con la ayuda de DeepL
