##### **Hello to all my Hive friends... 🐱**
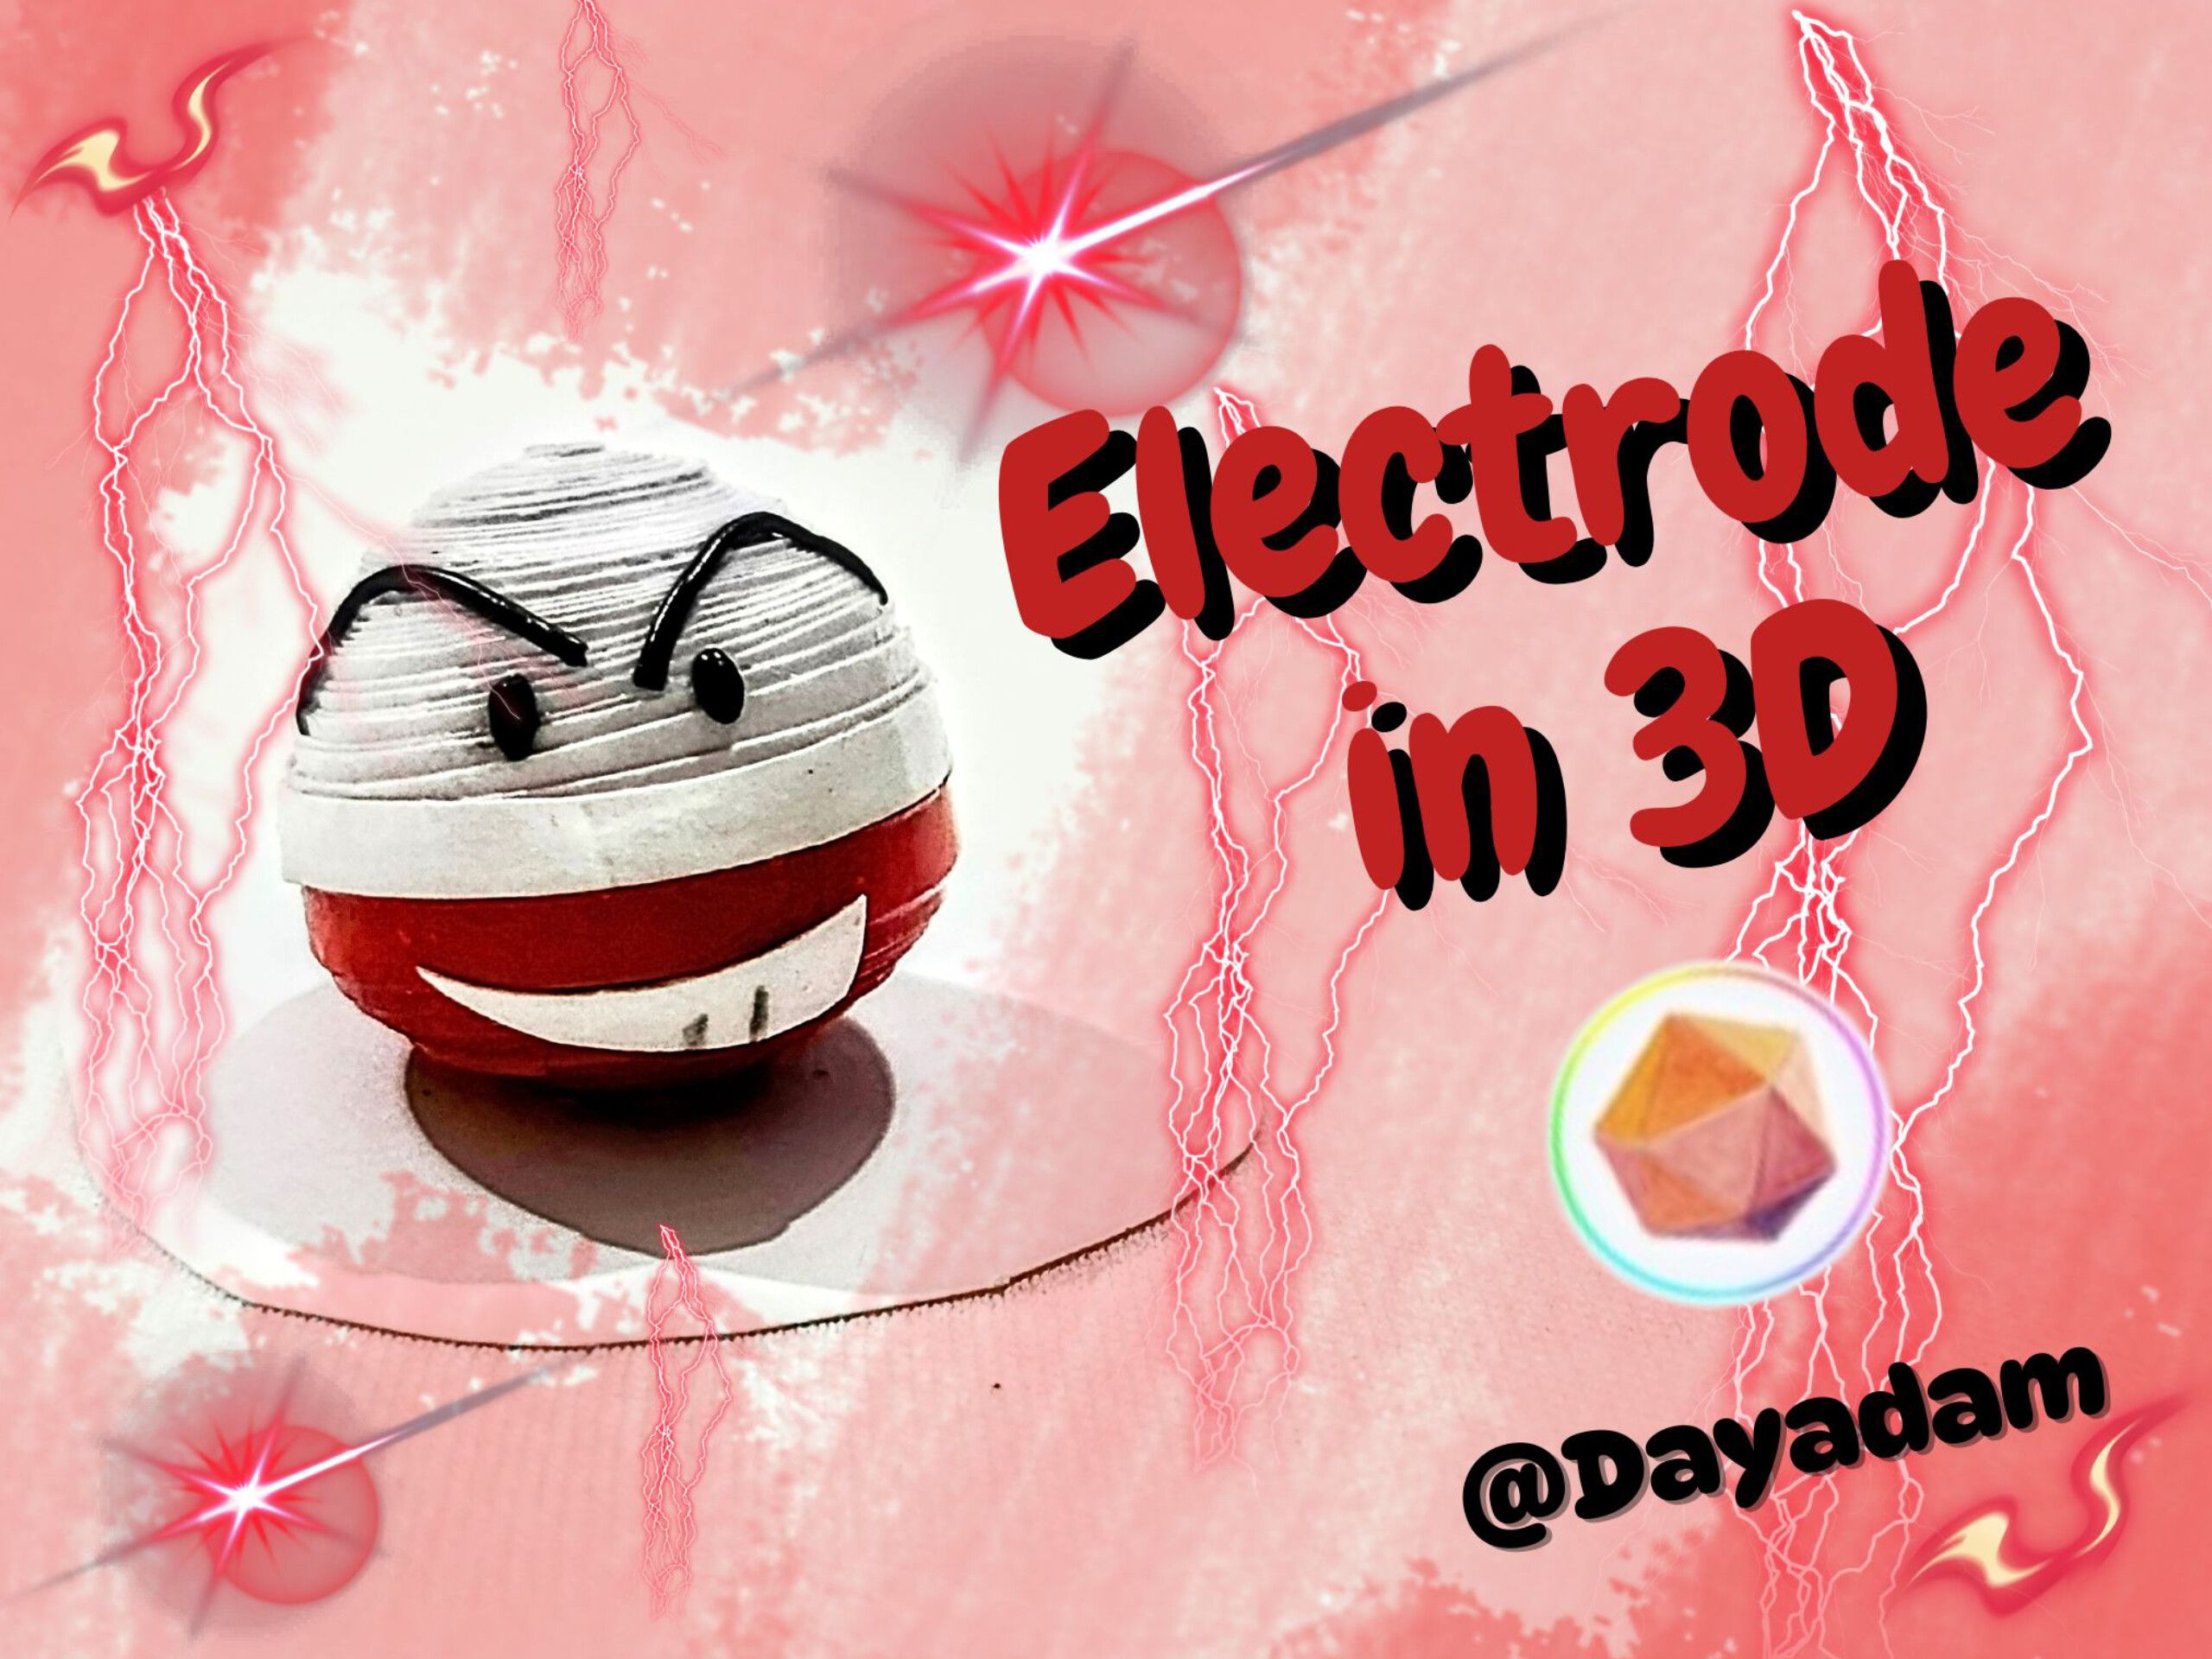
Today I bring you another Pokémon from the many that exist in that beautiful anime. I decided to make a 3D decorative figure of the character **Electrode**.
***I hope you like it. Here's my creative process:***
>##### **Let's get started:😃**

##### **Hola a toda mi gente de Hive... 🐱** Para hoy les traigo un Pokémon más de tantos que existen en ese bonito anime, decidí hacer una figura decorativa en 3D del personaje **Electrode**. ***Esperando que sea de su agrado, les dejo mi proceso creativo:*** >##### **Comencemos:😃** --- --- || |-| |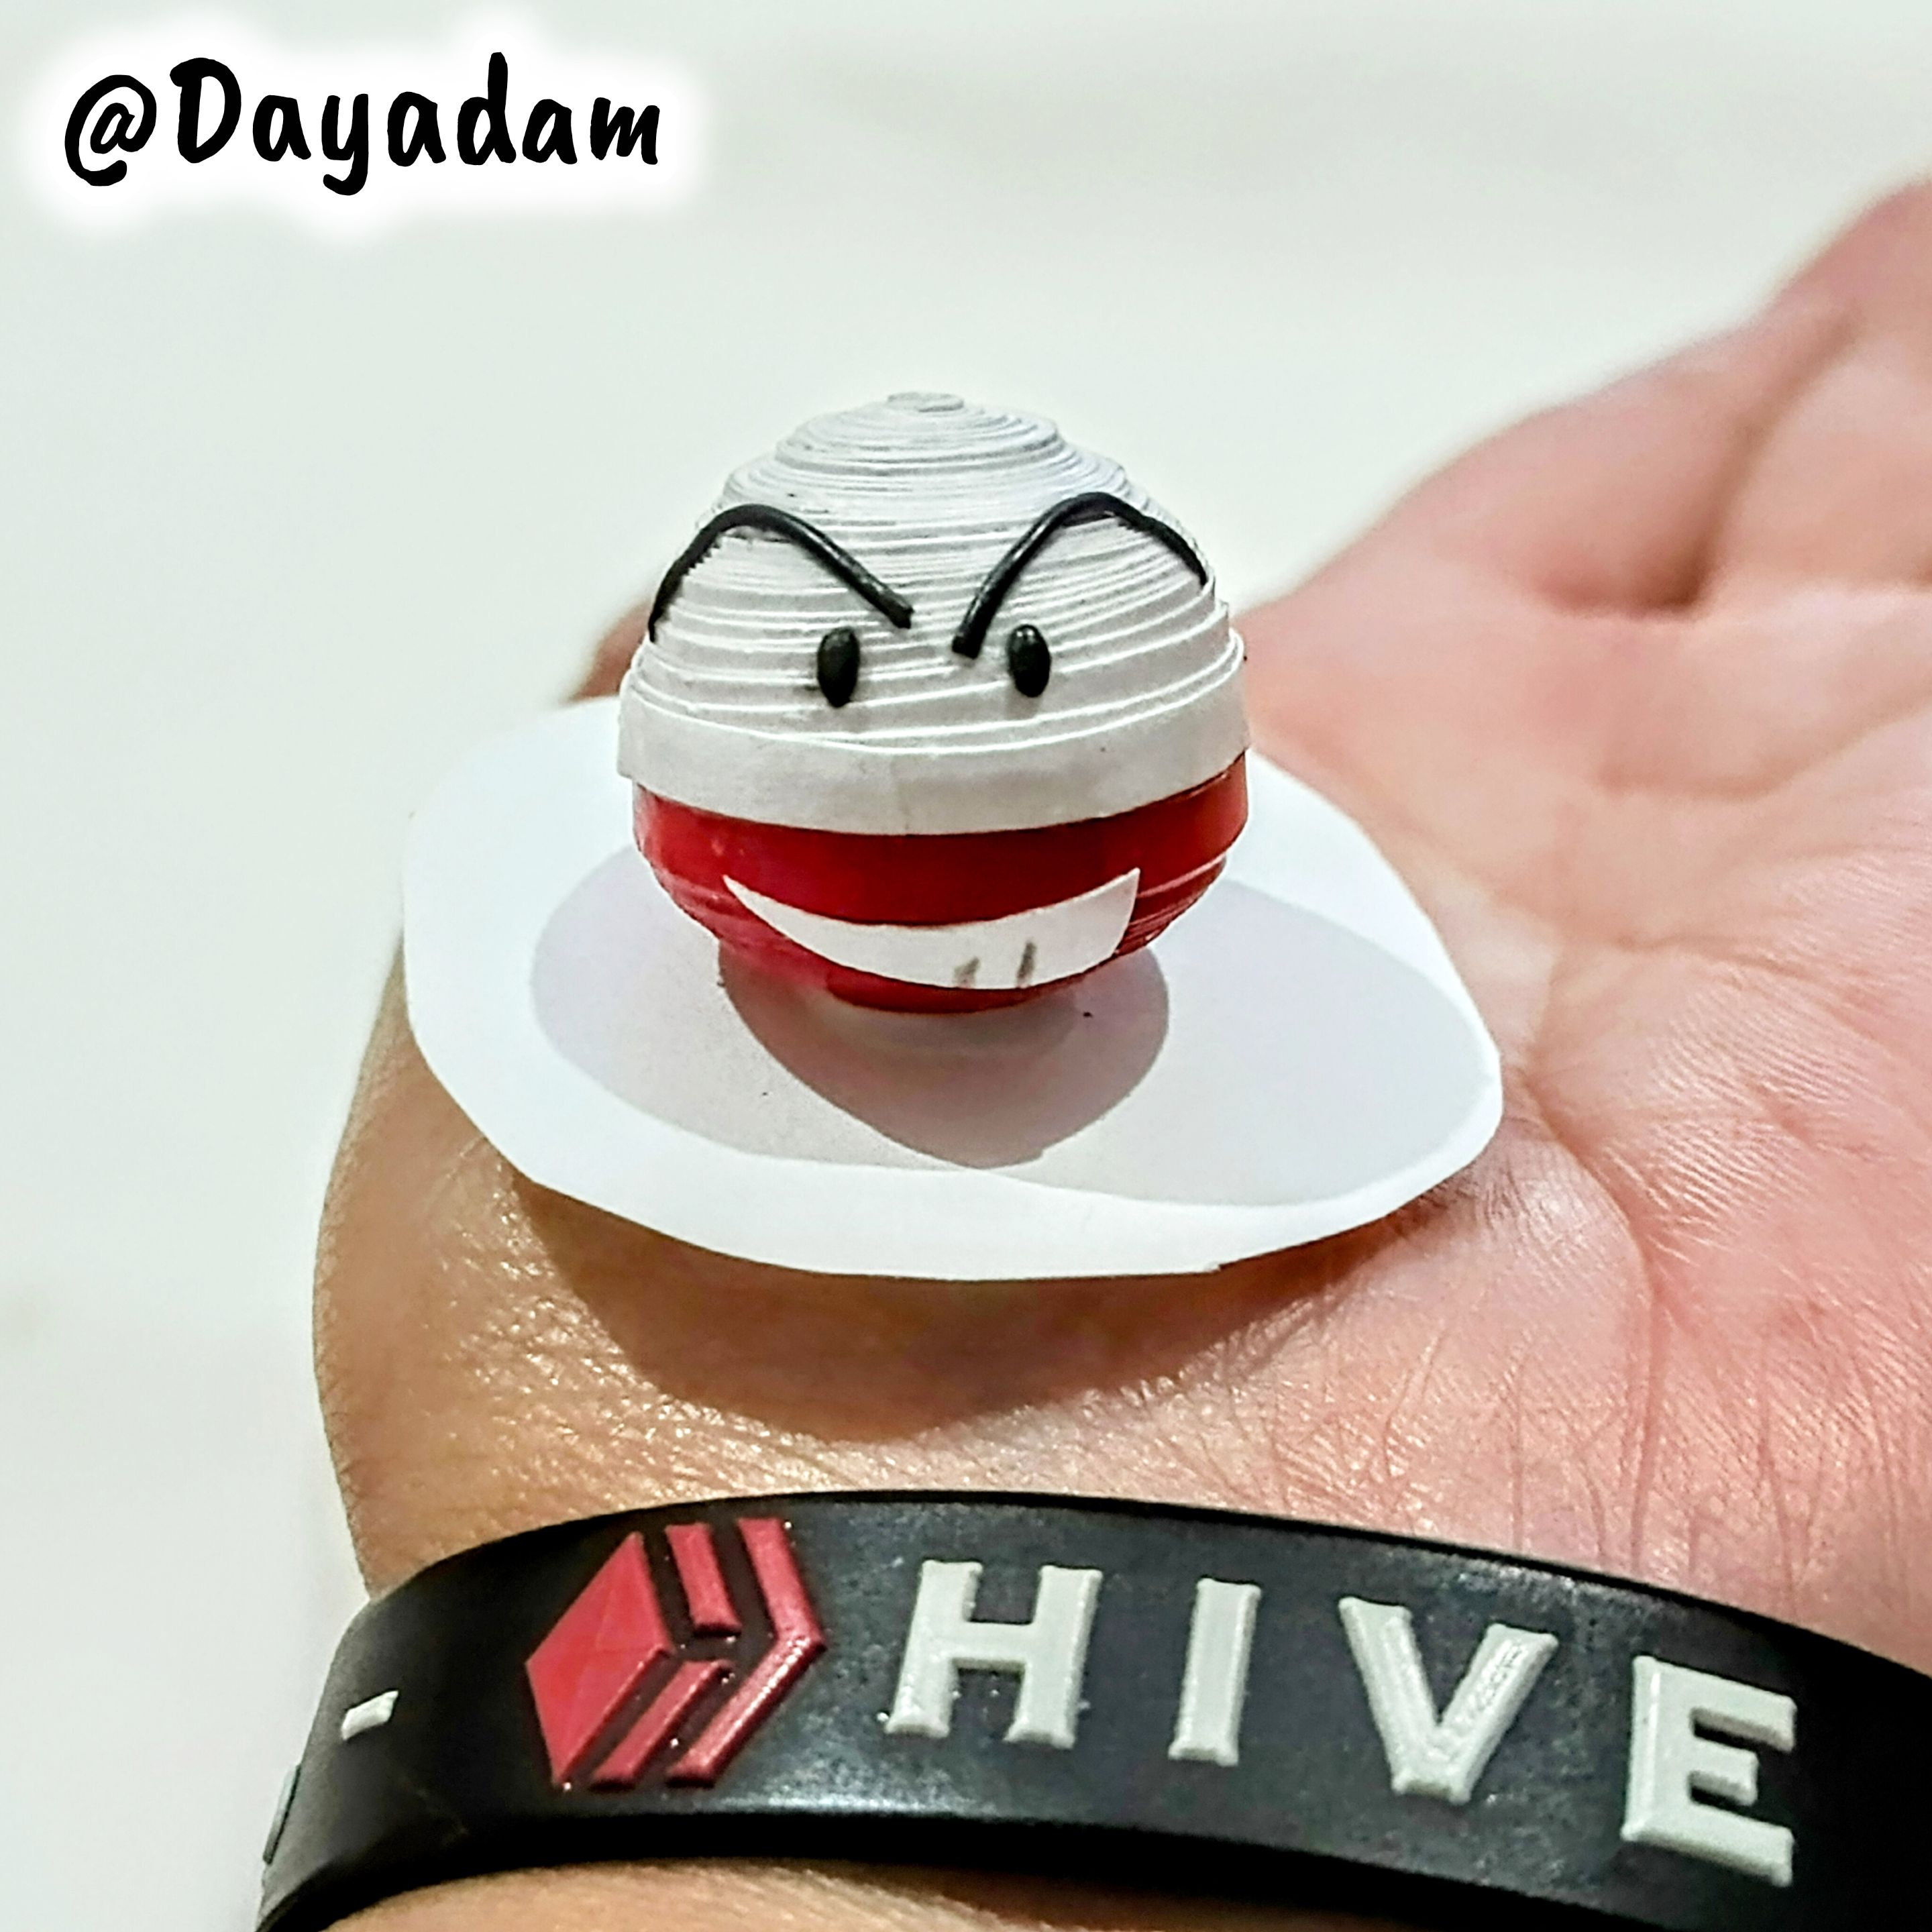| || |-| |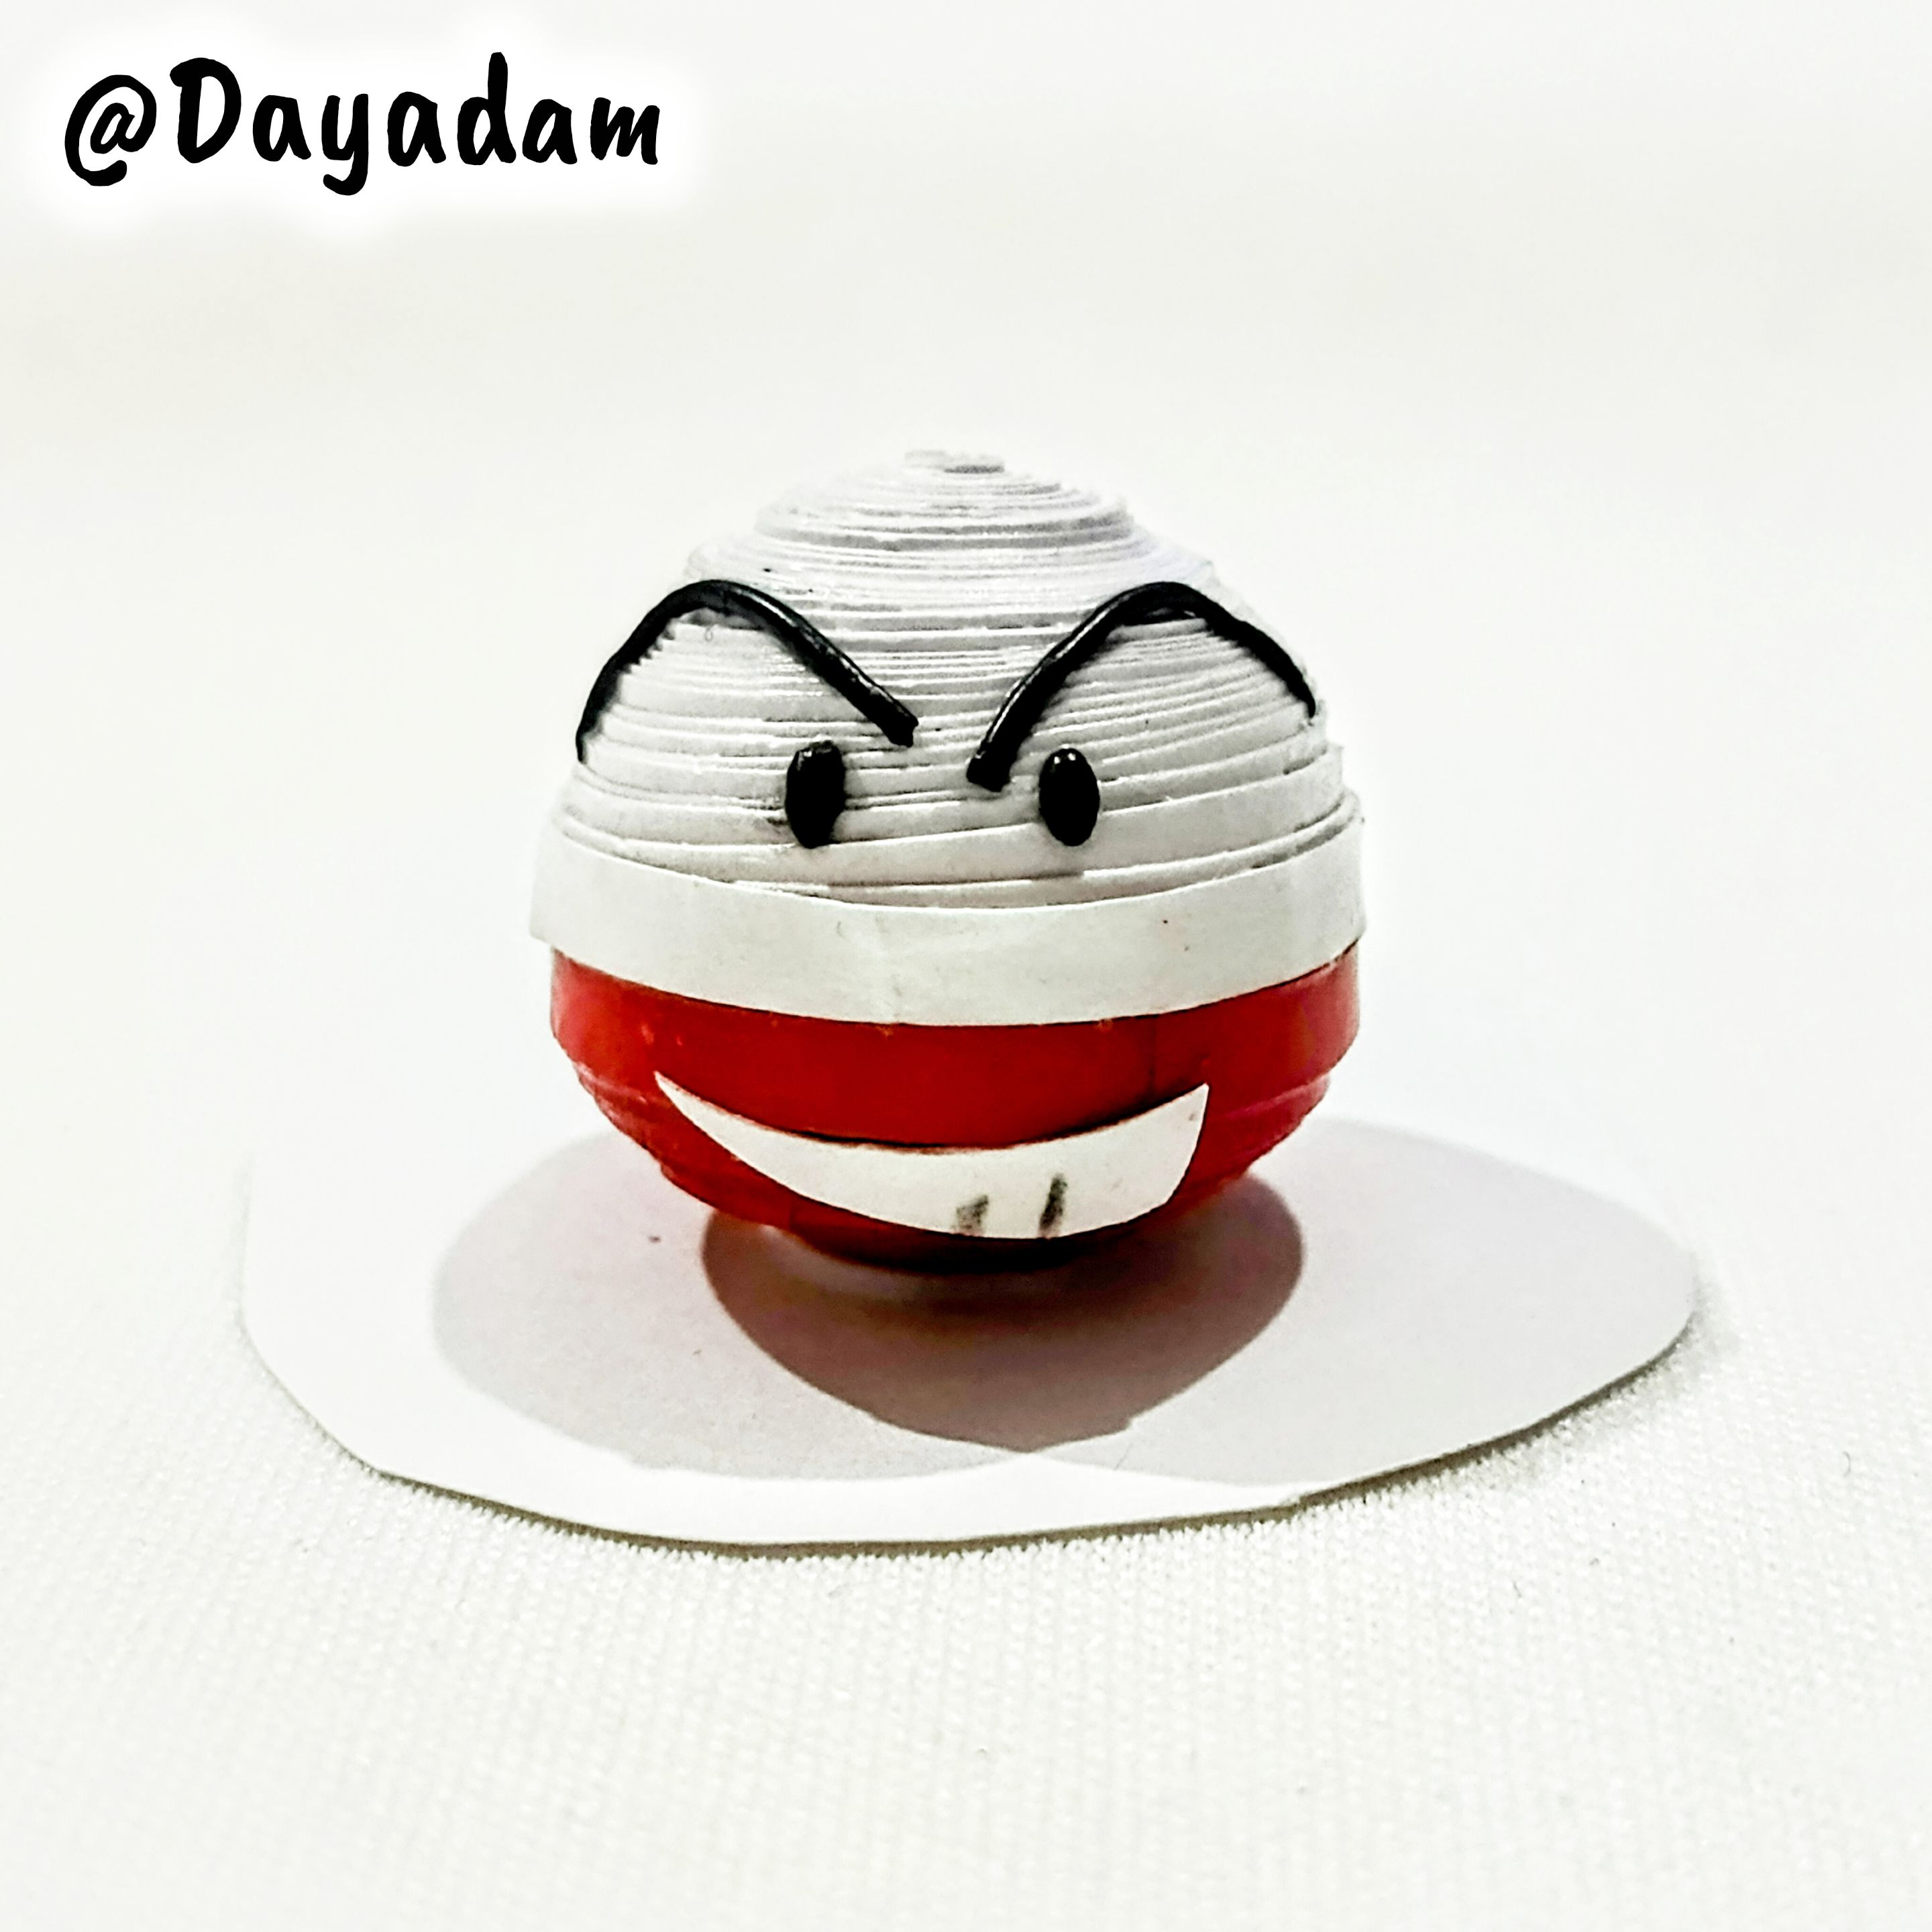| || |-| | 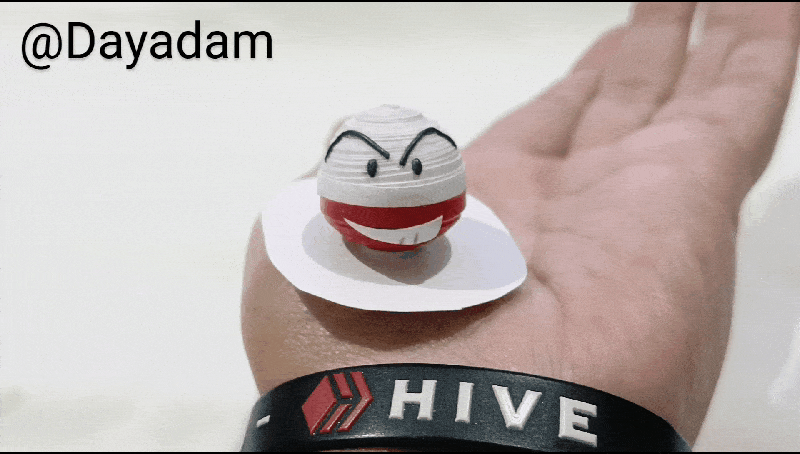 | --- ---  --- ---

• Sacamos de la plantilla, aplicamos pega blanca extra fuerte por su parte interna dejamos secar, luego procedemos a unir ambos círculos, pase una cinta de color blanca en el medio. • En este punto realicé la boca recortando un trozo de hoja blanca y dibujando los dientes con un lápiz, luego coloque los ojos y las cejas. • Apliqué una capa de pega blanca extra fuerte dejando secar muy bien, esto para proteger y endurecer la figura. • Para finalizar recorte una pequeña base de cartulina color blanca, allí pegué la figura decorativa con pega blanca extra fuerte. >De esta manera finalice esta figura decorativa del Pokémon Electrode en 3D, en la técnica de técnica de quilling. --- --- |||| |-|-|-| |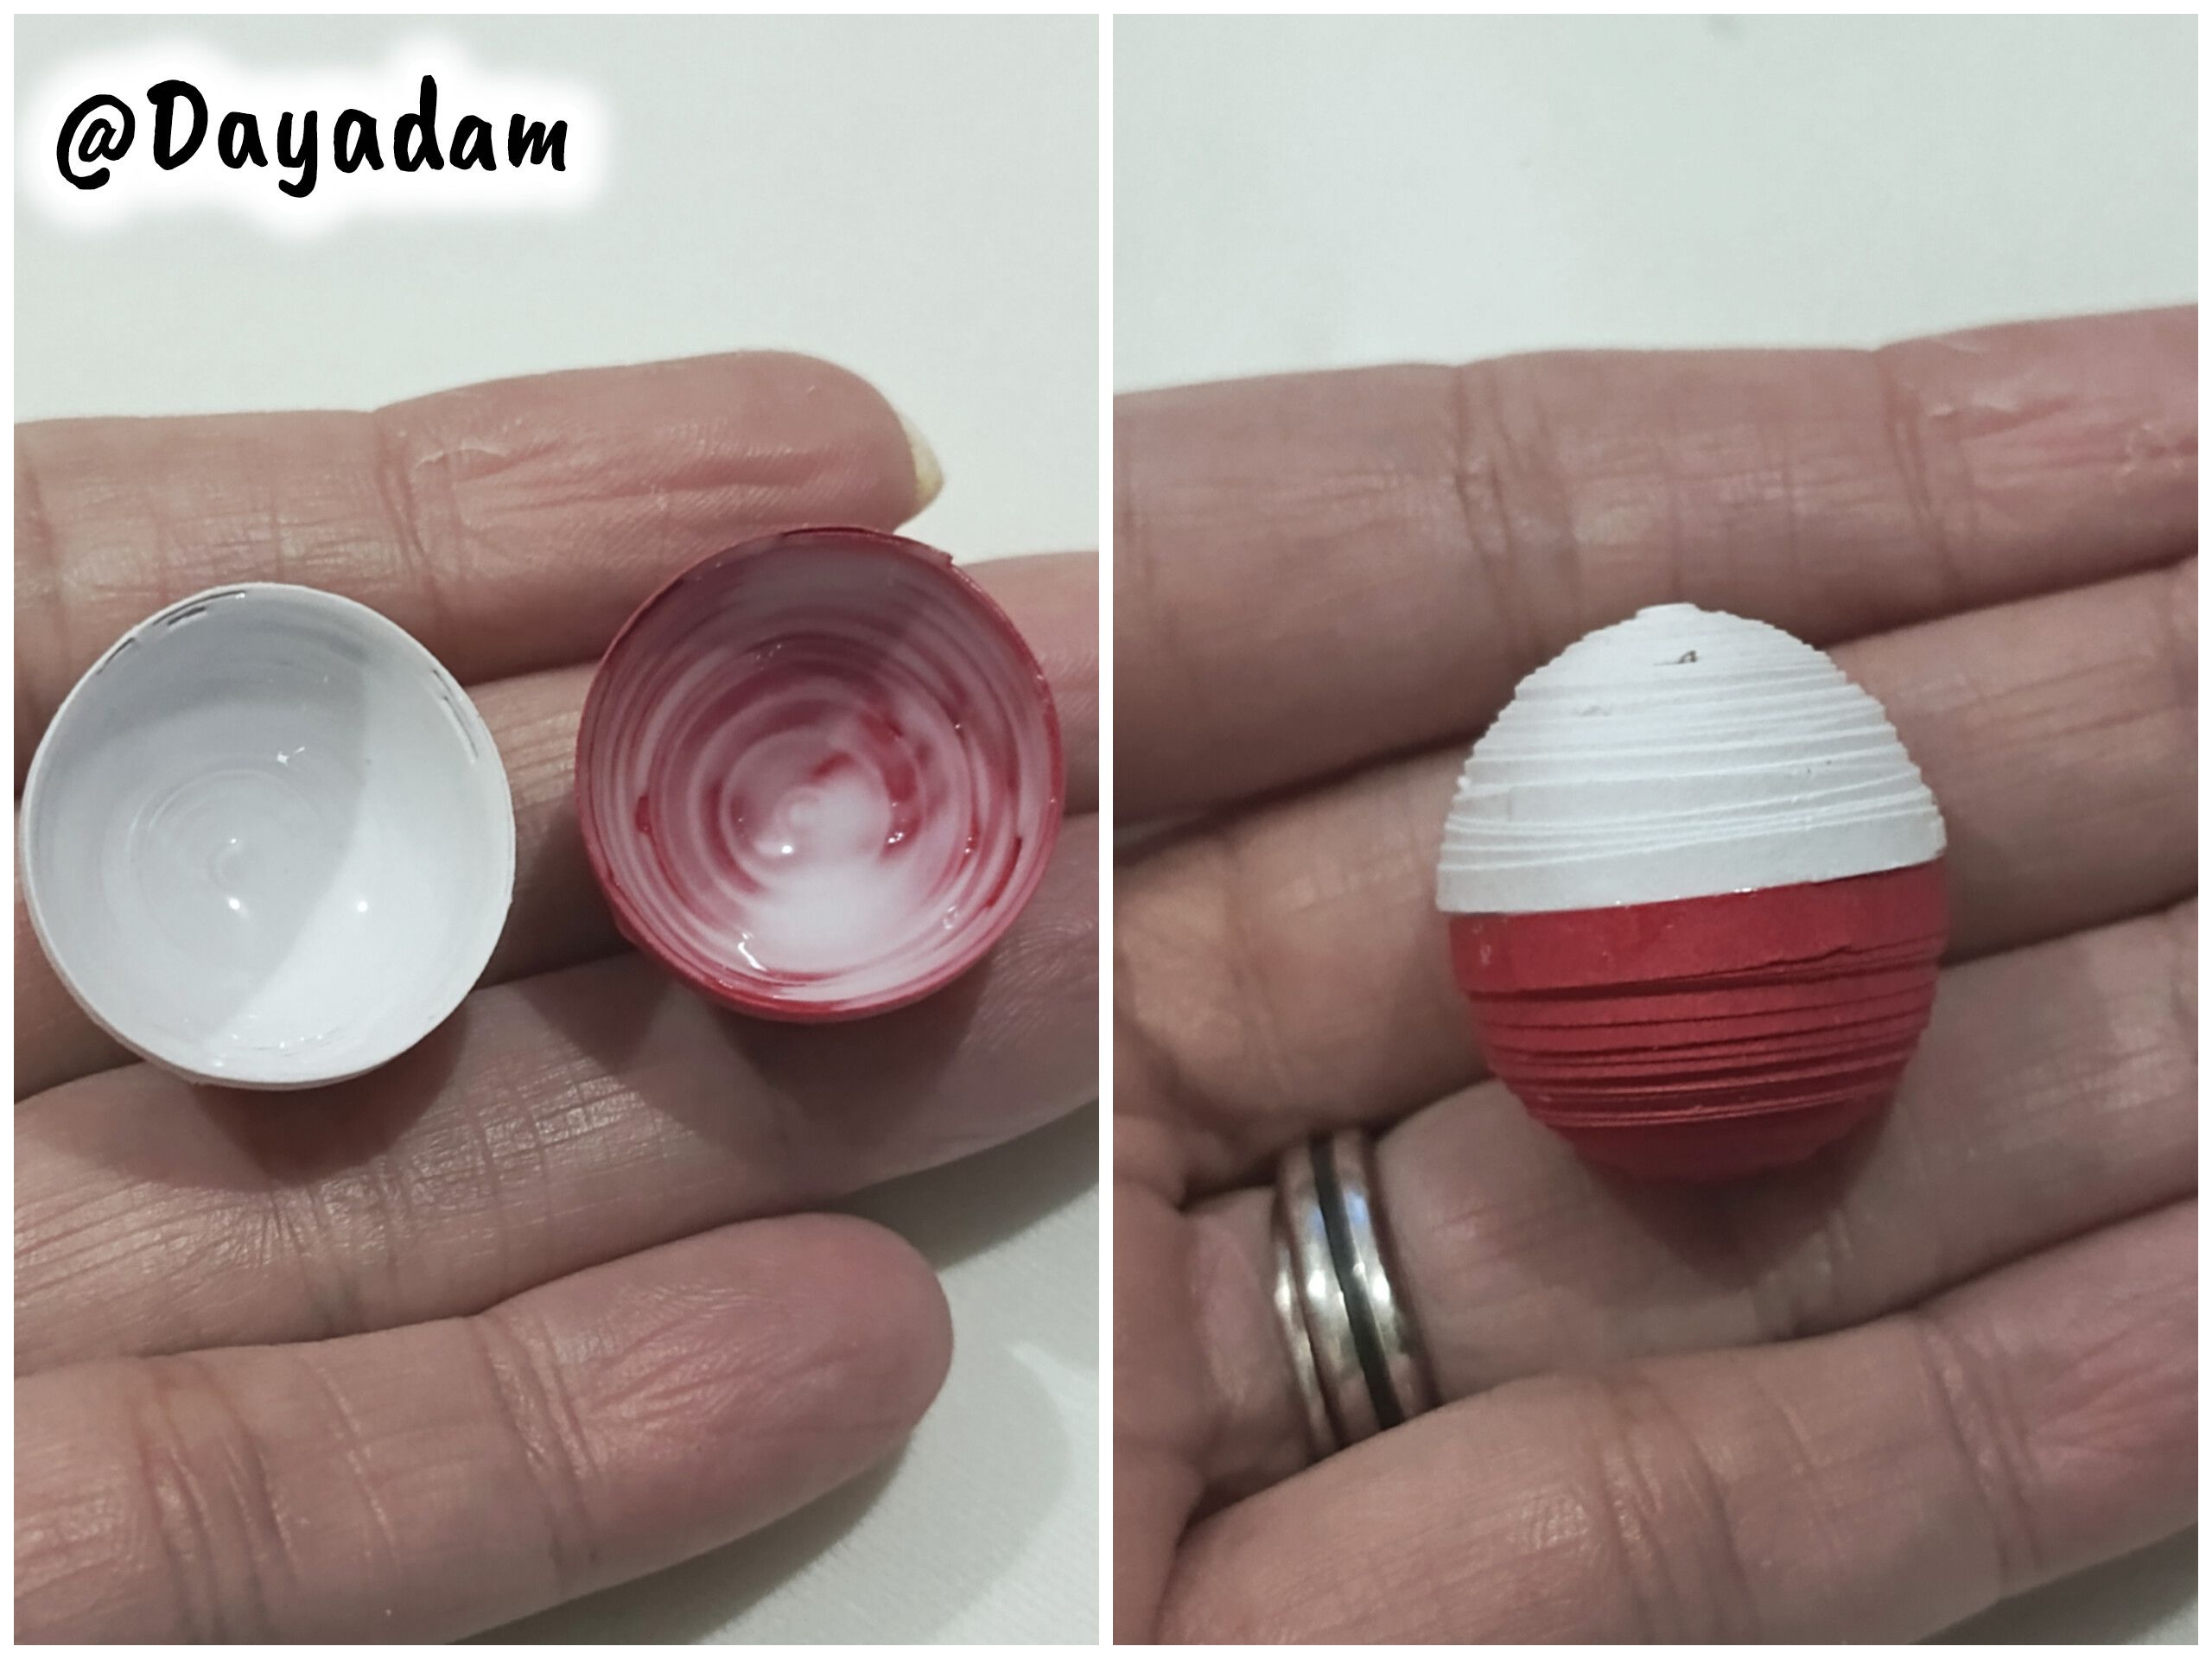|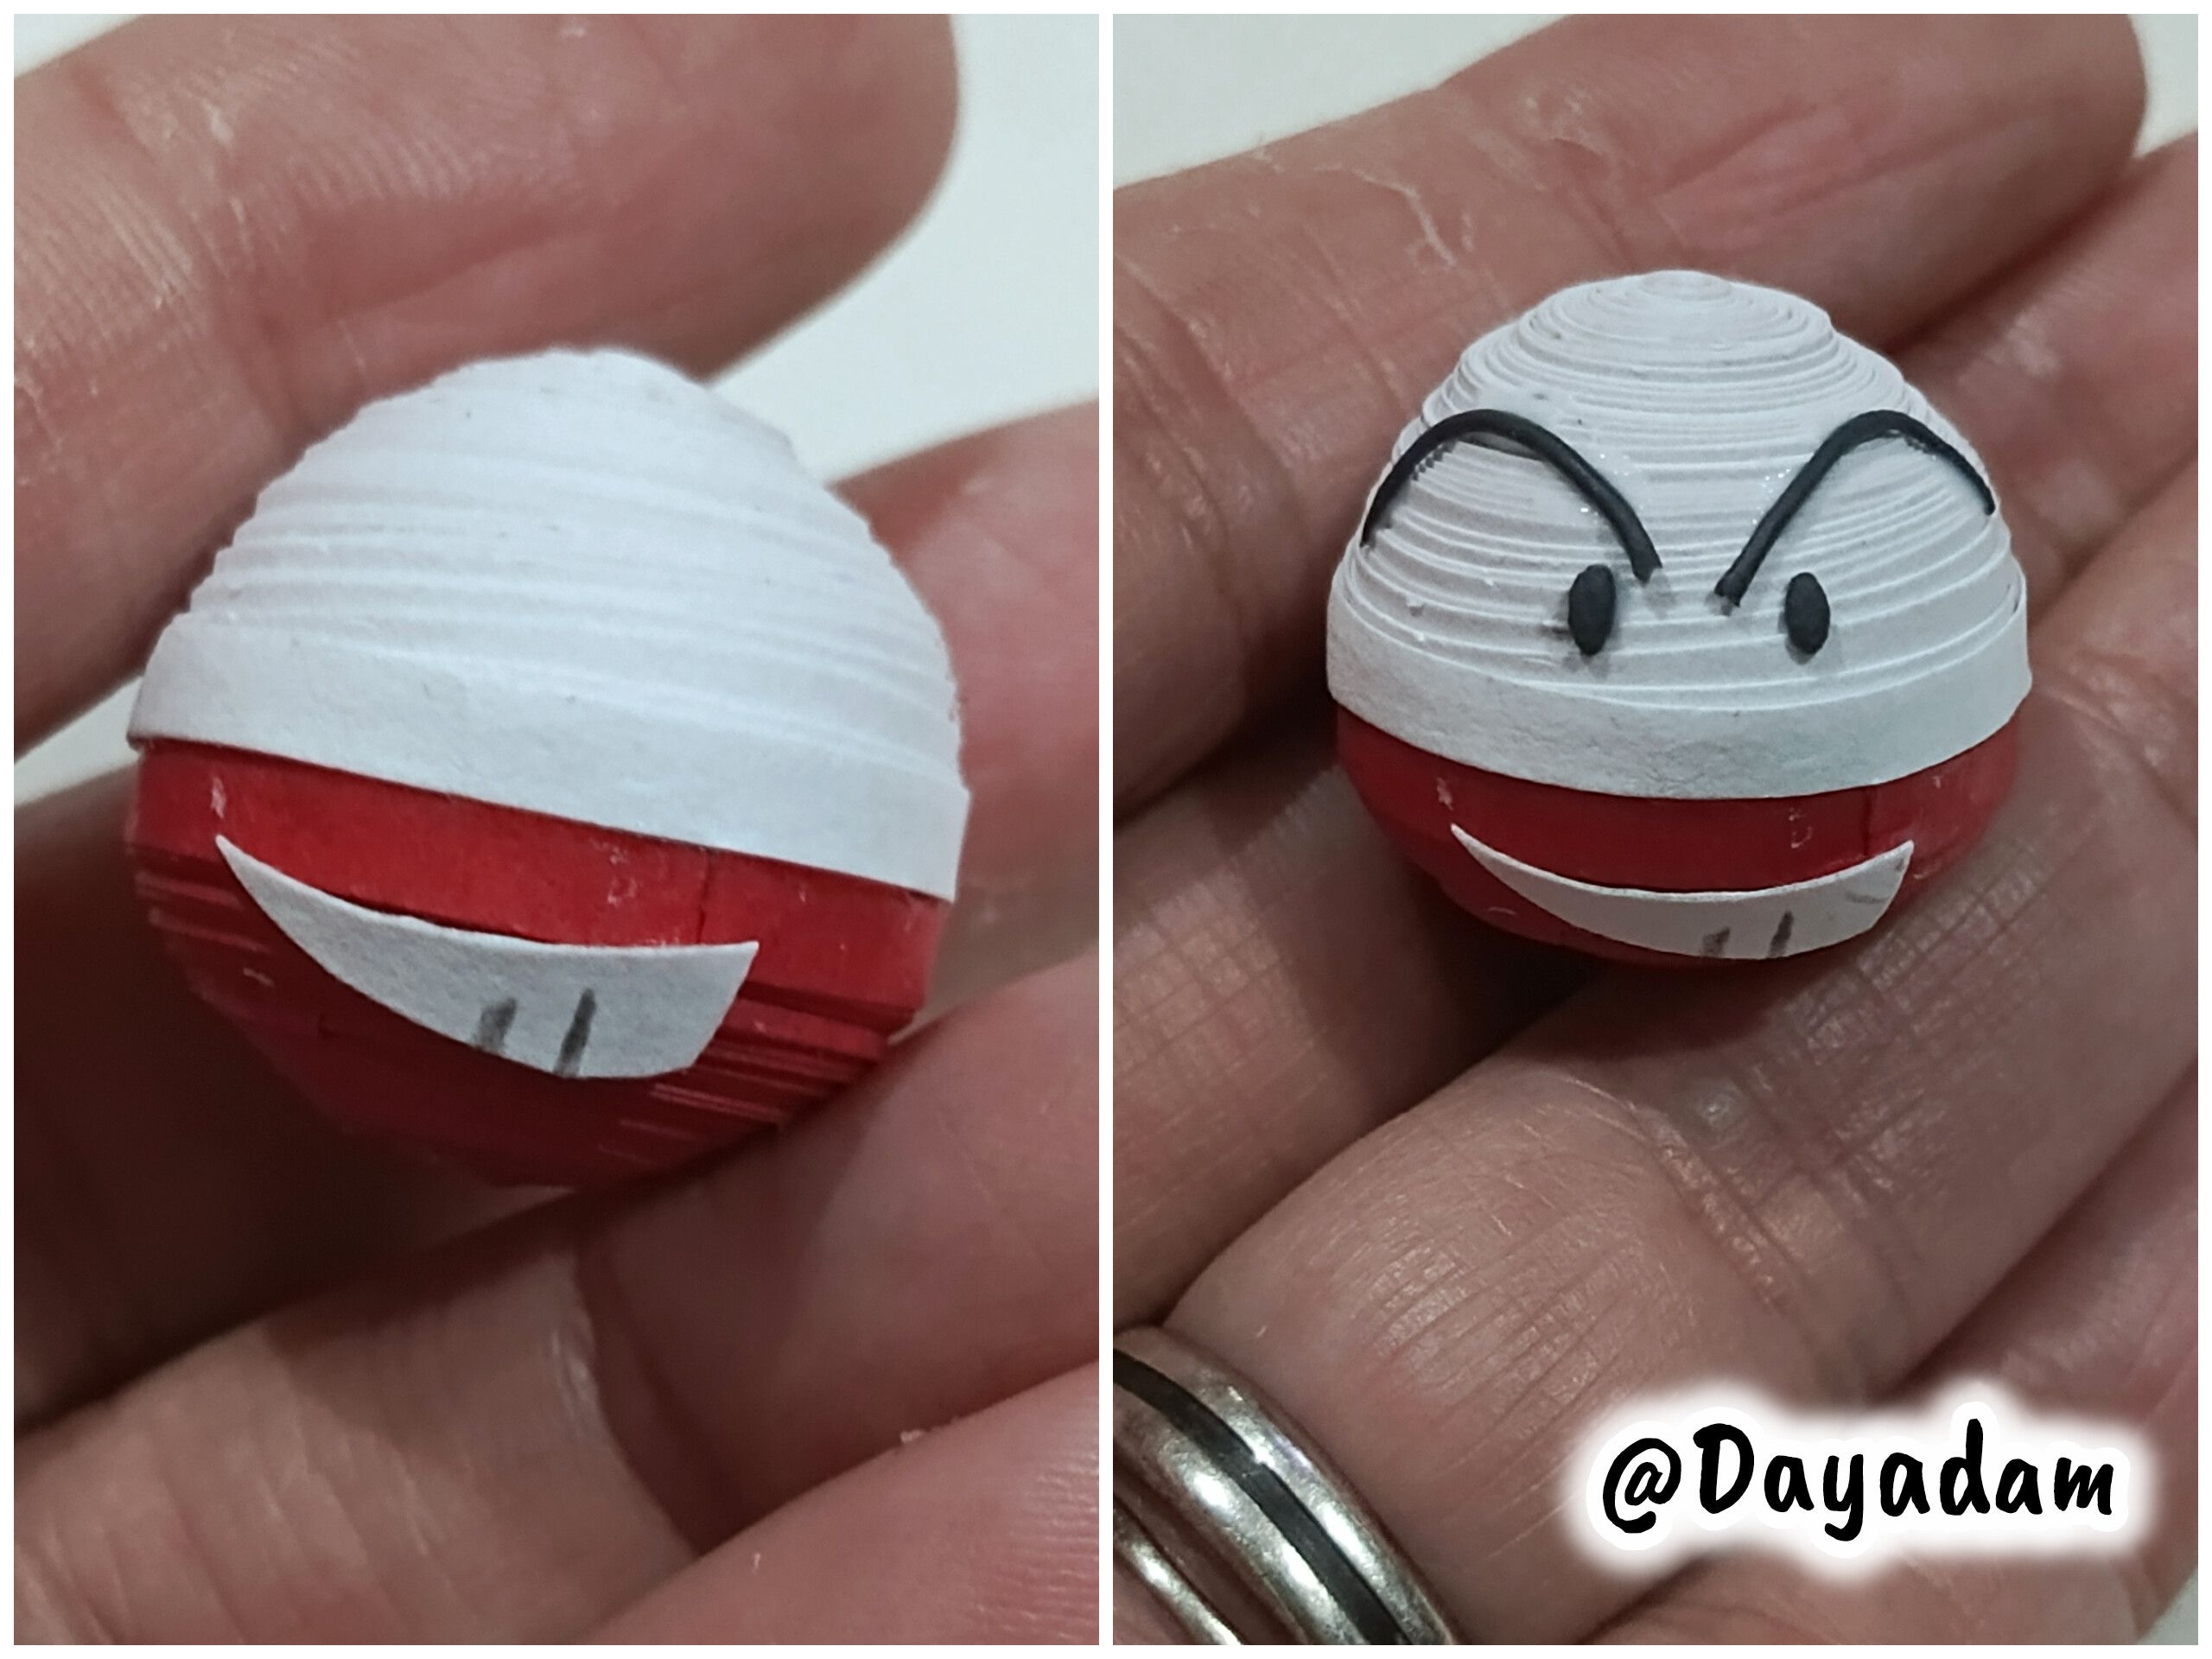|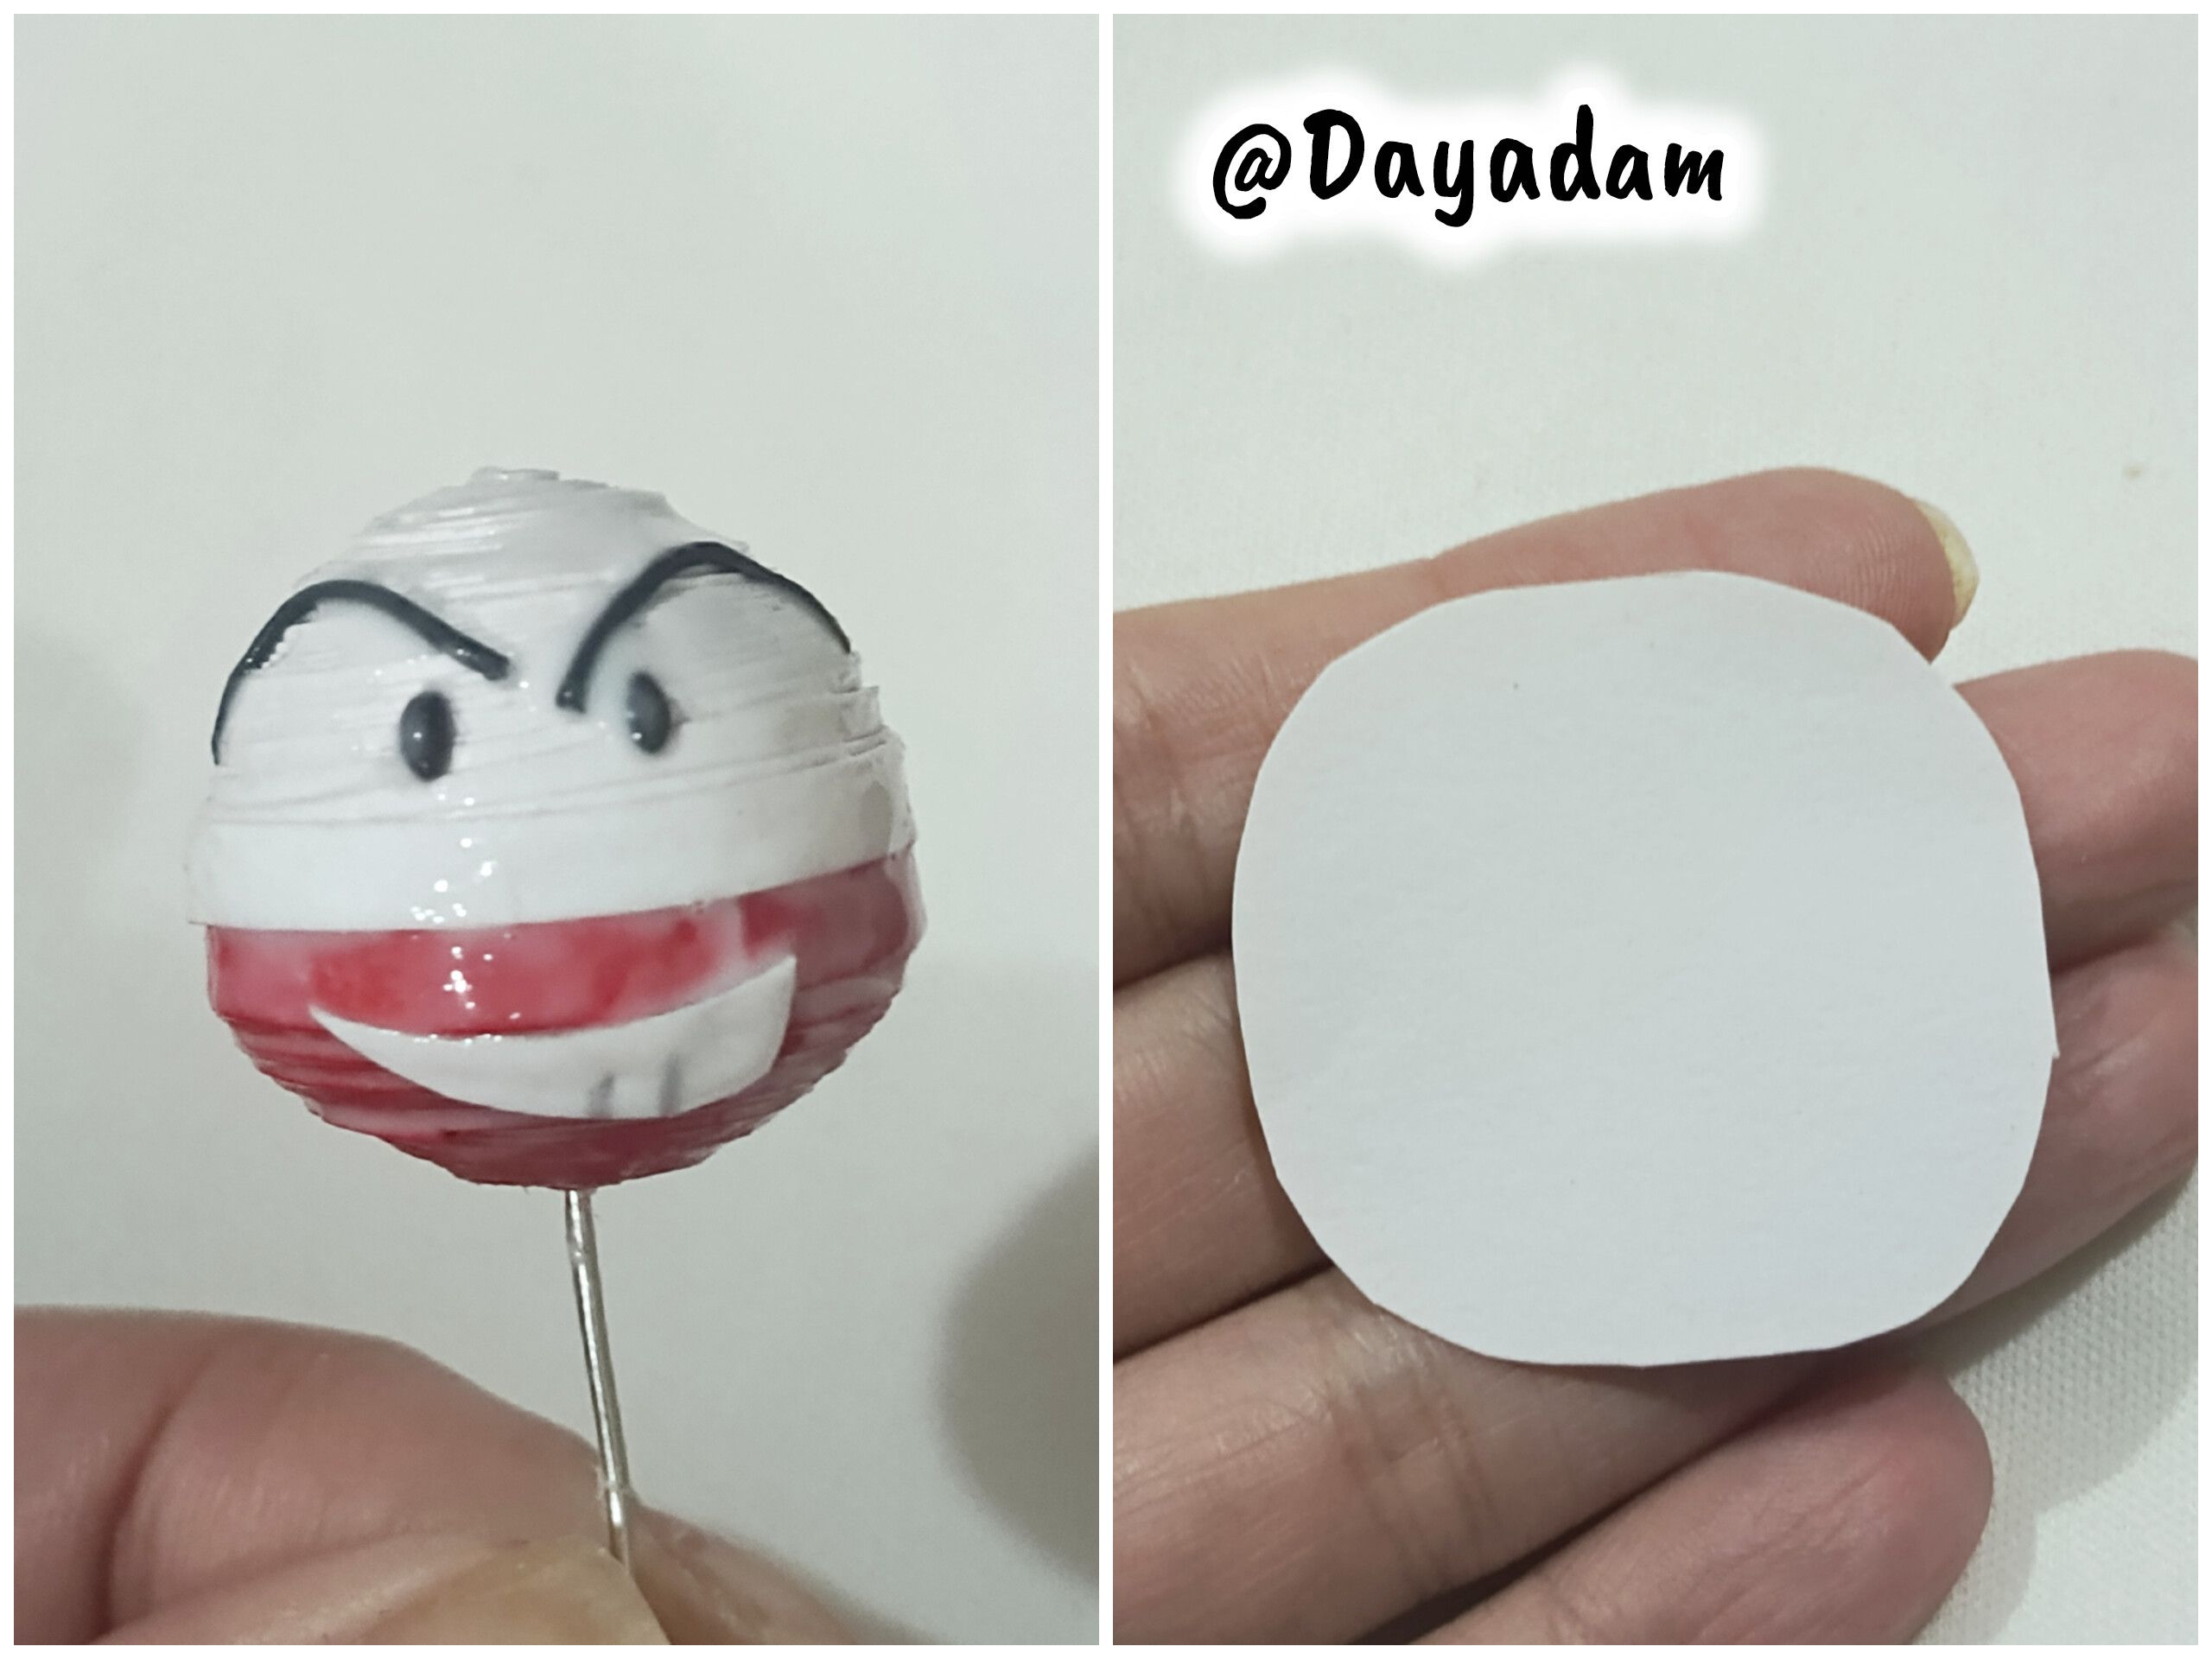| --- ---  --- --- || |-| |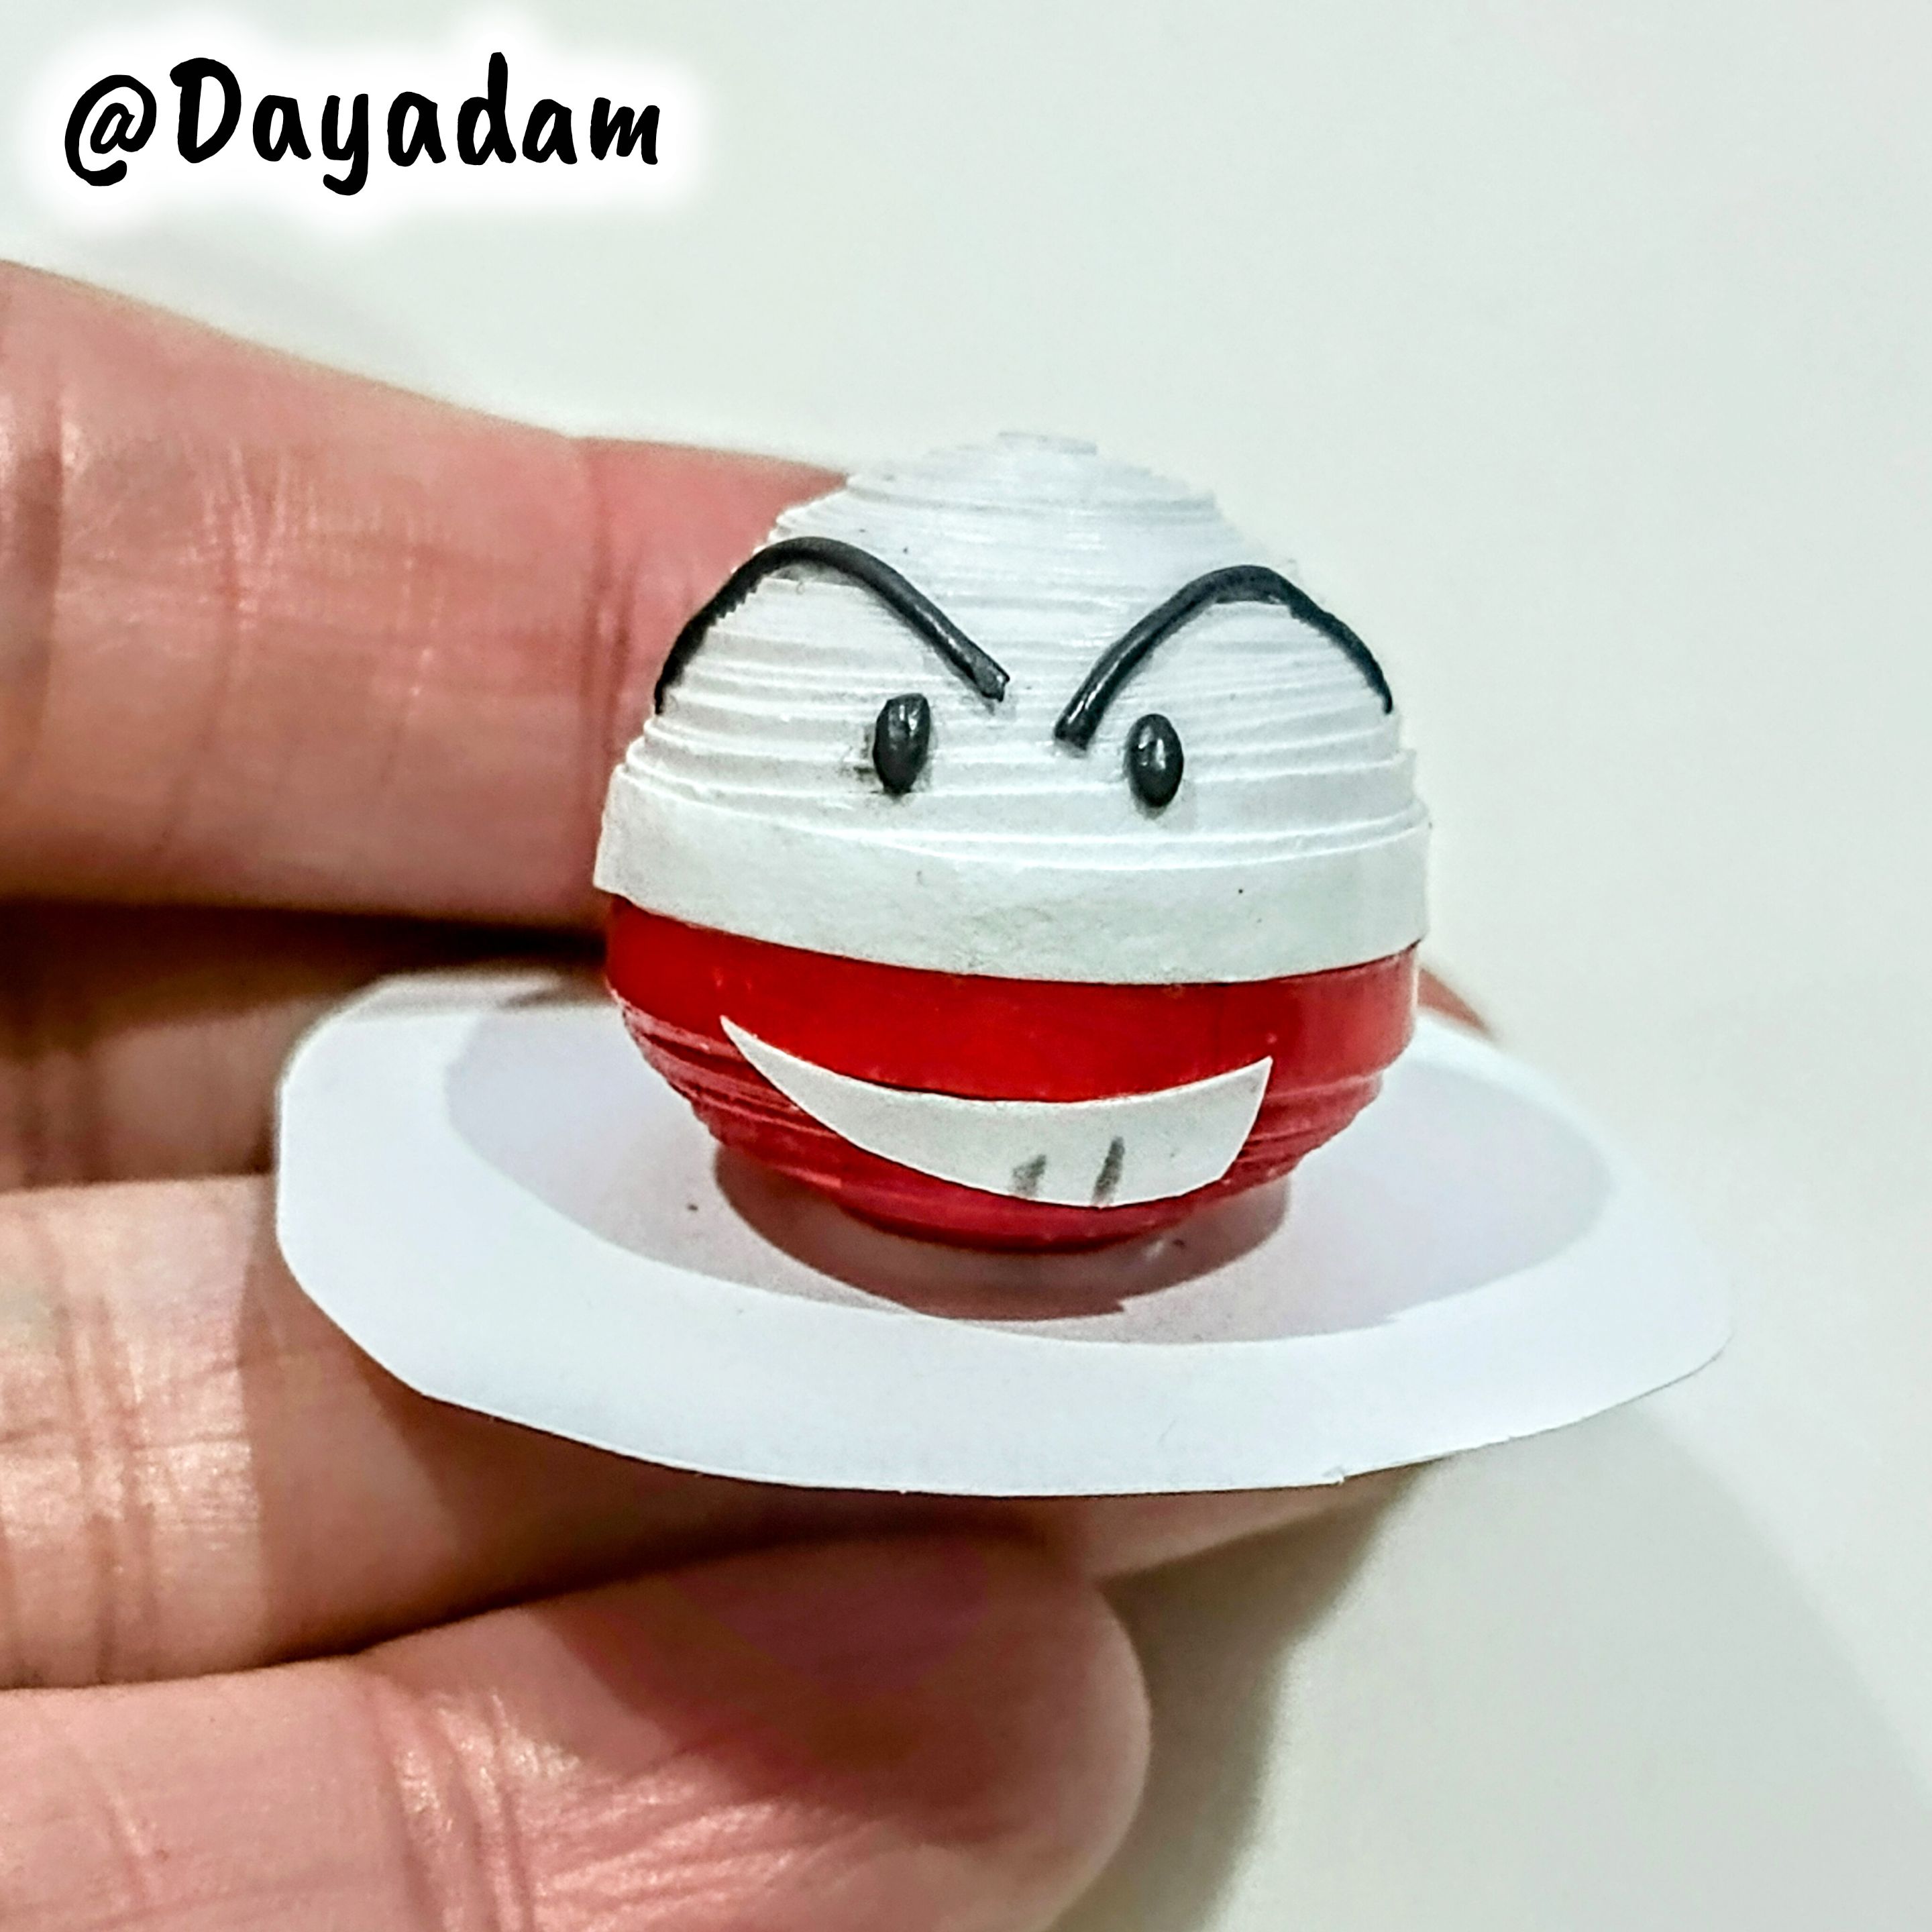| ||| |-|-| |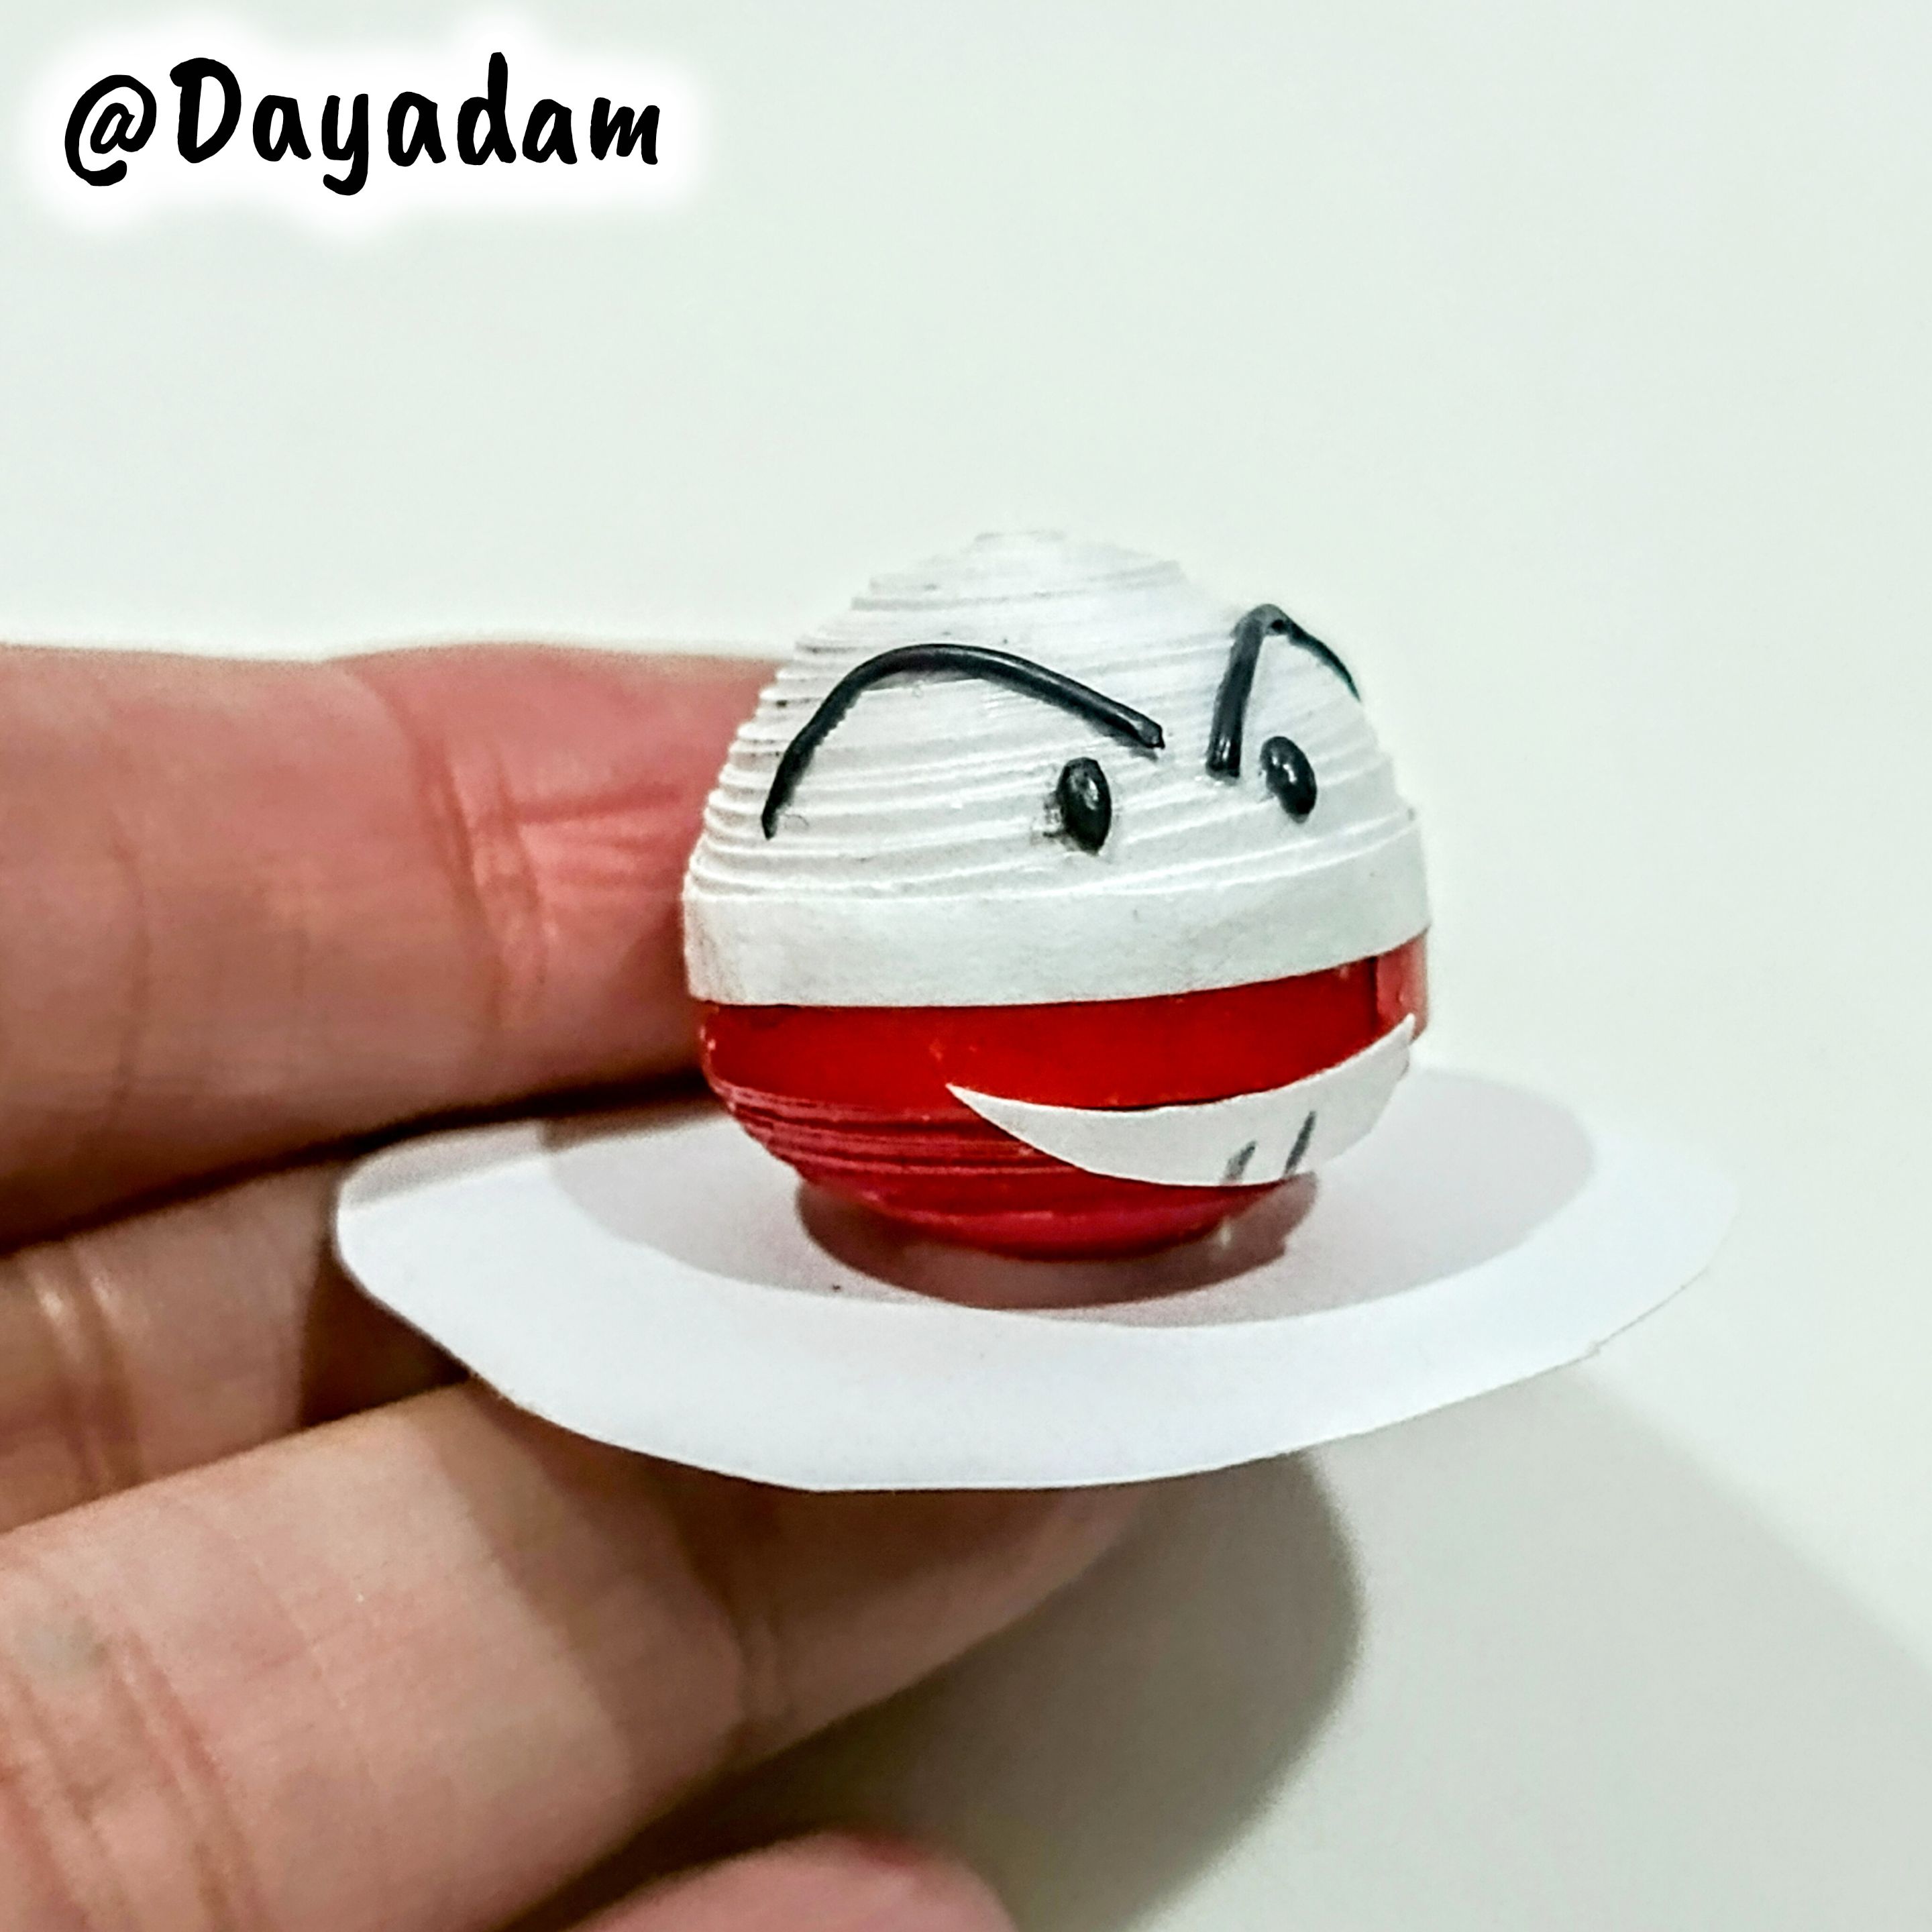|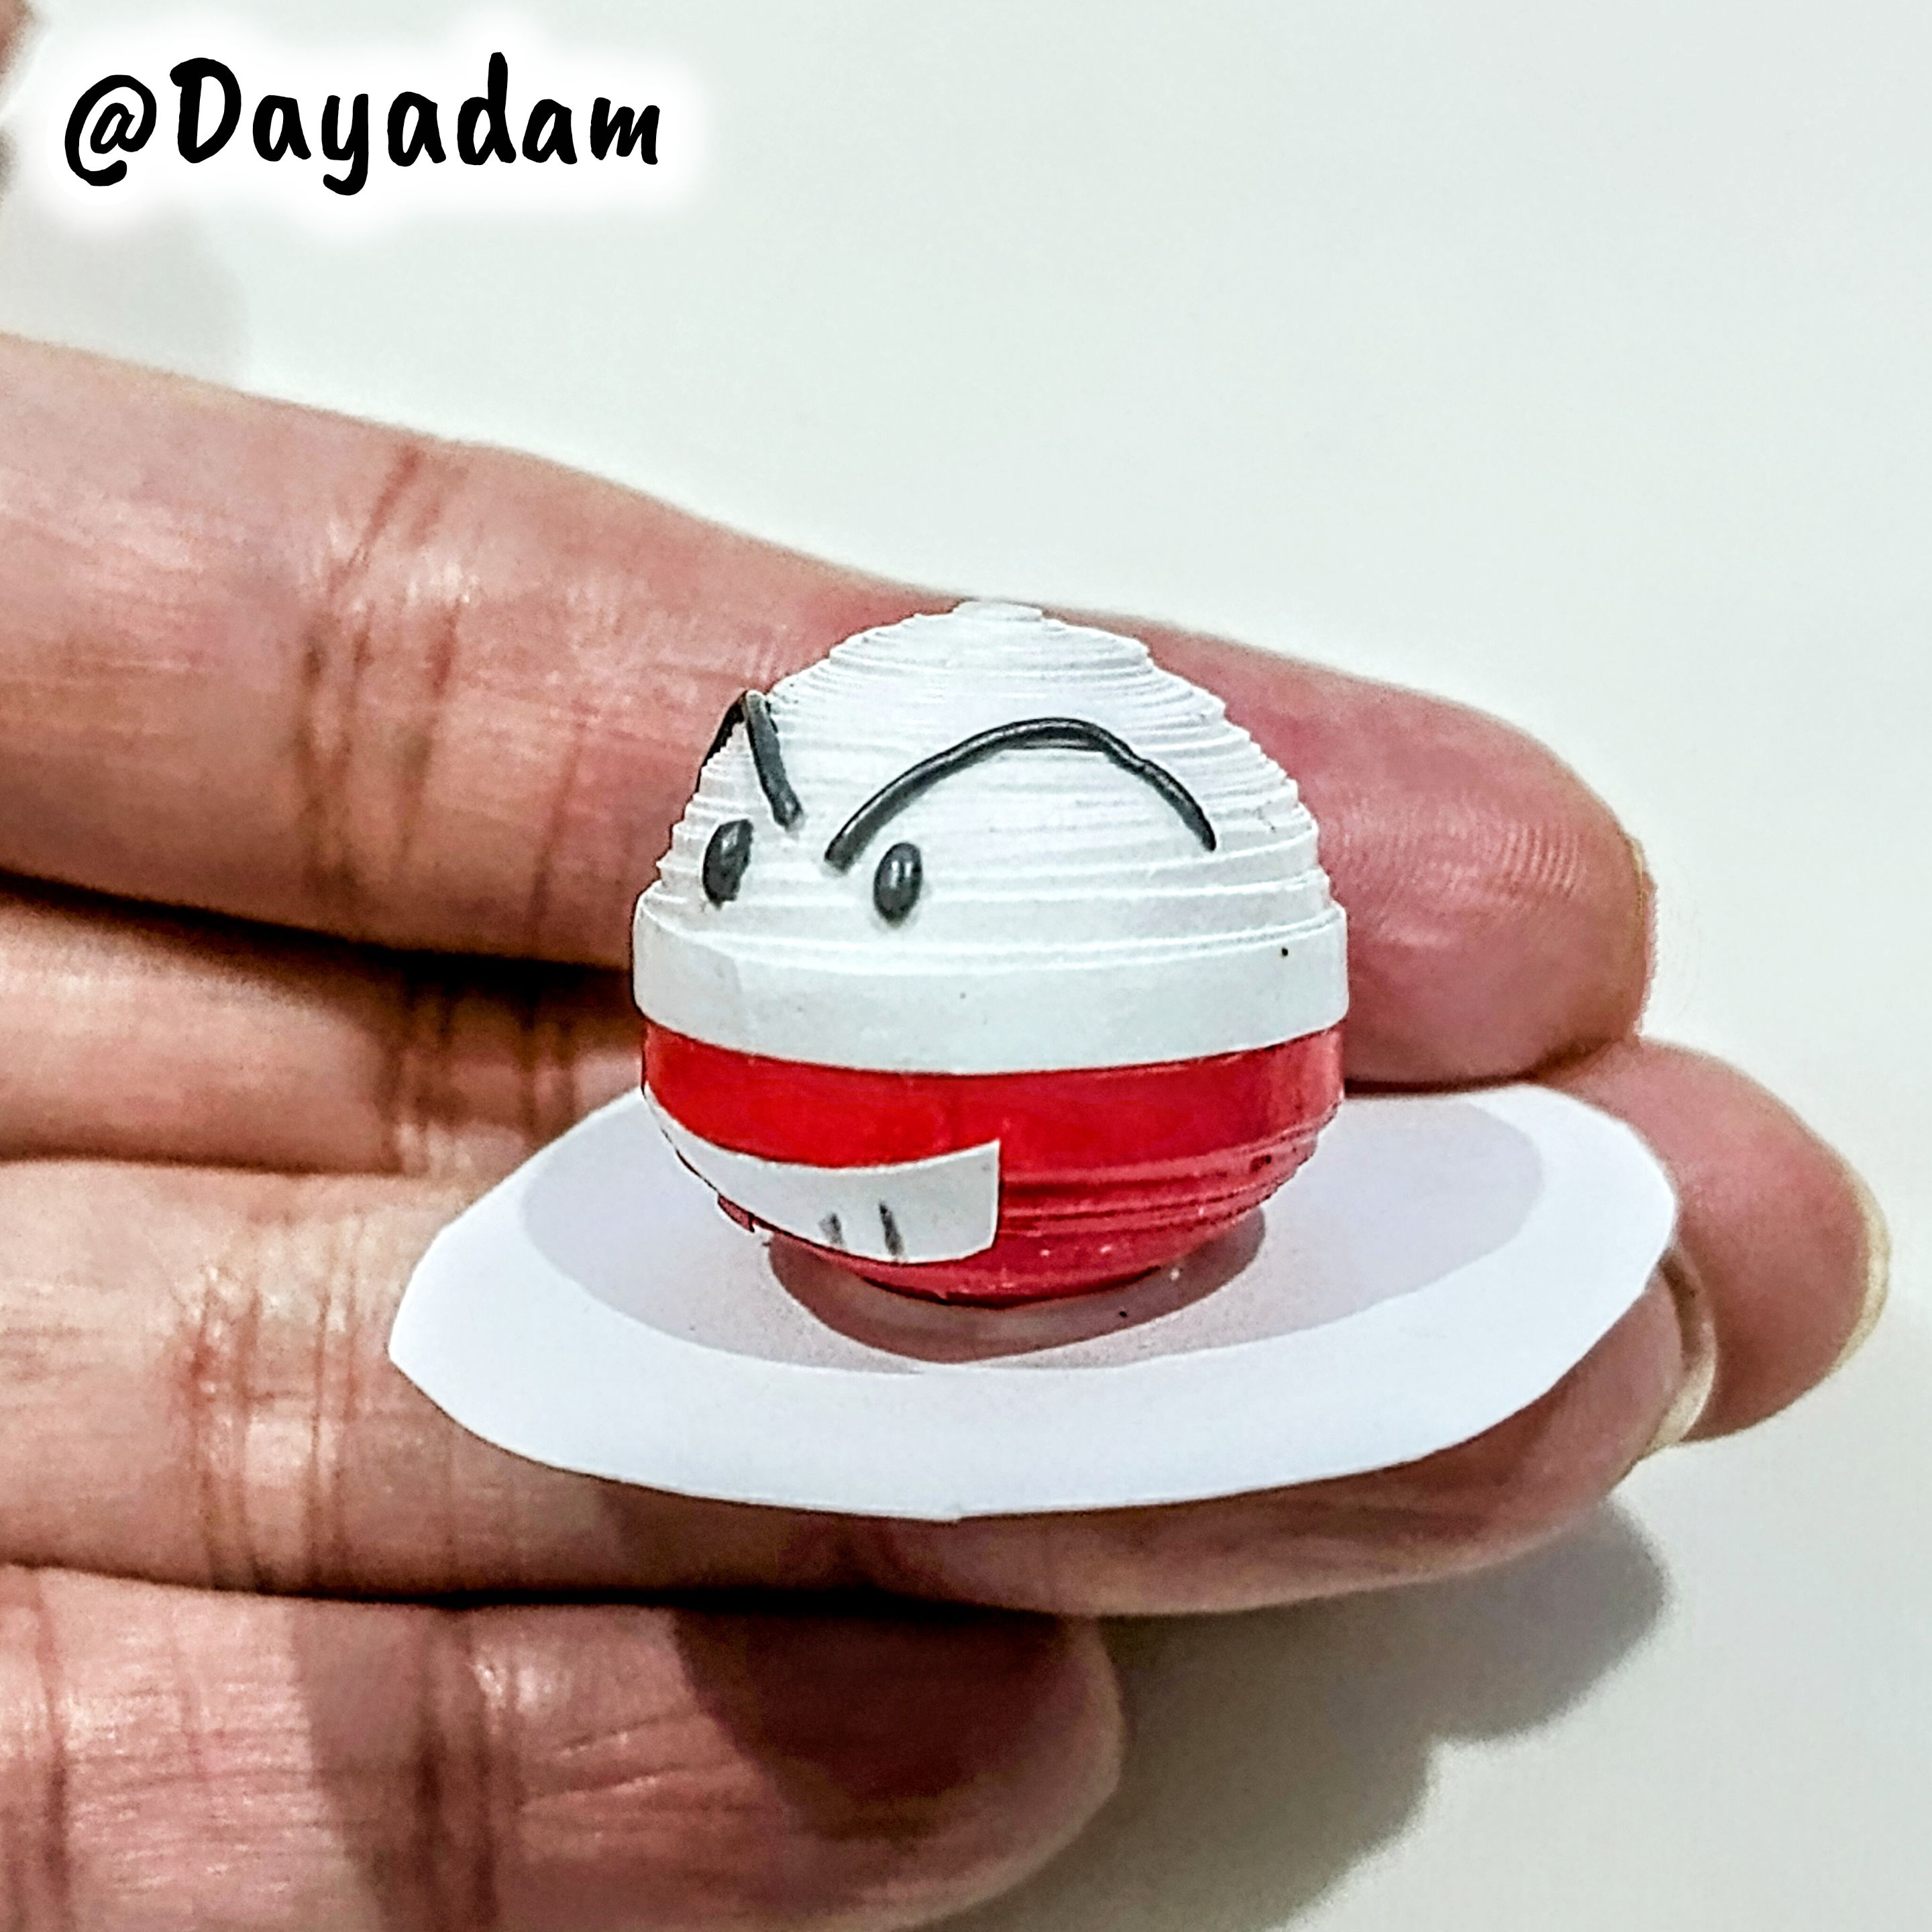| || |-| || ||| |-|-| |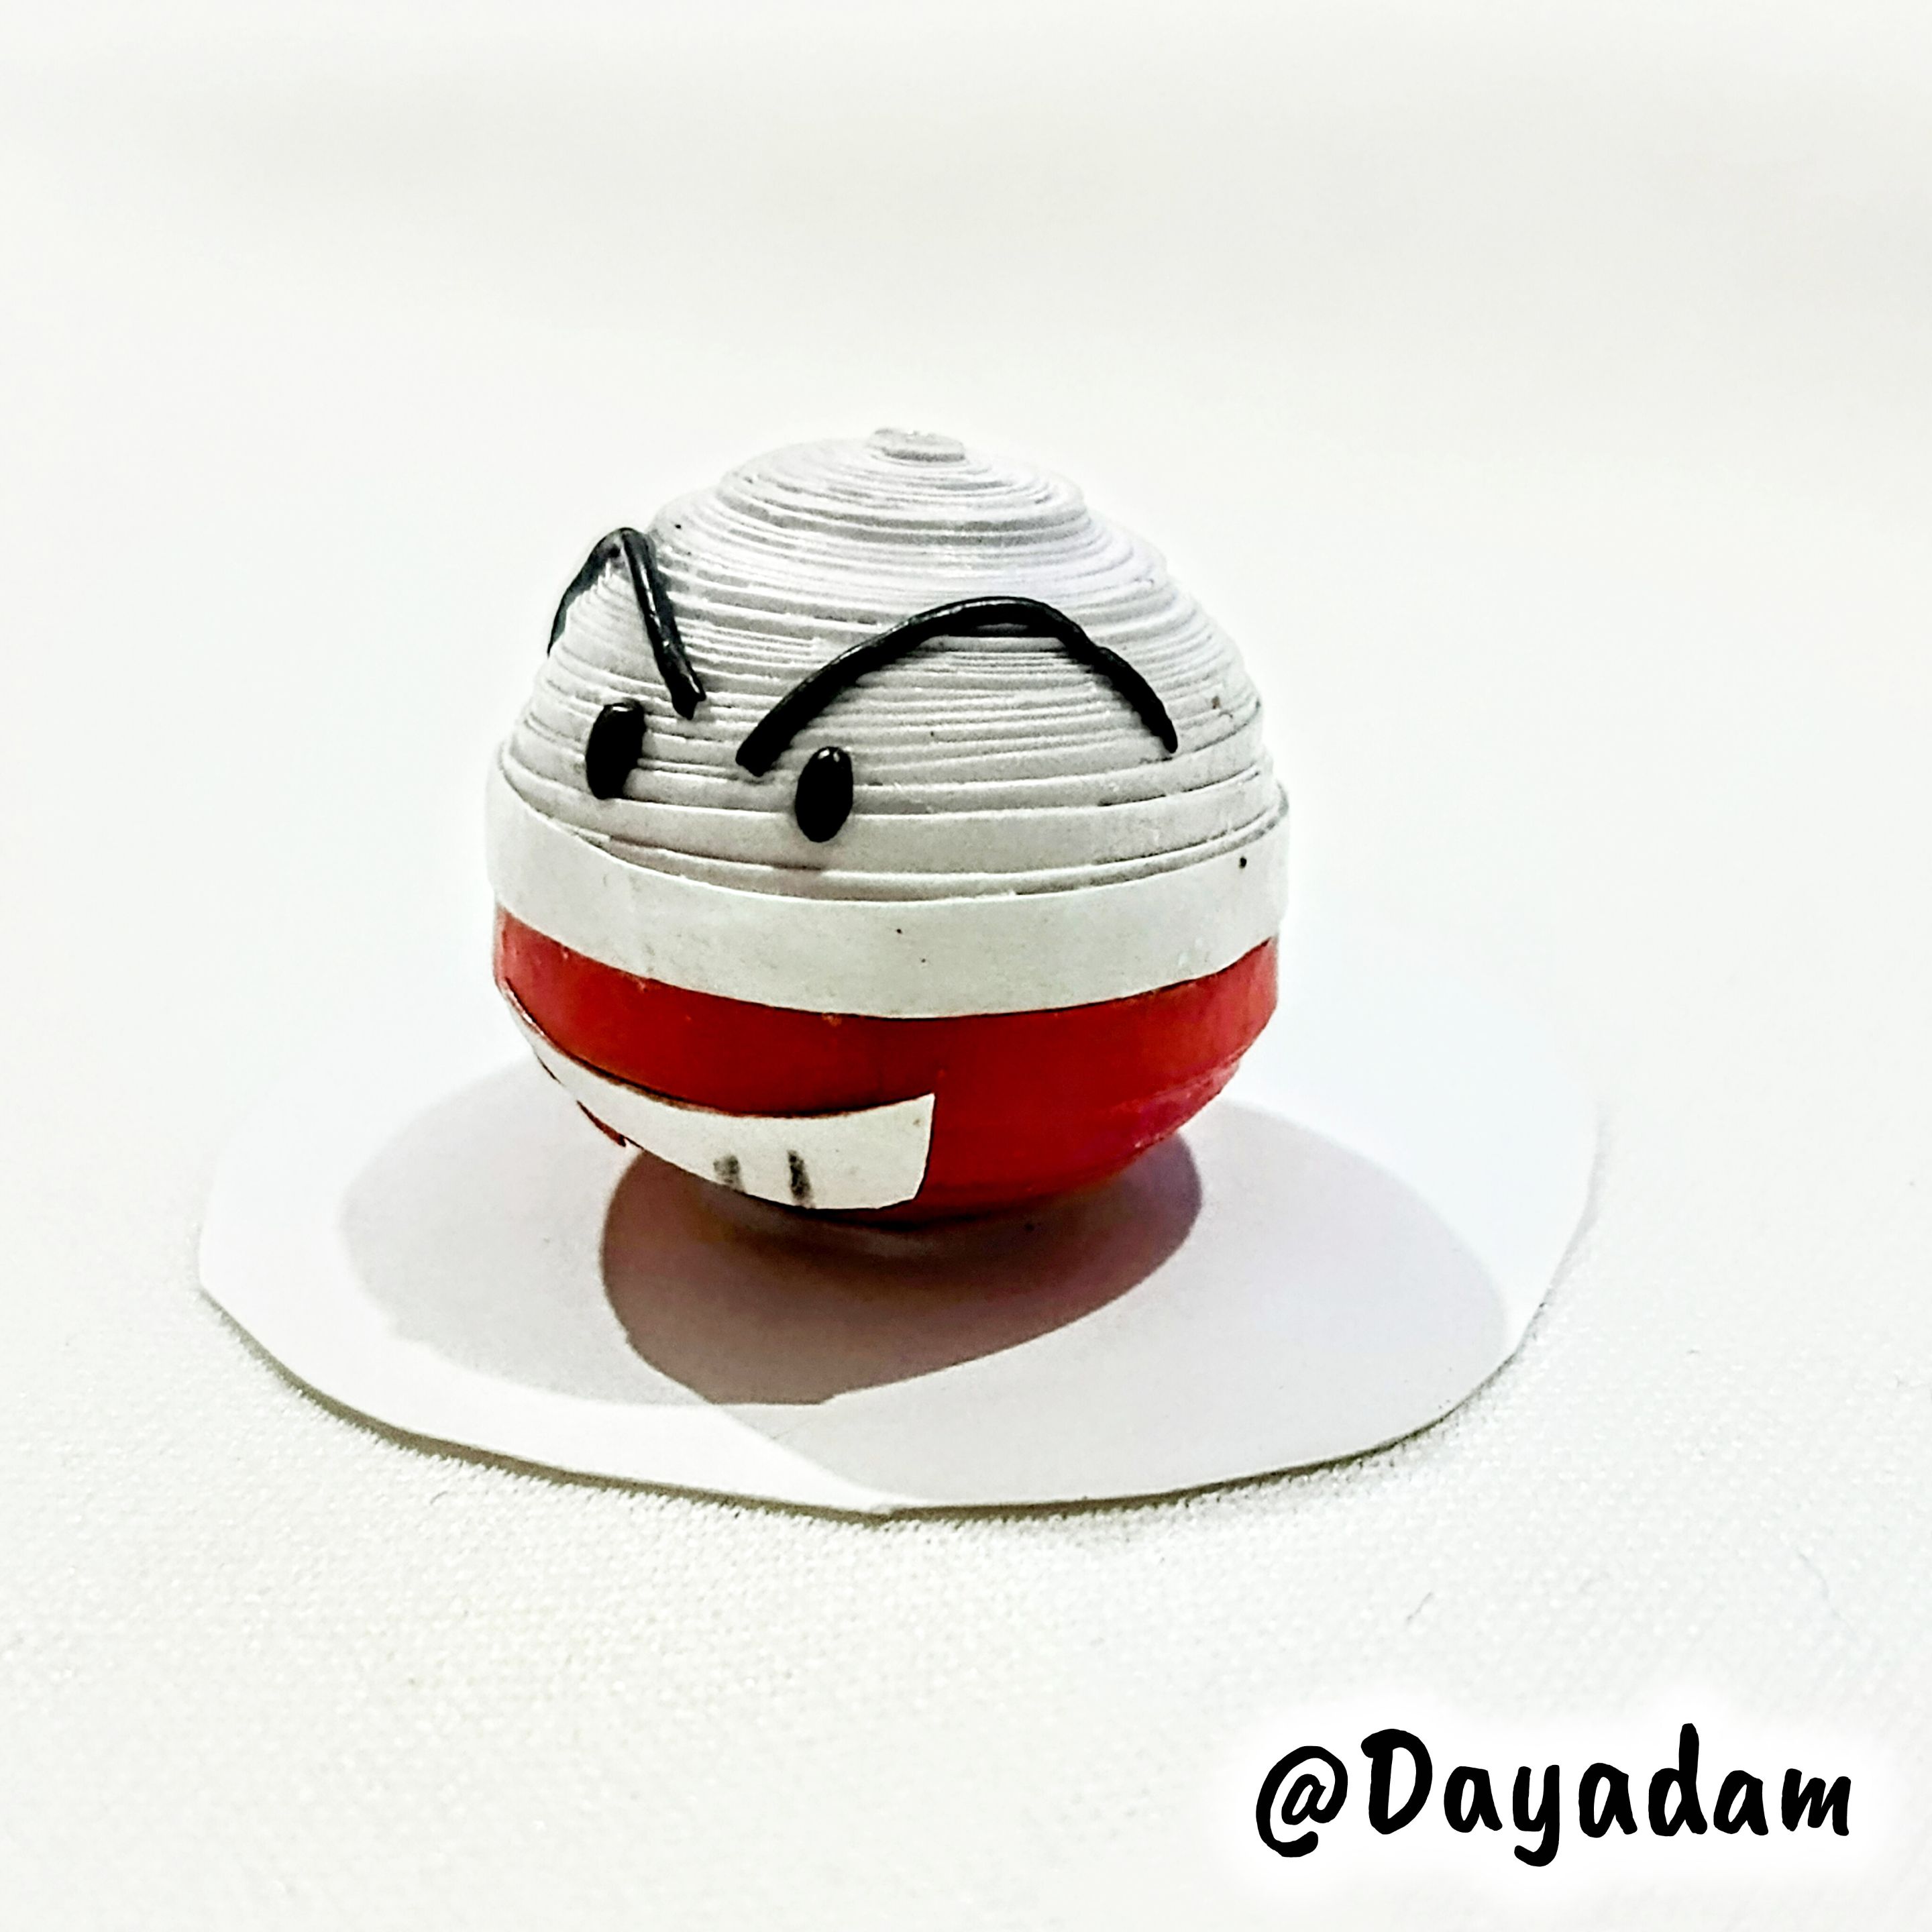|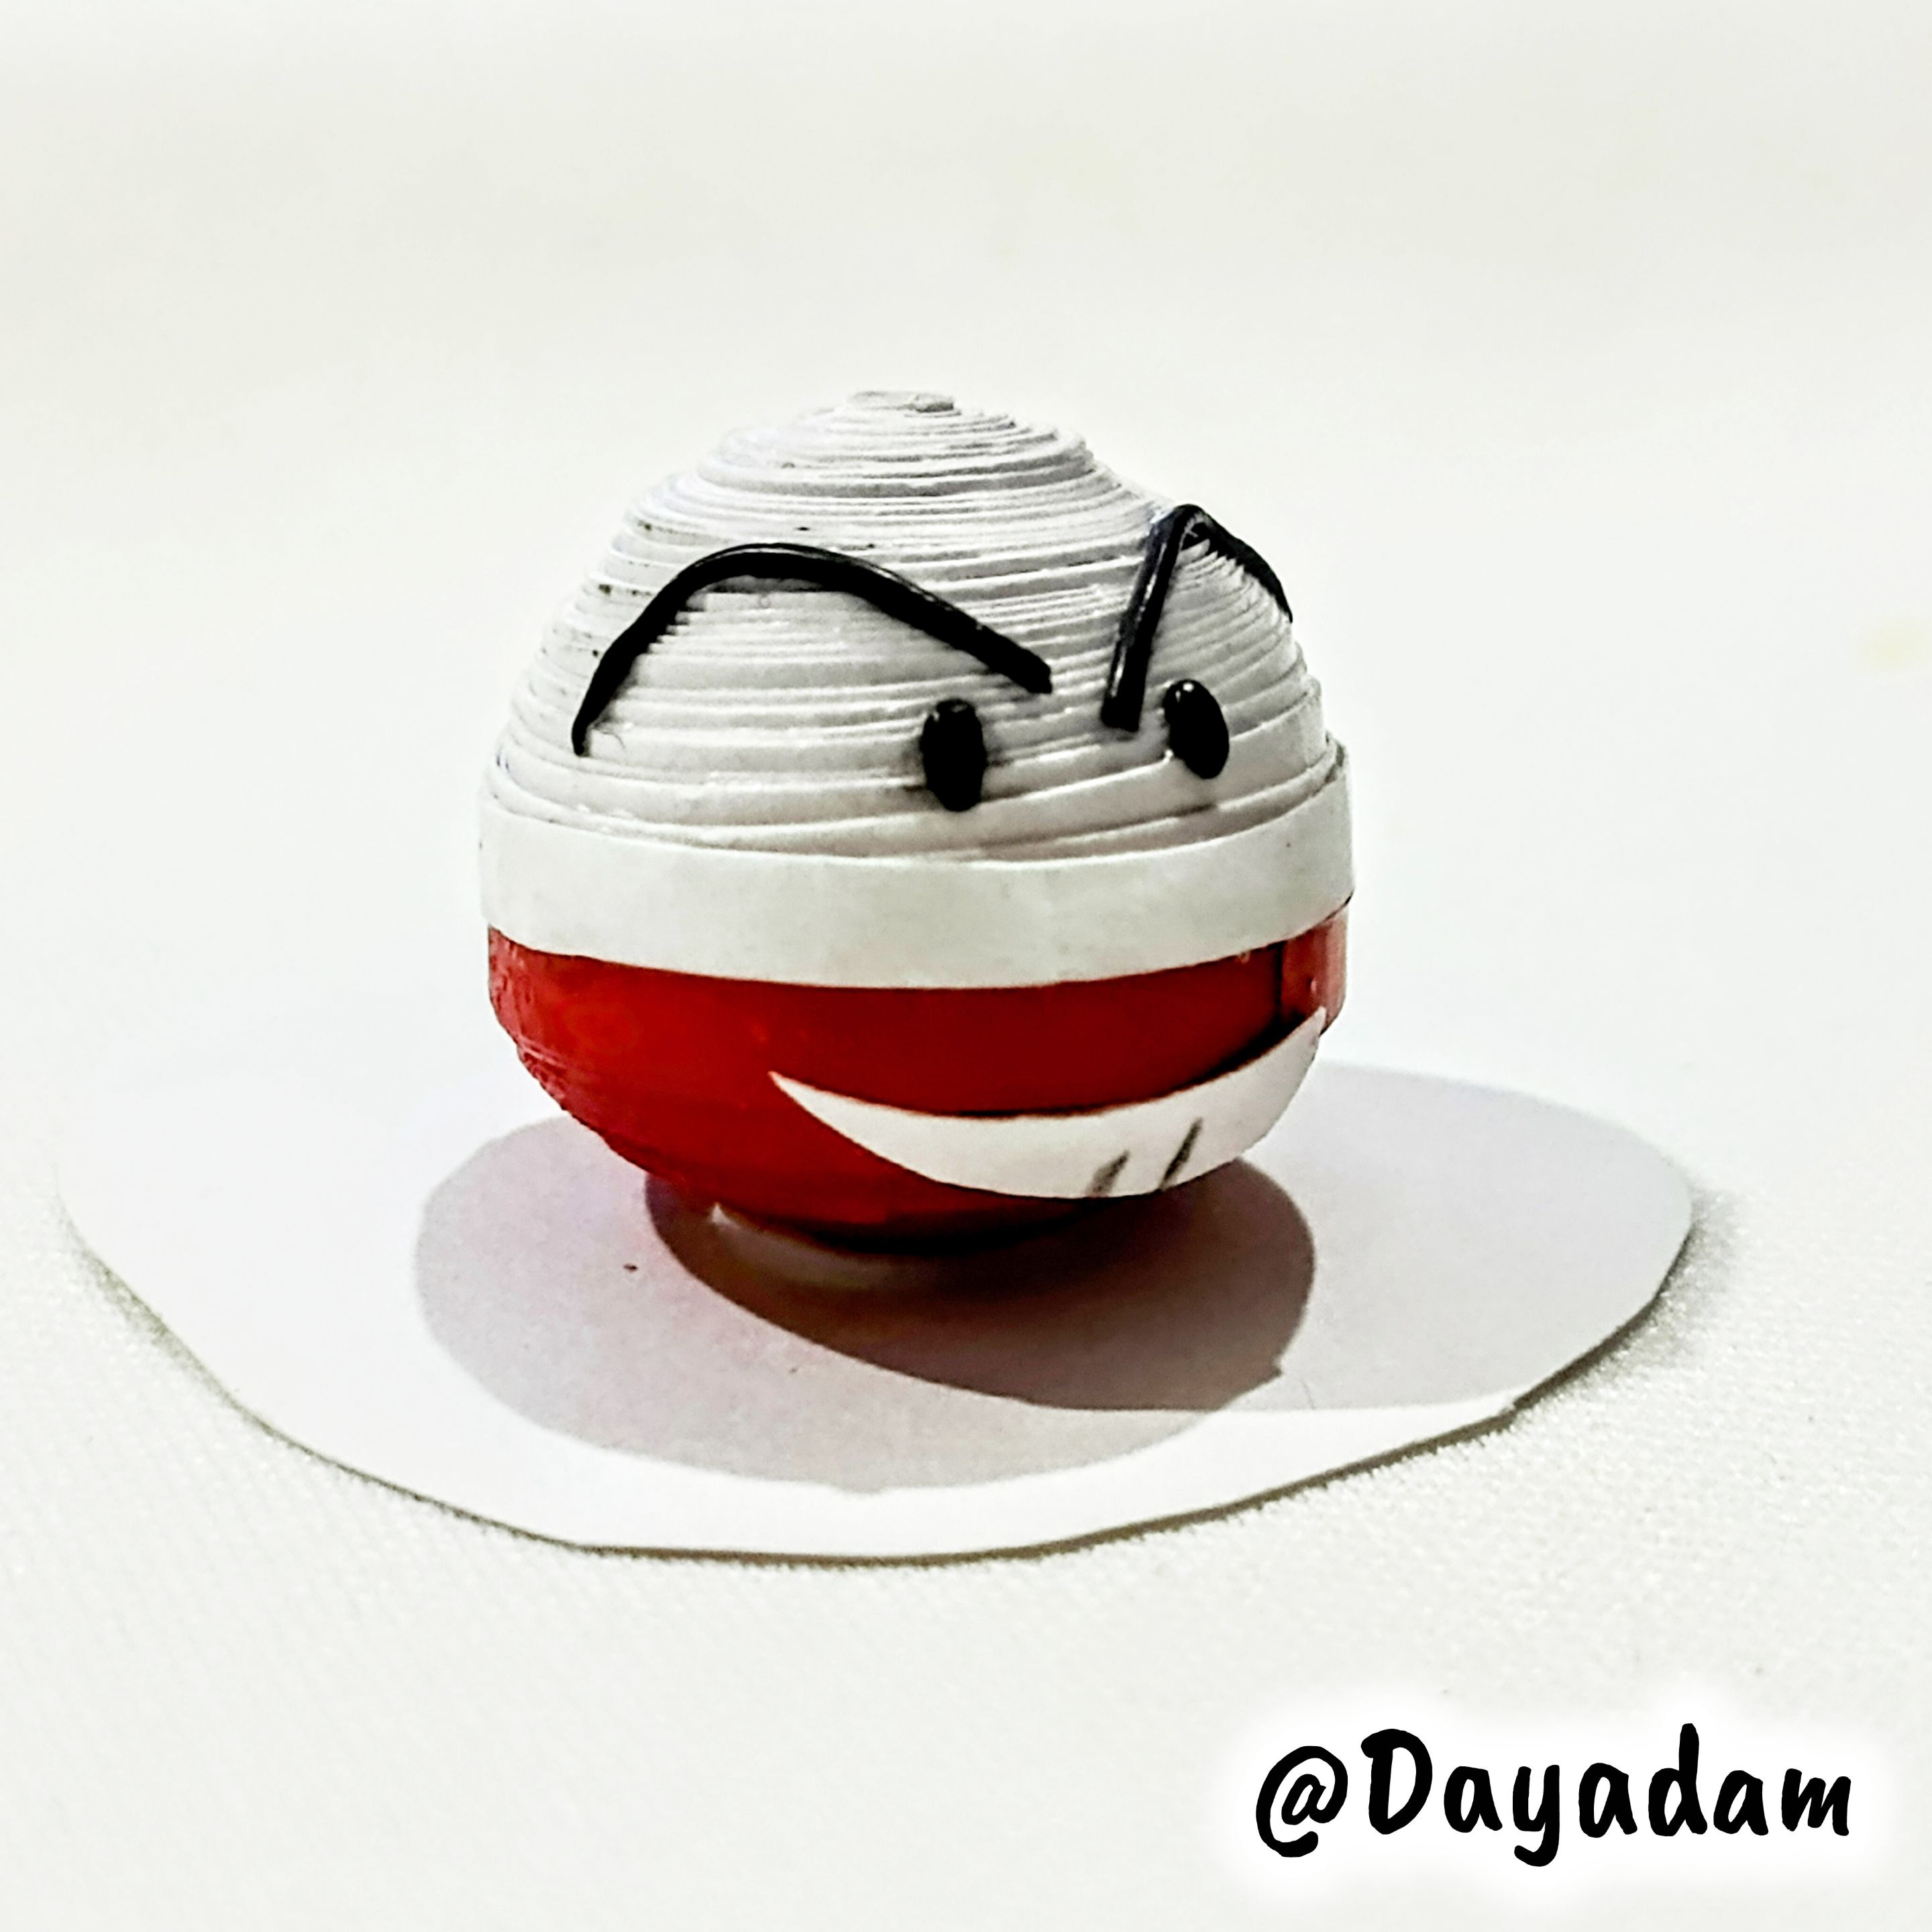| || |-| |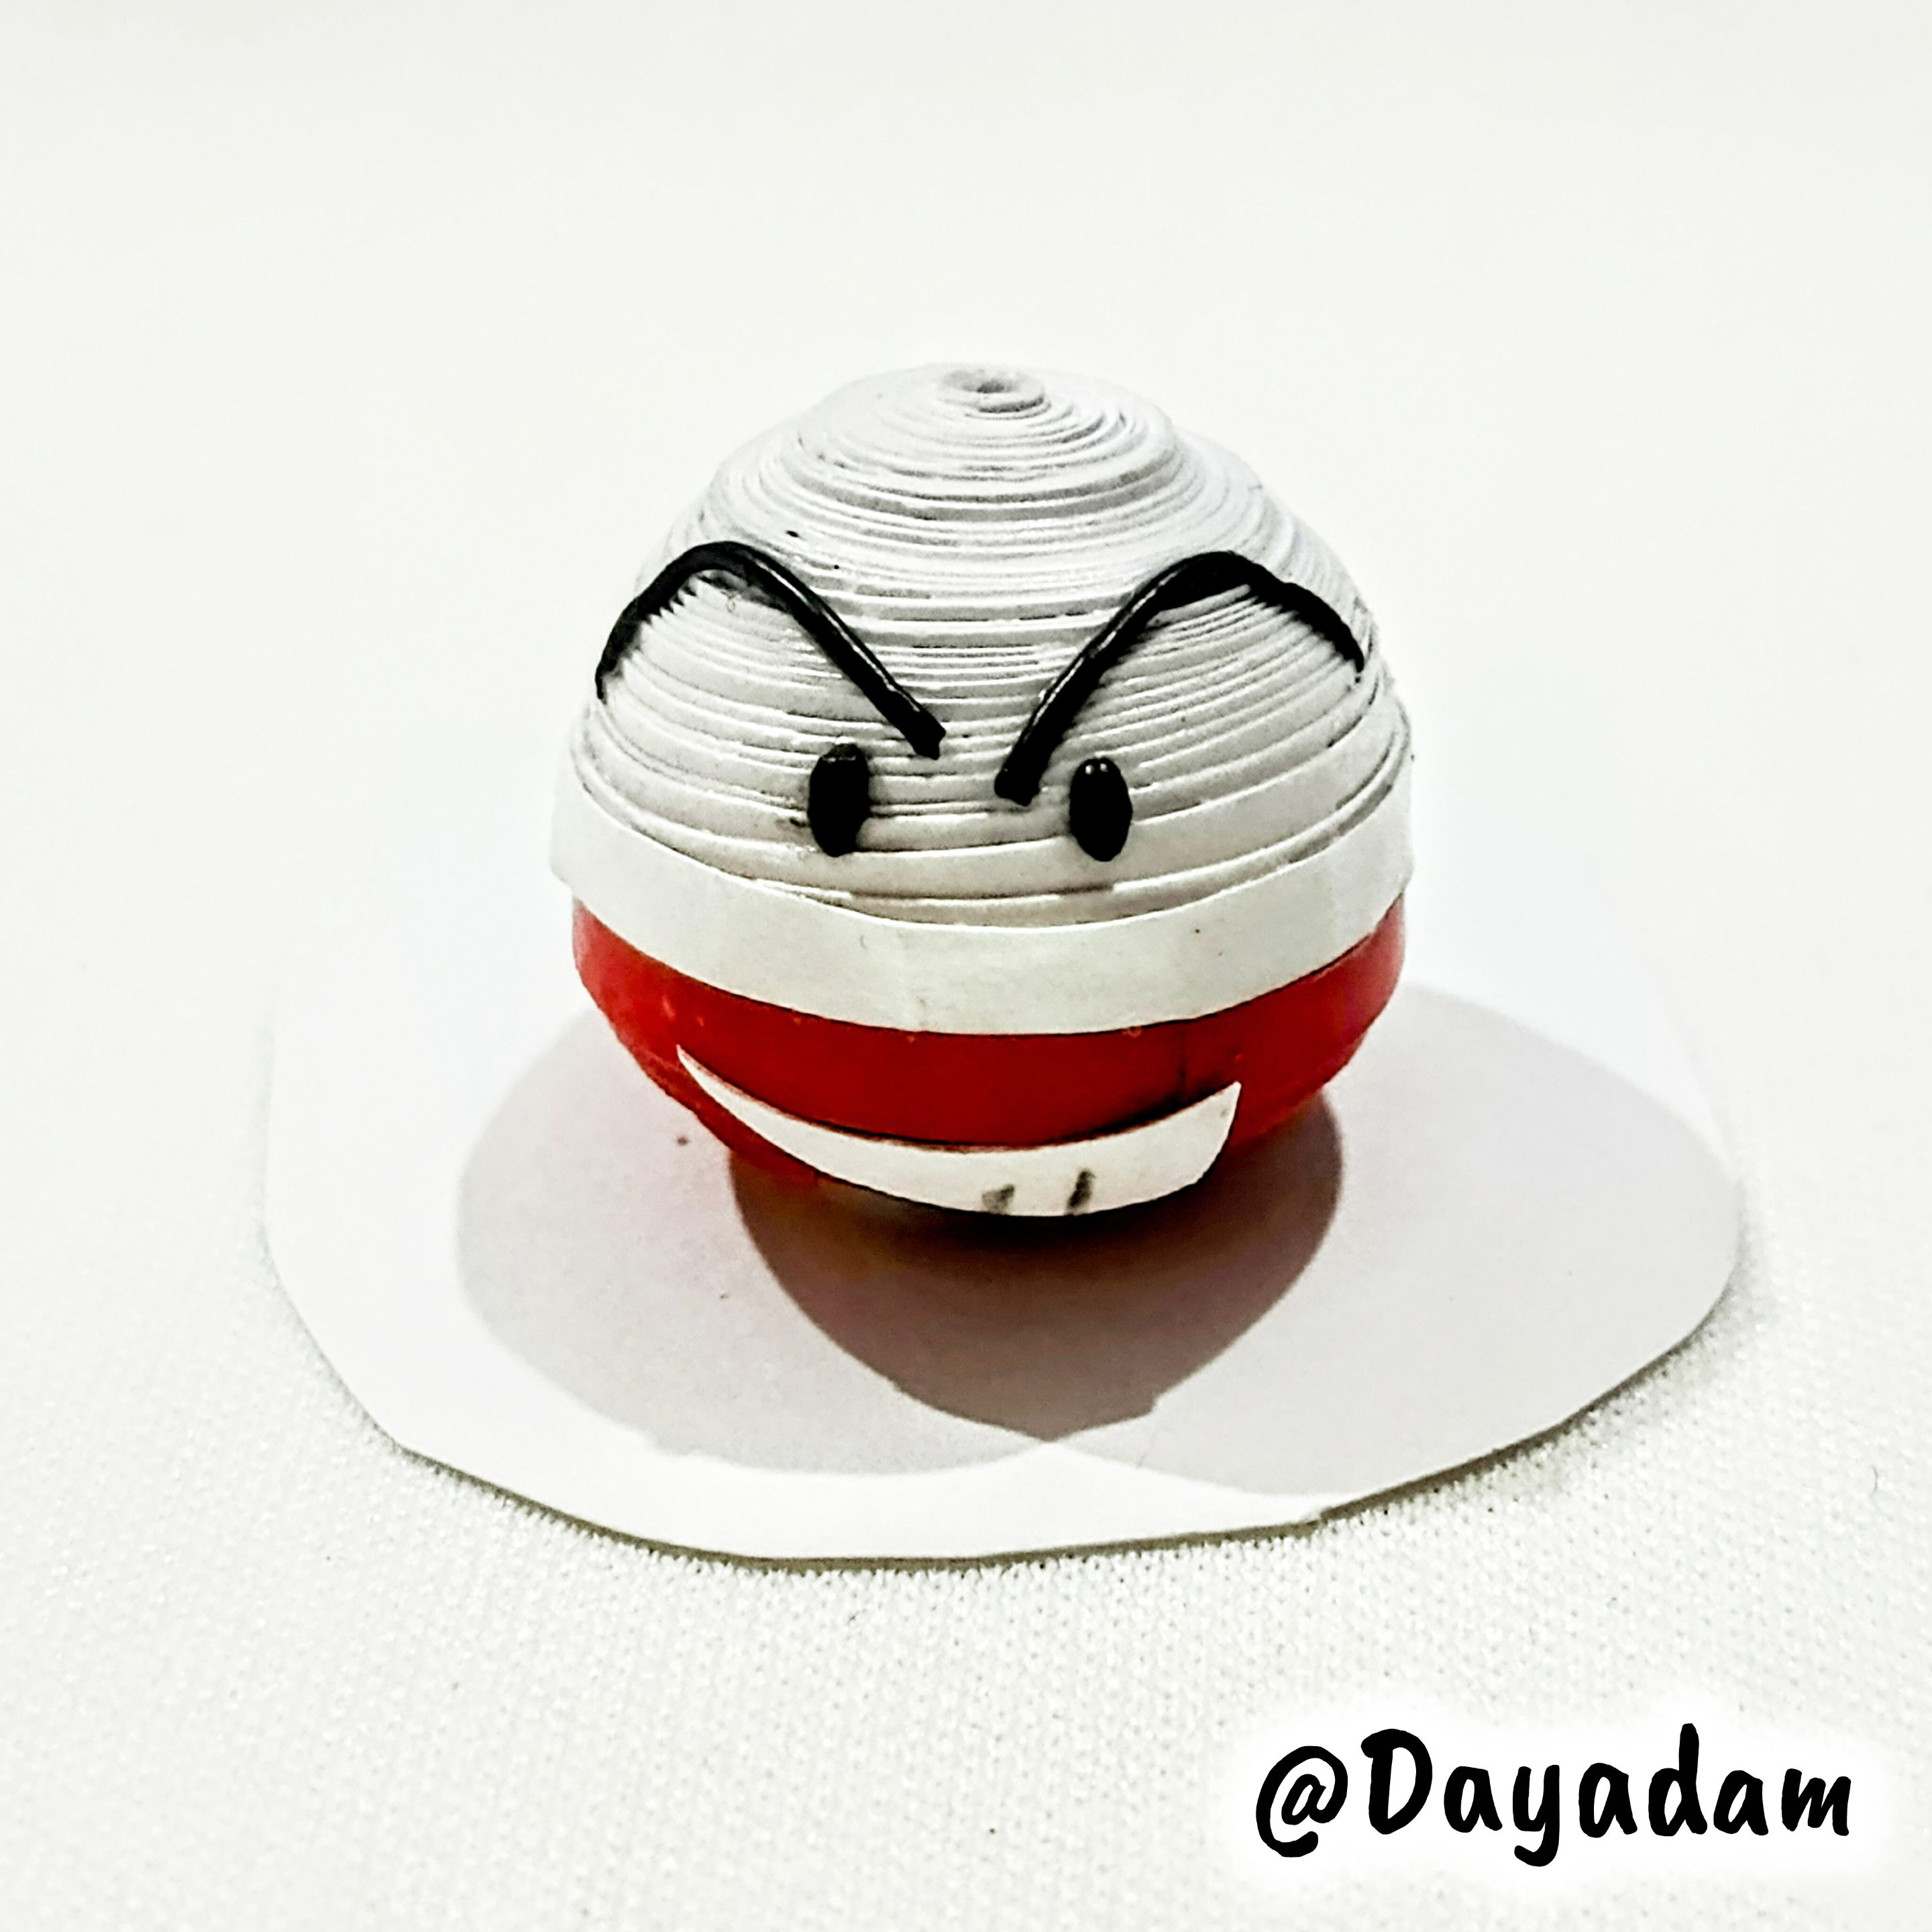| --- --- || |-| | 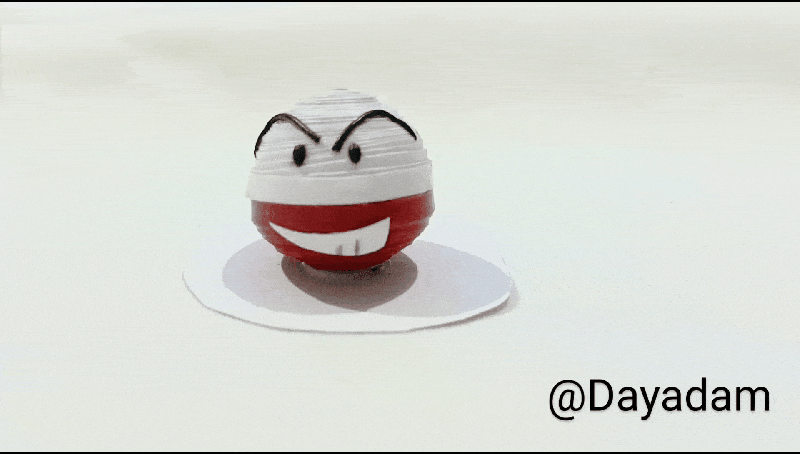 | --- --- >>## **What did you think, did you like it?**
I hope you did, I hope you liked my explanation, procedure and photos, I made them with love for you.
>#### ***"Let out that muse that inspires you, and let your imagination fly".***
>>##### ***Thank you all, see you next time ✨.***

>>## **¿Qué les pareció, les gustó?**
Espero que sí, que les haya gustado mi explicación, procedimiento y fotos, los hice con mucho cariño por y para ustedes.
>#### ***"Deja salir esa musa que te inspira, y deja volar tu imaginación".***
>>##### ***Gracias a todos, nos vemos en la próxima✨*** --- --- --- --- All photos used in this post are of my authorship and have been taken on my personal cell phone a Infinity Hot 40pro, edited in [InShot](https://inshot.com/) and [Canva](https://www.canva.com/) Banner and separator made by me in [Canva](https://www.canva.com/) Translated with the help of [DeepL](https://www.deepl.com/es/translator)

Todas las fotos usadas en este post son de mi autoría y han sido sacadas en mi celular personal un Infinity Hot 40pro, editadas en [InShot](https://inshot.com/) y [Canva](https://www.canva.com/) Banner y separador hecho por mí en [Canva](https://www.canva.com/) Traducido con la ayuda de [DeepL](https://www.deepl.com/es/translator) 

##### **Hola a toda mi gente de Hive... 🐱** Para hoy les traigo un Pokémon más de tantos que existen en ese bonito anime, decidí hacer una figura decorativa en 3D del personaje **Electrode**. ***Esperando que sea de su agrado, les dejo mi proceso creativo:*** >##### **Comencemos:😃** --- --- || |-| || || |-| || || |-| |  | --- ---  --- ---
>• Cintas para quilling.
• Aguja para quilling.
• Plantilla para moldear círculos.
>• Cartulinas.
>• Guillotina de cortar papel.
>• Pega blanca extra fuerte (de carpintería).
>• Pincel.
>• Tijera.
>
- Ribbons for quilling.
- Needle for quilling.
- Template for molding circles.
- Cardboards.
- Paper cutting guillotine.
- Extra strong white glue (carpentry glue).
- Brush.
- Scissors.
---
---

---
---
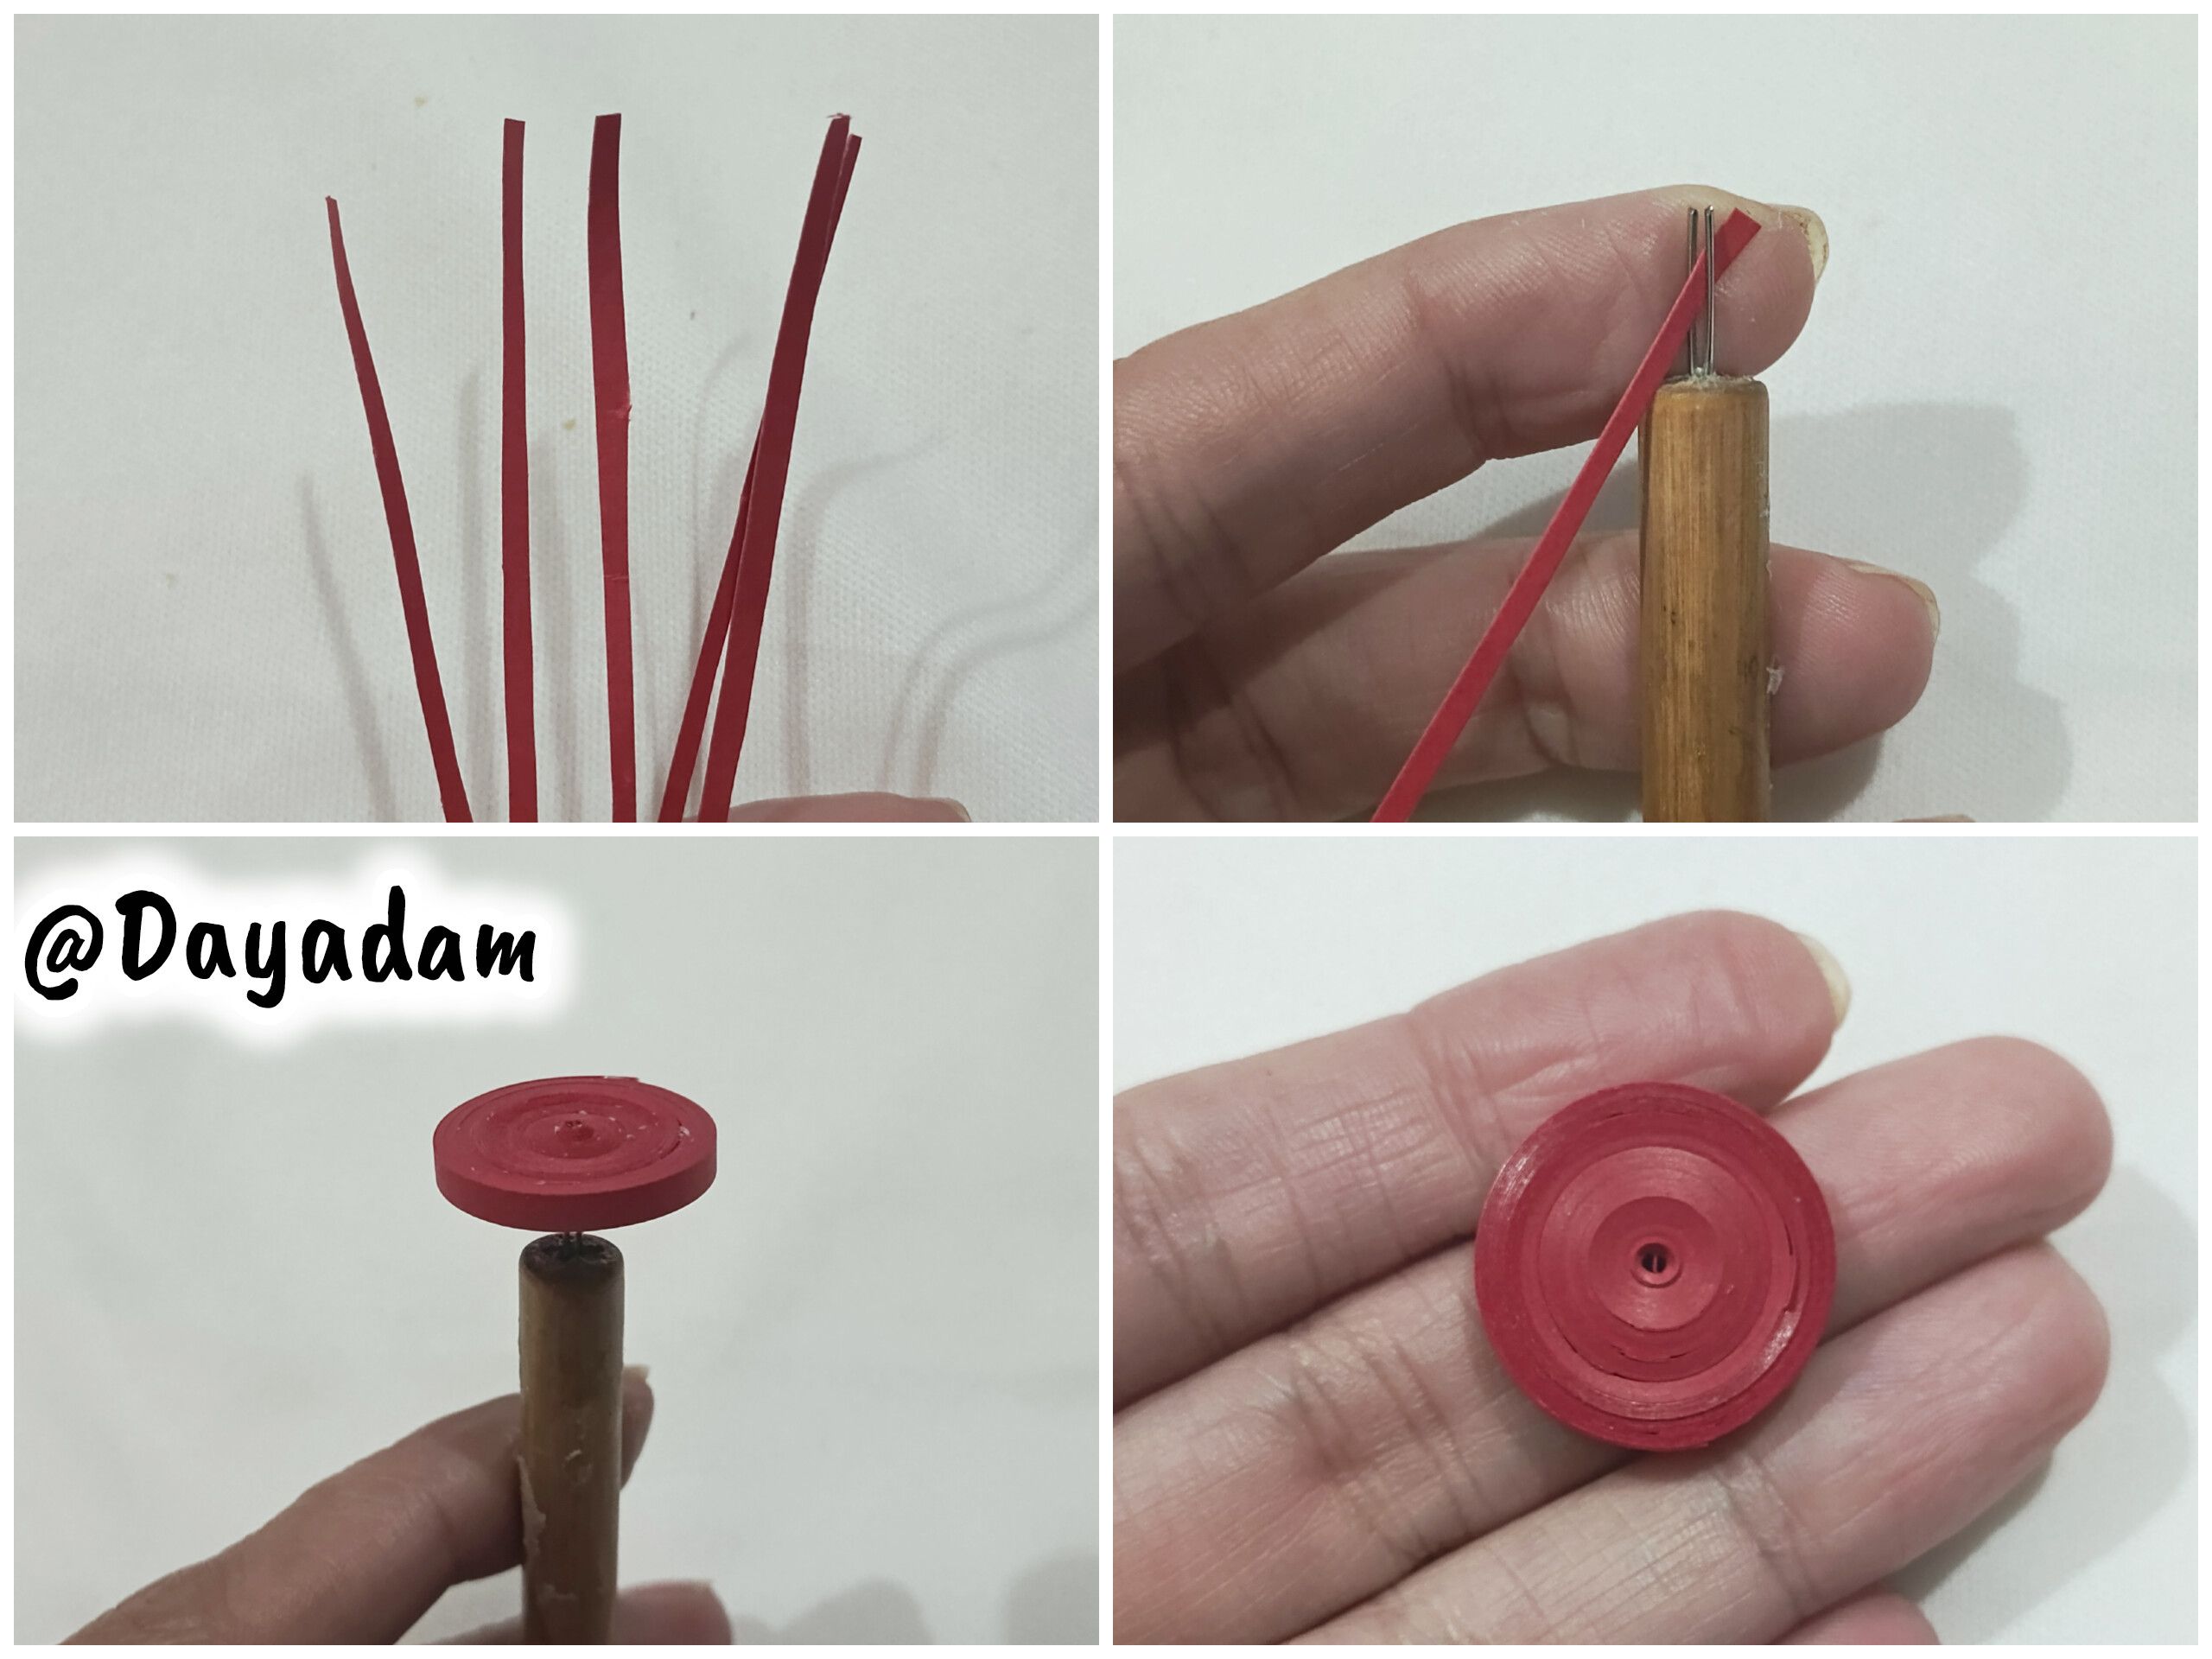
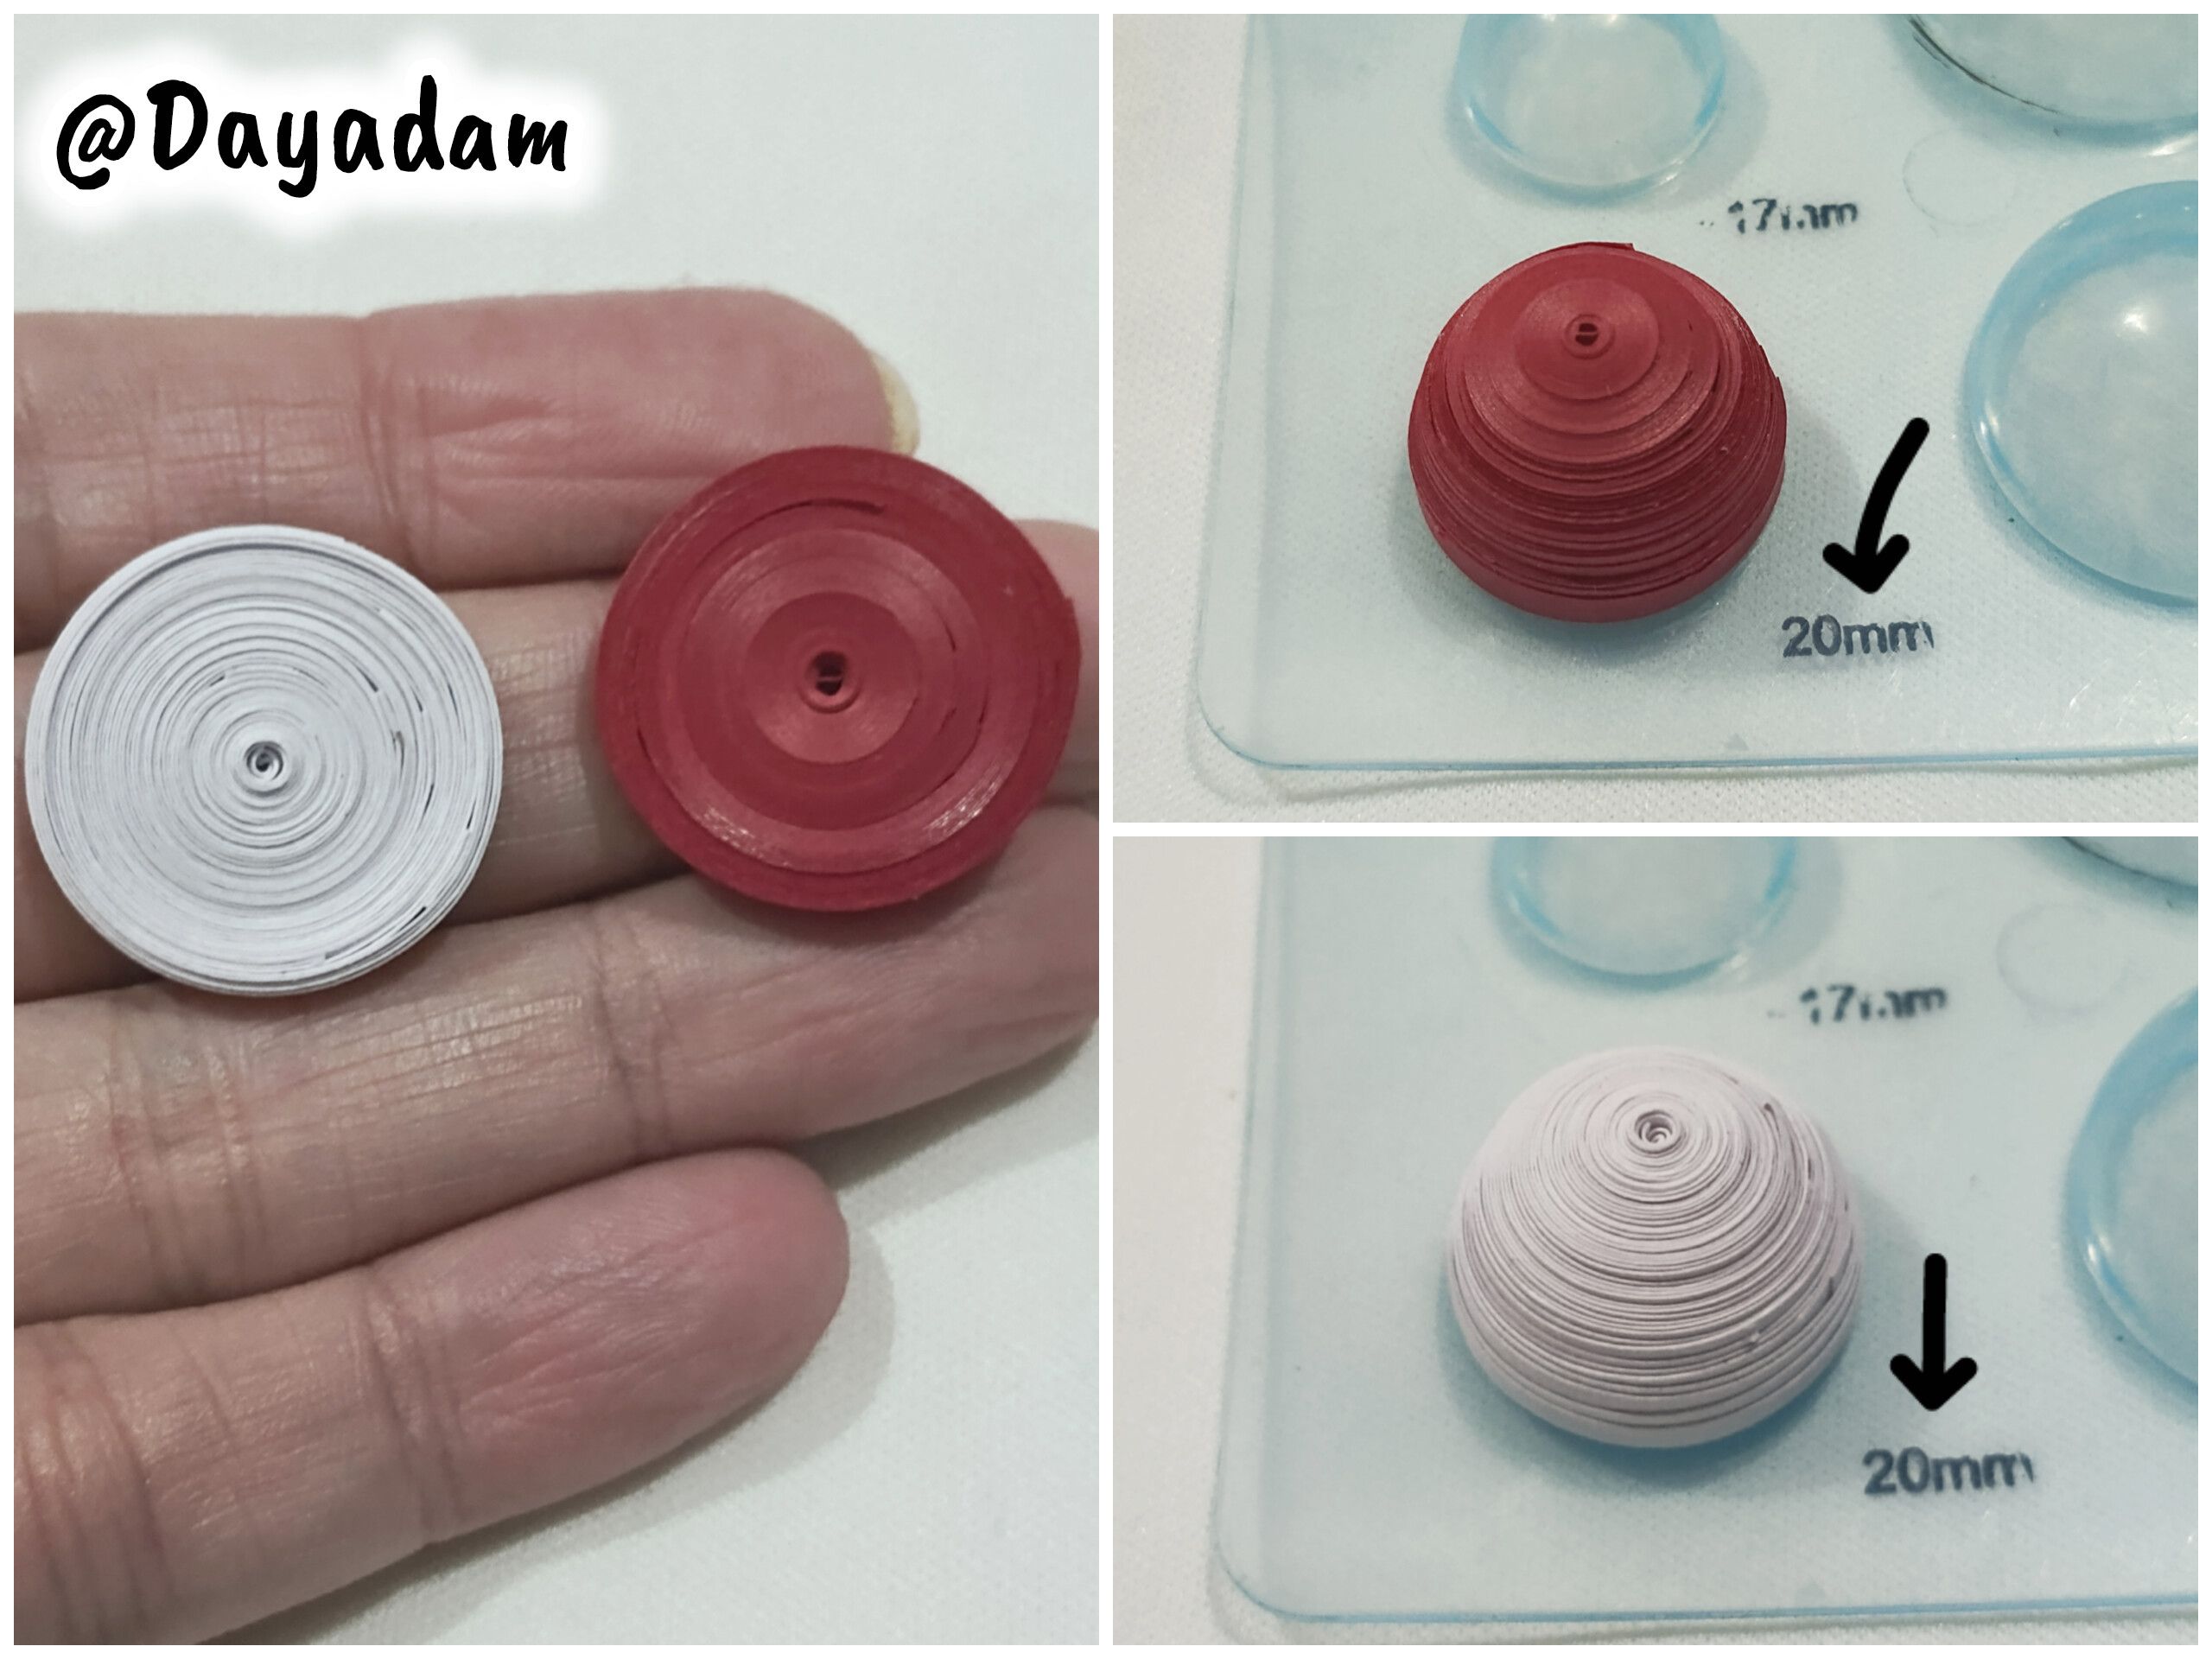
• I started by taking a 3 mm wide red quilling strip and, using the needle, rolled it up until I reached the end. I sealed it with extra-strong white glue and removed it from the needle to form a closed circle.
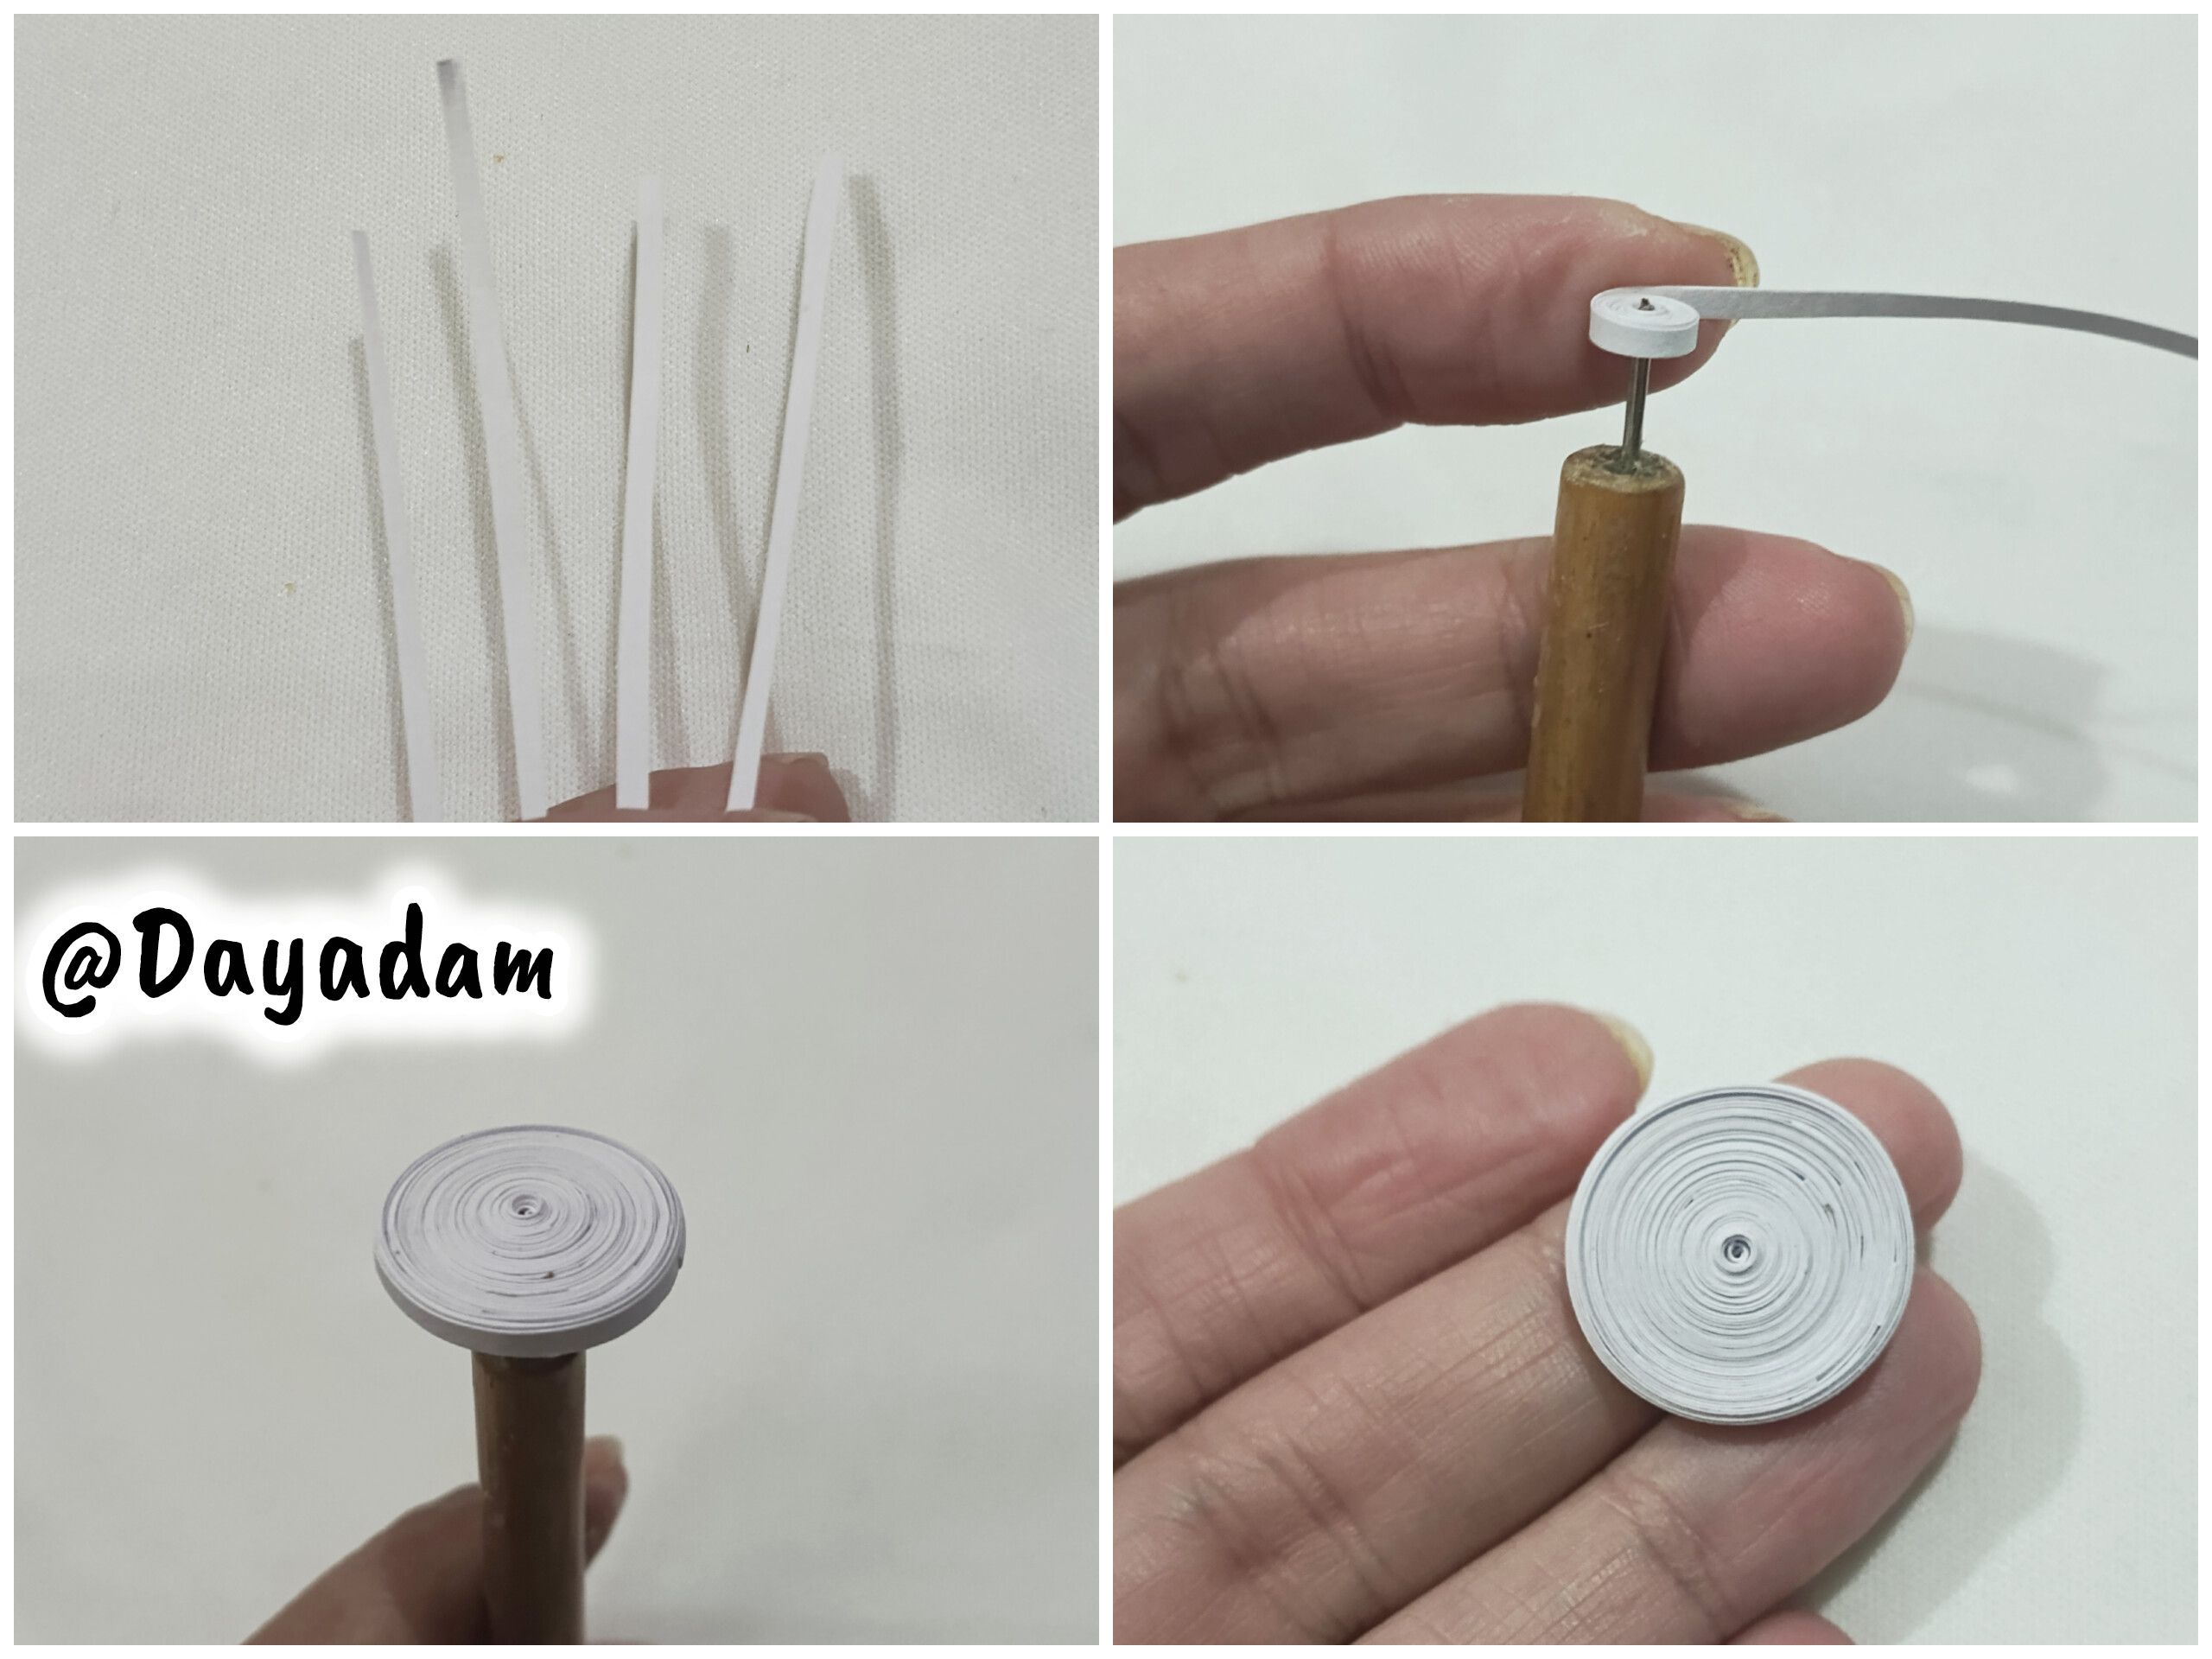
• Using the same method, I made another closed circle of the same size, but this time with 3mm wide white tape.
• We are going to mold the circles into a template, measuring 20mm.
---
---

---
---
• Comencé tomando cinta para quilling de 3mm de ancho de color rojo, con la aguja procedí a enrollar toda la cinta hasta llegar al final de la misma, sellé con pega blanca extra fuerte, saqué de la aguja para conseguir un círculo cerrado.
• Bajo los mismos parámetros anteriores realicé un círculo cerrado del mismo tamaño, pero esta vez con cinta de color blanco de 3 mm de ancho.
• Vamos a moldear los círculos en una plantilla, lo haremos en la medida número 20 mm.
---
---
||||
|-|-|-|
||||
---
• Remove from the template, apply extra-strong white glue to the inside, let dry, then join both circles together, passing a white ribbon through the middle.
• At this point, I made the mouth by cutting out a piece of white paper and drawing the teeth with a pencil, then I placed the eyes and eyebrows.
• I applied a layer of extra-strong white glue and let it dry thoroughly to protect and harden the figure.
• To finish, I cut out a small white cardboard base and glued the decorative figure to it with extra-strong white glue.
>This is how I finished this decorative 3D Electrode Pokémon figure using the quilling technique.

• Sacamos de la plantilla, aplicamos pega blanca extra fuerte por su parte interna dejamos secar, luego procedemos a unir ambos círculos, pase una cinta de color blanca en el medio. • En este punto realicé la boca recortando un trozo de hoja blanca y dibujando los dientes con un lápiz, luego coloque los ojos y las cejas. • Apliqué una capa de pega blanca extra fuerte dejando secar muy bien, esto para proteger y endurecer la figura. • Para finalizar recorte una pequeña base de cartulina color blanca, allí pegué la figura decorativa con pega blanca extra fuerte. >De esta manera finalice esta figura decorativa del Pokémon Electrode en 3D, en la técnica de técnica de quilling. --- --- |||| |-|-|-| |||| --- ---  --- --- || |-| || ||| |-|-| ||| || |-| || ||| |-|-| ||| || |-| || --- --- || |-| |  | --- --- >>## **What did you think, did you like it?**
I hope you did, I hope you liked my explanation, procedure and photos, I made them with love for you.
>#### ***"Let out that muse that inspires you, and let your imagination fly".***
>>##### ***Thank you all, see you next time ✨.***

>>## **¿Qué les pareció, les gustó?**
Espero que sí, que les haya gustado mi explicación, procedimiento y fotos, los hice con mucho cariño por y para ustedes.
>#### ***"Deja salir esa musa que te inspira, y deja volar tu imaginación".***
>>##### ***Gracias a todos, nos vemos en la próxima✨*** --- --- --- --- All photos used in this post are of my authorship and have been taken on my personal cell phone a Infinity Hot 40pro, edited in [InShot](https://inshot.com/) and [Canva](https://www.canva.com/) Banner and separator made by me in [Canva](https://www.canva.com/) Translated with the help of [DeepL](https://www.deepl.com/es/translator)

Todas las fotos usadas en este post son de mi autoría y han sido sacadas en mi celular personal un Infinity Hot 40pro, editadas en [InShot](https://inshot.com/) y [Canva](https://www.canva.com/) Banner y separador hecho por mí en [Canva](https://www.canva.com/) Traducido con la ayuda de [DeepL](https://www.deepl.com/es/translator) 