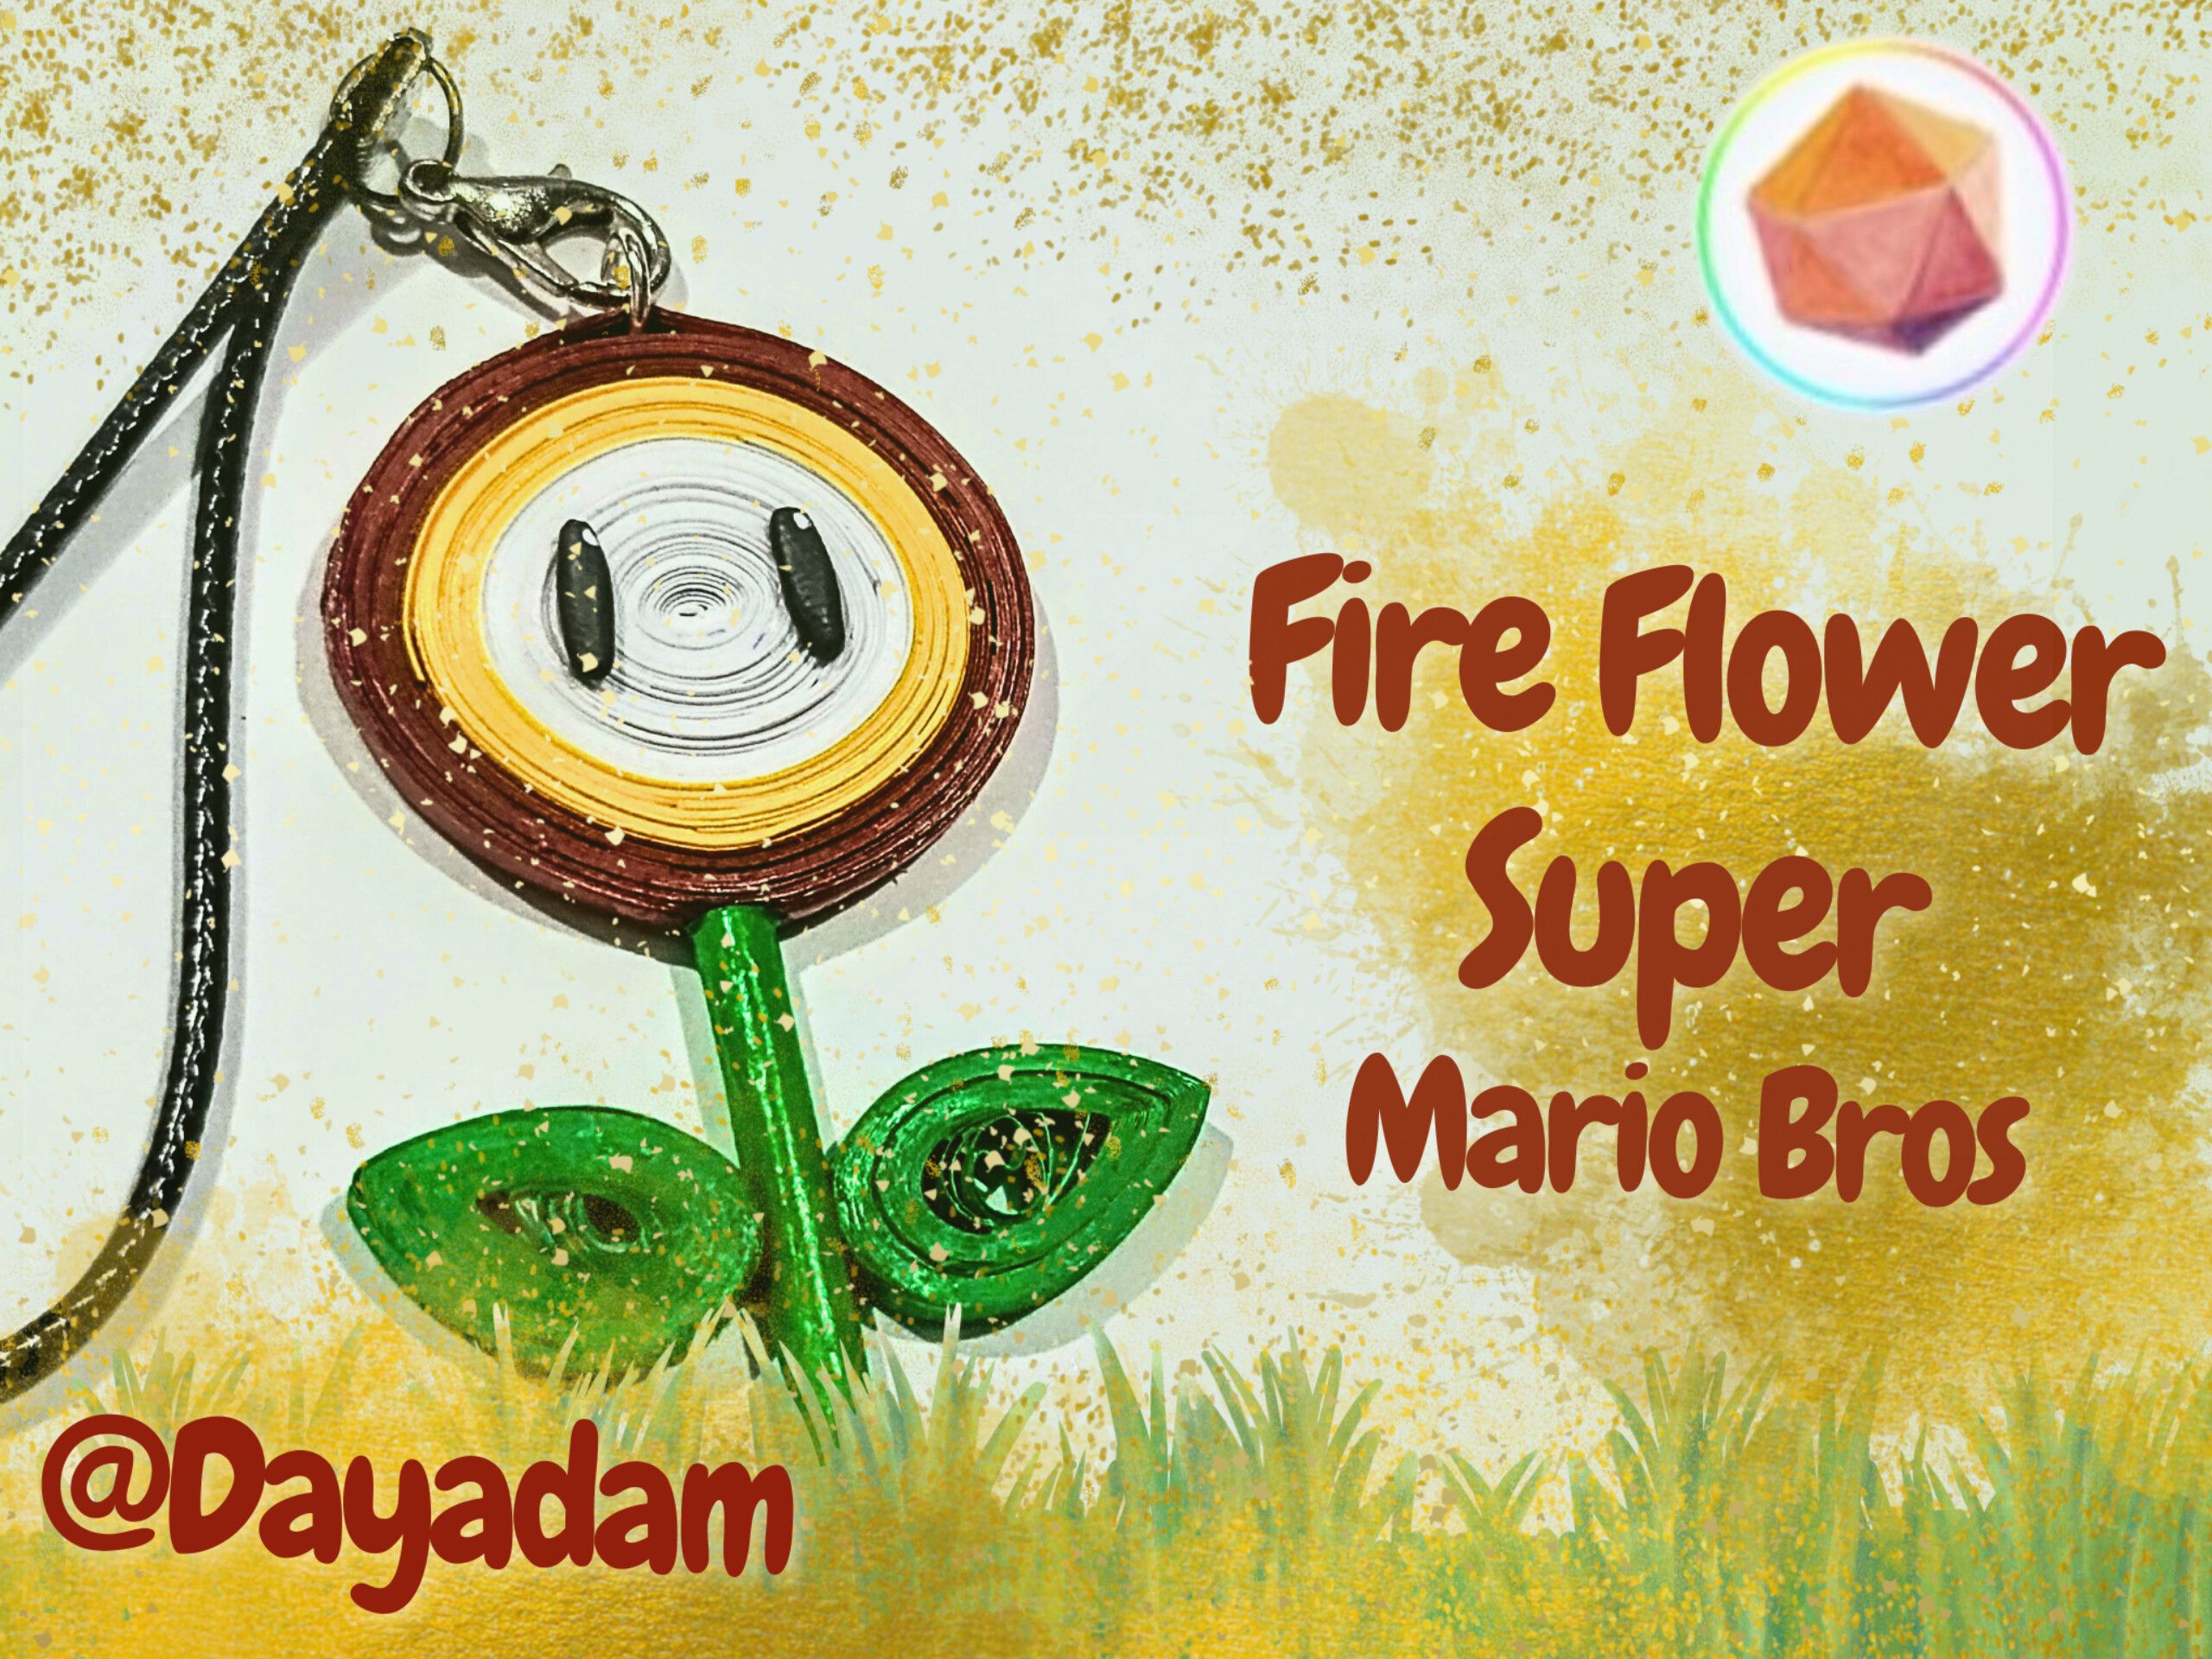
I once told you that one of the few video games I enjoyed many years ago, and in fact completed, was Super Mario Bros. I remember that time when I was little and we had that Nintendo at home and I played a lot.
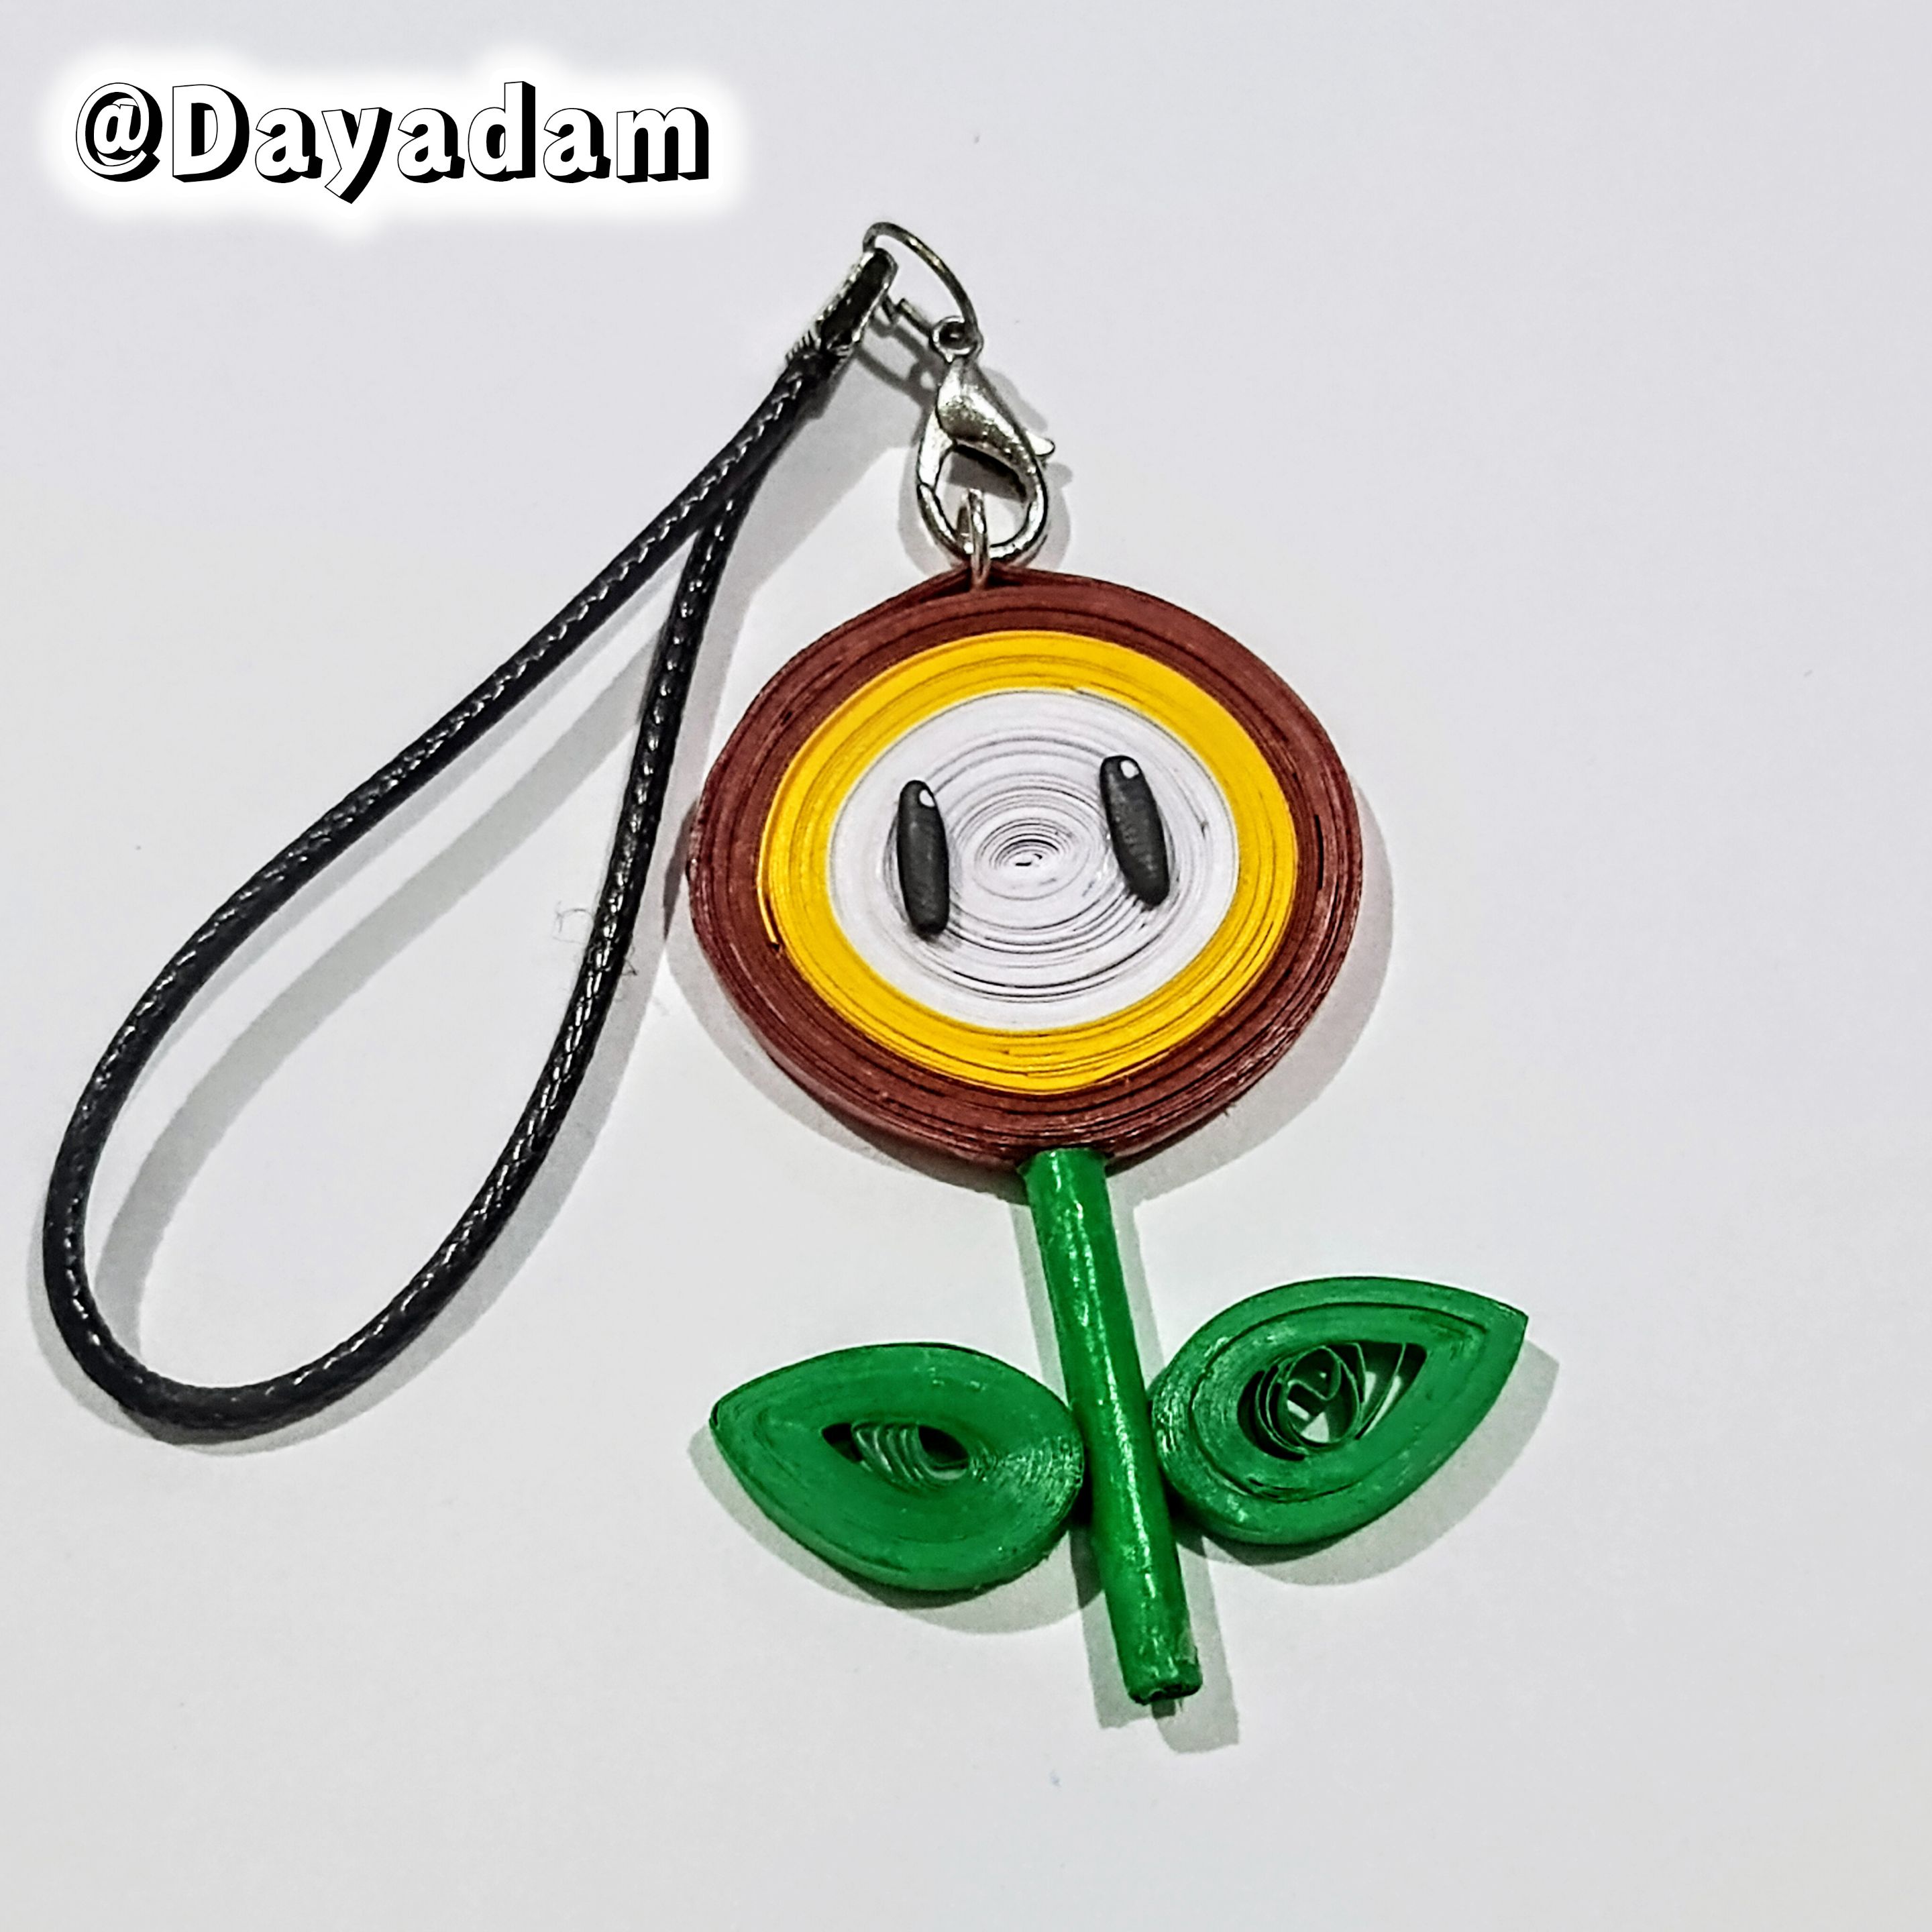
Those memories came back to me, and I wanted to do something related to the game, so today I bring you a decorative pendant of the Fire Flower from Super Mario Bros. using the quilling technique.
Hoping you like it, I leave you my creative process:
Let's get started:😃

Hola a toda mi gente de Hive... 🐱
En una oportunidad les comenté que unos de los pocos videojuegos que disfruté hace muchos años y de echo lo pase completo fue Súper Mario Bross, recuerdo esa época de pequeña en la que teníamos ese Nintendo en casa y jugaba mucho.
Aquellos recuerdos vinieron y quise hacer algo con relación al juego, pues hoy les traigo un colgante decorativo de la Flor de fuego de Súper Mario Bross en la técnica de quilling.
Esperando que sea de su agrado, les dejo mi proceso creativo:
Comencemos:😃
 |
 |
|


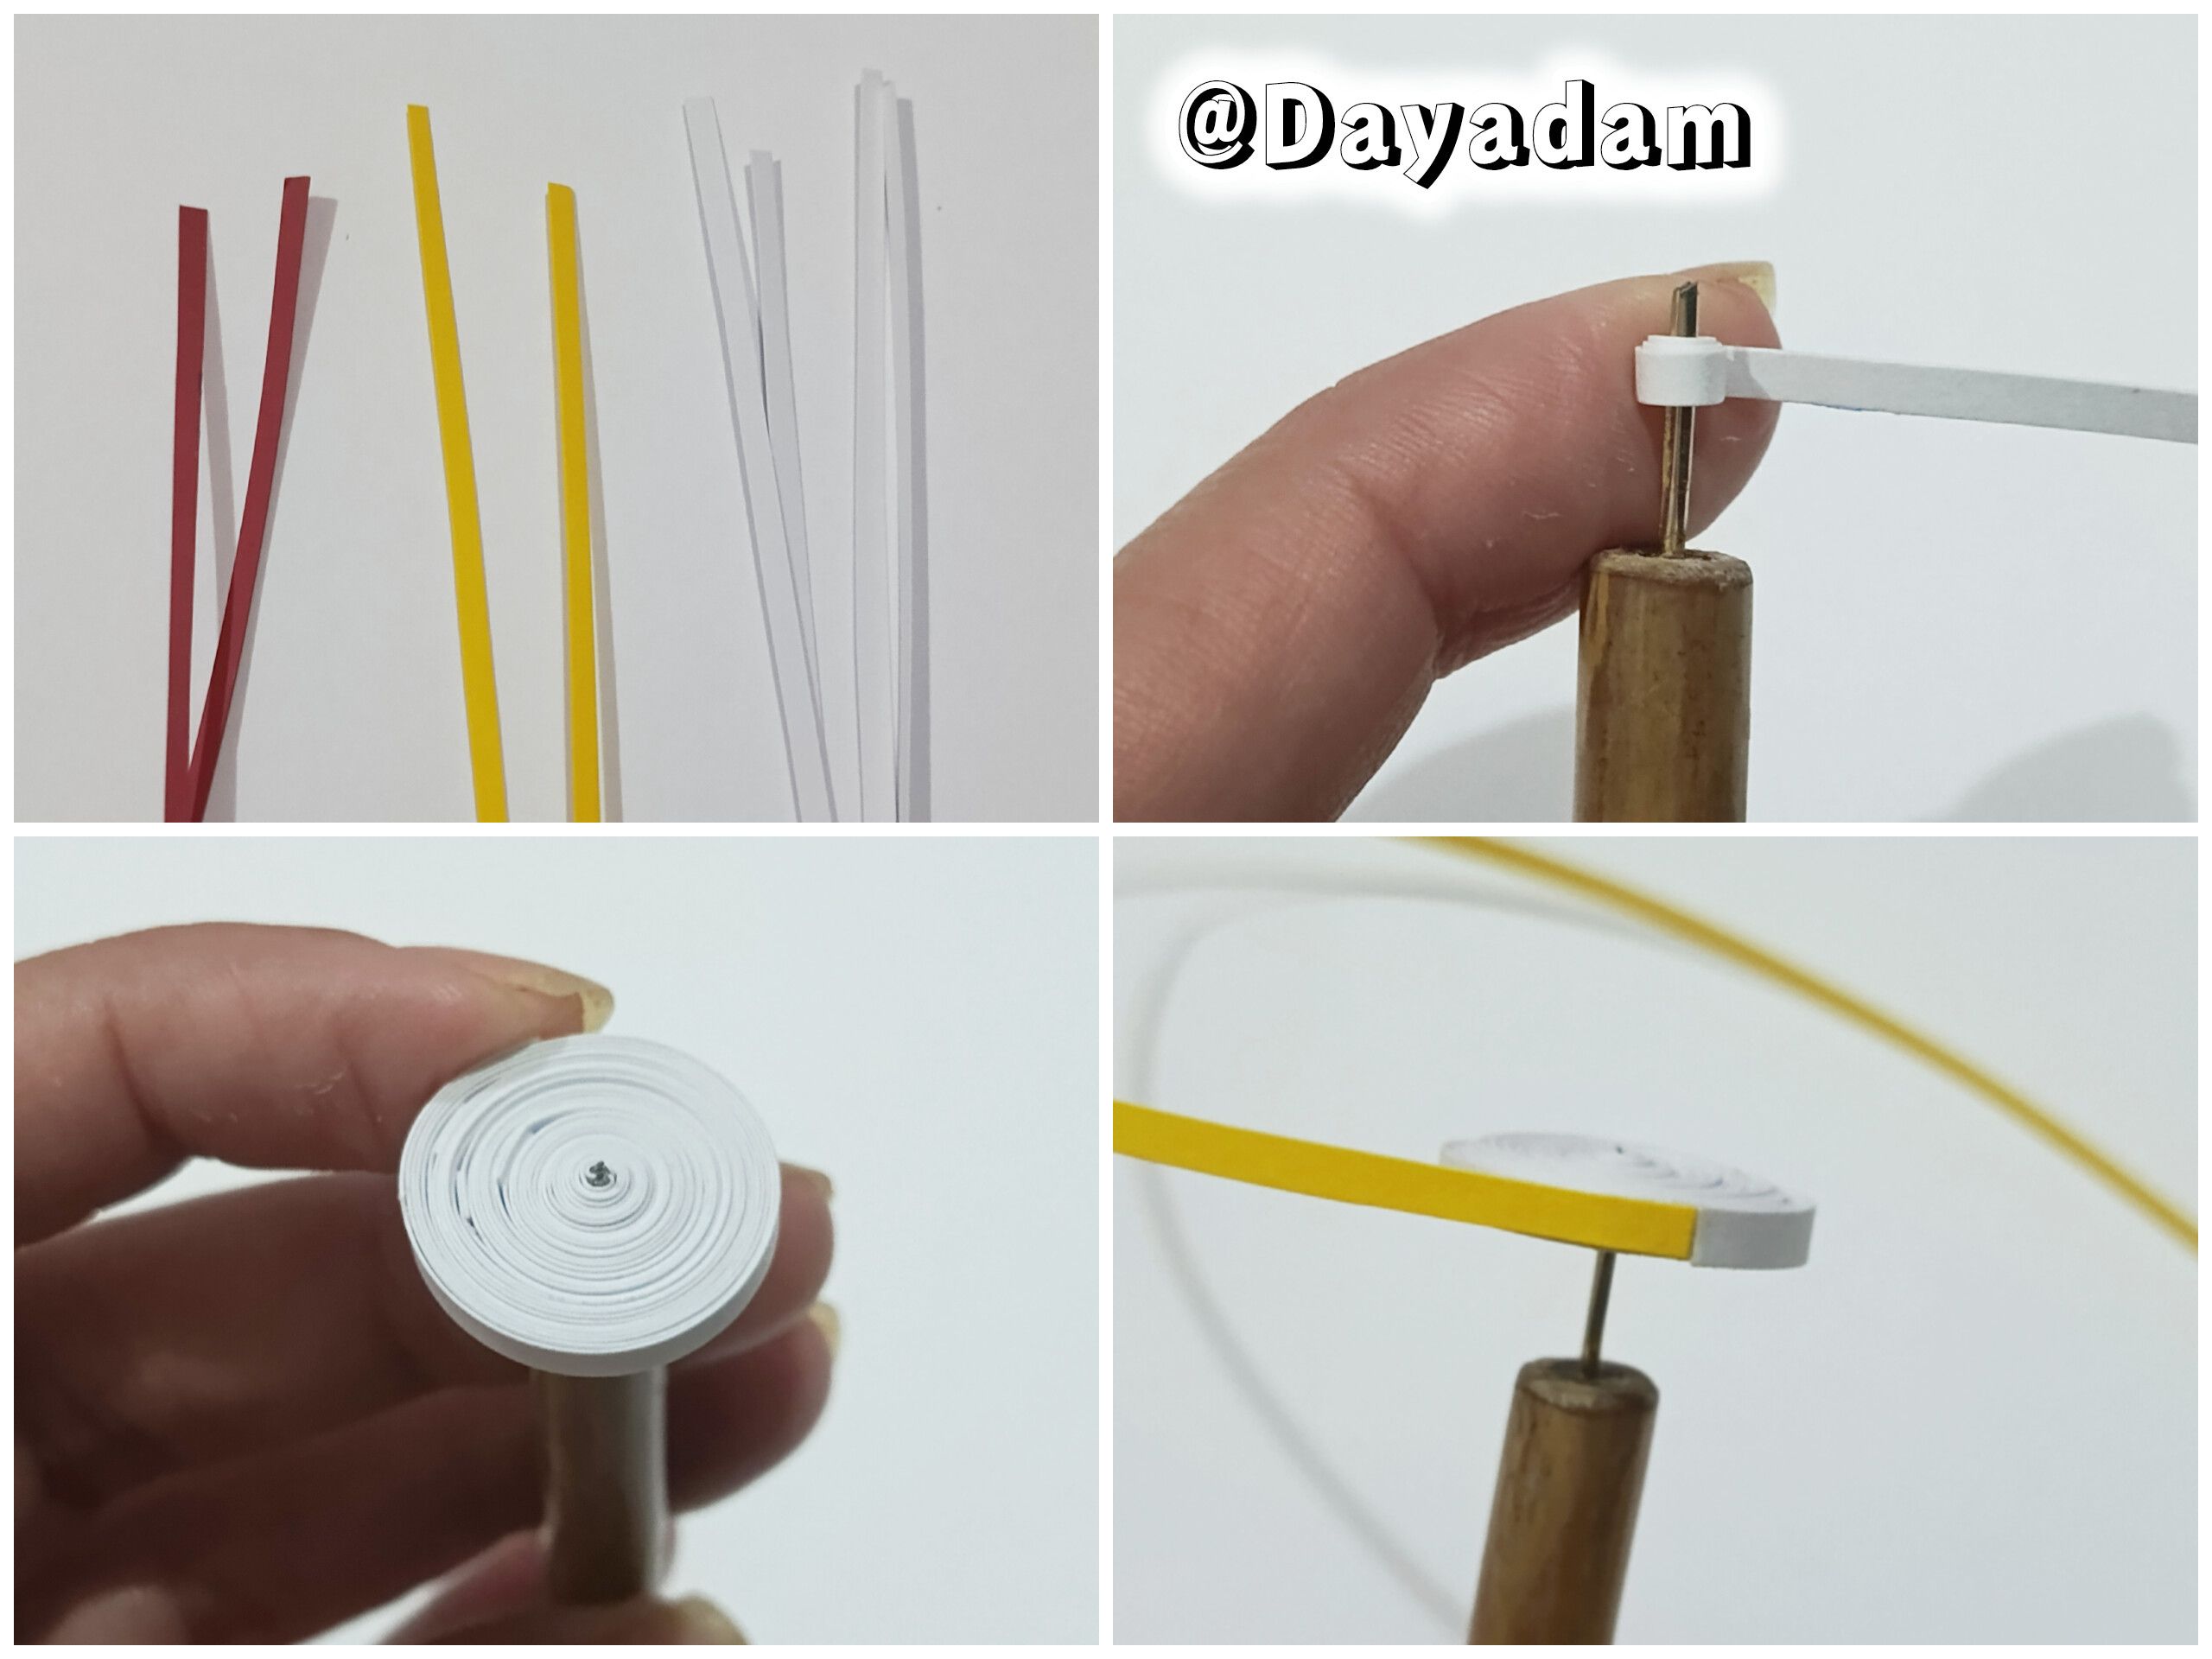
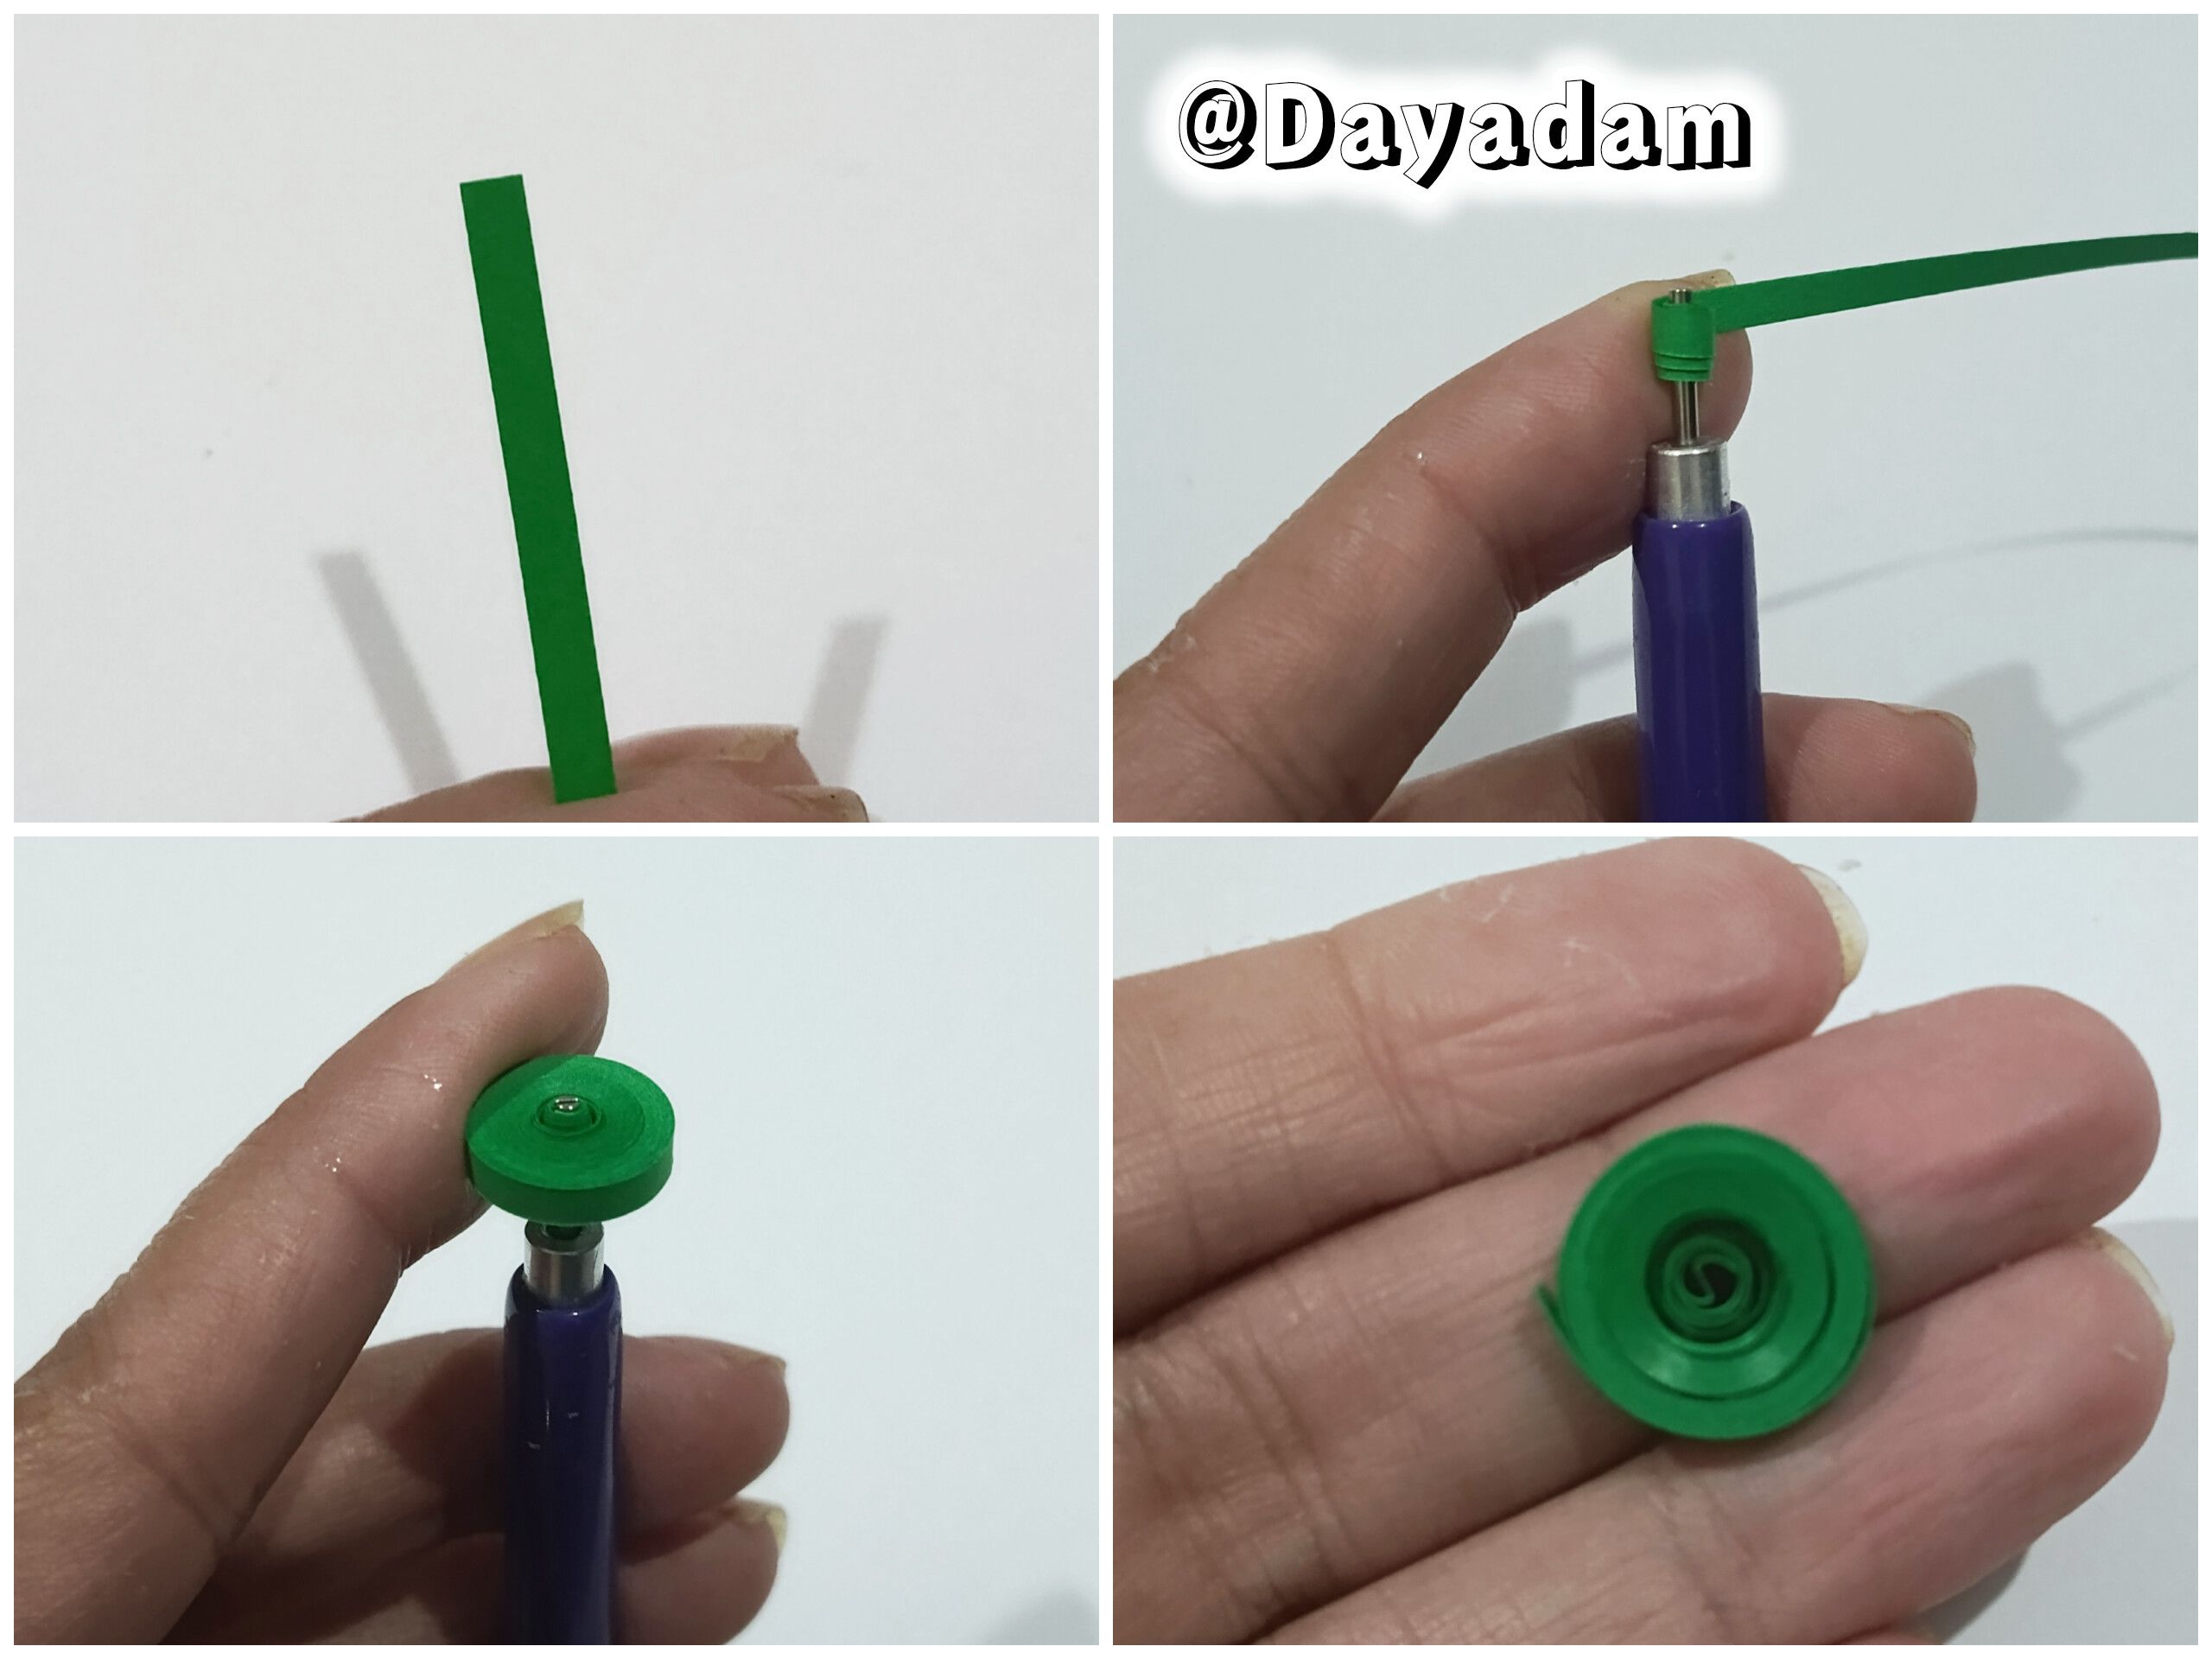
• Since I didn't have any quilling colors, I bought white, red, and yellow cardstock and used long-nosed scissors to cut the strips I needed to the appropriate sizes.
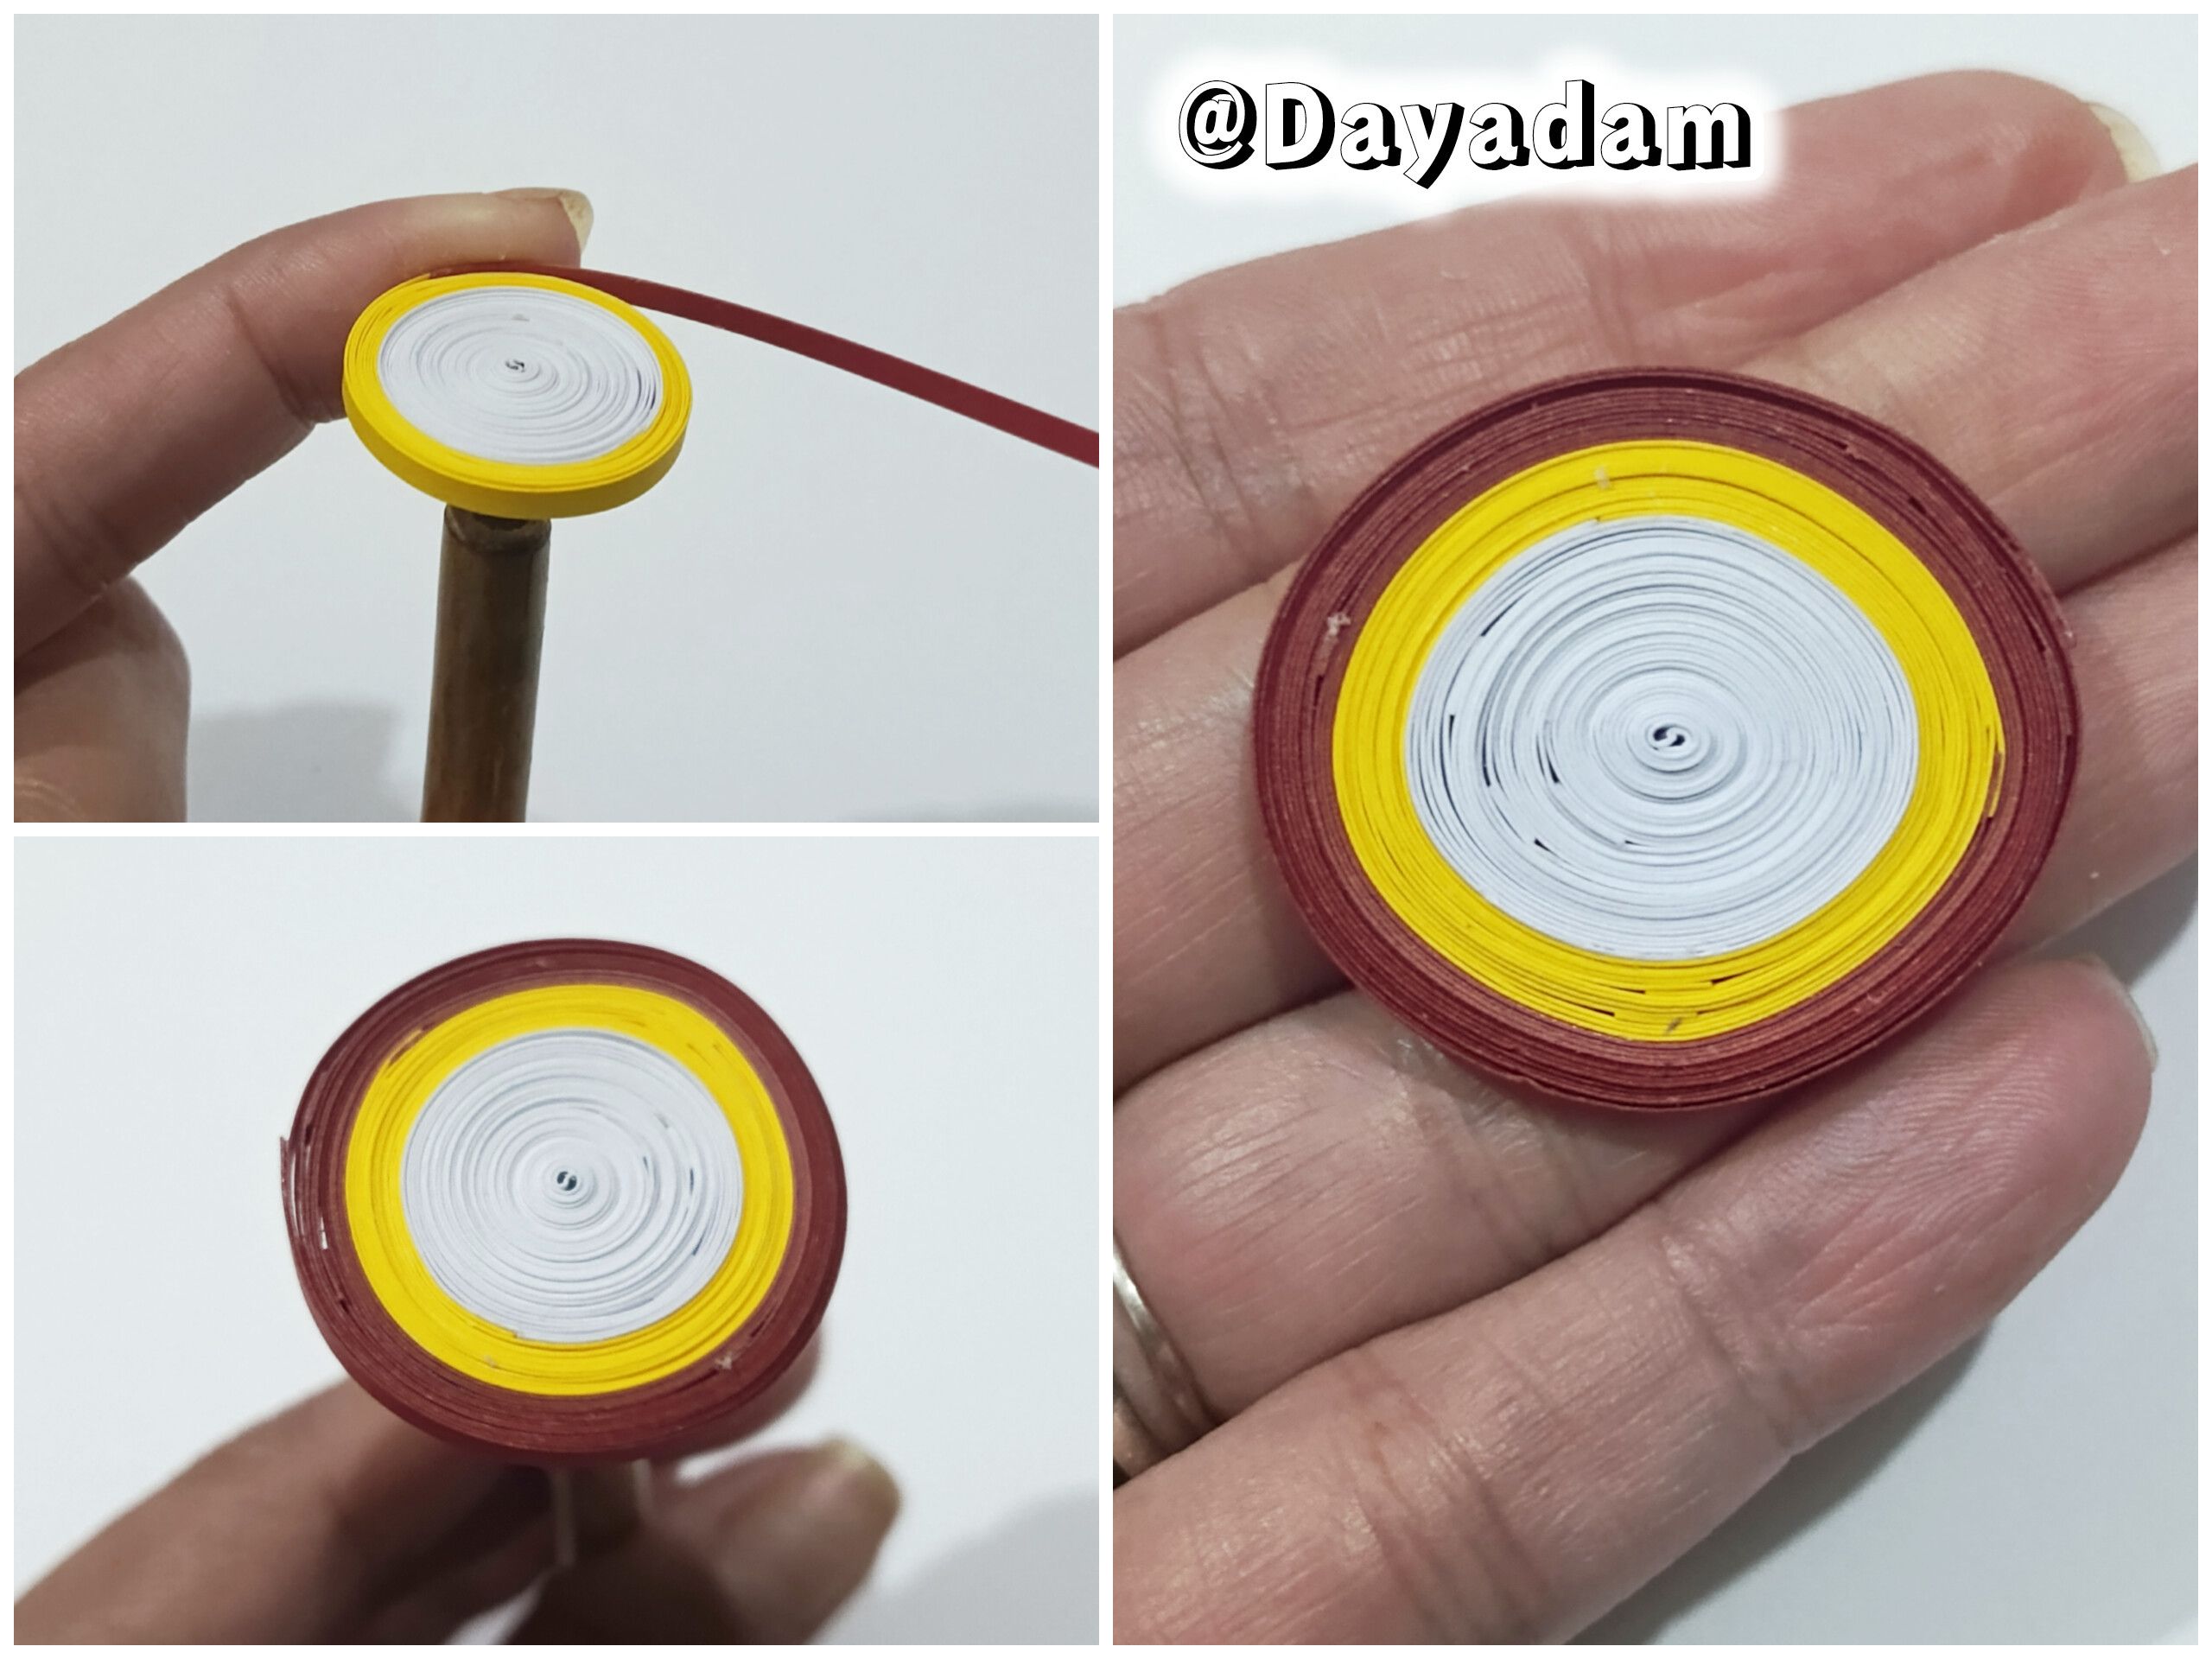
• I started by taking a 3mm wide white ribbon and, using the needle, I rolled it up until I had used up all the ribbon. I sealed it with extra-strong white glue. Without removing it from the needle, I attached a piece of yellow ribbon and continued rolling until I had a strip that was not too thick. Then I continued with red tape, rolling until I got another strip, and sealed it with extra-strong white glue. We ended up with a closed multicolored circle.
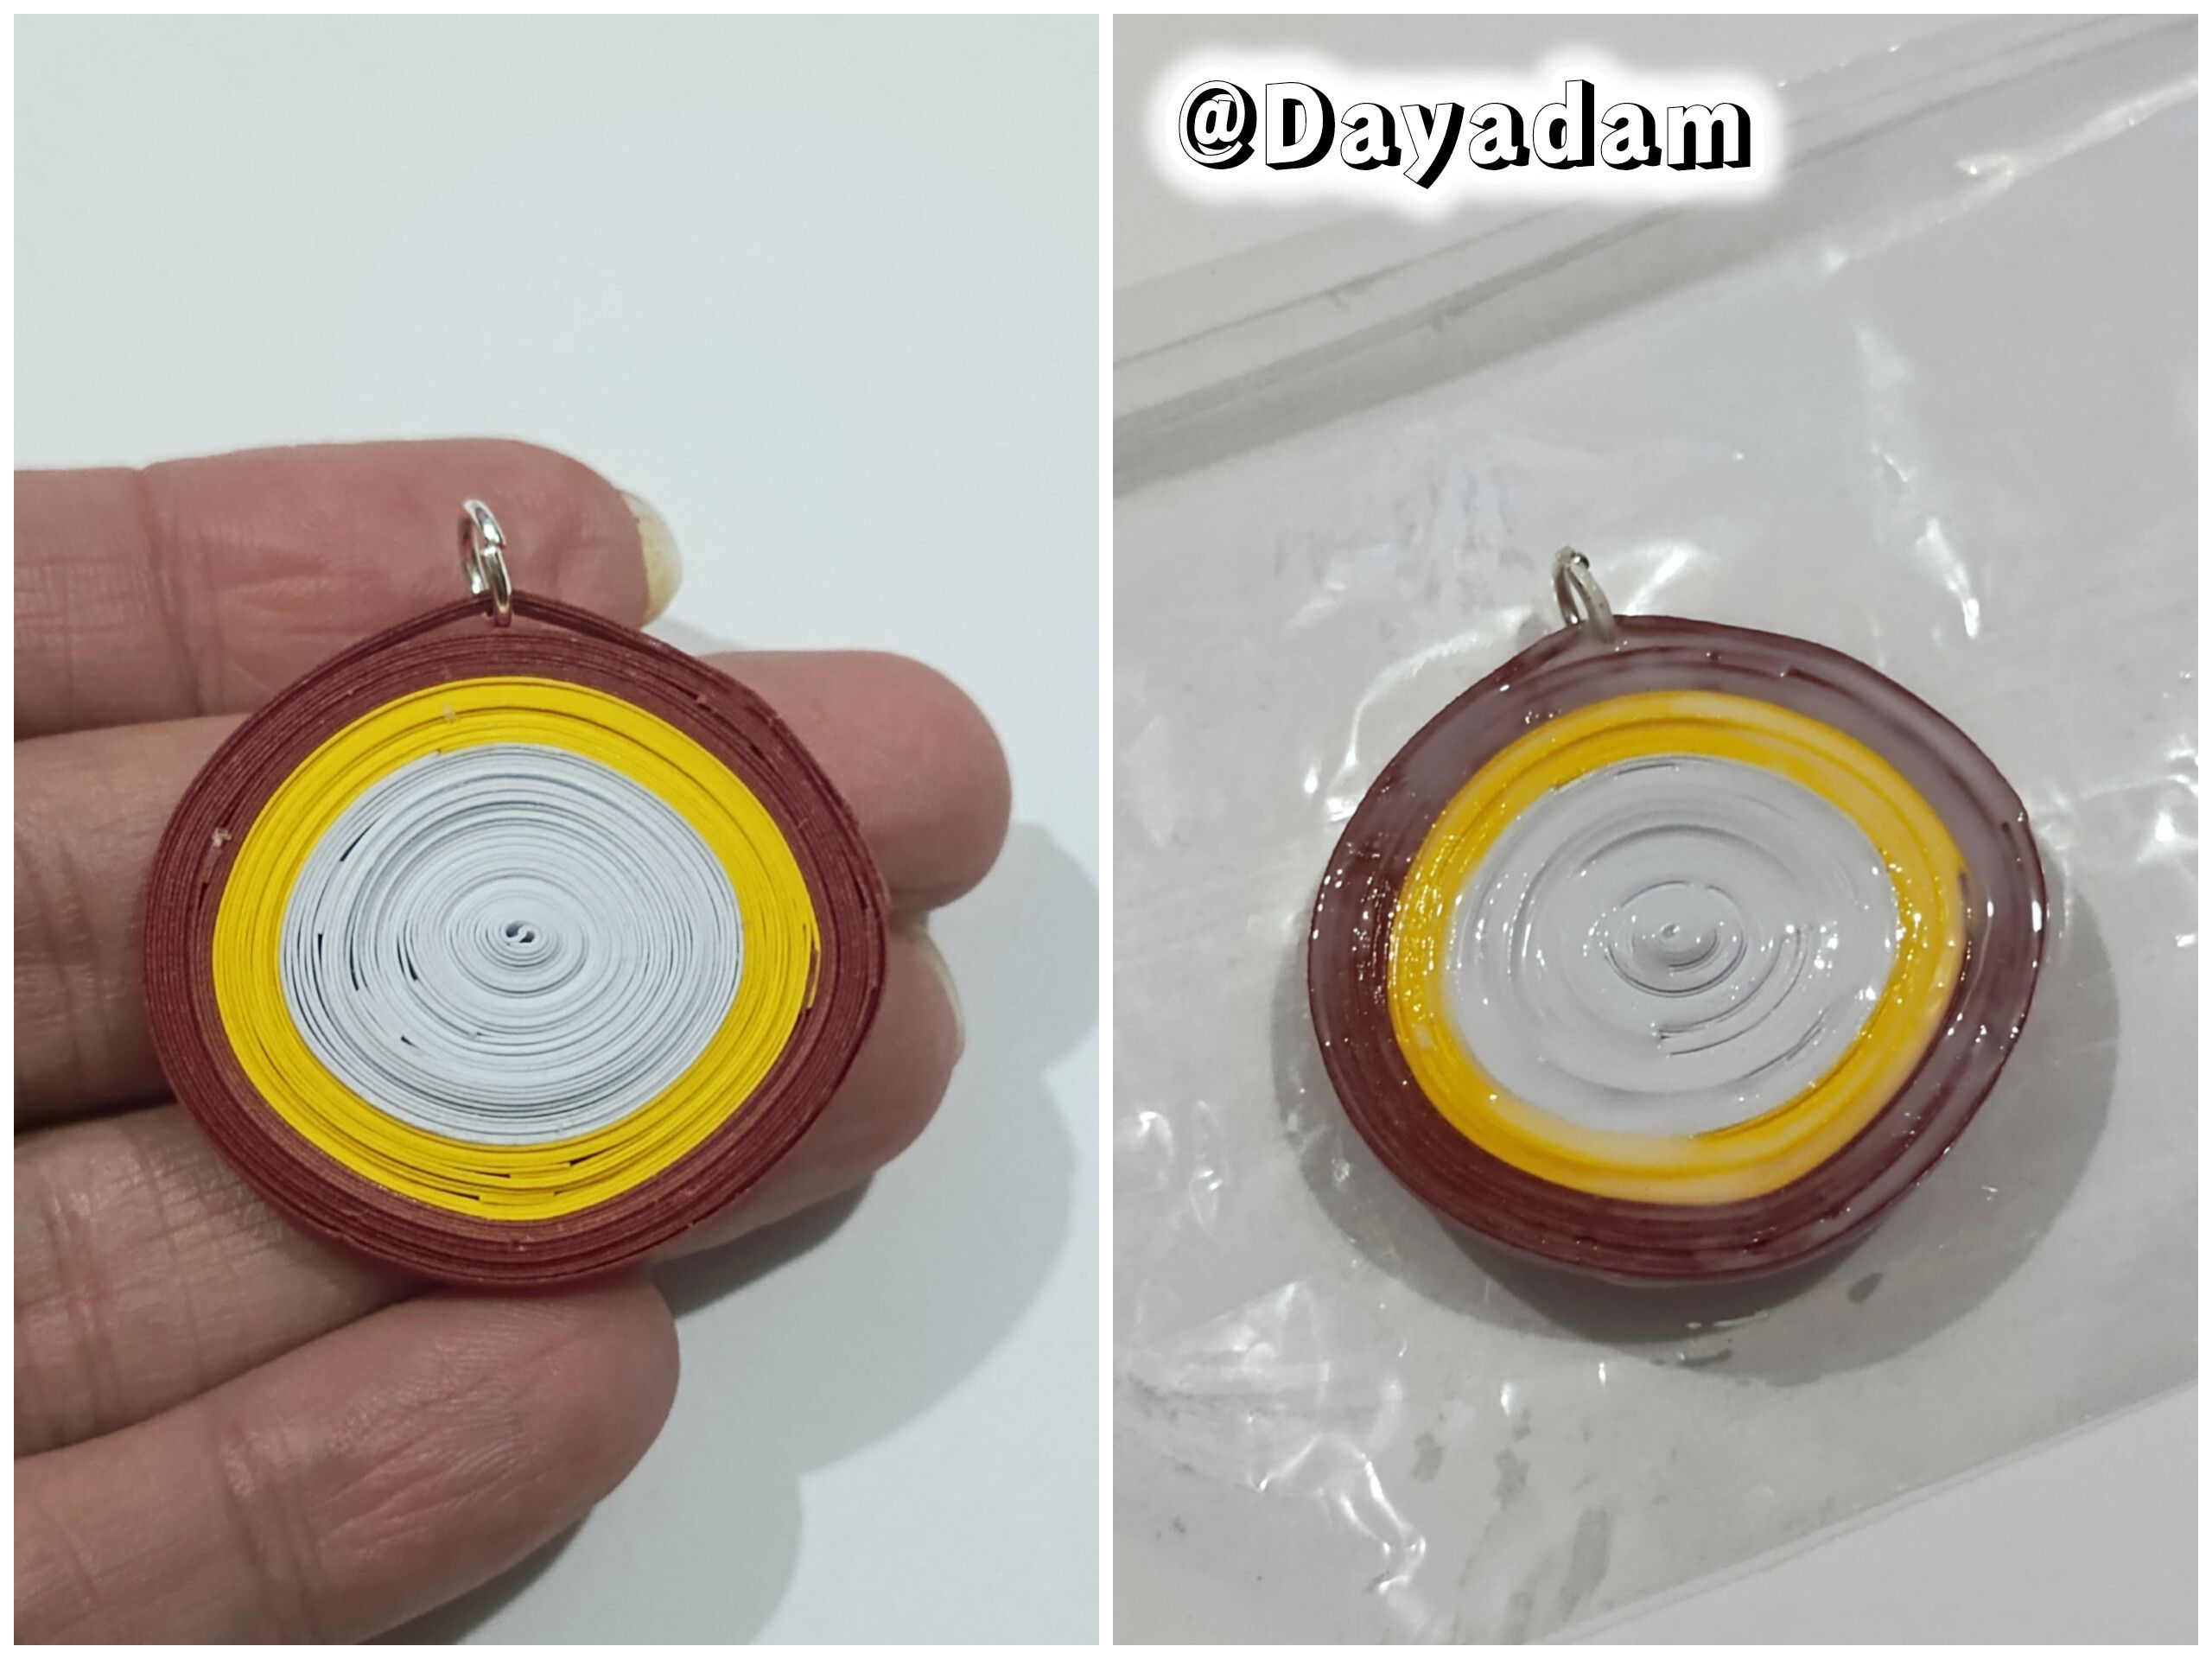
• During the process, I realized that I had not attached the ring to the circle, which is necessary to be able to hang it as a pendant. I proceeded to remove the red tape and attach the ring, then rewound and sealed it again with extra-strong white glue. I applied a layer of extra-strong white glue to harden the piece and let it dry thoroughly.
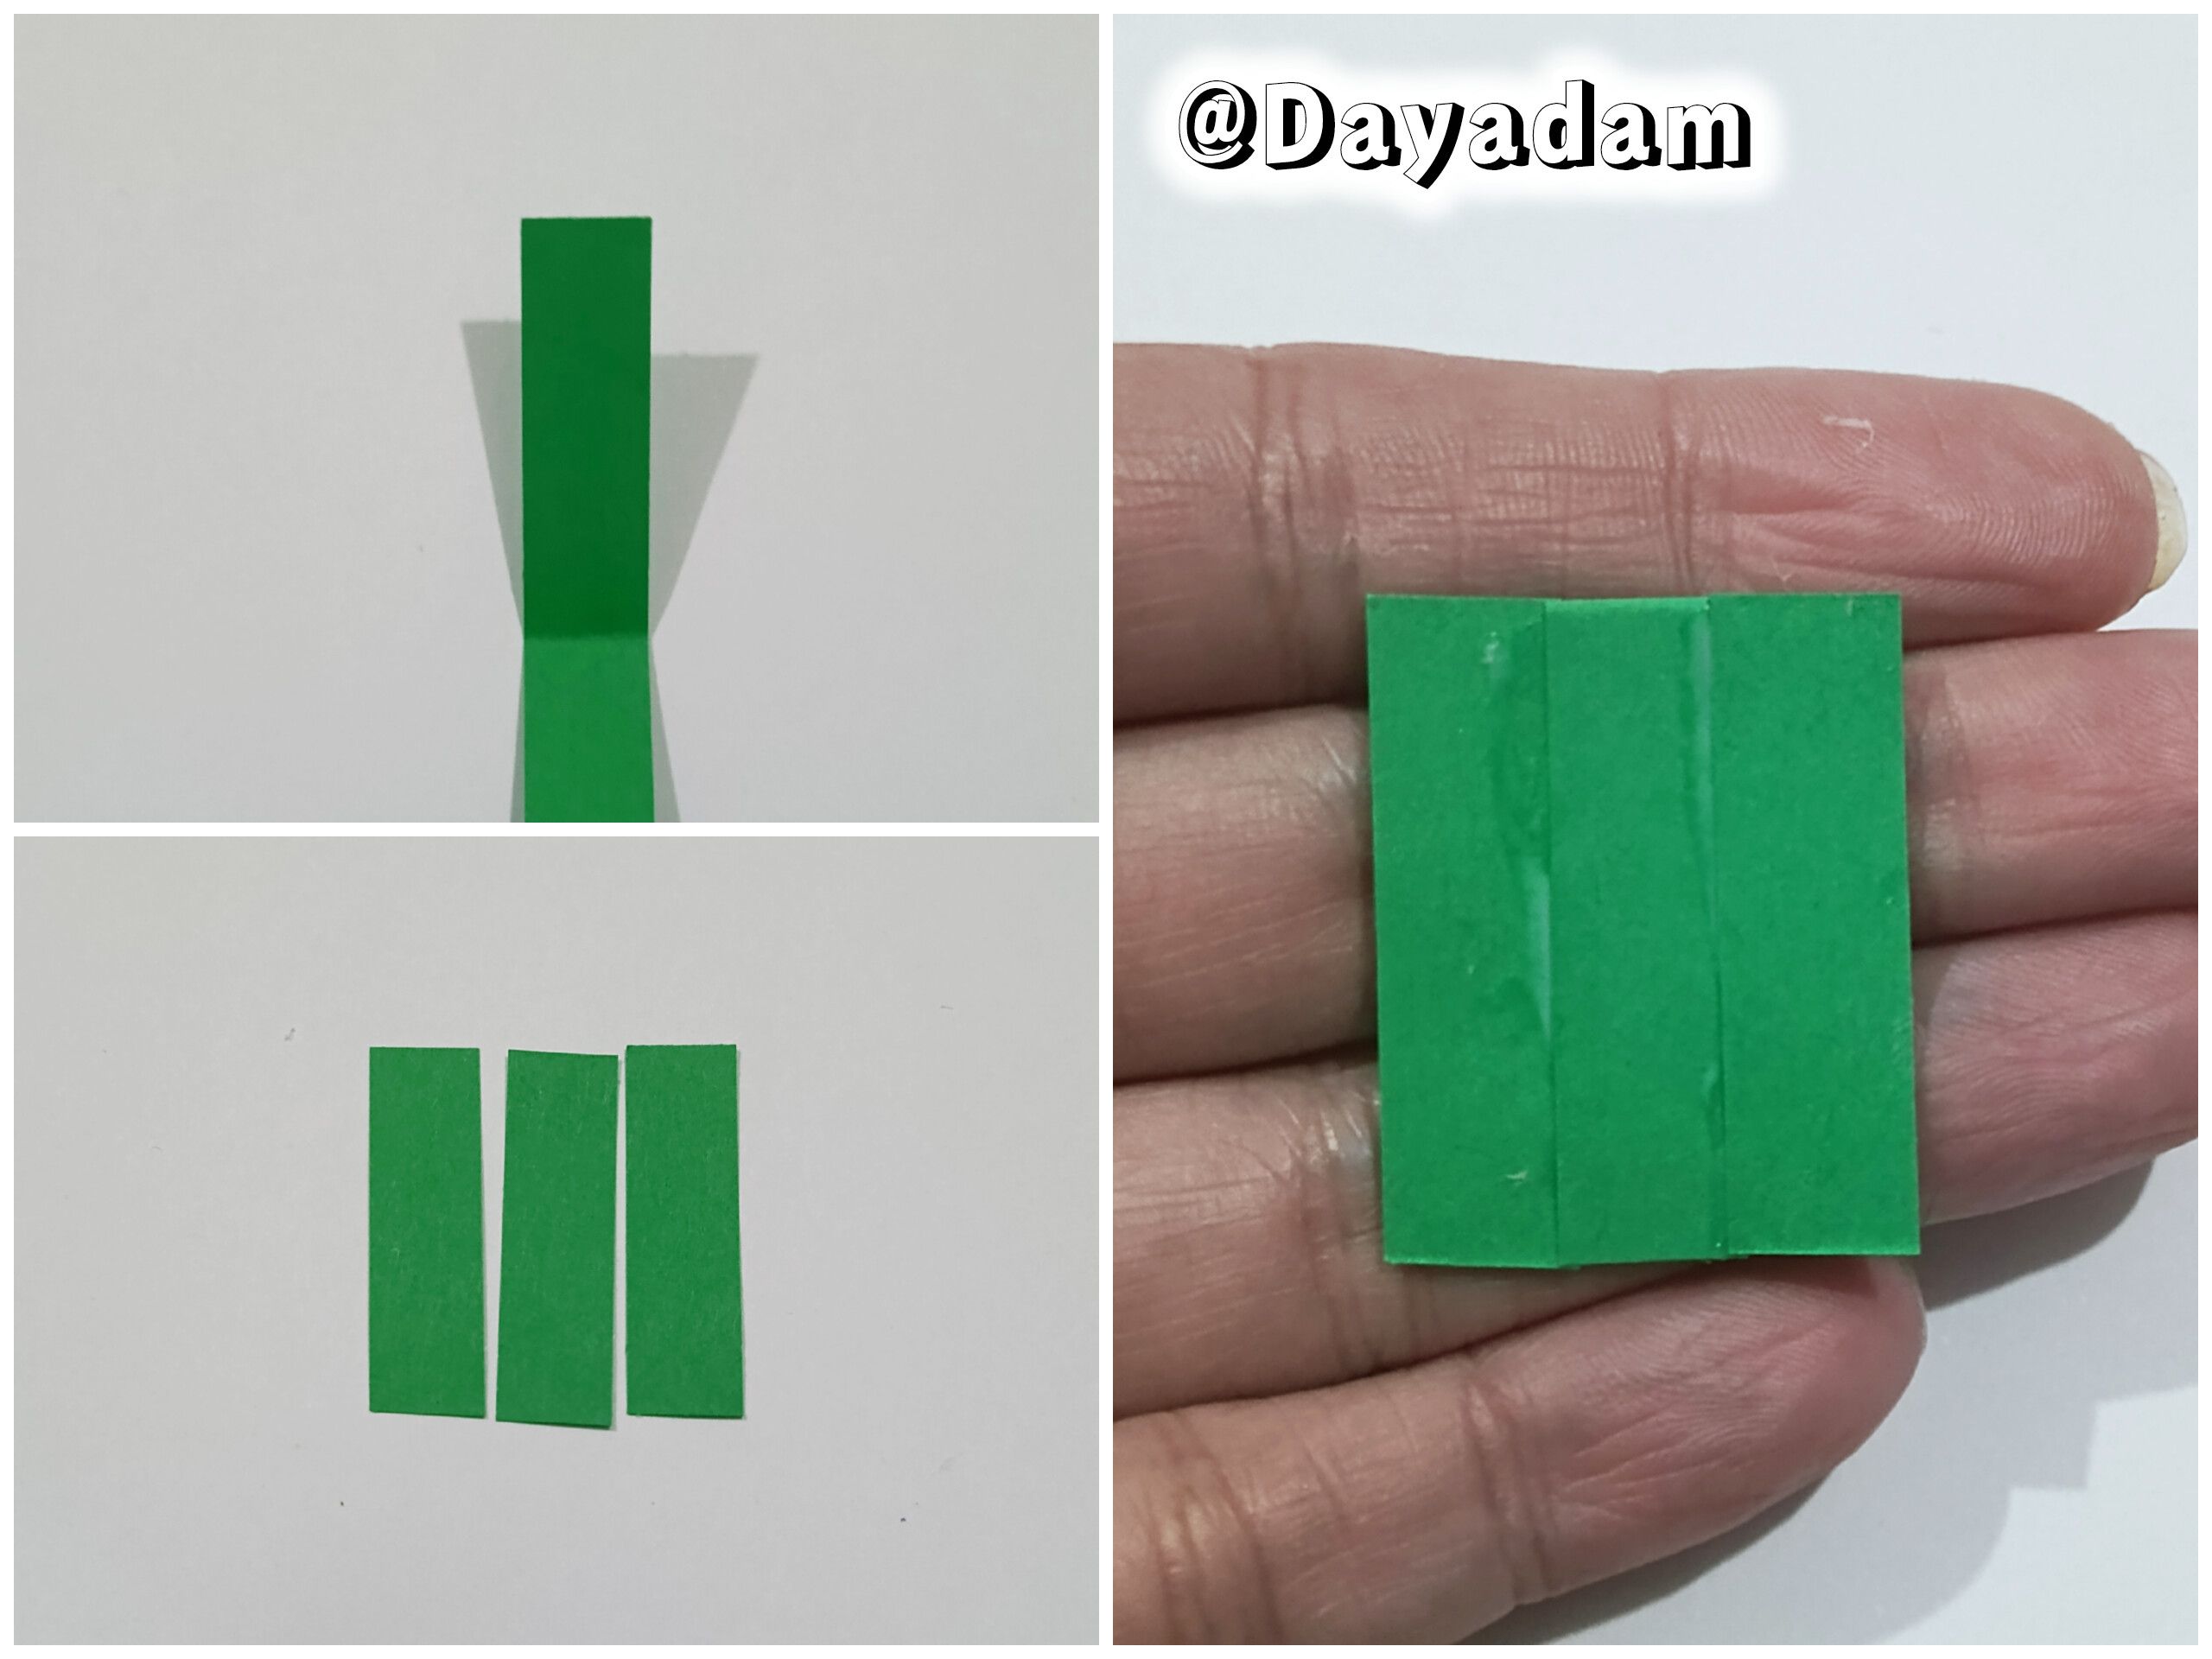
• I forgot to buy colored cardstock, so I used 9mm wide tape and stuck some together until I got a wide piece.

• Cómo no contaba con los colores en quilling procedí a comprar cartulinas de color blanca, roja y amarilla y con una tijera punta larga recorte las tiras que necesitaba de las medidas apropiadas.
• Comencé tomando cinta de color blanca de 3mm de ancho, con la aguja procedí a enrollar hasta terminar con toda la cinta, sellé con pega blanca extra fuerte, sin sacar de la aguja pegue un trozo de cinta de color amarilla y continúe enrollando hasta conseguir una franja no tan gruesa, luego continúe con cinta de color rojo, seguí enrollando hasta conseguir otra franja, sellé con pega blanca extra fuerte. Obtuvimos un círculo cerrado multicolor.
• En el proceso me di cuenta que no había colocado la argolla al círculo, esto es necesario para poder enganchar en colgante, procedí a despegar la cinta roja y coloque la argolla volví a enrollar y sellé nuevamente con pega blanca extra fuerte. Apliqué una capa de pega blanca extra fuerte para endurecer la pieza, deje secar muy bien.
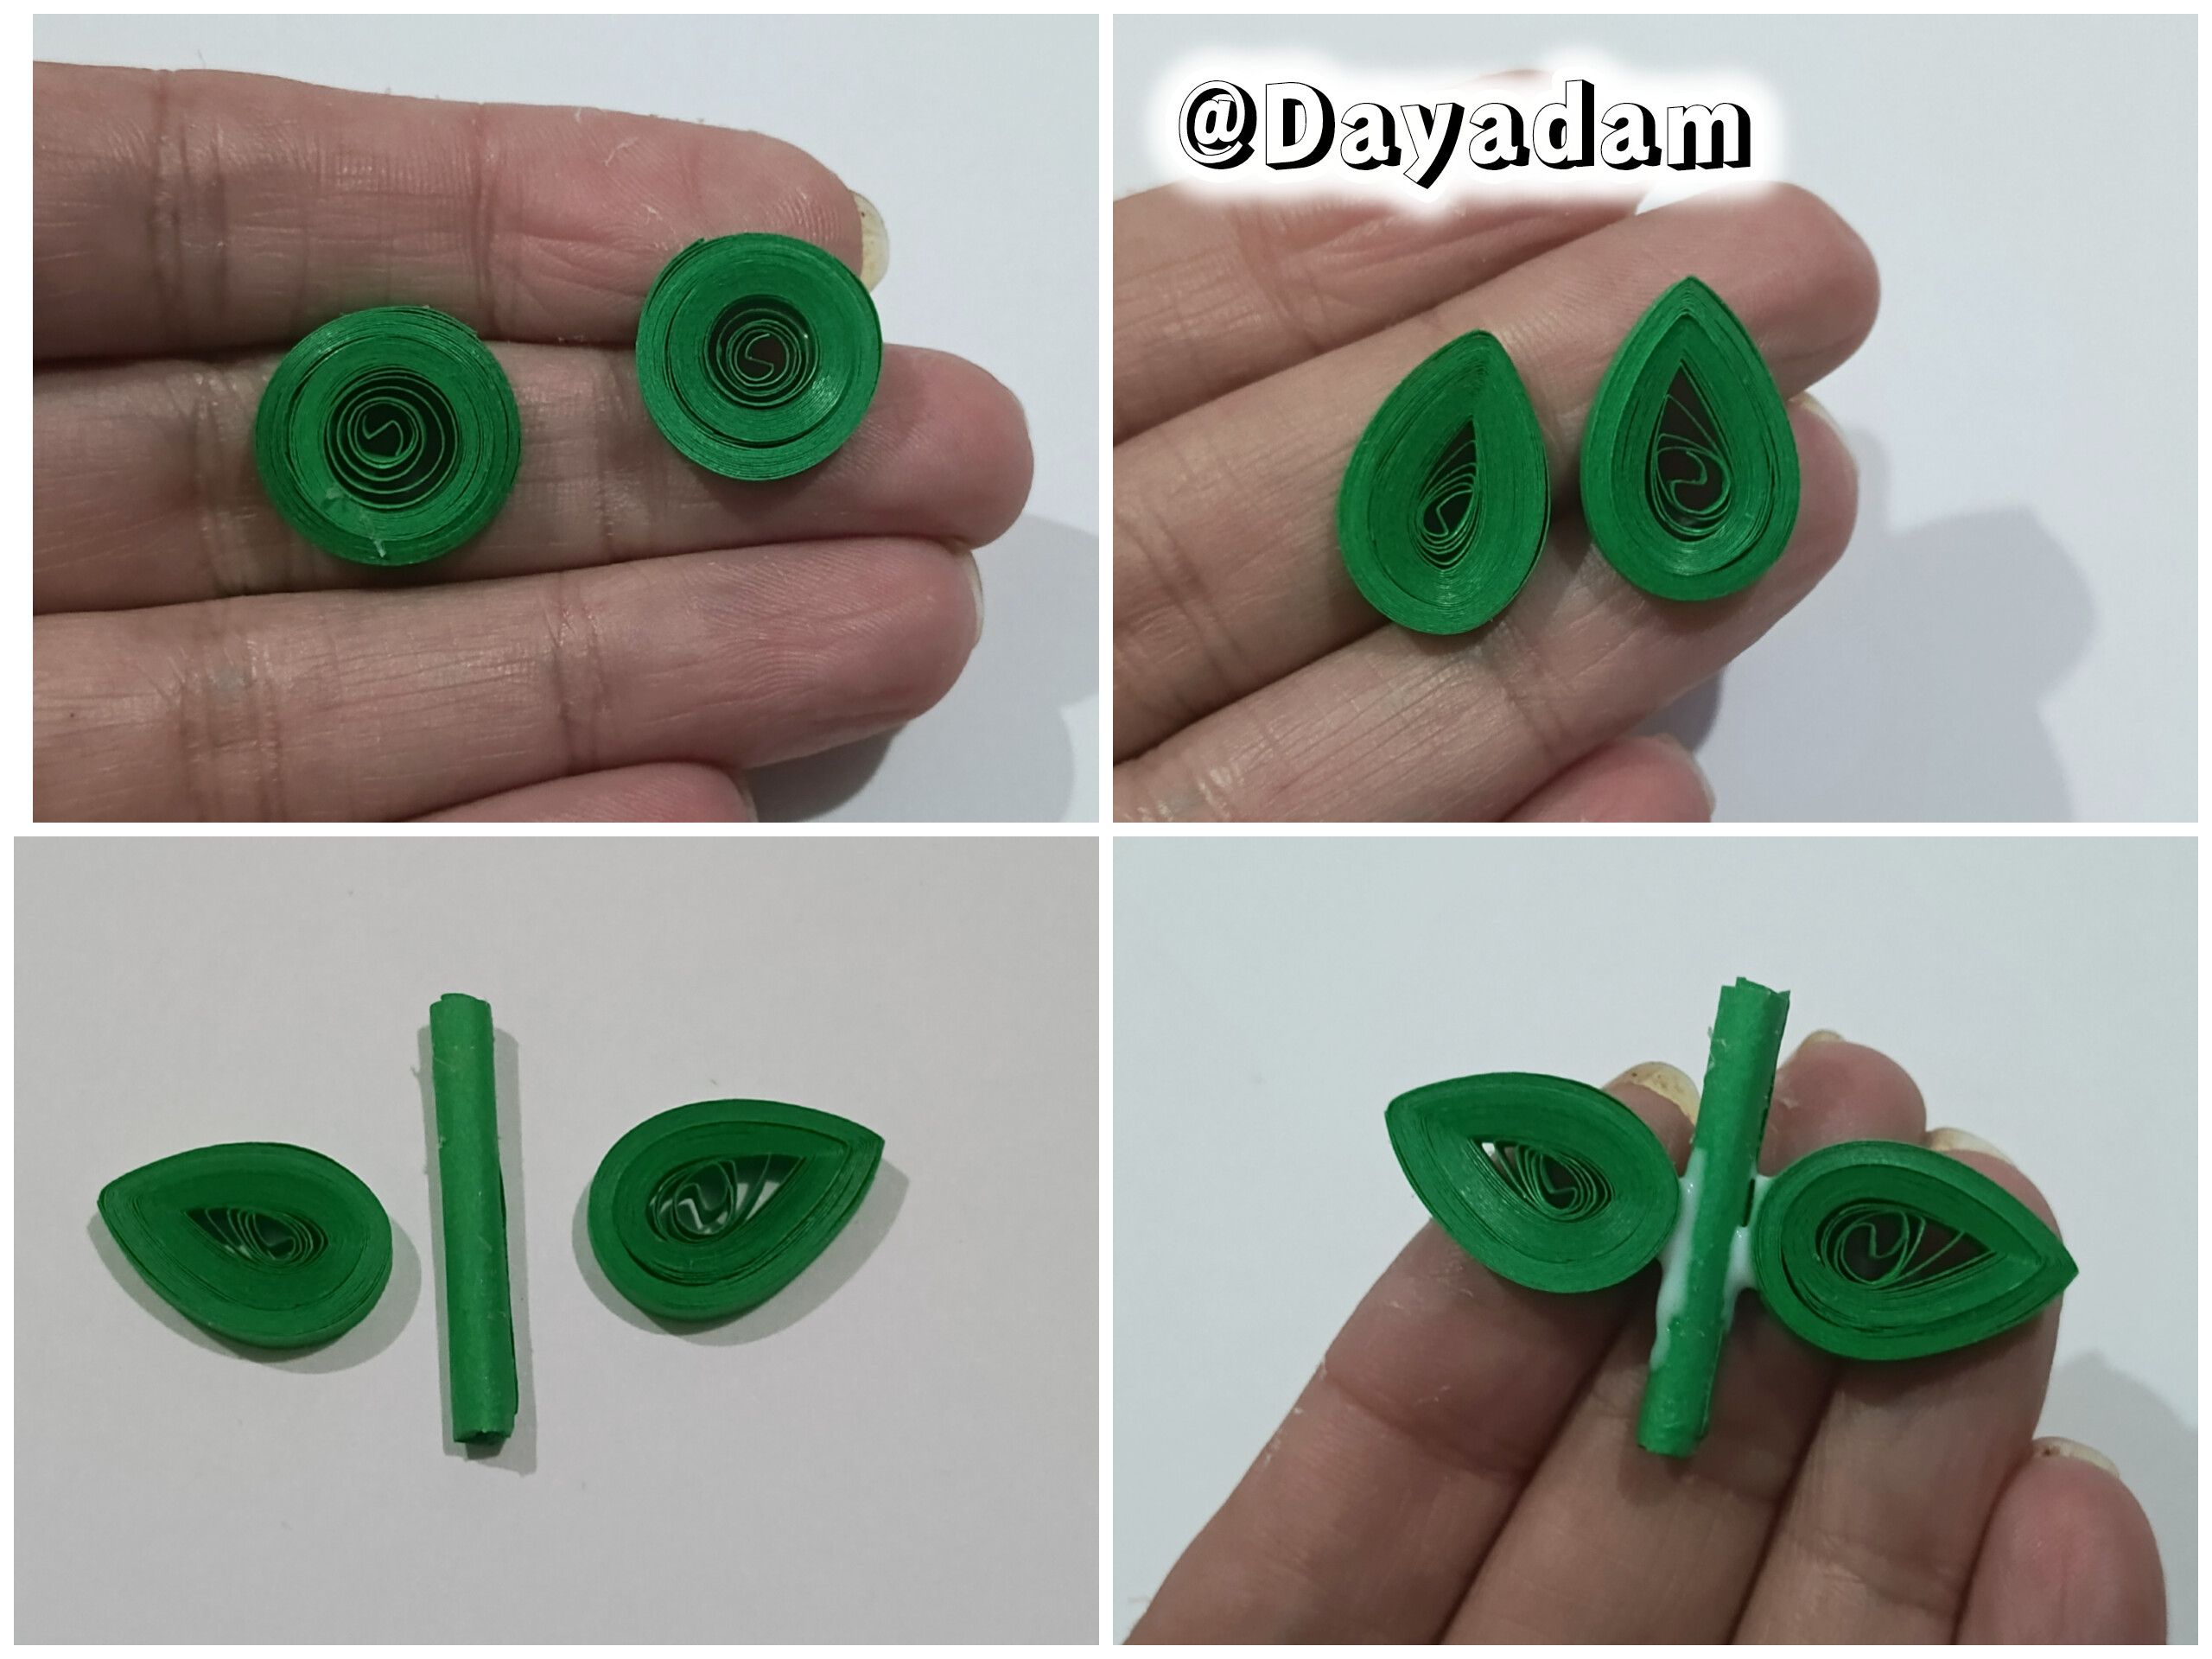
• Olvide comprar cartulina de color verdad, en ese caso tenía cinta de 9mm de ancho y pegué algunas hasta conseguir un trozo ancho.
 |
 |
 |
 |
• At this point, I rolled the thick ribbon with the quilling needle to make the stem of the flower.
• To make the leaves of the flower, I made two open circles with 3mm wide green ribbon, which I shaped into leaves.
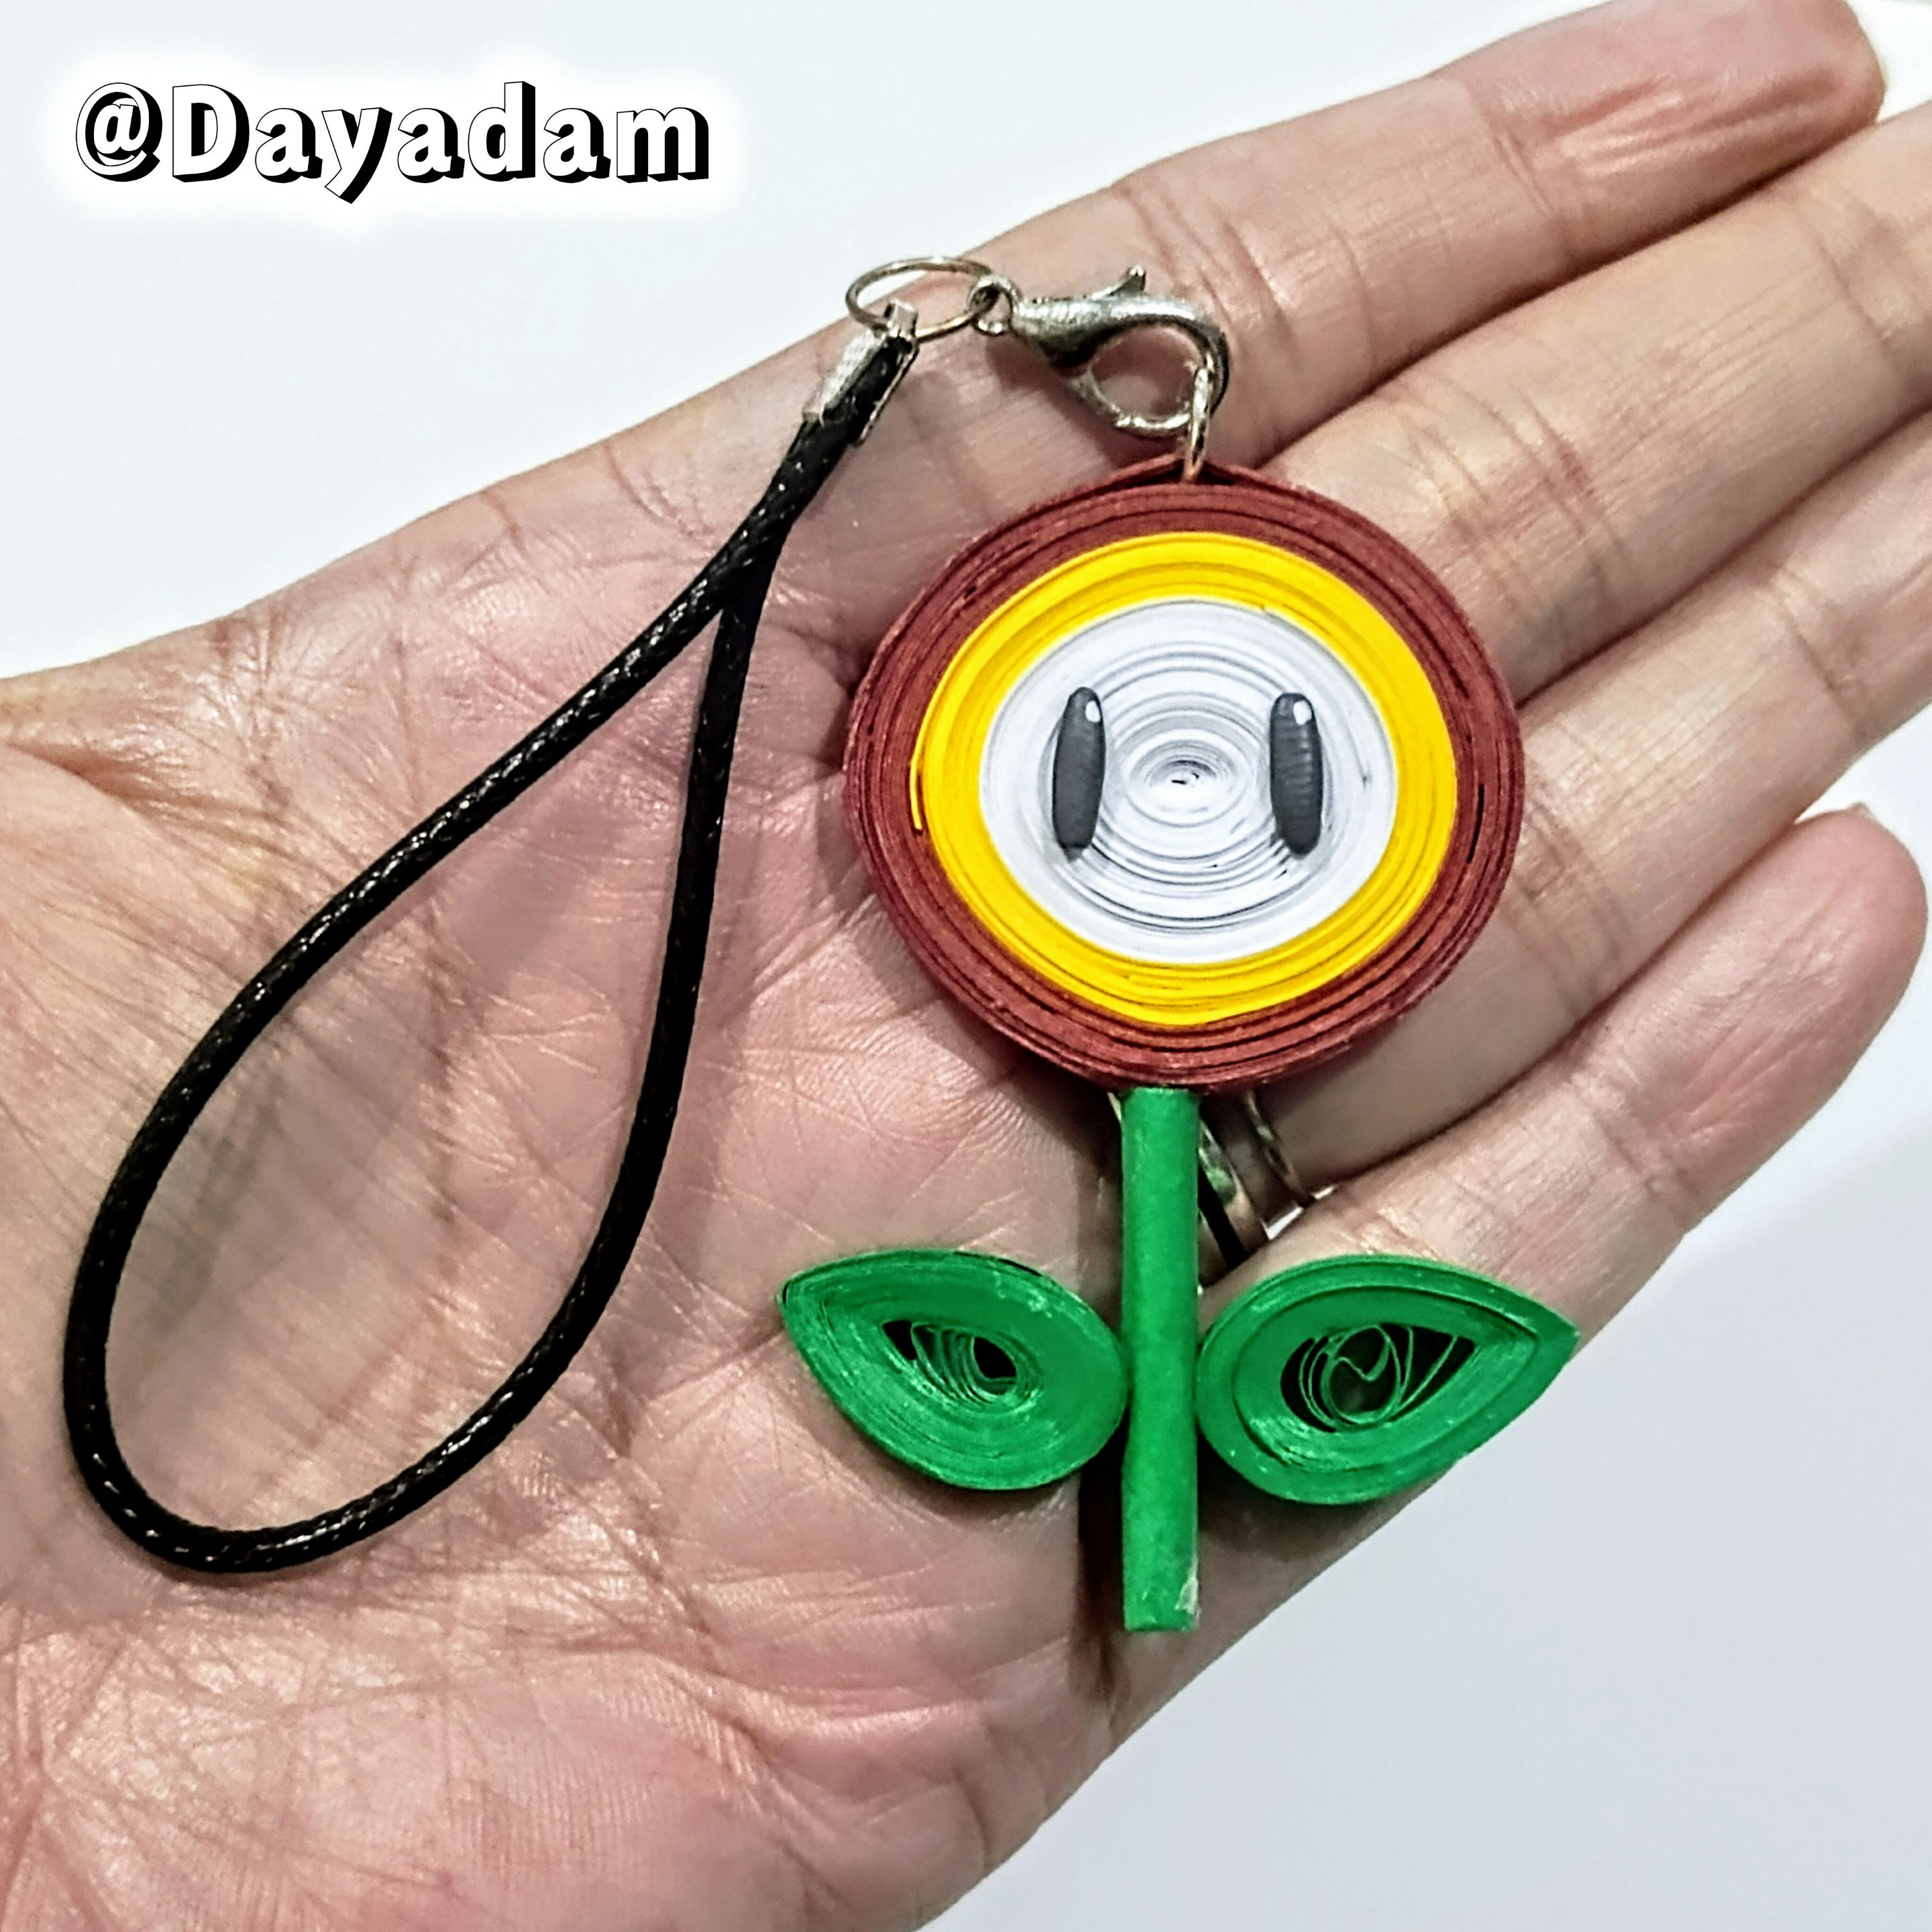
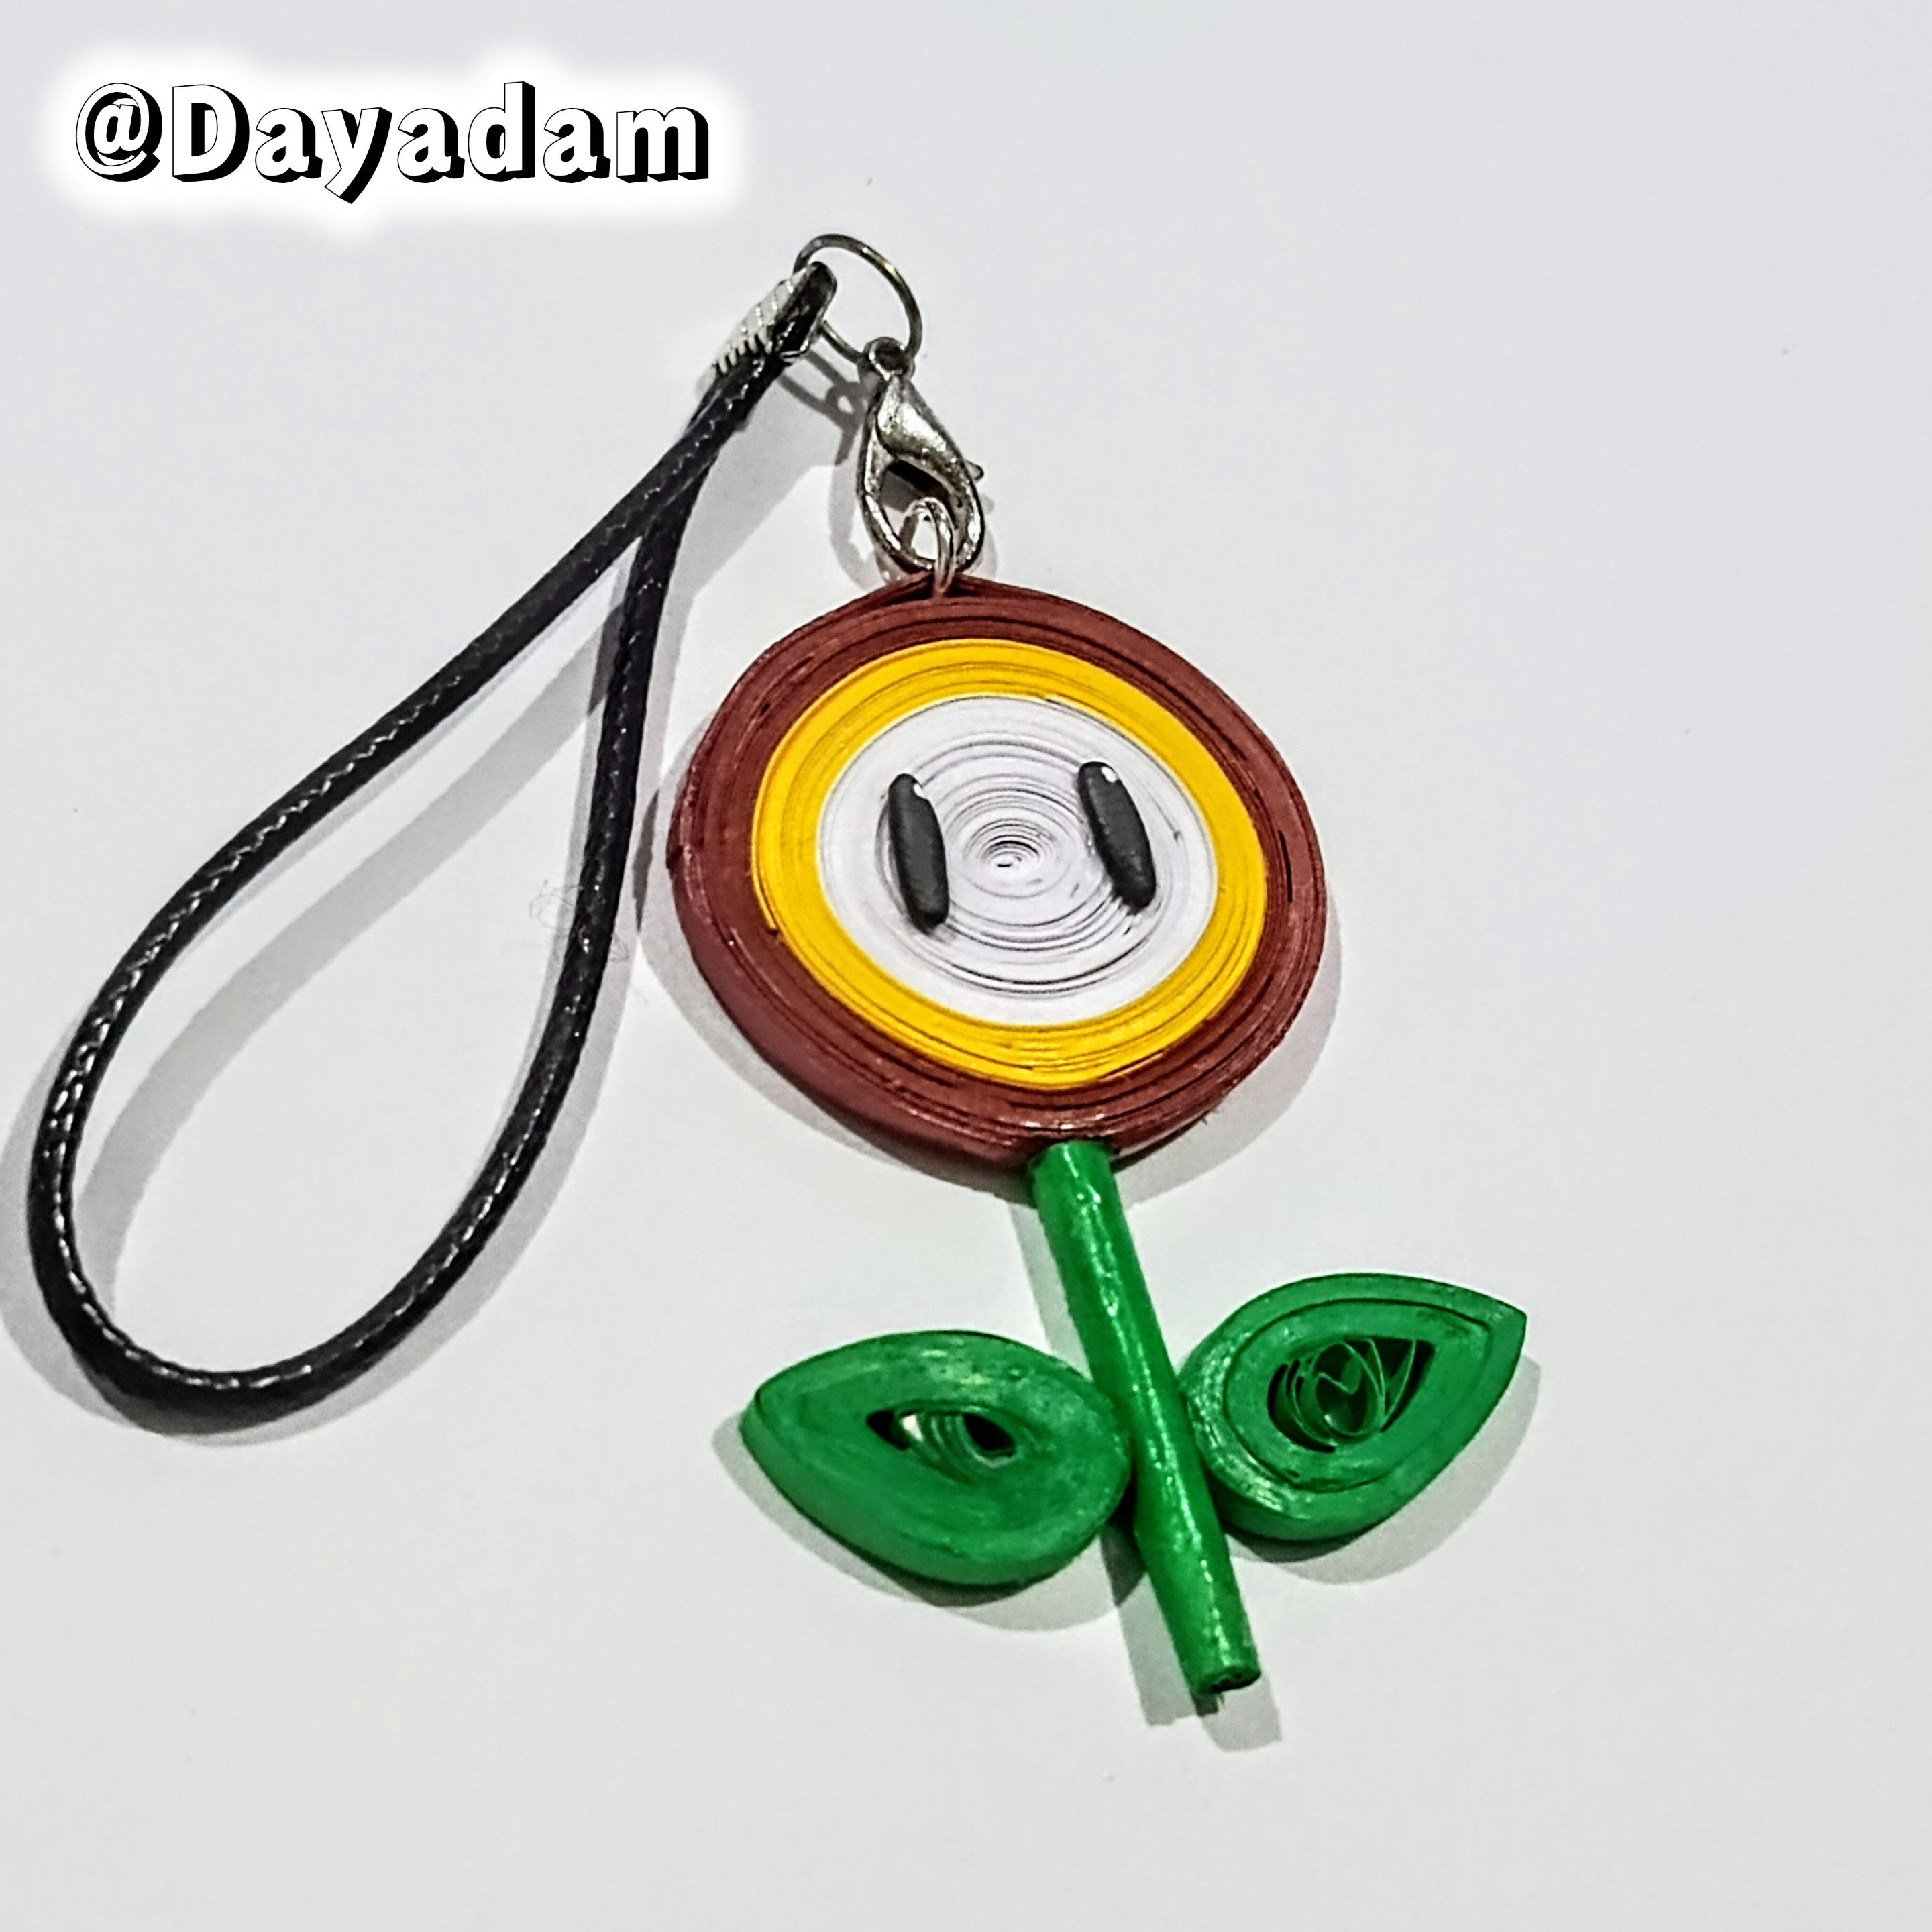
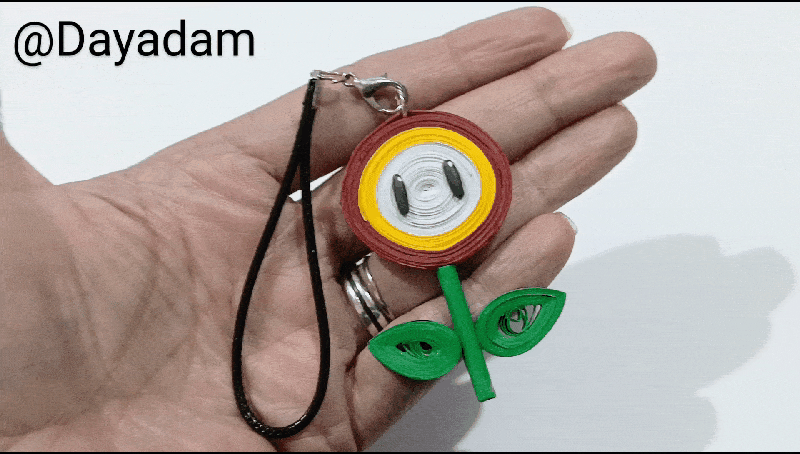
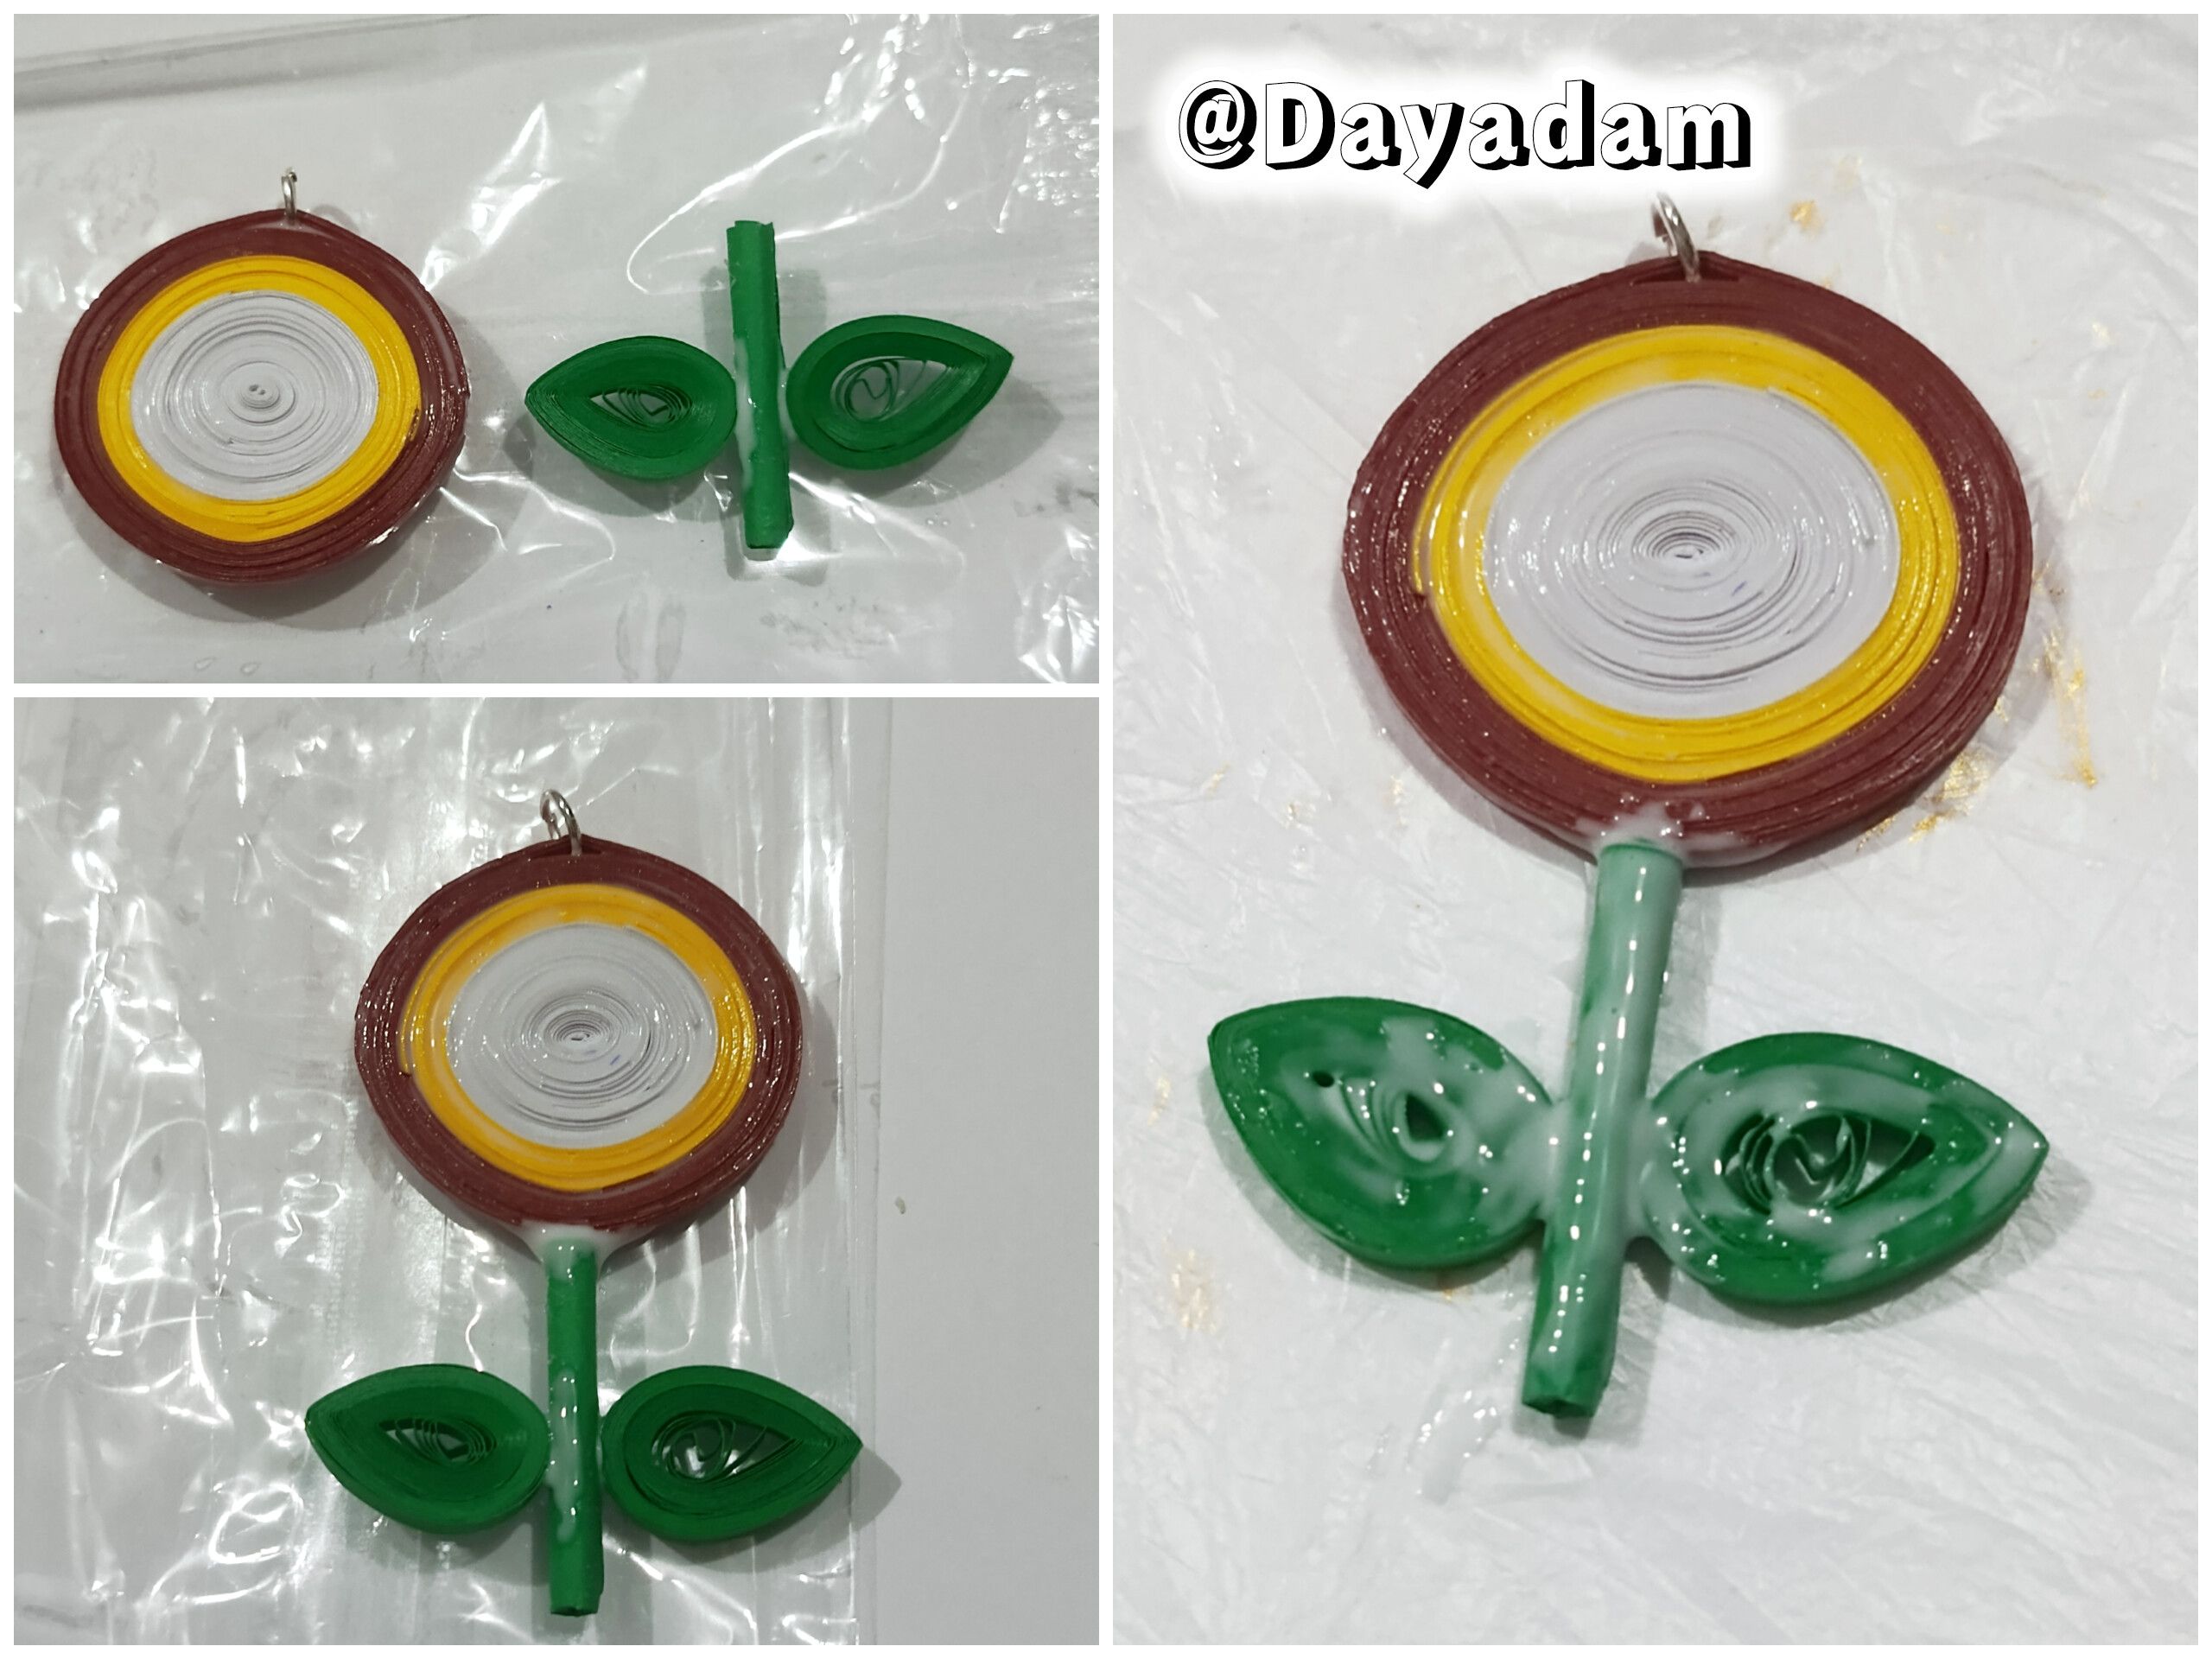
• Once all the pieces were ready, I joined them together and let them dry thoroughly. I applied a thick, even layer of extra-strong white glue so that when the flower dried, it would be completely laminated and protected and could be used as a pendant.
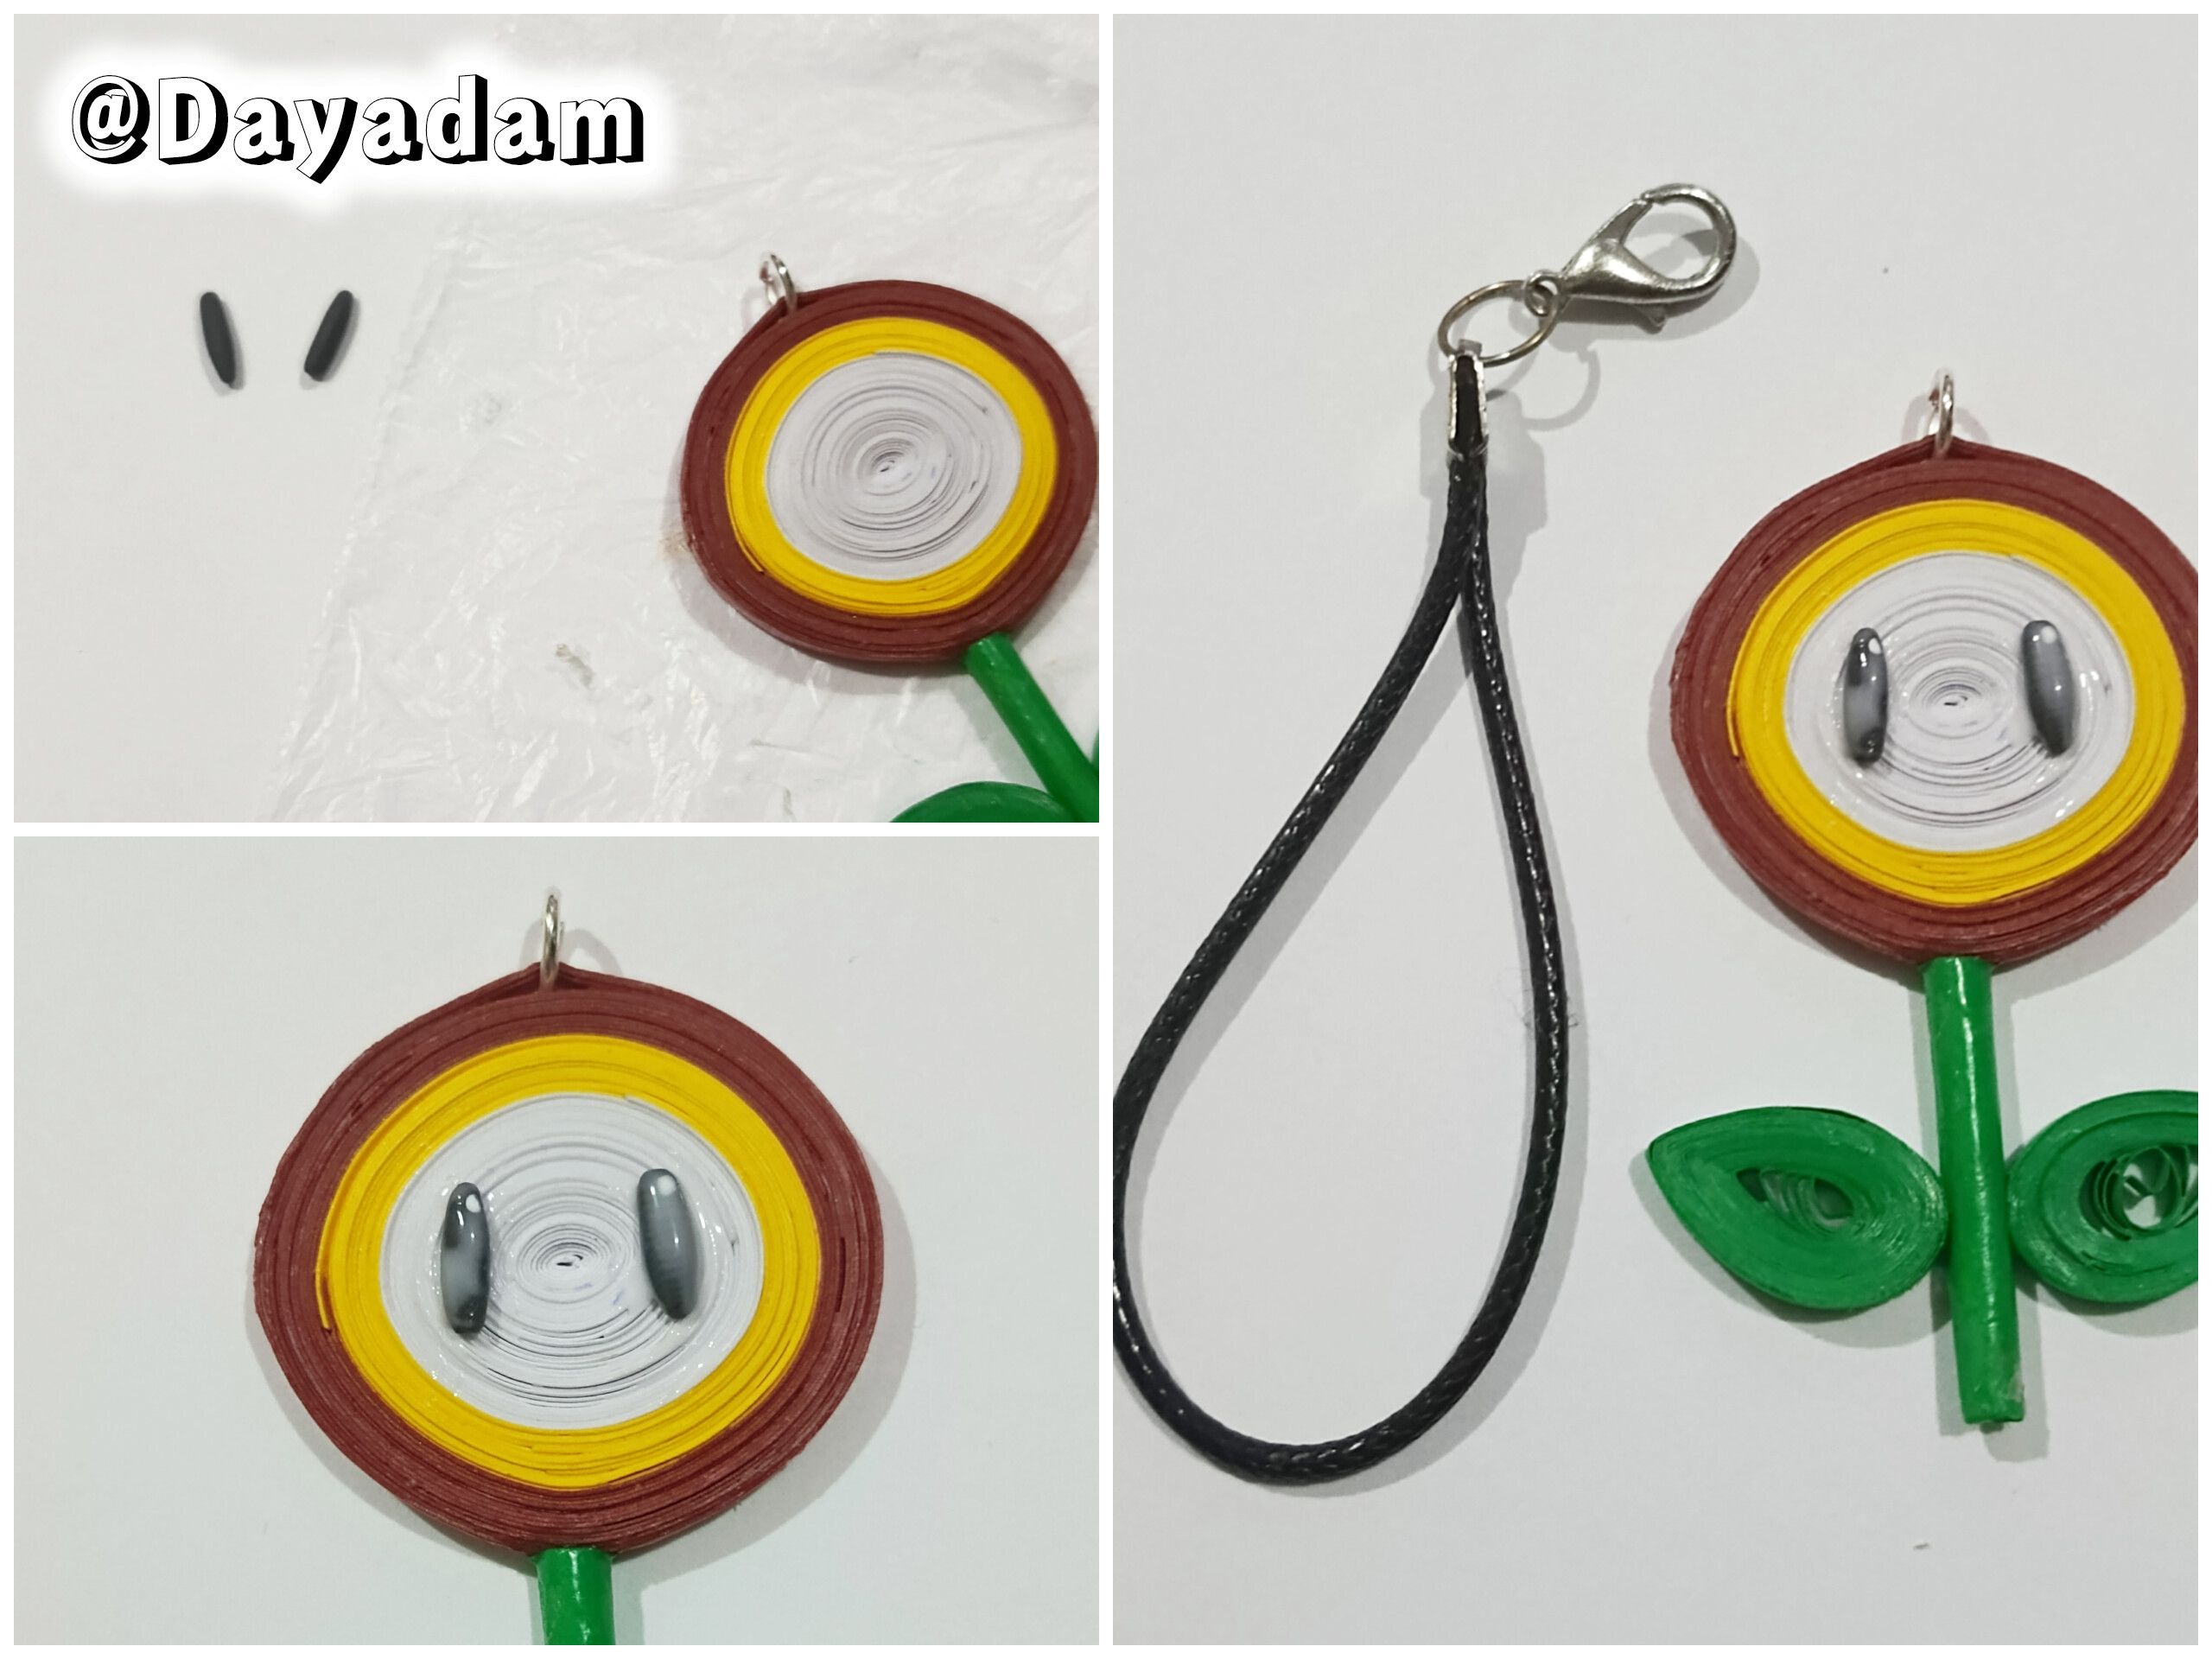
• To finish, I made the eyes with two small pieces of black plasticine, then I made some small lights with white cold paint using an embossing tool. I applied a little white glue to the eyes to protect them. I liked using this material because it makes the eyes stand out much more.
This is how I finished this decorative pendant of the fire flower from Super Mario Bros using the quilling technique.
• En este punto enrollé la cinta gruesa con la aguja para quilling, para obtener el tallo de la flor.
• Para realizar las hojas de la flor realicé dos círculos abiertos con cinta verde de 3mm de ancho, estos círculos los moldee en forma de hojas.
• Una vez listas todas las piezas las uni todas deje secar muy bien, apliqué una capa uniforme y gruesa de pega blanca extra fuerte, para que la flor al secar quedé totalmente plastificada, y protegida y poder usar como colgante.
• Para finalizar procedí a realizar los ojos con dos trocitos de plastilina de color negro, luego le hice unas pequeñas luces con pintura al frío color blanco con la ayuda de un repujador, apliqué un poco de pega blanca en los ojos para protegerlos. Me ha gustado utilizar este material ya que los ojos resaltan mucho mas.
De esta manera finalice este colgante decorativo de la flor de fuego de Súper Mario Bross, en la técnica de quilling.
 |
 |
 |
 |
 |

|
 |
 |
 |
|
|
What did you think, did you like it?
I hope you did, I hope you liked my explanation, procedure and photos, I made them with love for you.
"Let out that muse that inspires you, and let your imagination fly".
Thank you all, see you next time ✨.
¿Qué les pareció, les gustó?
Espero que sí, que les haya gustado mi explicación, procedimiento y fotos, los hice con mucho cariño por y para ustedes."Deja salir esa musa que te inspira, y deja volar tu imaginación".
Gracias a todos, nos vemos en la próxima✨
All photos used in this post are of my authorship and have been taken on my personal cell phone a Infinity Hot 40pro, edited in InShot and Canva
Banner and separator made by me in Canva
Translated with the help of DeepL
Todas las fotos usadas en este post son de mi autoría y han sido sacadas en mi celular personal un Infinity Hot 40pro, editadas en InShot y Canva
Banner y separador hecho por mí en Canva
Traducido con la ayuda de DeepL
