Hello to my dear Hivers and the beloved community of artists Diyhub. As always, I am very pleased and excited to be here, showing you my work, made with love and especially for you.
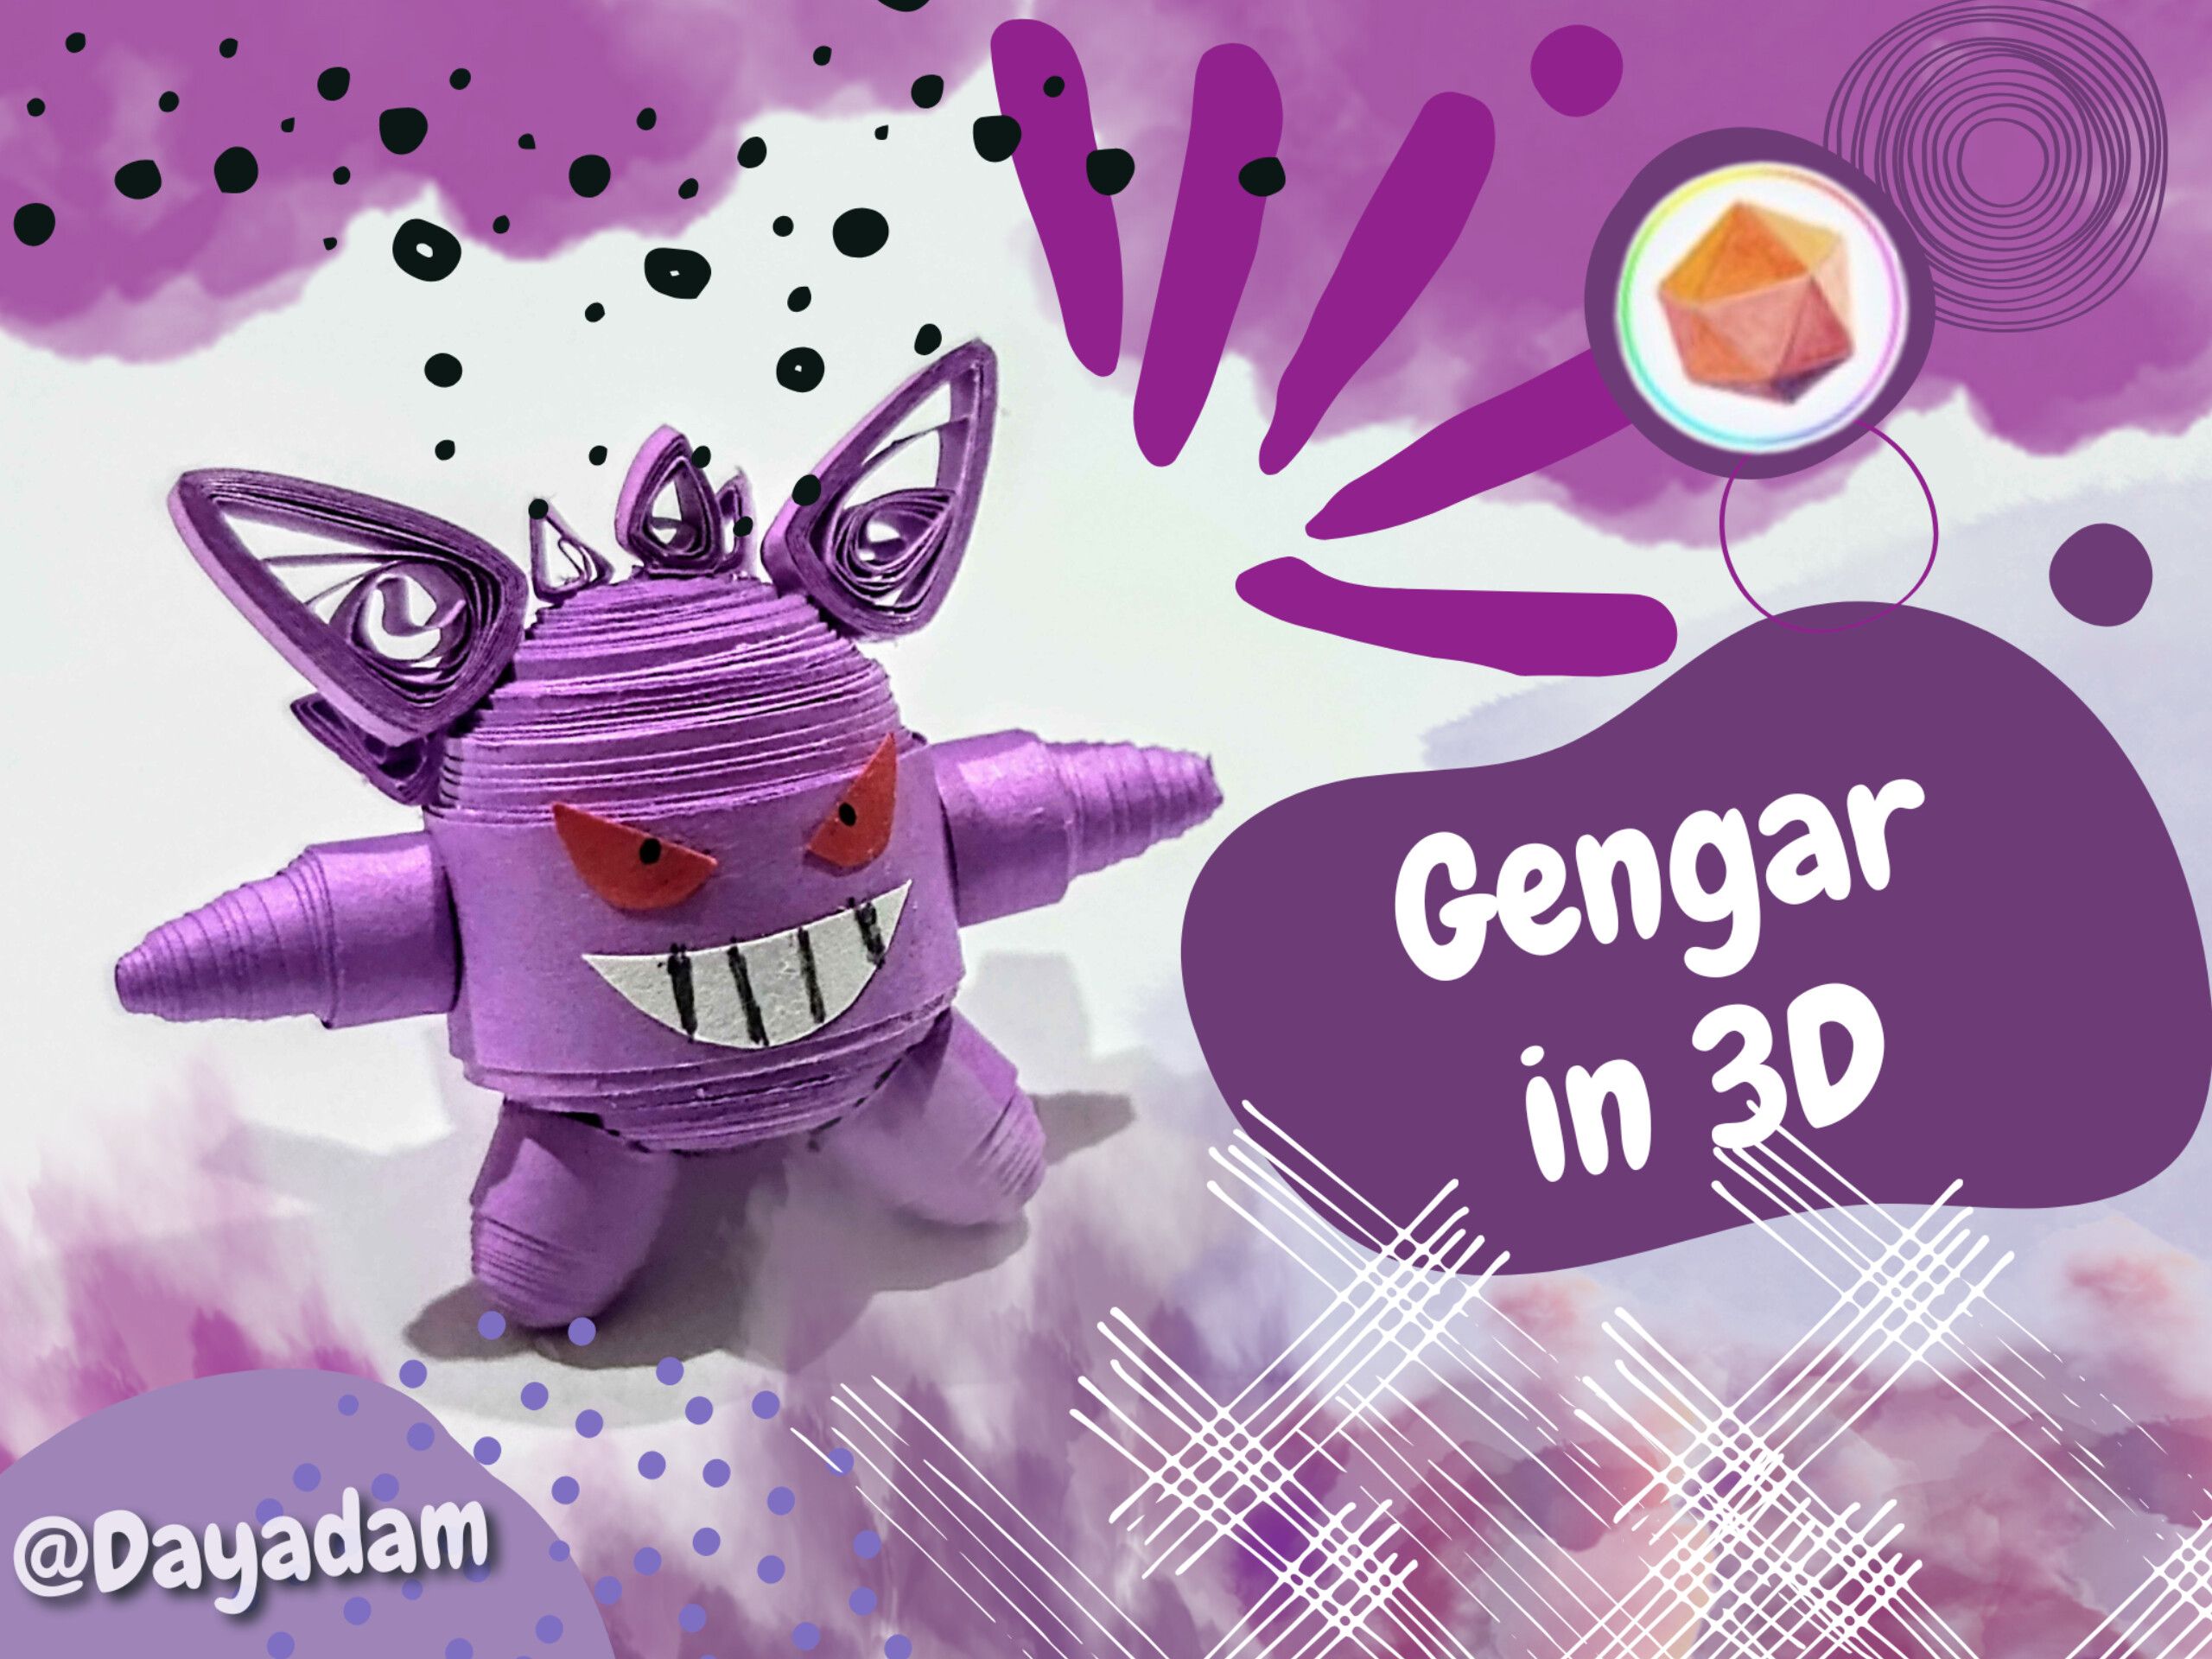
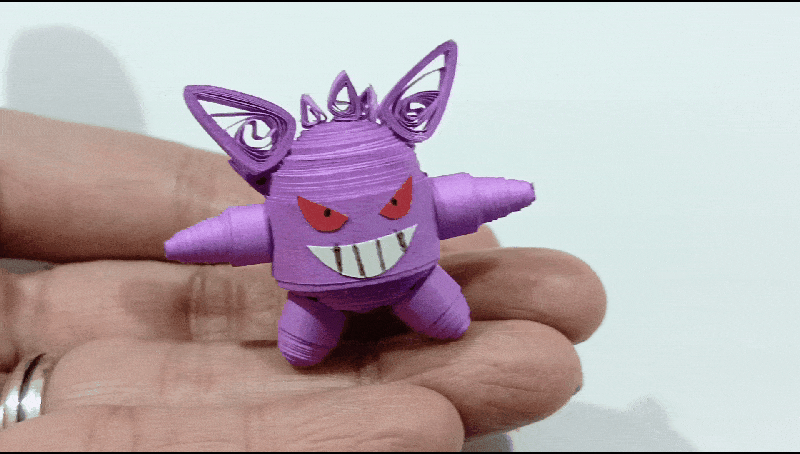
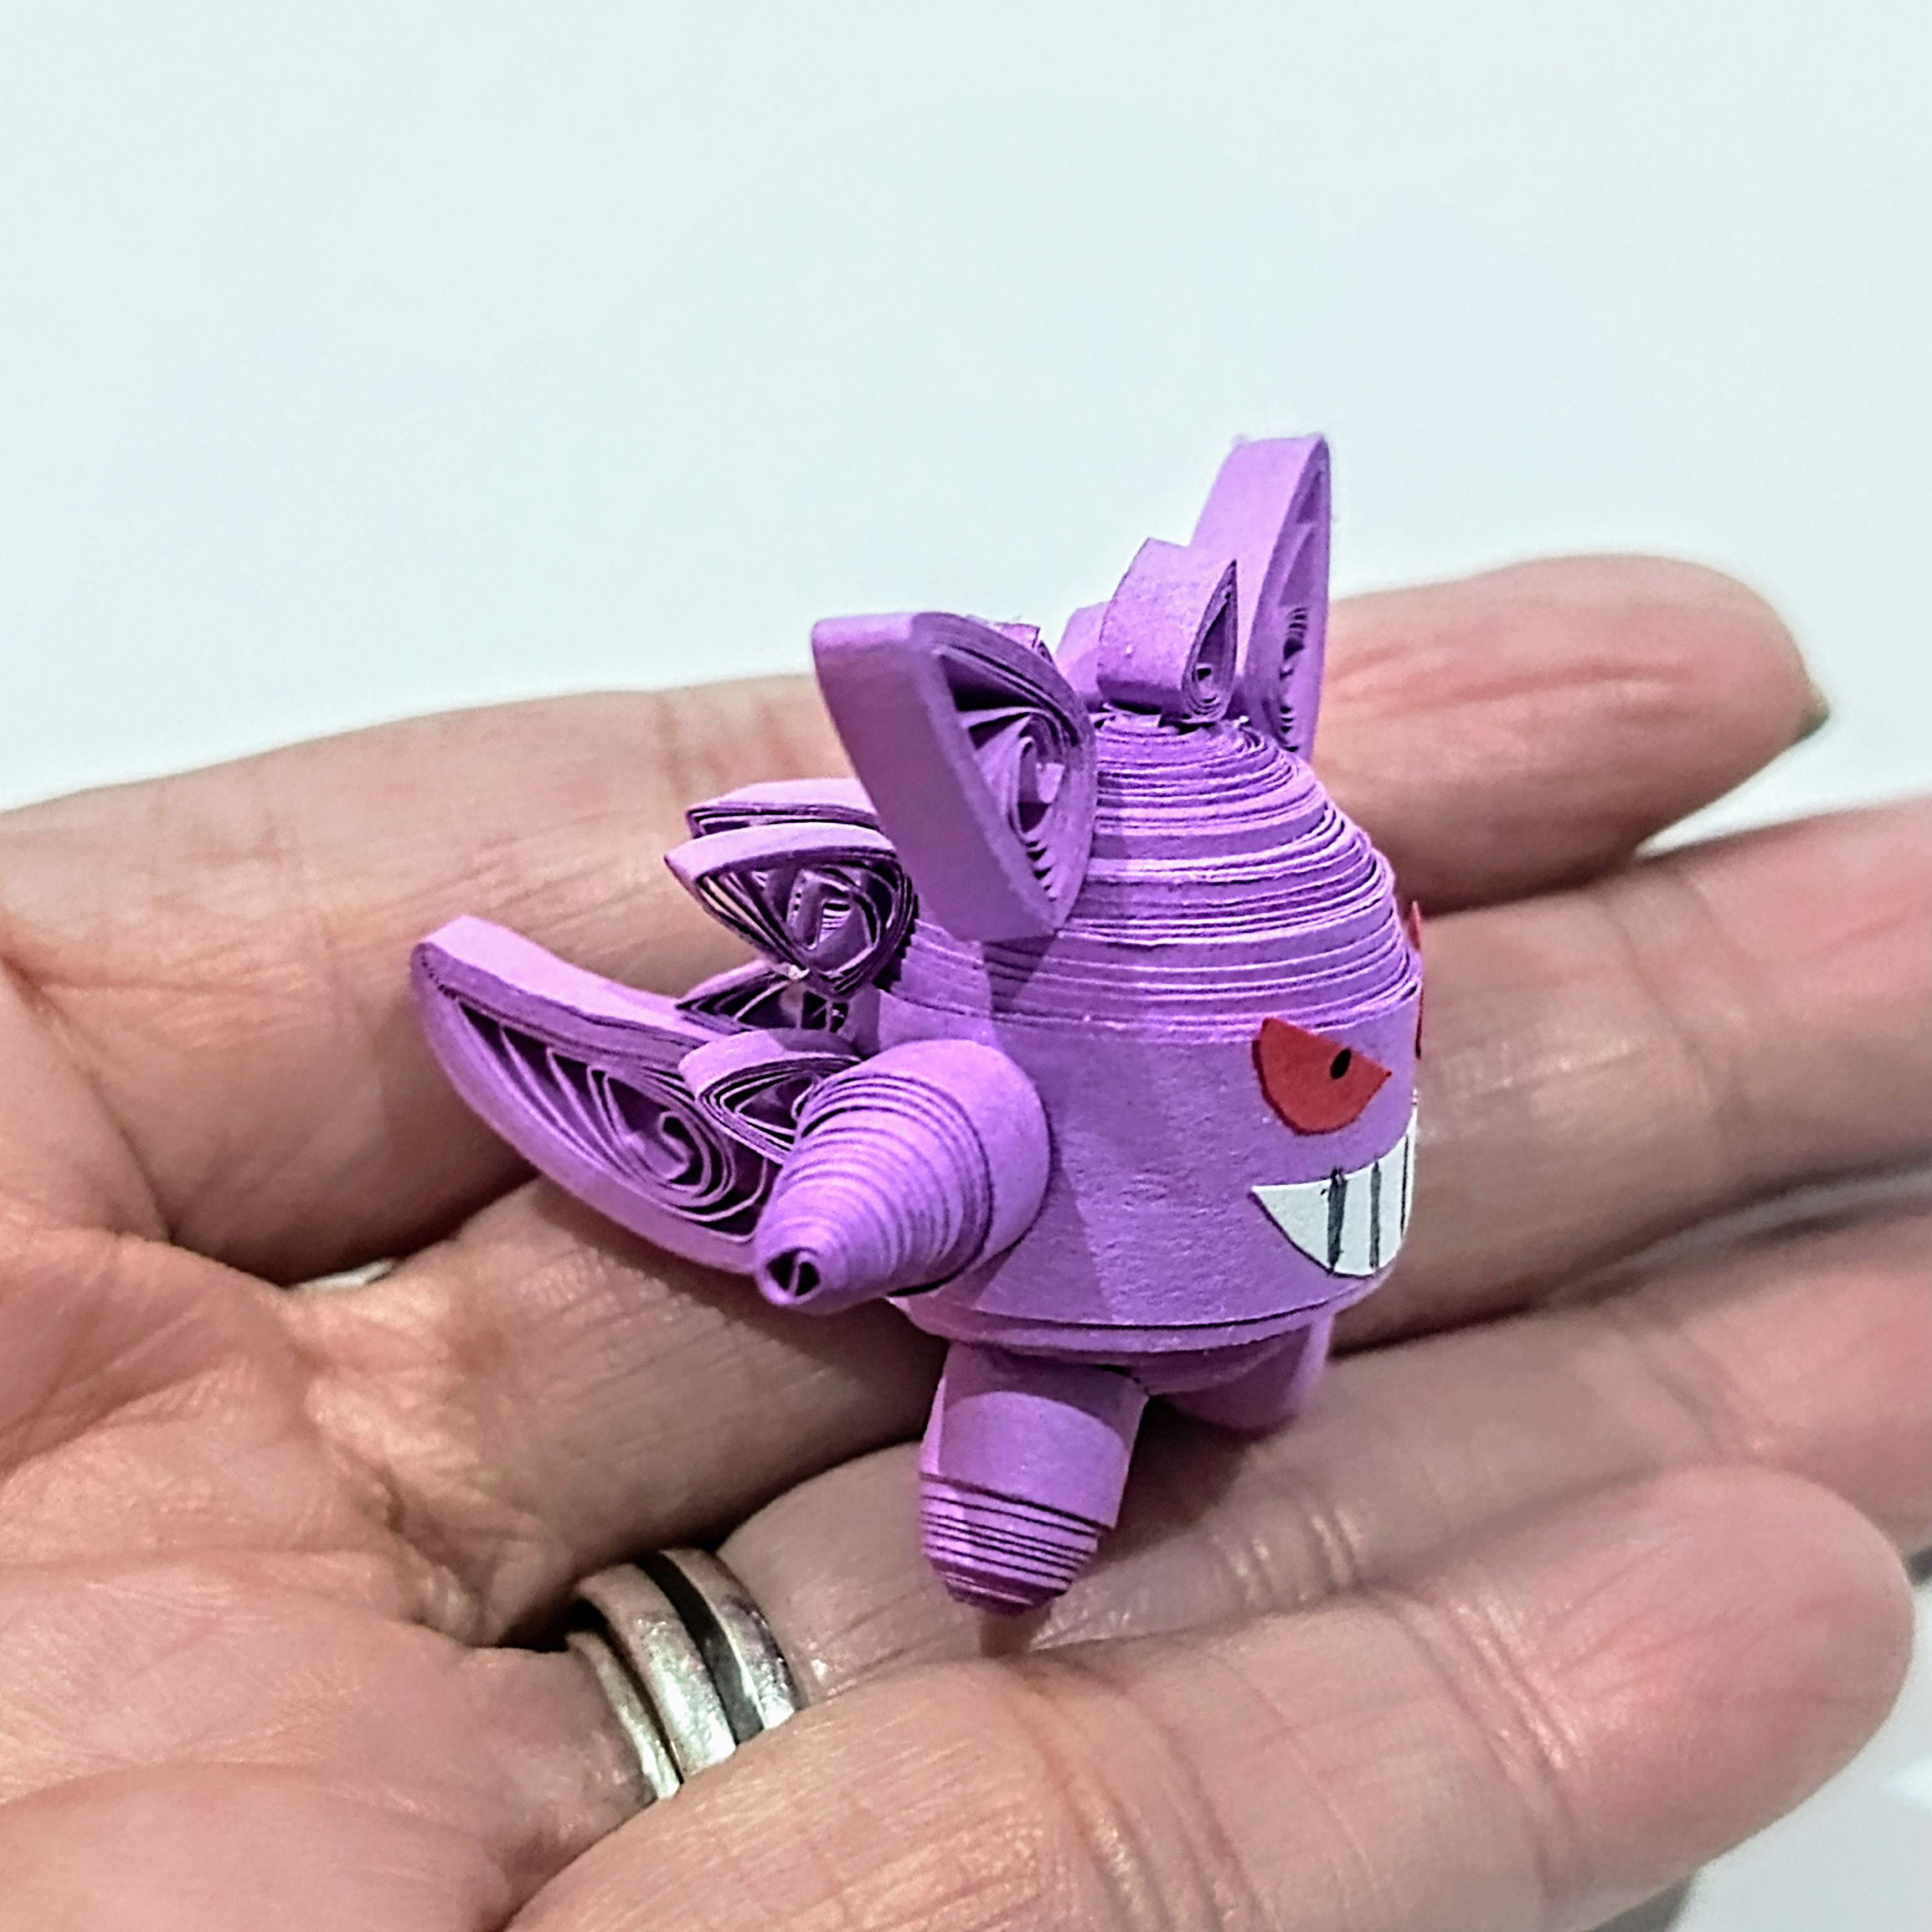
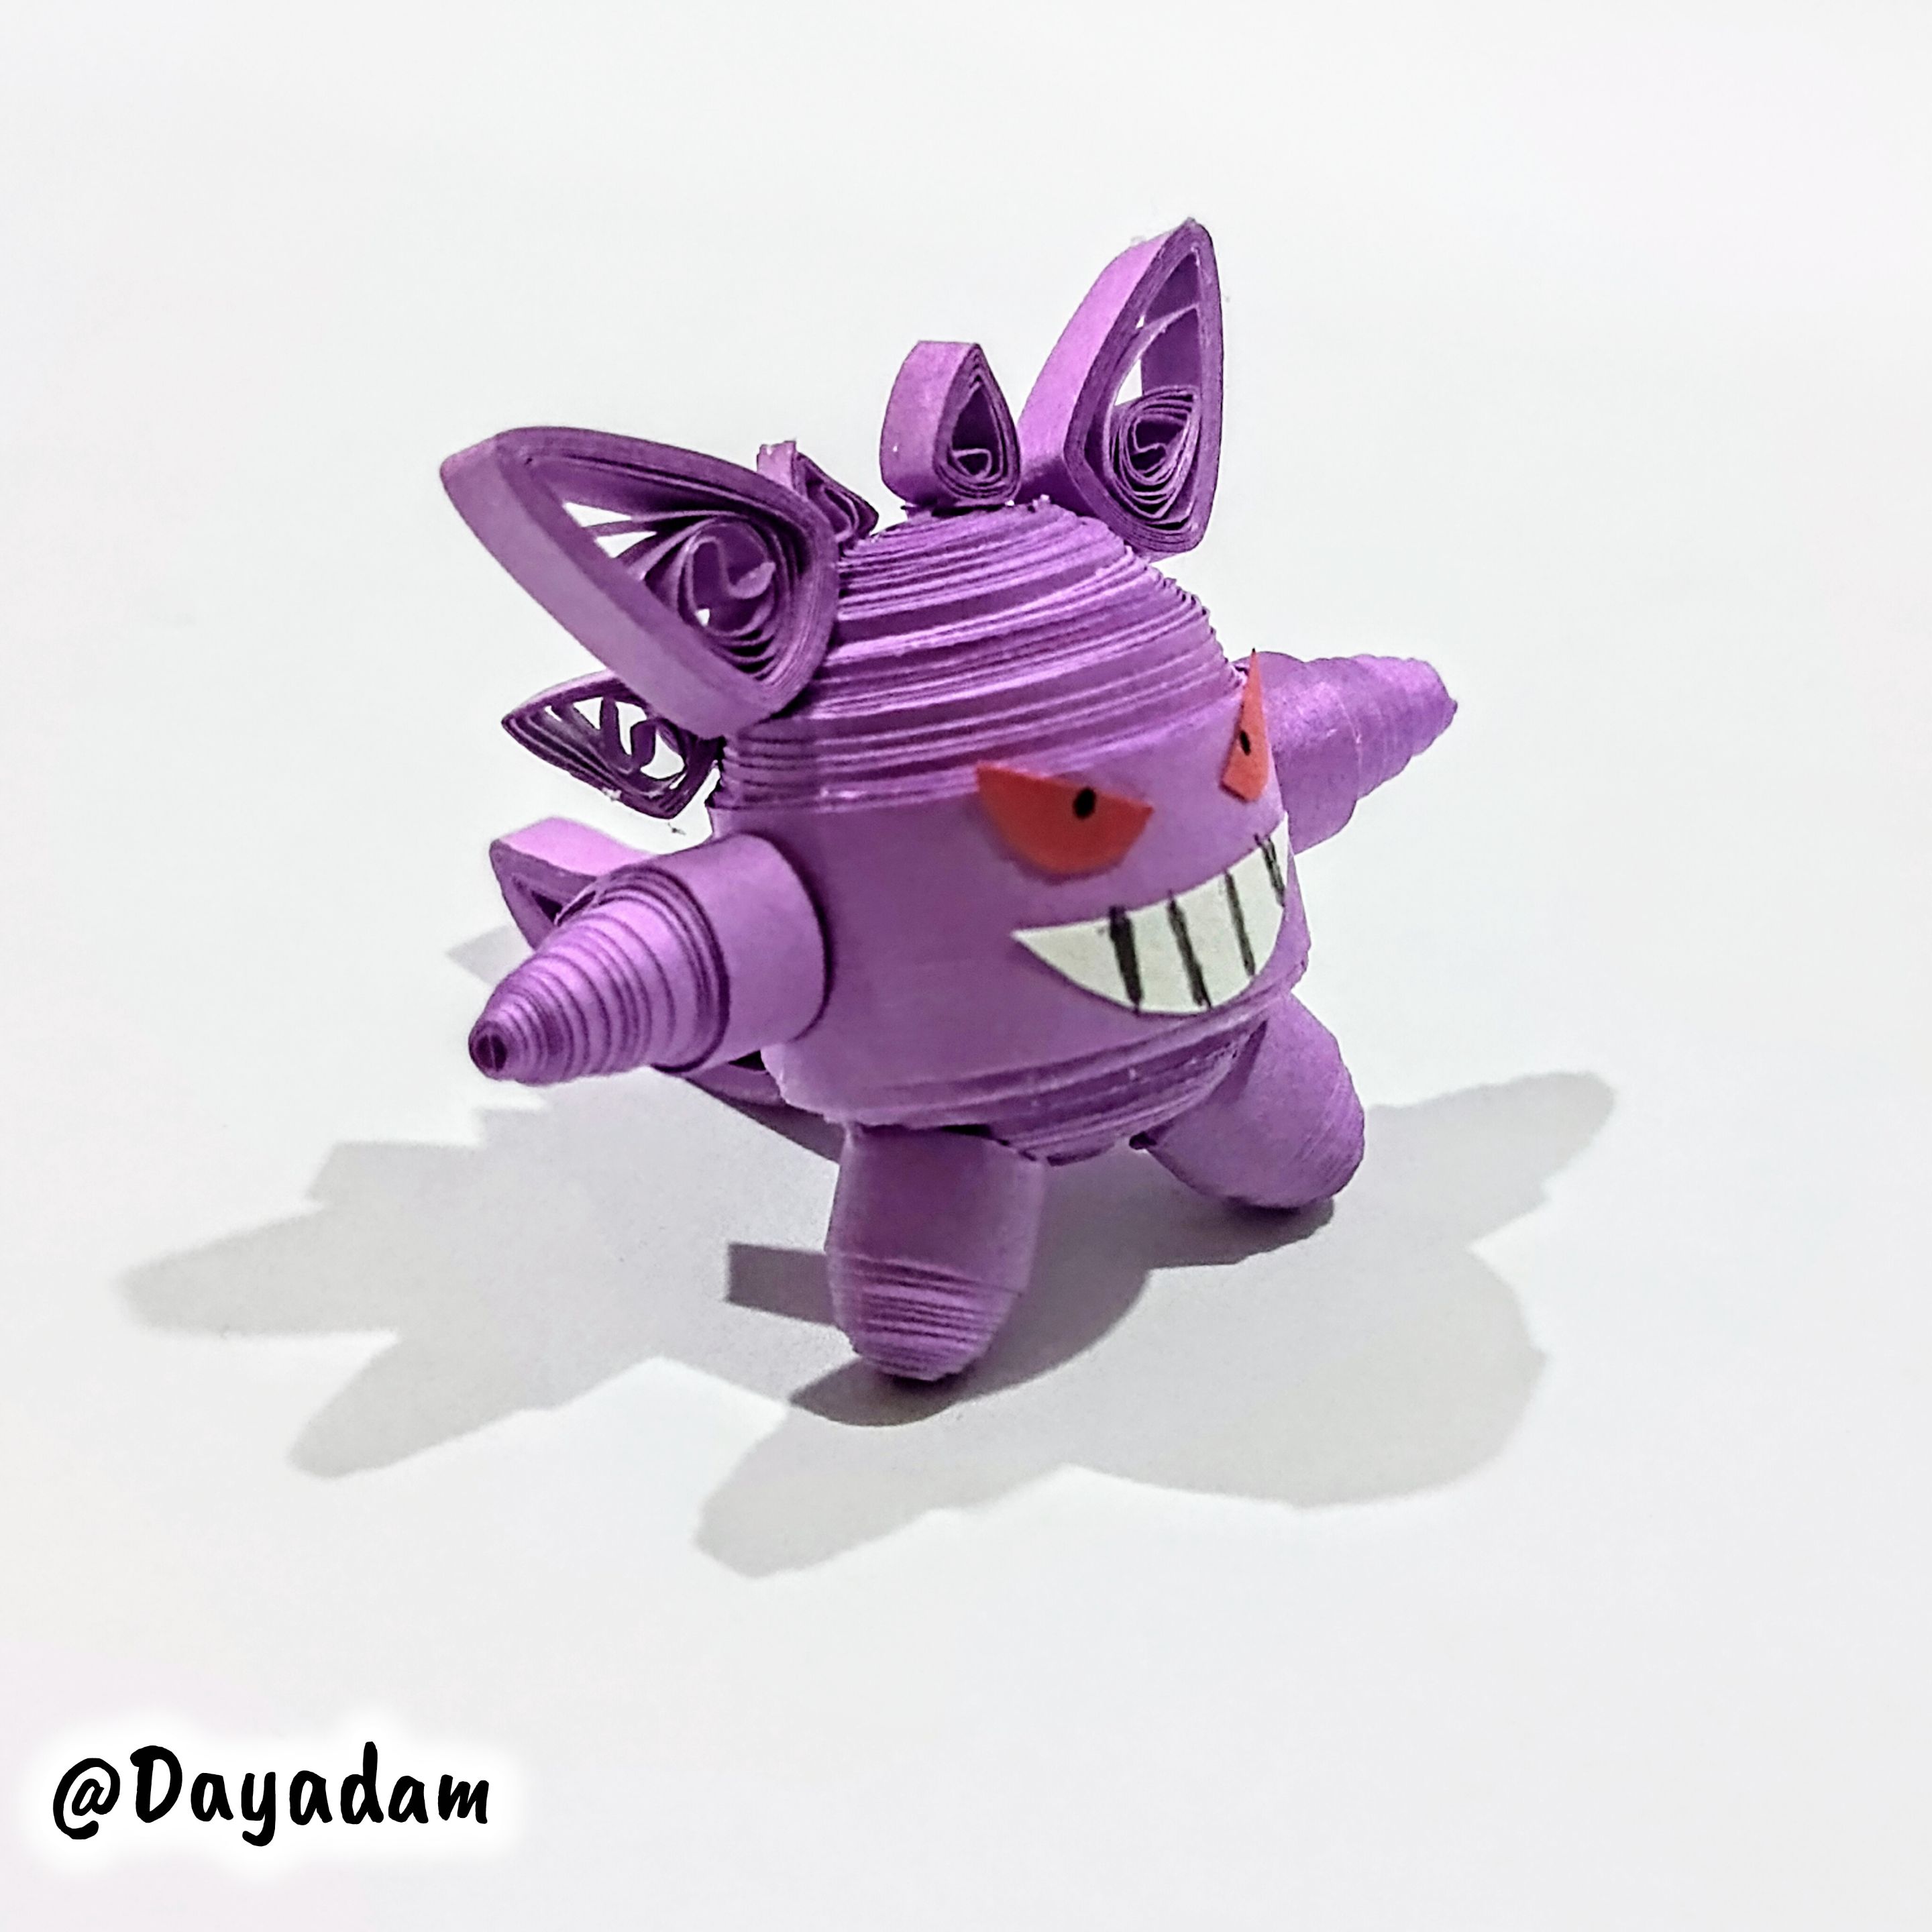
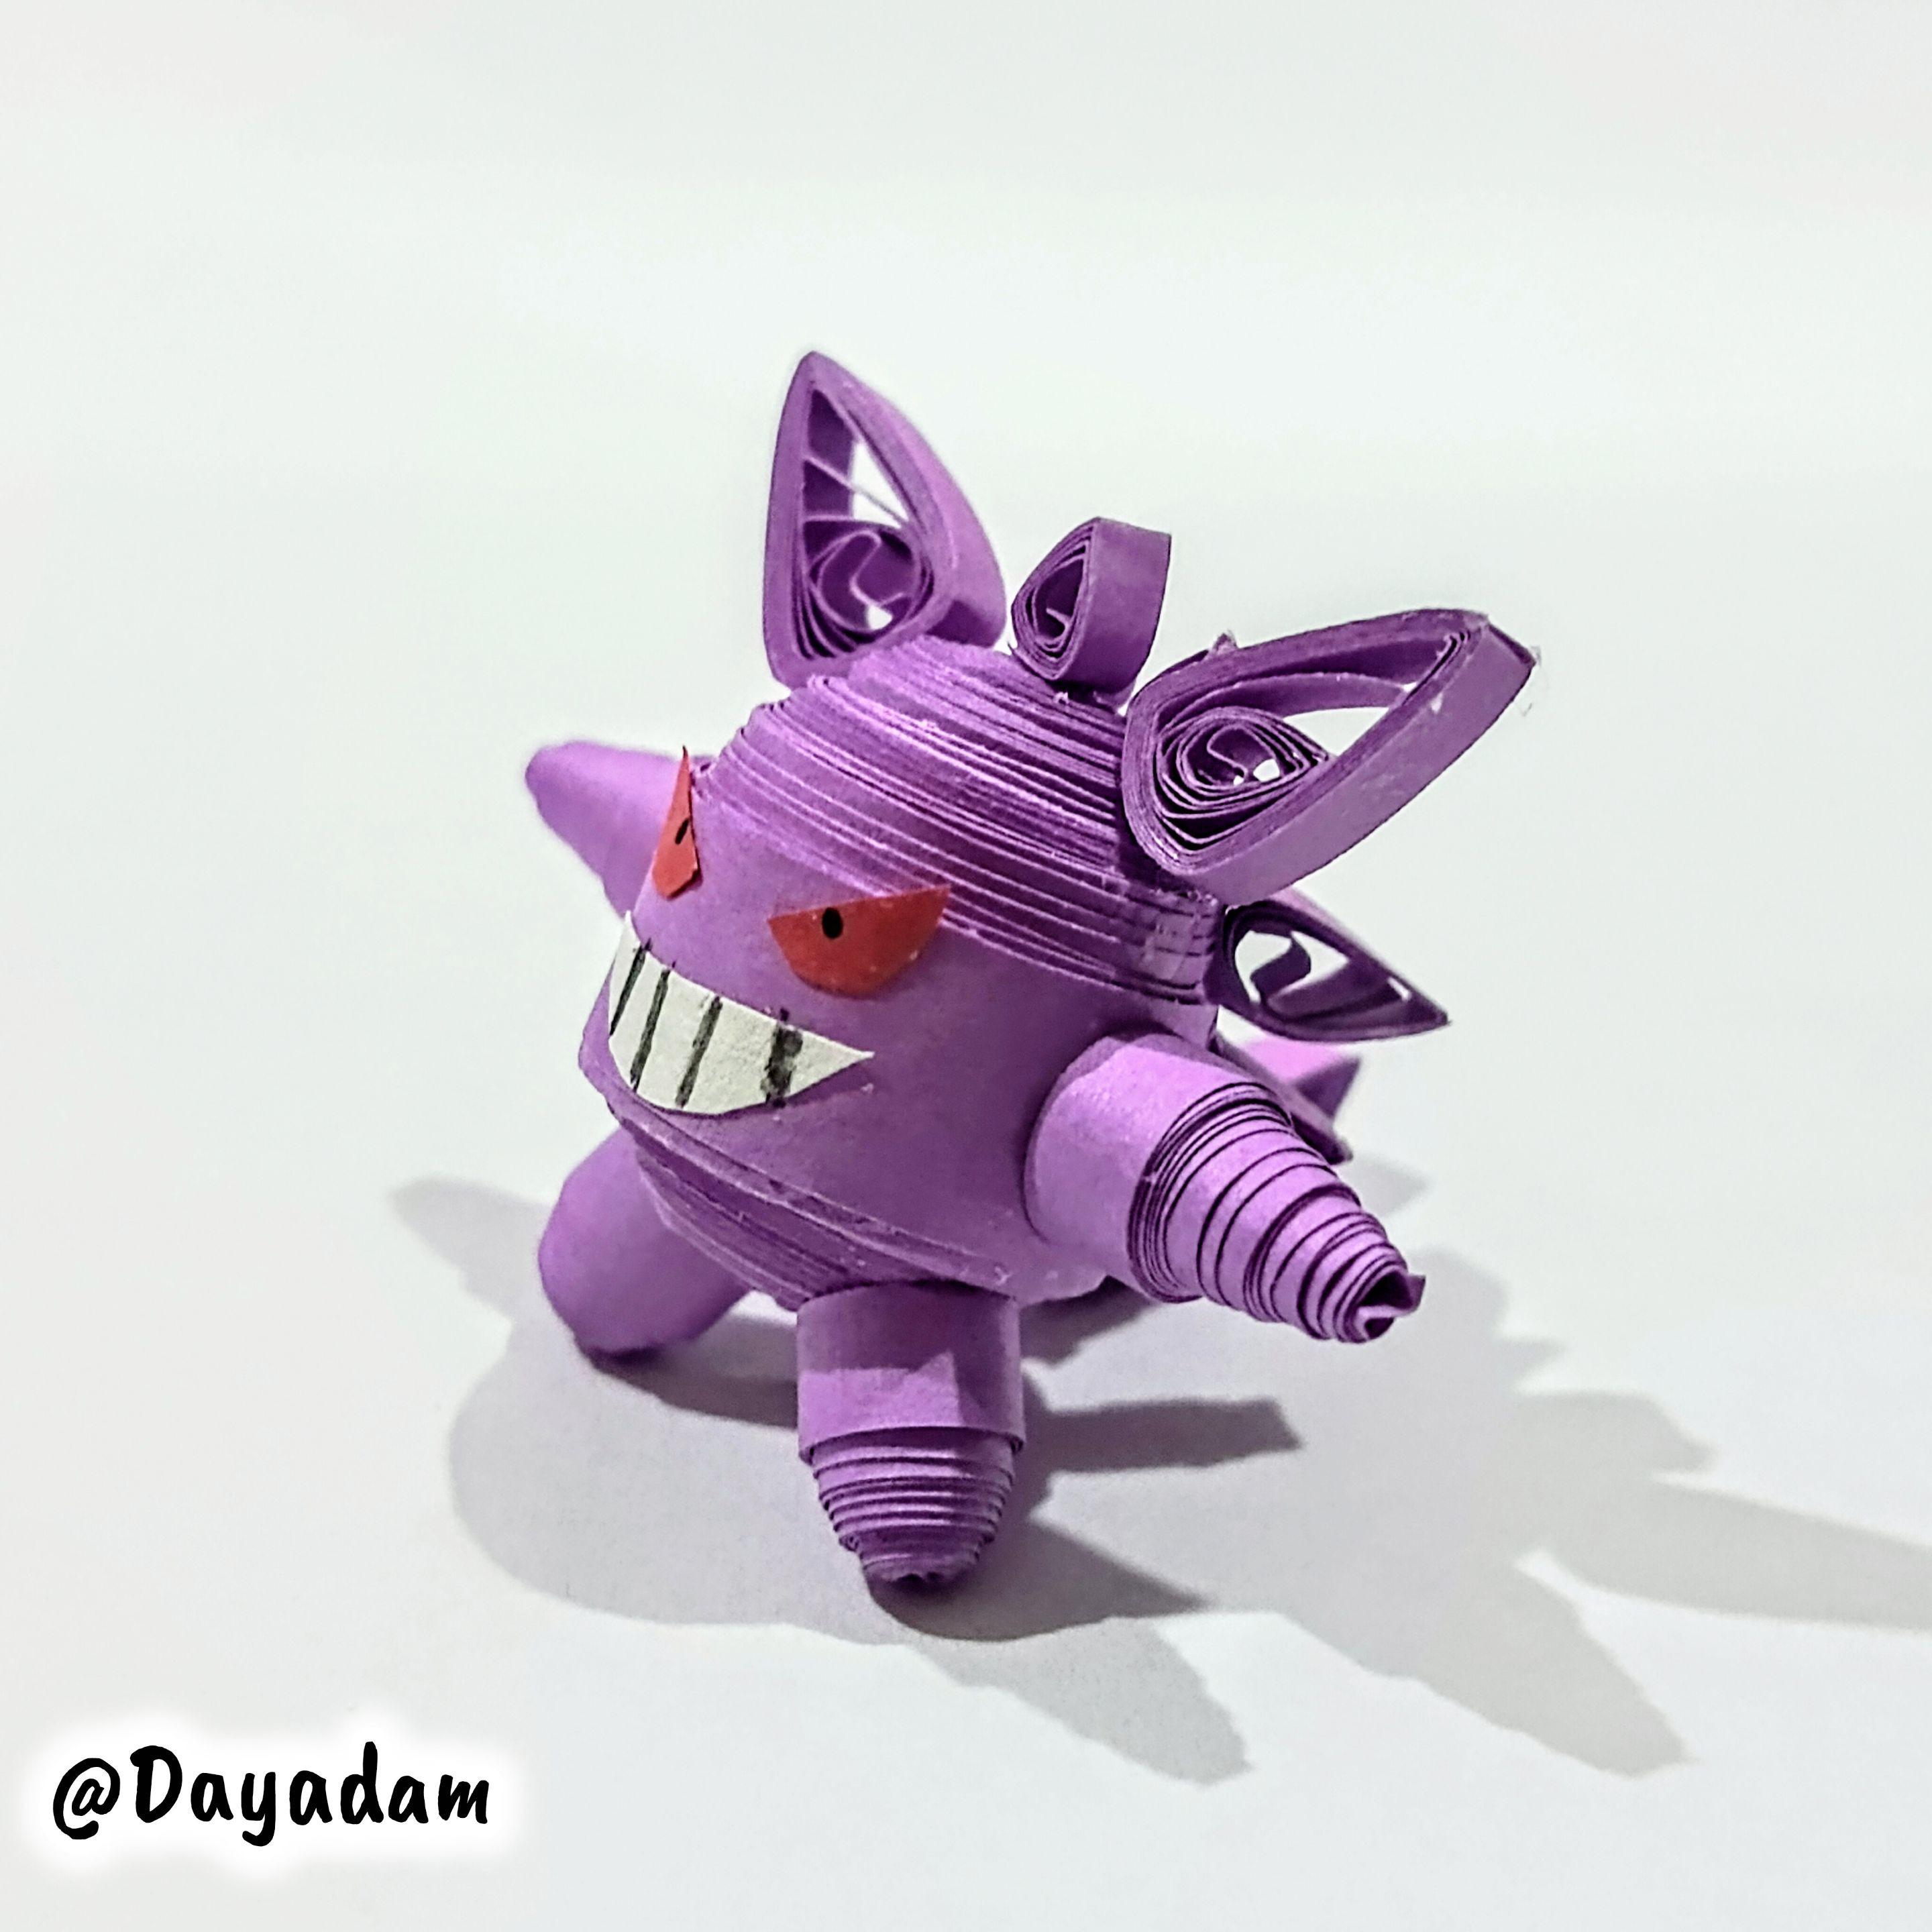
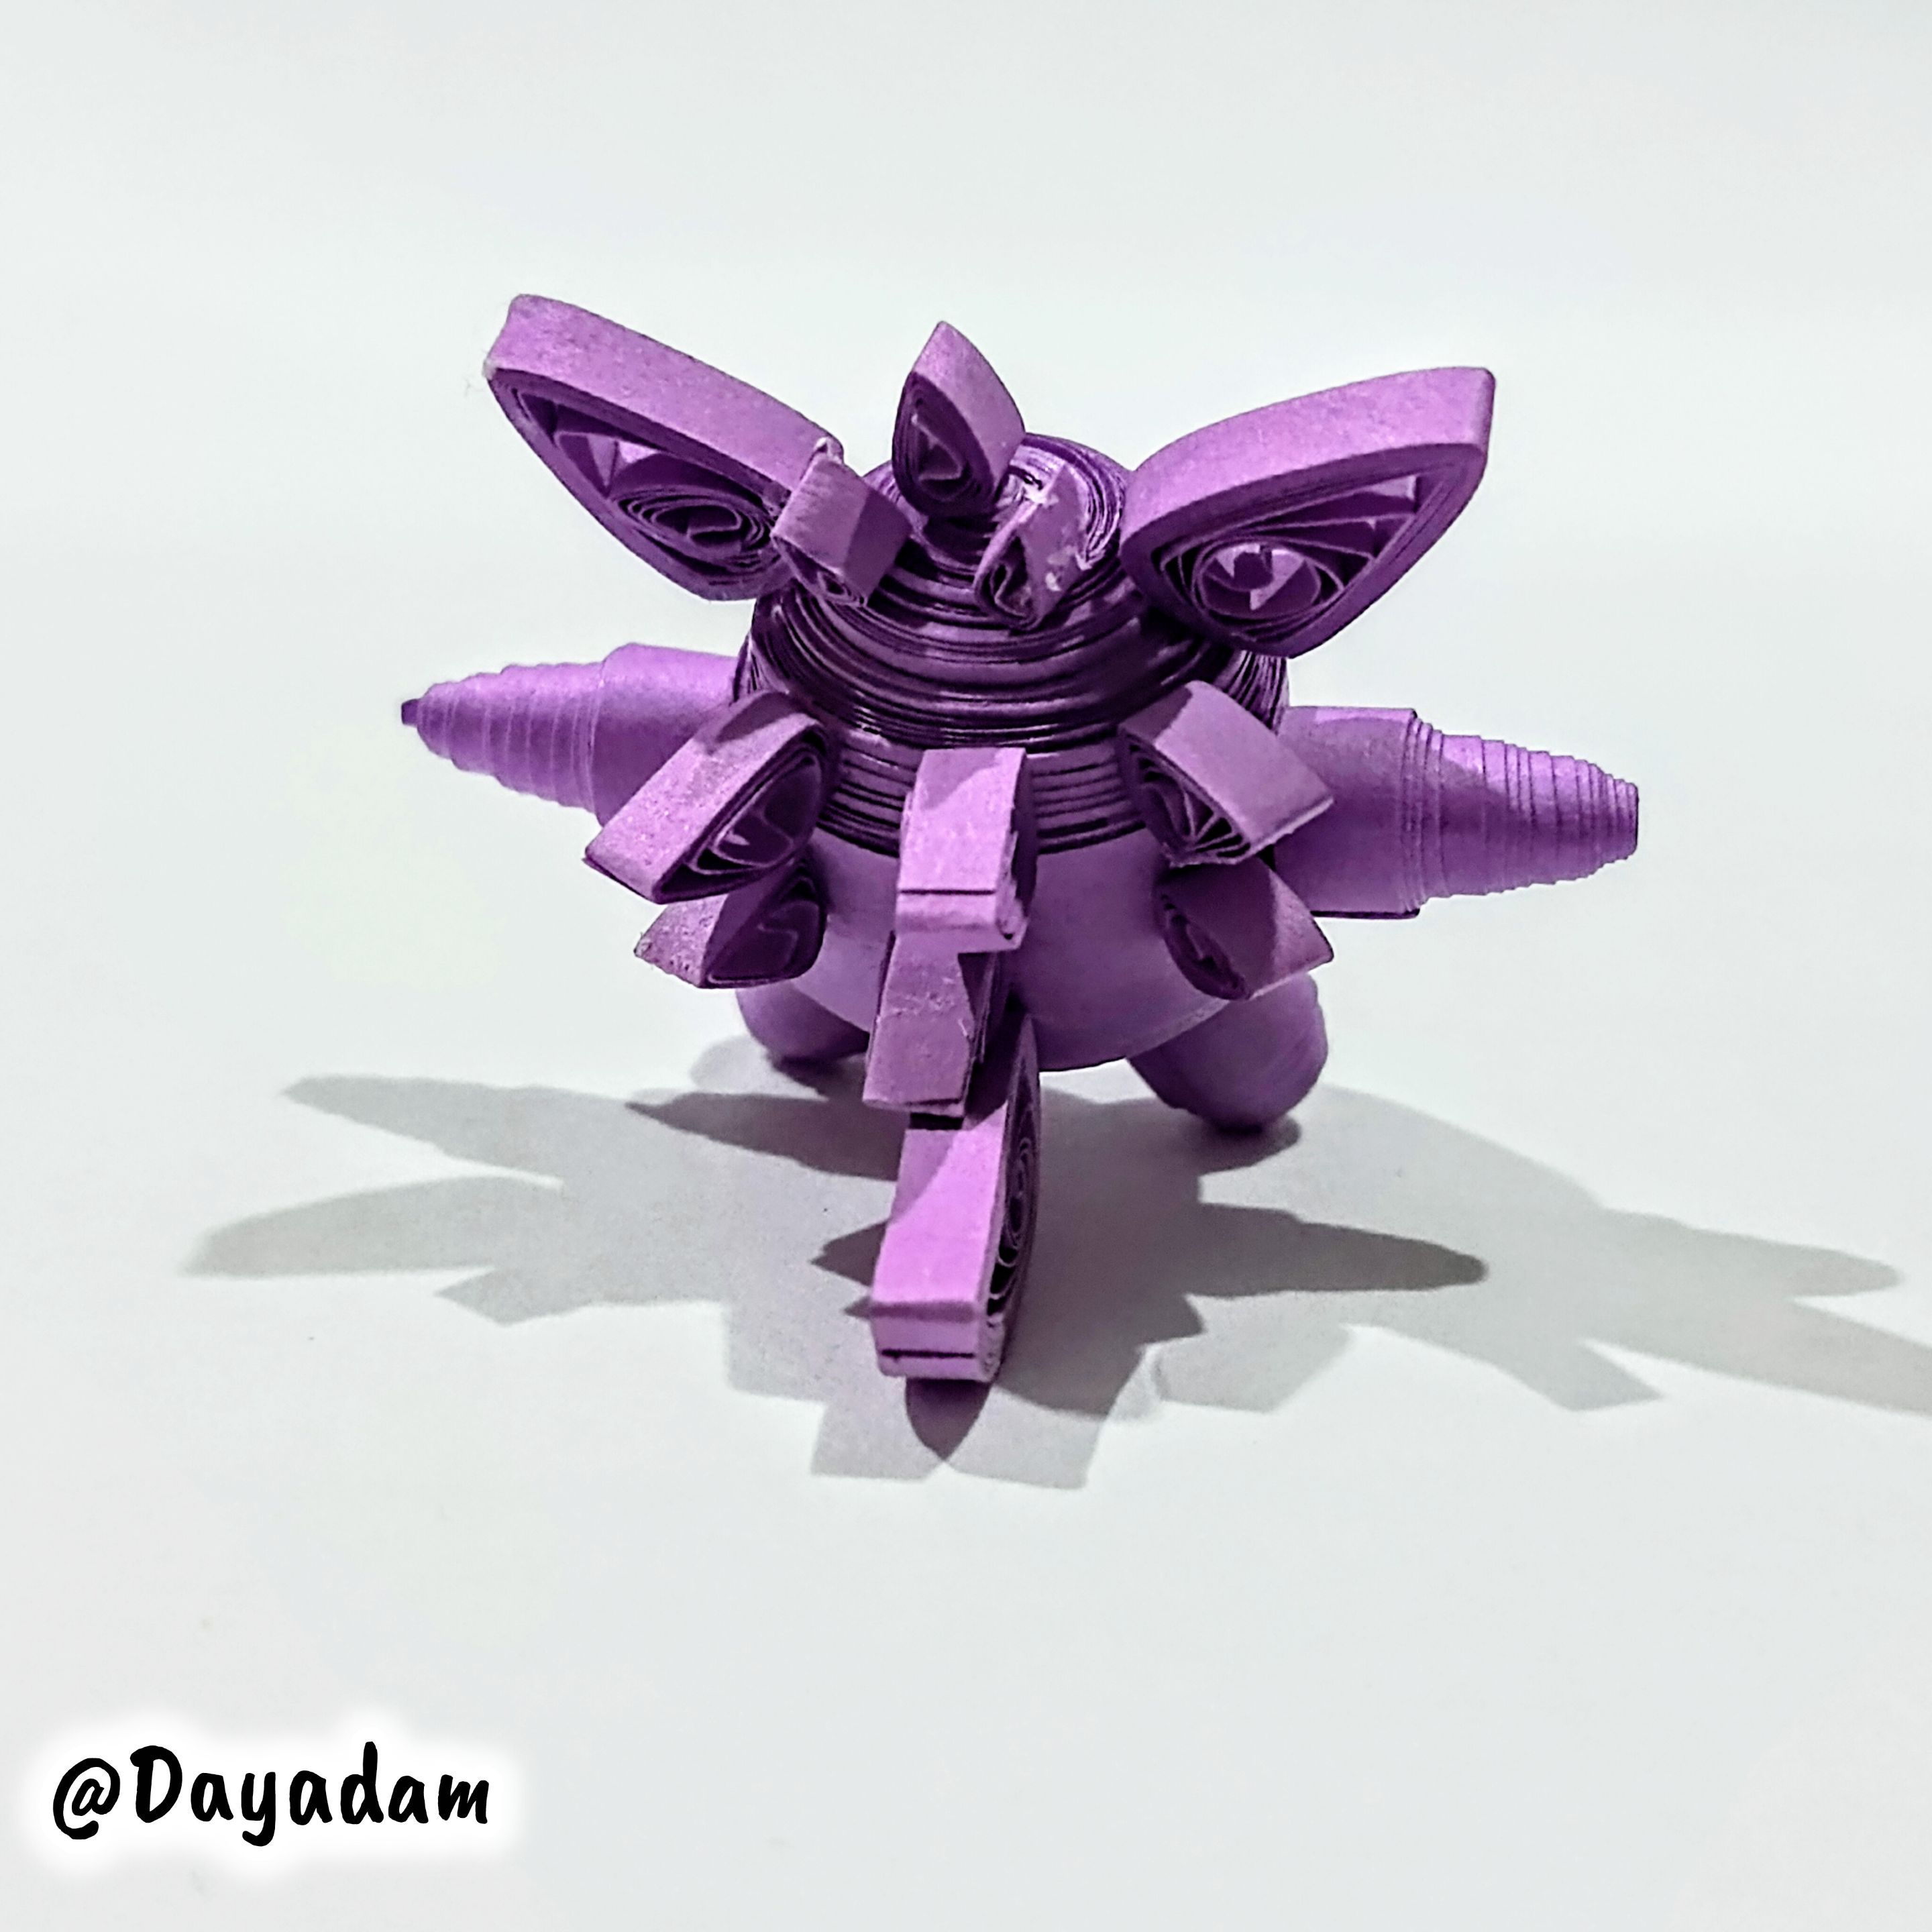
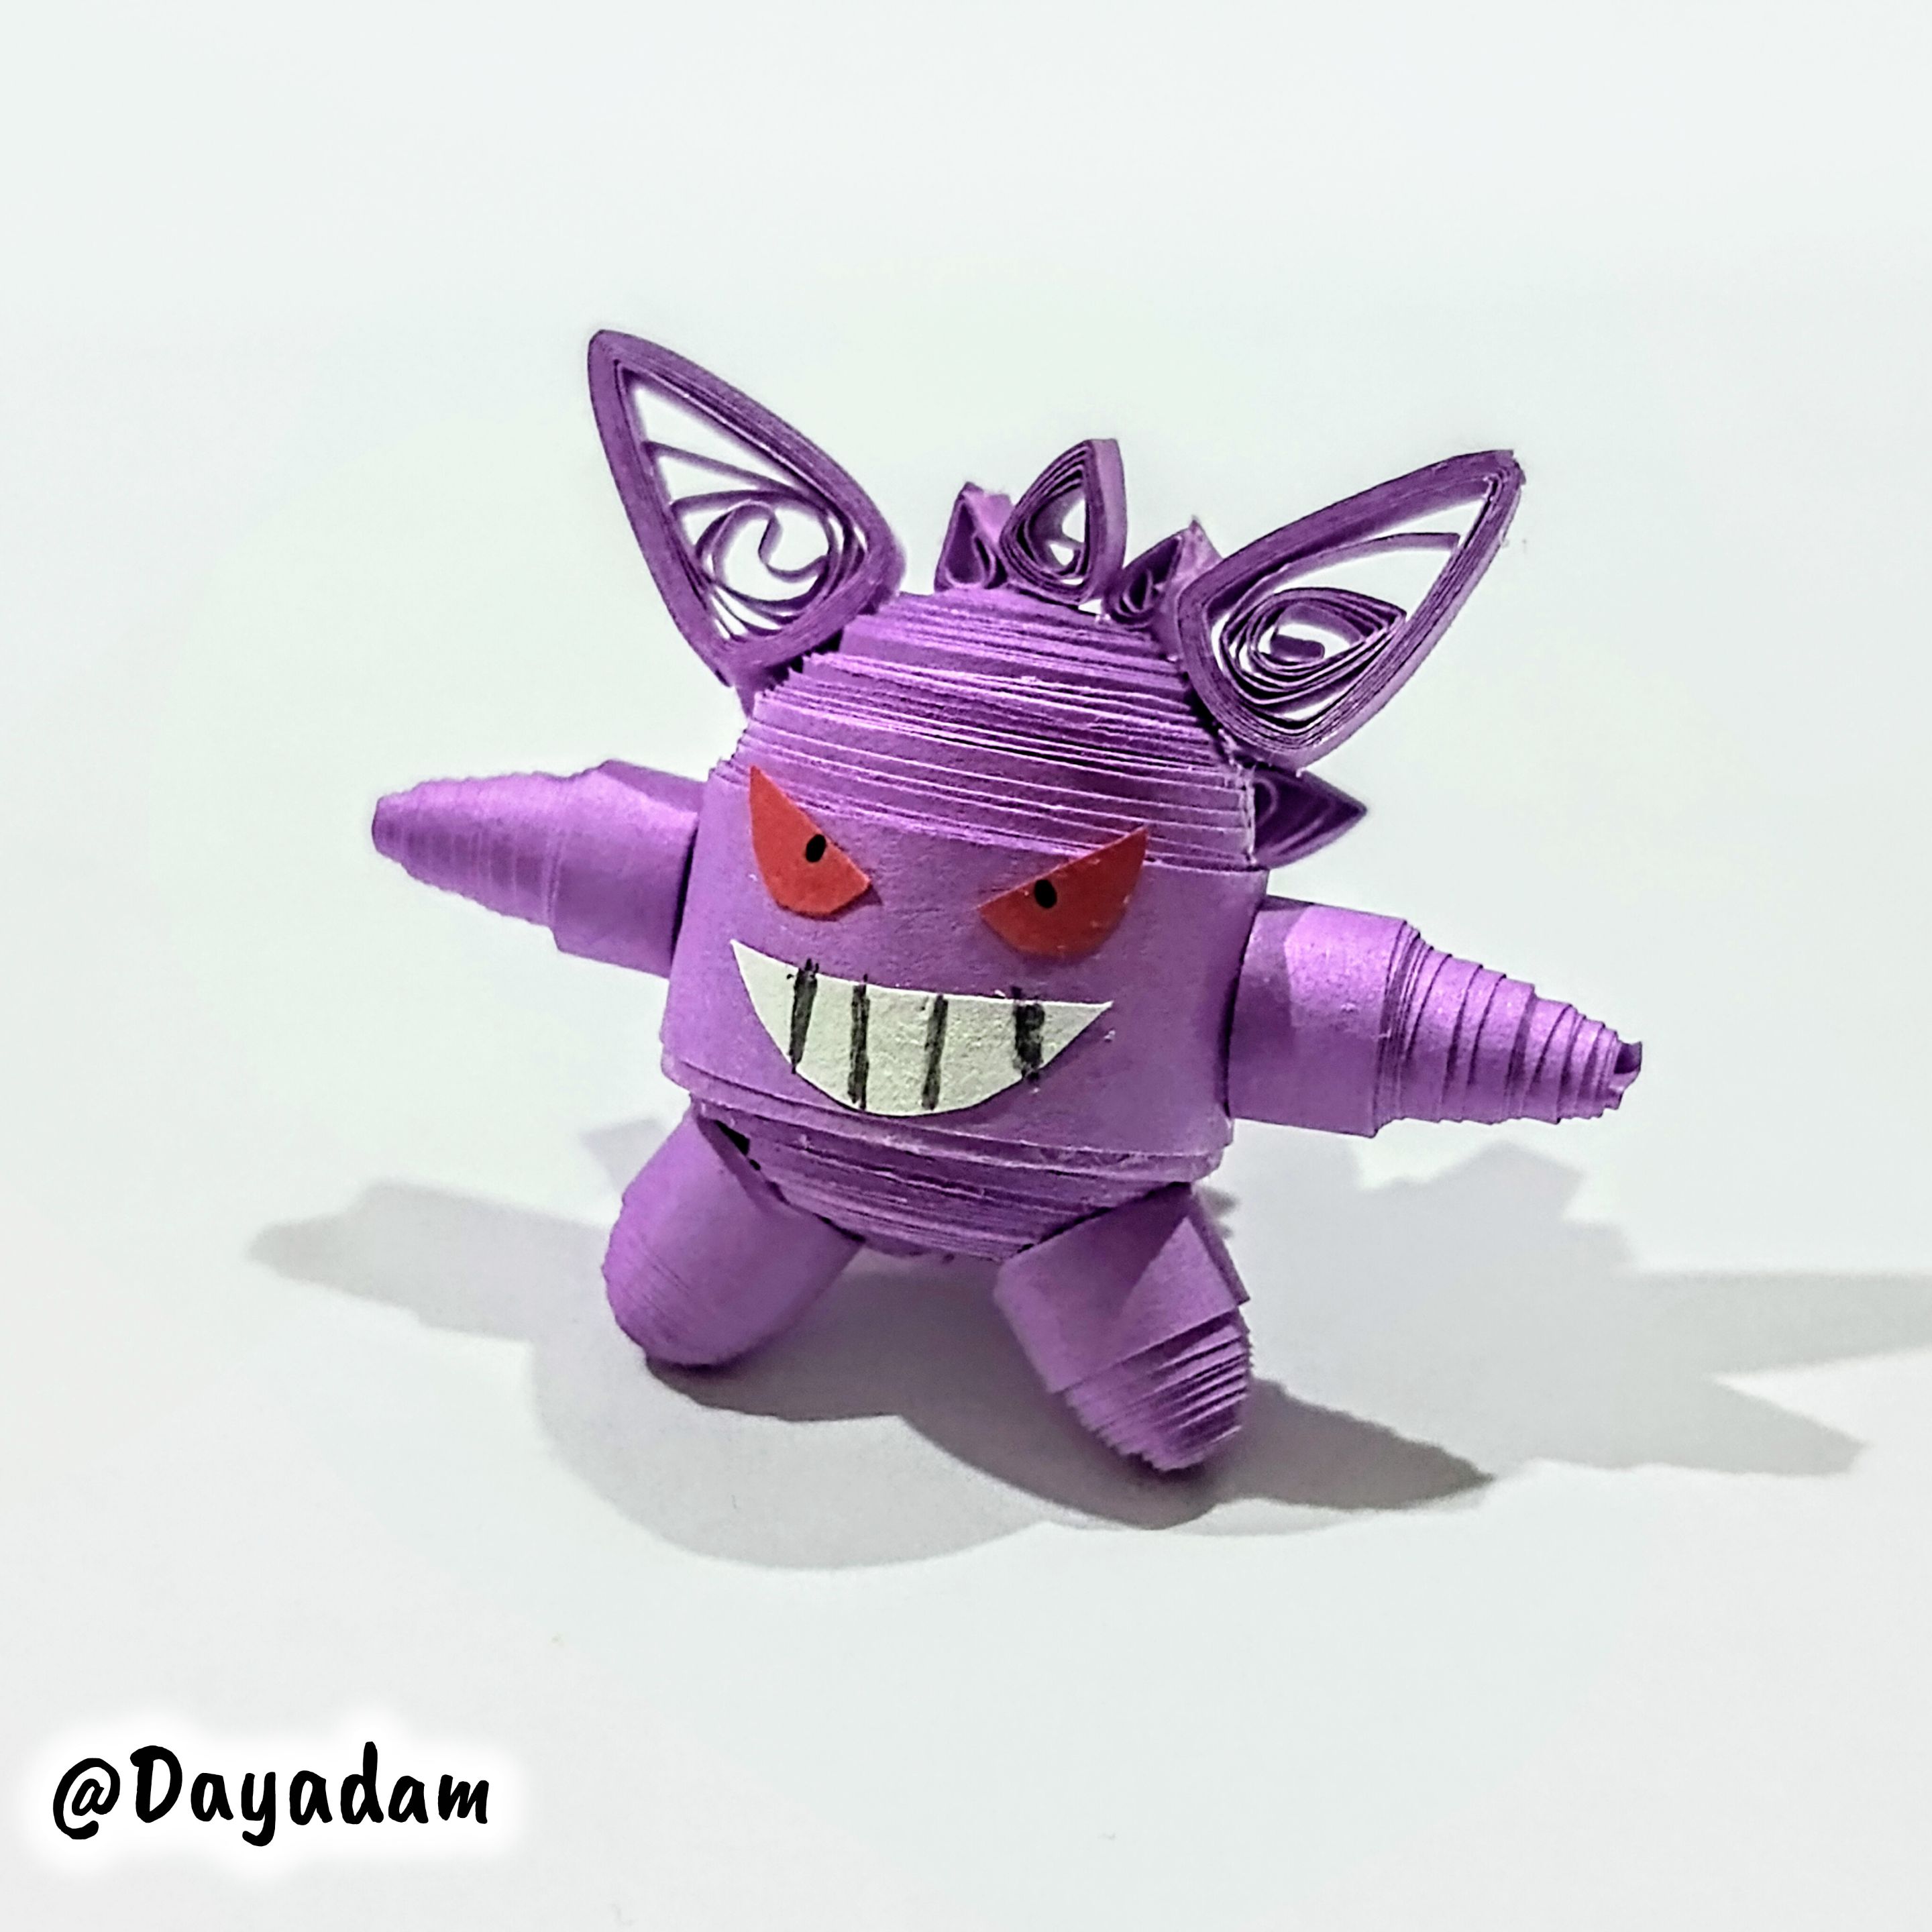
I have made several Pokémon on various occasions, and today I bring you another one: a 3D Gengar using the quilling technique.
I decided to do this because I noticed that more than one of the artists on Hive has done it in their technique, and one of them asked me to do one, so I did it in my own personal technique.
My friend @fixie, I hope it meets your expectations and you like it ☺️
Hoping you like it, I leave you my creative process:
Let's get started:😃

Hola a Todos...✨
Hola a mis queridos Hivers y a la querida comunidad de artistas Diyhub, como siempre muy complacida y emocionada de encontrarme por acá, mostrándole mi trabajo hecho con mucho amor y especialmente para ustedes.
En varias oportunidades he realizado algunos Pokémon, para hoy les traigo uno más, un Gengar en 3D en la técnica de quilling.
Decidí realizar este ya que he observado que más de uno de los artistas de Hive lo ha realizado en su técnica, adicionalmente uno de ellos me pidió realizar uno, así que lo hice en mi técnica personal.
Amigo @fixie, espero cumpla con tus expectativas y te guste ☺️
Esperando que sea de su agrado, les dejo mi proceso creativo:
Comencemos:😃
 |
 |
|


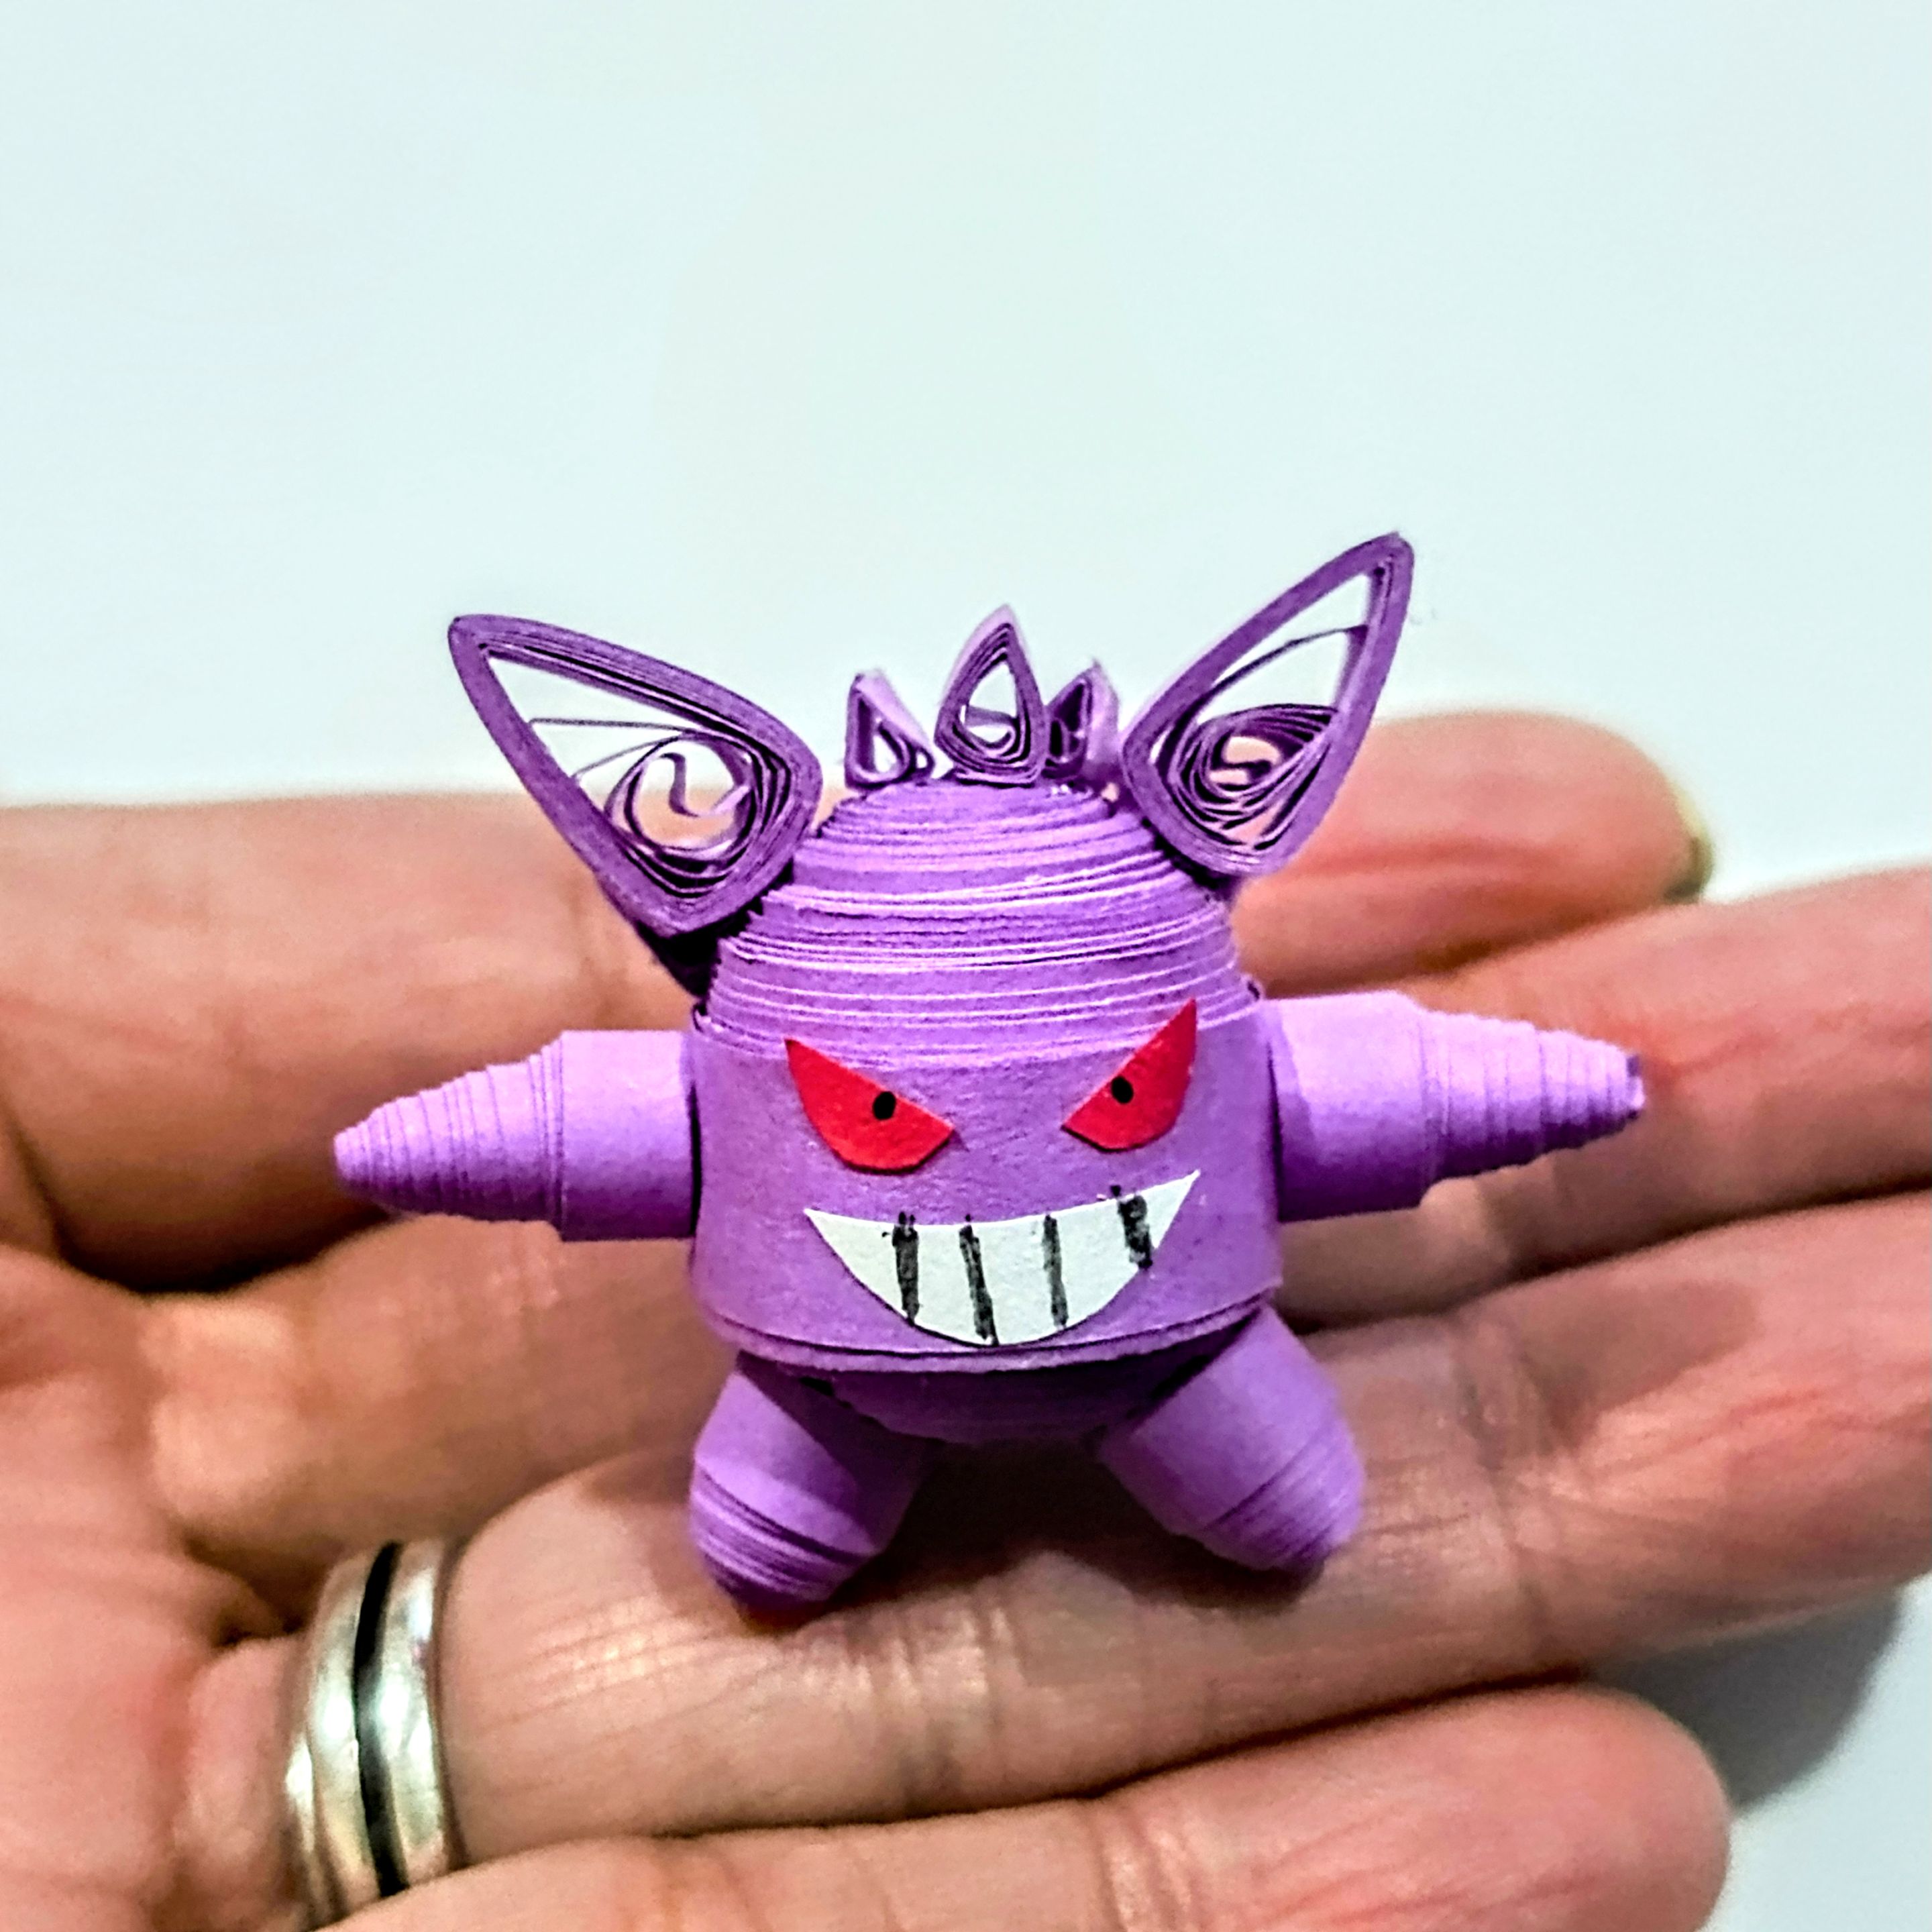
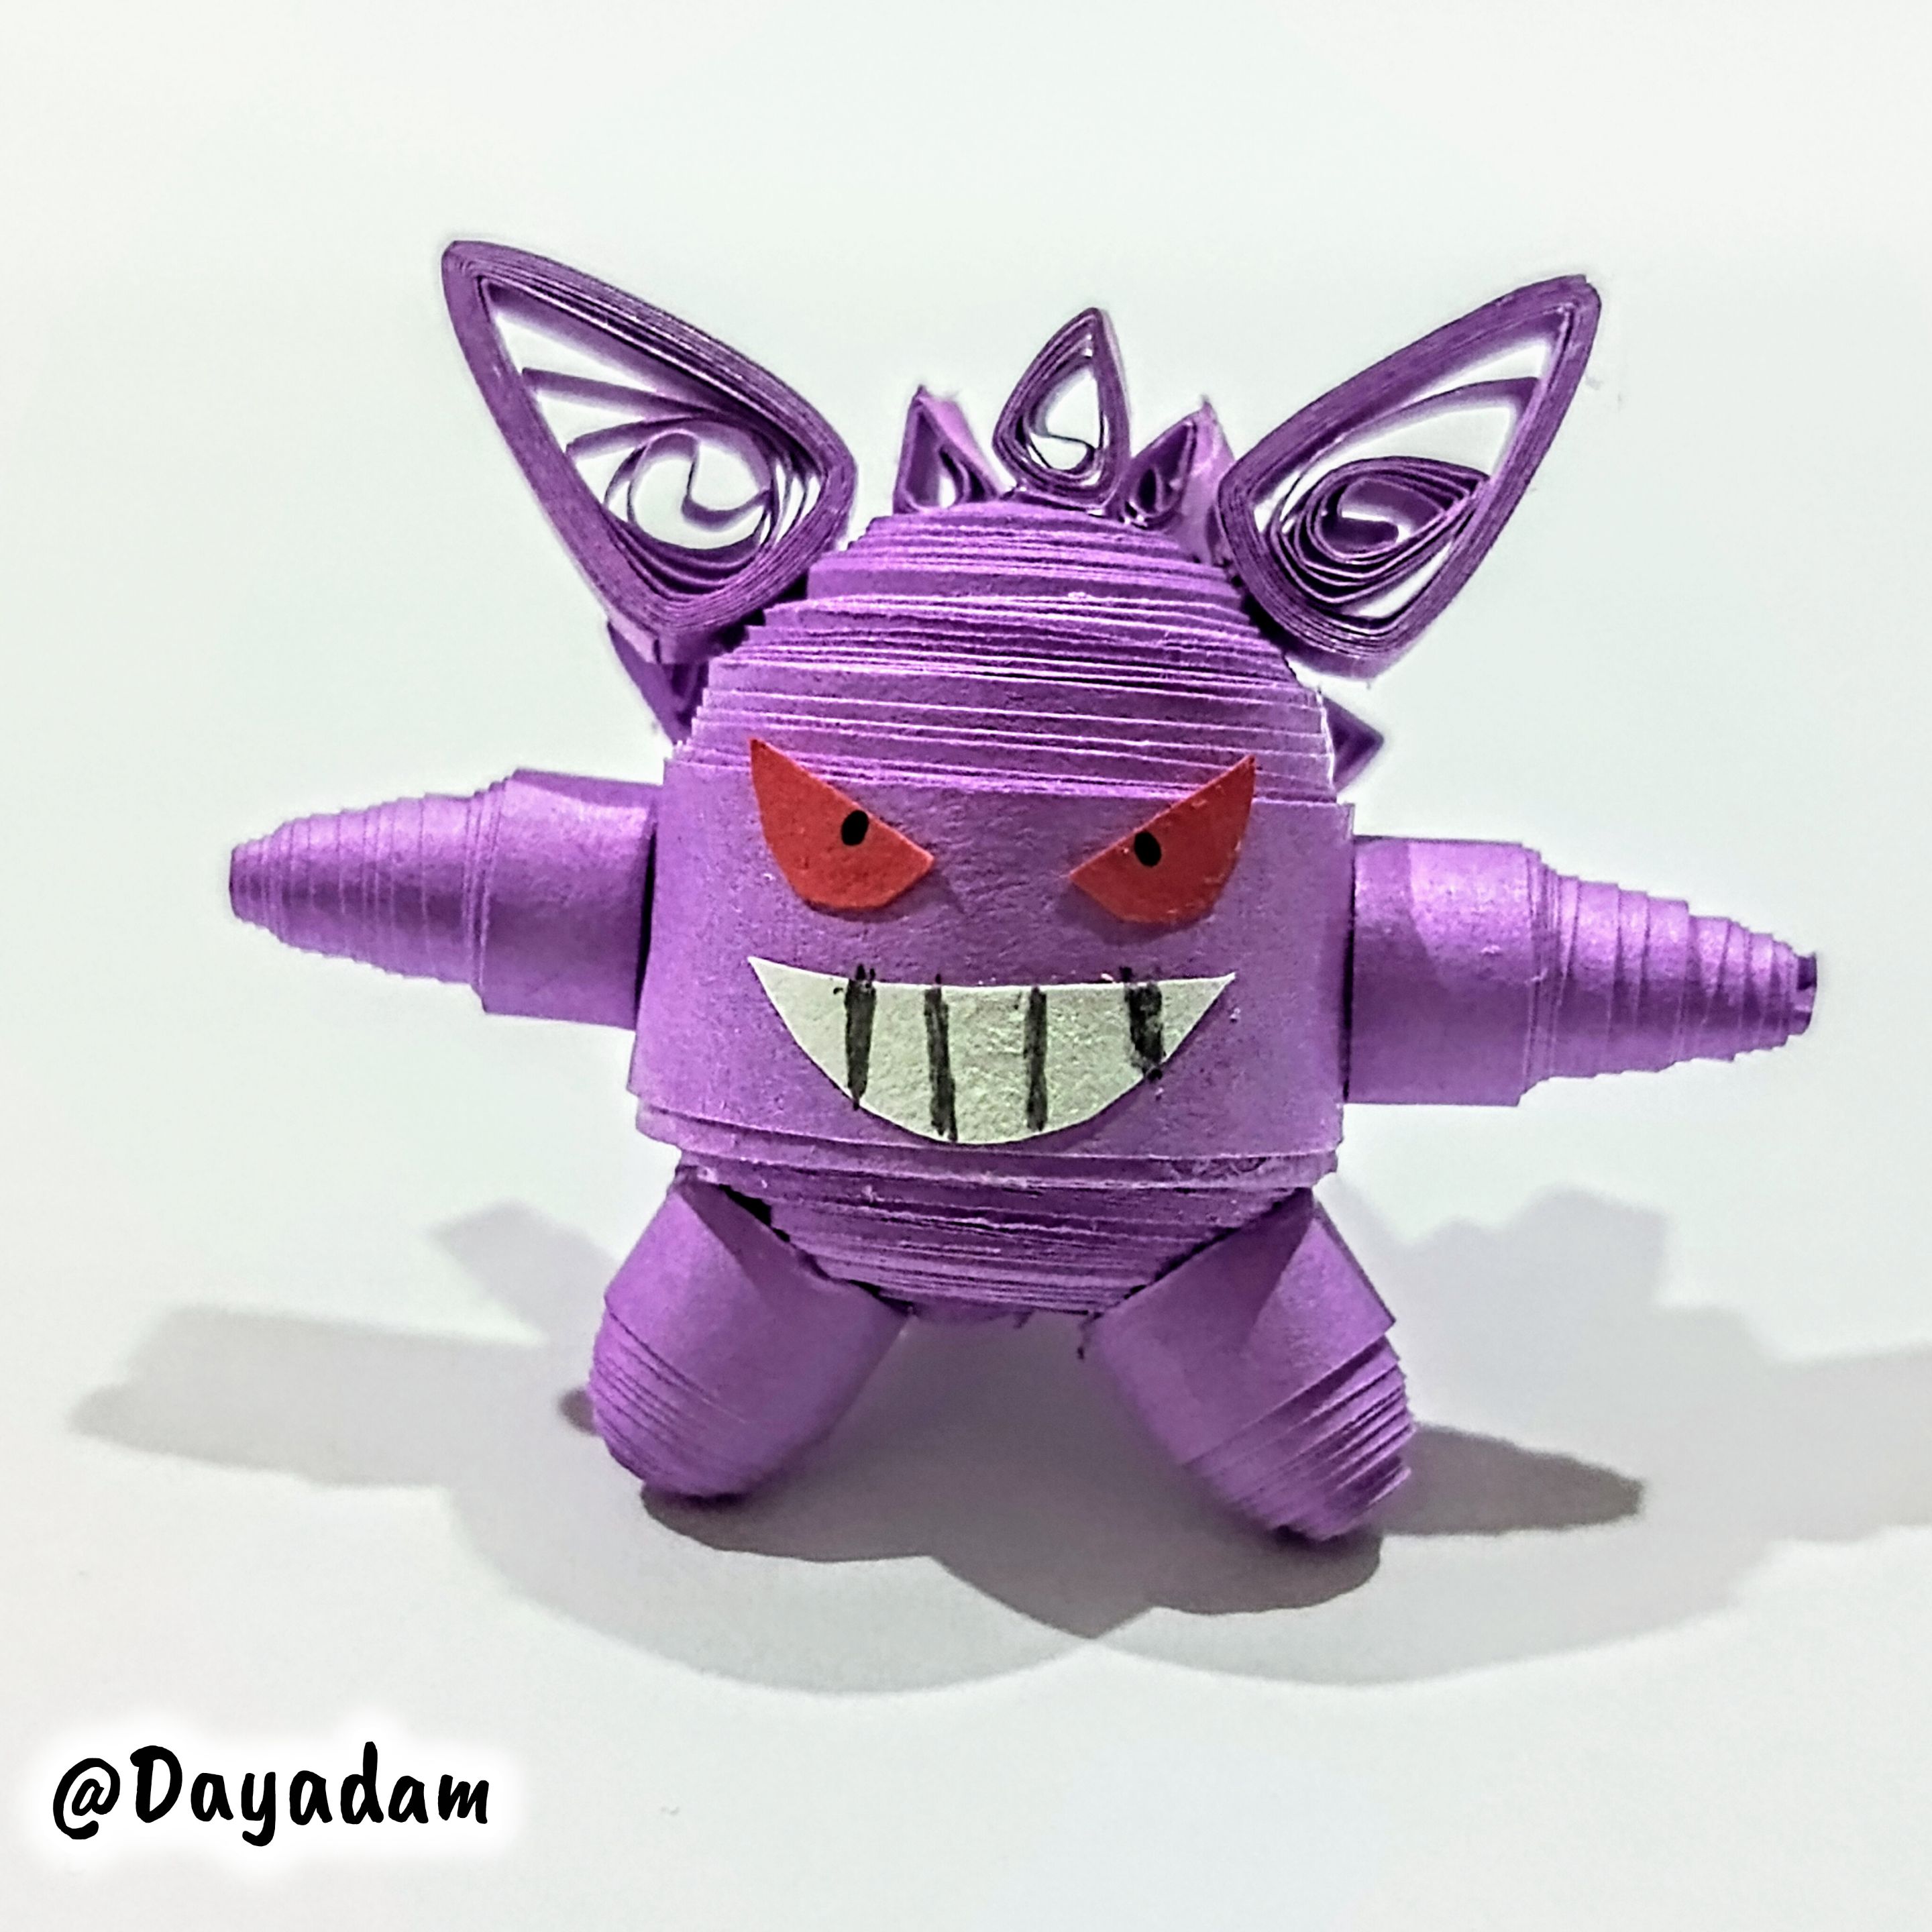
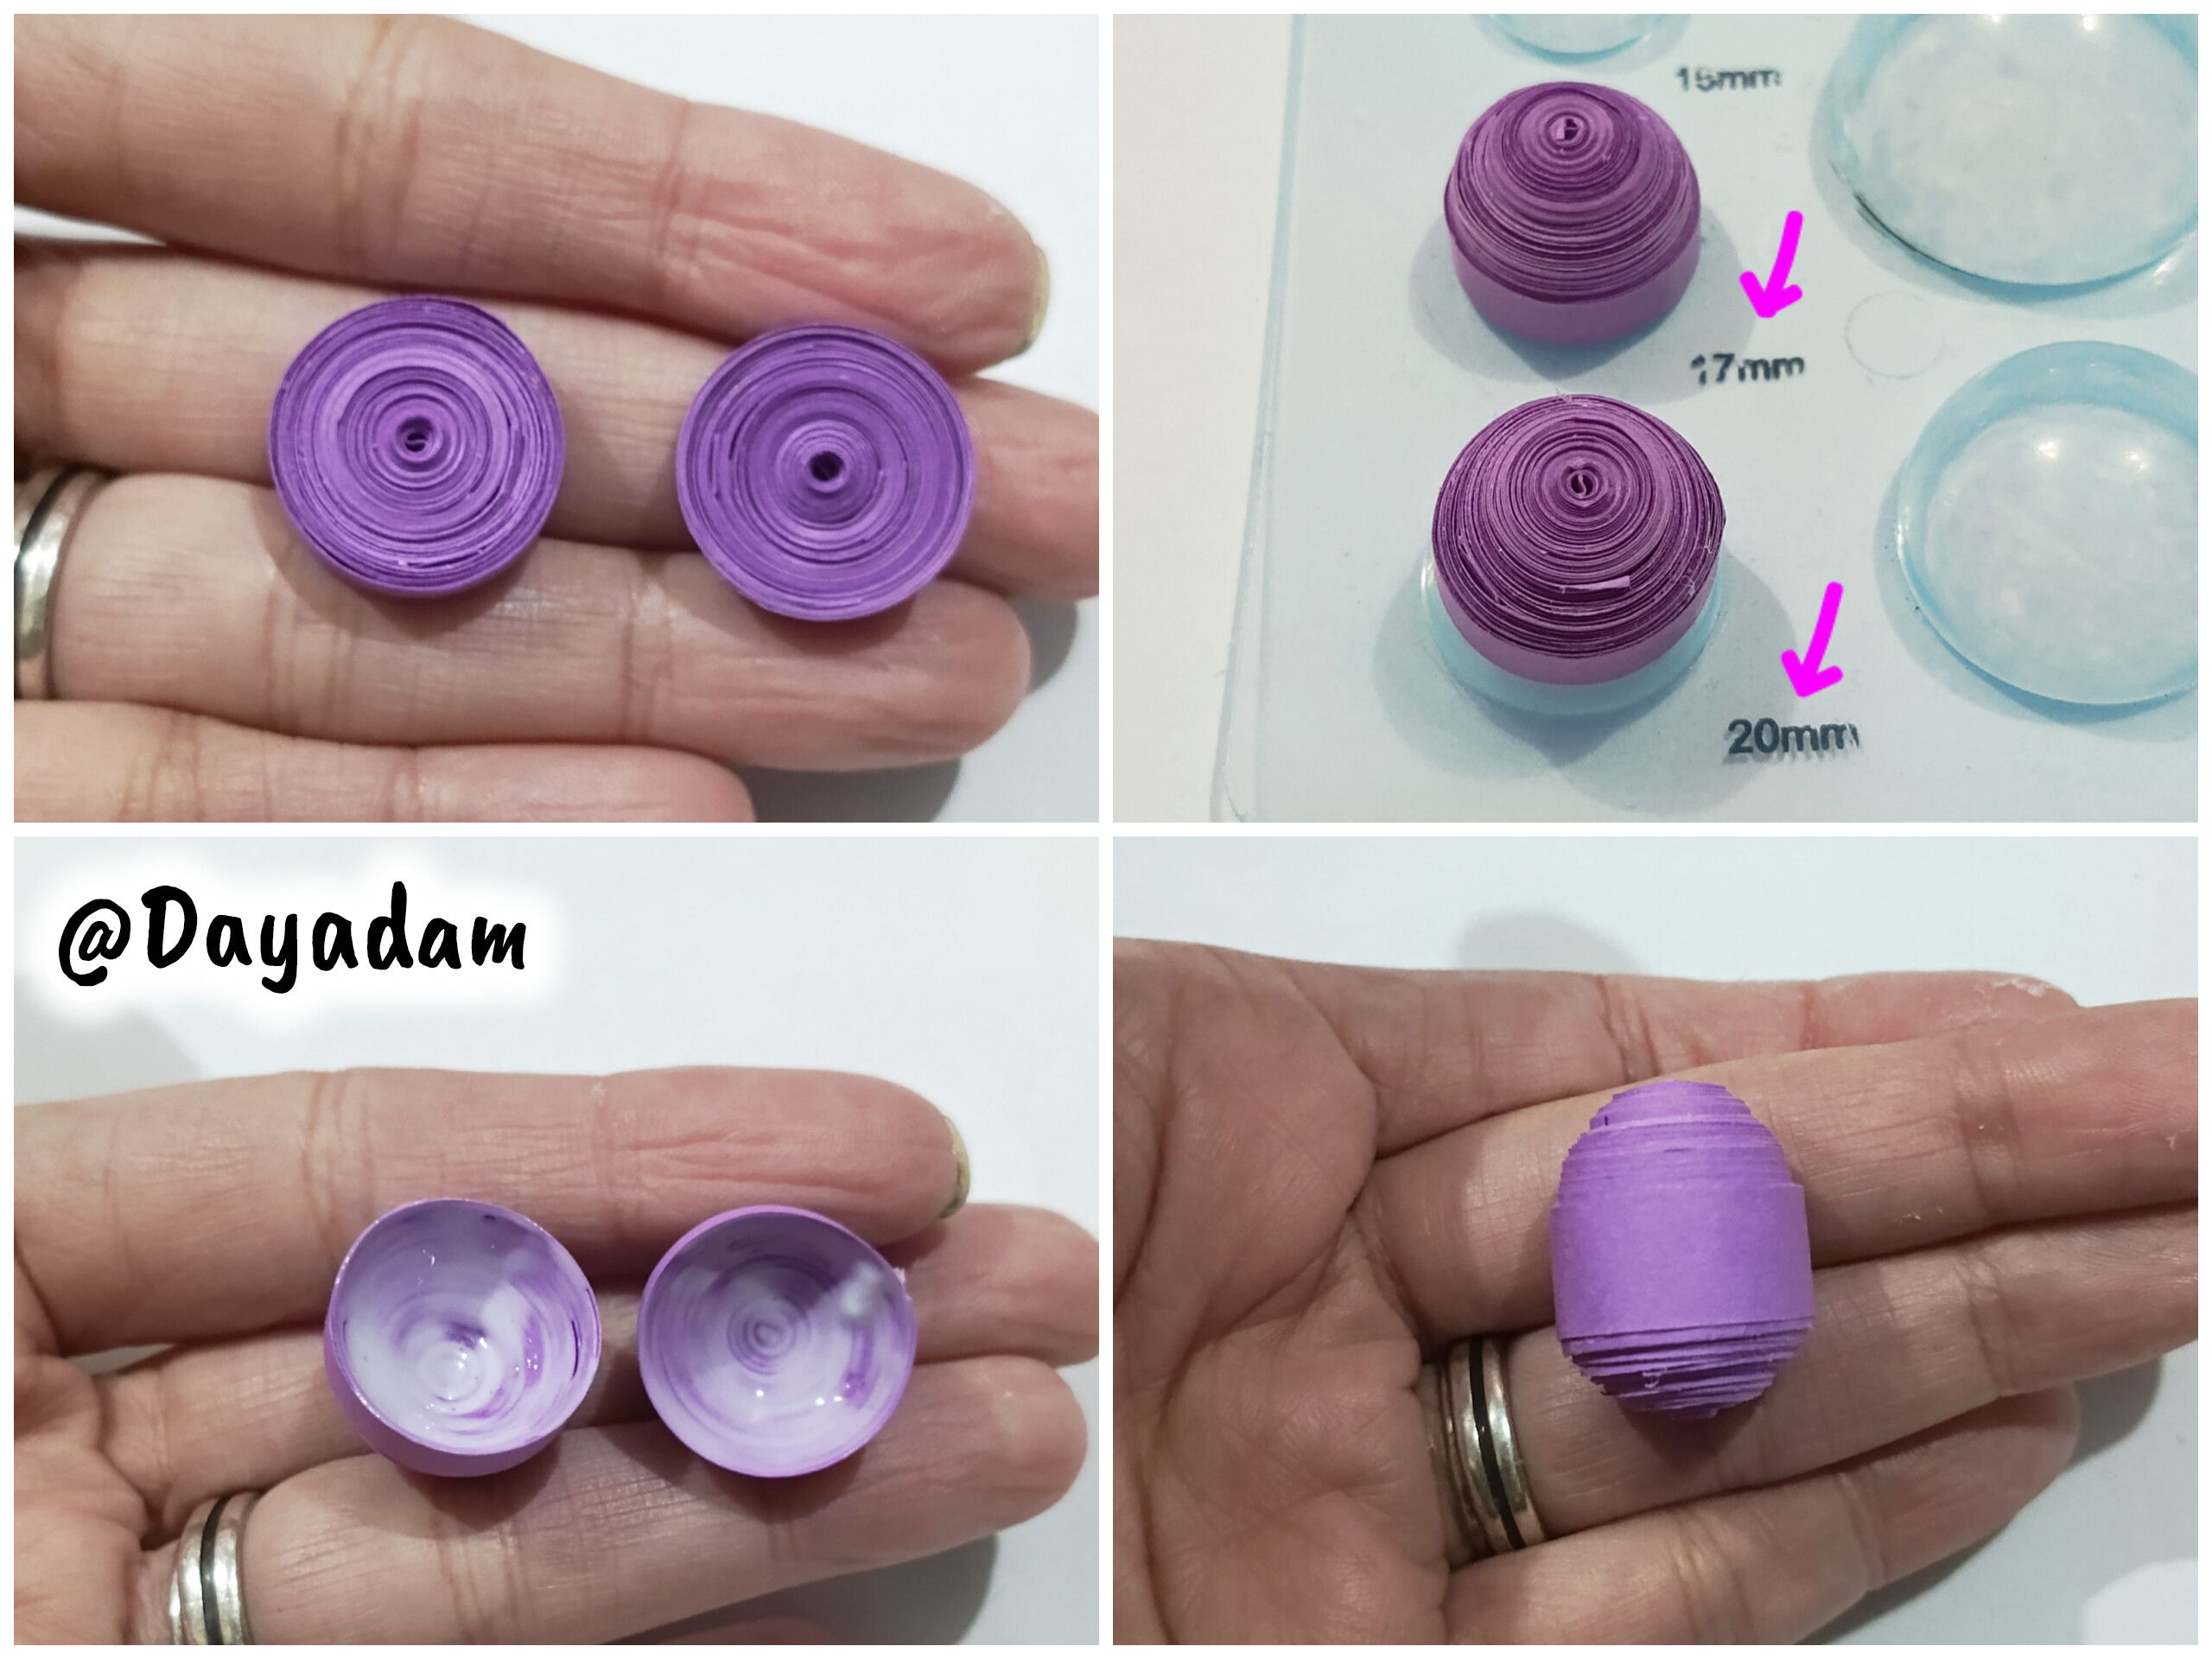
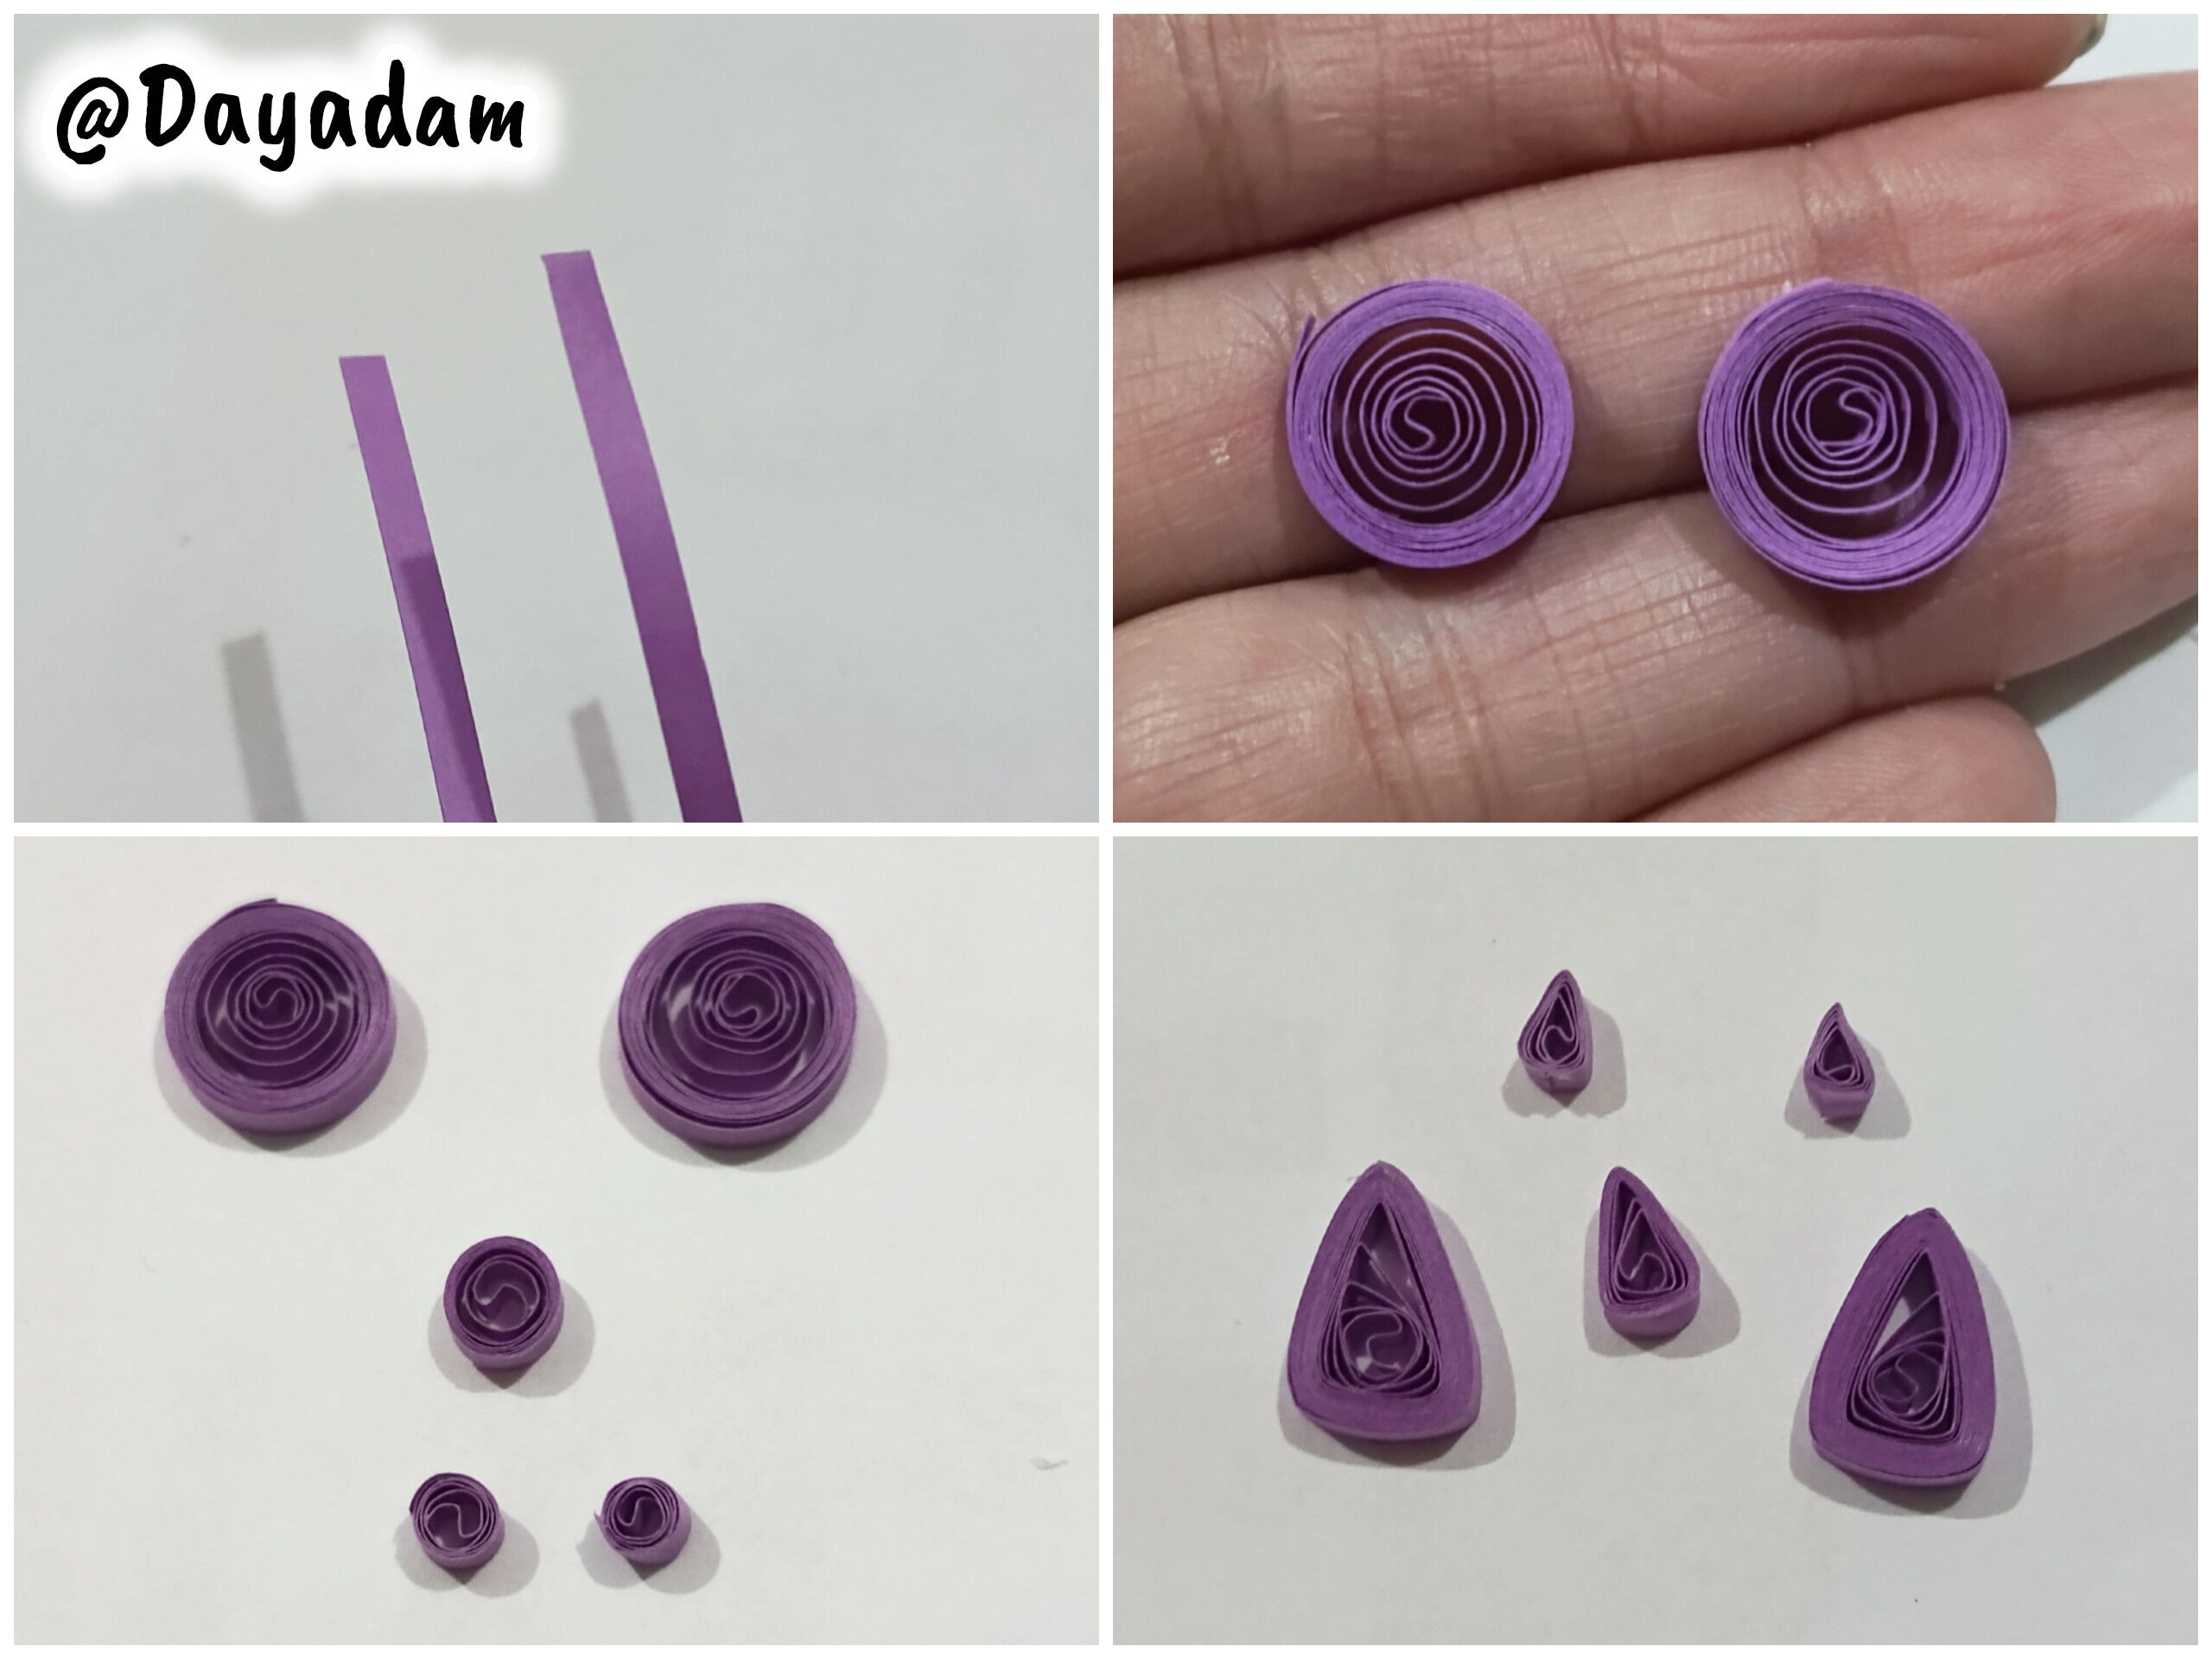
• Start by taking a 4 mm wide quilling strip. Using the needle, roll up the entire strip until you reach the end. Seal it with extra-strong white glue, remove it from the needle, and you will need two circles of the same size.
• We will shape both circles using a circle shaping template. One will be 17 mm and the other 20 mm. Remove them from the mold and apply extra-strong white glue to the inside to prevent them from deforming. Then, join the two together by passing a strip of tape with glue through the center.
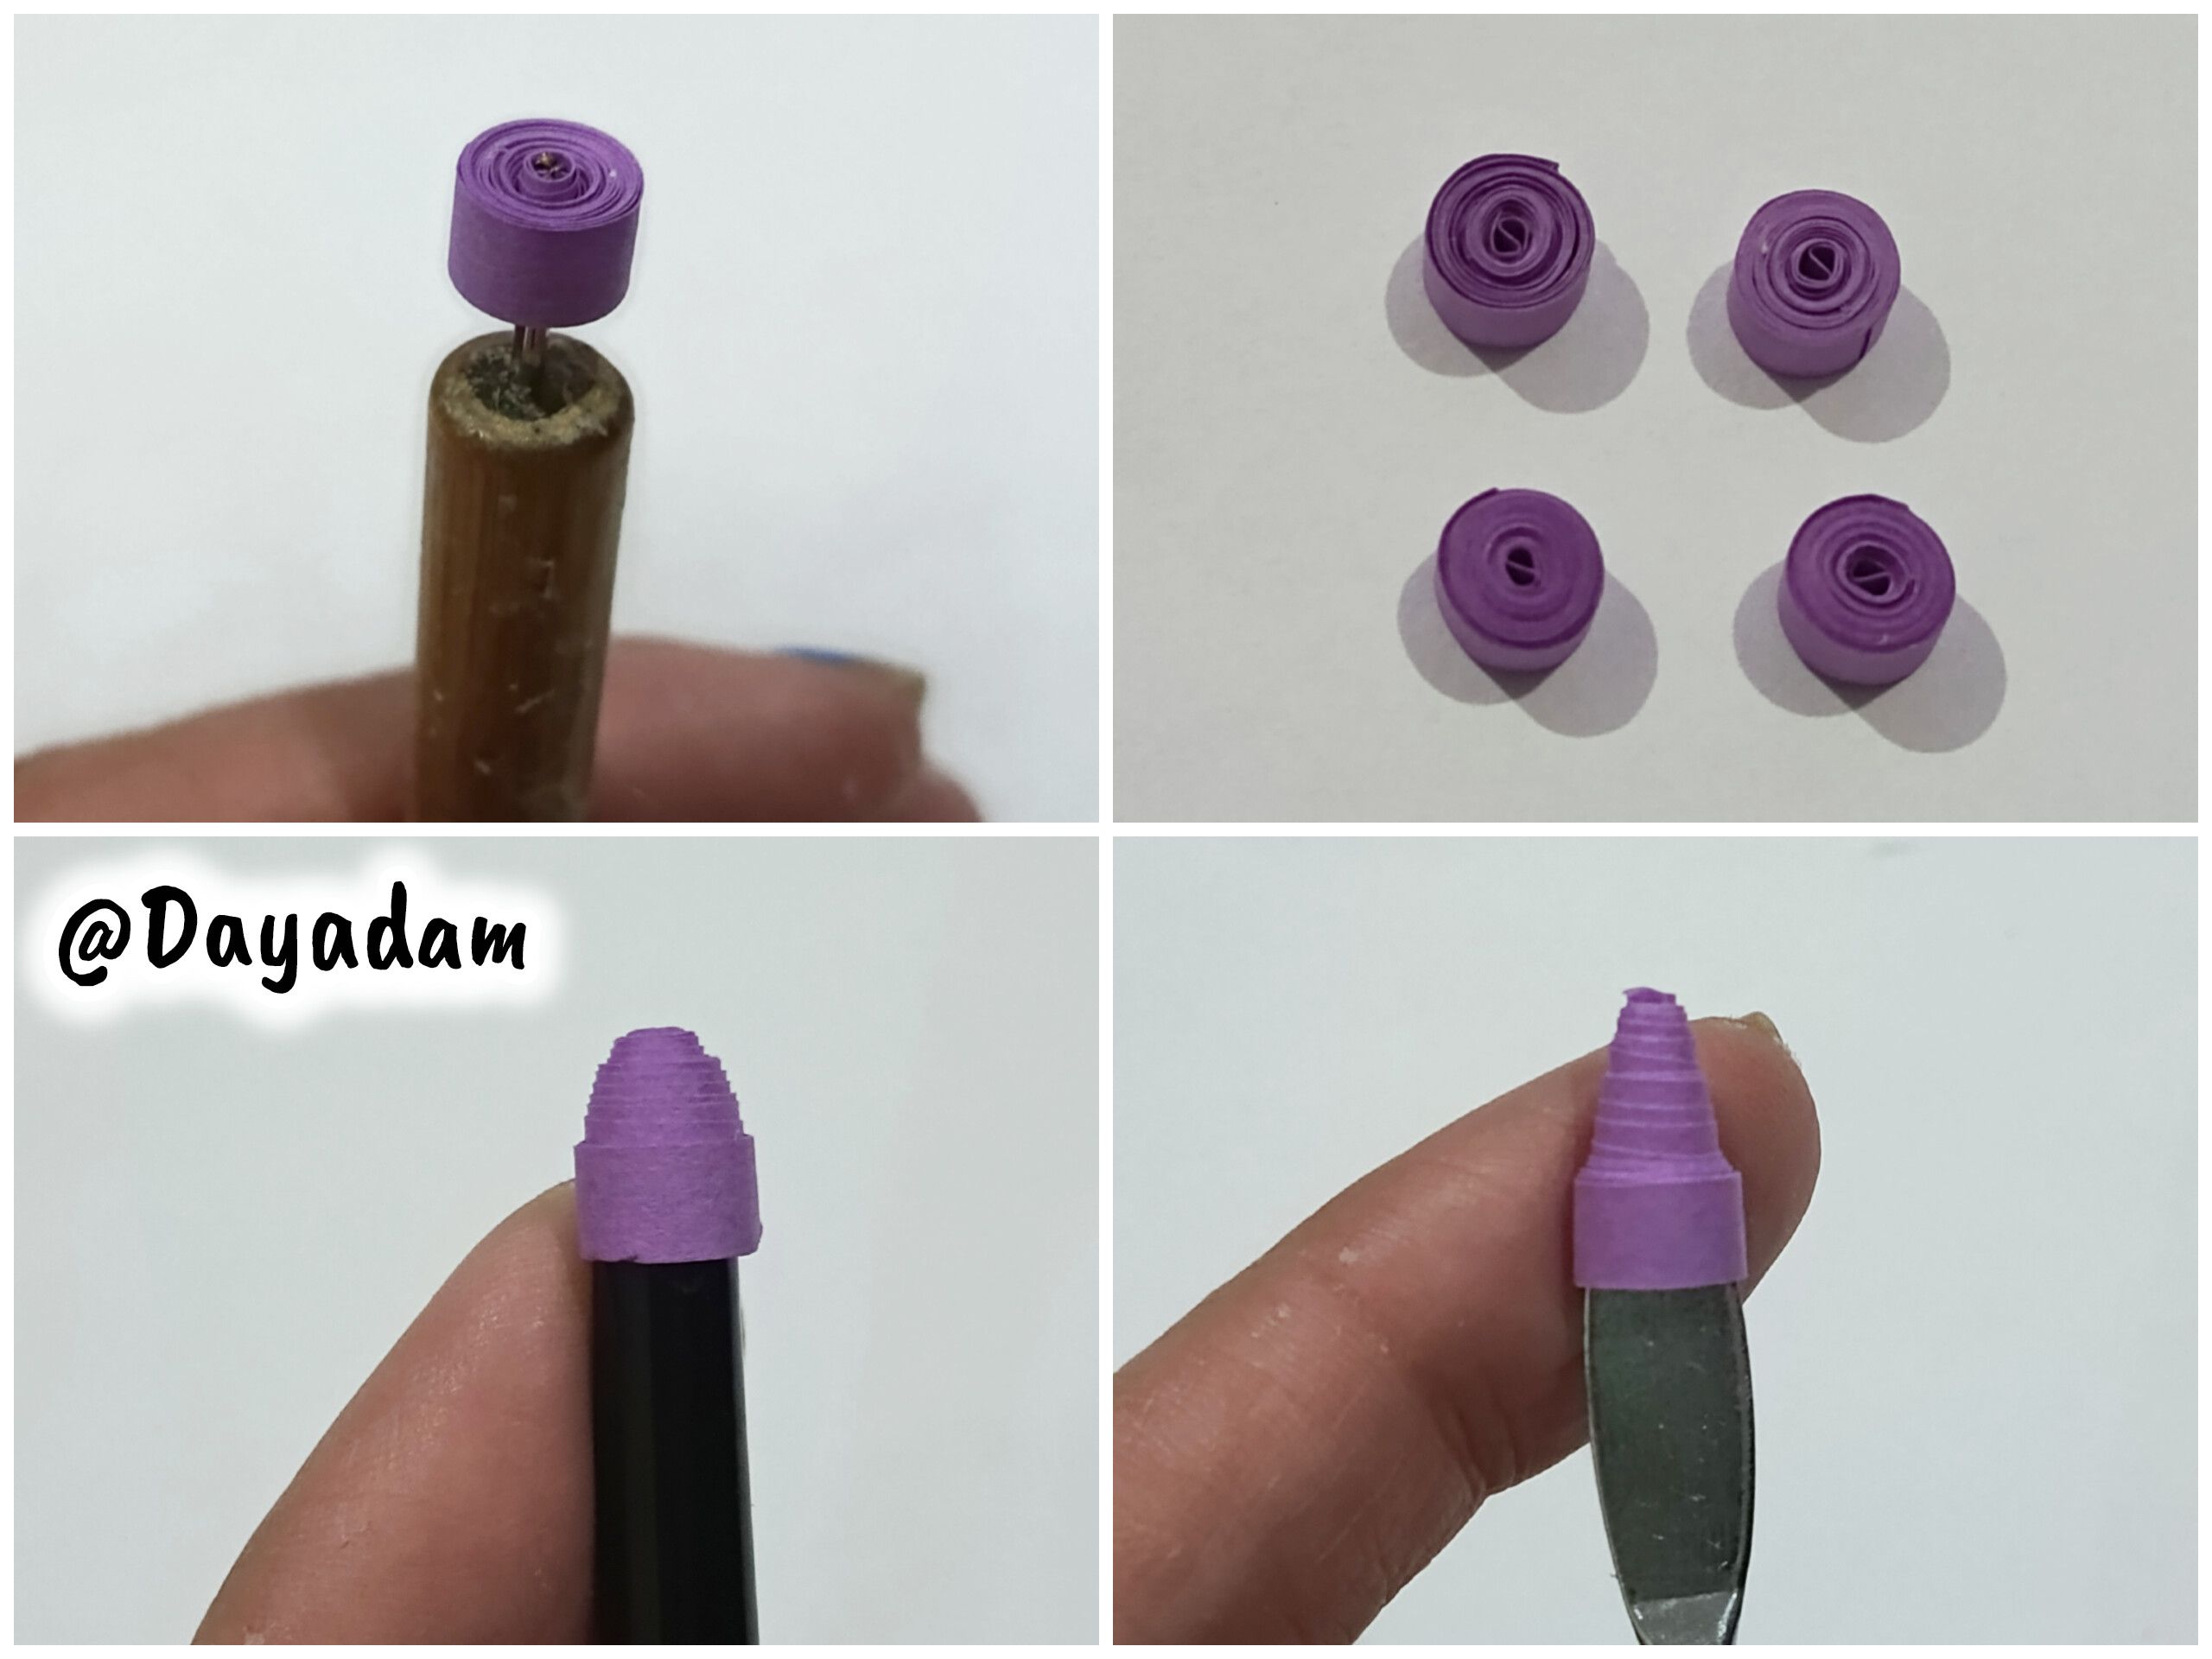
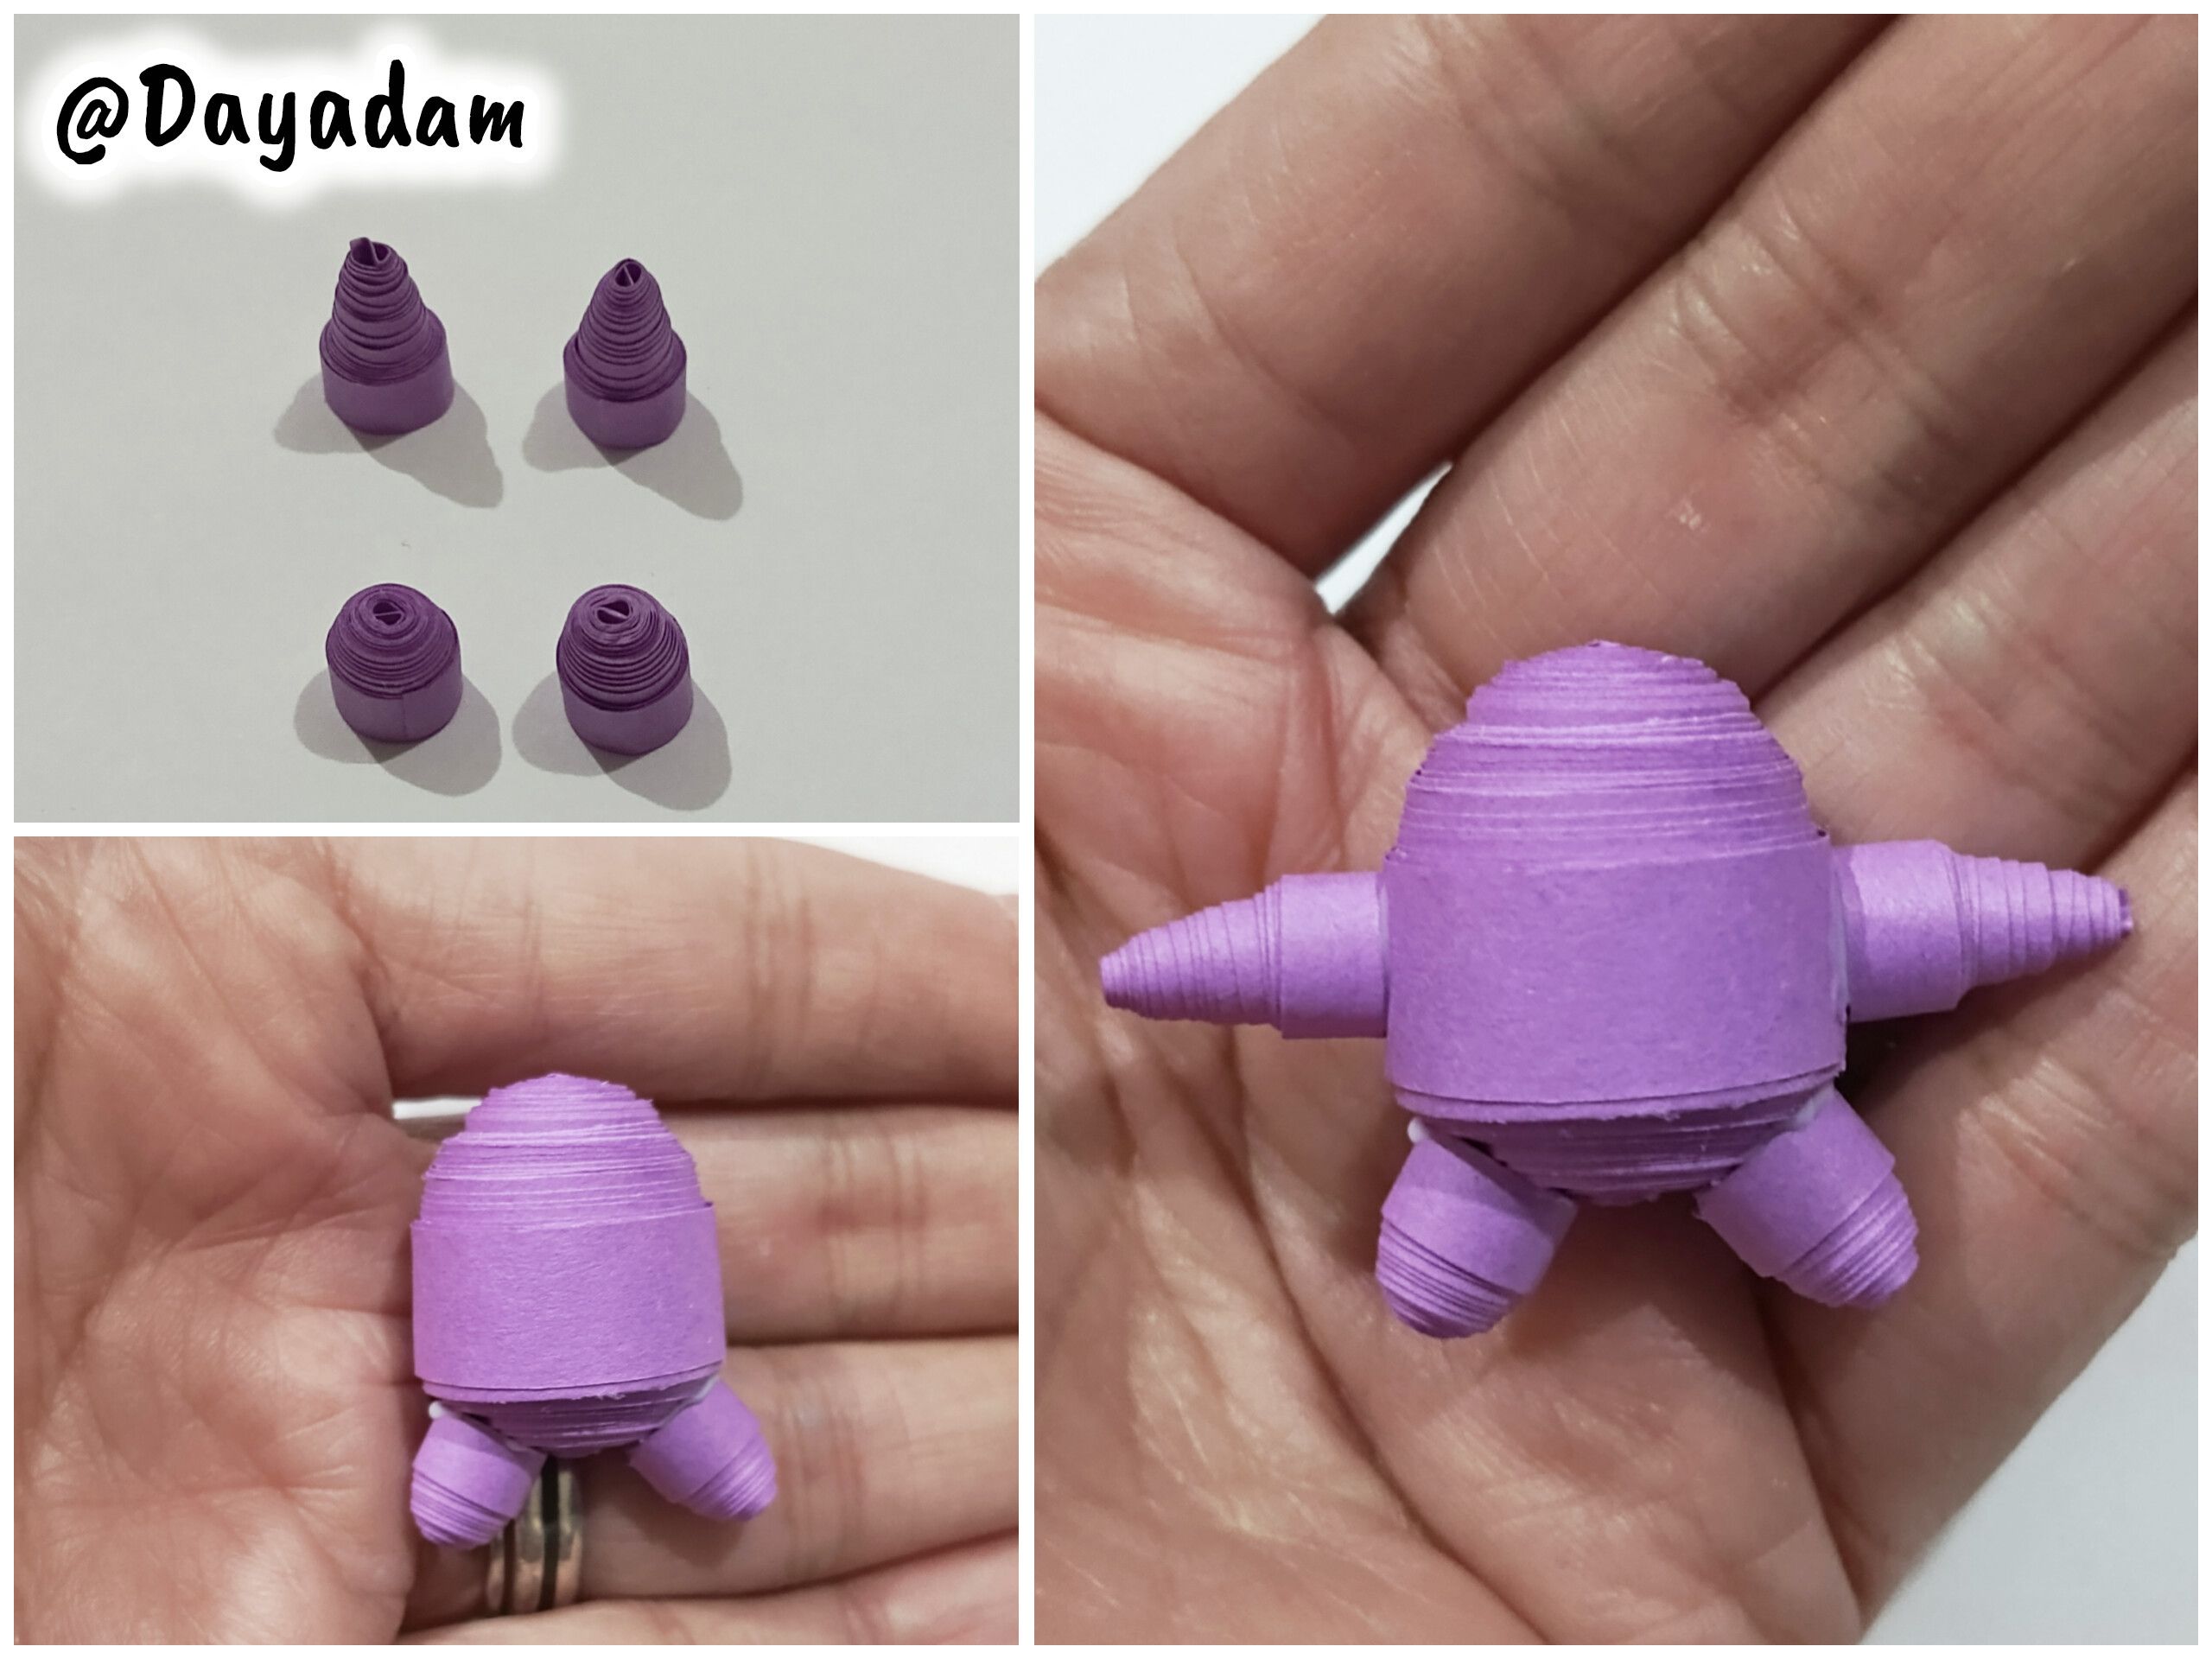
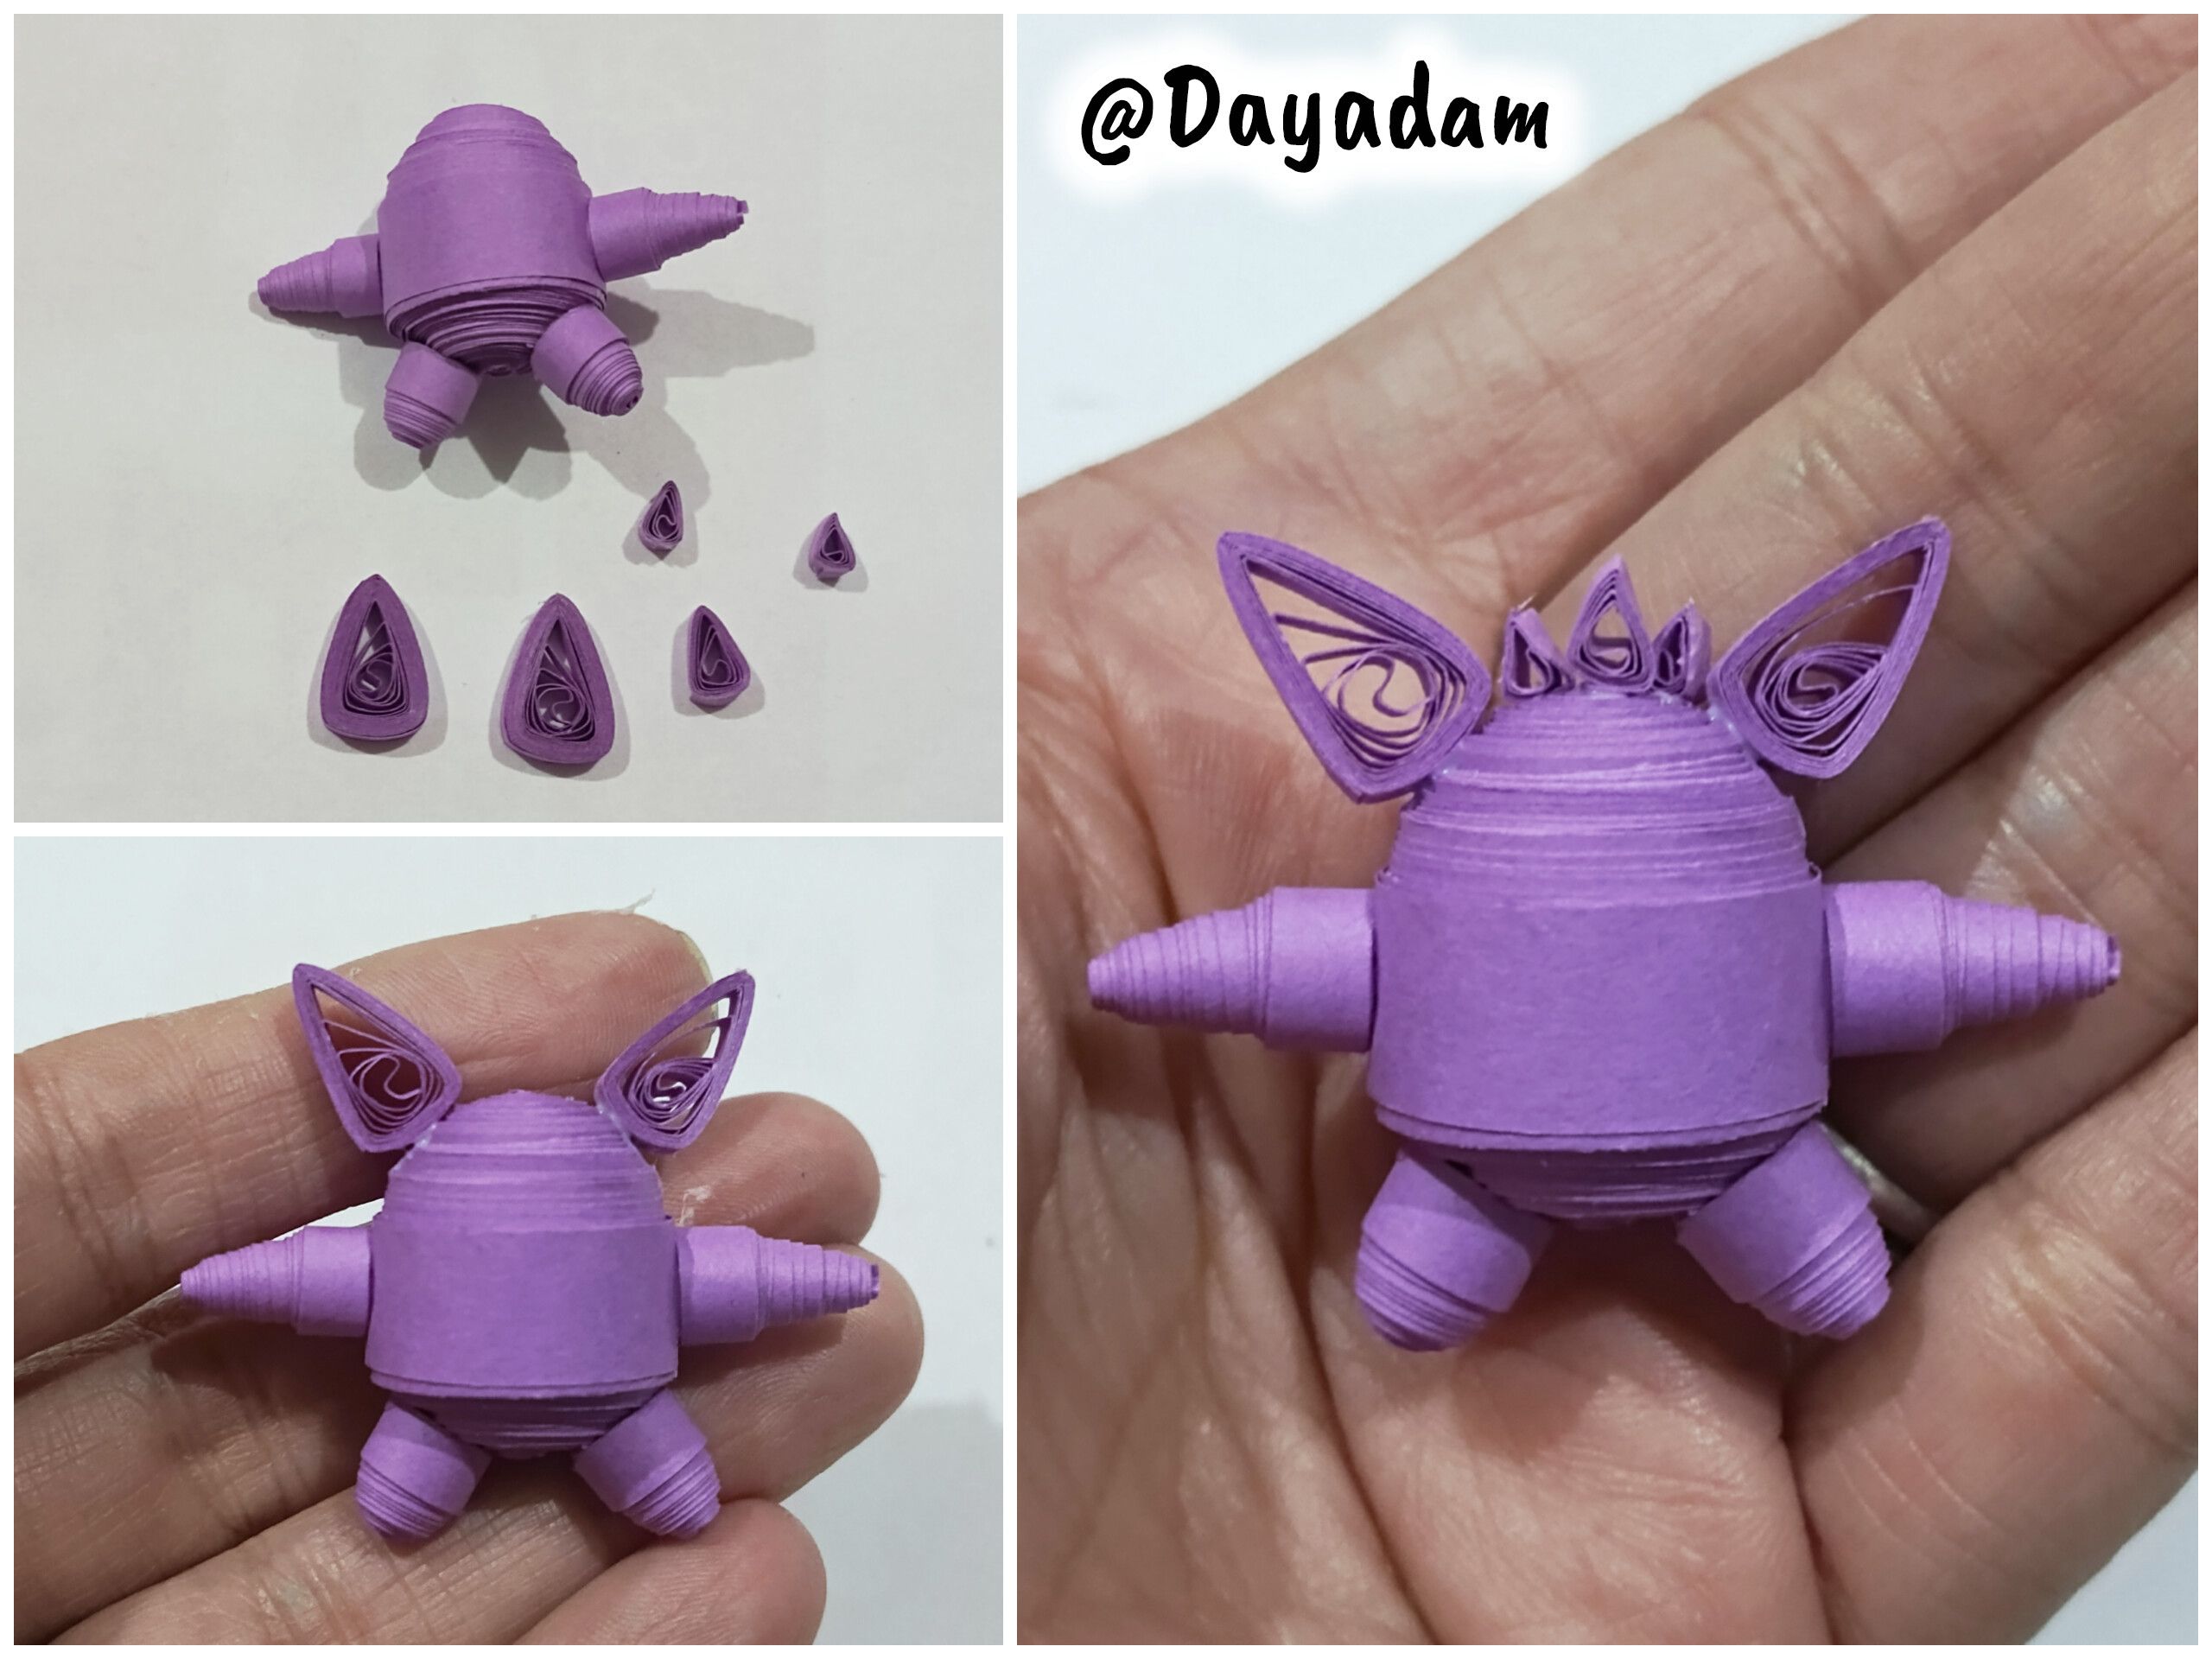
• To make the hands and feet, we will make four small closed purple circles with 4 mm wide tape. I molded the feet with the tip of a paintbrush and the arms with the tip of a pair of tweezers. I then glued them to the corresponding places on the character's body.

• Comenzamos tomando cinta para quilling de 4 mm de ancho, con la aguja vamos a enrollar toda la cinta hasta llegar al final de la misma, sellamos con pega blanca extra fuerte, sacamos de la aguja necesitaremos 2 círculos del mismo tamaño.
• Moldearemos ambos círculos utilizando una plantilla para moldear círculos uno lo haremos en la medida número 17mm y el otro en el 20mm, sacamos del molde aplicamos pega blanca extra fuerte por su parte interna para evitar que los mismos se deformen, luego procedemos a unir los ambos pasando una cinta con pega por el centro.
• Para realizar las manos y las patas realizaremos cuatro pequeños círculos cerrados de color morado con cinta de 4 mm de ancho, las patas las moldee con la punta de un pincel, y los brazos los moldee con la punta de una pinza. Procedí a pegarlos en el sitio correspondiente del cuerpo del personaje.
 |
 |
 |
 |
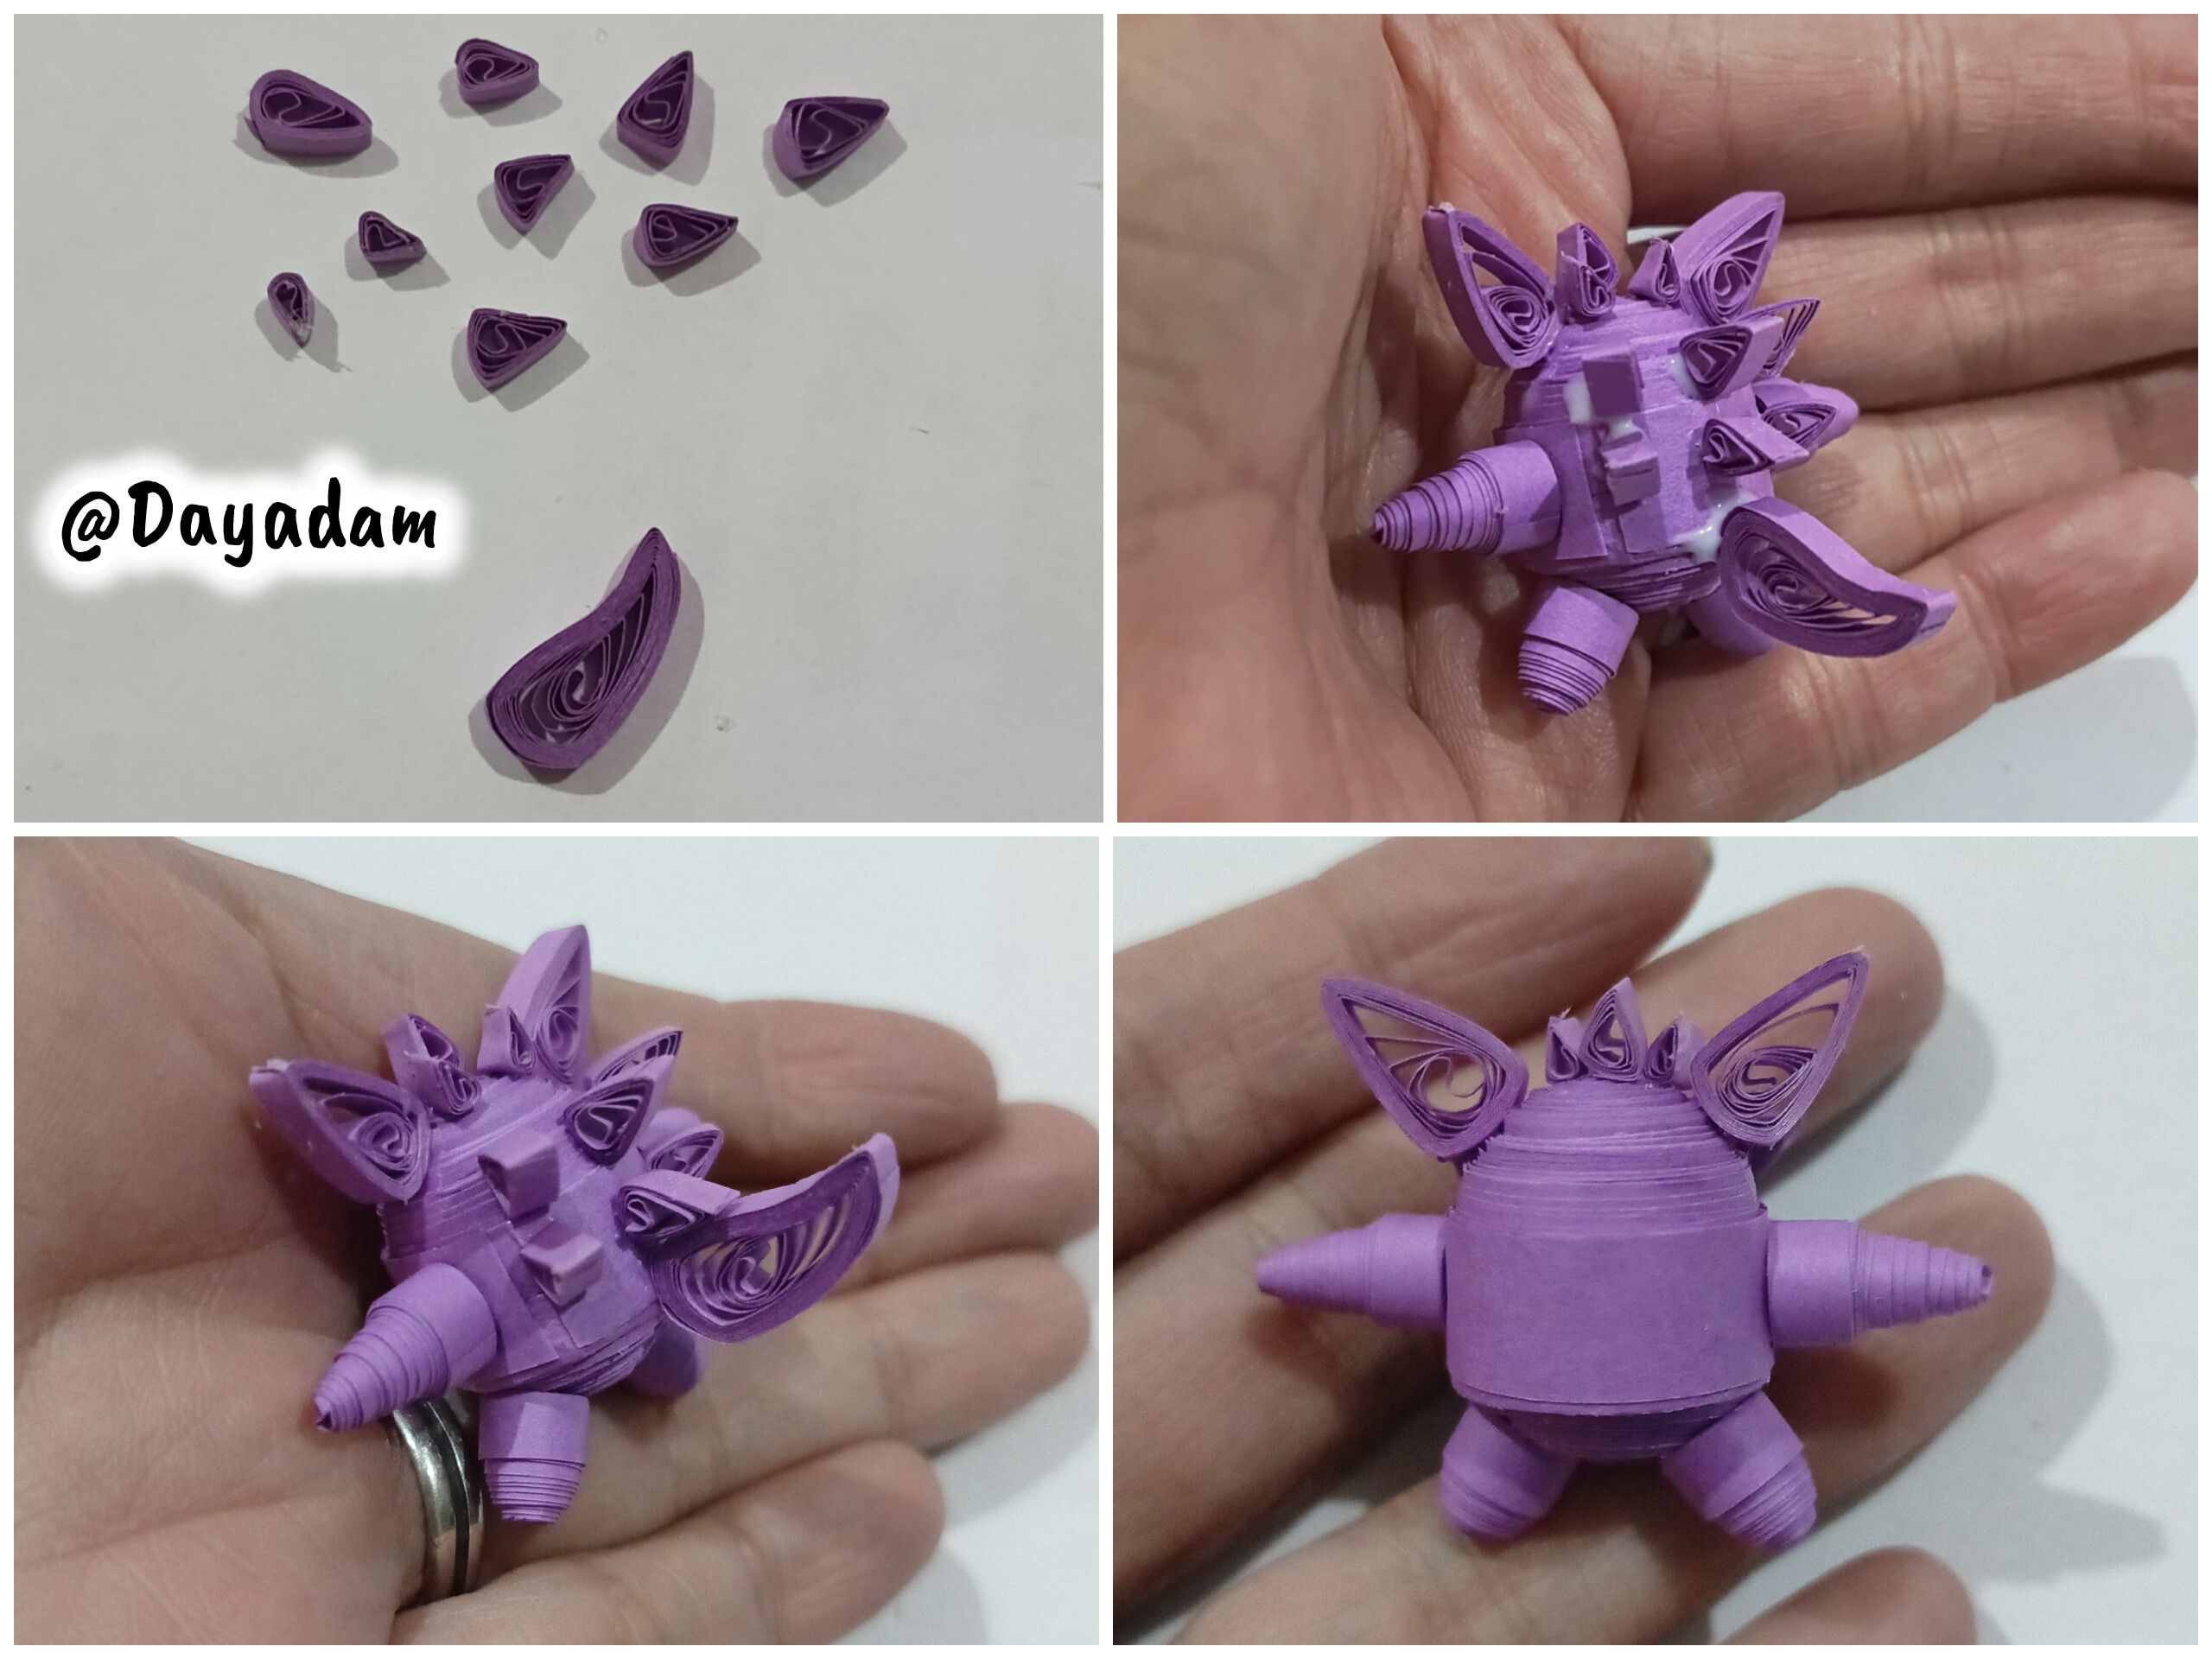
• To make the ears and hair, I made some open circles of various sizes, which I shaped into triangles and glued to the character's head.
• To make the tail and some other elements of the character, I made more triangles of various sizes with purple tape and glued them to various points on the character's back.
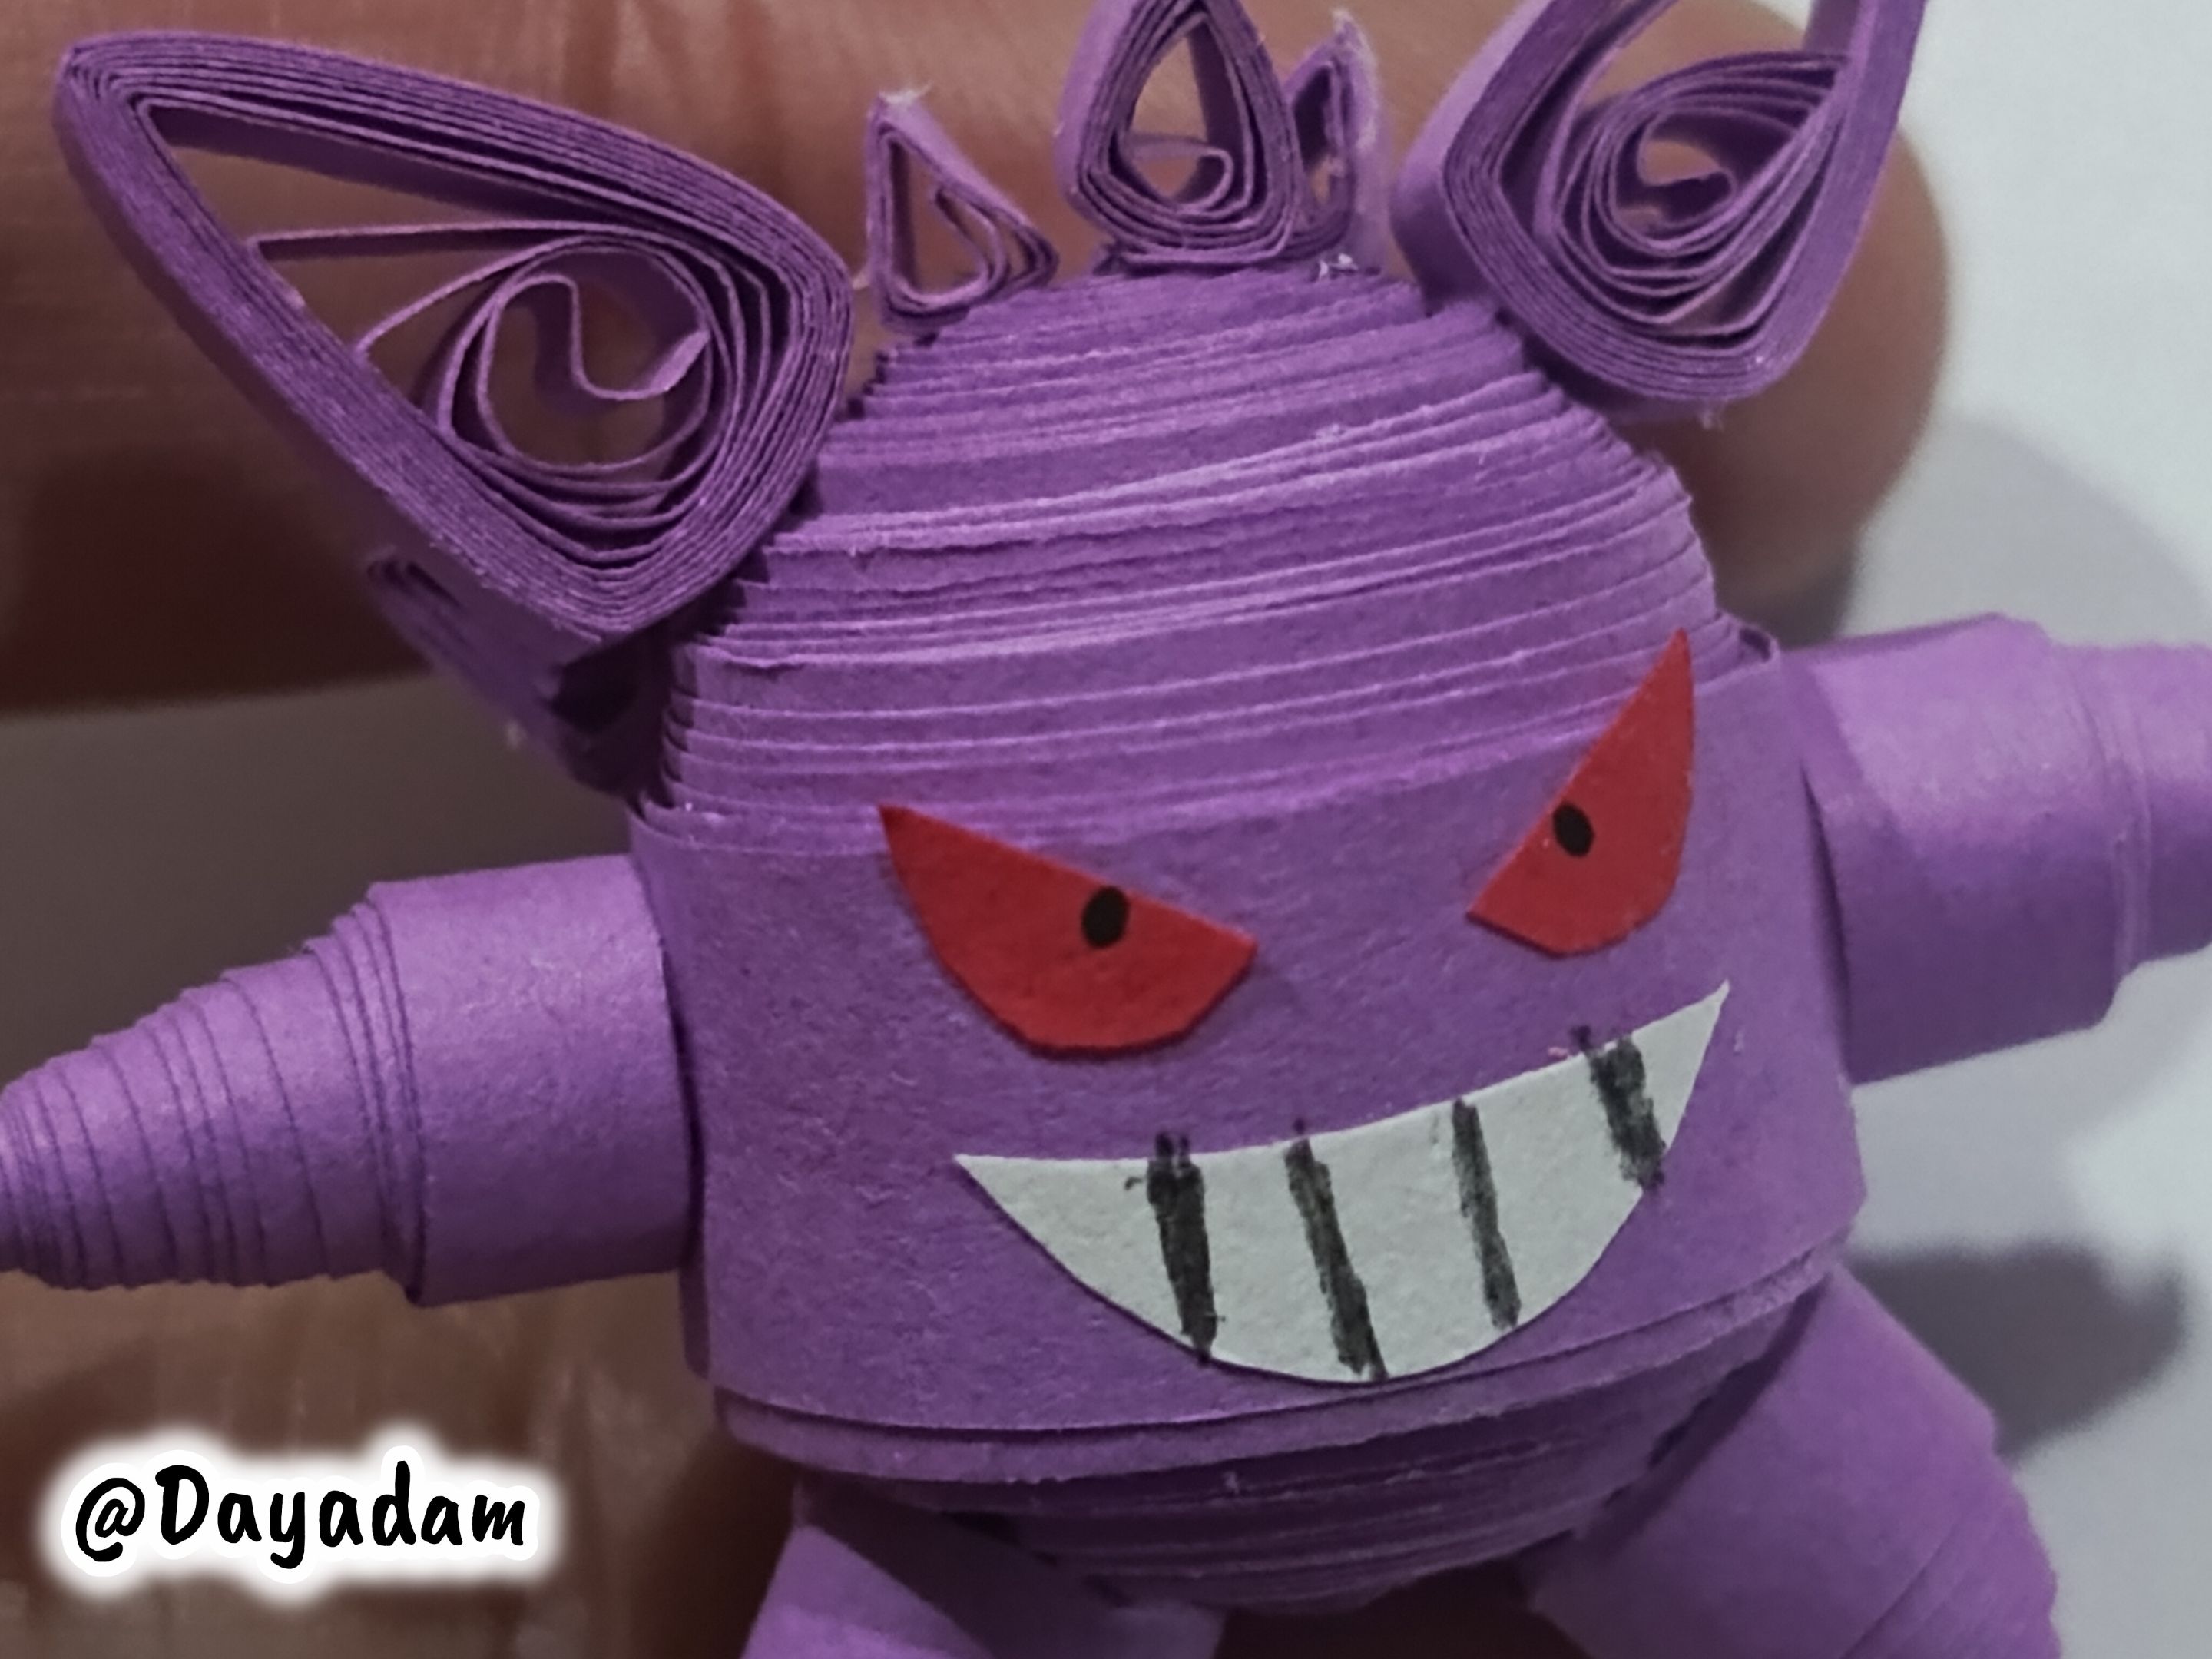
• Finally, I made the eyes and mouth and glued them to the face.
This is how I finished this 3D Gengar Pokémon using the quilling technique.
• Para realizar las orejas y el pelo, realicé algunos círculos abiertos de diversos tamaños los cuales moldee en forma de triángulo, los pegué de la cabeza del personaje.
• Para realizar la cola y algunos otros elementos del personaje, realicé más triángulos de diversos tamaños con cinta también de color morada, la pegué en varios puntos de la espalda del personaje.
• Para finalizar realicé los ojos y boca, los pegué de la cara.
De esta manera finalice este Pokémon Gengar en 3D, en la técnica de técnica de quilling.
 |
 |
 |
 |

|
 |
|
 |
 |
 |
 |
|
What did you think, did you like it?
I hope you did, I hope you liked my explanation, procedure and photos, I made them with love for you.
"Let out that muse that inspires you, and let your imagination fly".
Thank you all, see you next time ✨.
¿Qué les pareció, les gustó?
Espero que sí, que les haya gustado mi explicación, procedimiento y fotos, los hice con mucho cariño por y para ustedes."Deja salir esa musa que te inspira, y deja volar tu imaginación".
Gracias a todos, nos vemos en la próxima✨
All photos used in this post are of my authorship and have been taken on my personal cell phone a Redmi 9T, edited in InShot and Canva
Banner and separator made by me in Canva
Translated with the help of DeepL
Todas las fotos usadas en este post son de mi autoría y han sido sacadas en mi celular personal un Redmi 9T, editadas en InShot y Canva
Banner y separador hecho por mí en Canva
Traducido con la ayuda de DeepL