Today I bring you another piece of my art, this time once again to please the Hive gaming community. I had been working on a Minecraft collection, which I will continue soon. I need to get some materials so I can continue. Today, I wanted to challenge myself and create a video game character that I had been asked to make several times on Hive's Ready Player program. In my mind, I thought it would be quite difficult to do, and it wasn't that easy, but I managed it.
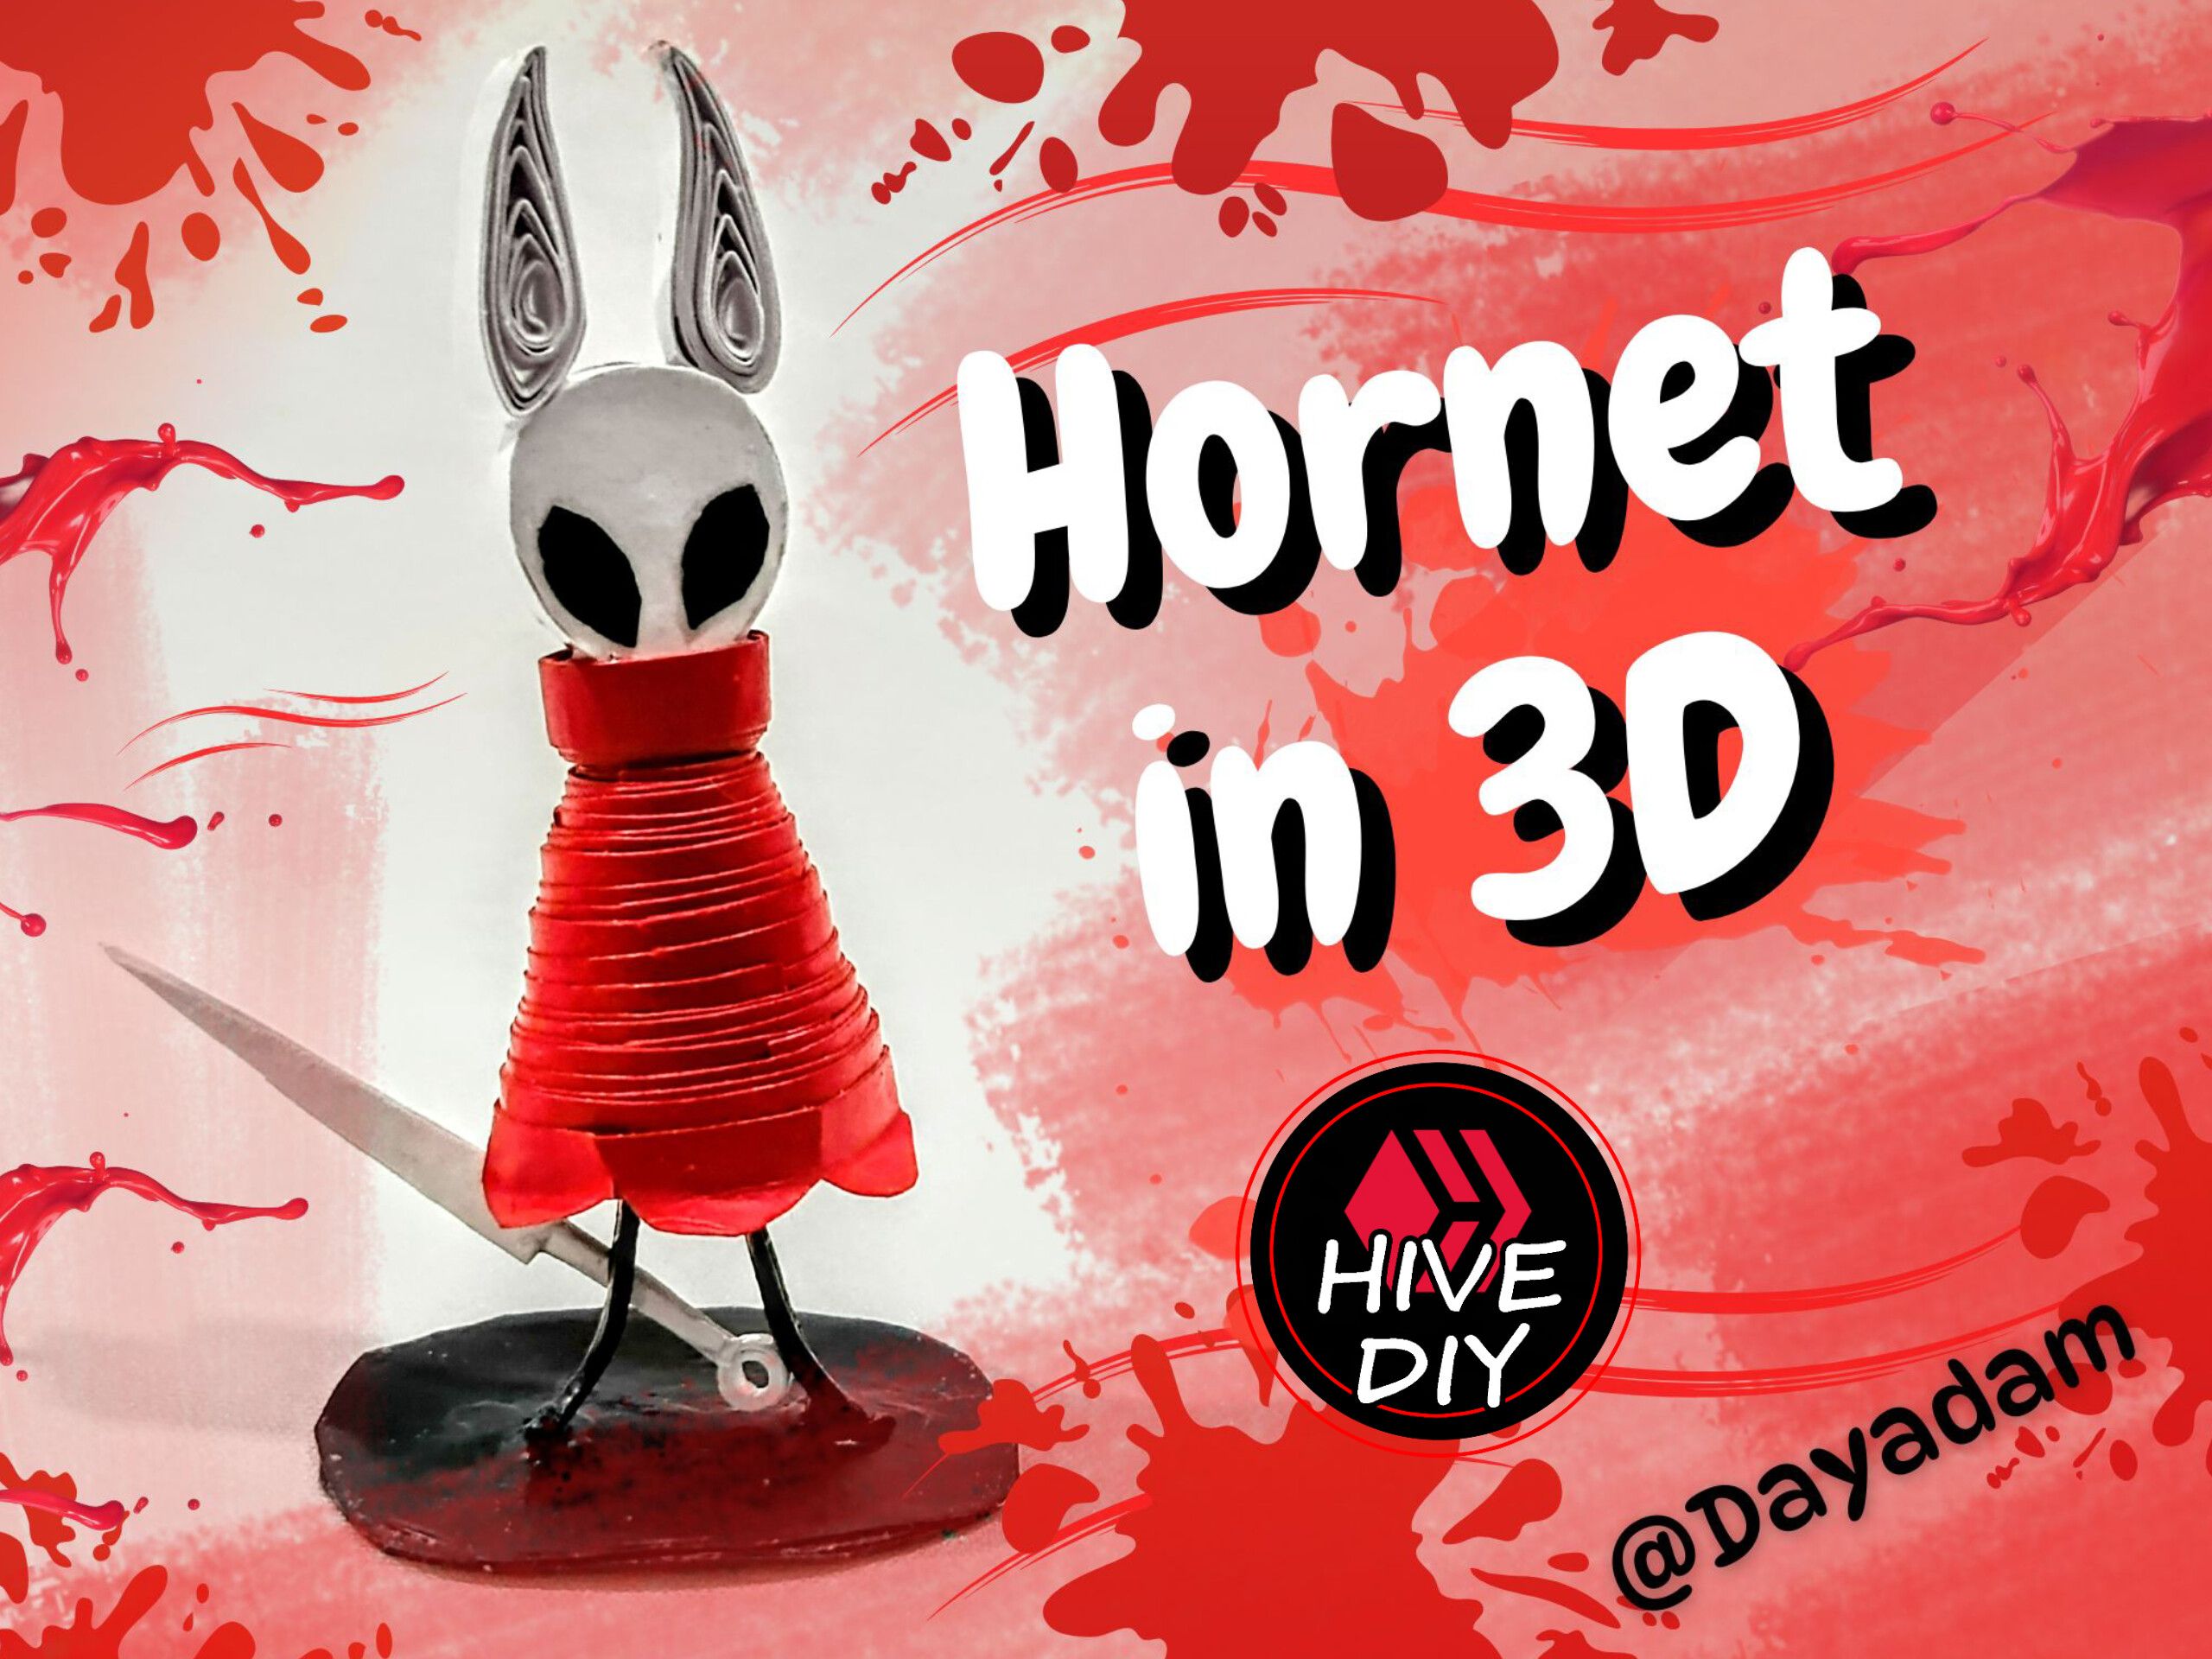
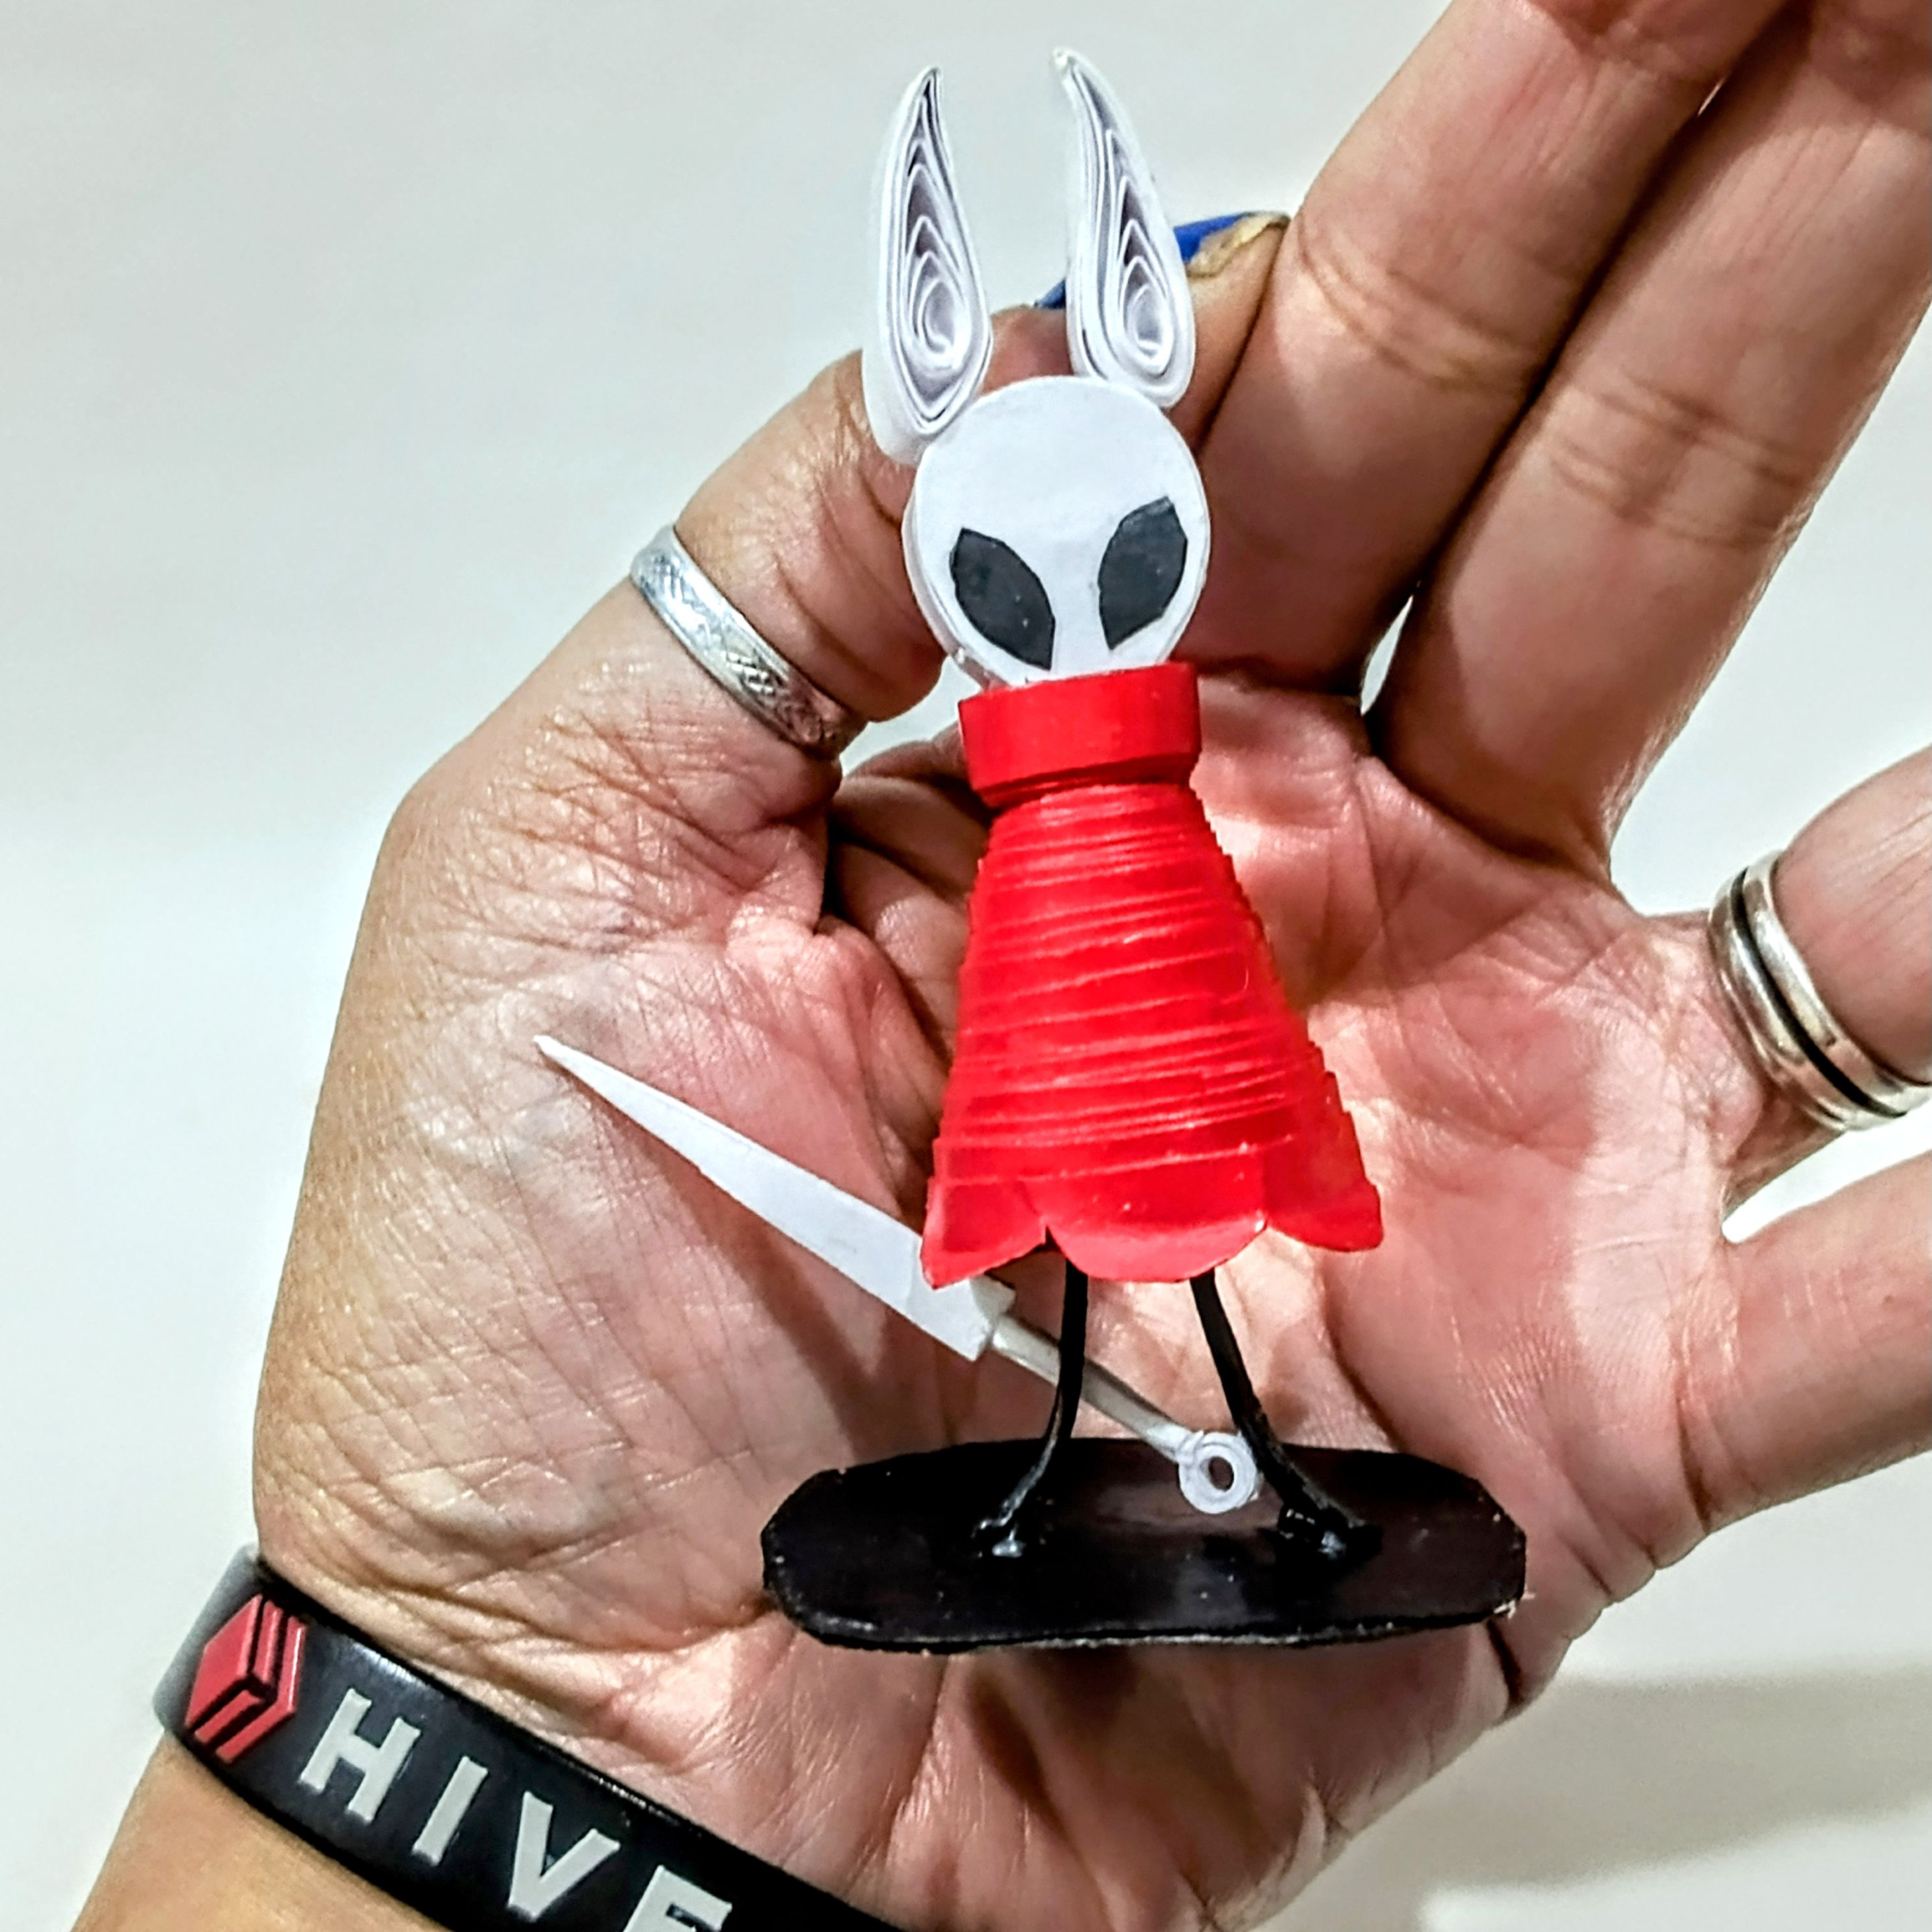
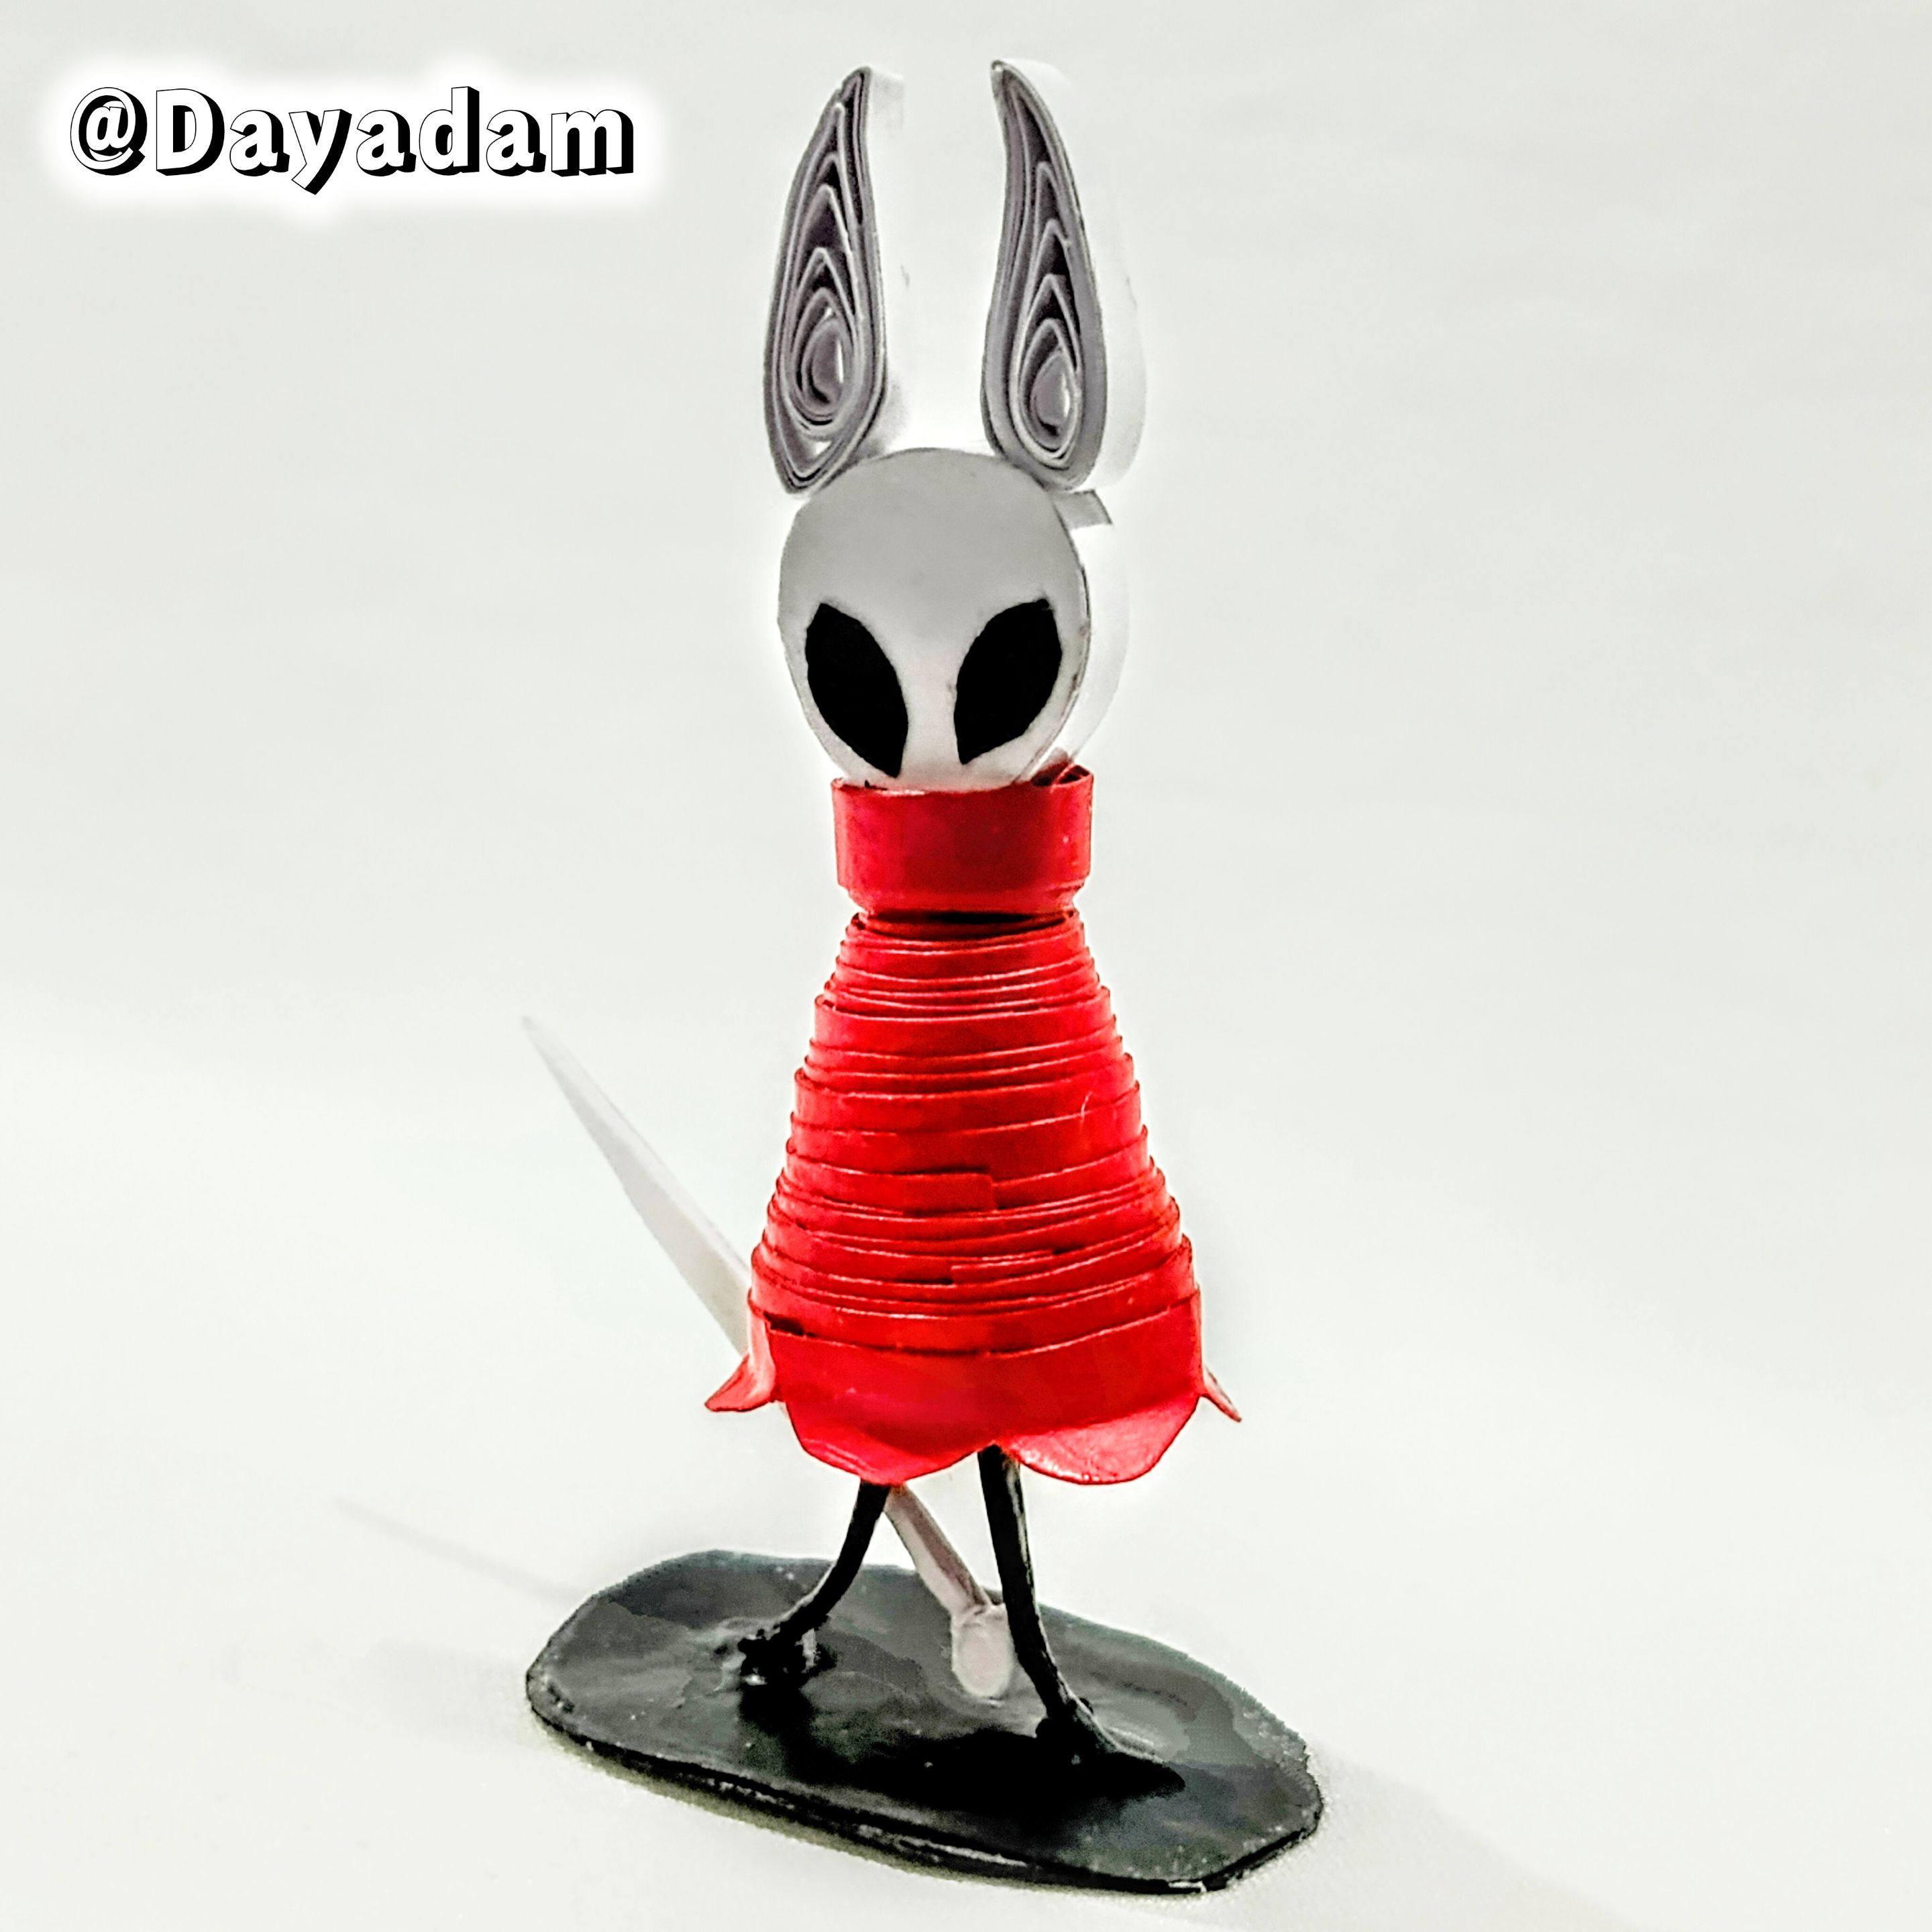
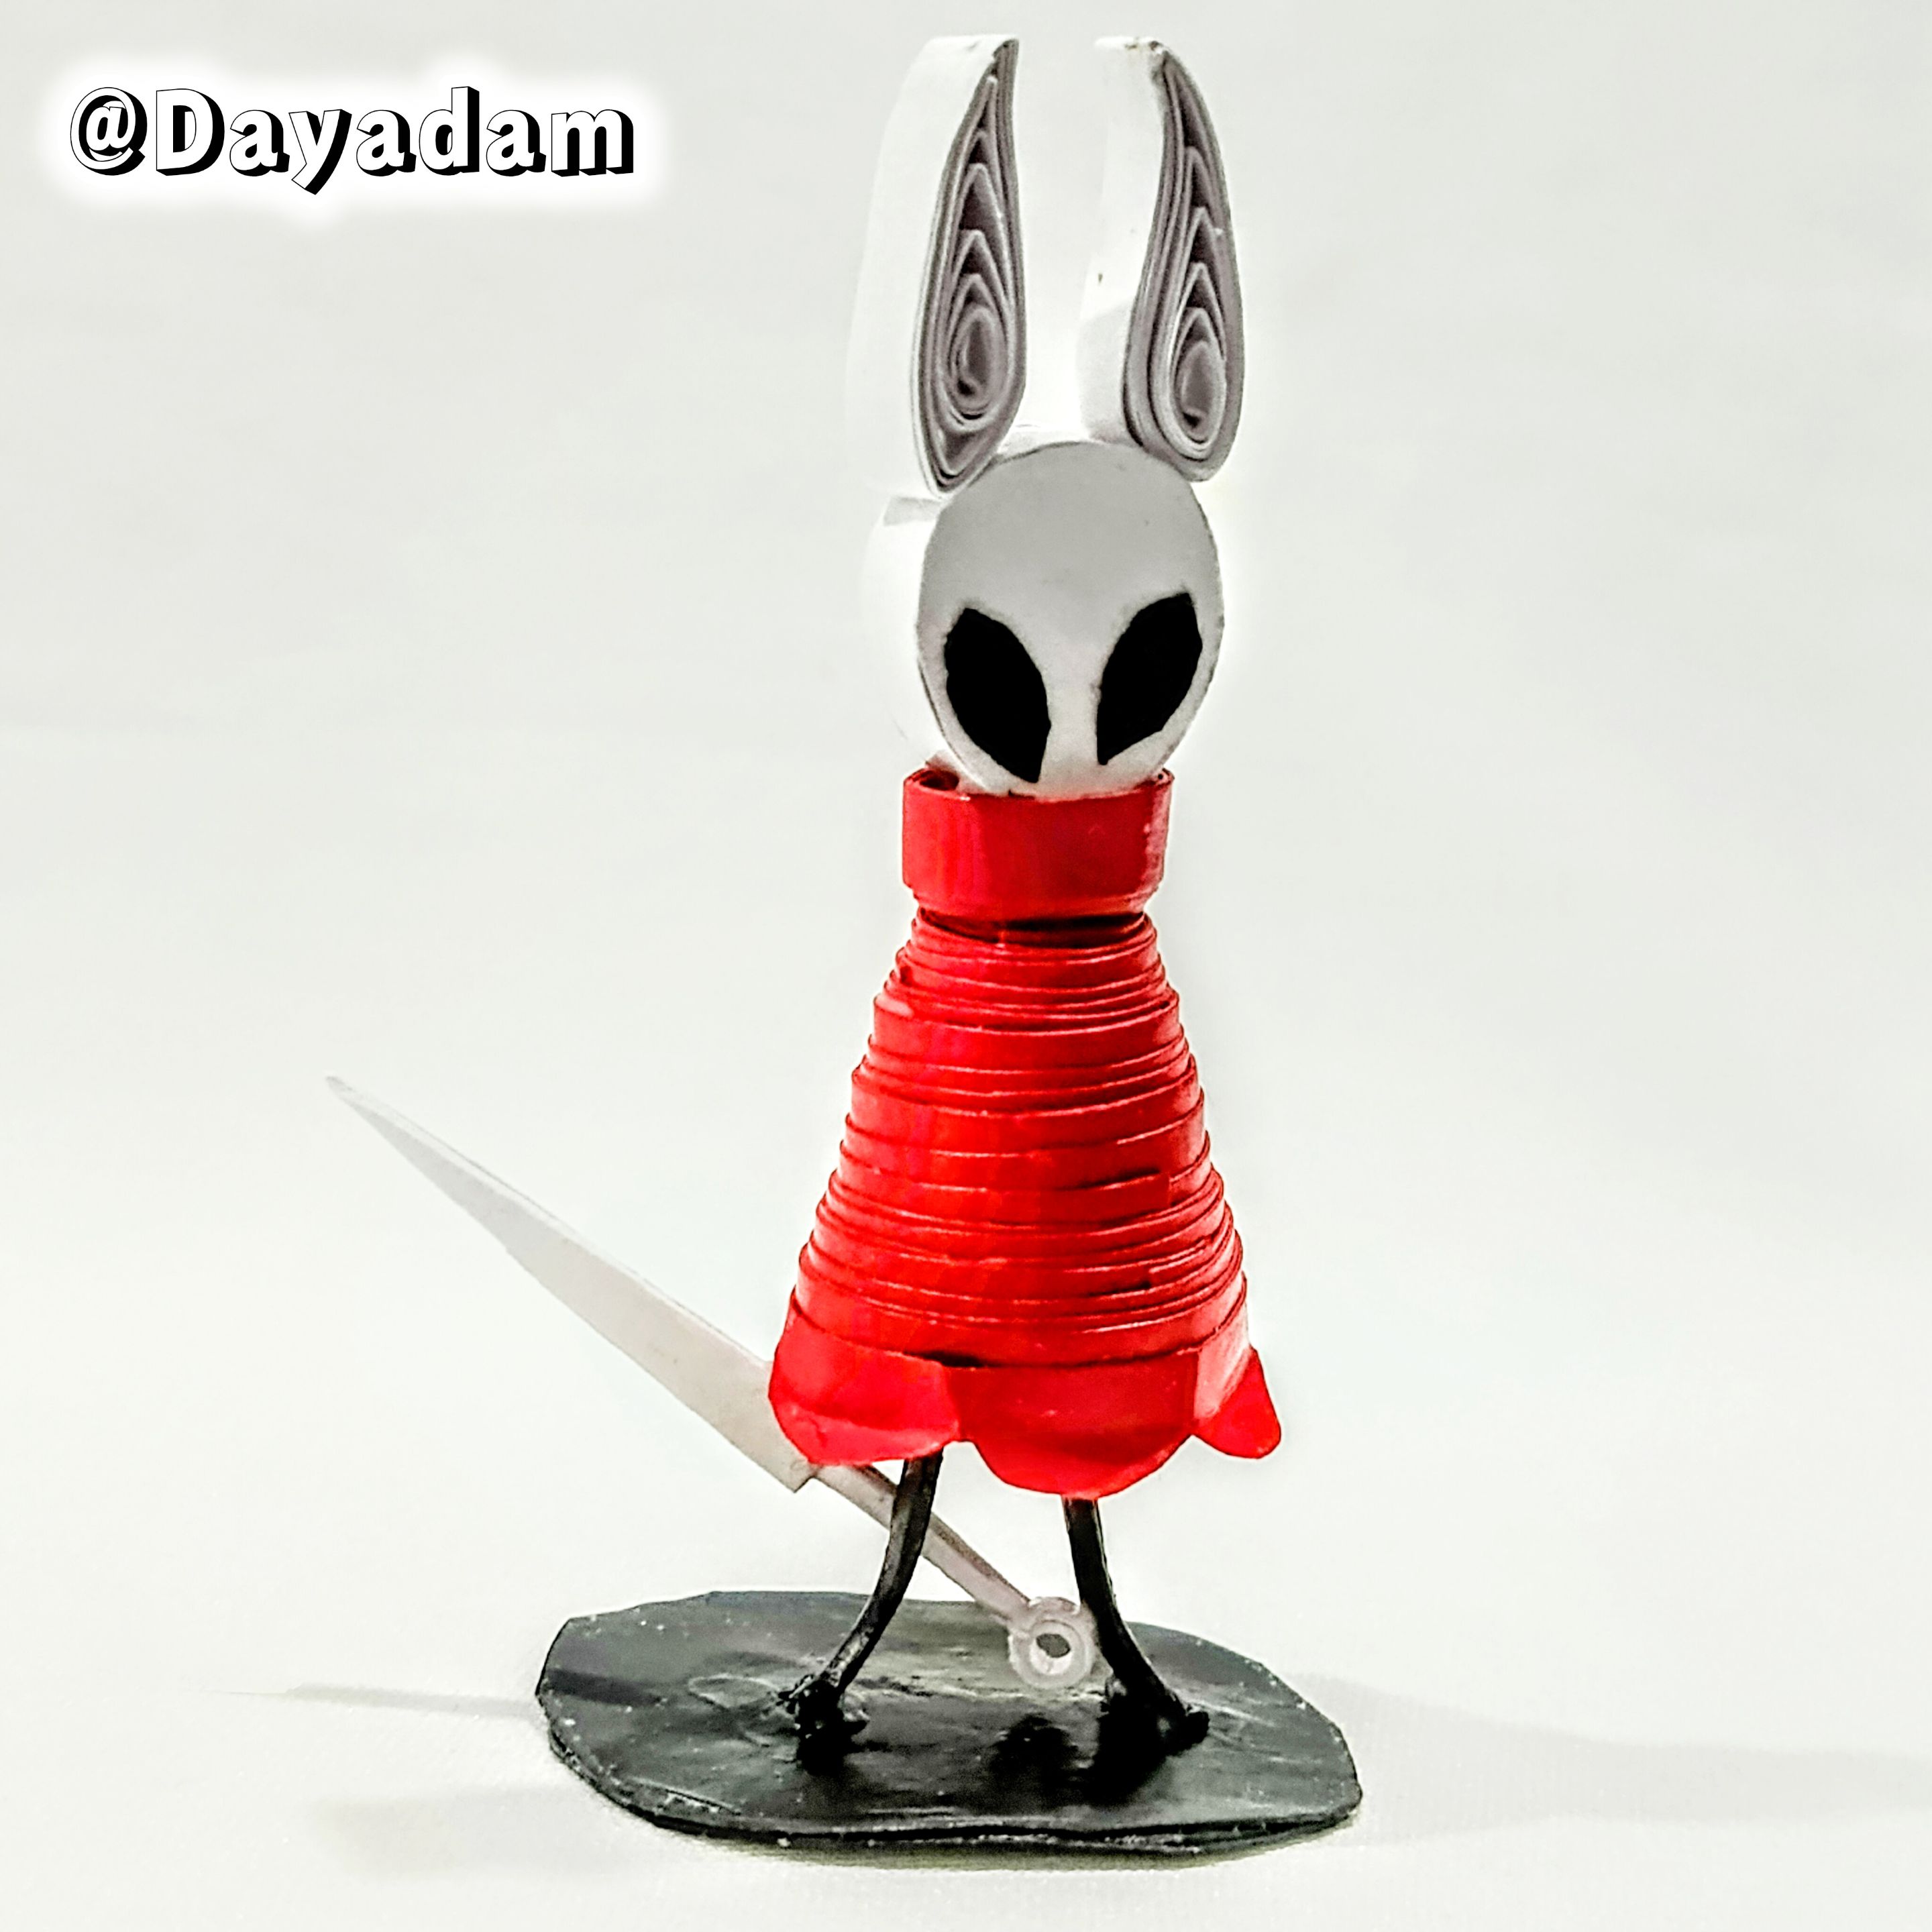
I present to you a small 3D Hollow Knight Hornet, made using the quilling technique.
Hoping you like it, I leave you my creative process:
Let's get started:😃

Hola a toda mi gente de Hive... 🐱
Hoy les traigo un trabajo más de mi arte, esta vez nuevamente para complacer a la comunidad de gamers de Hive, venía haciendo una colección de Minecraft la cual voy a seguir próximamente debo hacerme de materiales para poder continuar, para hoy quise retarme y realizar un personaje de un videojuego el cual me pidieron en varias oportunidades en el programa ready player de hive, en mi mente decía que era bastante difícil de realizar, no fue tan fácil pero lo logre.
Les presento a un pequeño Hornet Hollow Knight en 3D, en la técnica de quilling.
Esperando que sea de su agrado, les dejo mi proceso creativo:
Comencemos:😃
 |
 |
|


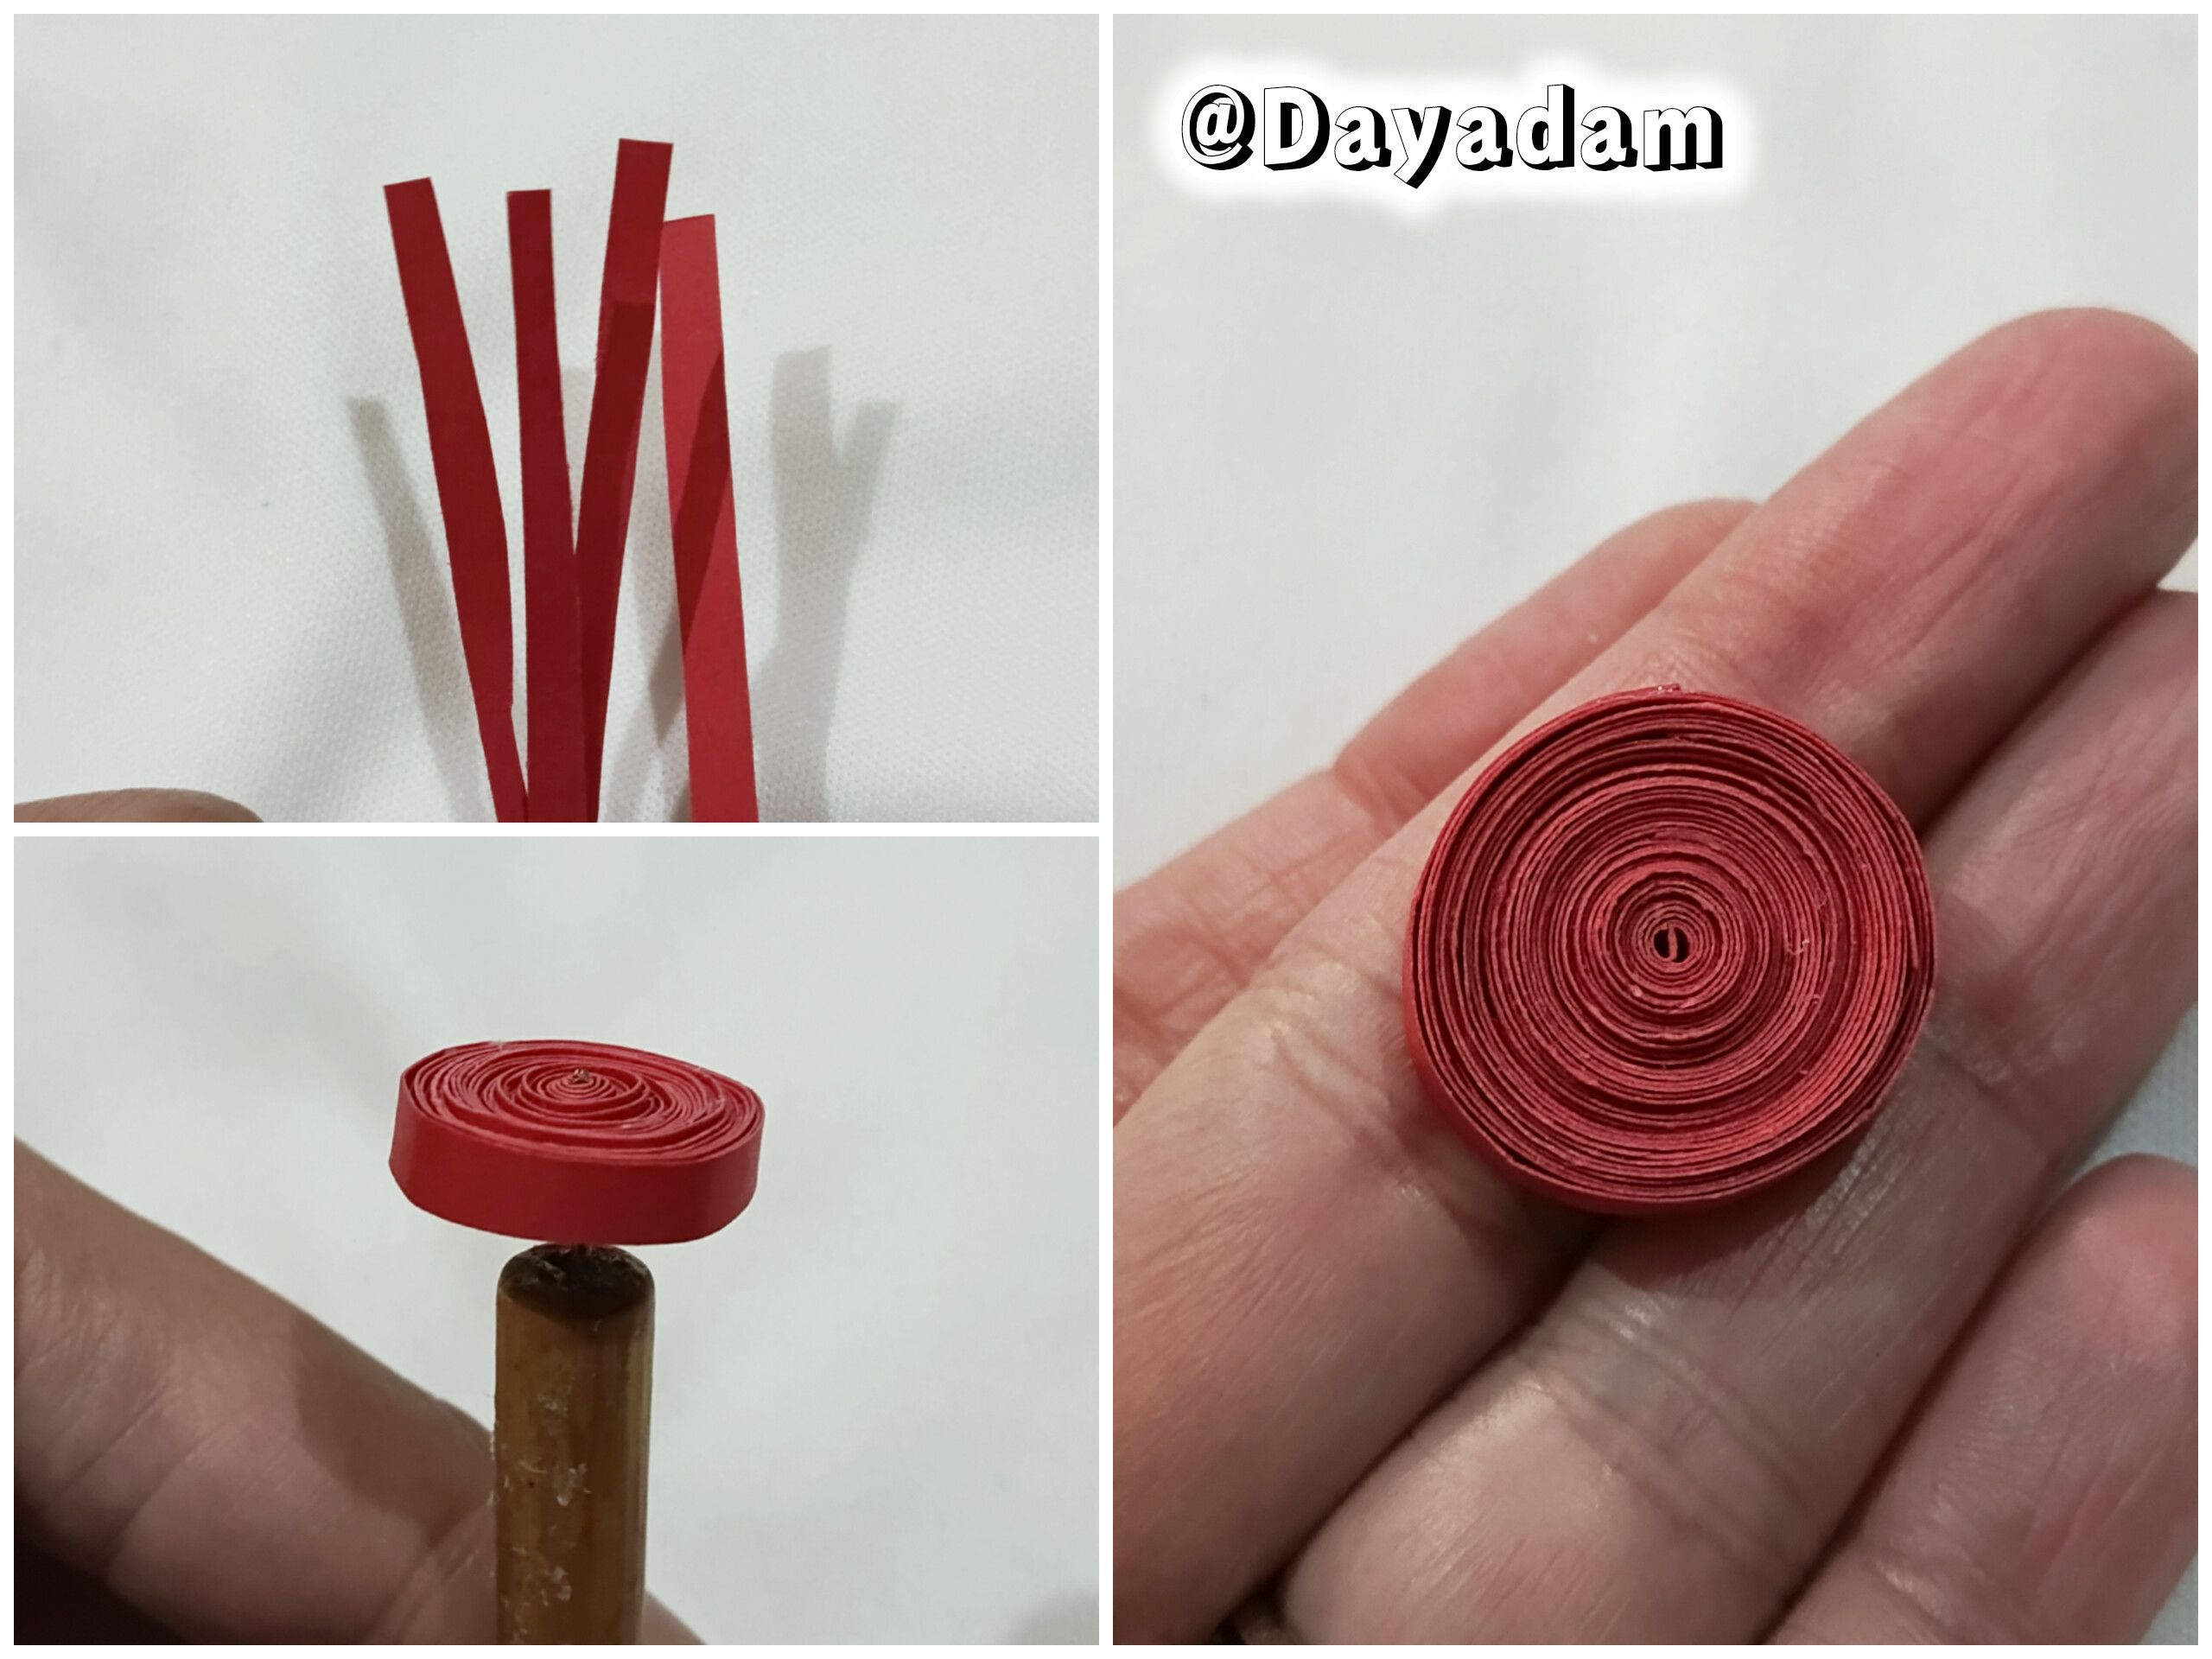
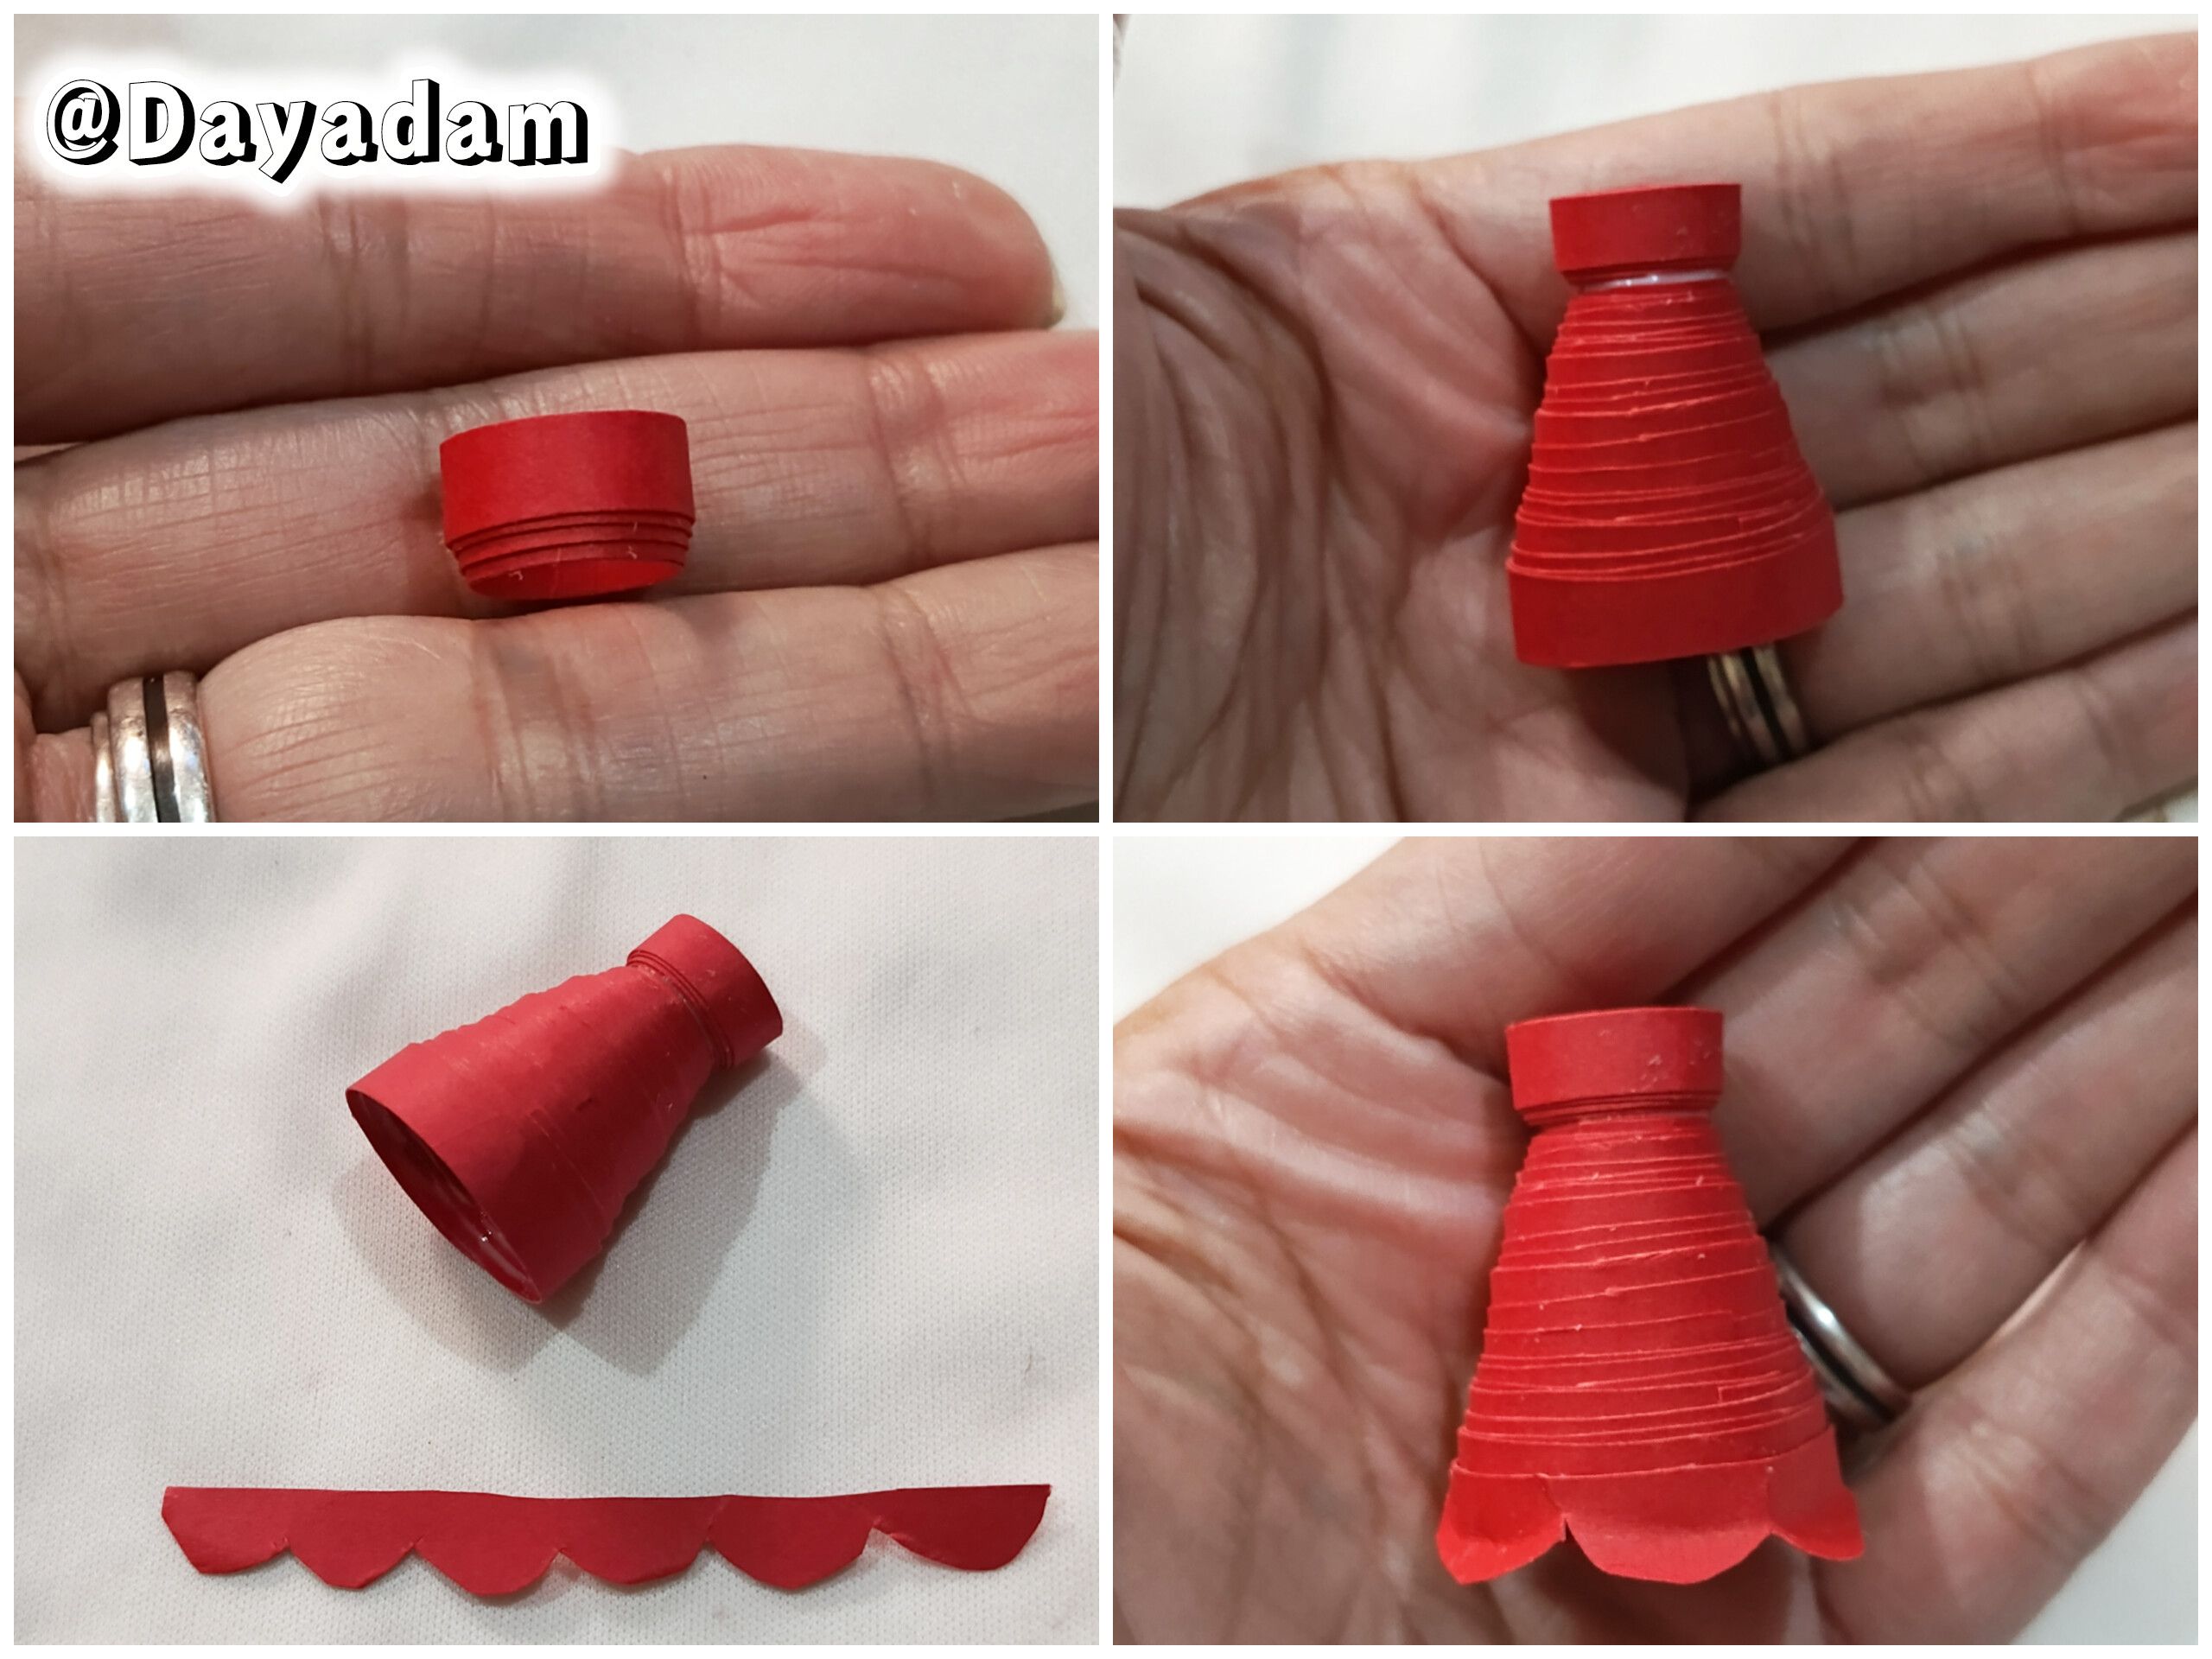
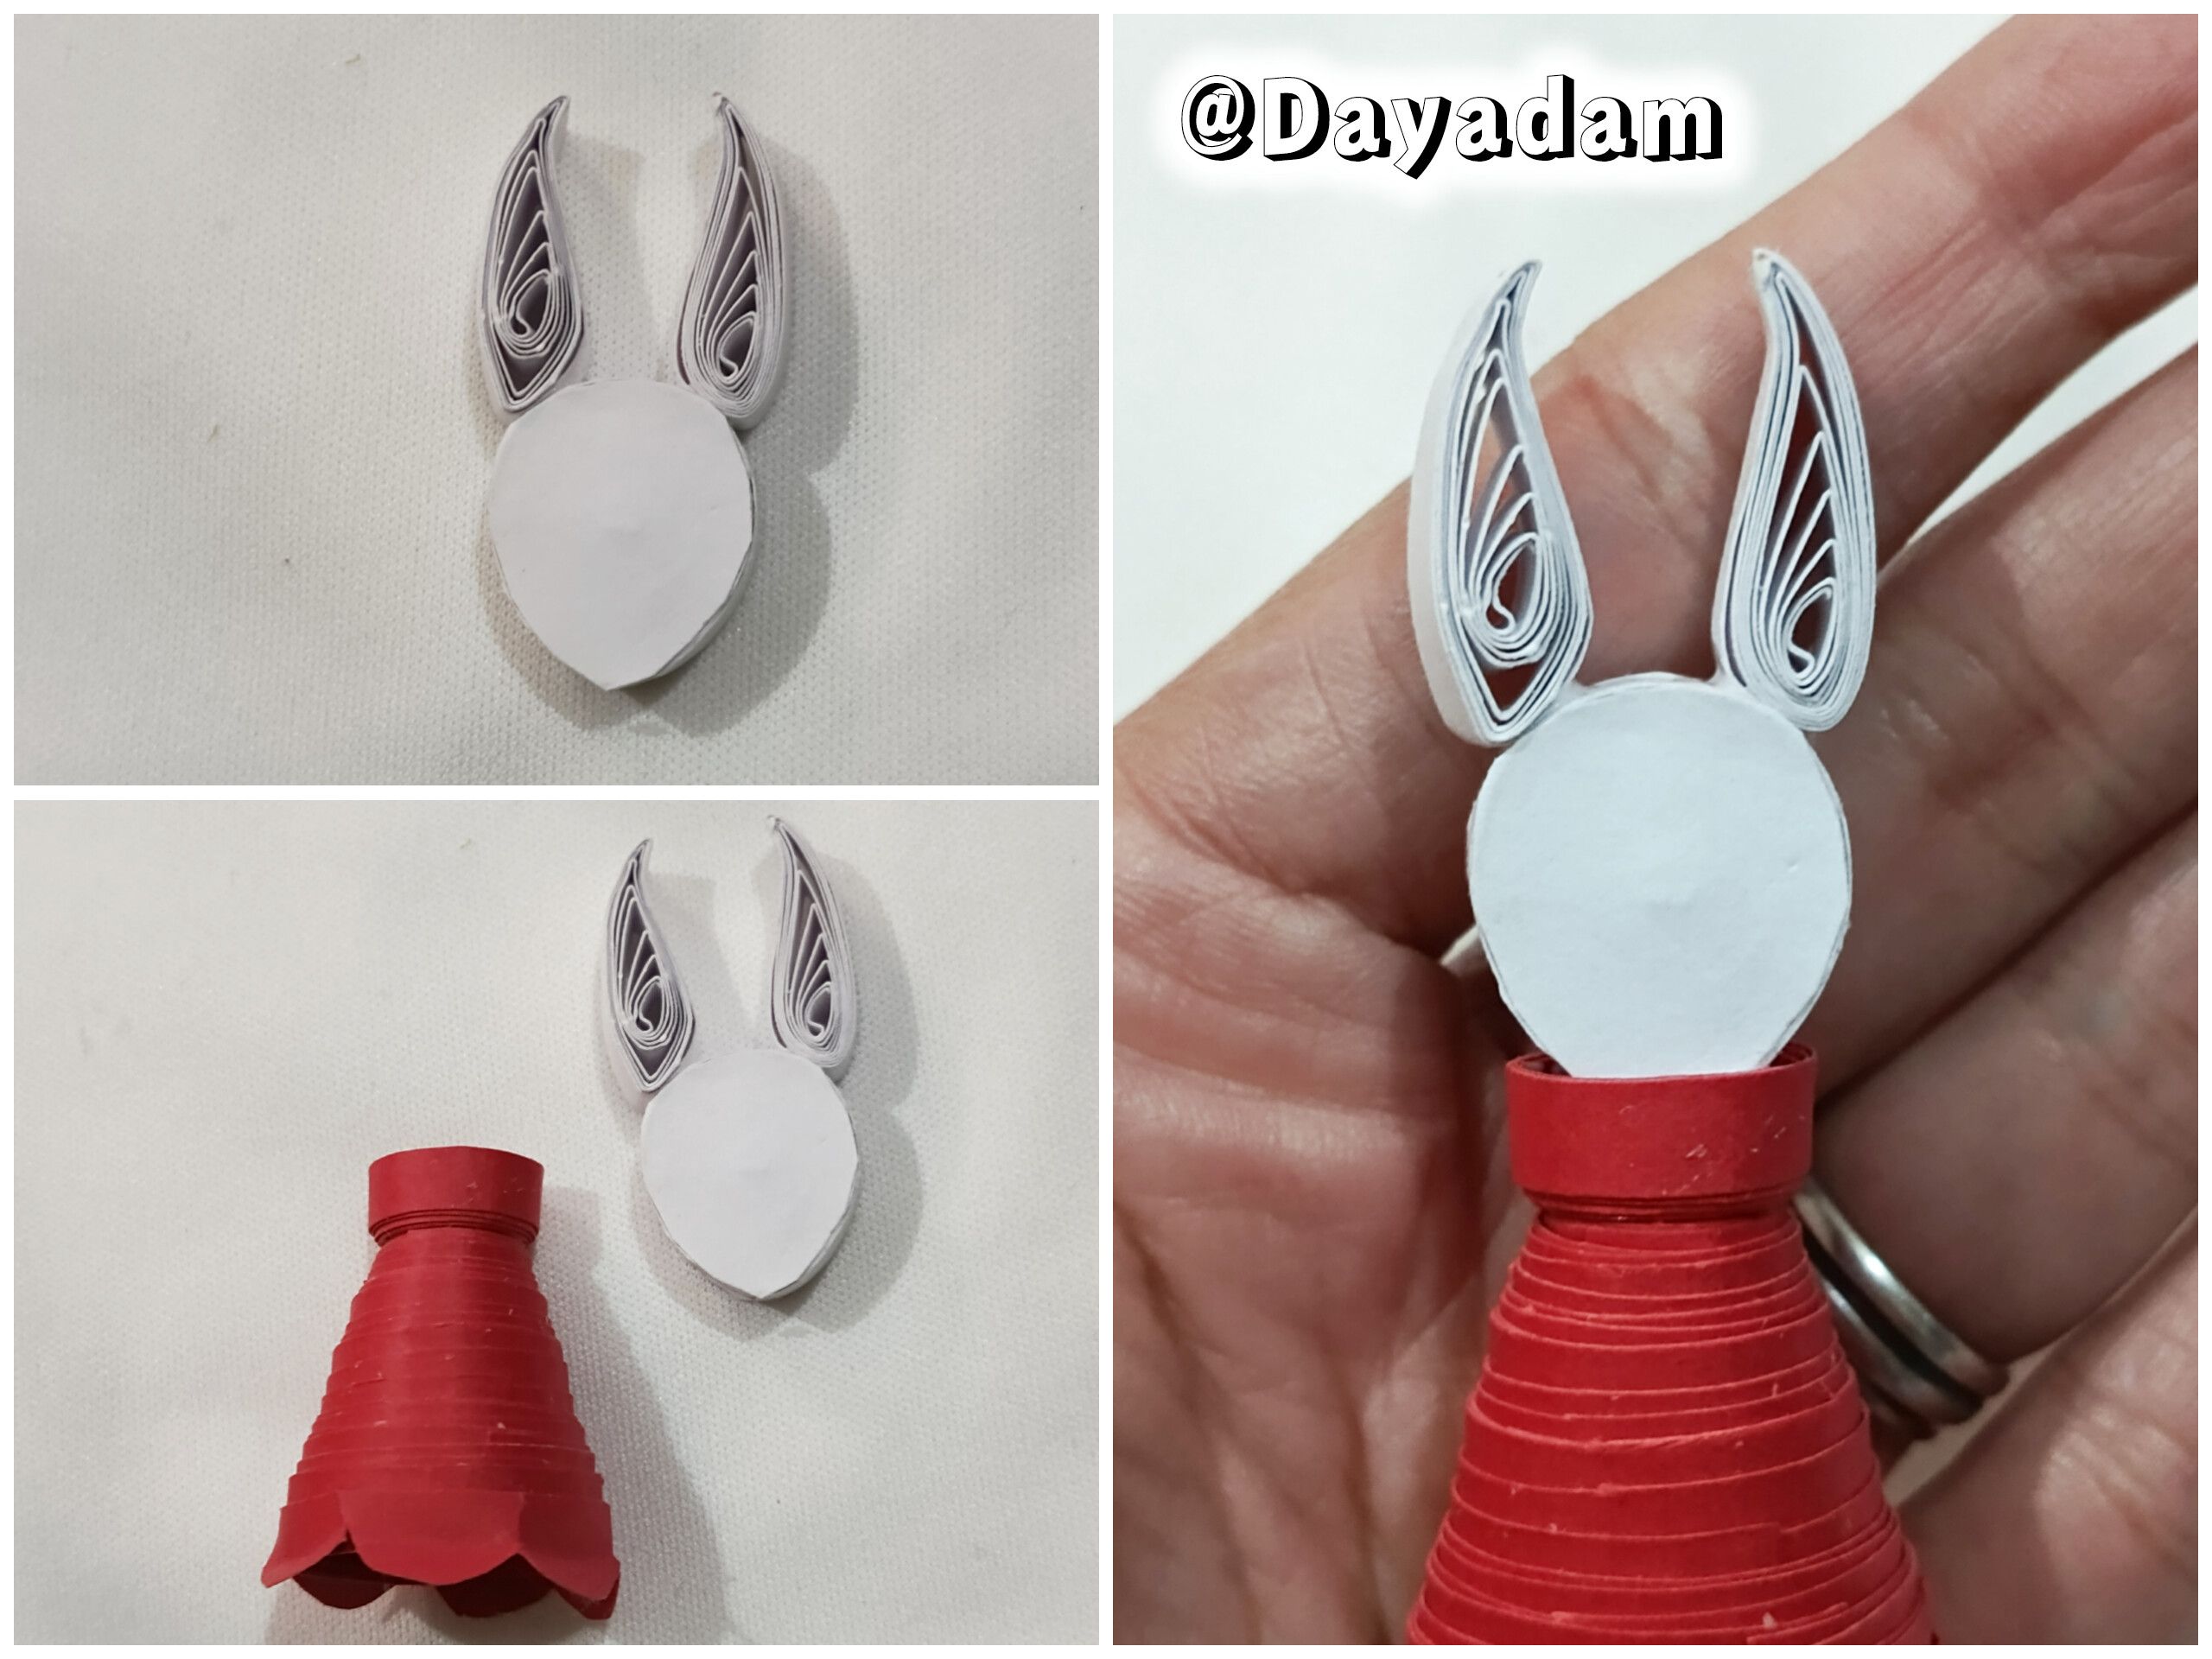
• I cut strips 4 mm wide from red cardstock and used a quilling needle to make a closed circle. Once the circle was ready, I molded it into a 20 mm circle template, then used my fingers to complete the cone shape. I applied extra-strong white glue to the inside to prevent it from deforming and let it dry thoroughly. This will be the character's body.
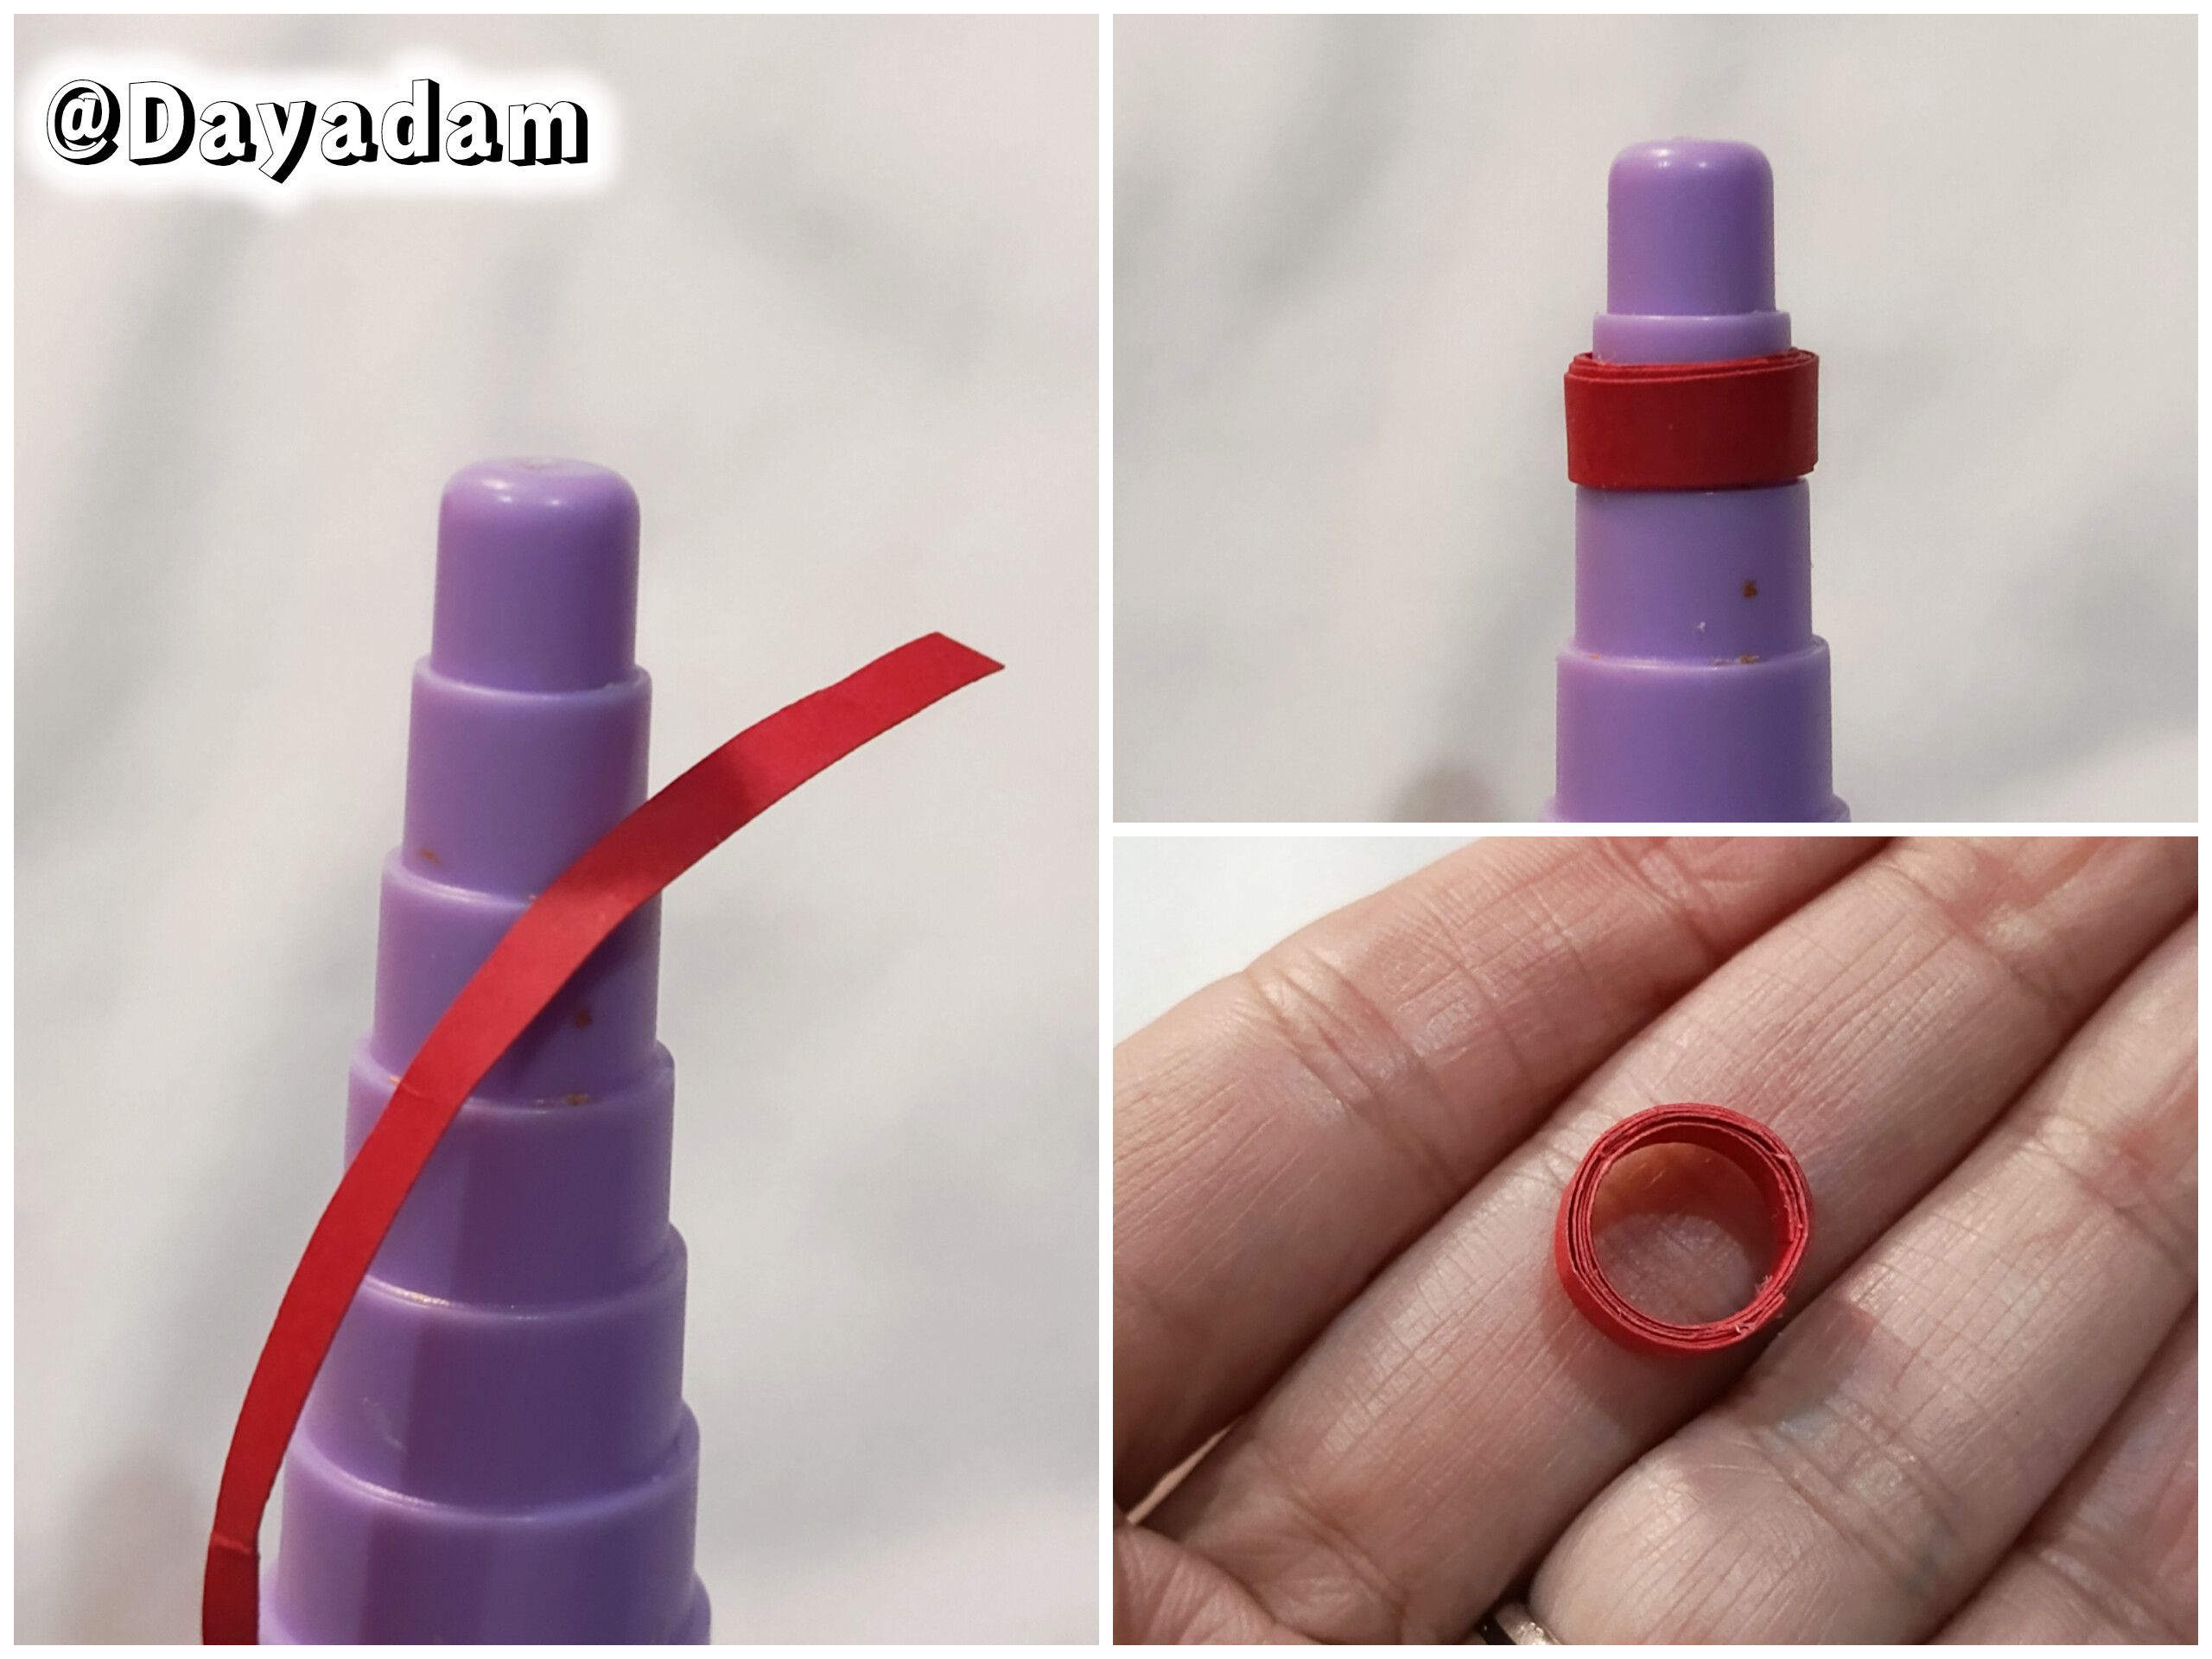
• Using a circle molding mandrel, I made a small ring with 4 mm wide red tape on the second measurement from top to bottom. I glued this on top of the character's body to resemble the neck of a cape.
• I cut out a strip of red cardstock and made some wavy shapes at the bottom. I glued this to the character's body.

• De una cartulina color rojo recorté tiras de 4 mm de ancho, con ella procedi a realizar con ayuda de la aguja para quilling un círculo cerrado. Listo el círculo lo moldea en una plantilla para círculos en la medida 20 mm, luego con los dedos completé la forma de un cono, apliqué pega blanca extra fuerte por su parte interna para evitar que el mismo se deforme, deje secar muy bien. este será el cuerpo del personaje.
• En un mandril para moldear círculos, realicé un pequeño aro con cinta de color rojo de 4 mm de ancho en la segunda medida de arriba hacia abajo, este lo pegué arriba del cuerpo del personaje para asemejar el cuello de una capa.
• Recorte una tira de cartulina roja a la cual le hice unas forma onduladas en la parte de abajo, está la pegué en el cuerpo del personaje.
 |
 |
 |
 |
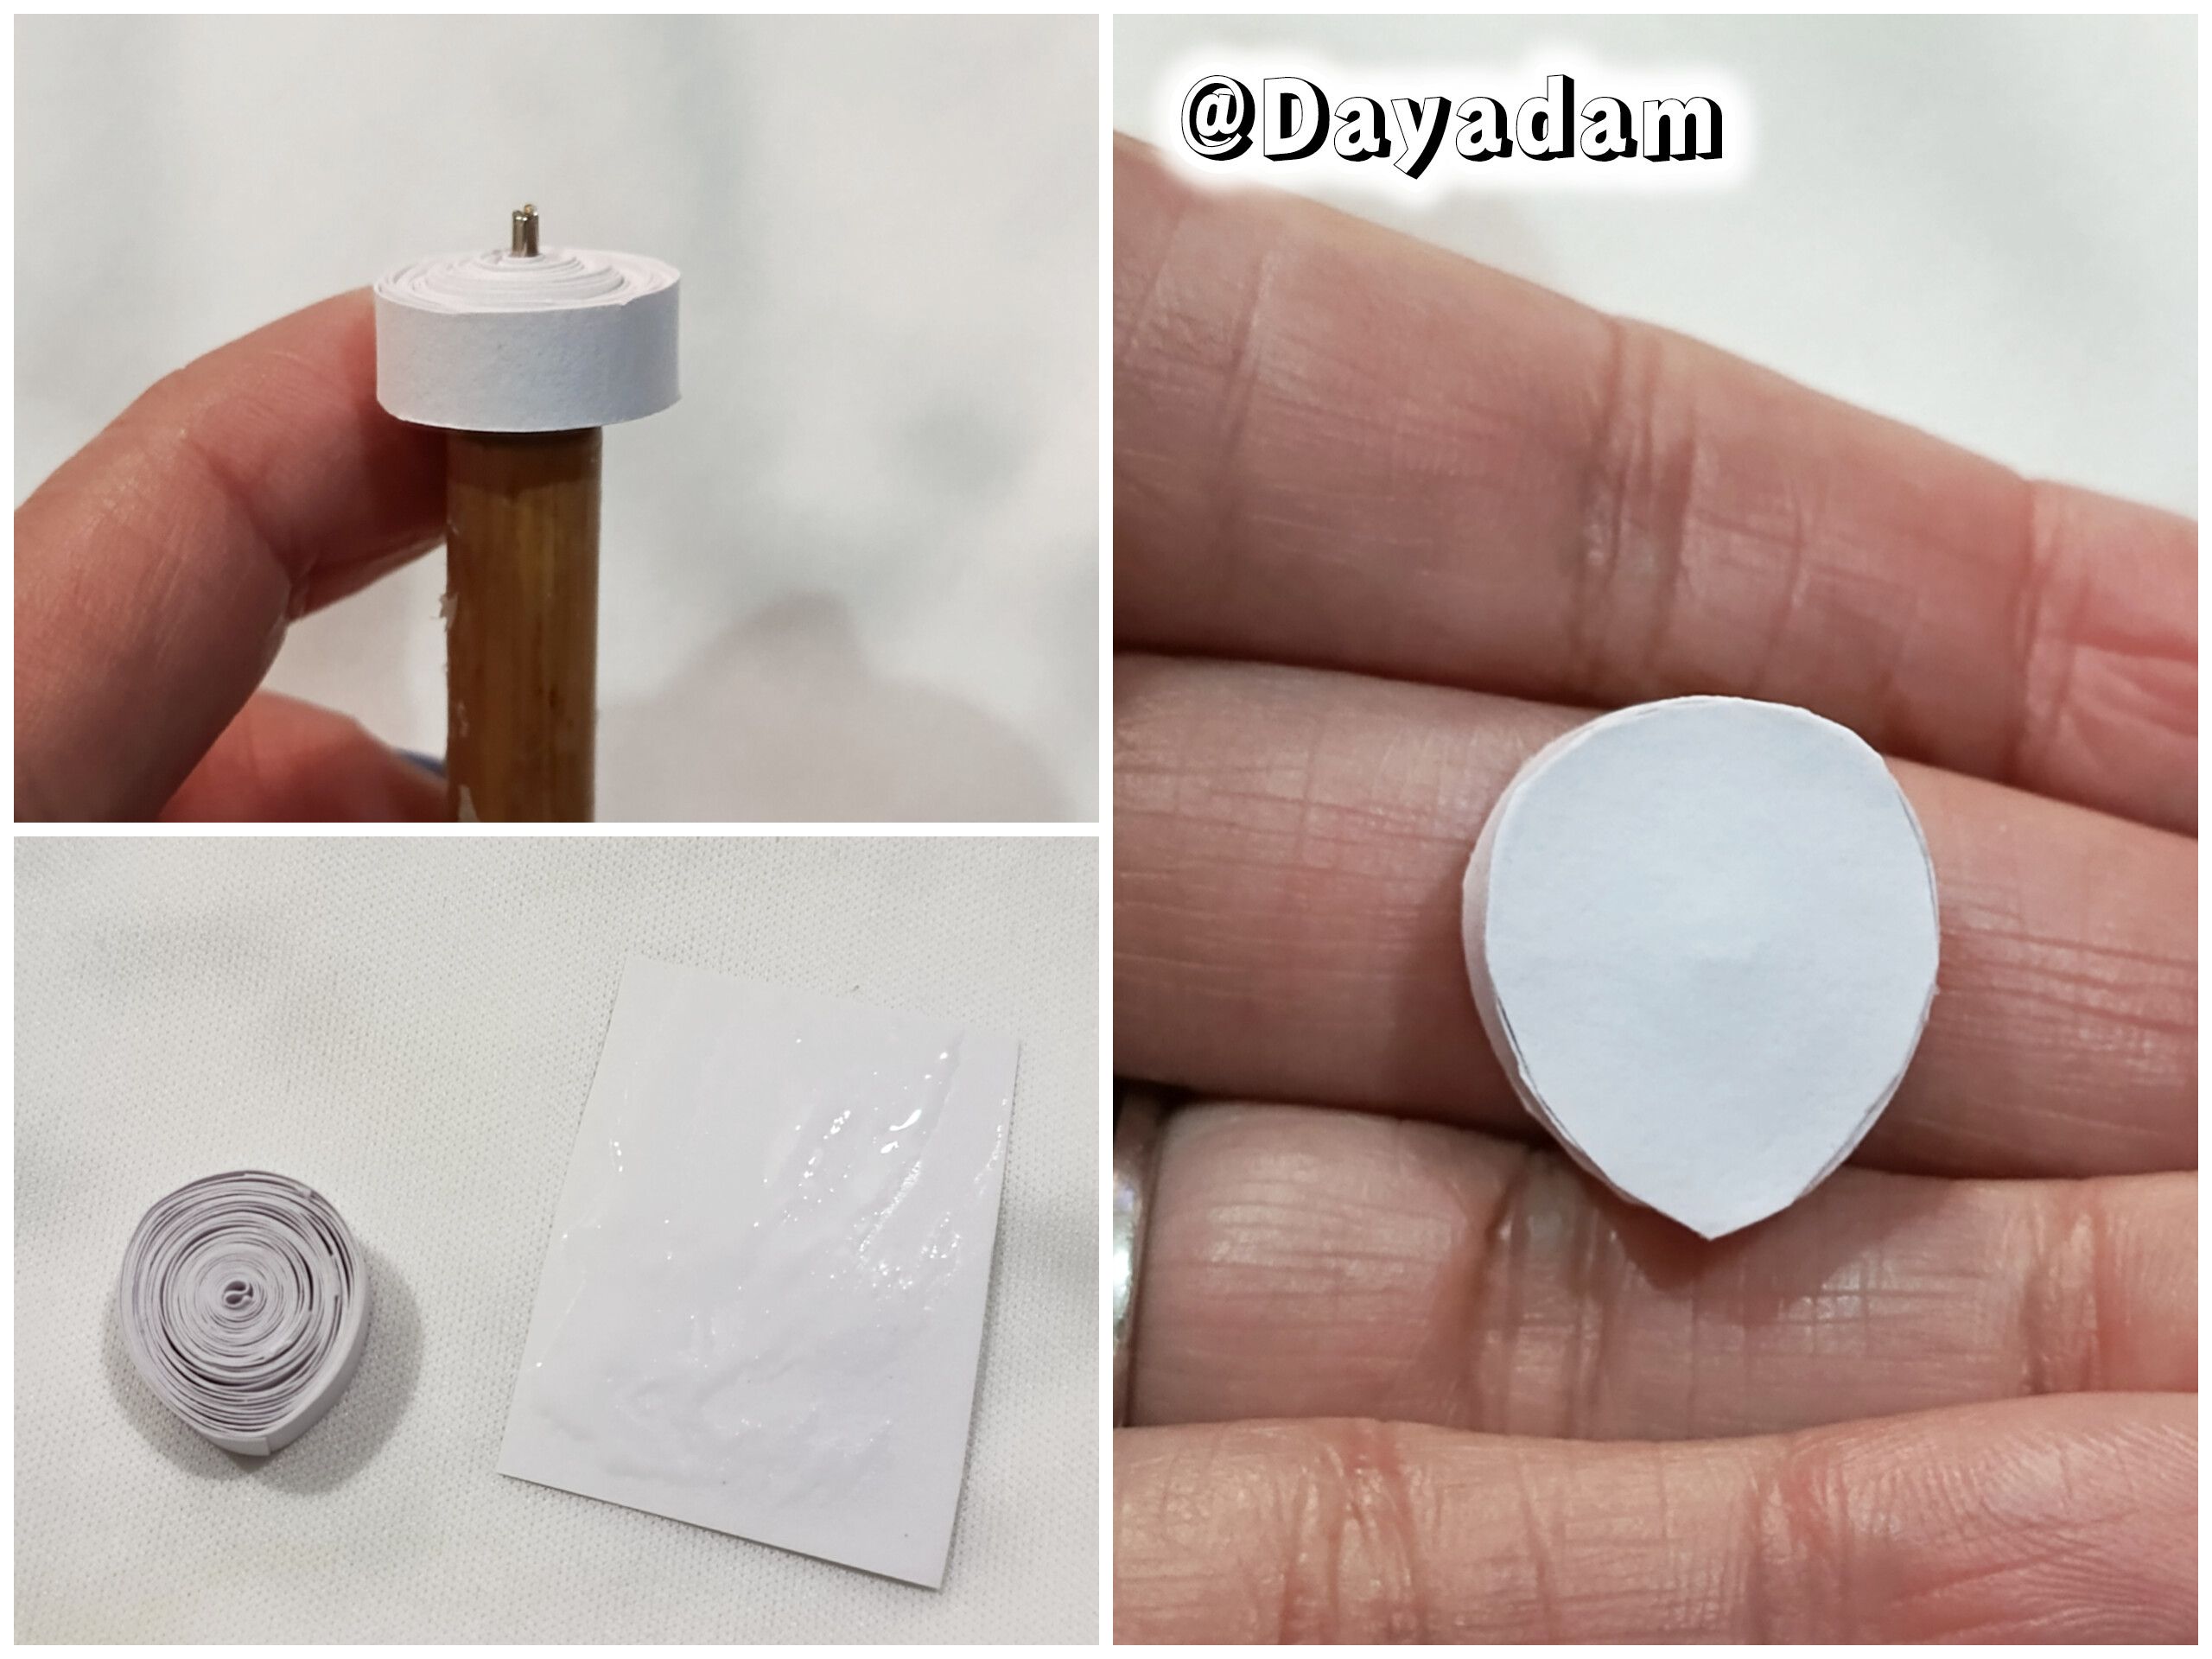
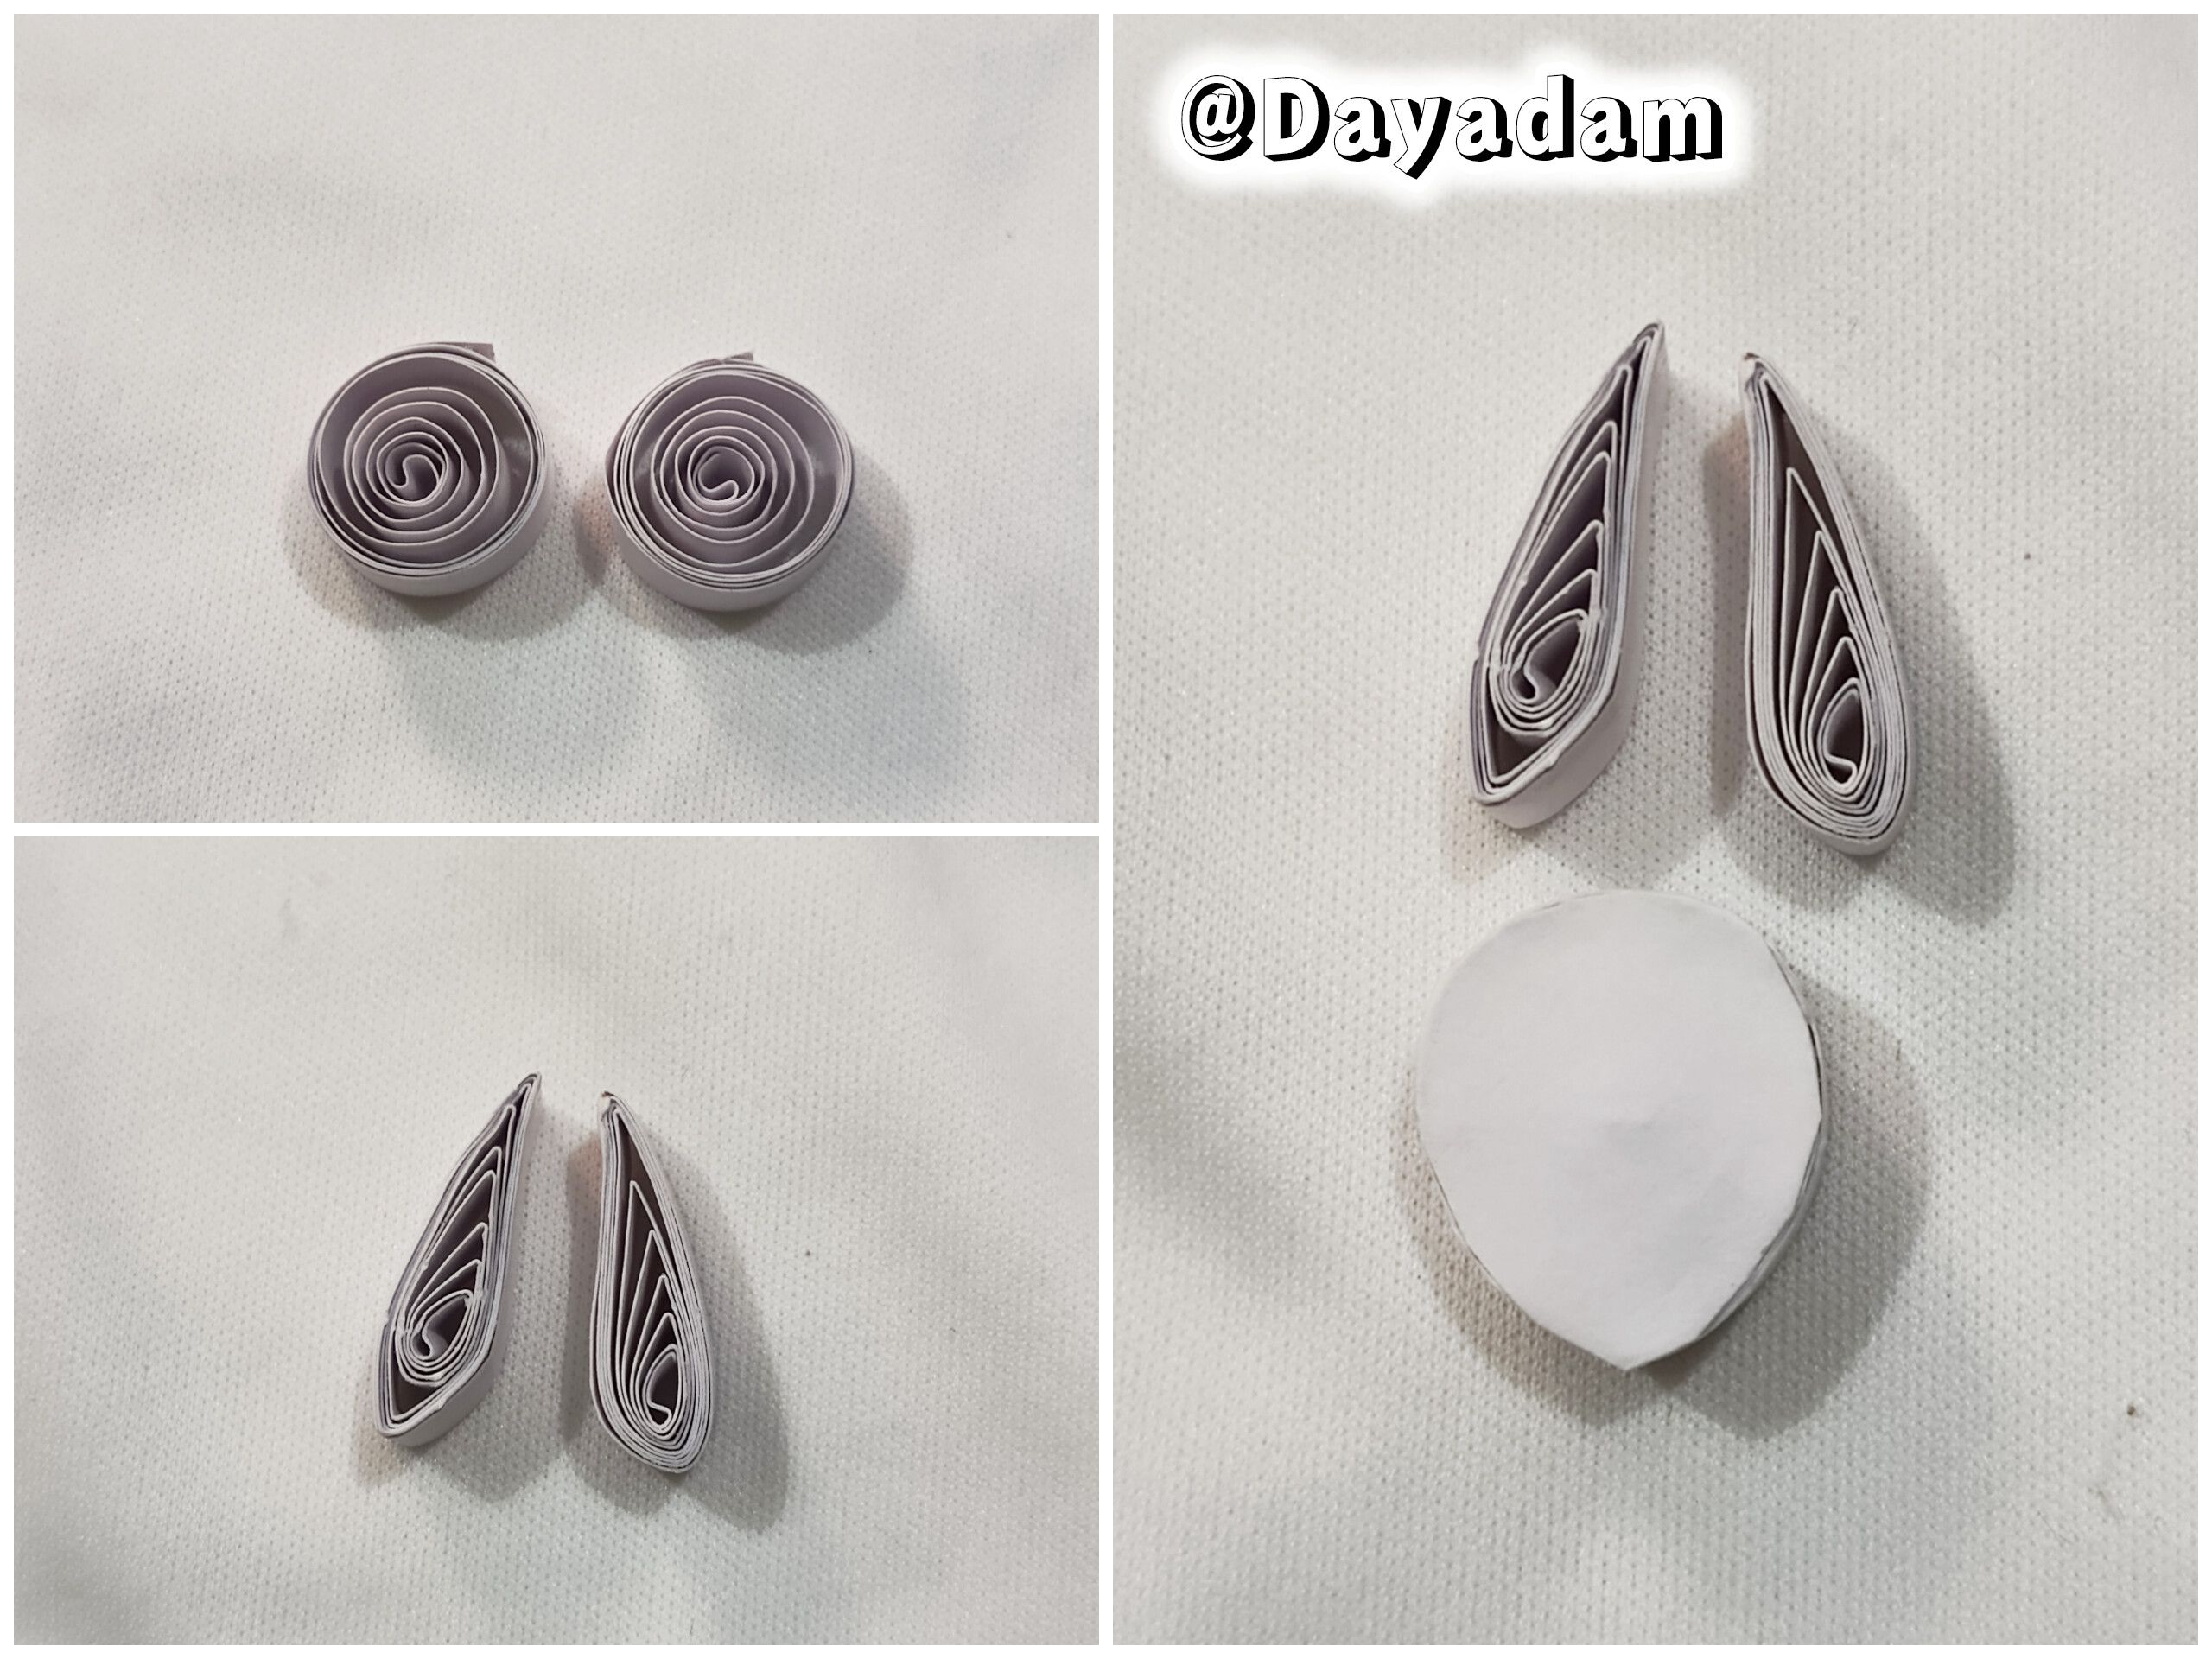
• To make the head, cut a 4 mm wide strip of white paper. Using the needle, roll it up to form a closed circle. Shape it by lengthening the bottom part slightly, then glue a piece of cardstock to both sides.
• I made the ears by cutting two open circles out of 4 mm wide white tape. I shaped them into points and stuck them onto the character's head, then joined the head and body together.
• Para hacer la cabeza, recorte una tira de color blanco de 4 mm de ancho, con la aguja enrollé para formar un círculo cerrado, este lo moldee alargando un poco la parte de abajo, luego le pegué un trozo de cartulina en ambas caras.
• Realicé las orejas llevando a cabo dos círculos abiertos con cinta de color blanca de 4 mm de ancho, estás las moldee de forma puntiaguda y pegue en la cabeza del personaje, luego uni la cabeza y el cuerpo.
 |
 |
 |
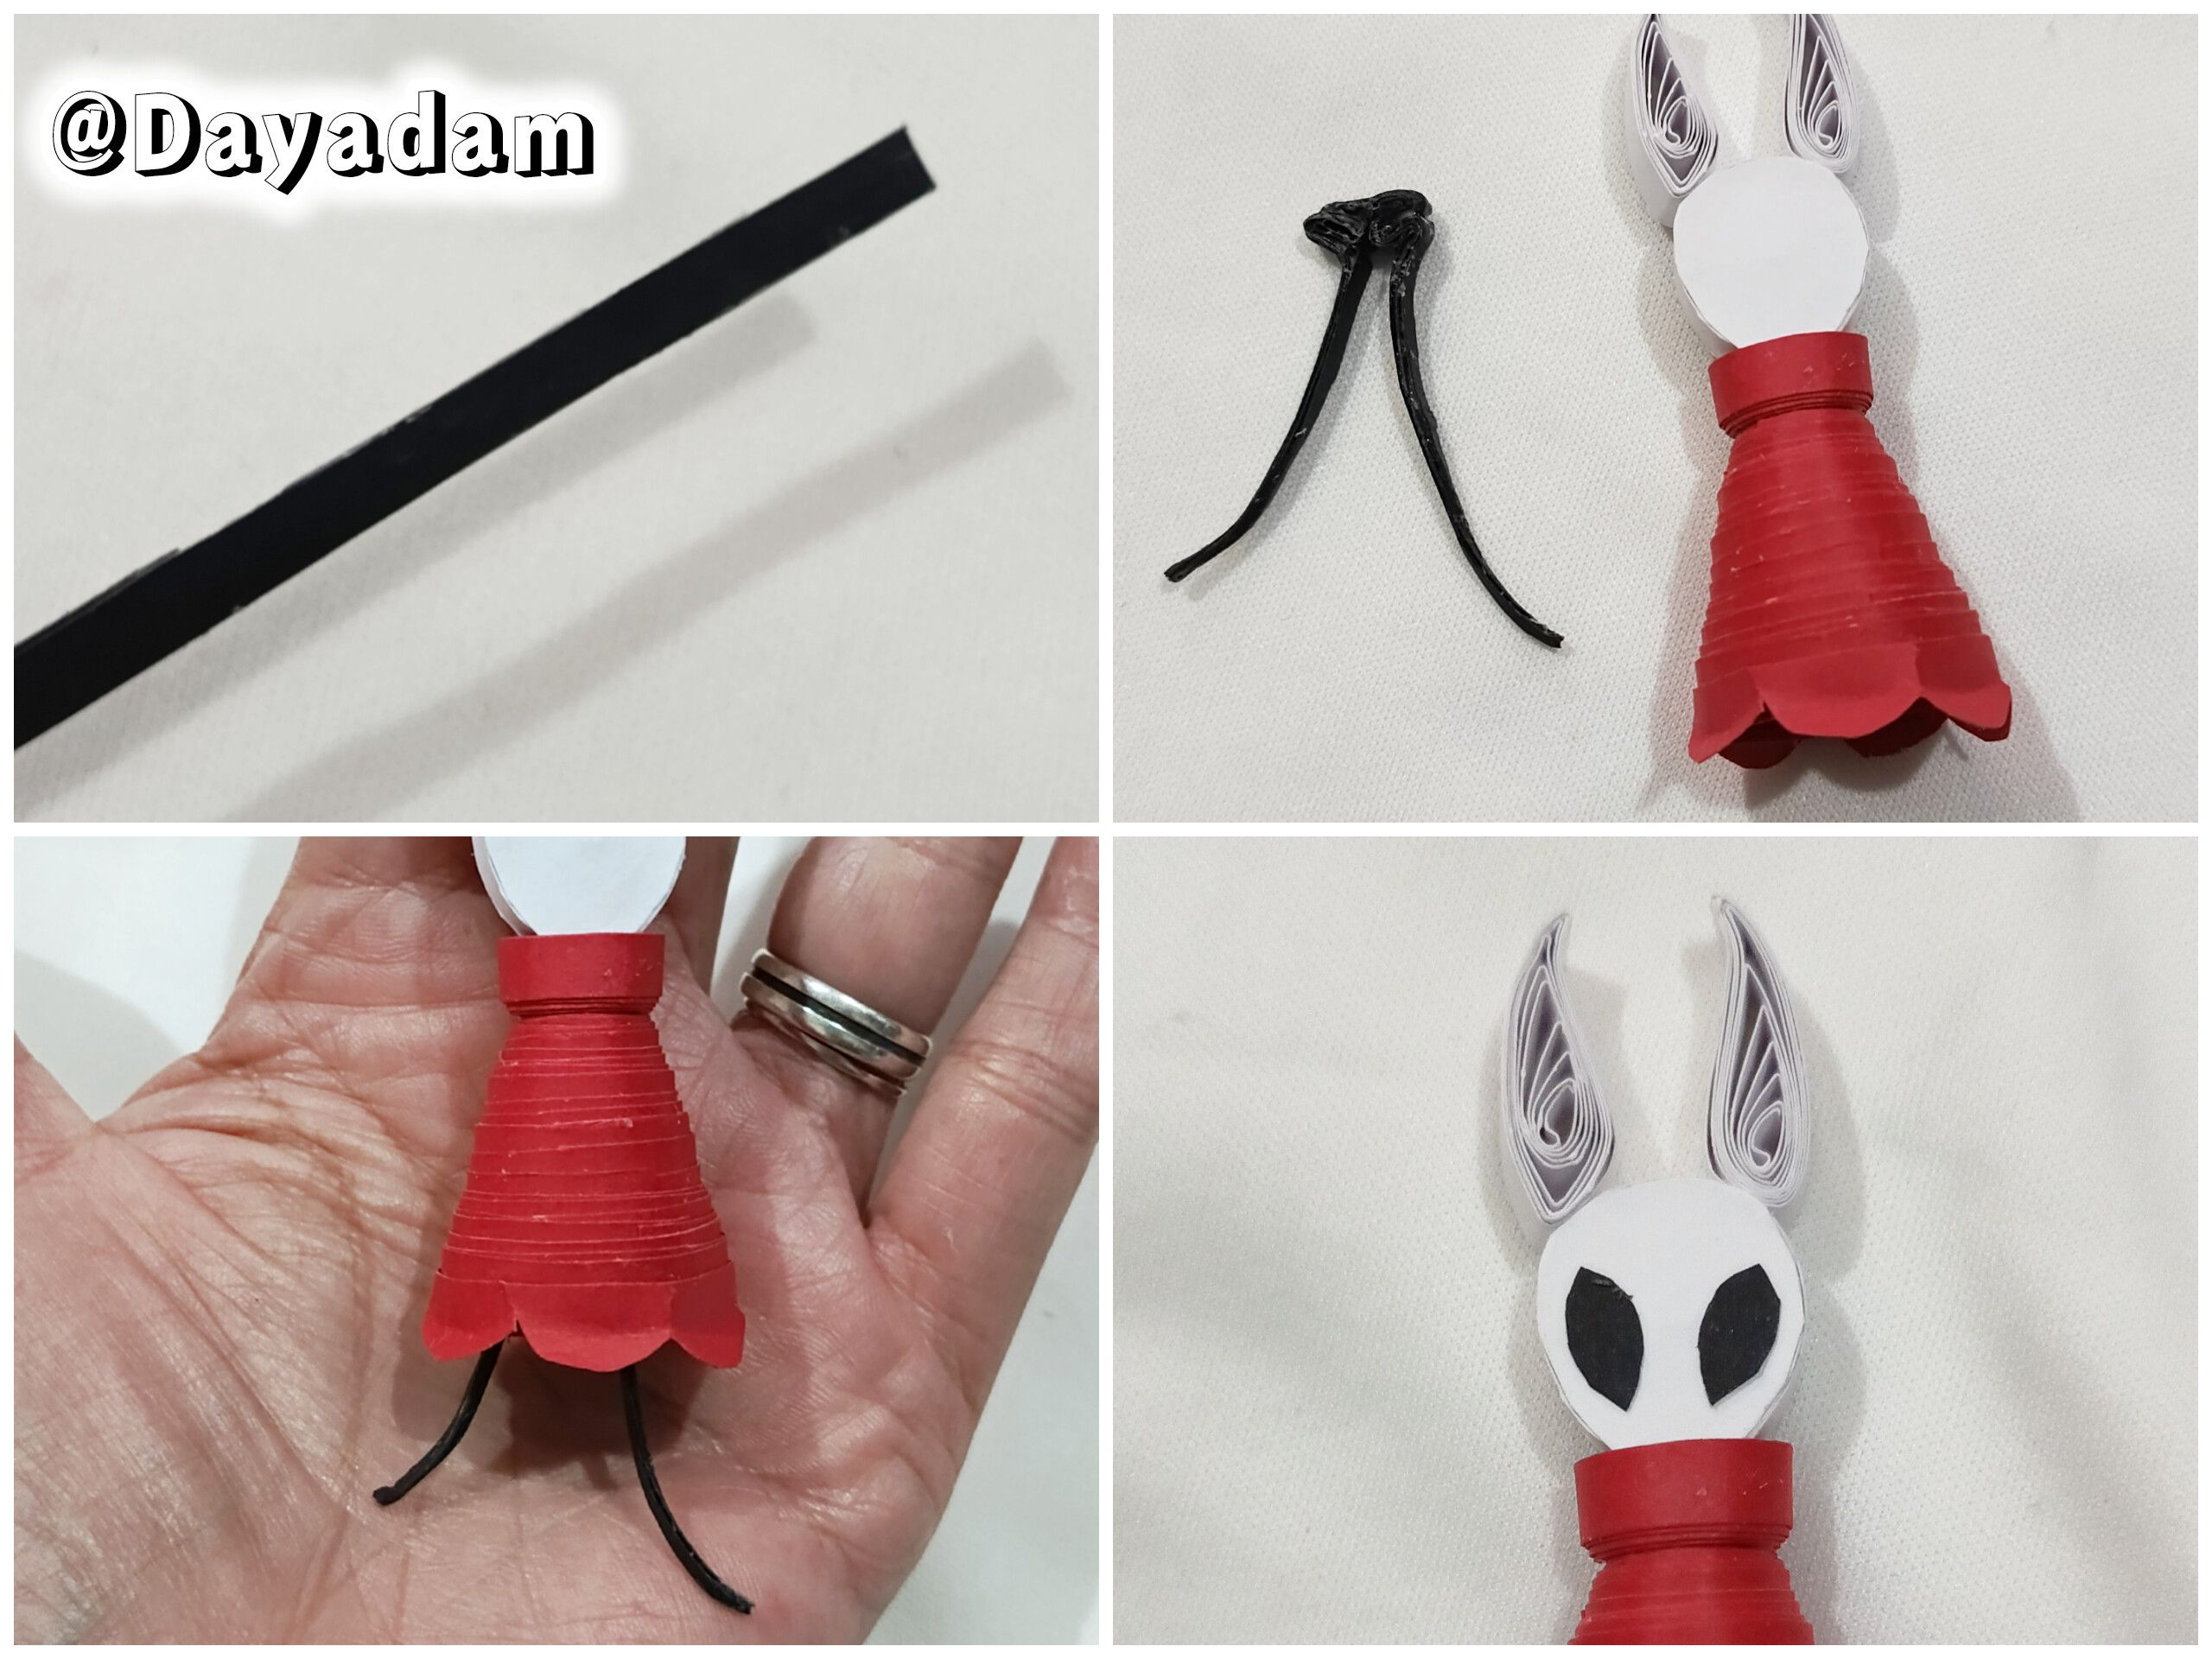
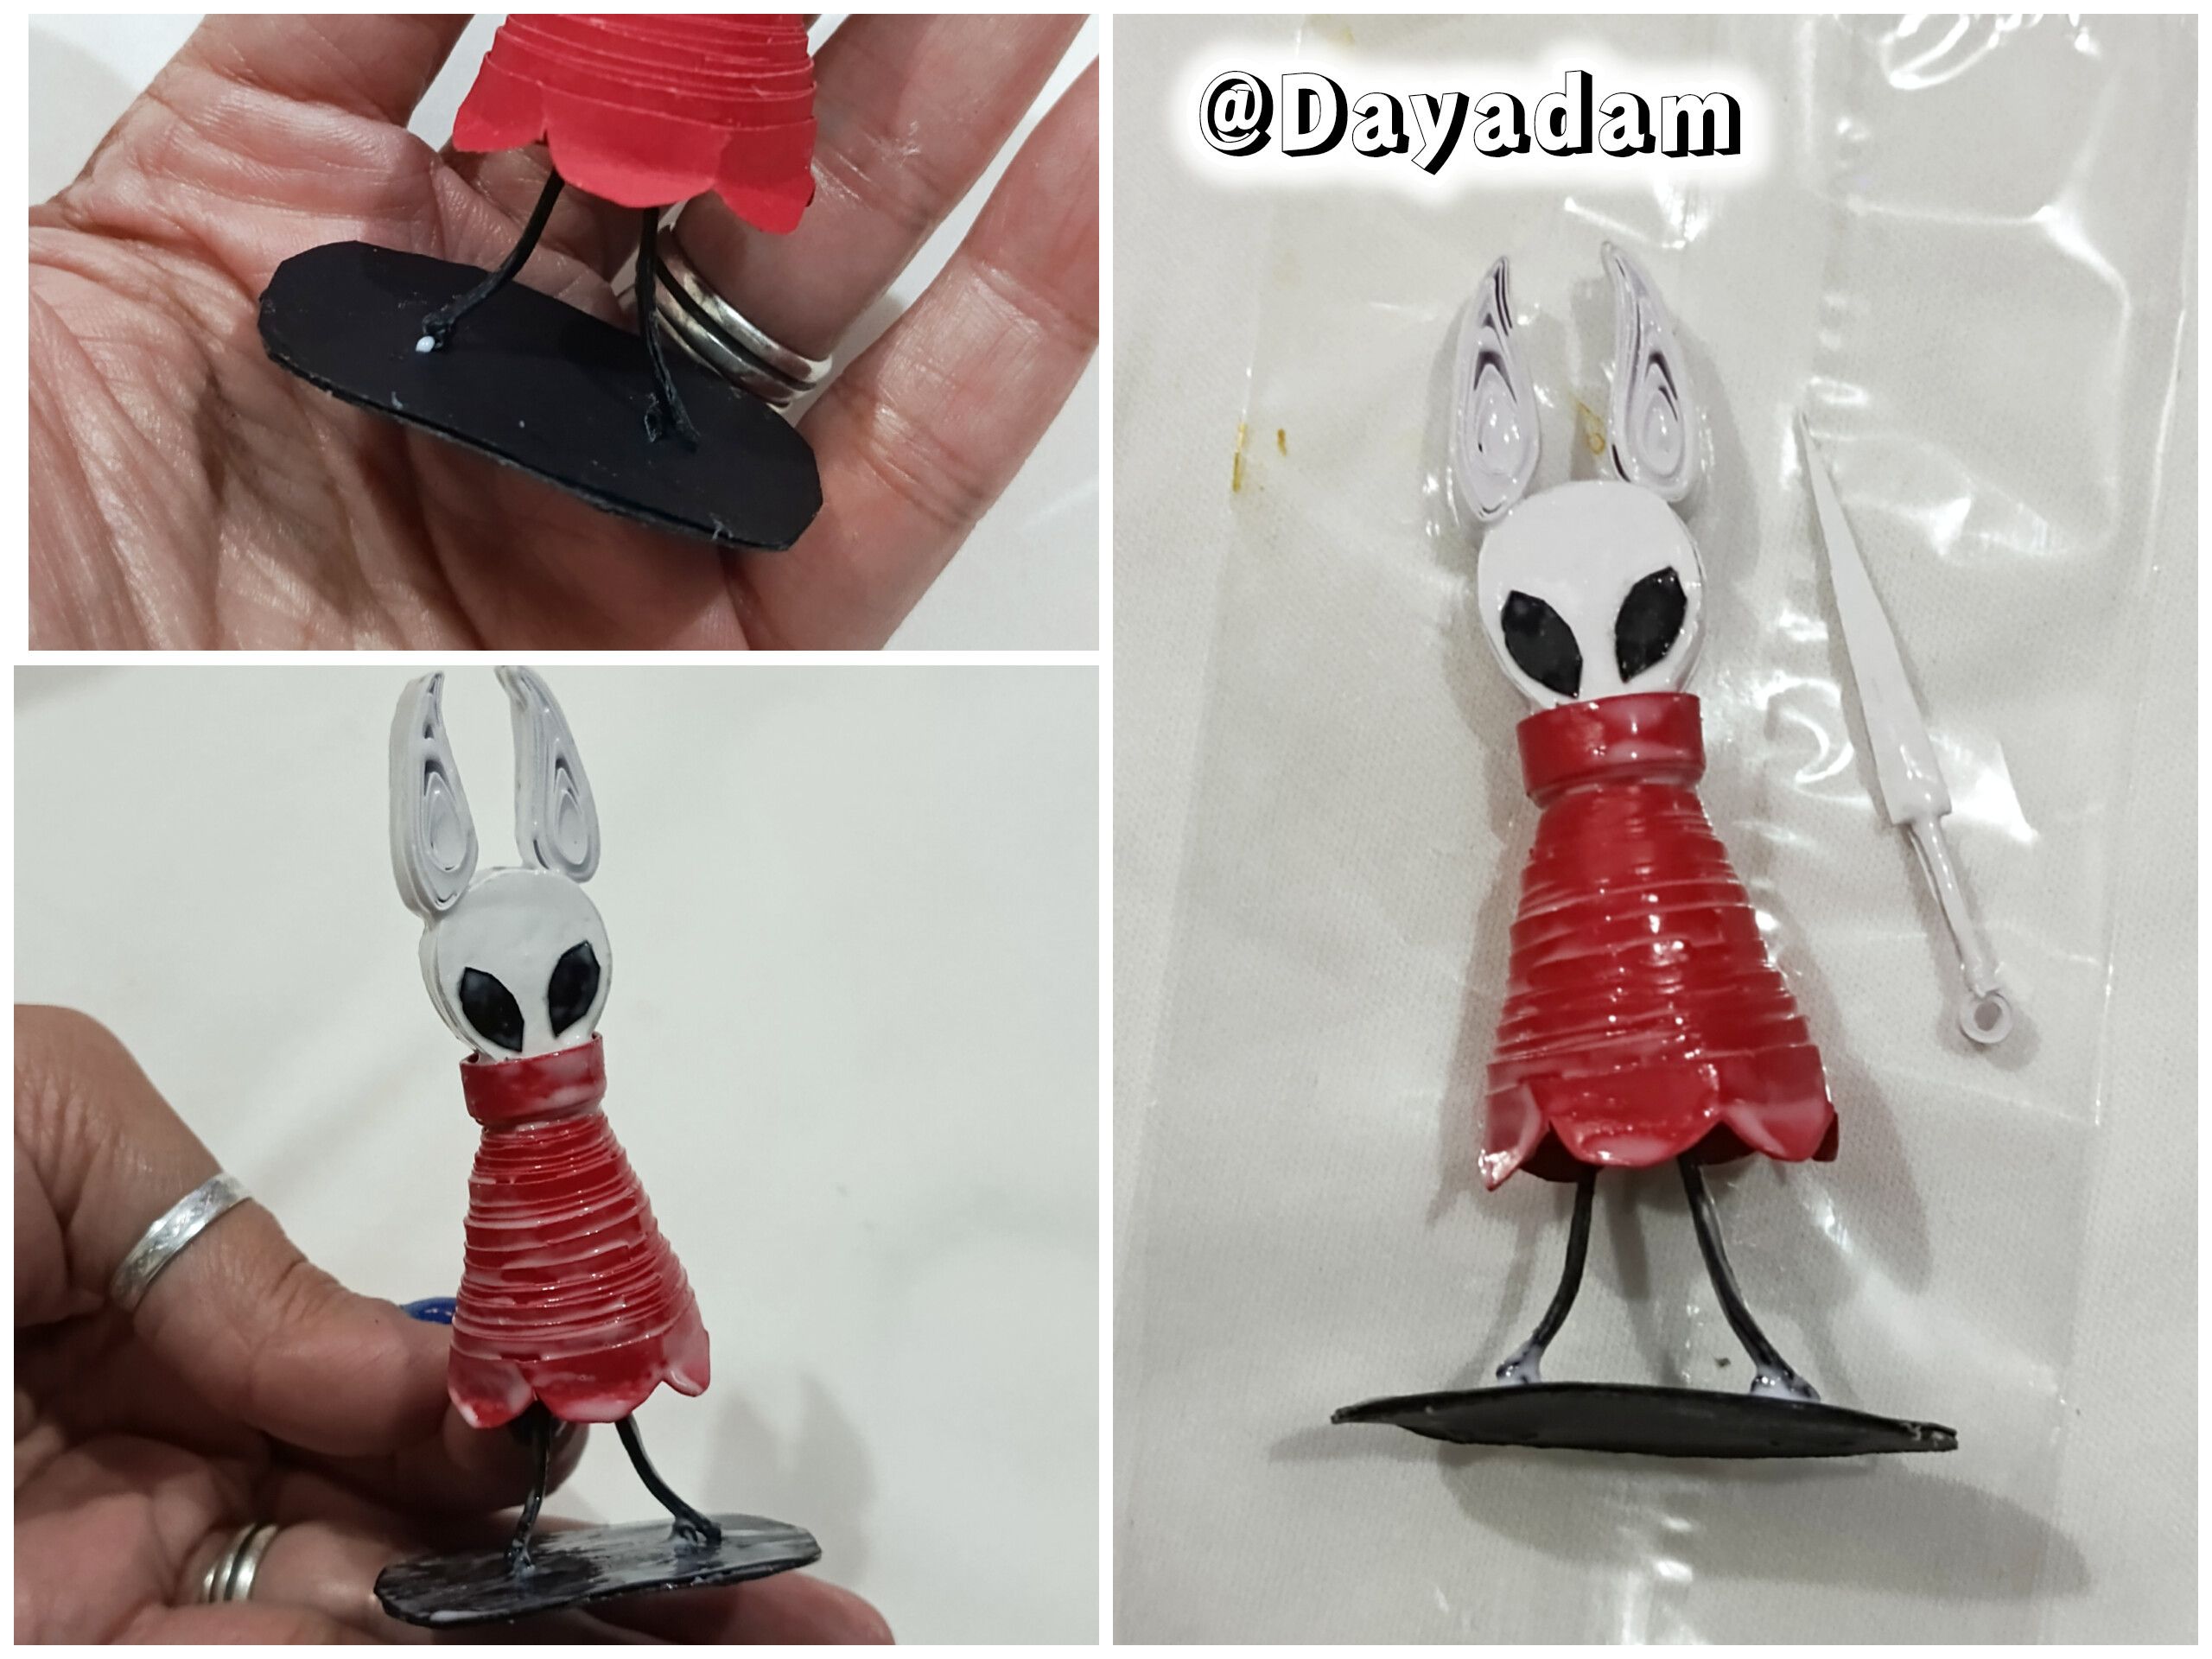
• To make the character's elongated feet, cut out a piece of black cardstock, mold it, and cut it out as shown in the image, then glue it to the bottom of the body.
• I cut out the eyes from a piece of black cardstock and glued them onto the face.
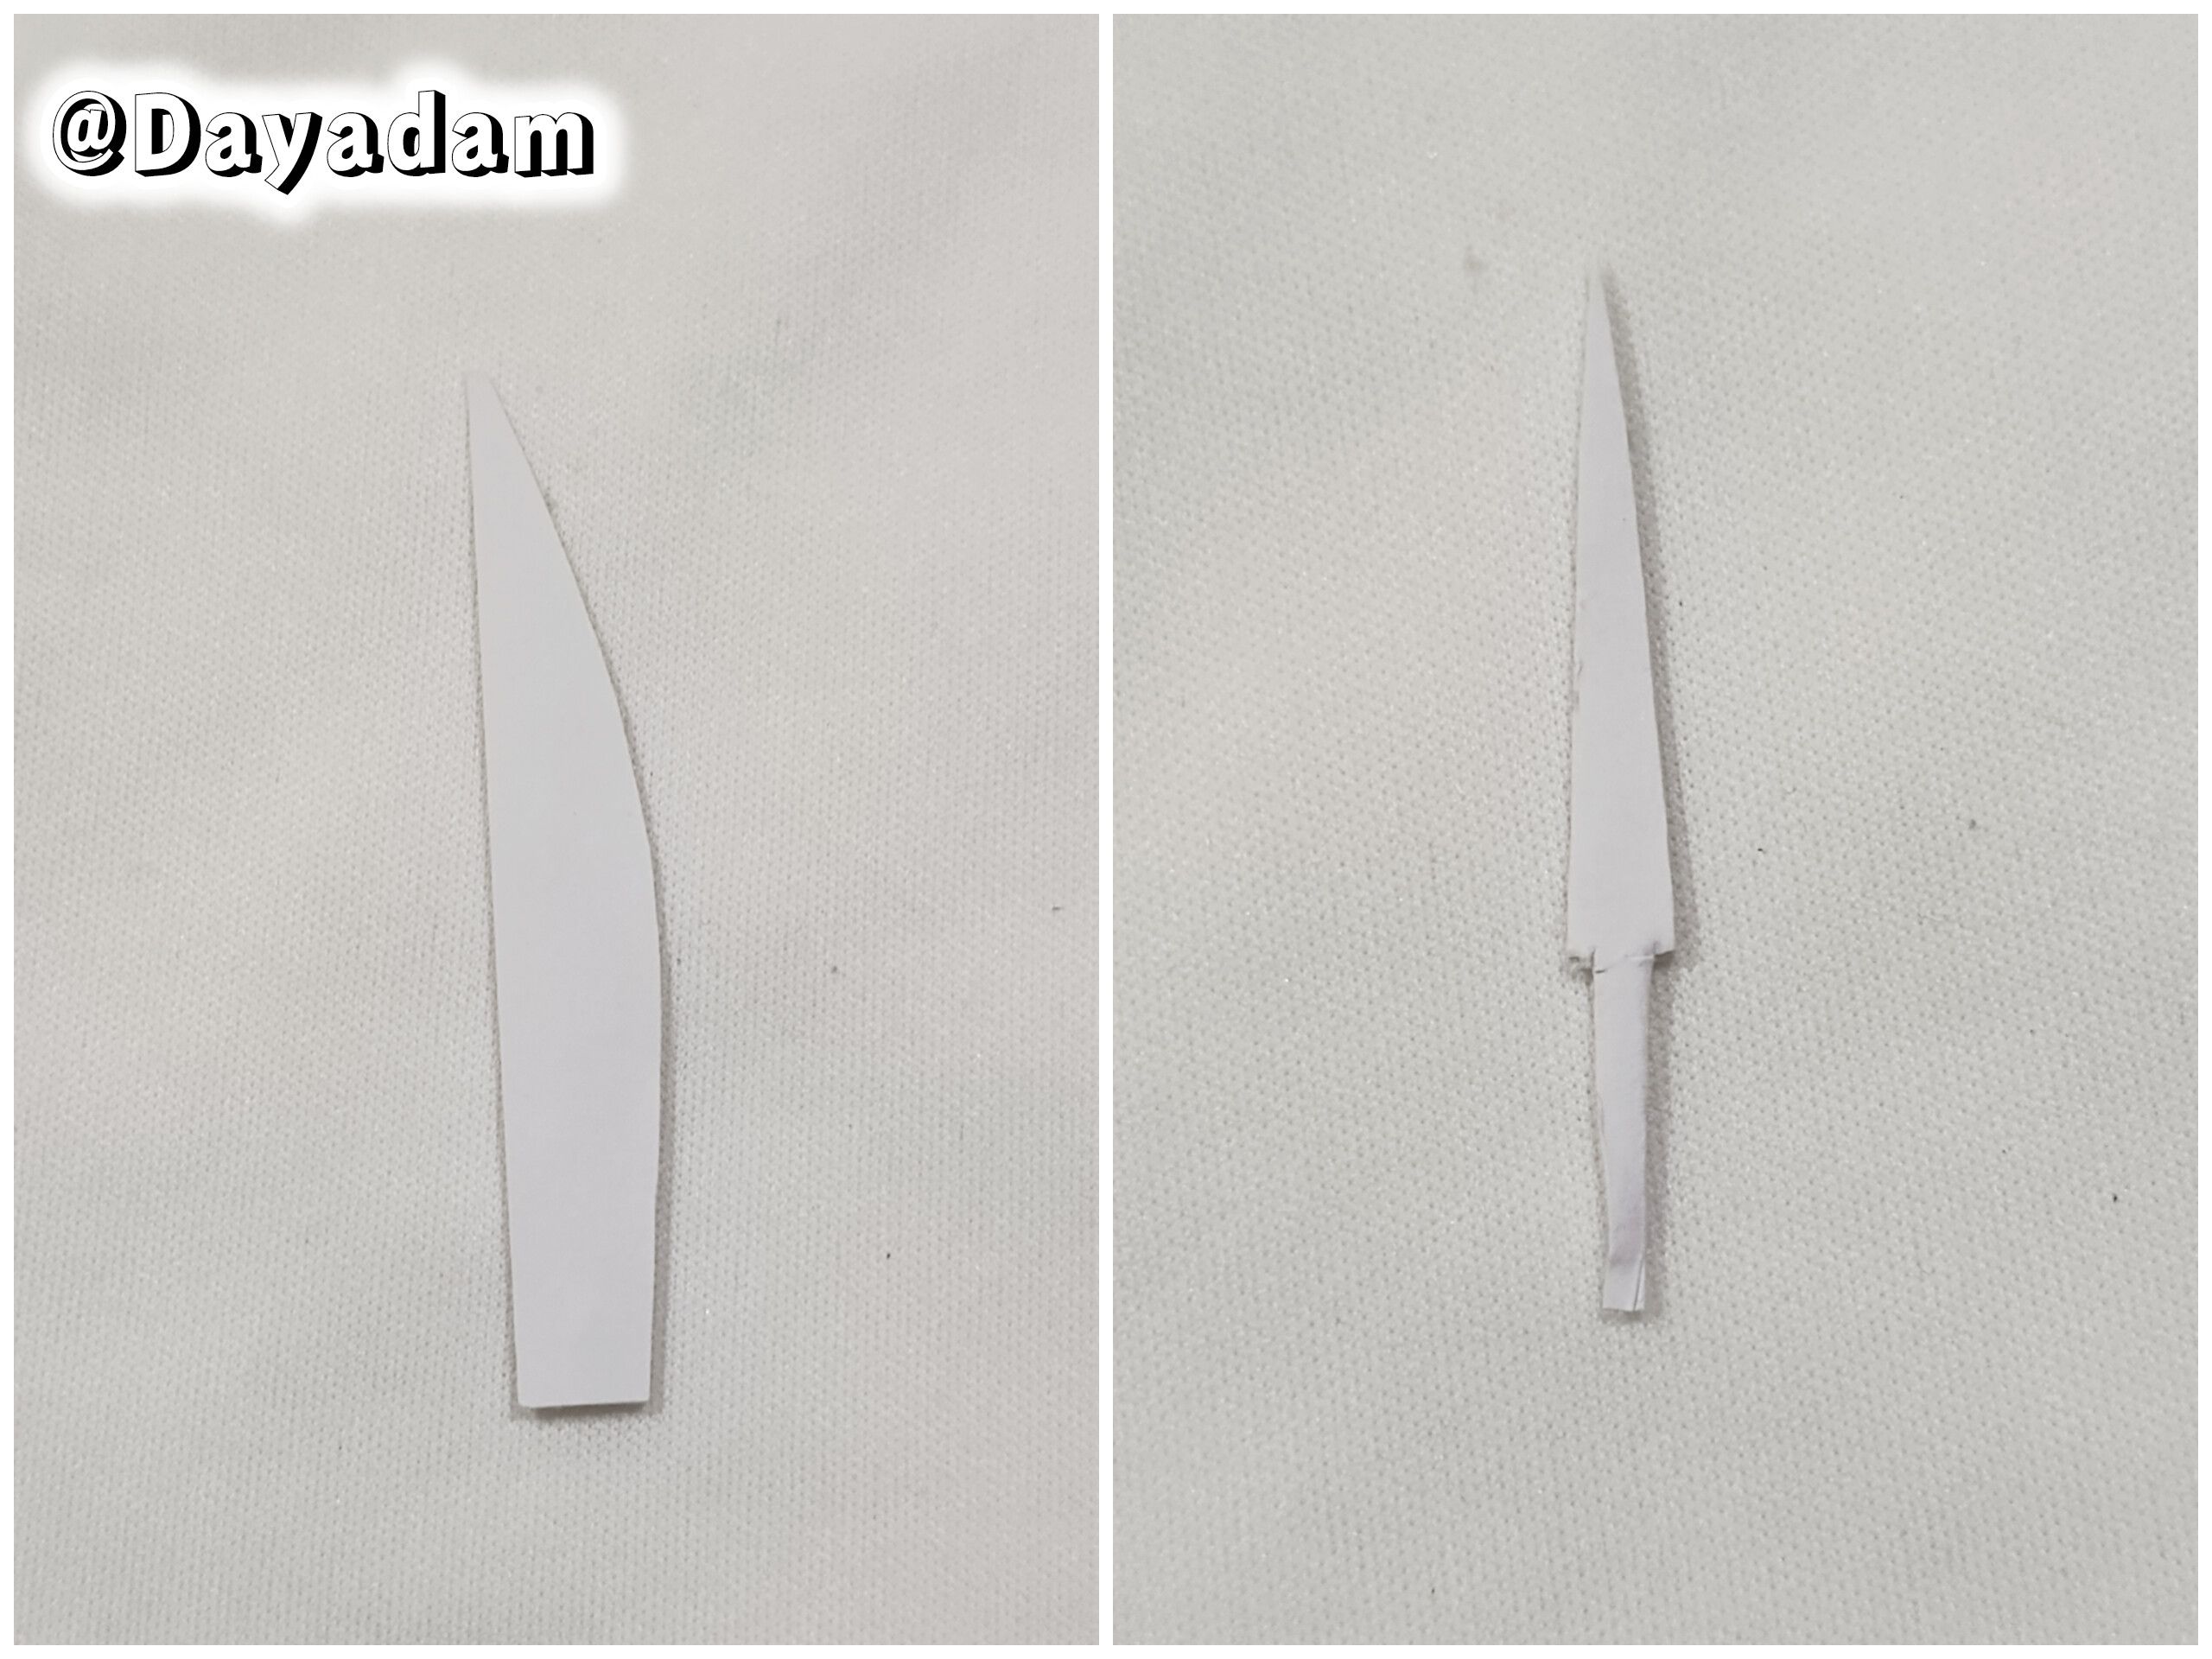
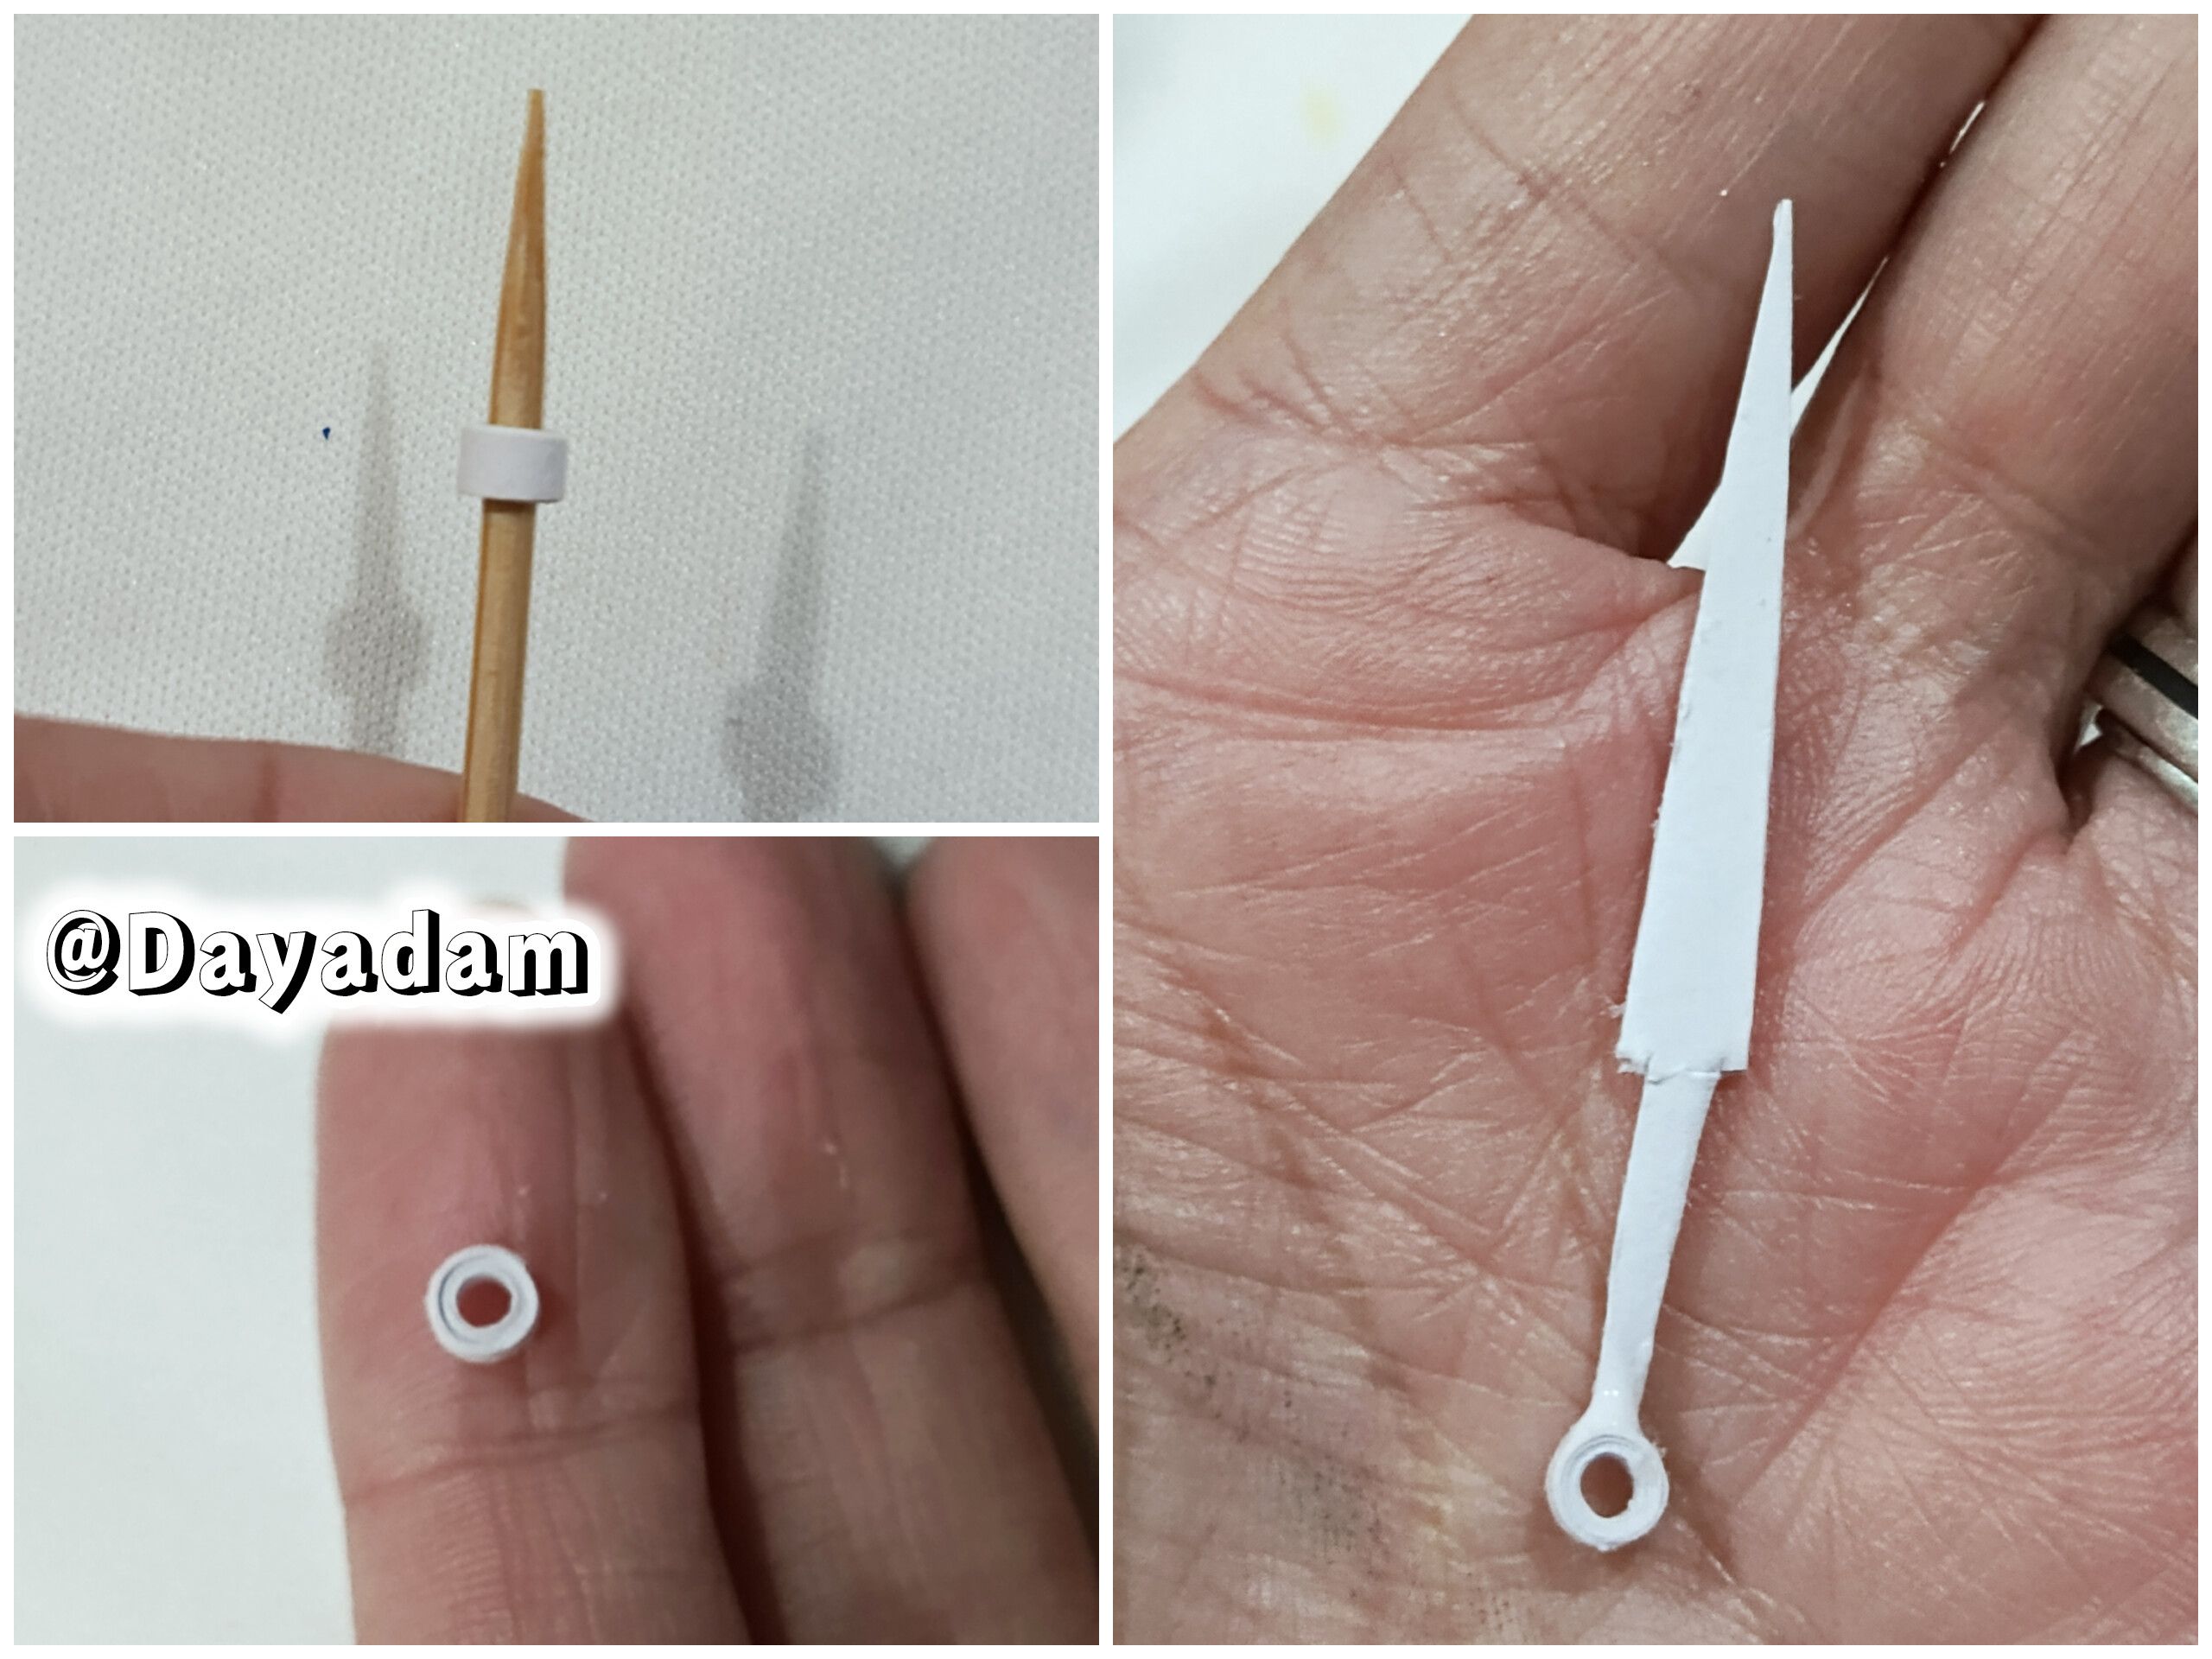
• To make the character's sword or pin, I cut out a piece of white cardstock and used a toothpick to make a small ring, which I glued to the bottom of the sword.
• I made a base out of black cardstock and glued the character to it.
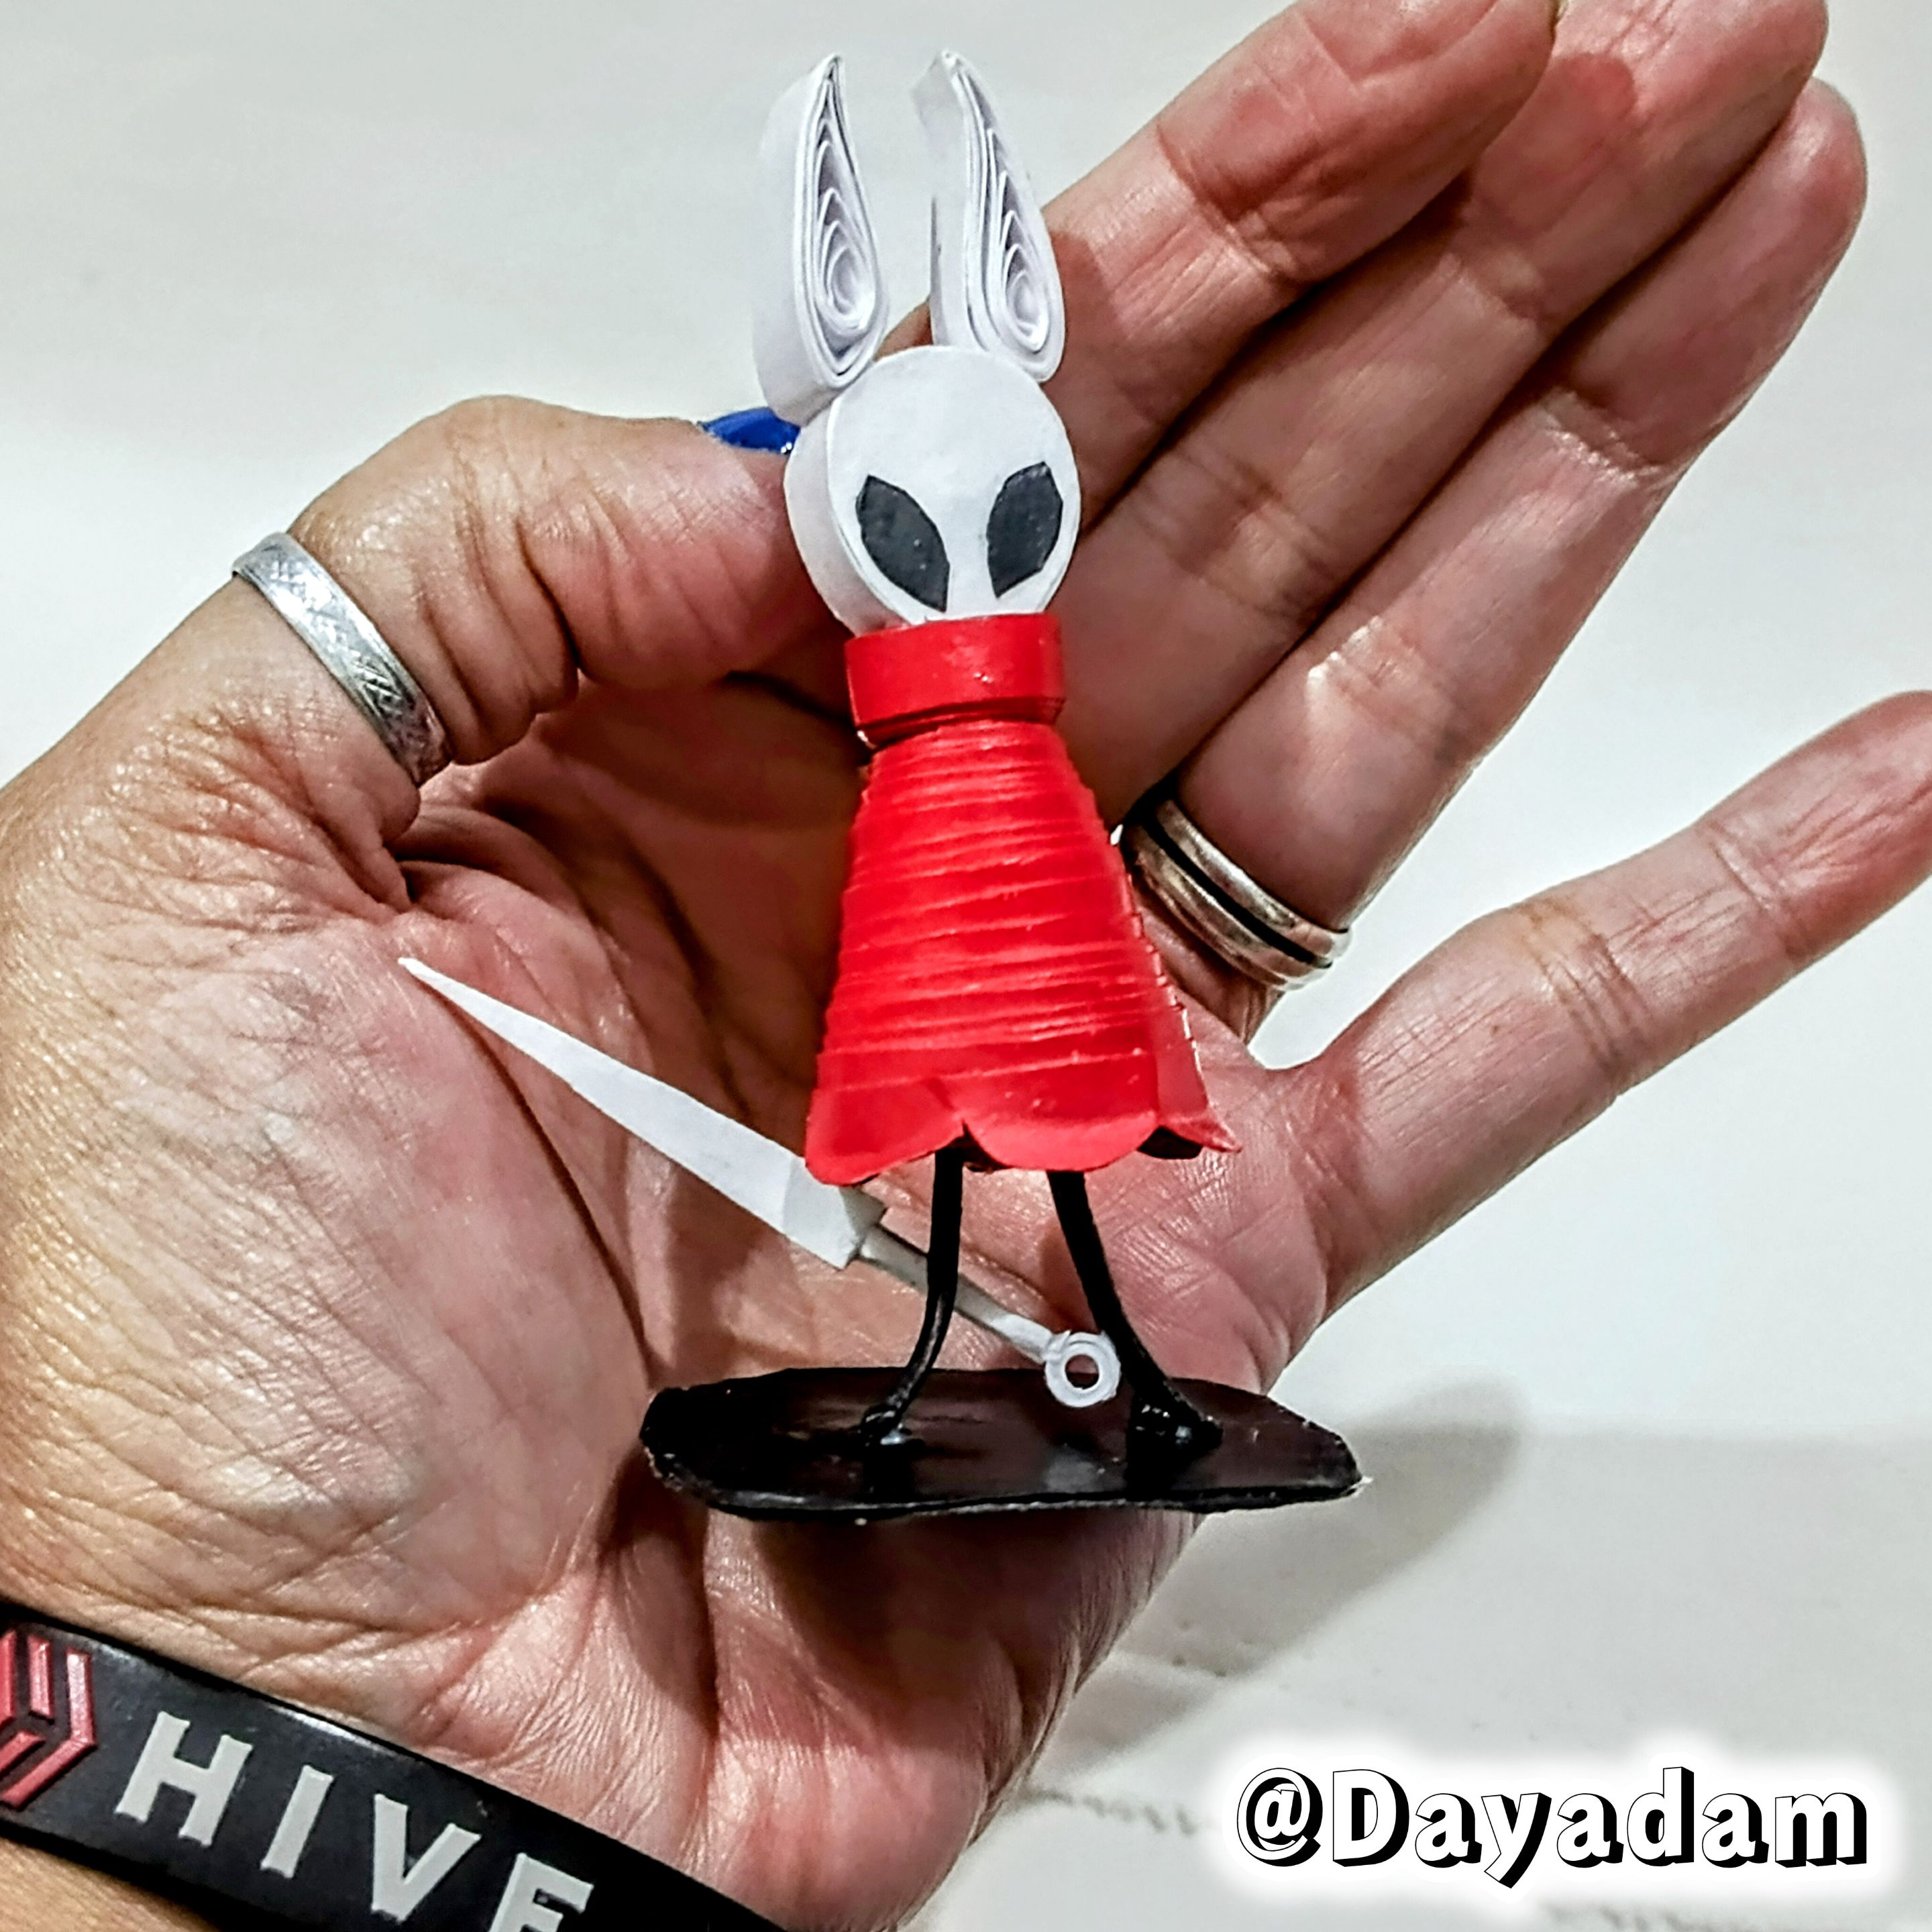
• To protect, laminate, and add some shine to the figure I made, I applied several layers of extra-strong white glue, letting each layer dry before applying the next.
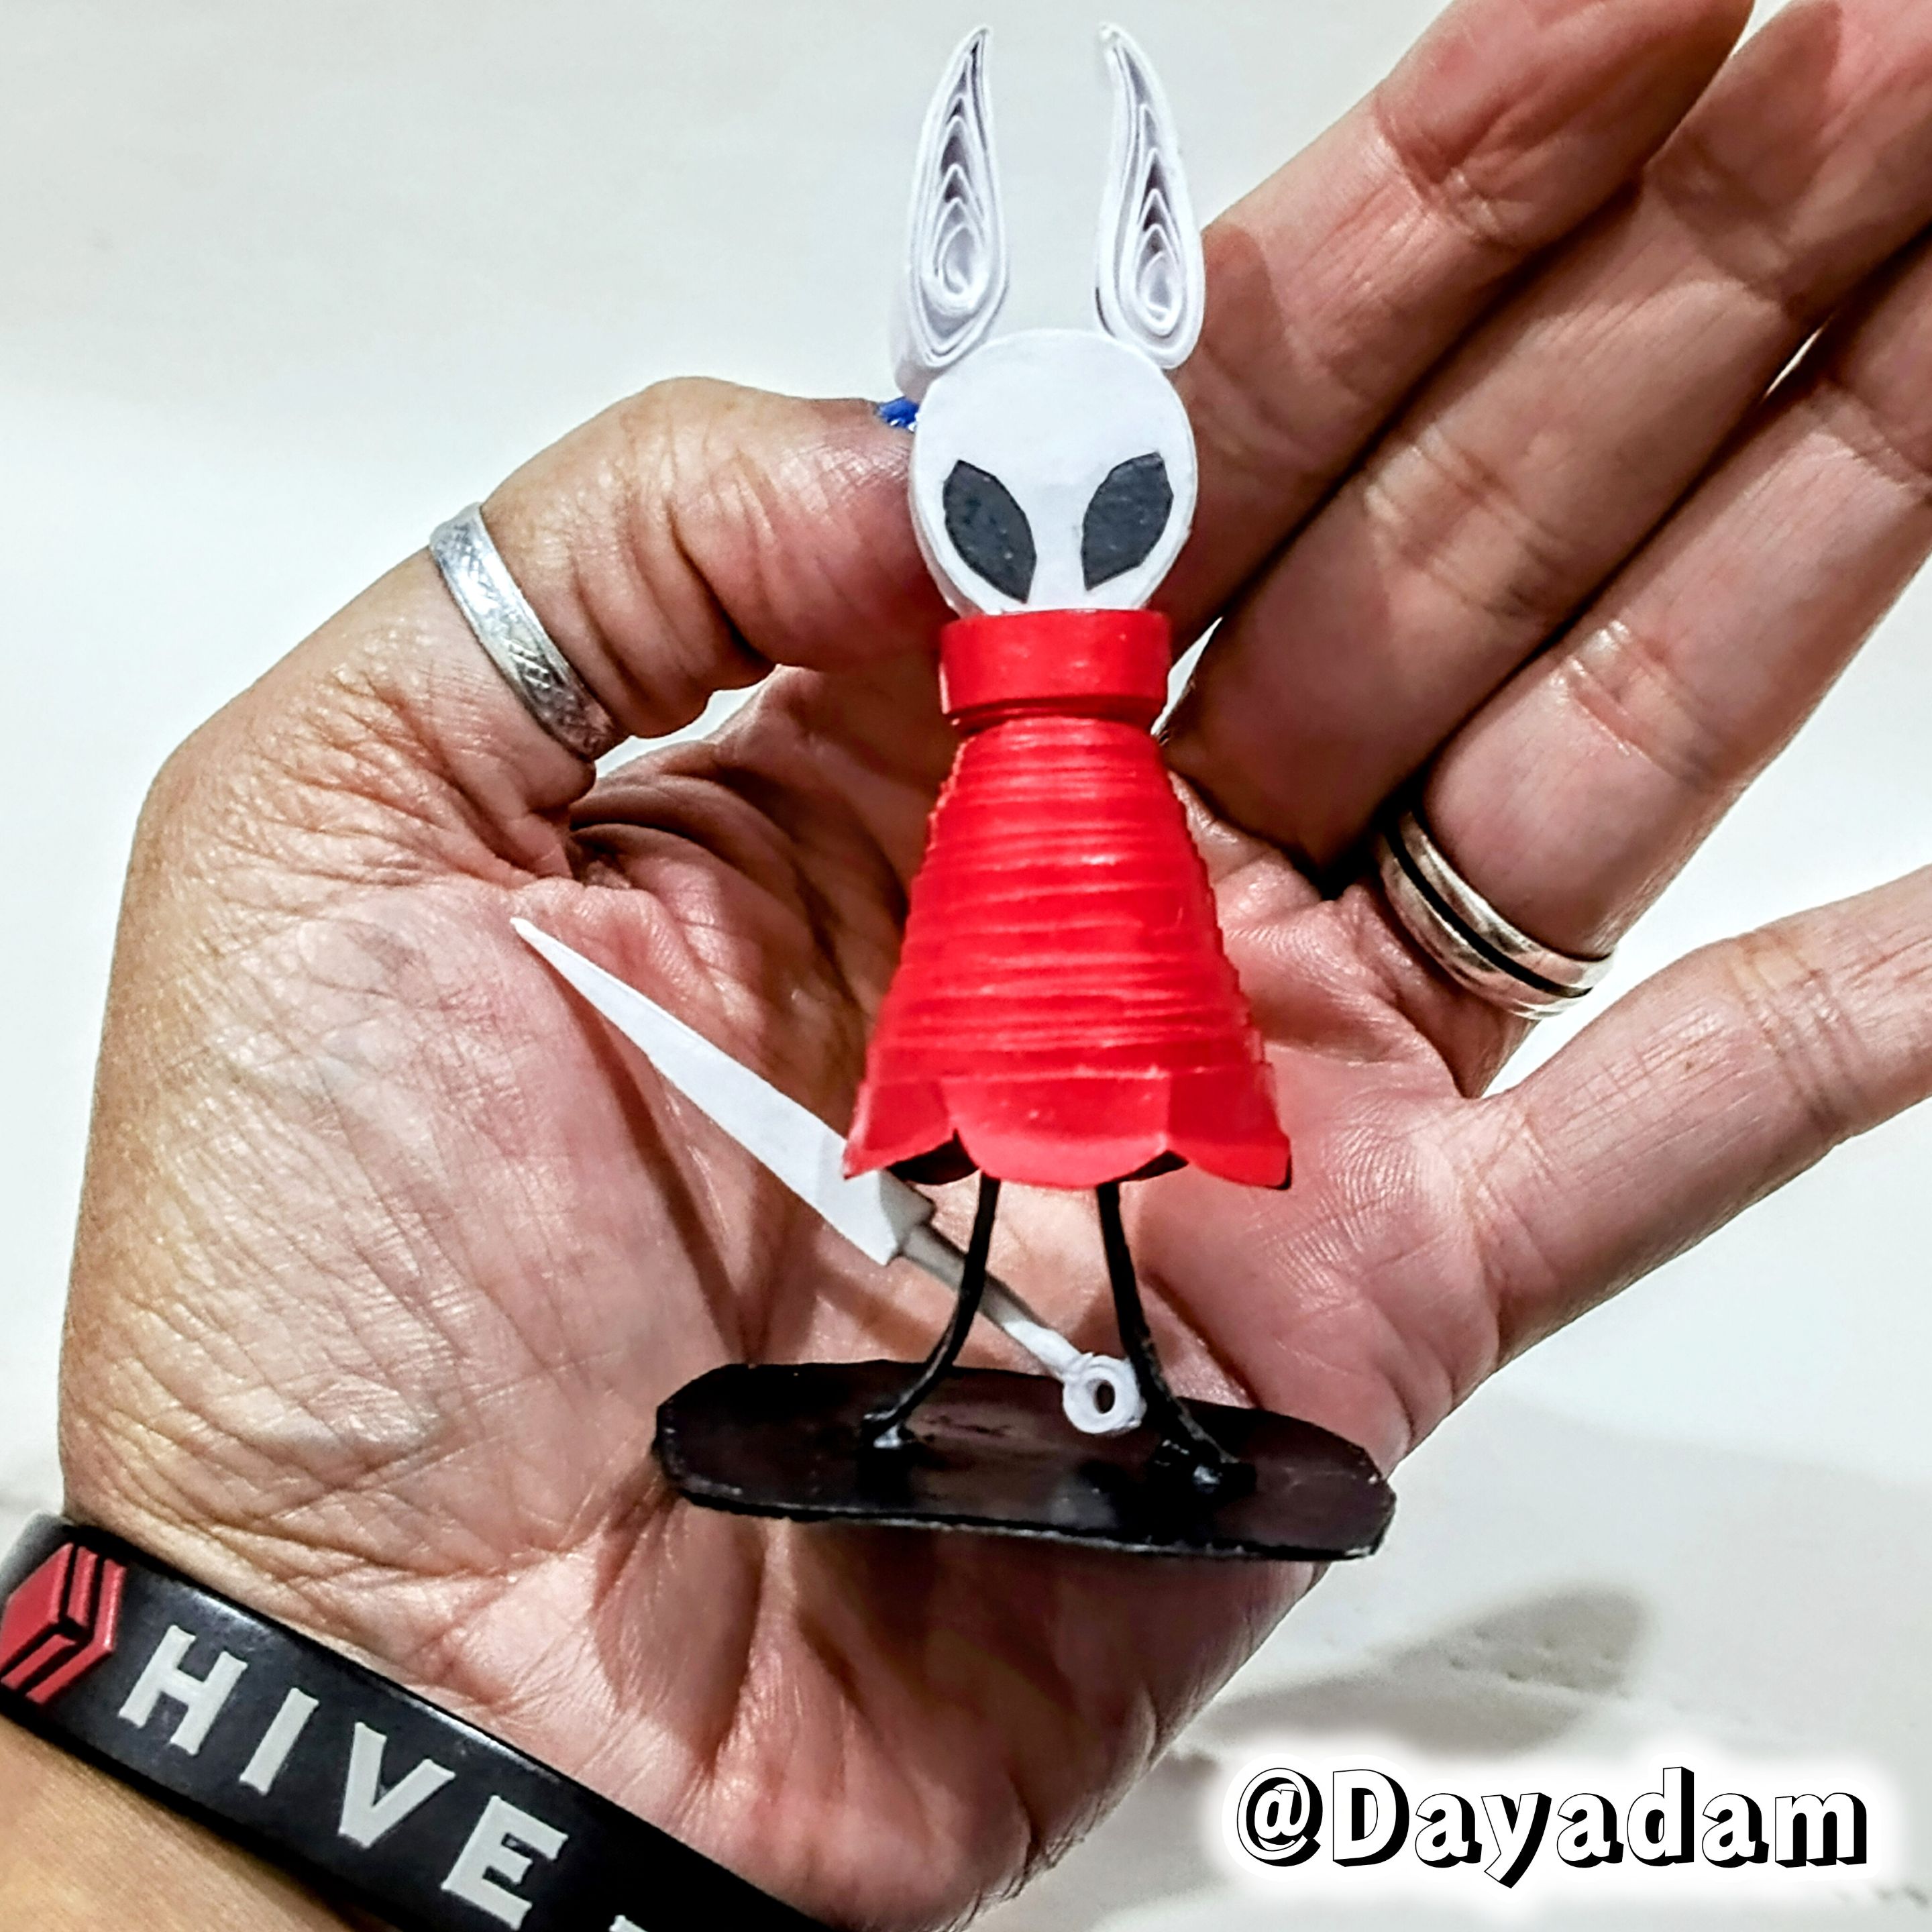
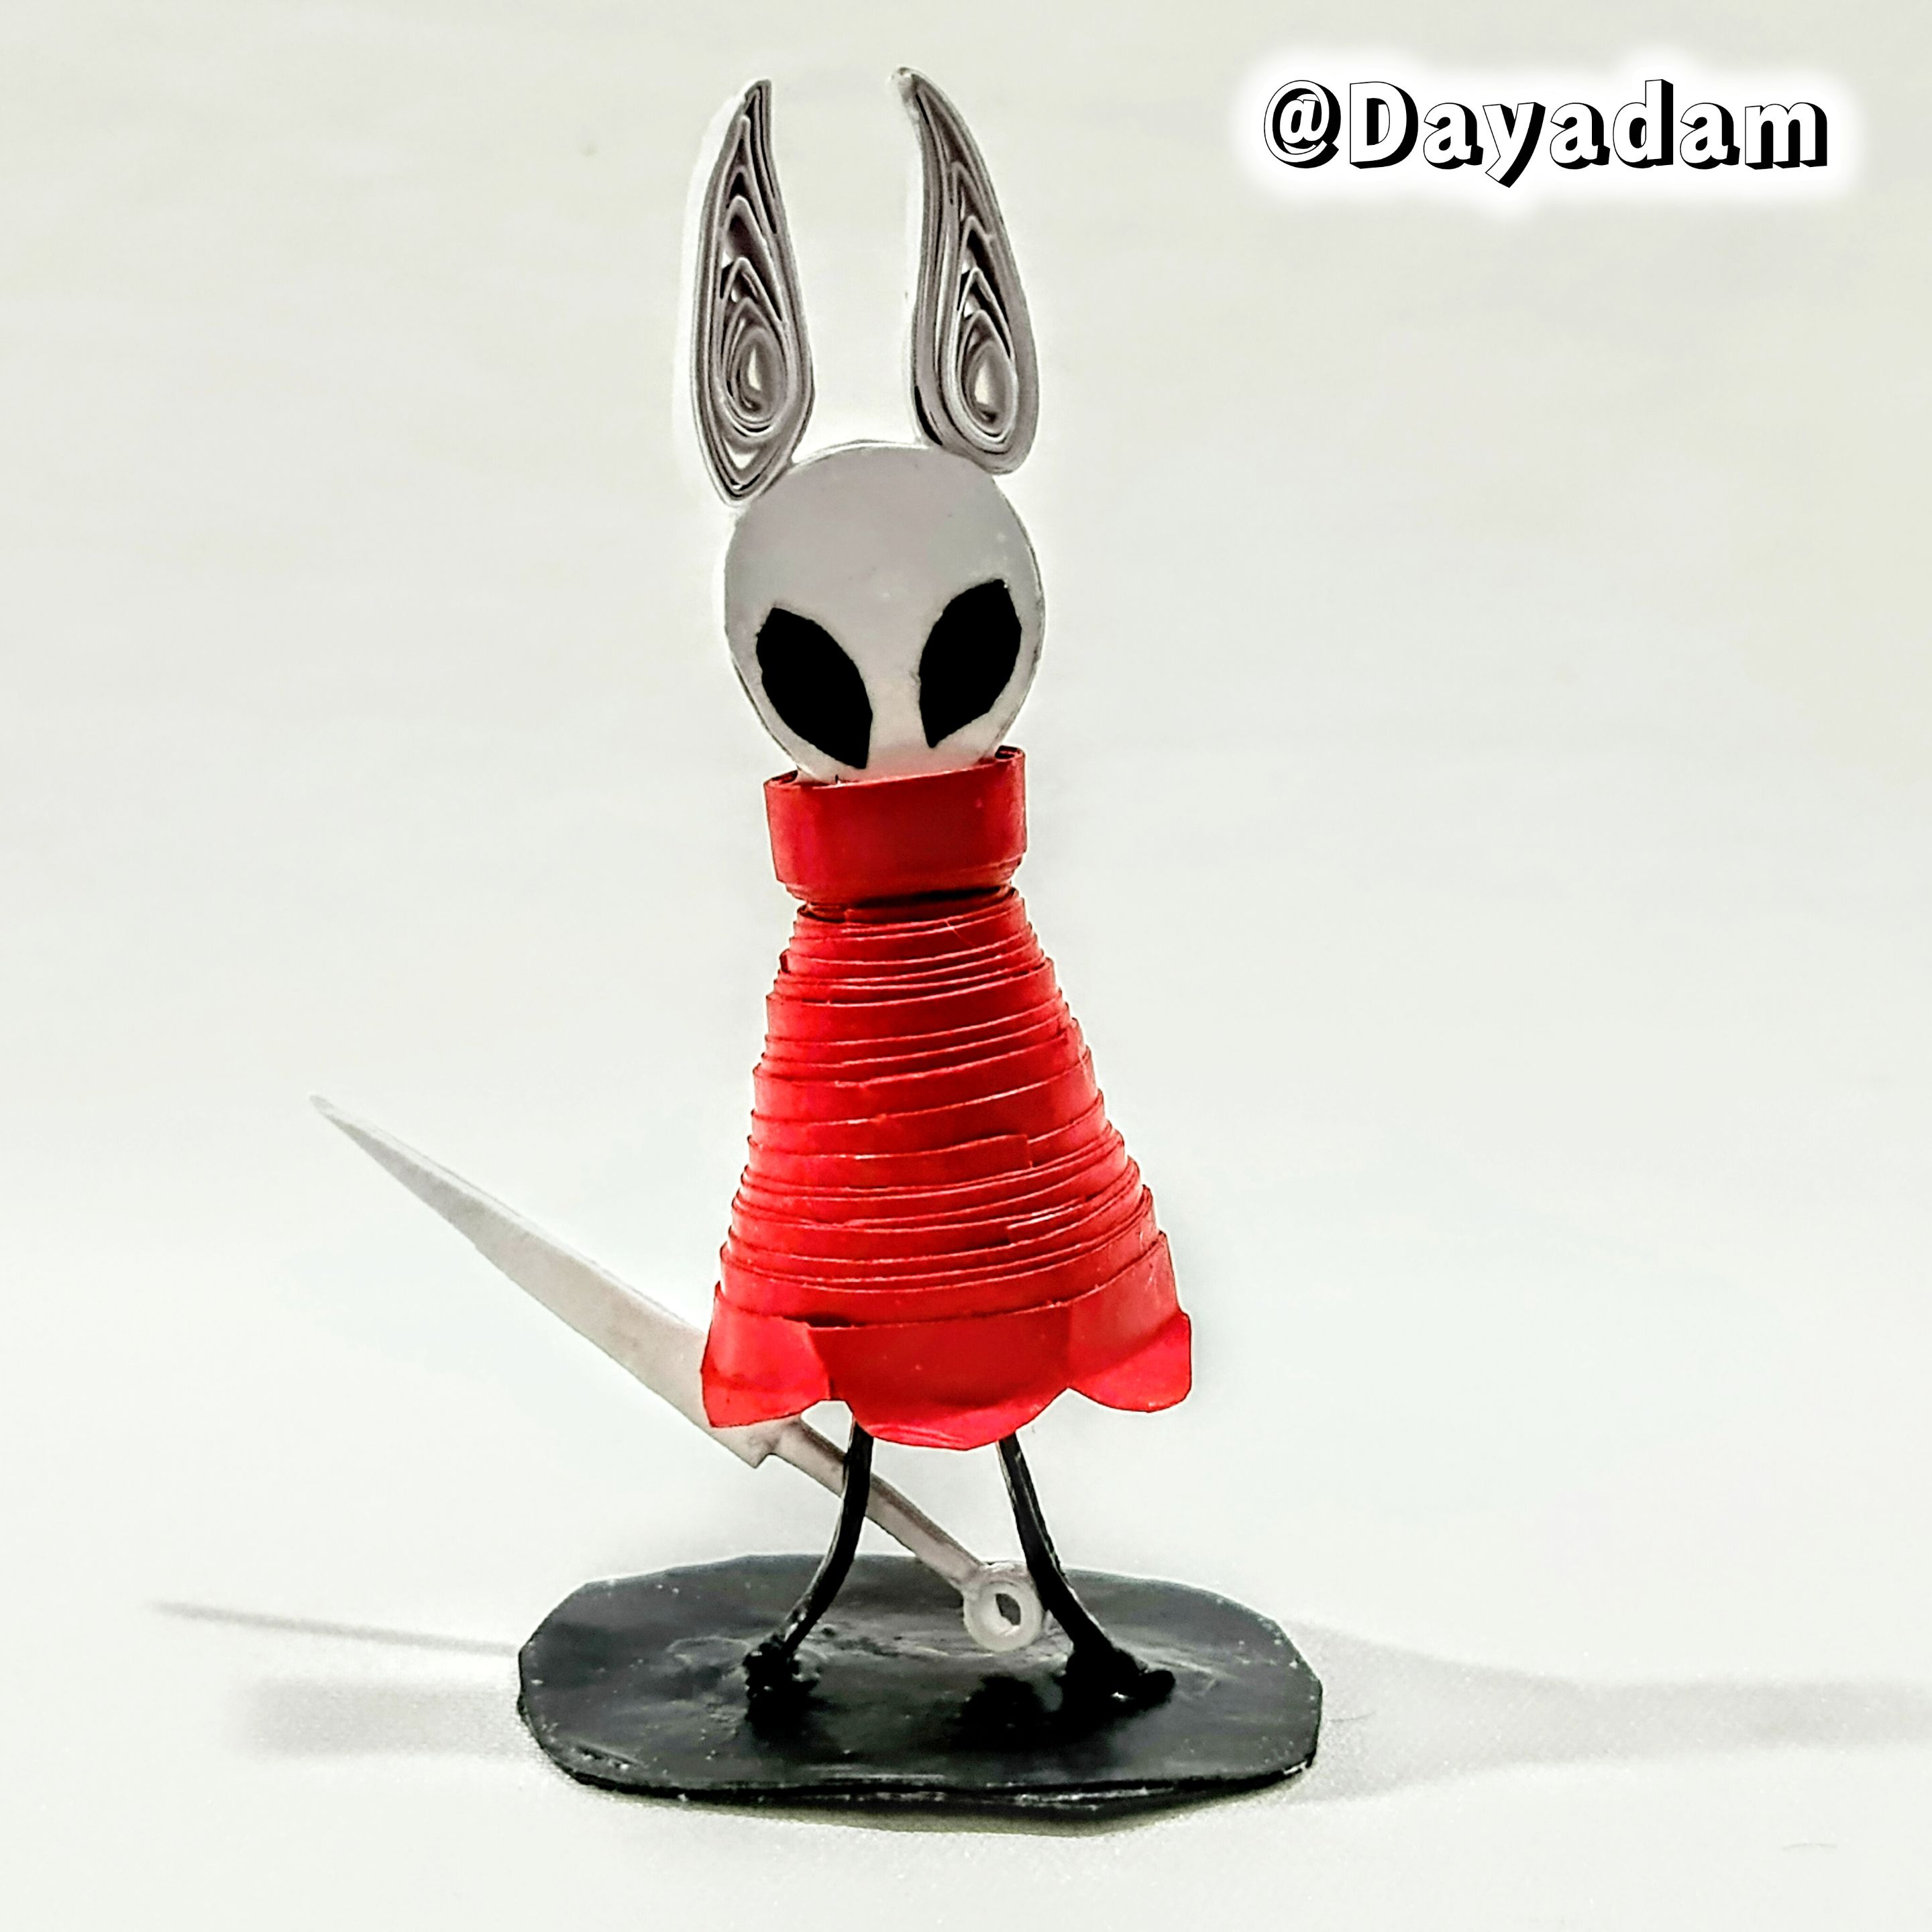
This is how I finished this decorative 3D Hornet Hollow Knight figure using the quilling technique.
• Para realizar los piecitos alargados del personaje, recorte en trozo de cartulina negra este lo moldee y recorte tal y como pueden ver en la imagen, pegue en la parte de abajo del cuerpo del mismo.
• Los ojos los recorté de un trozo de cartulina negra, los pegué en la cara.
• Para hacer la espada o el alfiler del personaje recorte de un trozo de cartulina de color blanco, con un palillo realicé un pequeño aro el cual pegue de la parte de abajo de la espada.
• Cartulina negra realicé una base y de allí pegué al personaje.
• Para proteger, plastificar y darle algo de brillo a la figura que realicé, aplique varias capas de pega blanca extra fuerte dejando sacarme una capa y otra.
De esta manera finalice esta figura decorativa de Hornet Hollow Knight en 3D , en la técnica de quilling.
 |
 |
 |
 |

|
 |
 |
|
 |
 |
|
What did you think, did you like it?
I hope you did, I hope you liked my explanation, procedure and photos, I made them with love for you.
"Let out that muse that inspires you, and let your imagination fly".
Thank you all, see you next time ✨.
¿Que les pareció, les gustó?
Espero que sí, que les haya gustado mi explicación, procedimiento y fotos, los hice con mucho cariño por y para ustedes."Deja salir esa musa que te inspira, y deja volar tu imaginación".
Gracias a todos, nos vemos en la próxima✨

All photos used in this post are of my authorship and have been taken on my personal cell phone a Redmi 9T, edited in InShot and Canva
Banner and separator made by me in Canva
Translated with the help of DeepL
Todas las fotos usadas en este post son de mi autoría y han sido sacadas en mi celular personal un Redmi 9T, editadas en InShot y Canva
Banner y separador hecho por mí en Canva
Traducido con la ayuda de DeepL
