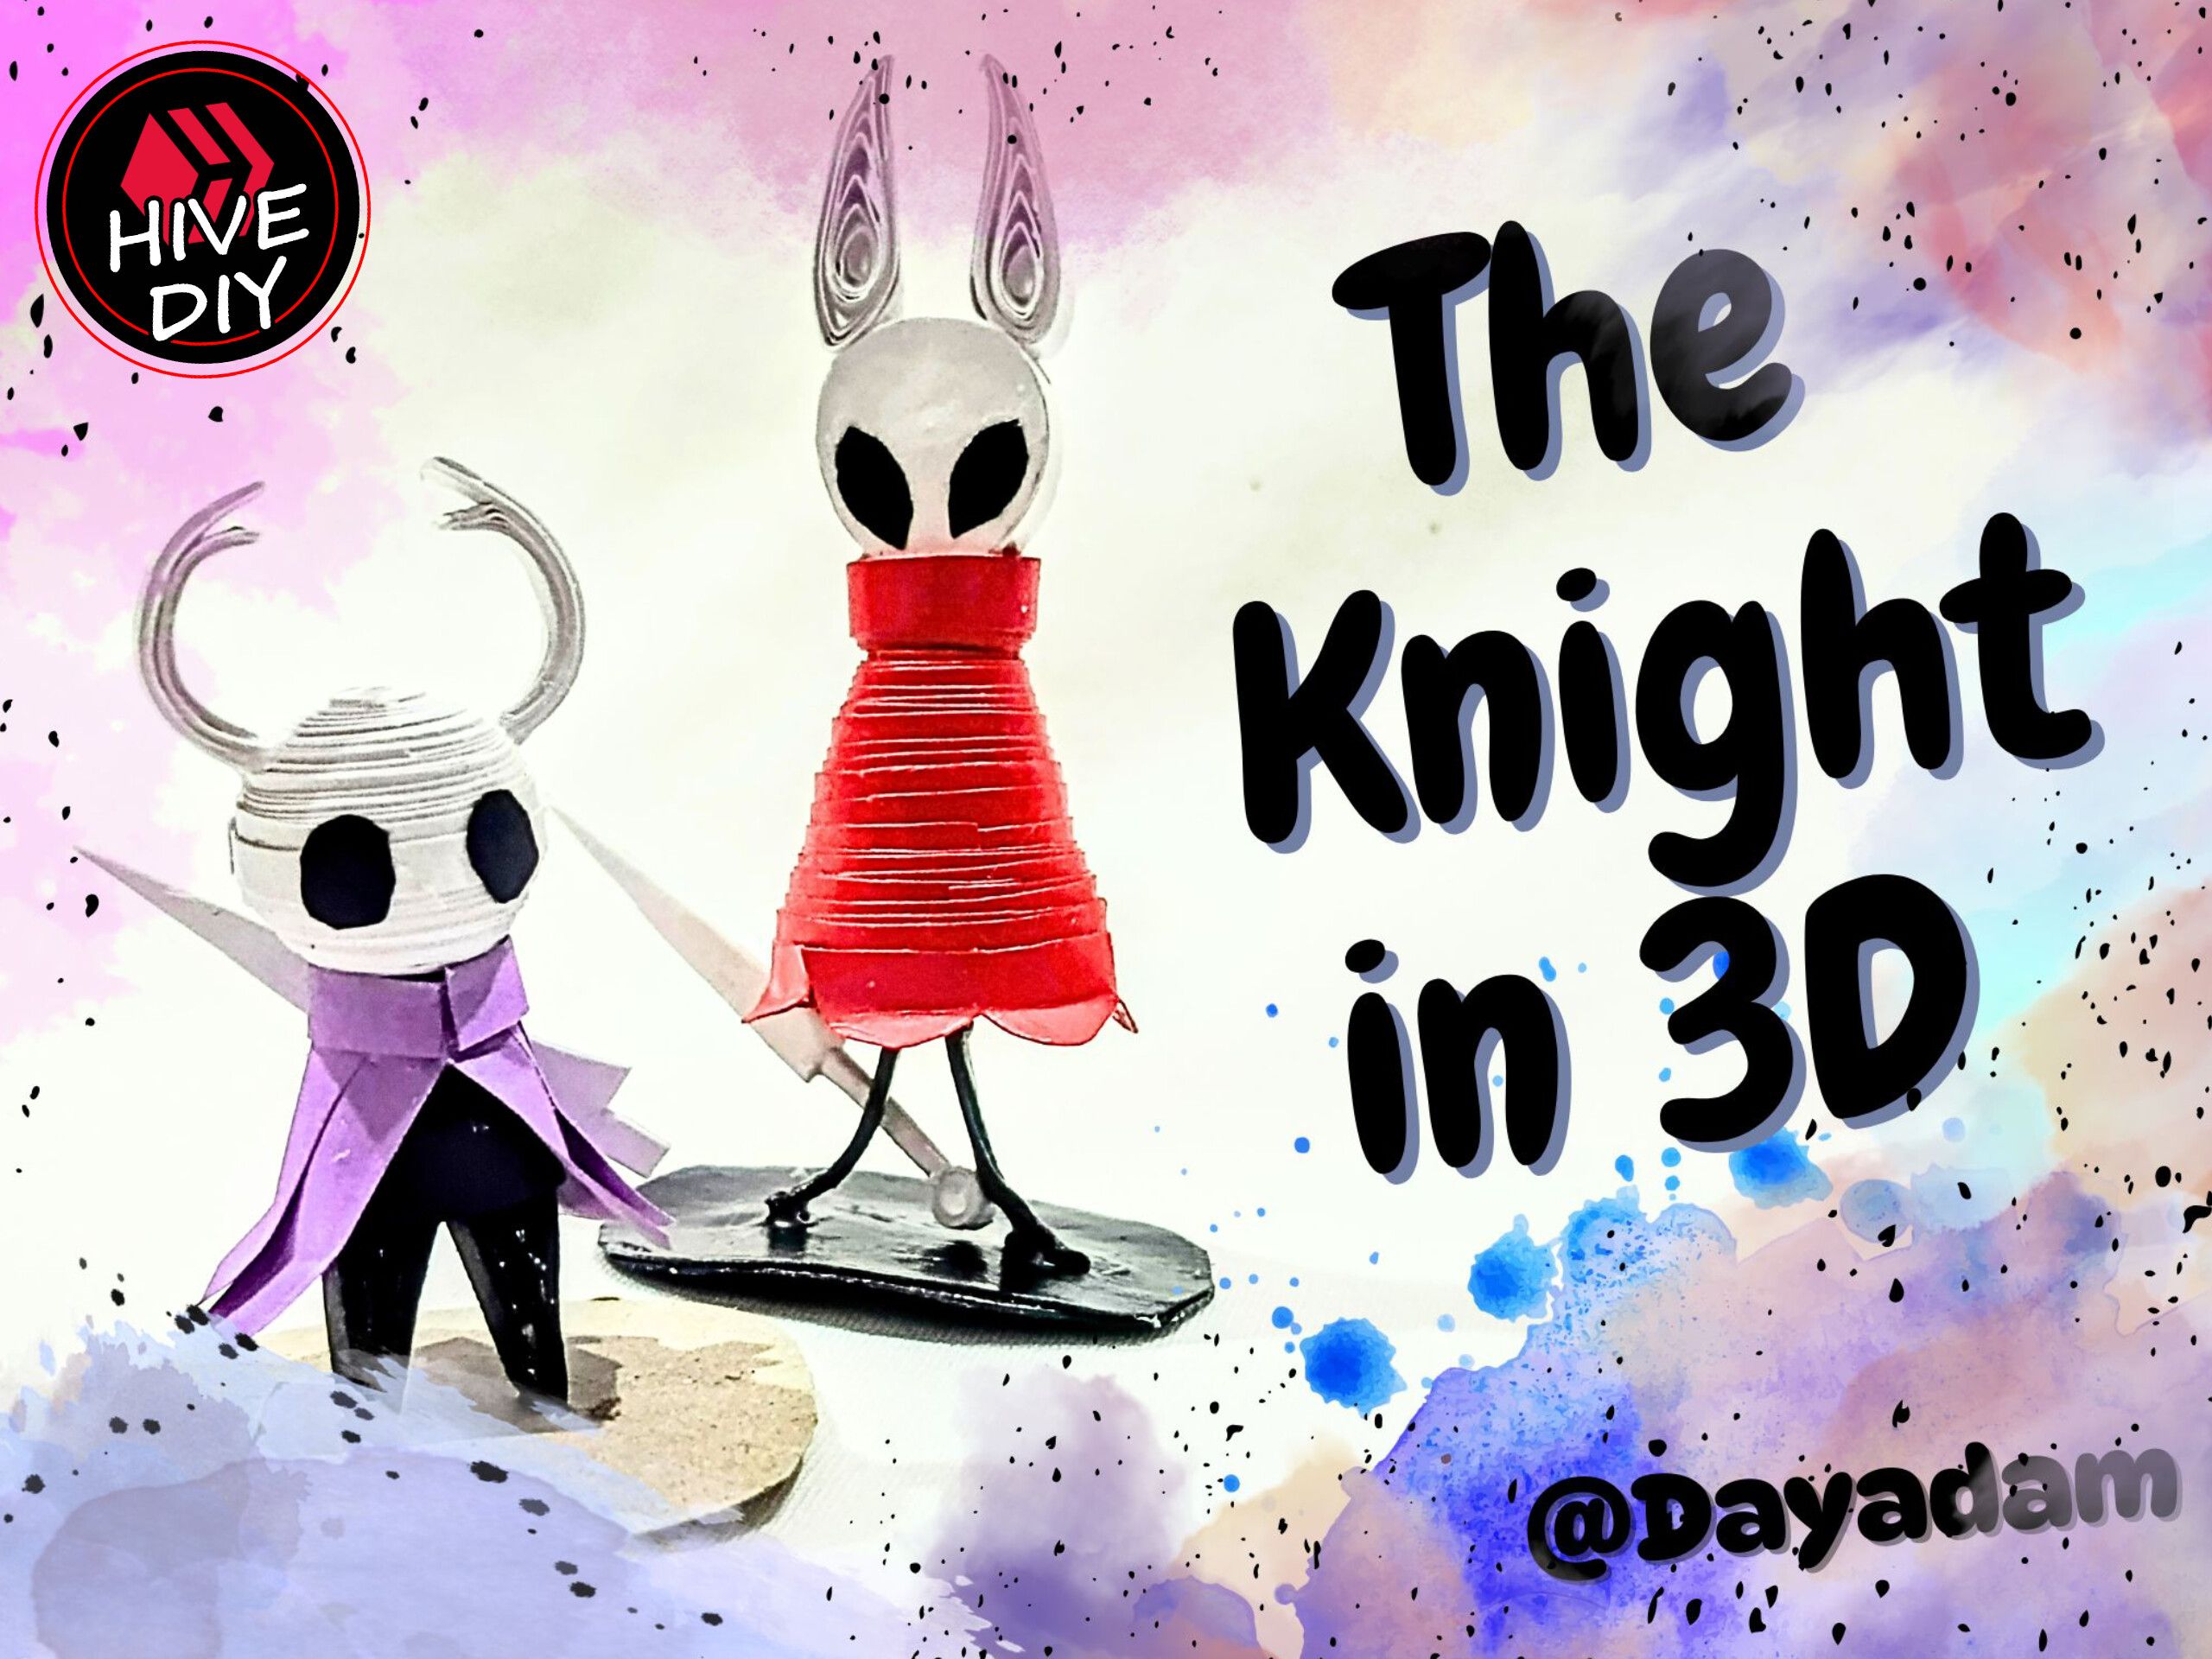
Today I bring you one more work of my art, this time again to please the Hive gaming community.
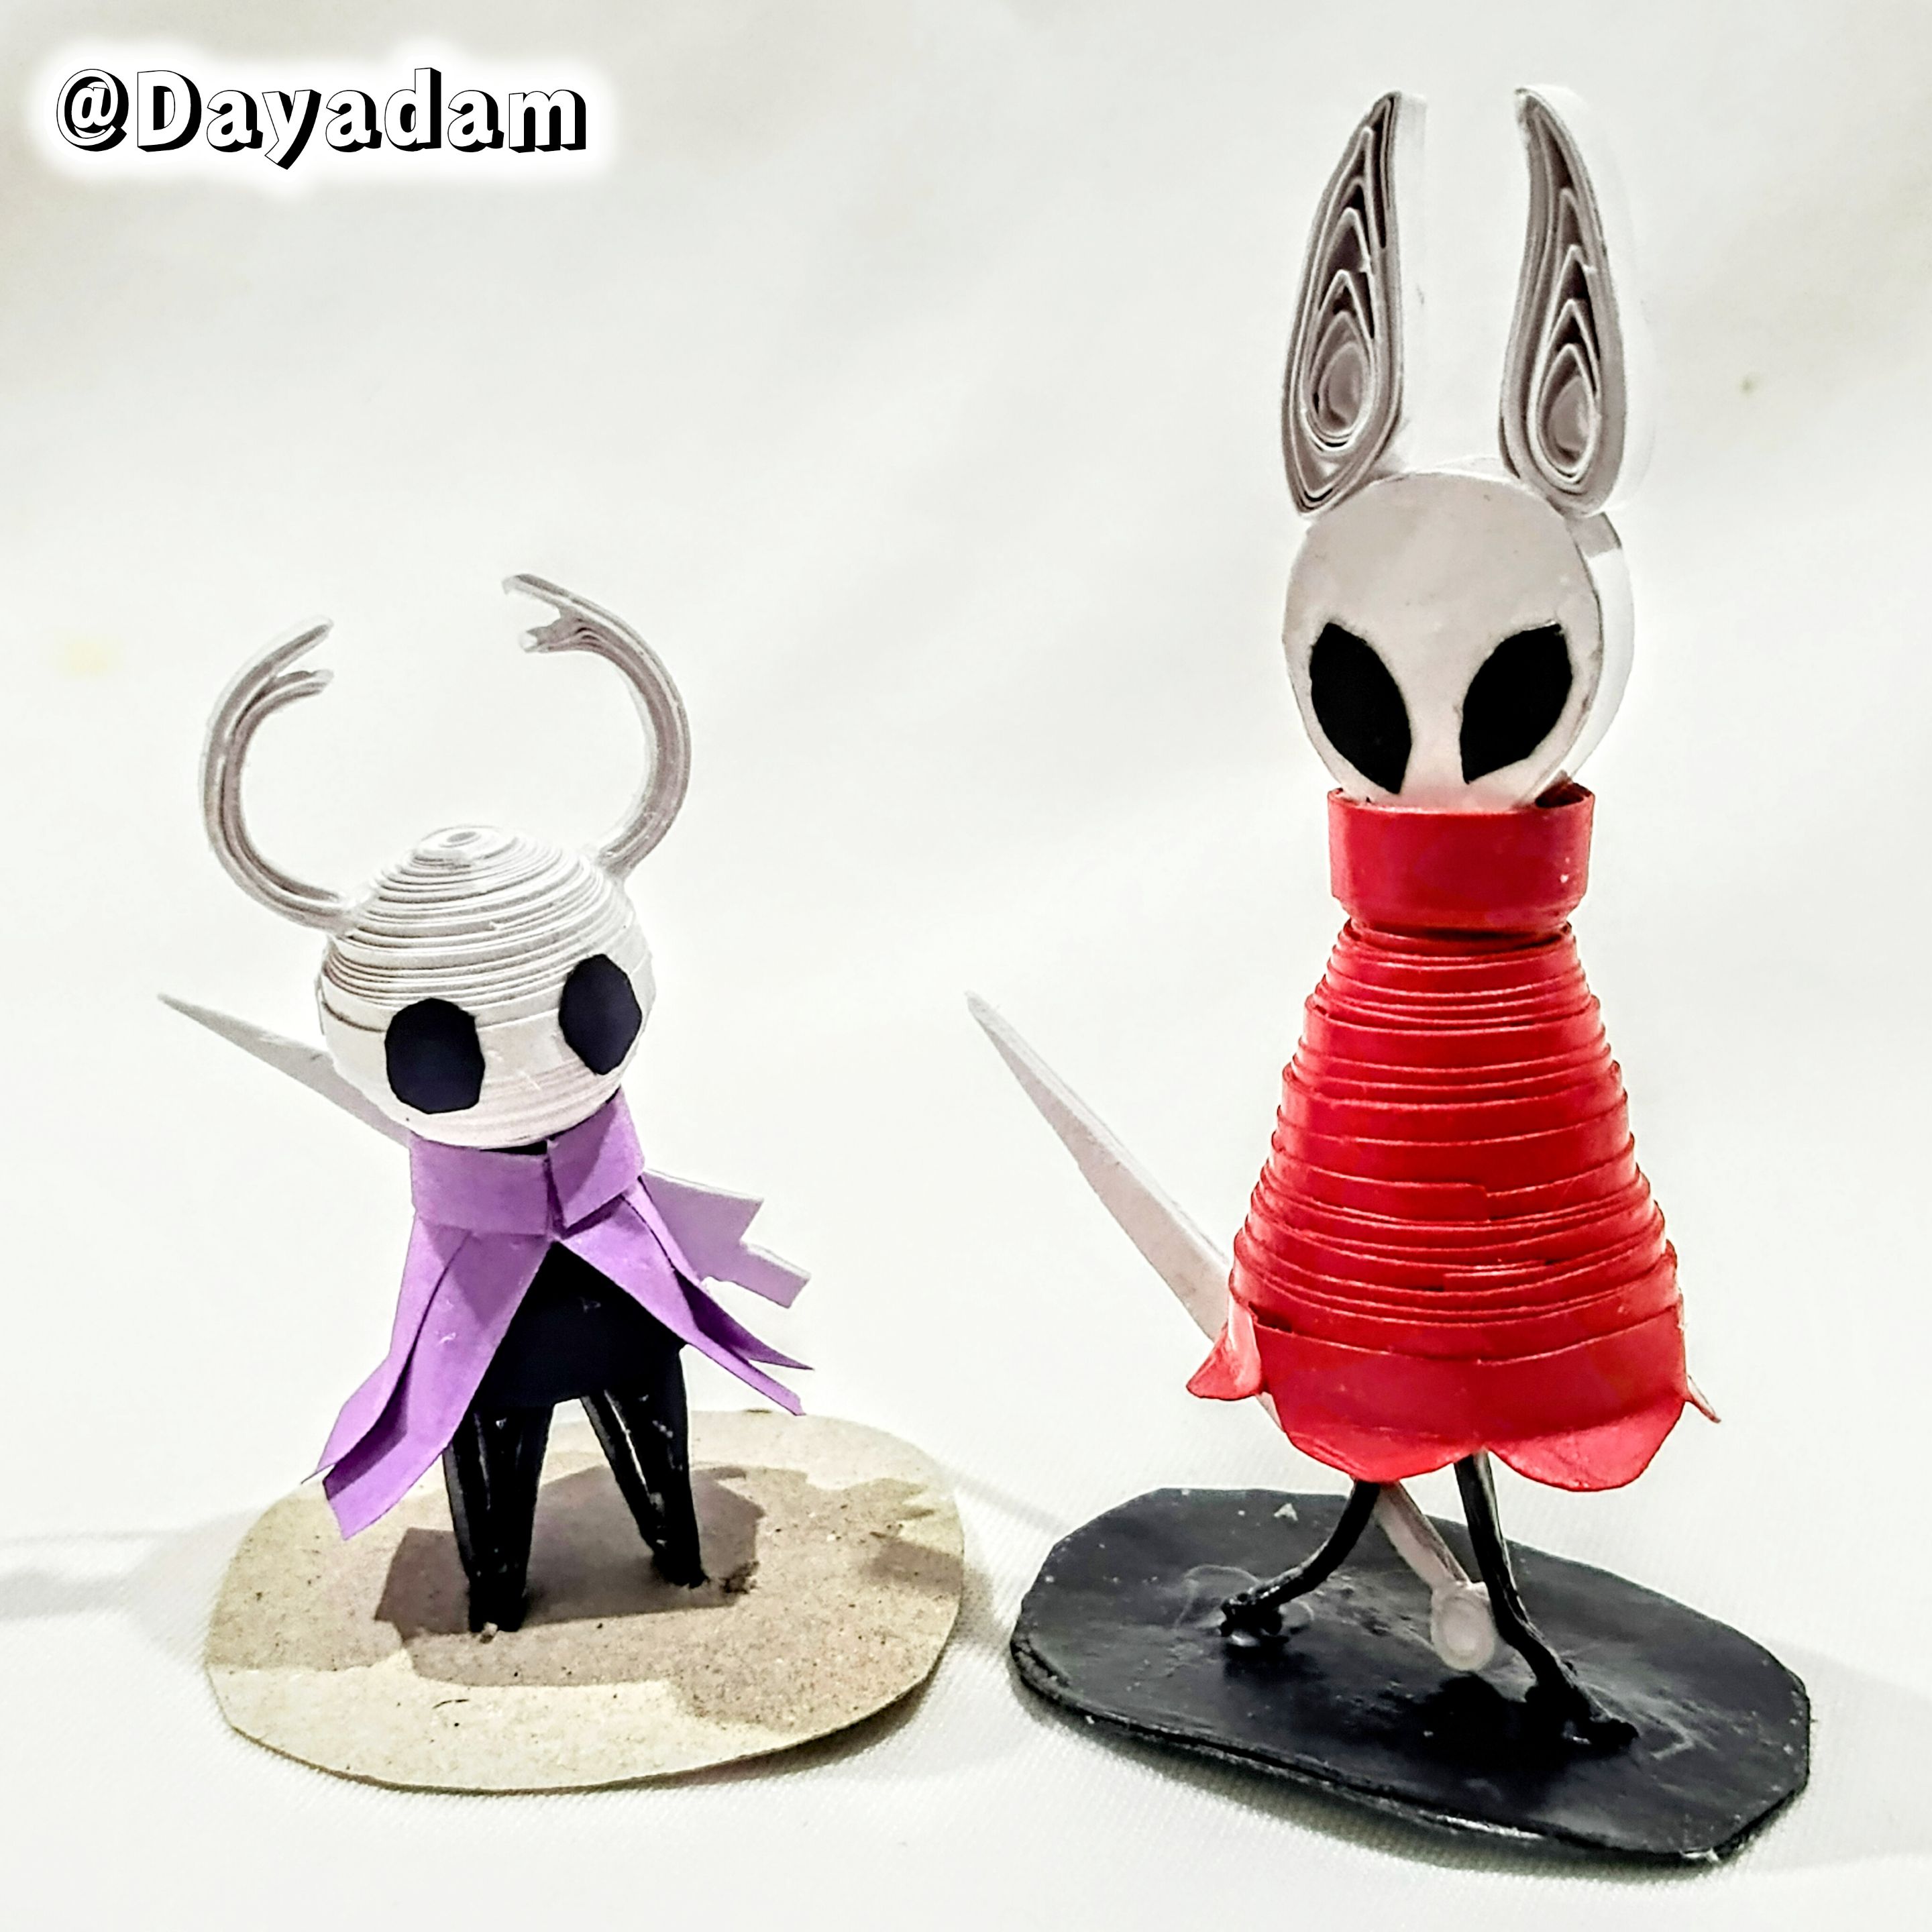
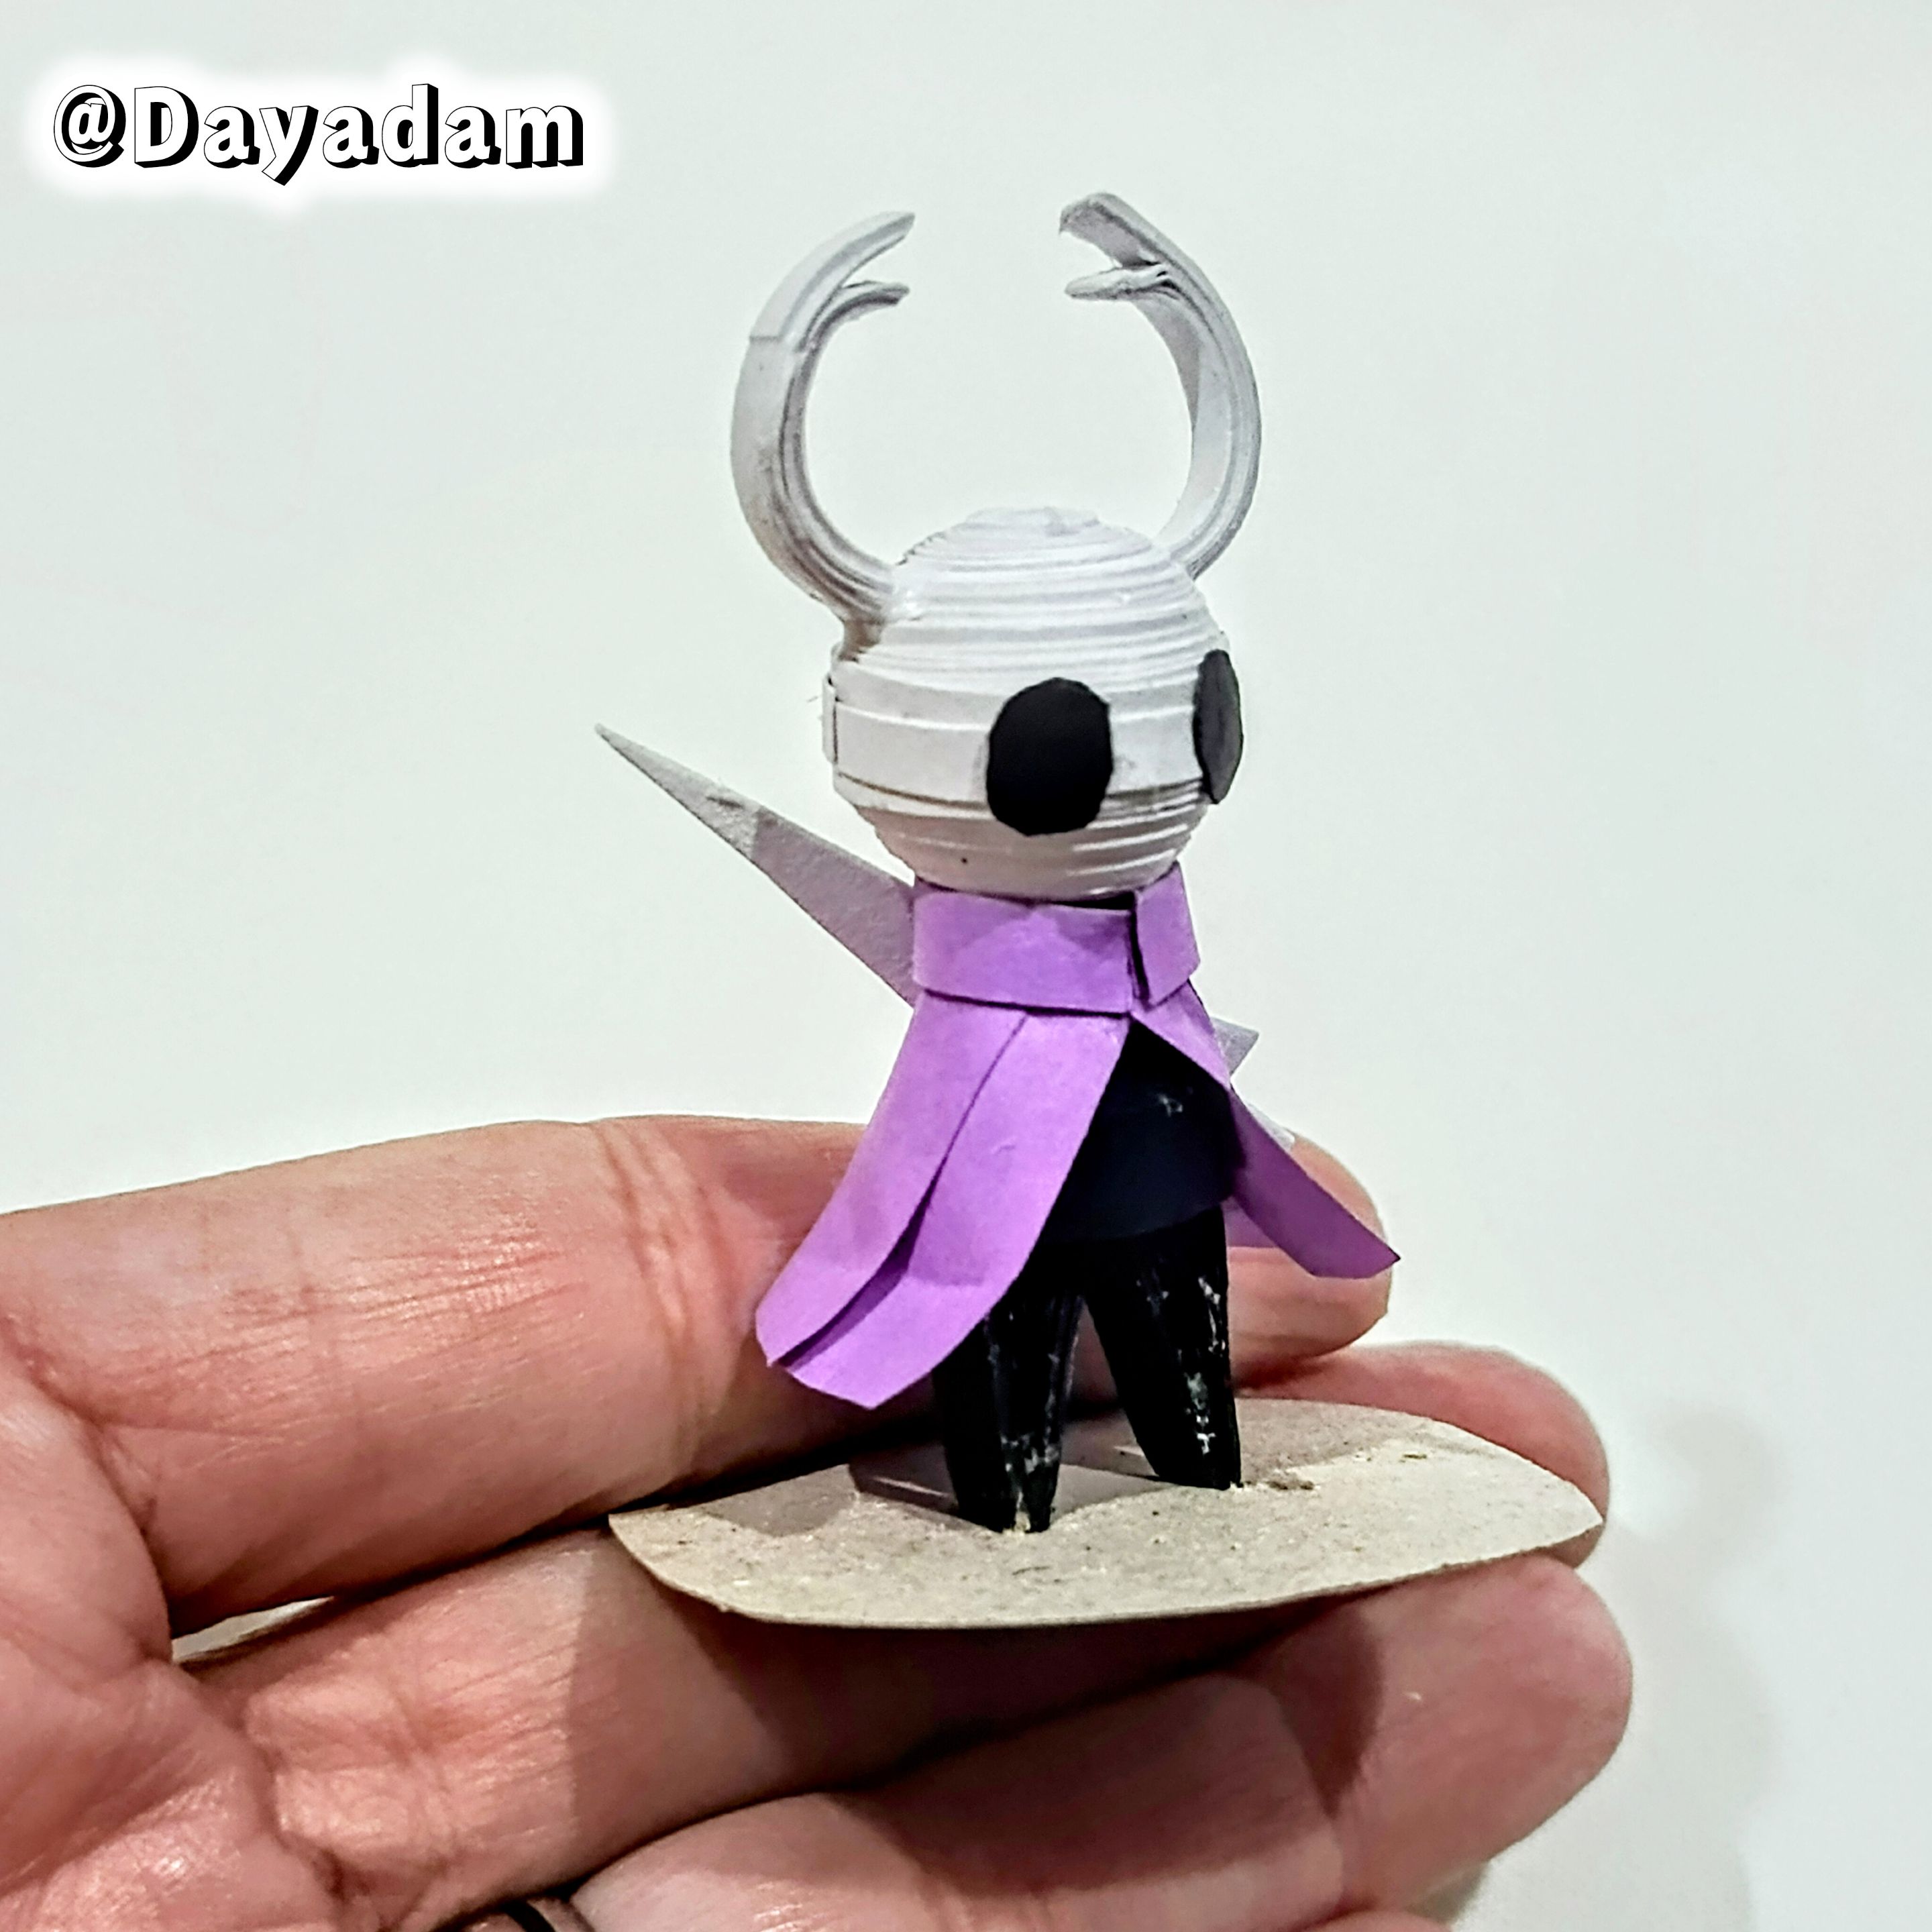
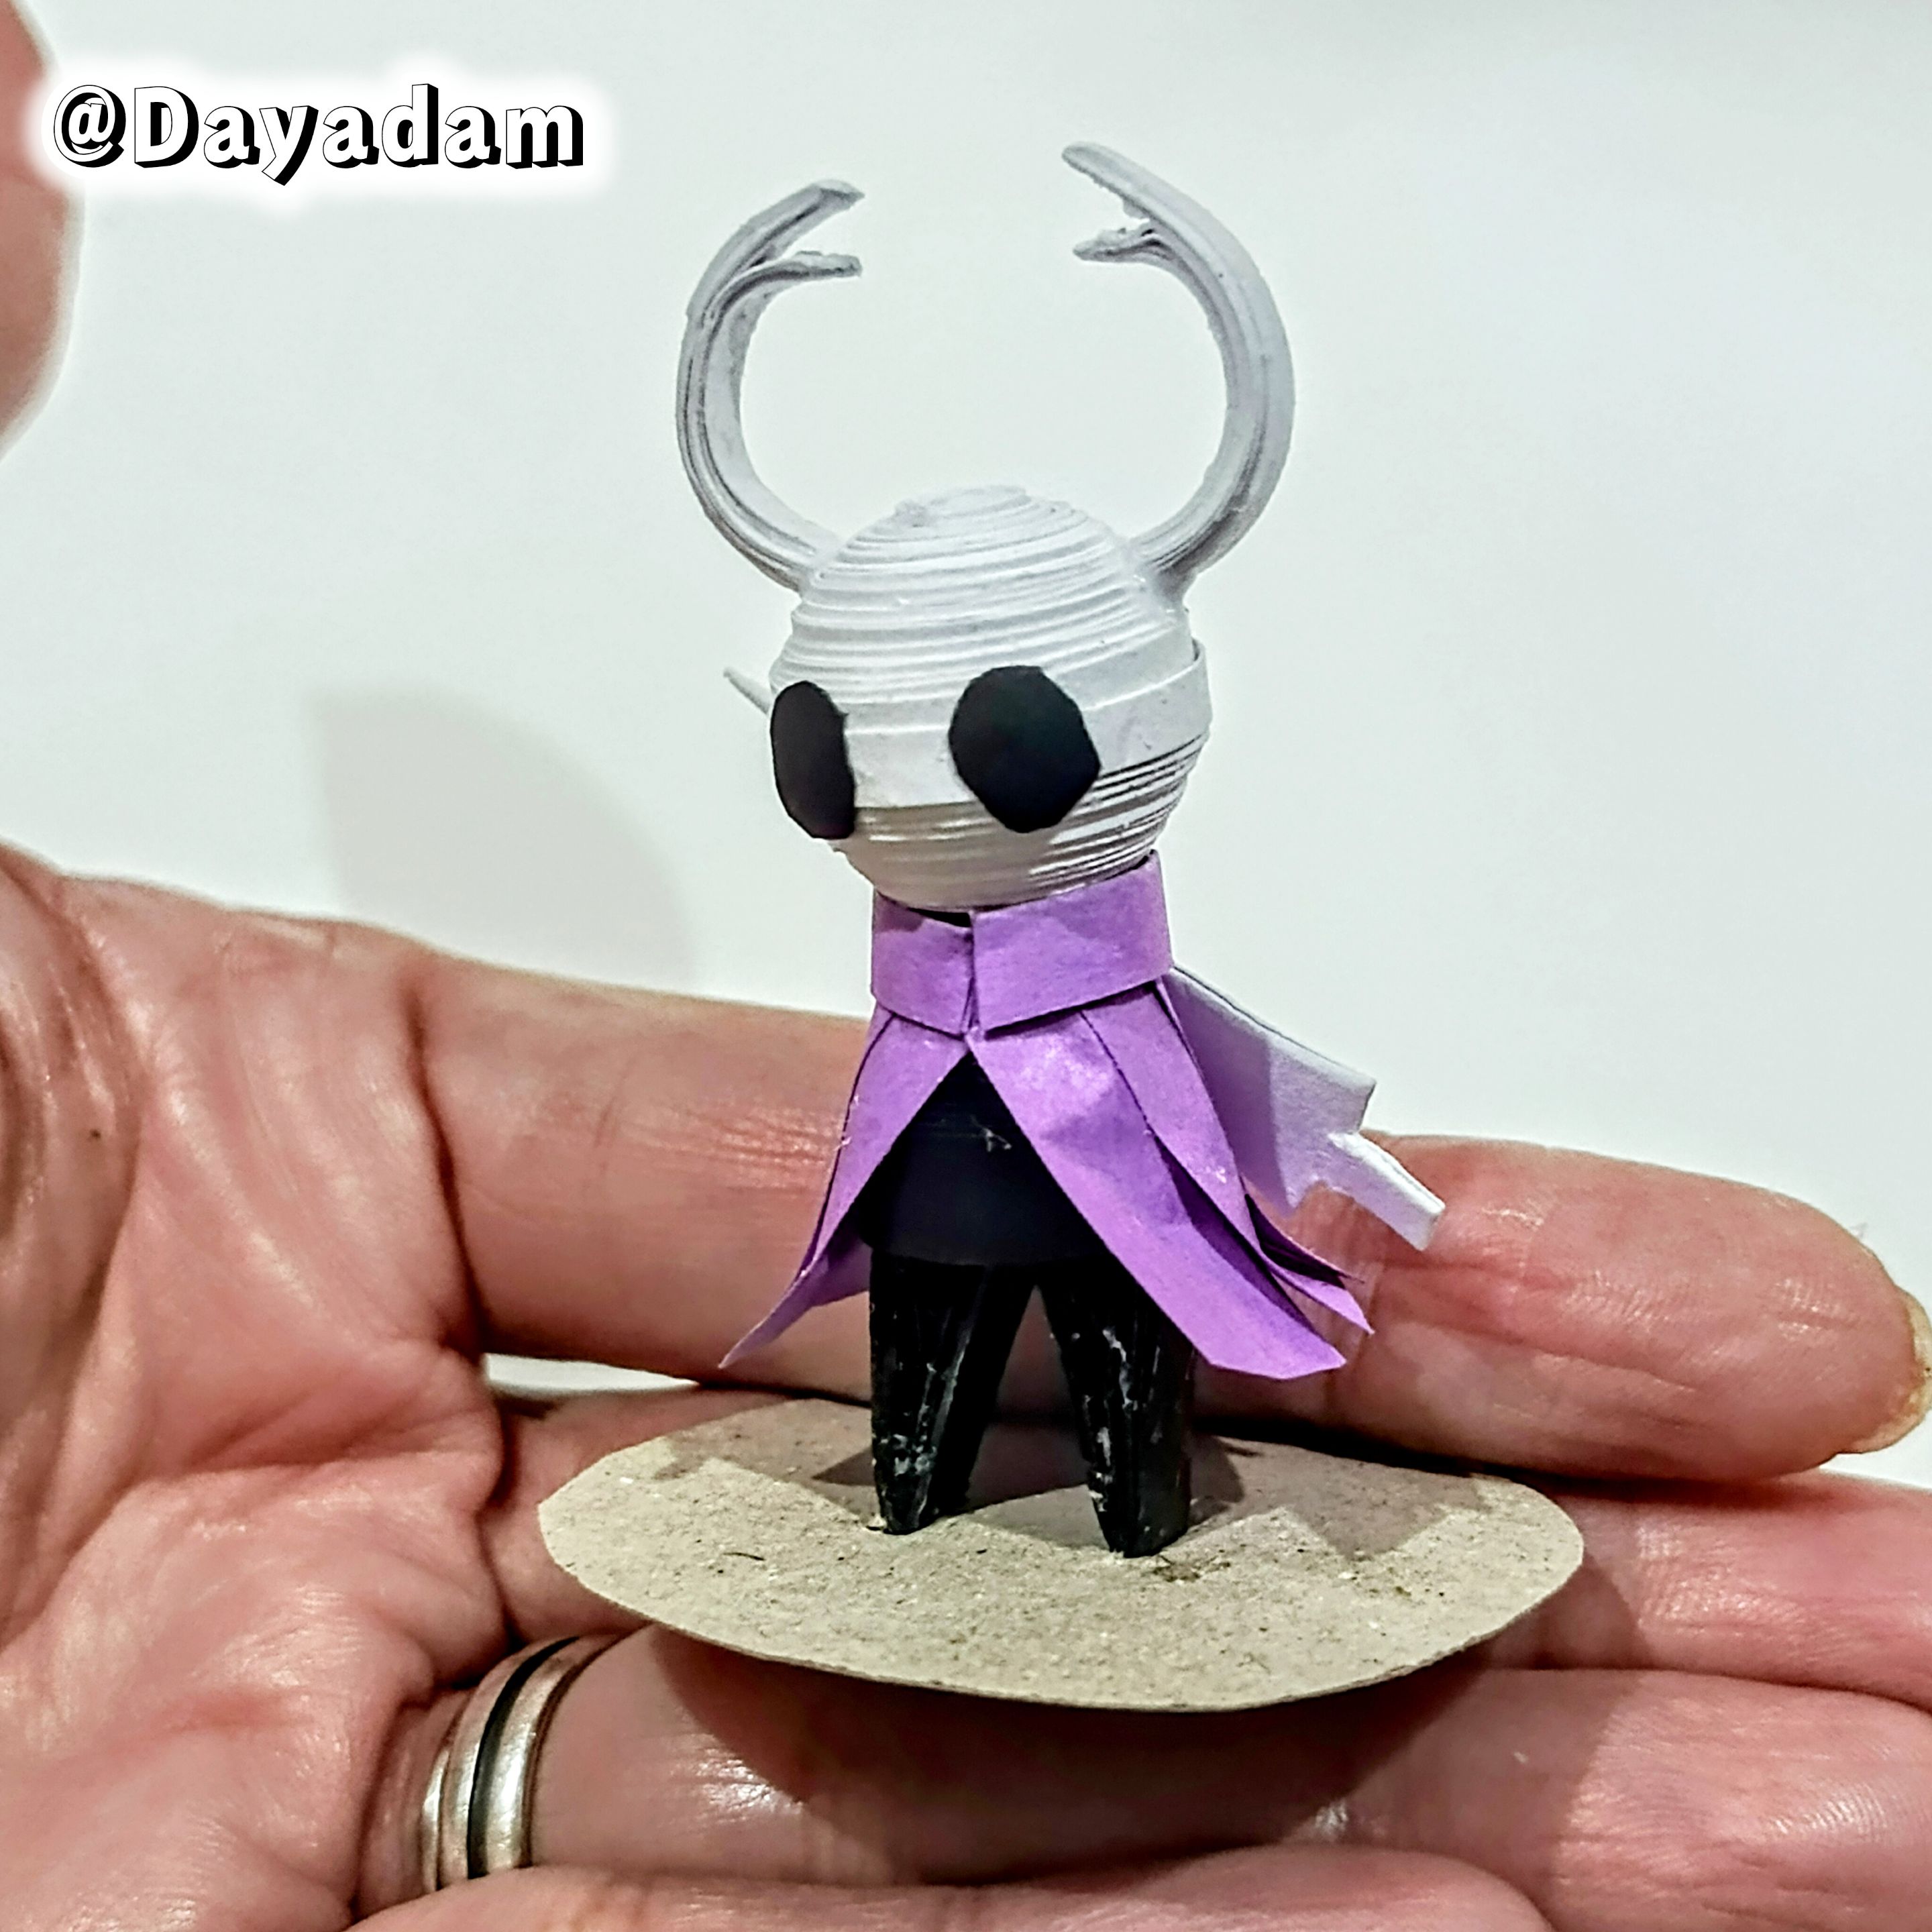
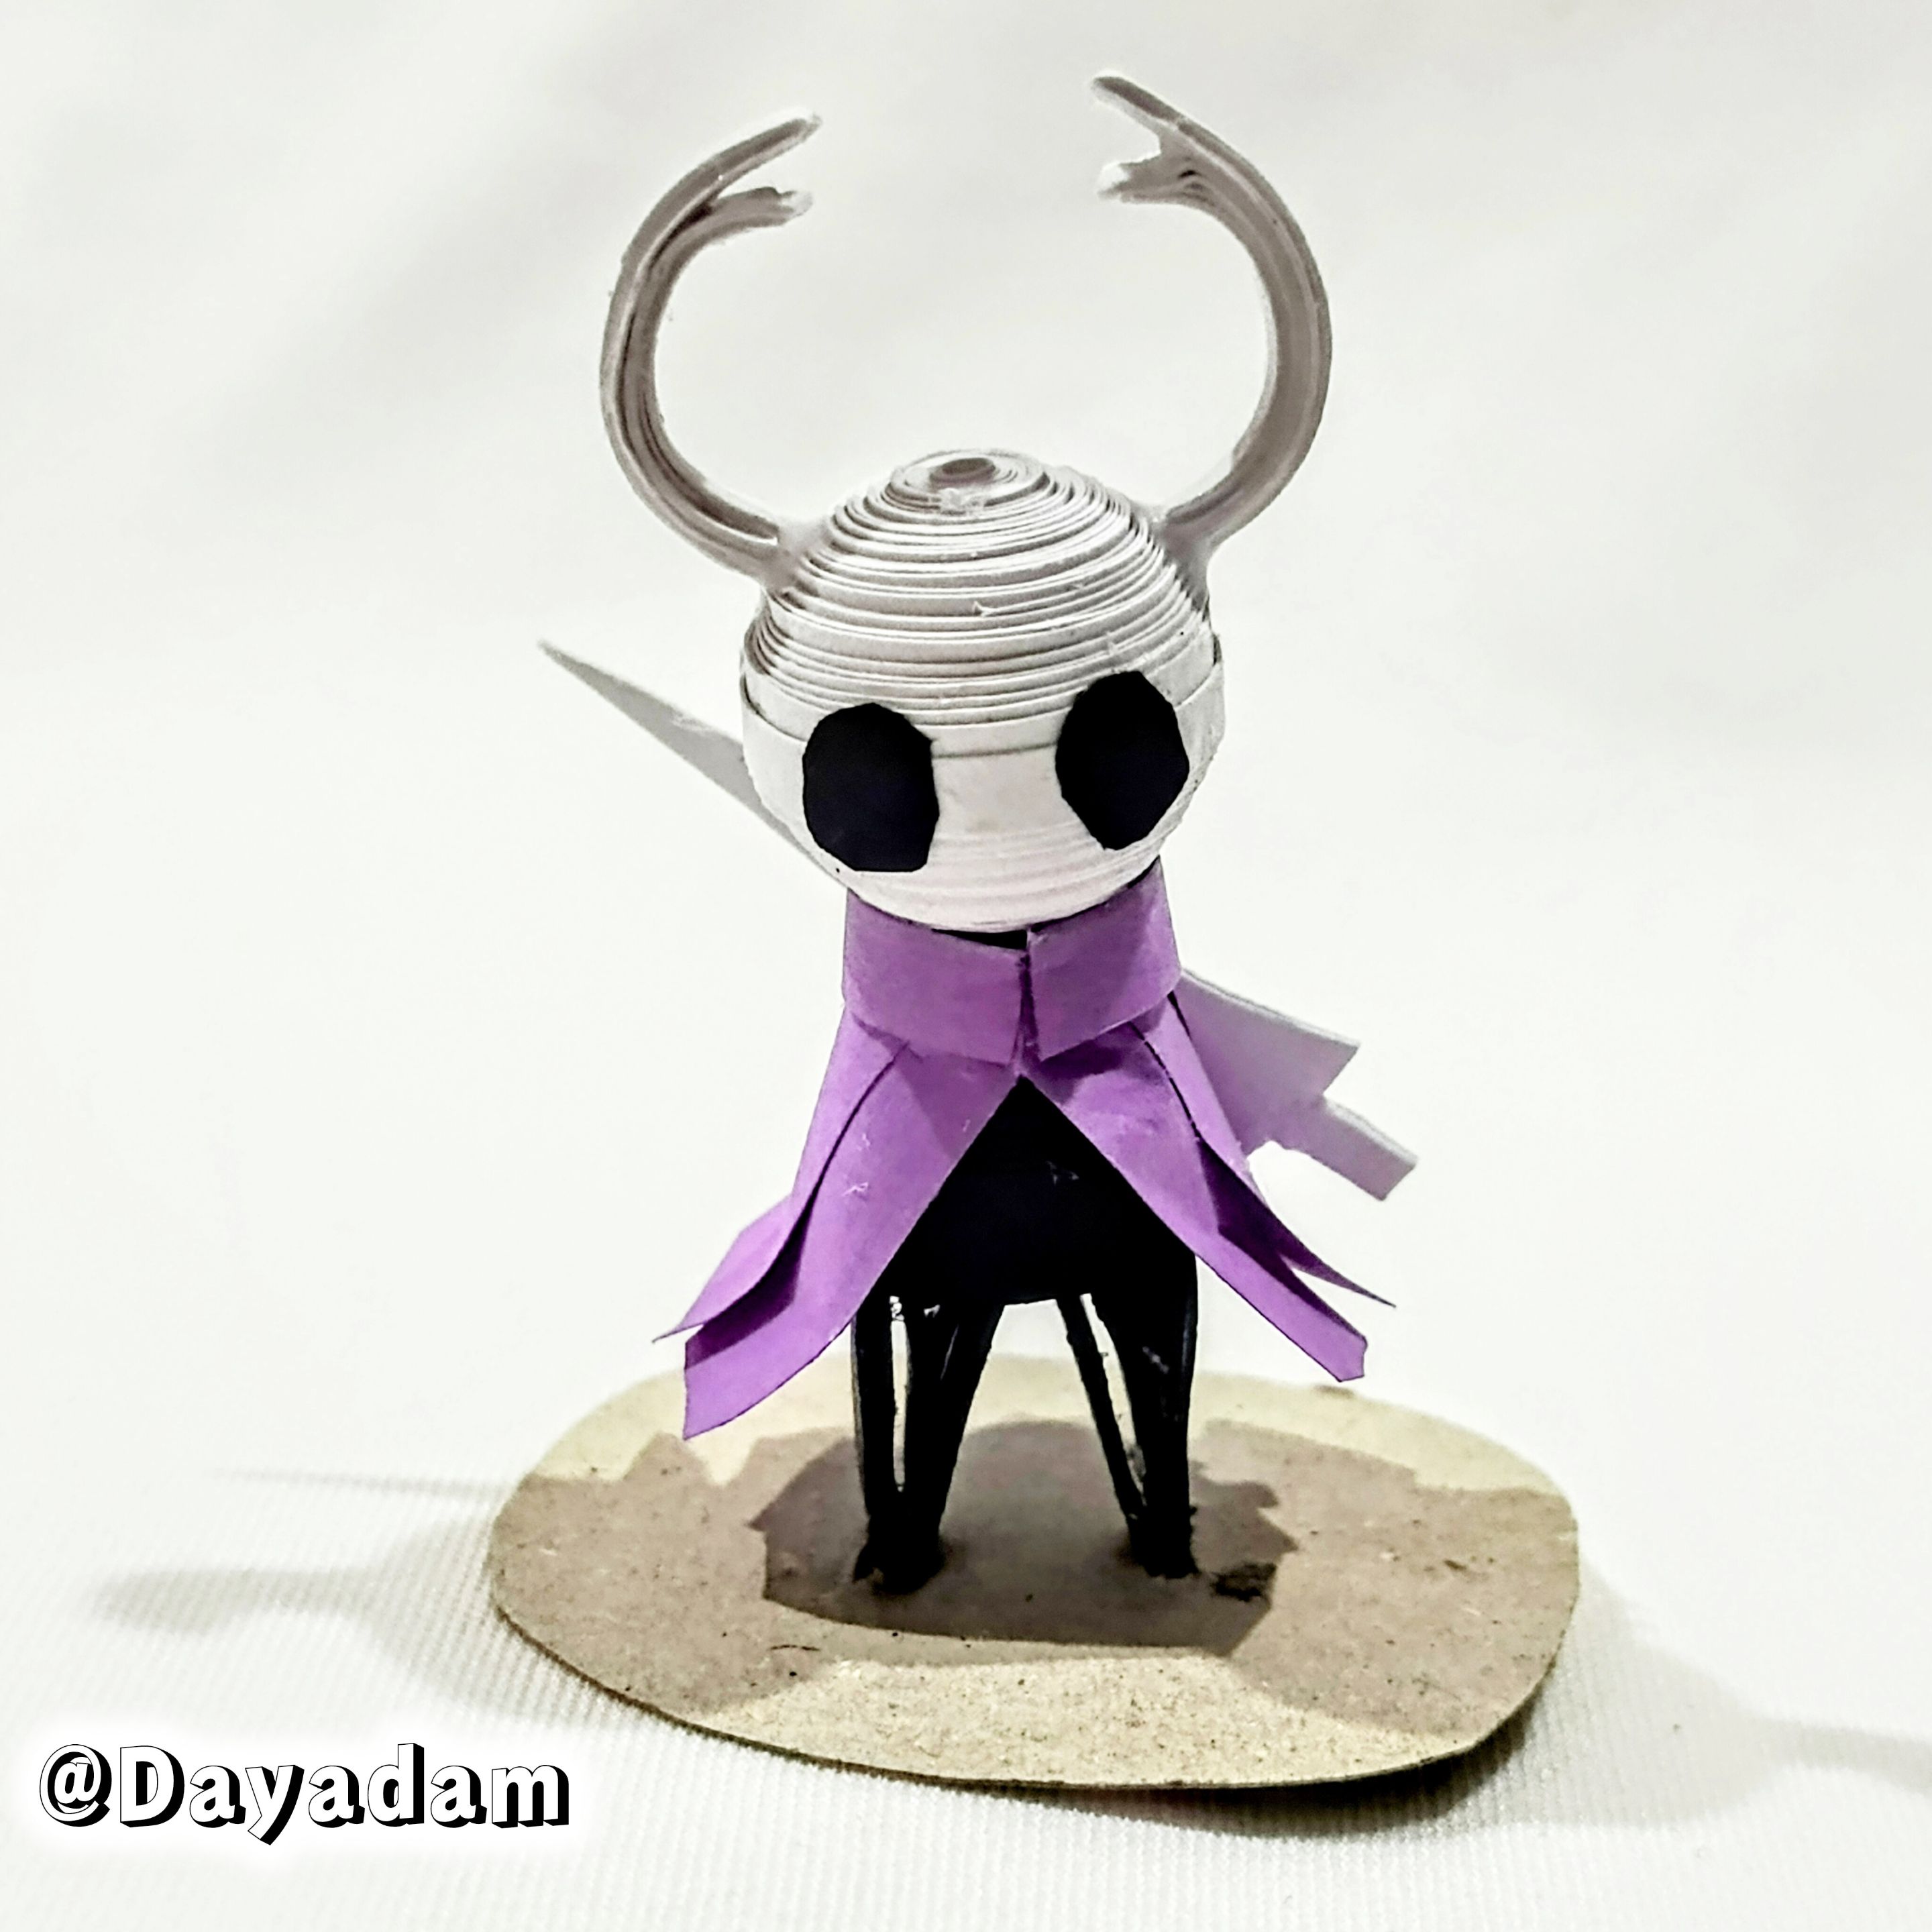
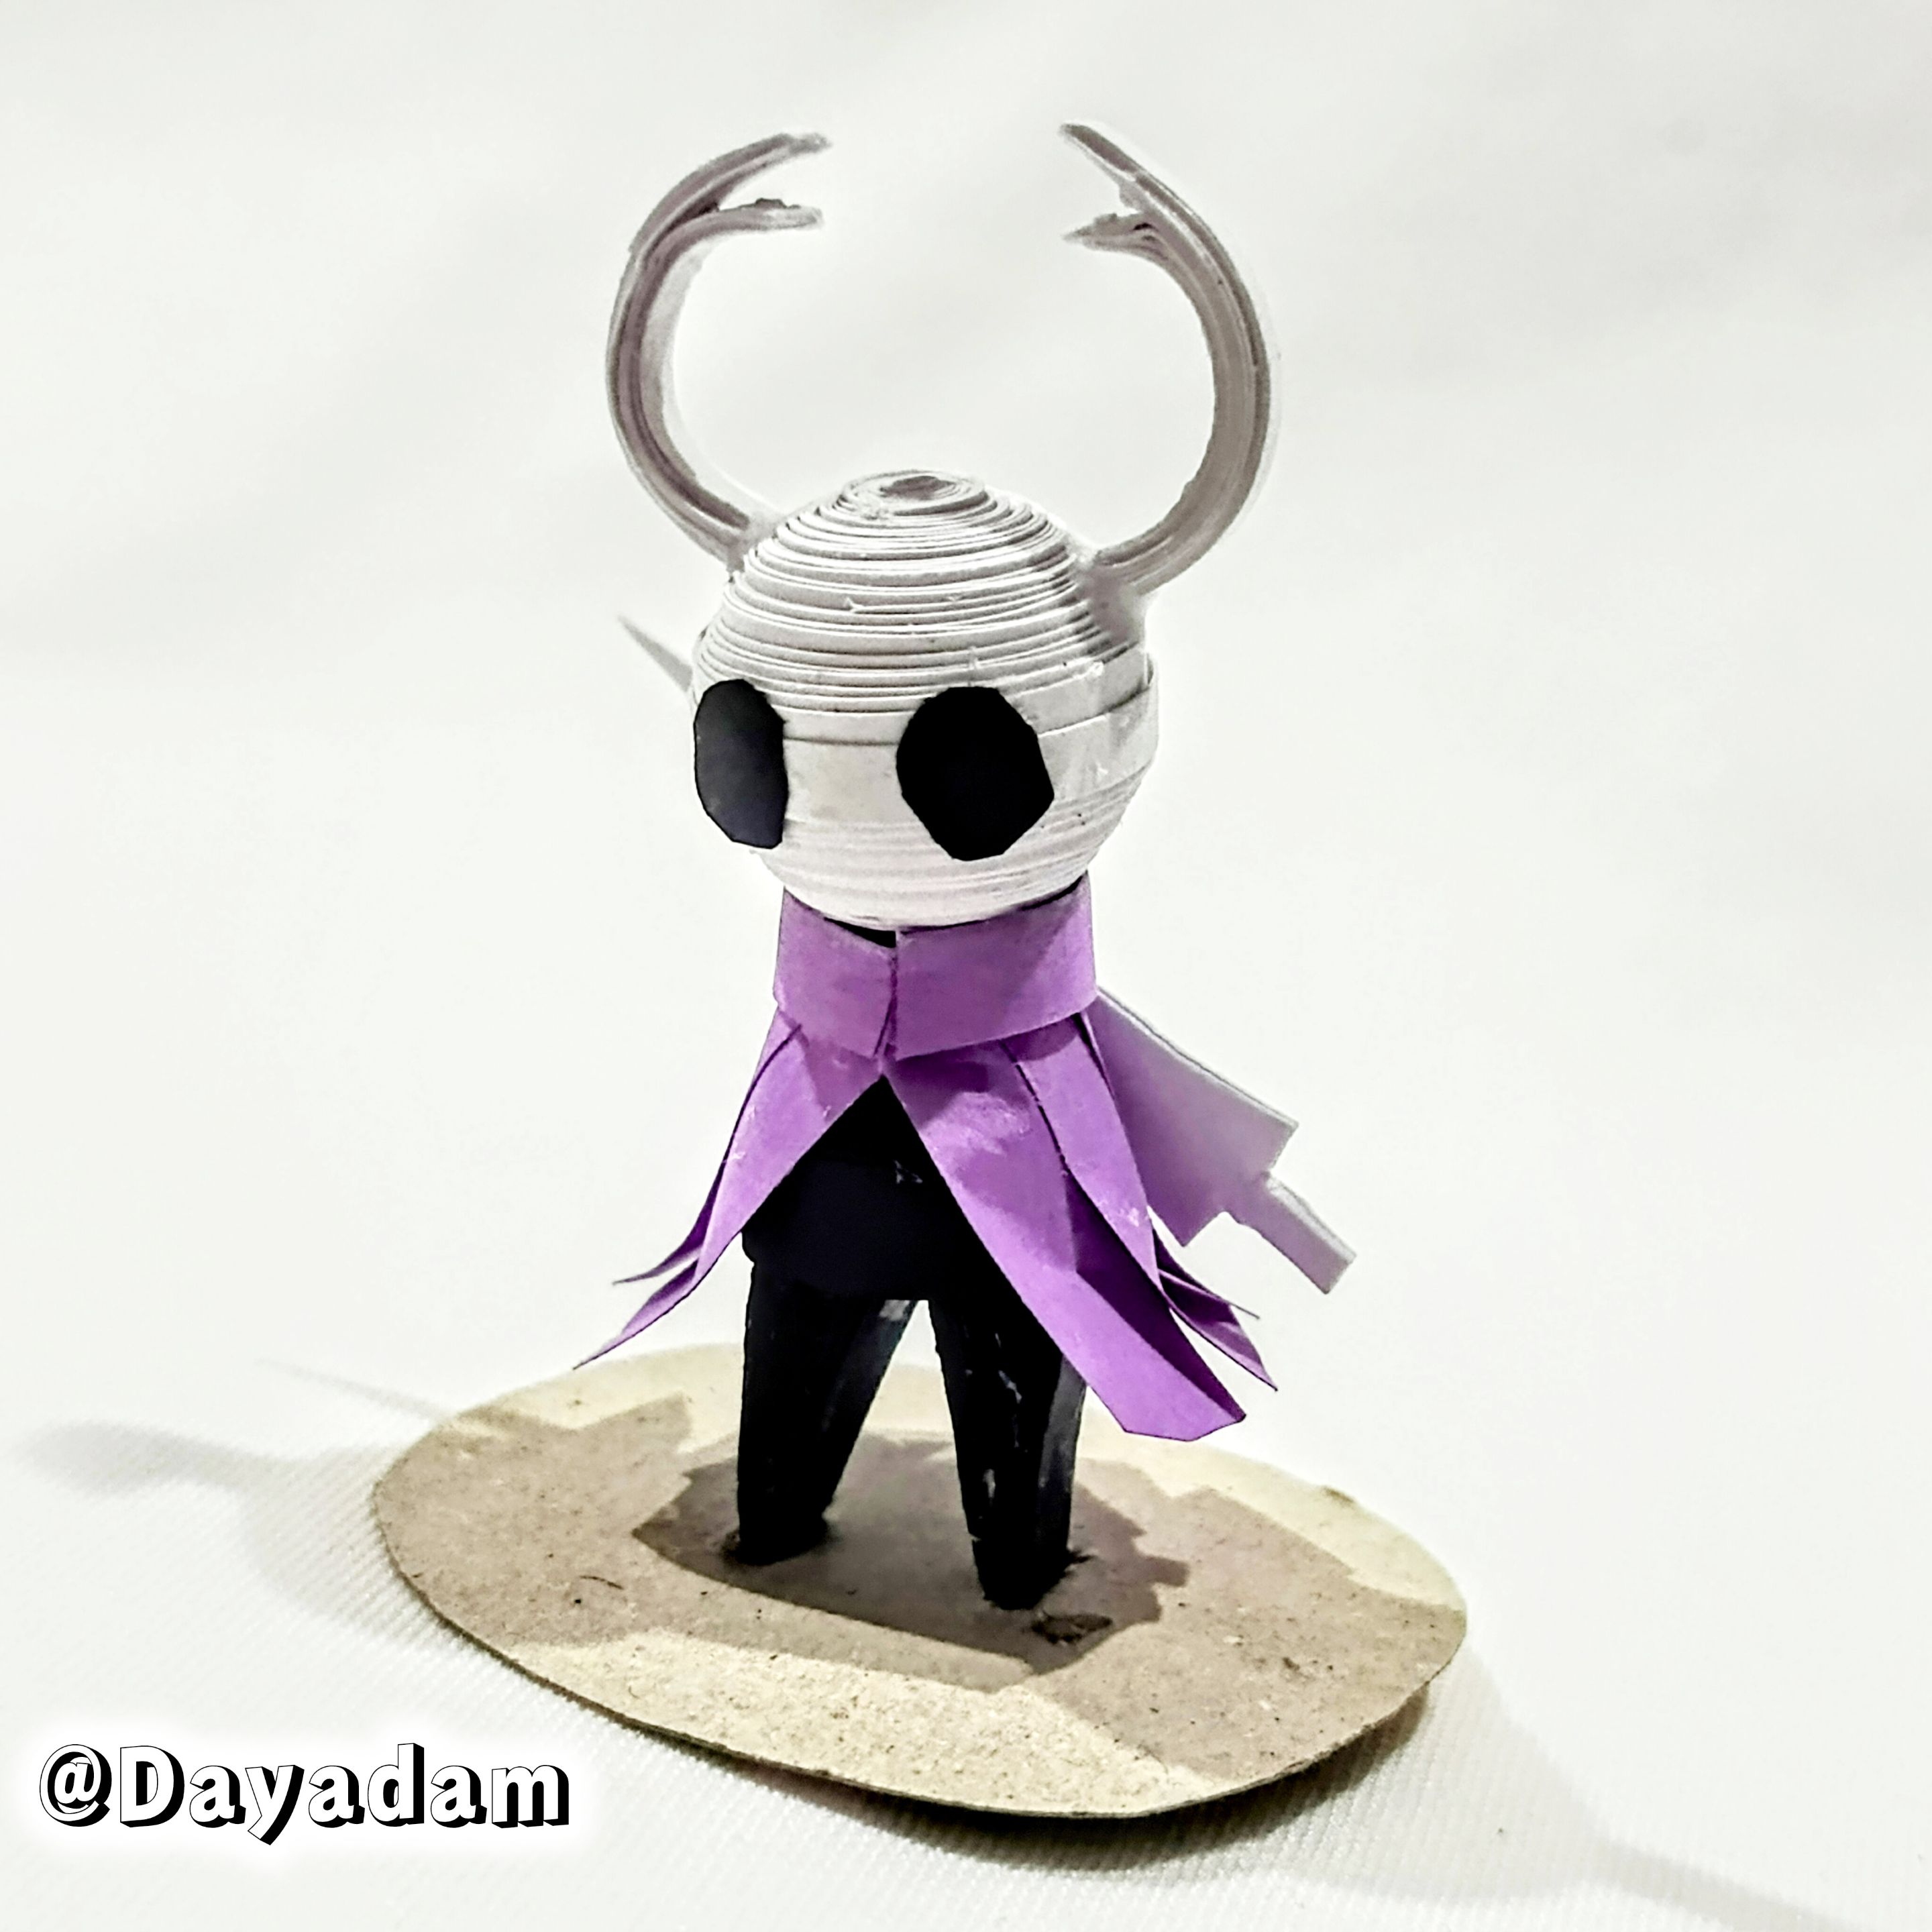
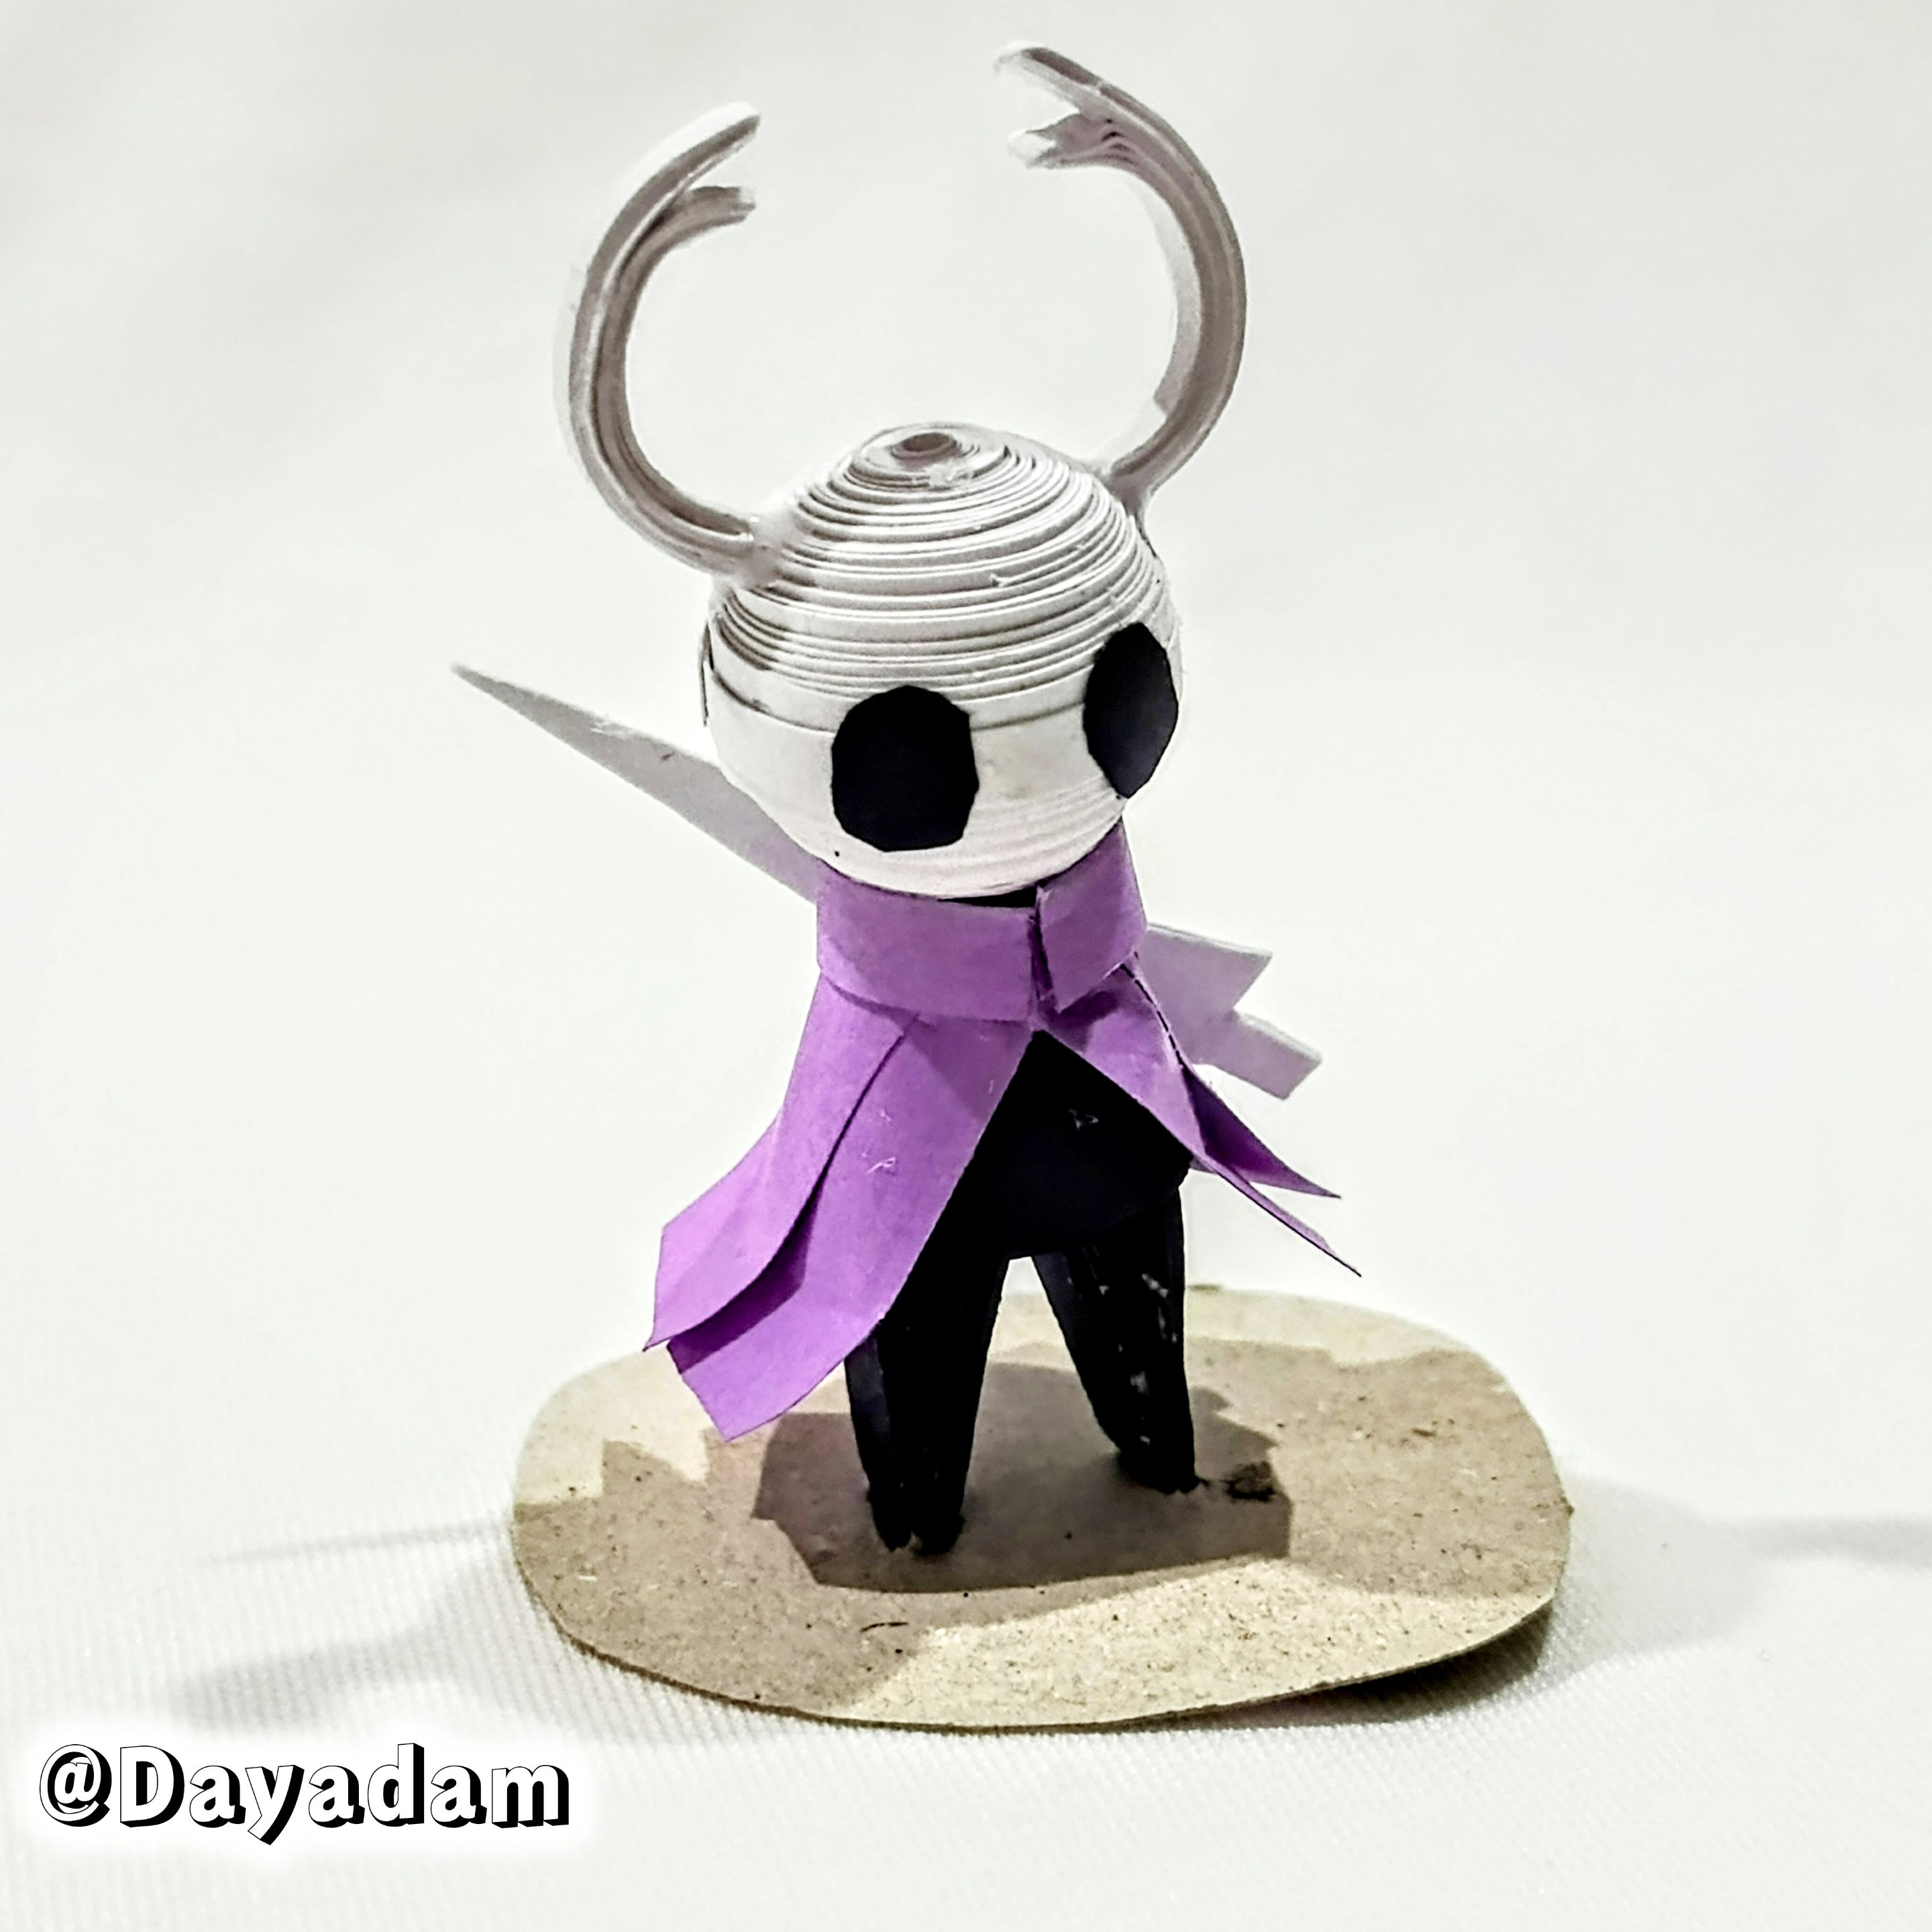
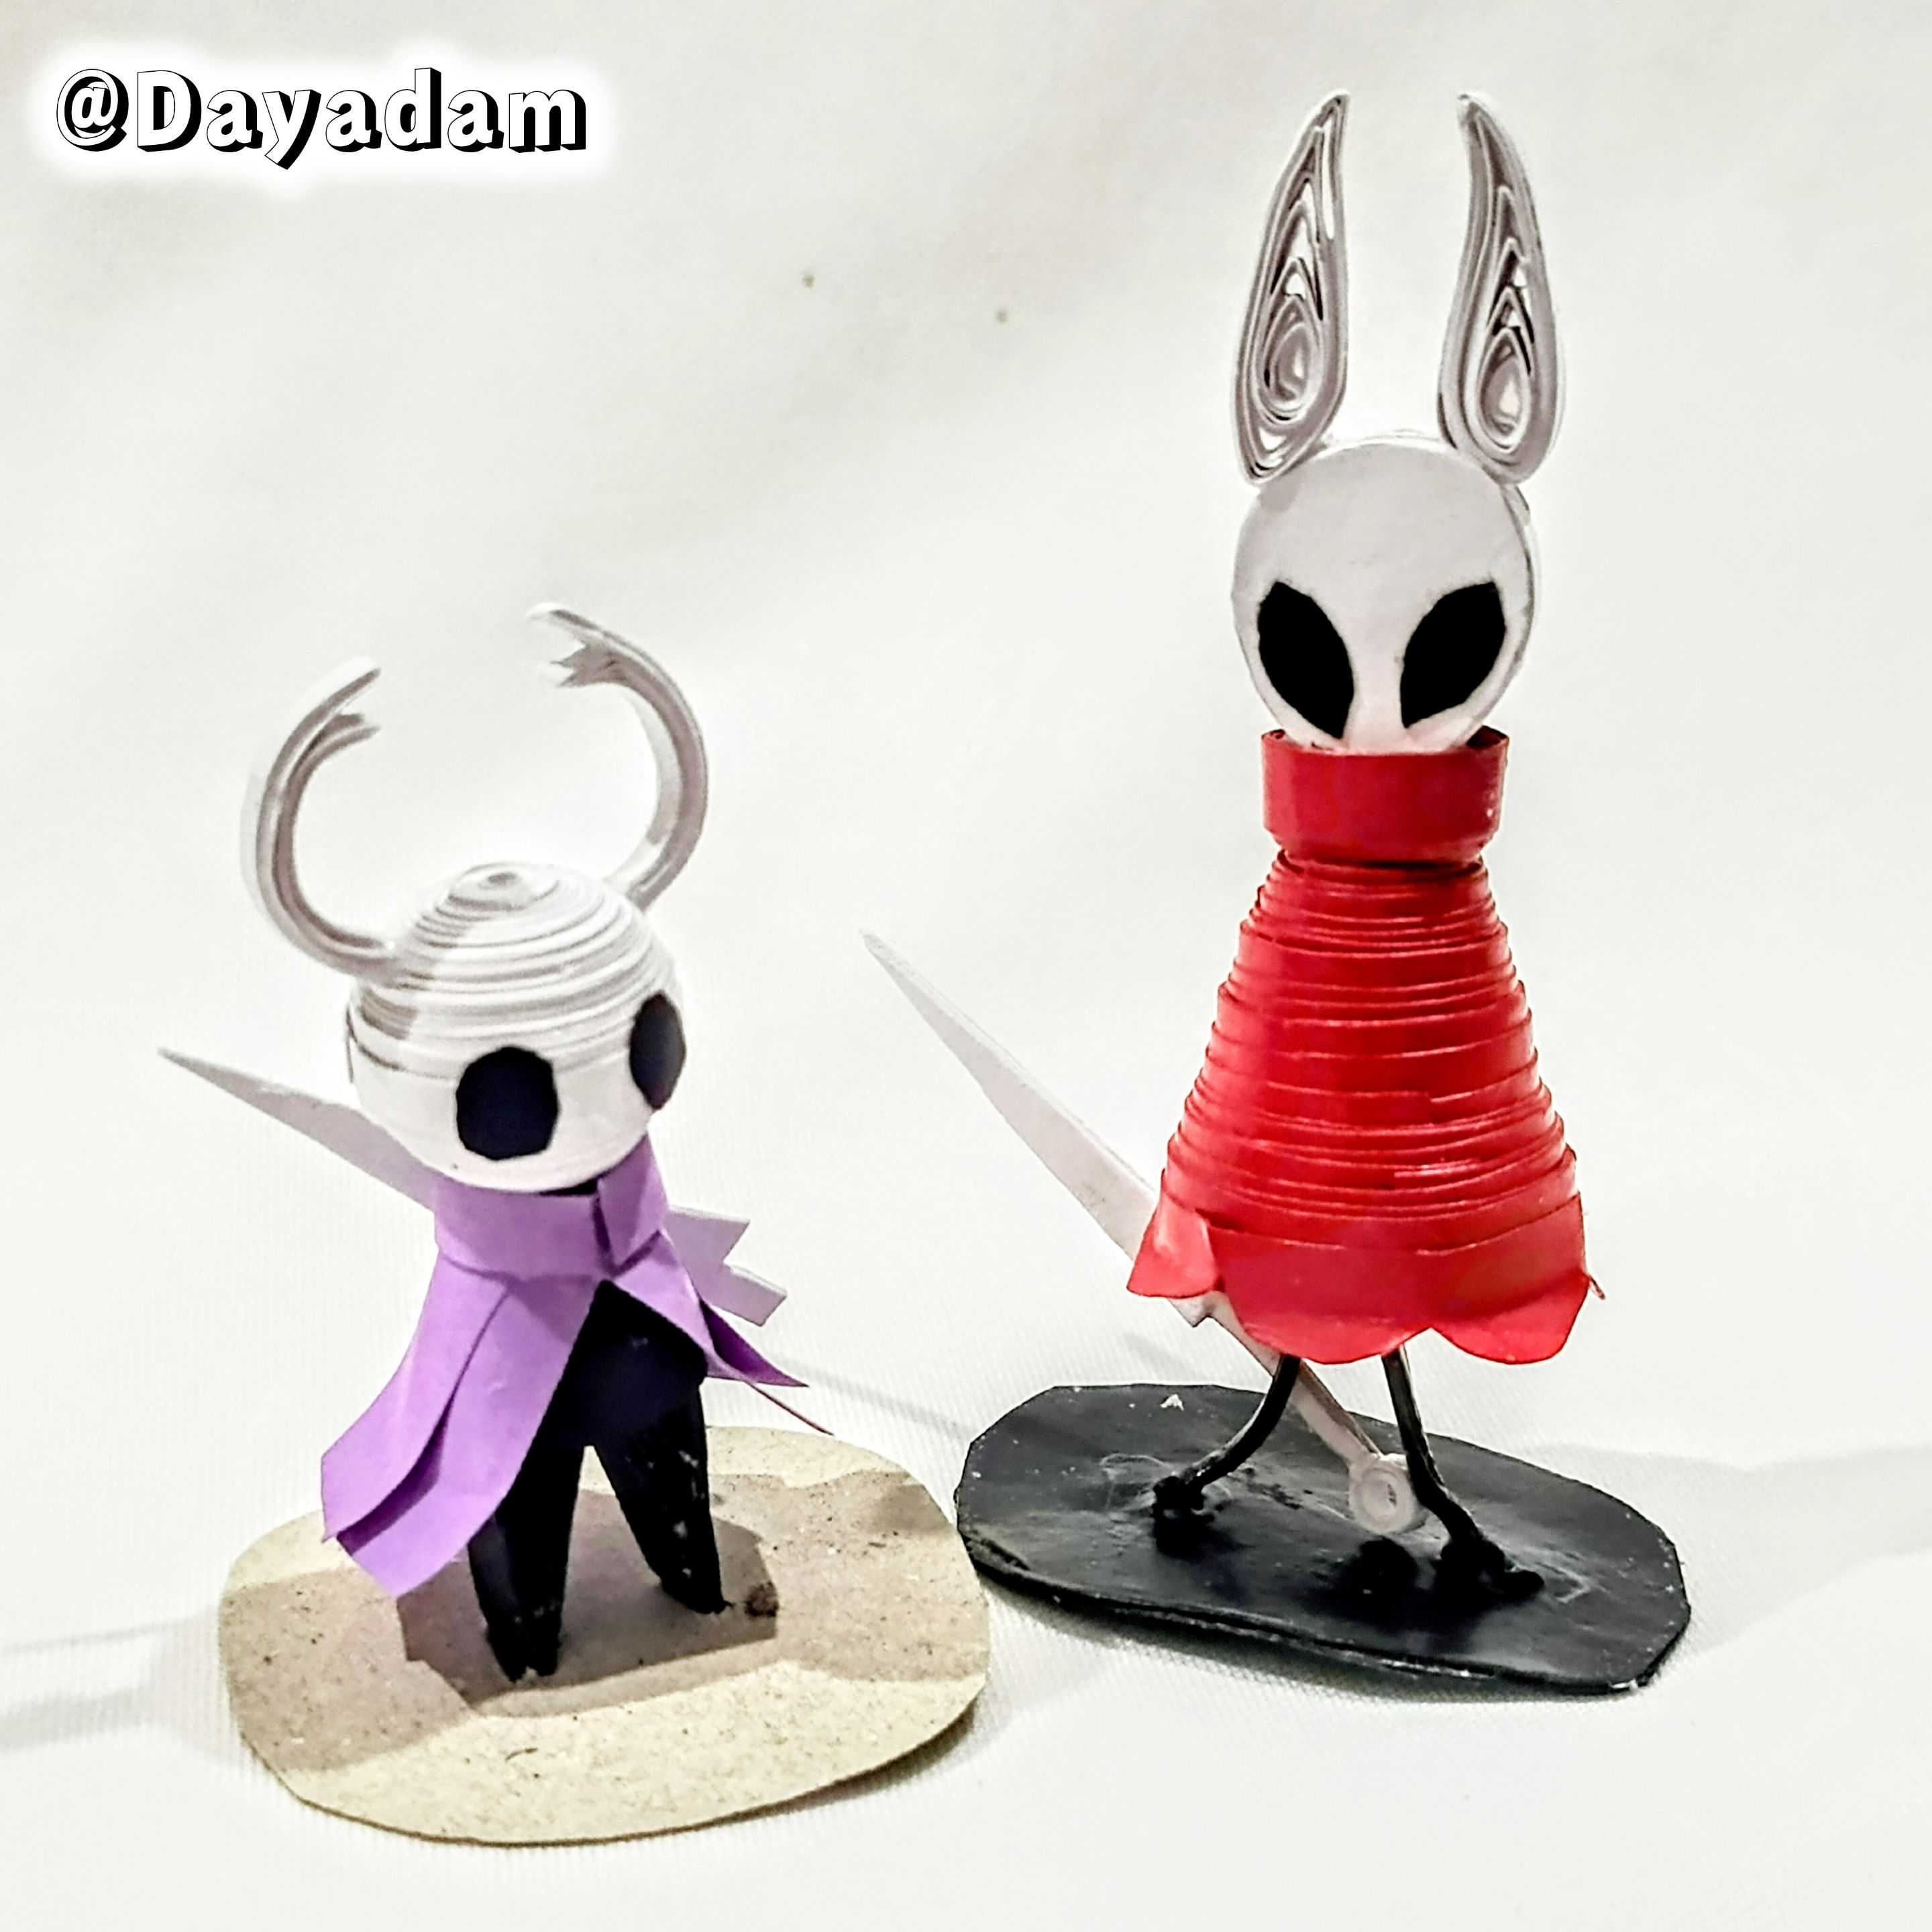
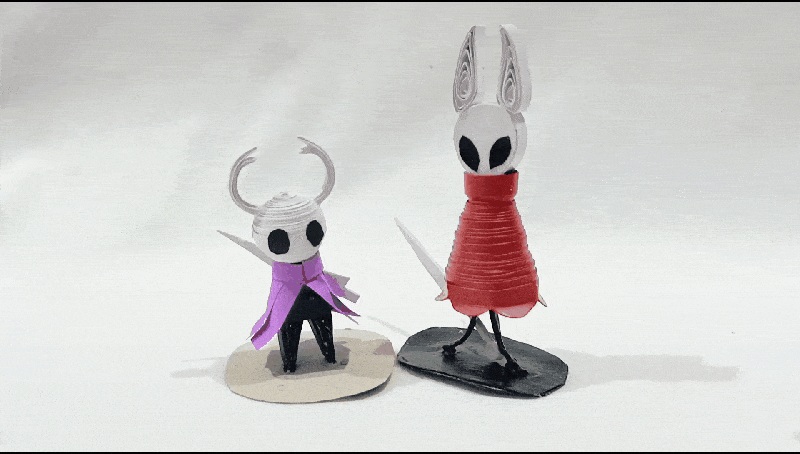
Last week I made a small decorative figure of Hornet, to complete the couple today I present you a small The Knight in 3D, in the quilling technique.
Hoping you like it, I leave you my creative process:
Let's get started:😃

Hola a toda mi gente de Hive... 🐱
Hoy les traigo un trabajo más de mi arte, esta vez nuevamente para complacer a la comunidad de gamers de Hive.
La semana pasada realicé una pequeña figura decorativa de Hornet, para completar la pareja hoy les presento a un pequeño The Knight en 3D, en la técnica de quilling.
Esperando que sea de su agrado, les dejo mi proceso creativo:
Comencemos:😃
 |
 |
 |
|


-
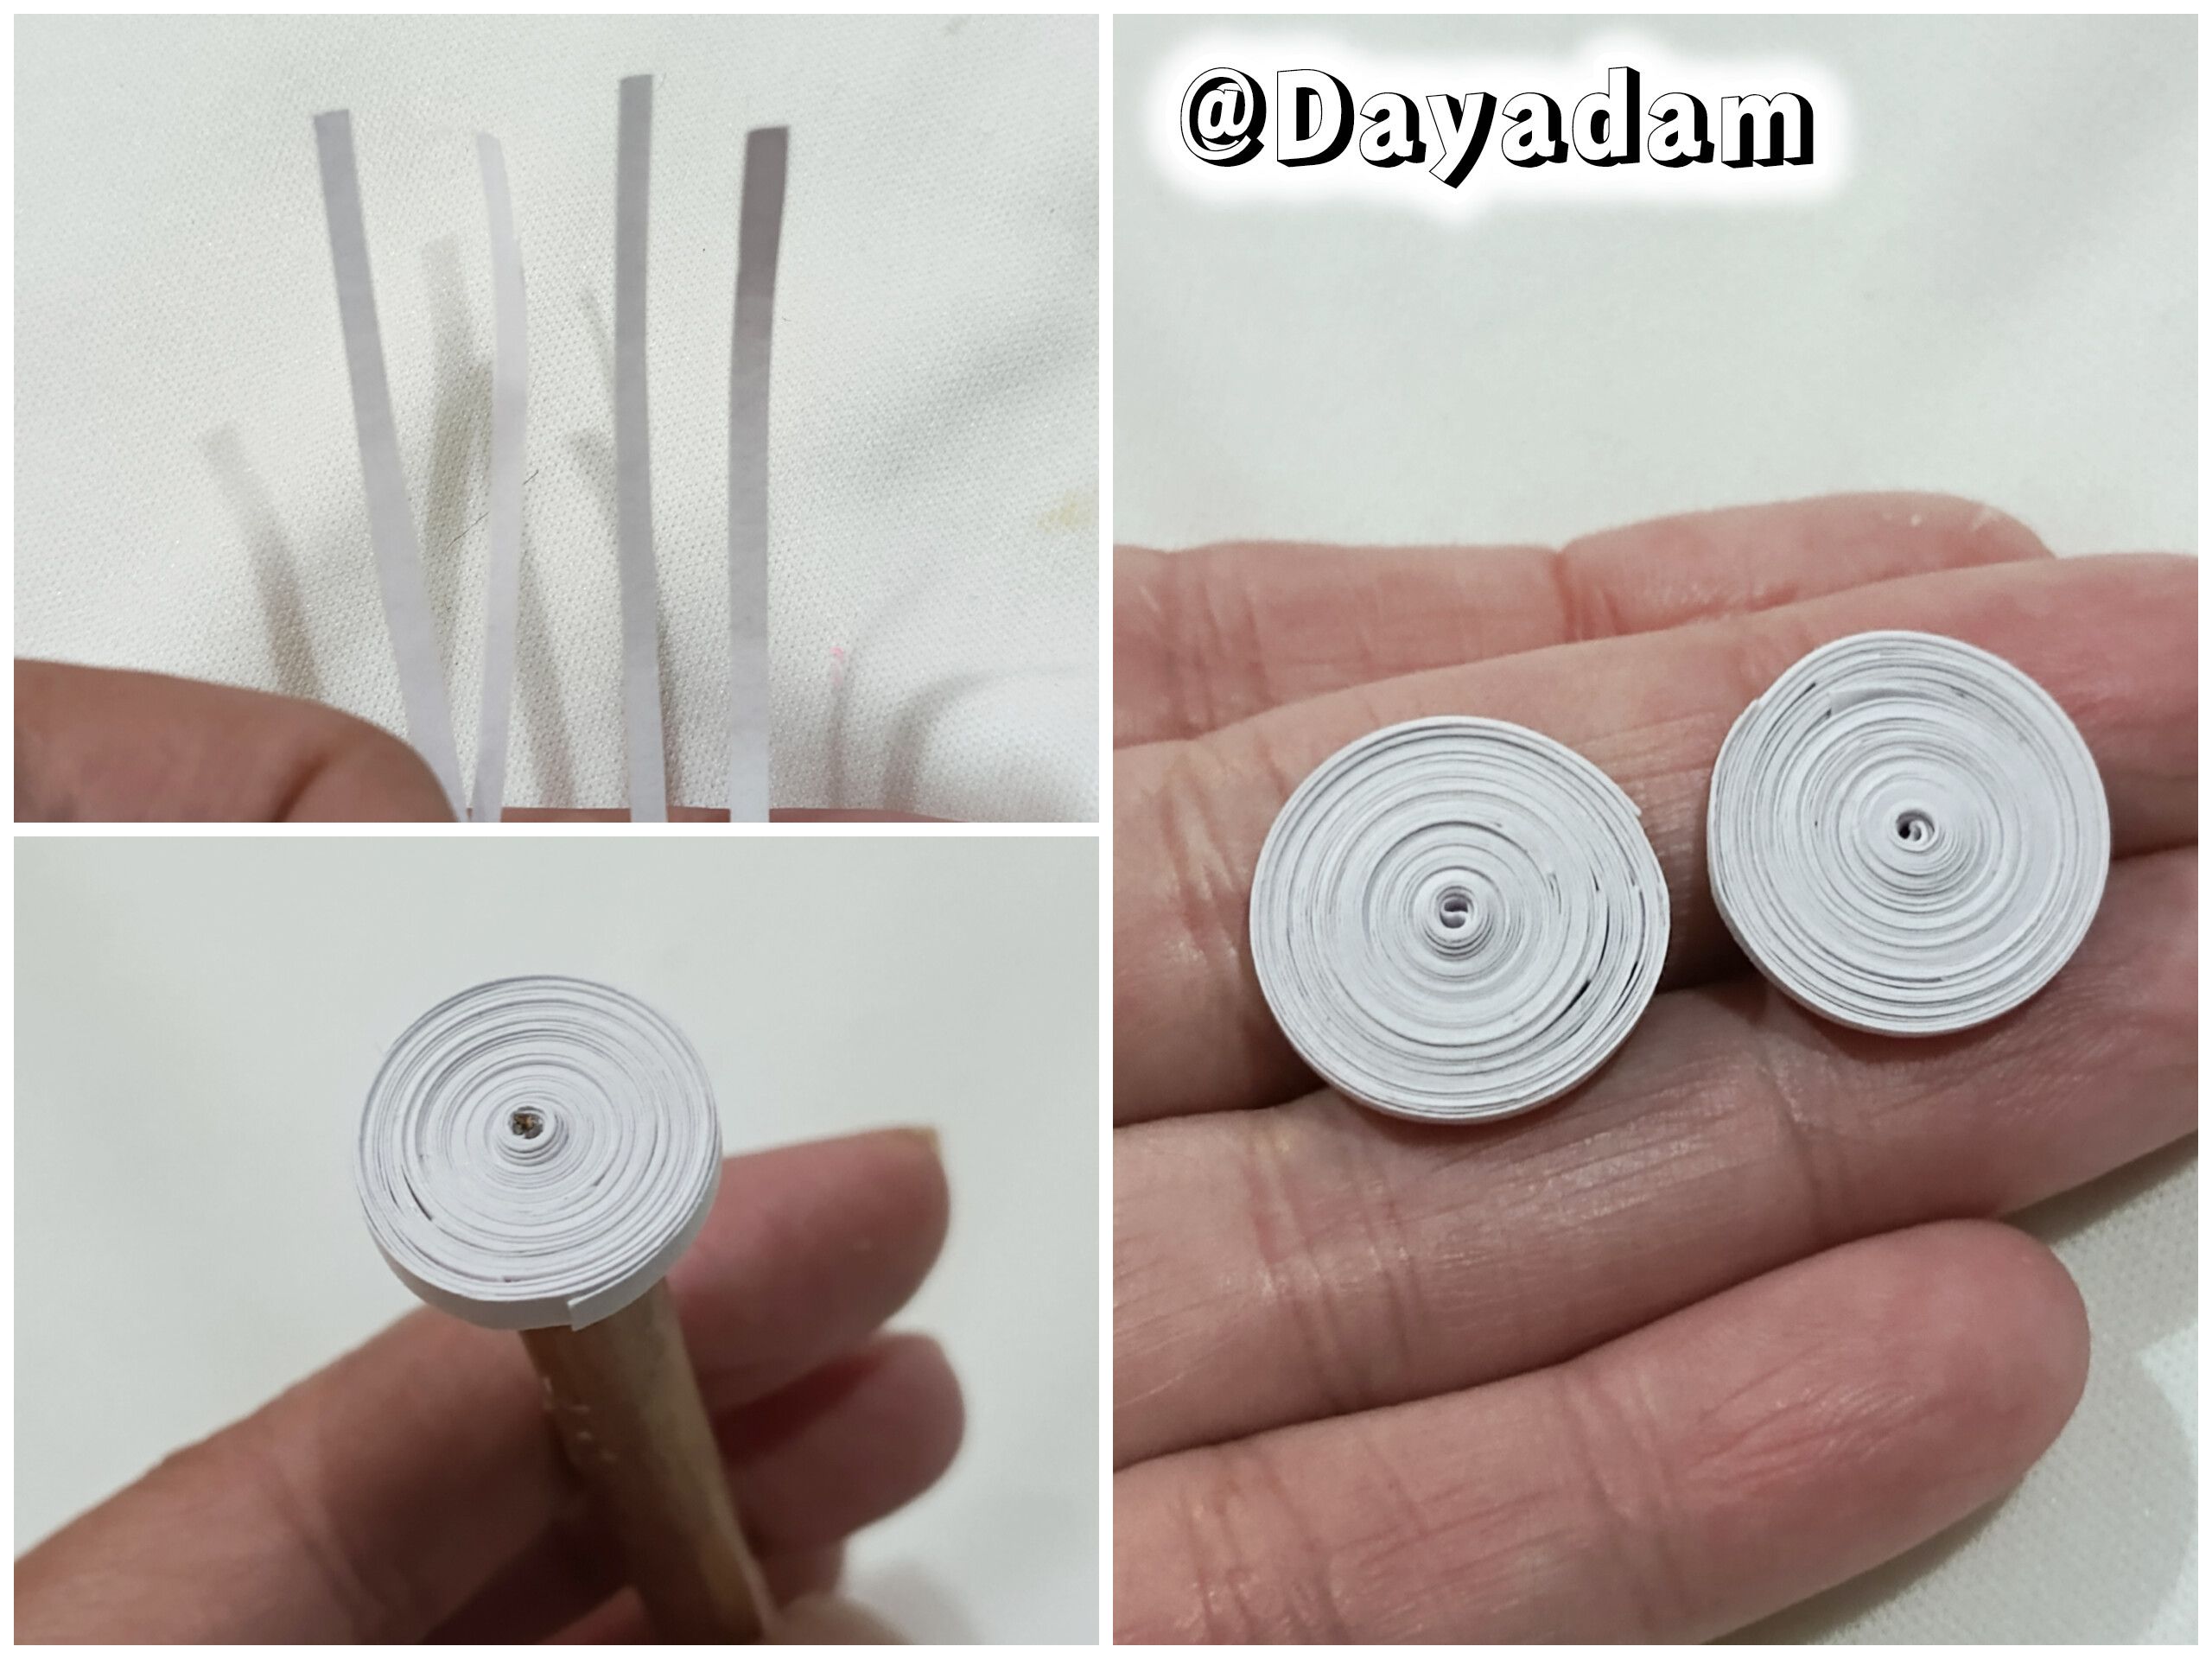
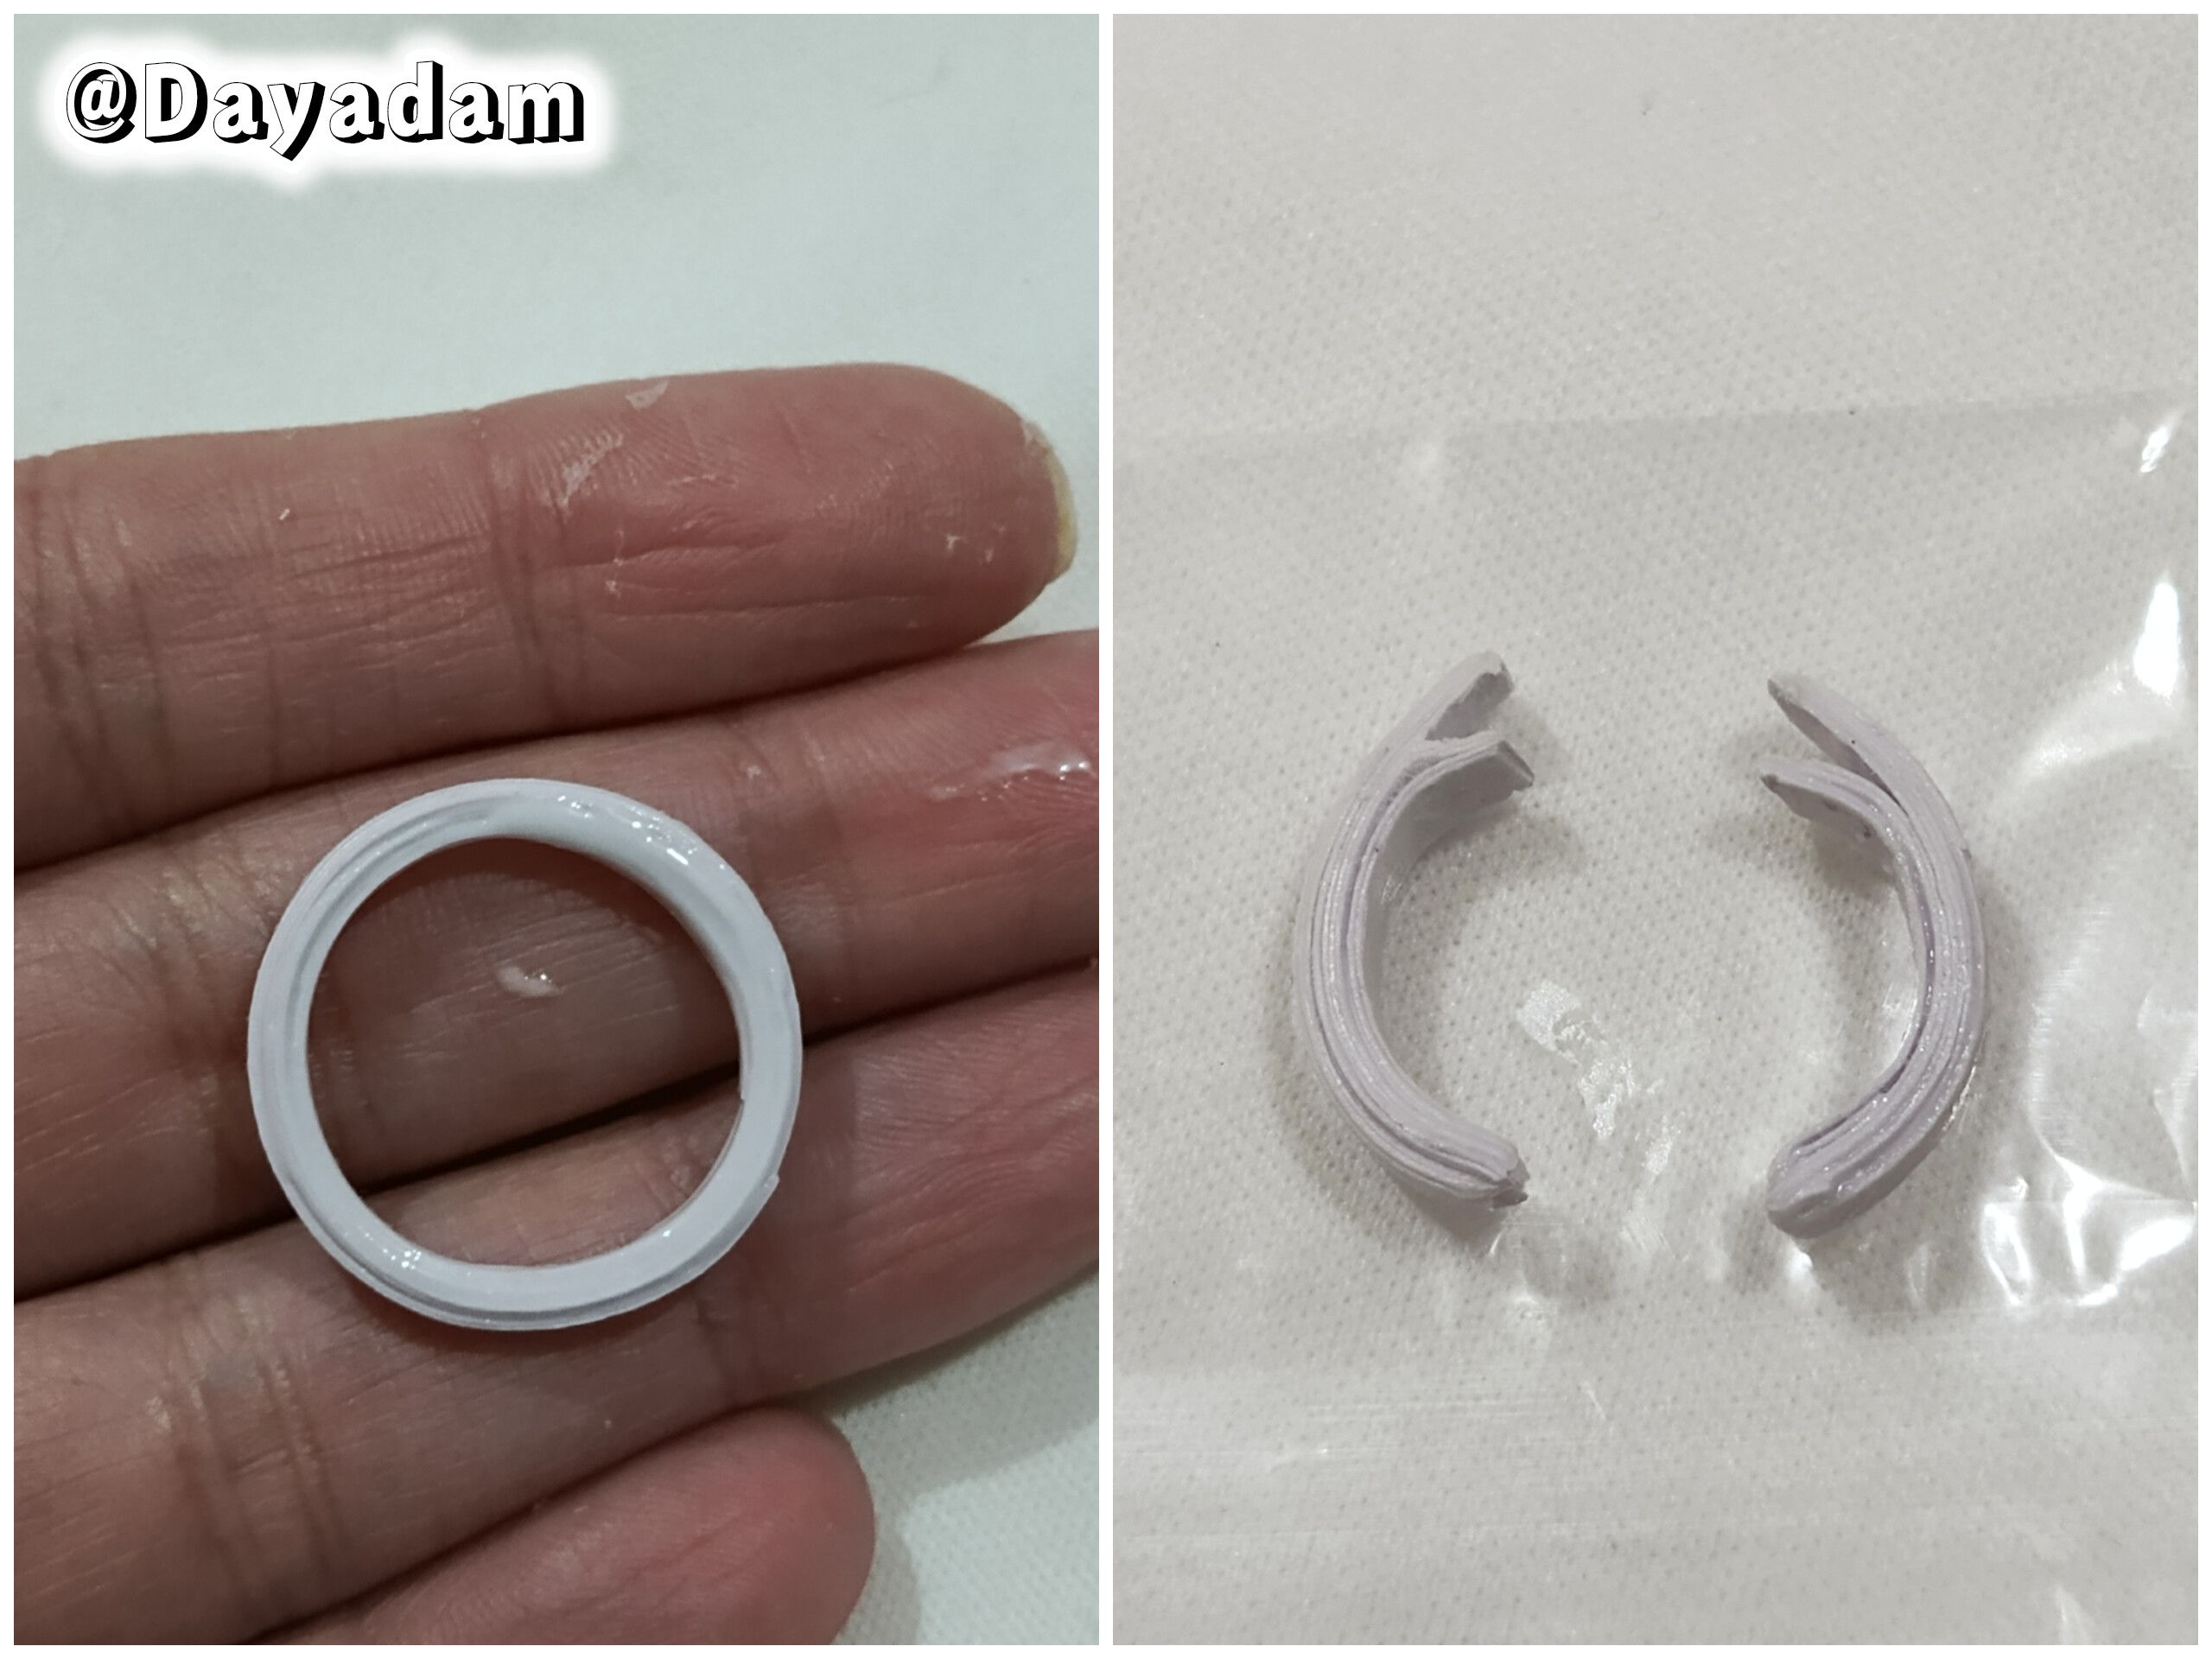
For the head: we start by taking 3mm wide white quilling tape, with the quilling needle we are going to roll until we reach the end of the tape, we seal it with extra strong white glue, we take it out of the needle to obtain a closed circle. We will need two of the same
-
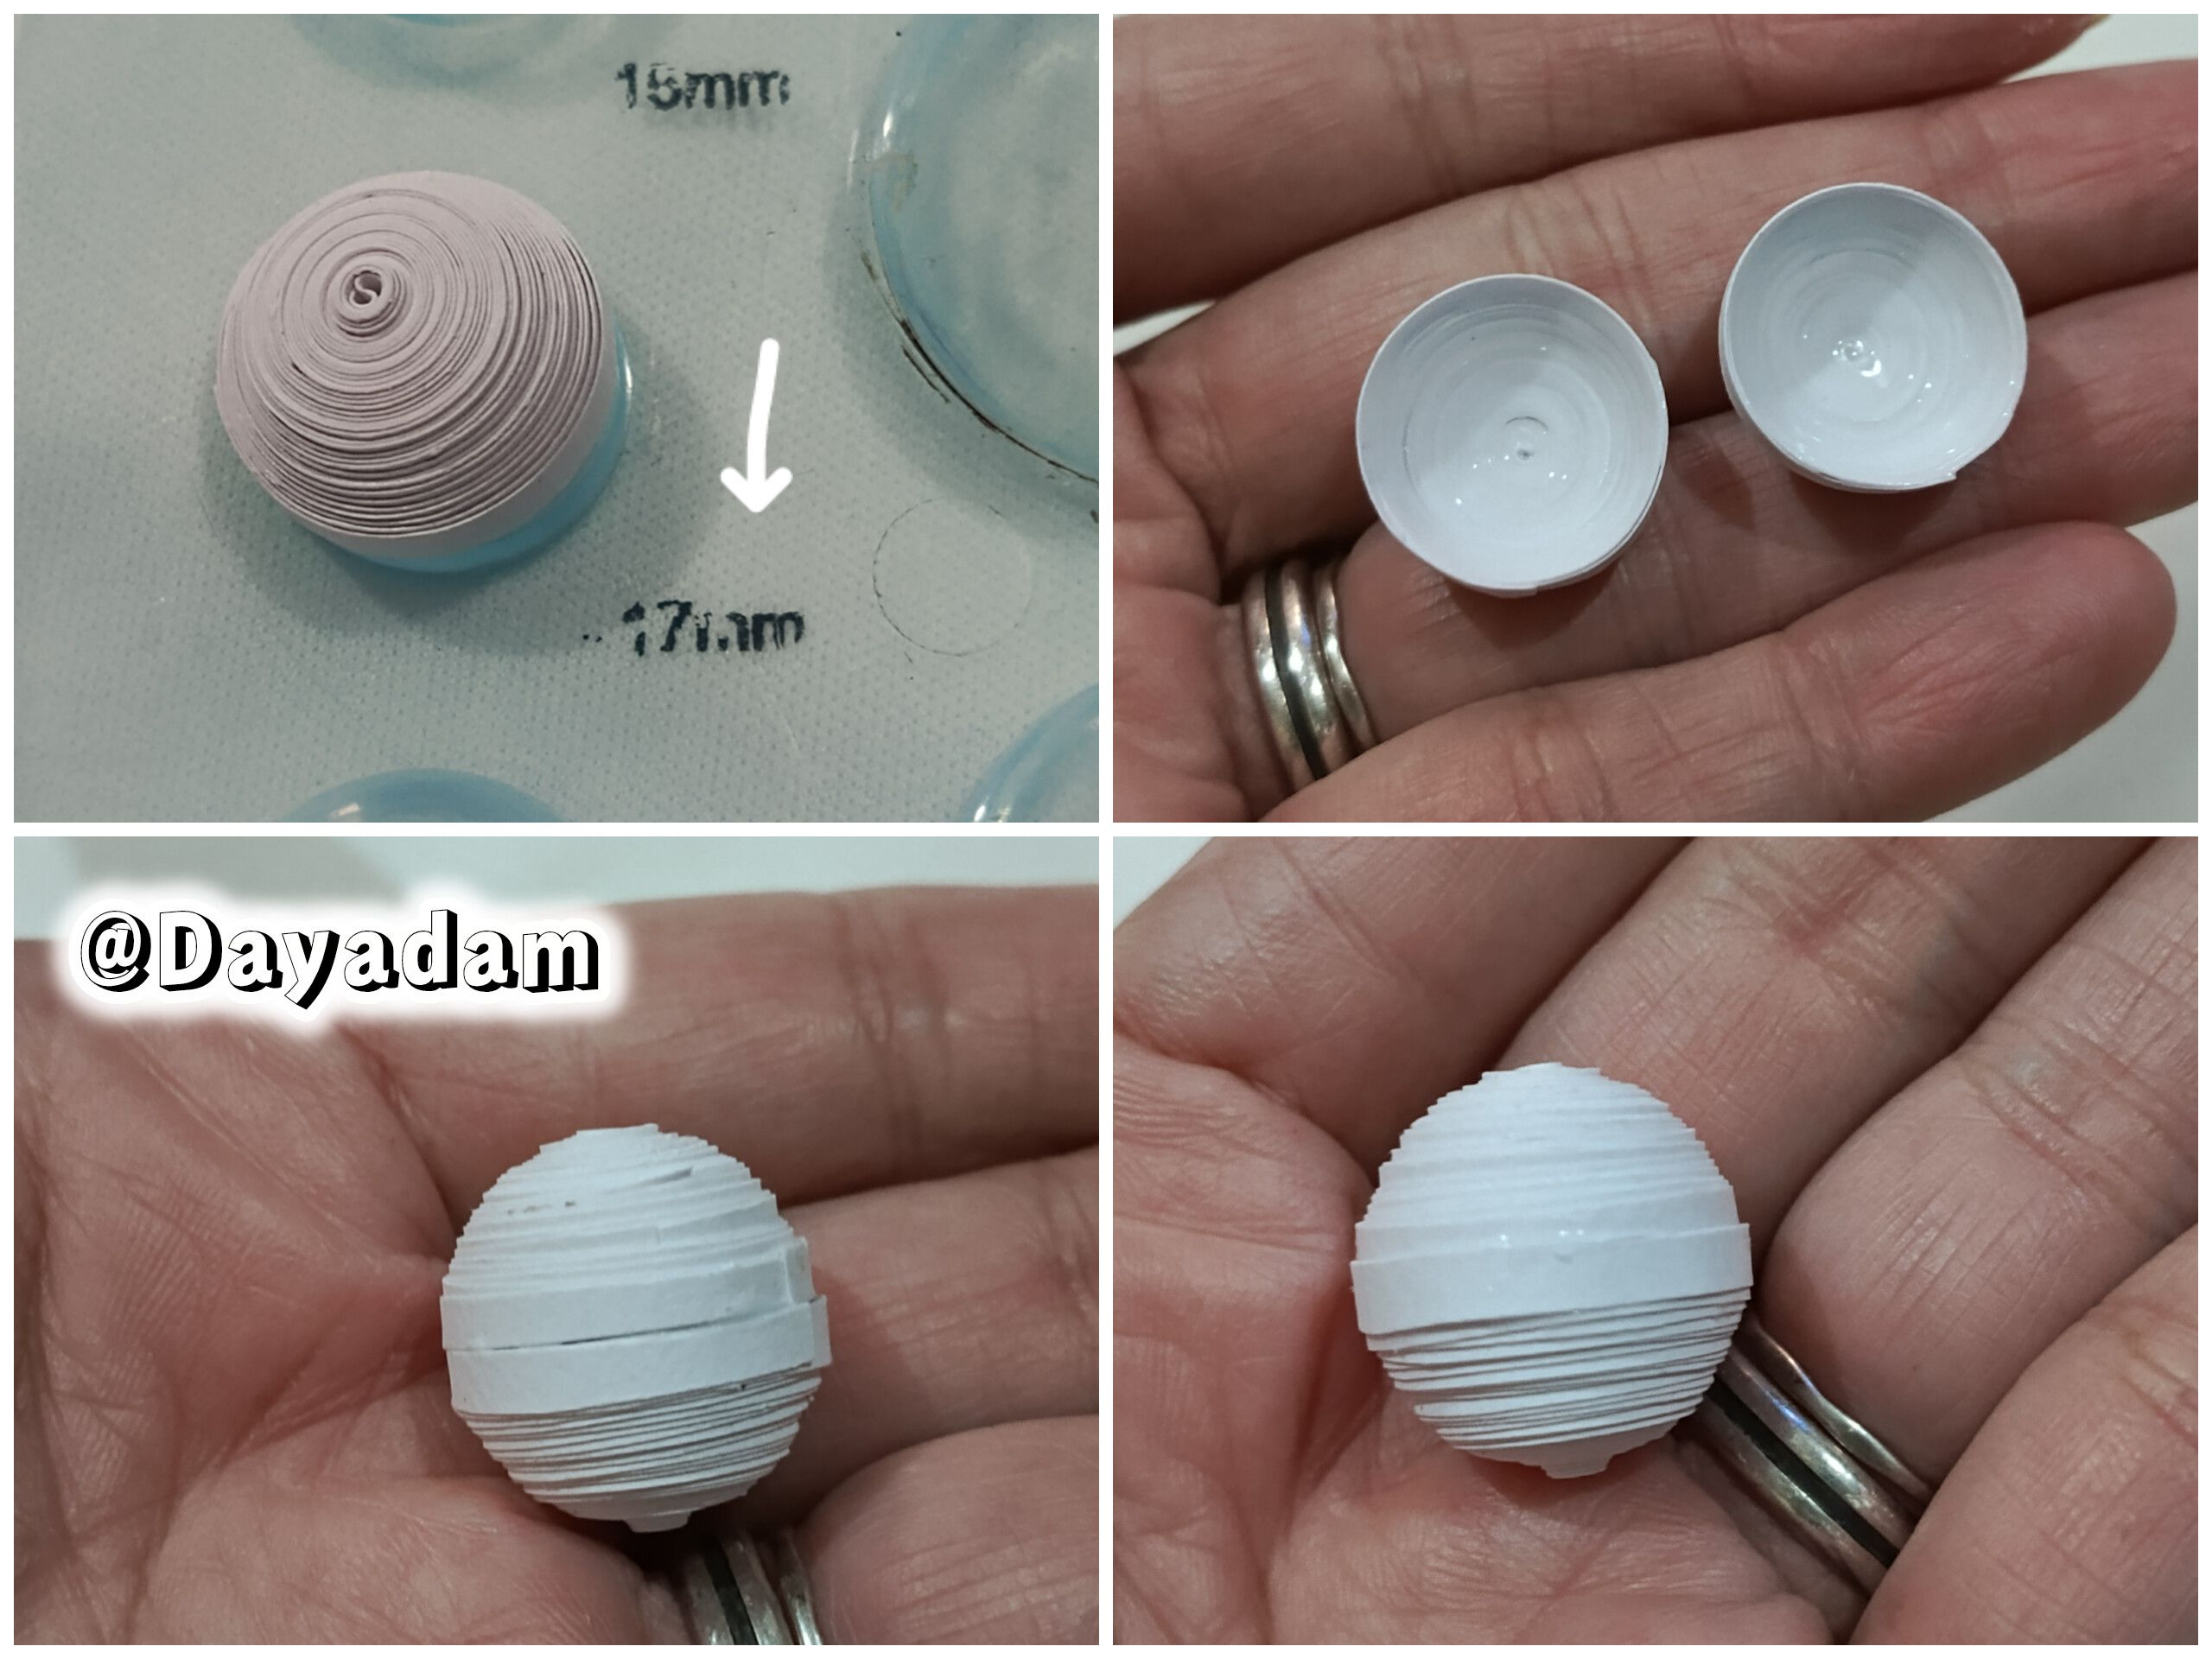
We will mold in a template for circles in the measure number 17 mm, we take out of the mold and apply extra strong white glue on the inside to prevent them from deforming or moving, we join both circles passing a white ribbon around them.
-
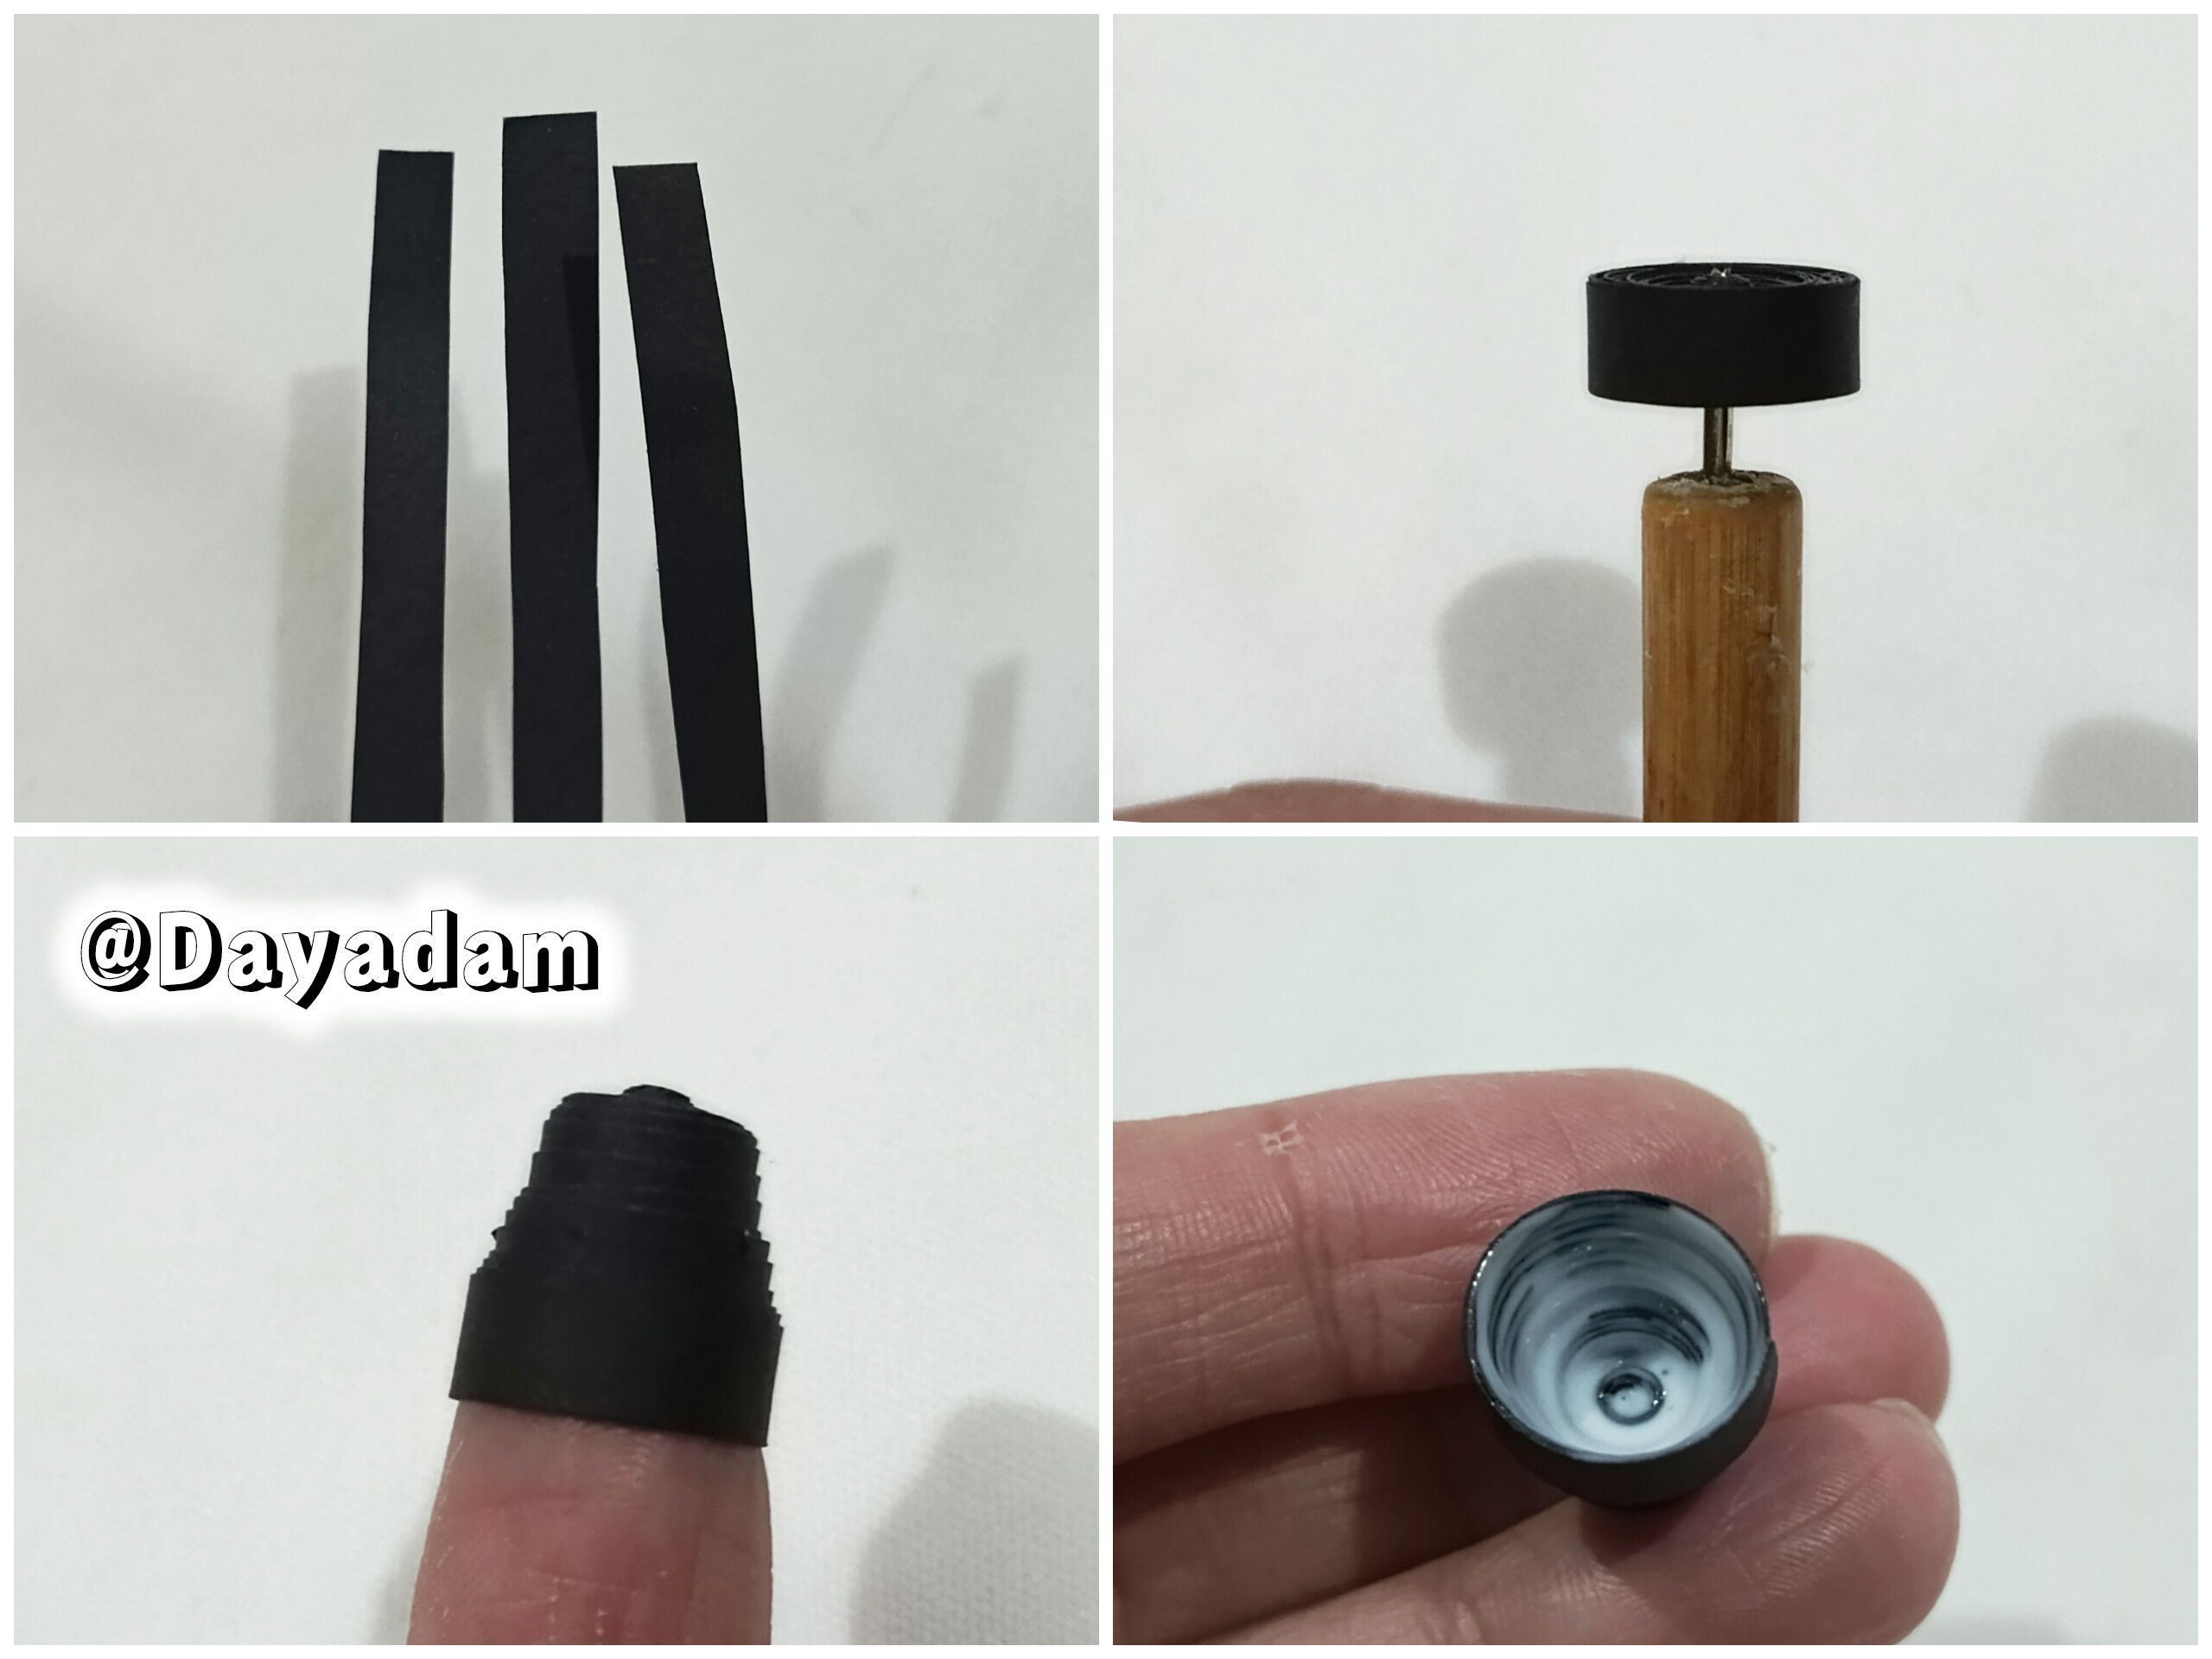
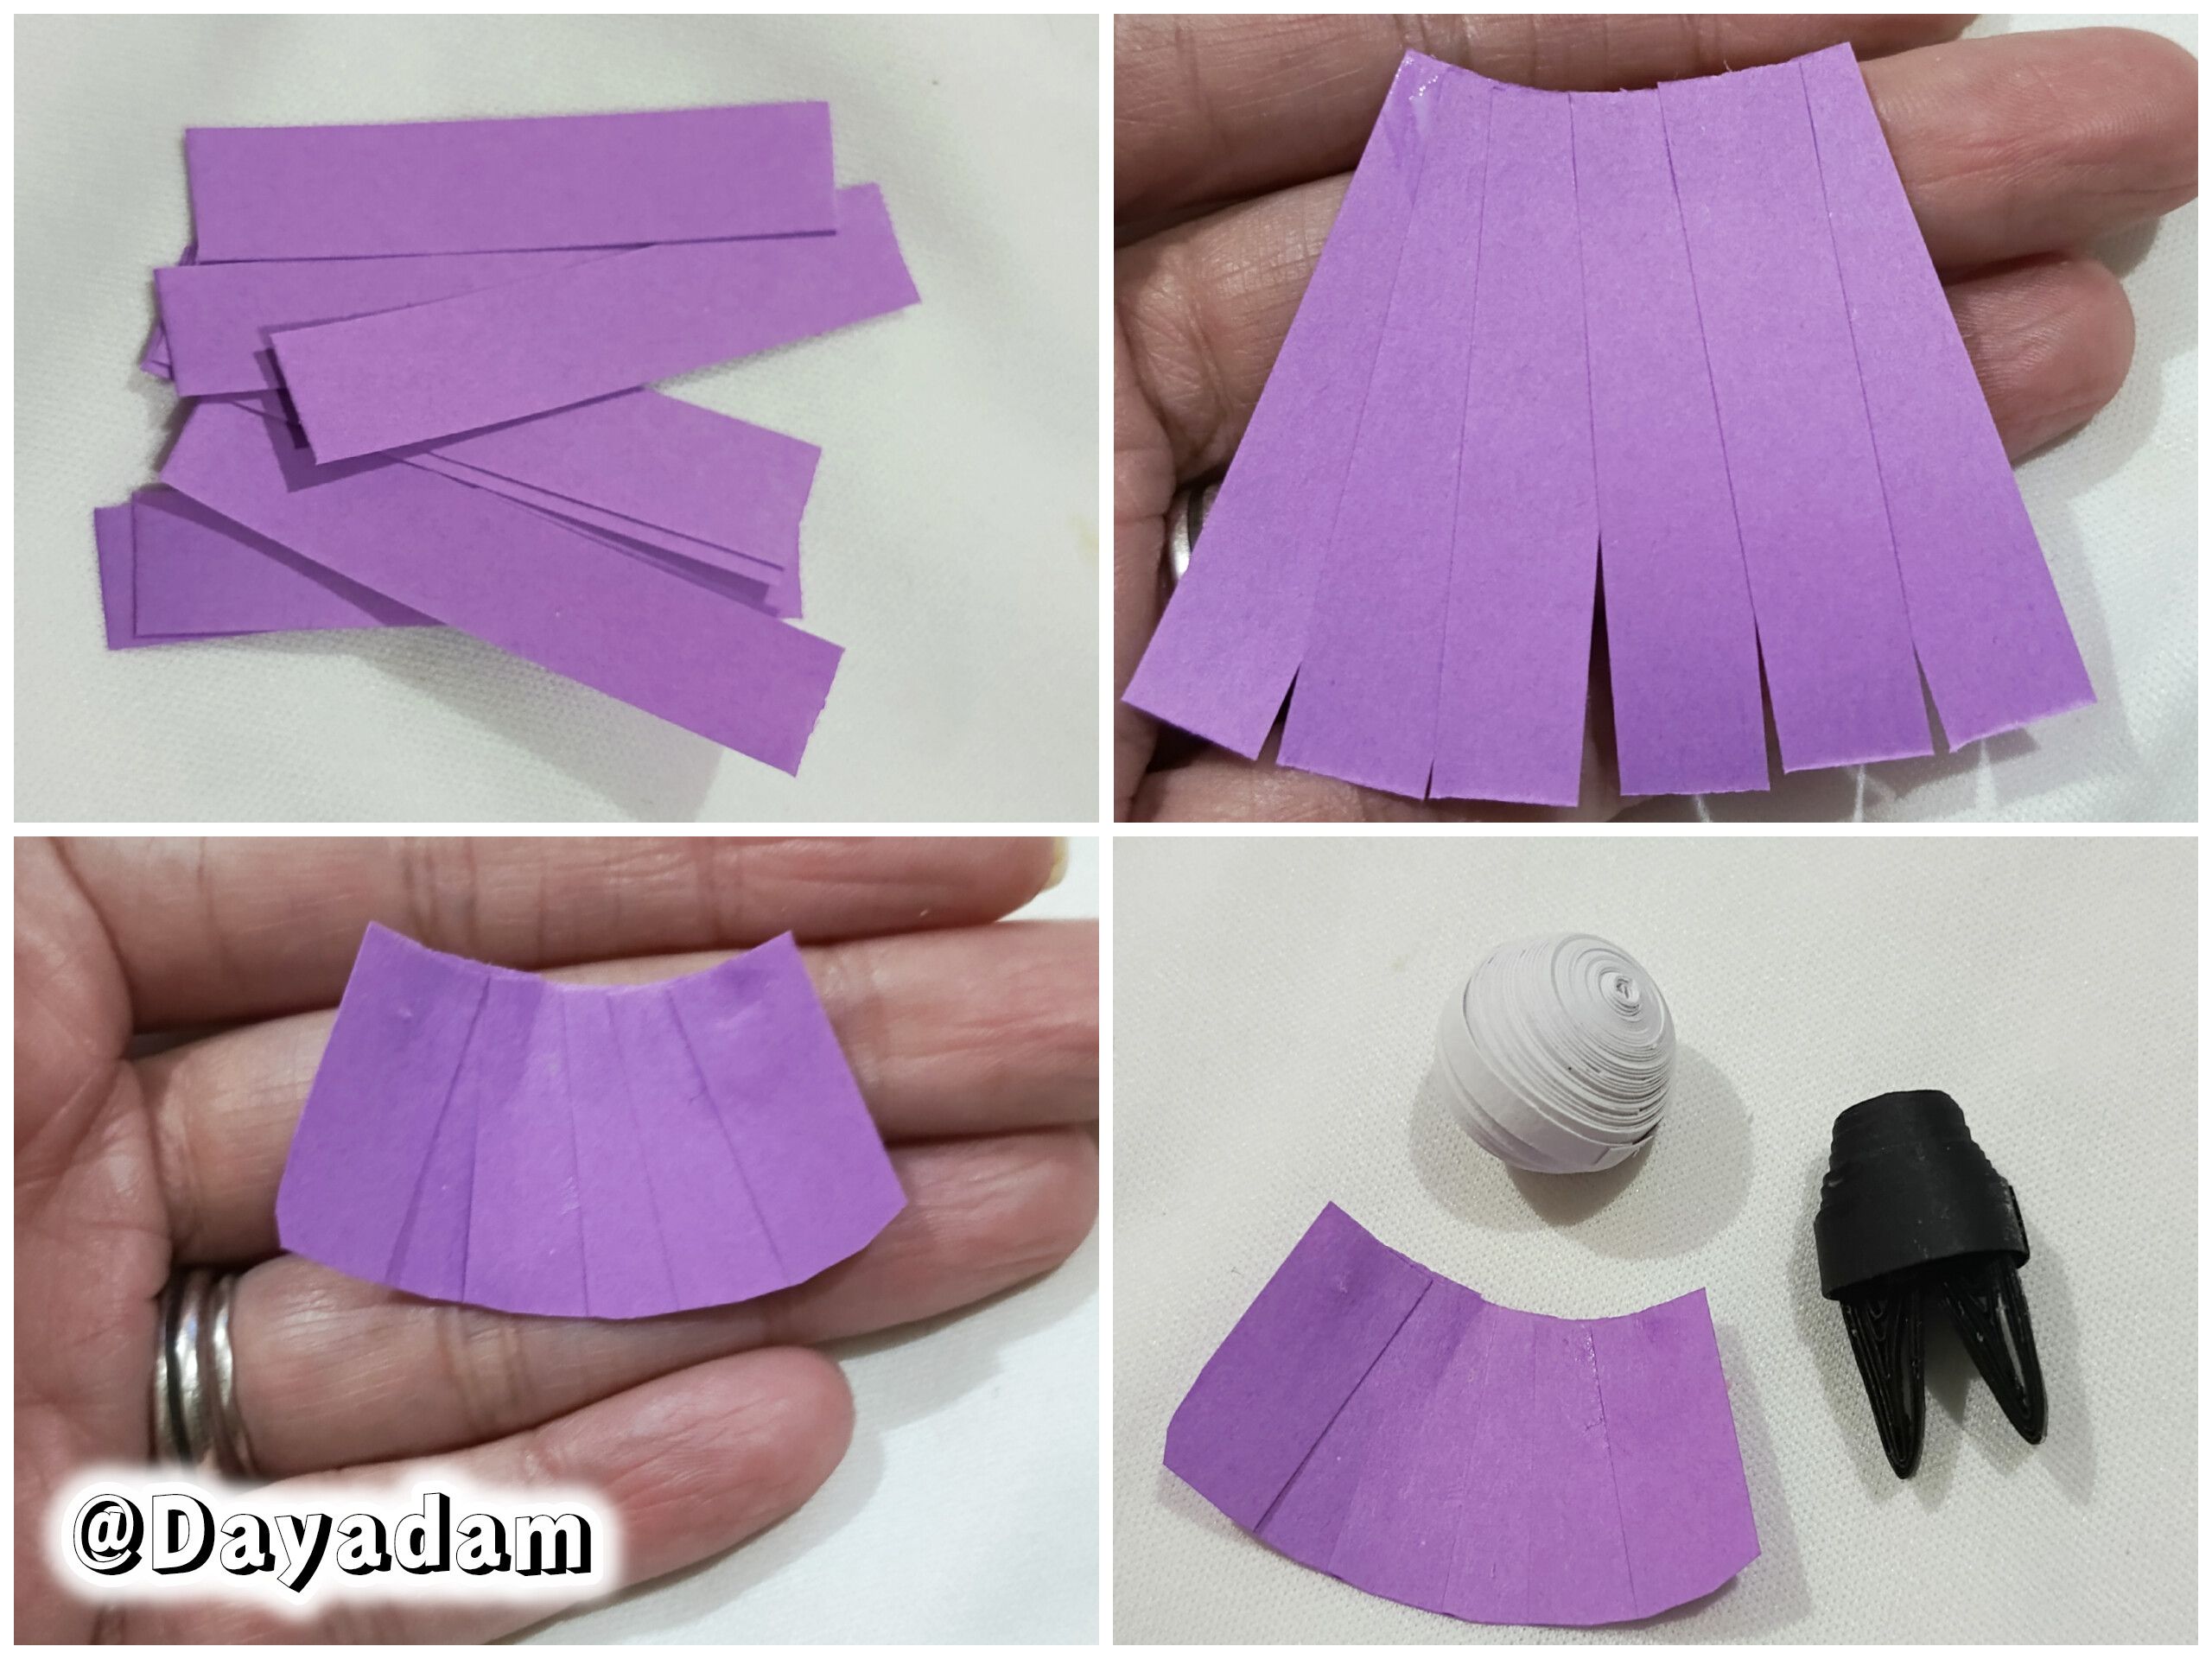
For the body: we will take 5mm wide black tape, we will make a closed circle which we will mold in the shape of a flattened cone at the top.
-
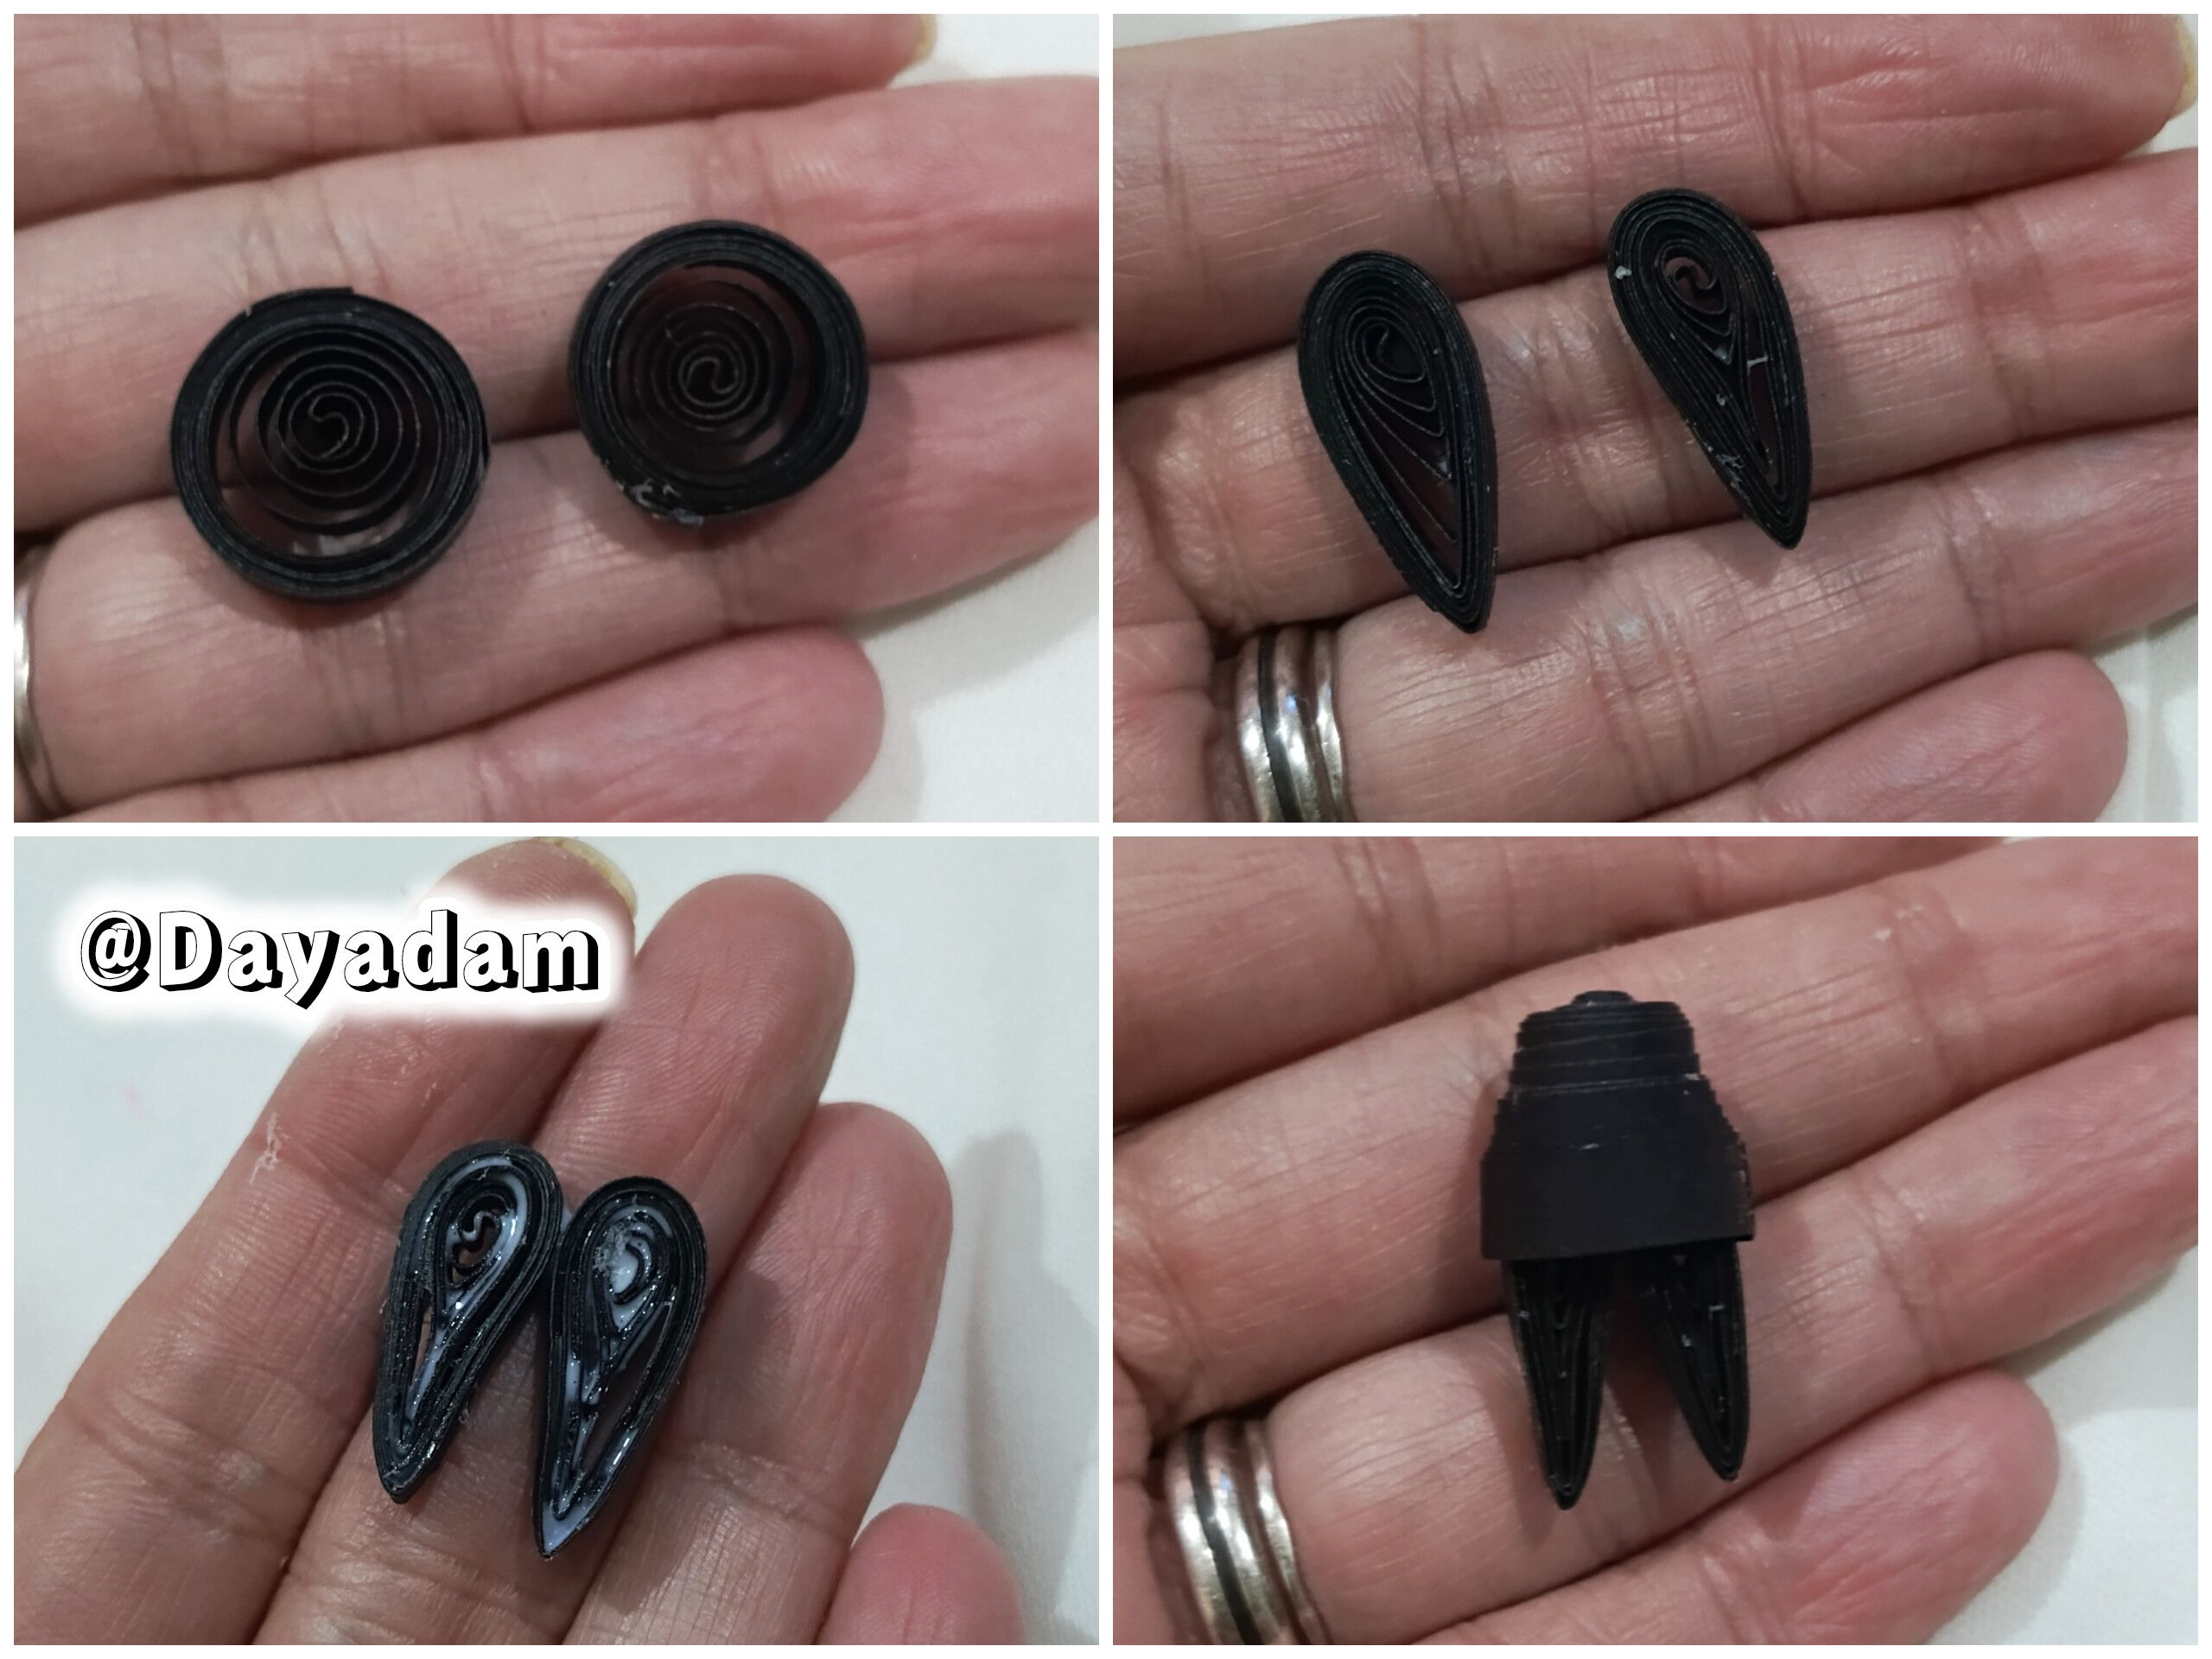
For the little feet, we will make two open circles with black ribbon 4mm wide, we will mold them in the shape of a drop, we will apply a little glue to make them more pointed, we will press them with our fingers while they dry, we will place them on the bottom of the hollow body, which we made previously.

• Para la cabeza: comenzamos tomando cinta para quilling de color blanco de 3mm de ancho, con la aguja para quilling vamos a enrollar hasta llegar al final de la cinta, sellamos con pega blanca extra fuerte, sacamos de la aguja para obtener un círculo cerrado. Necesitaremos dos iguales
• Moldearemos en una plantilla para círculos en la medida número 17 mm, sacamos del molde y aplicamos pega blanca extra fuerte por su parte interna para evitar que los mismos se deformen o se muevan, unimos ambos círculos pasando una cinta blanca alrededor.
• Para el cuerpo: tomaremos cinta de color negro de 5mm de ancho, realizaremos un círculo cerrado el cual moldearemos en forma de cono aplanado en la parte de arriba.
• Para los piecitos: realizaremos dos círculos abiertos con cinta de color negro de 4mm de ancho, estos los moldearemos en forma de gota, aplicamos un poco de pega para que queden más puntiagudos, haremos presión con los dedos mientras se secan, los colocaremos en la parte de abajo del cuerpo hueco, que hicimos con anterioridad.
 |
 |
 |
 |
-
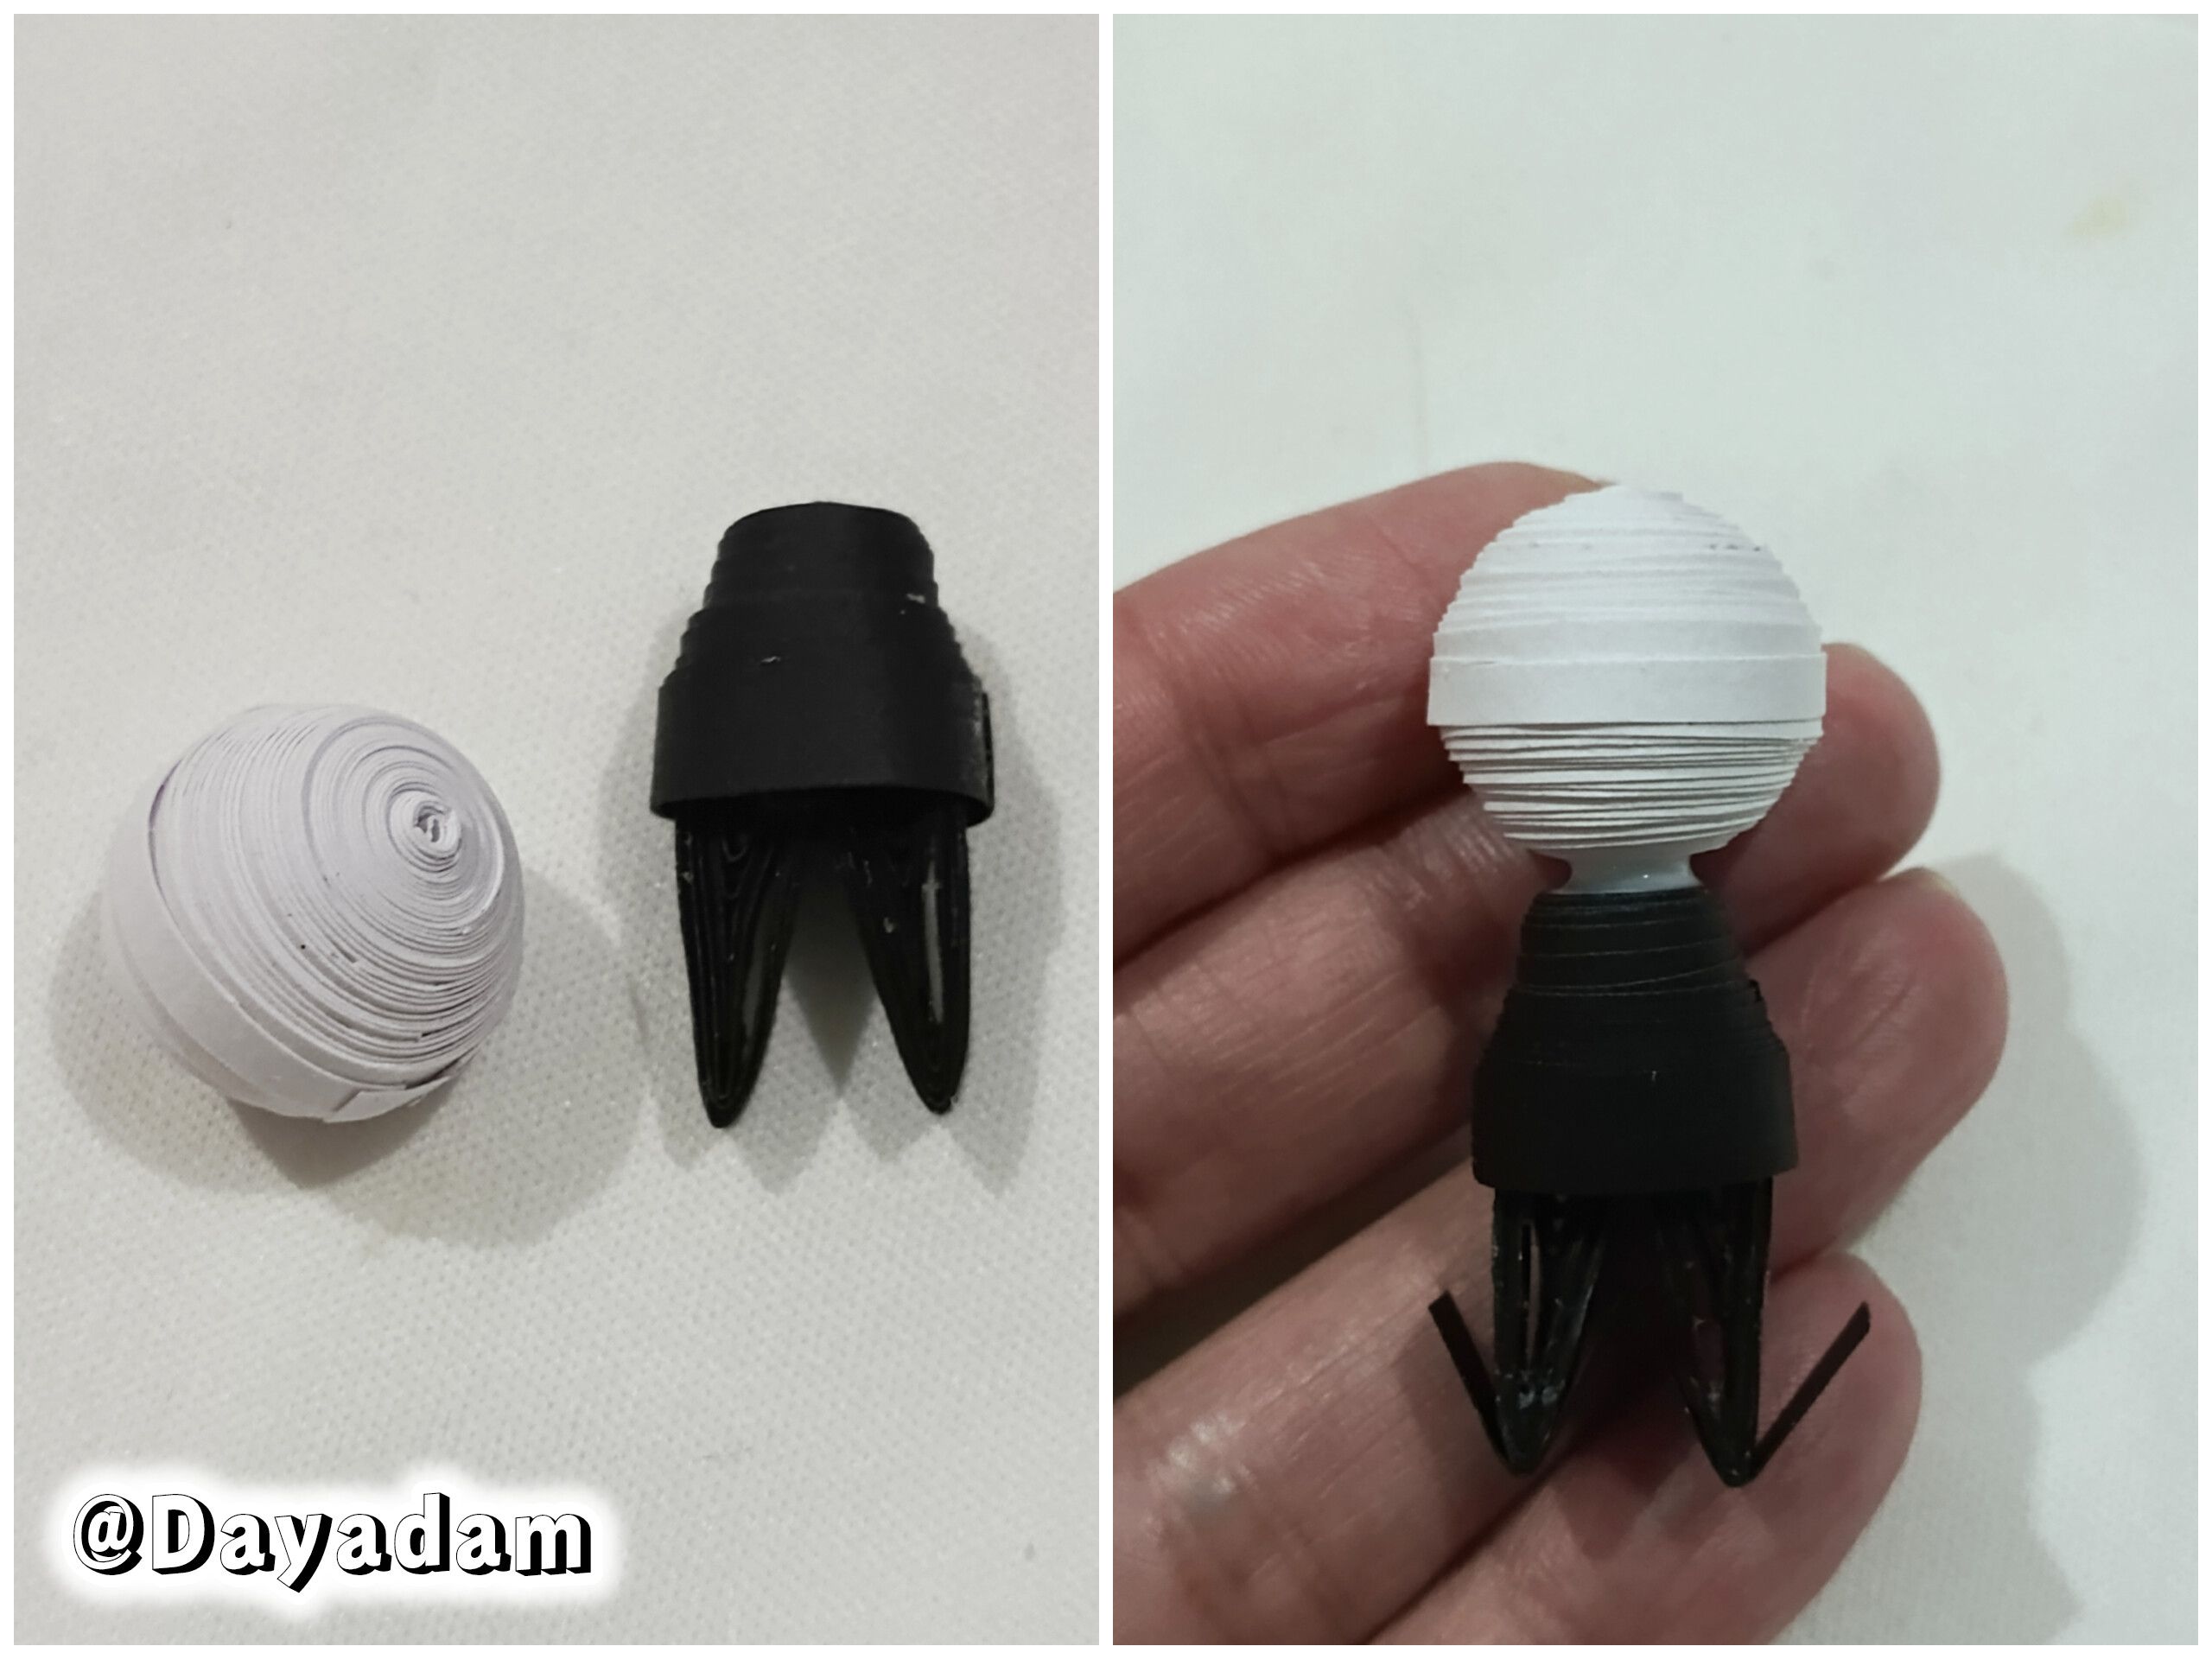
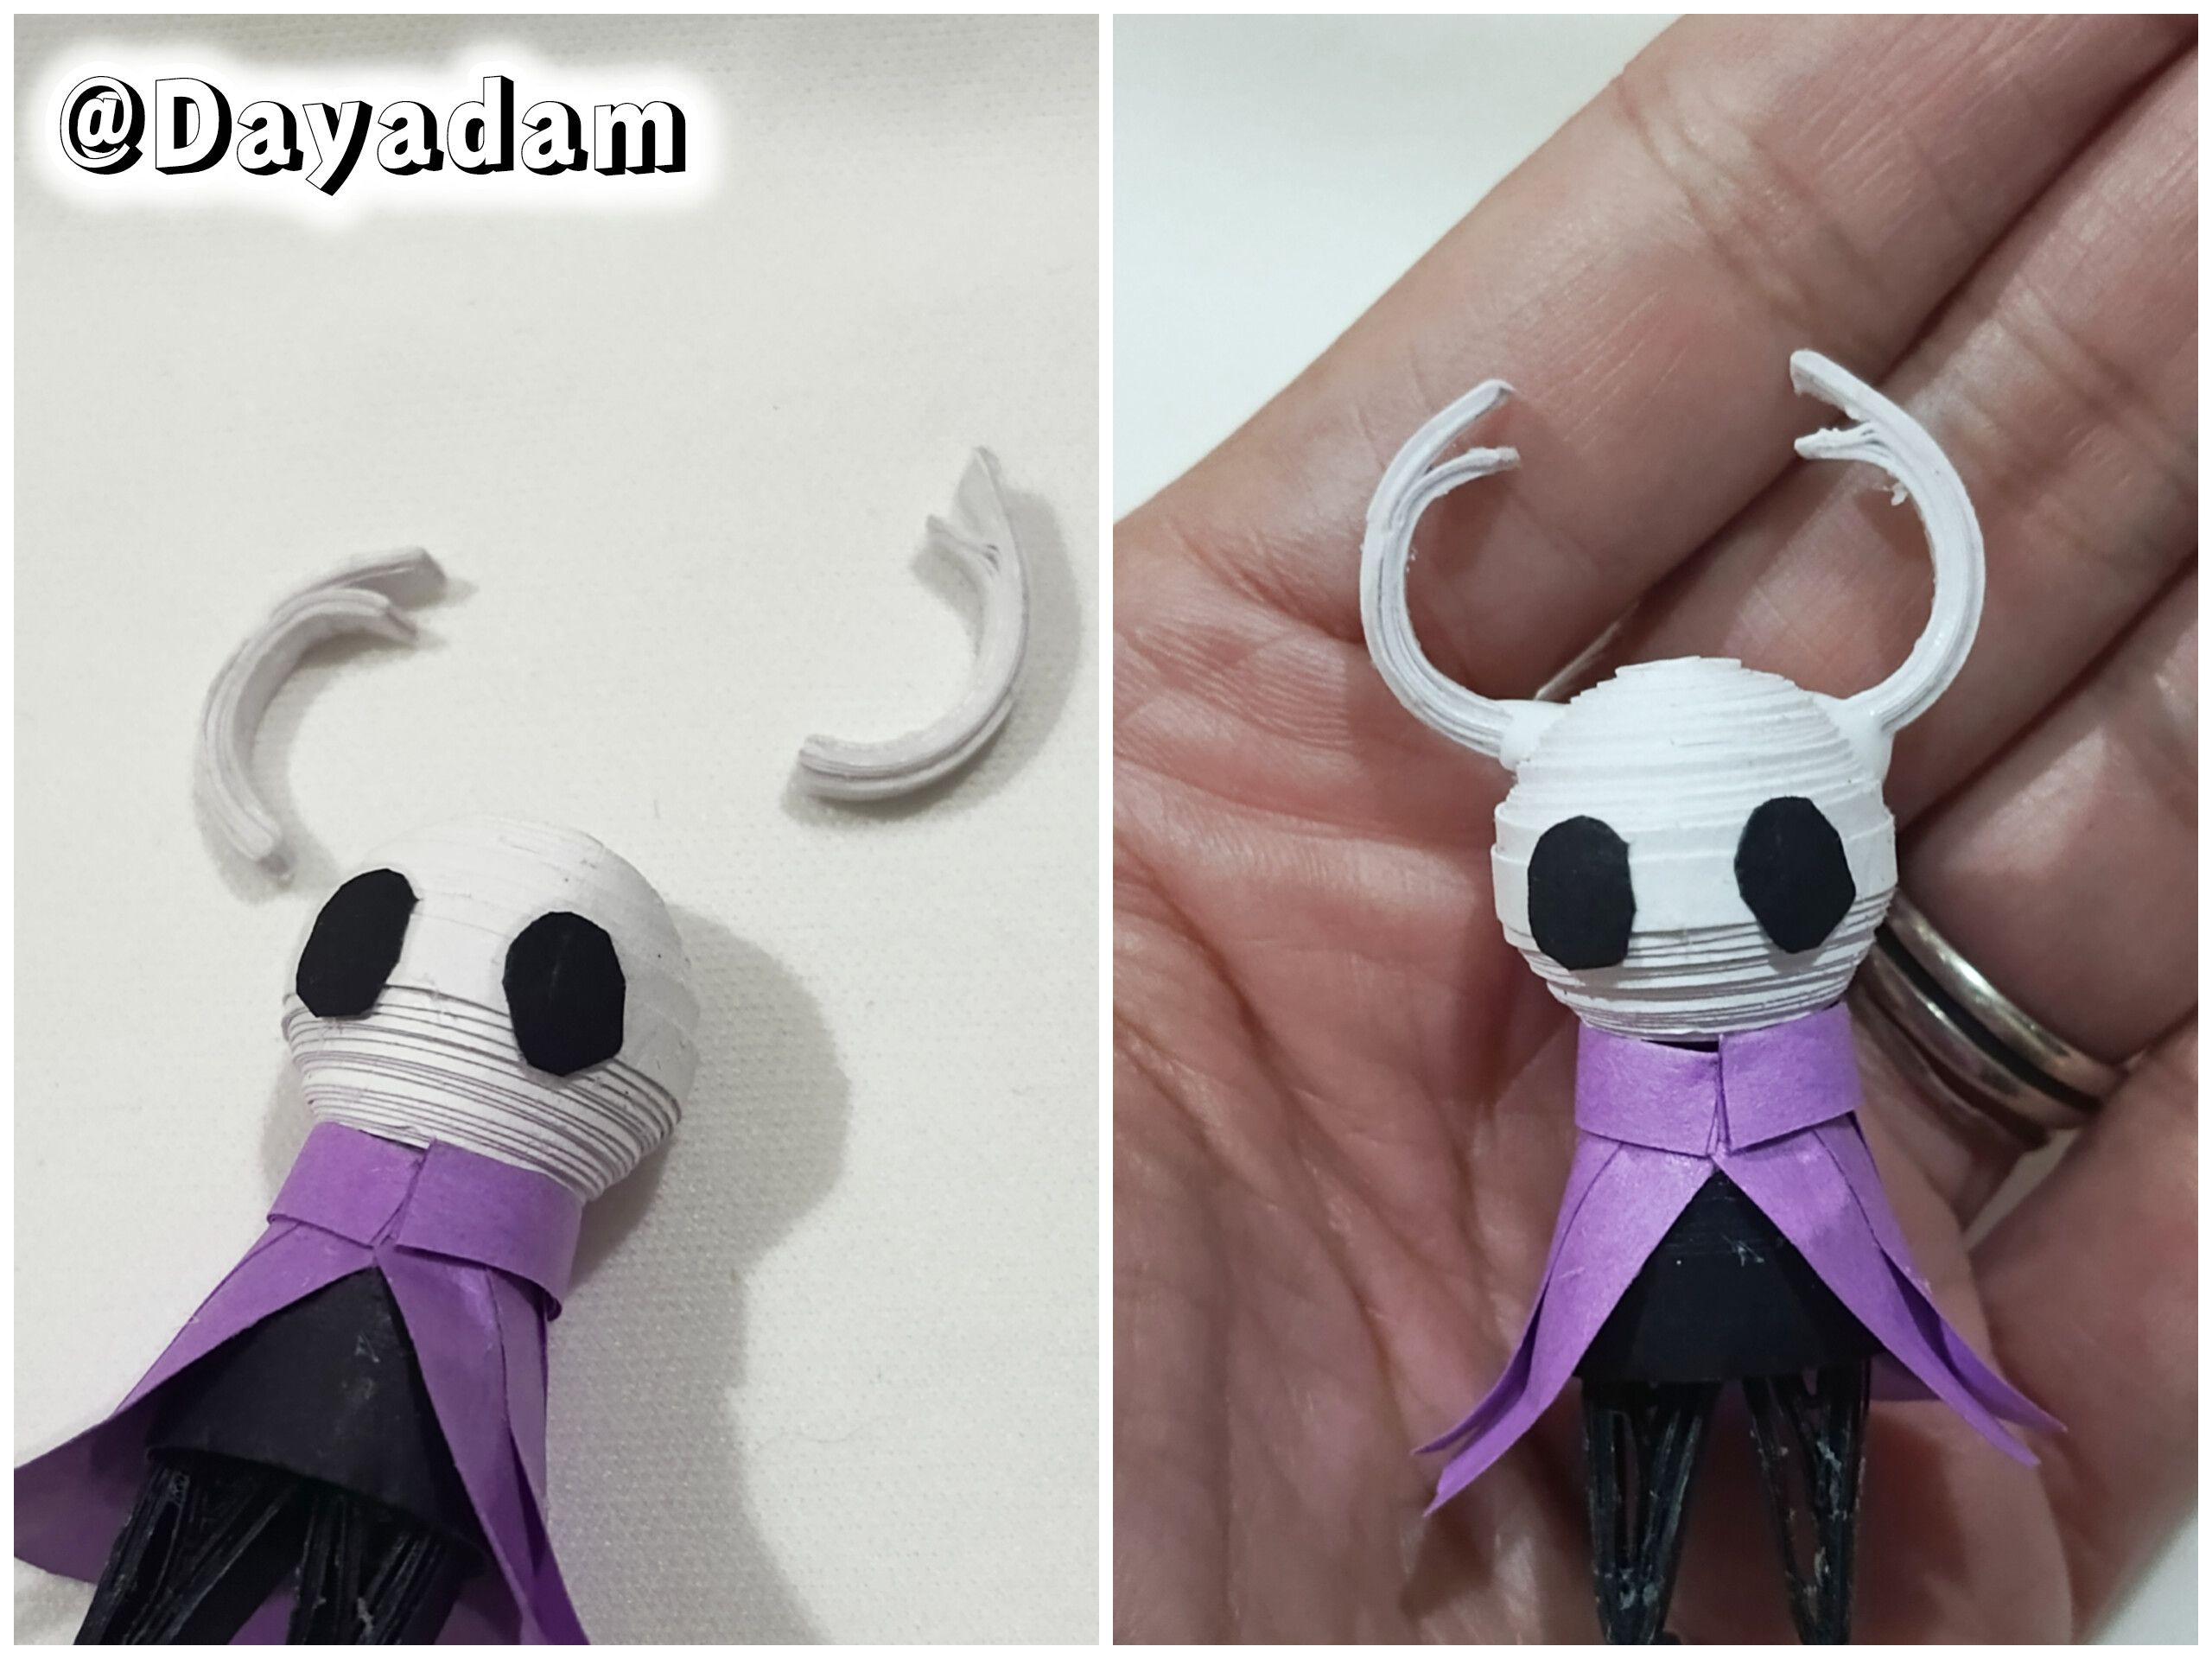
To make the horns I made in a mandrel for circles a ring with white ribbon 3mm wide, roll in the measure number 6 from top to bottom, at the end without removing from the mandrel I applied extra strong white glue and let dry very well. When dry I removed from the mandrel cut in half and separated a little the half ring at the top, I applied a little more glue.
-
To make the cape, I glued some purple ribbons 9mm wide, then trimmed, leaving some ribbon not completely glued at the bottom so that the cape has ruffles.
-
At this point I glued the head of the body.
• Para realizar los cuernos realicé en un mandril para círculos un aro con cinta de color blanco de 3mm de ancho, enrolle en la medida número 6 de arriba hacia abajo, al finalizar sin sacar del mandril apliqué pega blanca extra fuerte y deje secar muy bien. Al secar saqué del mandril corte a la mitad y separé un poco el medio aro en la parte de arriba, apliqué un poco más de pega.
• Para realizar la capa, pegué algunas cintas de color morado de 9mm de ancho, luego recorte, deja algunas cinta sin pegar totalmente en la parte de abajo para que la capa tenga volados.
• En este punto pegué la cabeza del cuerpo.
 |
 |
 |
 |
-
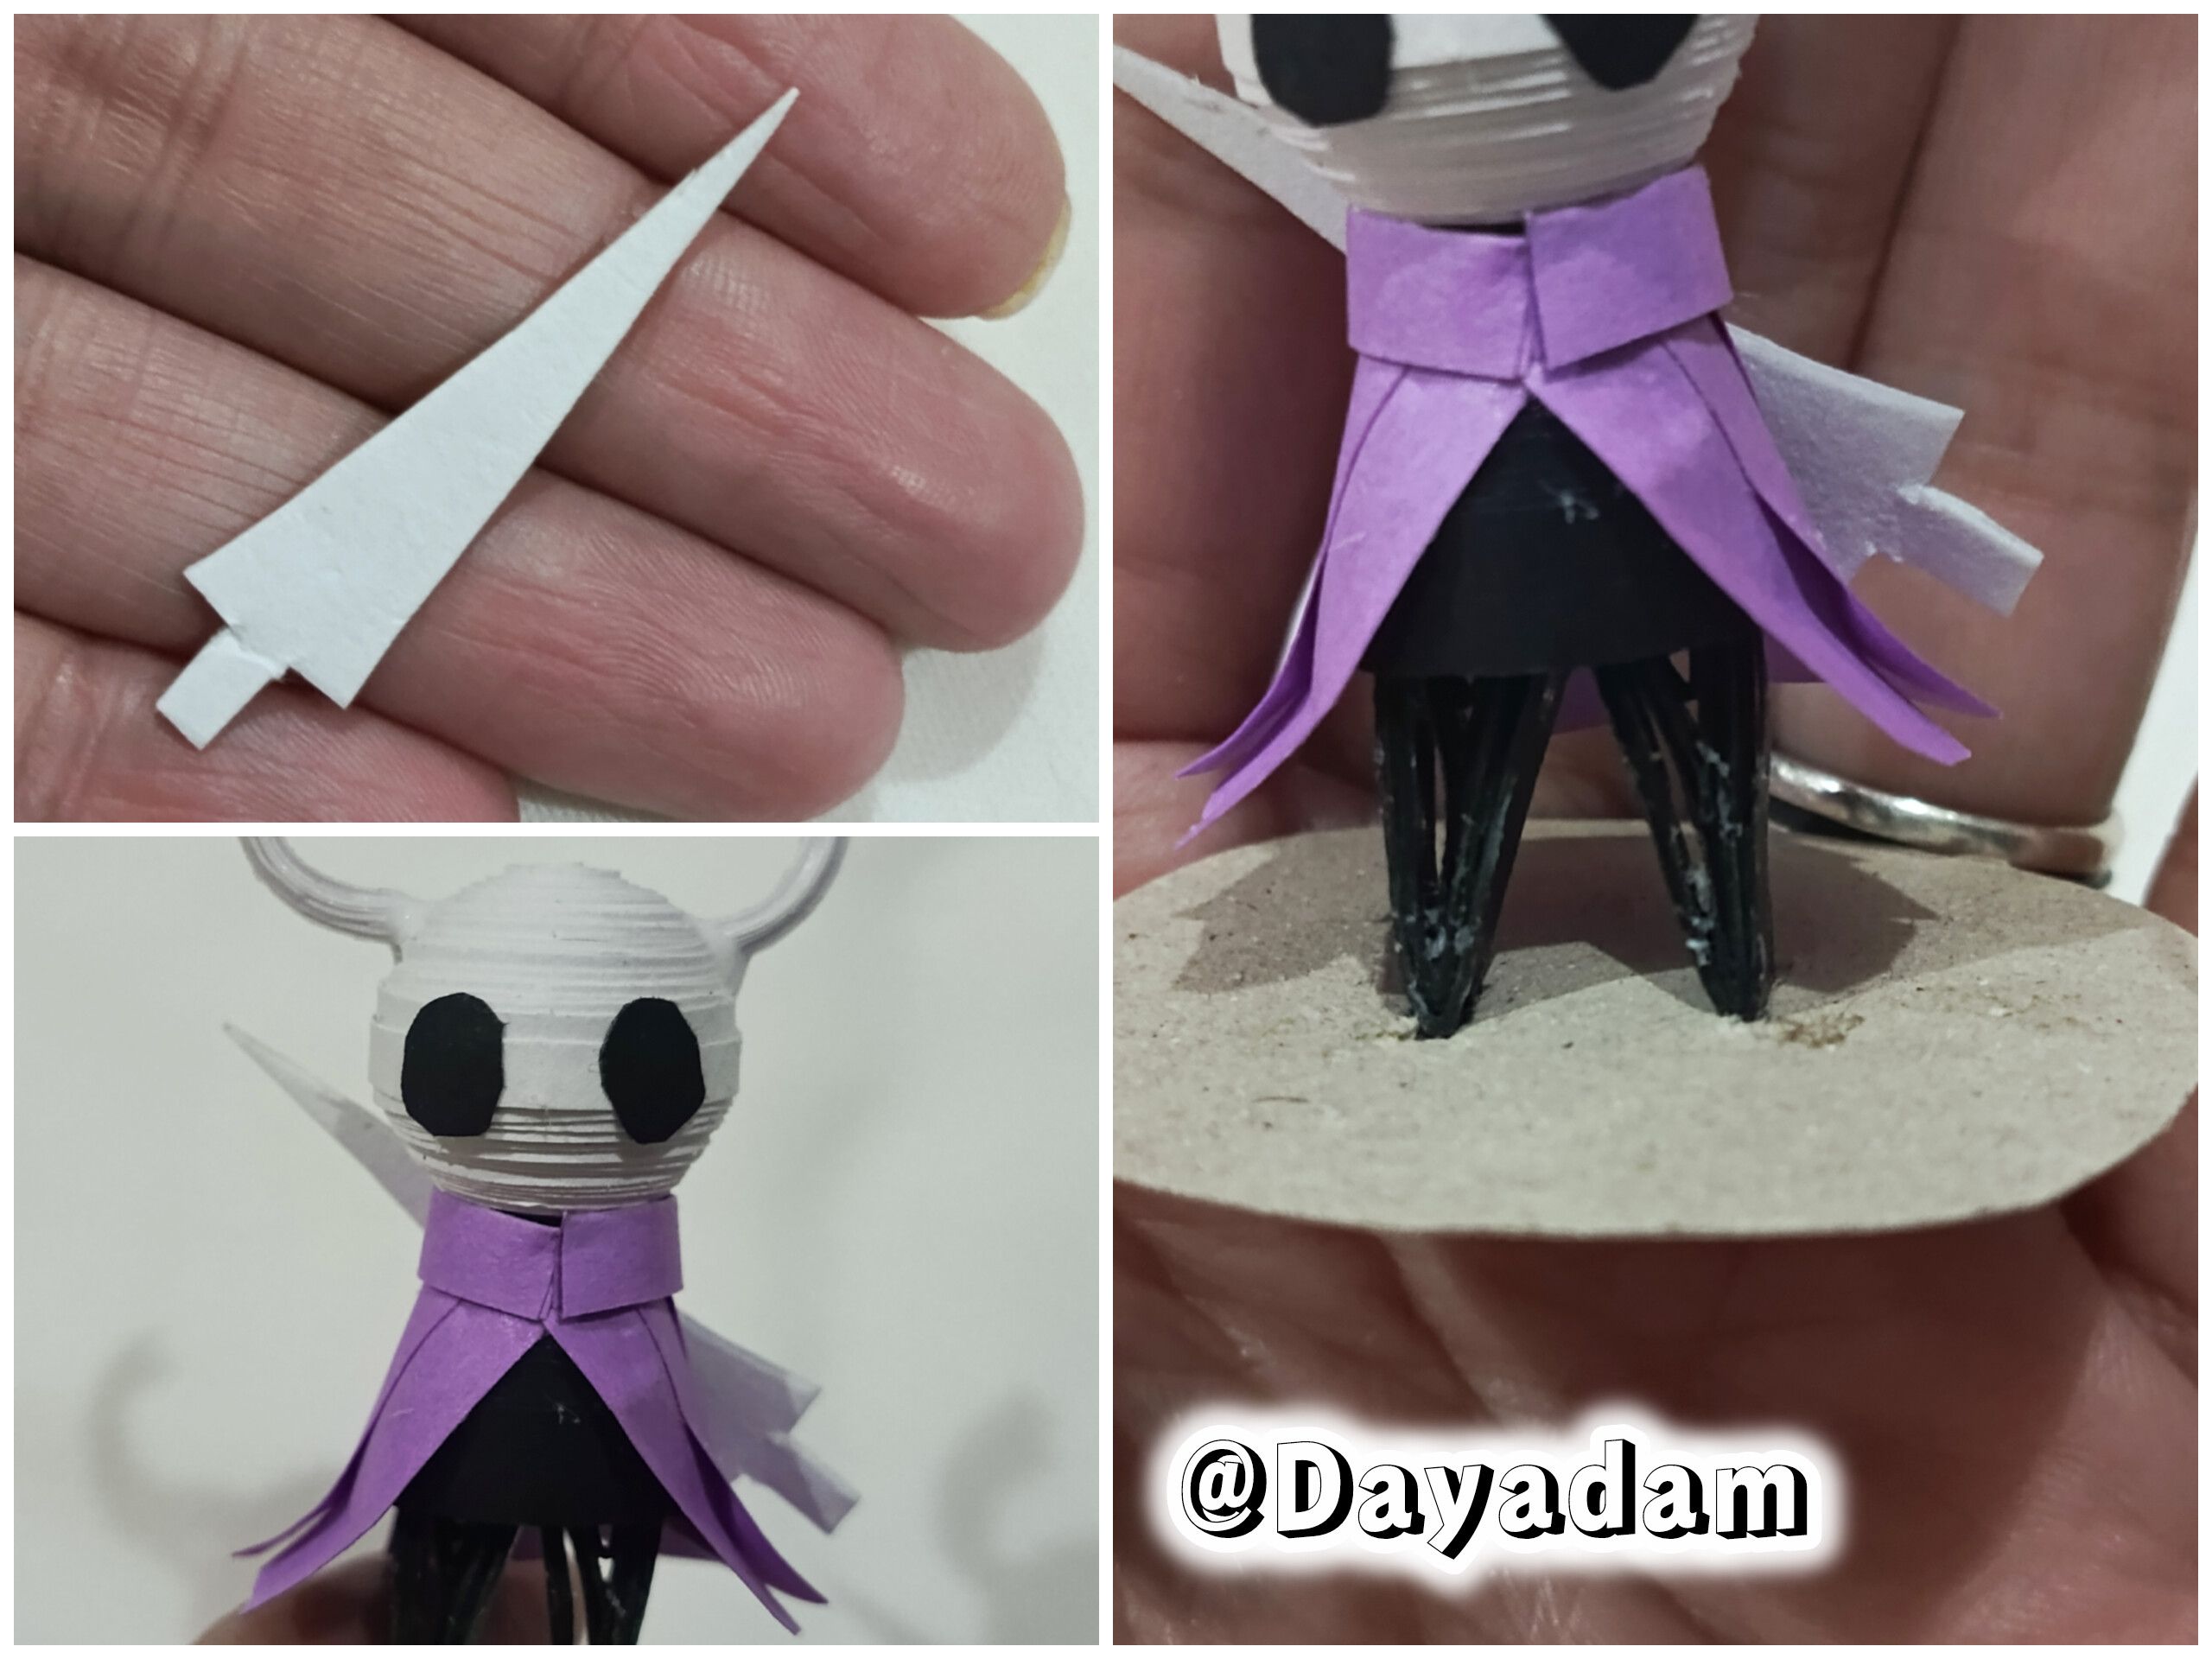
I proceeded to glue the cape to the body of the character, additionally I cut a piece of ribbon and glued it around it to resemble a collar on the cape.
-
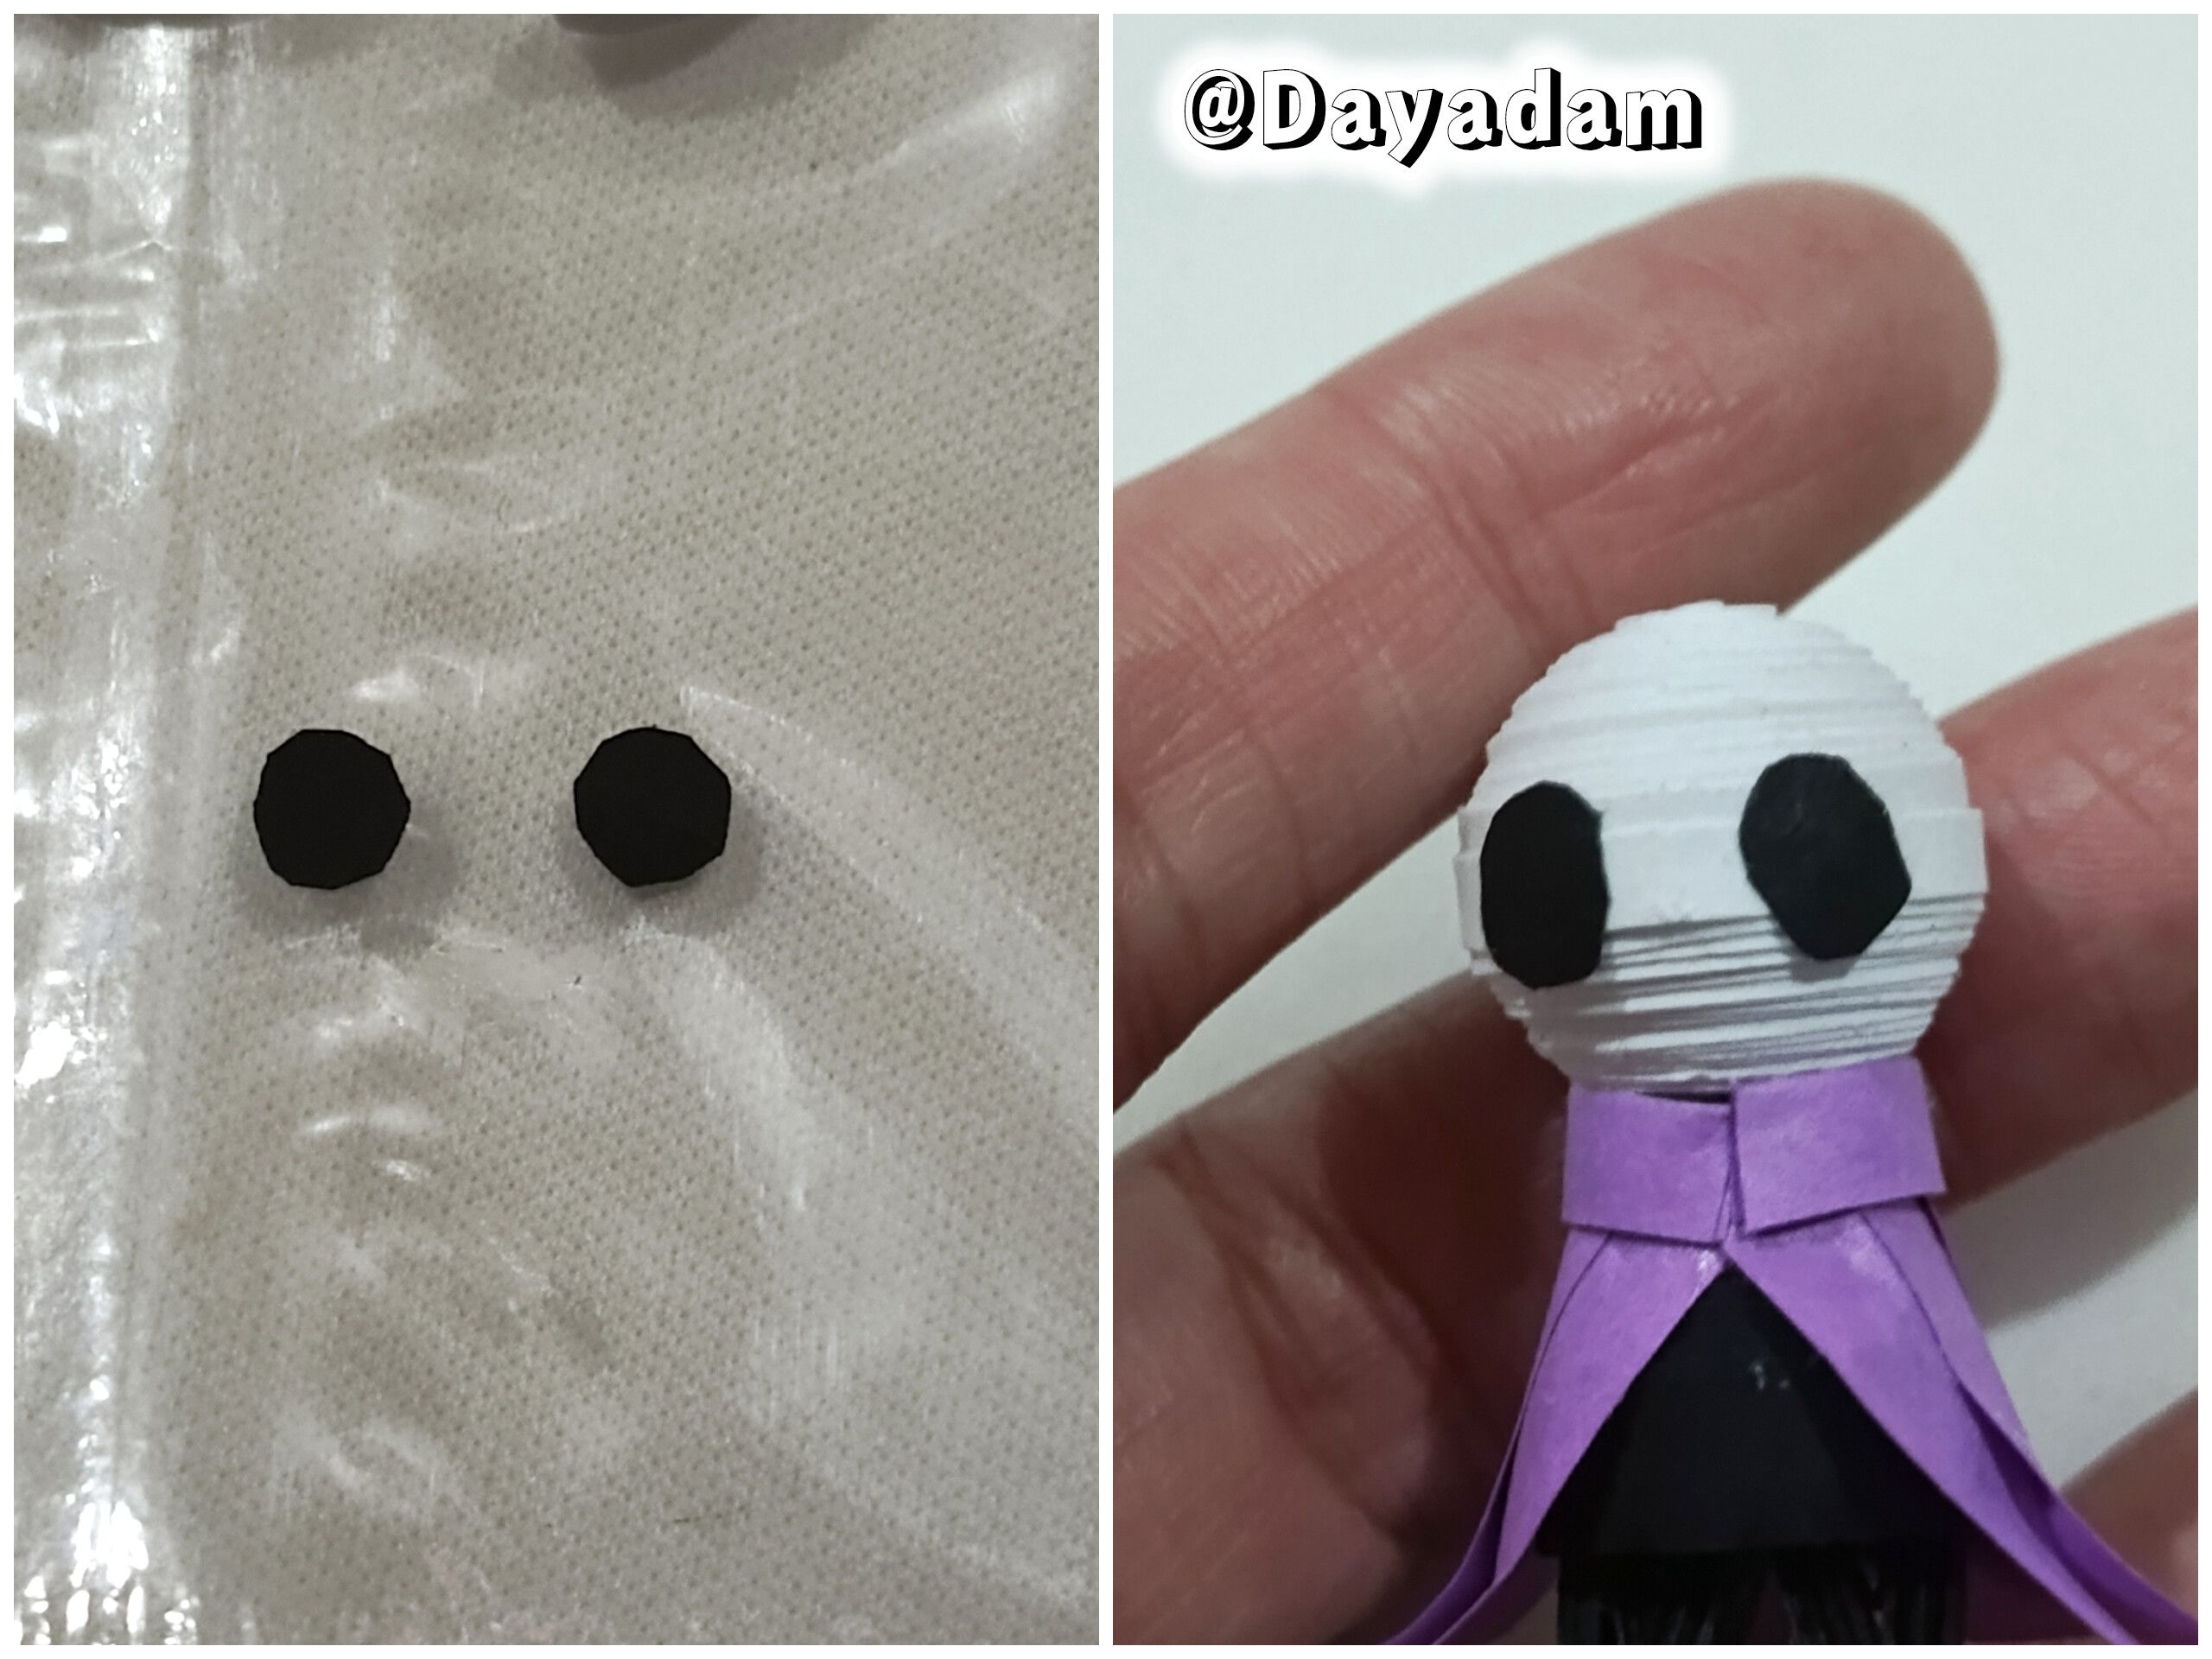
Cut out the eyes from a piece of black cardboard and glued them to the face.
-
I glued with extra strong white glue the horns of the character, one on each side of the head.
-
With a piece of white cardboard I cut out the character's small sword and glued it in the place I thought it was appropriate.
-
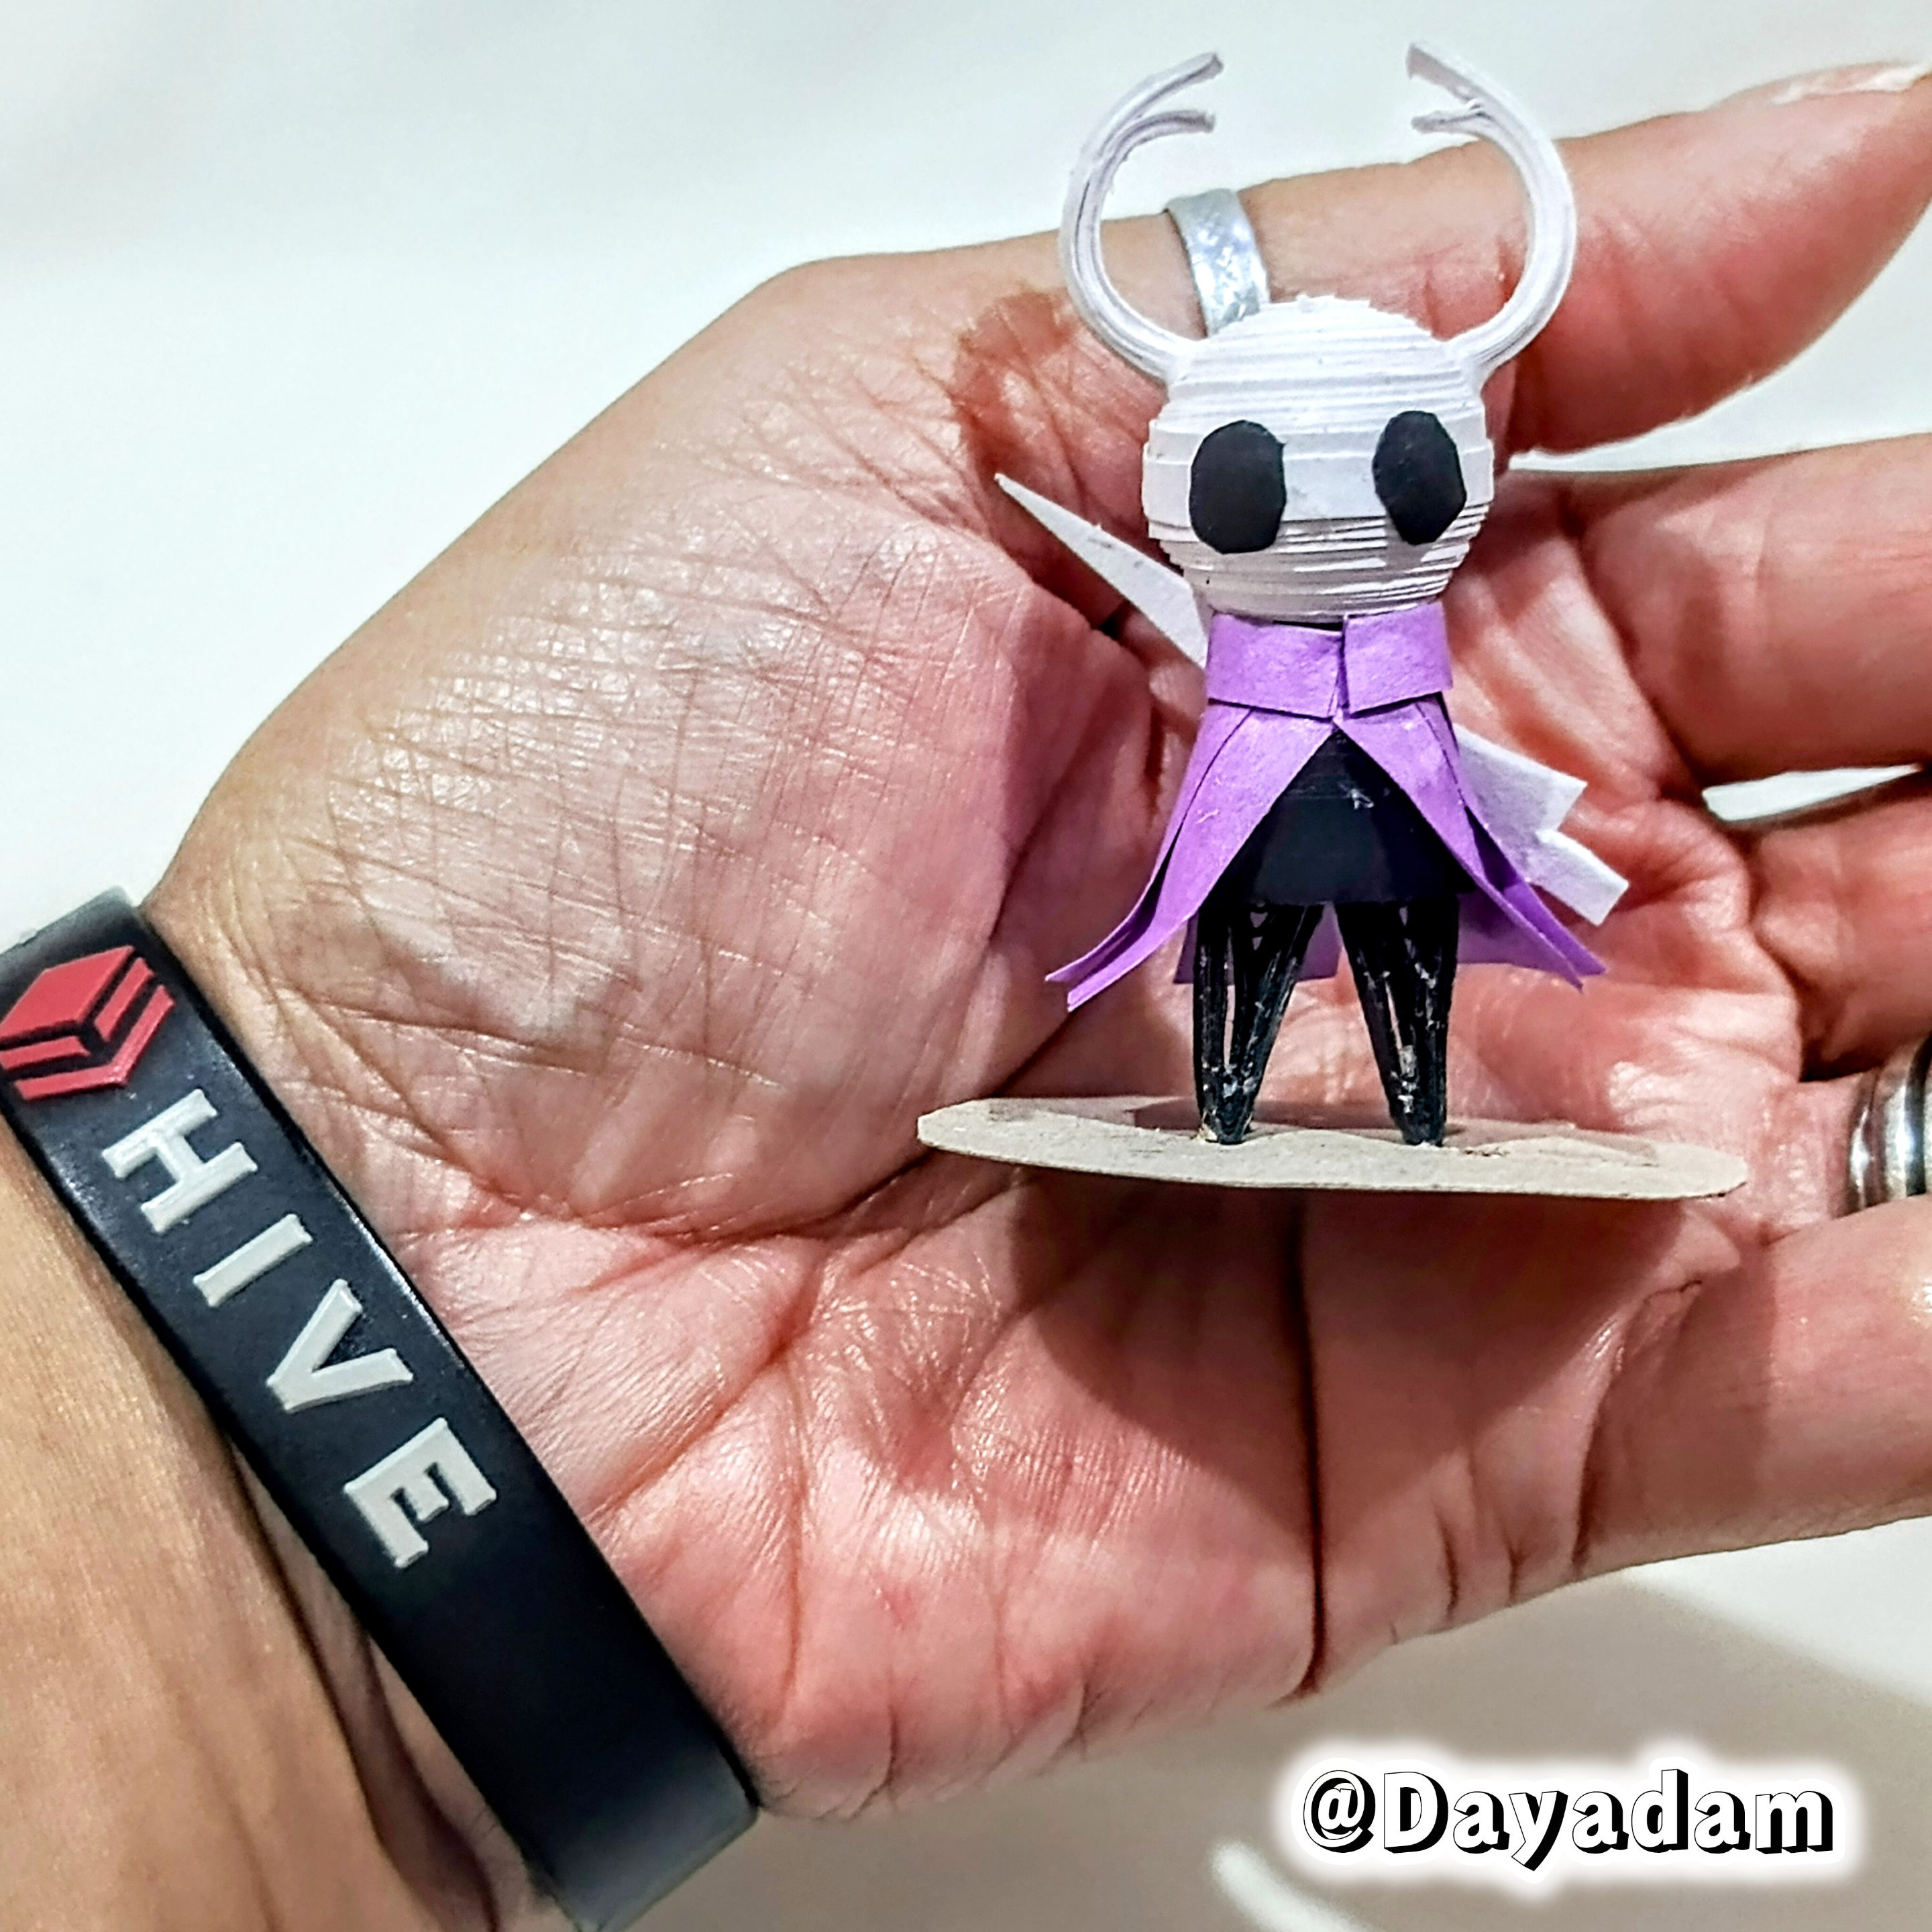
To finish I made a base to incorporate the character and put him on his feet.
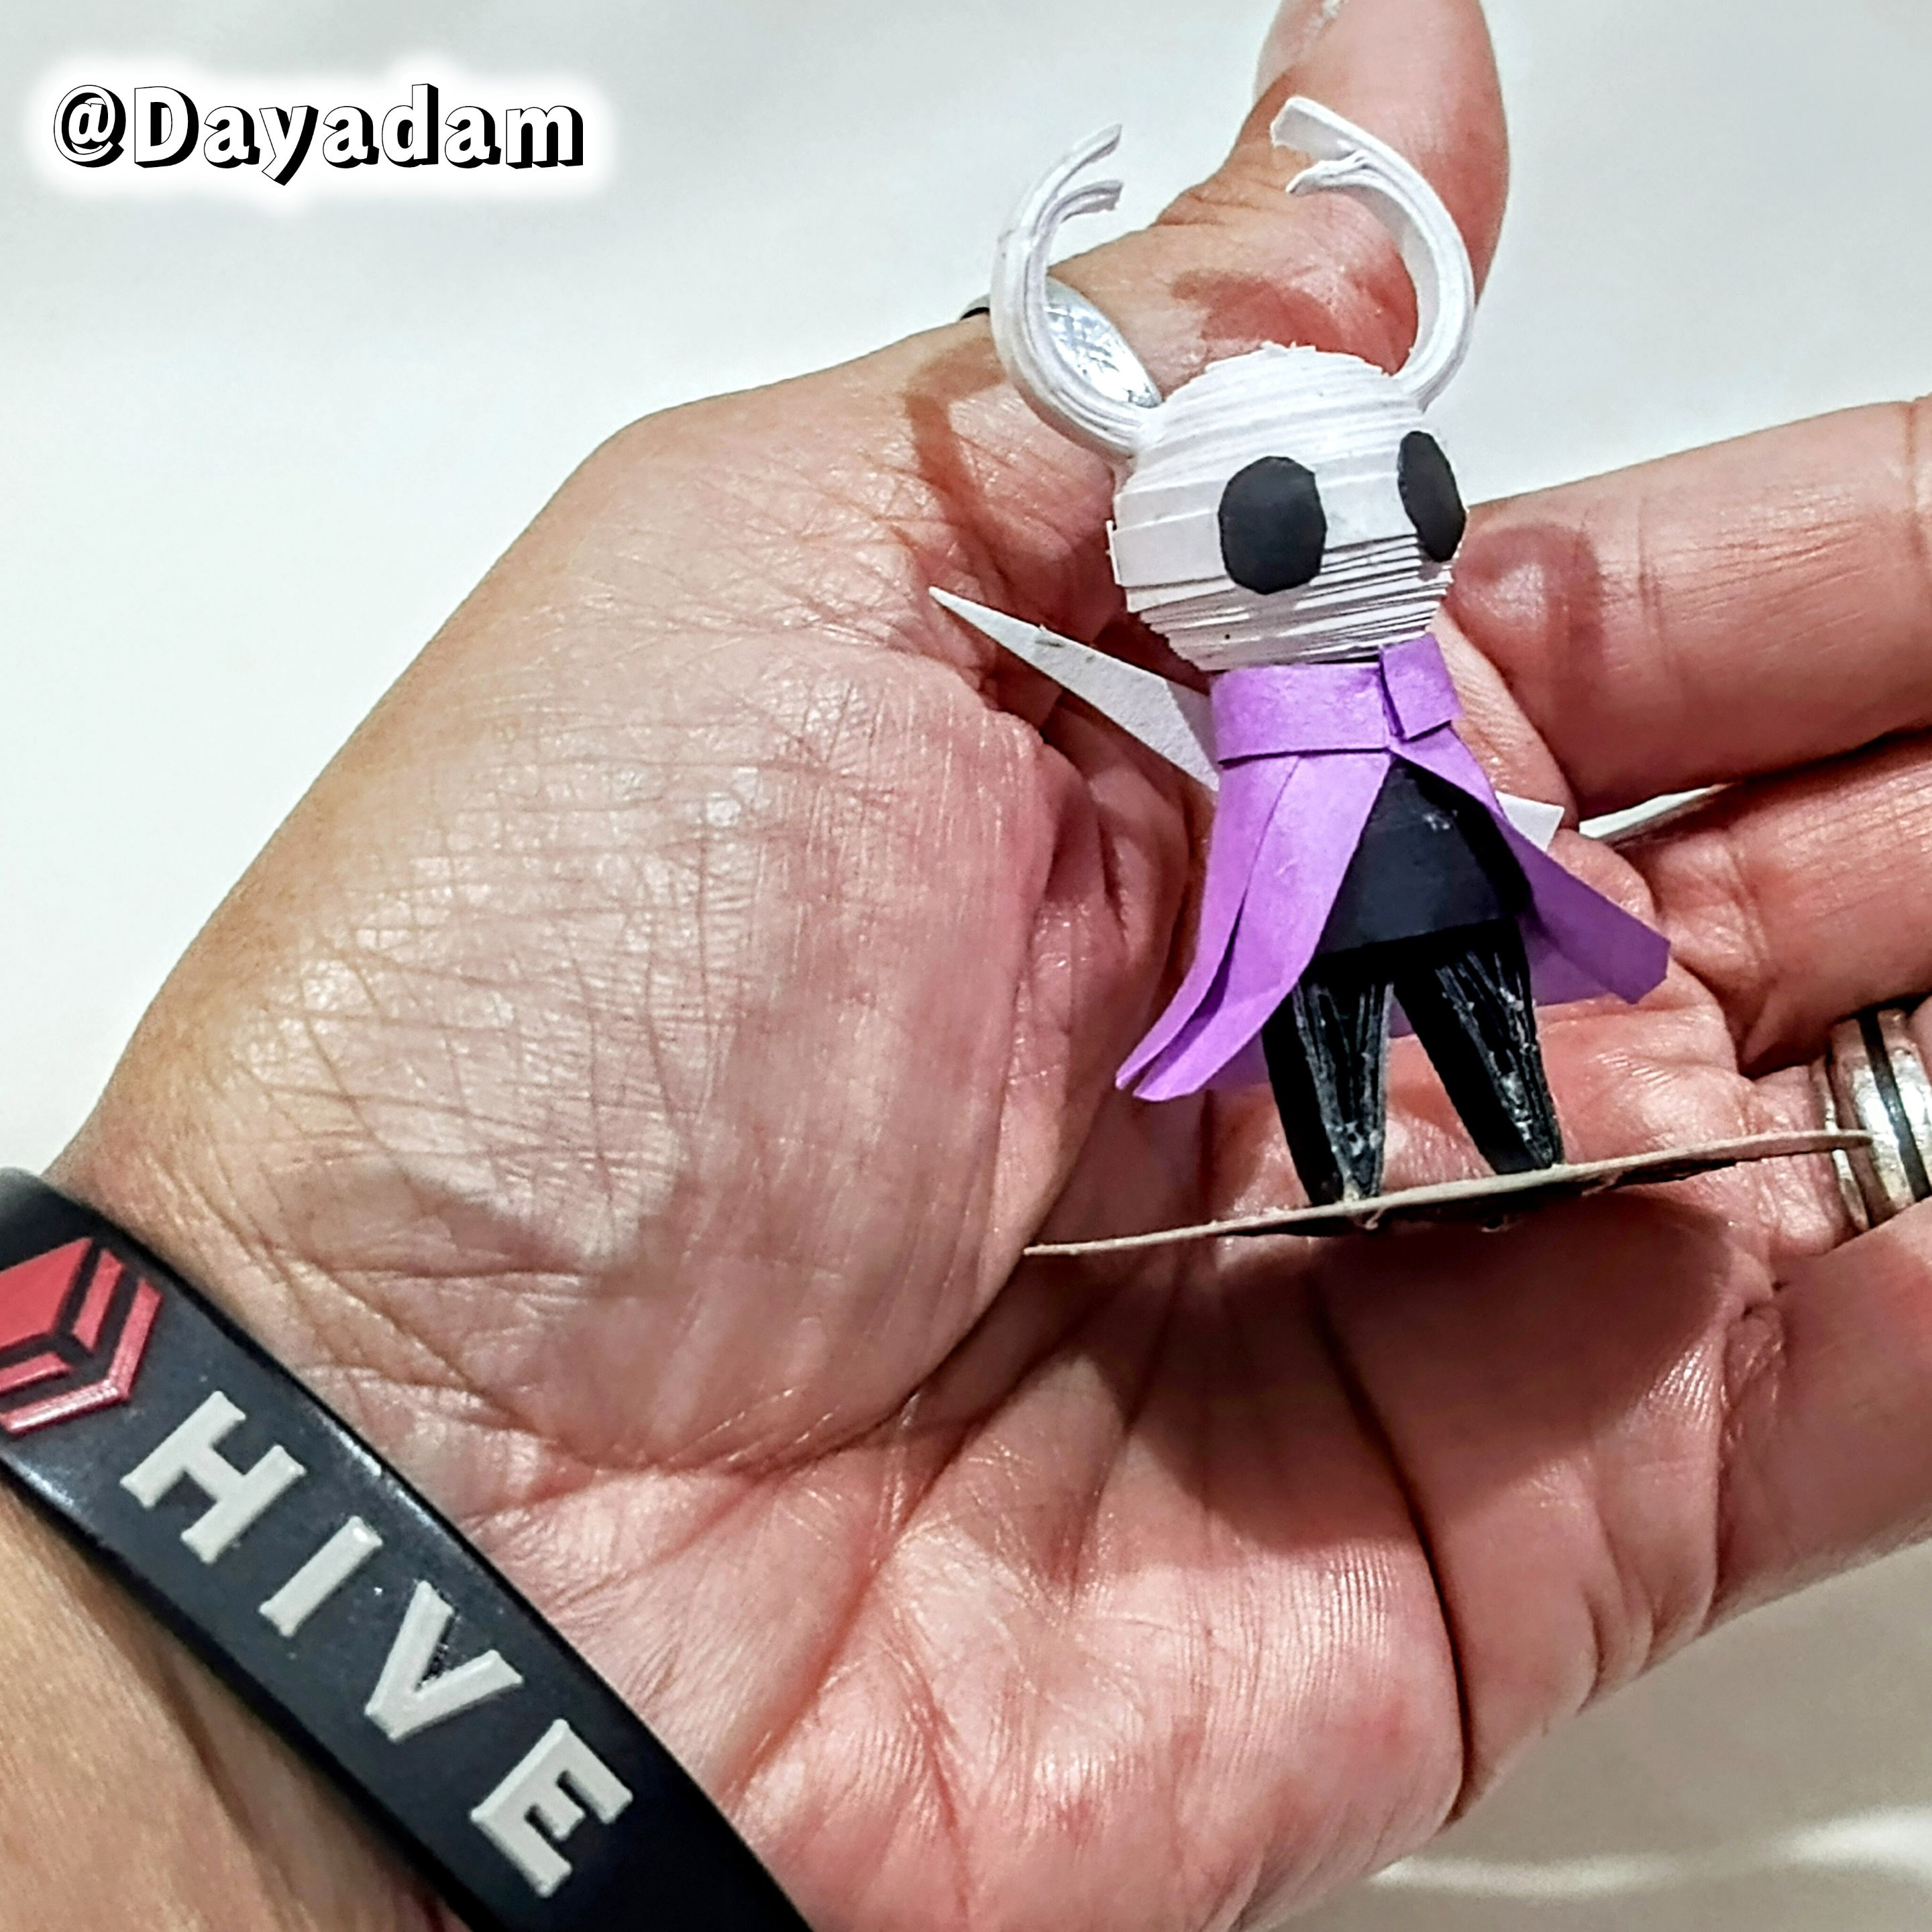
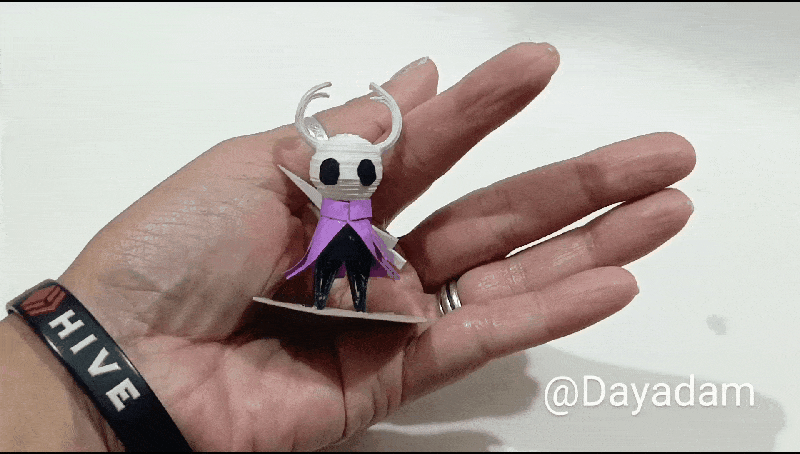
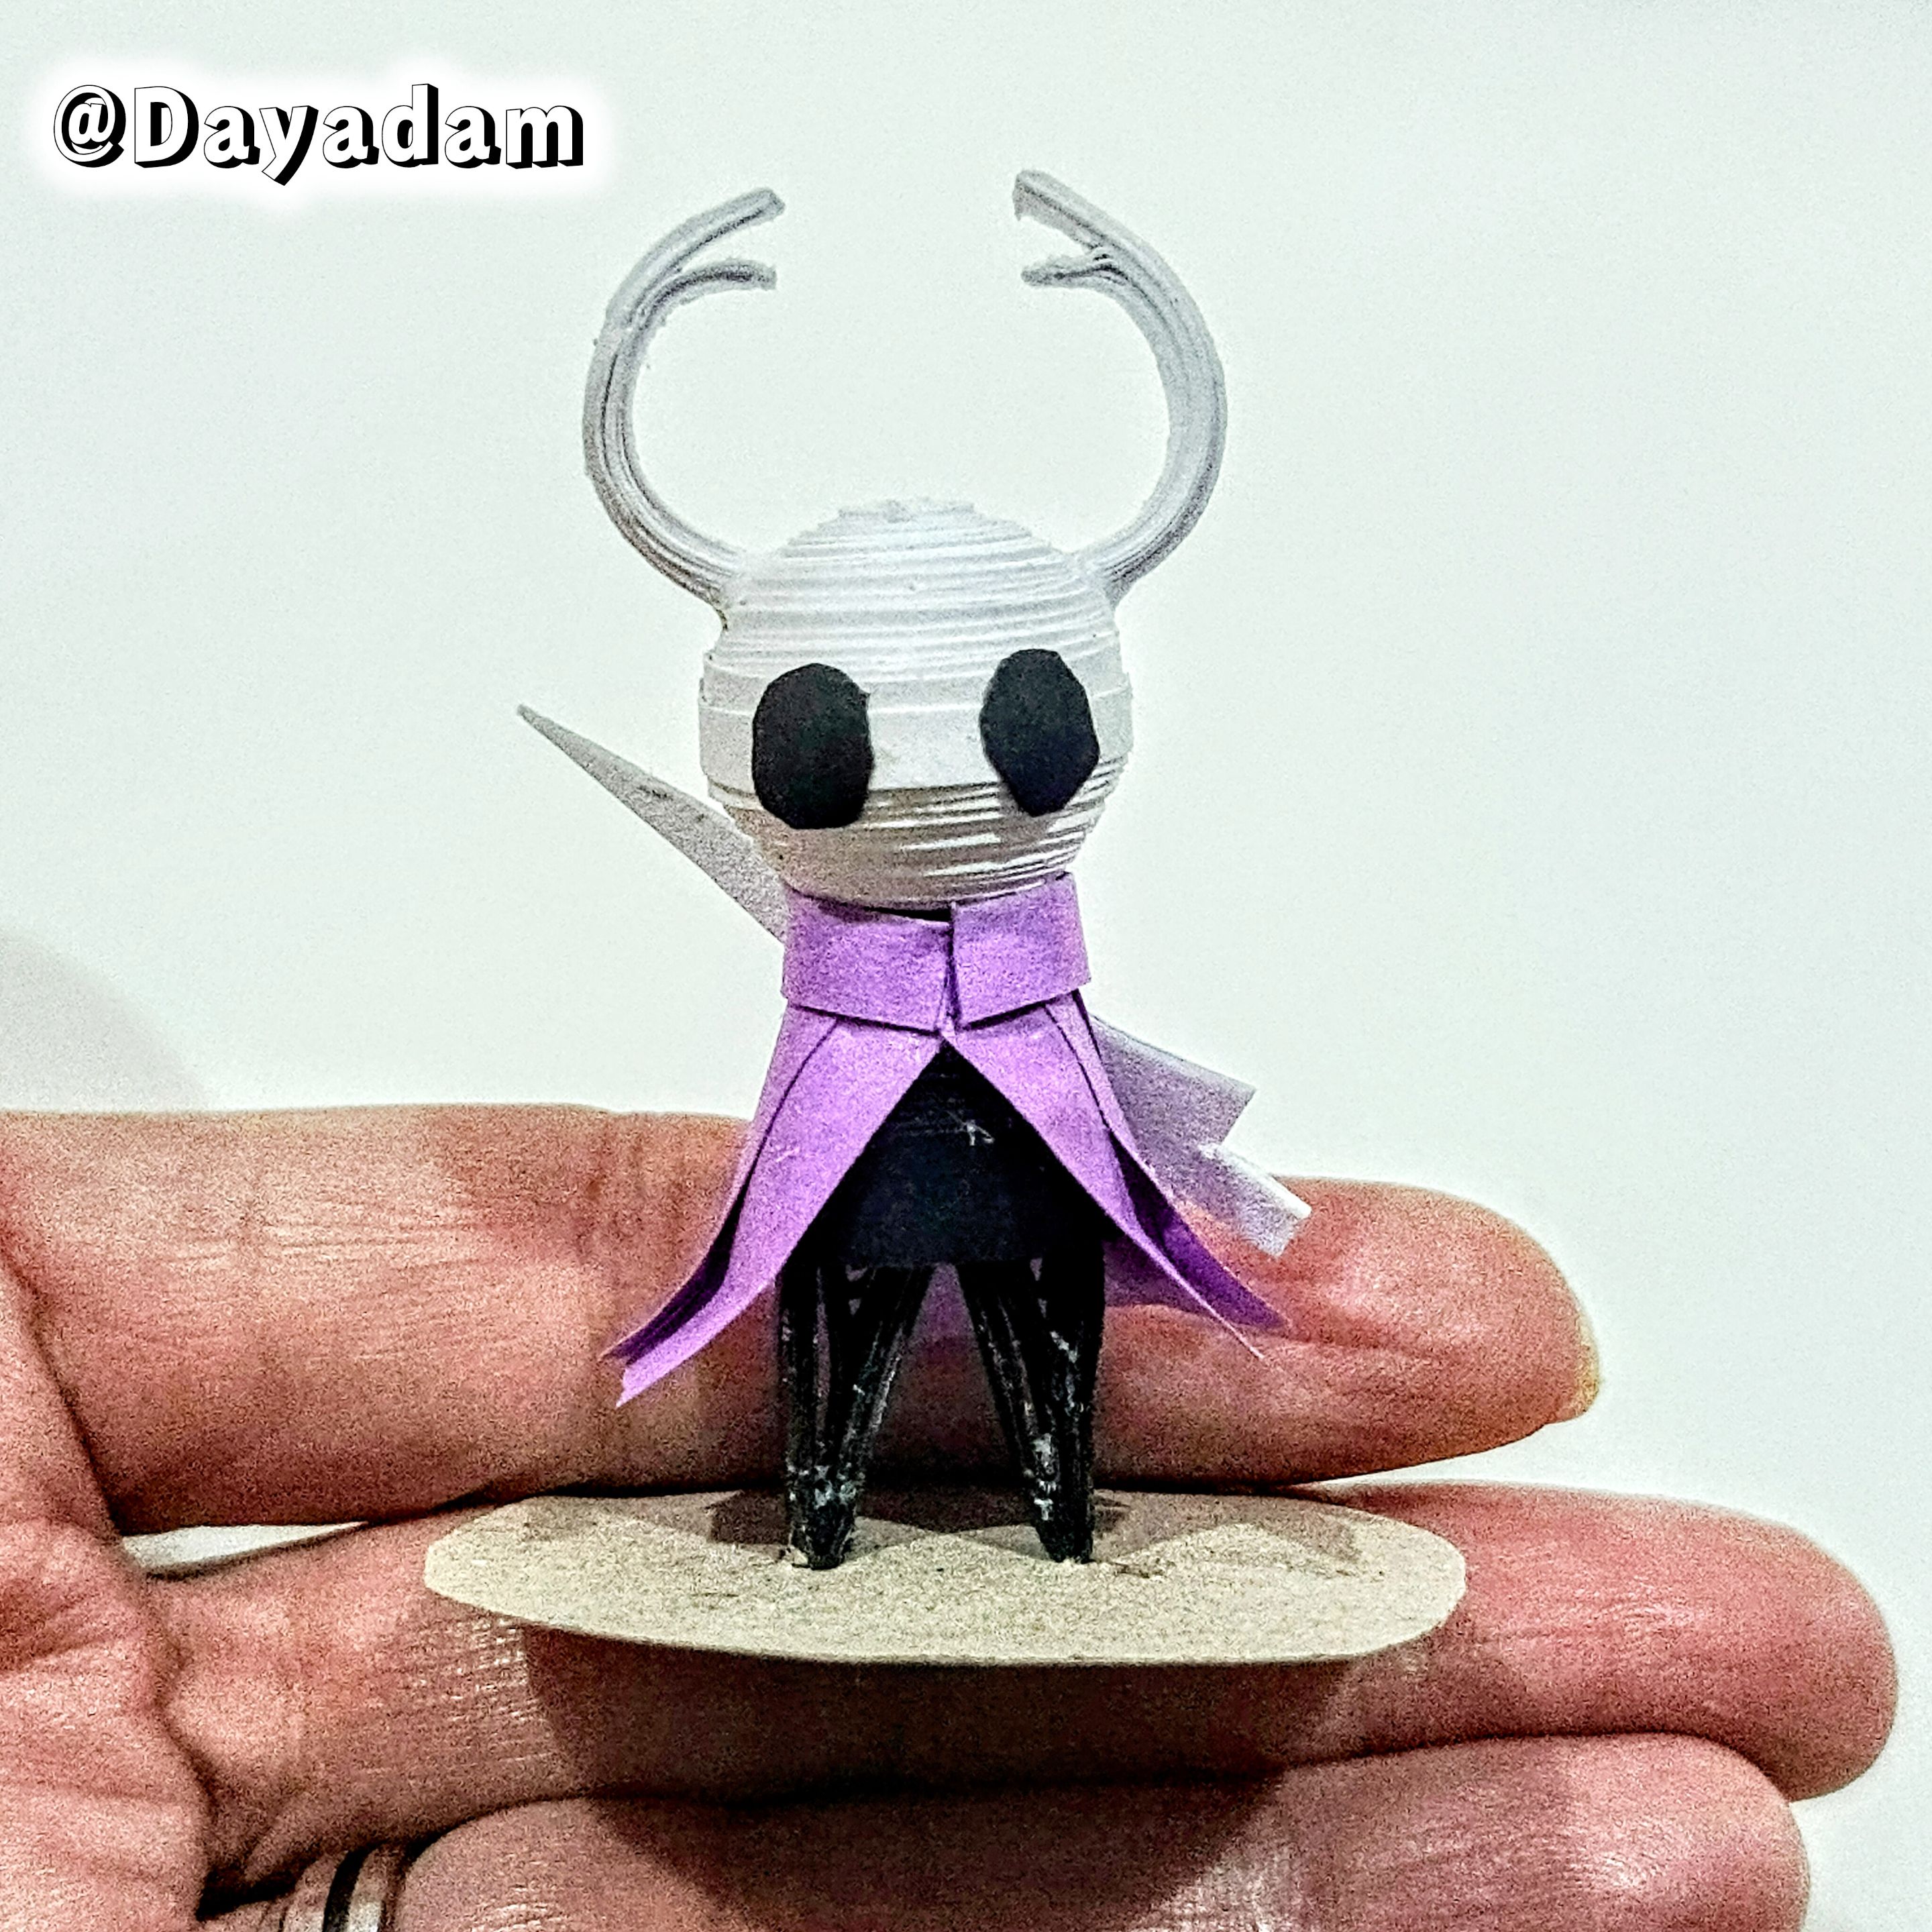
In this way I finished this decorative figure of The Knight in 3D, in the quilling technique.
• Procedi a pegar la capa del cuerpo del personaje, adicionalmente corte un trozo de cinta y lo pegué alrededor para asemejar un cuello en la capa.
• Recorte los ojos se un trozo de cartulina negra, los pegué de la cara.
• Pegué con pega blanca extra fuerte los cuernos del personaje, uno a cada lado de la cabeza.
• Con un trozo de cartulina de color blanco recorte la pequeña espada del personaje y la pegué en el sitio que me pareció adecuado.
• Para finalizar realicé una base para incorporar al personaje y poner ponerlo en pie.
De esta manera finalice esta figura decorativa de The Knight en 3D , en la técnica de quilling.
 |
 |
 |
 |

 |
 |
 |
 |
 |
 |
 |
 |
|
What did you think, did you like it?
I hope you did, I hope you liked my explanation, procedure and photos, I made them with love for you.
"Let out that muse that inspires you, and let your imagination fly".
Thank you all, see you next time ✨.
¿Qué les pareció, les gustó?
Espero que sí, que les haya gustado mi explicación, procedimiento y fotos, los hice con mucho cariño por y para ustedes."Deja salir esa musa que te inspira, y deja volar tu imaginación".
Gracias a todos, nos vemos en la próxima✨

All photos used in this post are of my authorship and have been taken on my personal cell phone a Redmi 9T, edited in InShot and Canva
Banner and separator made by me in Canva
Translated with the help of DeepL
Todas las fotos usadas en este post son de mi autoría y han sido sacadas en mi celular personal un Redmi 9T, editadas en InShot y Canva
Banner y separador hecho por mí en Canva
Traducido con la ayuda de DeepL
