En estos días me he reencontrado con las manualidades, es esa necesidad de realizar actividades diferentes que ayuden a saciar mi espíritu inquieto, cuando los compromisos me permiten tener el espacio disponible para obsequiarme esos momentos de relax y creación. Hay trabajos manuales que son tan sencillos de realizar, nos permiten obtener un producto hermoso y delicado. Es así como; en ese deseo de utilizar los materiales sencillos con los que cuento, experimenté crear estas lindas rosas, ideales para decorar o simplemente dar un toque diferente a nuestros espacios. Les contaré los detalles a continuación.
Materiales
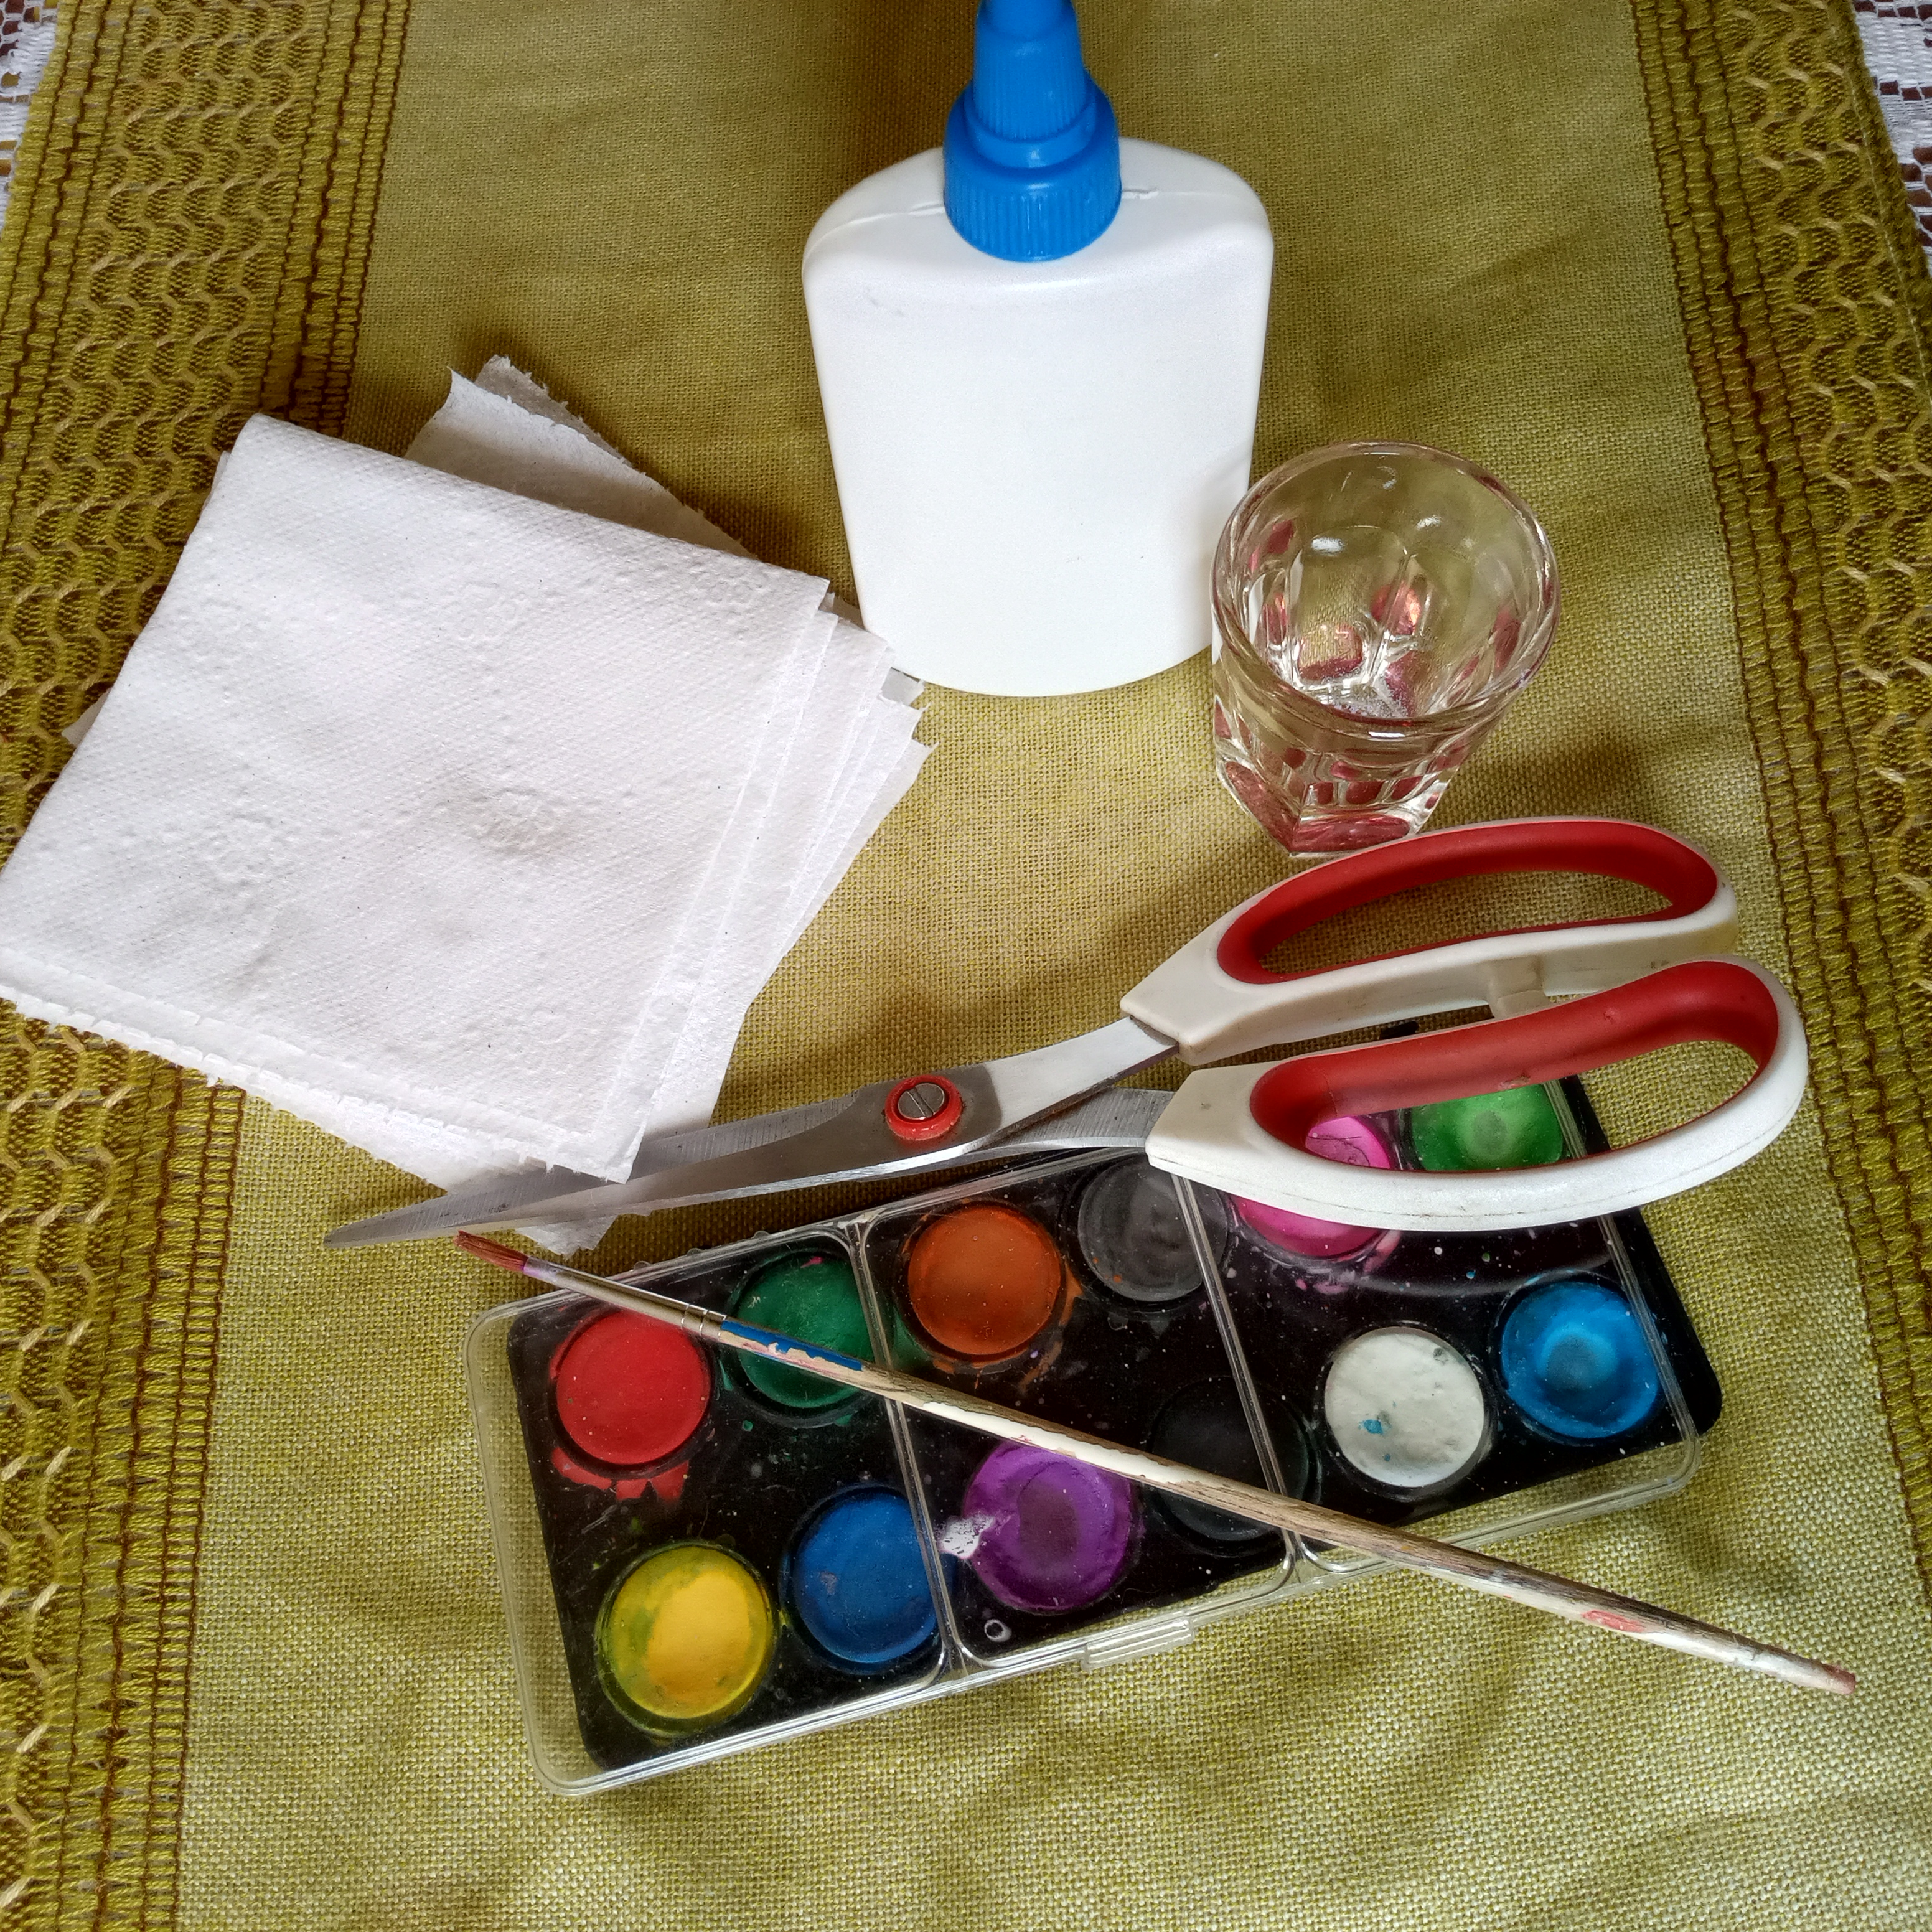
- Papel higiénico
- Acuarelas
- Tijera
- Pincel
- Pegamento blanco
- Vaso de cristal
Elaboración paso a paso
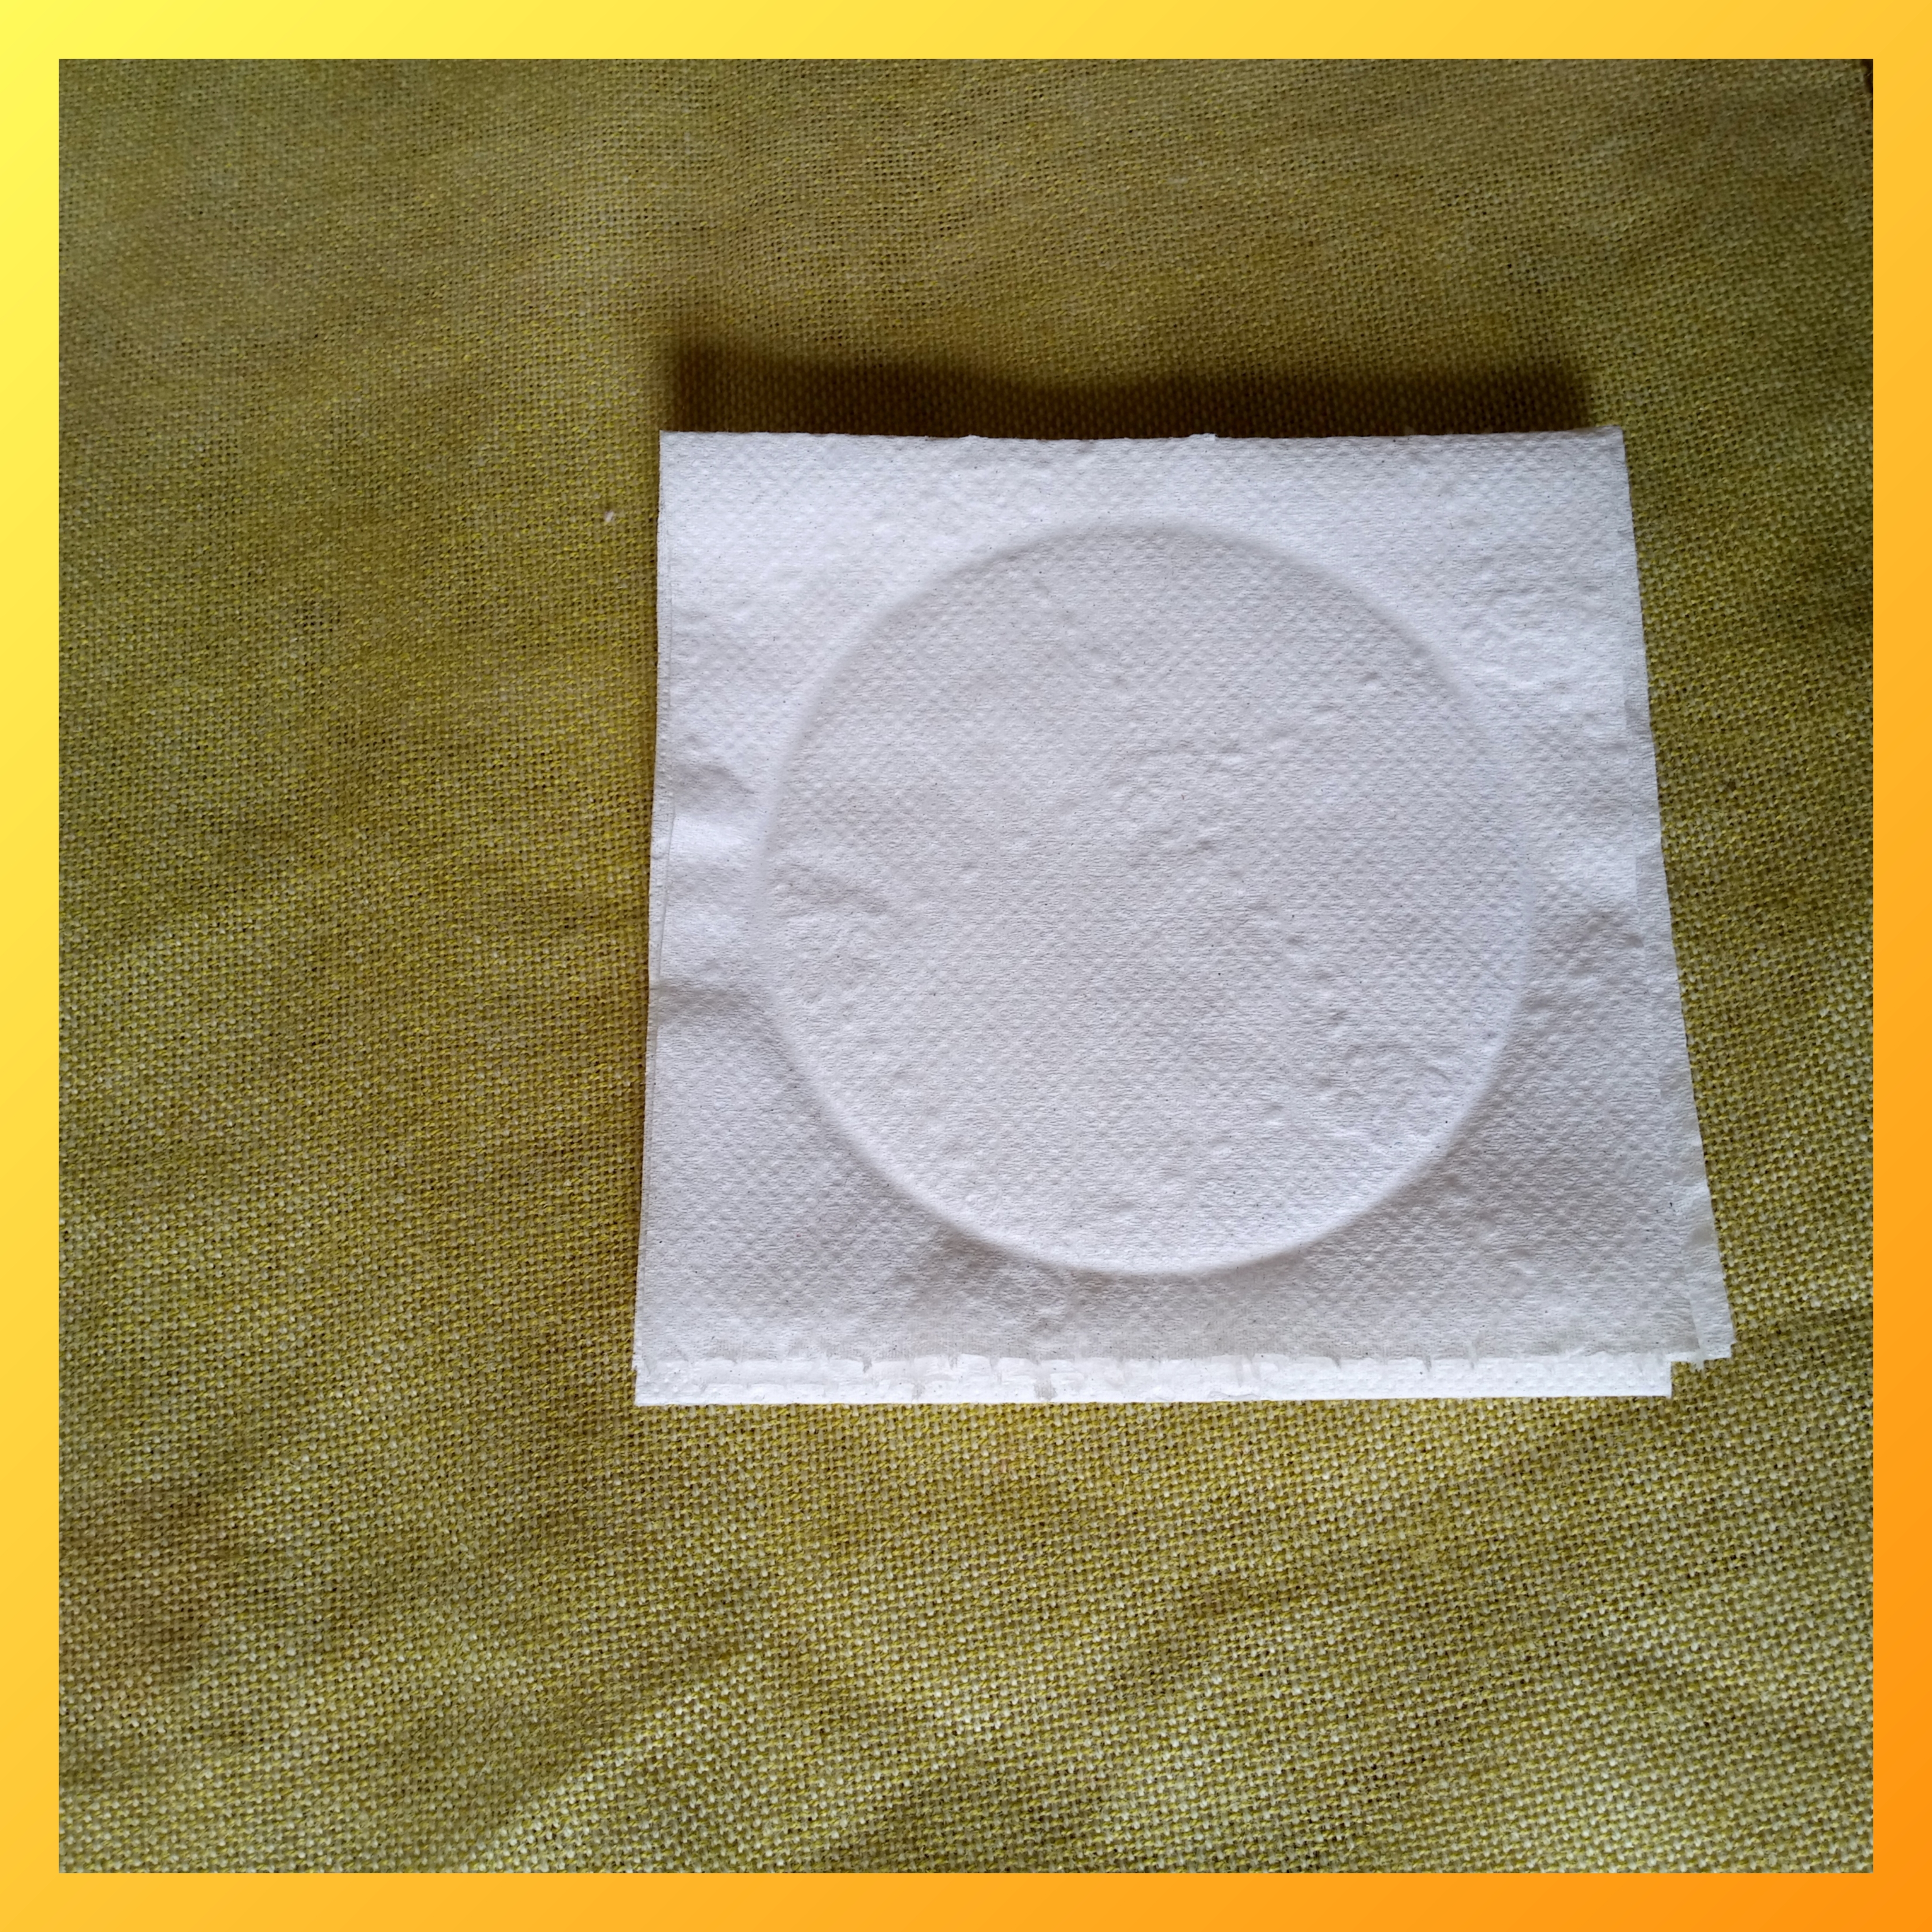
Paso 1.
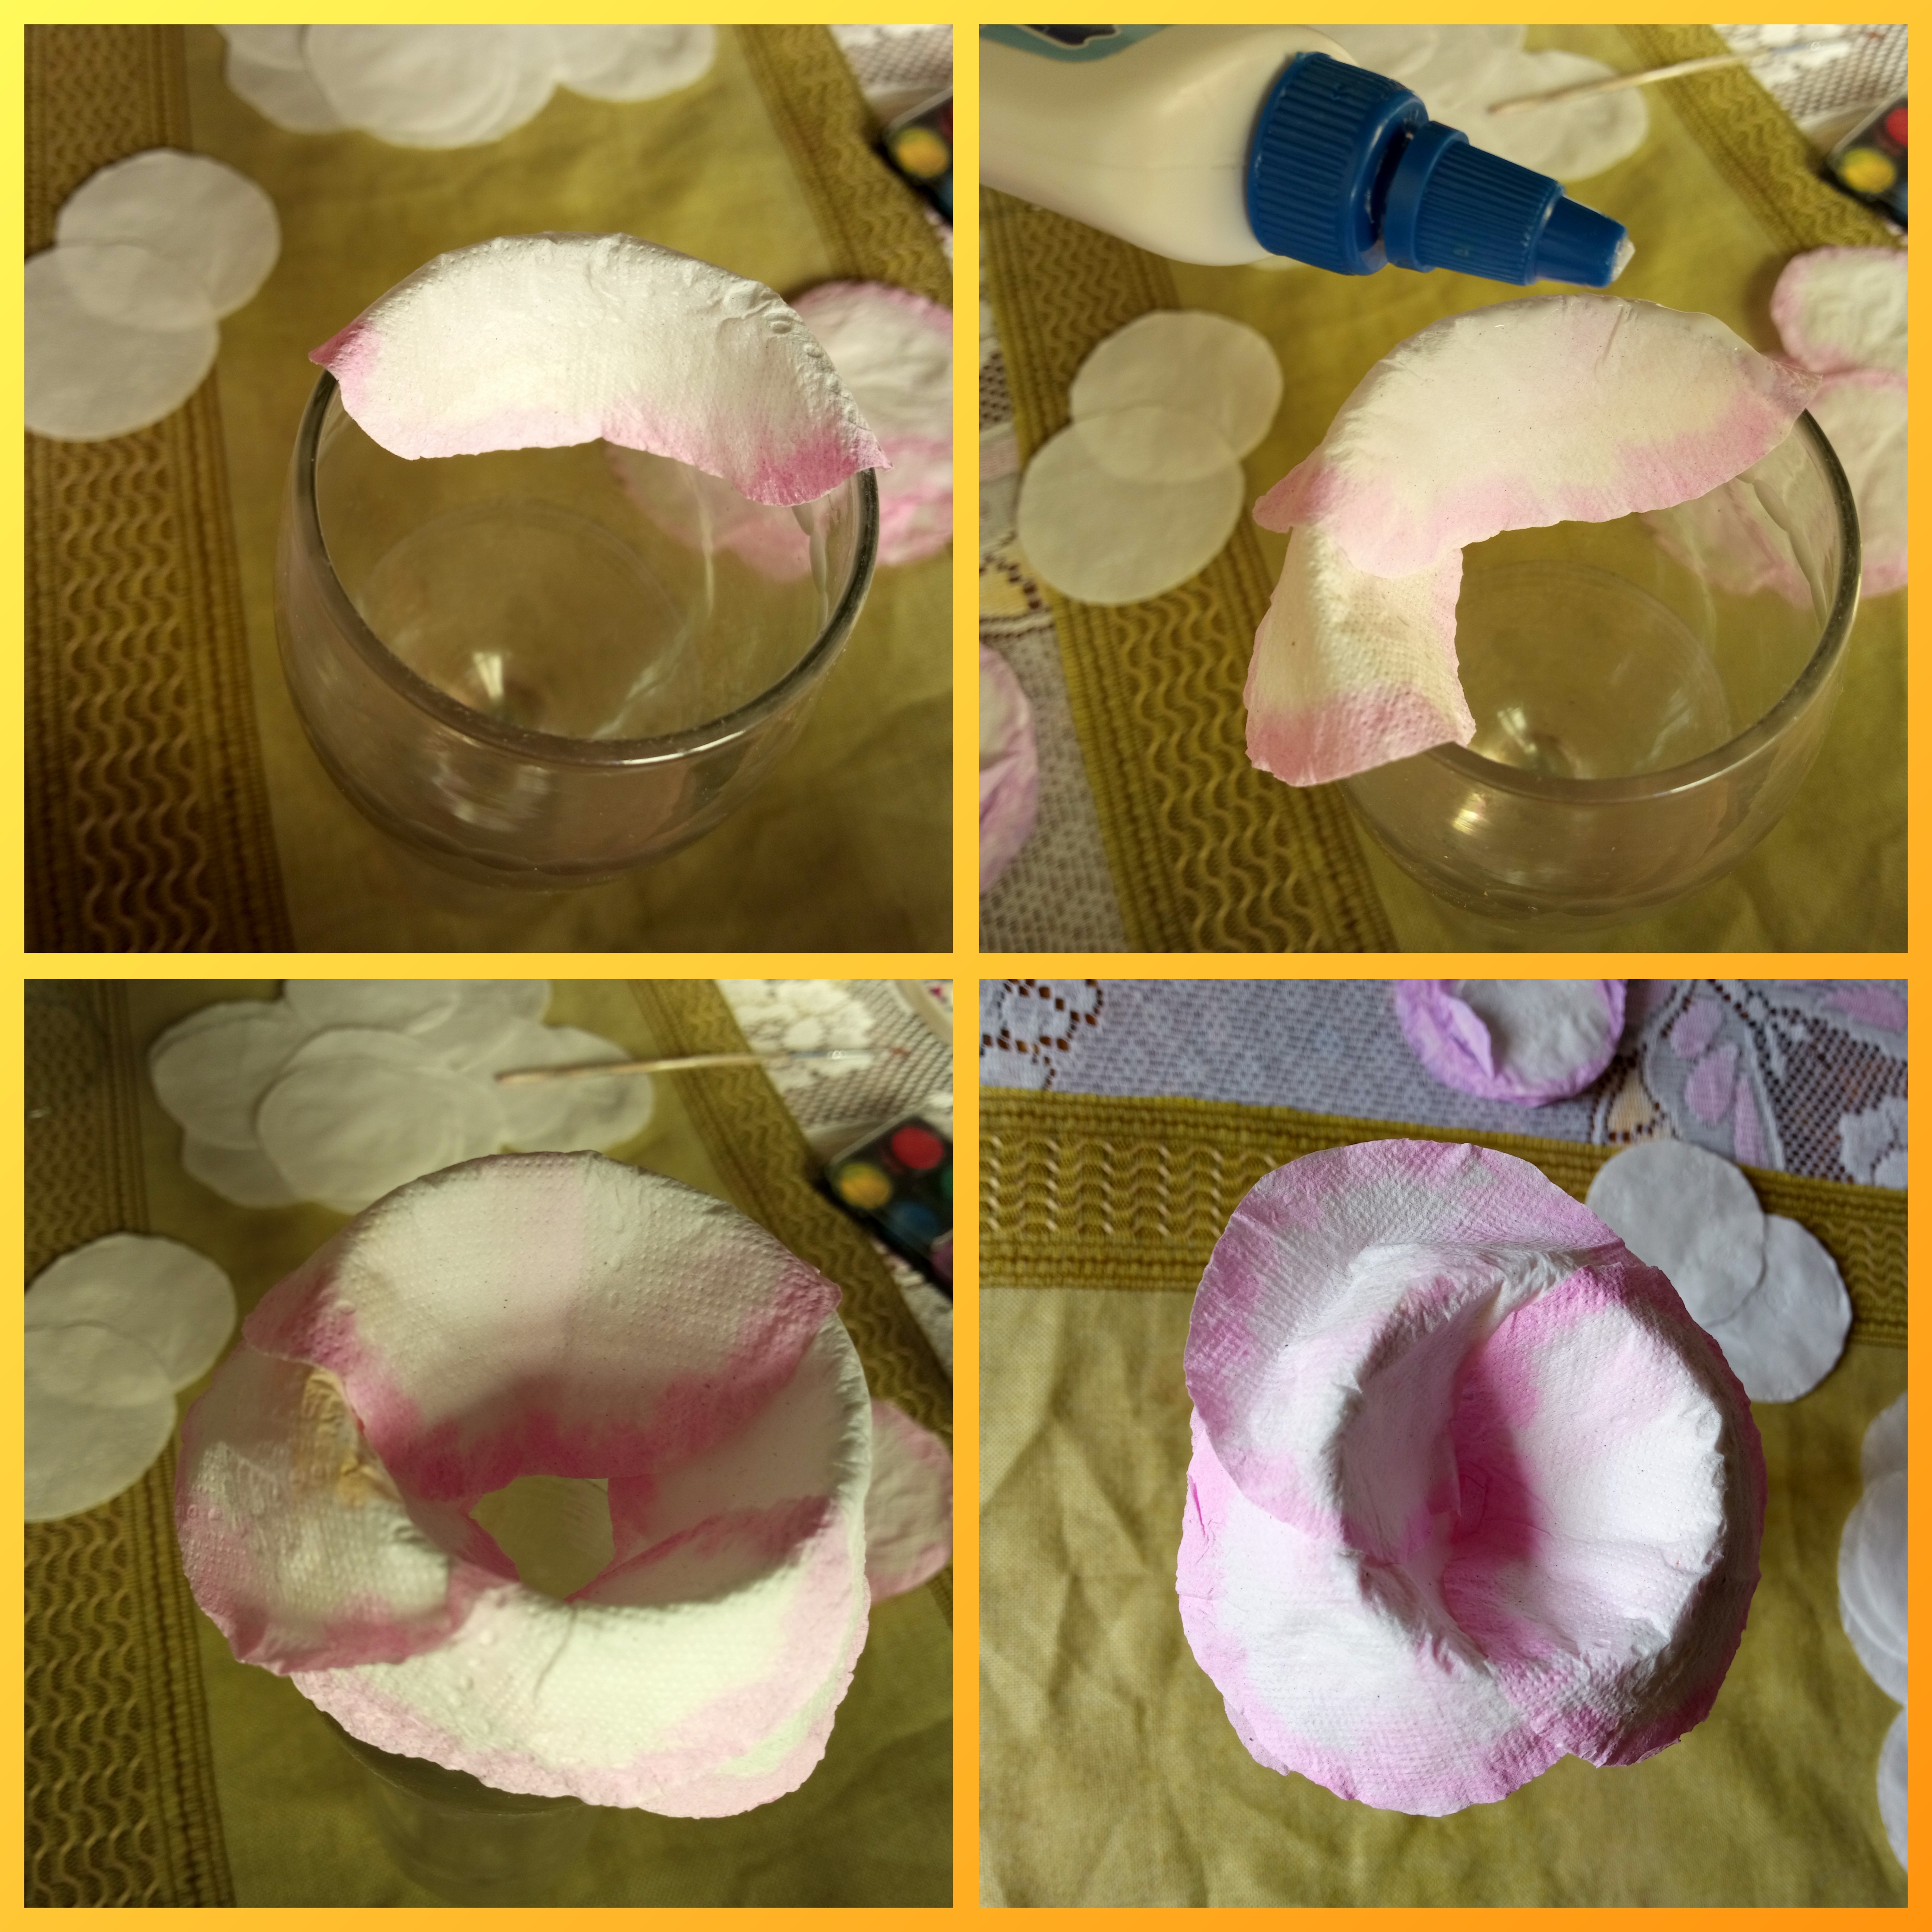
Para realizar estas rosas he utilizado papel higiénico pero se puede sustituir por el papel de preferencia, puede ser papel de servilleta, papel crepé, todo depende del gusto y la disponibilidad de los materiales con lo que cuente. Comencé fraccionando el papel de acuerdo a la medida que el mismo posee, saqué varios cuadritos para iniciar la elaboración de estas hermosas rosas, utilizando un vaso de cristal presioné sobre el papel para obtener un círculo.
Paso 2.
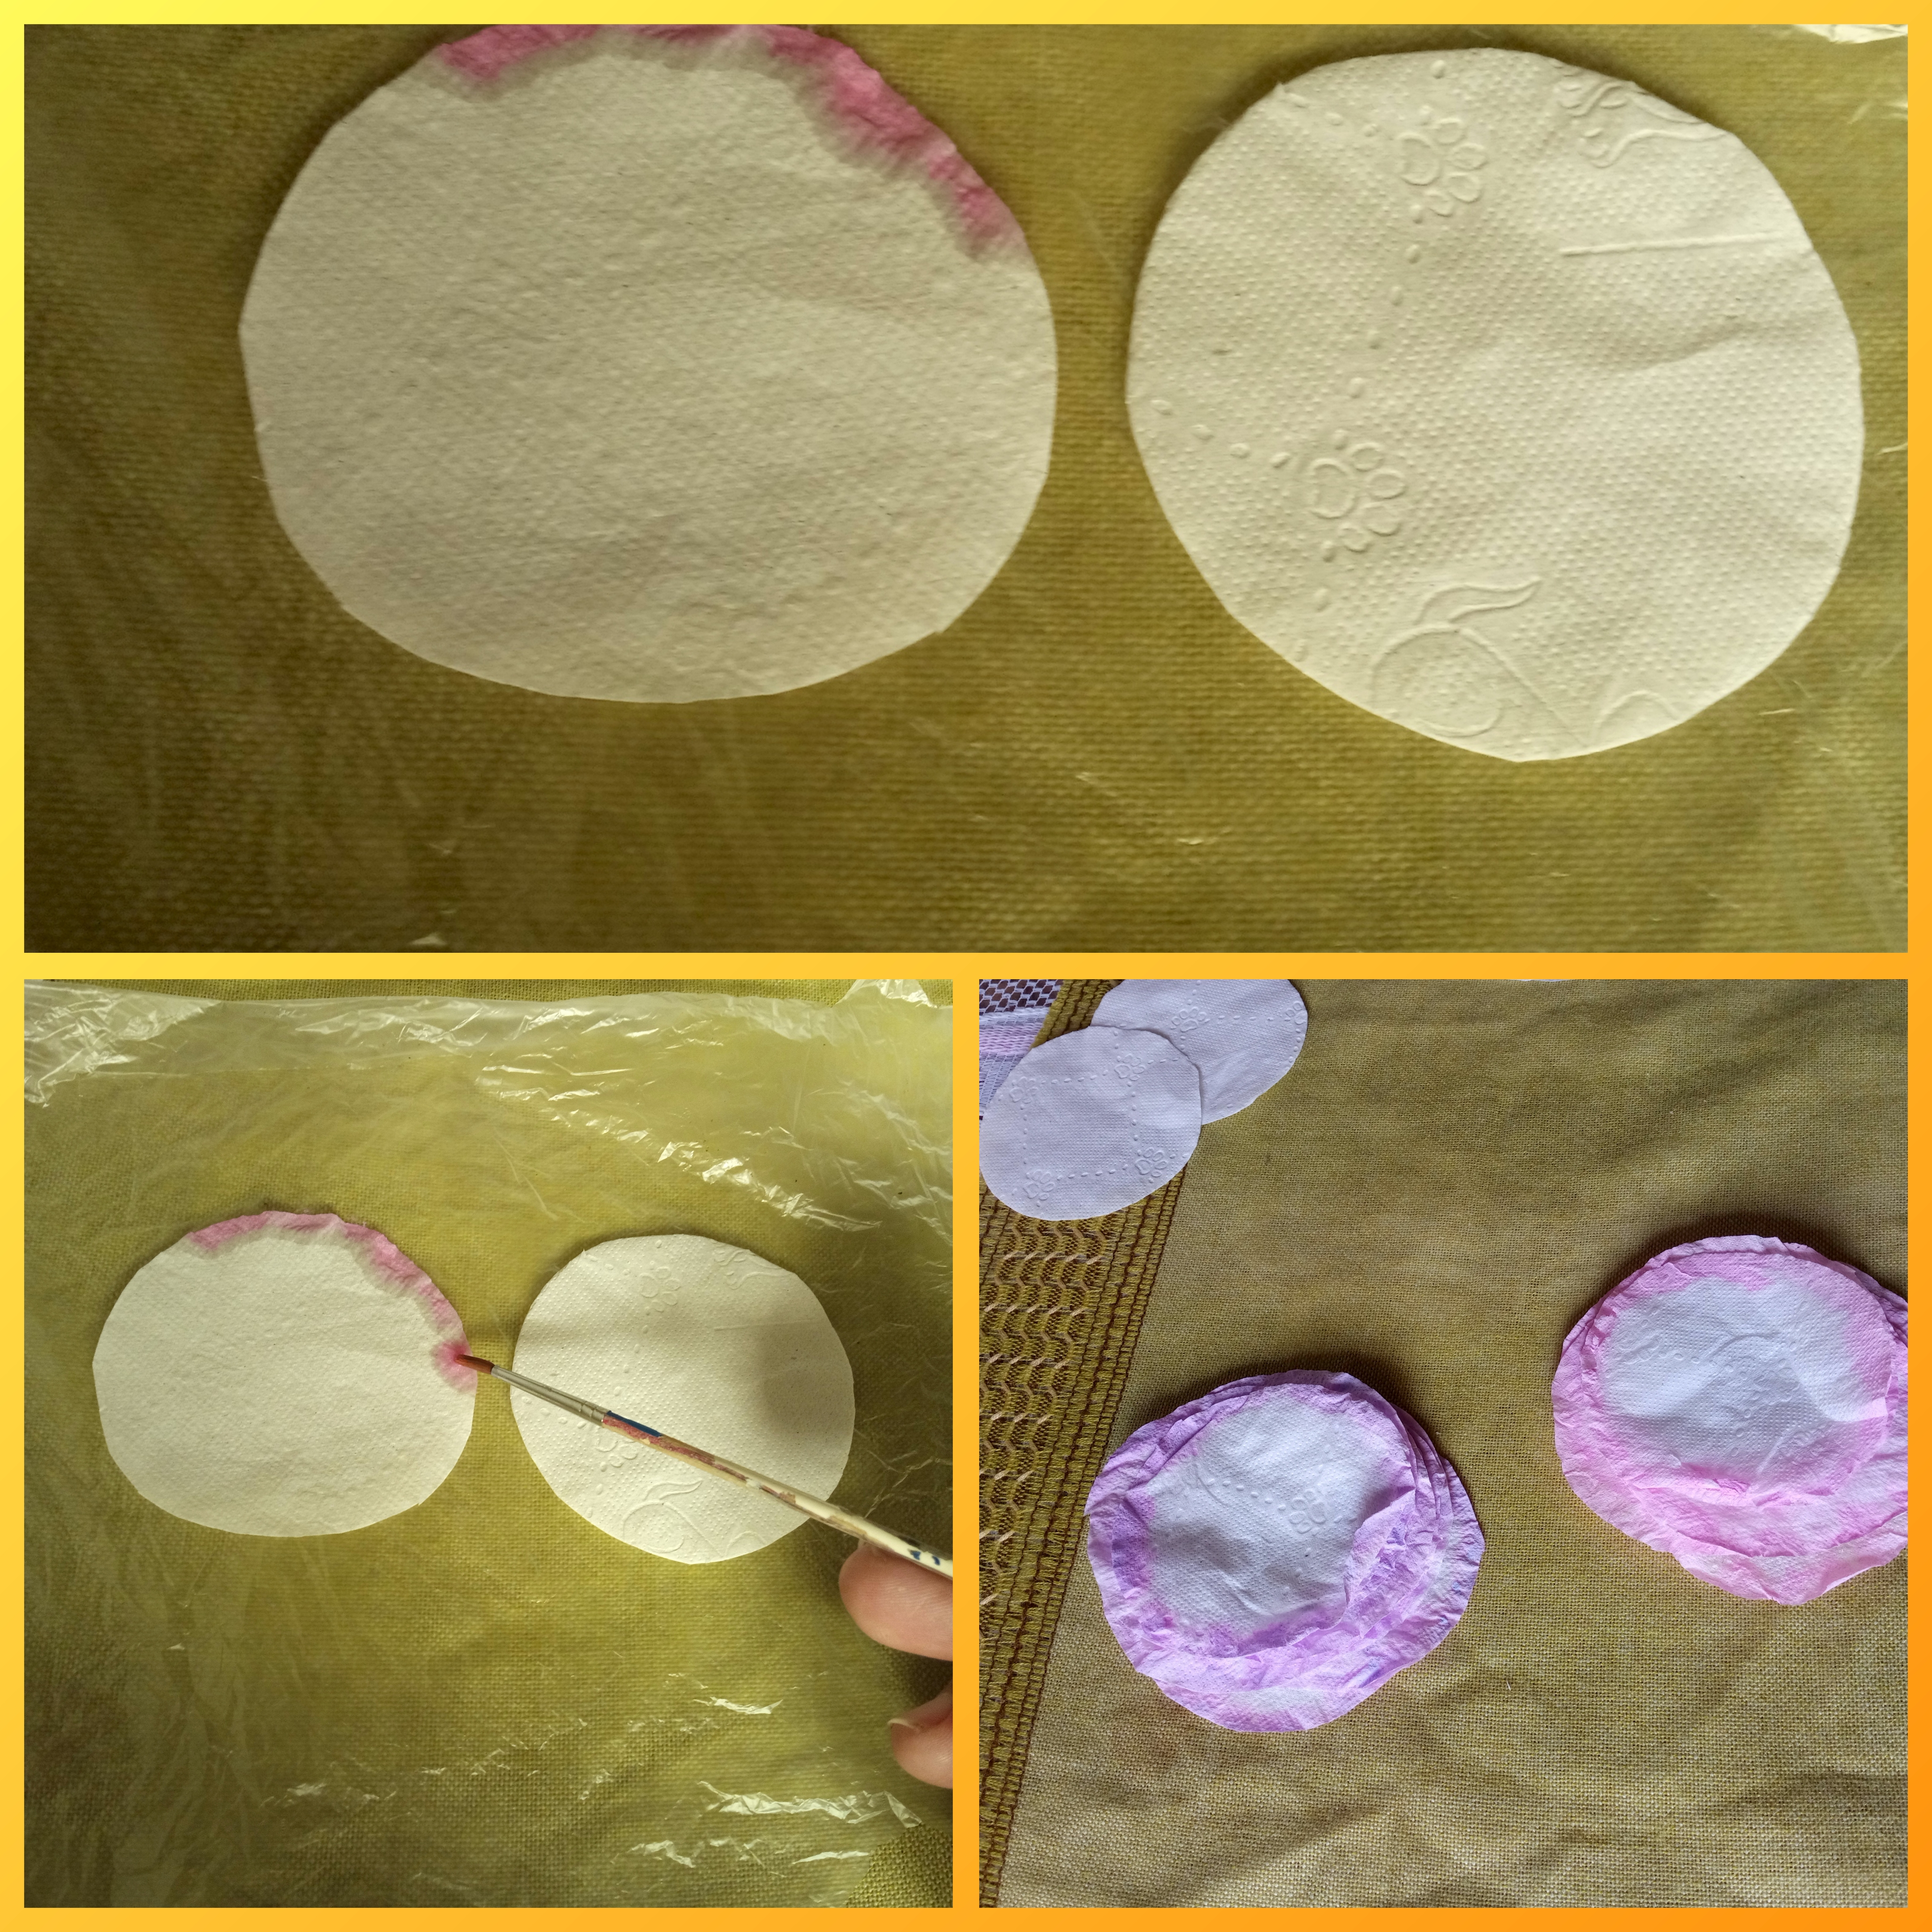
Luego de marcar los círculos procedí a recortarlos, es necesario tener suficientes para trabajar mejor, cada rosa lleva doce pétalos, se pueden utilizar más si se desea más abundante.

Paso 3.
Ahora comienzo a pintar los pétalos, previamente coloco una bolsa plástico sobre la mesa para evitar que el papel se pegue. Progresivamente voy colocando pinceladas de pintura diluida con agua, voy cubriendo los bordes y dejo que se expanda a su gusto.Allí los dejo secar para poder avanzar al siguiente paso.
Paso 4.
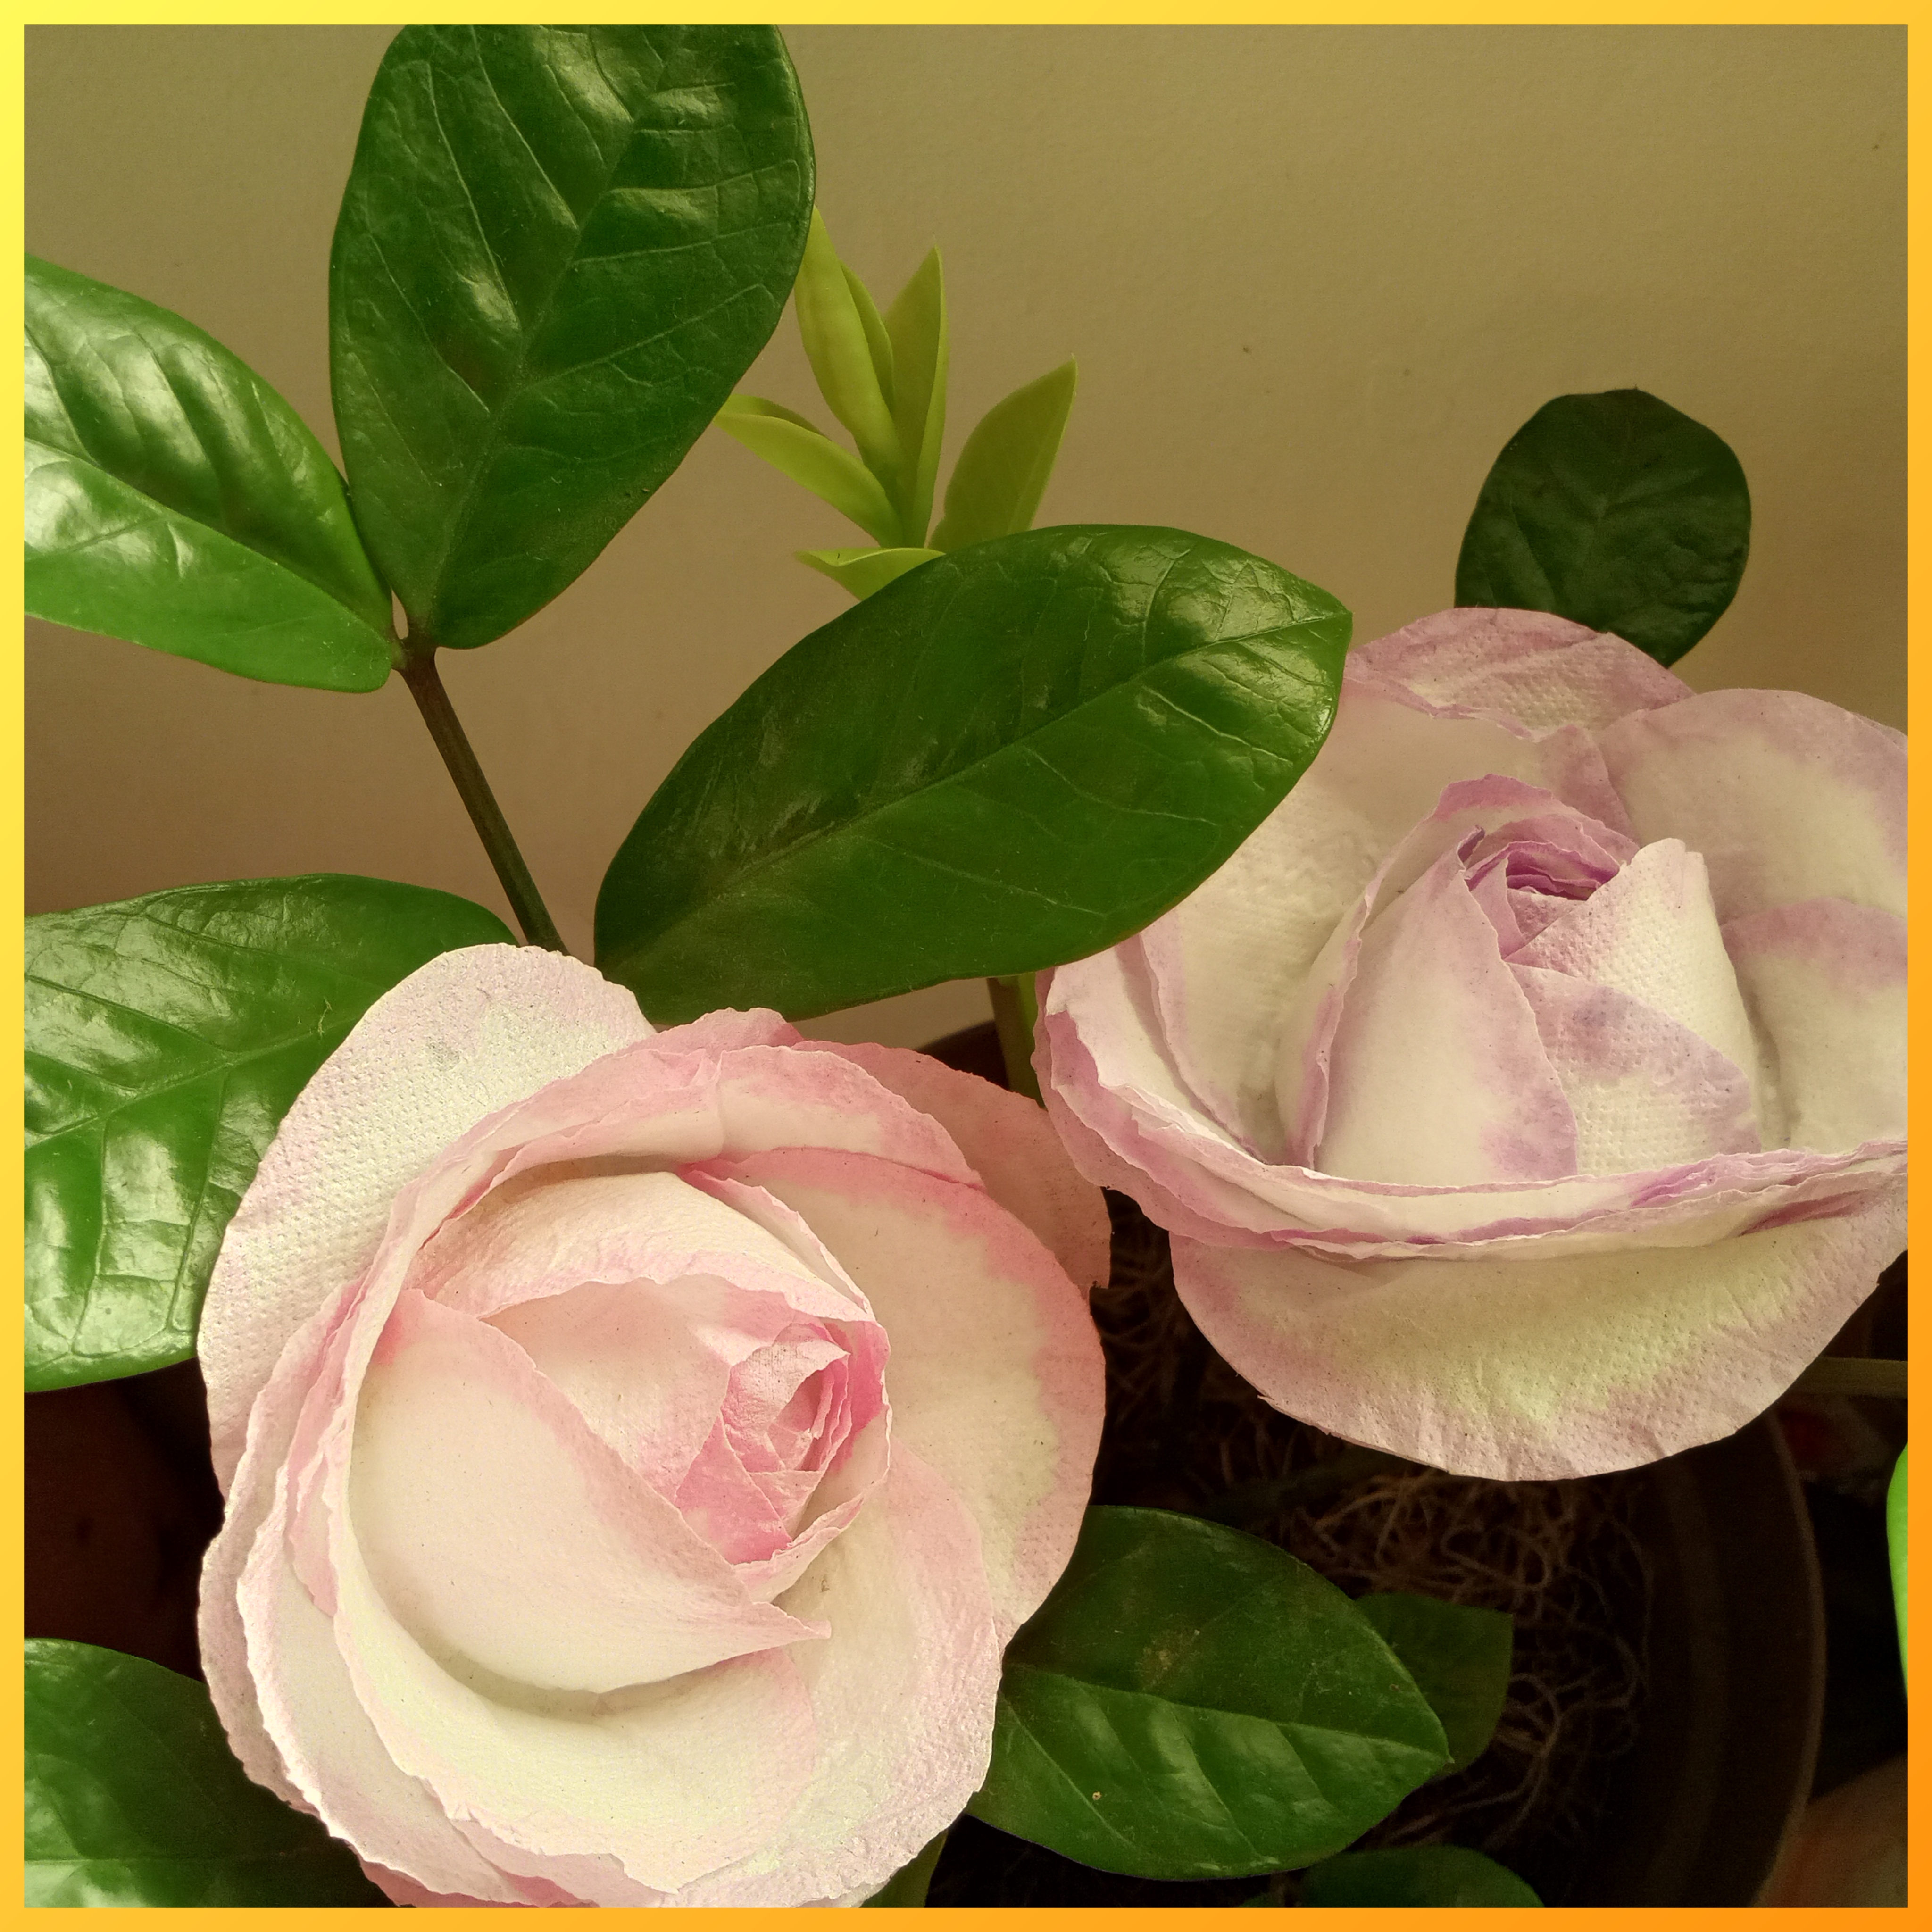
En este paso realizo el armado de la rosa, utilizando un vaso de cristal voy colocando los pétalos sobrepuestos agregando pegamento para fijar. De manera ordenada y paciente voy colocando pétalo por pétalo hasta obtener el tamaño deseado.
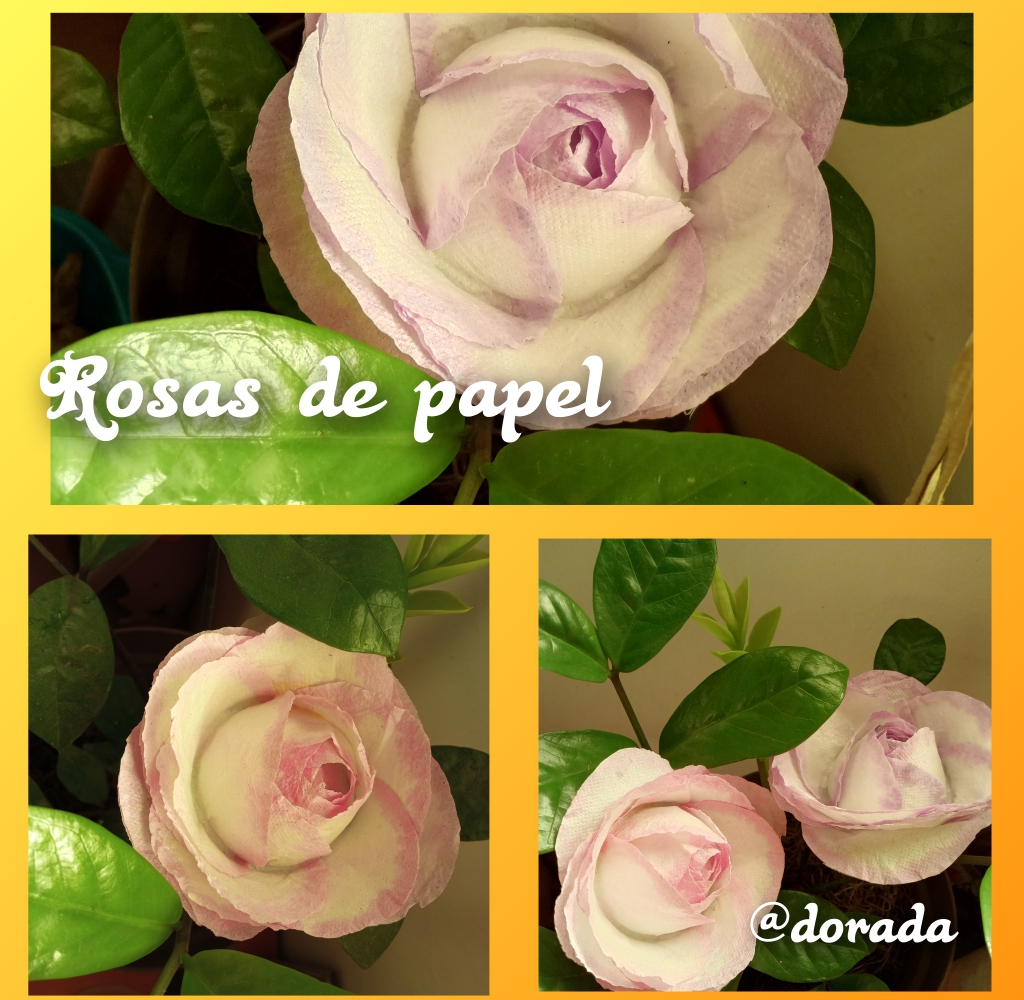
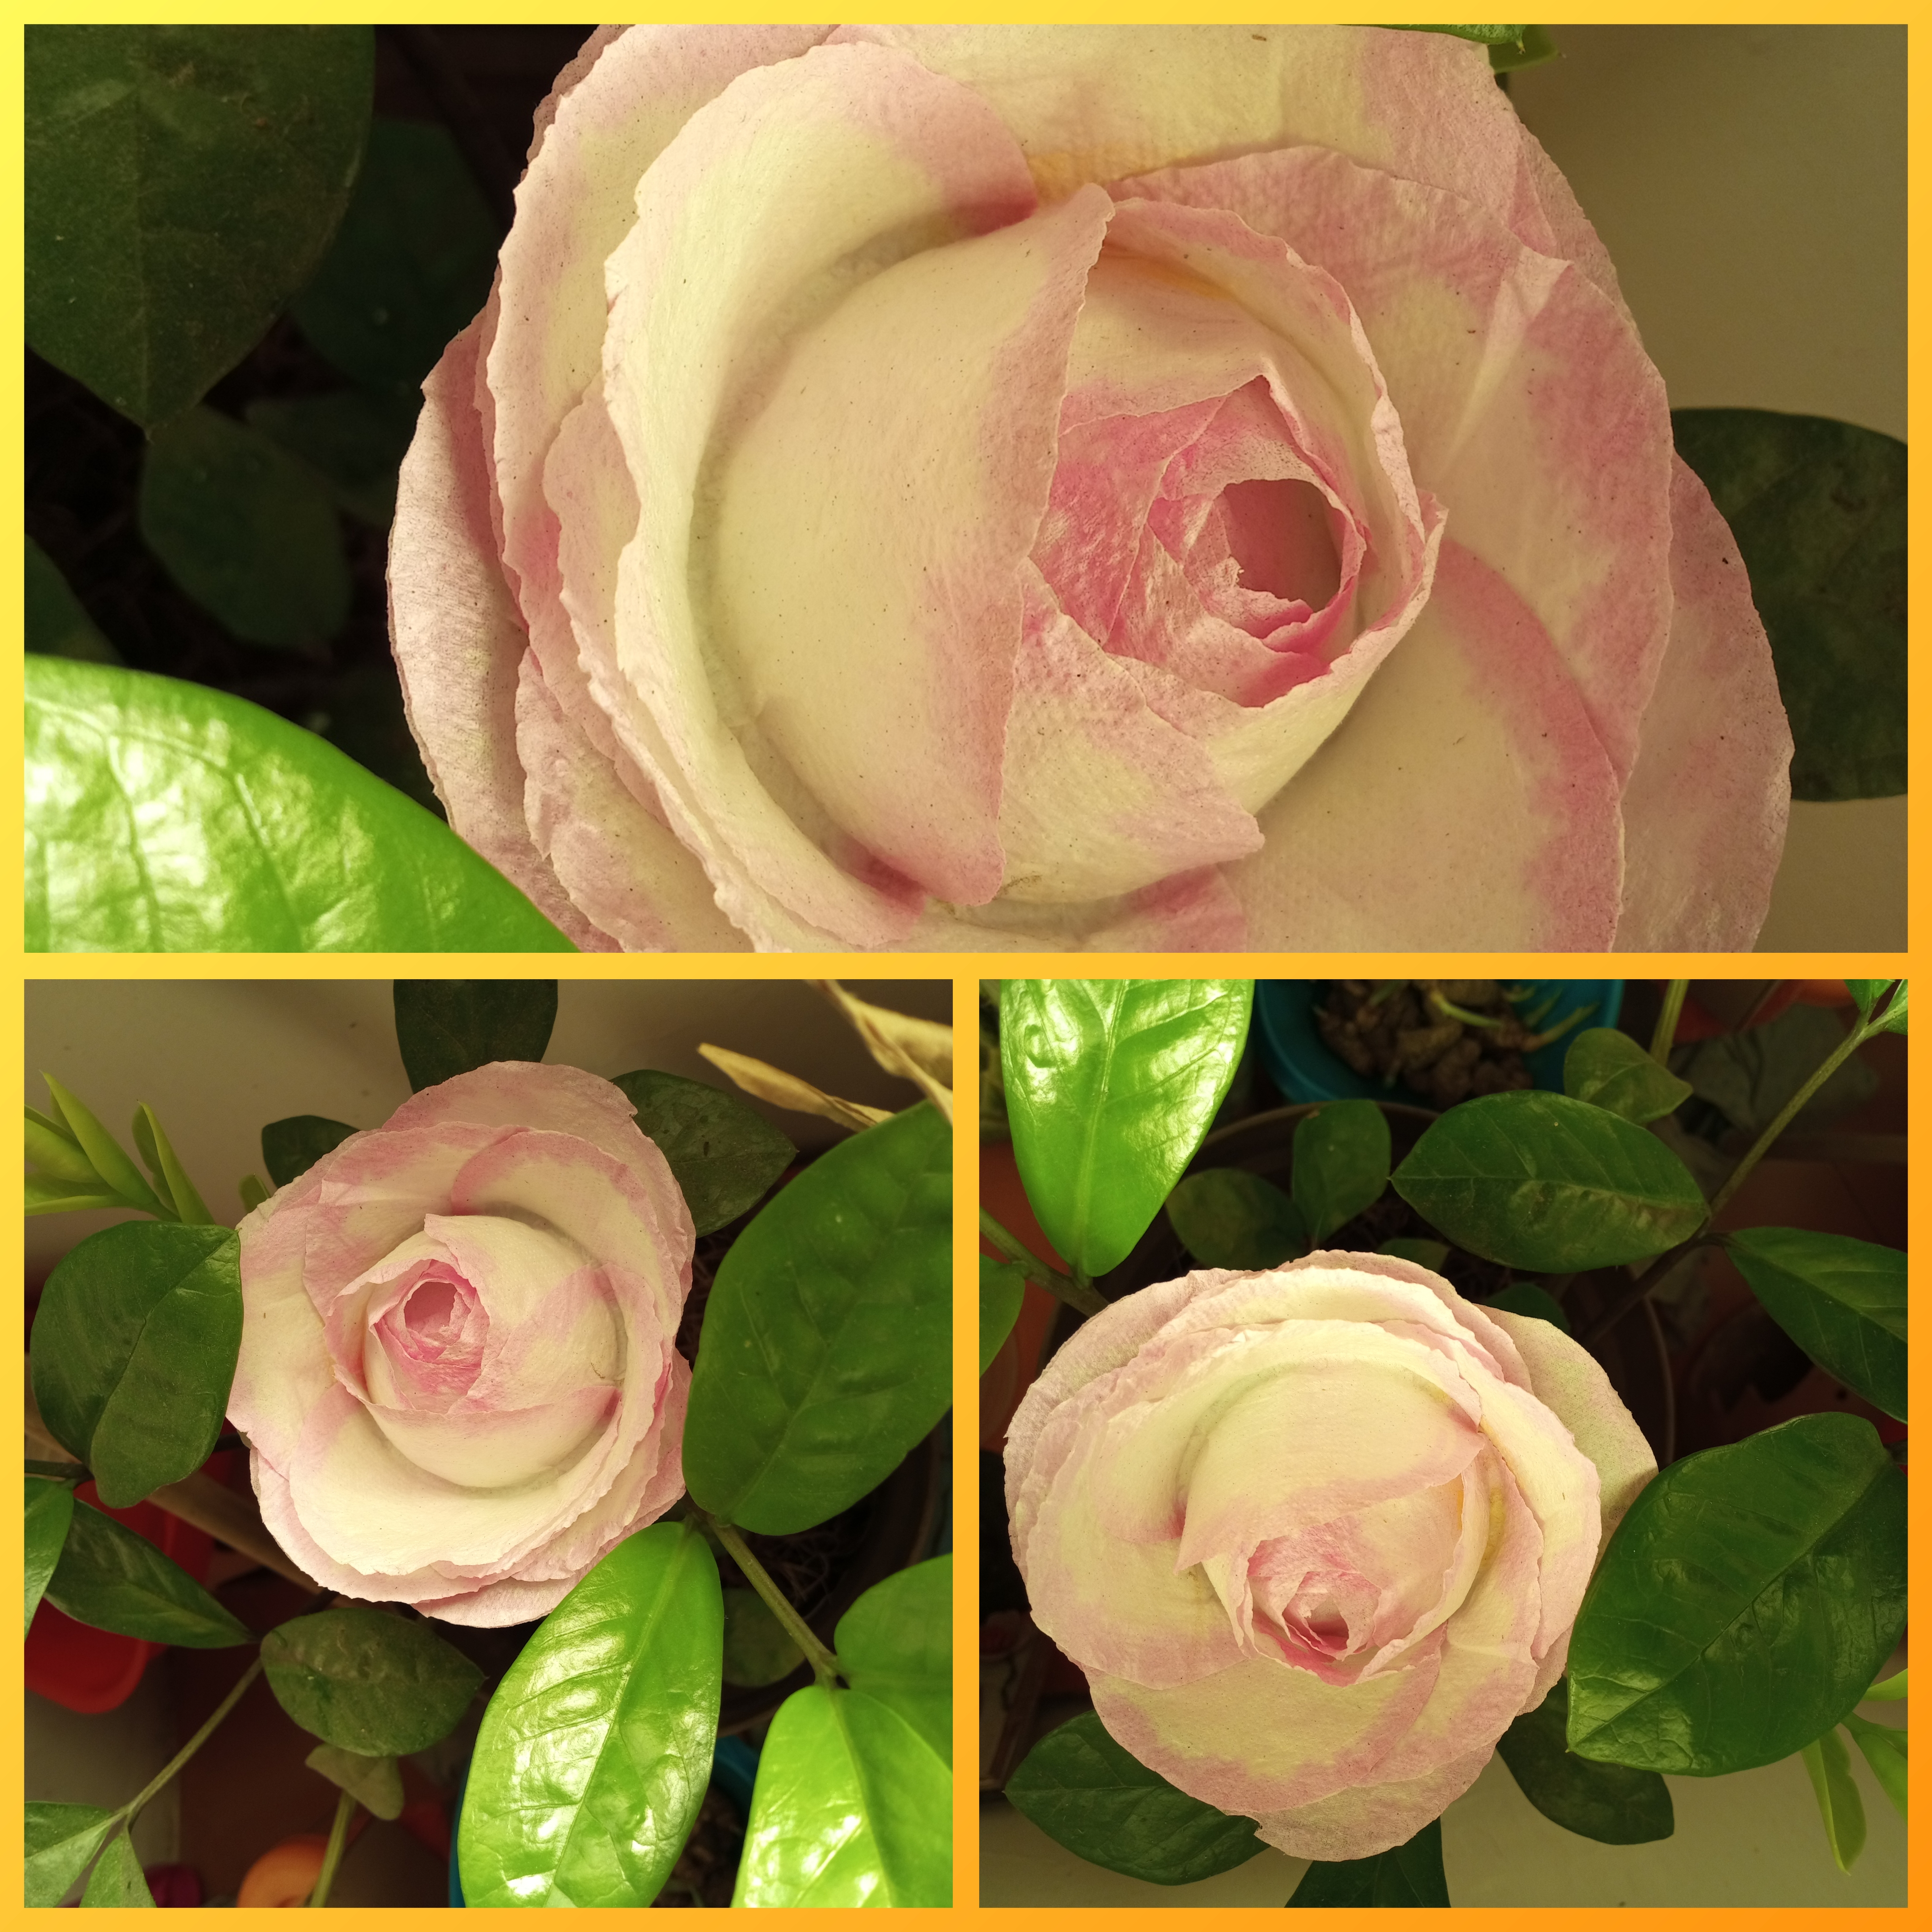
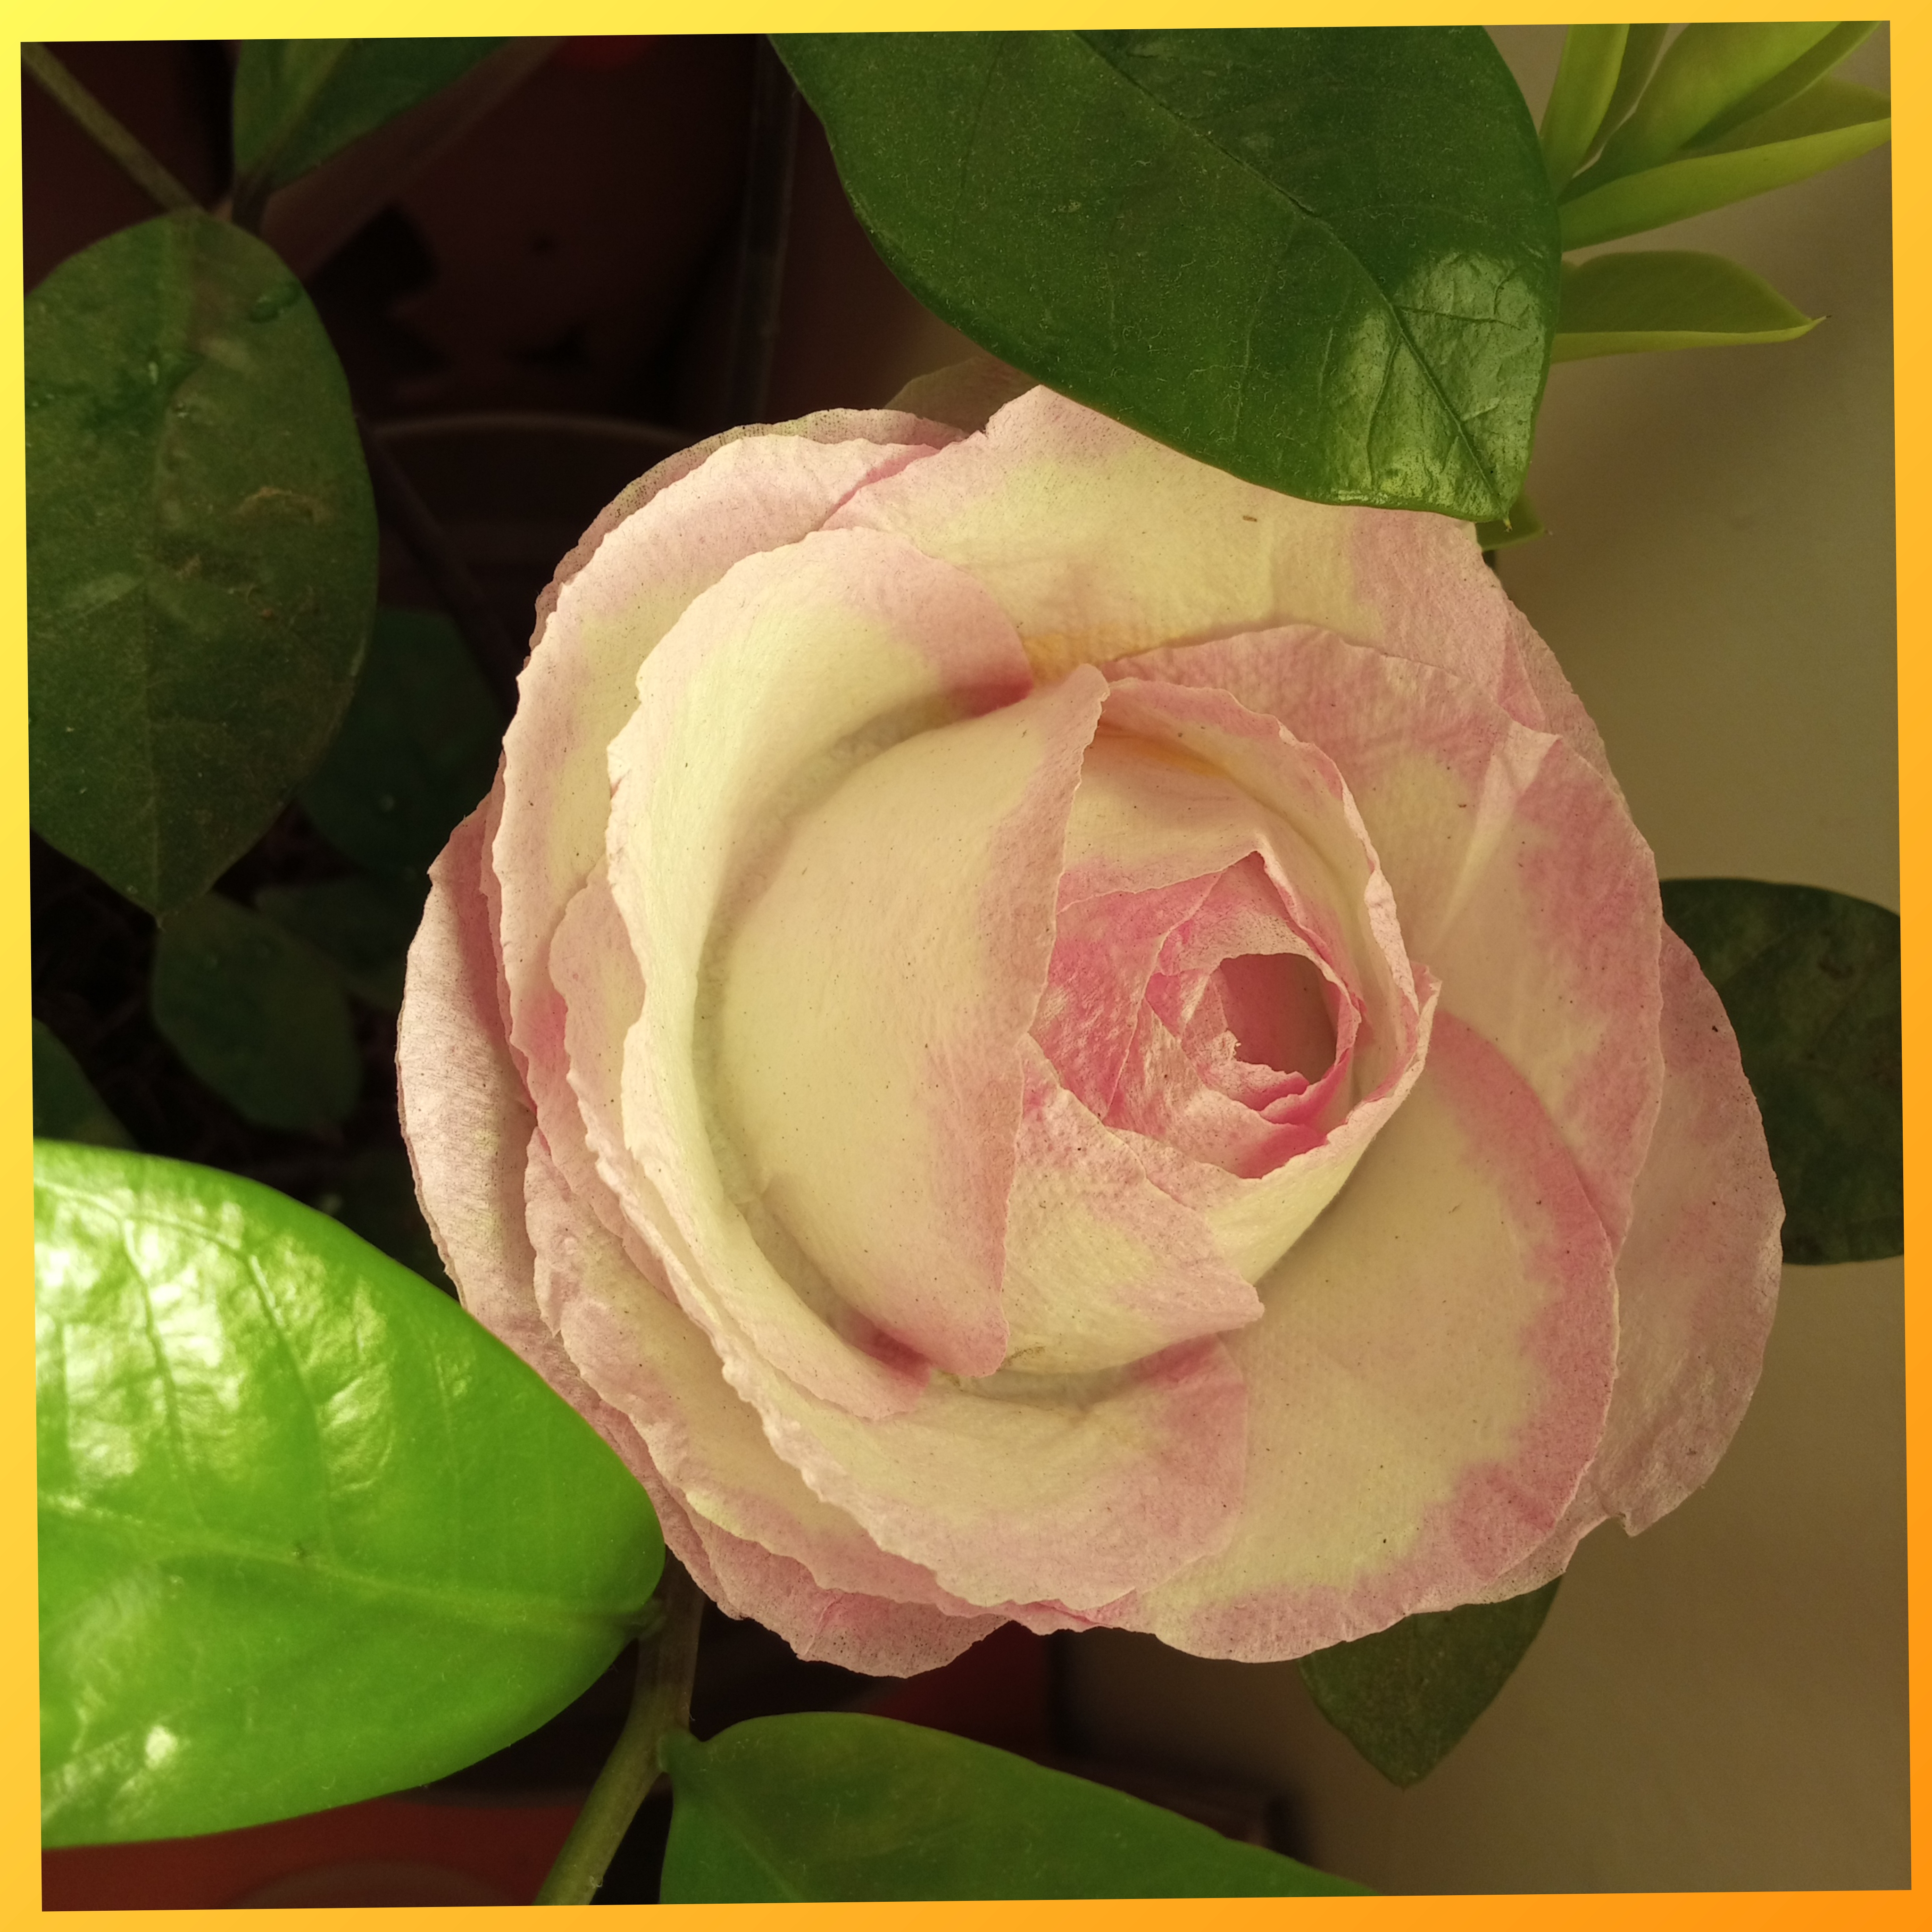
Aquí les muestro las rosas culminadas, decidí utilizar los colores fucsia y morado para darles color.


la Vida es Arte...
Gracias por leerme. Nos encontraremos en el próximo post de @dorada
Imágenes capturadas con dispositivo móvil tecno pova Traducción
Enlish Version
These days, I have rediscovered crafts. It is that need to do different activities that help satisfy my restless spirit, when my commitments allow me to have the space available to treat myself to those moments of relaxation and creation.
There are crafts that are so easy to do, yet they allow us to create something beautiful and delicate. That's how, in my desire to use the simple materials I have available, I experimented with creating these lovely roses, ideal for decorating or simply adding a different touch to our spaces. I'll tell you the details below.
Materials:
-
Toilet paper
-
Watercolors
-
Scissors
-
Paintbrush
-
White glue
-
Glass cup
Step-by-step instructions
Step 1.
To make these roses, I used toilet paper, but you can substitute any paper you like, such as napkins or crepe paper. It all depends on your taste and the materials you have available. I started by cutting the paper into squares according to its size. I cut out several squares to start making these beautiful roses, using a glass to press down on the paper to make a circle.
Step 2.
After marking the circles, I proceeded to cut them out. It is necessary to have enough to work better; each rose has twelve petals, but you can use more if you want a more abundant look.
Step 3.
Now I start painting the petals. First, I place a plastic bag on the table to prevent the paper from sticking. I gradually apply brushstrokes of paint diluted with water, covering the edges and letting it spread as desired. I leave them to dry so I can move on to the next step.
Step 4.
In this step, I assemble the rose, using a glass to place the petals on top of each other and adding glue to secure them. I patiently and carefully place each petal until I achieve the desired size.
Here are the finished roses. I decided to use fuchsia and purple to give them color.
Life is Art...
Thanks for reading me. See you in @dorada's next post.
Images captured with mobile device tecno pova Translation
Posted Using INLEO