 Feliz lunes mis queridos amigos y creadores.
Bienvenidos sean todos a mi Blog.
Feliz lunes mis queridos amigos y creadores.
Bienvenidos sean todos a mi Blog.
Vas a utilizar:
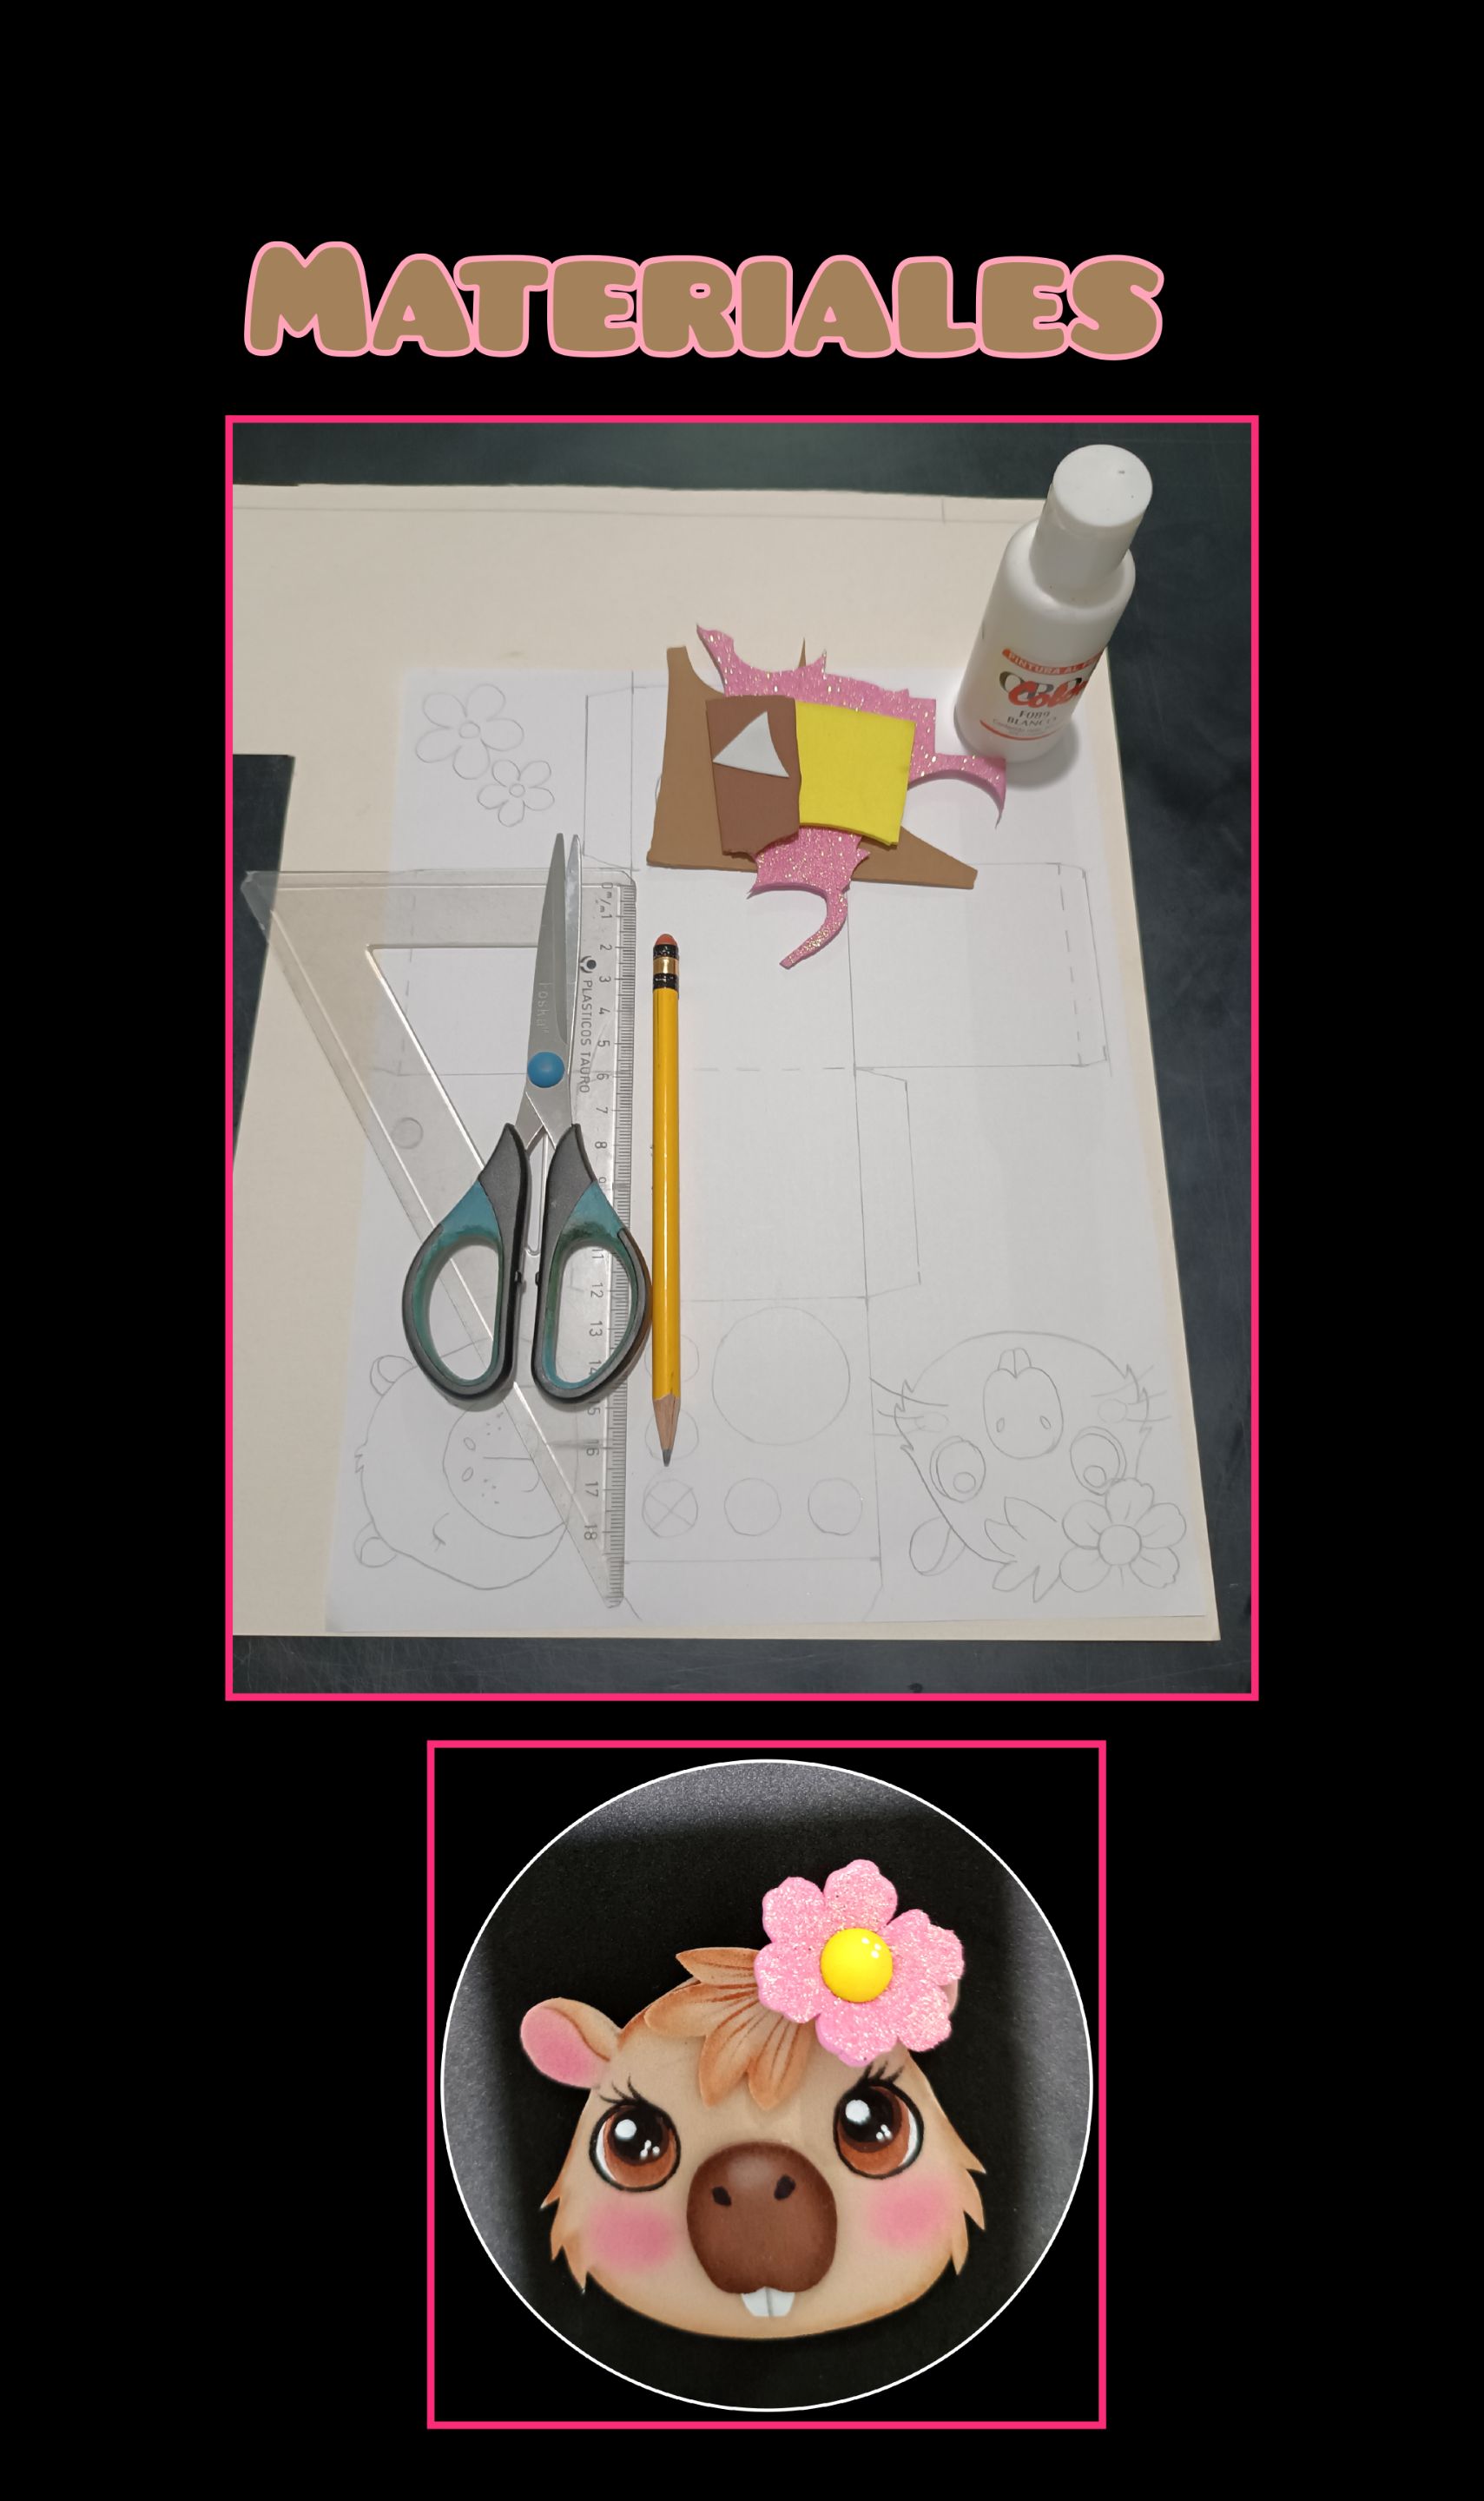
| Cartulina tamaño carta | Retazos de foami mate y escarchado |
|---|---|
| Pinturas y pinceles | Tijera y regla |
| Lápiz y exacto | Hoja de papel tamaño carta |
| Marcadores |
Entonces comencemos:
Paso 1:
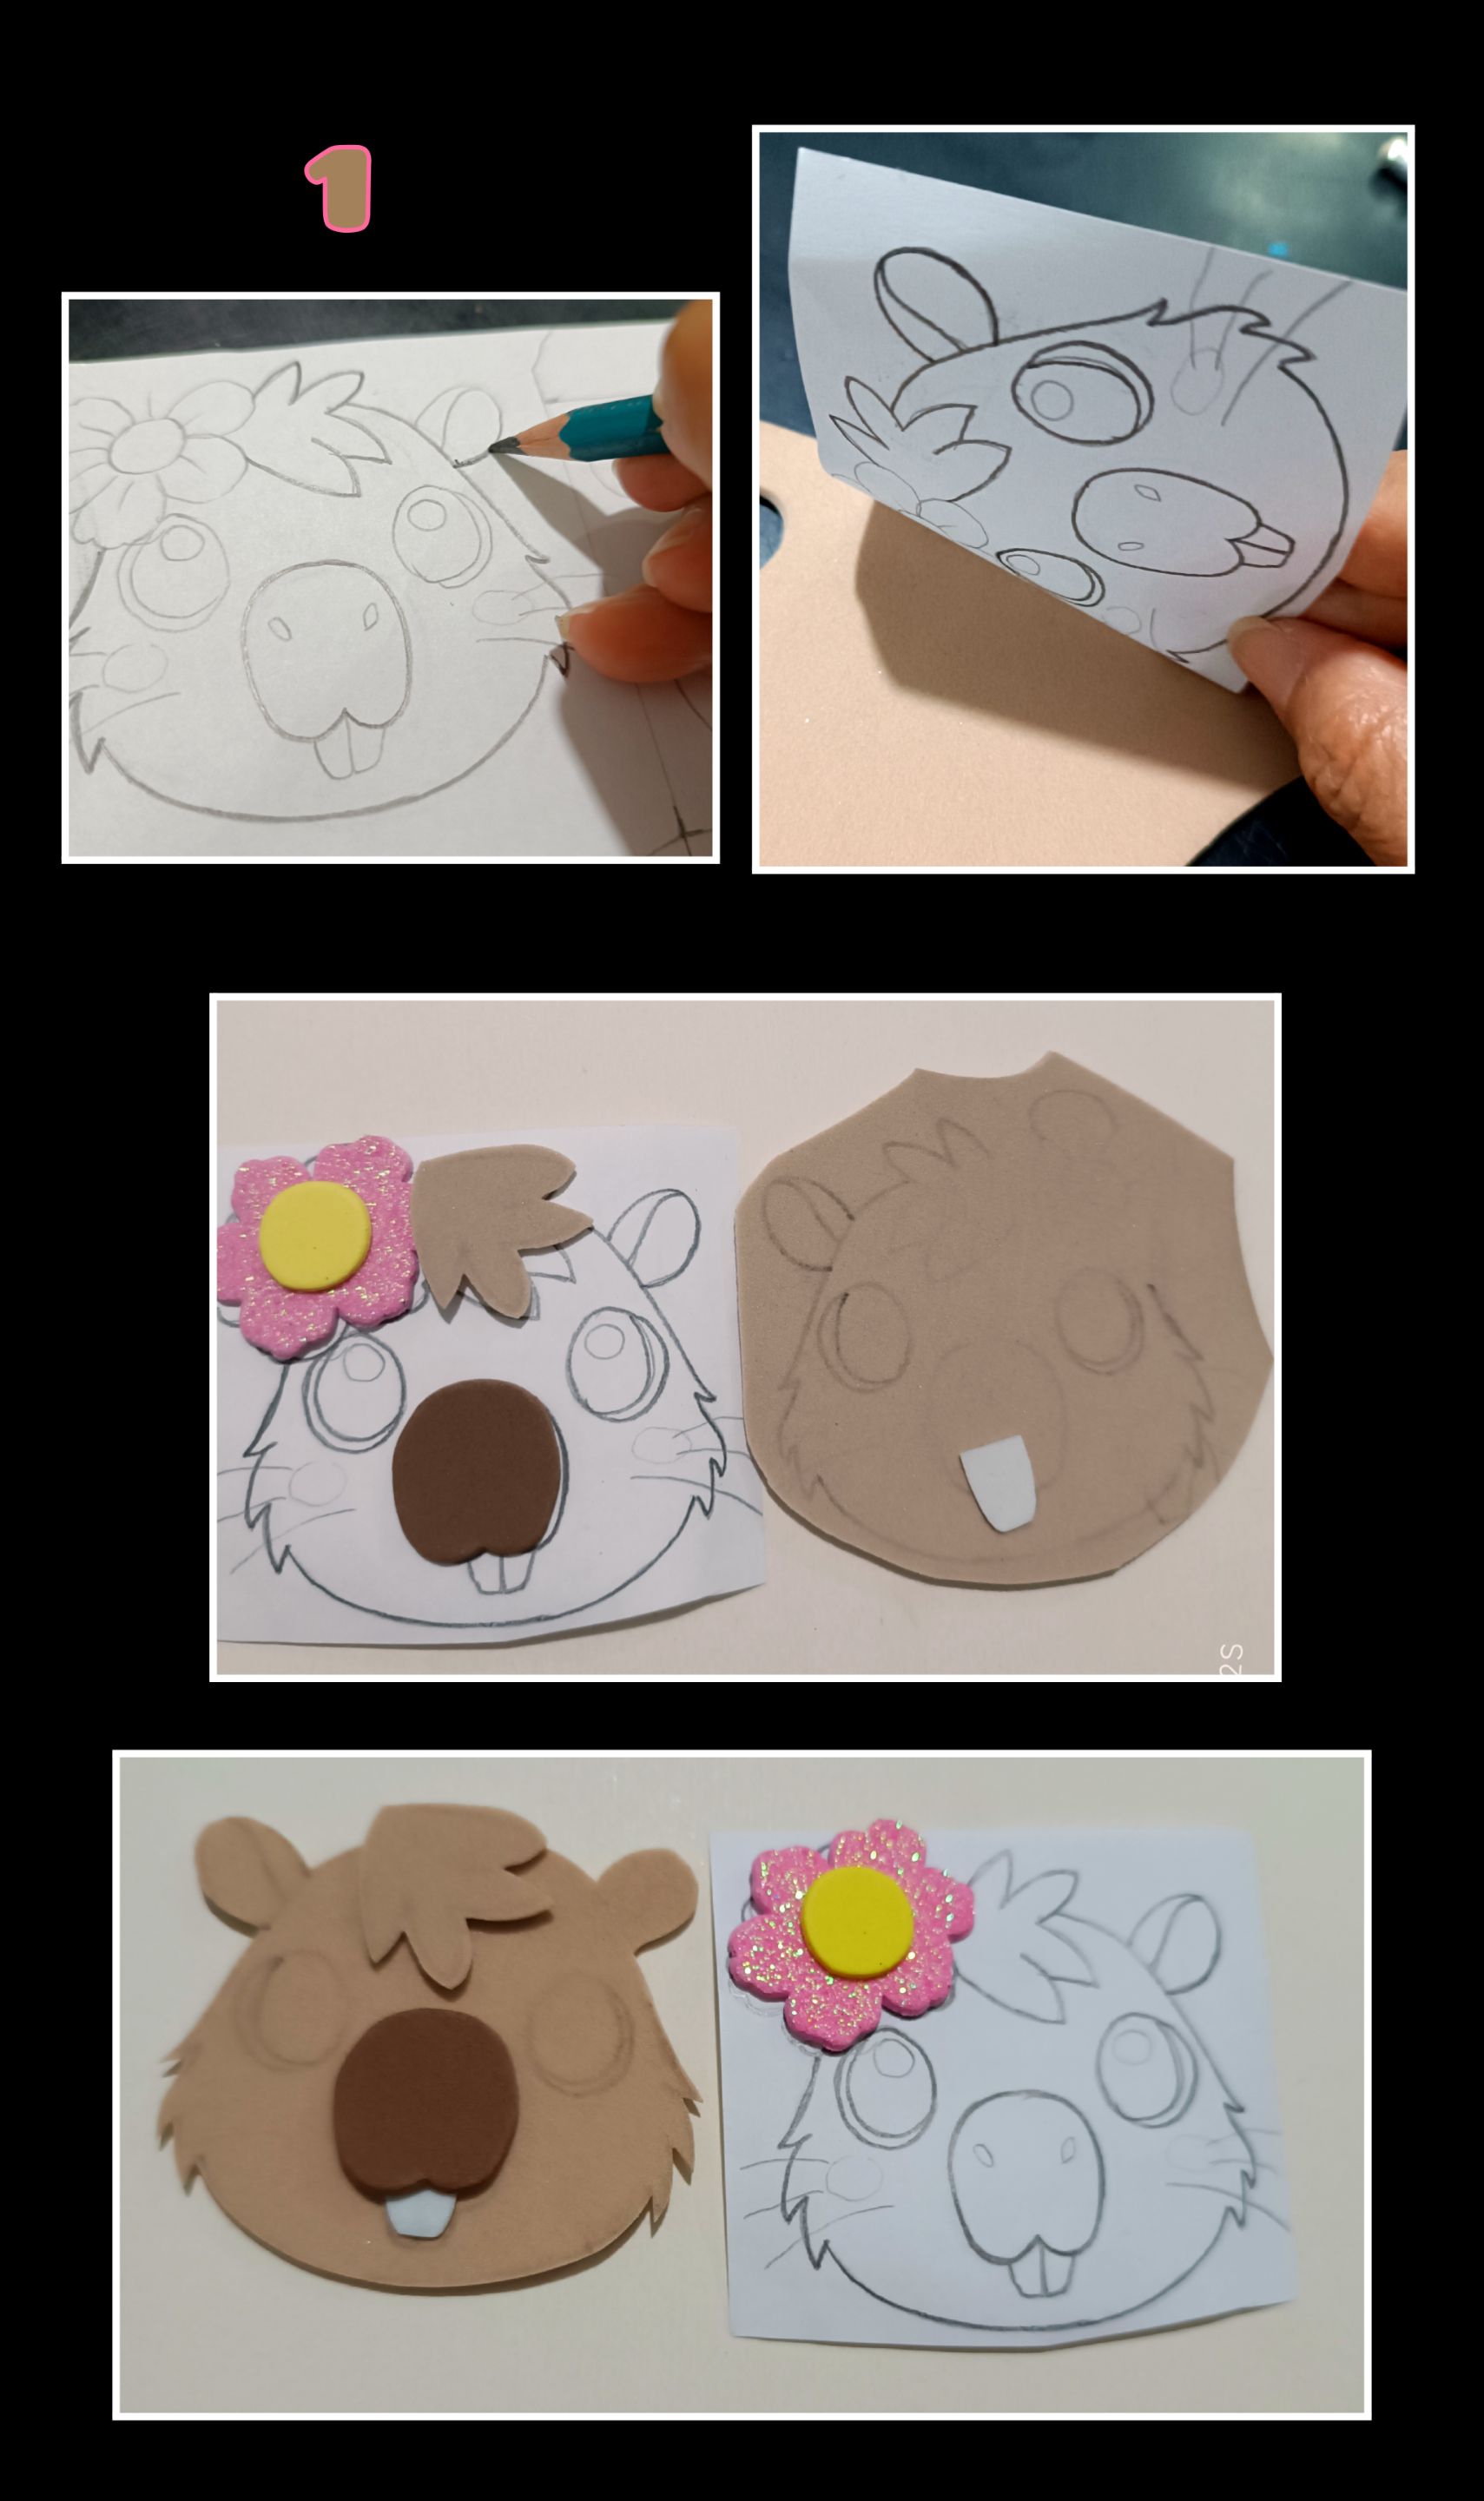
- Remarca el dibujo con lápiz de mina, preferiblemente blanda (4B, 6B), luego coloca sobre el foami y frota encima del papel con la ayuda de una tijera hasta transferir todas las piezas en los colores que necesites.
- Después comienza a recortar todas las piezas por todo el contorno.
Paso 2:
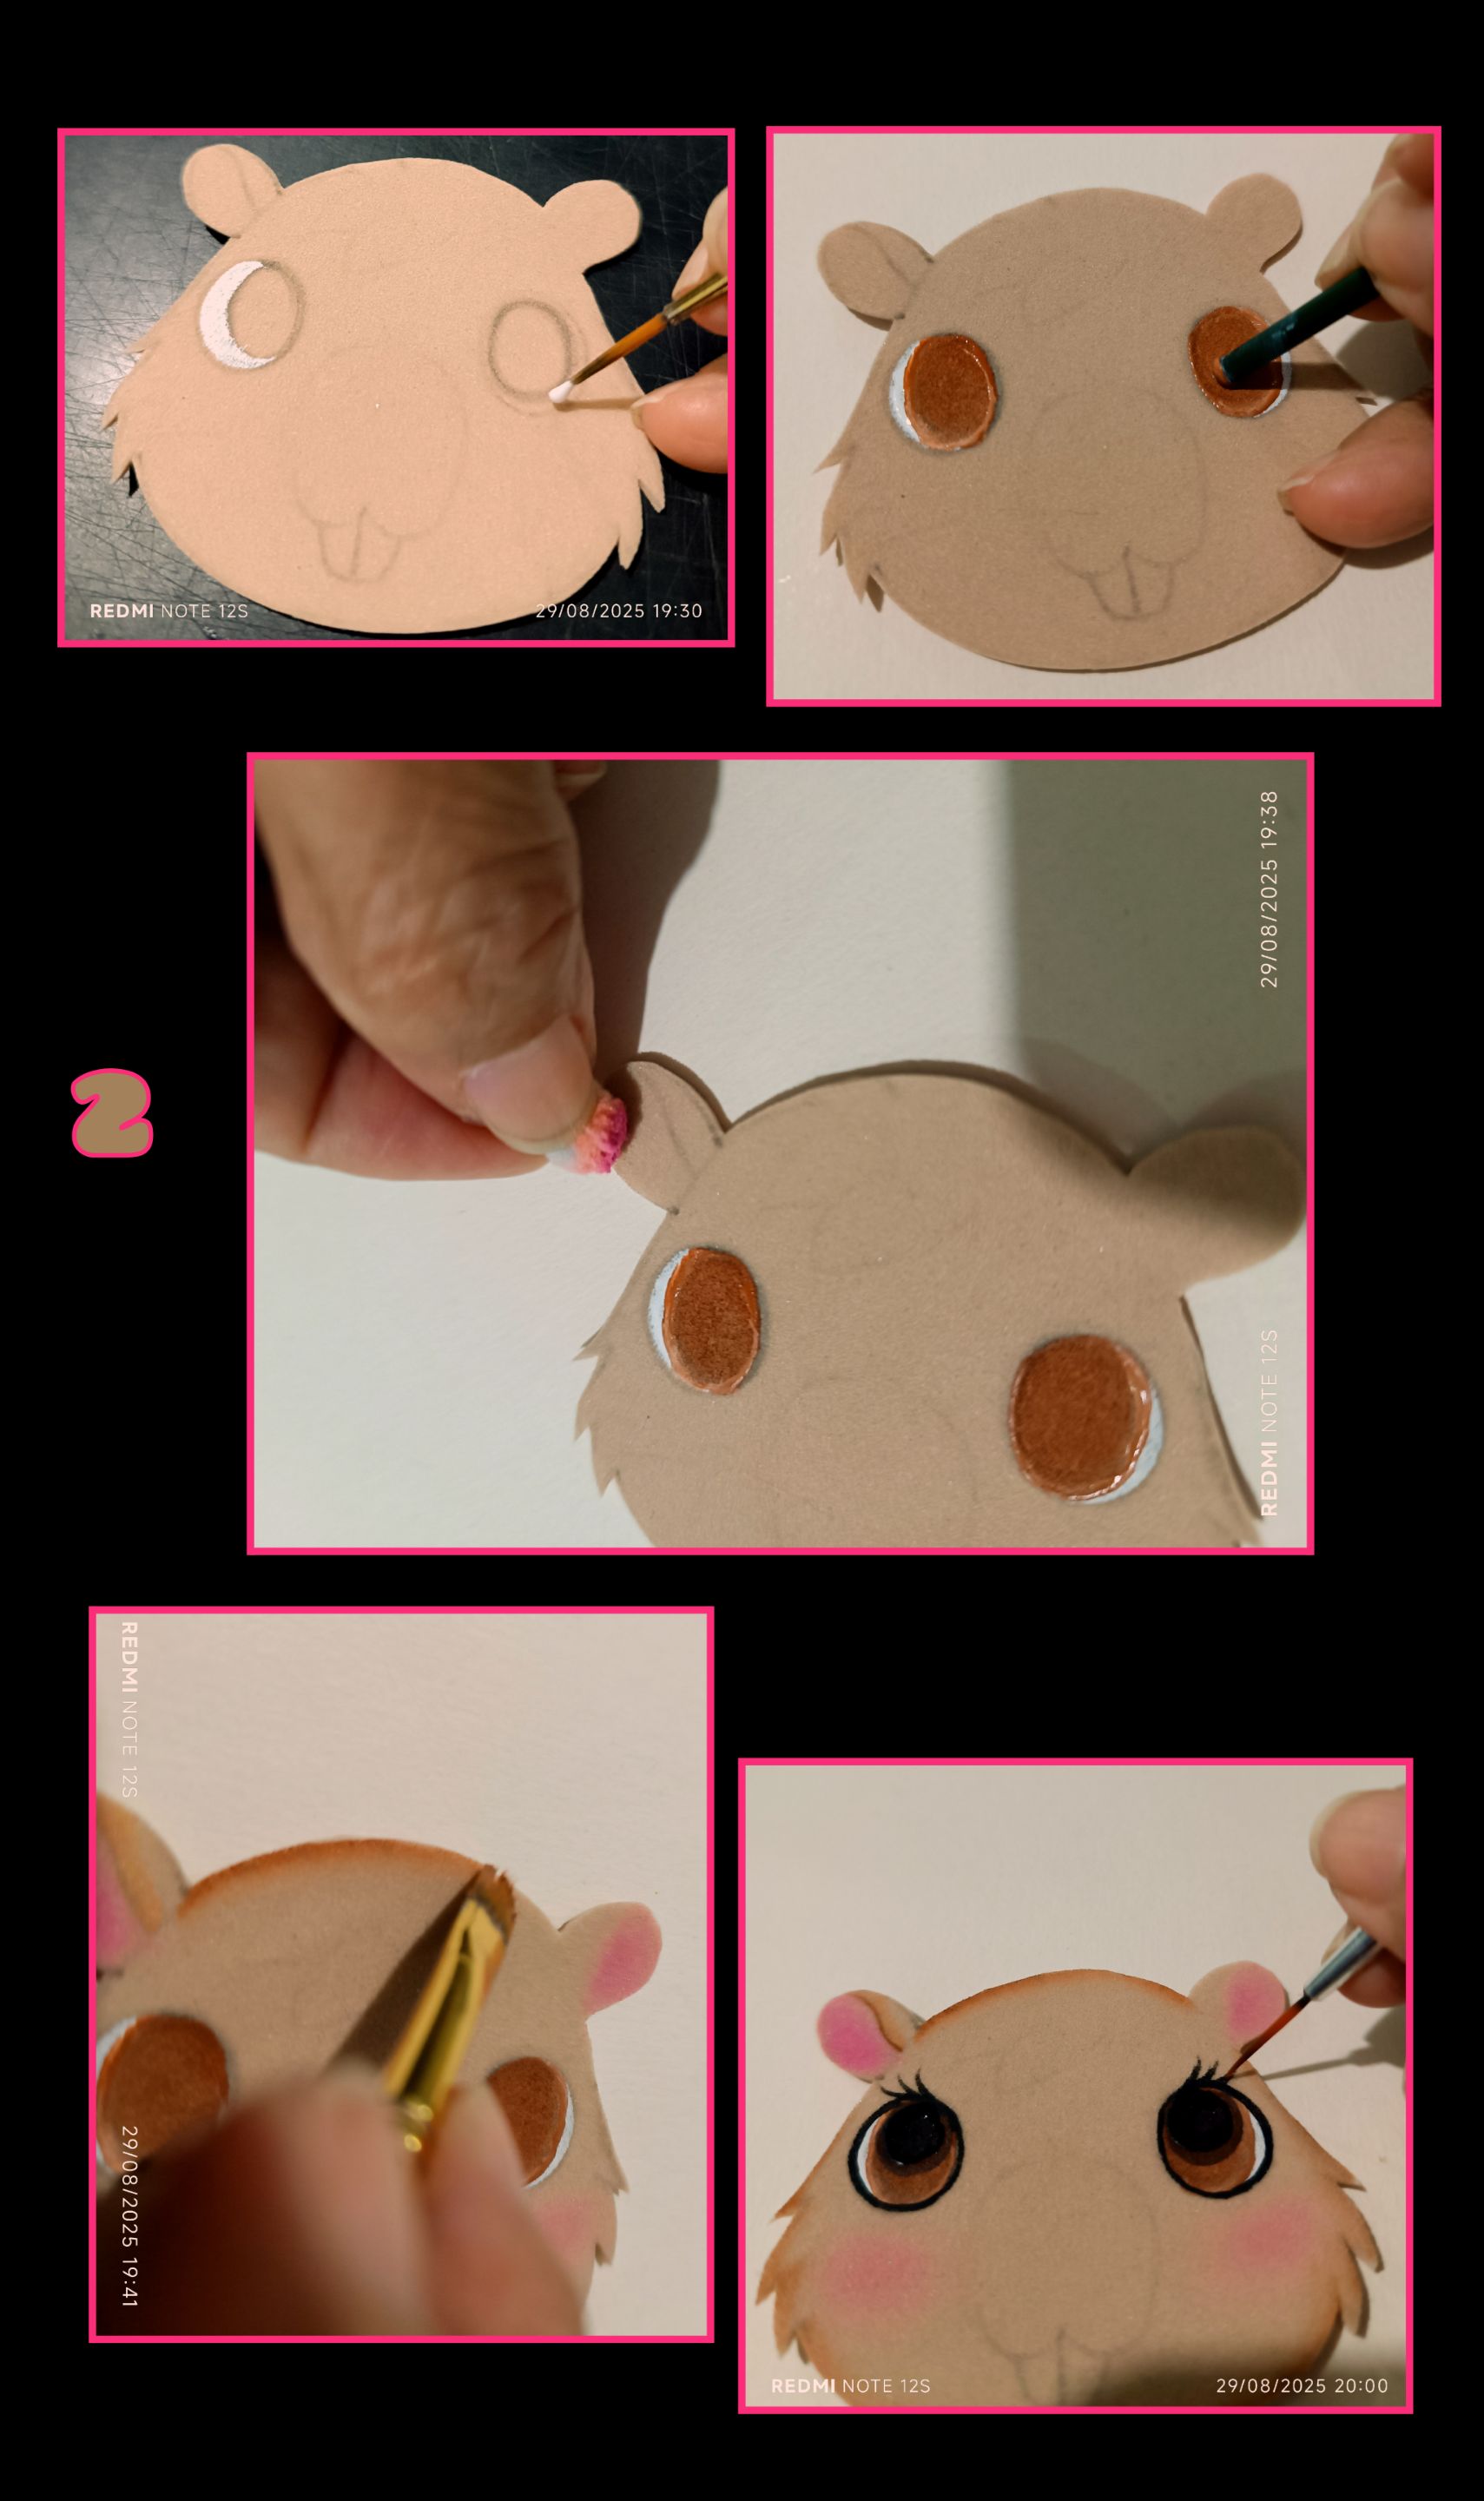
- Ahora comienza a pintar rellenando primero la parte blanca de los ojitos y deja secar, luego con la parte trasera del pincel rellena haciendo un círculo y rellena con el mismo pincel y deja secar, luego pinta las orejas y cacheticos con tiza o rubor.
- Ahora humedece el pincel y retira el exceso de agua, luego moja la punta del pincel en el color marrón y comienza a pintar toda la orilla de la cabecita.
- Luego con un pincel delinea los ojos y pestañas, sino estás práctico en ojitos, puedes pintar con pincel punta fina.
Paso 3:
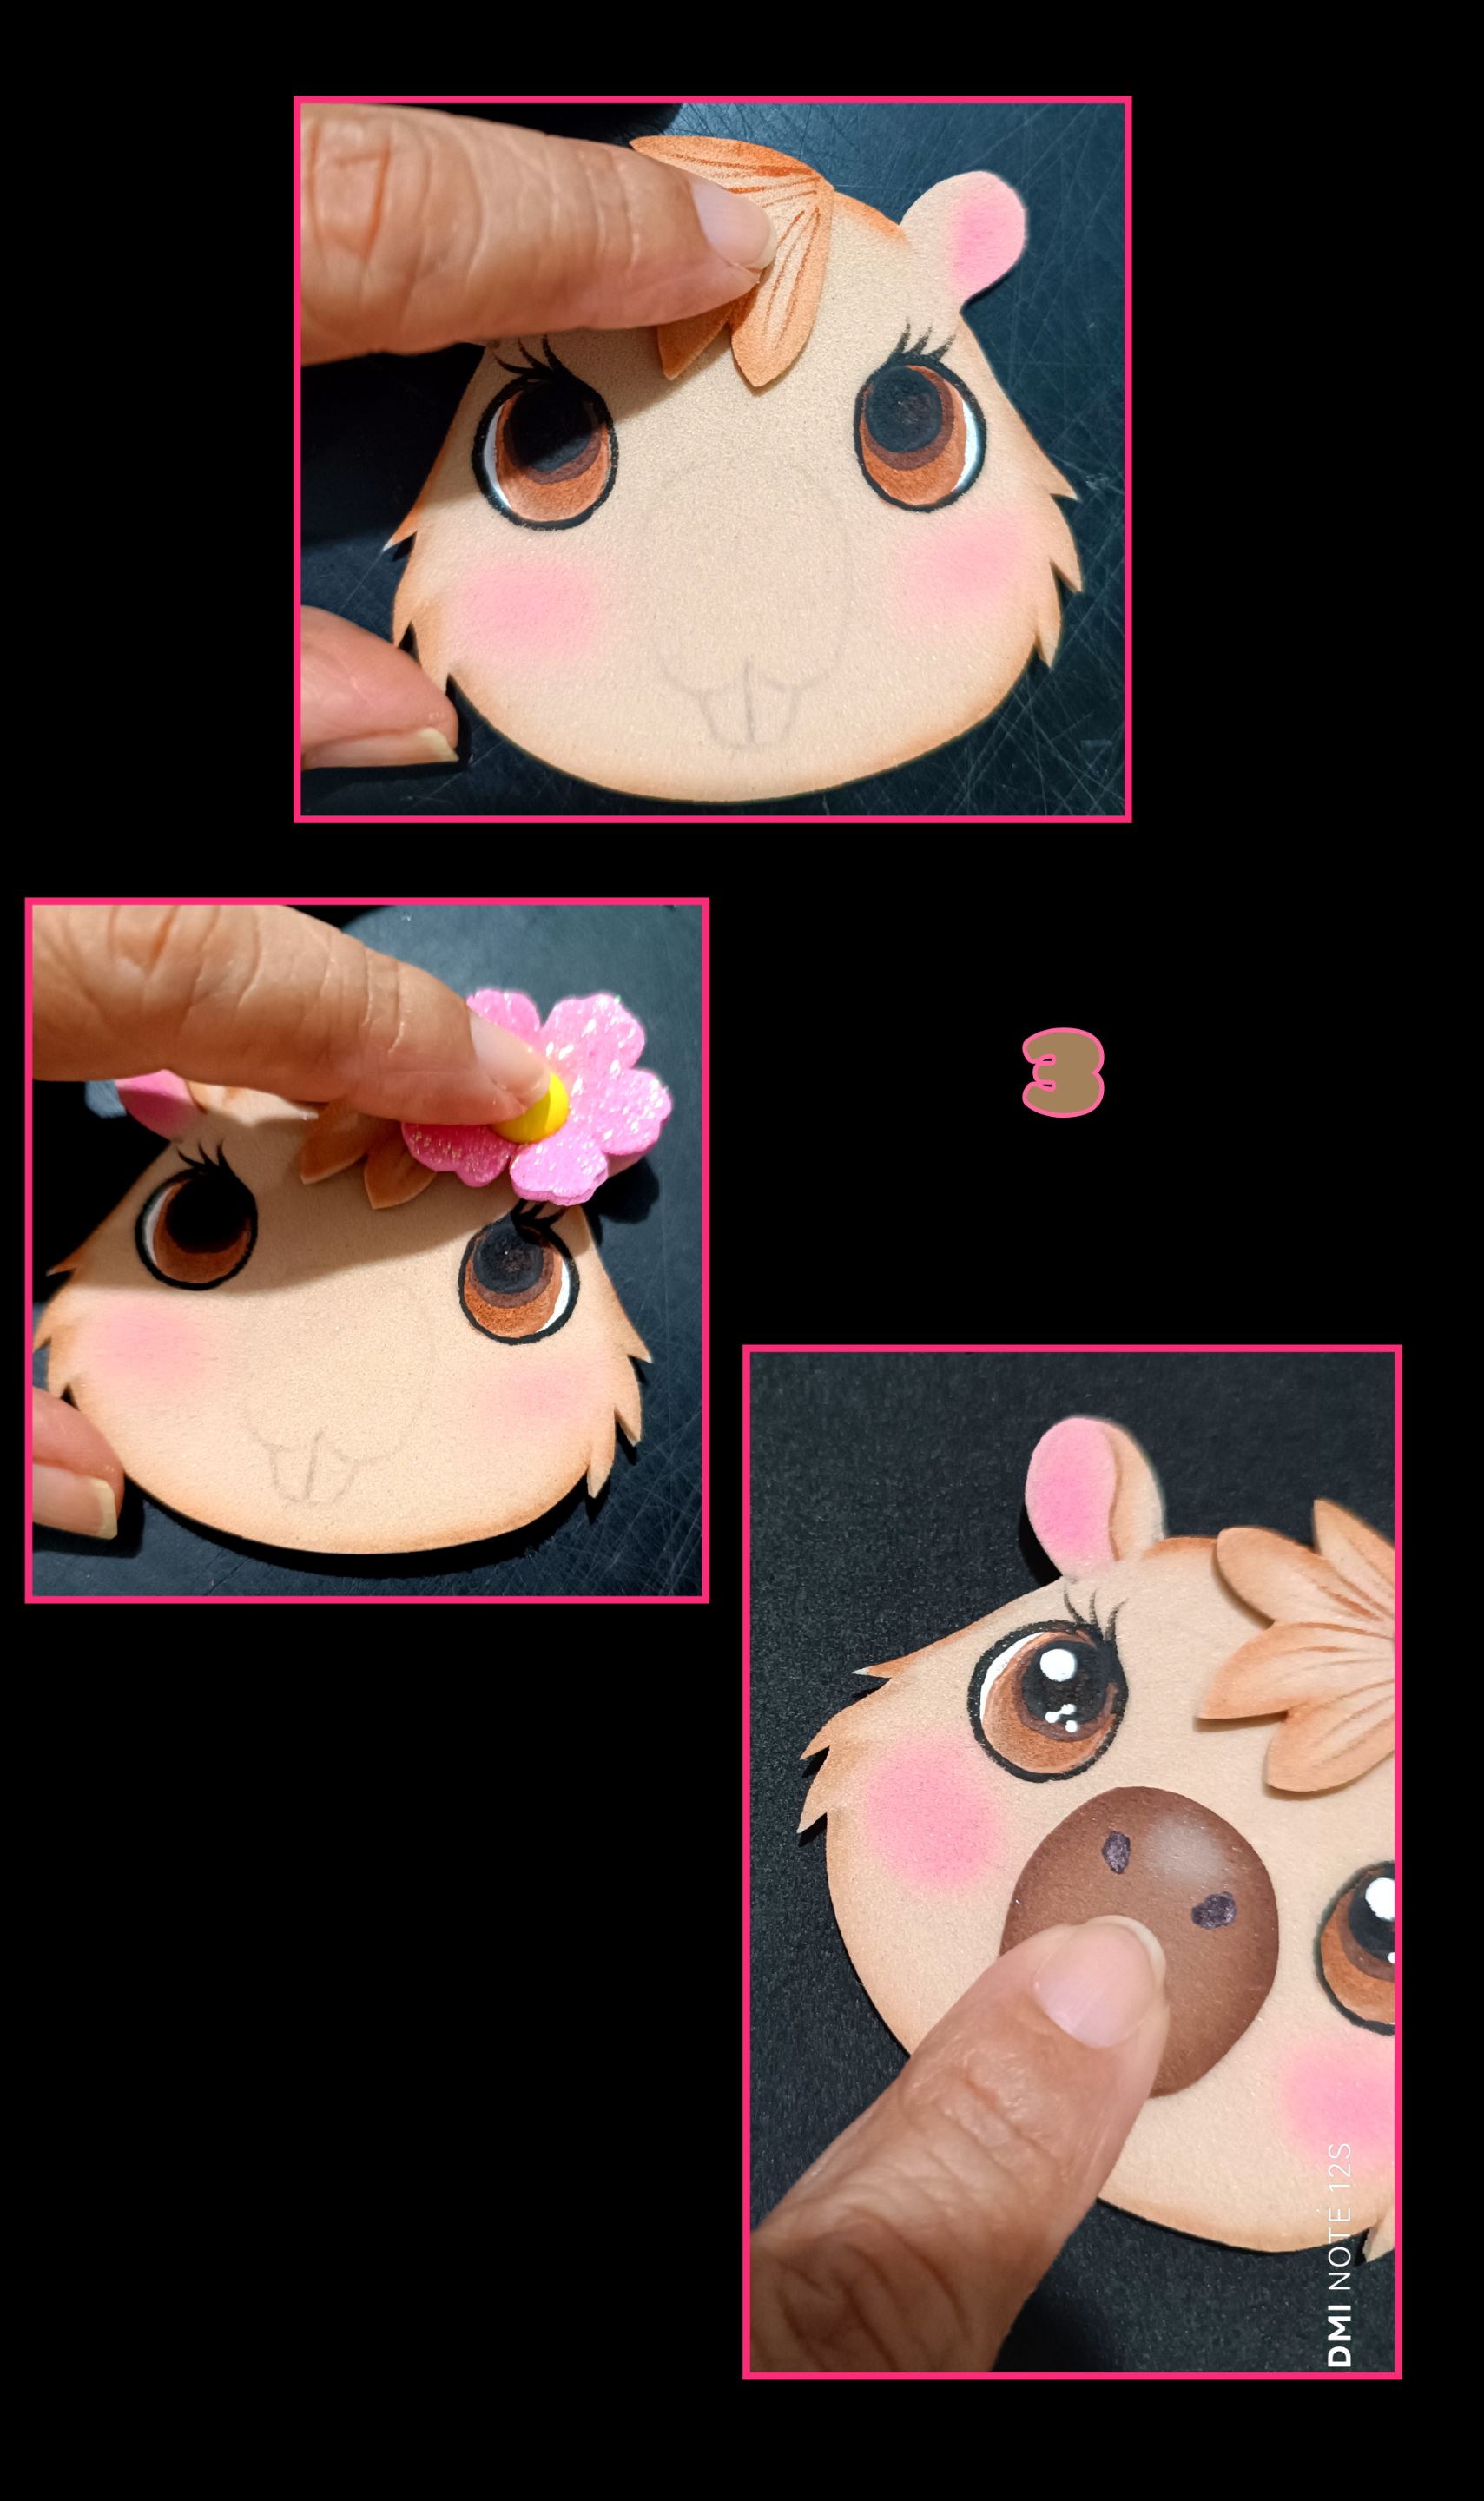
- Luego de difuminar todas las piezas, comienza a pegar y armar.
¡Así quedó!

Paso 4:
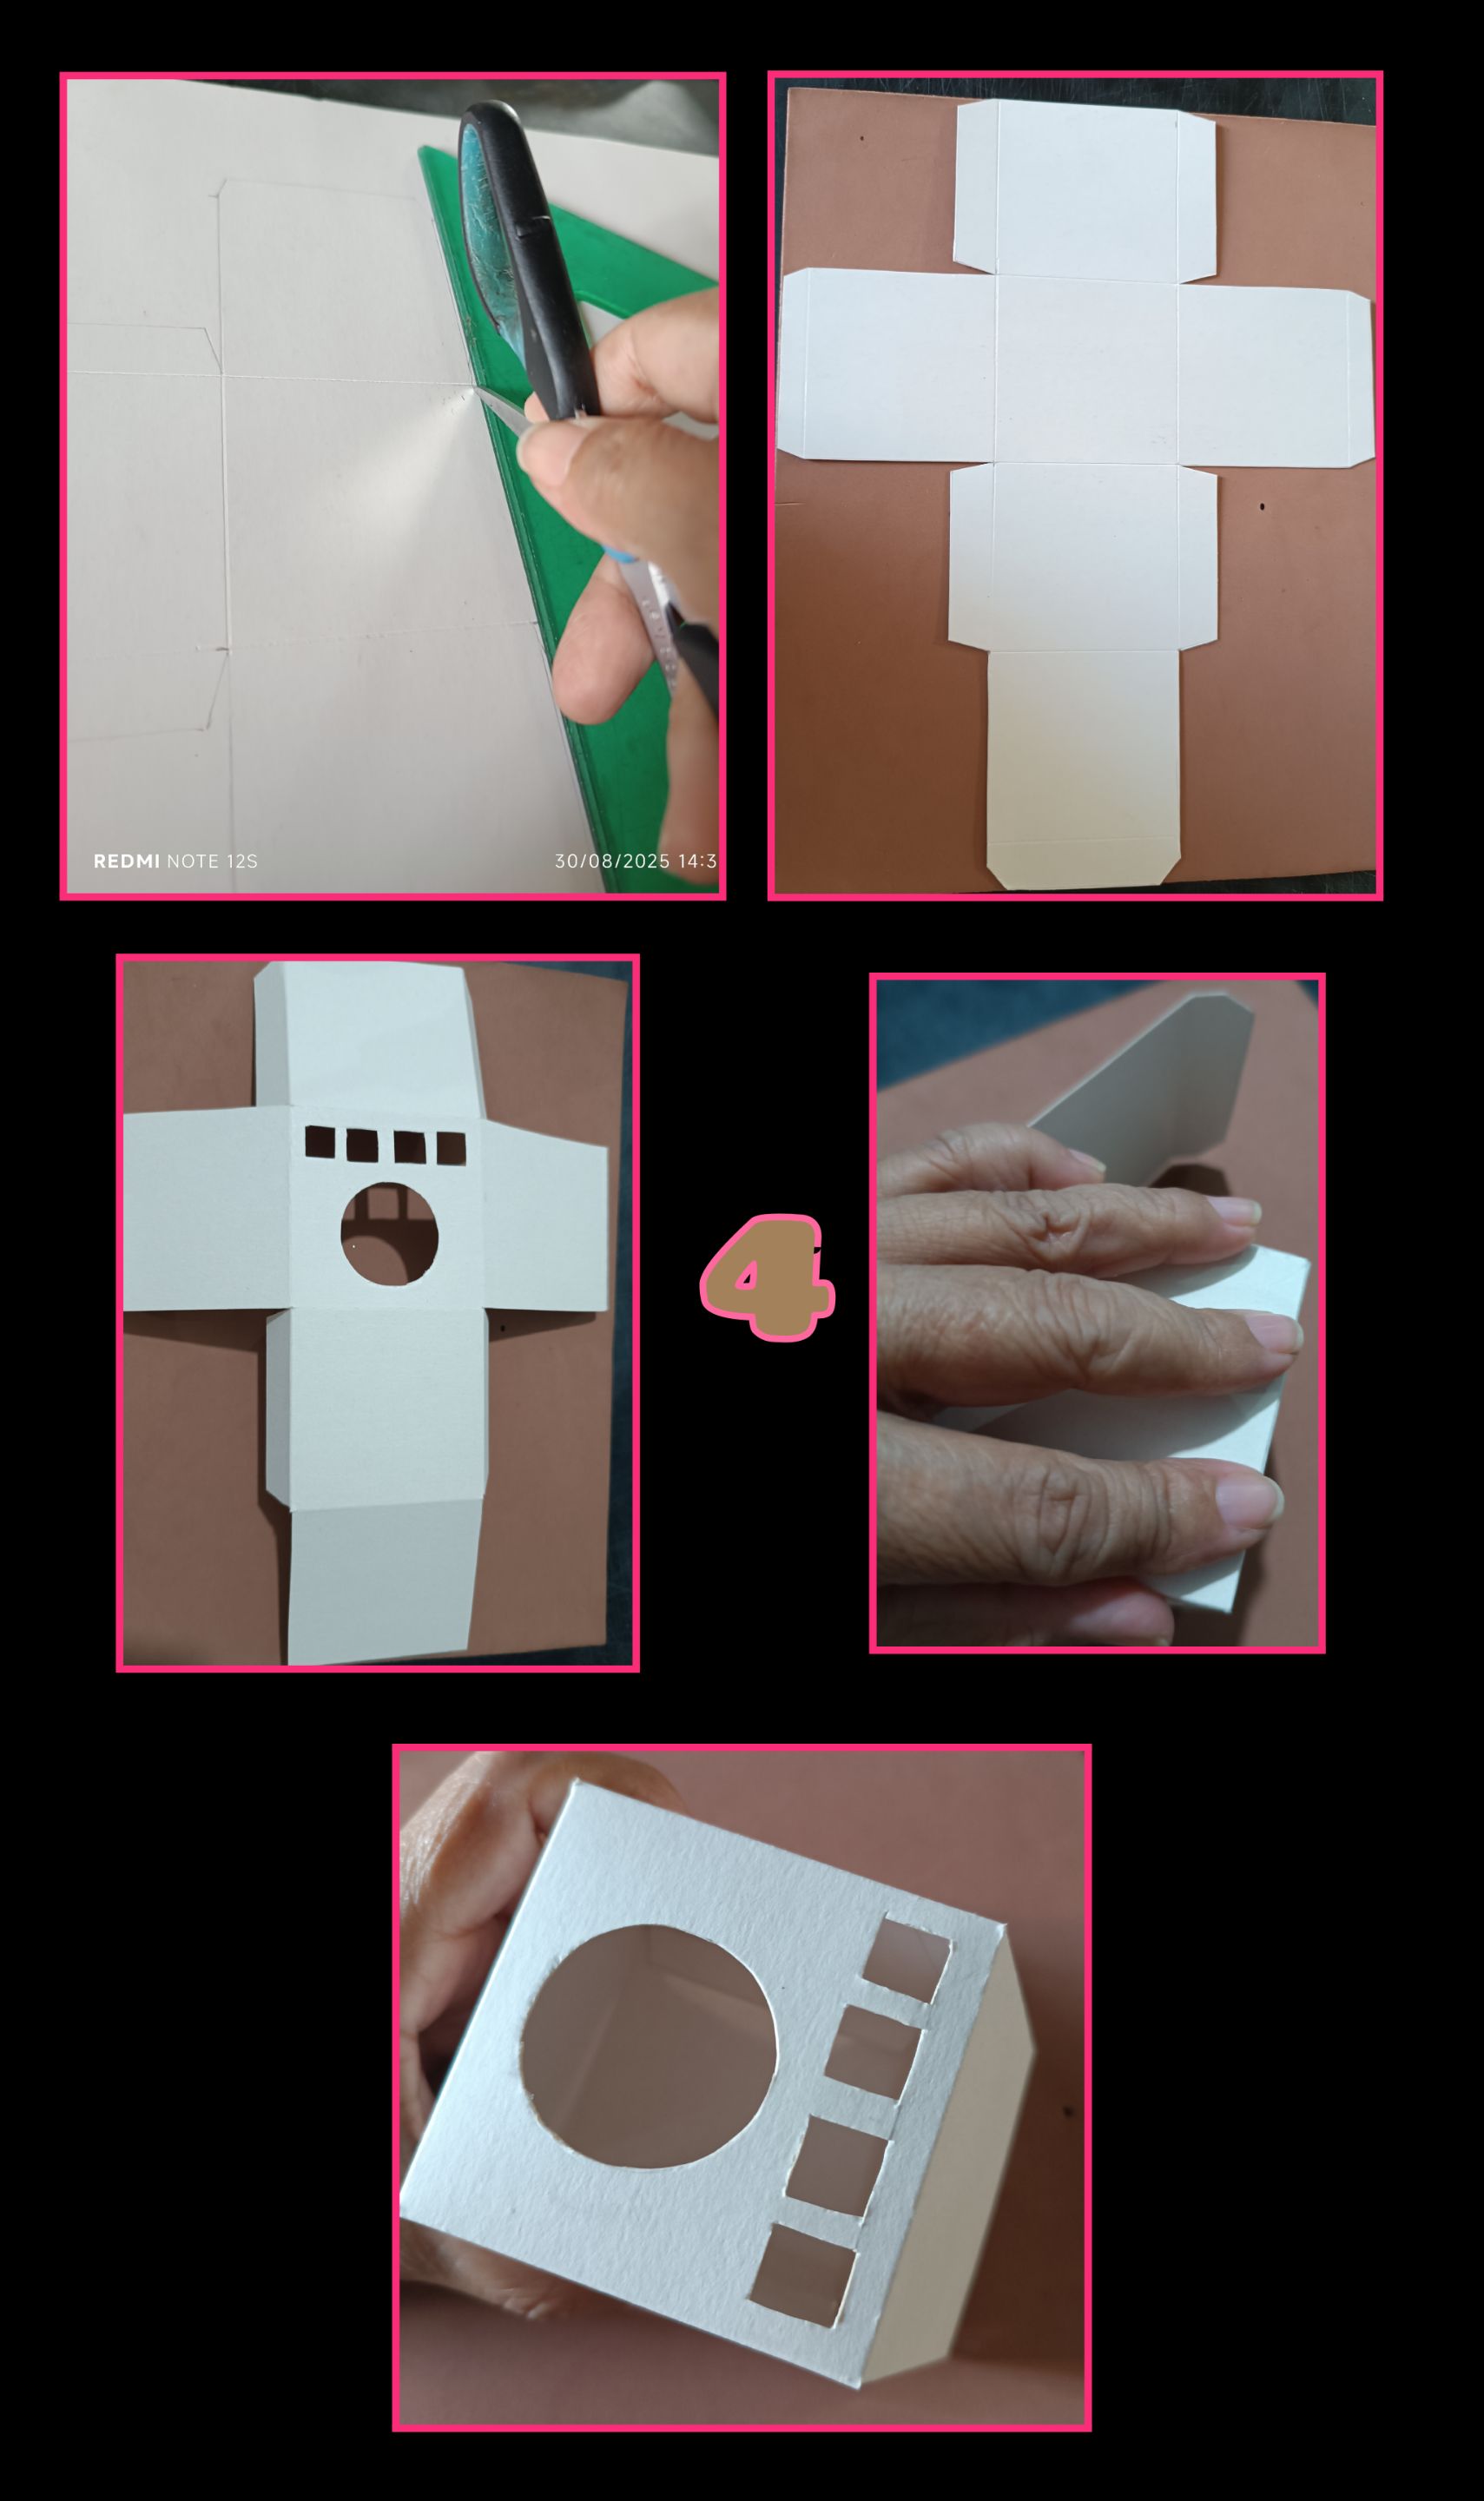
- Marca la caja en la cartulina y pasa sin hacer mucha presión el filo de la tijera por todas las líneas divisorias y recorta por todo el contorno.
- Luego haz los dobleces en las líneas remarcadas, aplica silicón en las pestañas y pega hasta cerrar la cajita.
Paso 5:
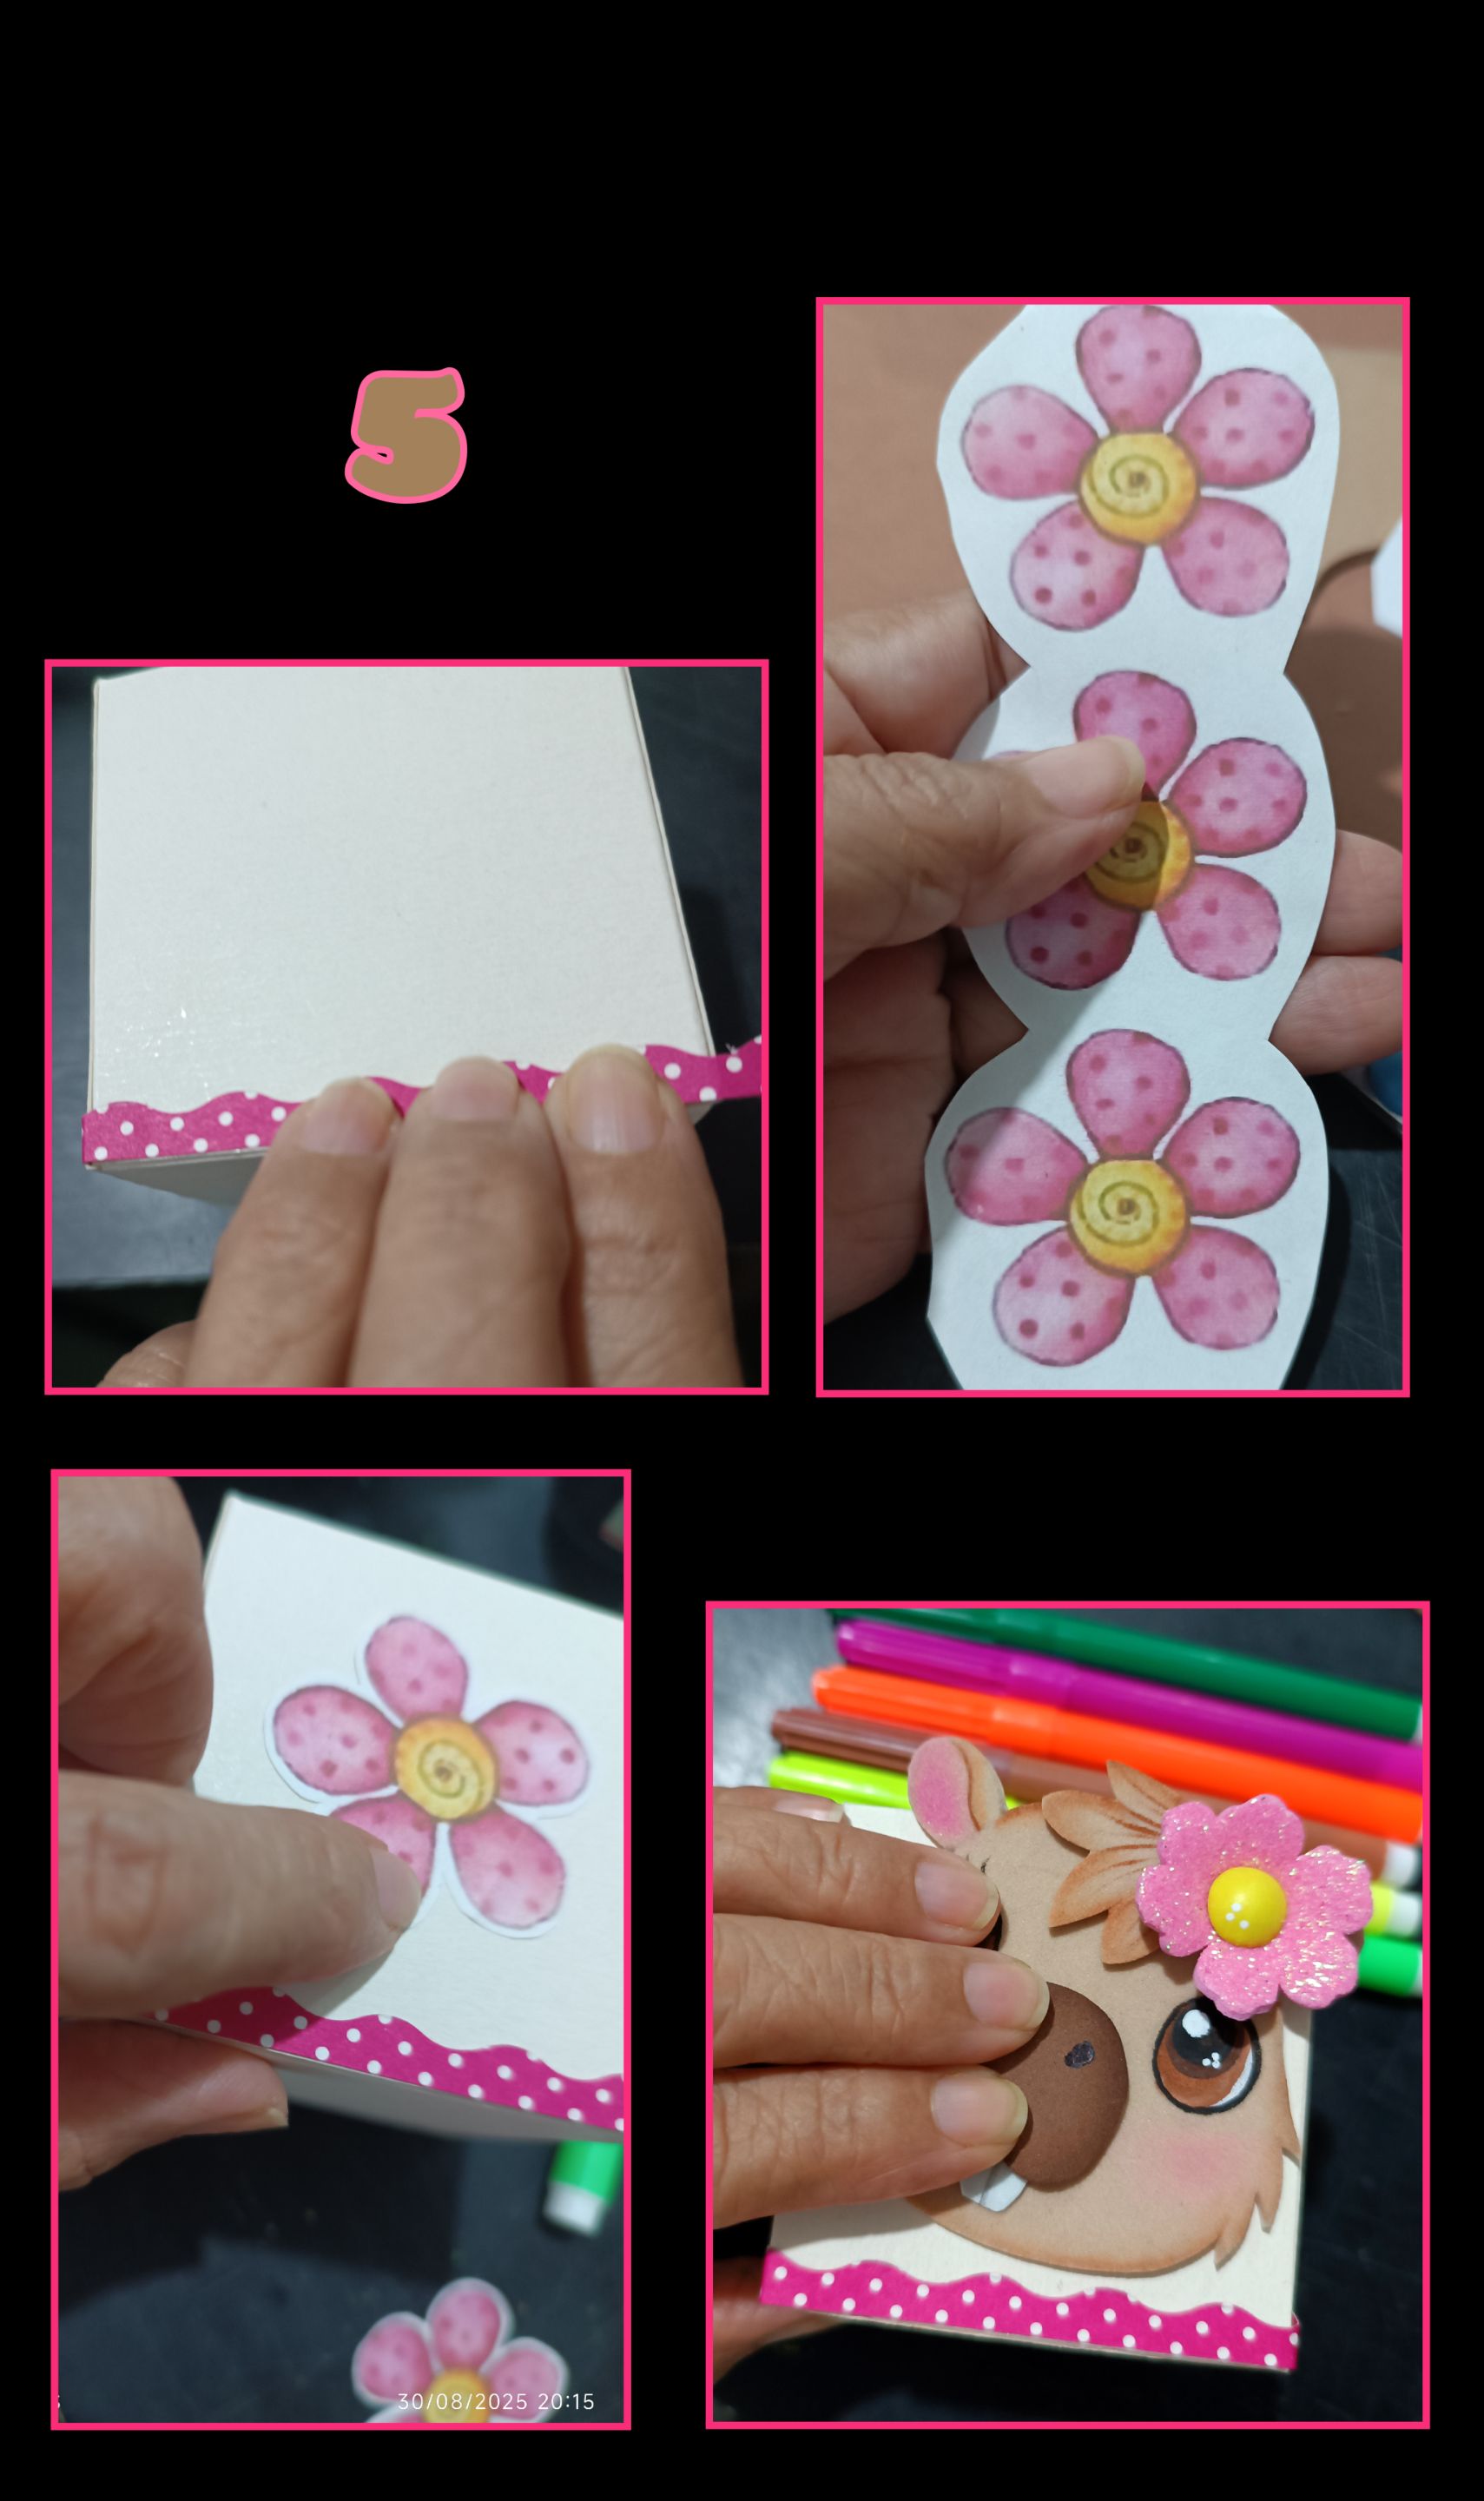
- Recorta una tirita delgada de cartulina de lunares o de la que tengas y pega por todo el borde inferior.
- Para decorar, puedes pegar flores impresas o las puedes realizar en foami y pegar en los laterales de la cajita y al frente pegas la figura realizada.
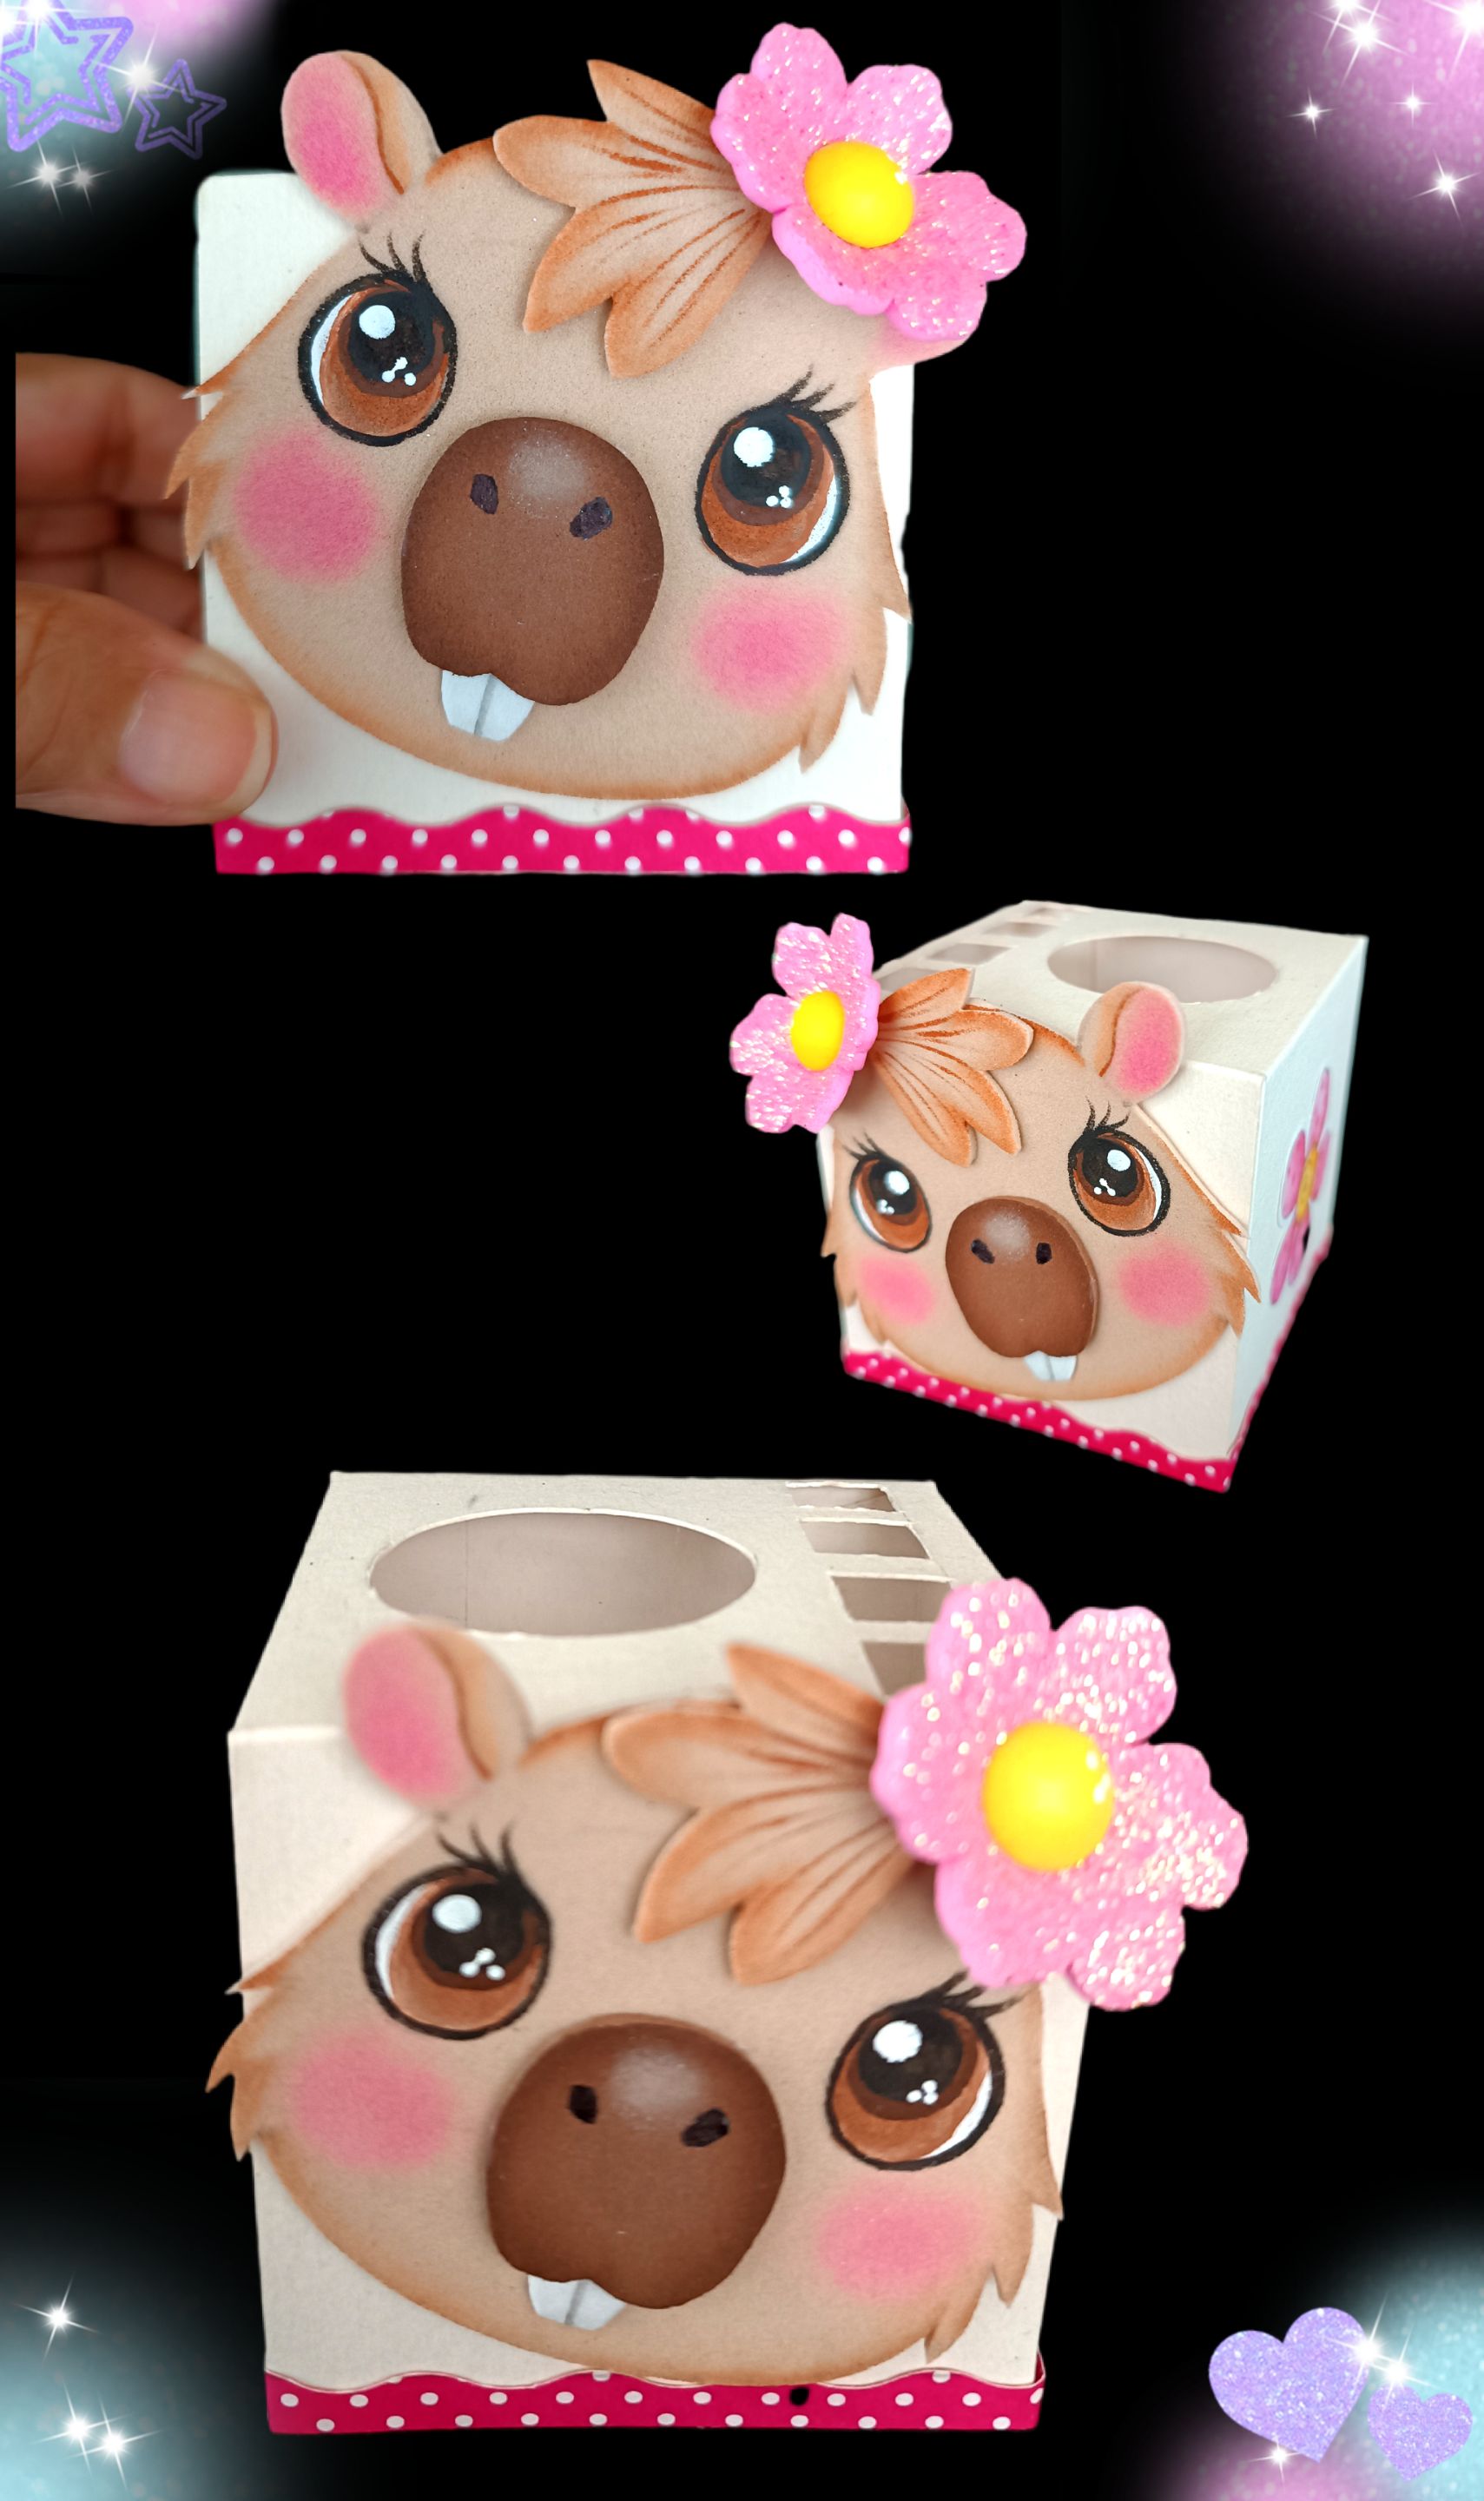
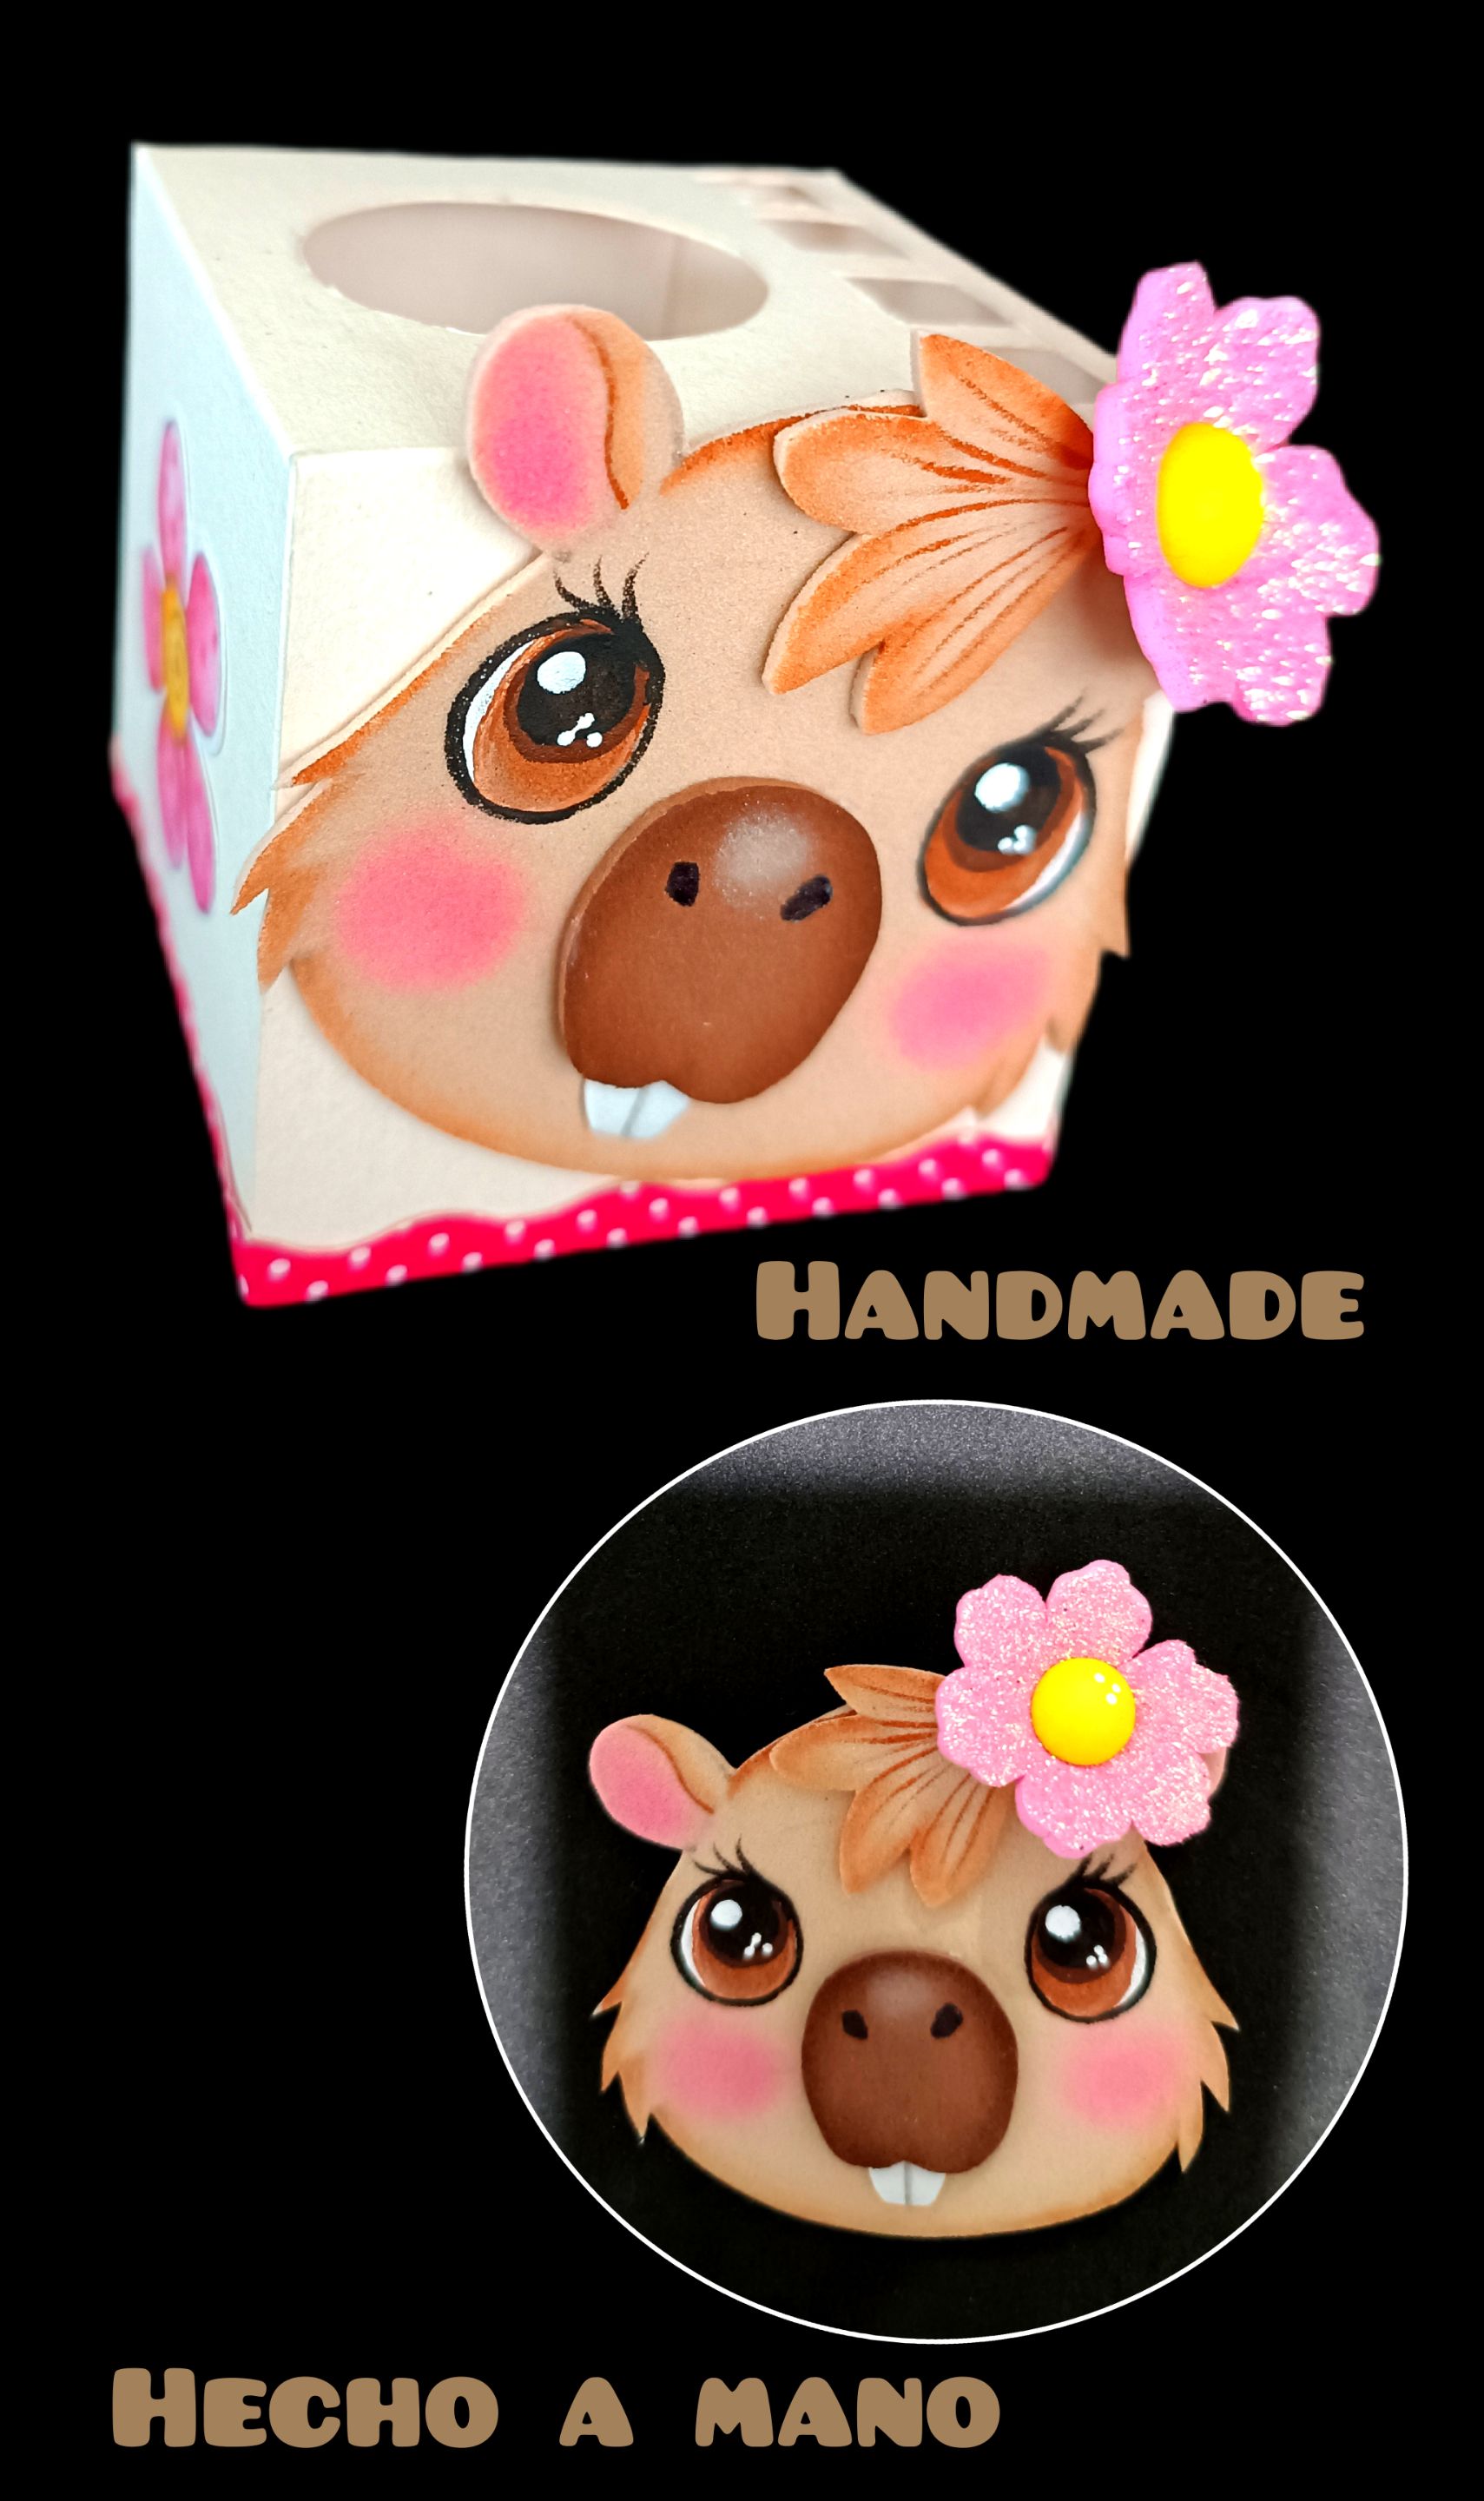
Y así quedó esta linda cajita.
- Calca el dibujo y remarca con marcador negro, también puedes imprimir muchas imágenes para colorear e insertar en la cajita.
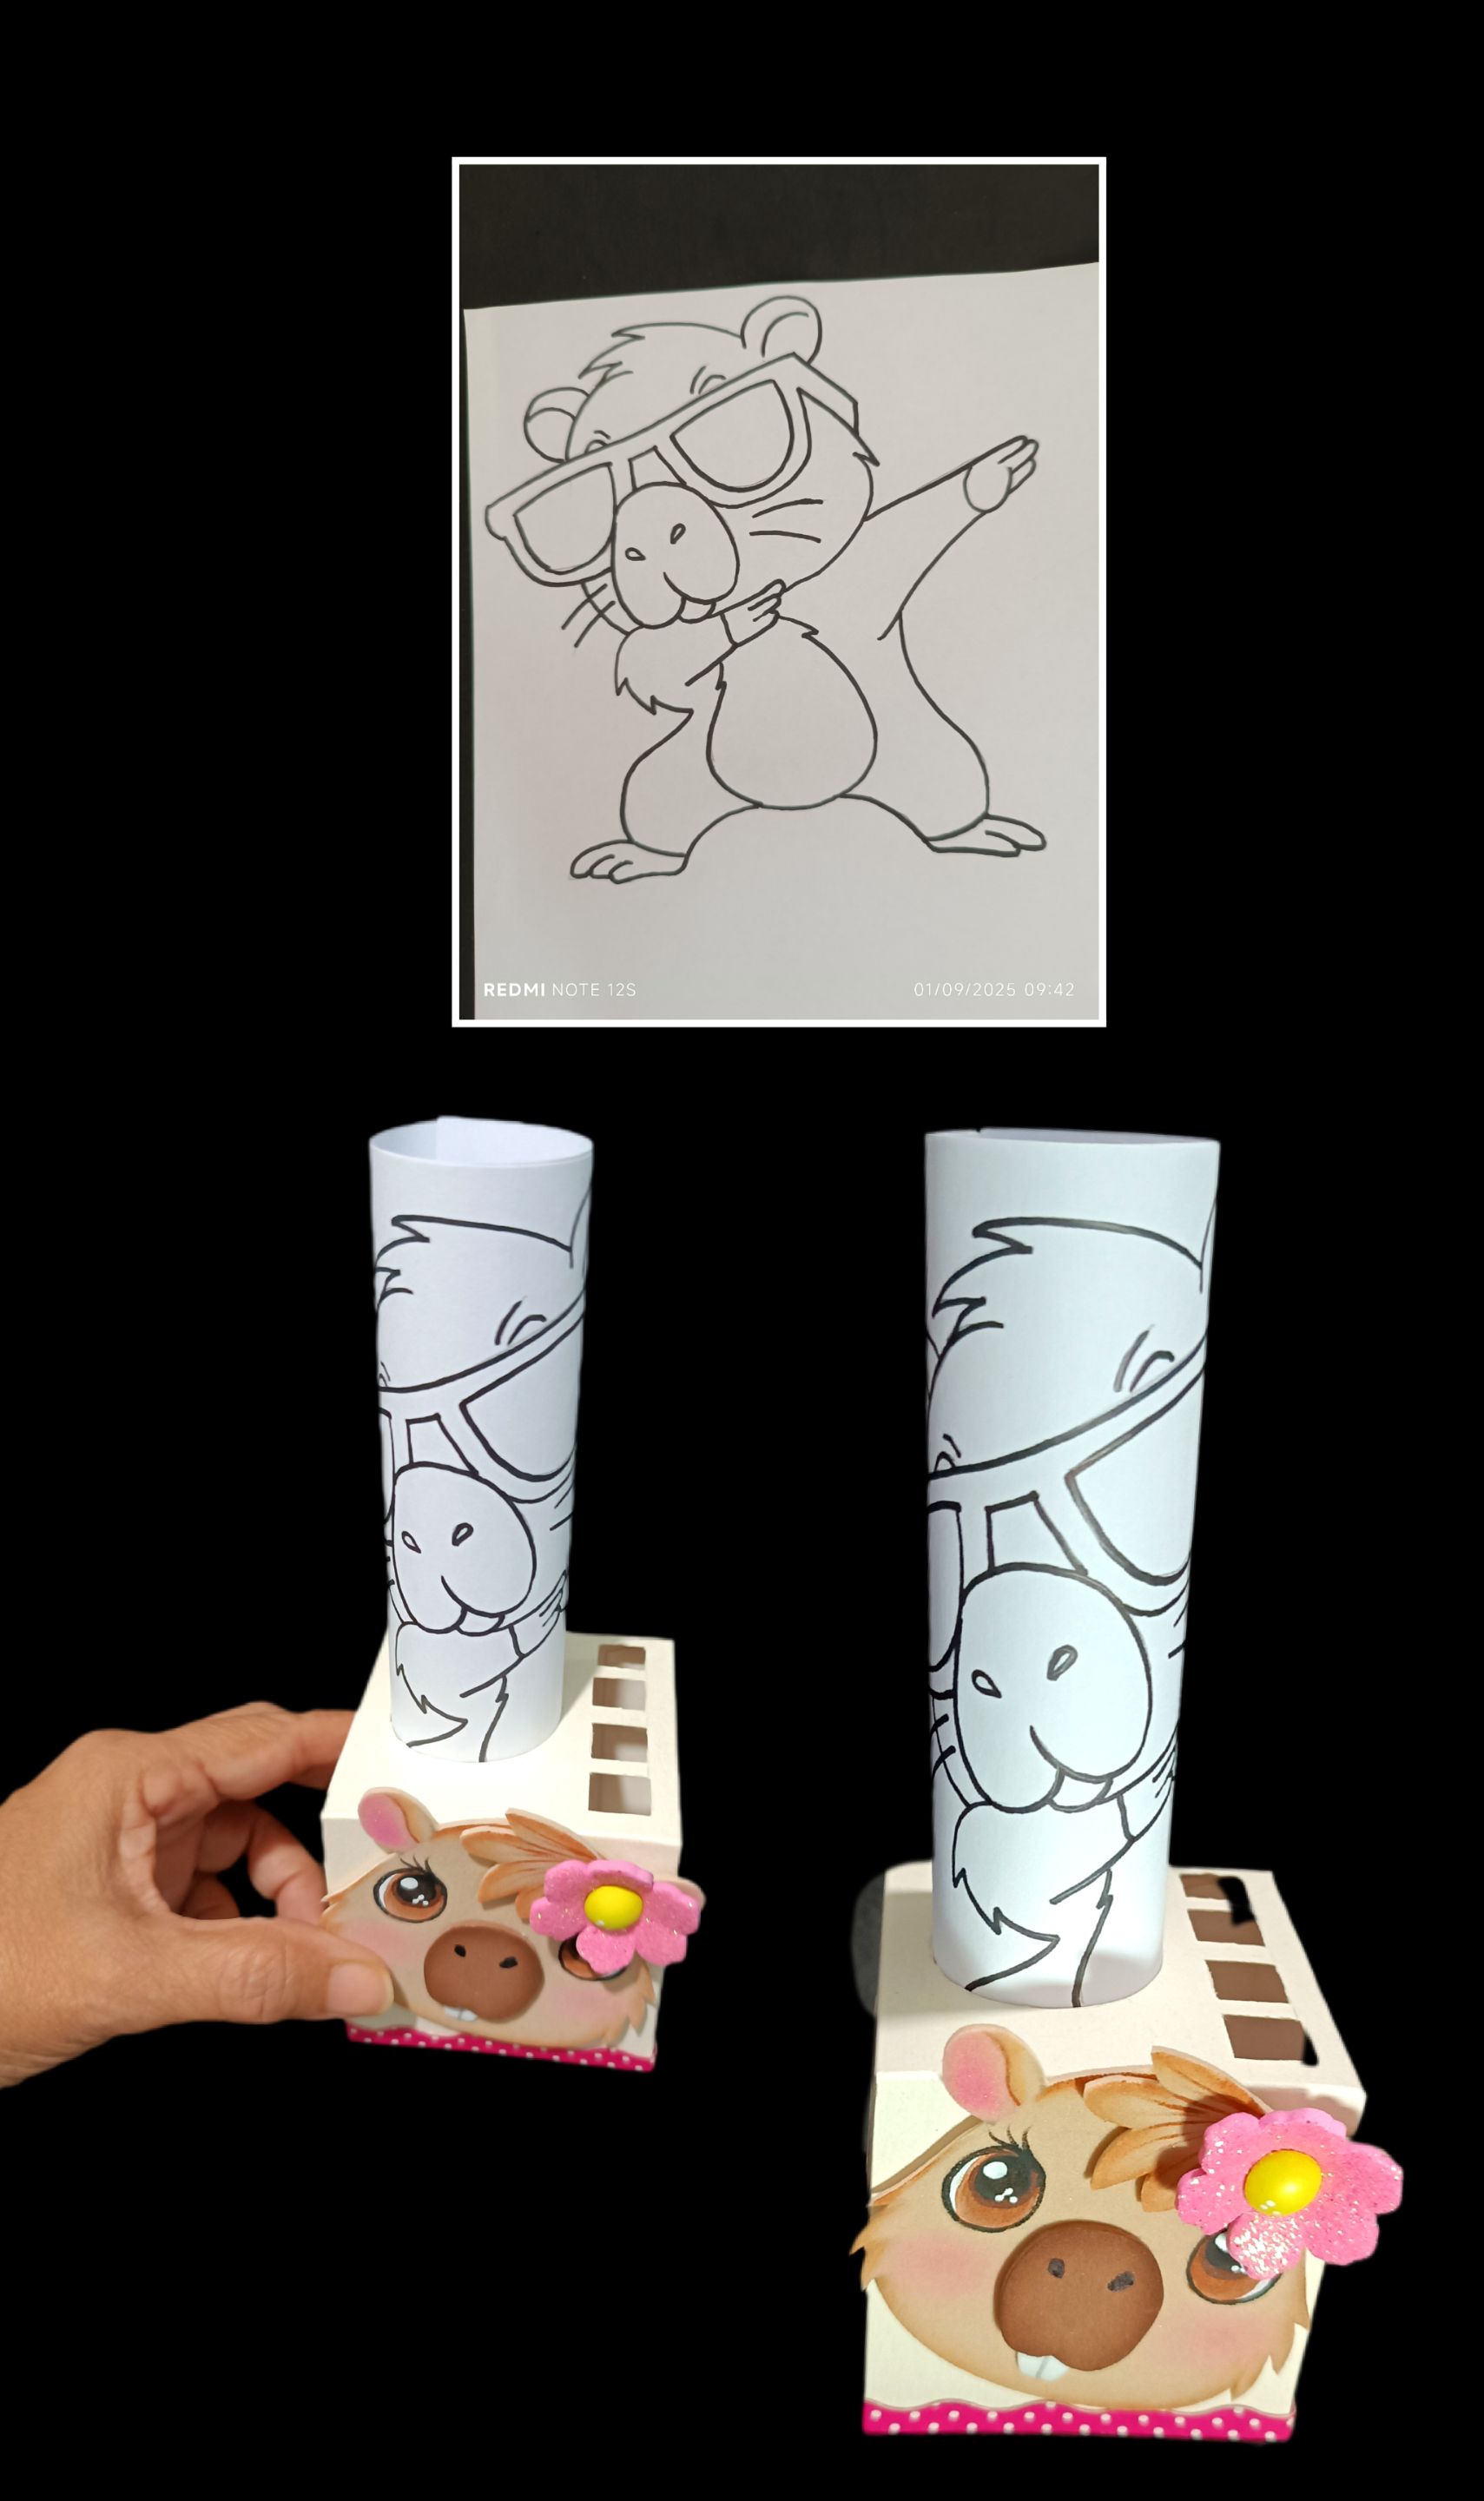
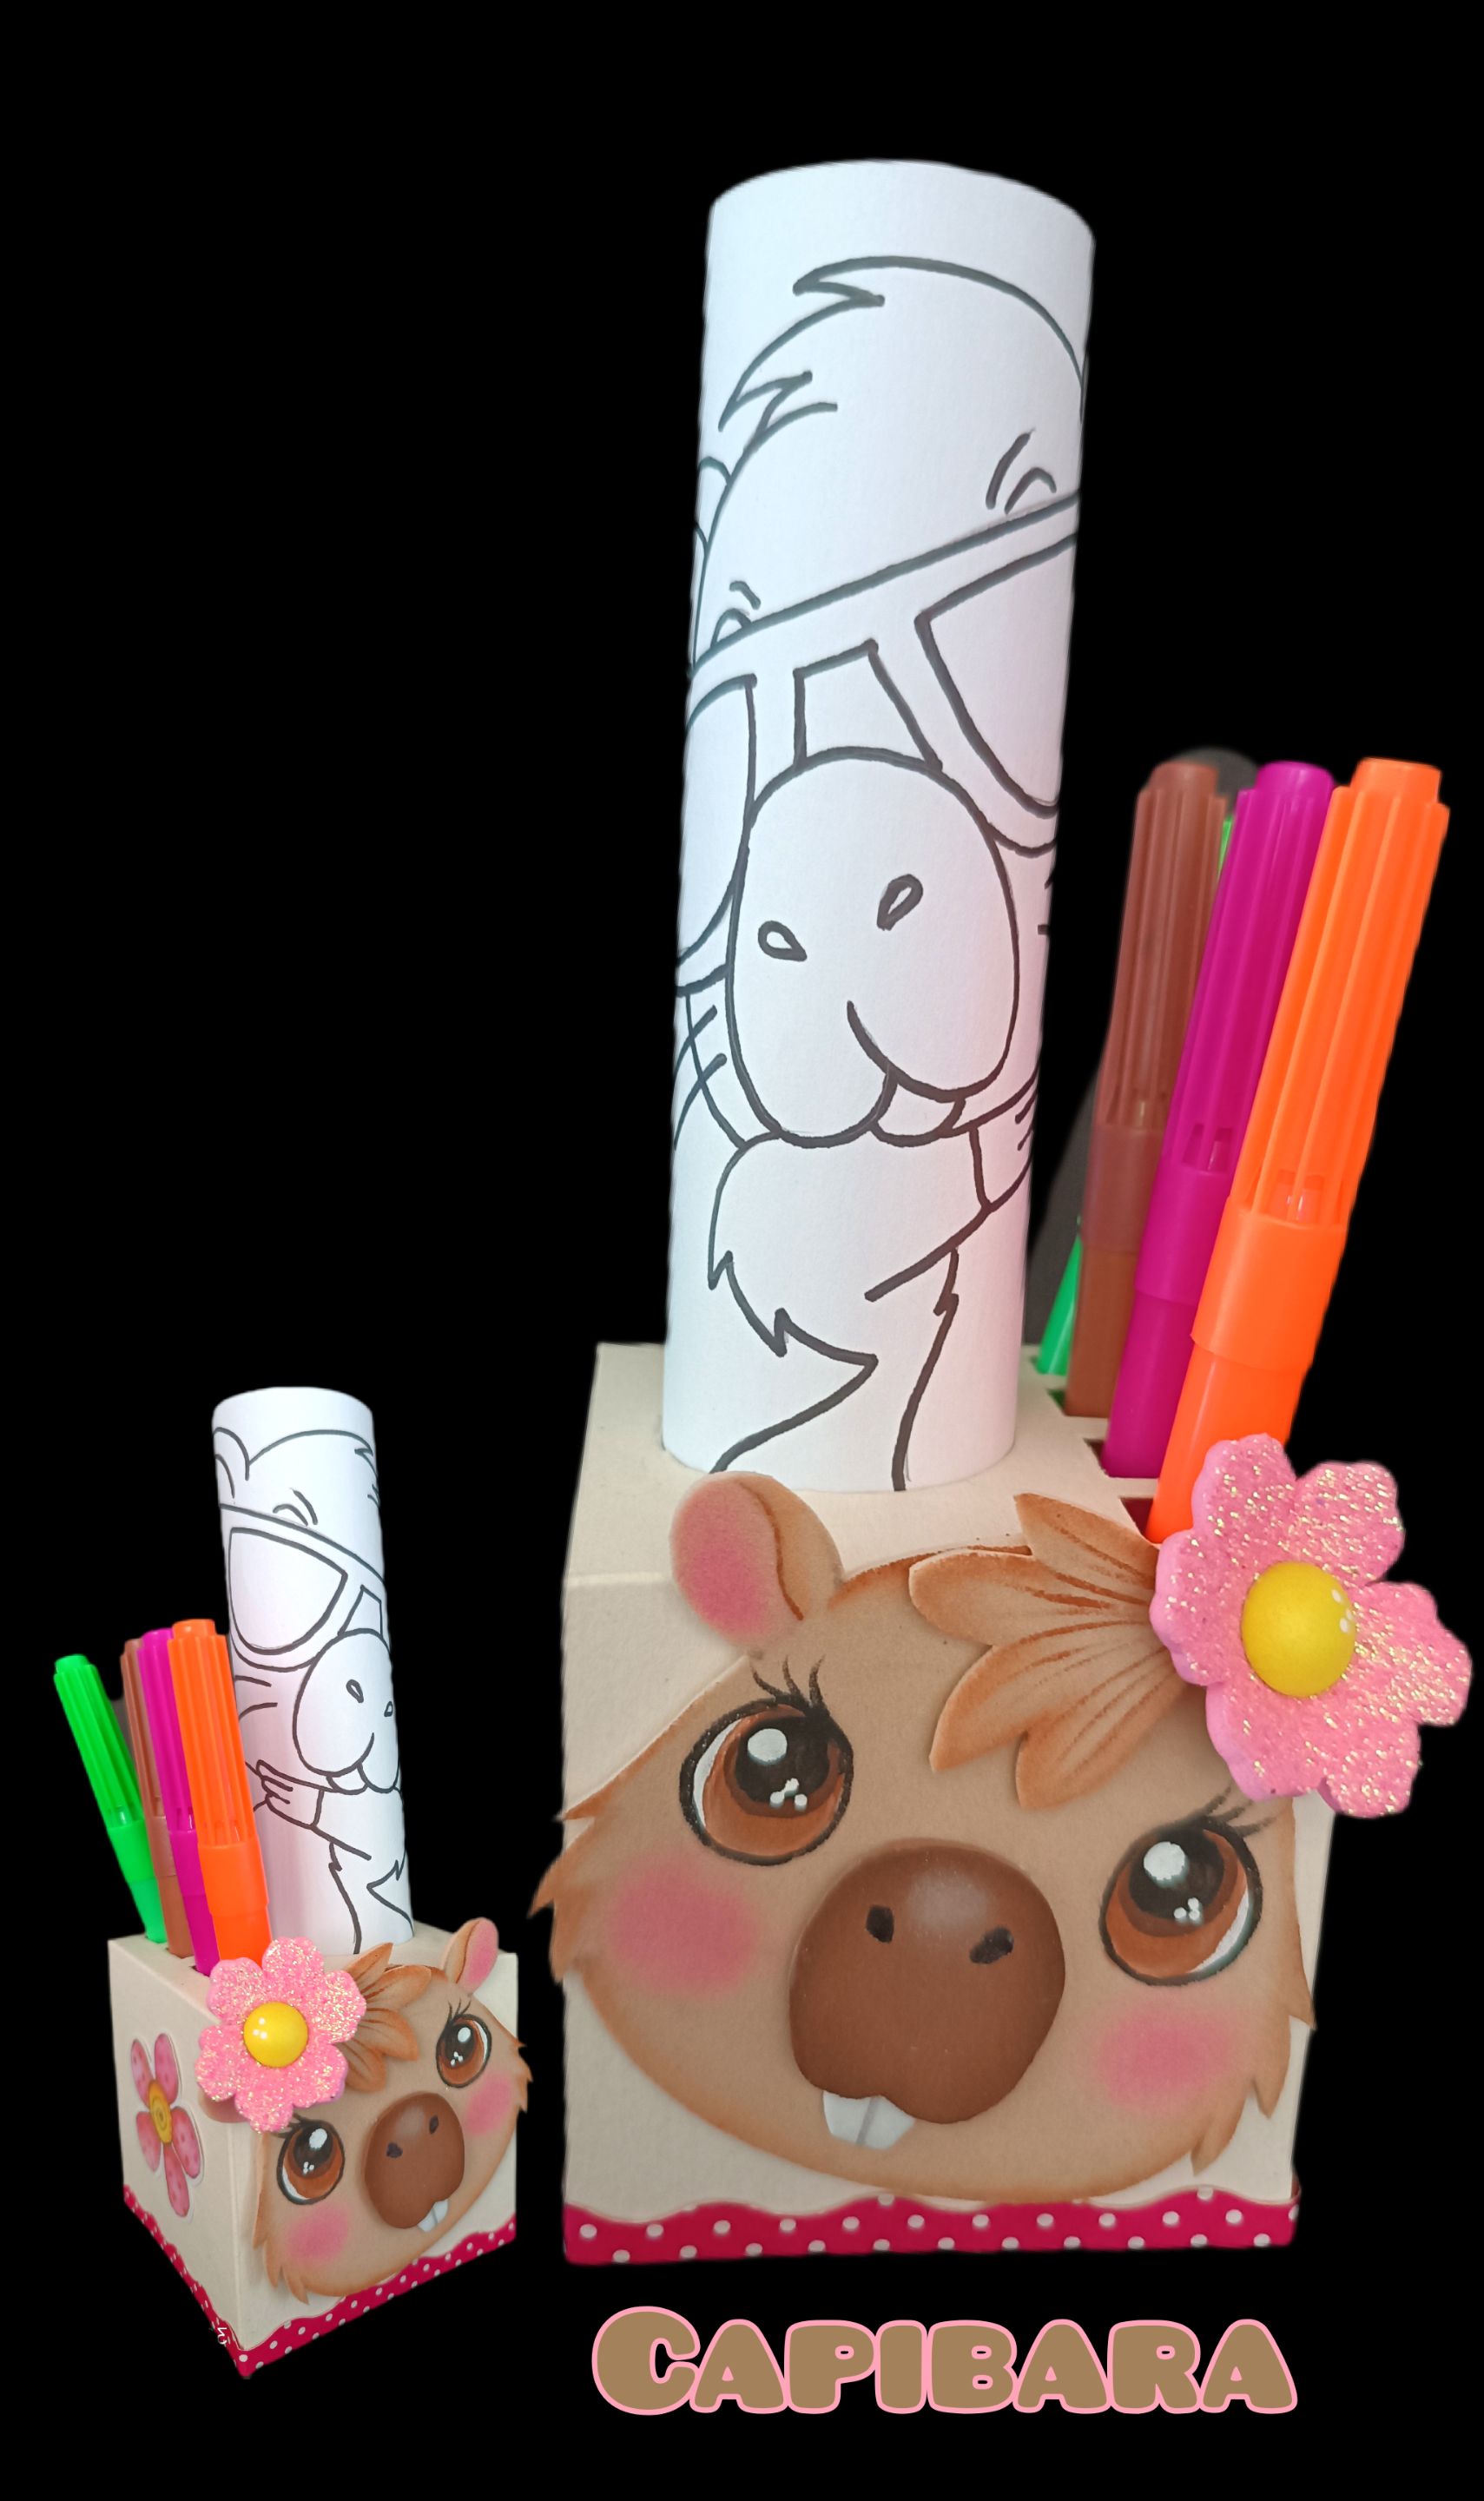
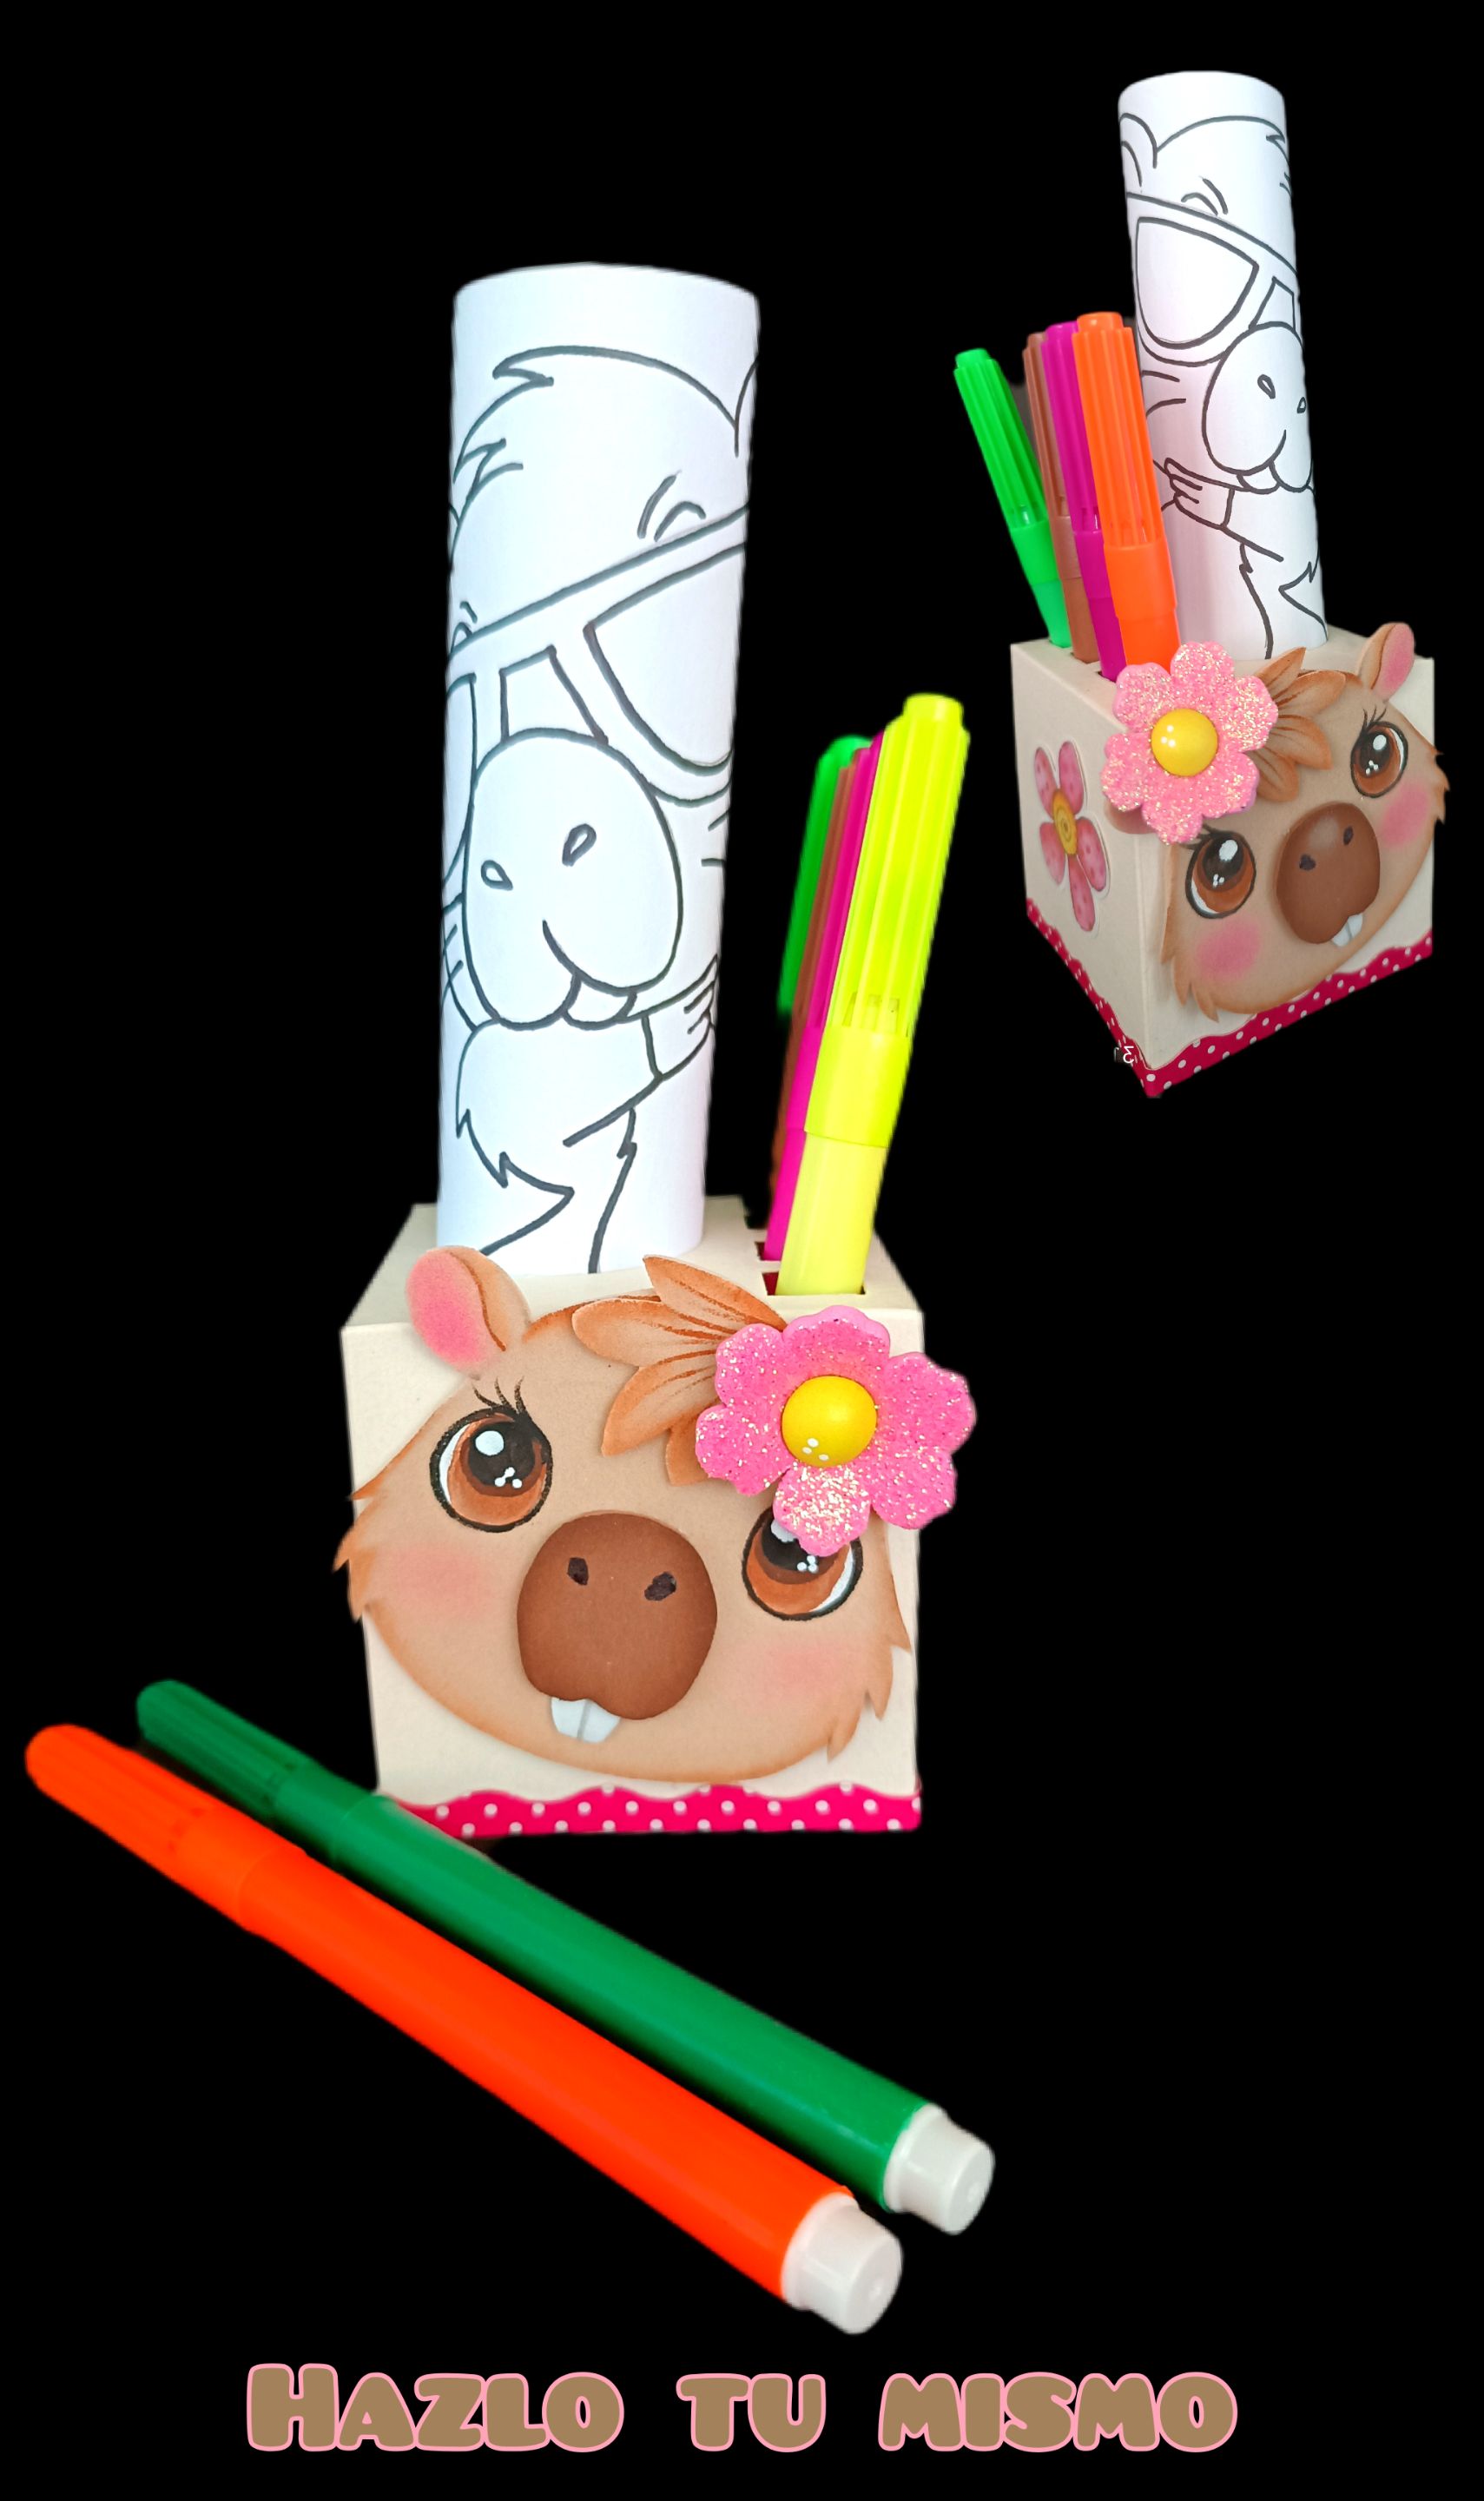
Ahora te muestro el proyecto terminado, espero te guste y animes a realizar.
Fuentes:https://es.pinterest.com/pin/476255729365301049/ https://es.pinterest.com/pin/476255729365342722/
Esta publicación la traduje con DeepL Las fotos están editadas con GridArt y las capturé con mi Redmi Note 12.
Ahora me despido hasta mi próximo paso a paso, deseando haya sido de tu agrado y te sirva de guía. Saludos y muchas gracias por tu visita y apoyo.
ENGLISH:
Happy Monday, my dear friends and creators.
Welcome, everyone, to my blog.
You will need:
| Letter-size cardstock | Scraps of matte and glitter foam |
|---|---|
| Paints and brushes | Scissors and ruler |
| Pencil and X-Acto knife | Letter-size sheet of paper |
| Markers |
Let's get started:
Step 1:
- Trace the drawing with a pencil, preferably a soft one (4B, 6B), then place it on the foam and rub over the paper with a pair of scissors until all the pieces are transferred in the colors you need.
- Then start cutting out all the pieces along the outline.
Step 2:
- Now start painting by first filling in the white part of the eyes and let dry. Then, using the back of the brush, fill in a circle and fill in with the same brush and let dry. Next, paint the ears and cheeks with chalk or blush.
- Now dampen the brush and remove the excess water, then dip the tip of the brush in brown paint and start painting the entire edge of the head.
- Then use a brush to outline the eyes and eyelashes. If you are not comfortable painting eyes, you can use a fine-tipped brush.
Step 3:
- After blending all the pieces, start gluing and assembling.
Here's how it turned out!
Step 4:
- Mark the box on the cardboard and gently run the edge of the scissors along all the dividing lines and cut around the entire outline.
- Then fold along the marked lines, apply silicone to the flaps, and glue them together to close the box.
Step 5:
- Cut a thin strip of polka dot cardstock or whatever you have and glue it along the bottom edge.
- To decorate, you can glue on printed flowers or make some out of foam and glue them to the sides of the box. Glue the figure you made to the front.
And this is how this pretty little box turned out.
- Trace the drawing and outline it with a black marker. You can also print out lots of pictures to color and insert into the box.
Now I'll show you the finished project. I hope you like it and feel inspired to make your own.
Sources:https://es.pinterest.com/pin/476255729365301049/ https://es.pinterest.com/pin/476255729365342722/
I translated this post with DeepL. The photos were edited with GridArt and taken with my Redmi Note 12.
Now I bid you farewell until my next step-by-step guide, hoping you enjoyed it and found it useful. Best regards and thank you very much for your visit and support.