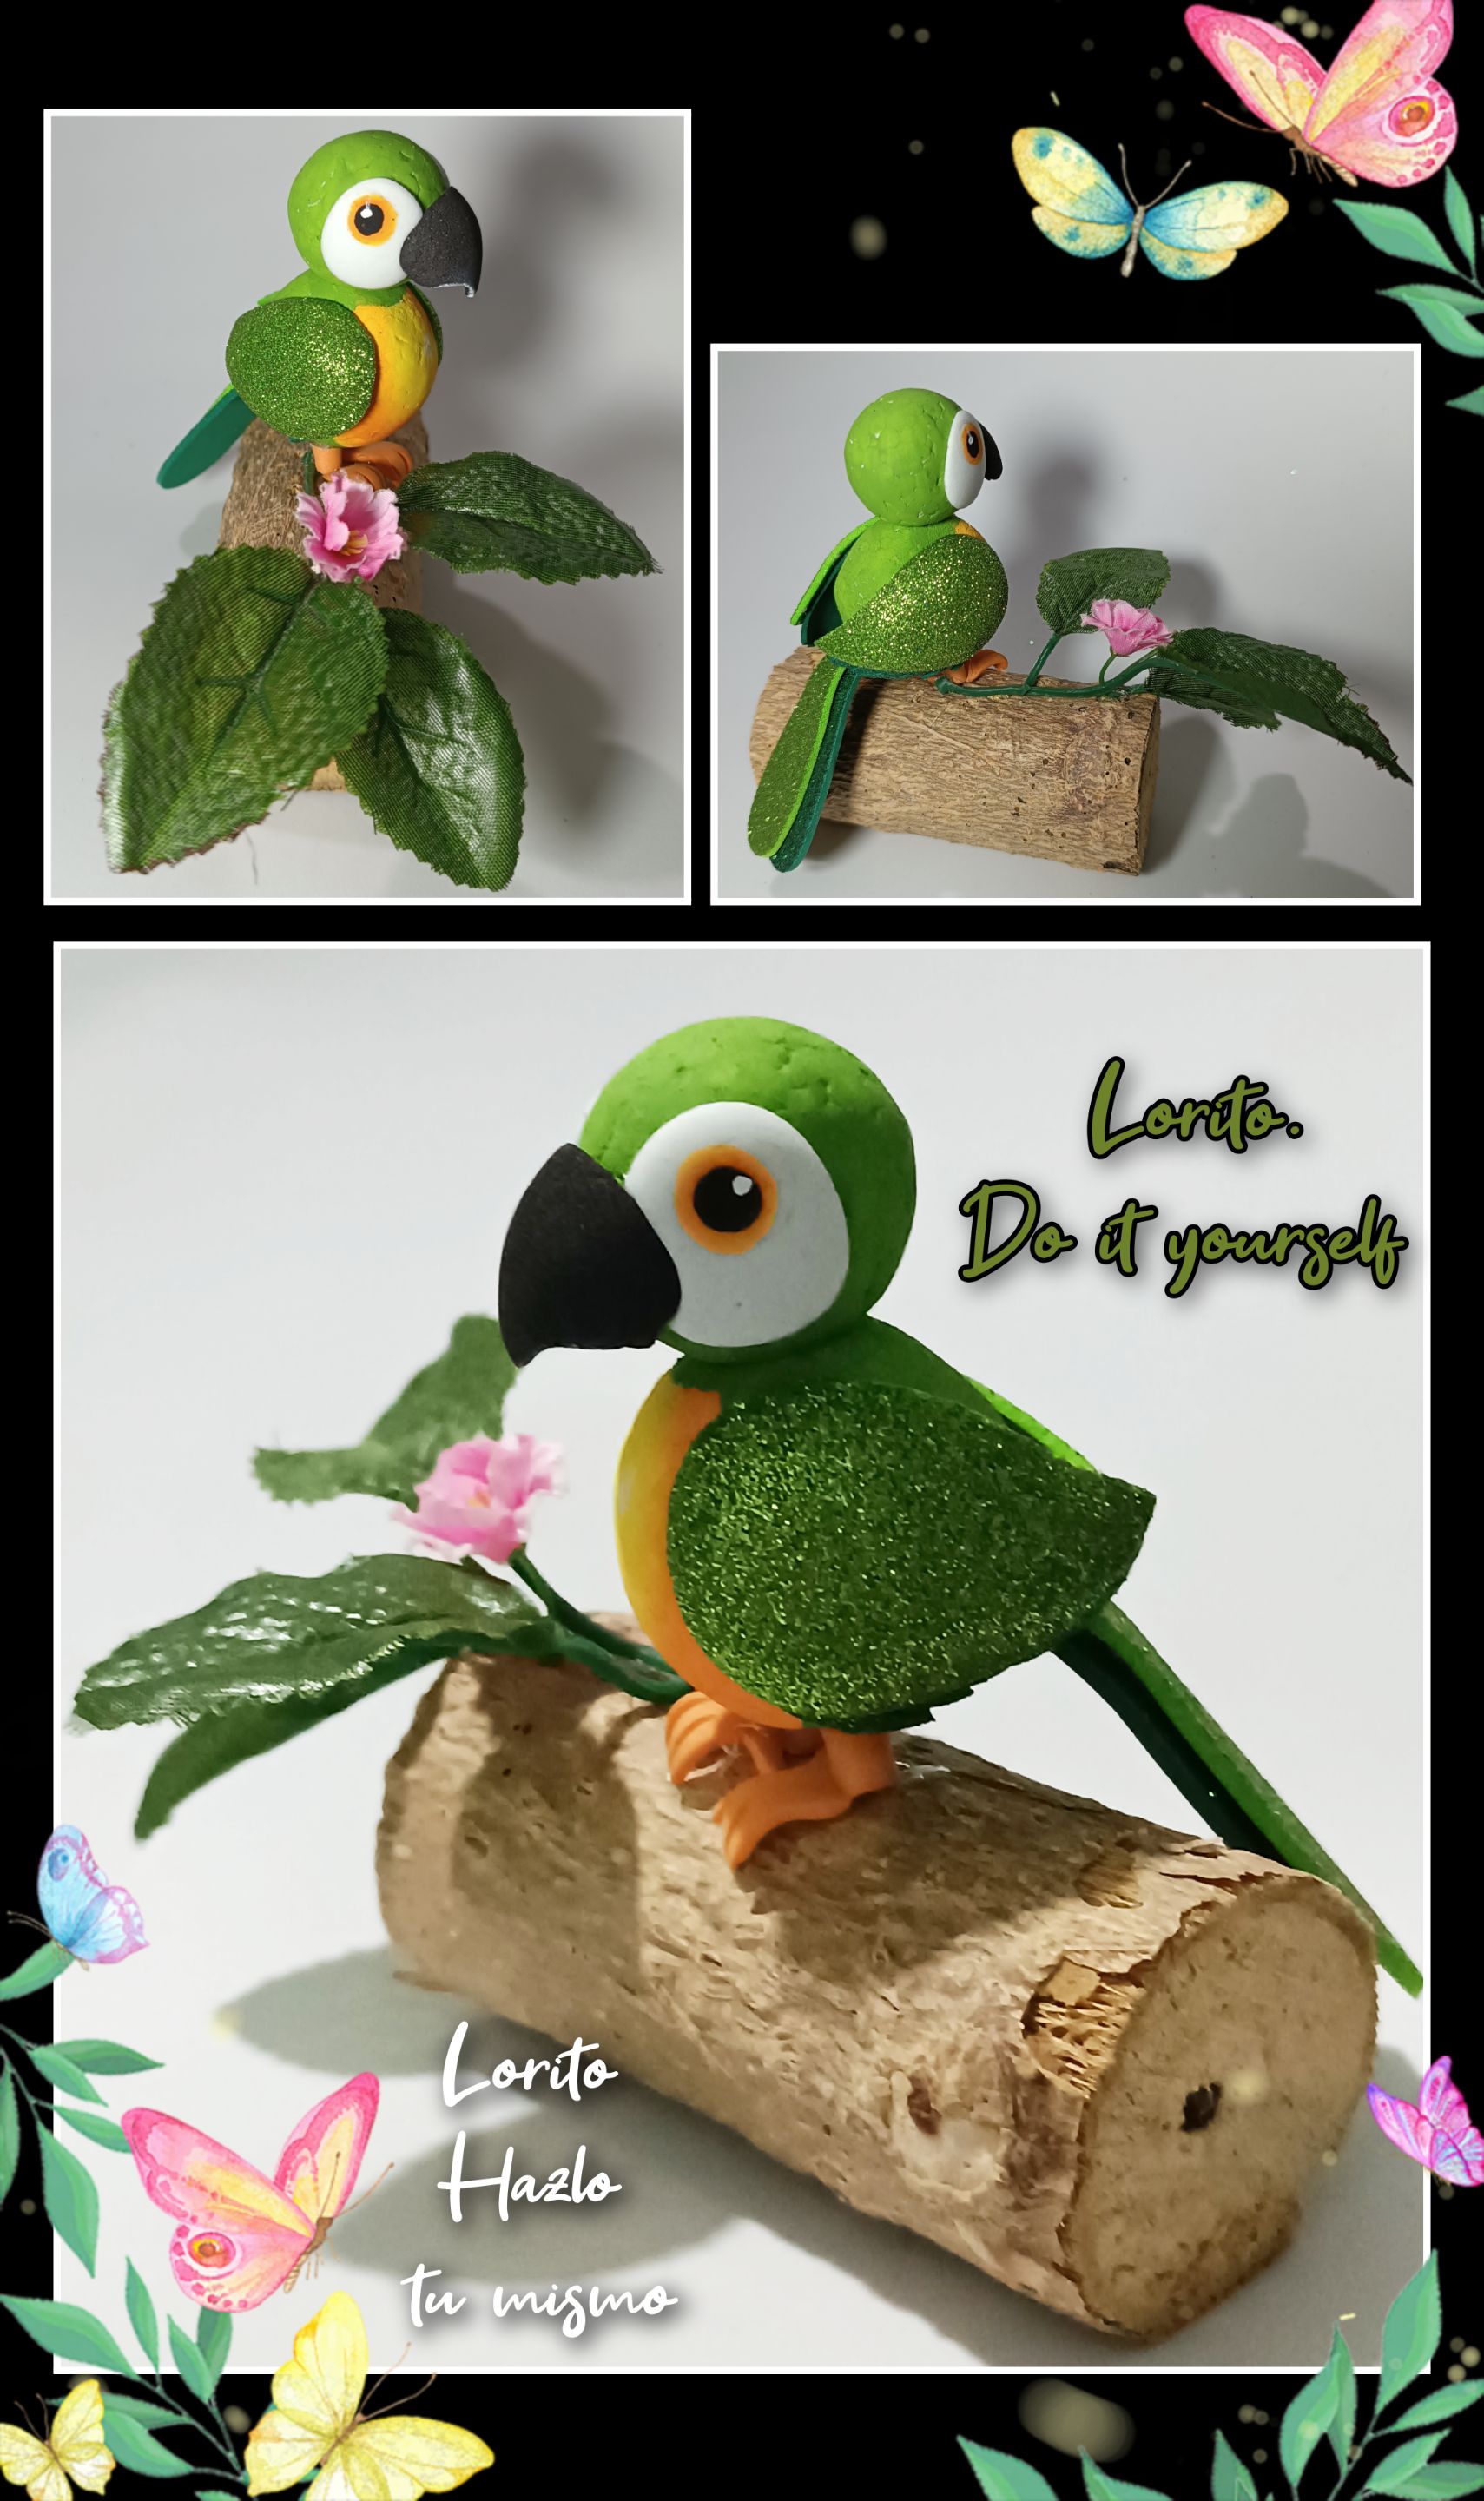
Saludos mis queridos creadores y amigos que hoy visitan mi página.
Y para ello, necesitas los siguientes materiales:
 | Bolitas de icopor o anime grueso| Foami mate y escarchado1
|----|----|
| Pinturas y pinceles| Tijera y cuchilla|
| Silicón| Lija y acocador|
| Tronquito o base| Hojas y flor de tela|
| Bolitas de icopor o anime grueso| Foami mate y escarchado1
|----|----|
| Pinturas y pinceles| Tijera y cuchilla|
| Silicón| Lija y acocador|
| Tronquito o base| Hojas y flor de tela|
¡Es hora de comenzar!
1° Paso:
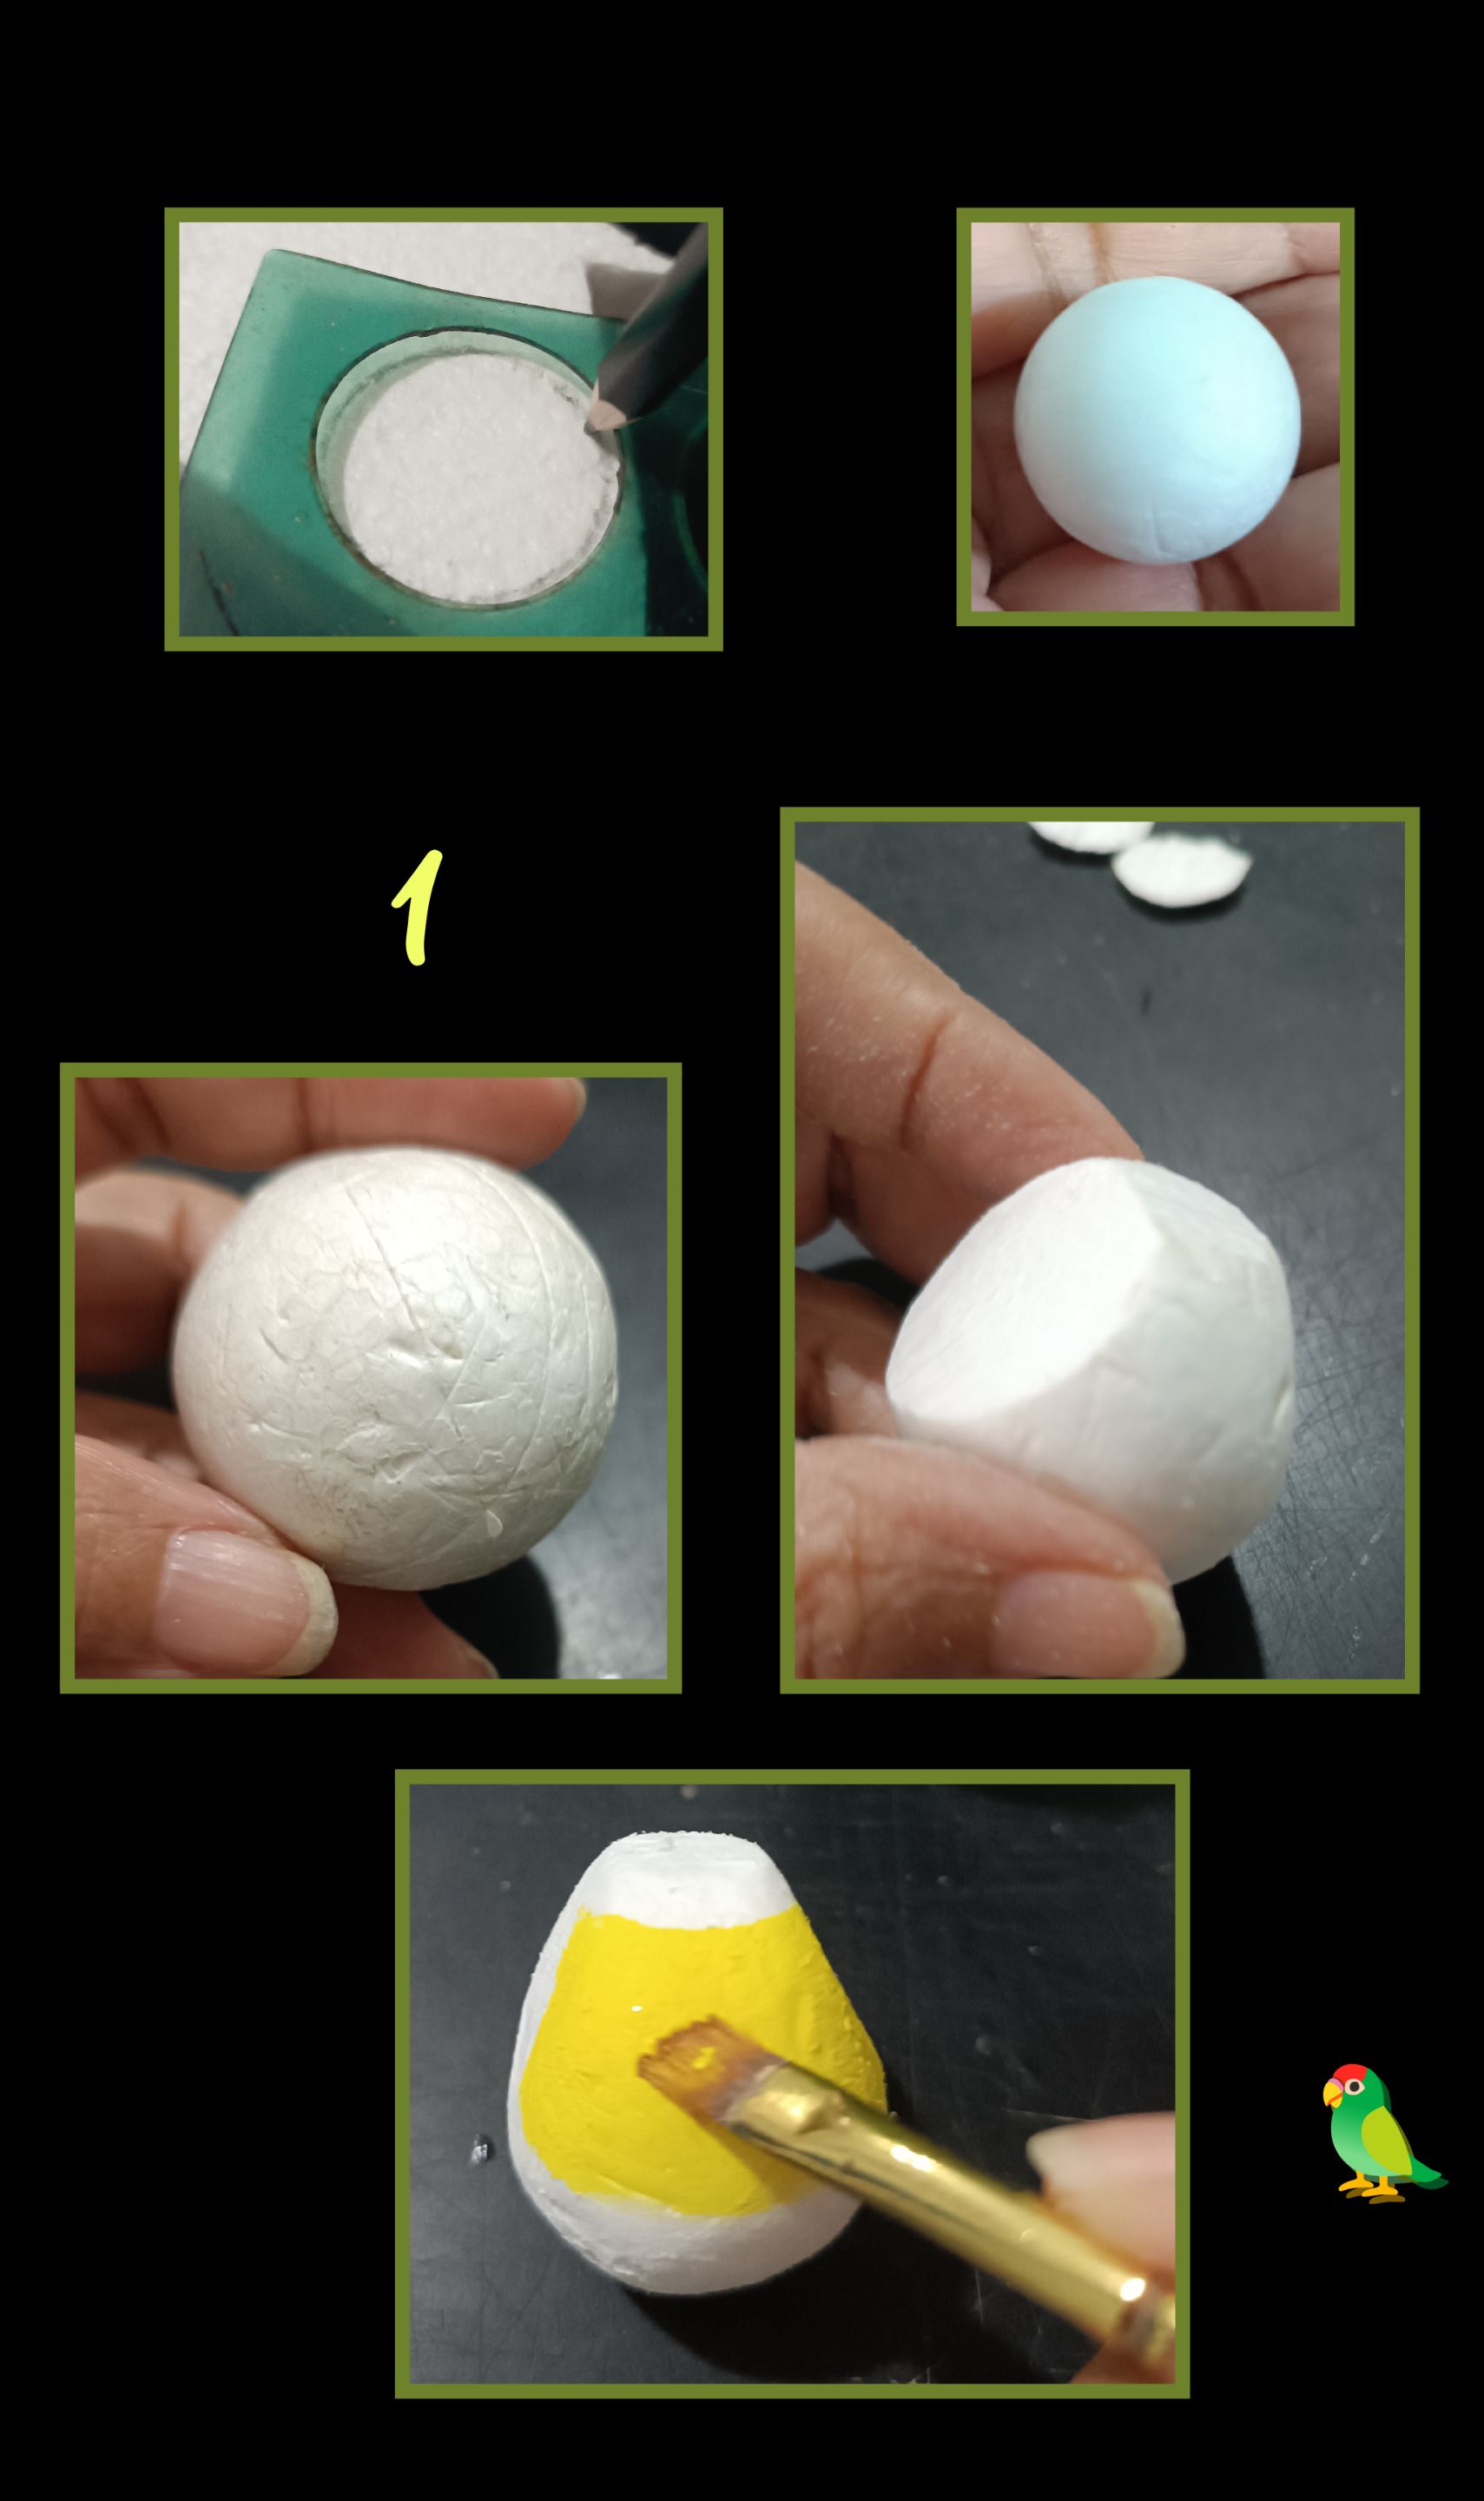
- Vas a utilizar 2 esferas una pequeña para la cabeza y la otra 1/0,5cm más grande para el cuerpo. Sino tienes esferas, marca en una pieza de icopor dos círculos uno pequeño y otro más grande y con la cuchilla recorta los filos de las orillas y dale forma redondeada, luego con una lija gruesa empareja hasta redondear bien y para quitar las imperfecciones moja con agua de lavaplatos y pasa la lija fina suavemente para alisar.(Debajo de dejo fotos)
- Ahora a la esfera más grande, haz 2 cortes iguales a los lado como se ve en la foto, aquí pegarás las alas y en la parte de arriba también haz un pequeño corte donde se pegará la cabeza y lija.
- Luego comienza a pintar en el centro o pecho con pintura amarilla.https://files.peakd.com/file/peakd-hive/elmundodebetty/23tvYHnYyBD16vroor6oFqaHRp2kyD1PJBER3nSeyGkSutMrh8718kKFRE8Fbr7okGVis.jpg
2° Paso:
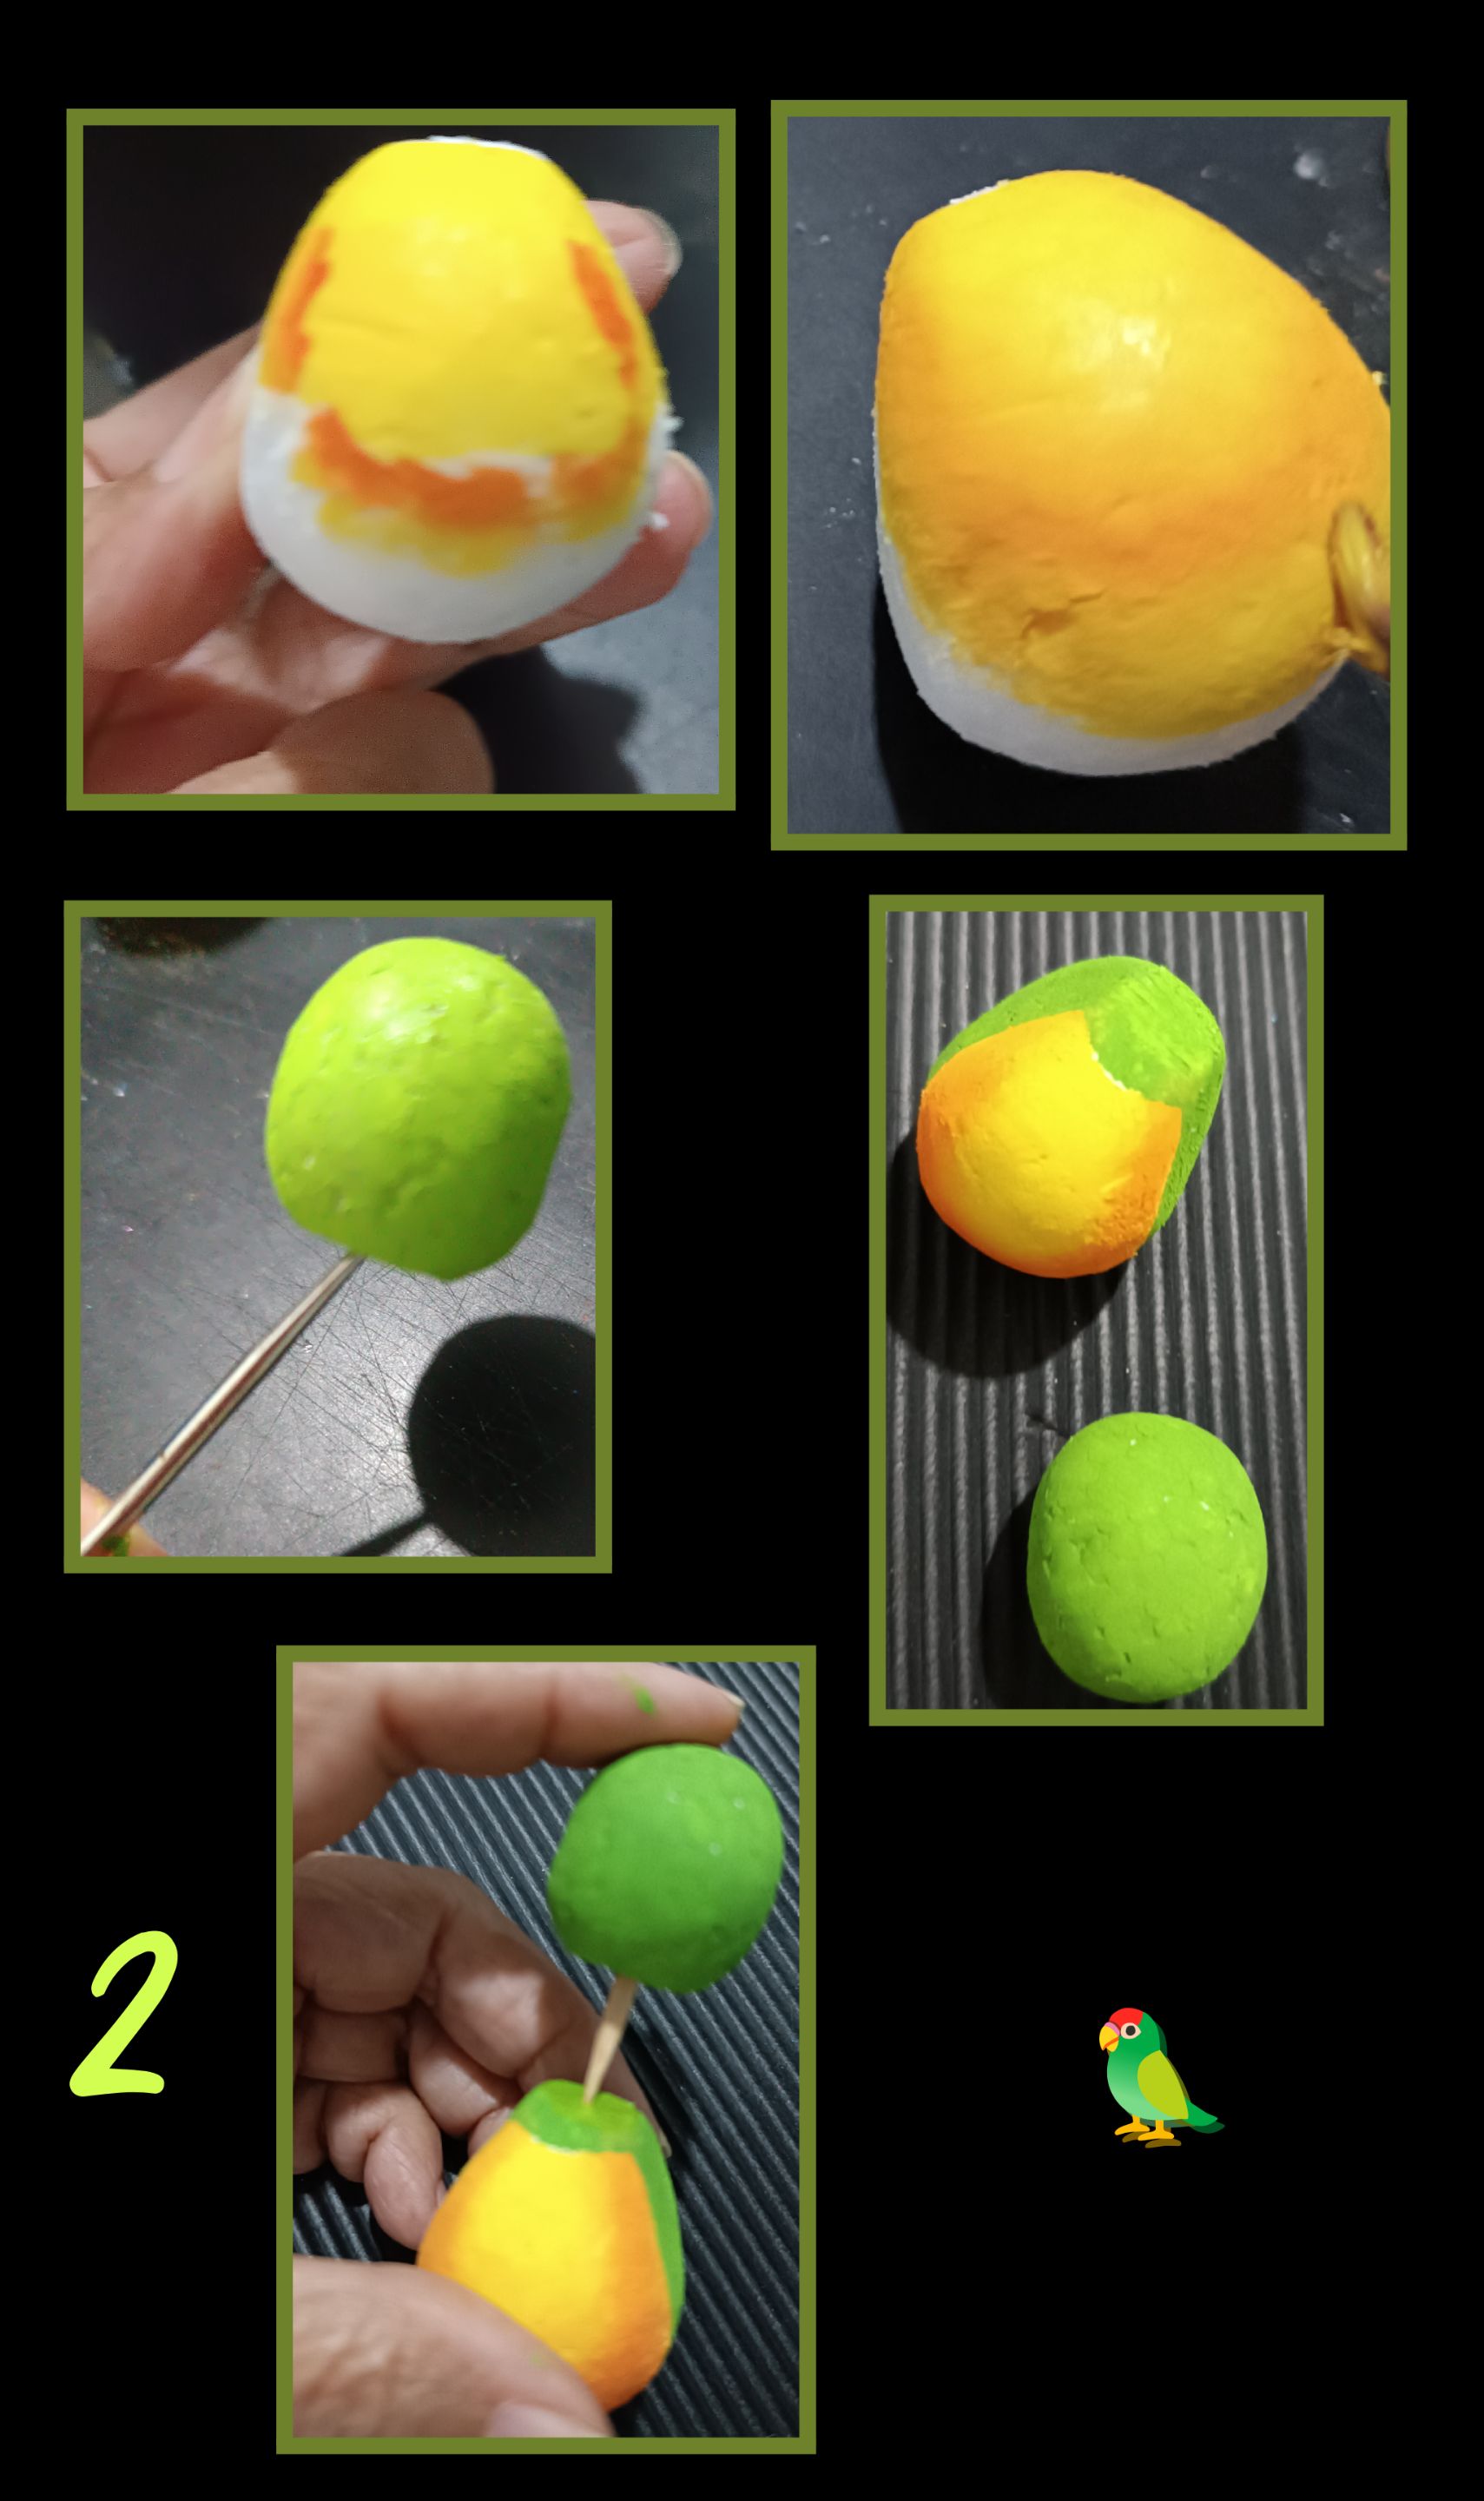 - Después de aplicar la pintura amarilla, estando aún húmeda aplica por los lados pintura naranja y difumina con el pincel y deja secar.
- Luego pinta la cabeza con verde y deja secar, después pinta el restante de cuerpo con pintura verde como se muestra en la foto.
- Ahora aplica un poco de silicón e inserta un palillo para unir cabeza con cuerpo.
- Después de aplicar la pintura amarilla, estando aún húmeda aplica por los lados pintura naranja y difumina con el pincel y deja secar.
- Luego pinta la cabeza con verde y deja secar, después pinta el restante de cuerpo con pintura verde como se muestra en la foto.
- Ahora aplica un poco de silicón e inserta un palillo para unir cabeza con cuerpo.
3° Paso:
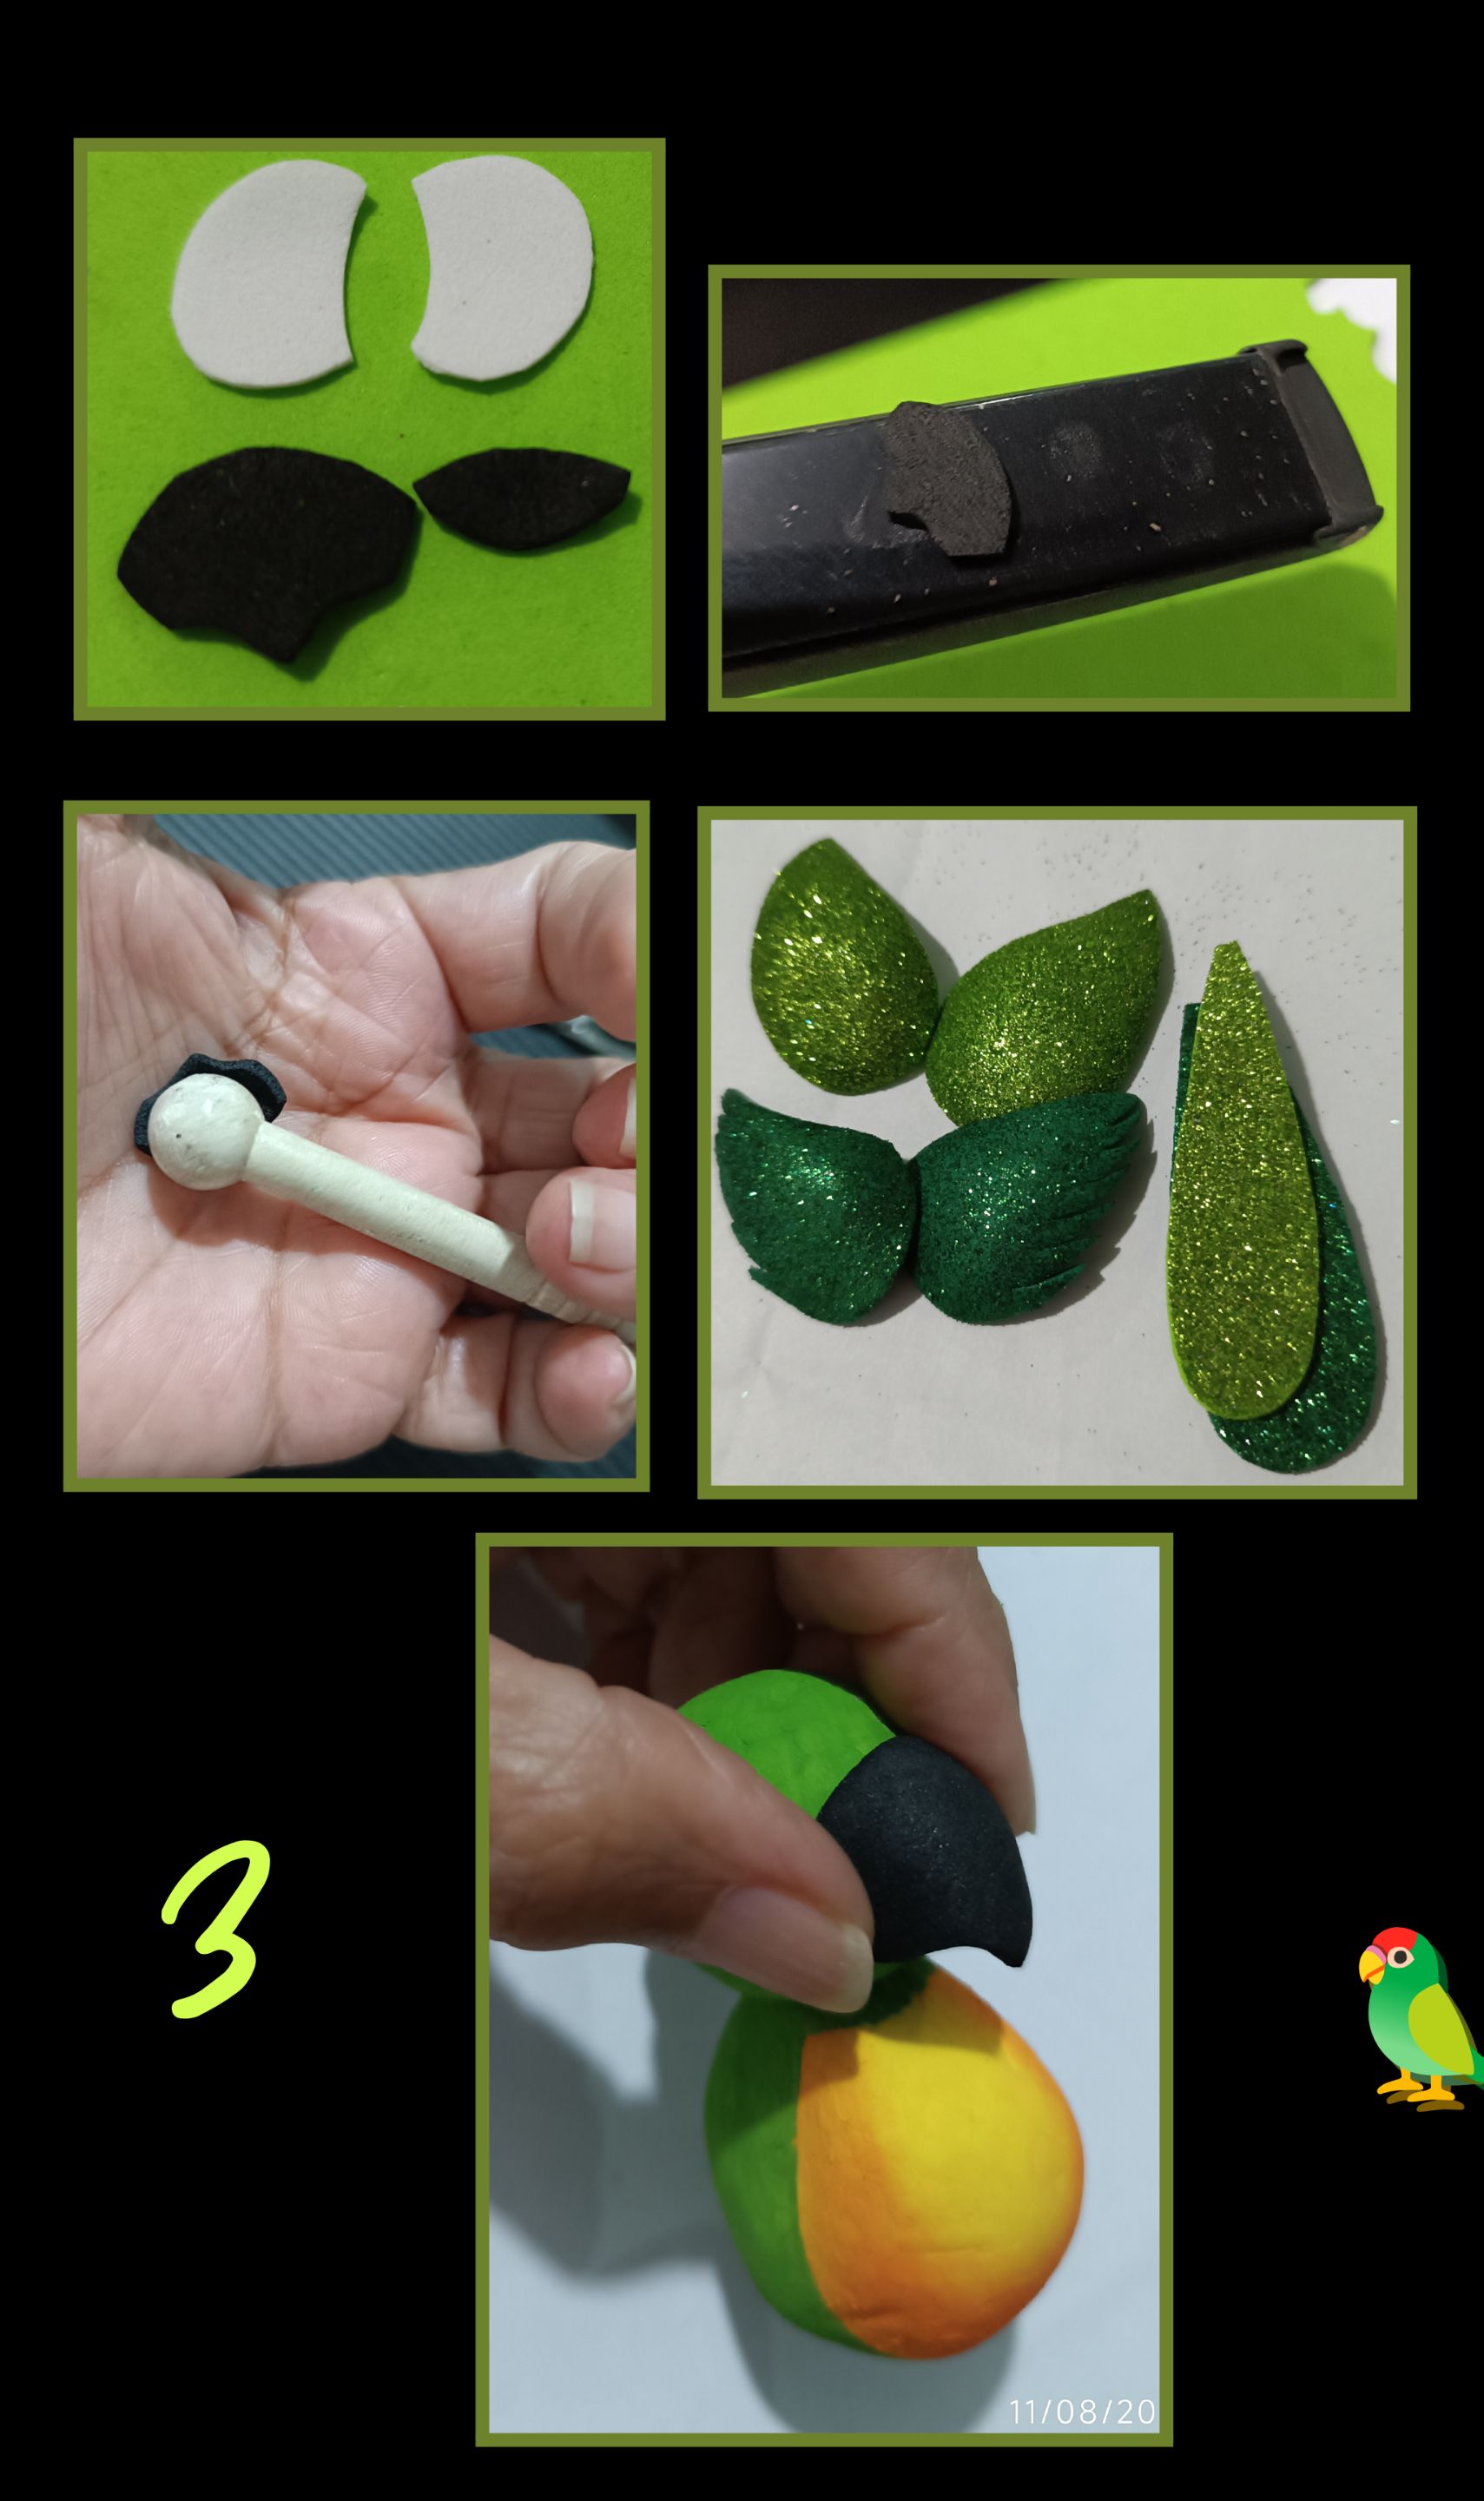
- Recorta dos círculos de foami blanco donde irán los ojos y recorta una parte como media luna, como se muestra en la foto, también recorta las 2 partes del pico, alas y cola.
- Calienta la plancha y coloca las piezas, cuando estén tomando forma retira y dales forma con un acocador.
- Luego aplica silicón por el borde ancho del pico y pega a la cabeza, haciendo un poco de presión hasta que seque.
4° Paso:
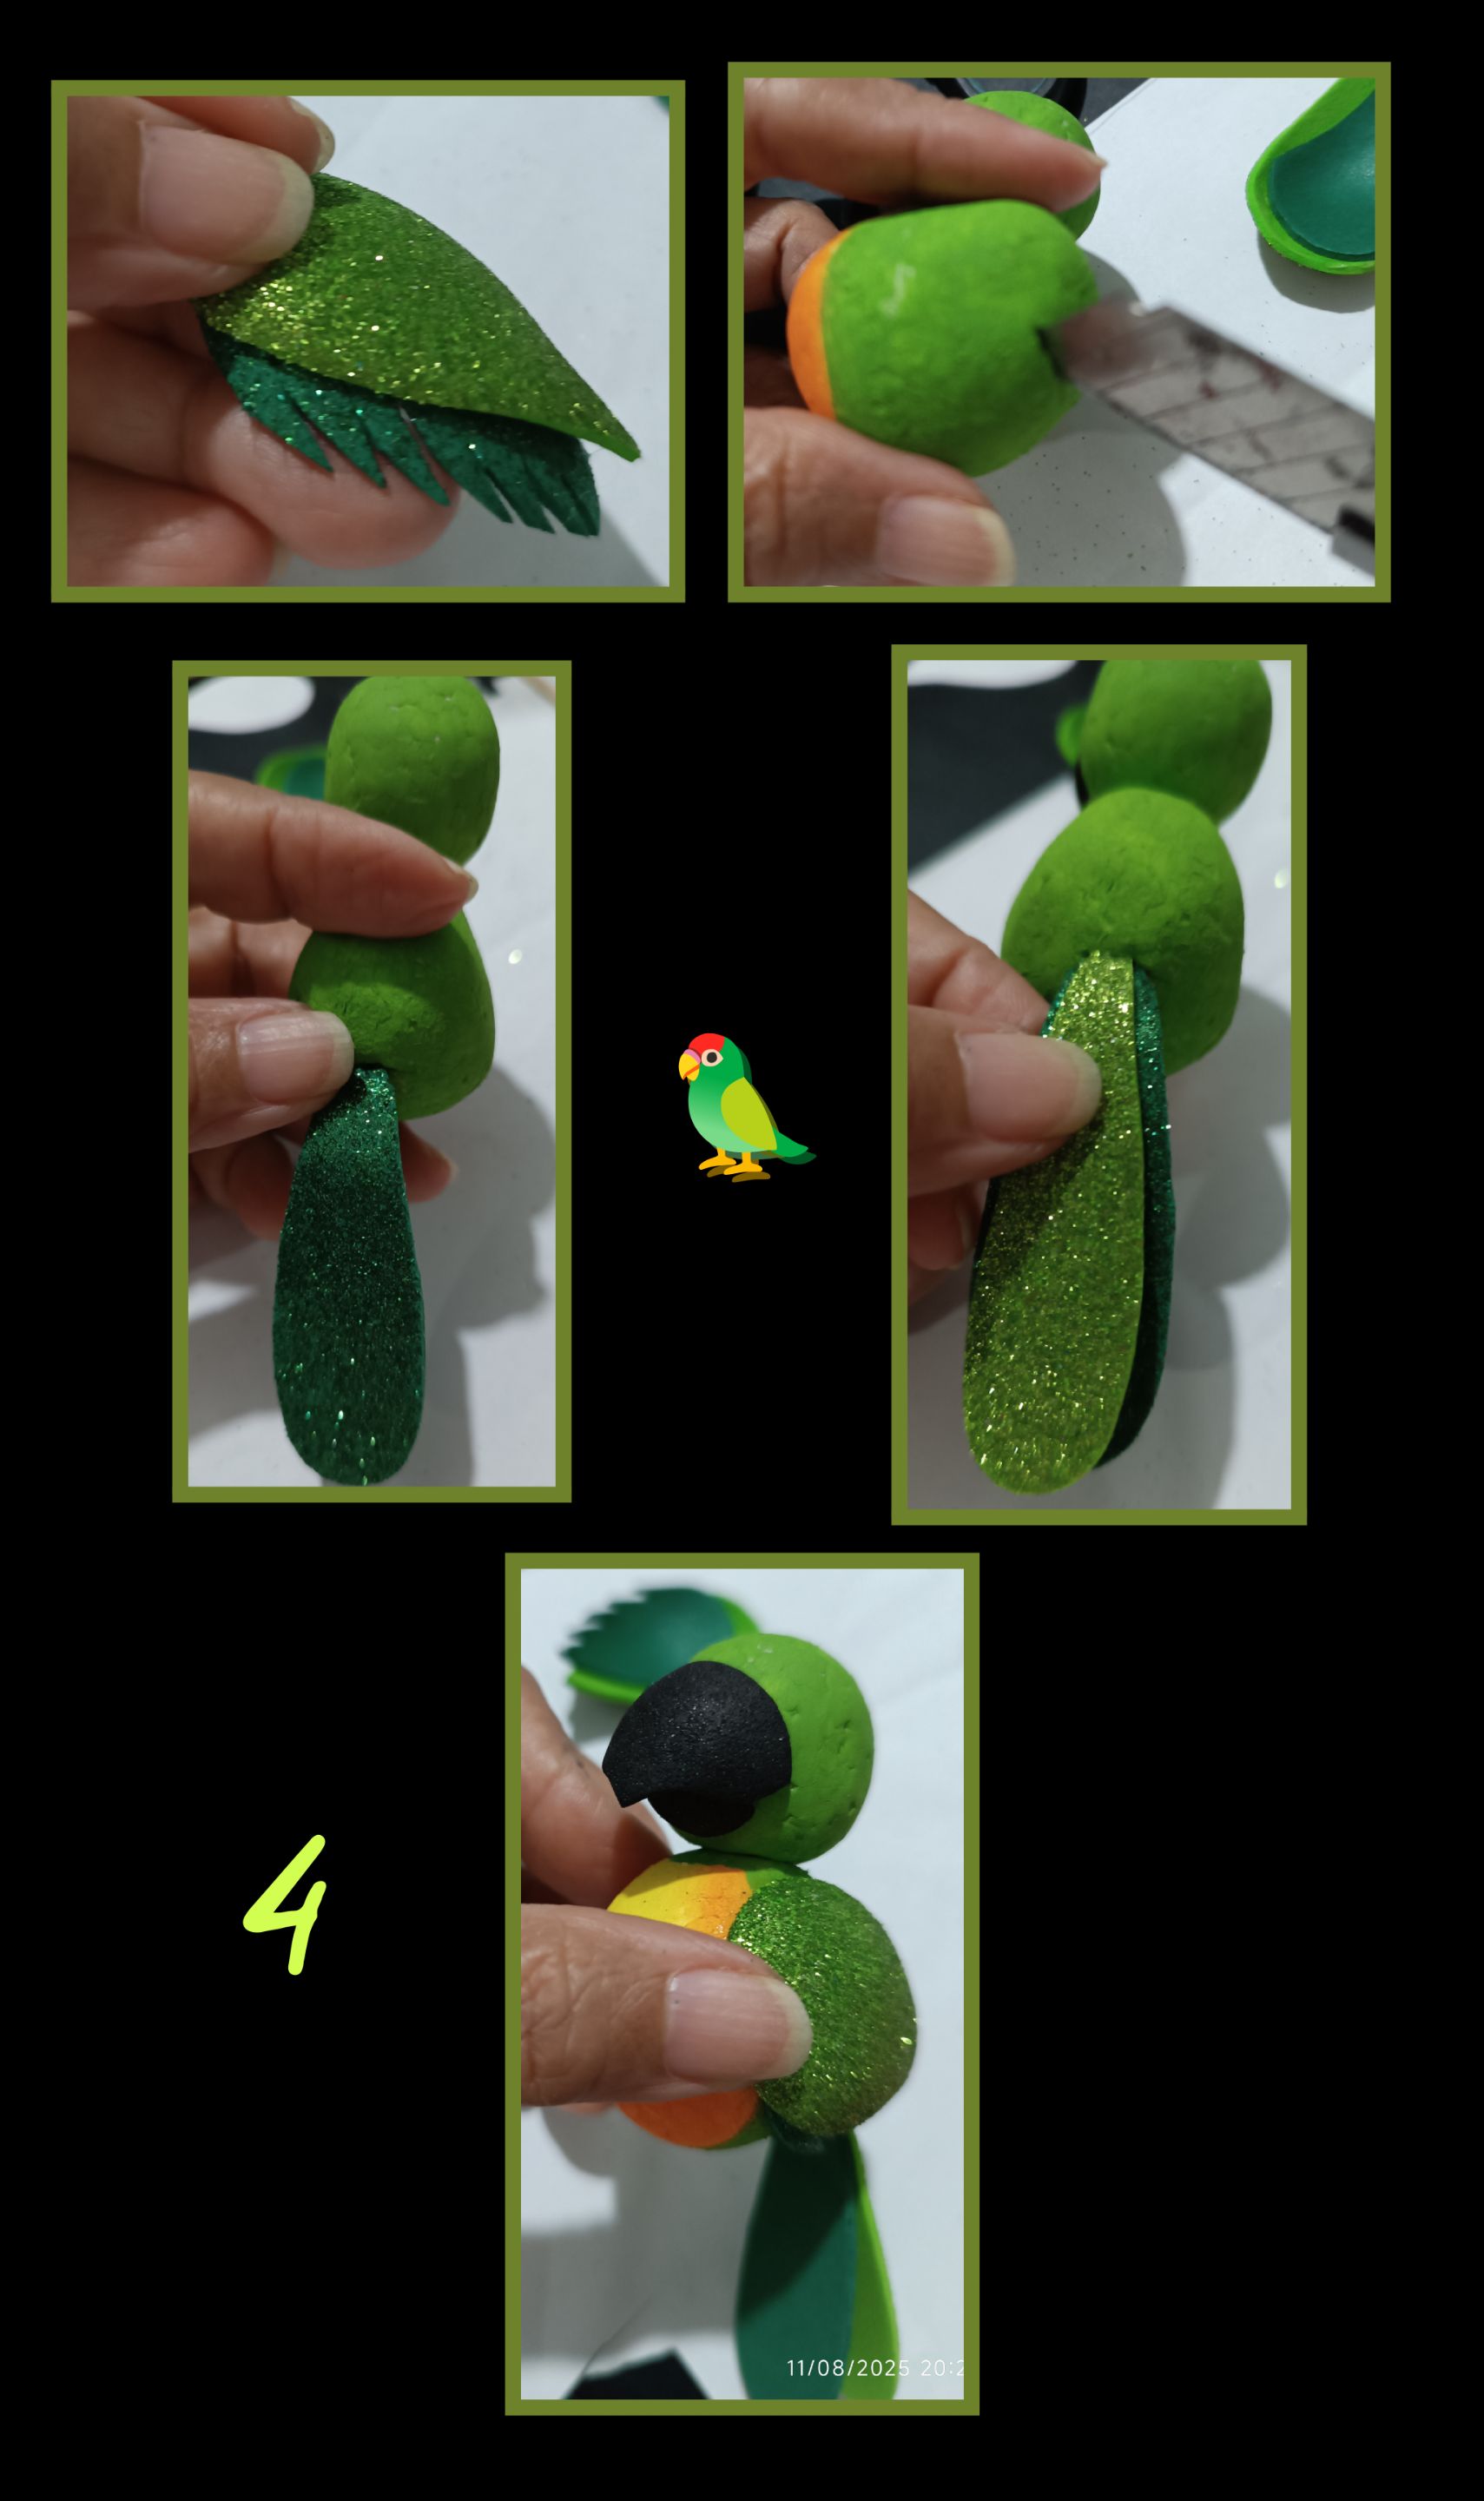
- Aplica silicón en las alas y pega una sobre la otra y deja secar.
- Con la cuchilla, haz una pequeña incisión en la parte de atrás, aplica silicón en la cola y pega en la ranura y luego pega las alas a los lados.
5° Paso:
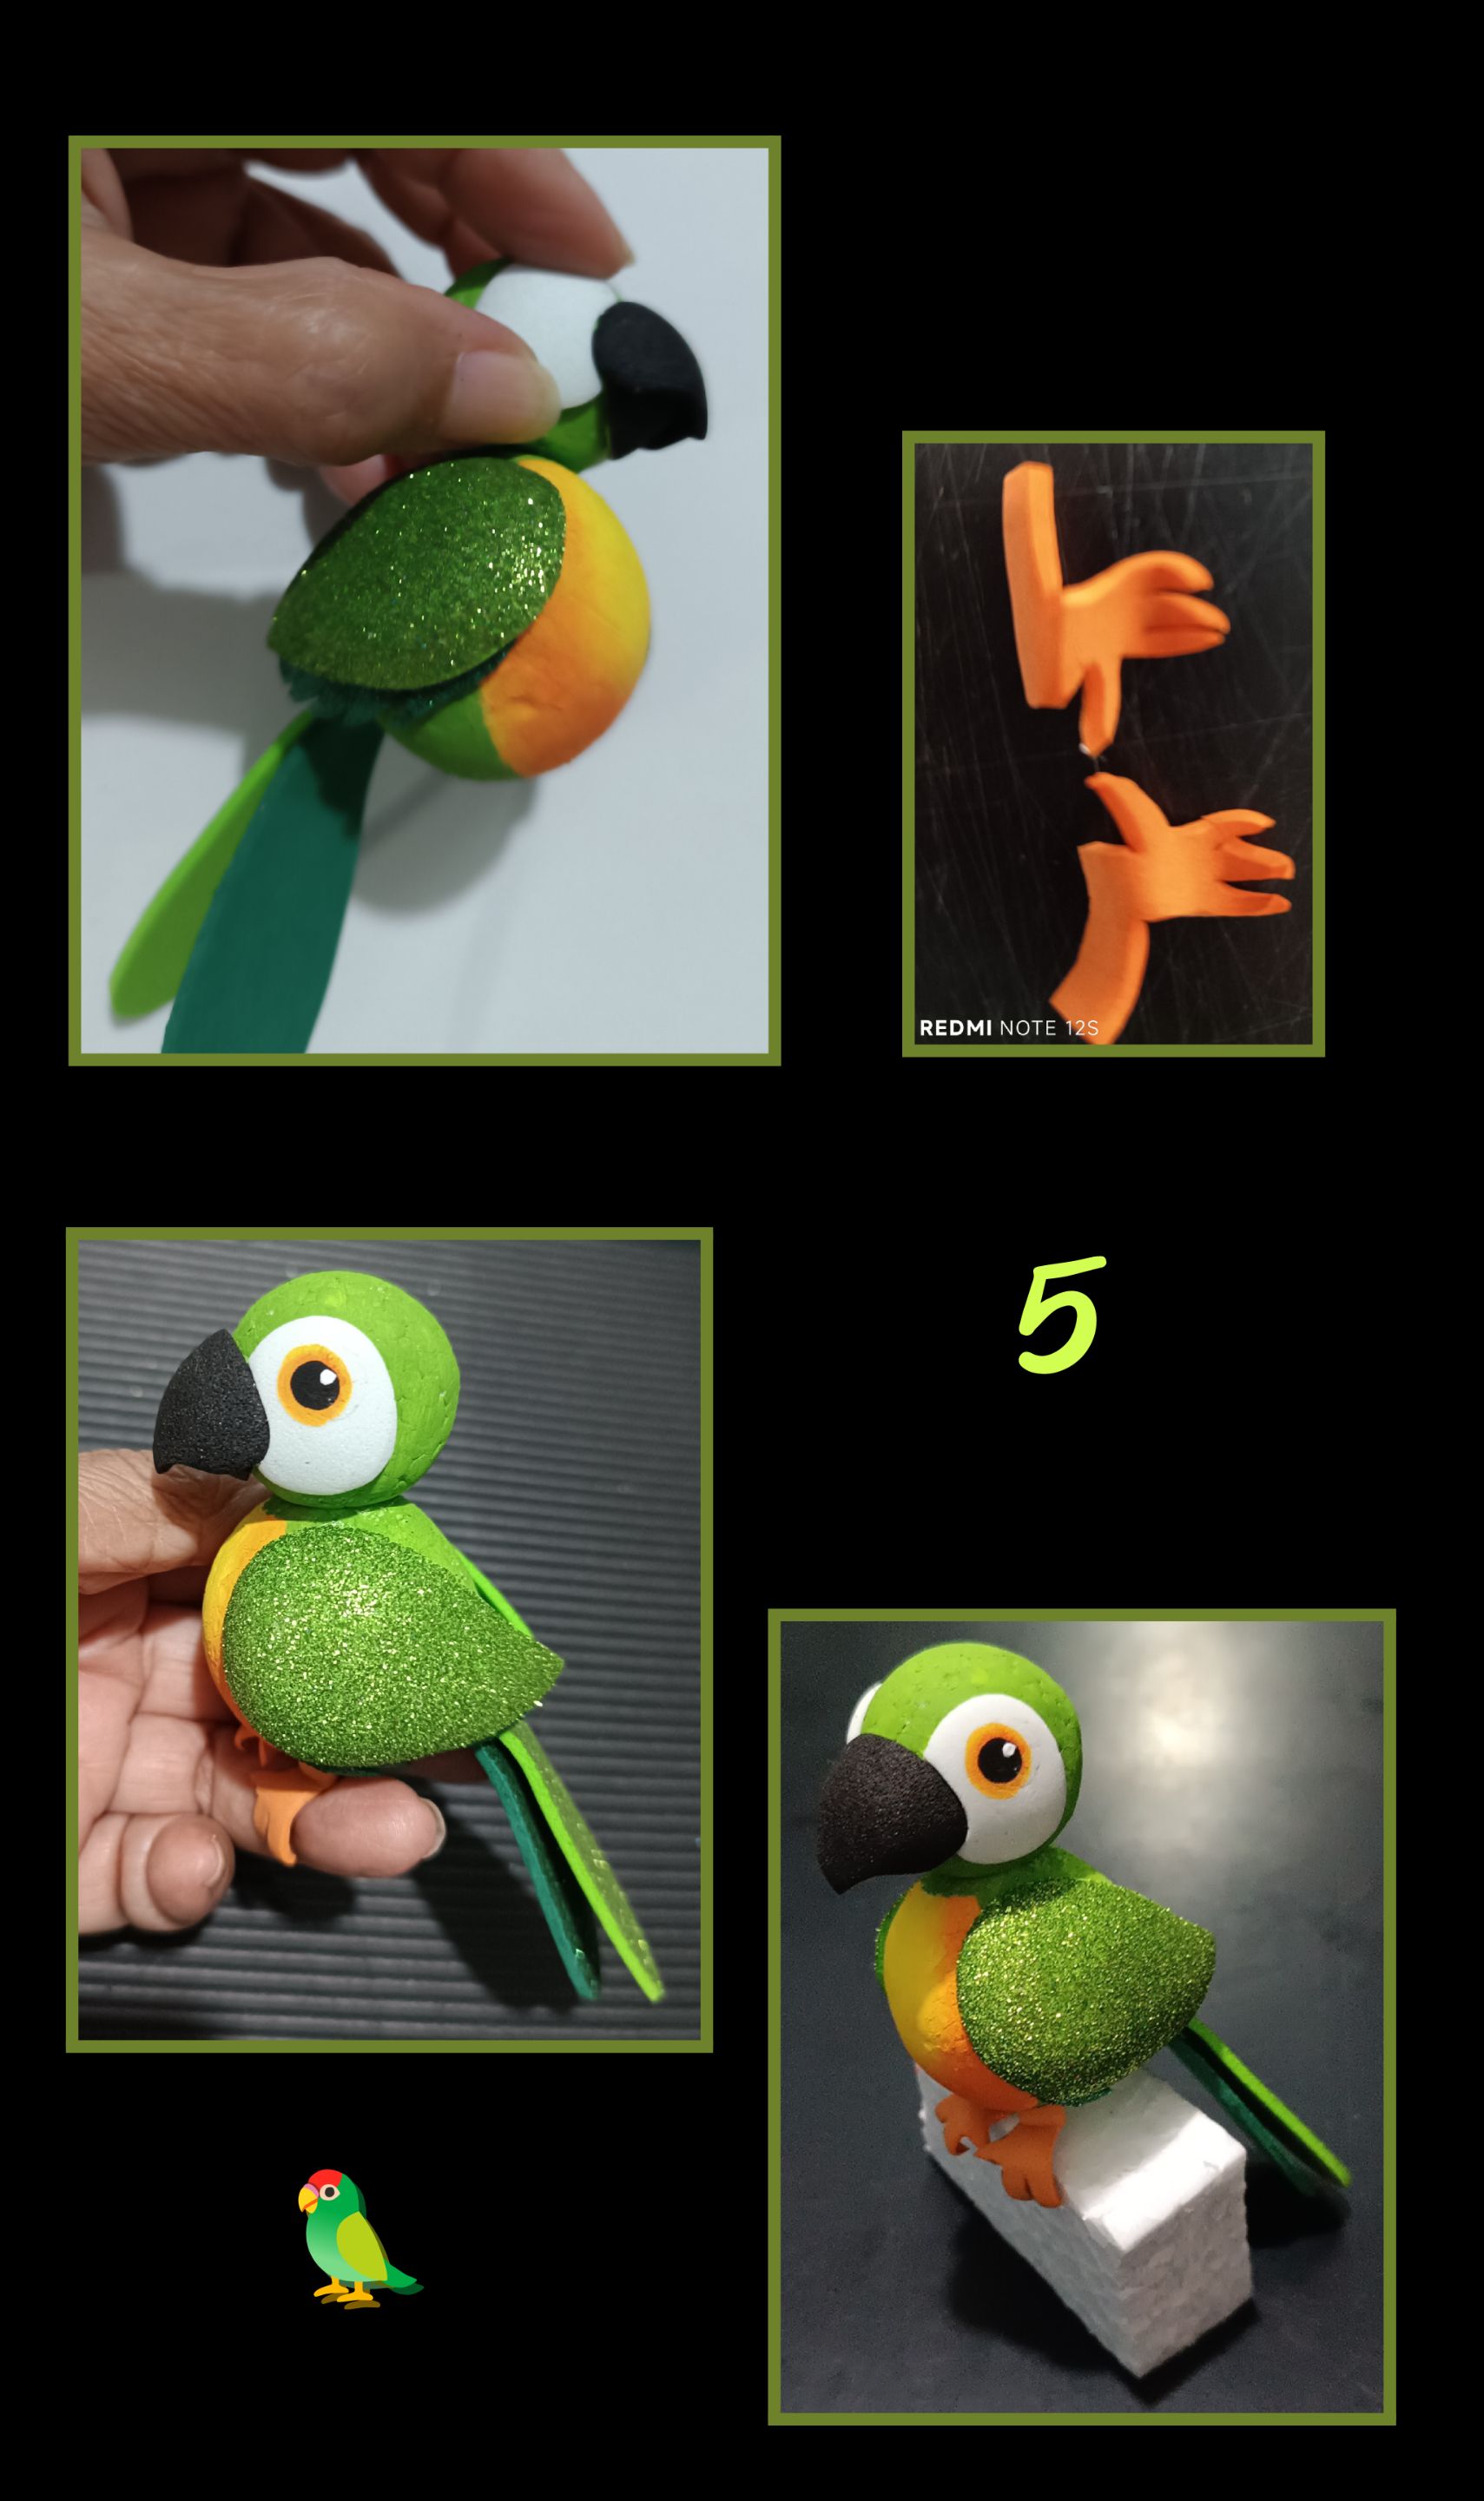 - Ahora pega las media luna a los lados del pico, las paticas y pinta los ojos.
6° Paso
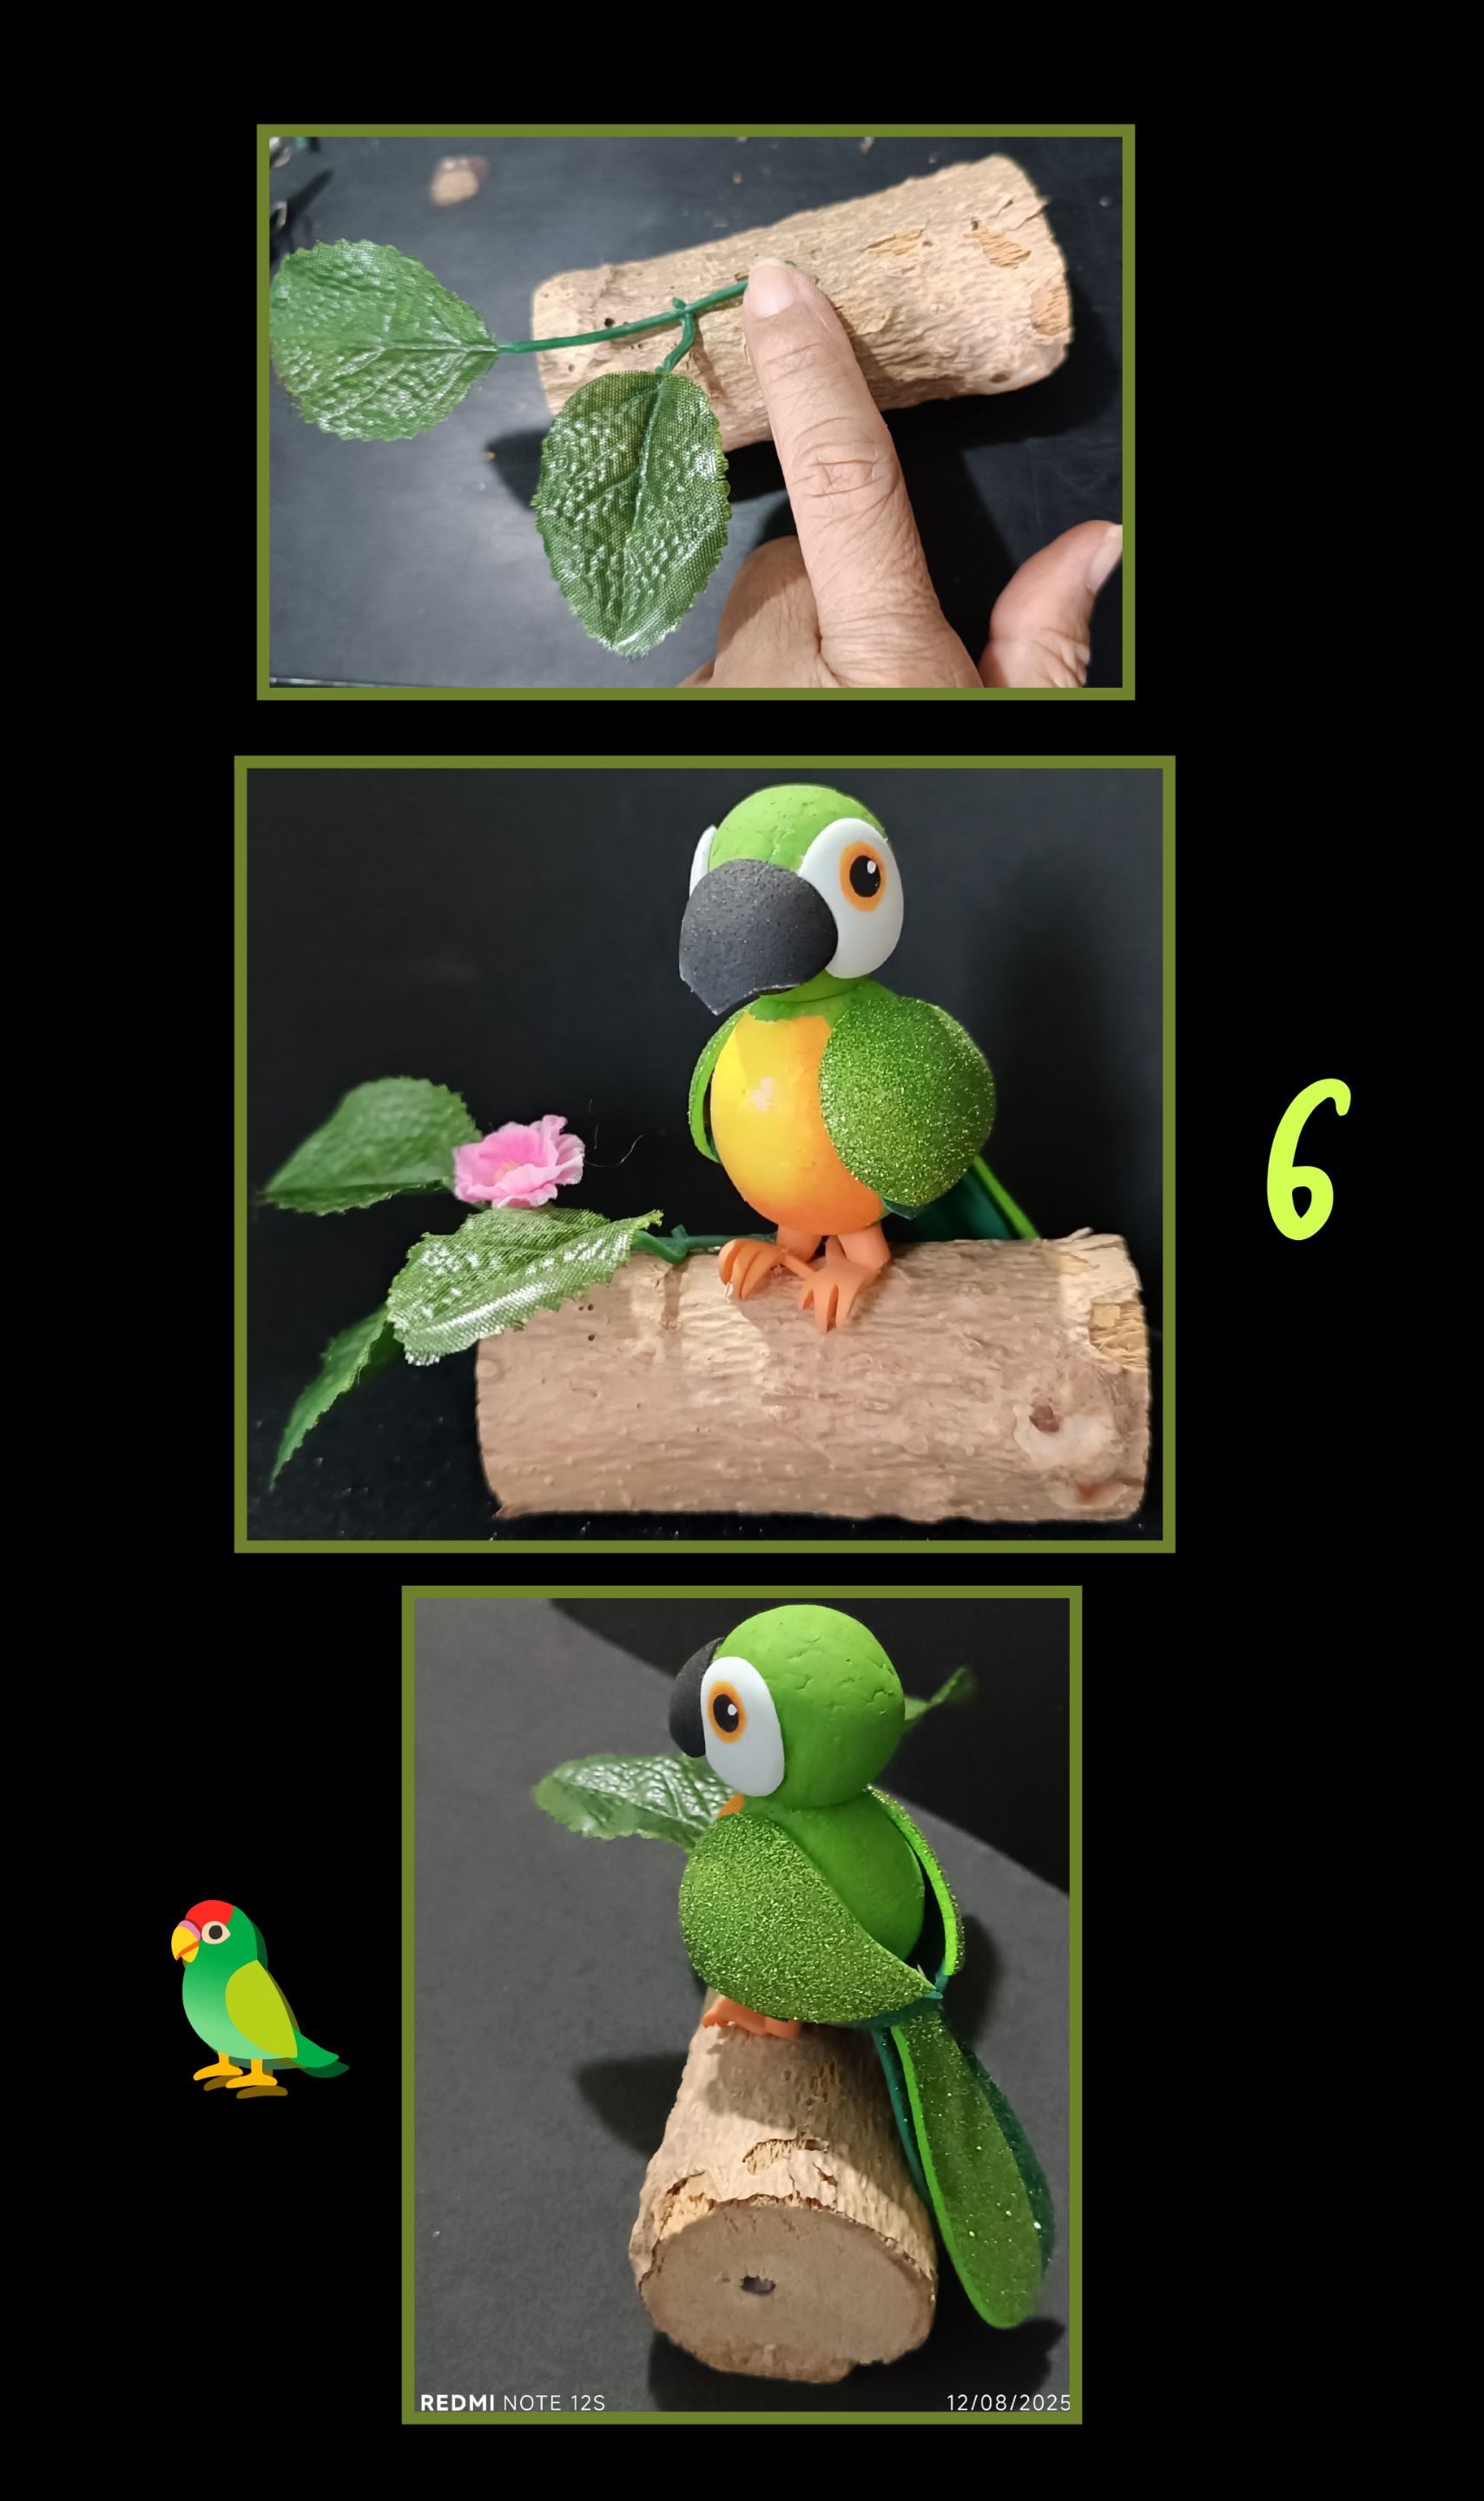
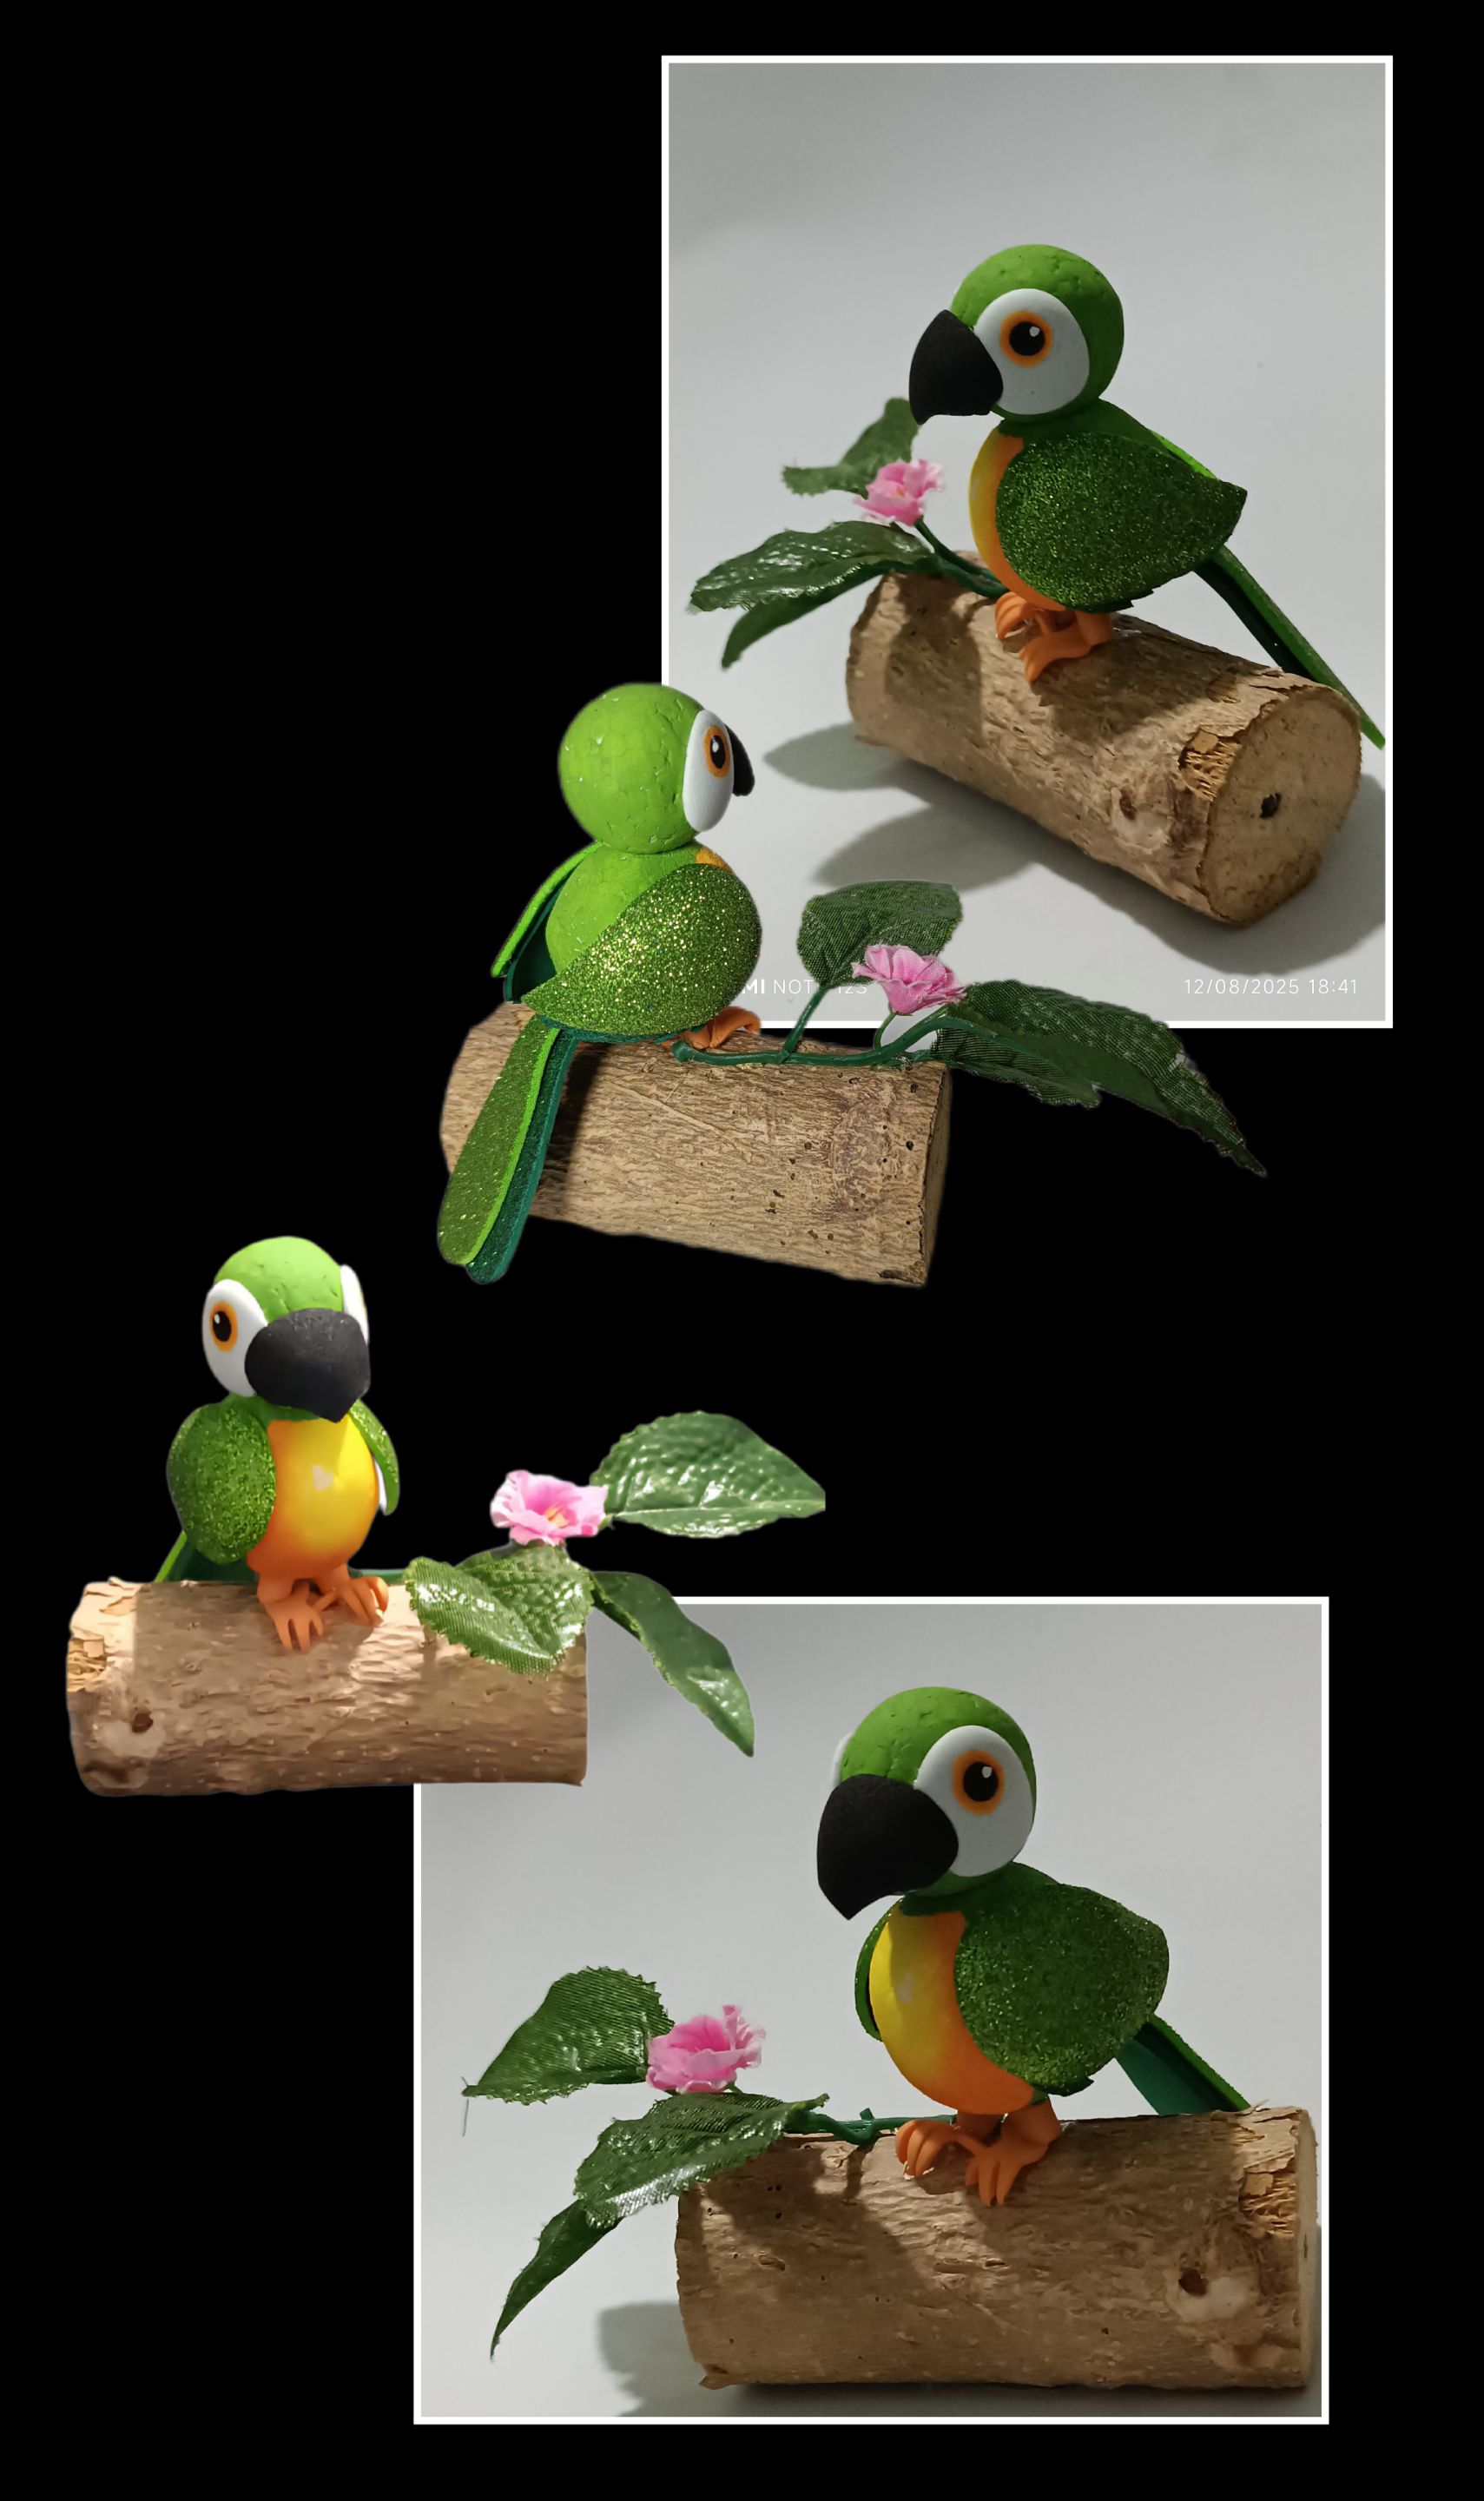
- Por último, pega las hojas al tronco, decora con una florecita y pega el lorito.
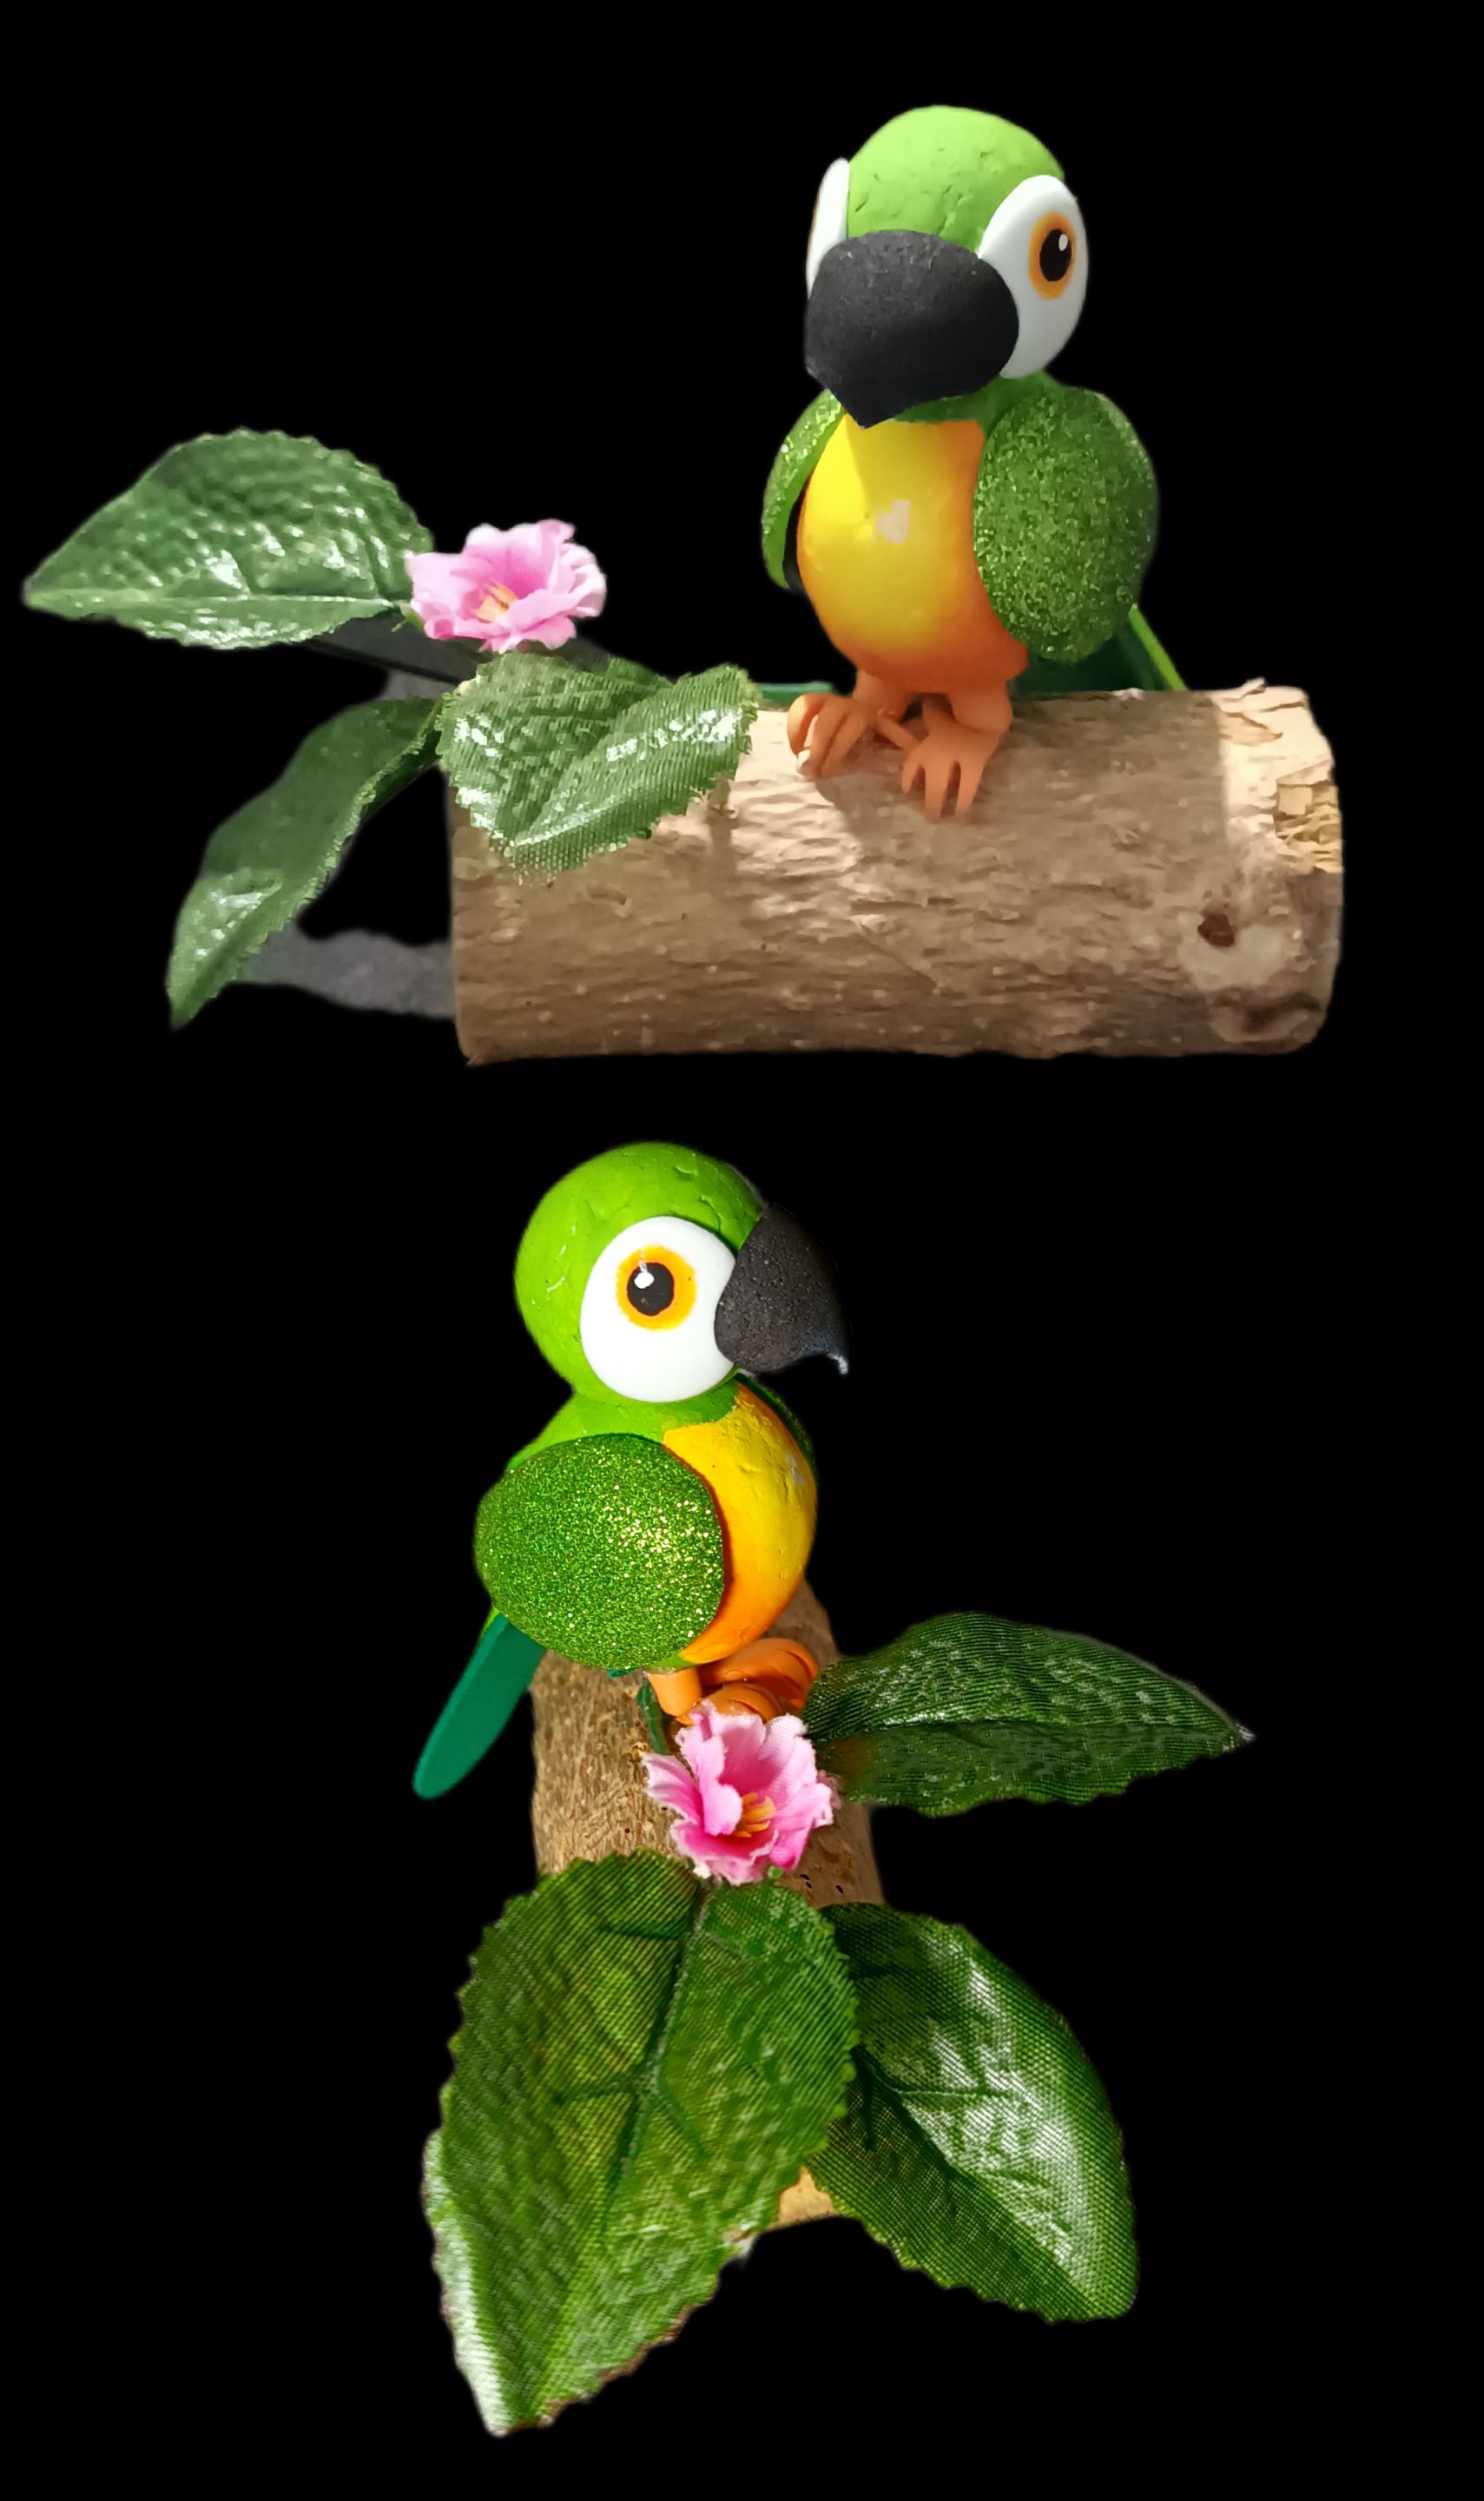
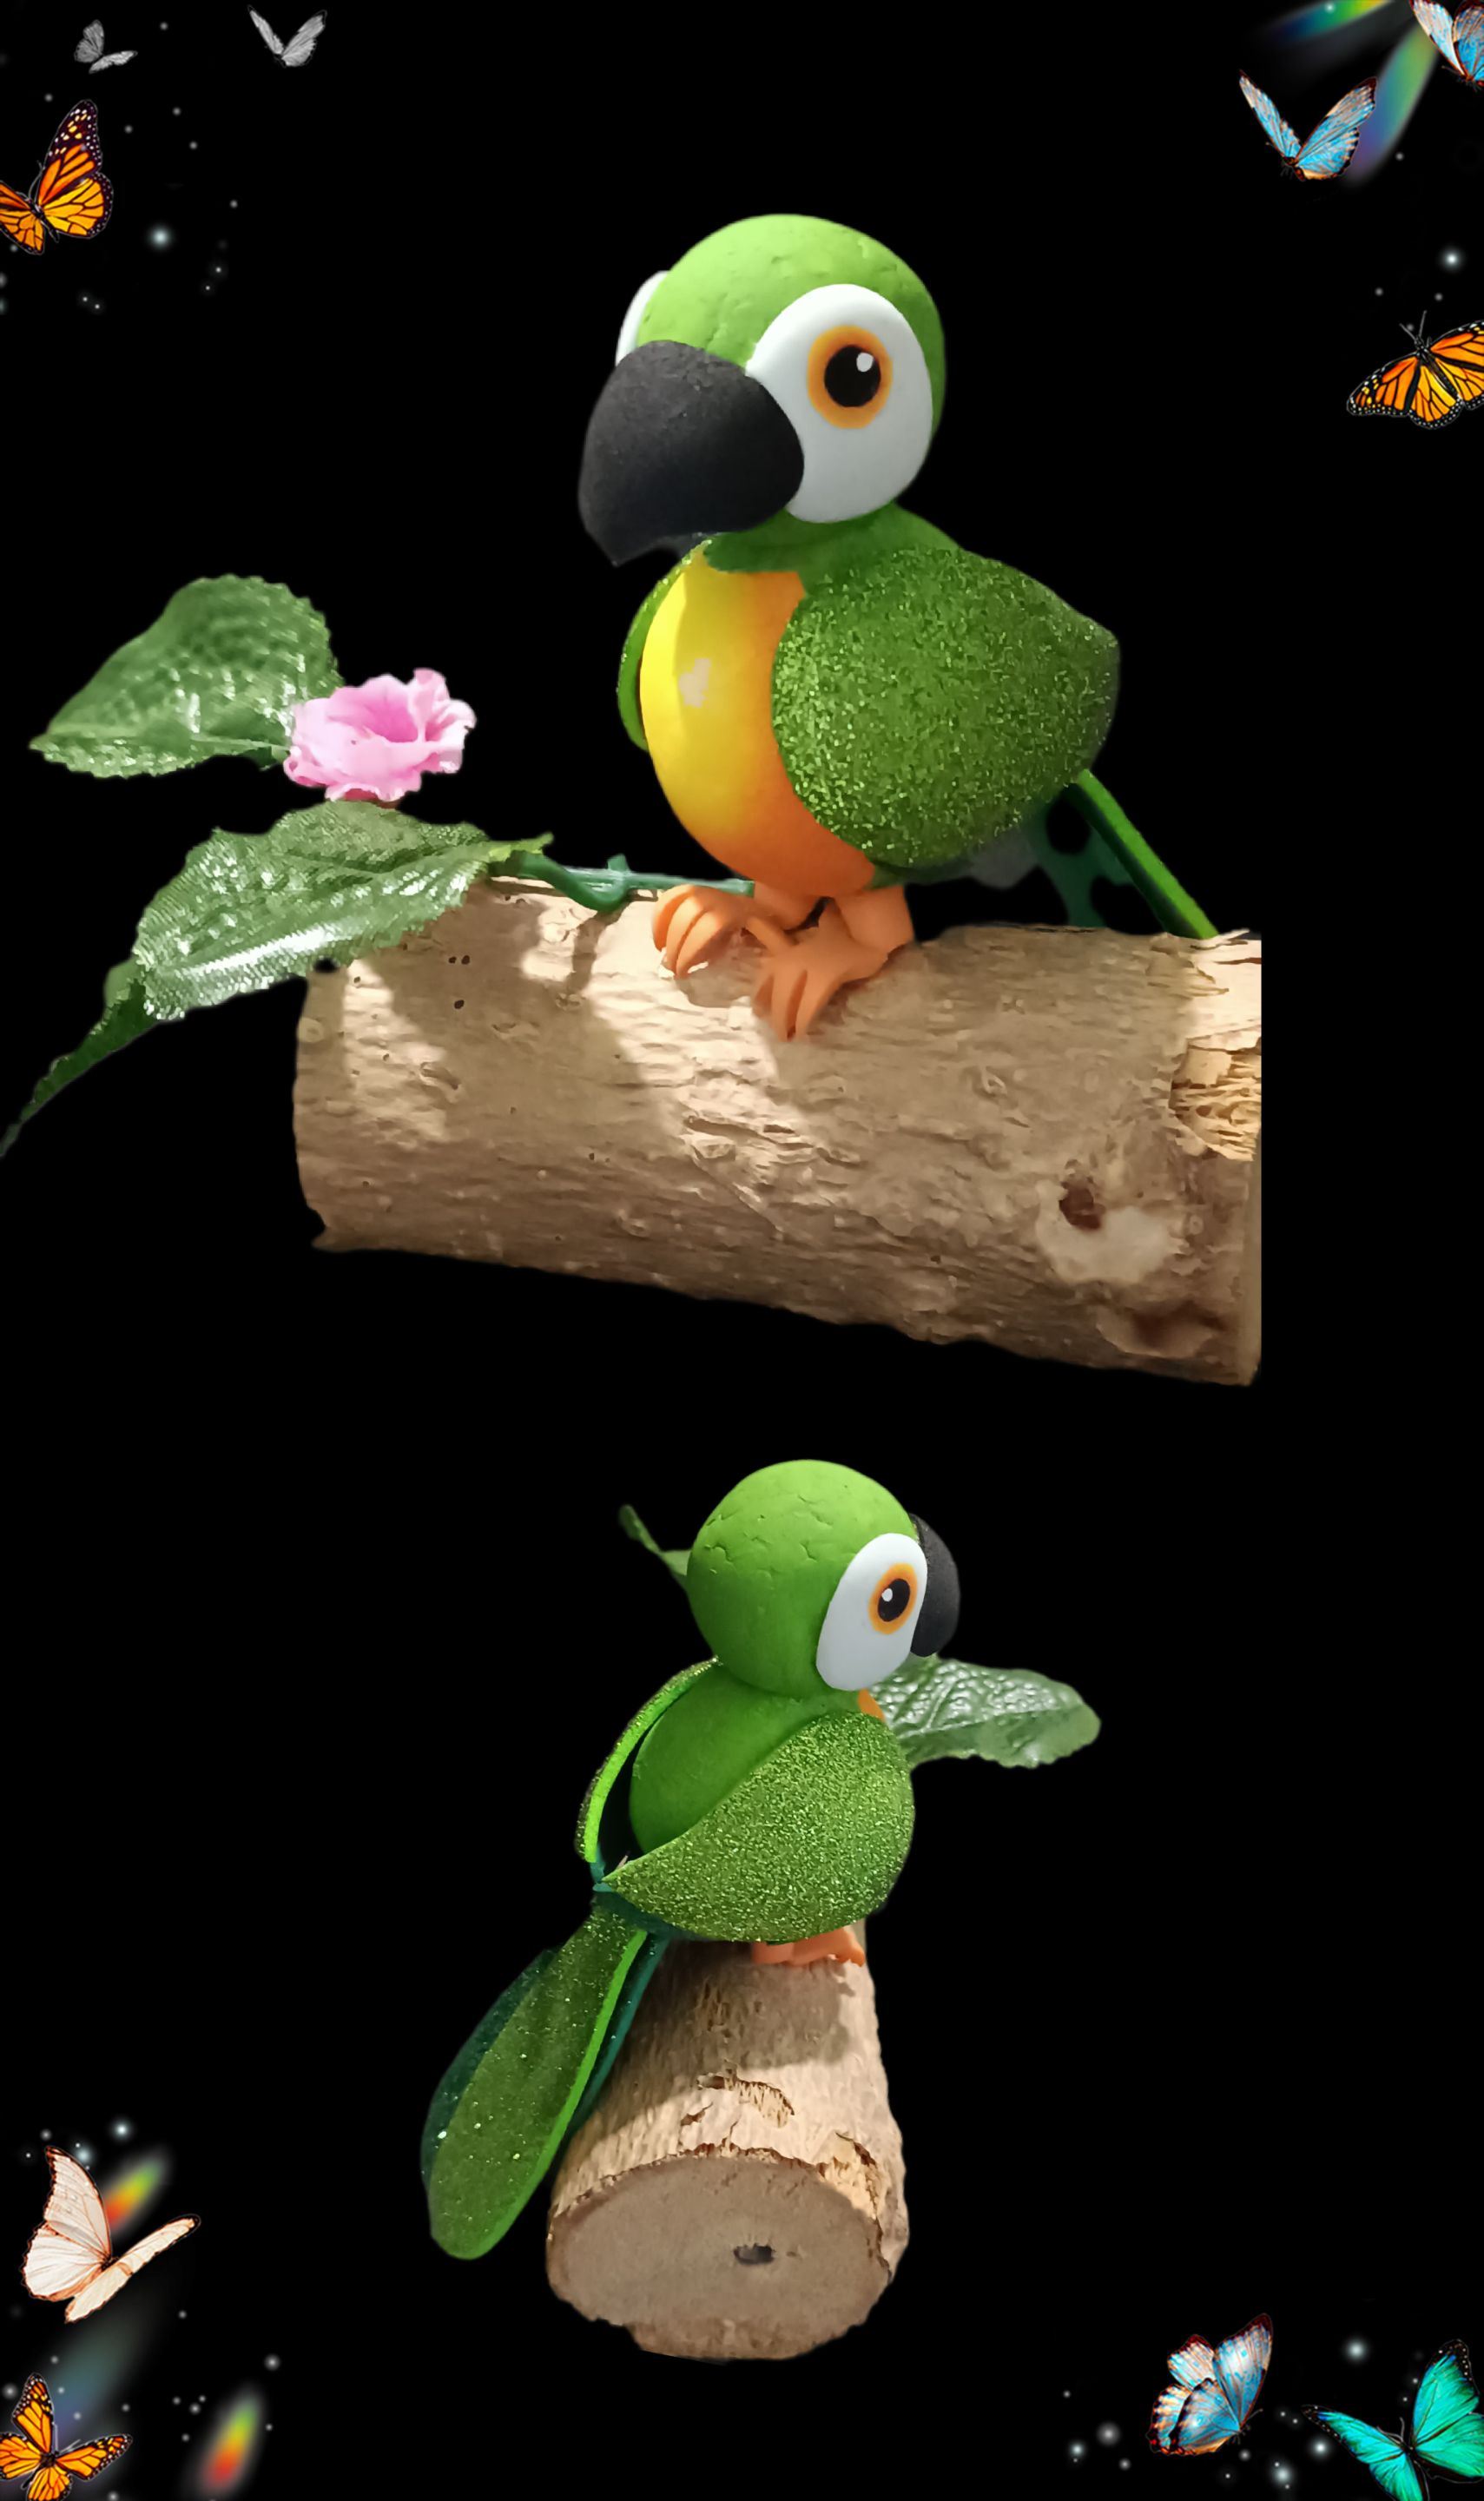
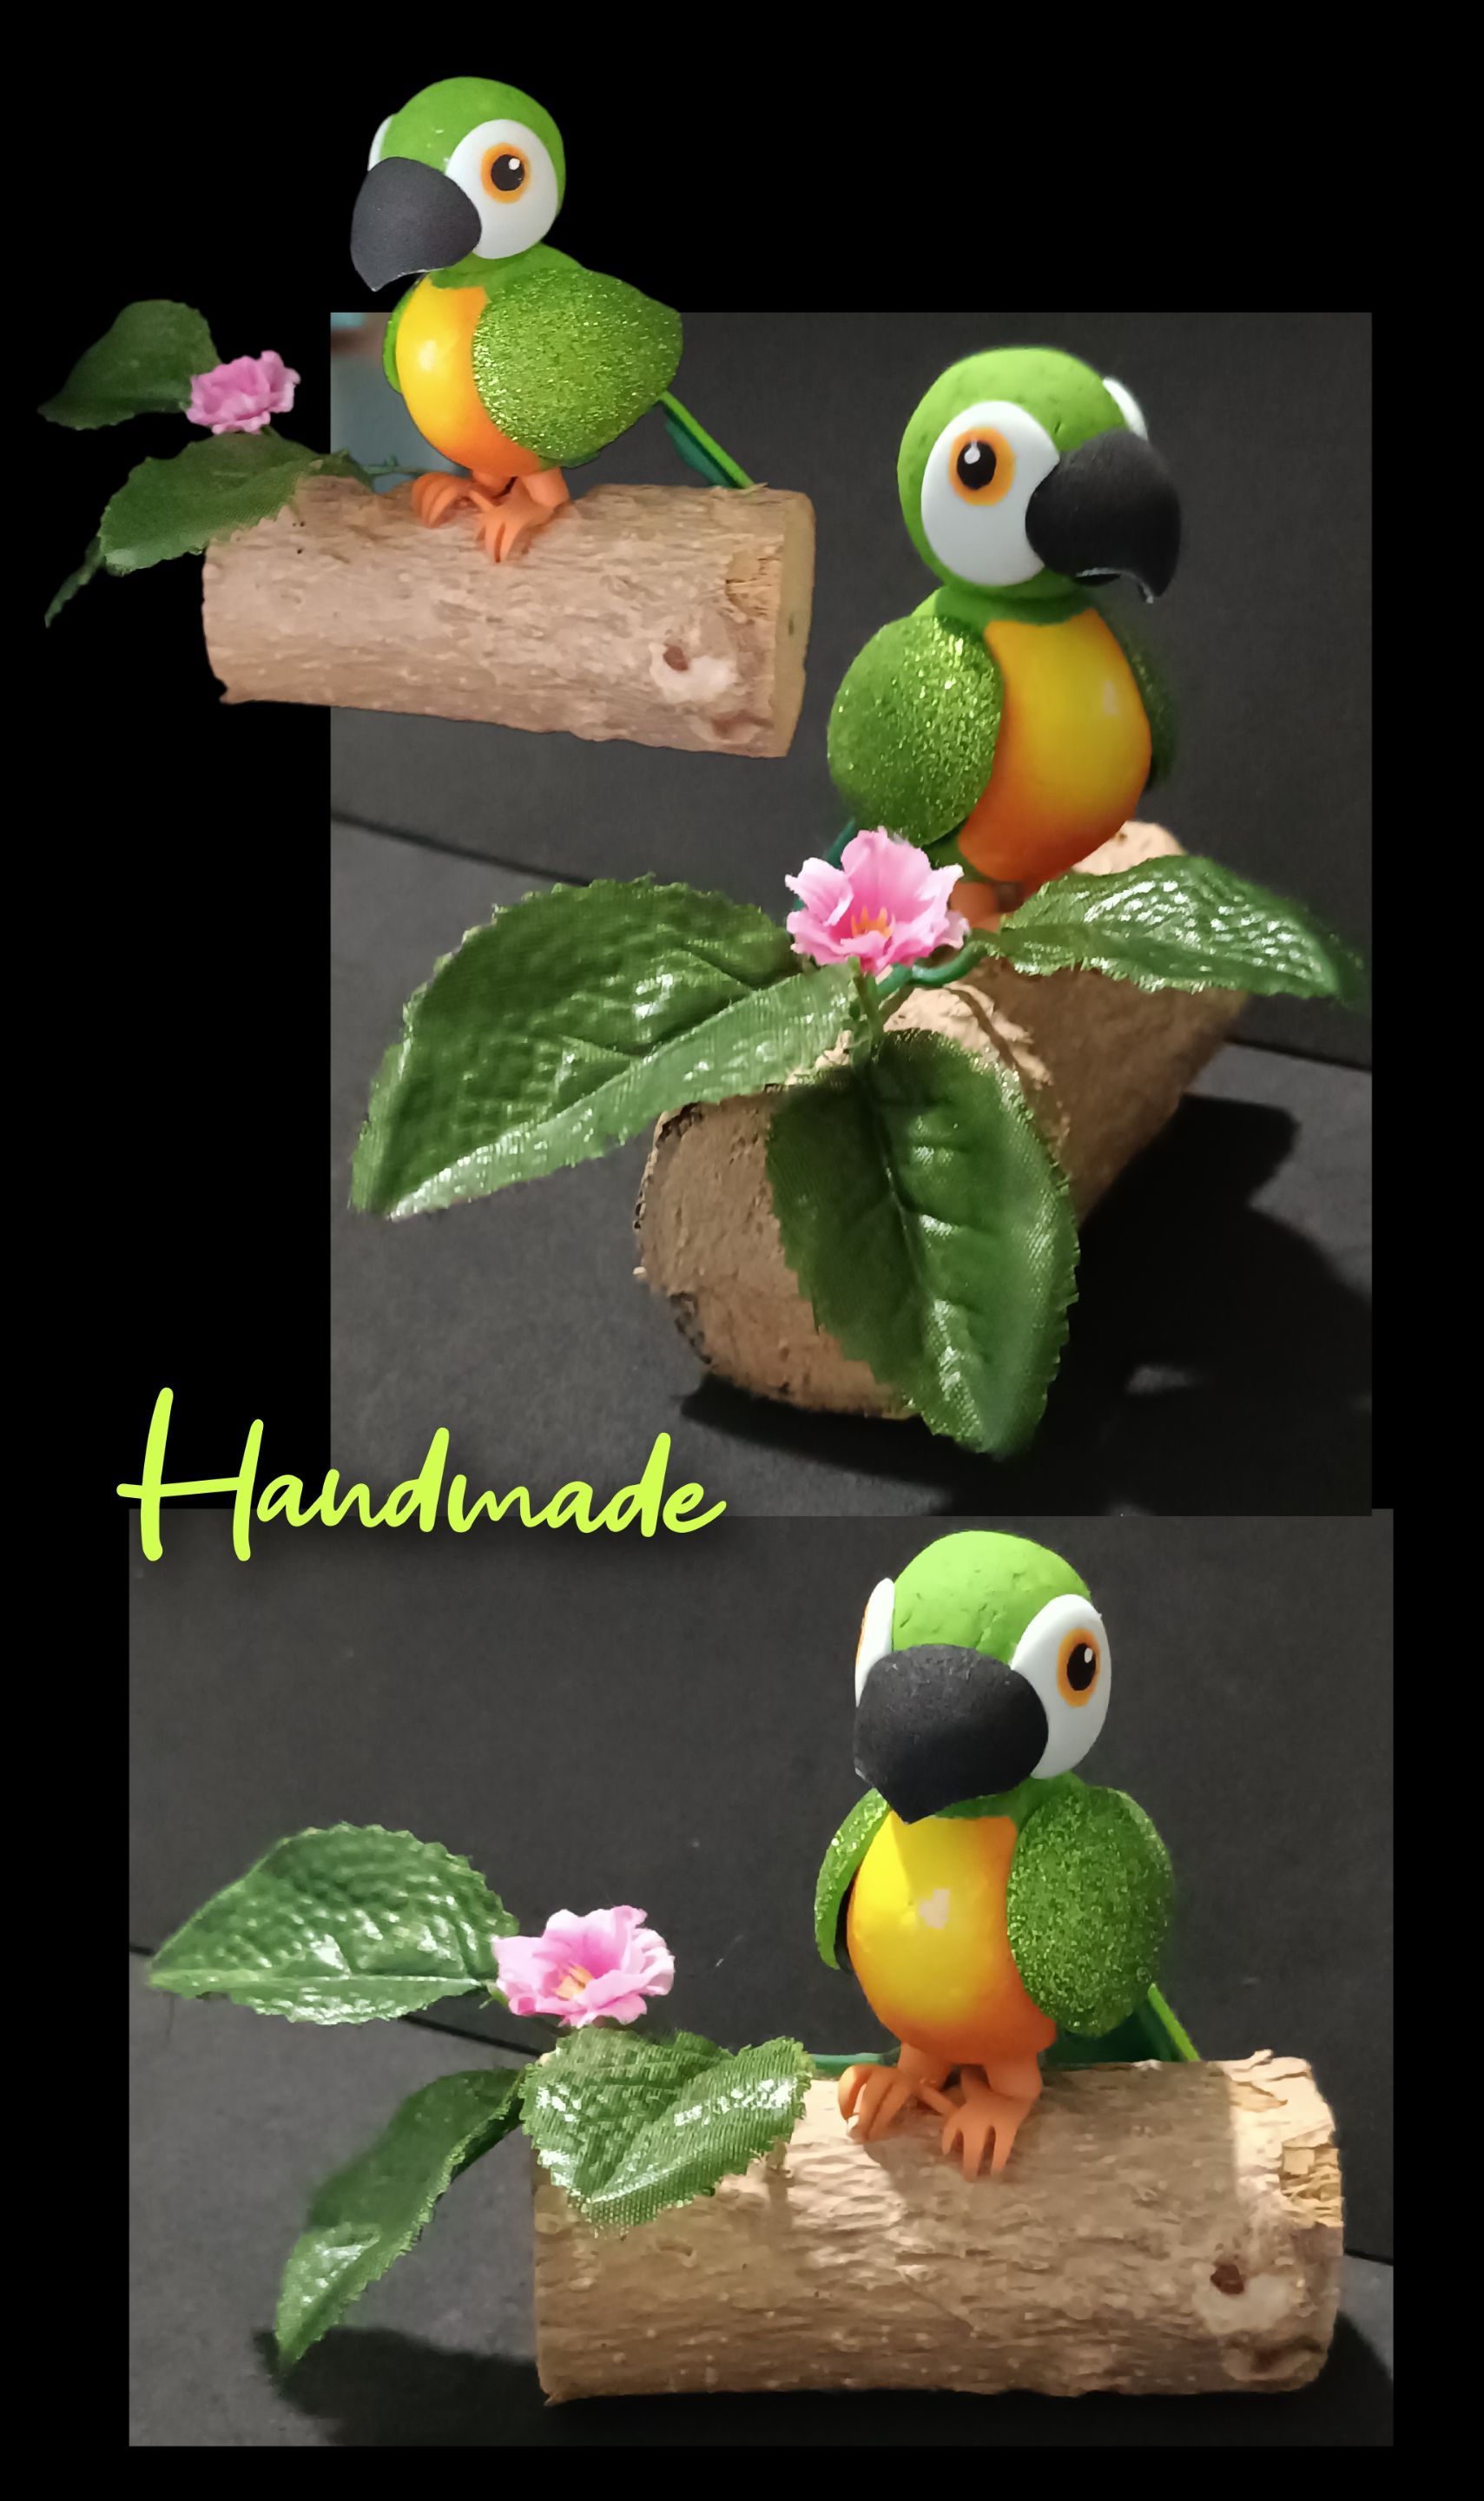
Y aquí el resultado final...
Mi publicación la traduje con DeepL Teléfono Redmi Note 12 Editor de fotos GridArt.
Atrévete y hazlo conmigo, verás que puedes y usa los colores y materiales de tu preferencia.
 Y llegó la hora de mi despedida no sin antes agradecer tu tiempo y apoyo.
Saludos y bendiciones.
Hasta mi próximo tutorial.
Y llegó la hora de mi despedida no sin antes agradecer tu tiempo y apoyo.
Saludos y bendiciones.
Hasta mi próximo tutorial.
English
Greetings, my dear creators and friends who are visiting my page today.
To do this, you will need the following materials:
| Styrofoam balls or thick anime| Matte and frosted foam1
|----|----|
| Paints and brushes| Scissors and craft knife|
| Silicone| Sandpaper and sanding block|
| Log or base| Fabric leaves and flowers|
Let's get started!
Step 1:
- You will need two spheres, one small for the head and the other 1/0.5 cm larger for the body. If you don't have spheres, mark two circles on a piece of Styrofoam, one small and one larger, and use the knife to cut the edges and round them off. Then, use coarse sandpaper to smooth them out and round them off well. To remove any imperfections, wet them with dishwater and gently sand them with fine sandpaper to smooth them out. (See photos below)
- Now, on the larger sphere, make two equal cuts on the sides as shown in the photo. This is where you will glue the wings. Also make a small cut at the top where the head will be glued, and sand it down.
- Then start painting the center or chest with yellow paint.https://files.peakd.com/file/peakd-hive/elmundodebetty/23tvYHnYyBD16vroor6oFqaHRp2kyD1PJBER3nSeyGkSutMrh8718kKFRE8Fbr7okGVis.jpg
Step 2:
- After applying the yellow paint, while it is still wet, apply orange paint to the sides and blend with the brush, then let dry.
- Next, paint the head green and let dry, then paint the rest of the body with green paint as shown in the photo.
- Now apply a little silicone and insert a toothpick to join the head to the body.
Step 3:
- Cut out two circles from white foam for the eyes and cut out a crescent shape, as shown in the photo. Also cut out the two parts of the beak, wings, and tail.
- Heat the iron and place the pieces on it. When they start to take shape, remove them and shape them with a curling iron.
- Then apply silicone to the wide edge of the beak and stick it to the head, applying a little pressure until it dries.
Step 4:
- Apply silicone to the wings, stick one on top of the other, and let dry.
- With the knife, make a small incision in the back, apply silicone to the tail, stick it in the groove, and then stick the wings to the sides.
Step 5:
- Now glue the half-moons to the sides of the beak, the feet, and paint the eyes.
Step 6
- Finally, glue the leaves to the trunk, decorate with a small flower, and glue the parrot.
And here is the final result...
I translated my post with DeepL. Redmi Note 12 phone. GridArt photo editor.
Go ahead and do it with me. You'll see that you can do it, and use the colors and materials you like best.
And now it's time for me to say goodbye, but not before thanking you for your time and support.
Best regards and blessings.
Until my next tutorial.