

Welcome fellow art enthusiasts. Wishing you a happy day. My name is Elvis Sanchez and today I am delighted to welcome you to my gallery where I exhibit my collection of realistic drawings. I hope you enjoy my art.
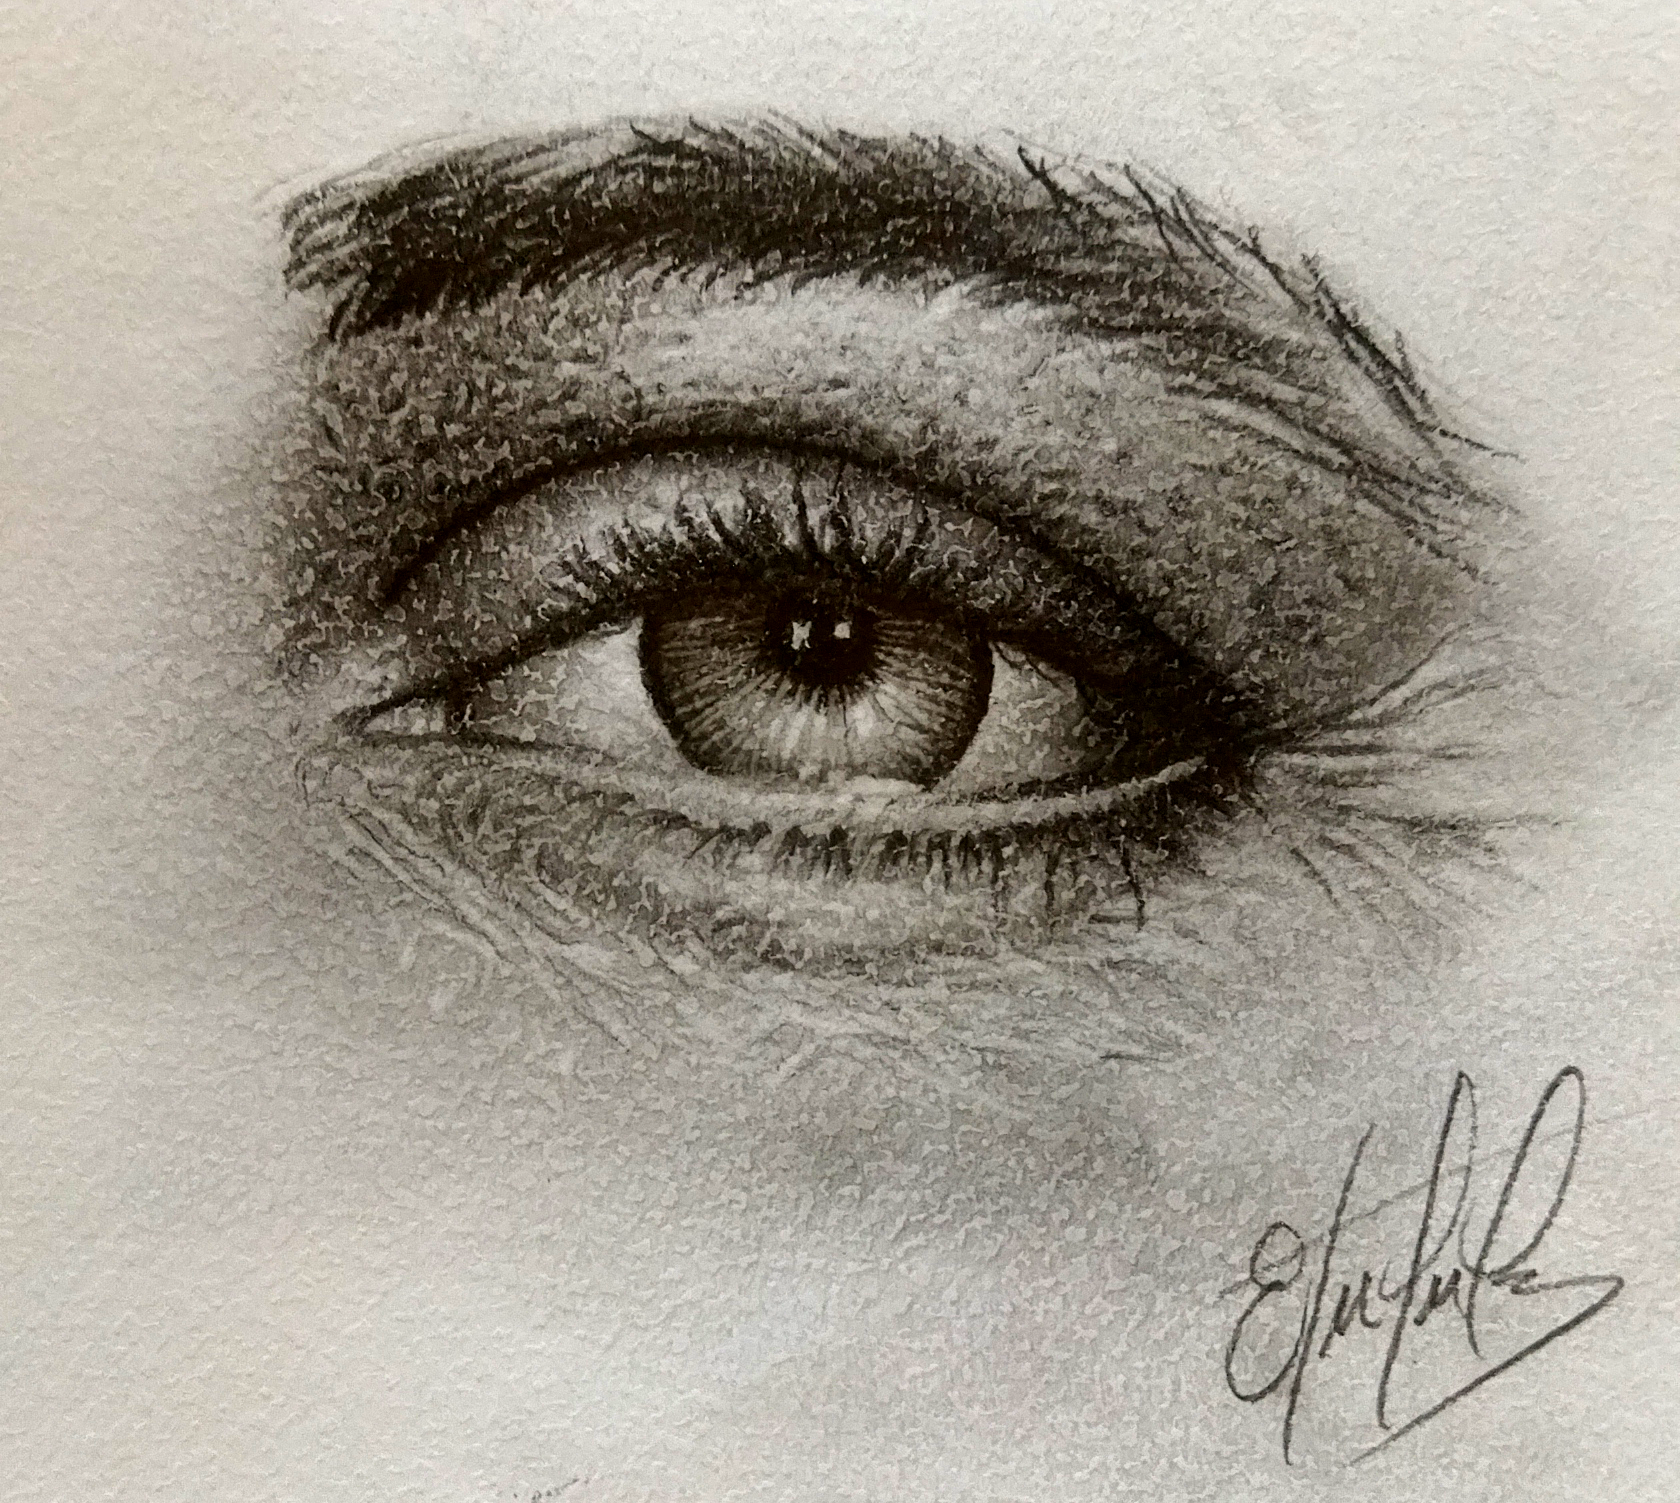
Like all opportunities in drawing practice, every day I have a small space to create a portrait or illustration and today allows me to share with you a small realistic drawing and it is an eye. Realistic drawing that has been done using a 2B graphite pencil.
Drawing realistic faces and character illustrations with graphite pencil is a passion that requires skill, dedication and practice. As with any artistic skill, practice is essential to improve. It is important to know the technique, have inspiration and creativity, and above all have fun when drawing, take advantage of the resources available to continue improving. Although drawing realistic faces requires precision and technique, it is also important to let your imagination and creativity fly to create unique and original characters.
Do not be afraid or discouraged if your first attempts are not perfect. With time and constant practice, you will see significant improvements in your drawing skills and experimenting with different techniques and styles. This will help you discover new ways to express yourself and develop your own unique style.
To create this realistic eye, a small white cardboard and the almost worn-out 2B graphite pencil were used, creating the parts of the eye such as eyelids, pupil, sclera, iris, eyelashes, eyebrows and skin.
Once this part was created, we continued with the skin, we placed a layer of very soft graphite as if caressing the paper, then with the help of a small soft bristle brush we expanded the graphite and thus created a surface with details such as pores and small wrinkles and then with the eraser we created some points of light leaving the different tones for the lights and shadows visible.
Now for the darker shadows and to give depth to the portrait we will use the same 2B pencil, but applying a little more pressure on the paper, but keep in mind that you must have a firm but light hand to carefully blend and blur the drawing to obtain an even and realistic finish.

Bienvenidos compañeros y entusiastas del arte. Deseándoles que tengan un feliz día. Mi nombre es Elvis Sanchez y hoy estoy encantado de darle la bienvenida a mi galería donde exhibo mi colección de dibujos realistas. Espero que disfruten de mi arte.
Como todas las oportunidades en la práctica de dibujo, cada día dispongo un pequeño espacio para crear algún retrato o ilustración y el día de hoy me permito compartirles un pequeño dibujo realista y se trata de un ojo. Dibujo realista que ha sido realizada utilizando un lápiz de grafito 2B.
Dibujar rostros realistas e ilustraciones de personajes con lápiz de grafito es una pasión que requiere habilidad, dedicación y práctica. Como en cualquier habilidad artística, la práctica es esencial para mejorar. Es importante conocer la técnica, tener inspiración y creatividad, y sobre todo divertirse a la hora de dibujar, aprovechar los recursos disponibles para seguir mejorando. Aunque el dibujo de rostros realistas requiere de precisión y técnica, también es importante dejar volar la imaginación y la creatividad para crear personajes únicos y originales.
No tengas miedo ni te desanimes si tus primeros intentos no son perfectos. Con el tiempo y la práctica constante, verás mejoras significativas en tus habilidades de dibujo y de experimentar con diferentes técnicas y estilos. Esto te ayudará a descubrir nuevas formas de expresarte y a desarrollar tu propio estilo único.
Para crear este ojo realista se usó una pequeña cartulina blanca y el lápiz de grafito 2B ya casi desgastado, creando las partes del ojo como parpados, pupila, escleróticas, iris, pestaña, cejas y piel.
Ya creado esta parte seguimos con la piel, colocamos una capa de grafito muy suave como acariciando el papel, para luego con la ayuda de un pequeño pincel de cerda suave expandir el grafito y así crear una superficie con detalles como poros y pequeñas arrugas para luego con el borrador creamos algunos puntos de luz dejando a la vista los diferentes tonos para las luces y sombras.
Ahora para las sombras más oscuras y darle profundidad al retrato usaremos el mismo lápiz 2B, pero haciendo un poco más de presión sobre el papel, pero hay que tener en cuenta que se debe tener una mano firme pero liviana para mezclar y difuminar cuidadosamente el dibujo para obtener un acabado uniforme y realista.
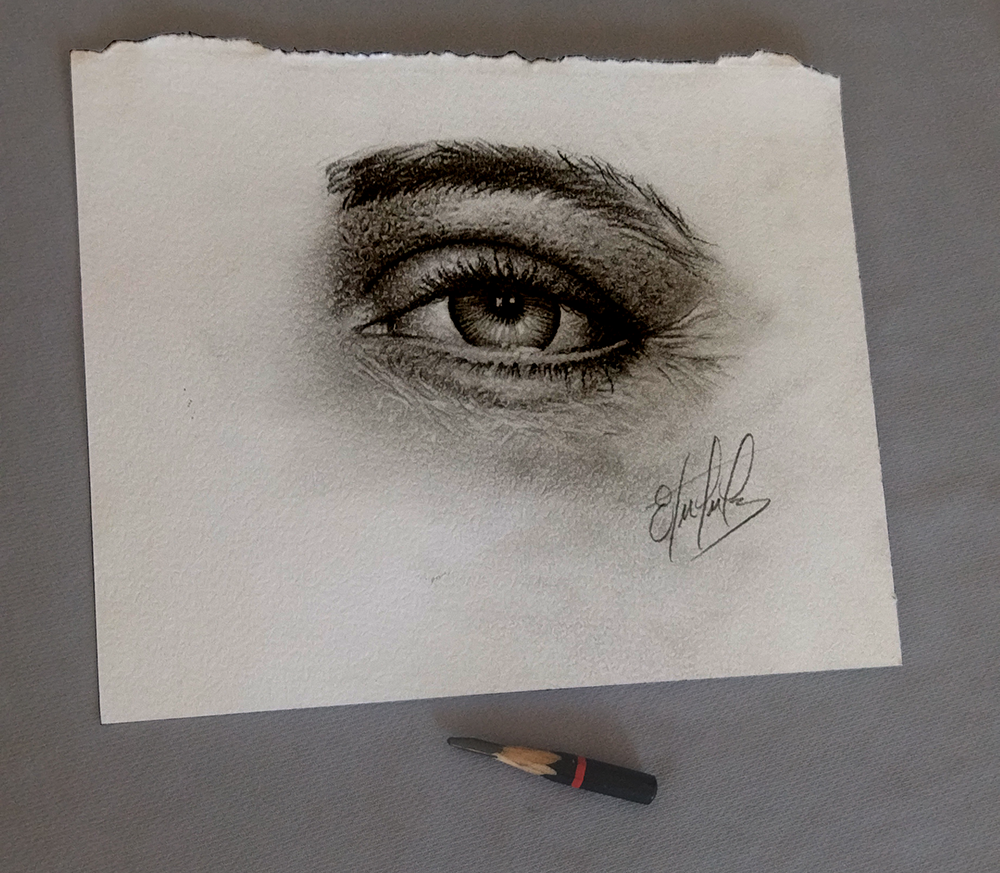
This drawing took me 50 minutes of work. Although I would have liked to have included more images of the step-by-step process, unfortunately, I was not able to because it was a drawing done from start to finish. But there are still some images of the process. However, I hope you enjoy this drawing and I would greatly appreciate it if you would leave me your comments.
I would also like to express my gratitude for taking the time to visit my post. I wish you all many blessings and success in all your projects. My name is Elvis Sanchez and I am available here or on my social networks if you need to contact me. I hope to see you soon on my next project. See you soon.
Este dibujo me 50 minutos de trabajo. A pesar de que me hubiera gustado haber incluido mas imágenes del proceso paso a paso, desafortunadamente, no me fue posible debido que fue un dibujo hecho de principio a fin. Pero de igual manera están algunas imágenes del proceso. No obstante, espero que disfruten de este dibujo y les agradecería mucho si me dejaran sus comentarios.
También quisiera expresar mi agradecimiento por haberse tomado el tiempo de visitar mi publicación. Les deseo a todos muchas bendiciones y éxito en todos sus proyectos. Mi nombre es Elvis Sánchez y estoy disponible aquí o en mis redes sociales si necesitan contactarme. Espero verlos pronto en mi próximo proyecto. Hasta pronto.


![]()
![]()