
Hello, creativity lovers! I'm glad to see you back here at Hive DIY. I hope inspiration is accompanying you with each project. Today I want to tell you how one of my most special pieces came to be: a necklace with a story behind it. A few days ago, my daughter made a request that, unknowingly, pulled me out of a creative block. She asked for a flower, but not just any flower, one she could wear. So together we immersed ourselves in an image search until we found the perfect design to work in wood. With the design in mind, I got to work with great excitement. The idea was to create something my daughter could wear, so I prepared all the tools to turn a simple piece of wood into a unique piece. In the end, not only did I get a beautiful accessory for her, but I also learned that the best inspiration can come from the most unexpected moments. Now, I invite you to follow each of the steps in this tutorial so you can create your own flower necklace. I hope you like it!
¡Hola, amantes de la creatividad! Me alegra verlos de nuevo en este espacio de Hive Diy. Espero que la inspiración los esté acompañando en cada proyecto. Hoy quiero contarles cómo nació una de mis piezas más especiales, un collar que tiene una historia detrás. Hace unos días, mi hija me hizo una petición que, sin saberlo, me sacó de un bloqueo creativo. Me pidió una flor, pero no una cualquiera, una que pudiera usar, así que juntos nos sumergimos en una búsqueda de imágenes hasta que dimos con el diseño perfecto para trabajar en madera. Con el diseño en mente, me puse manos a la obra con mucha emoción, la idea era crear algo que mi hija pudiera lucir, así que preparé todas las herramientas para convertir un simple trozo de madera en una pieza única. Al final, no solo conseguí un accesorio hermoso para ella, sino que también aprendí que la mejor inspiración puede surgir de los momentos más inesperados. Ahora, los invito a seguir cada uno de los pasos de este tutorial para que puedan crear su propio collar de flor. ¡Espero que les guste!

PROCESS
 |
 |
|
|---|---|---|
 |
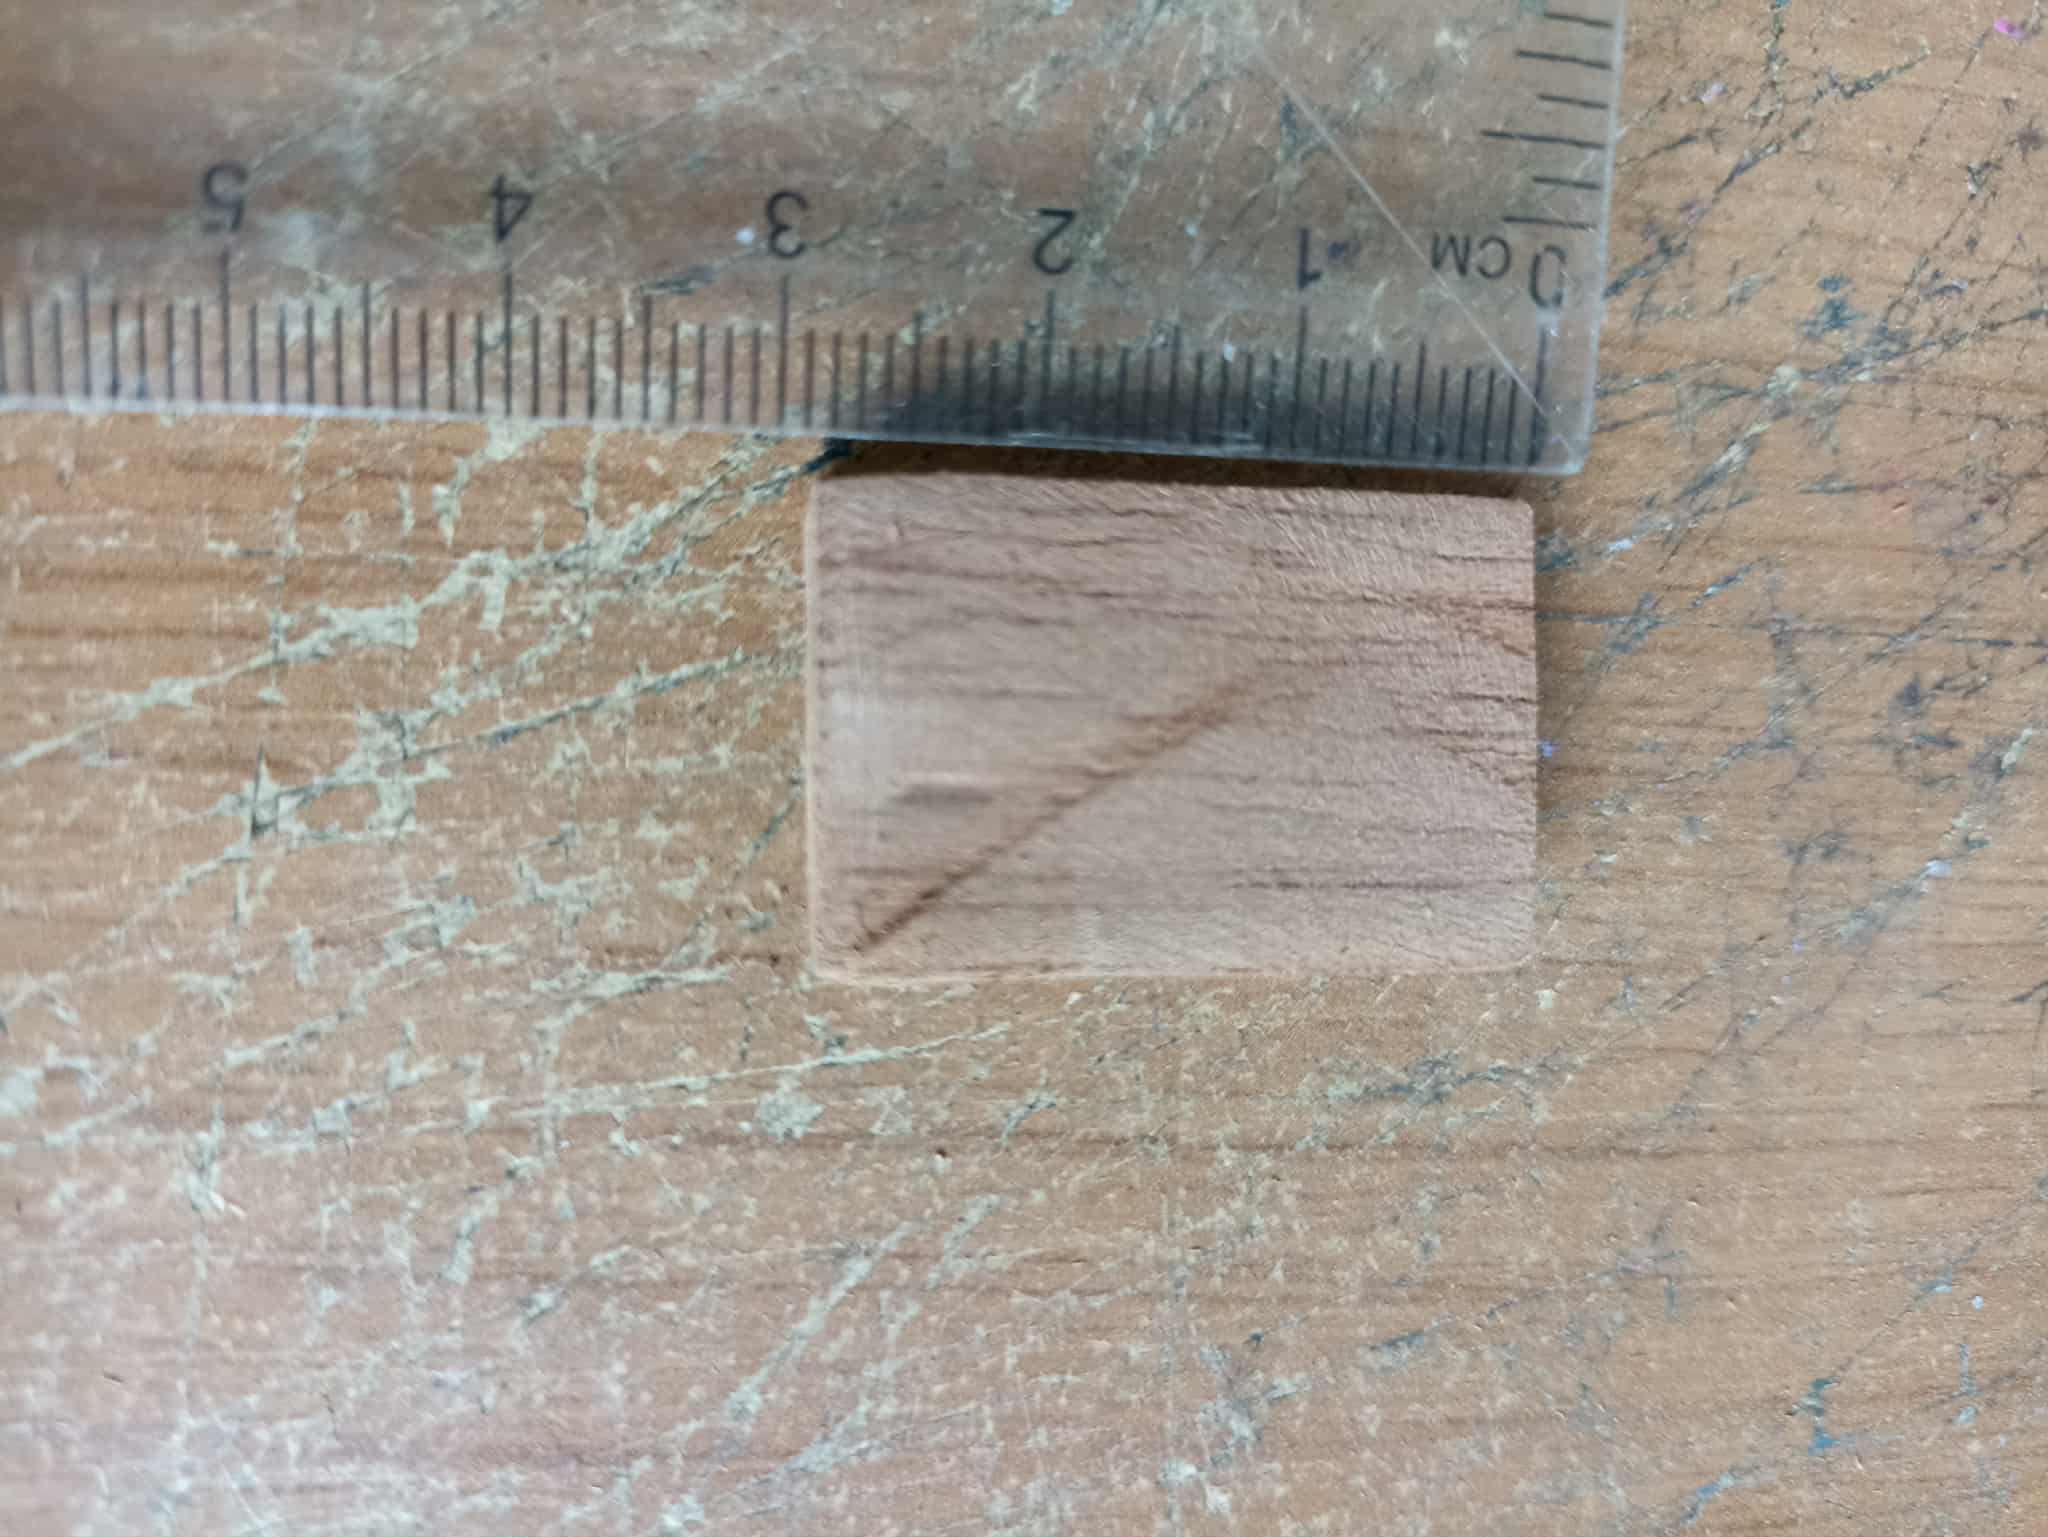 |
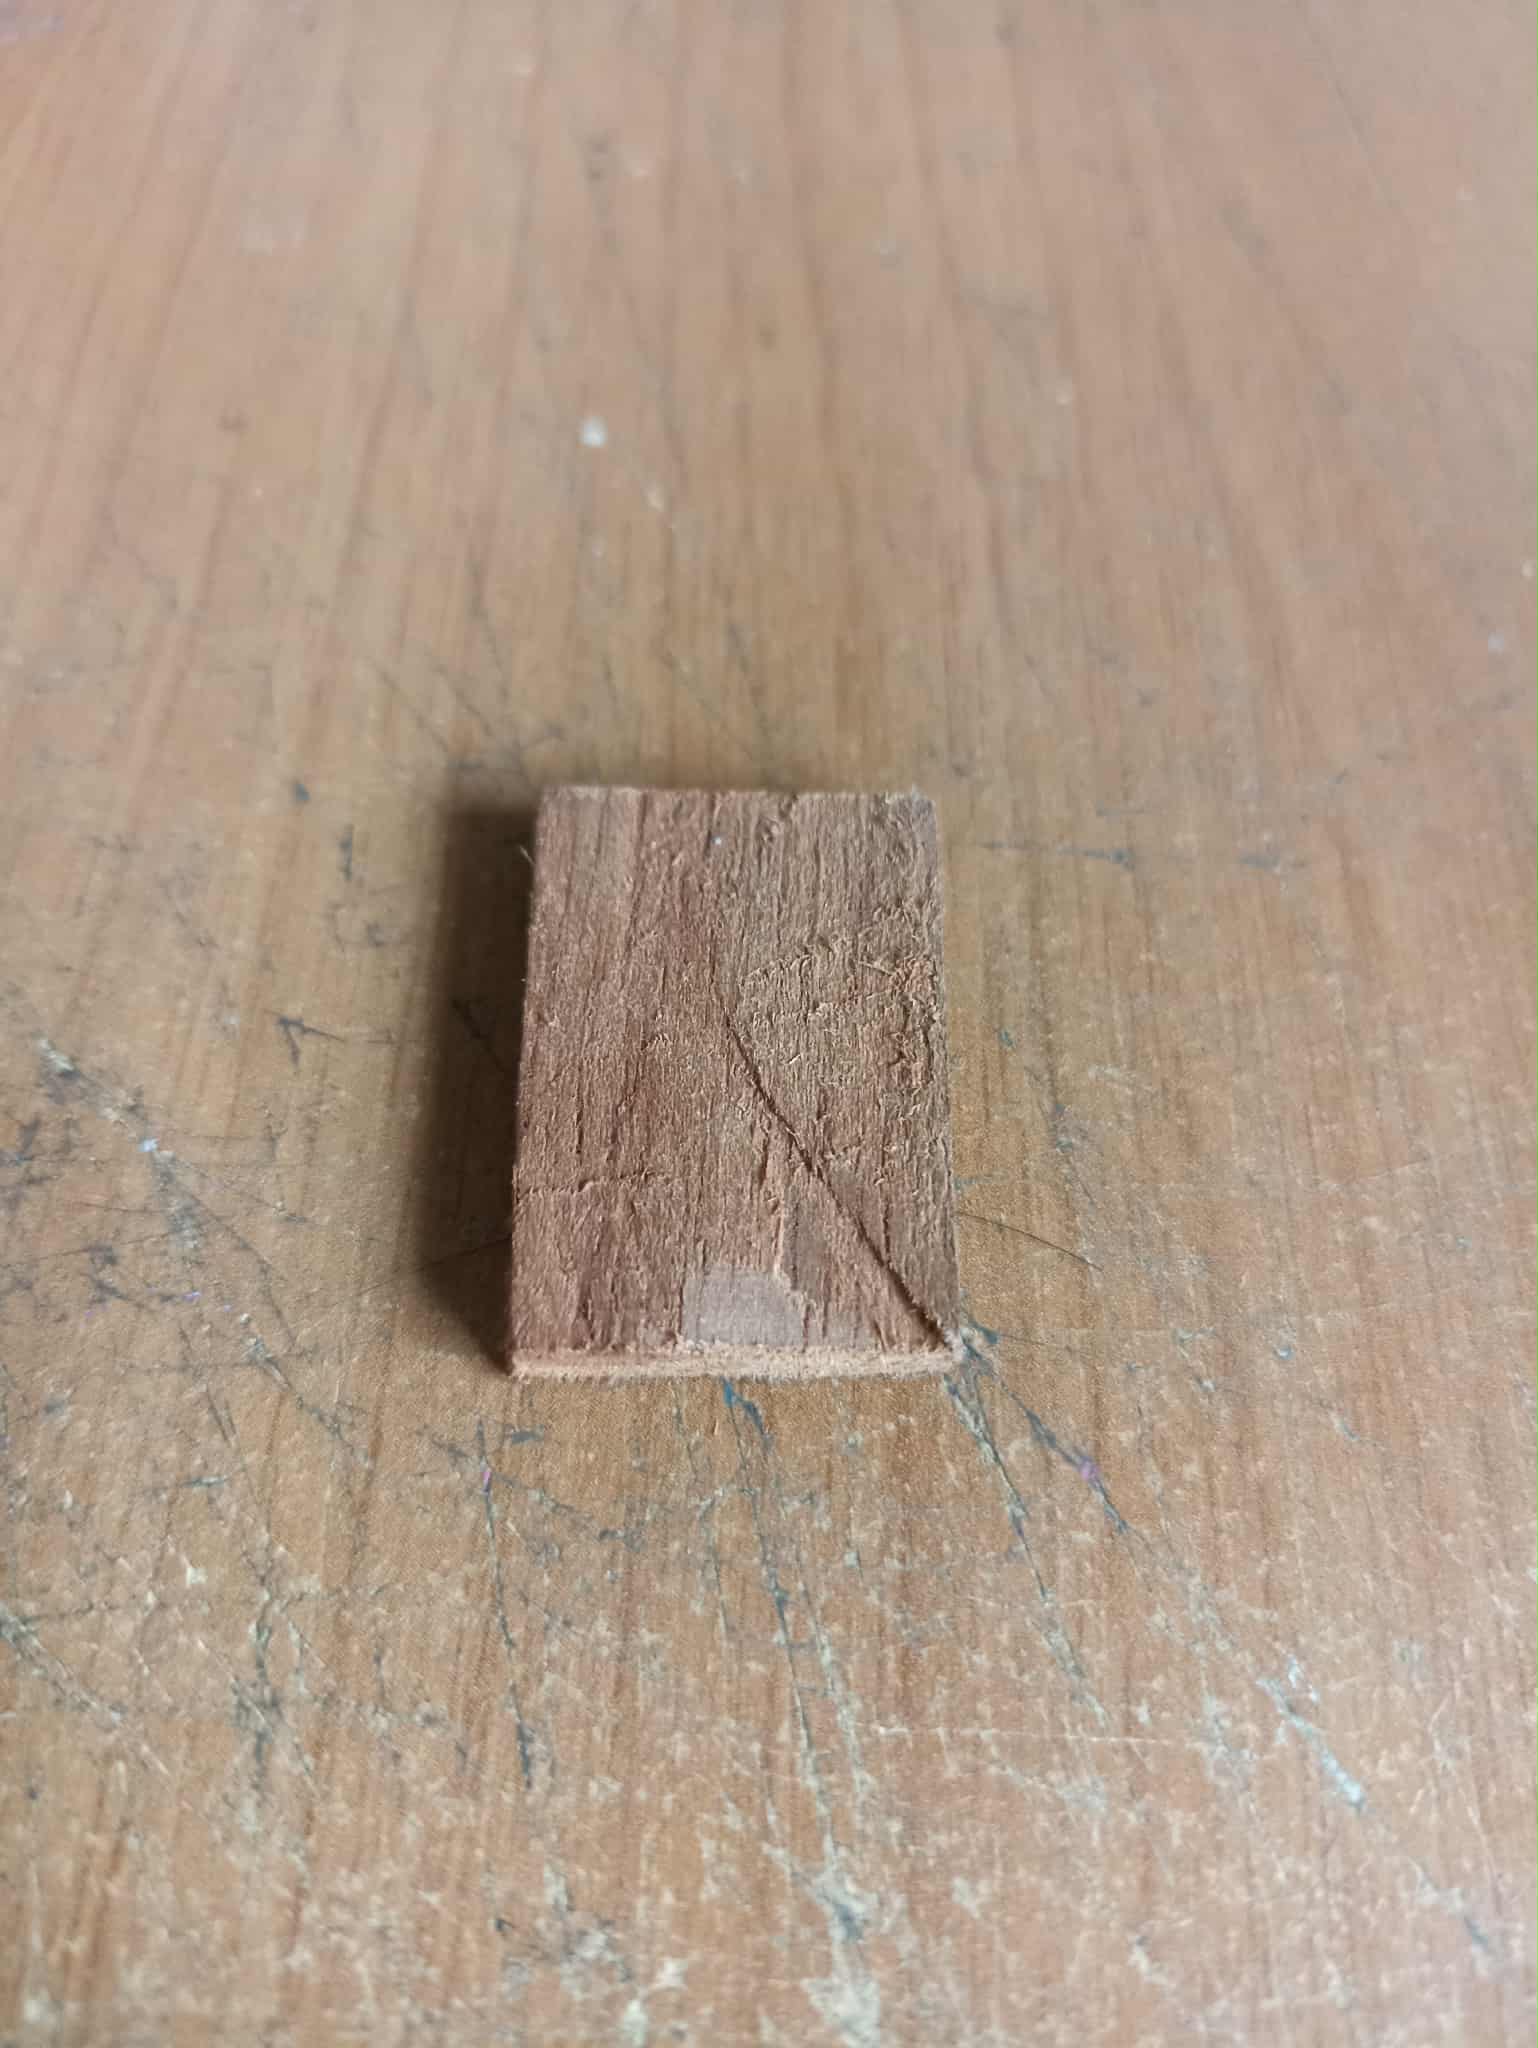
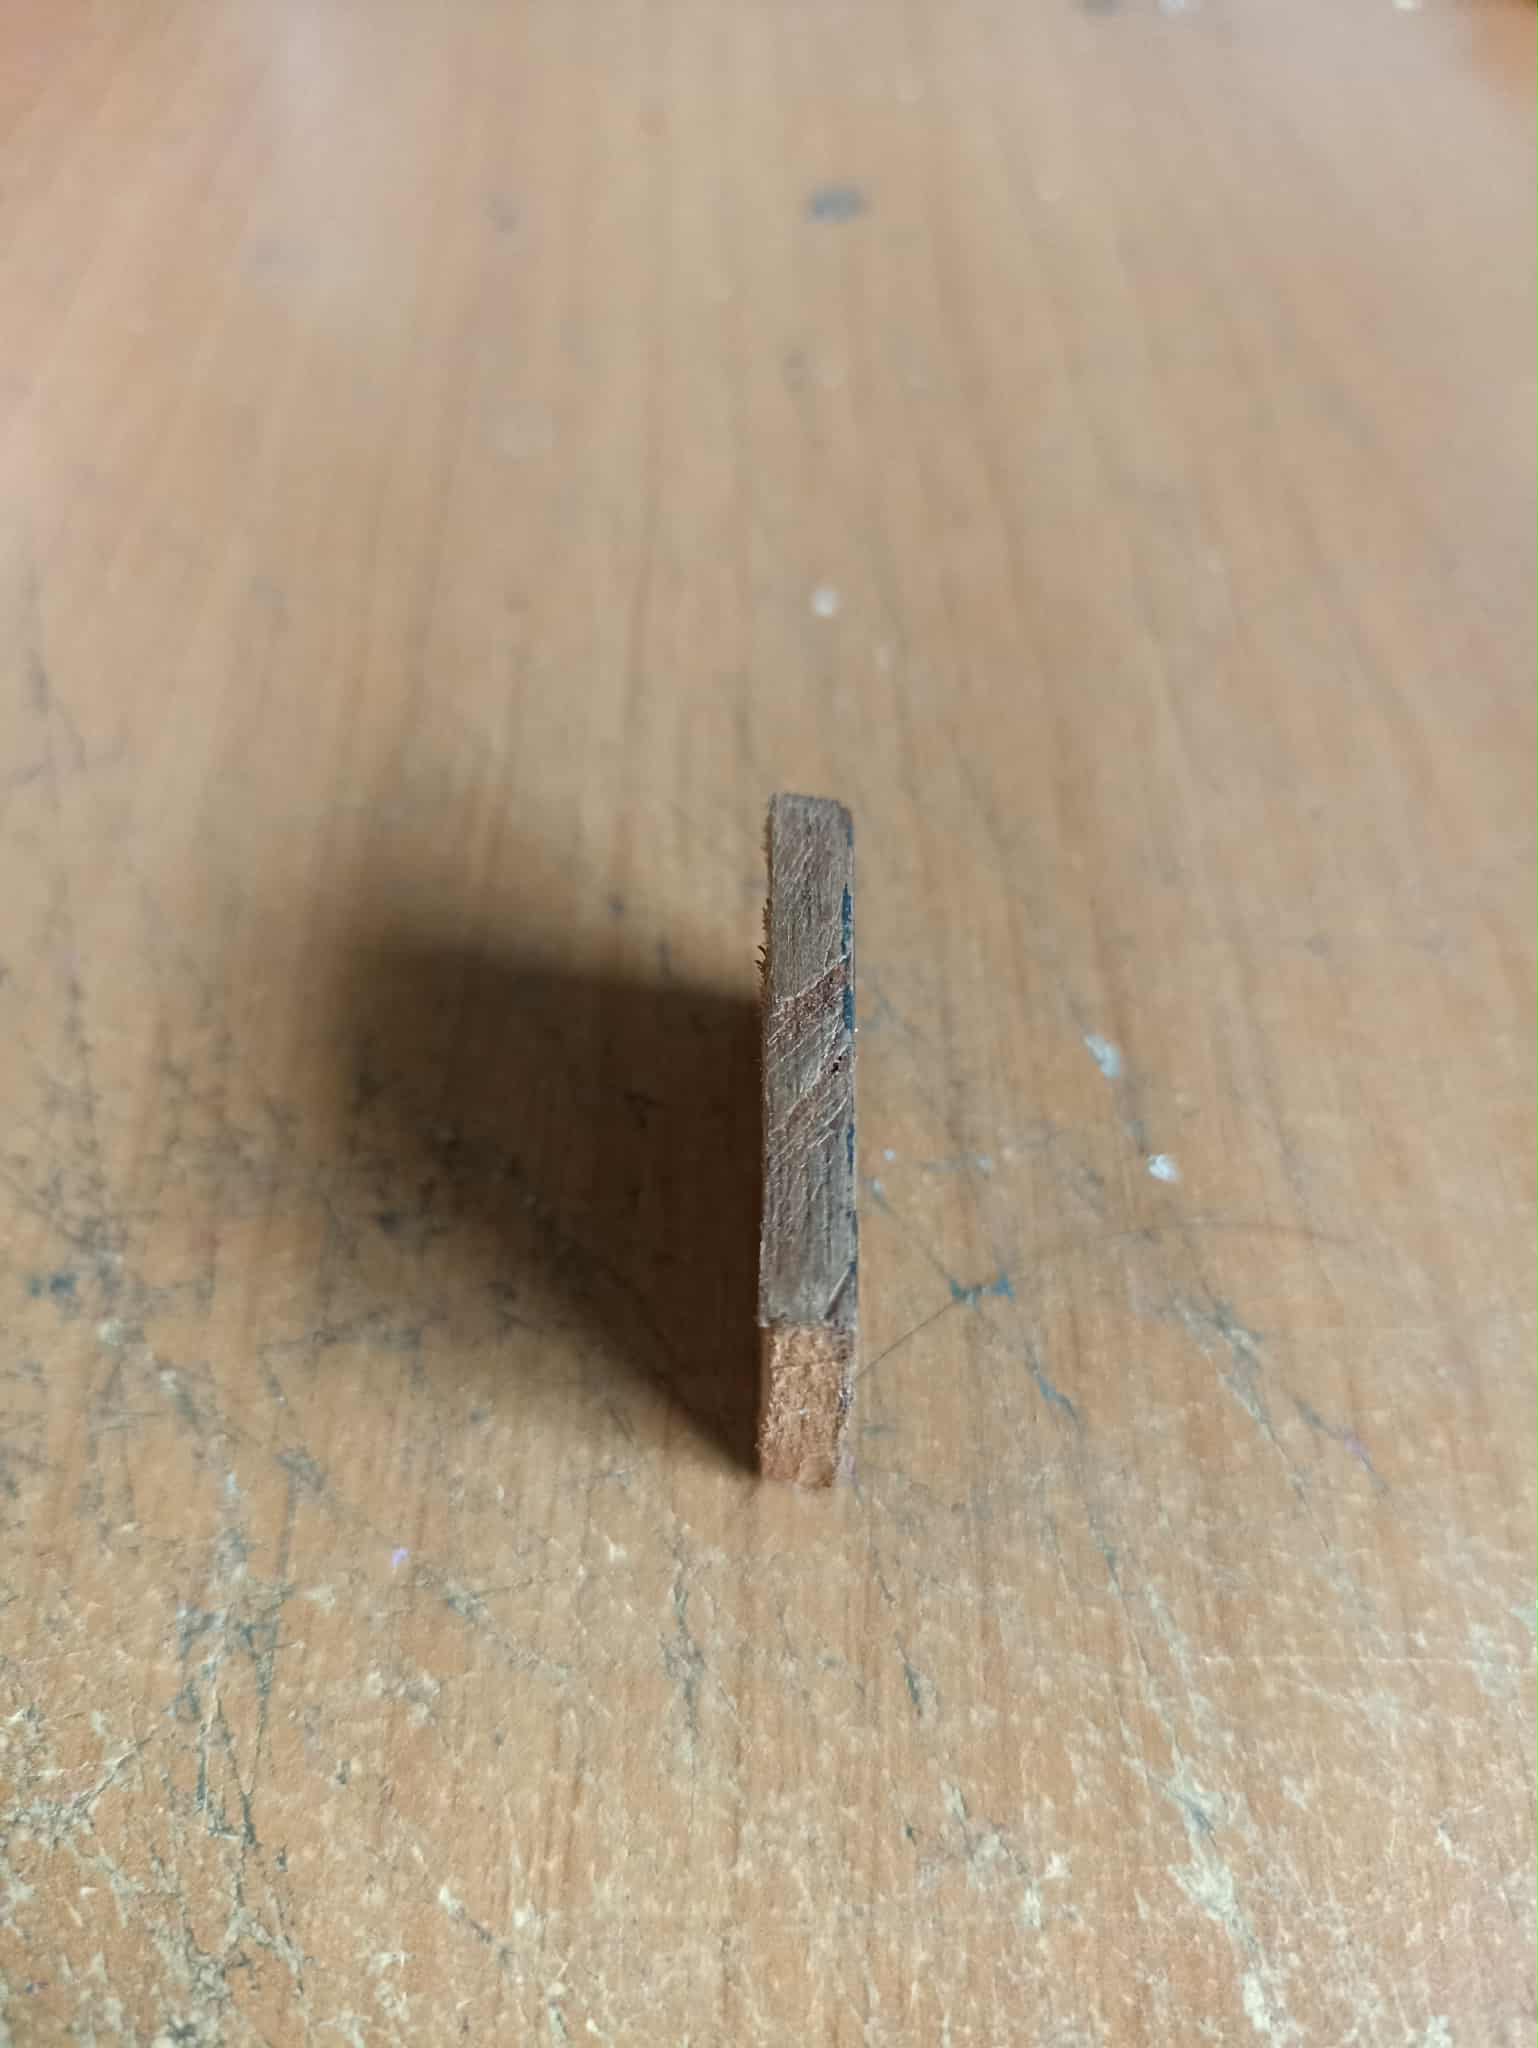
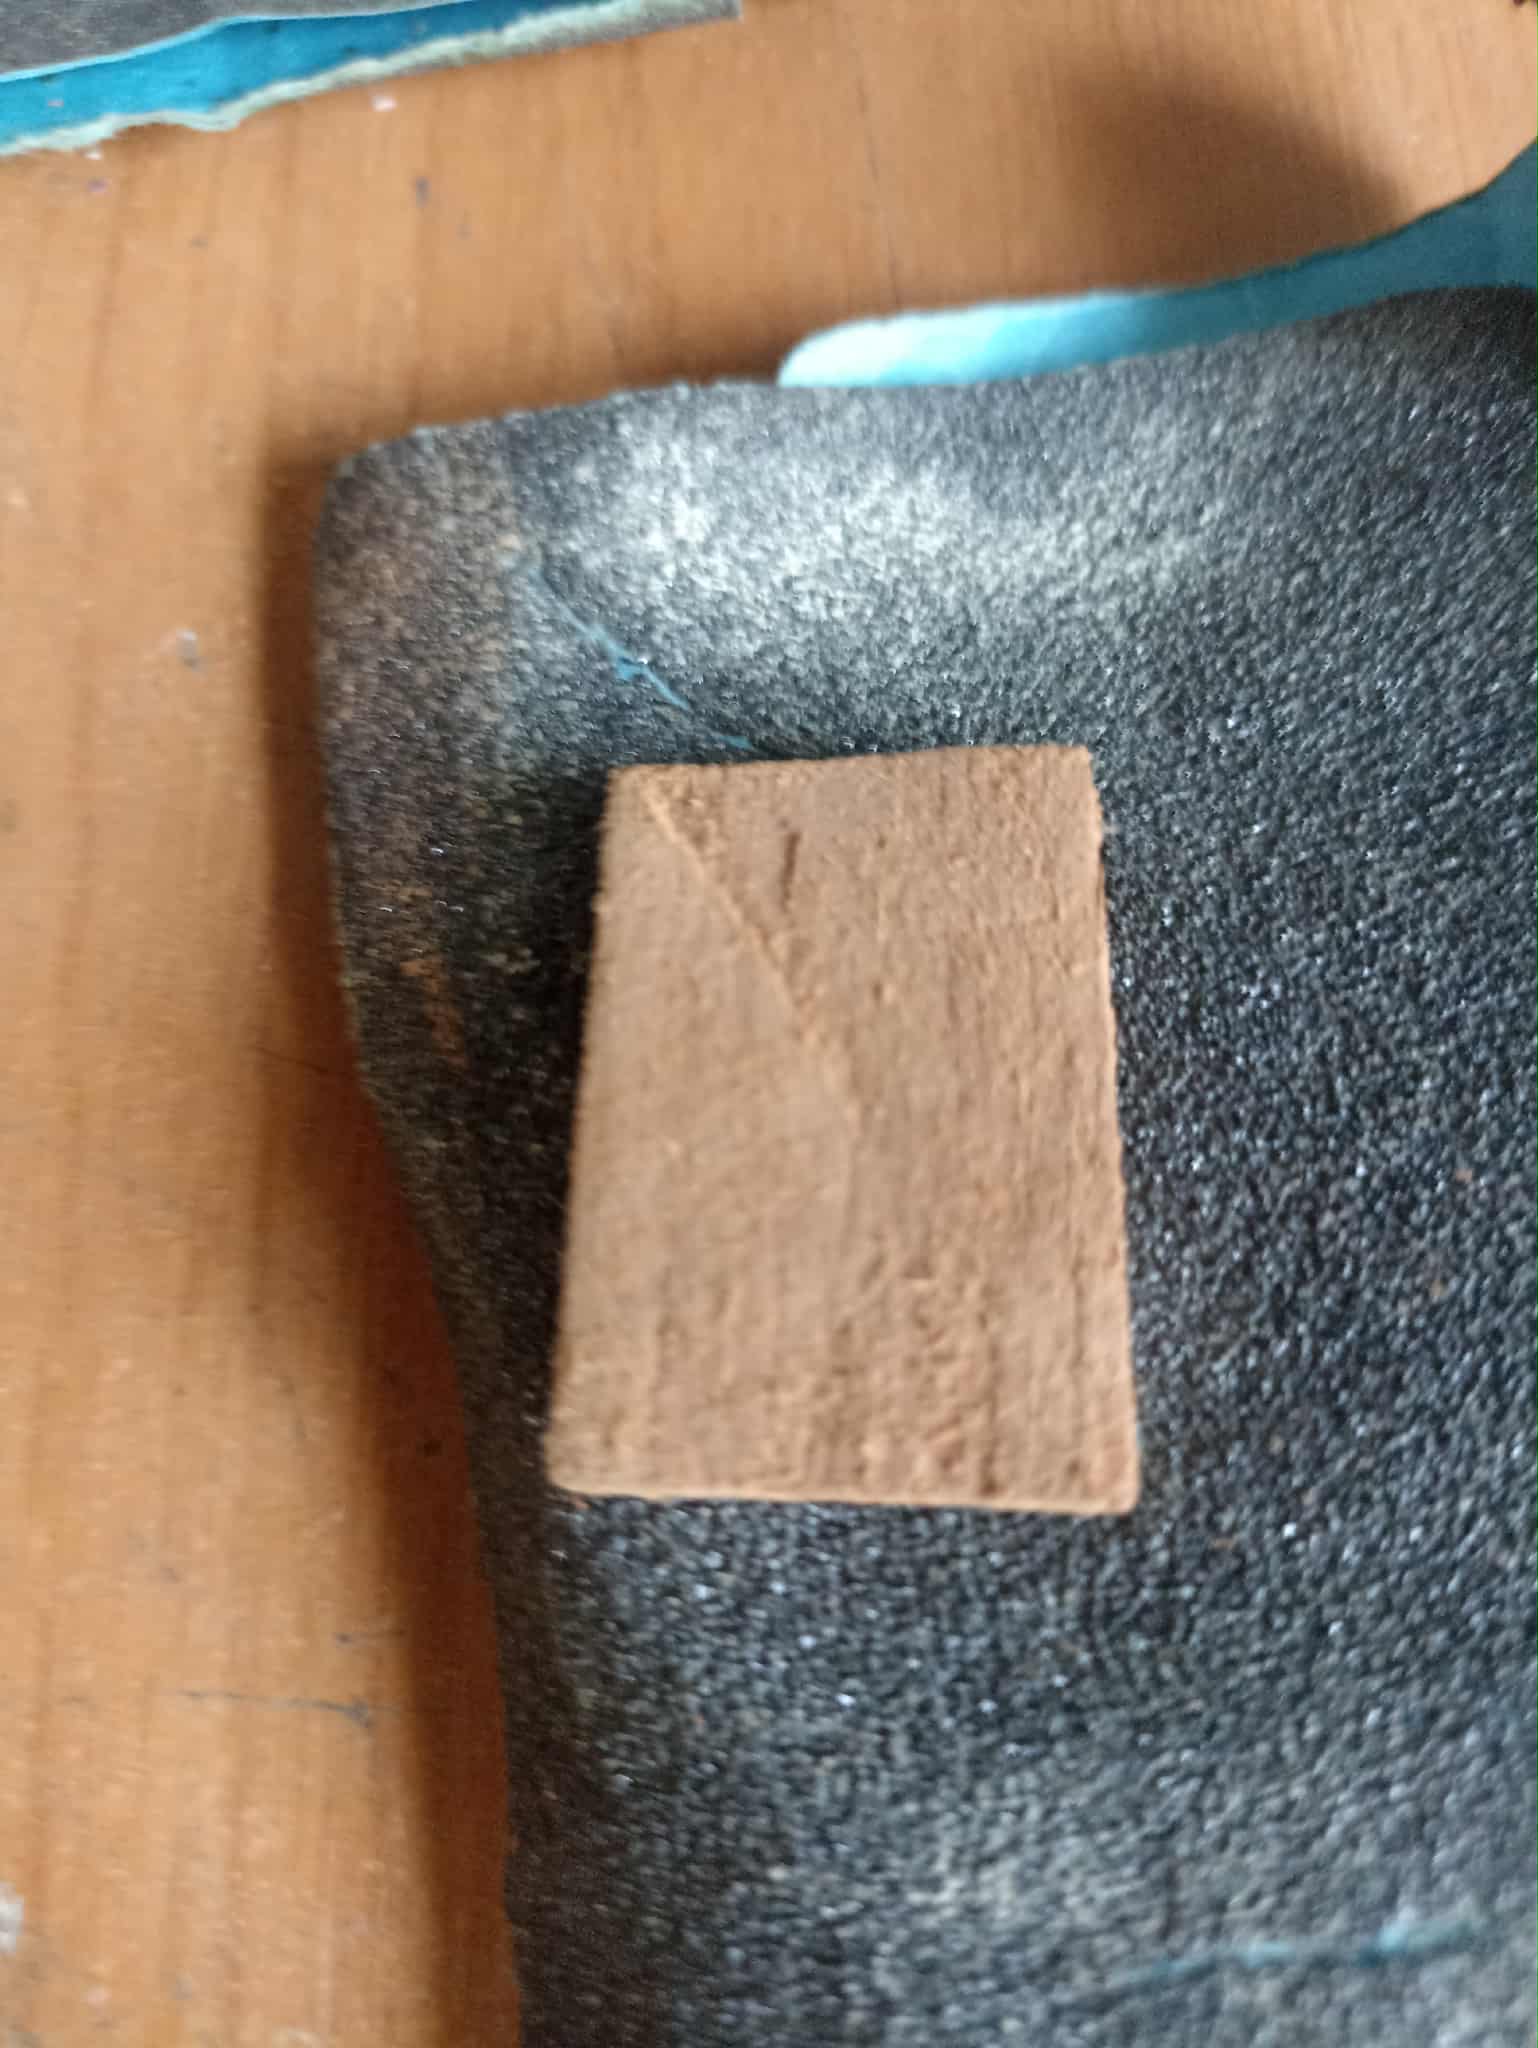
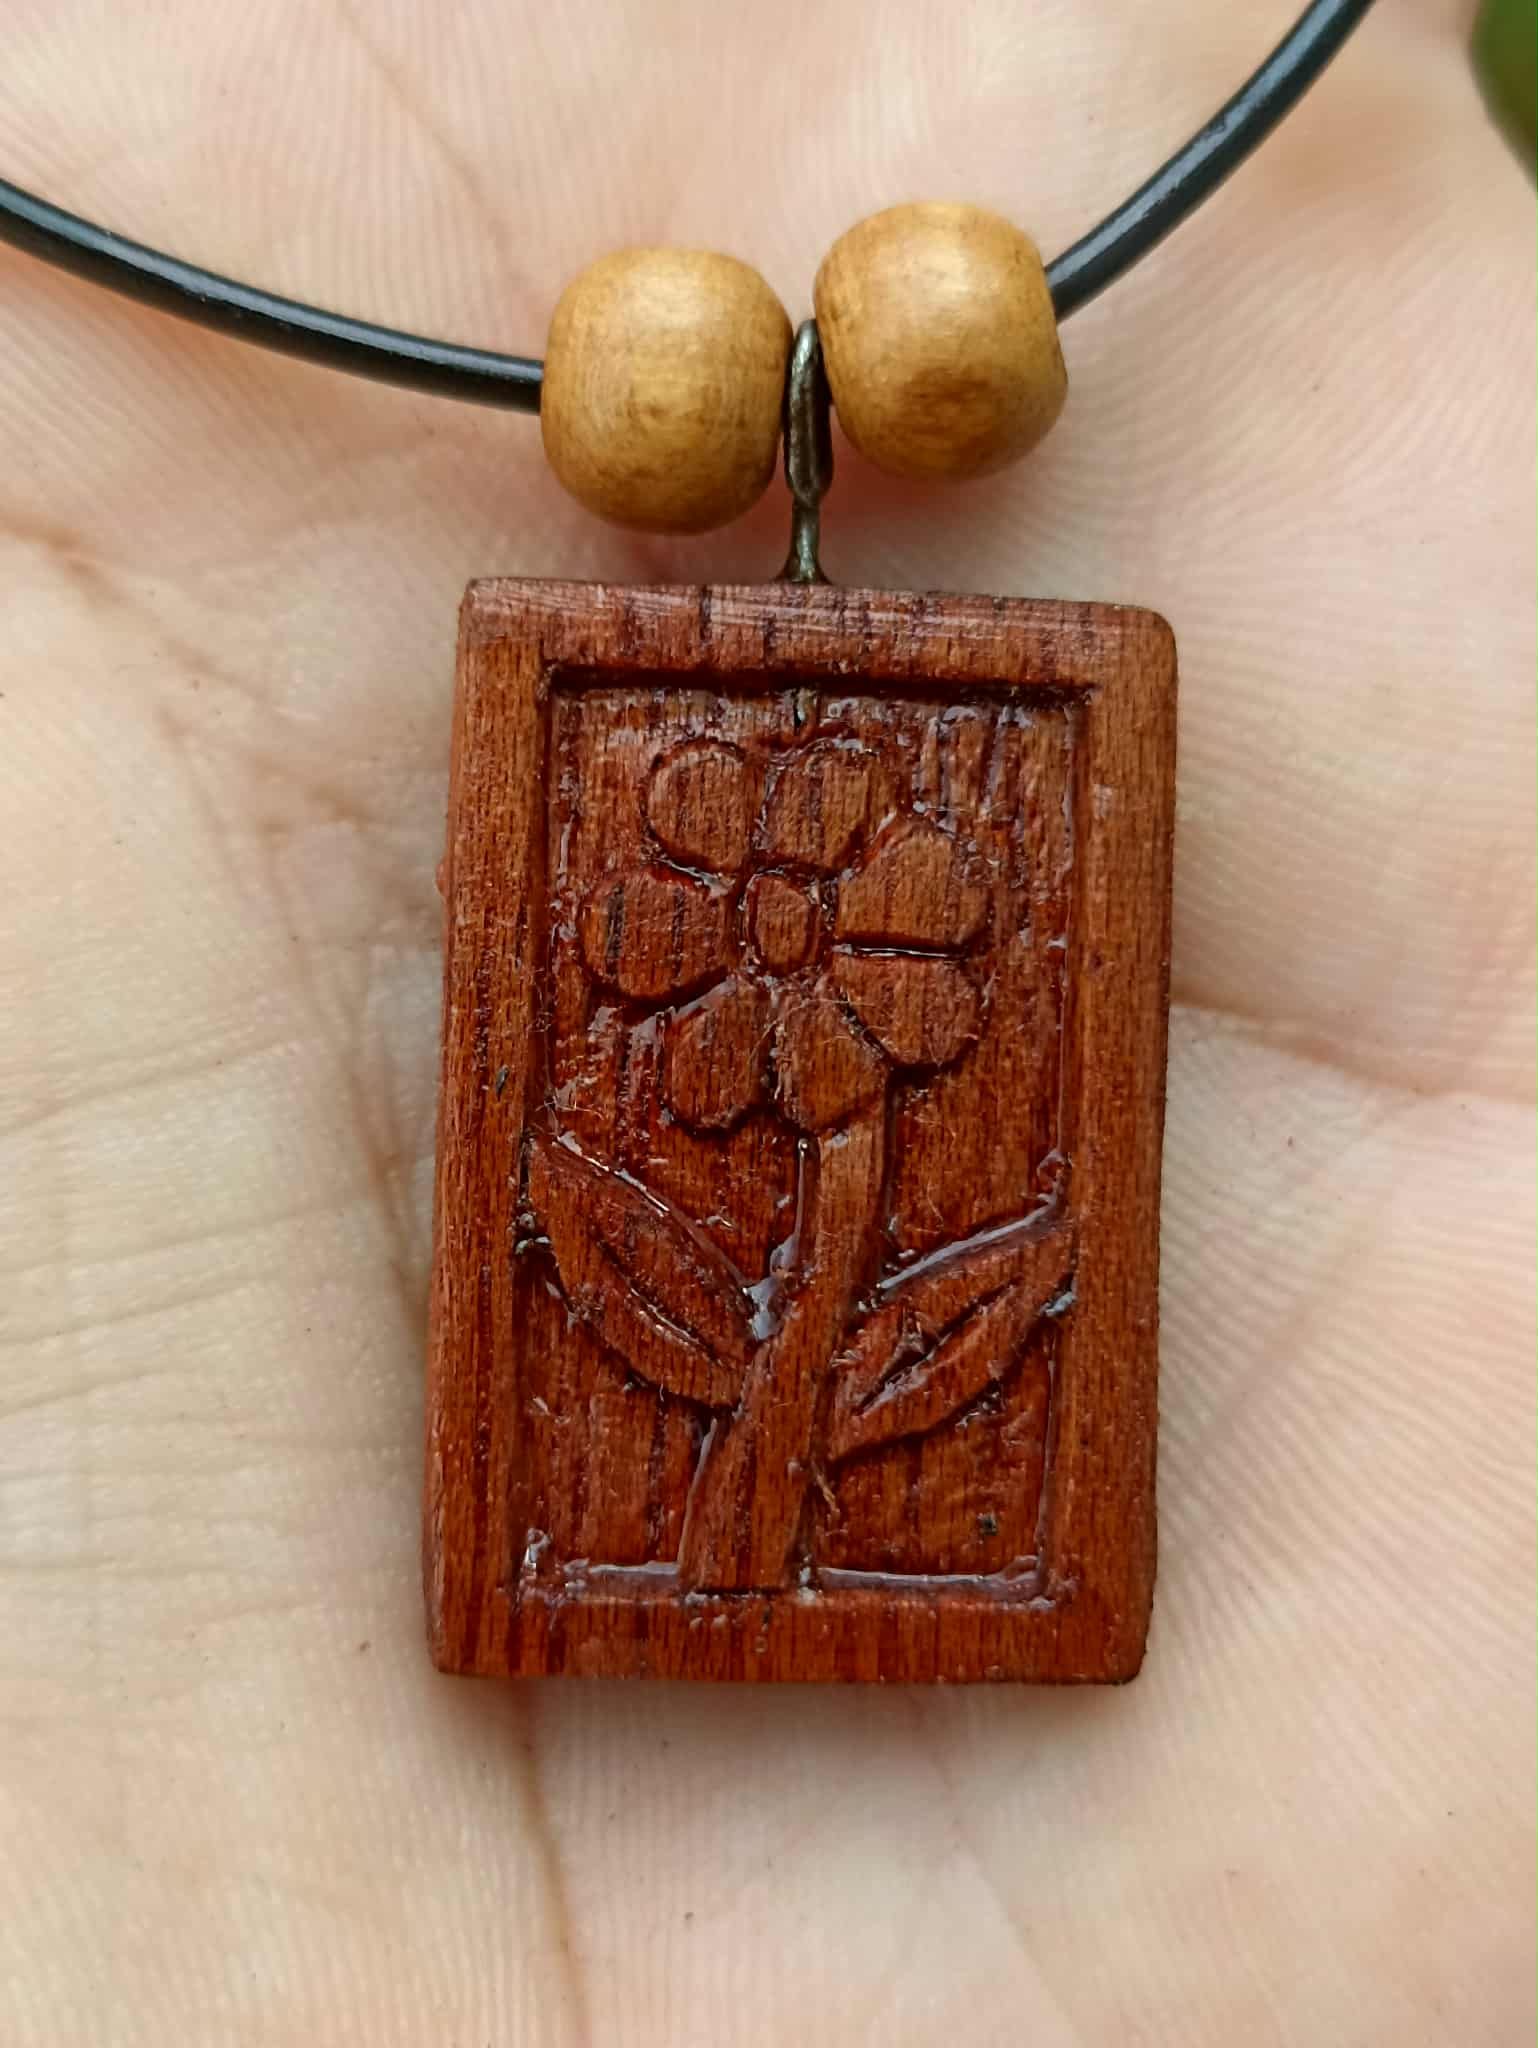
The wood chosen for the piece is mahogany, a very beautiful reddish color. Just a few drops of varnish on it, and the tone it achieves is beautiful. So, after cutting, I prepare it, using sandpaper to polish the piece as best I can. The piece measures 3 centimeters by 2 centimeters, so since it's made for my little girl, it's not too big.
La madera elegida para la pieza es caoba, un color rojizo muy hermoso, que apenas caen encima unas gotas de barniz el tono que alcanza es una belleza. Así que la preparo luego de haberla cortado, utilizando una lija para pulir la pieza lo mejor que pueda. La pieza tiene una medida de 3 centímetros por 2 centímetros, como es para mi pequeña hija, el tamaño no es considerablemente grande.
 |
 |
|
|---|---|---|
 |
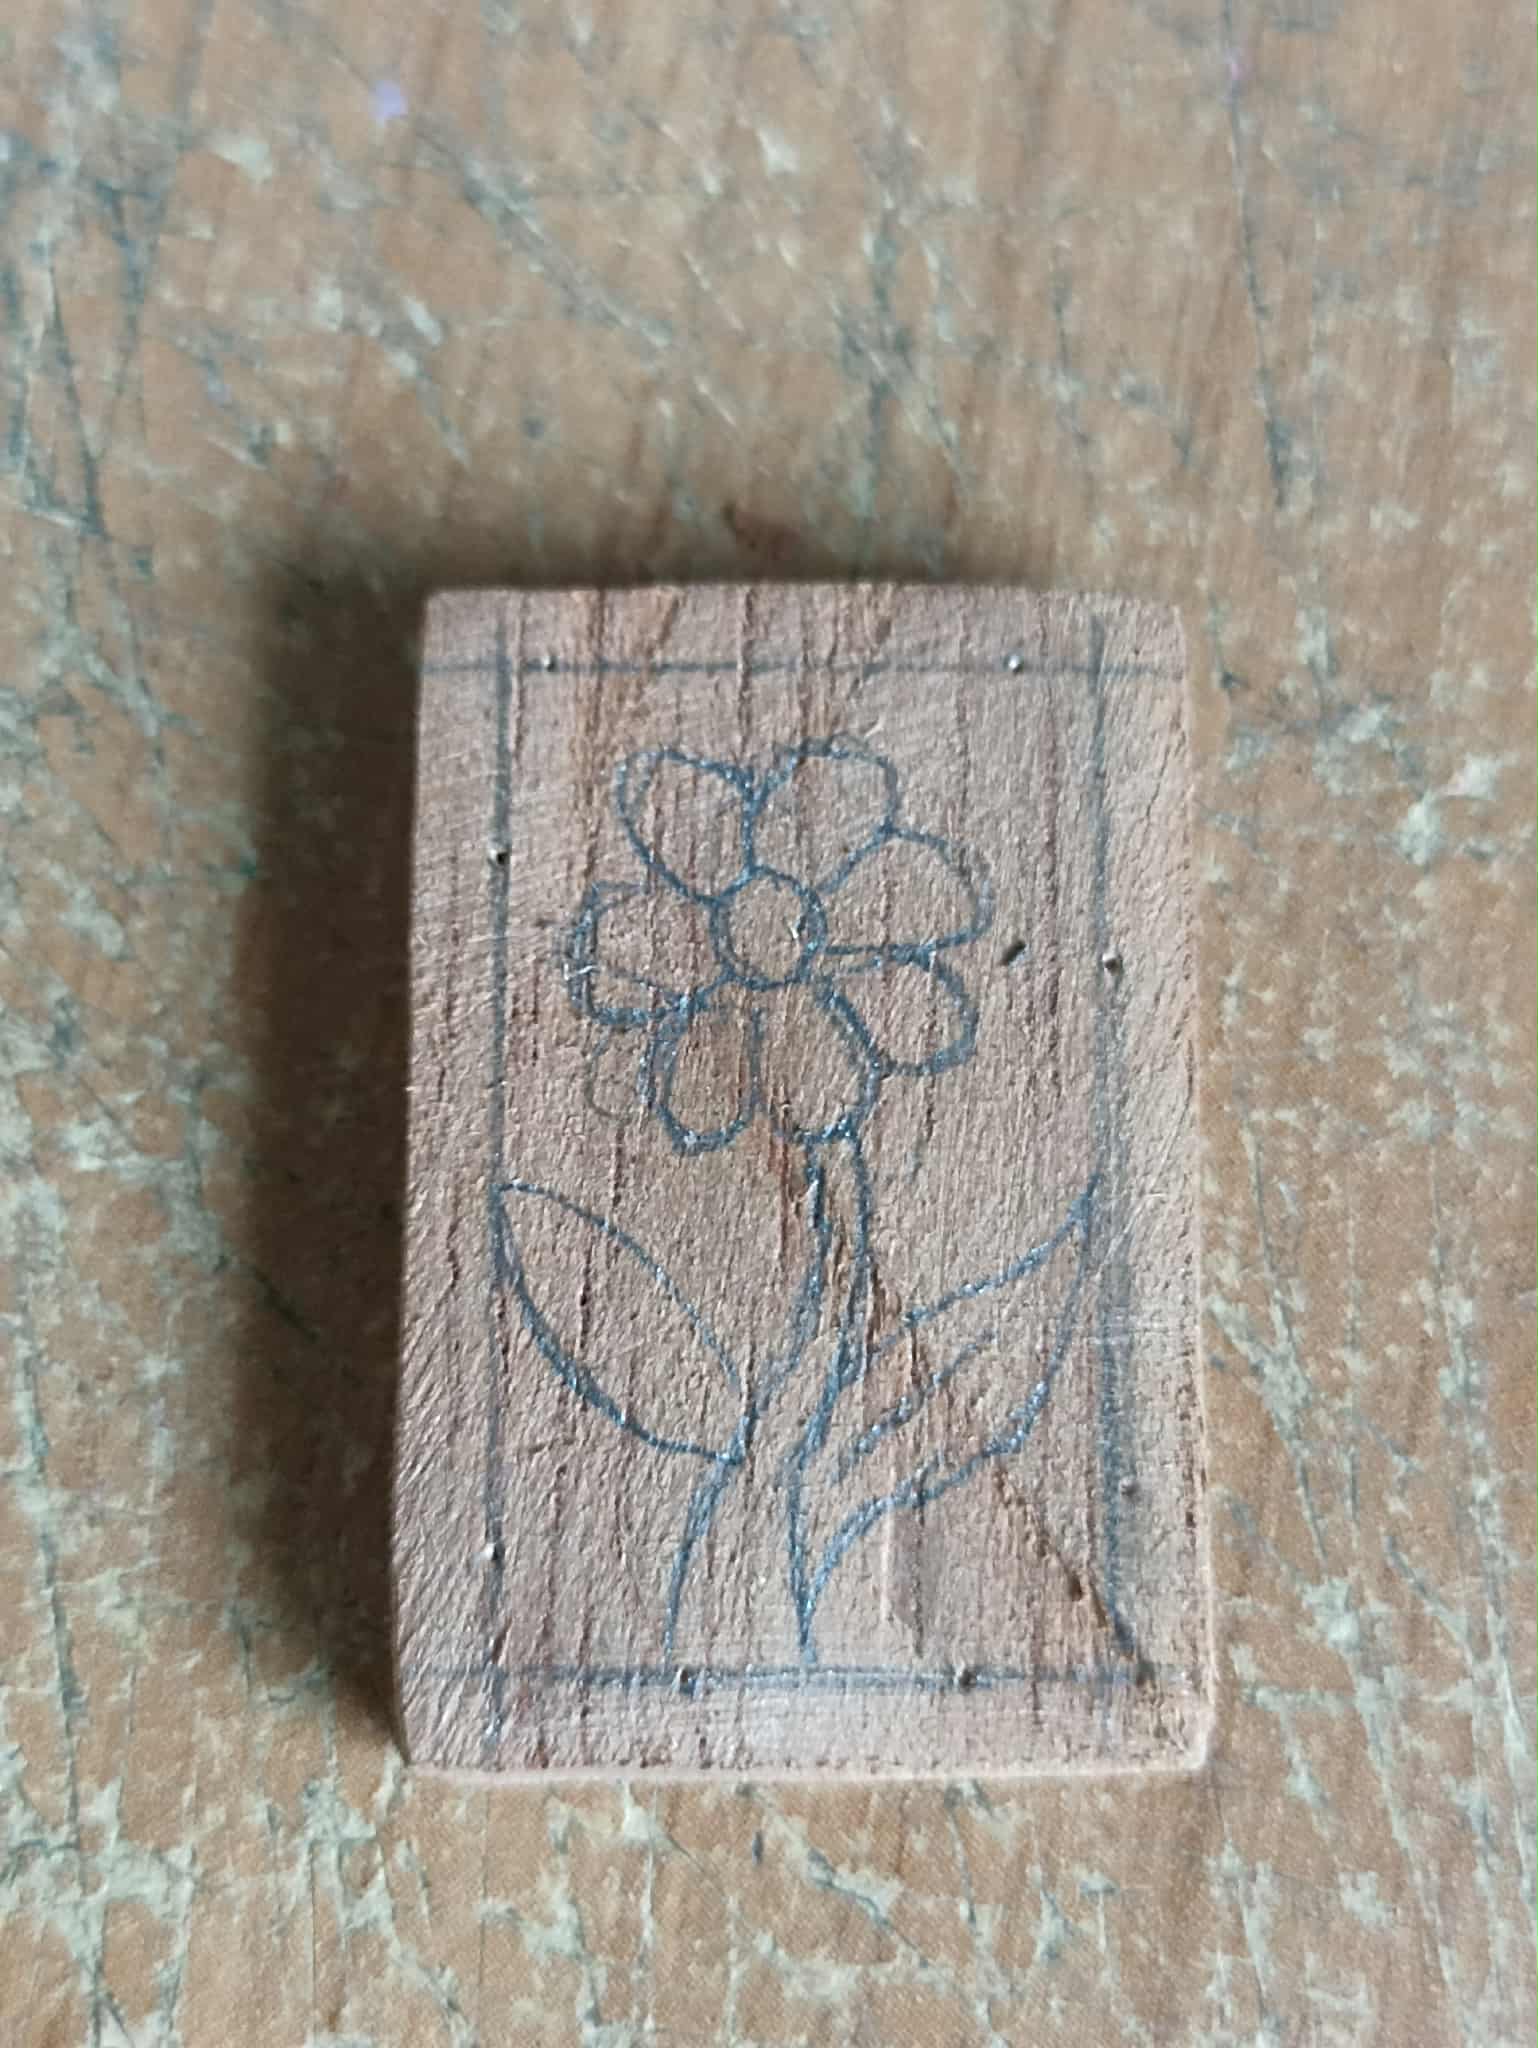 |
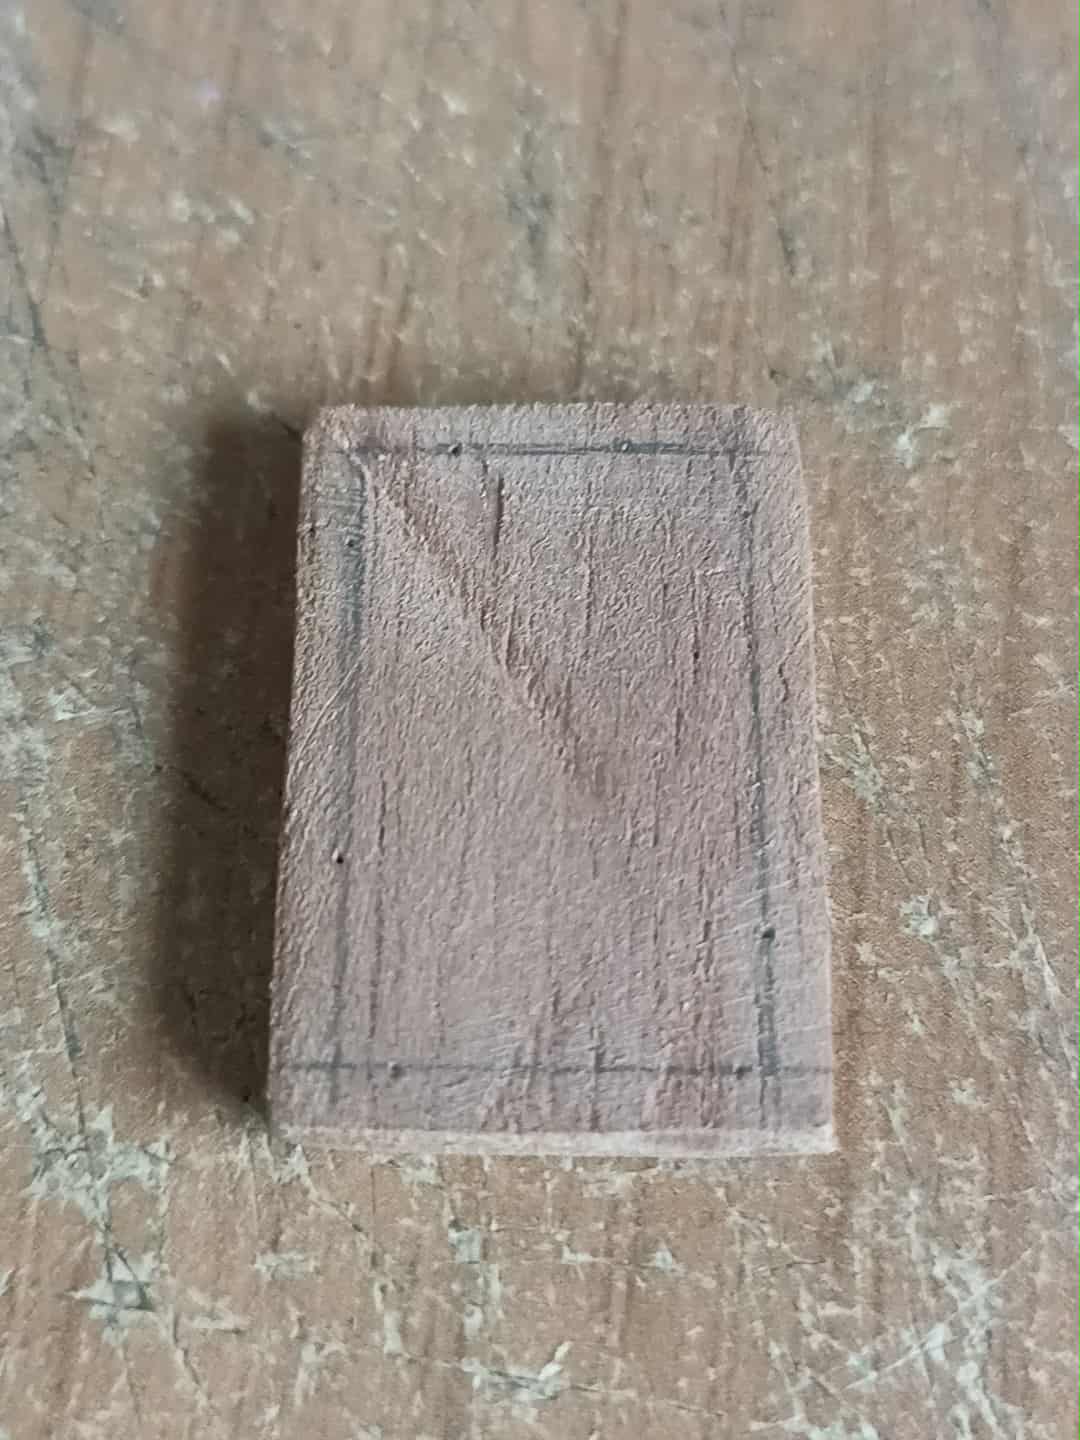
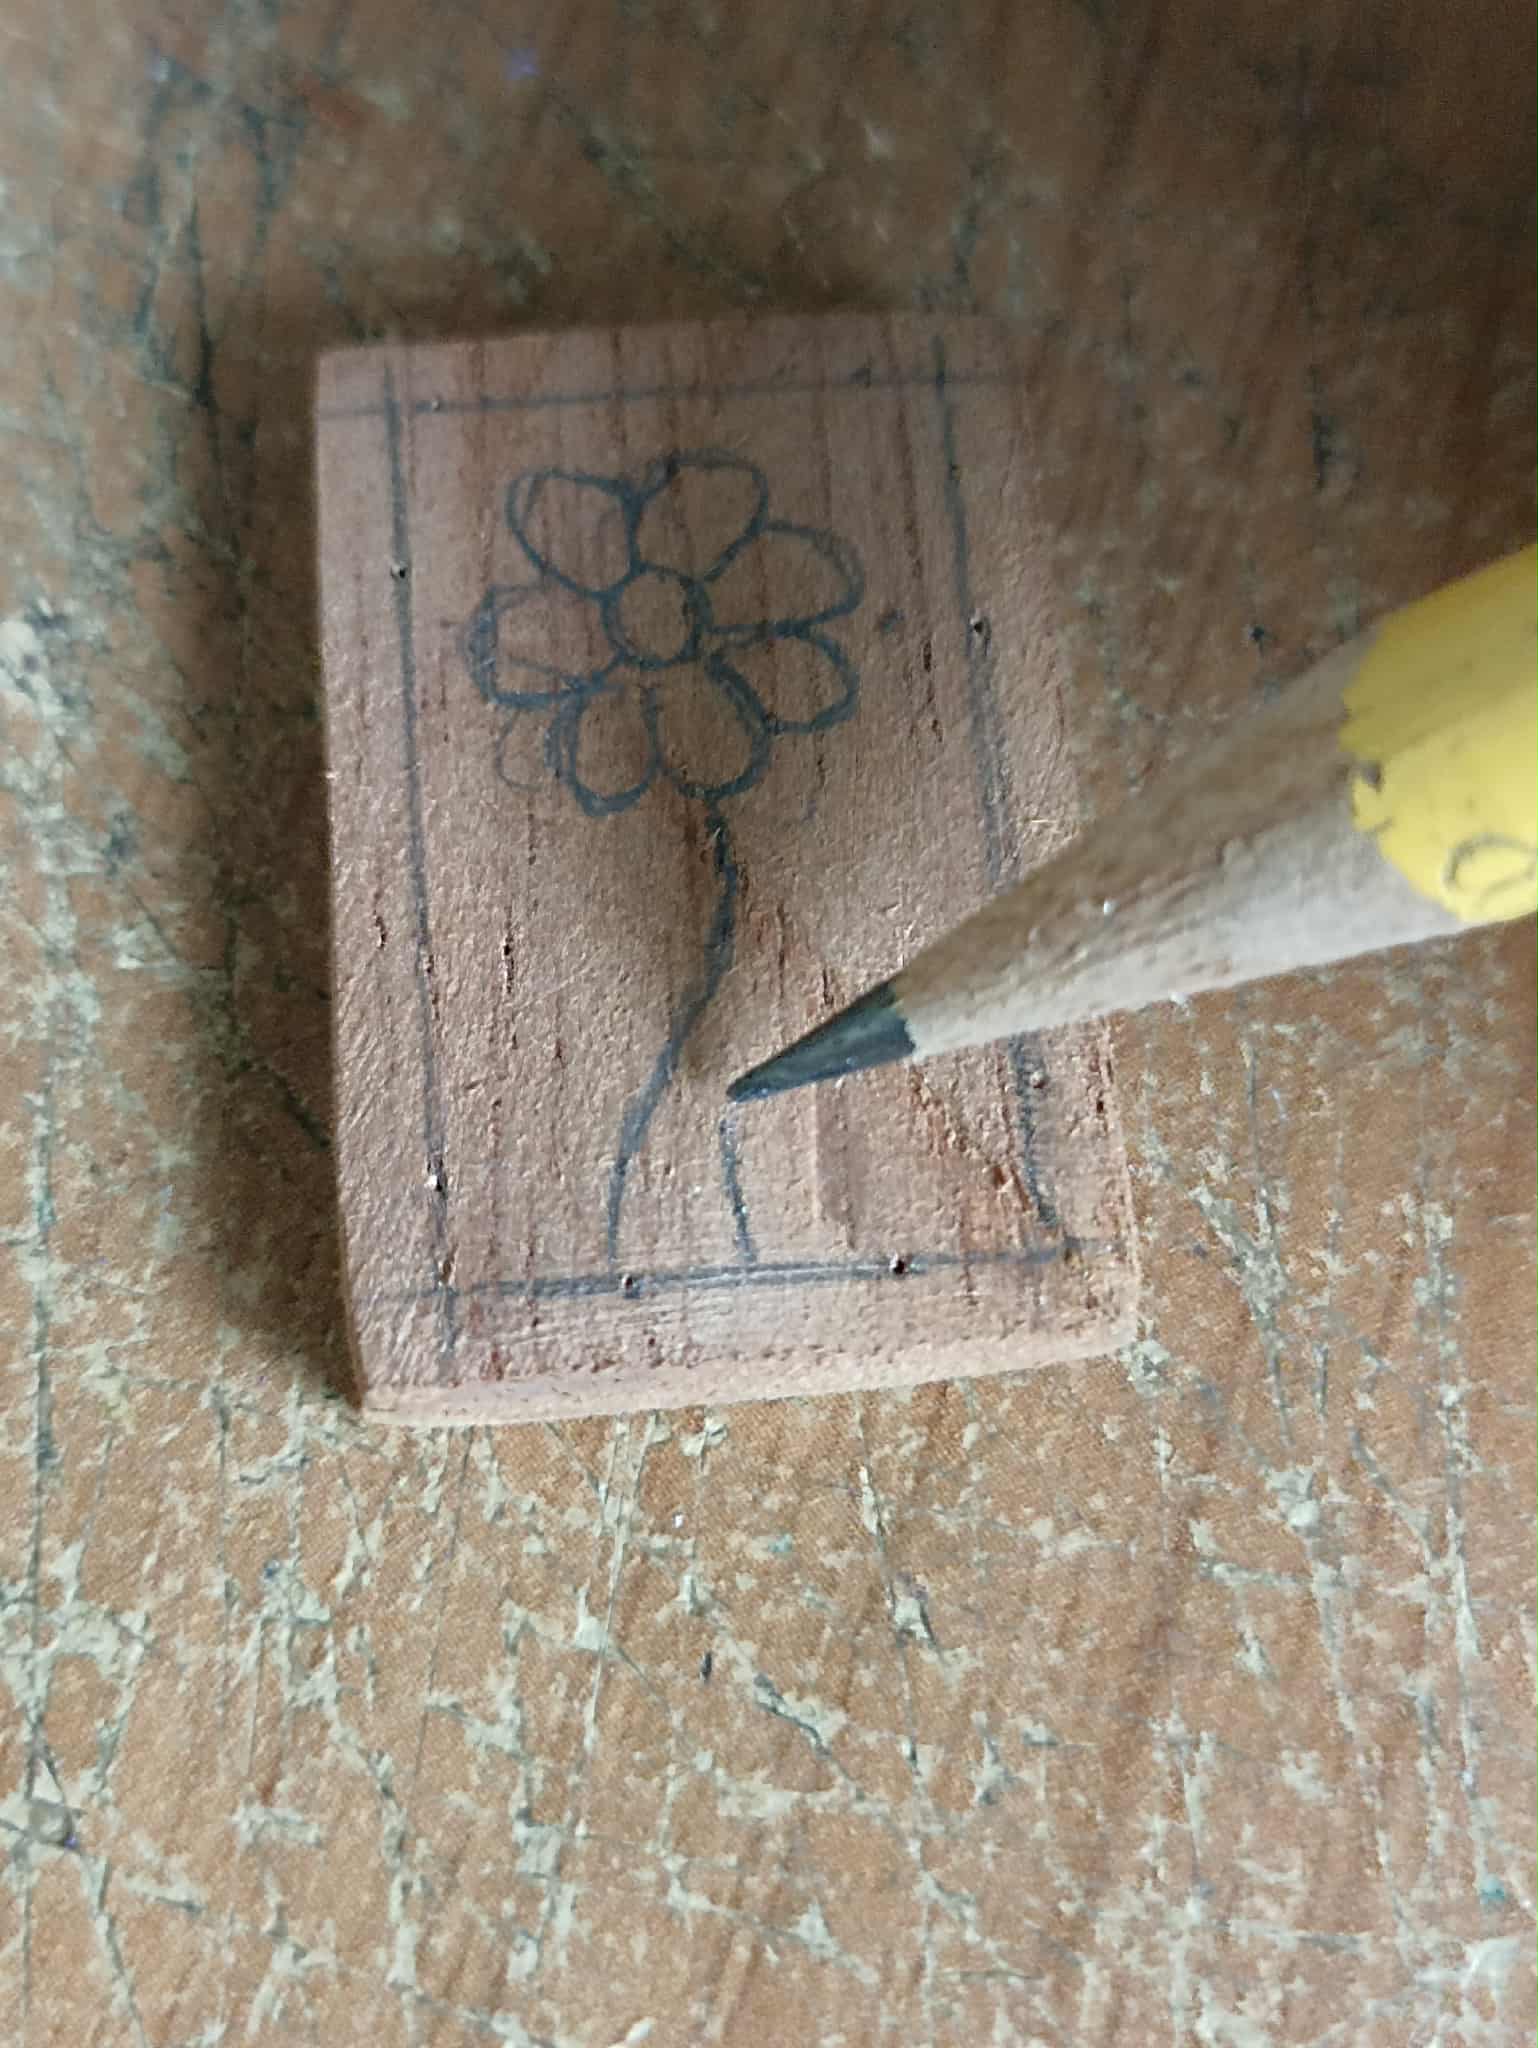
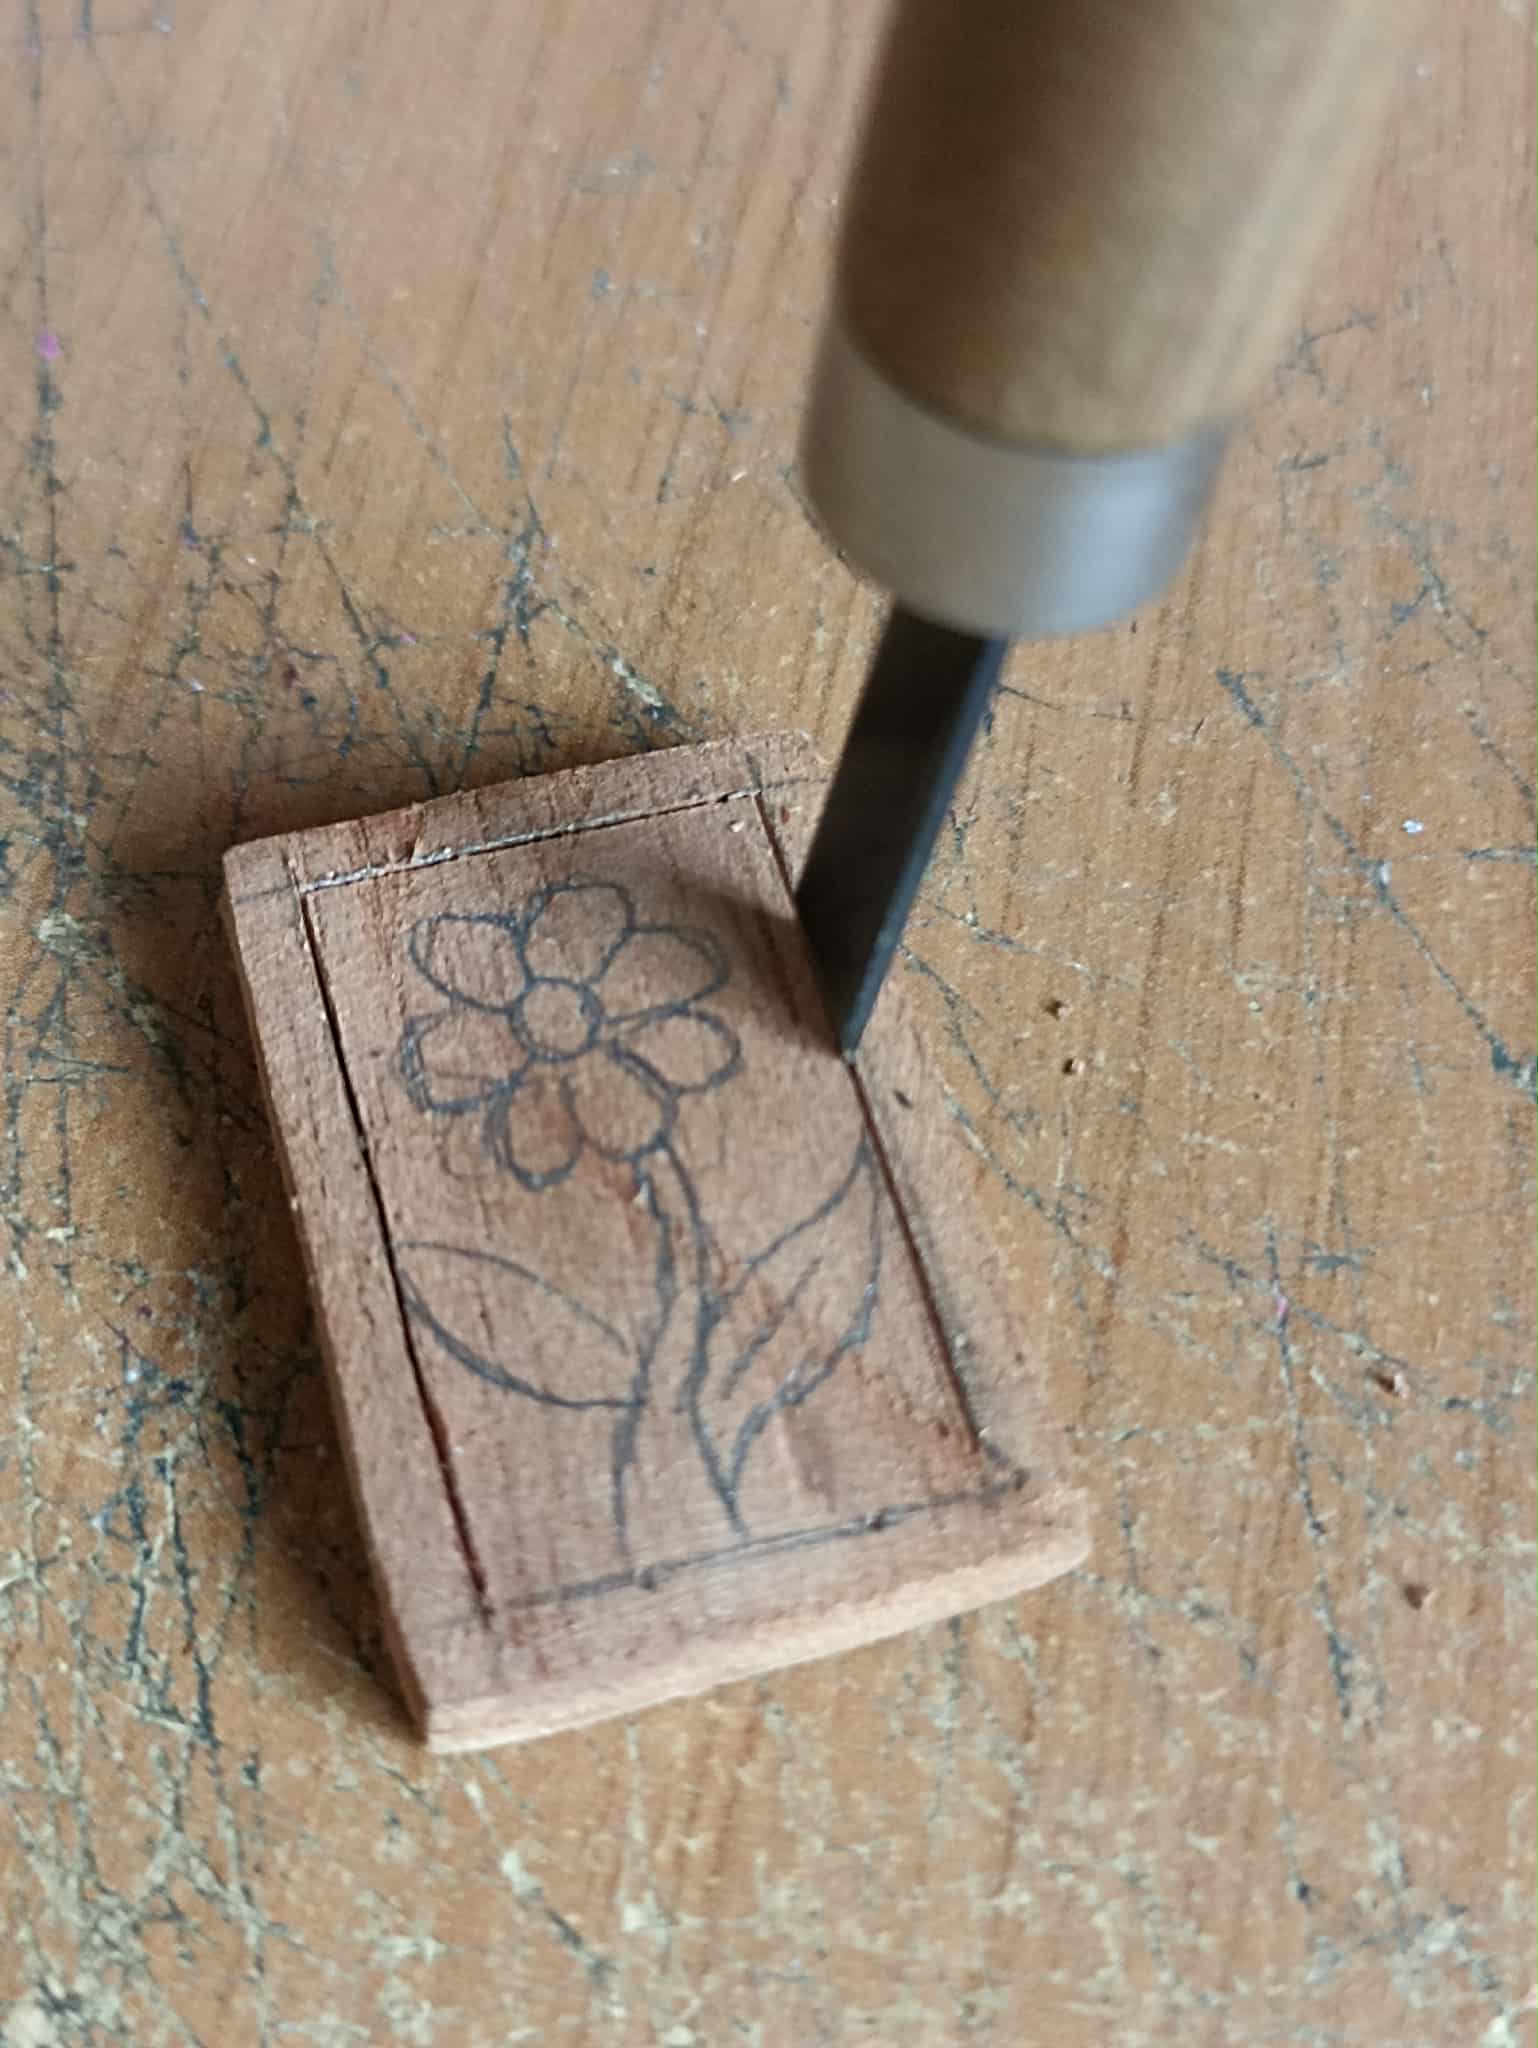
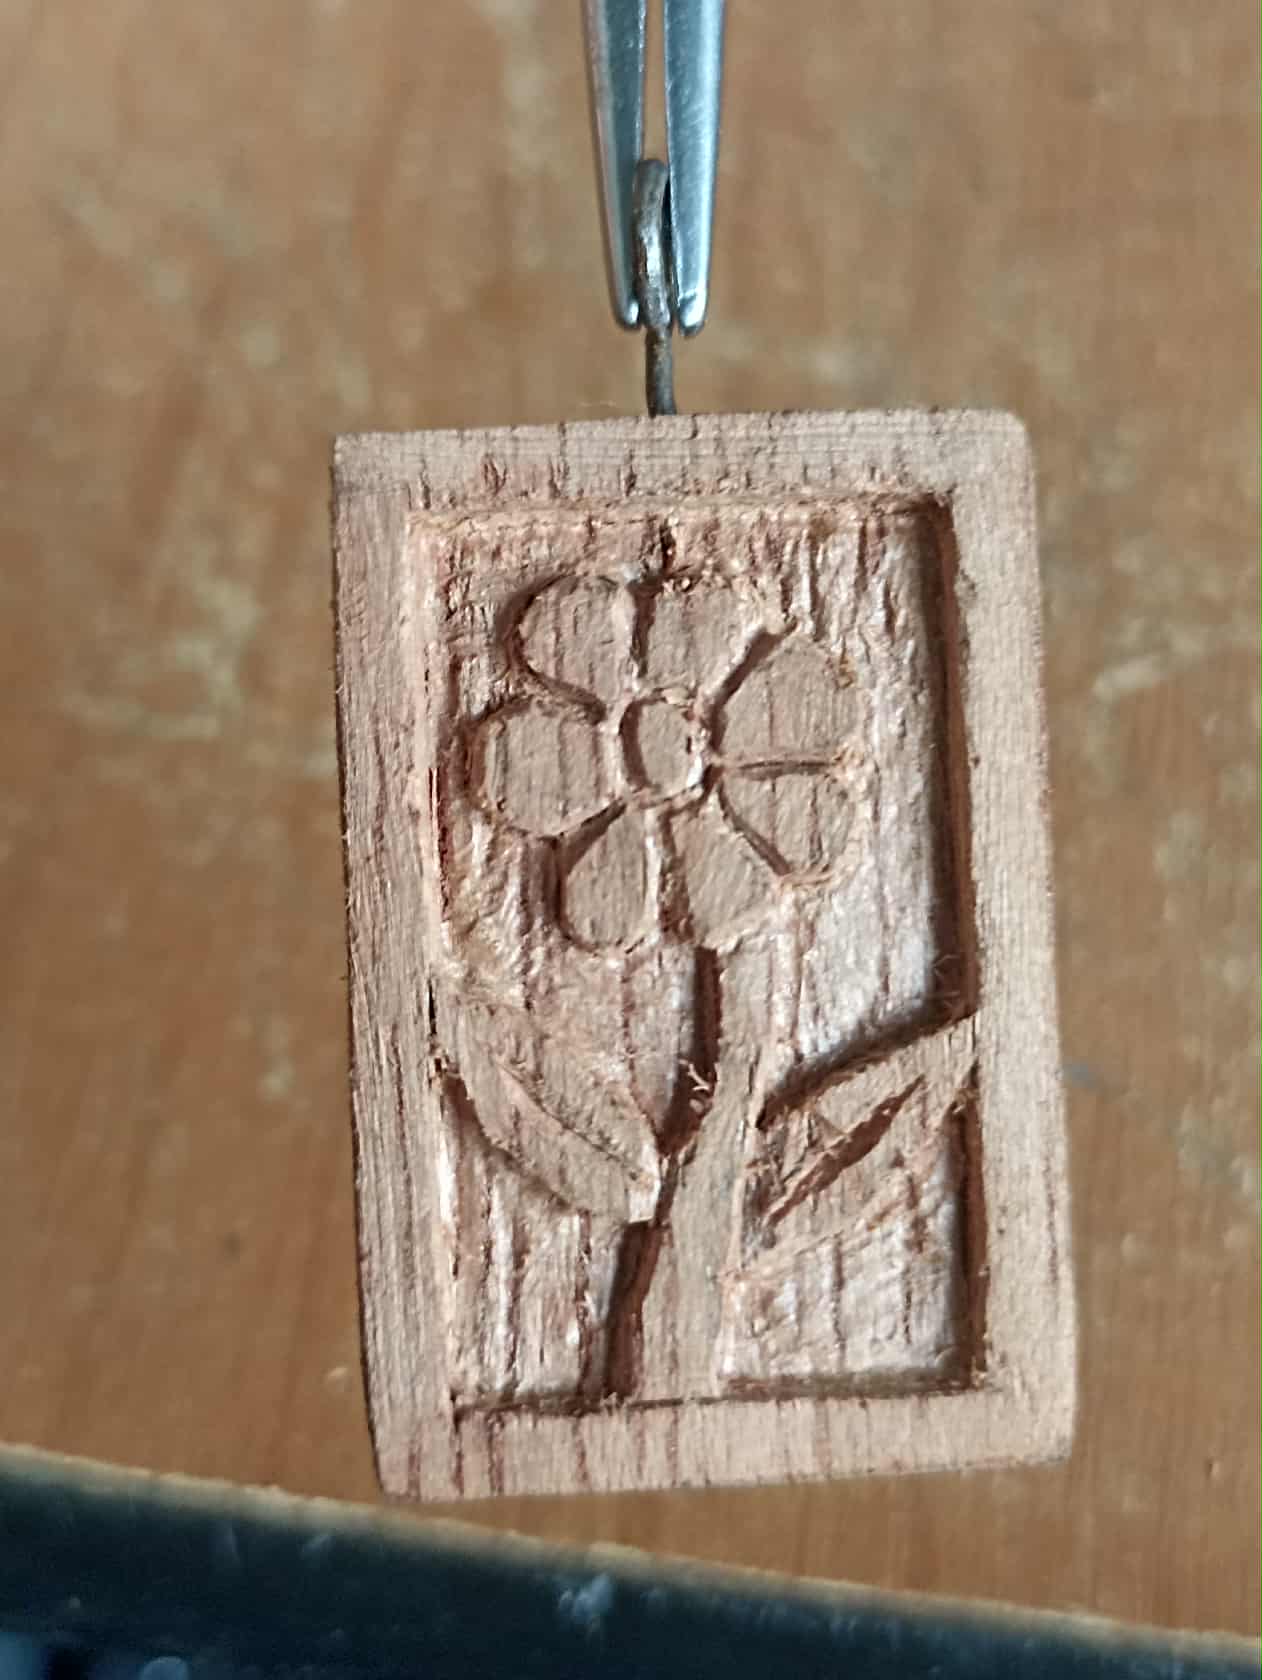
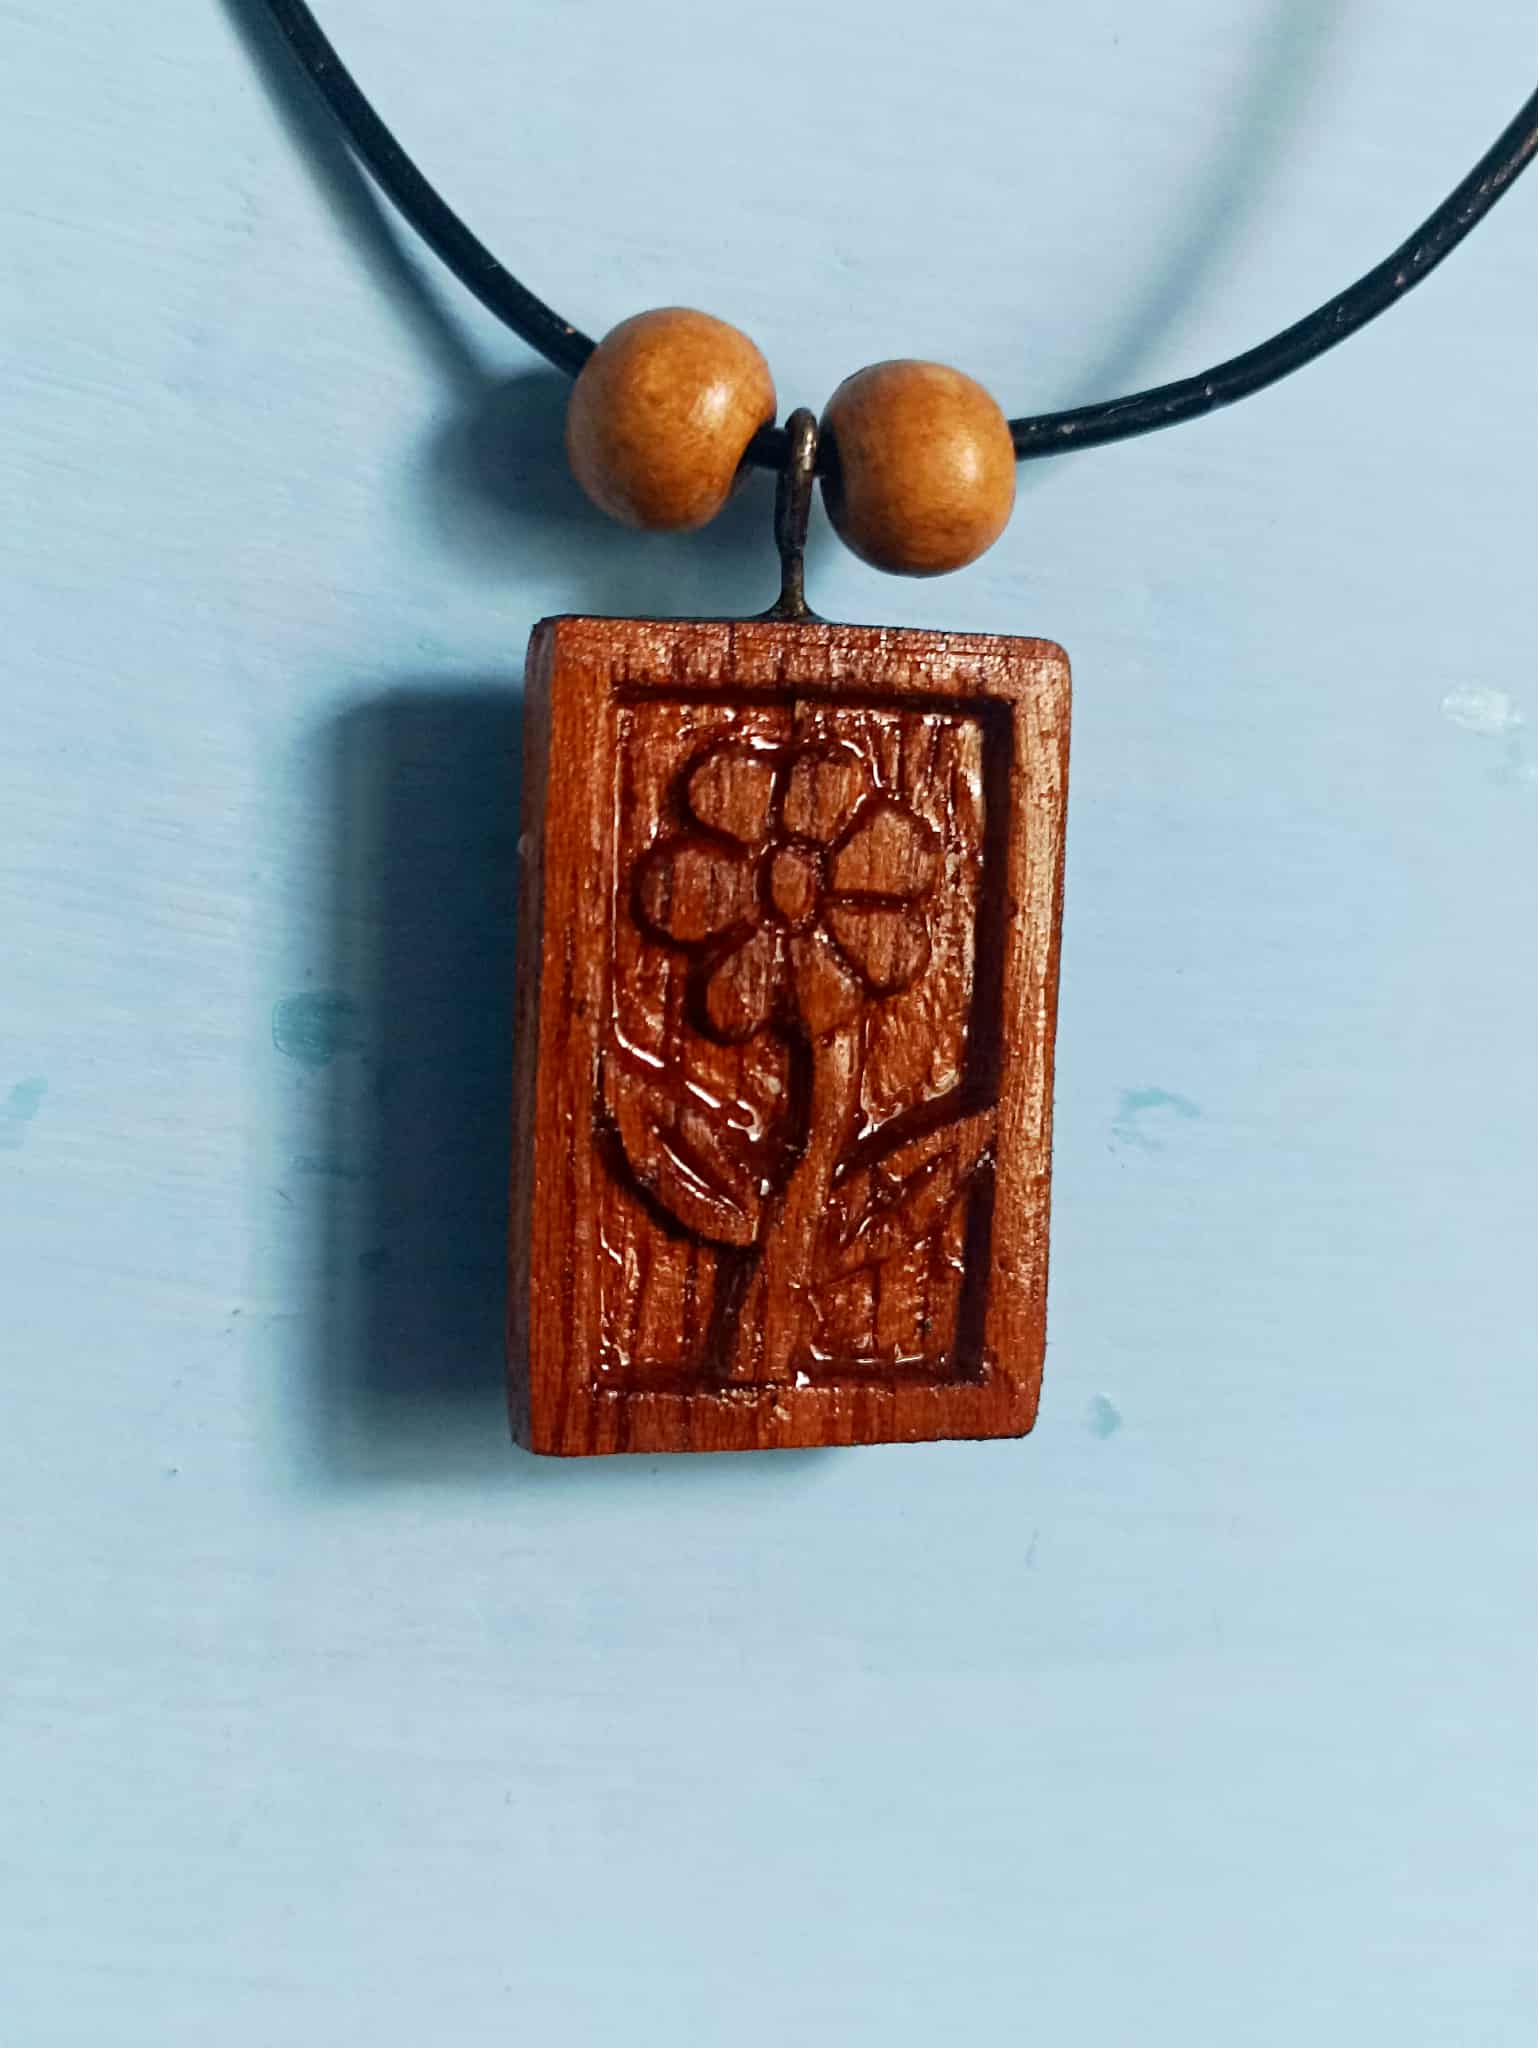
After sanding and polishing the wood a bit, I began to draw the pattern. First, I made a small frame, which measures only 2 millimeters. Then, inside the frame, I began to draw the flower. It's a very simple model, with a few petals, a center, a stem, and a couple of leaves. As you can see, it's not a very complicated design; sometimes the most important moments are found in the simple things in life.
Después de lijar pulir la madera un poco comencé a hacer el dibujo, en primer lugar hice un pequeño marco, el cual mide solamente 2 milímetros. Luego al interior del marco comencé a dibujar la flor, es un modelo muy sencillo, con algunos pétalos, el centro, el tallo y par de hojas. Como pueden ver no se trata de un diseño muy complicado, a veces en las cosas simples de la vida están los momentos más importantes.
 |
 |
|
|---|---|---|
 |
 |
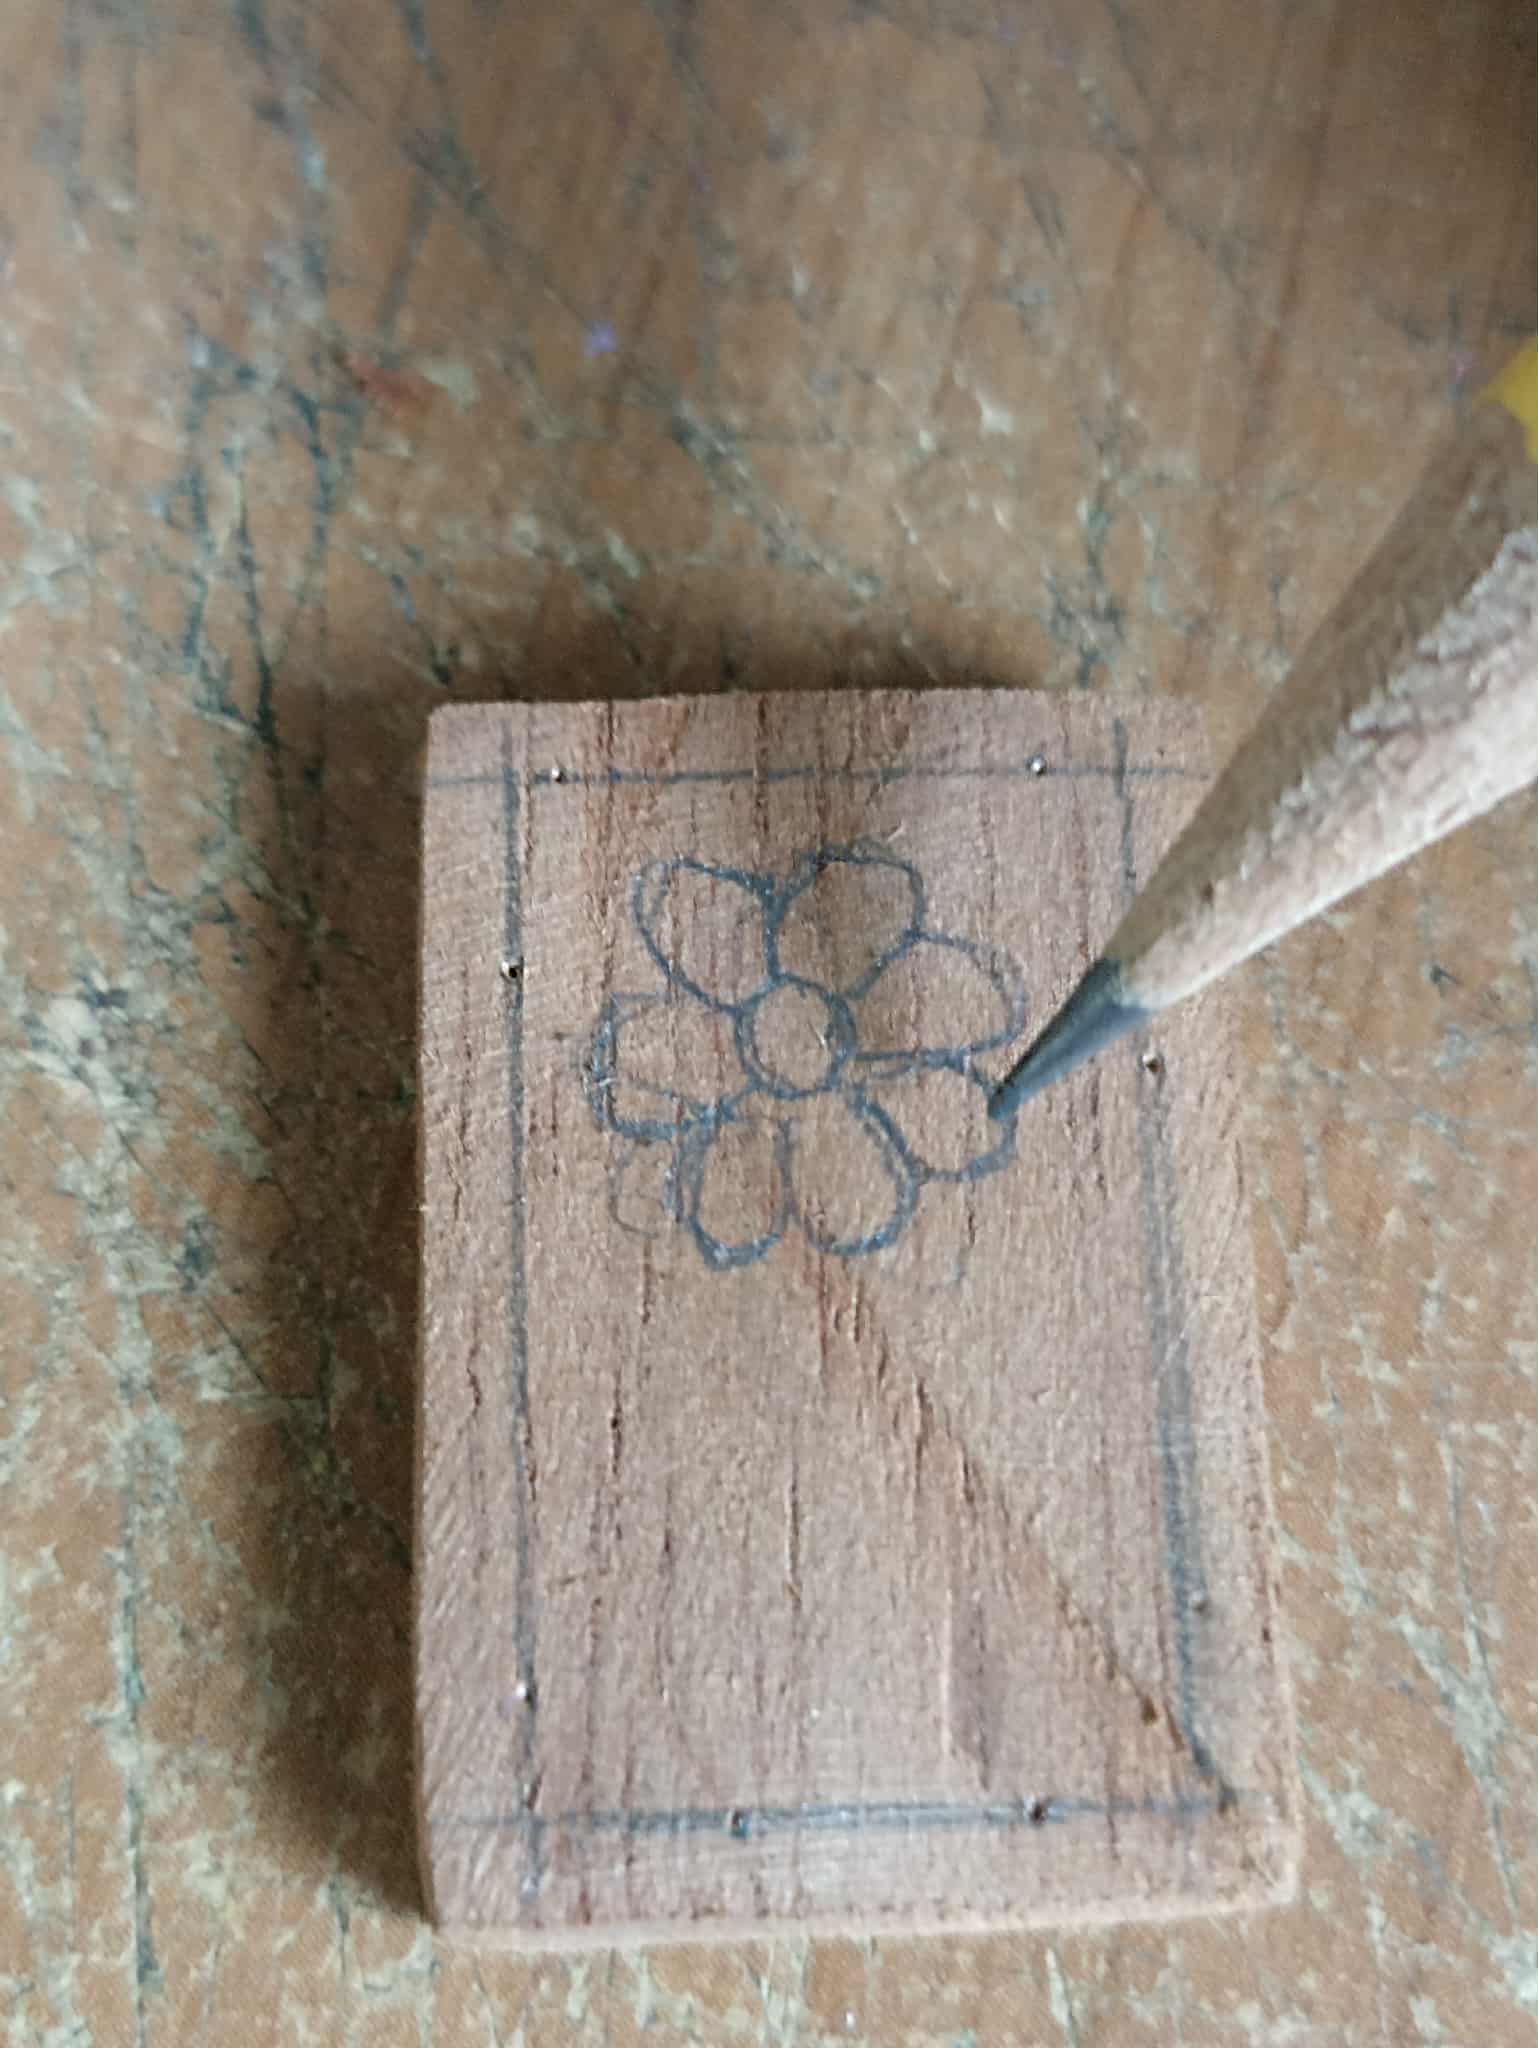
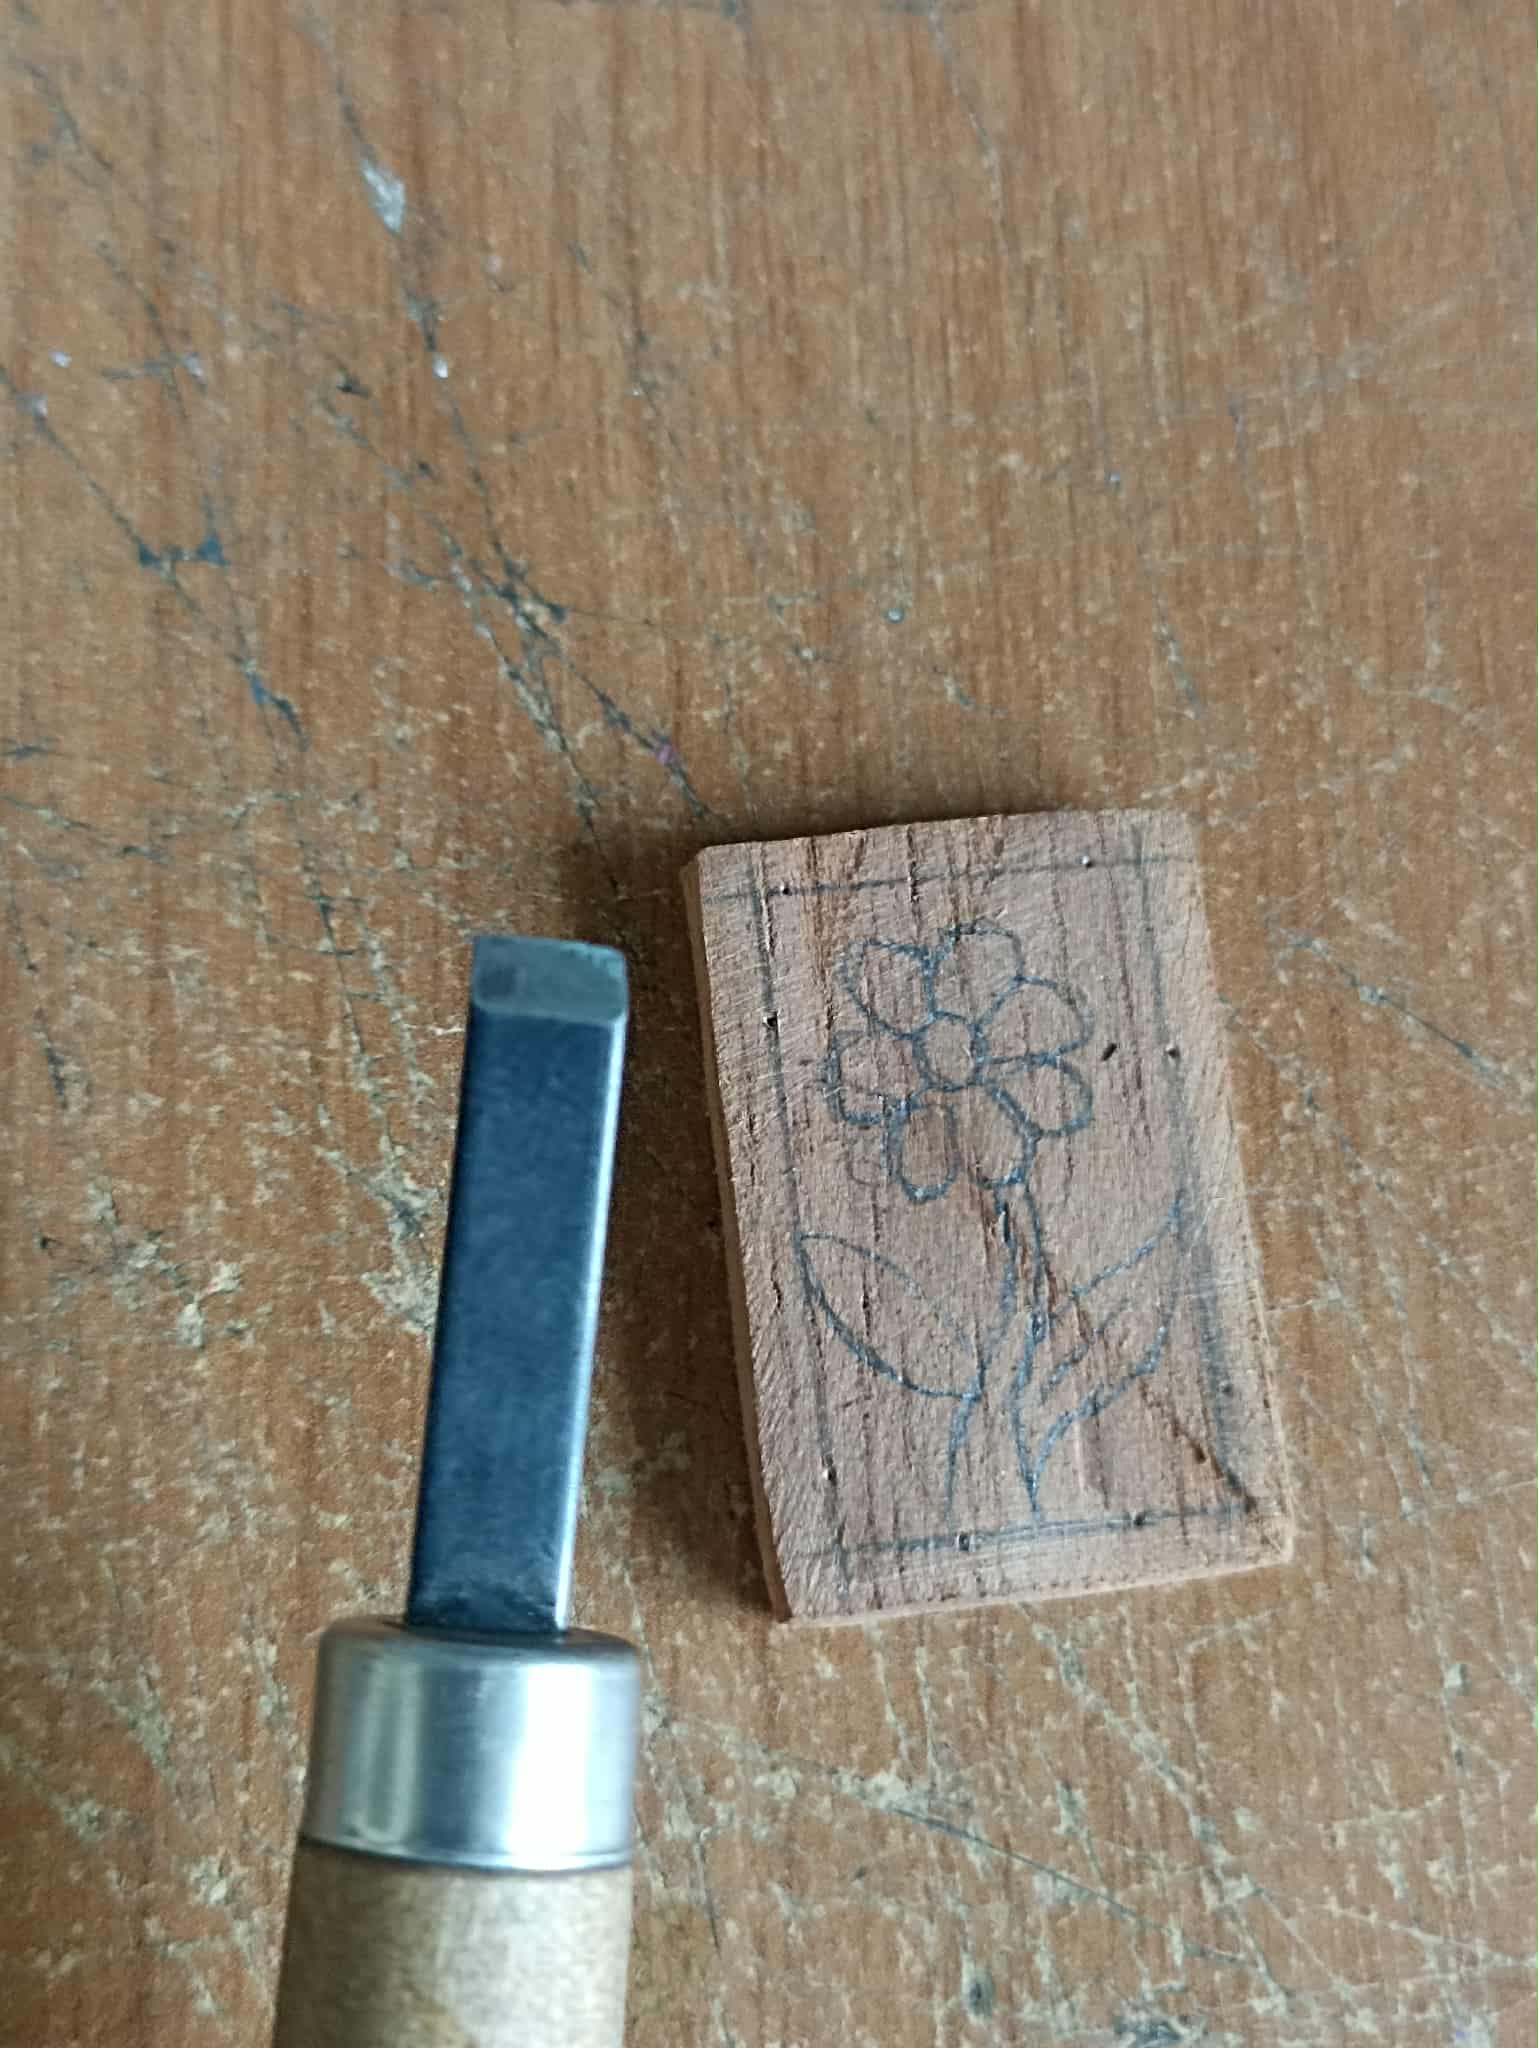
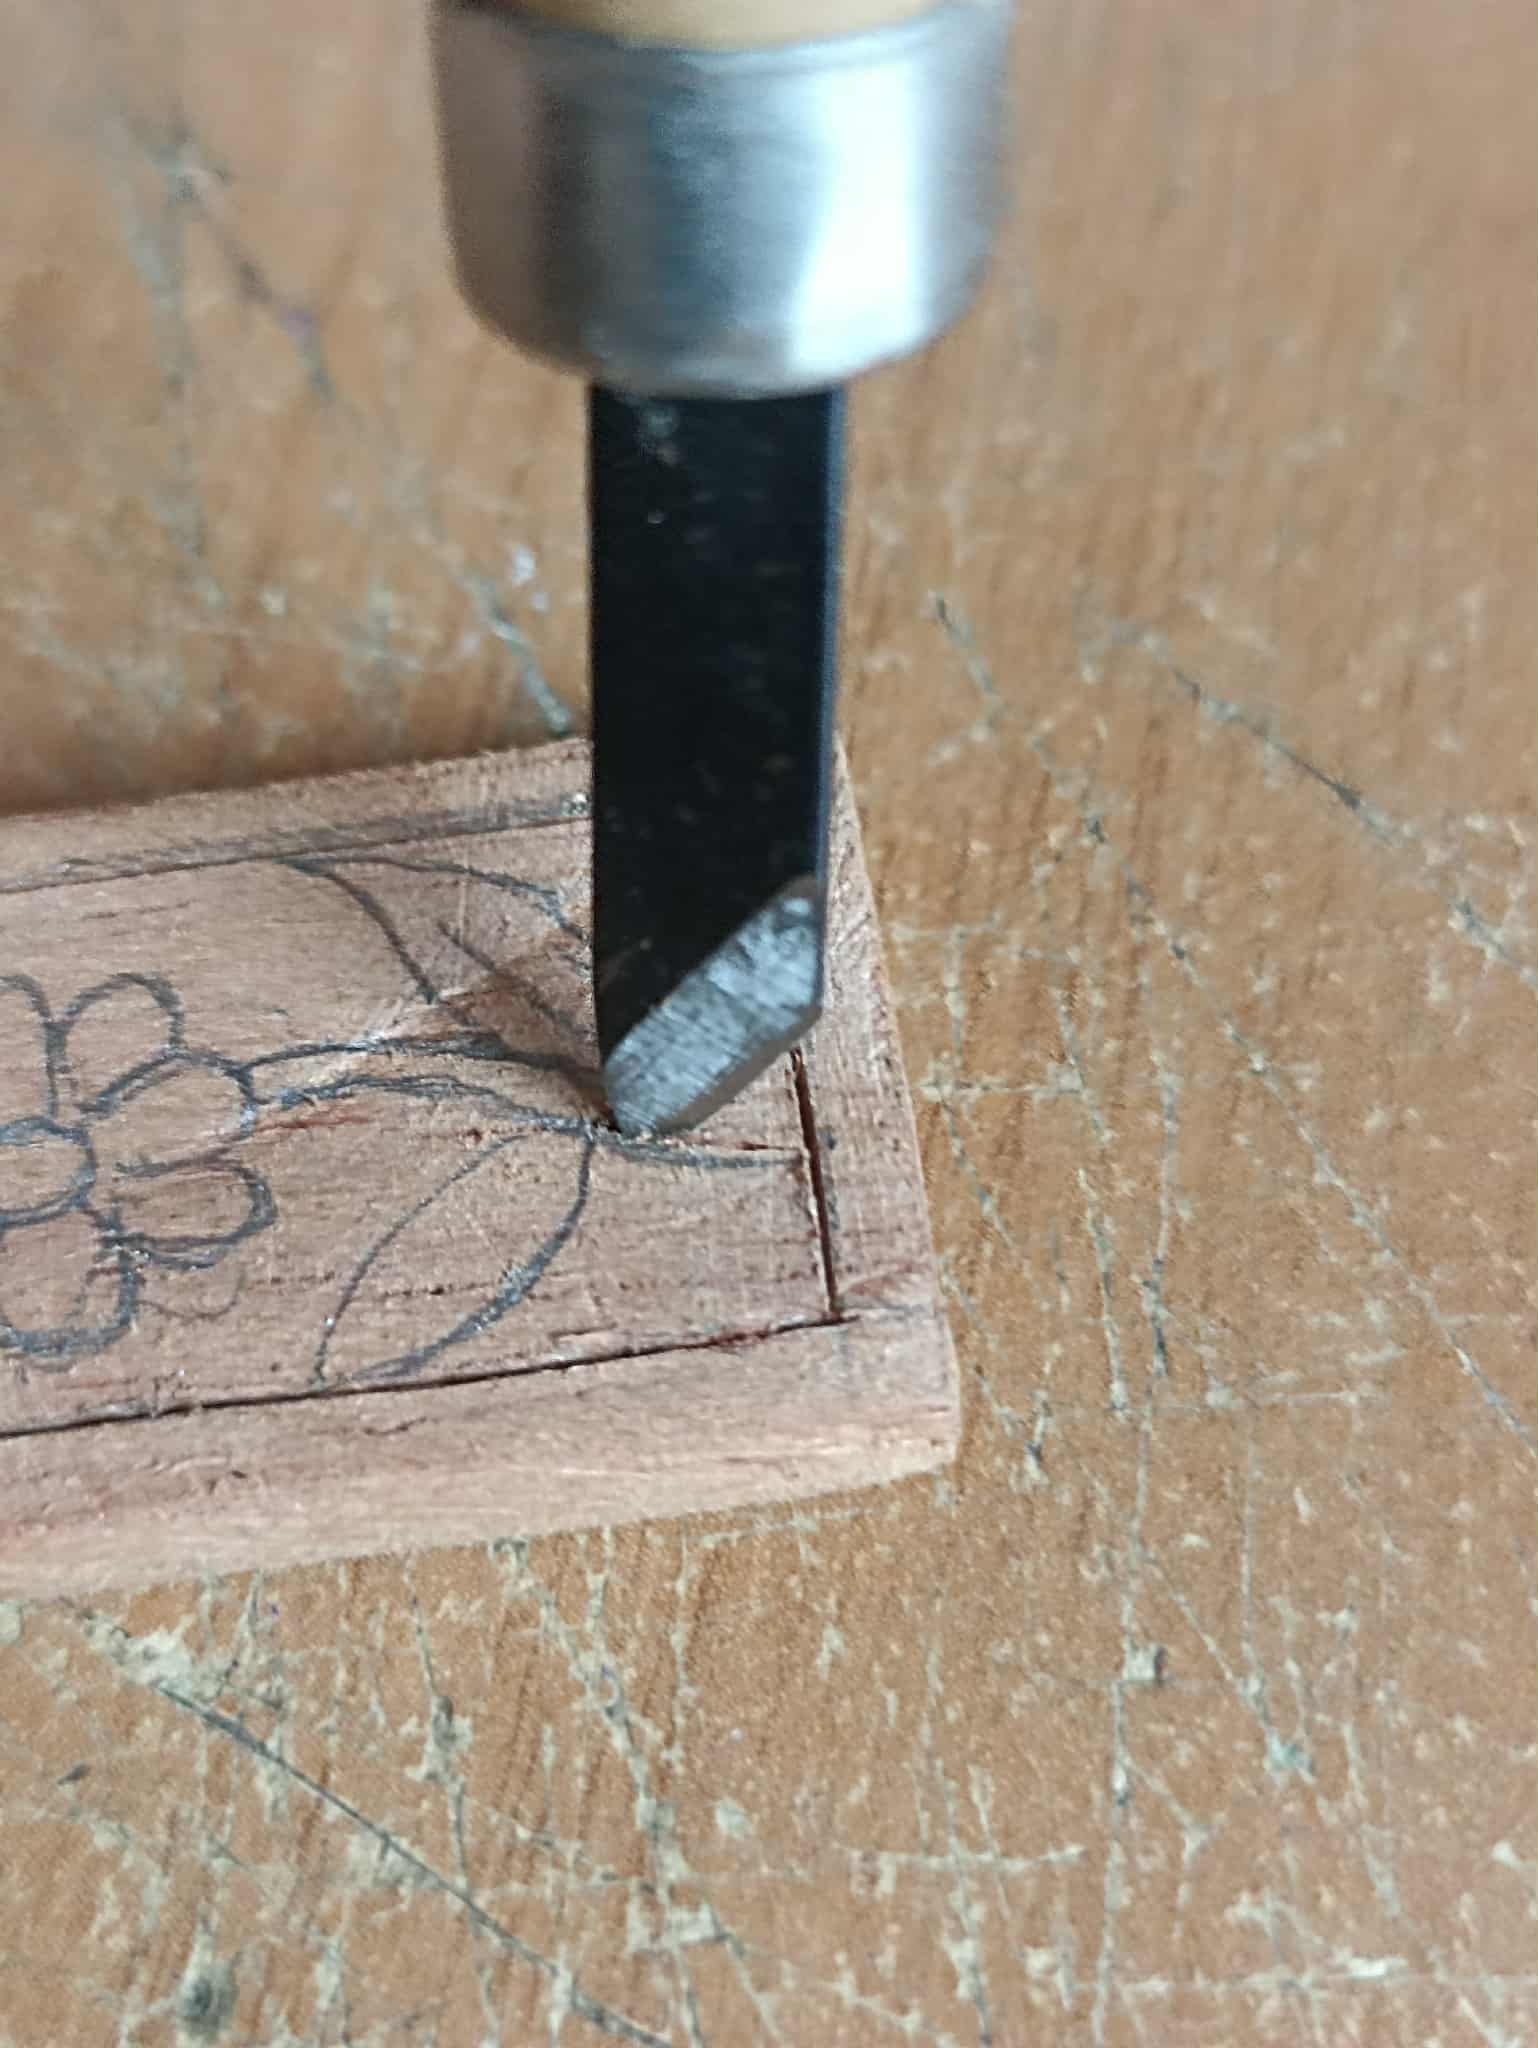
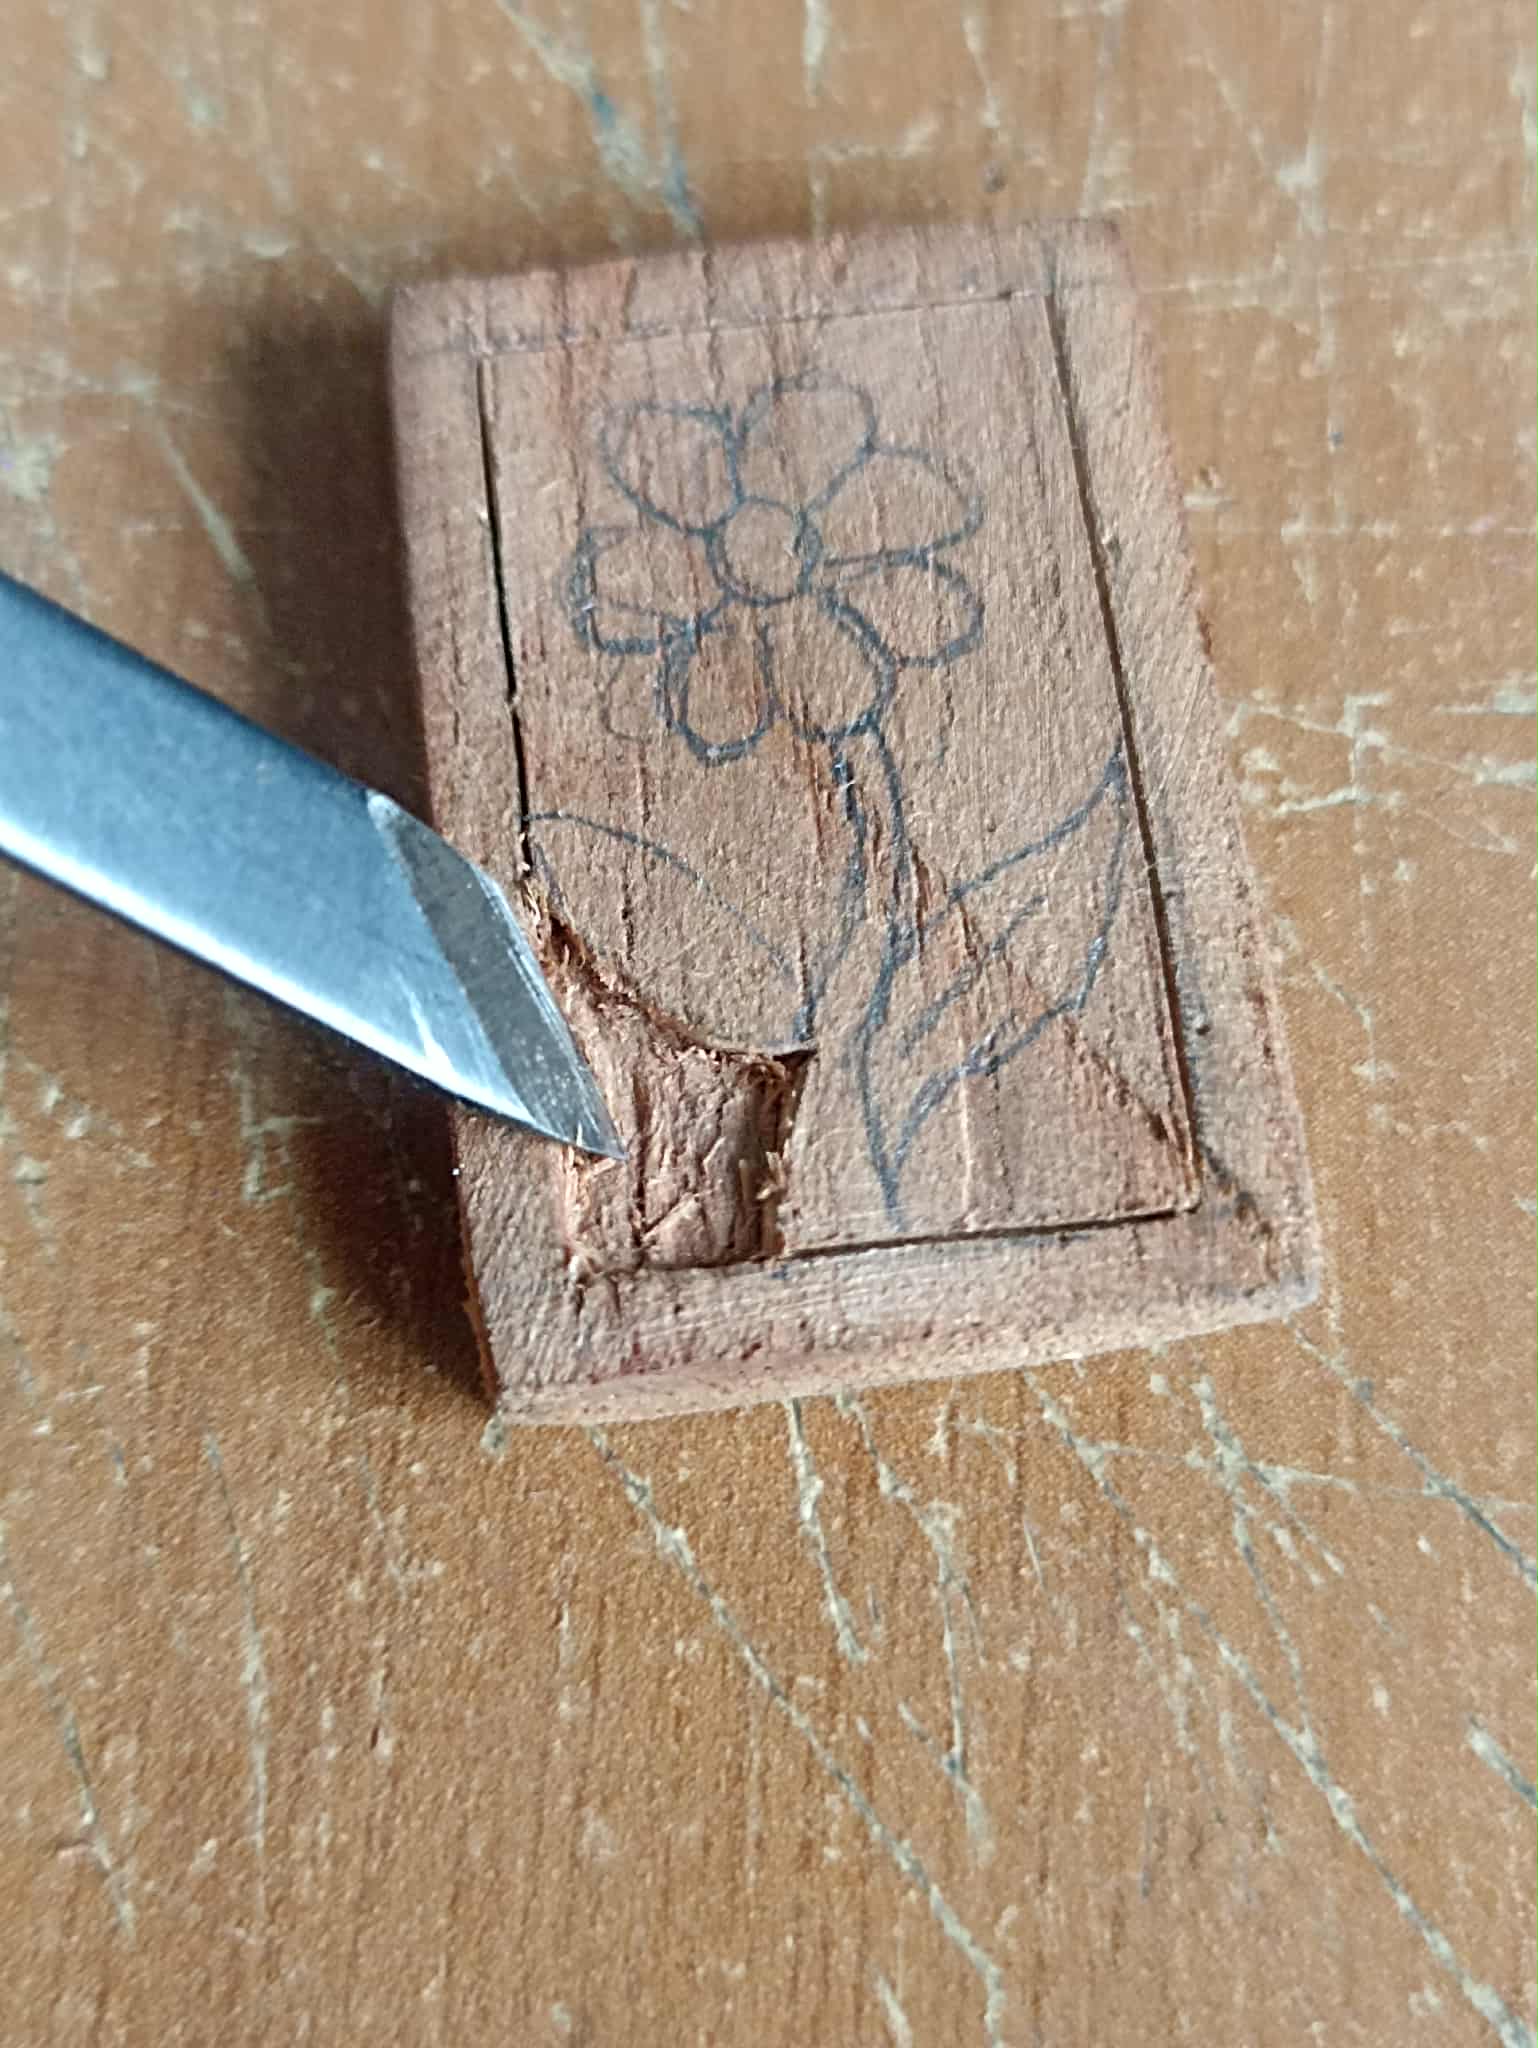
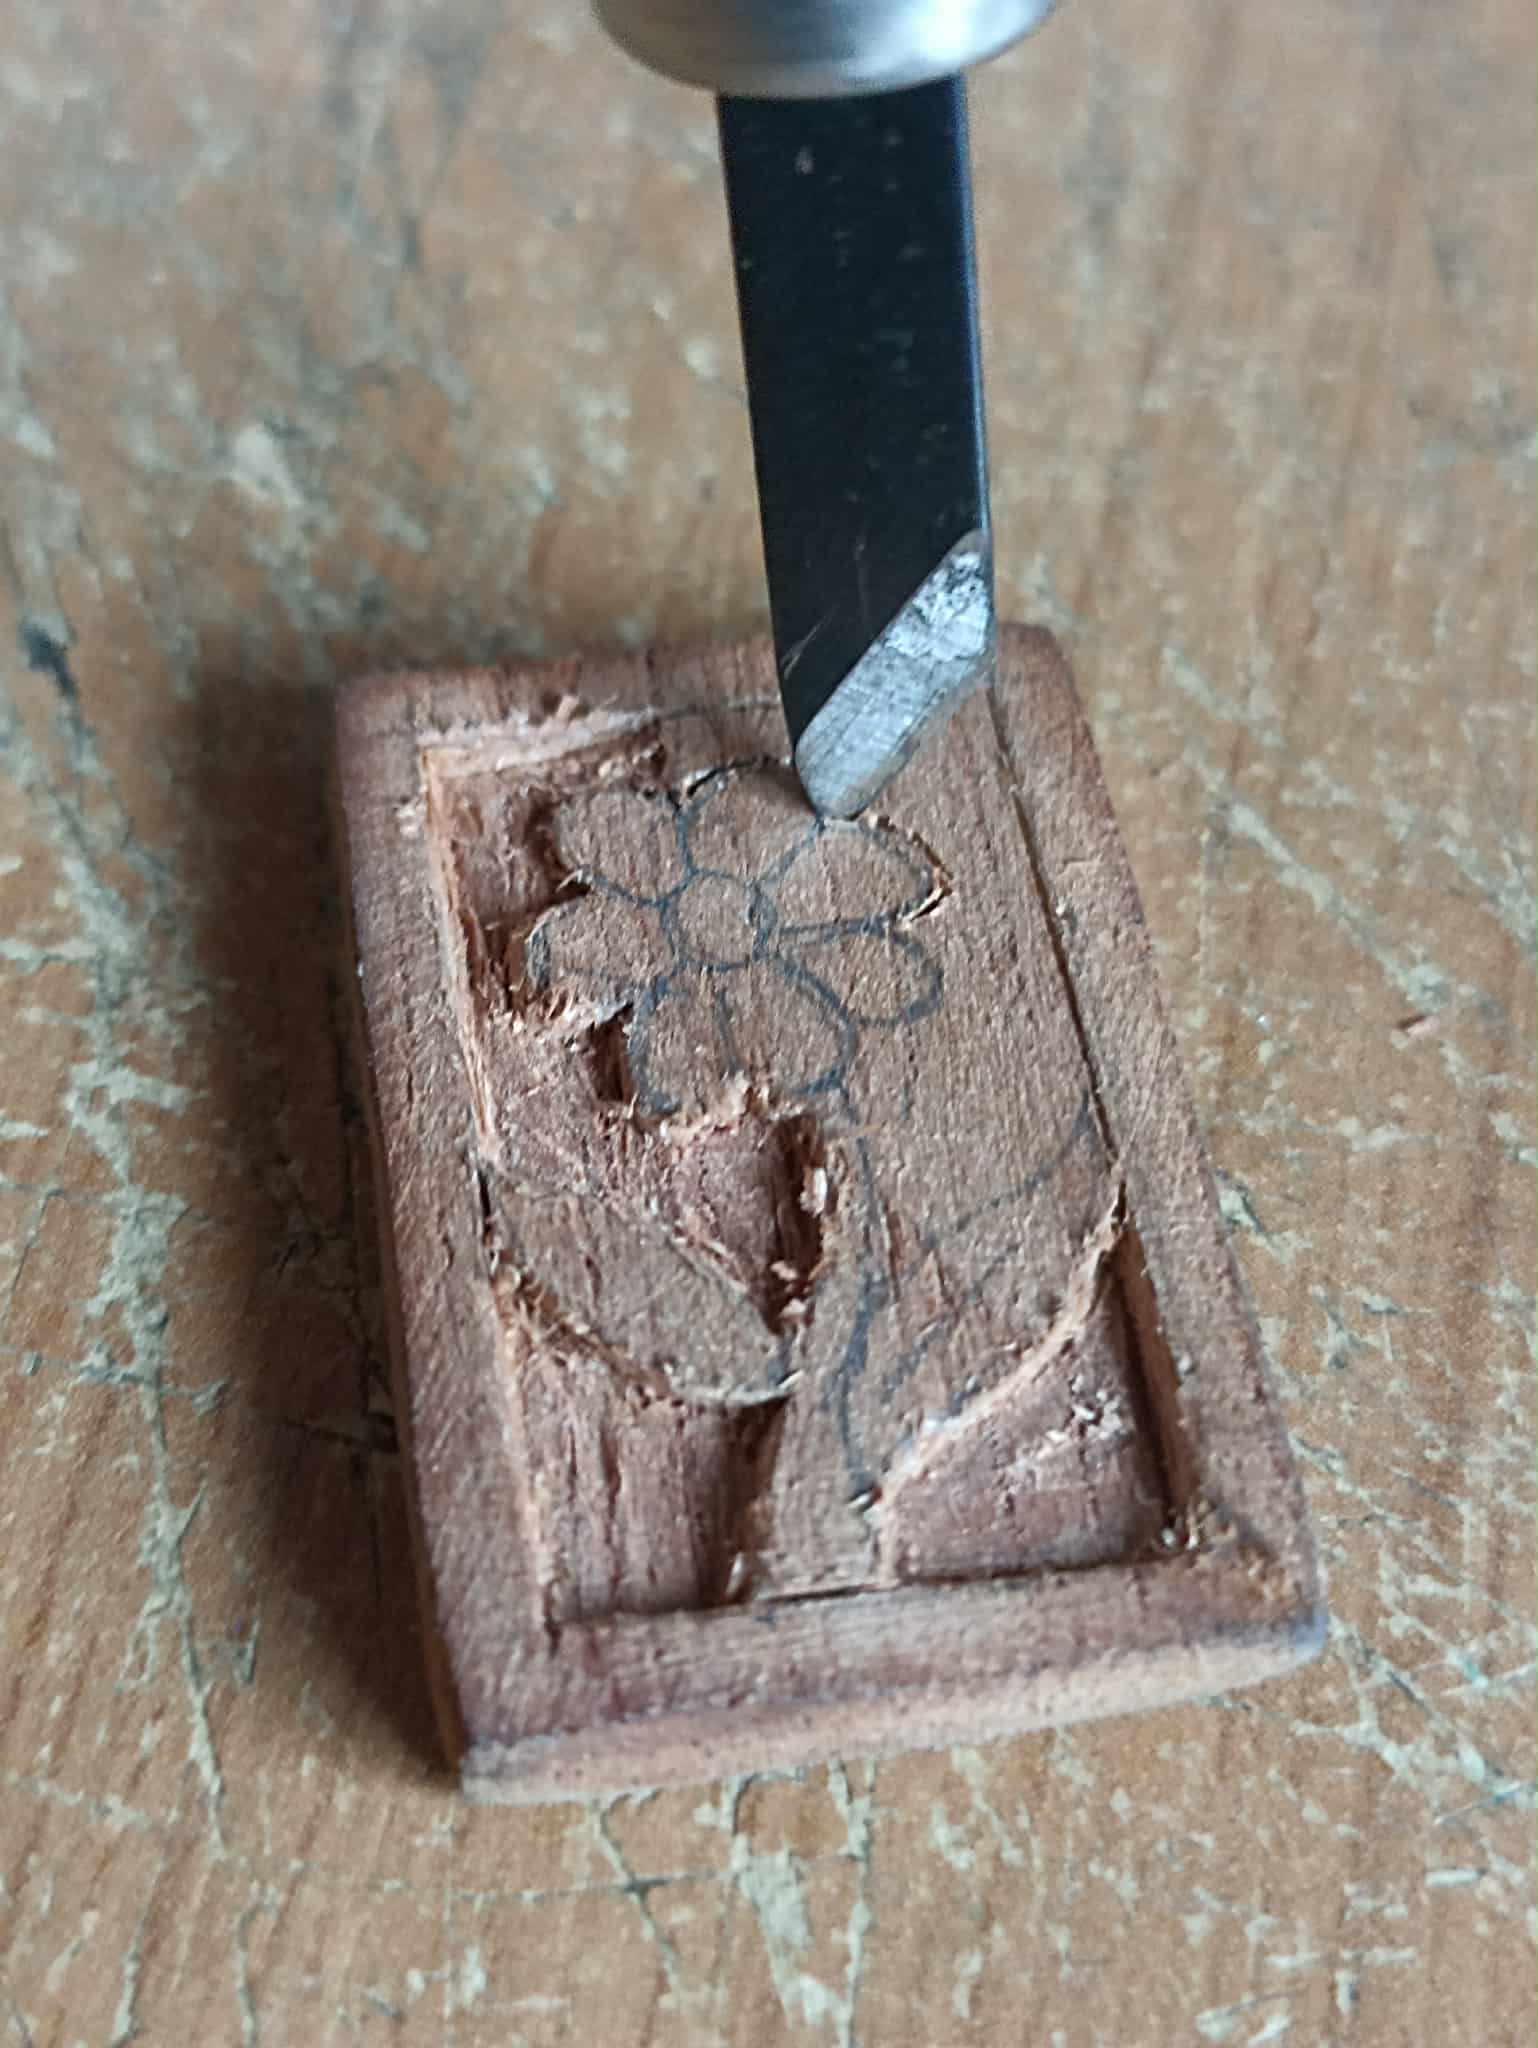
How do I carve this wood? First, I use a flat-tipped knife to make a cut along the entire frame line. This would be the limit for carving the flower piece by piece. Once this entire section is marked, I switch to another type of knife, a pointed one, and then repeat the same cutting process along the outline of the flower design. Since it's a small piece, the process must be careful, with a lot of force, and the blades would easily pierce the wood.
¿Cómo tallar esta madera? en primer lugar, utilizo una d elas cuchillad de punta plana para hacer un corte por toda la línea del marco, esto vendría siendo el límite para tallar la flor parte por parte. Una vez marcado toda esta parte, se cambia a otra clase de cuchilla, una que sea puntiaguda para entonces hacer el mismo proceso de corte en el trazo del dobujo de la flor. Como es una pieza pequeña, el proceso debe ser cuidadoso, mucha fuerza y las cuchillas traspasarían fácilmente la madera.
 |
 |
|
|---|---|---|
 |
 |
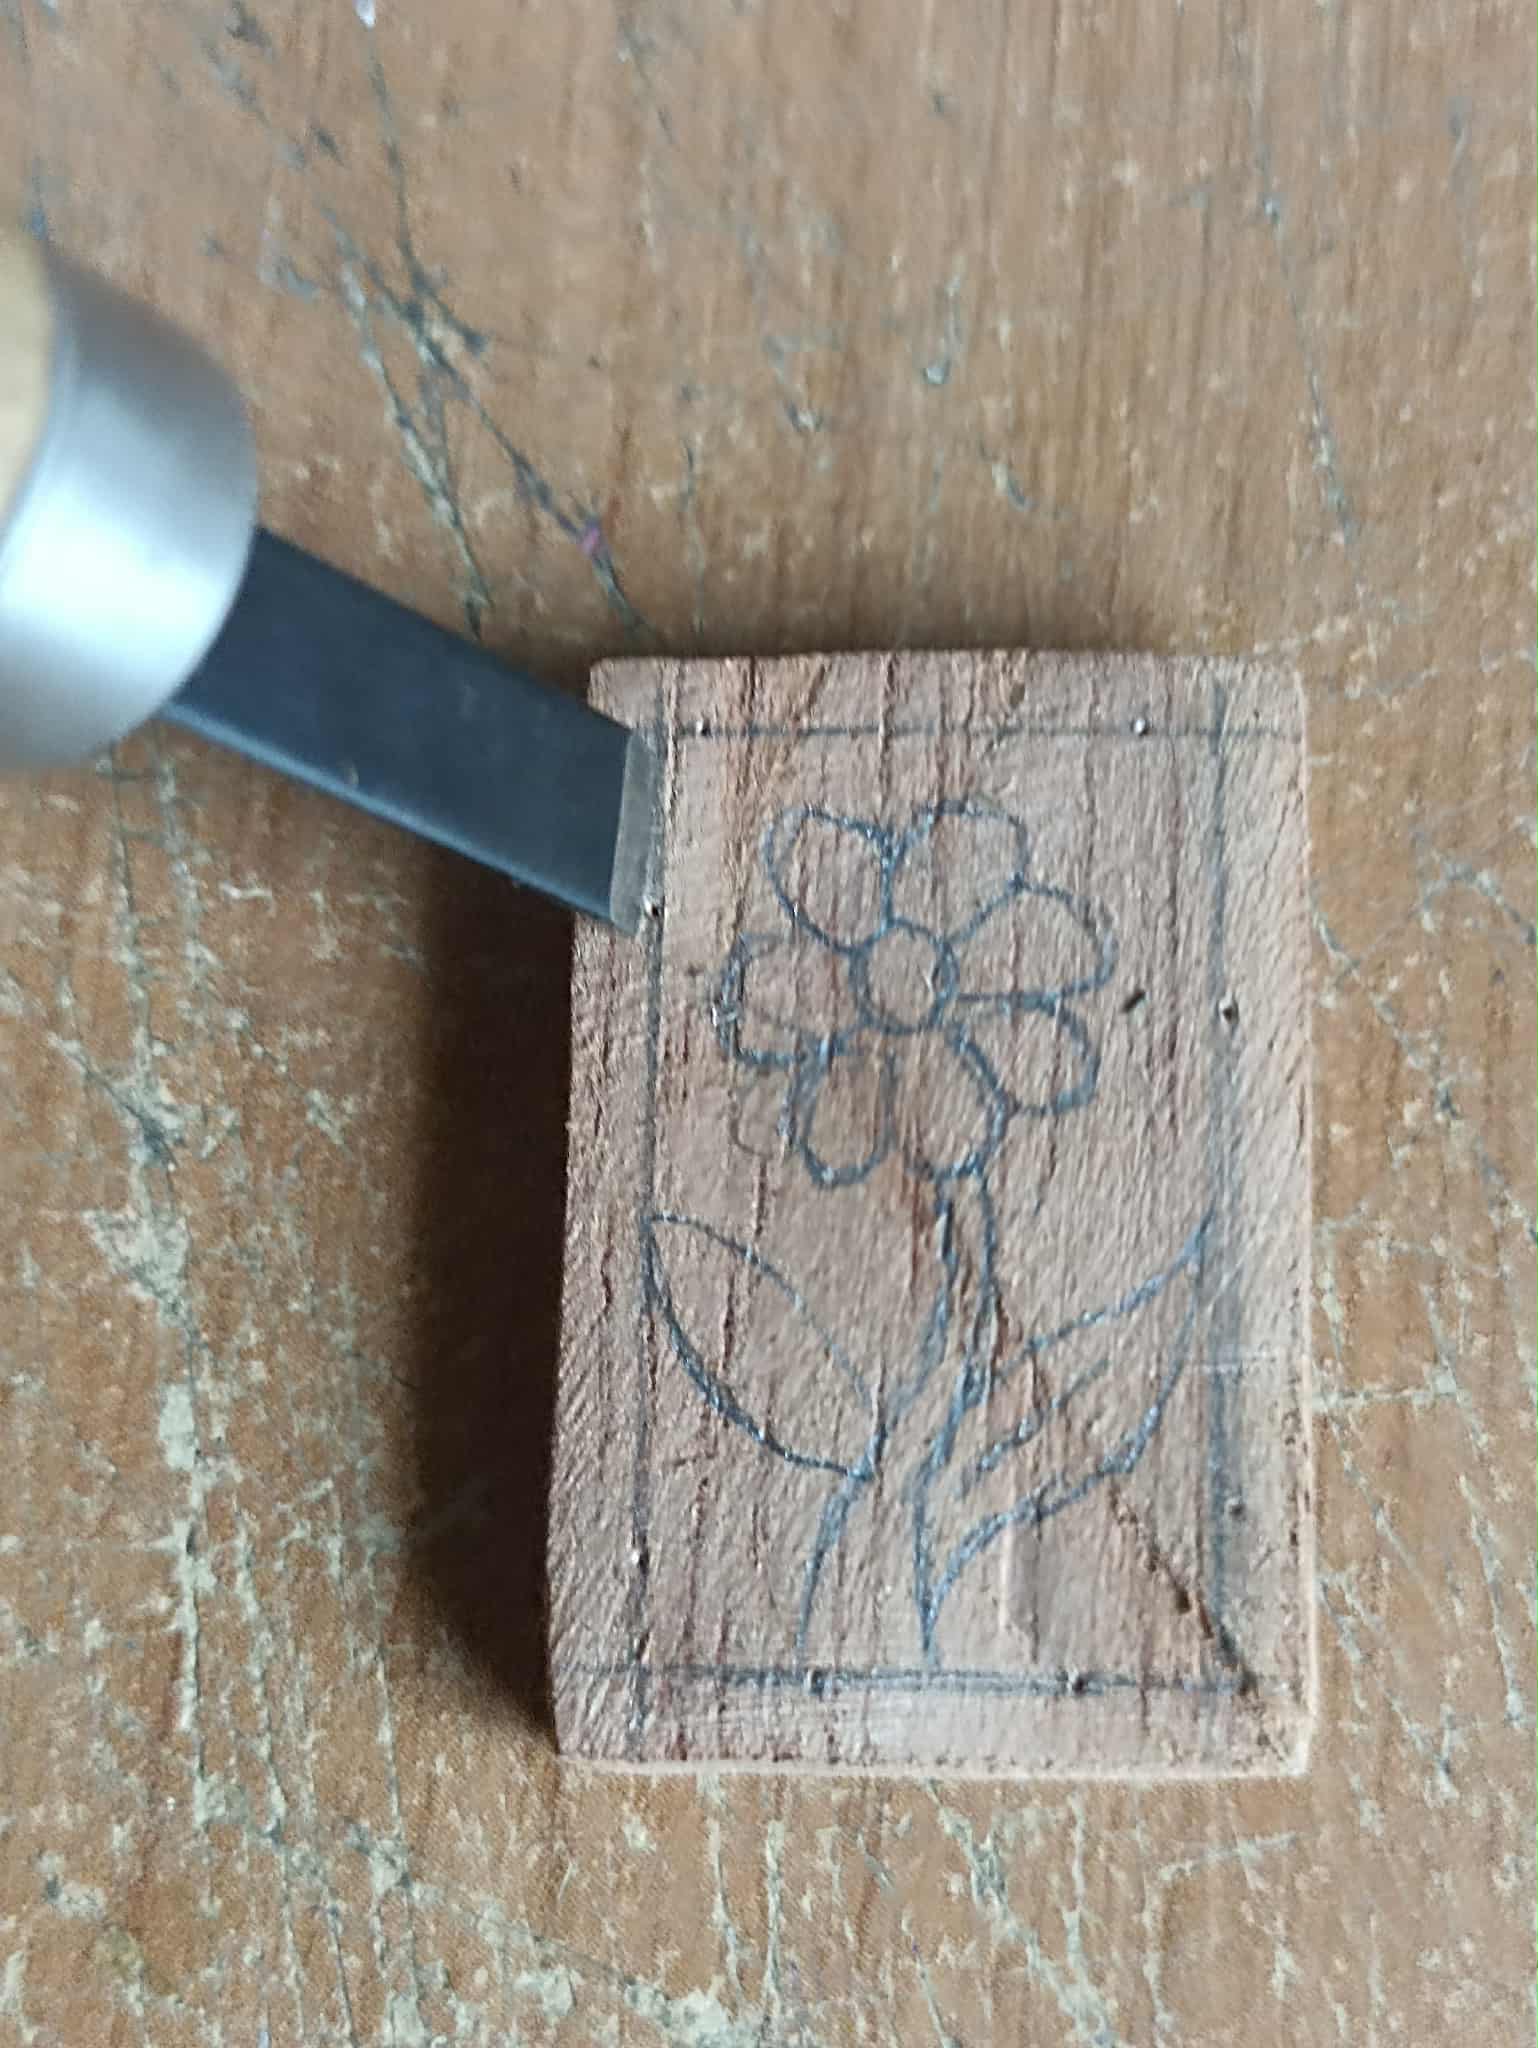
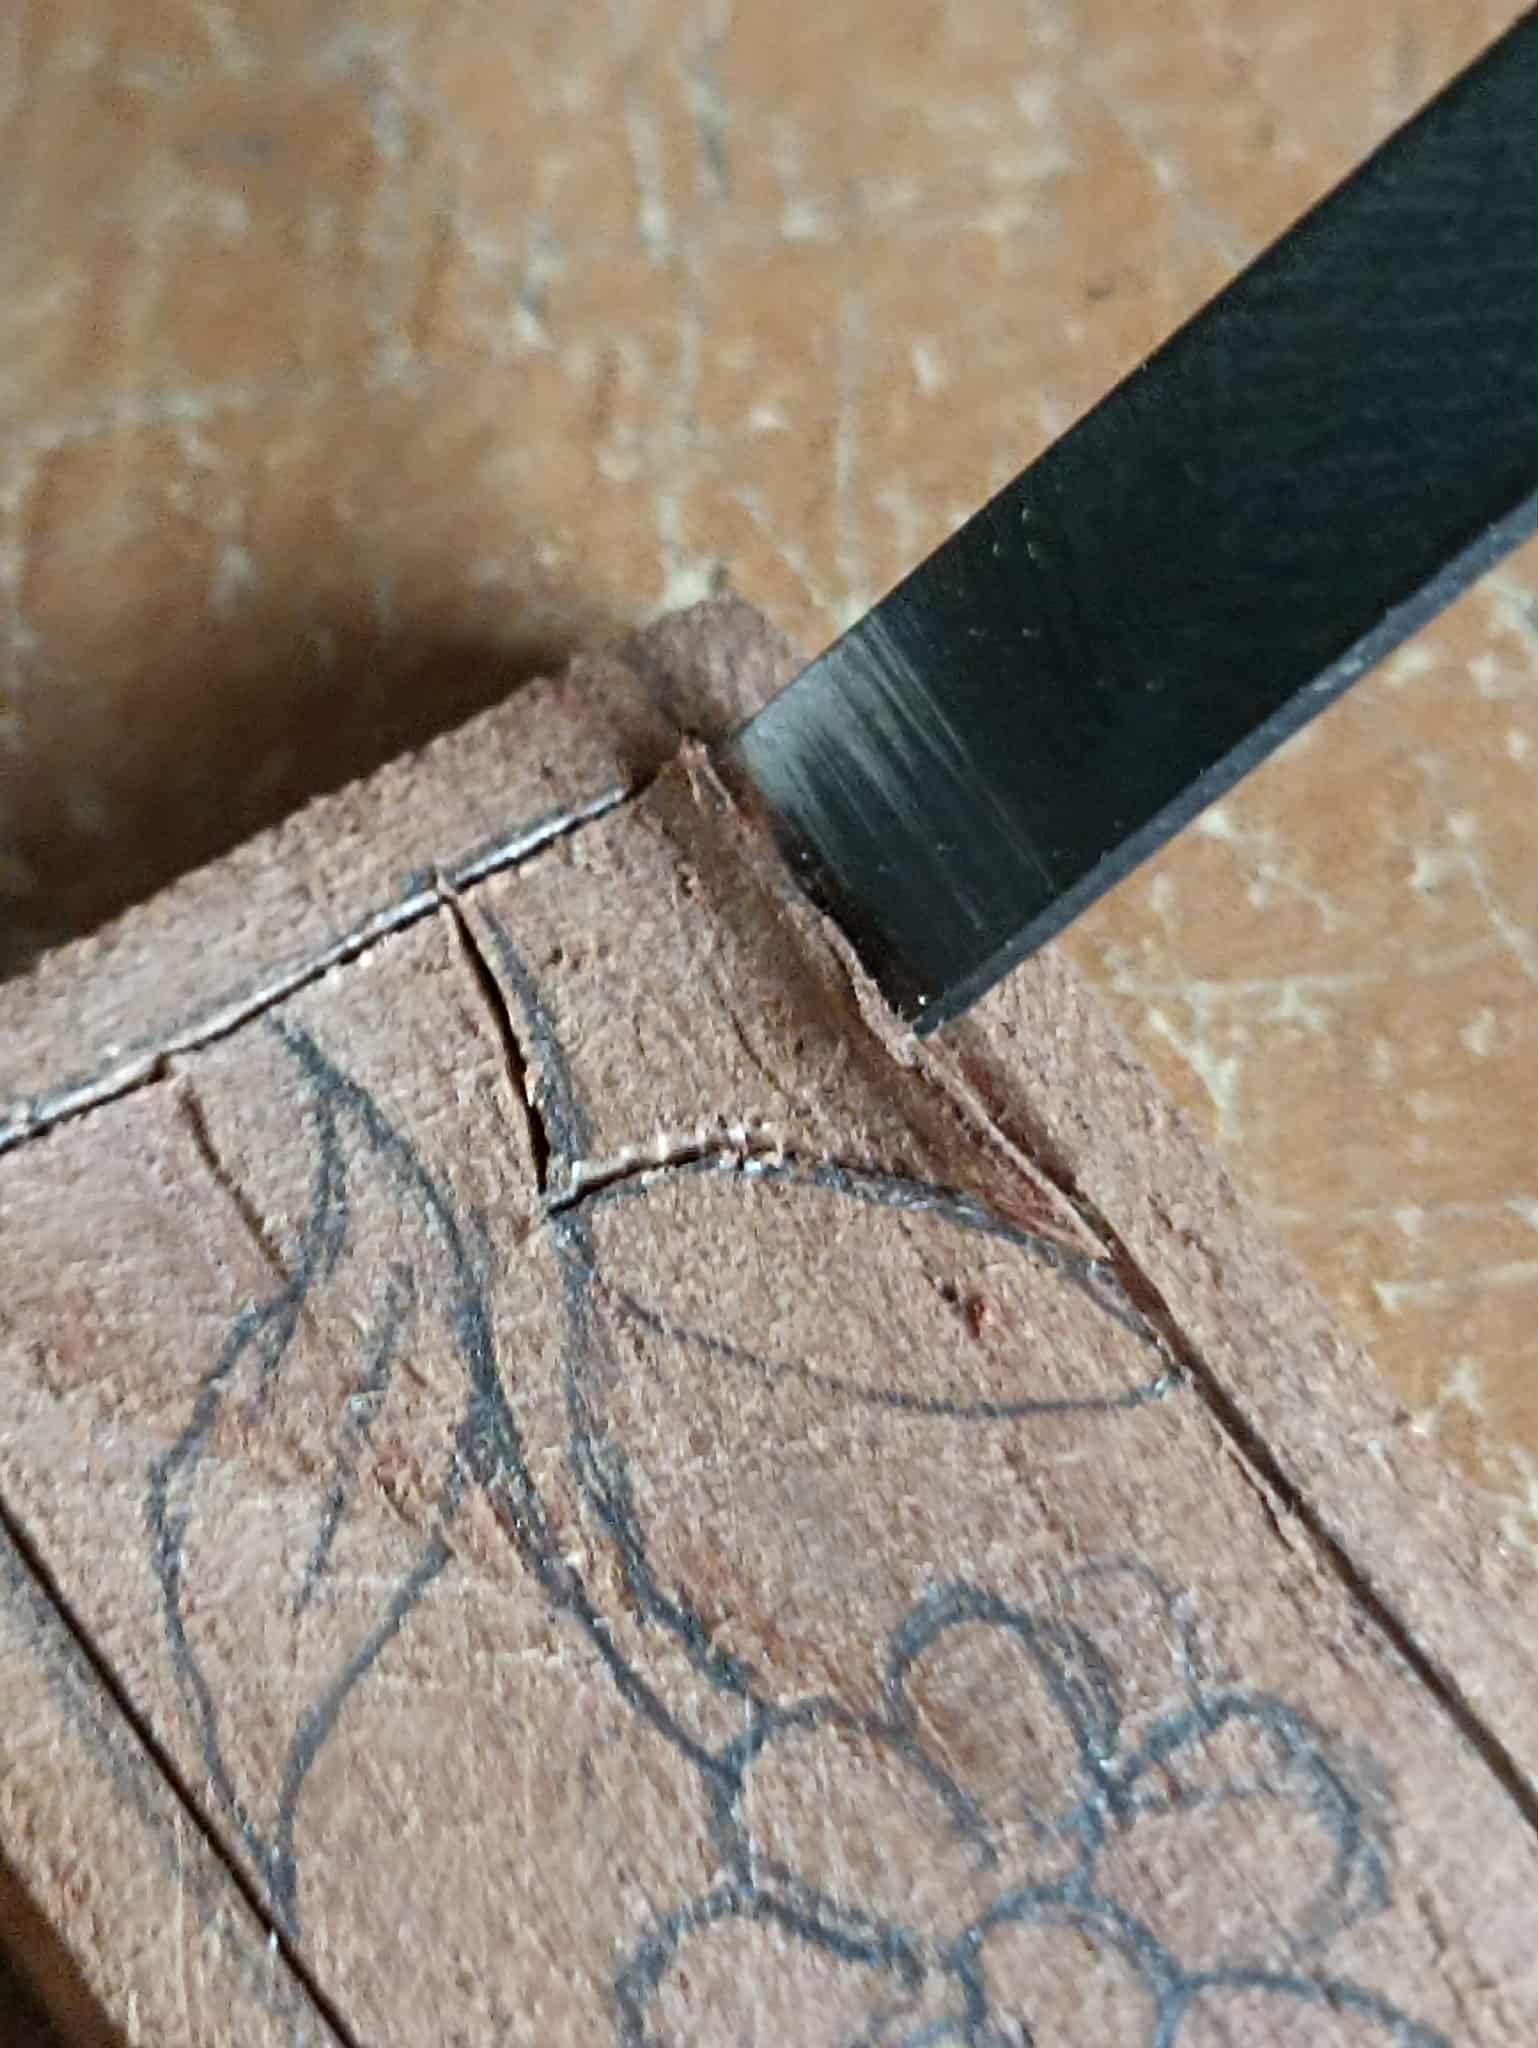
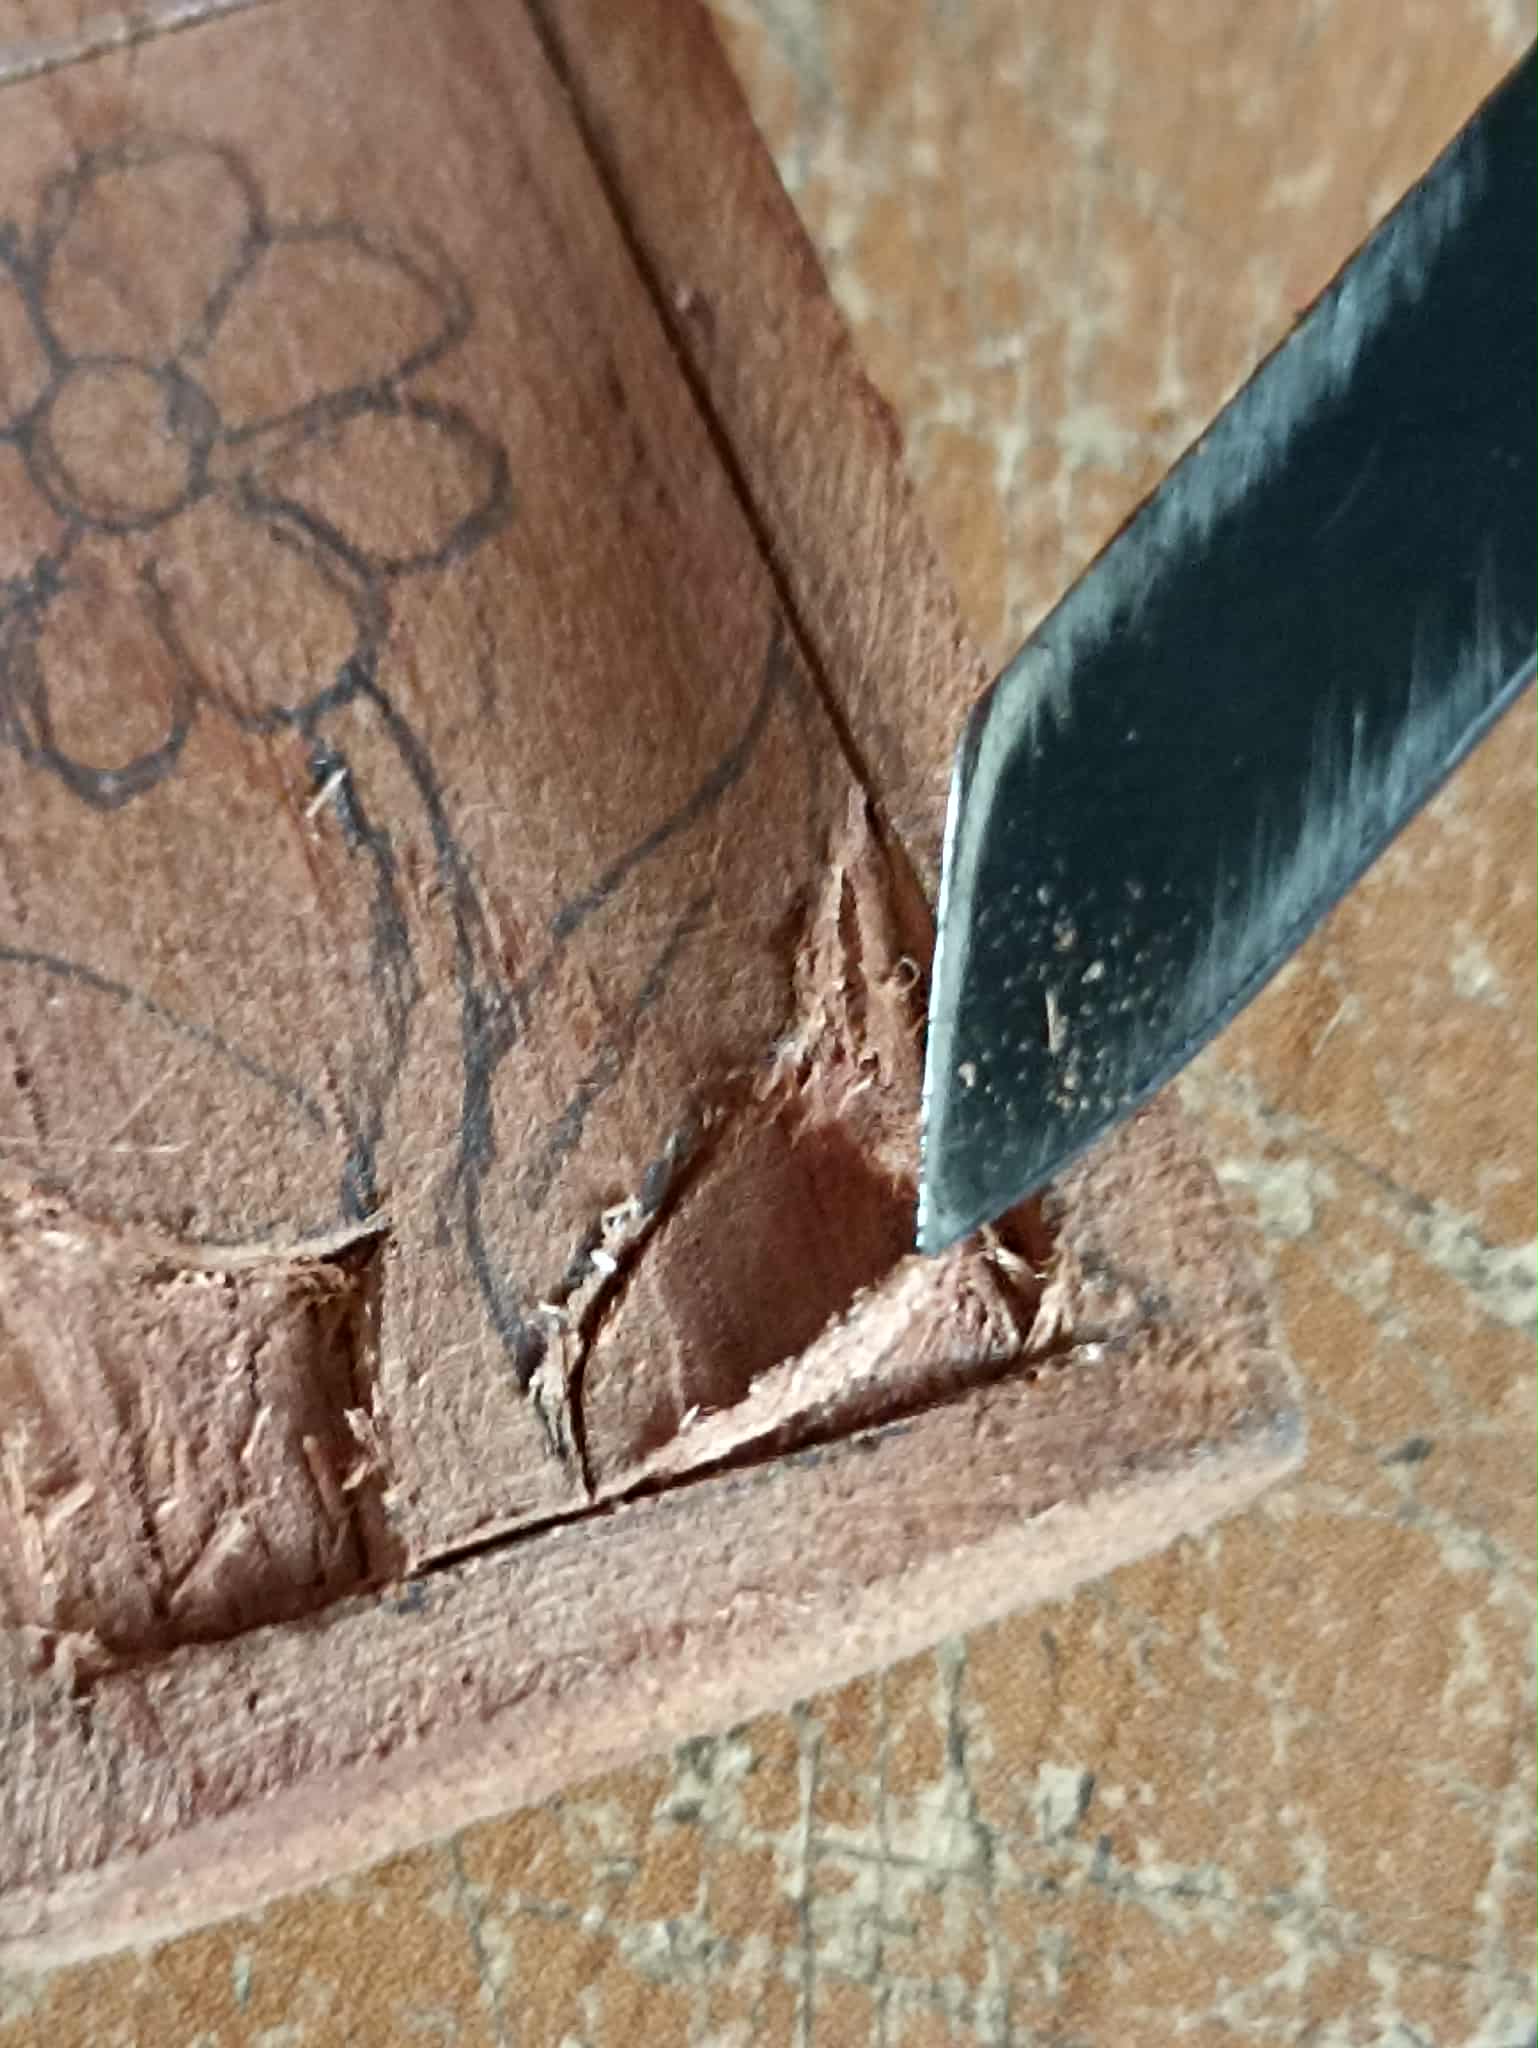
I formally began the carving at the bottom of the figure, and as I mentioned before, using a pointed knife, I make the cut along the flower pattern. To extract the wood, I use the silver knife, pushing the edge upwards, and the wood gradually emerges. This should be done gradually, so as not to pierce the wood and damage it.
Comencé el tallado formalmente por la parte baja de la figura, y como les dije antes, utilizando una cuchilla puntiaguda hago el corte en el dibujo de la flor. Para extraer la amdera utilizo la cuchilla plata, y empujo el filo hacia arriba y así la madera va saliendo poco a poco. Se debe hacer poco a poco, para no traspasar la madera y dañarla.
 |
 |
|
|---|---|---|
 |
 |
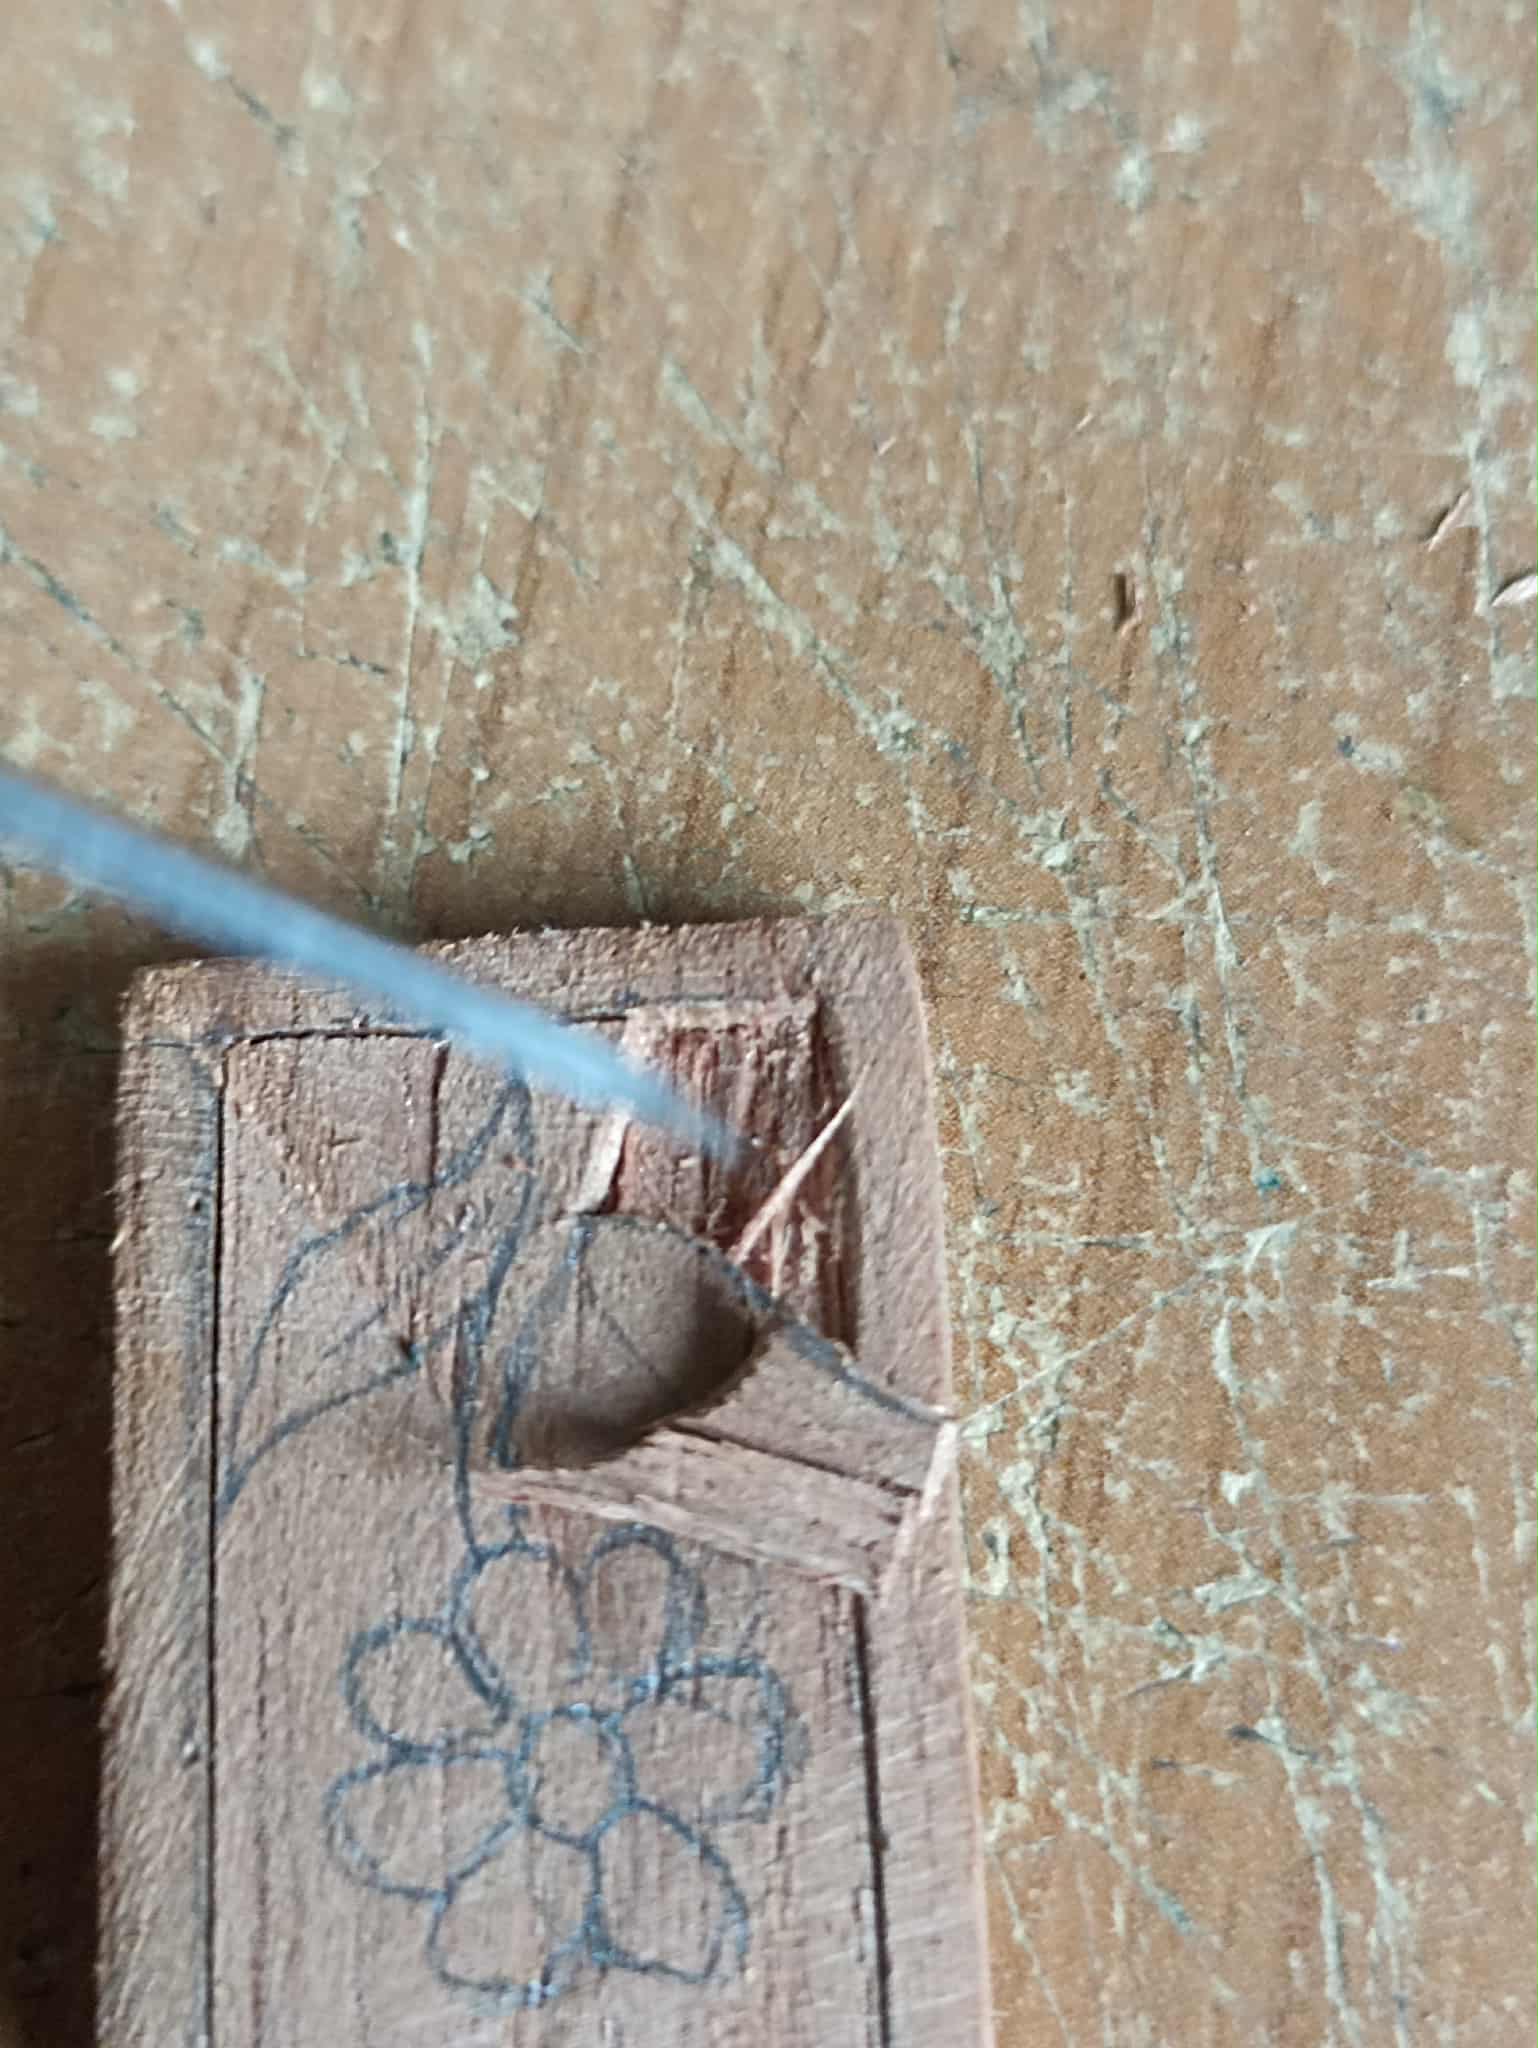
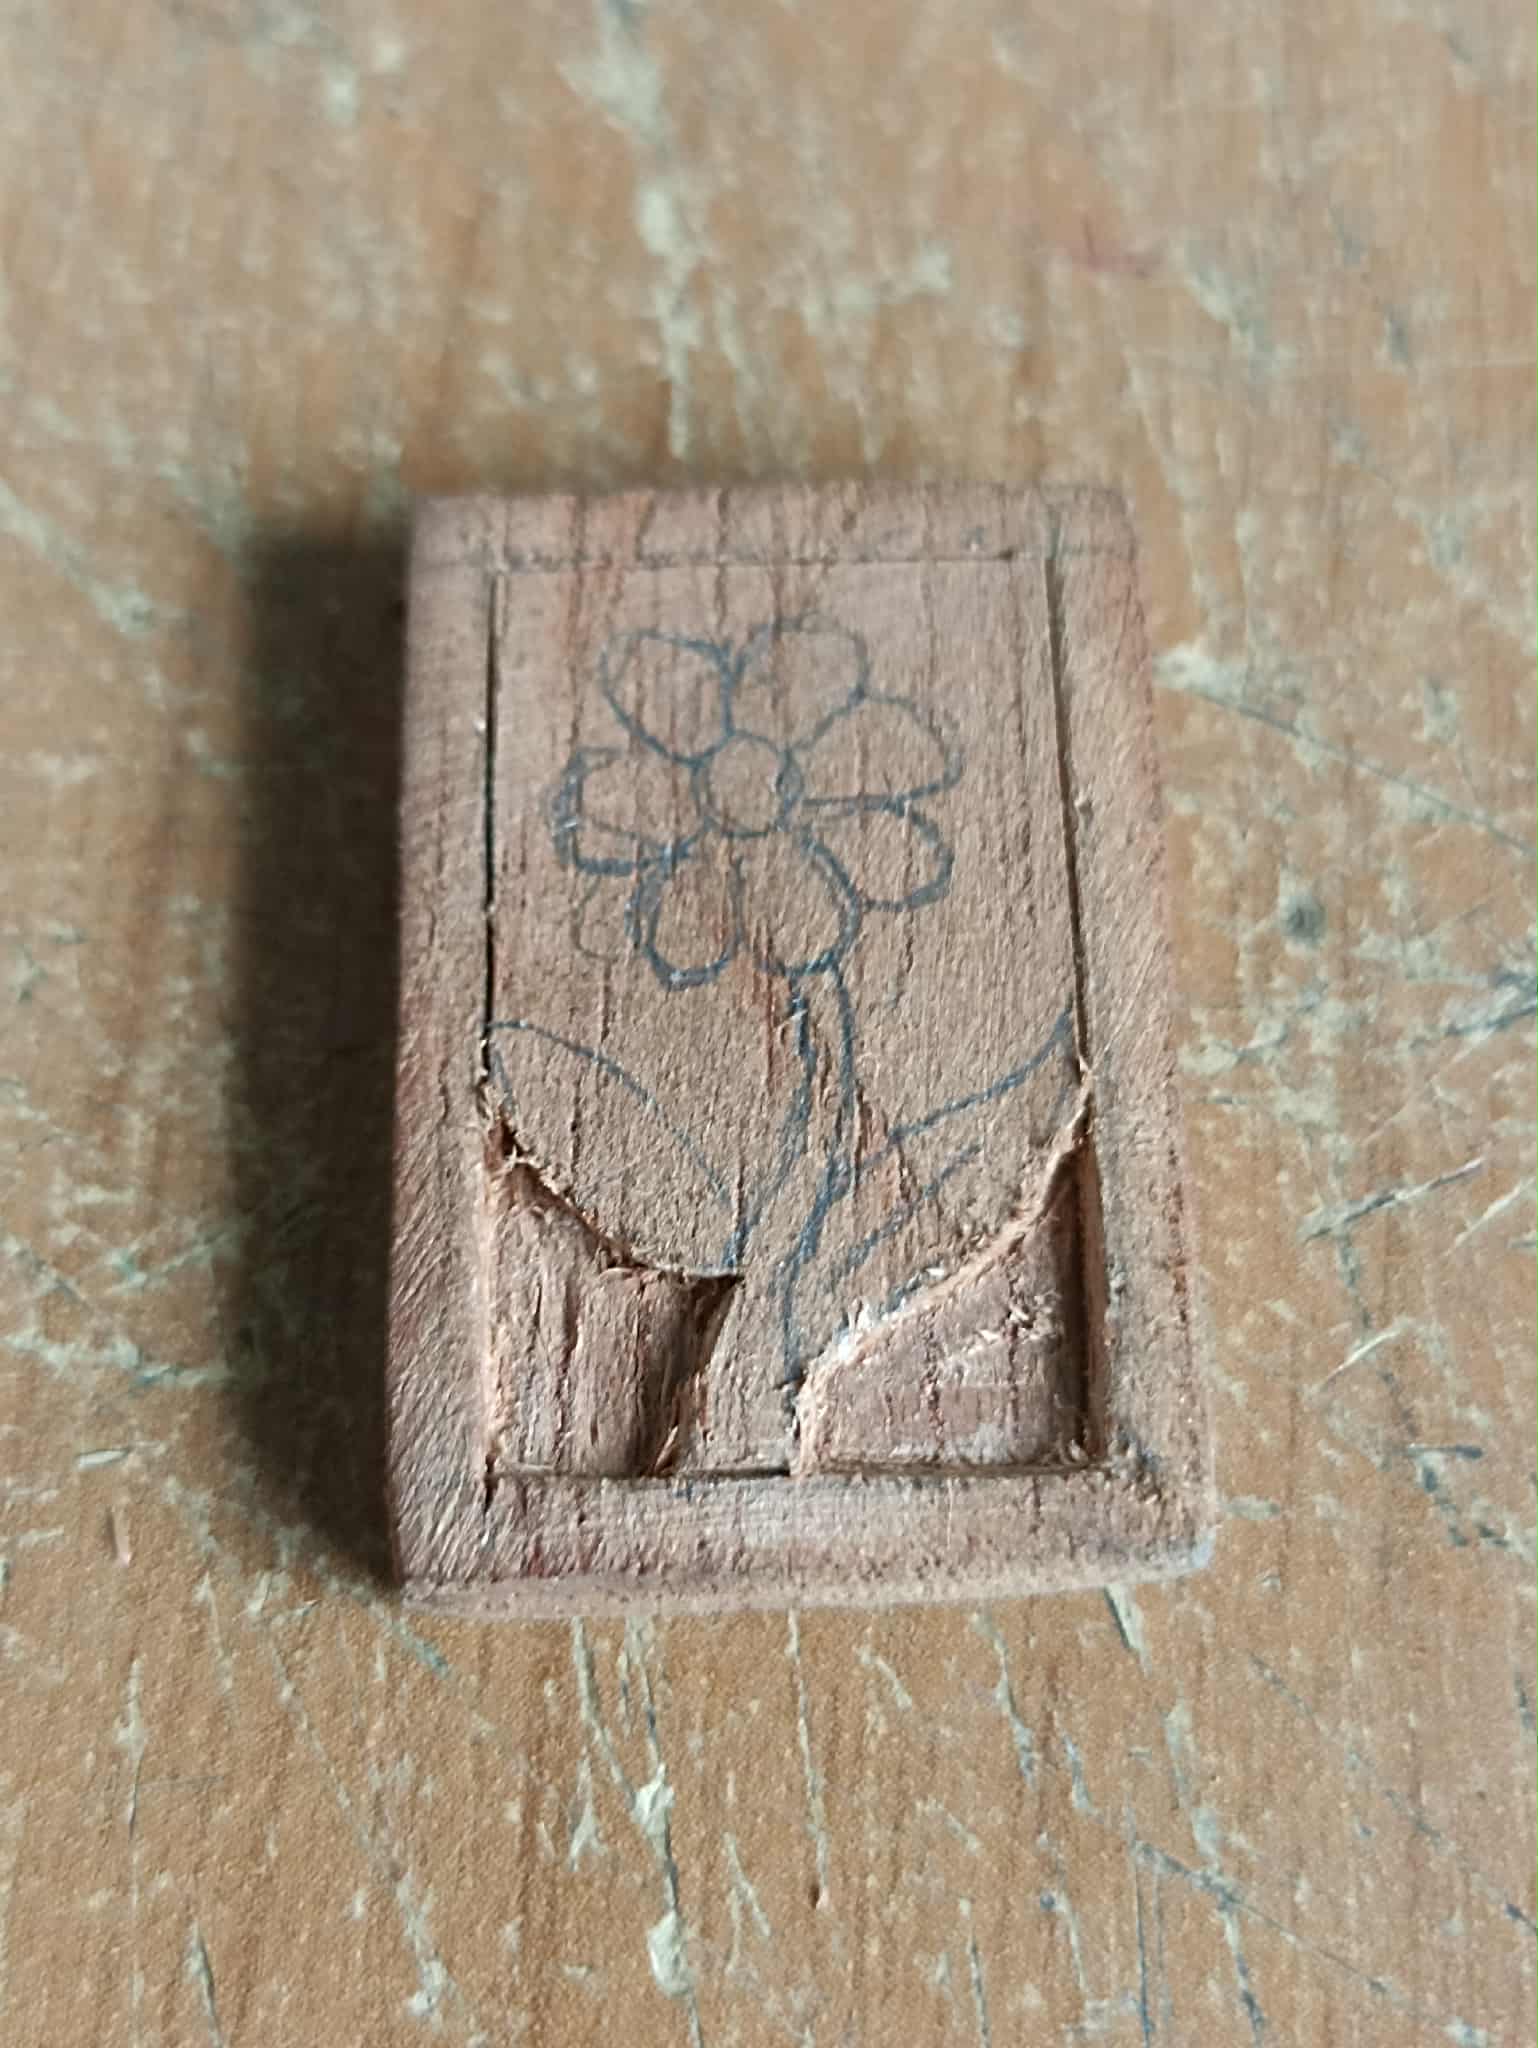
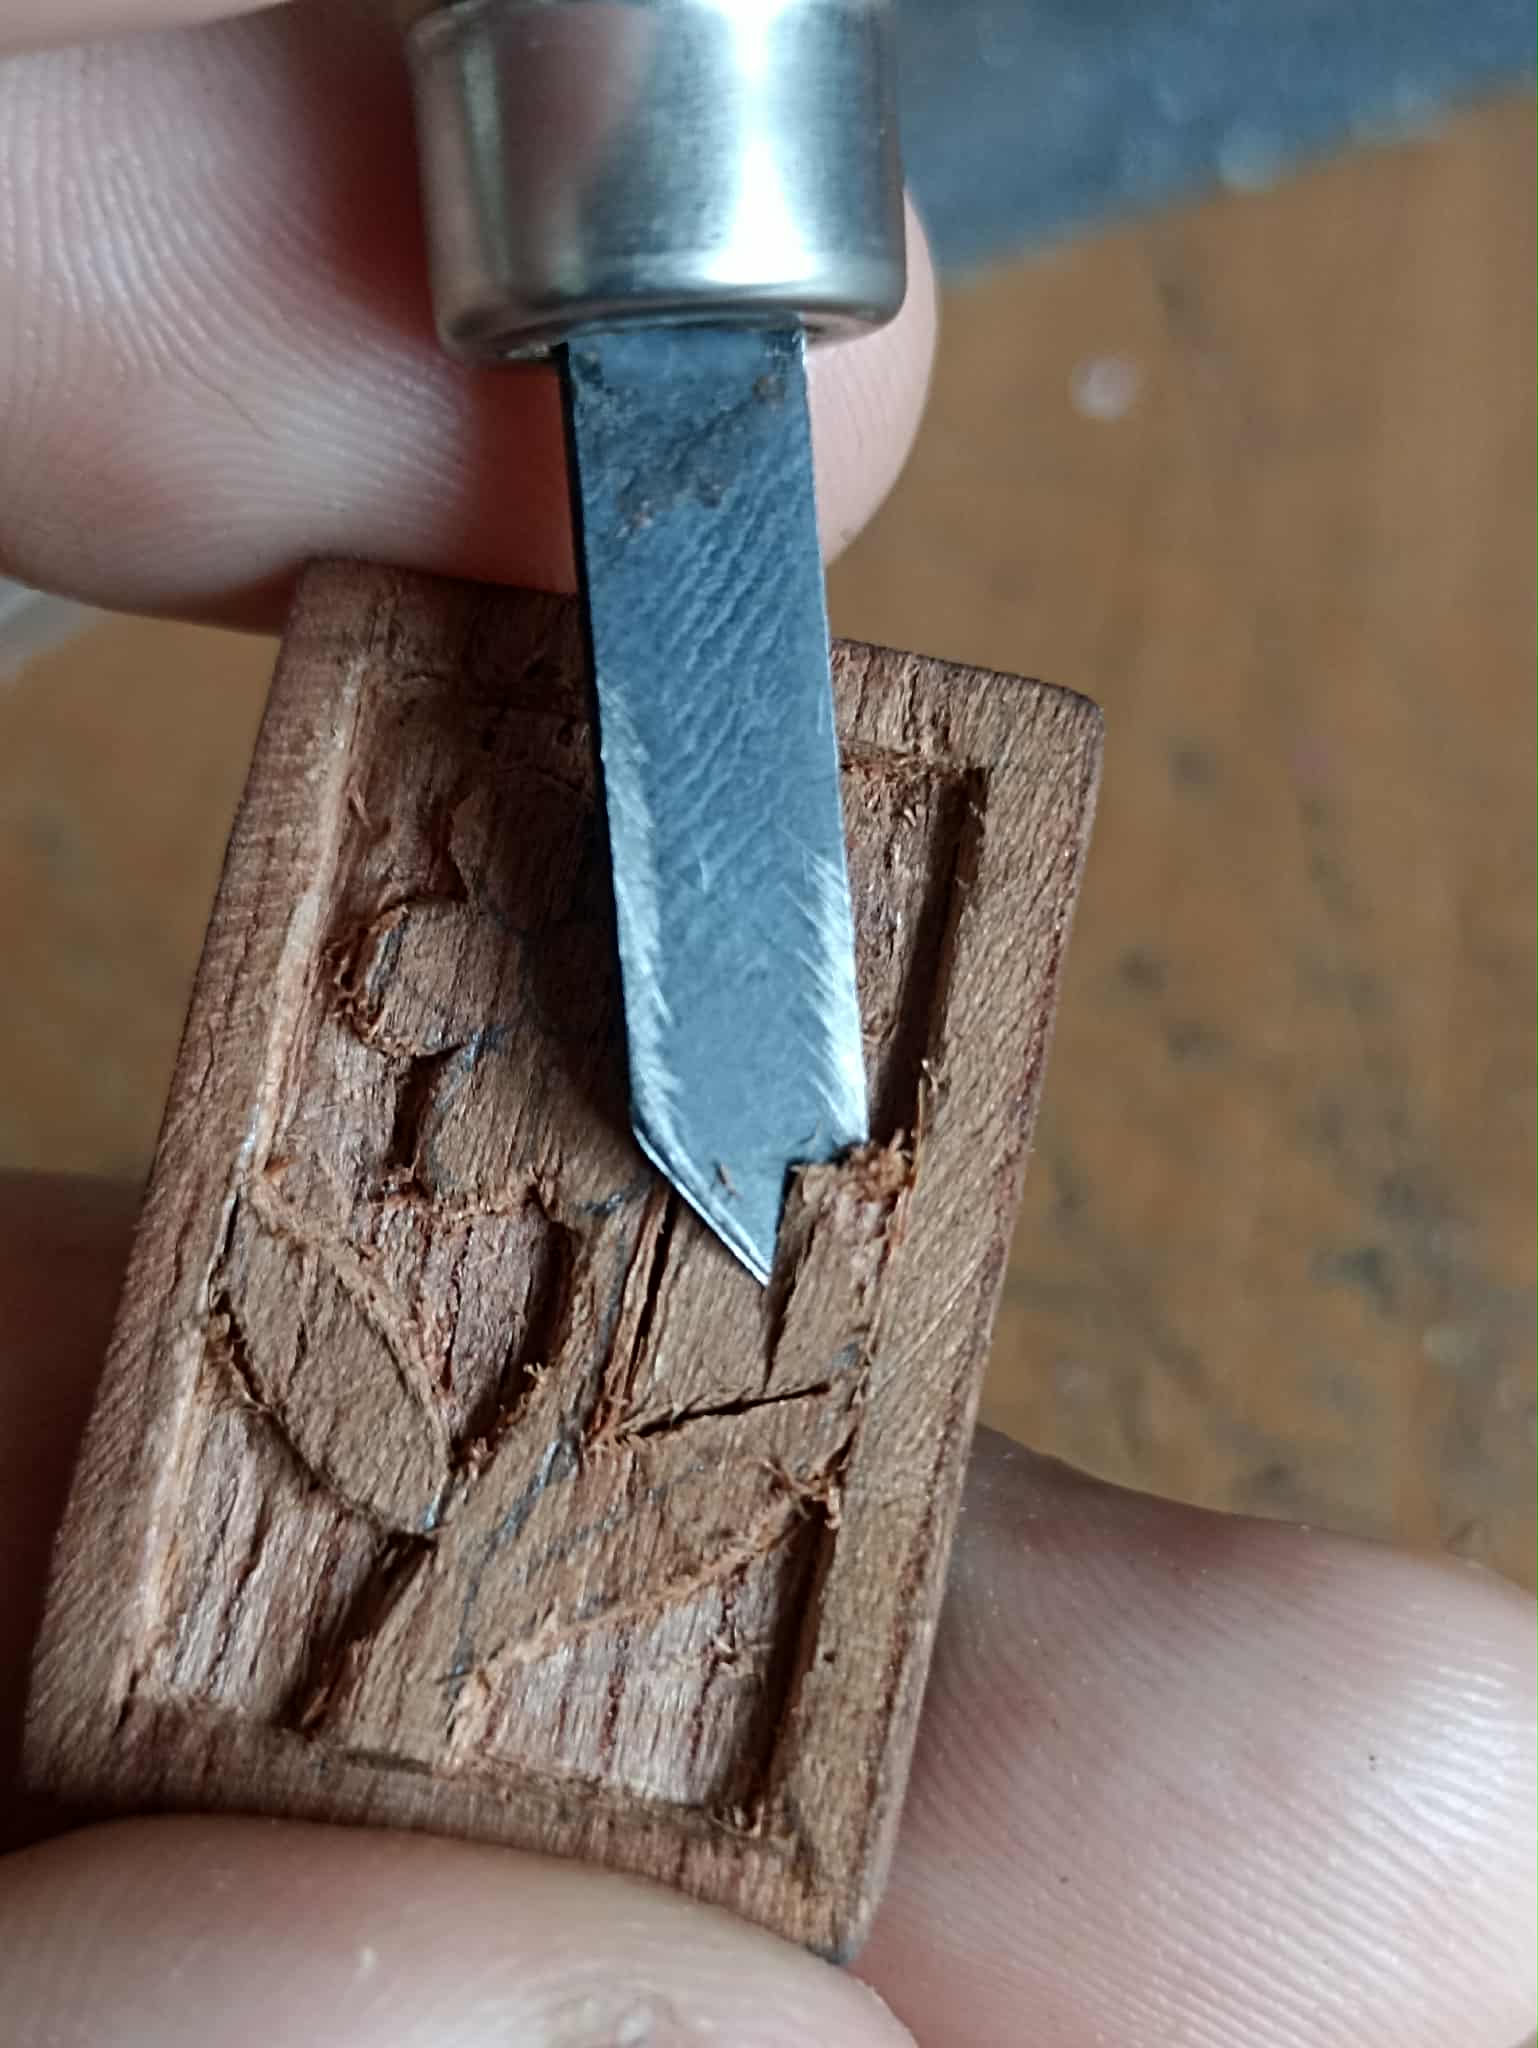
This is where the fun began. I felt like I had immersed myself in the utmost concentration, even though my daughter was supervising me every five minutes. I gradually applied the same process to the right side of the piece; the excitement of seeing that things were going well on this part was simply too much. Then I continued up the piece toward the left side of the stem, where the process was the same. However, as I approached the petals, the work became more difficult.
Aquí comenzó la diversión, sentí que me había sumergido en la máxima concentración, aunque tenía a mi hija supervisandome cada 5 minutos. Poco fui aplicando el mismo proceso del lado derecho de la pieza, la emoción de ver que simplemente en esta parte las cosas iban bien, fue demasiado. Luego seguí ascendiendo por la pieza hacia el lado izquiedo del tallo, donde el proceso fue igual, sin embargo al acercarme a los pétalos el trabajo se hacía más difícil.
 |
 |
|
|---|---|---|
 |
 |
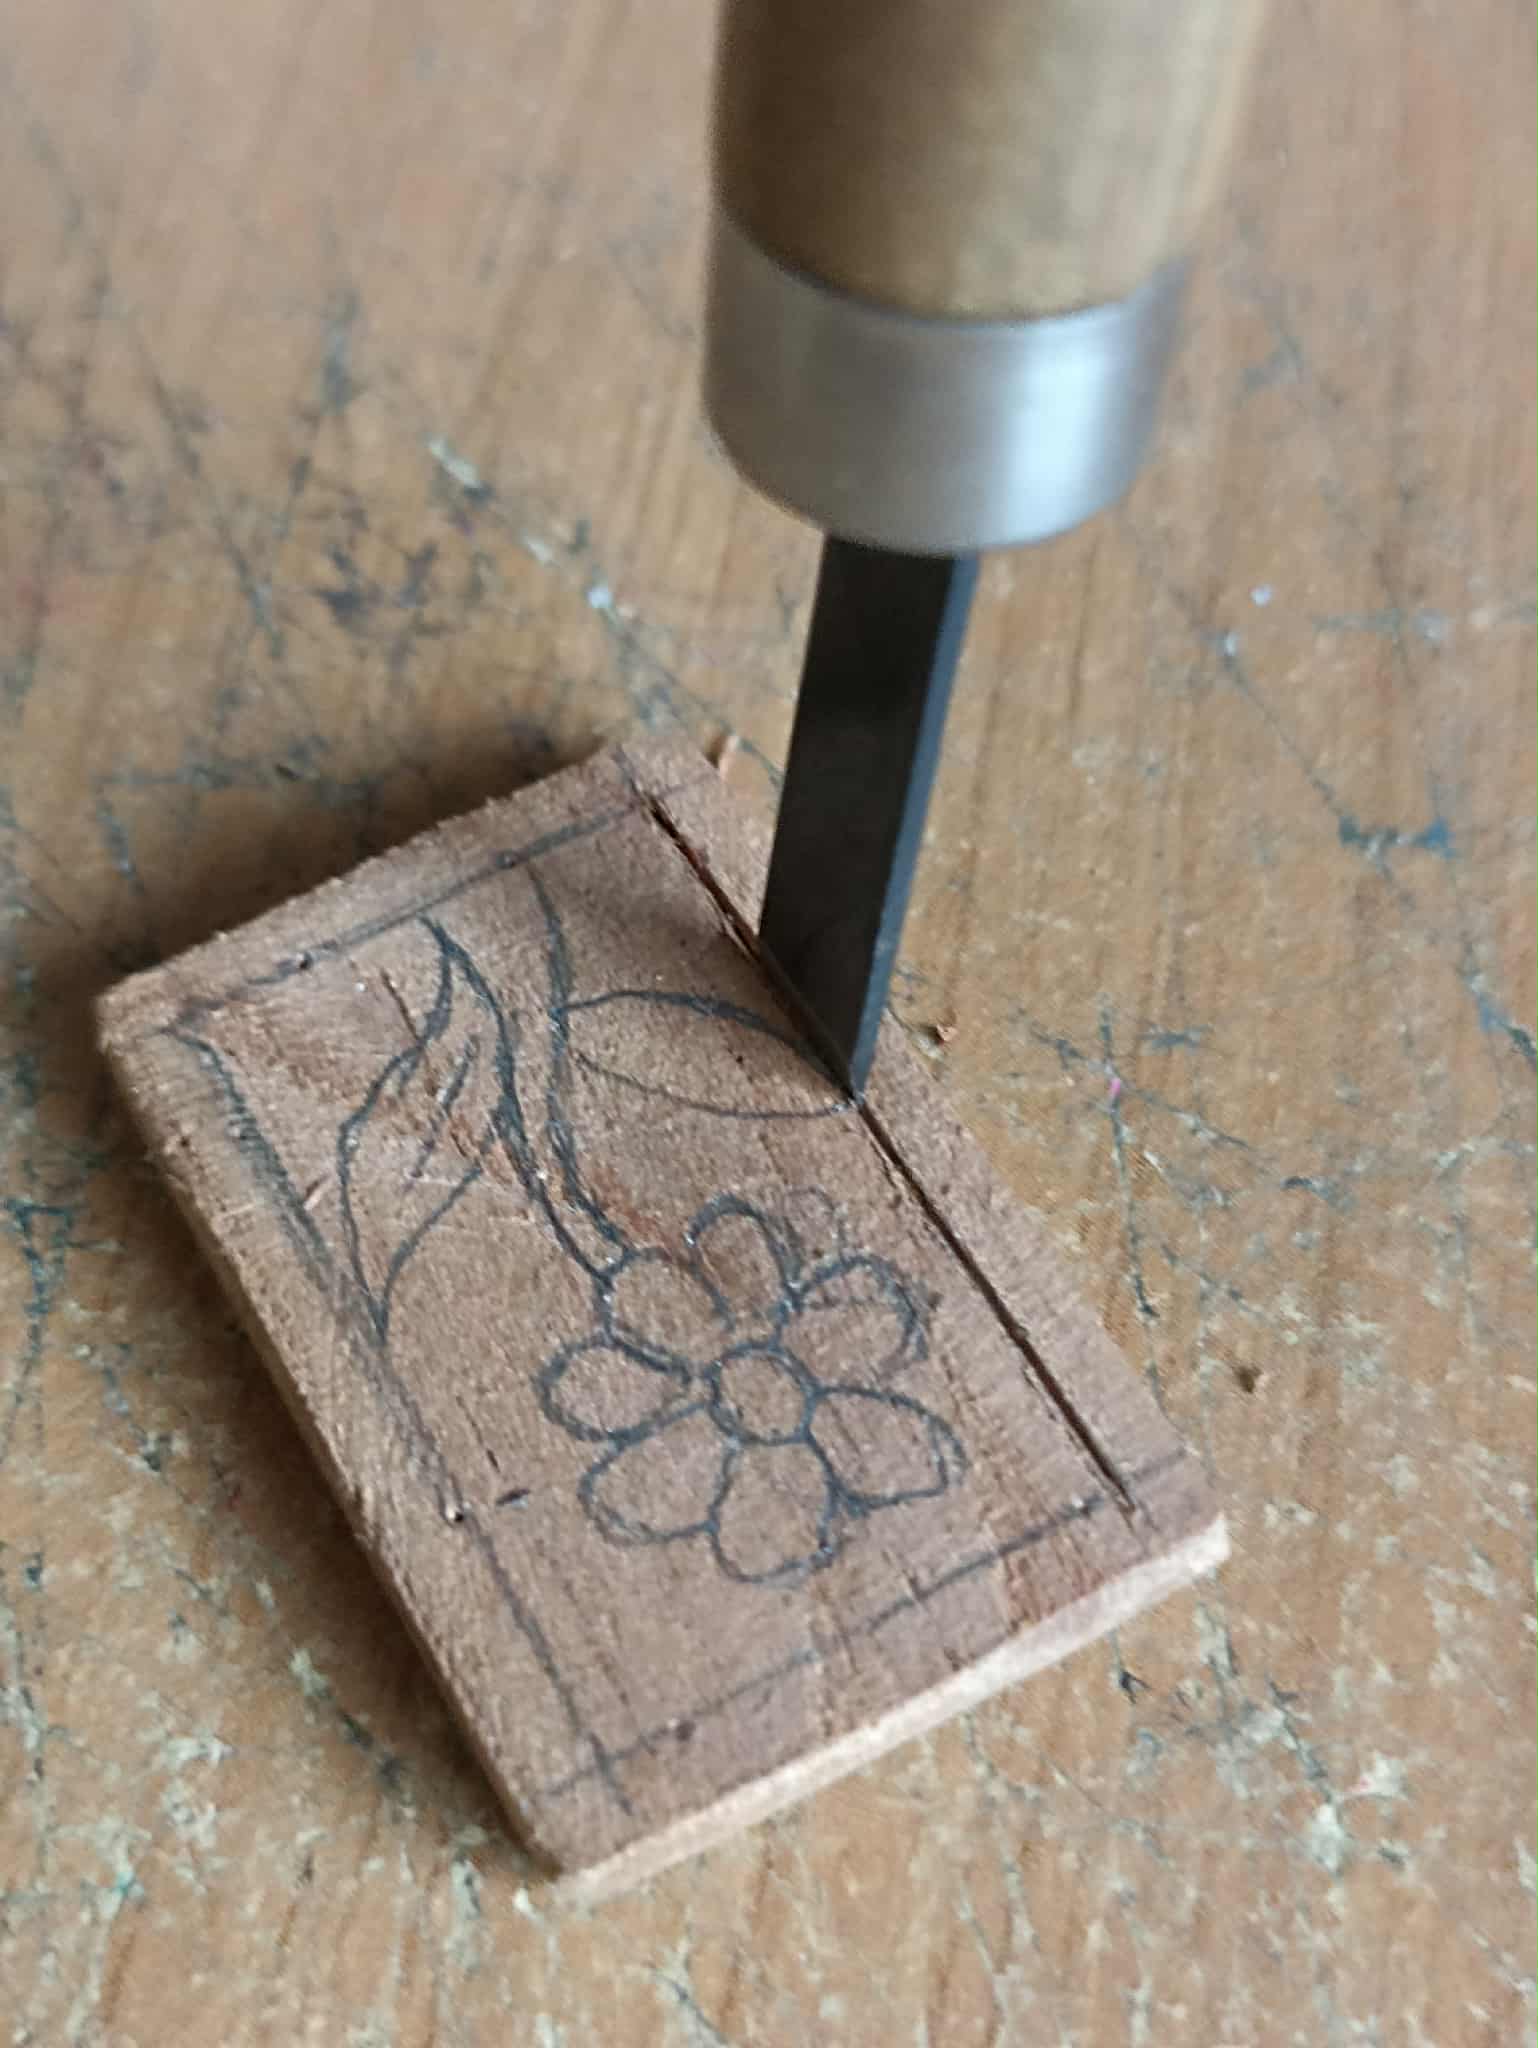
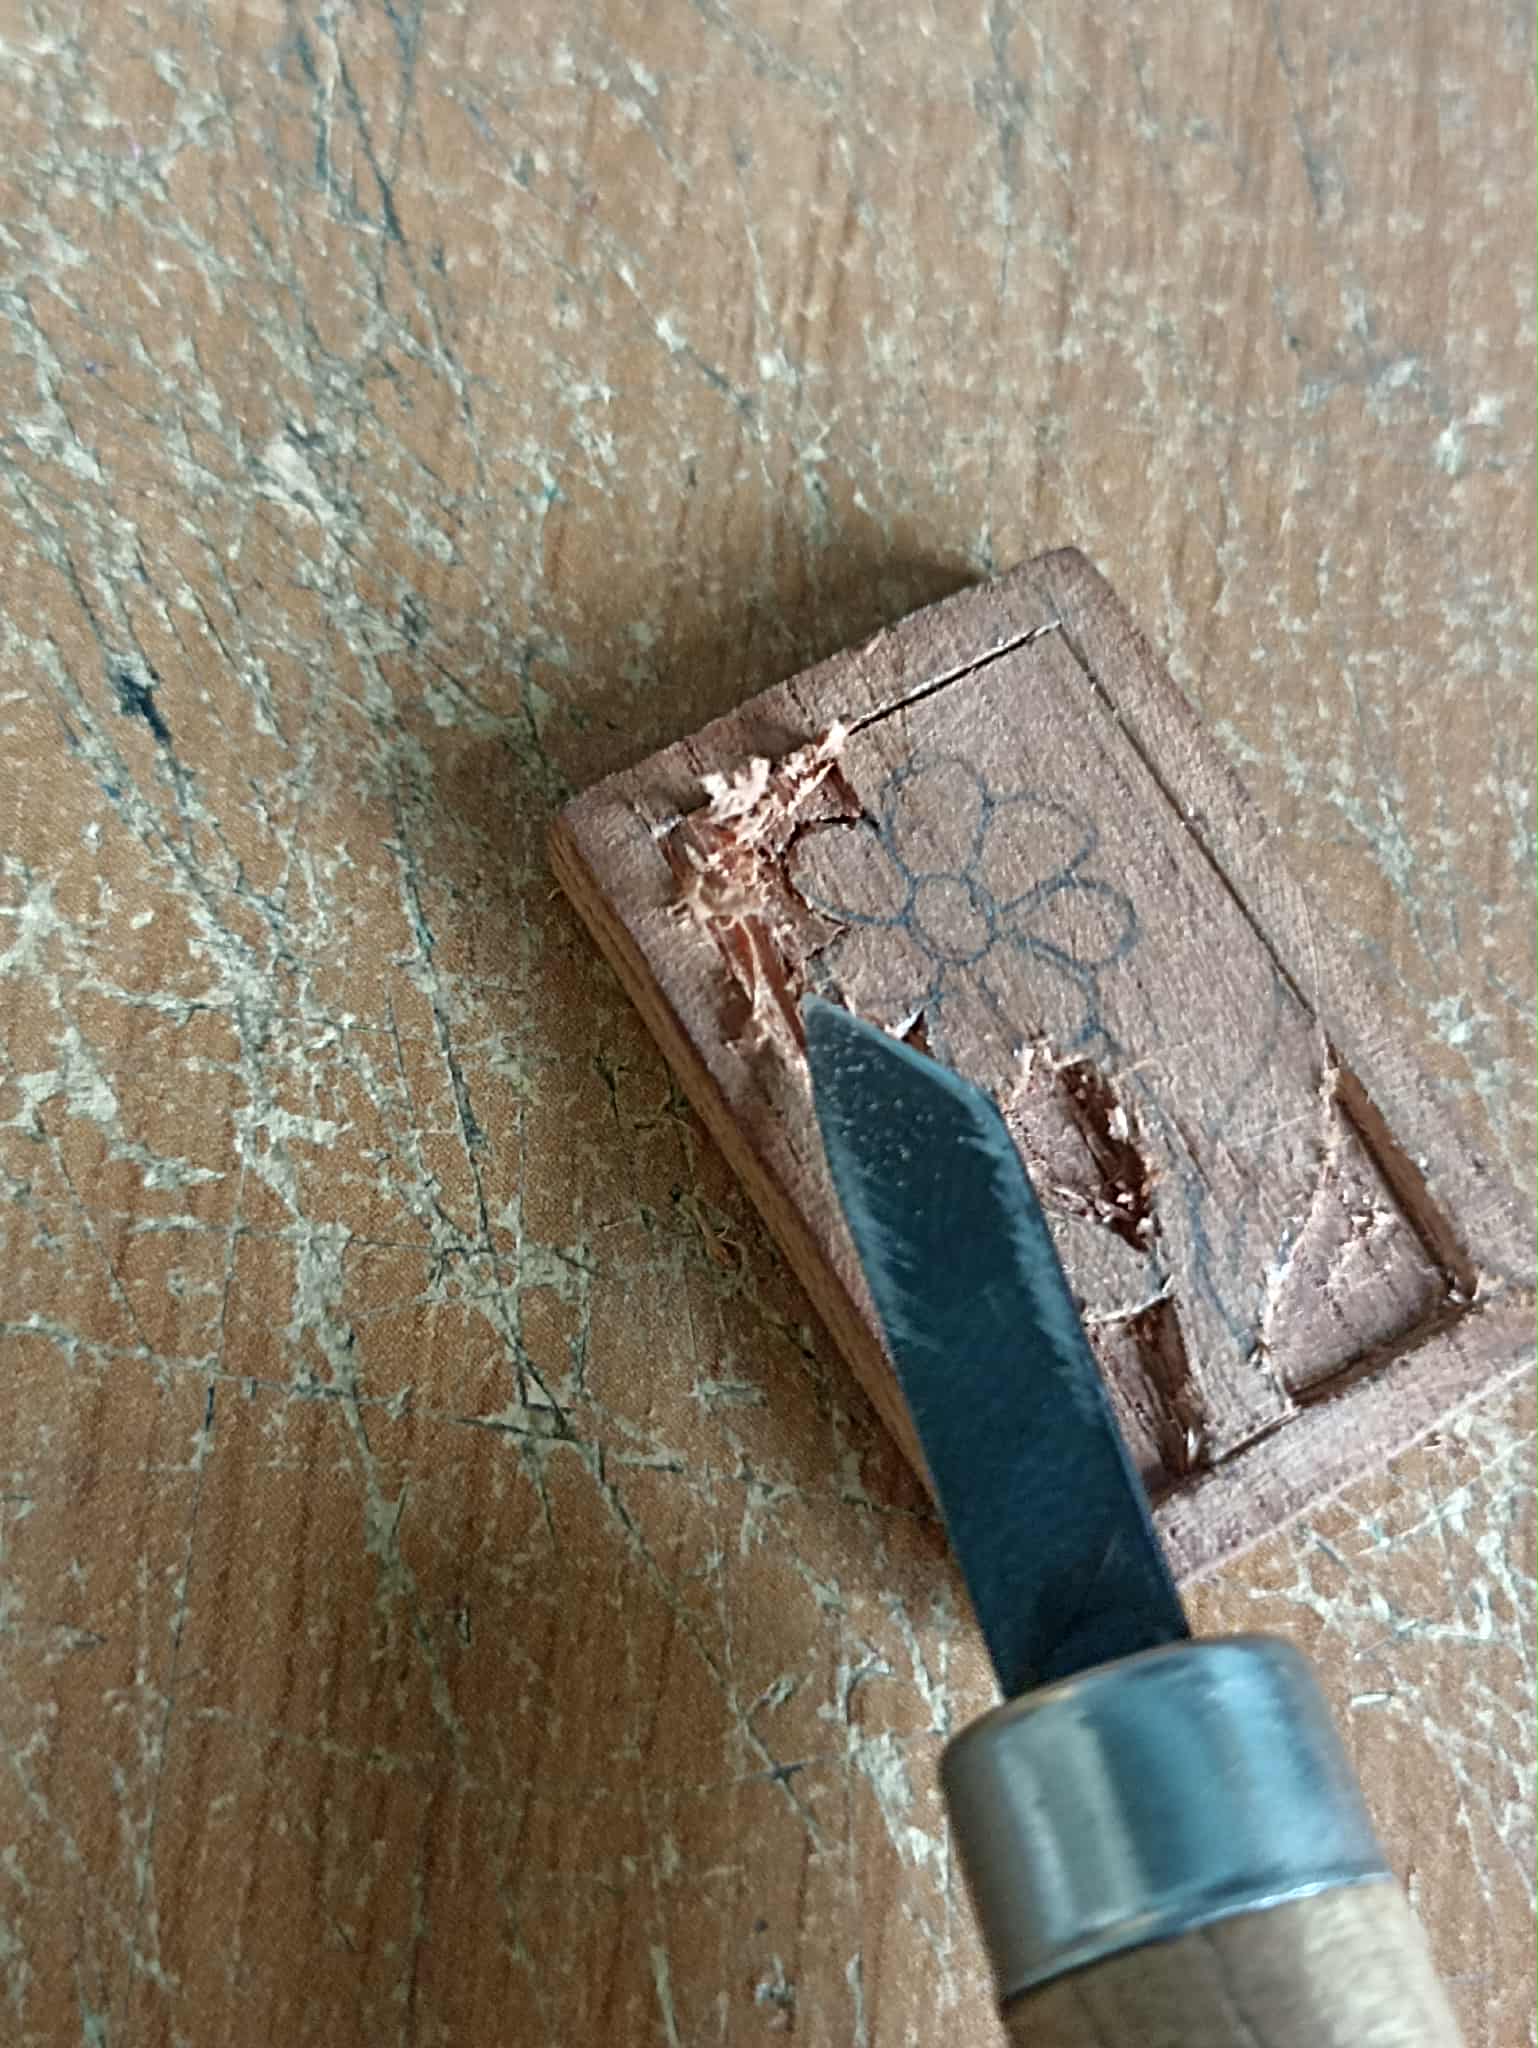
I then began carving the flower on the side where the petals were drawn. Here, I used the knife as if it were a pencil, so rather than carving, I used the blade as if I were writing on the wood. These small movements helped me remove the wood without compromising the shape of the petals. So, I turned the entire piece over and finished on the right side of the stem.
Comencé entonces a tallar la flor por el lado donde estan los pétalos dibujado, aquí utilicé la cuchilla como si fuera un lápiz, así que más que tallar, utilicé la hojilla como si estuviera escribiendo encima de la madera. Estos pequeños movimientos me ayudaron a retirar la madera sin comprometer la forma de los pétalos. Así le di la vuelta a toda la pieza y finalicé en lado derecho del tallo.
 |
 |
 |
|---|---|---|
 |
 |
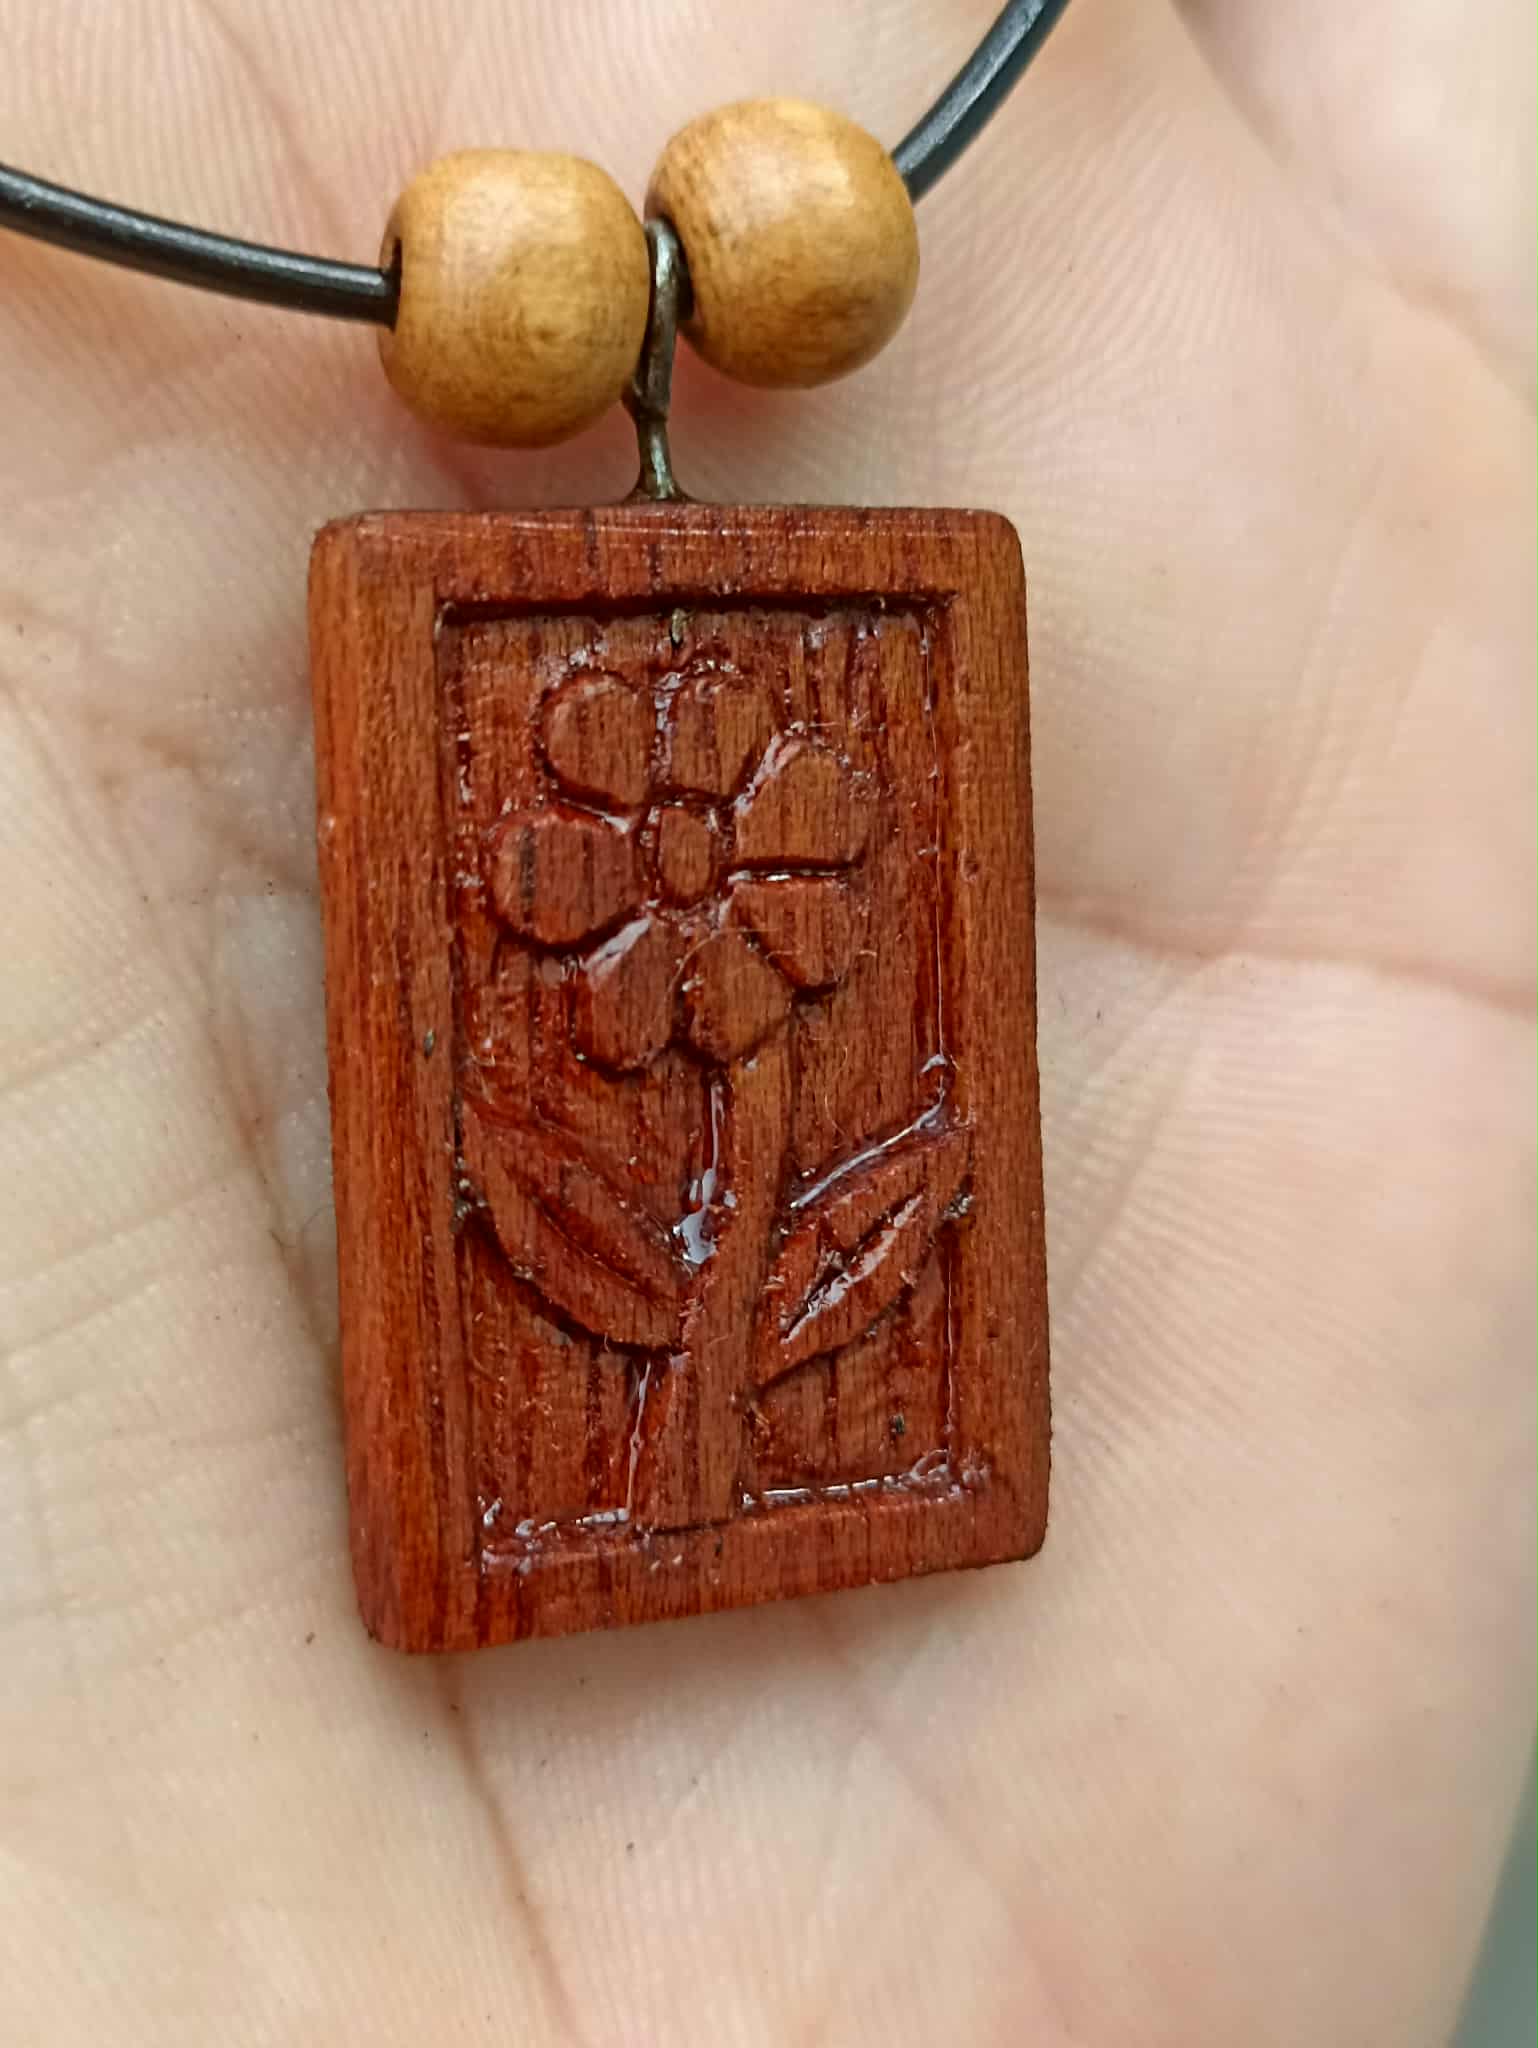 |
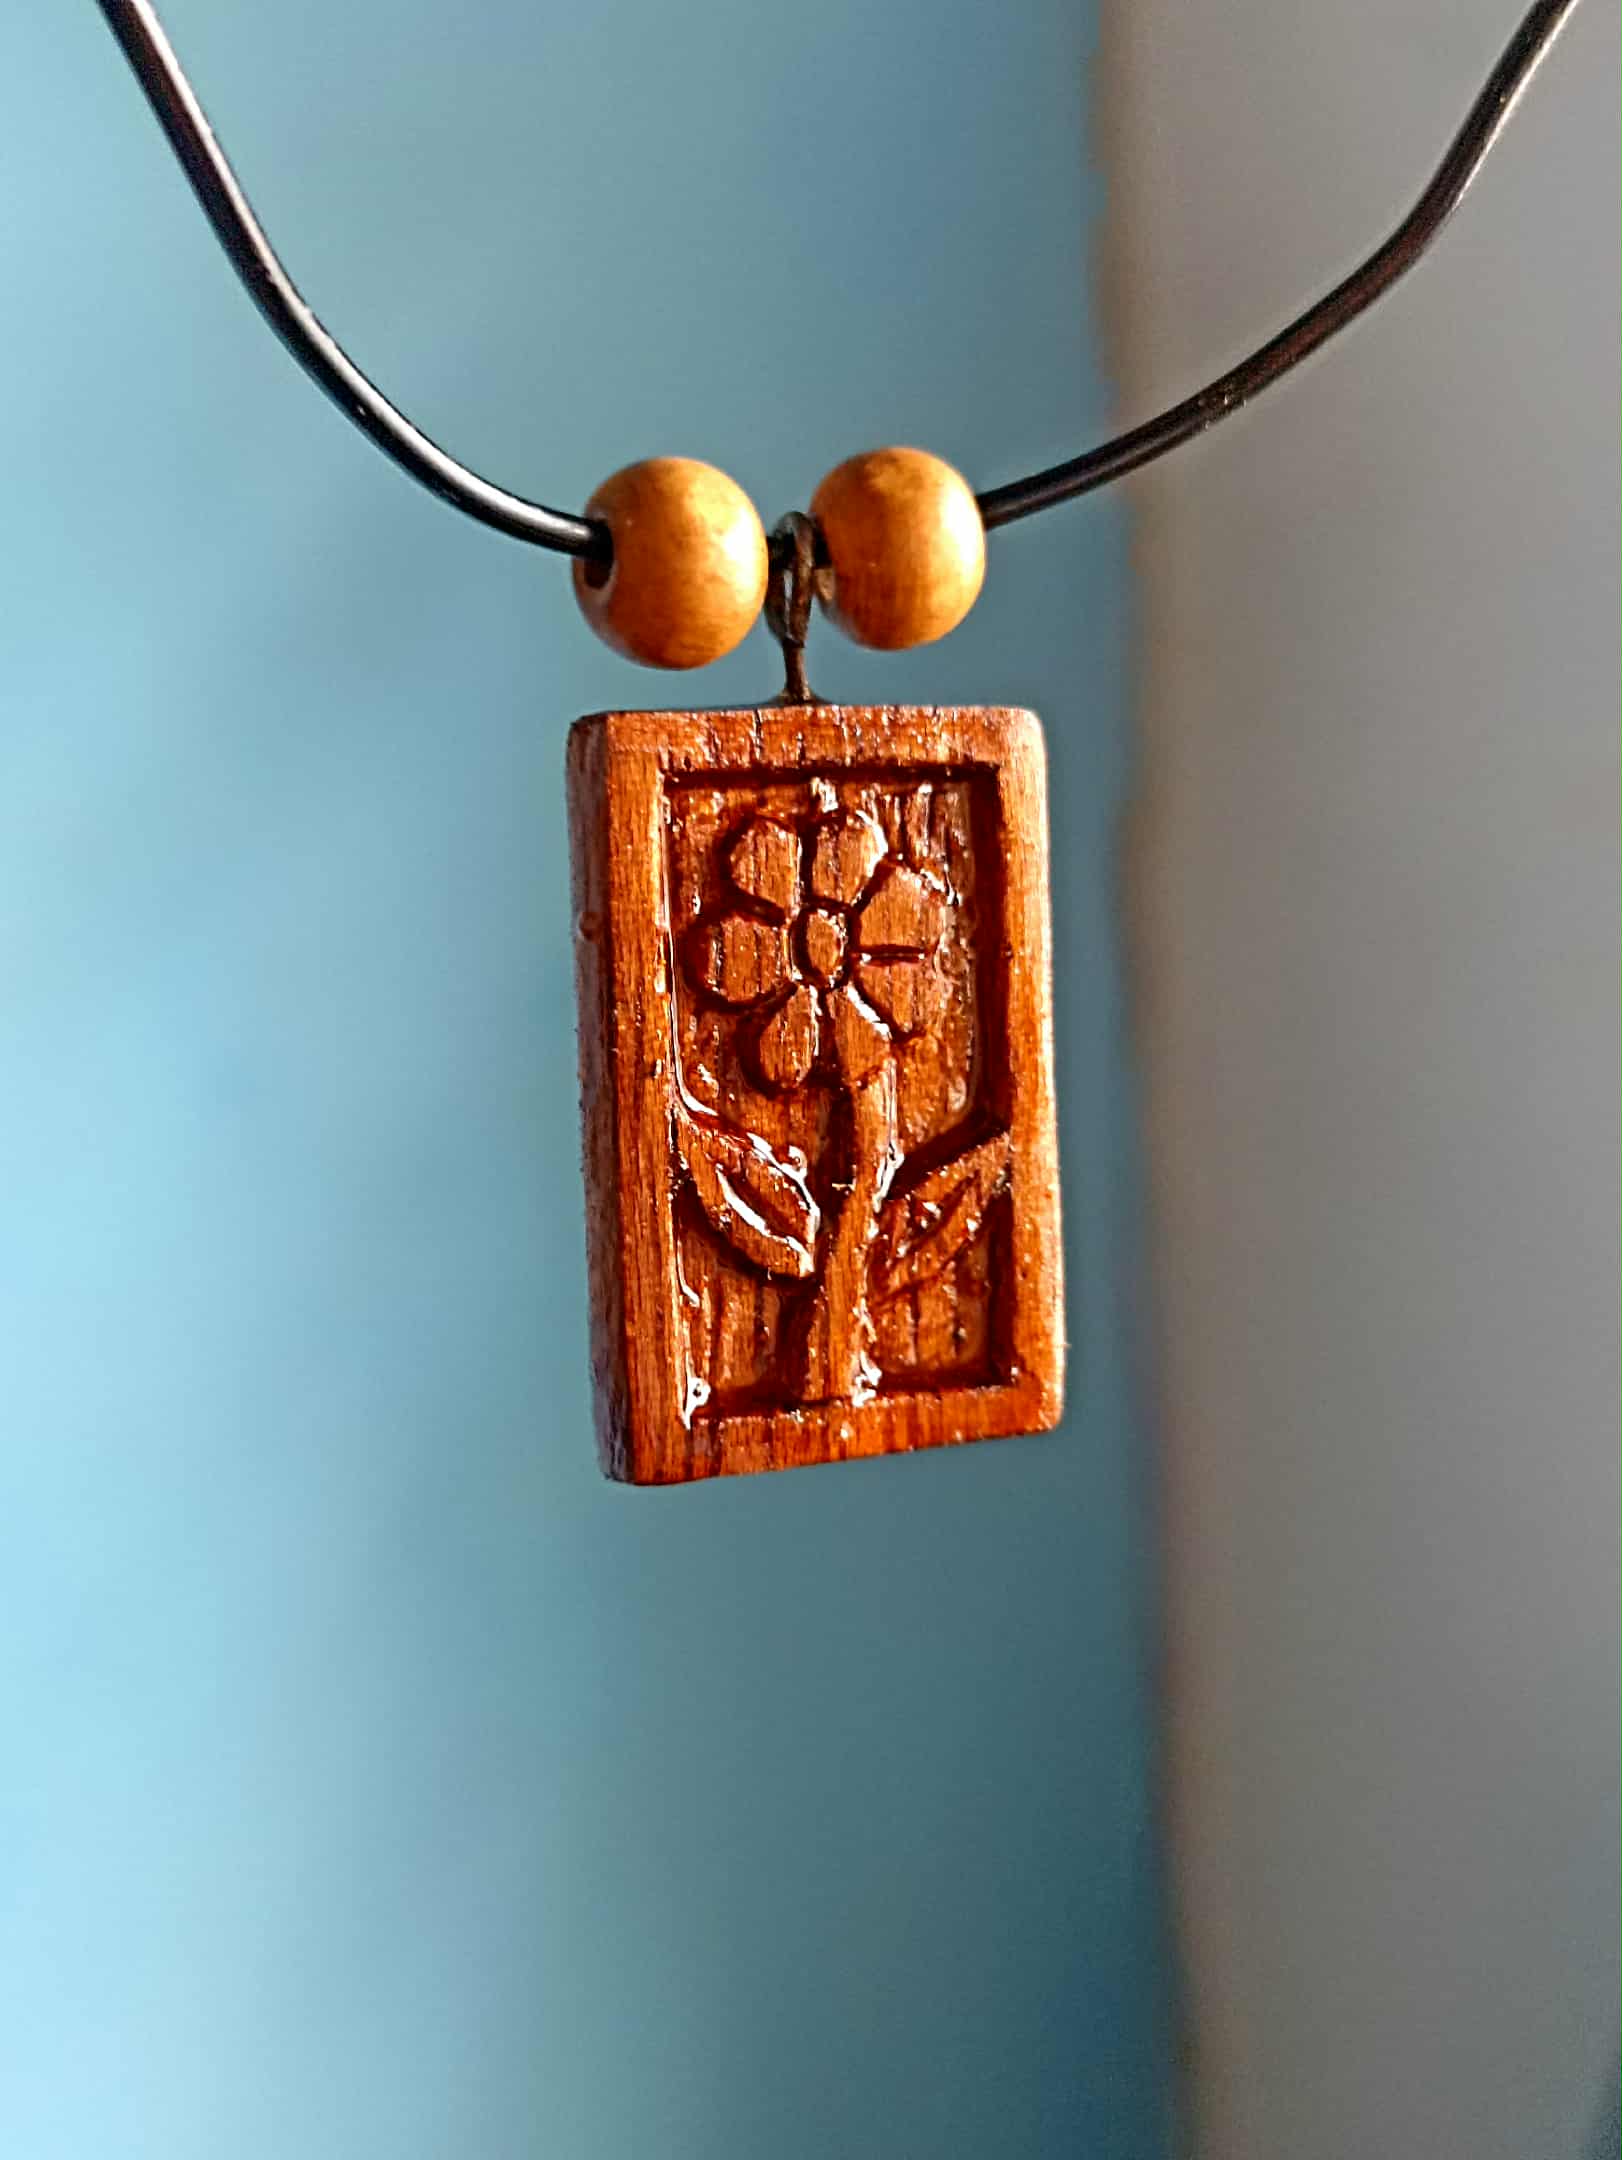
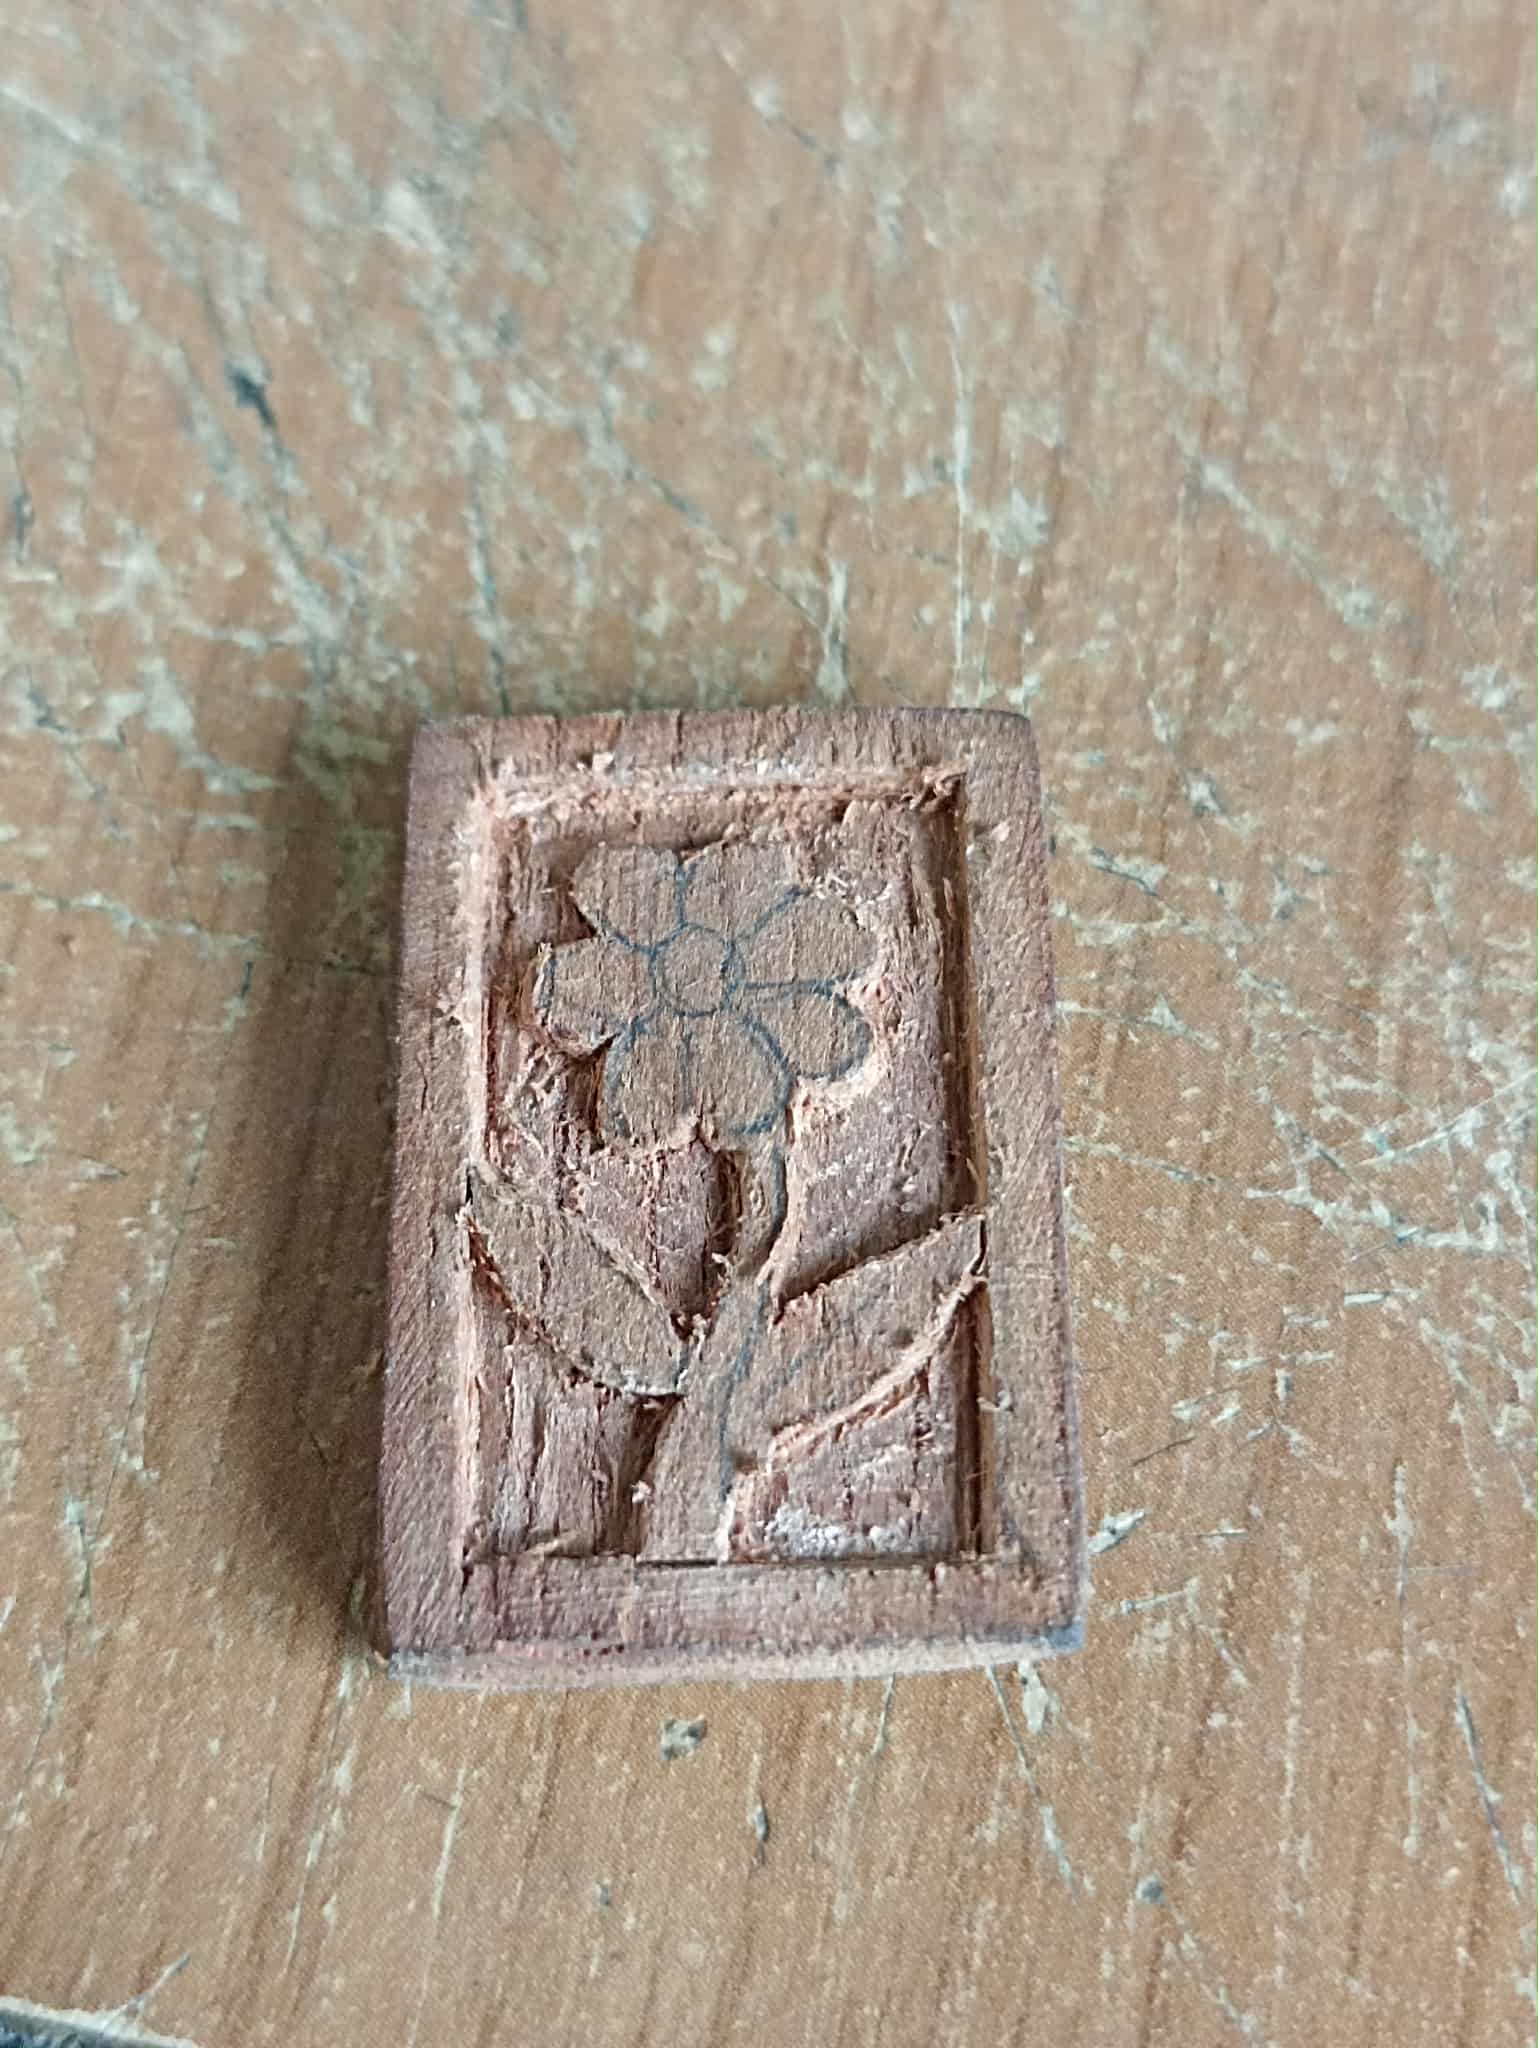
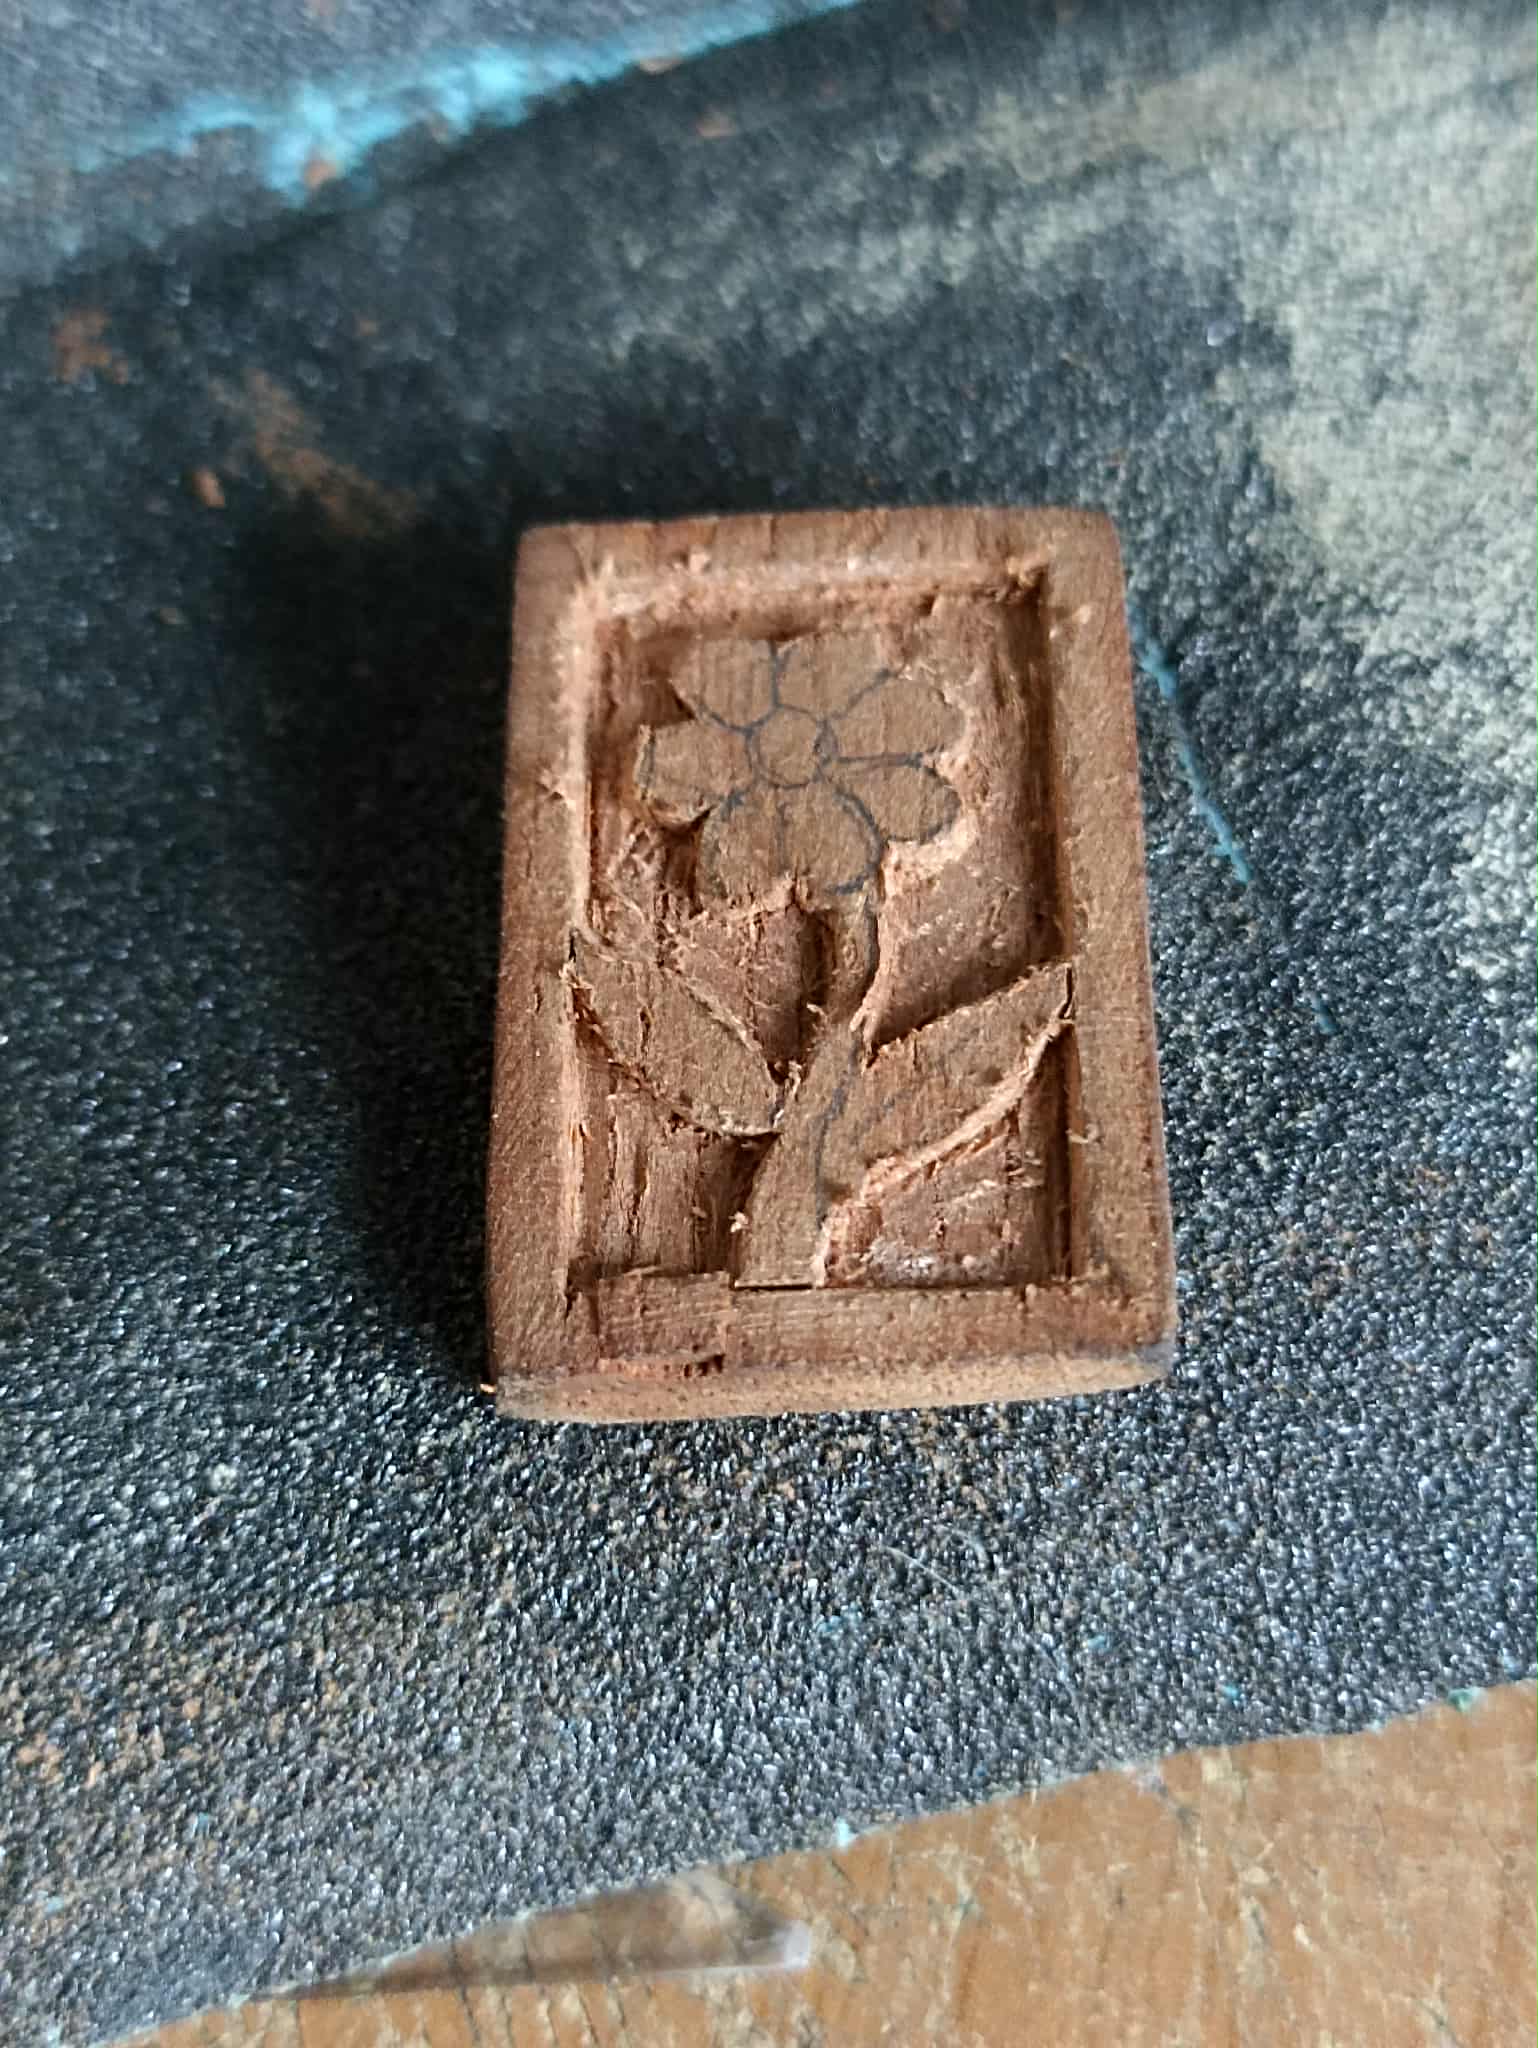
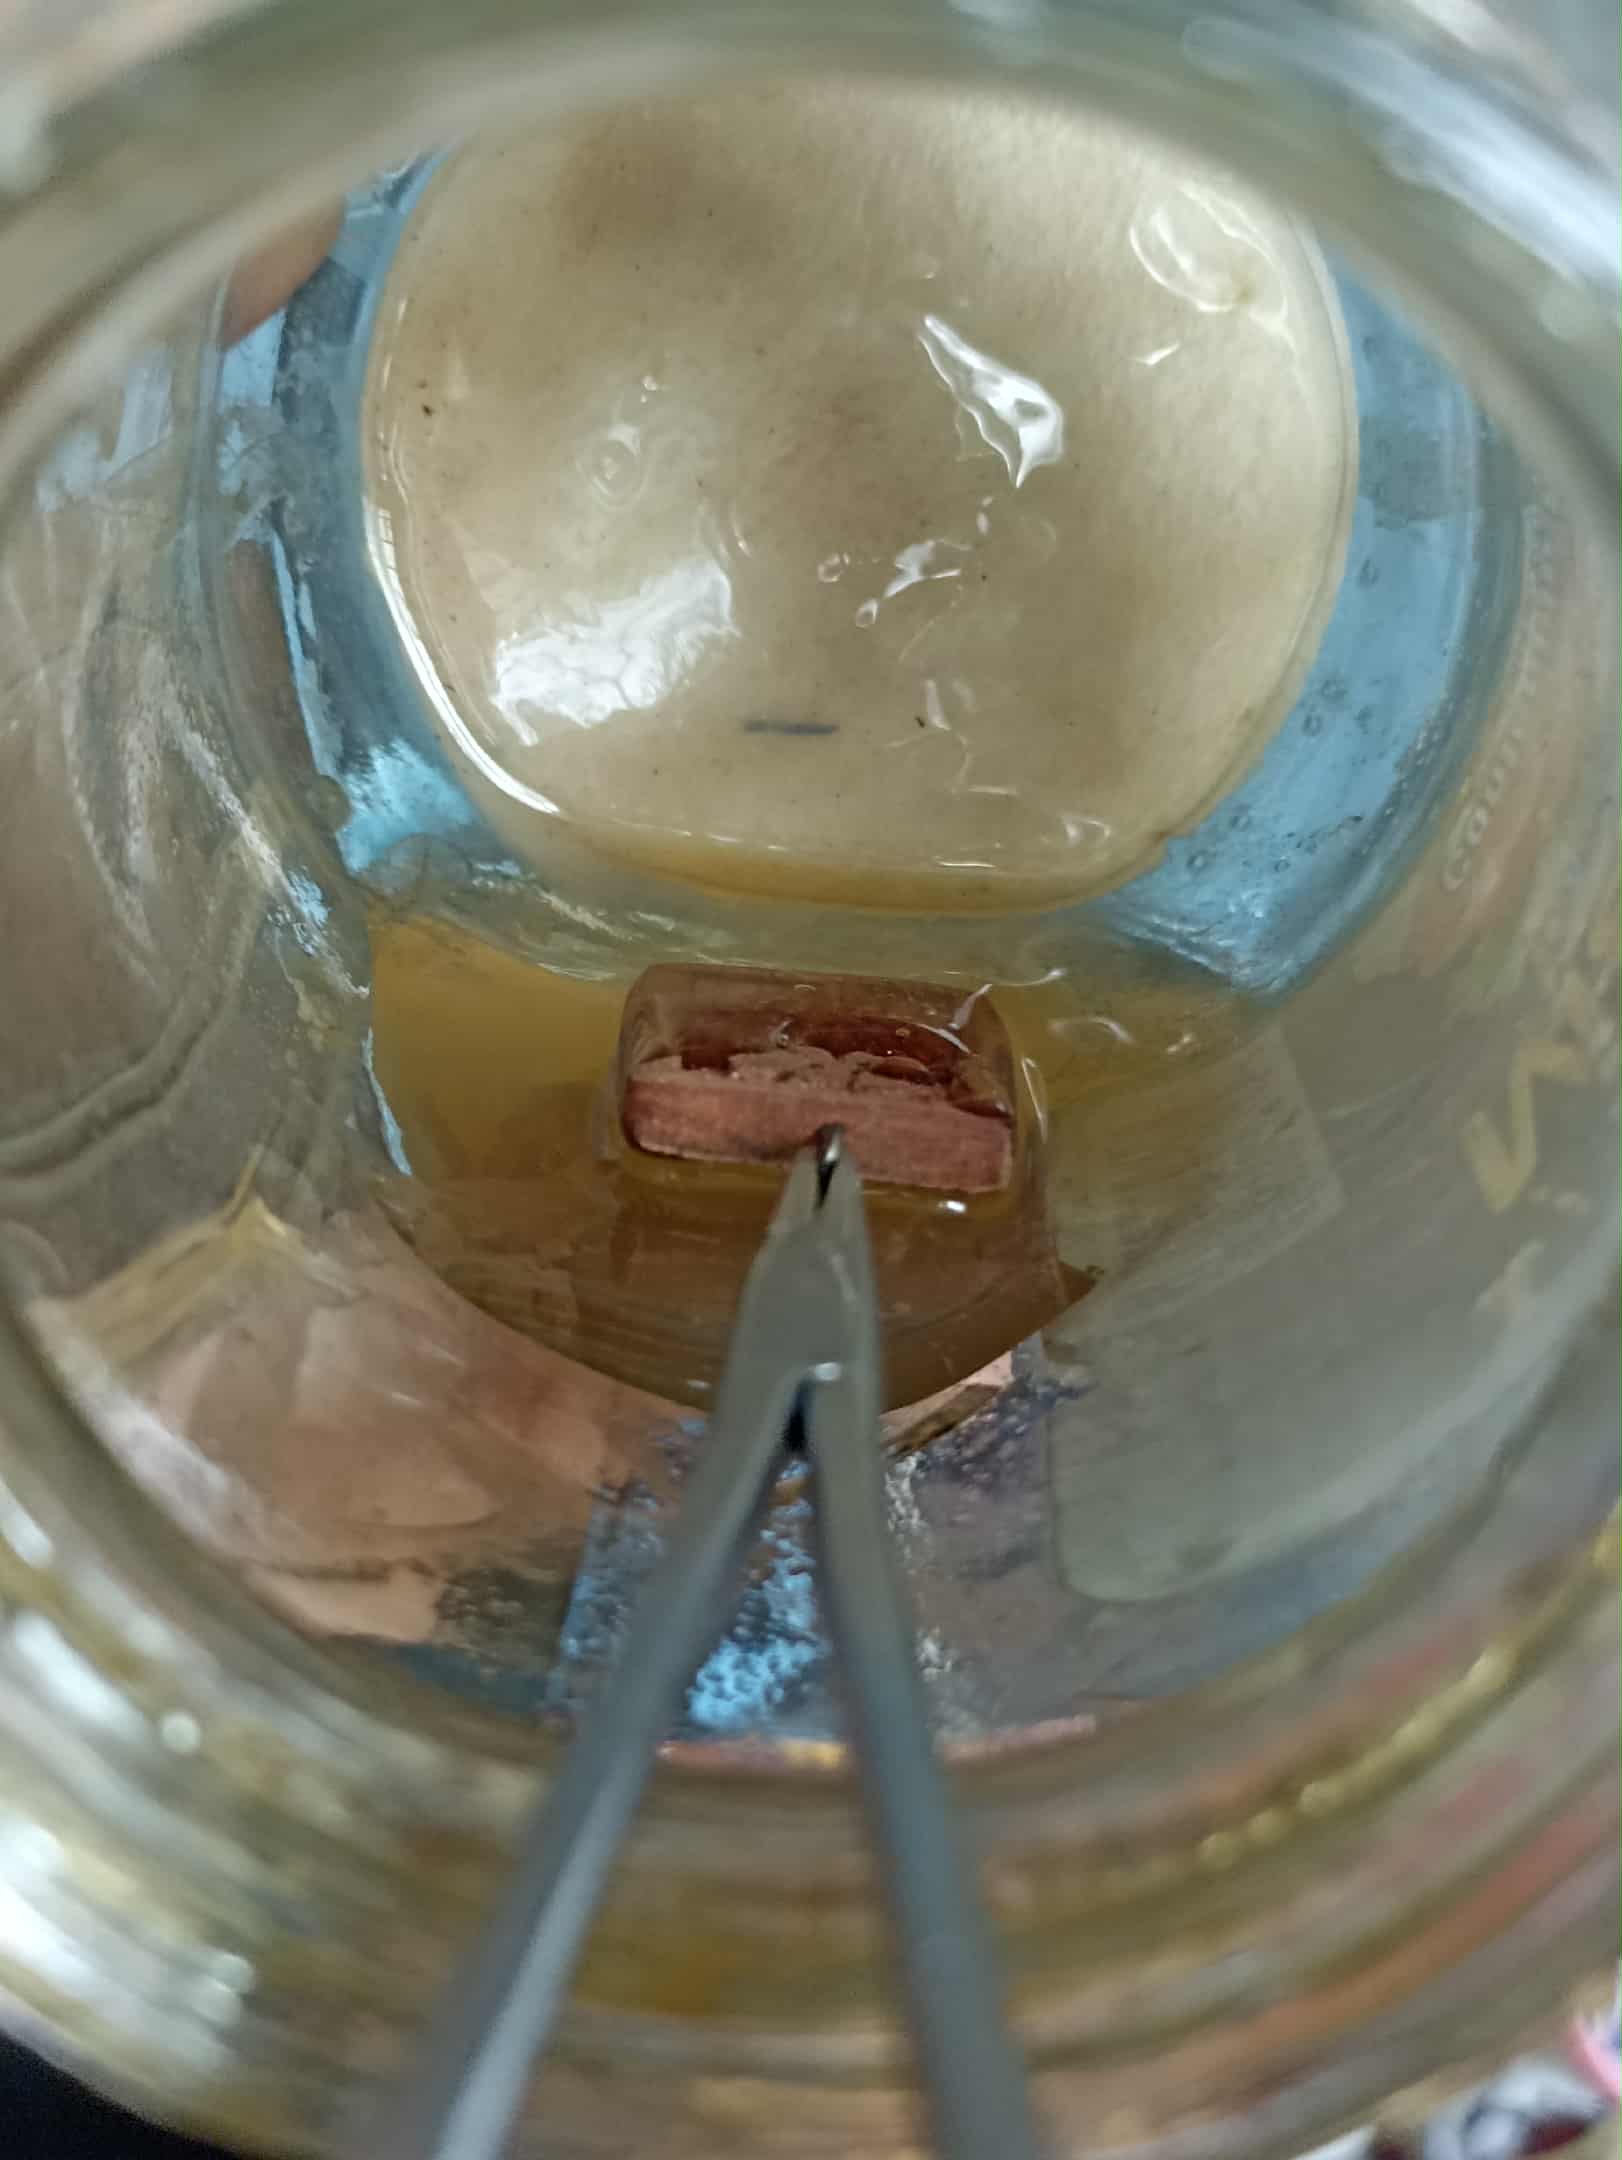
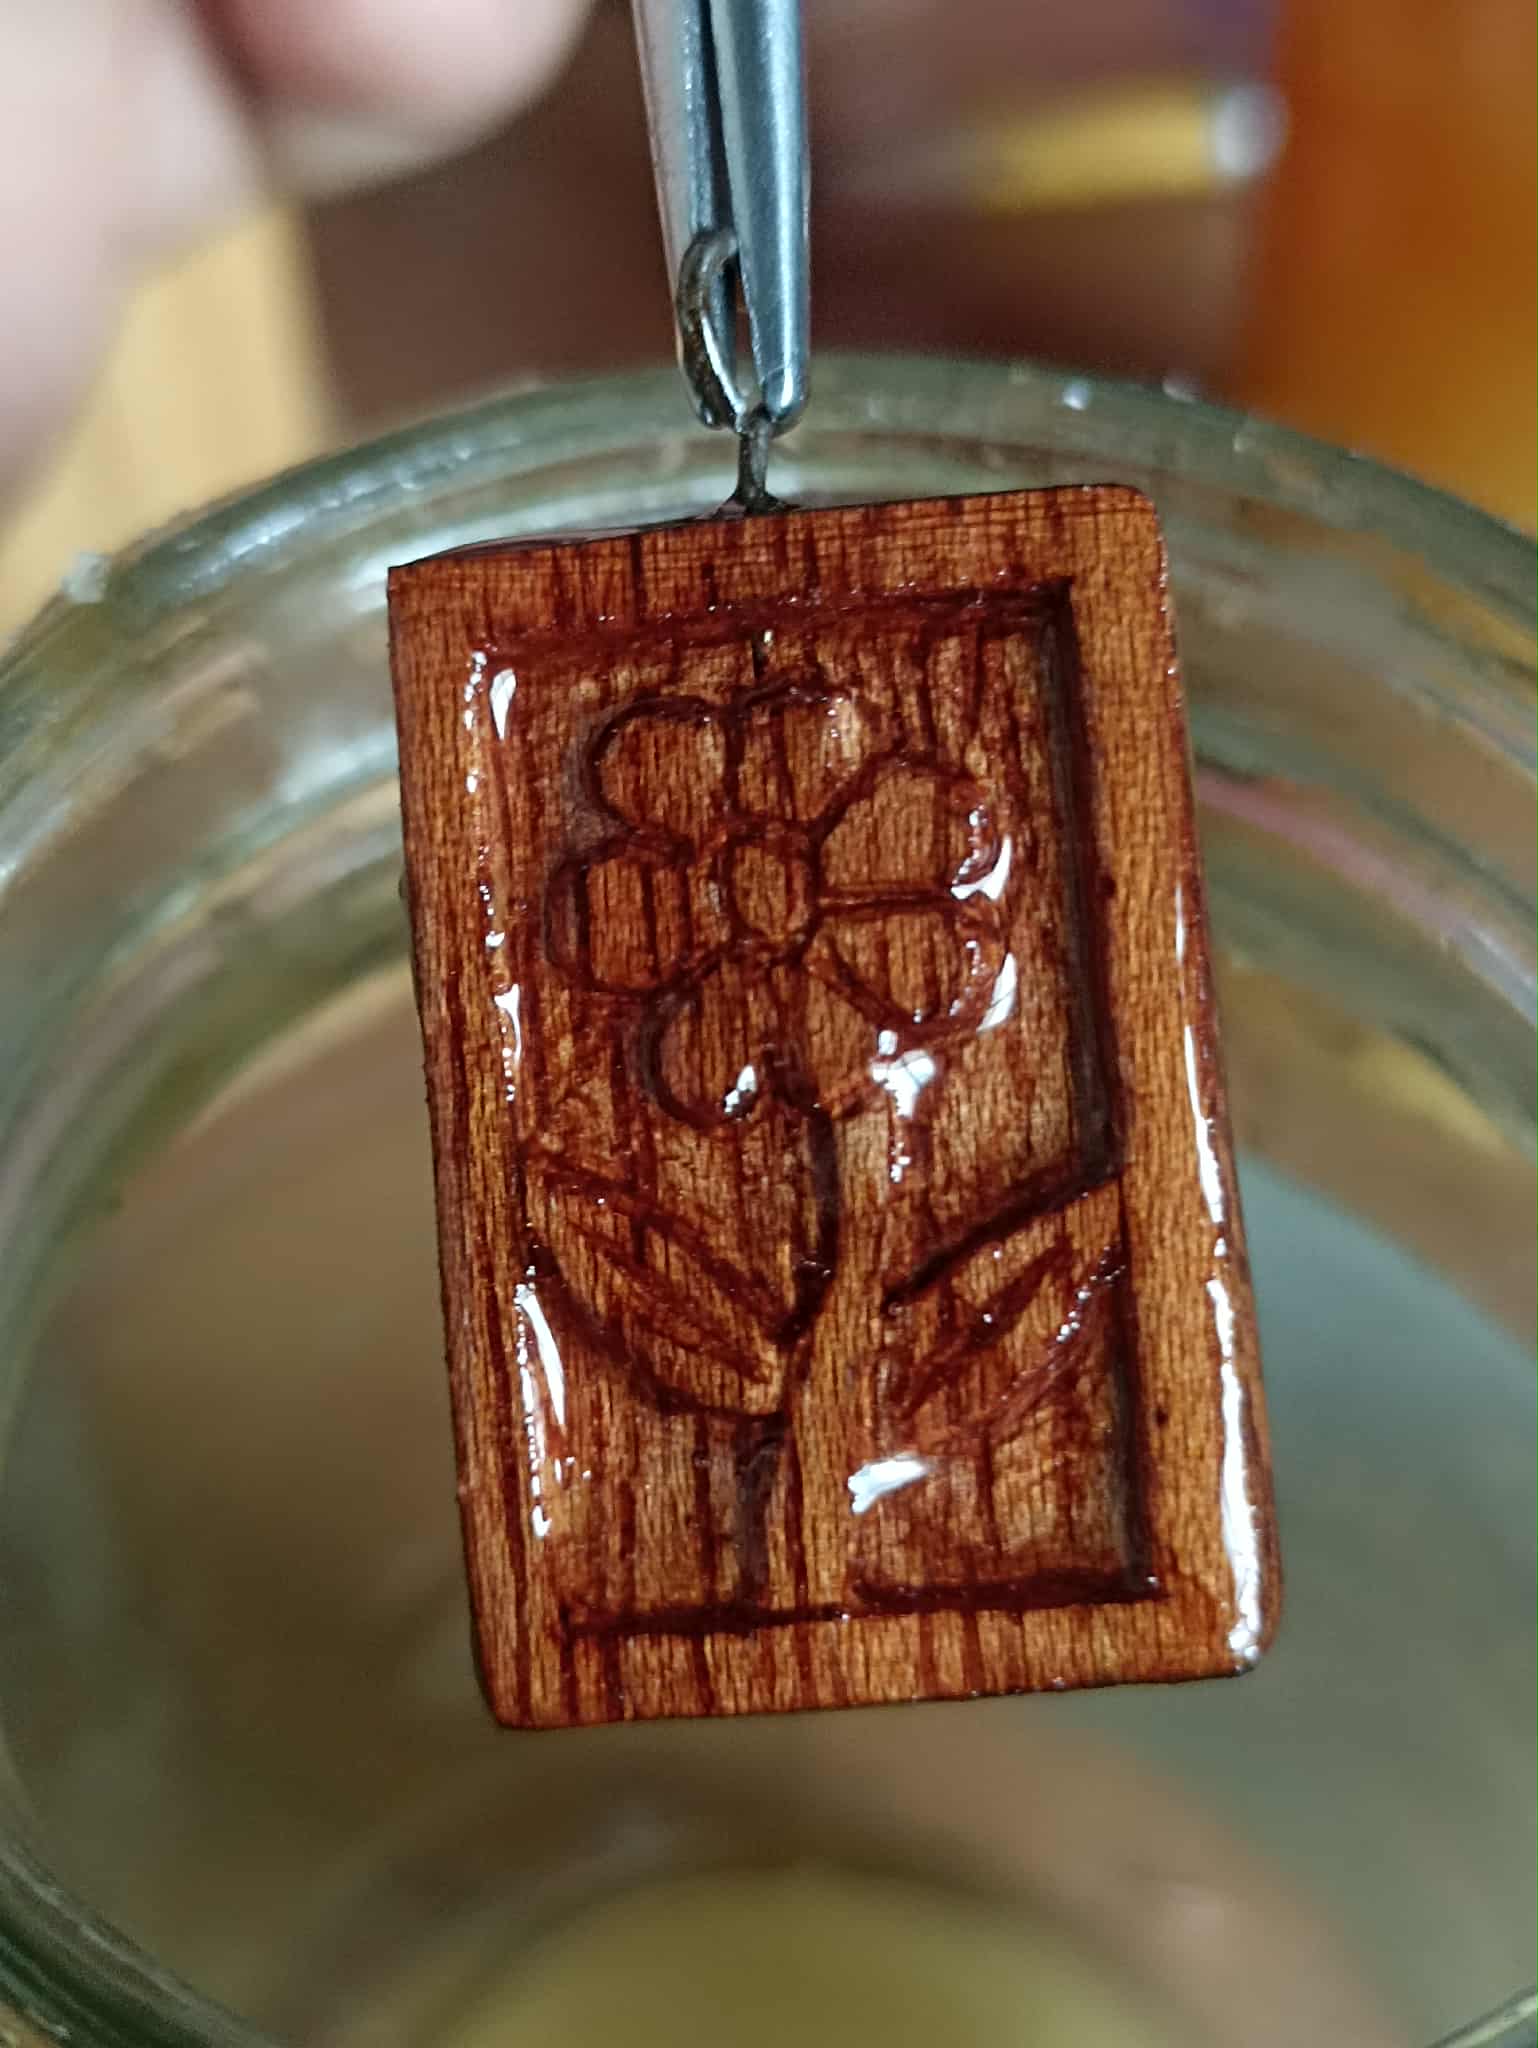
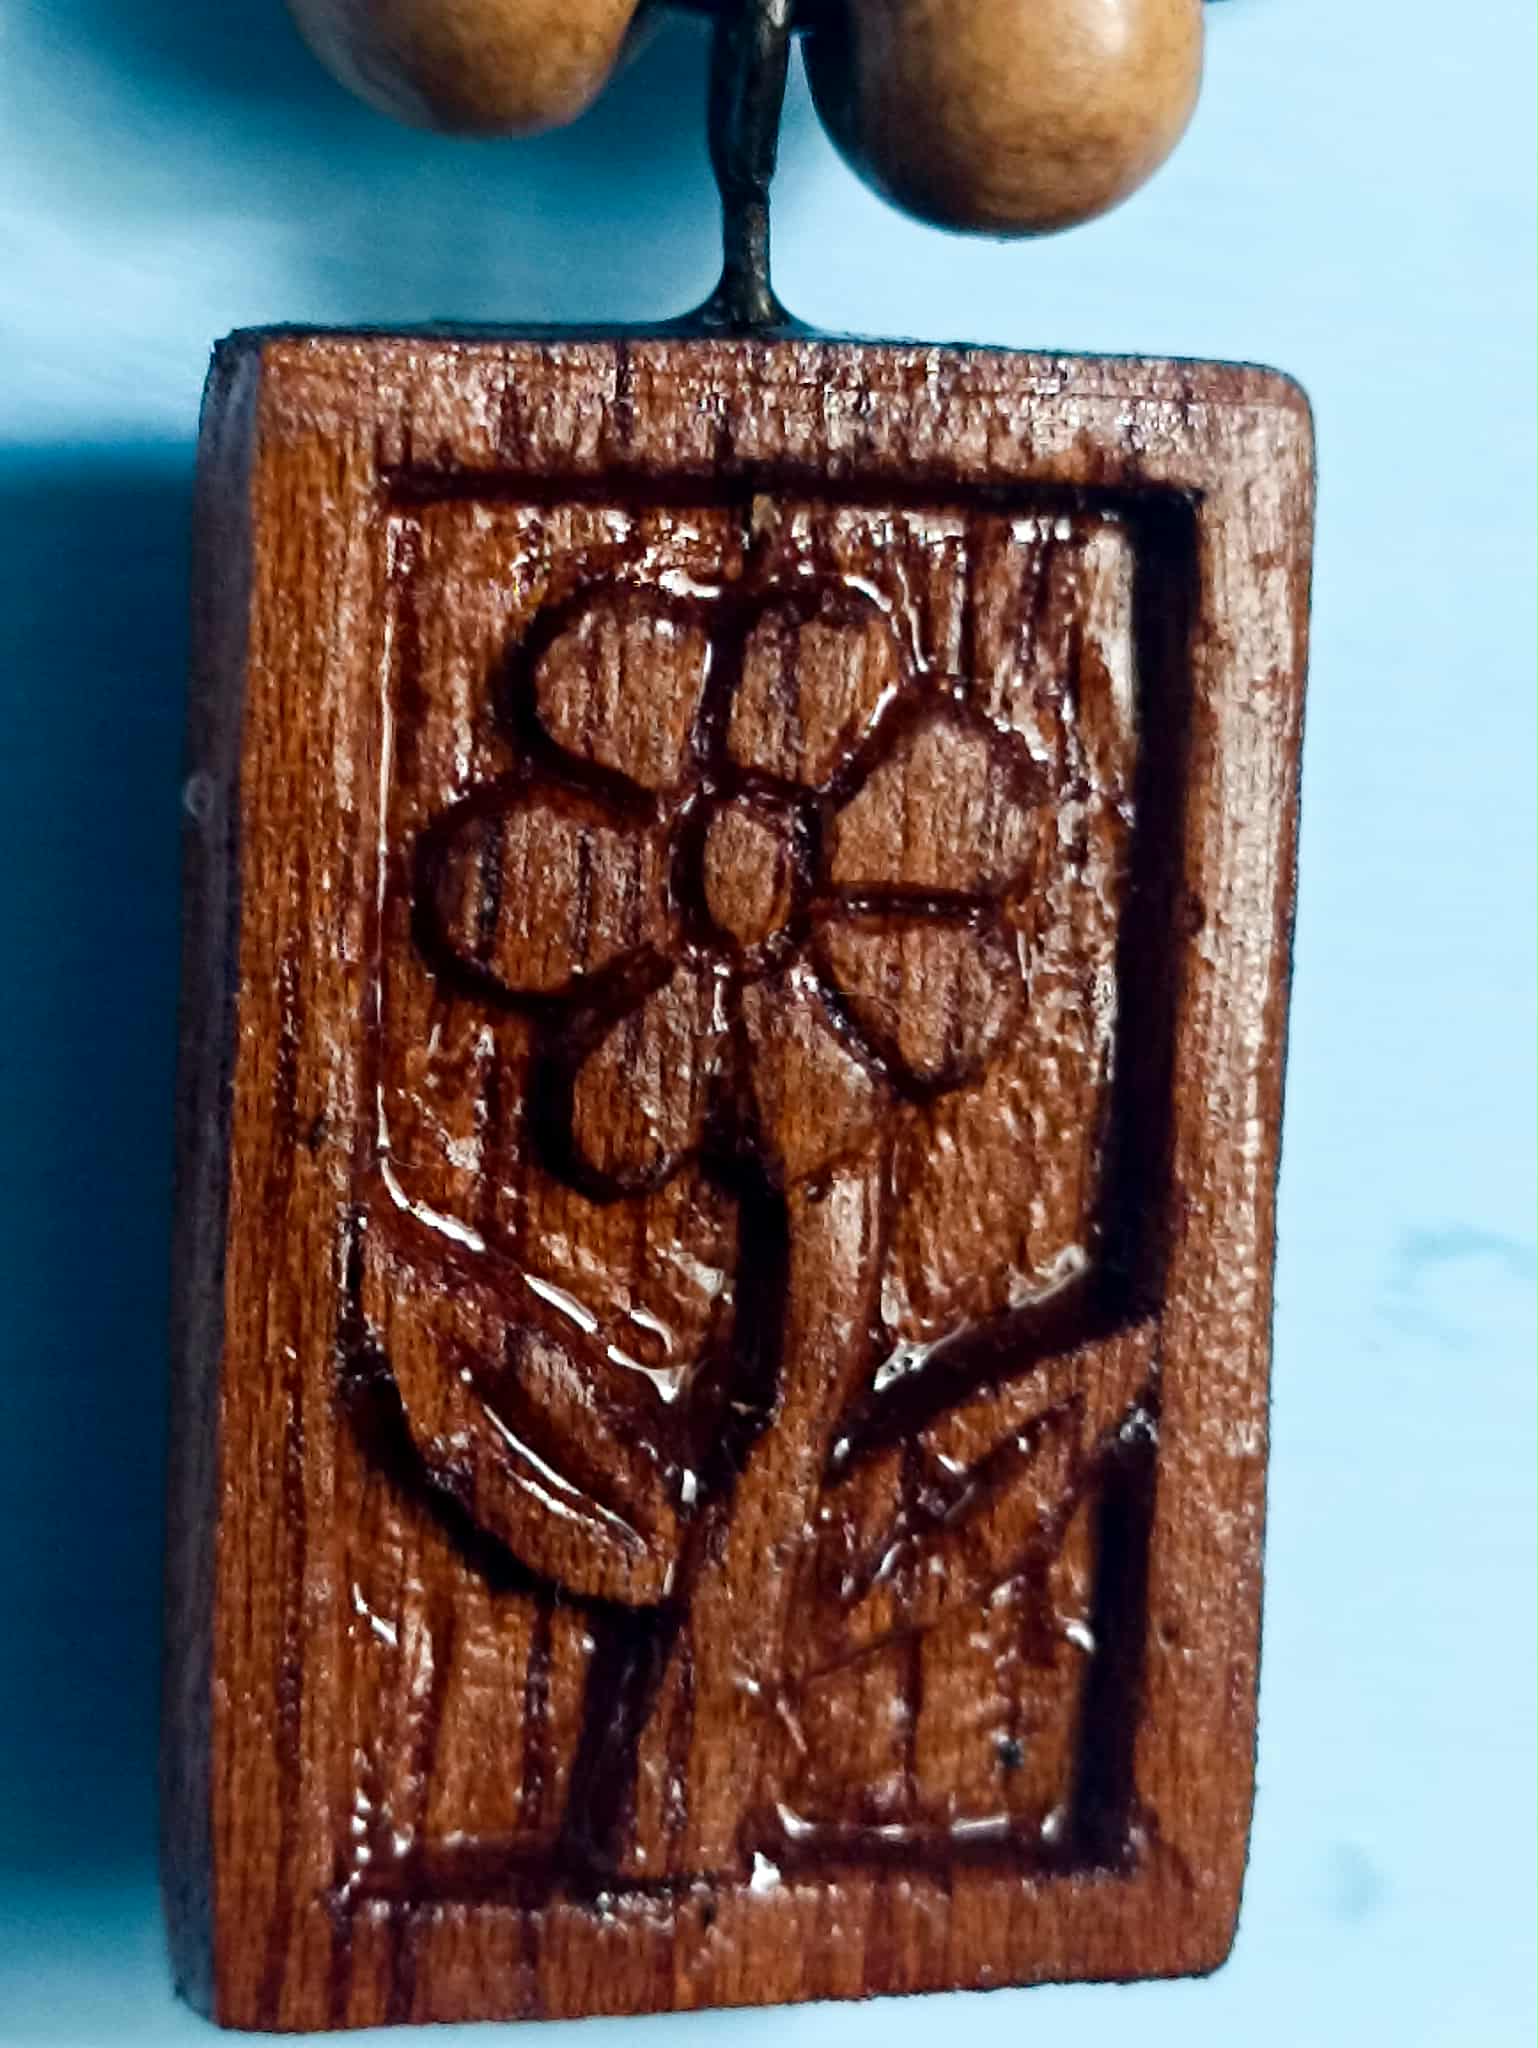
Then I sanded the entire piece again, this time completely so it was finished. While doing so, I also made small cuts in the petals to give the image a raised relief, as well as in the leaves on the stem. After sanding again, I gave it a coat of varnish, and as I said at the beginning, the color of this wood is beautiful. I added a couple of wooden spheres to finish the decoration, and that's how it was finished.
Luego volví a lijar toda la pieza, pero esta vez de forma completa para que quedara lista, al hacerlo hice tambien pequeños cortes en los pétalos para que la imagen quedara con relieve, así también en las hojas del tallo. Después de volver a lijar le di un baño de barniz, y como dije al comienzo, el color de esta madera es hermoso, puse par de esferas de madera para terminar de adornar y así quedo finalizado.

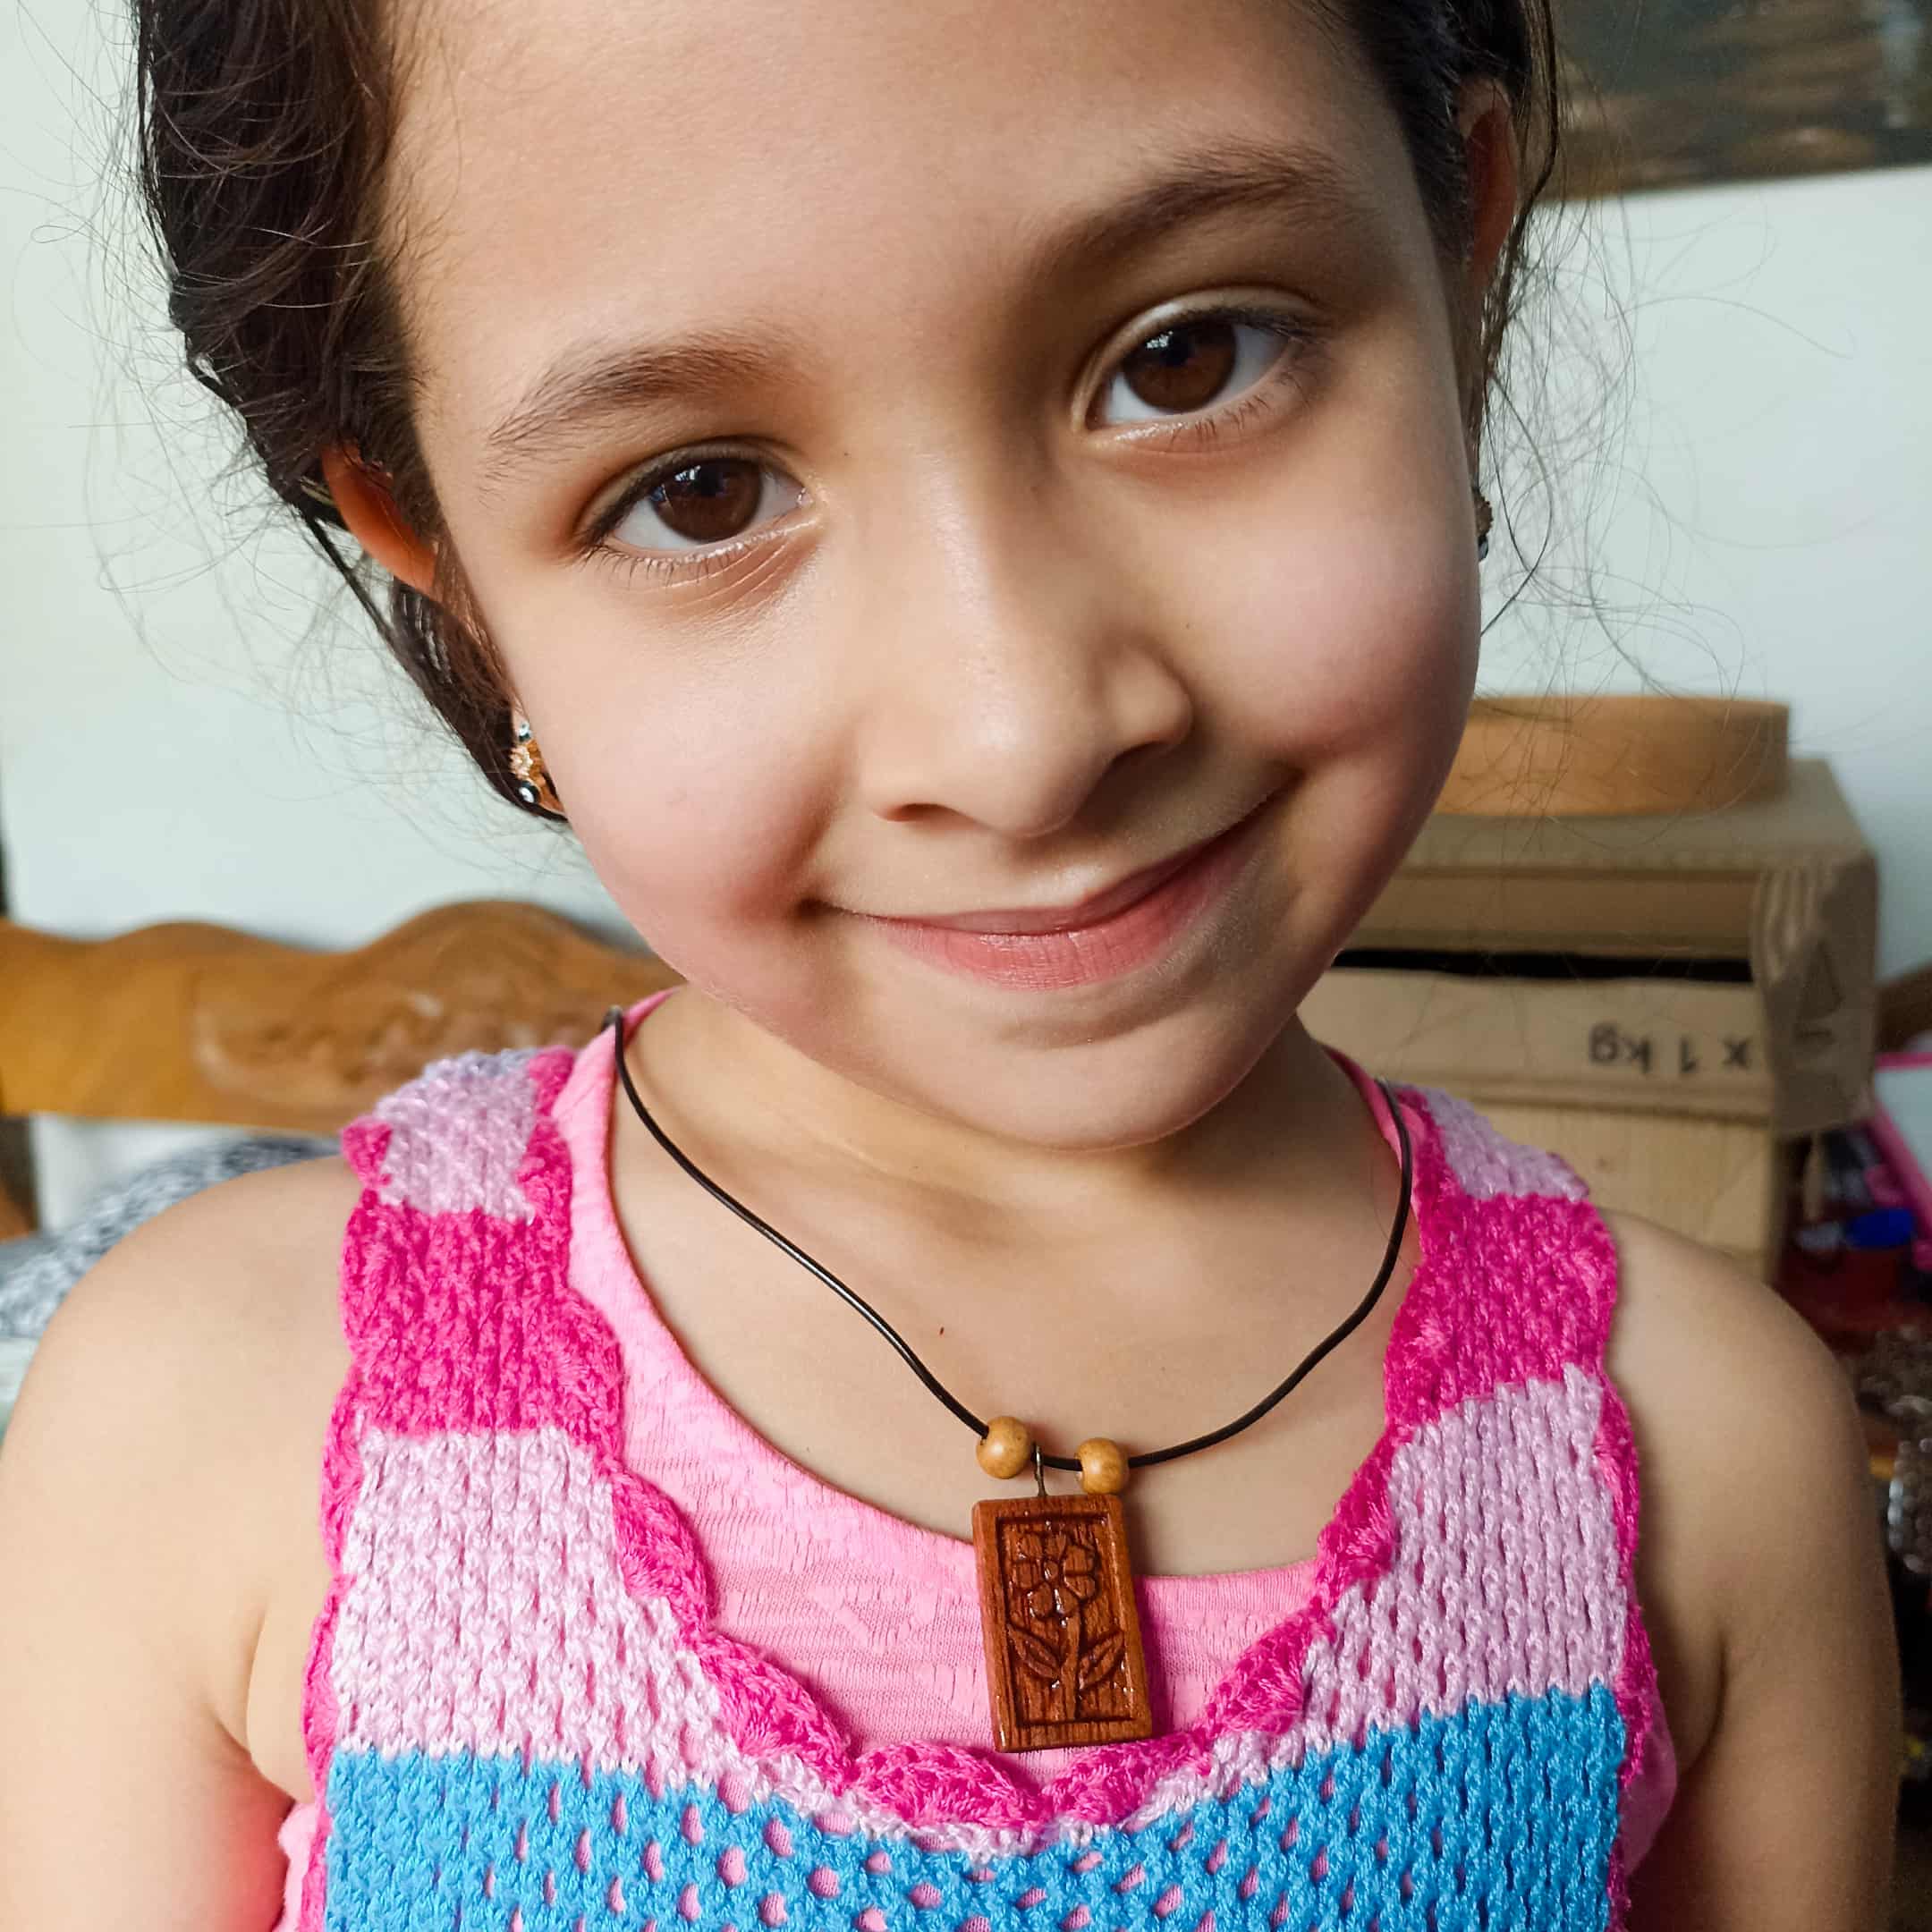
What did you think of the process? If you made it to the end, I appreciate you following along, not just me, but my little girl, who was super happy. She's my first super fan. Whenever I finish a project, she's the first to notice it, and she loves everything about it, so her appreciation means everything to me. I hope you liked it; this time it was a joint inspiration between my daughter and me; we teamed up. I'm saying goodbye for now, and I'll see you next time.
¿Qué les ha parecido el proceso? Si llegaste hasta el final, agradezco que me hayas acompañado, no solo a mi, sino a mi pequeña, quien quedó super contenta, ella es mi primera super fan, siempre que termino un trabajo ella es la primera en observarlo y todo le gusta, así que con su apreciación ya es todo para mi. Espero les haya gustado, esta vez fue una inspiración conjunta entre mi hija y yo, hicimos equipo. Me despido por ahora y será hasta una nueva oportunidad.