Hello, my DIY lovers, it's been a while since I write about my beadwork, and today I'm super excited to share my latest work. It's a bag, my new favorite, which I hope will becomes my best seller, hehe. 
I saw the design in the bead store I always patronize a while back, but I never got enough motivation to bead it until a client requested it. The bag took a lot of my time and effort, but the pay is worth it, and the end result is breathtaking 😘. 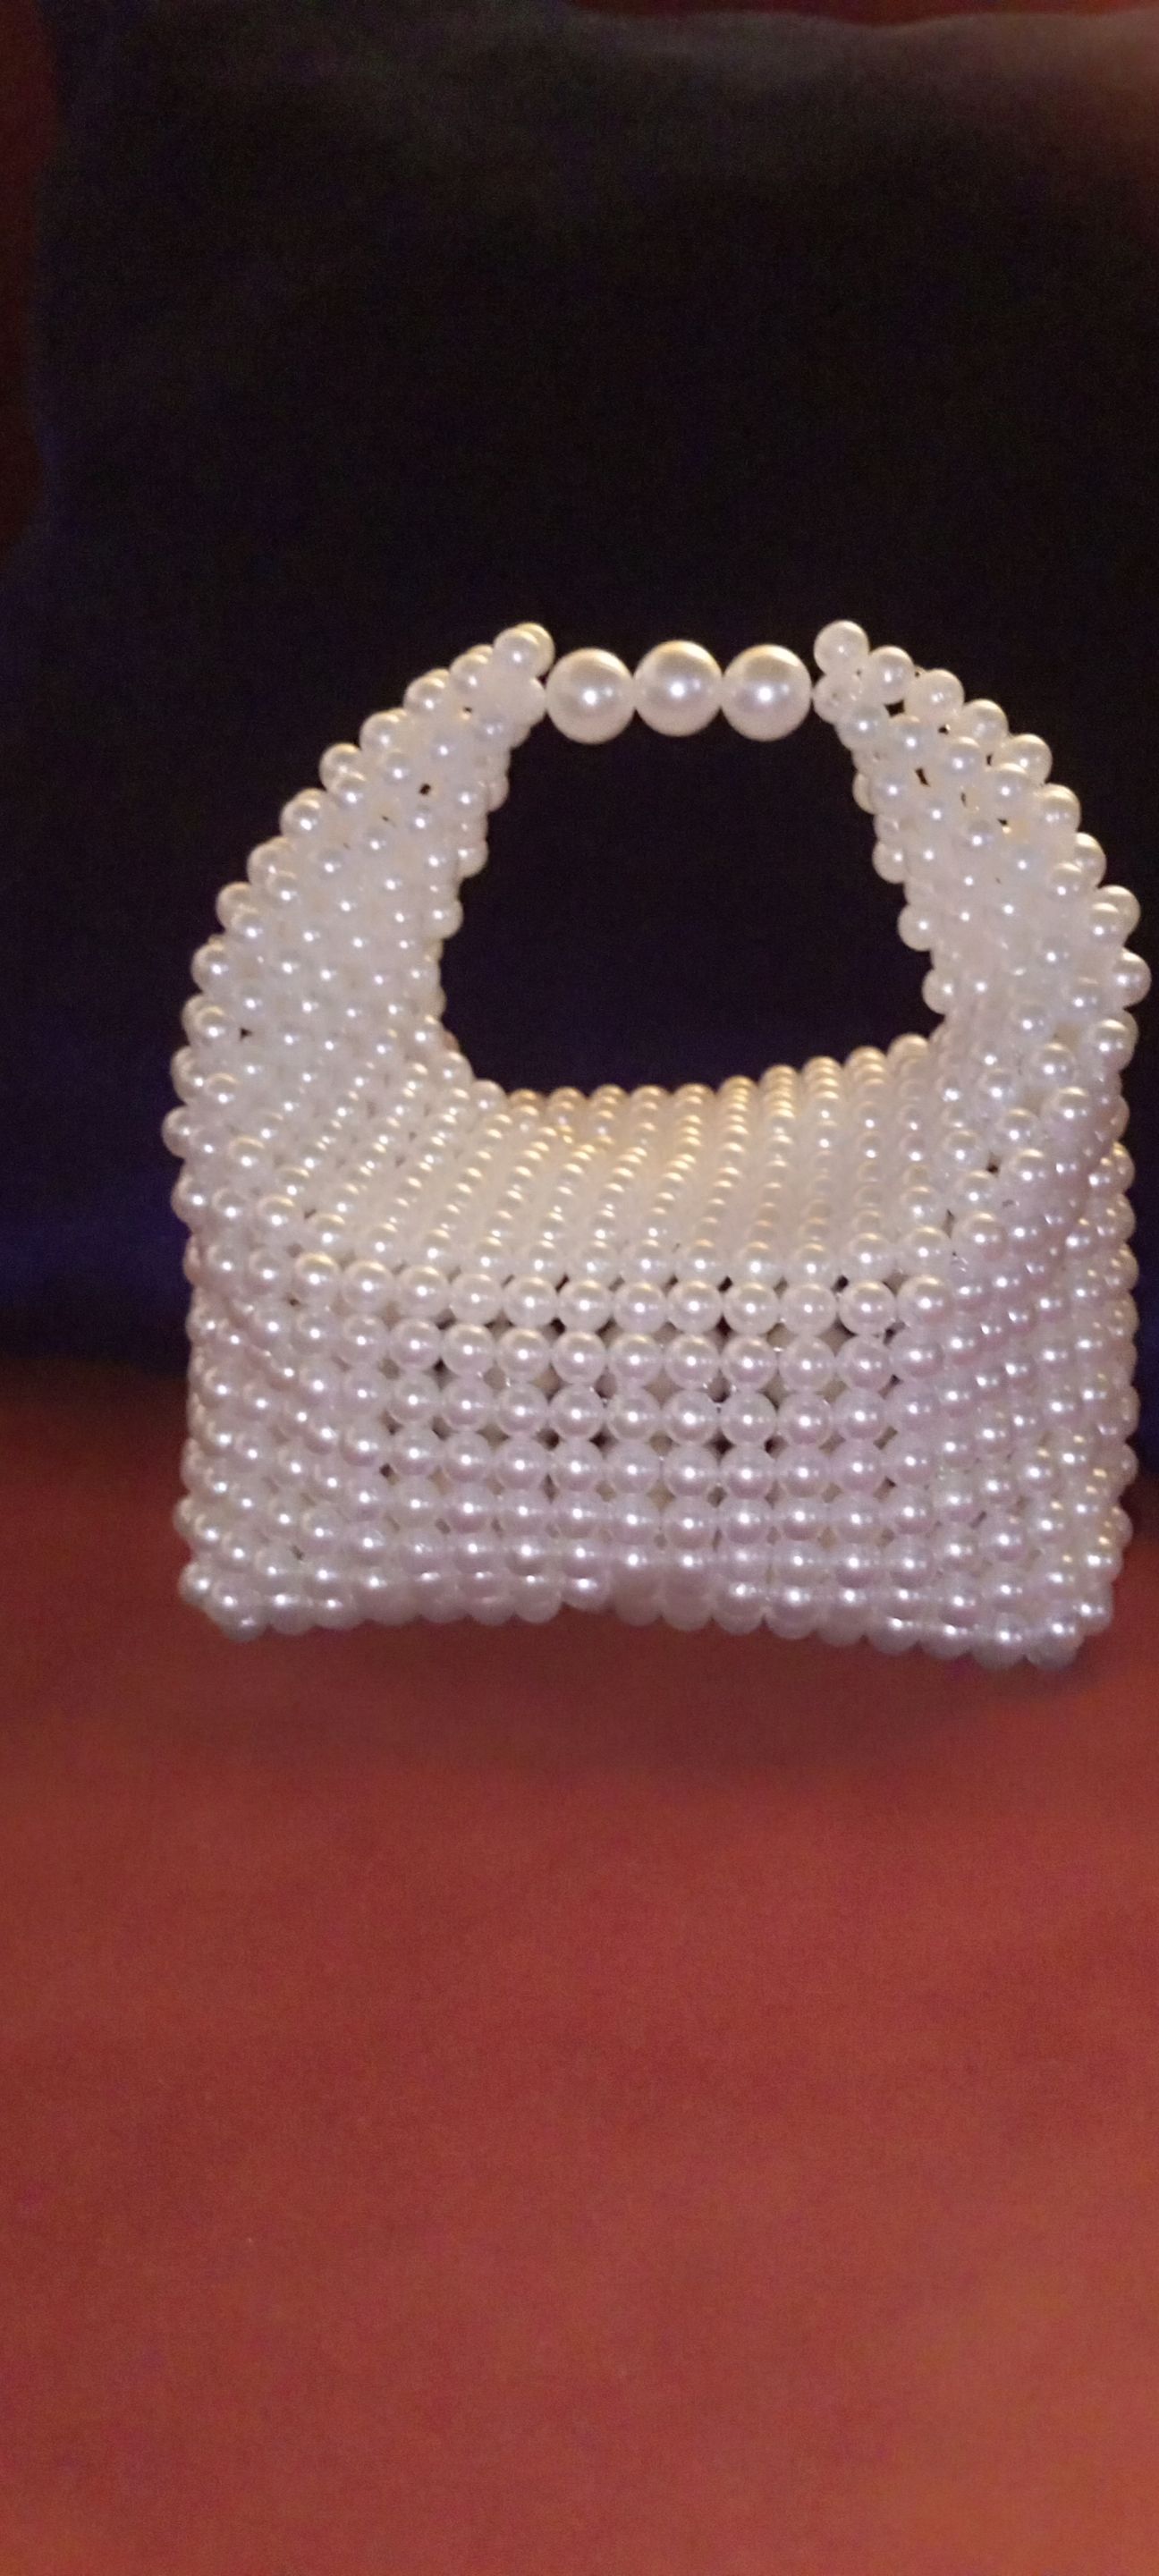 So, guys, come with me, and let me break it down for you as simply as I can, as always.. 🤗
**Materials used**
I used 1 pack of size ten off-white pearl beads, four size 14 pearl beads for the handle, 0.6 fishing line, and a pair of scissors. 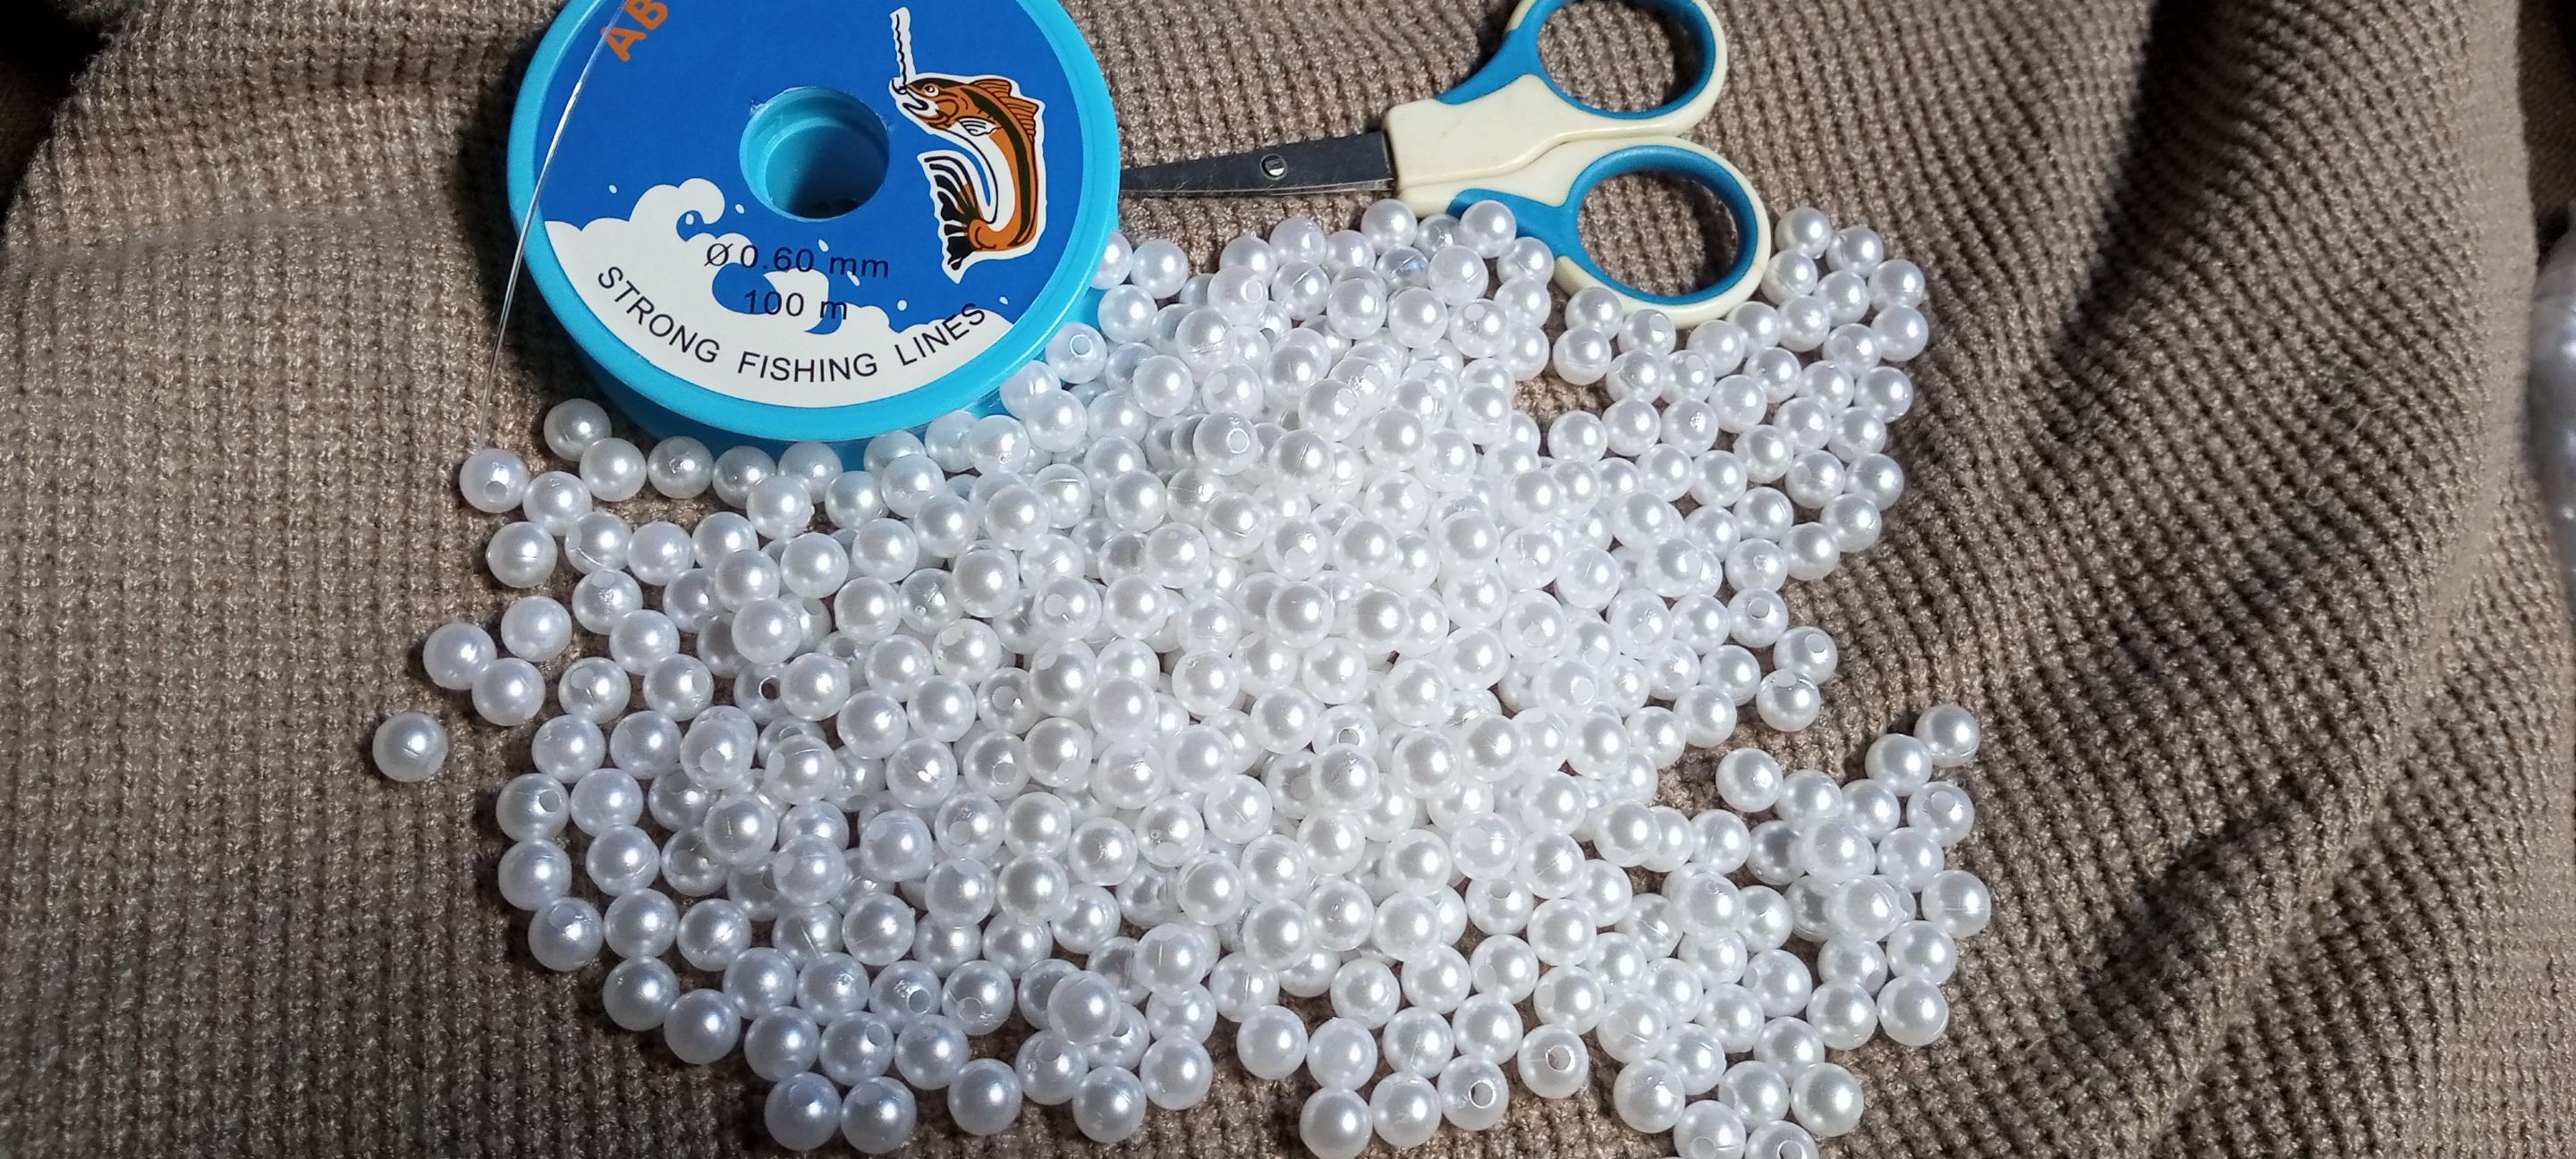
>Step by step process
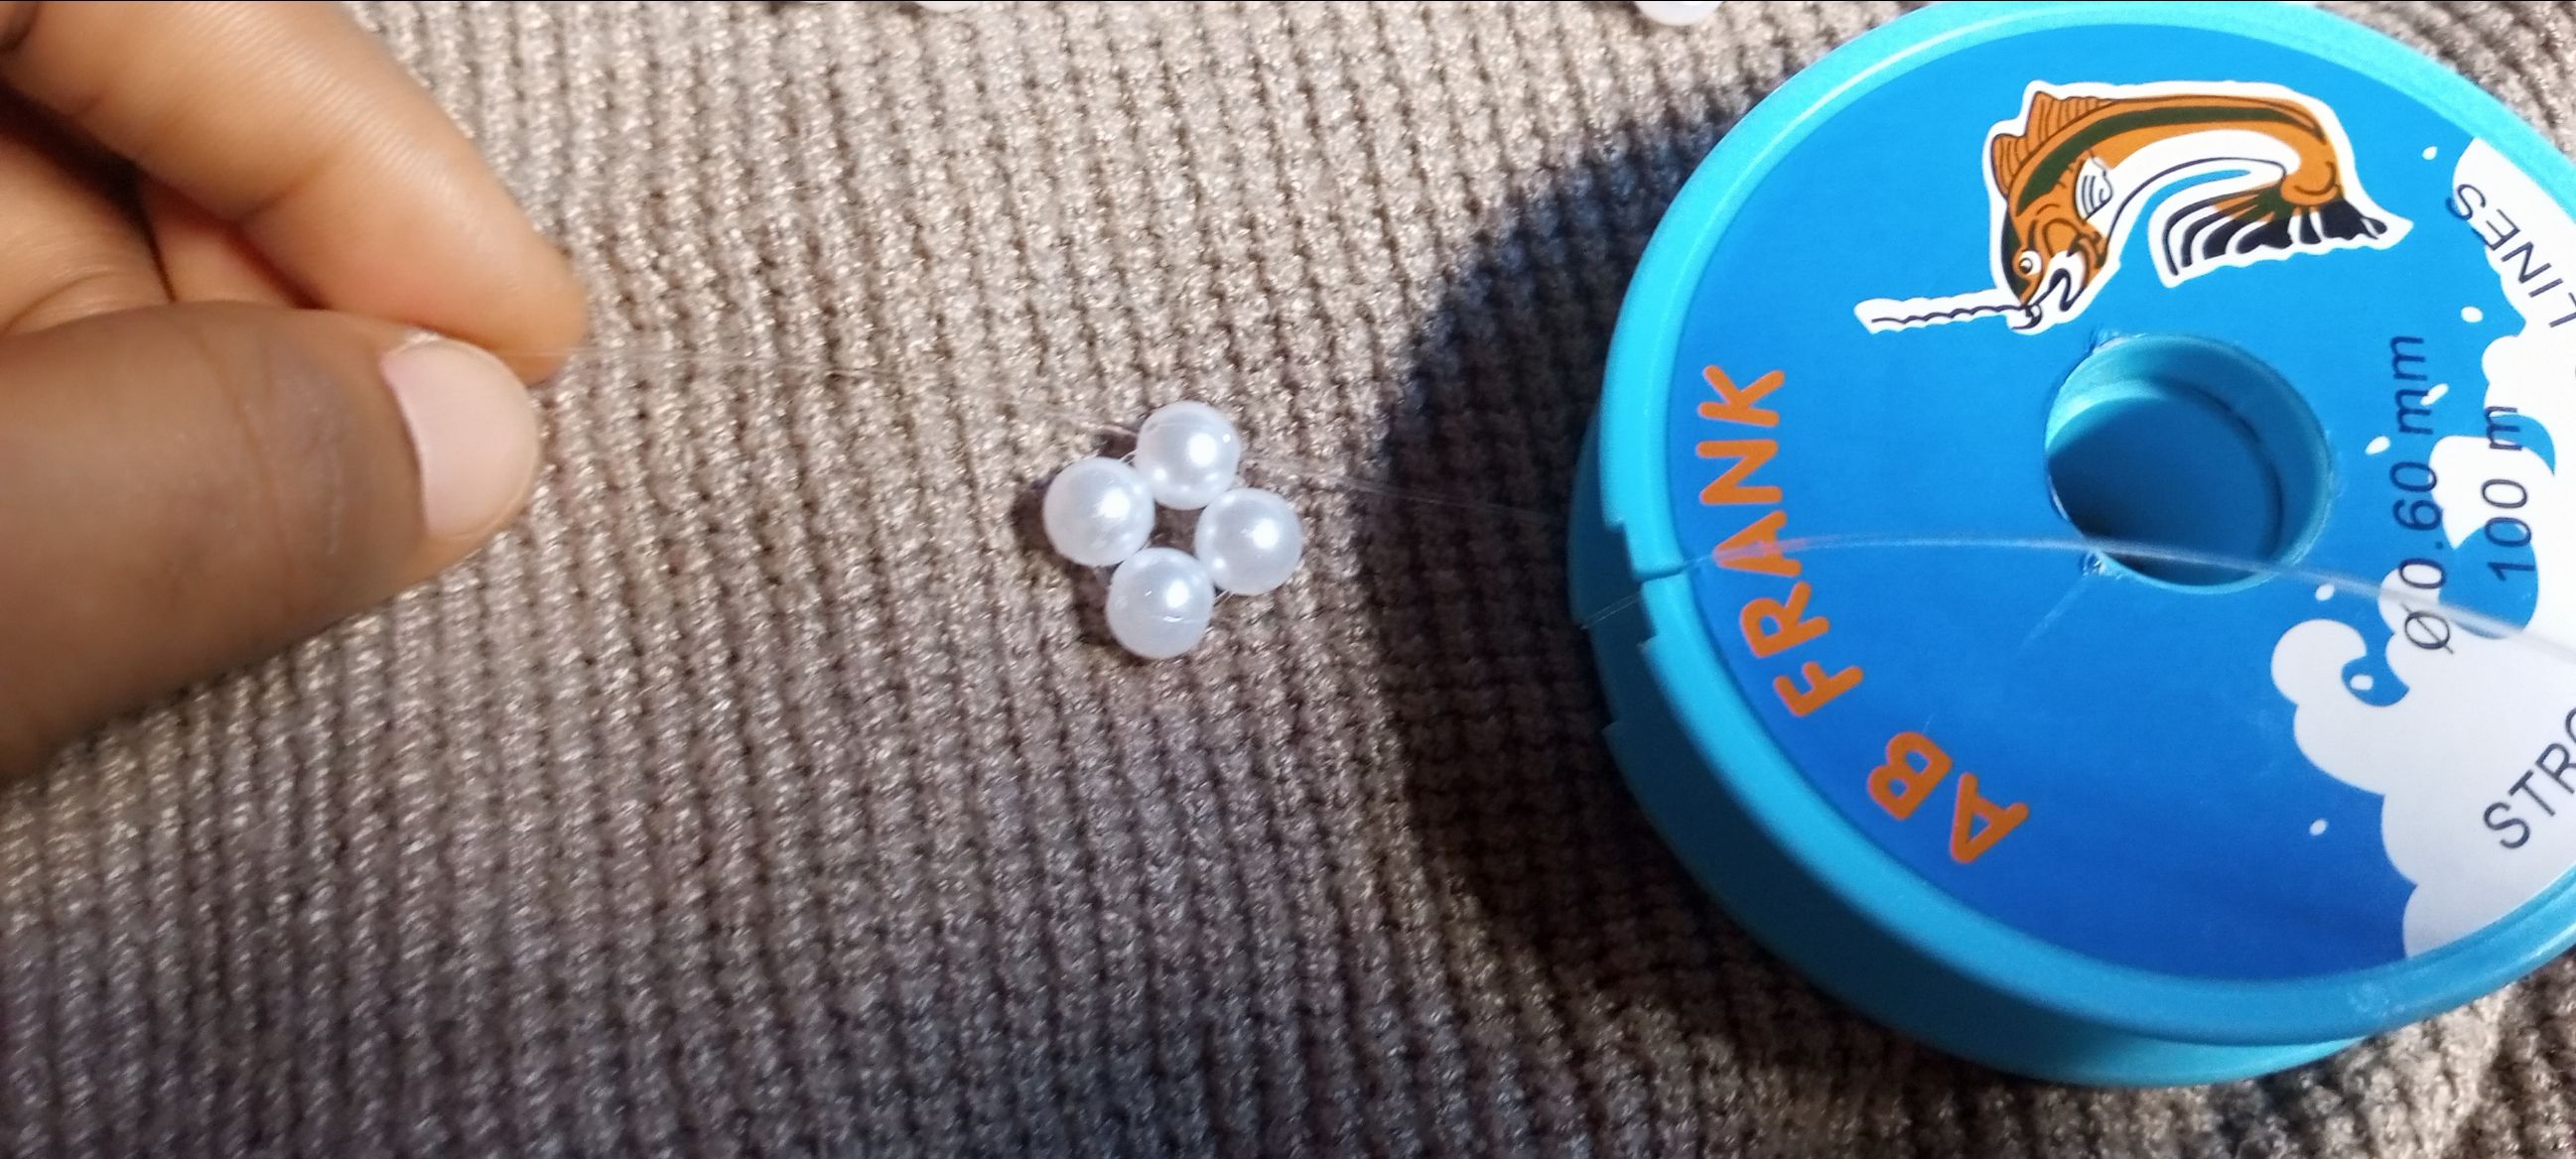
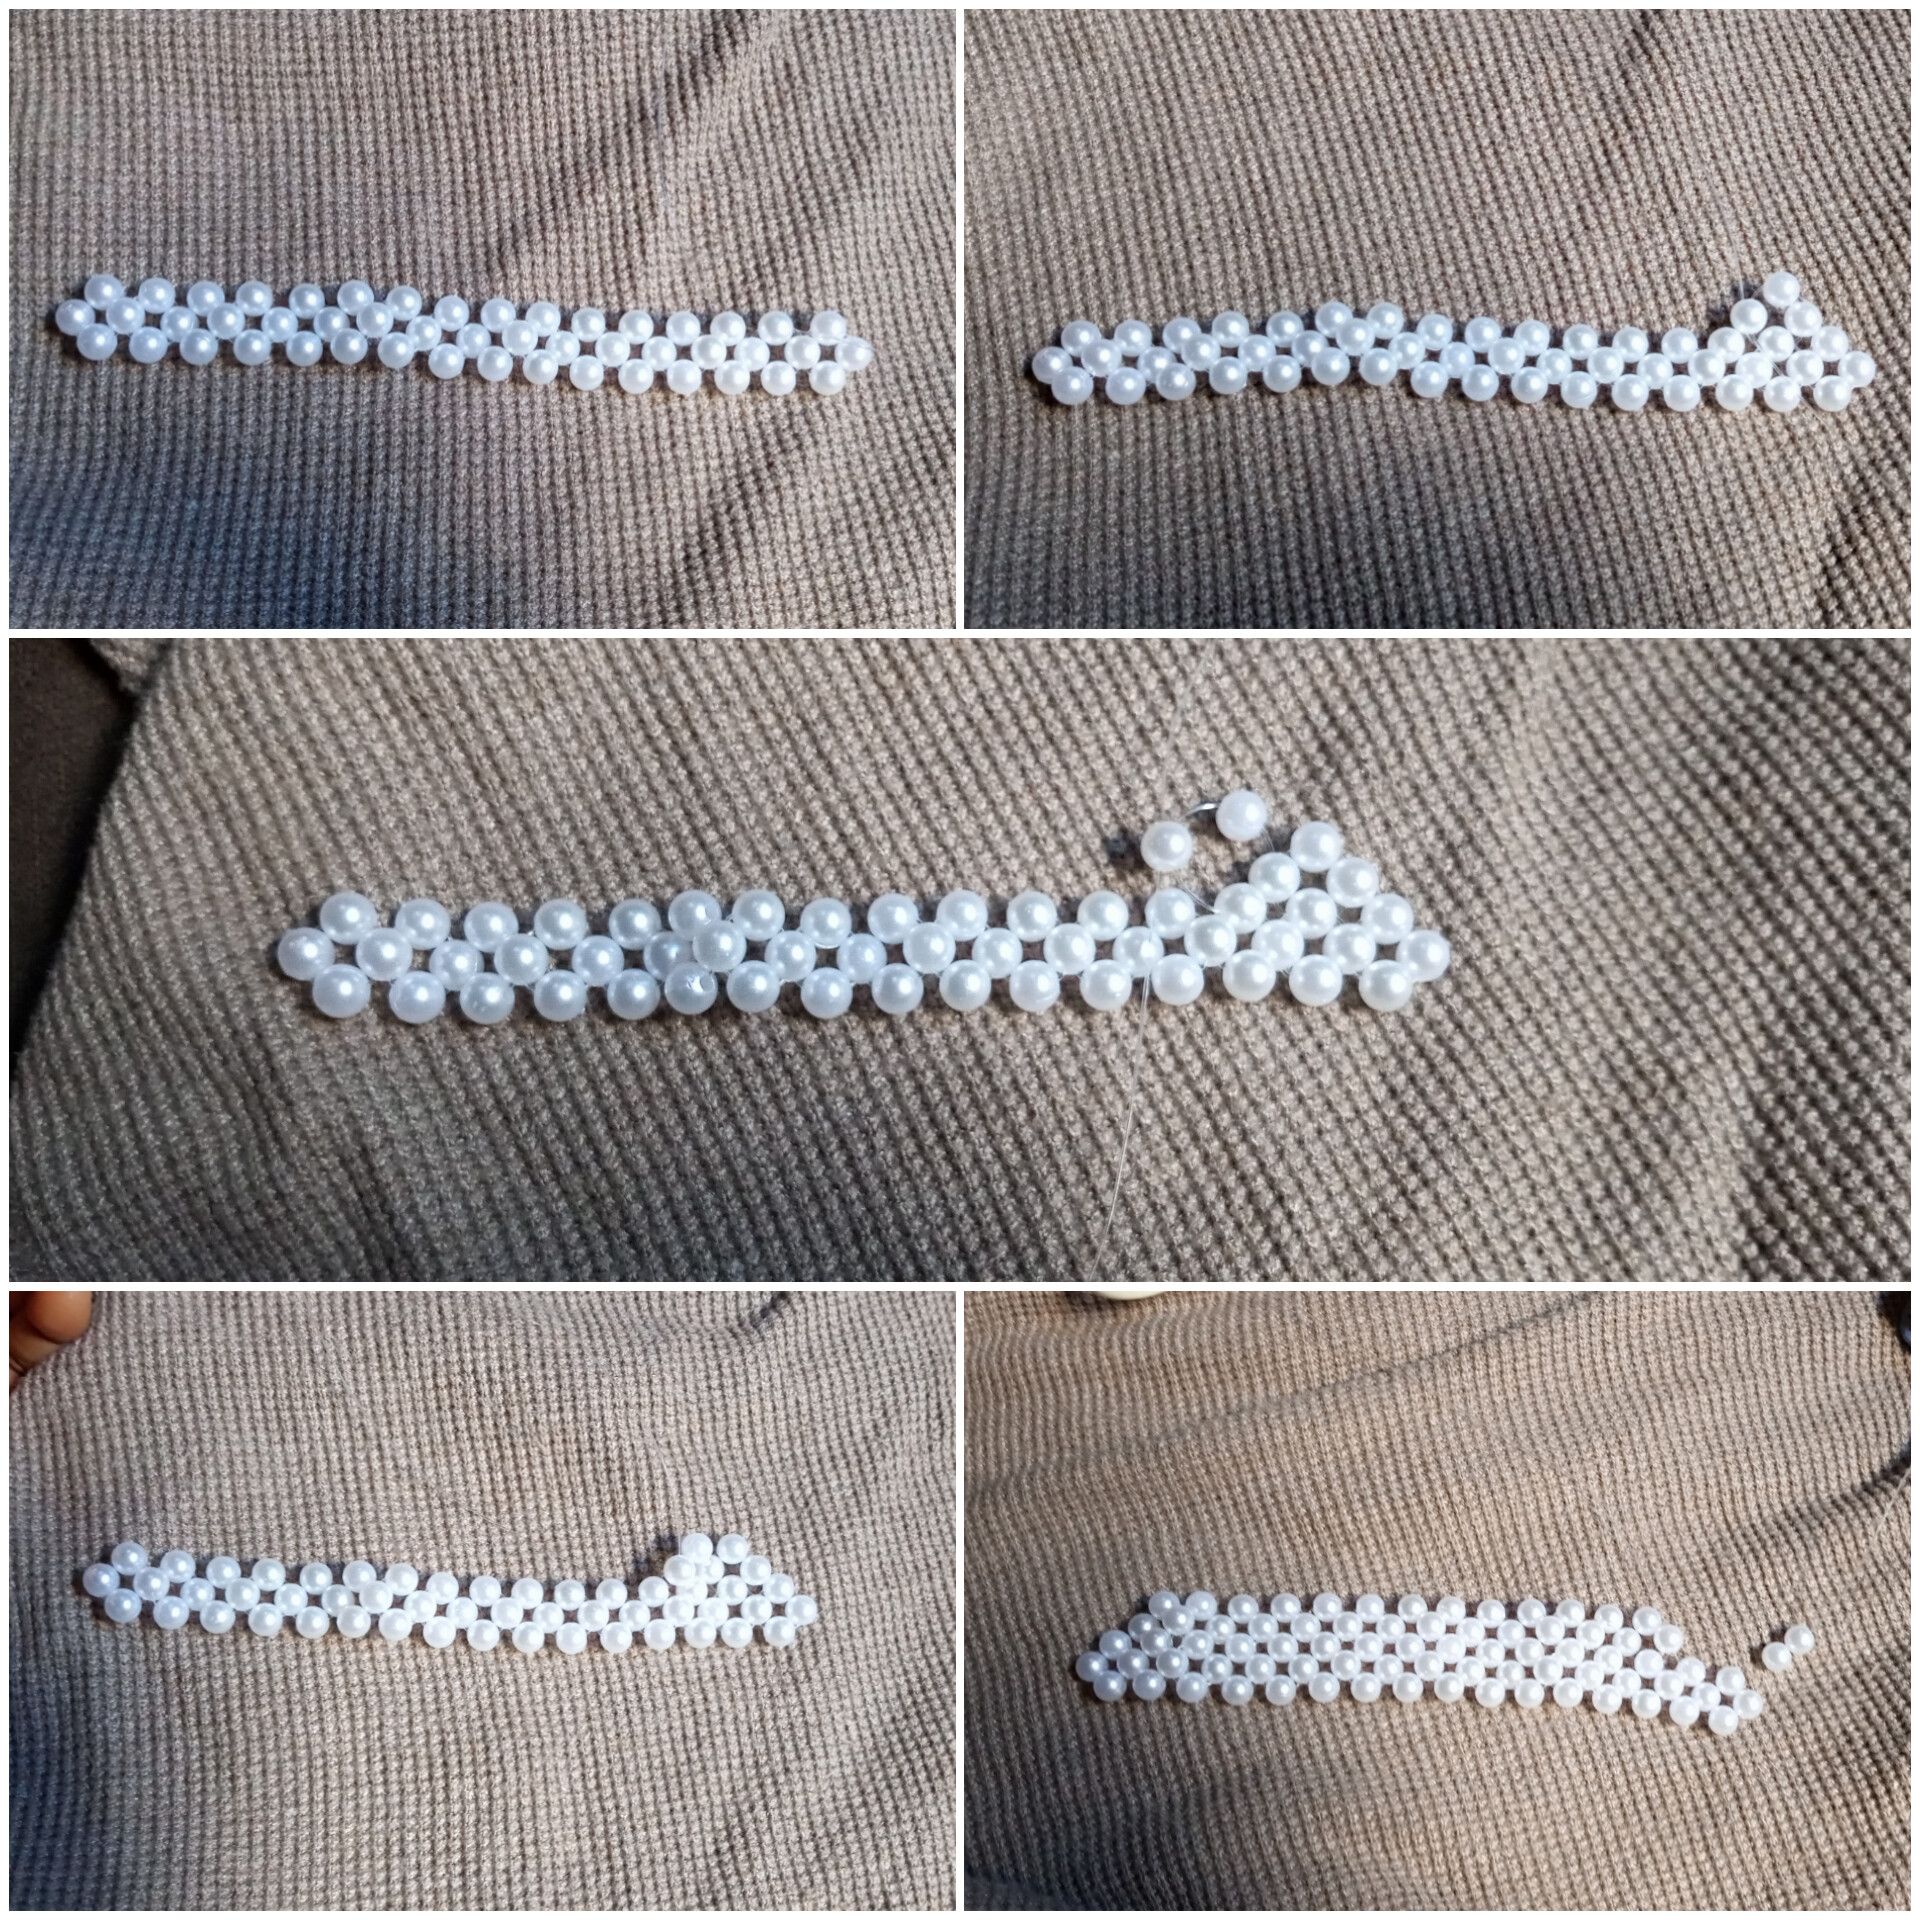
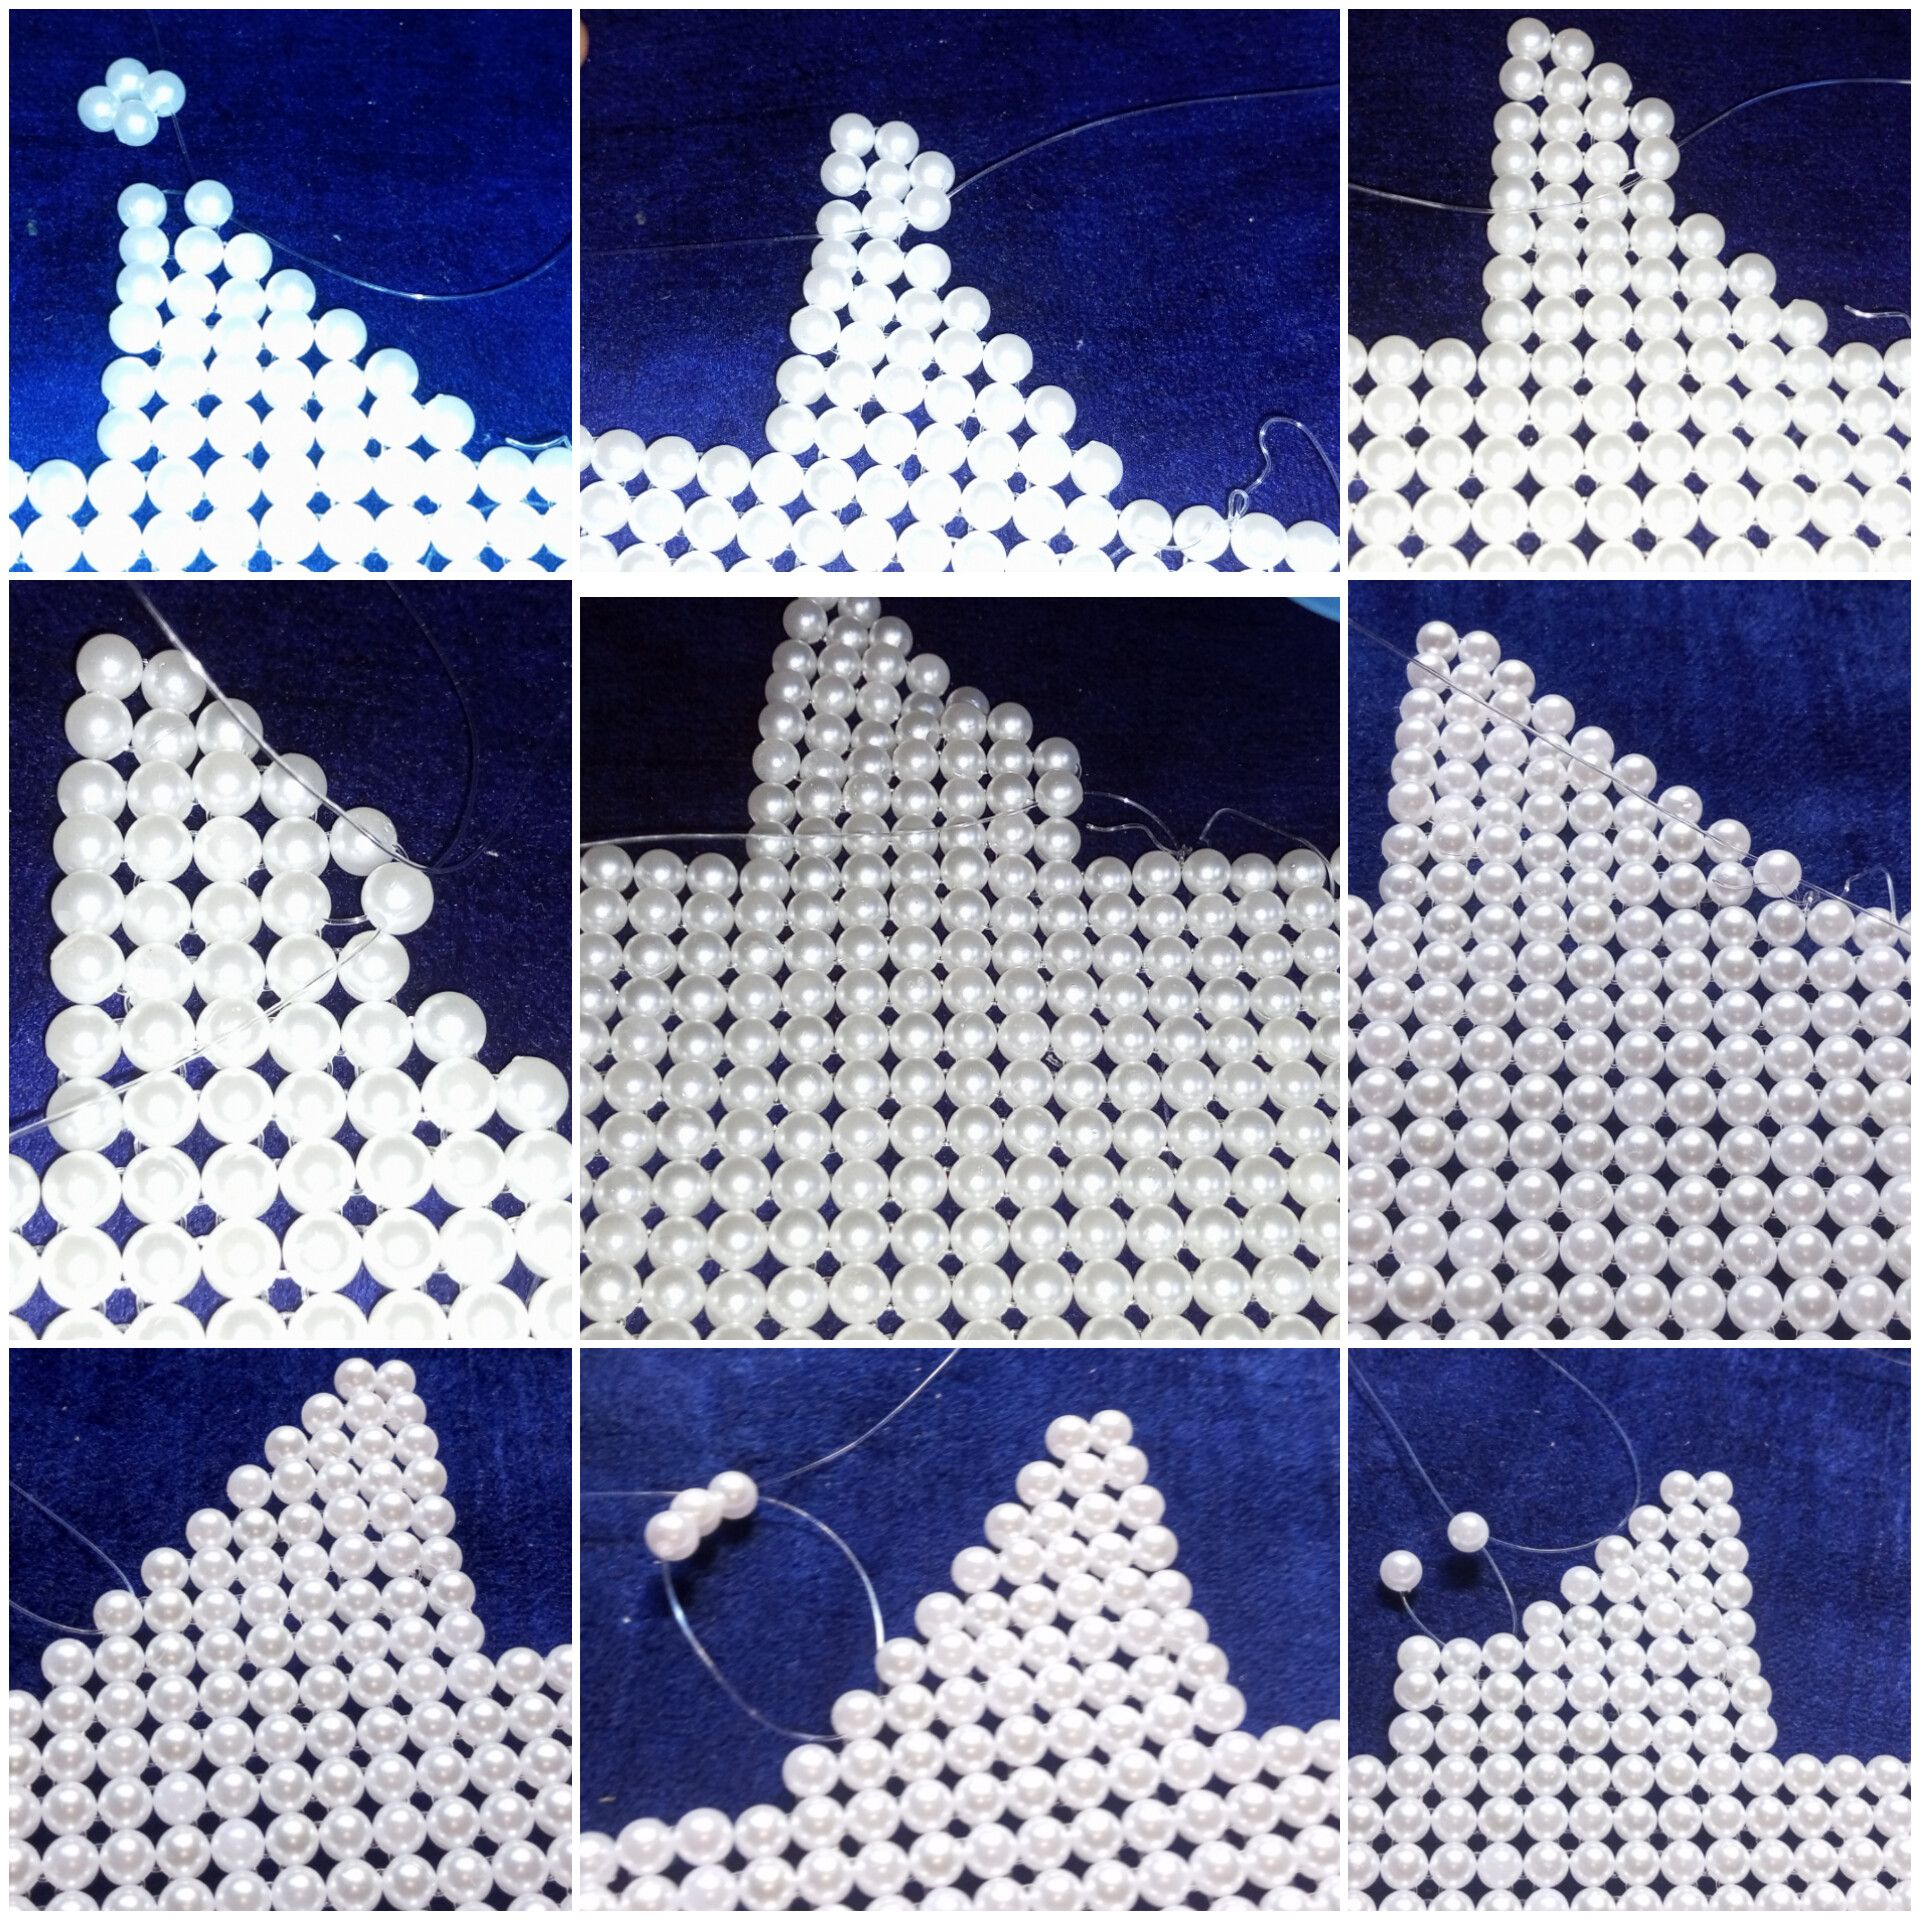
**Step 1:**
I started by putting 4 beads on 200cm fishing line, then crossed both sides with the fourth bead.
**Step 2:**
I went ahead to make 15 rings of beads and then made a turn with the 16th ring.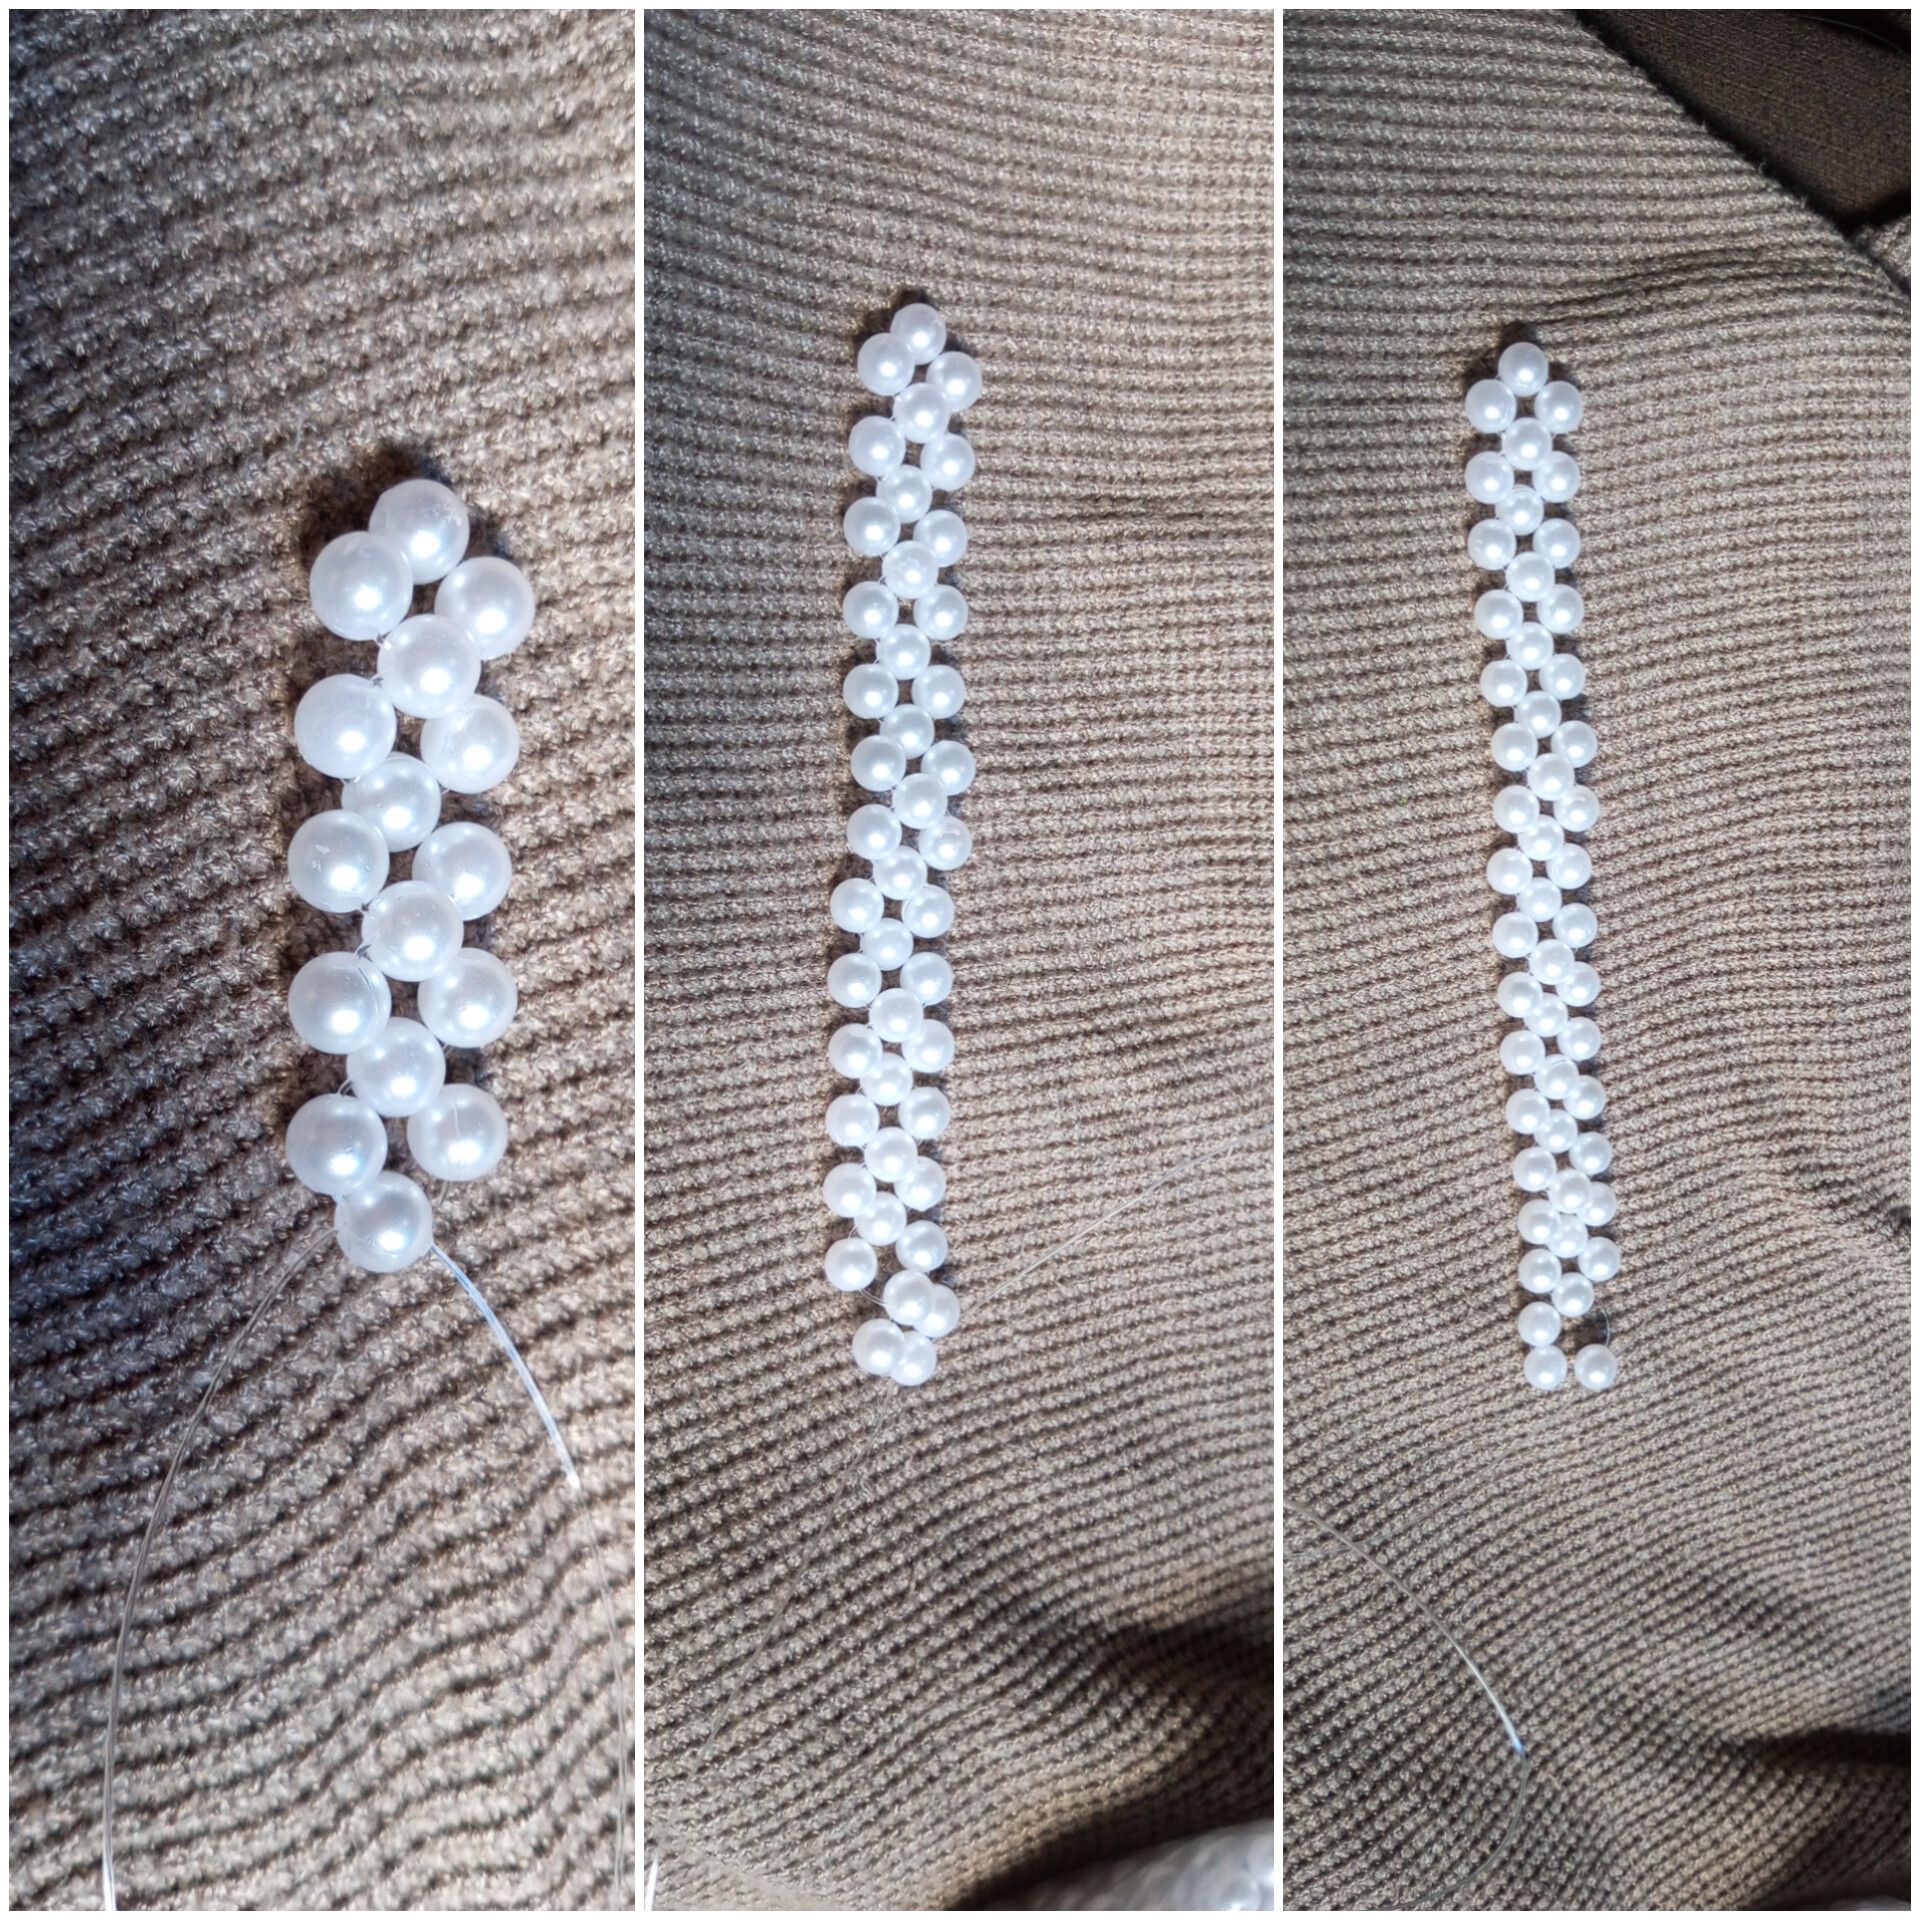
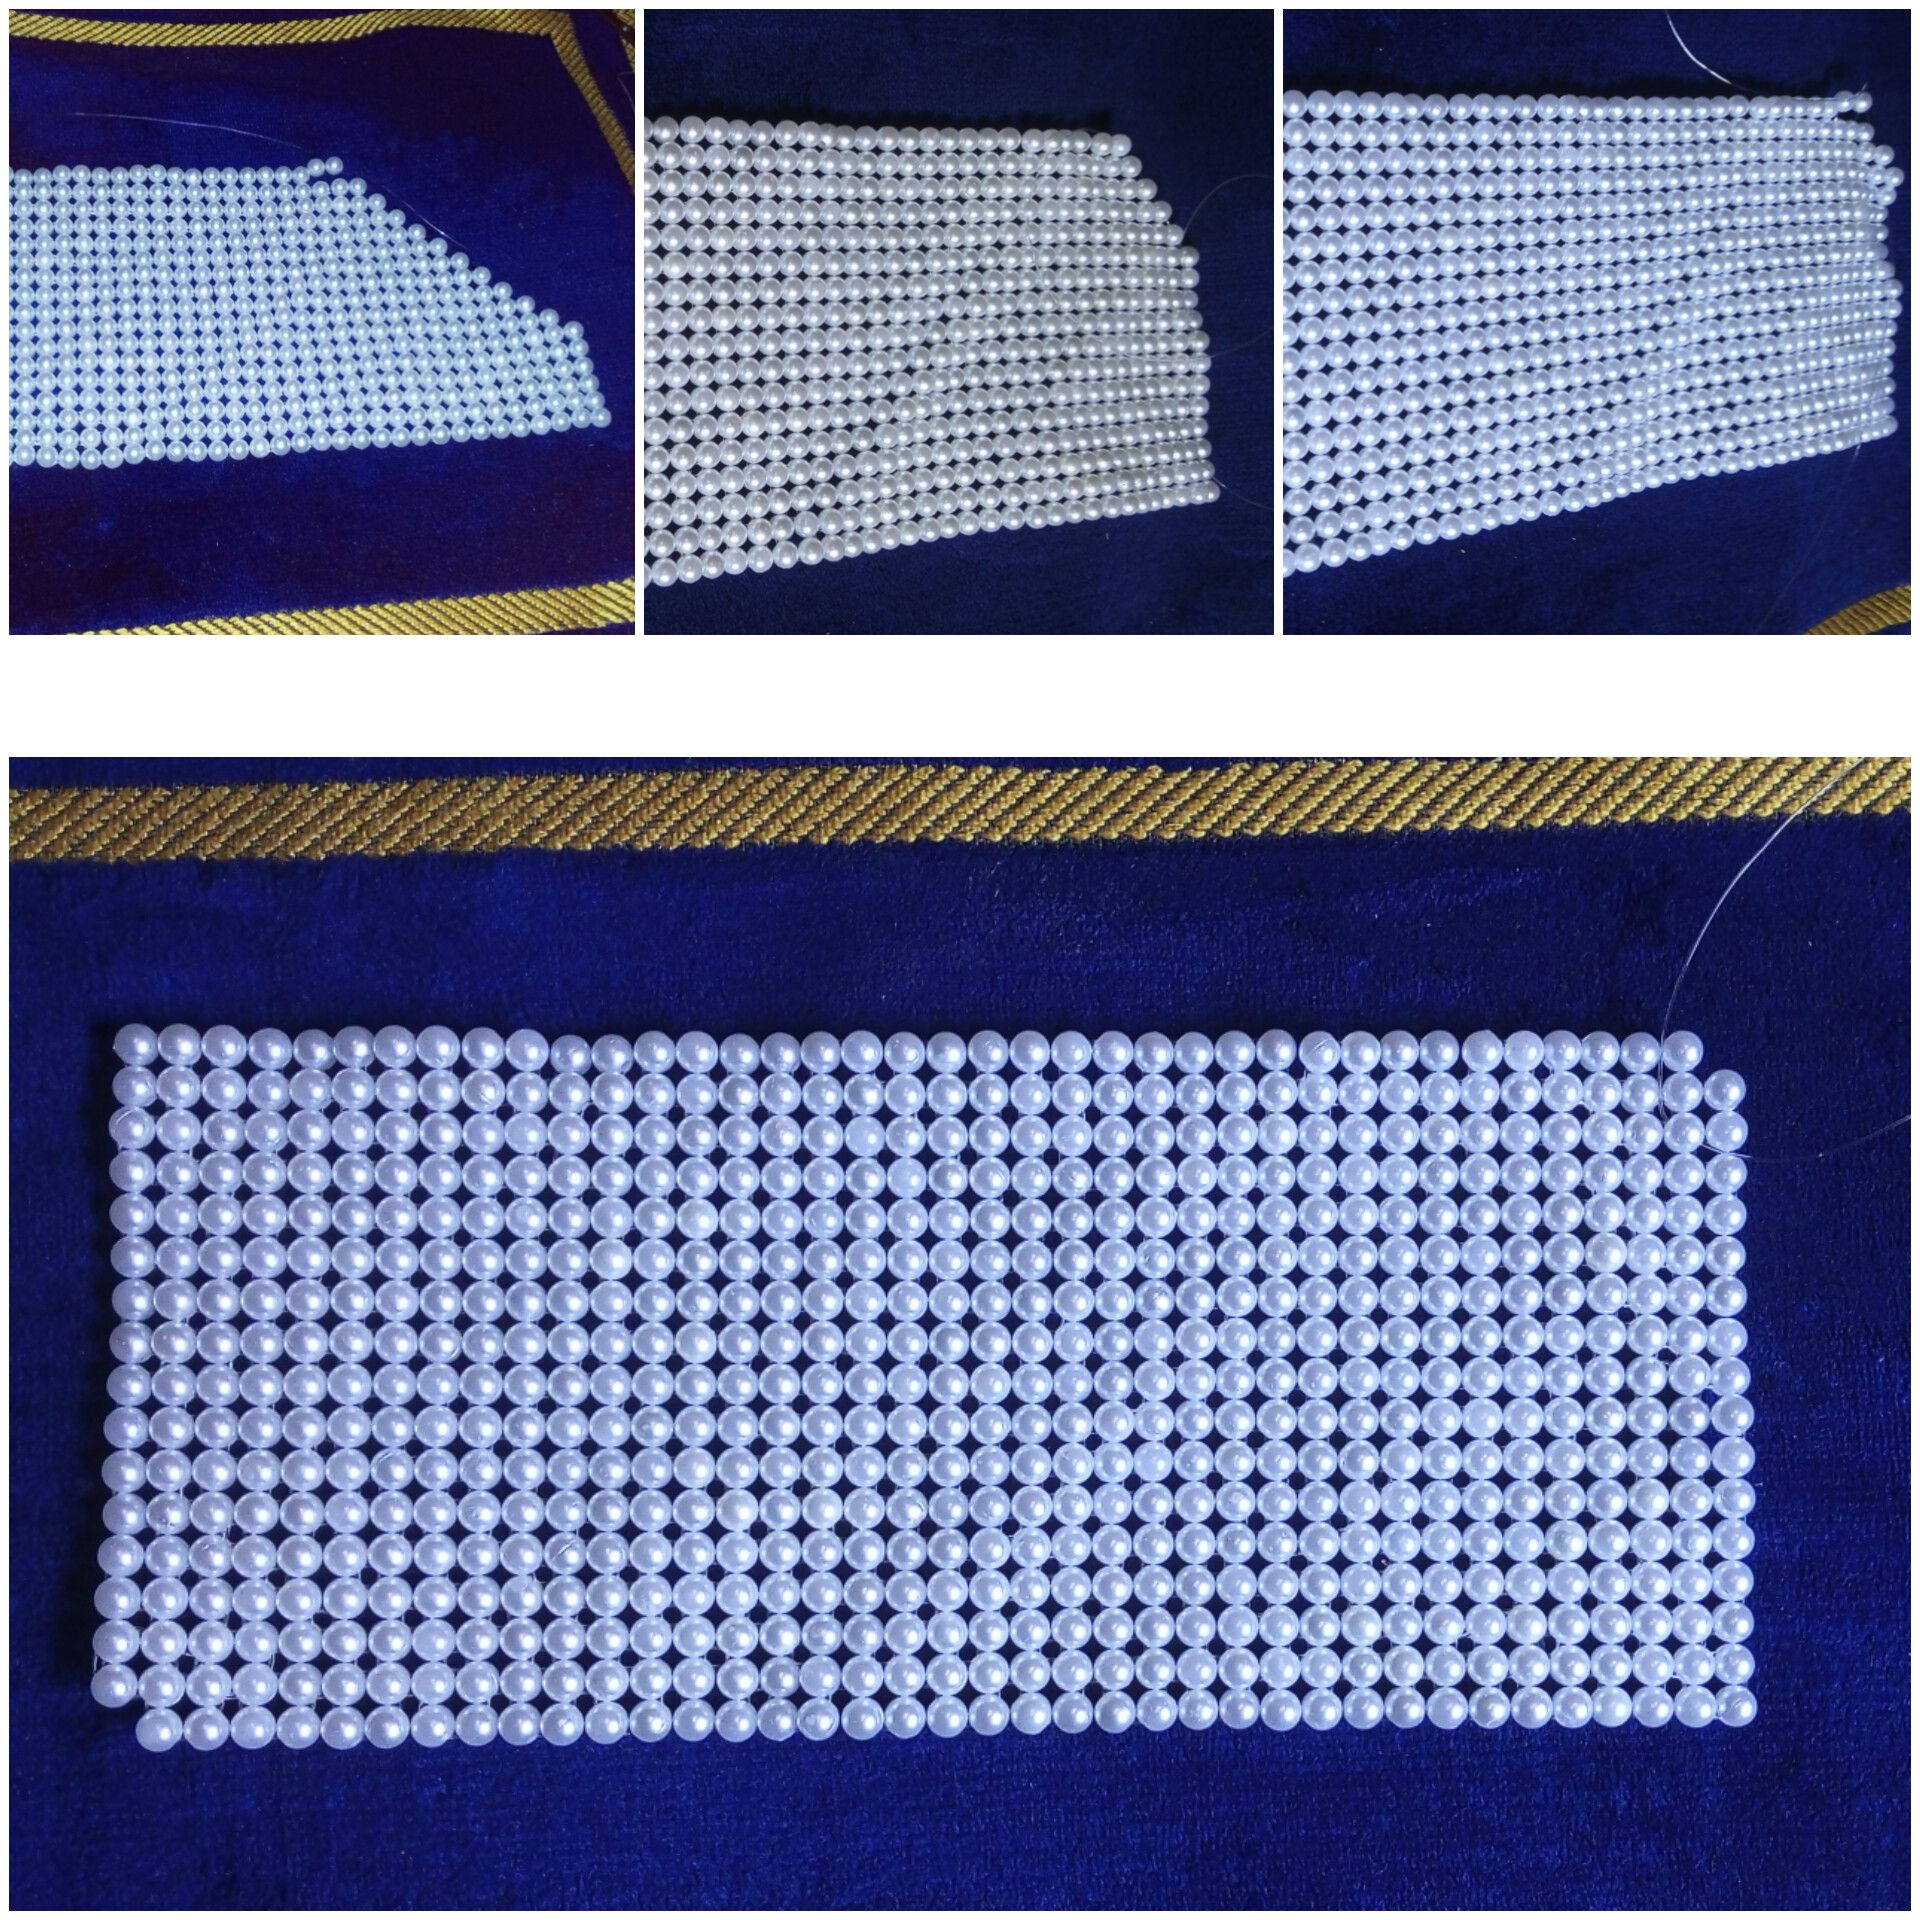
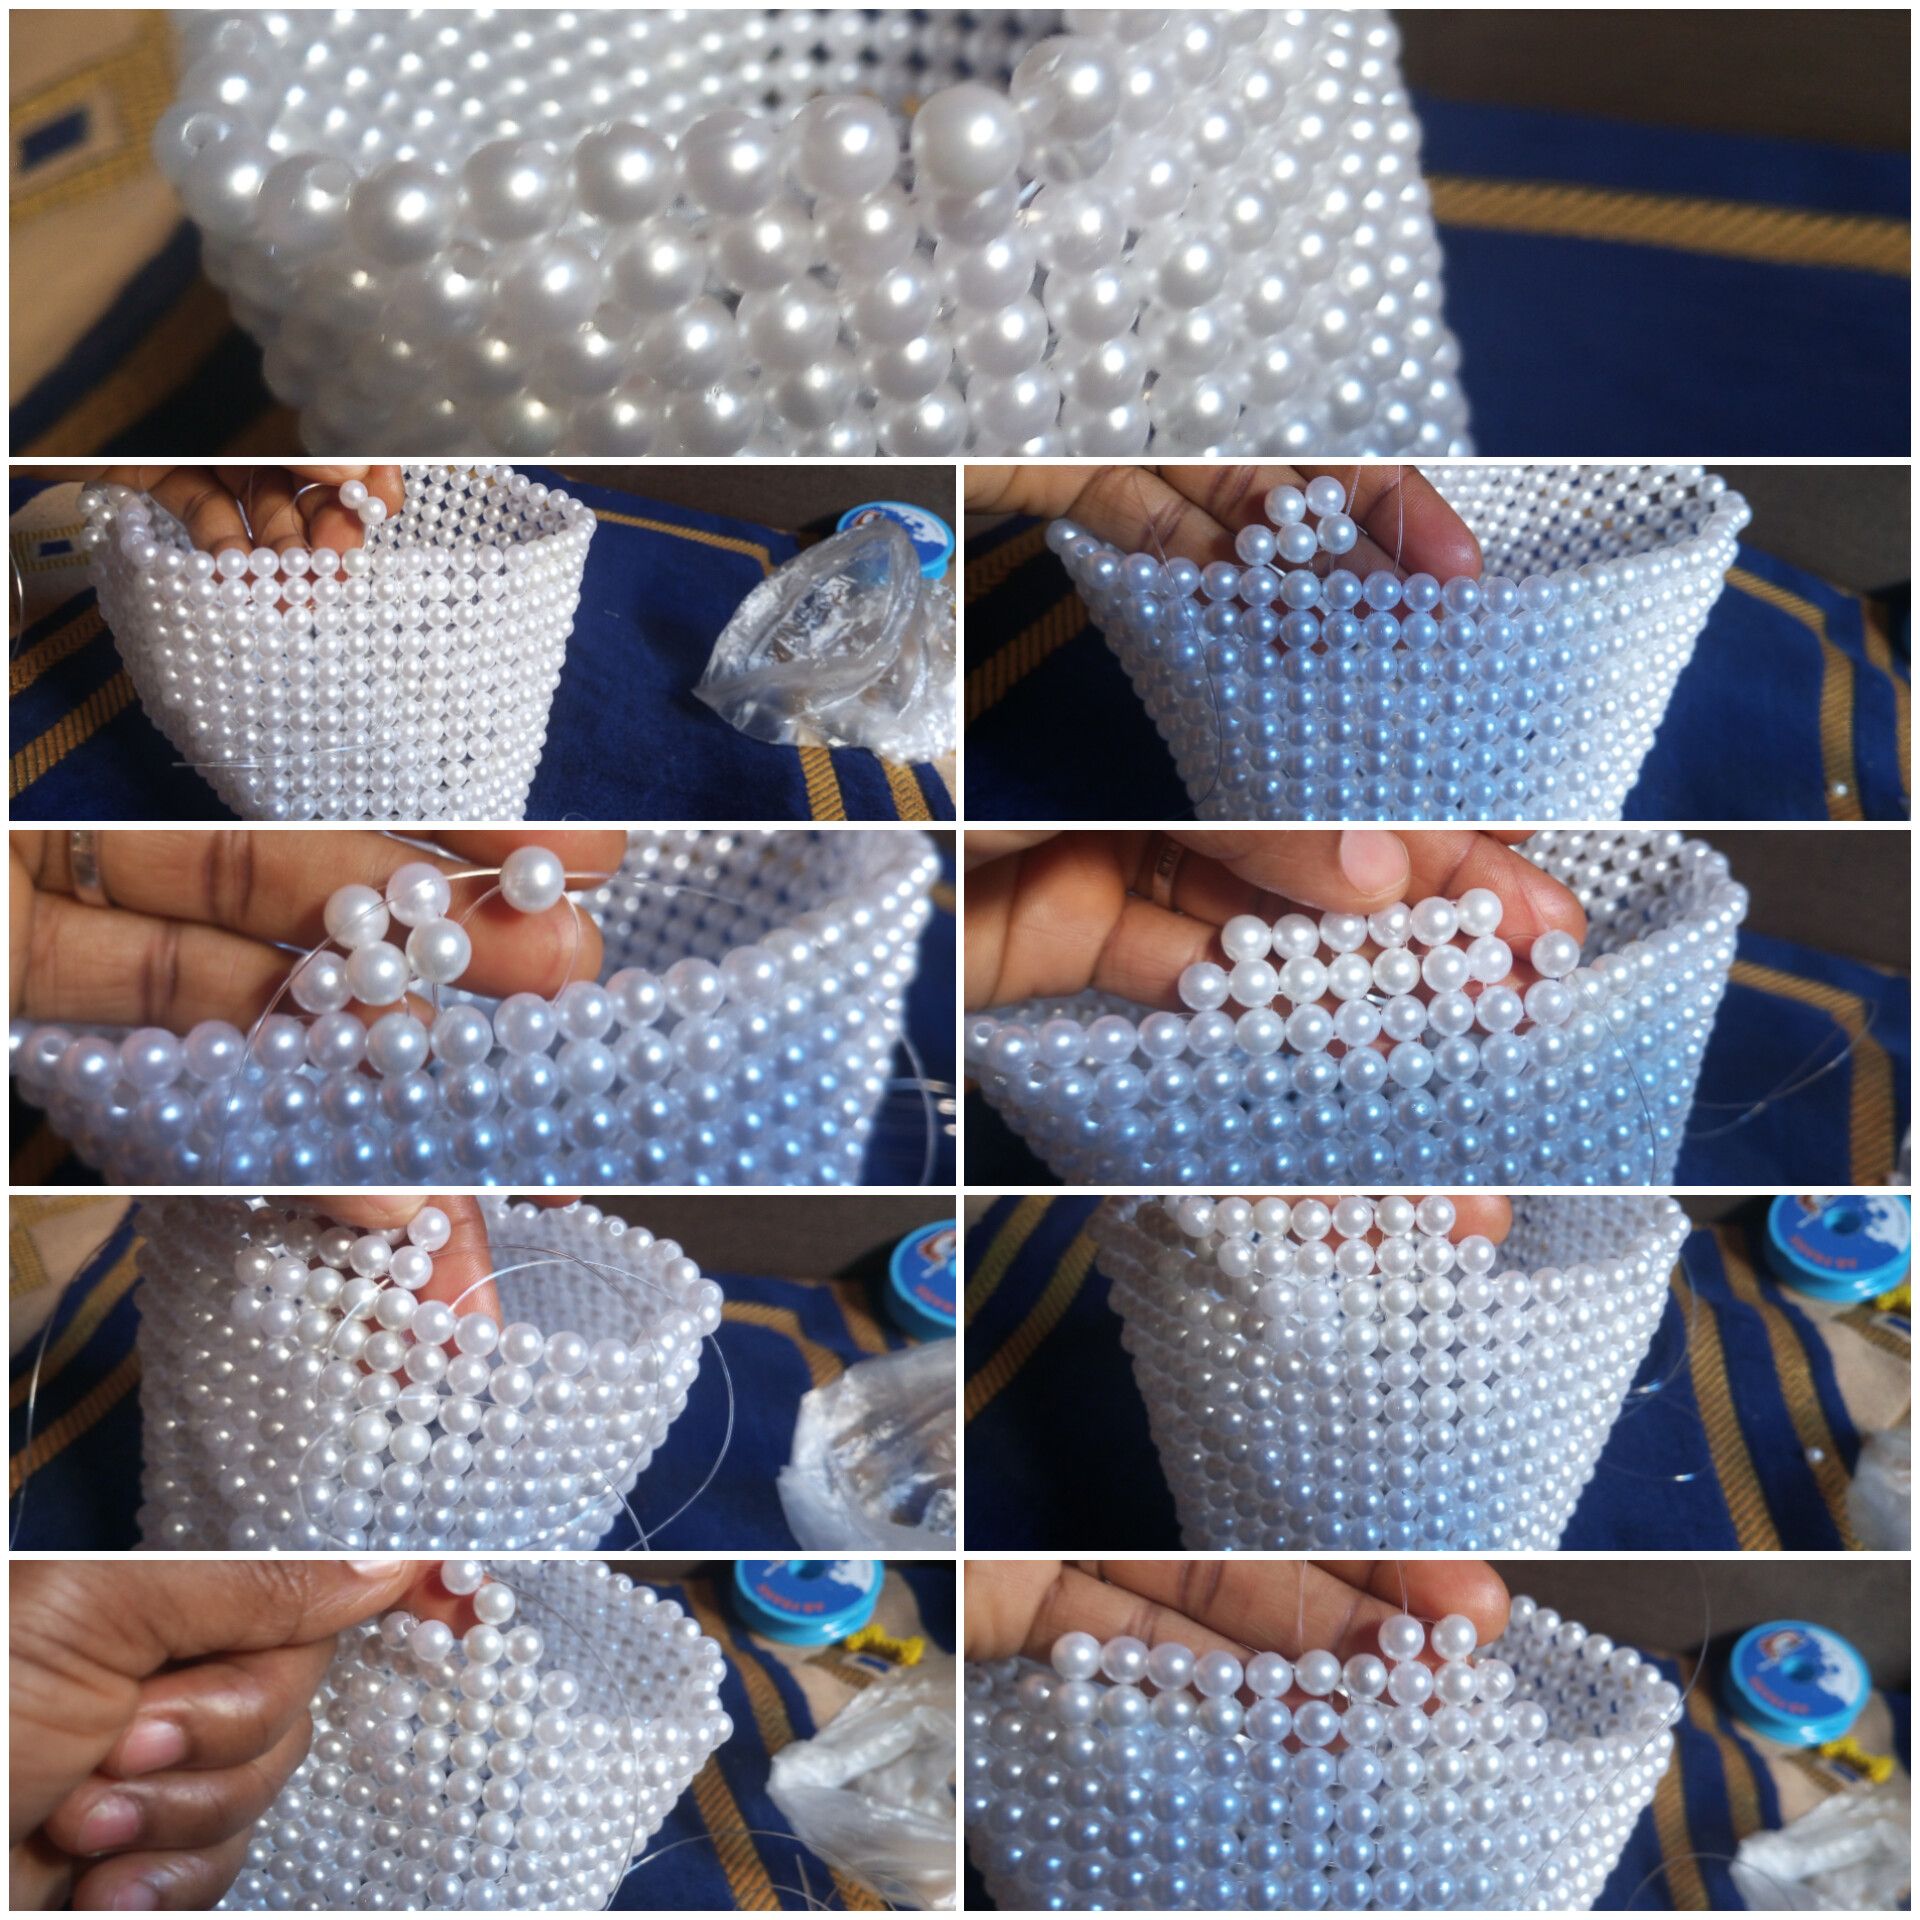
**Step 3:**
I needed to make a triangle on this side, so I started to reduce both sizes of the work. By working my fishing line to the second bead and ending the line with the second to last bead in a line.
**Step 4:**
I just continued to reduce the work on both sides until I got a triangle.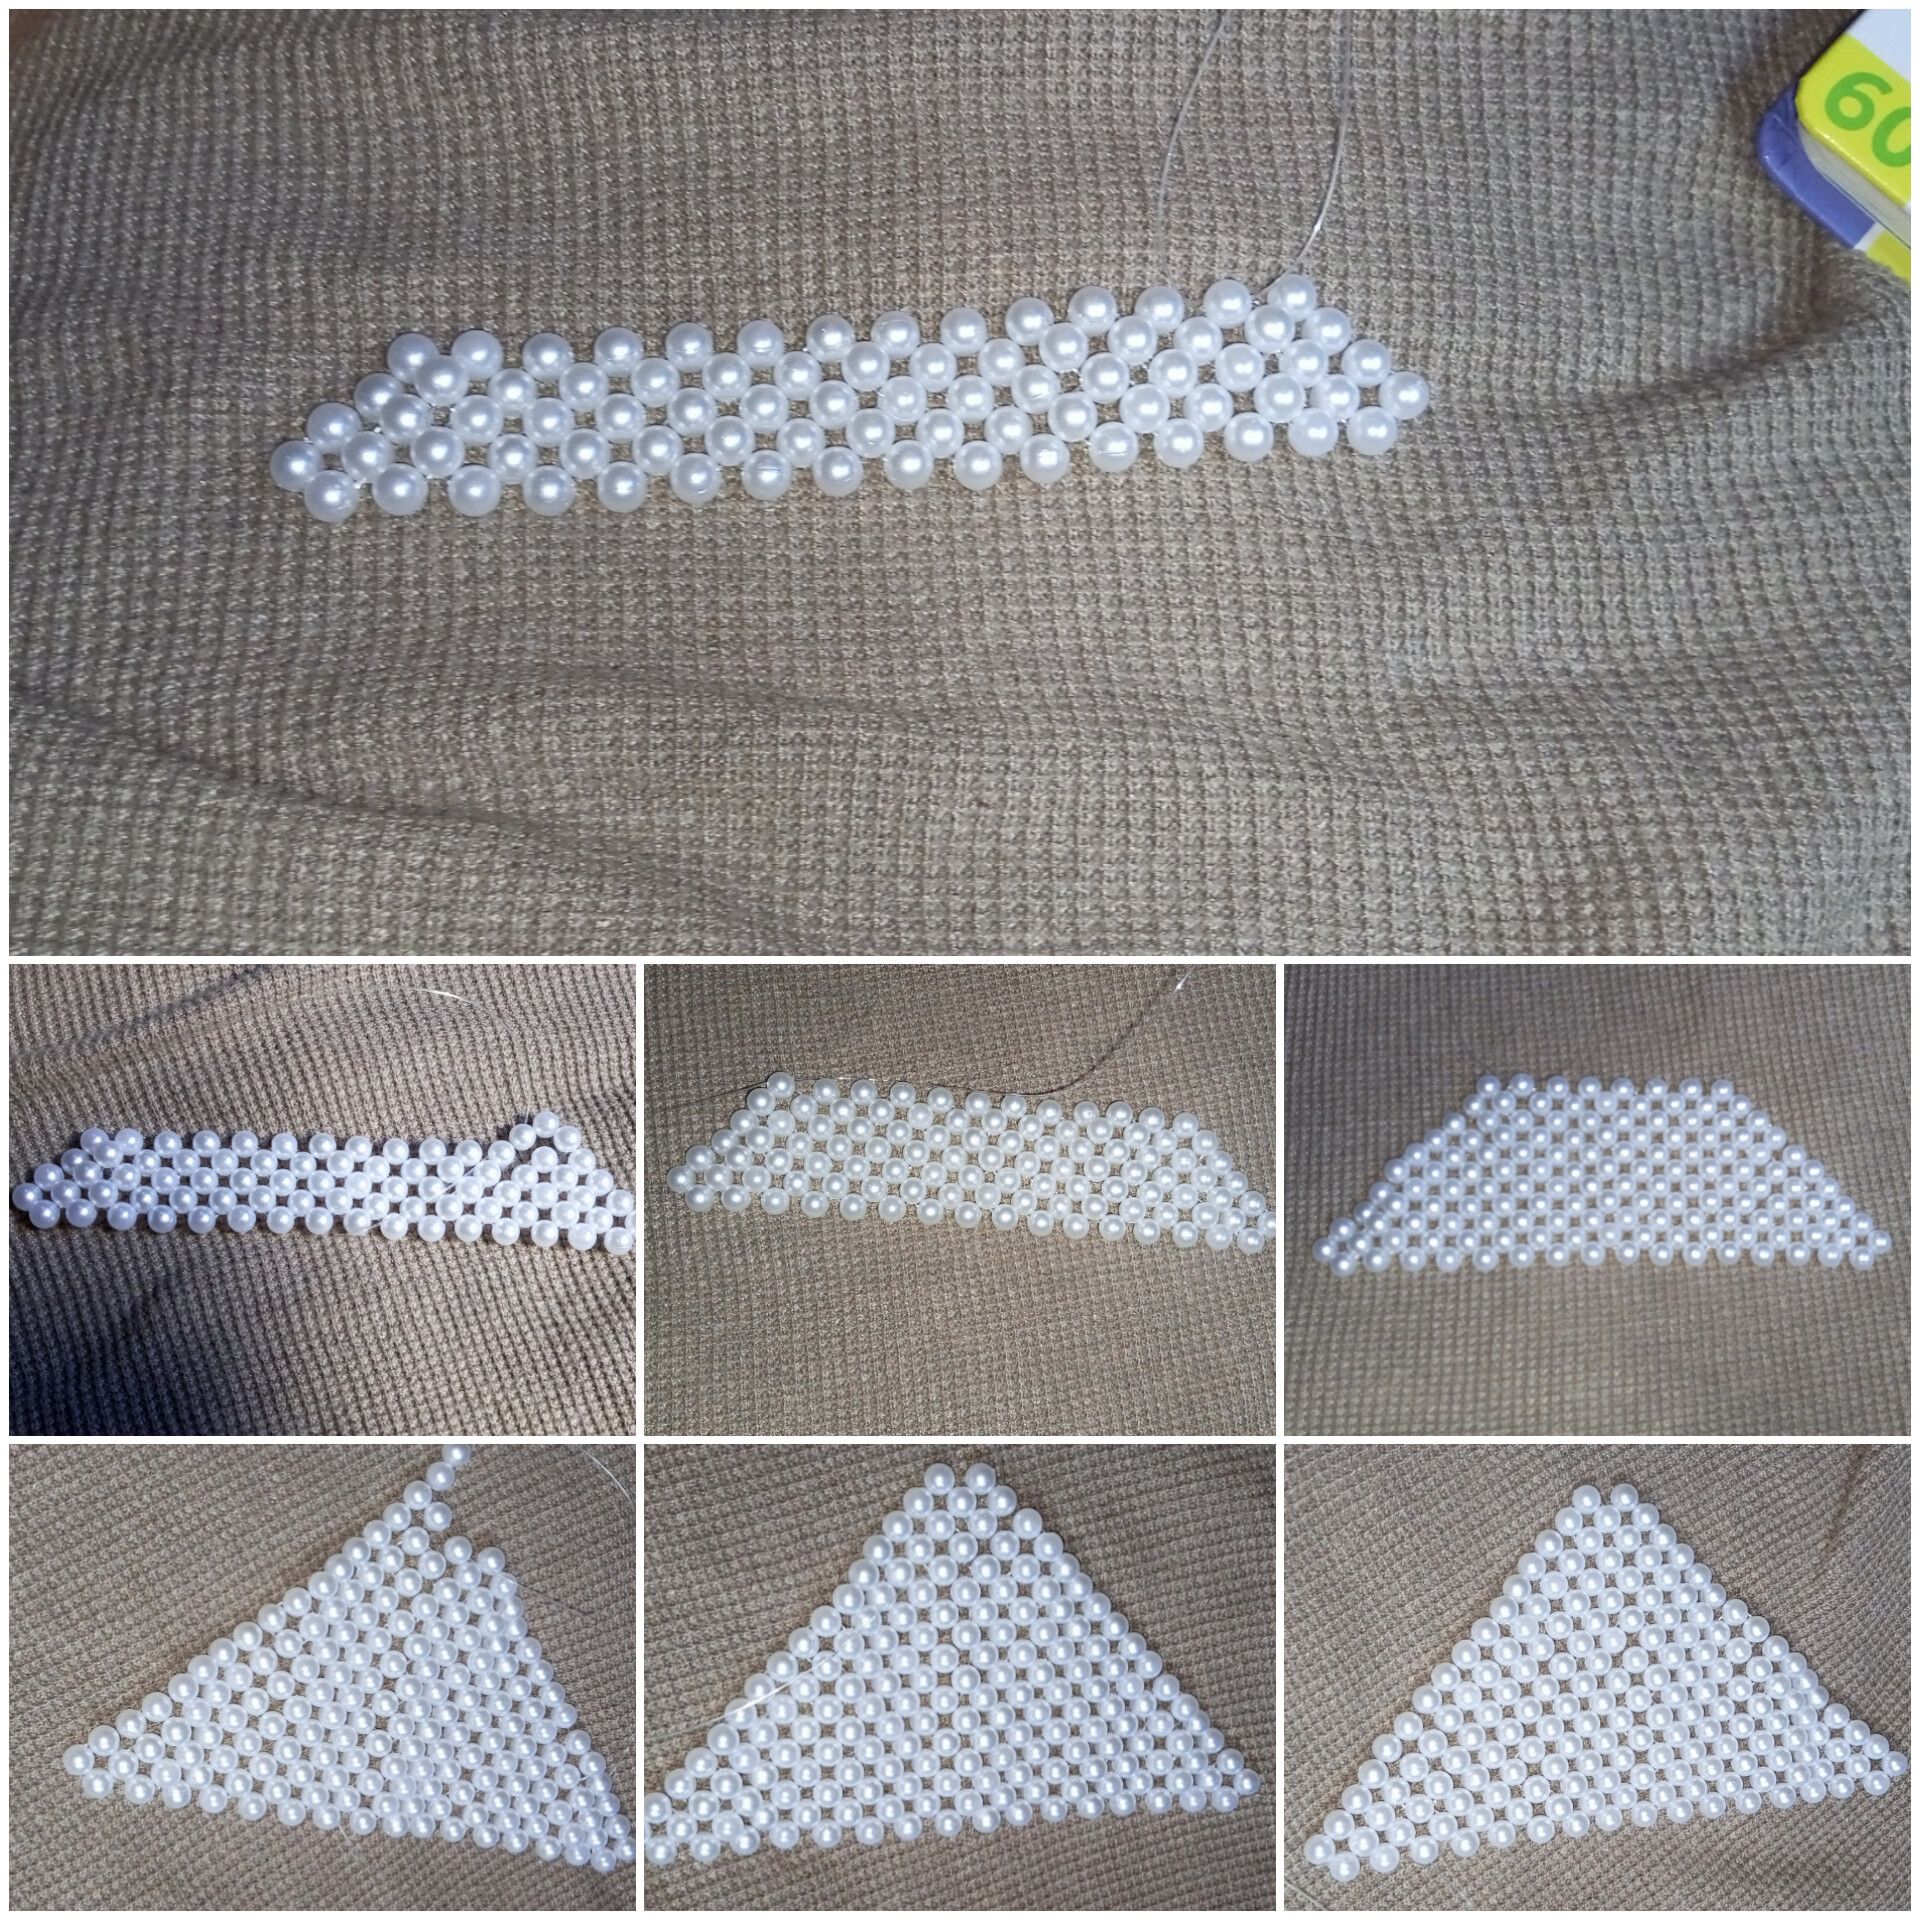
Look at the triangle with two beads on the top.

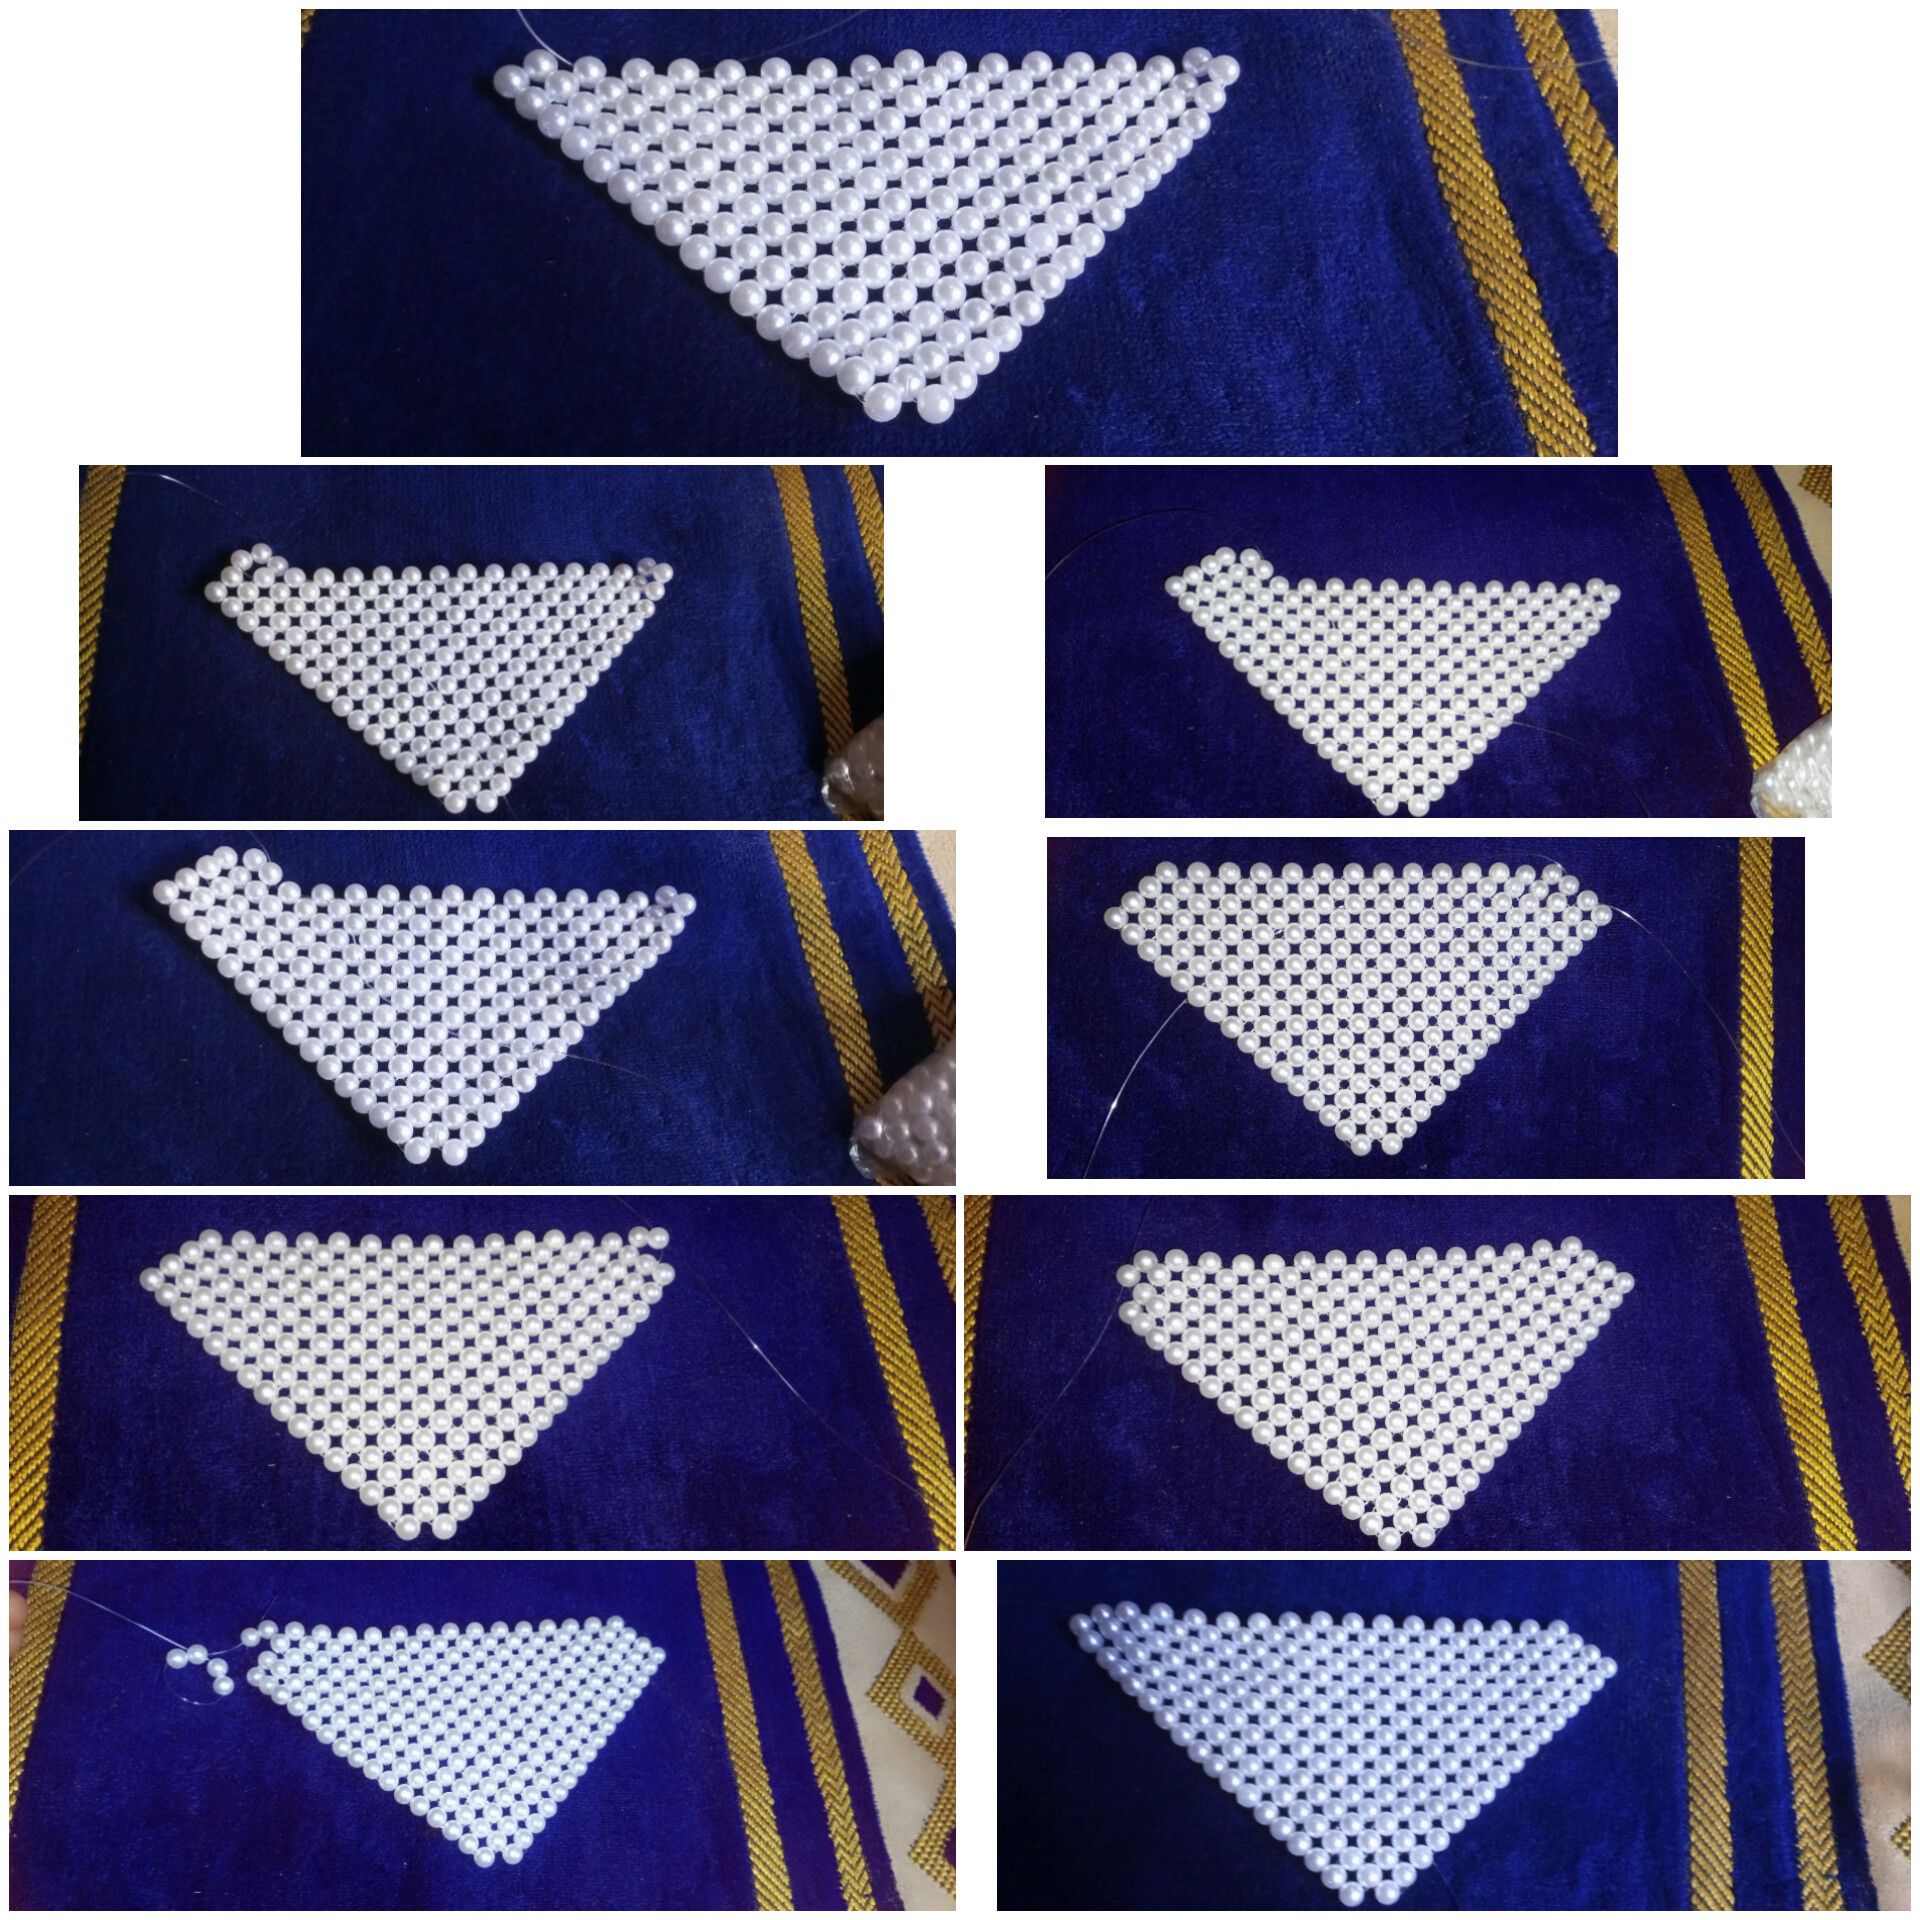
**Step 5:**
I started to build on the longer side of the triangle, and this time I was reducing one side and increasing the other side until I had 19 rings of beads on the longer side.
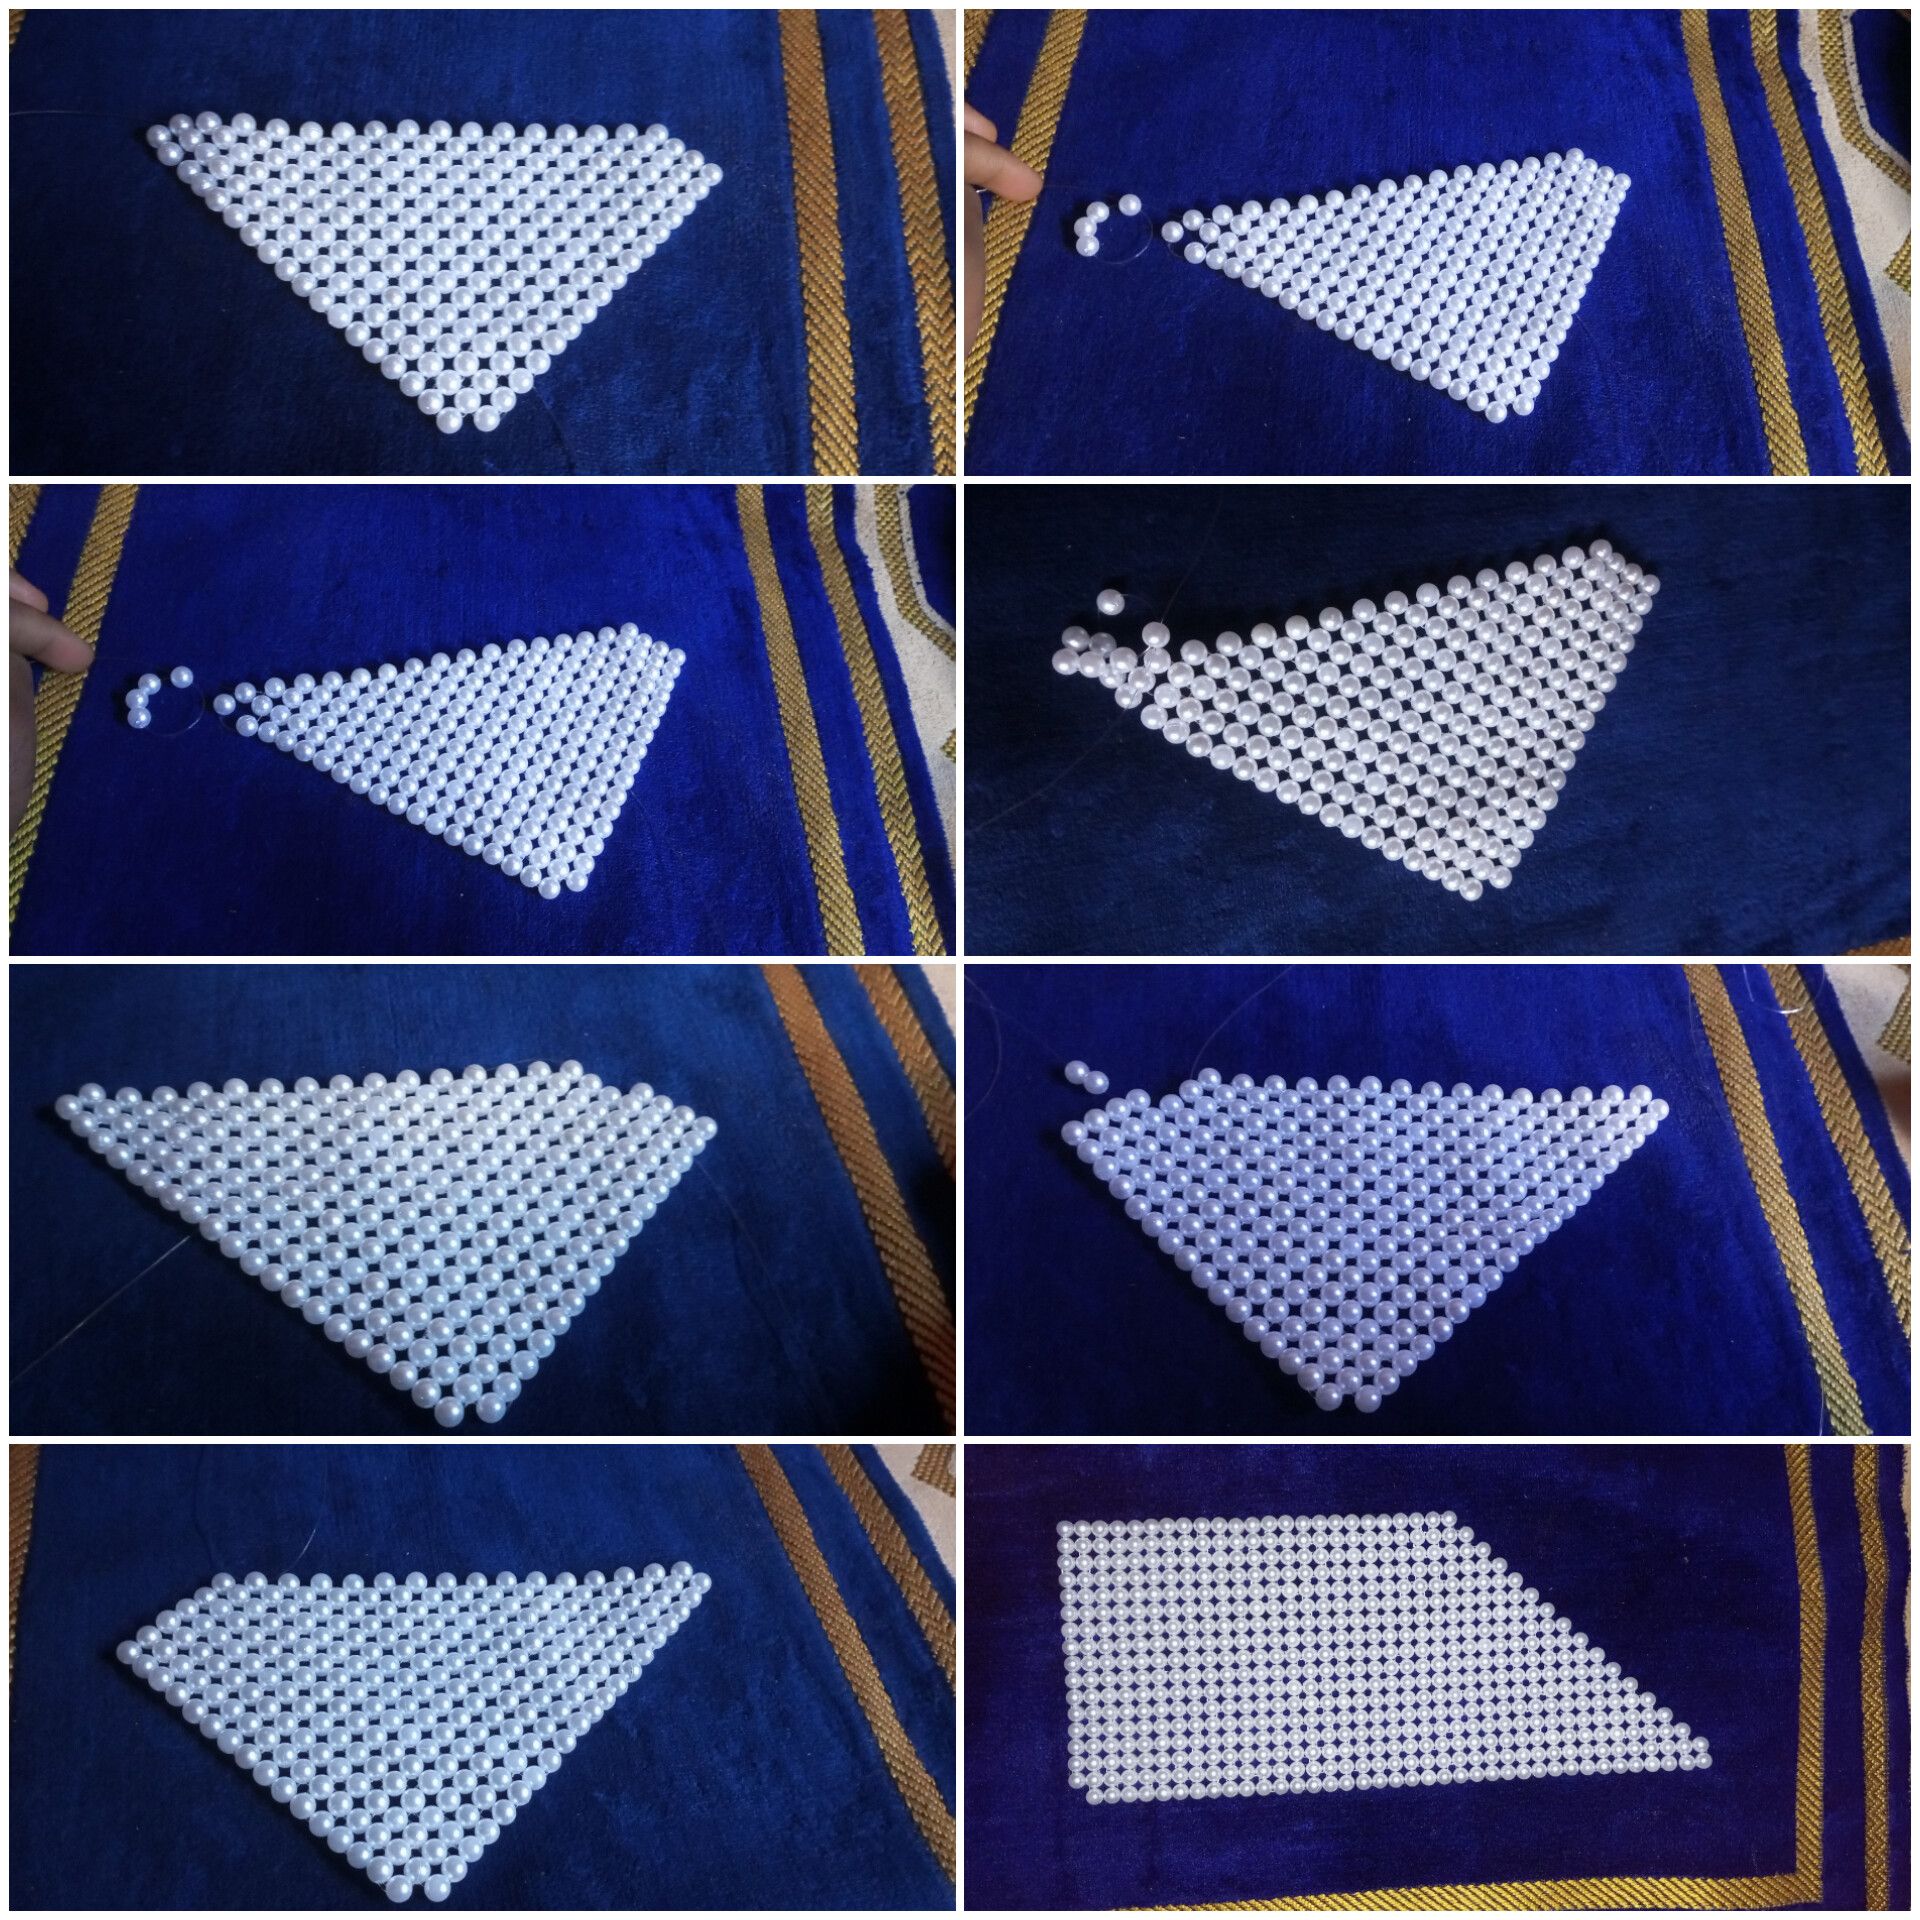
**Step 6:**
I went ahead to build the last part of the angle to make it a rectangle, 16 by 41.
**Step 7:**
I counted 15 beads on each side, marked it with a little cut-out fishing line, and then started building the side of the bag on the marked-out line.
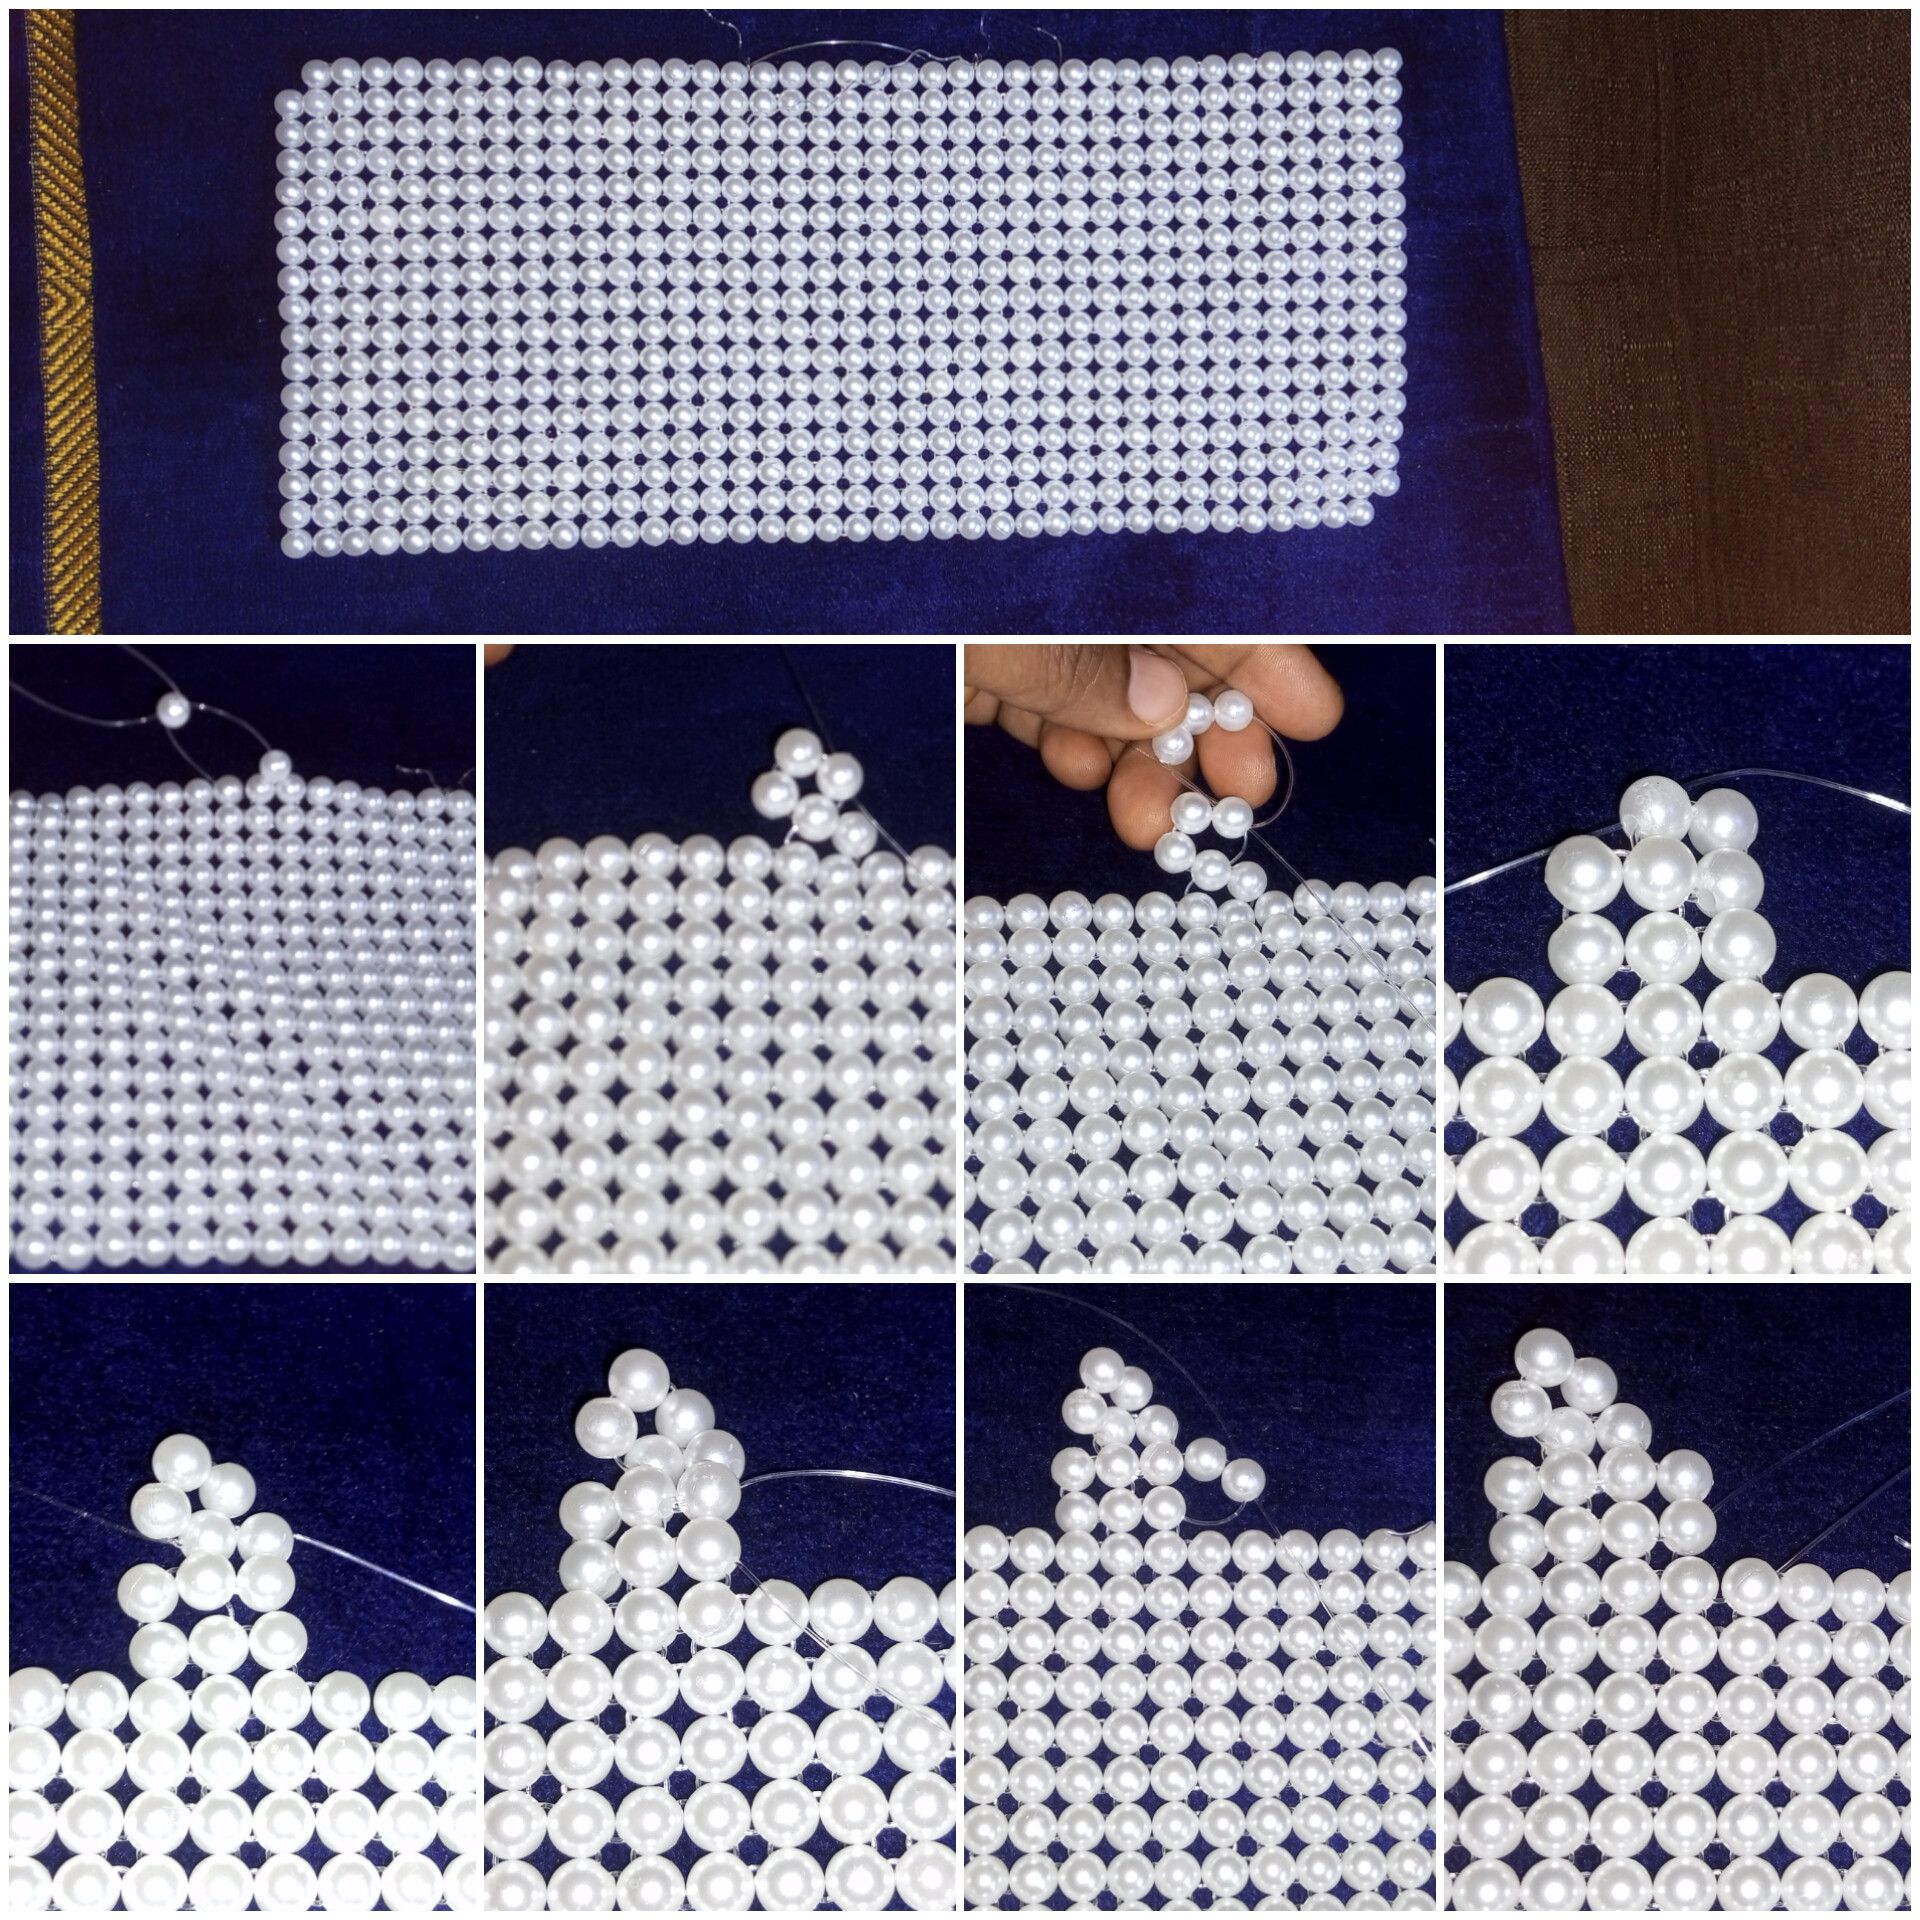
This is what it's looking like after building one side.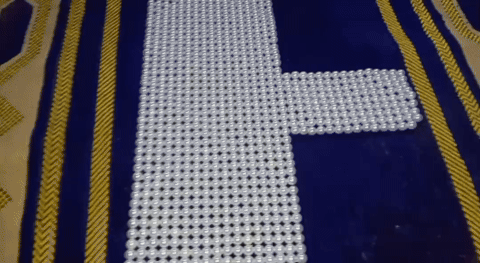
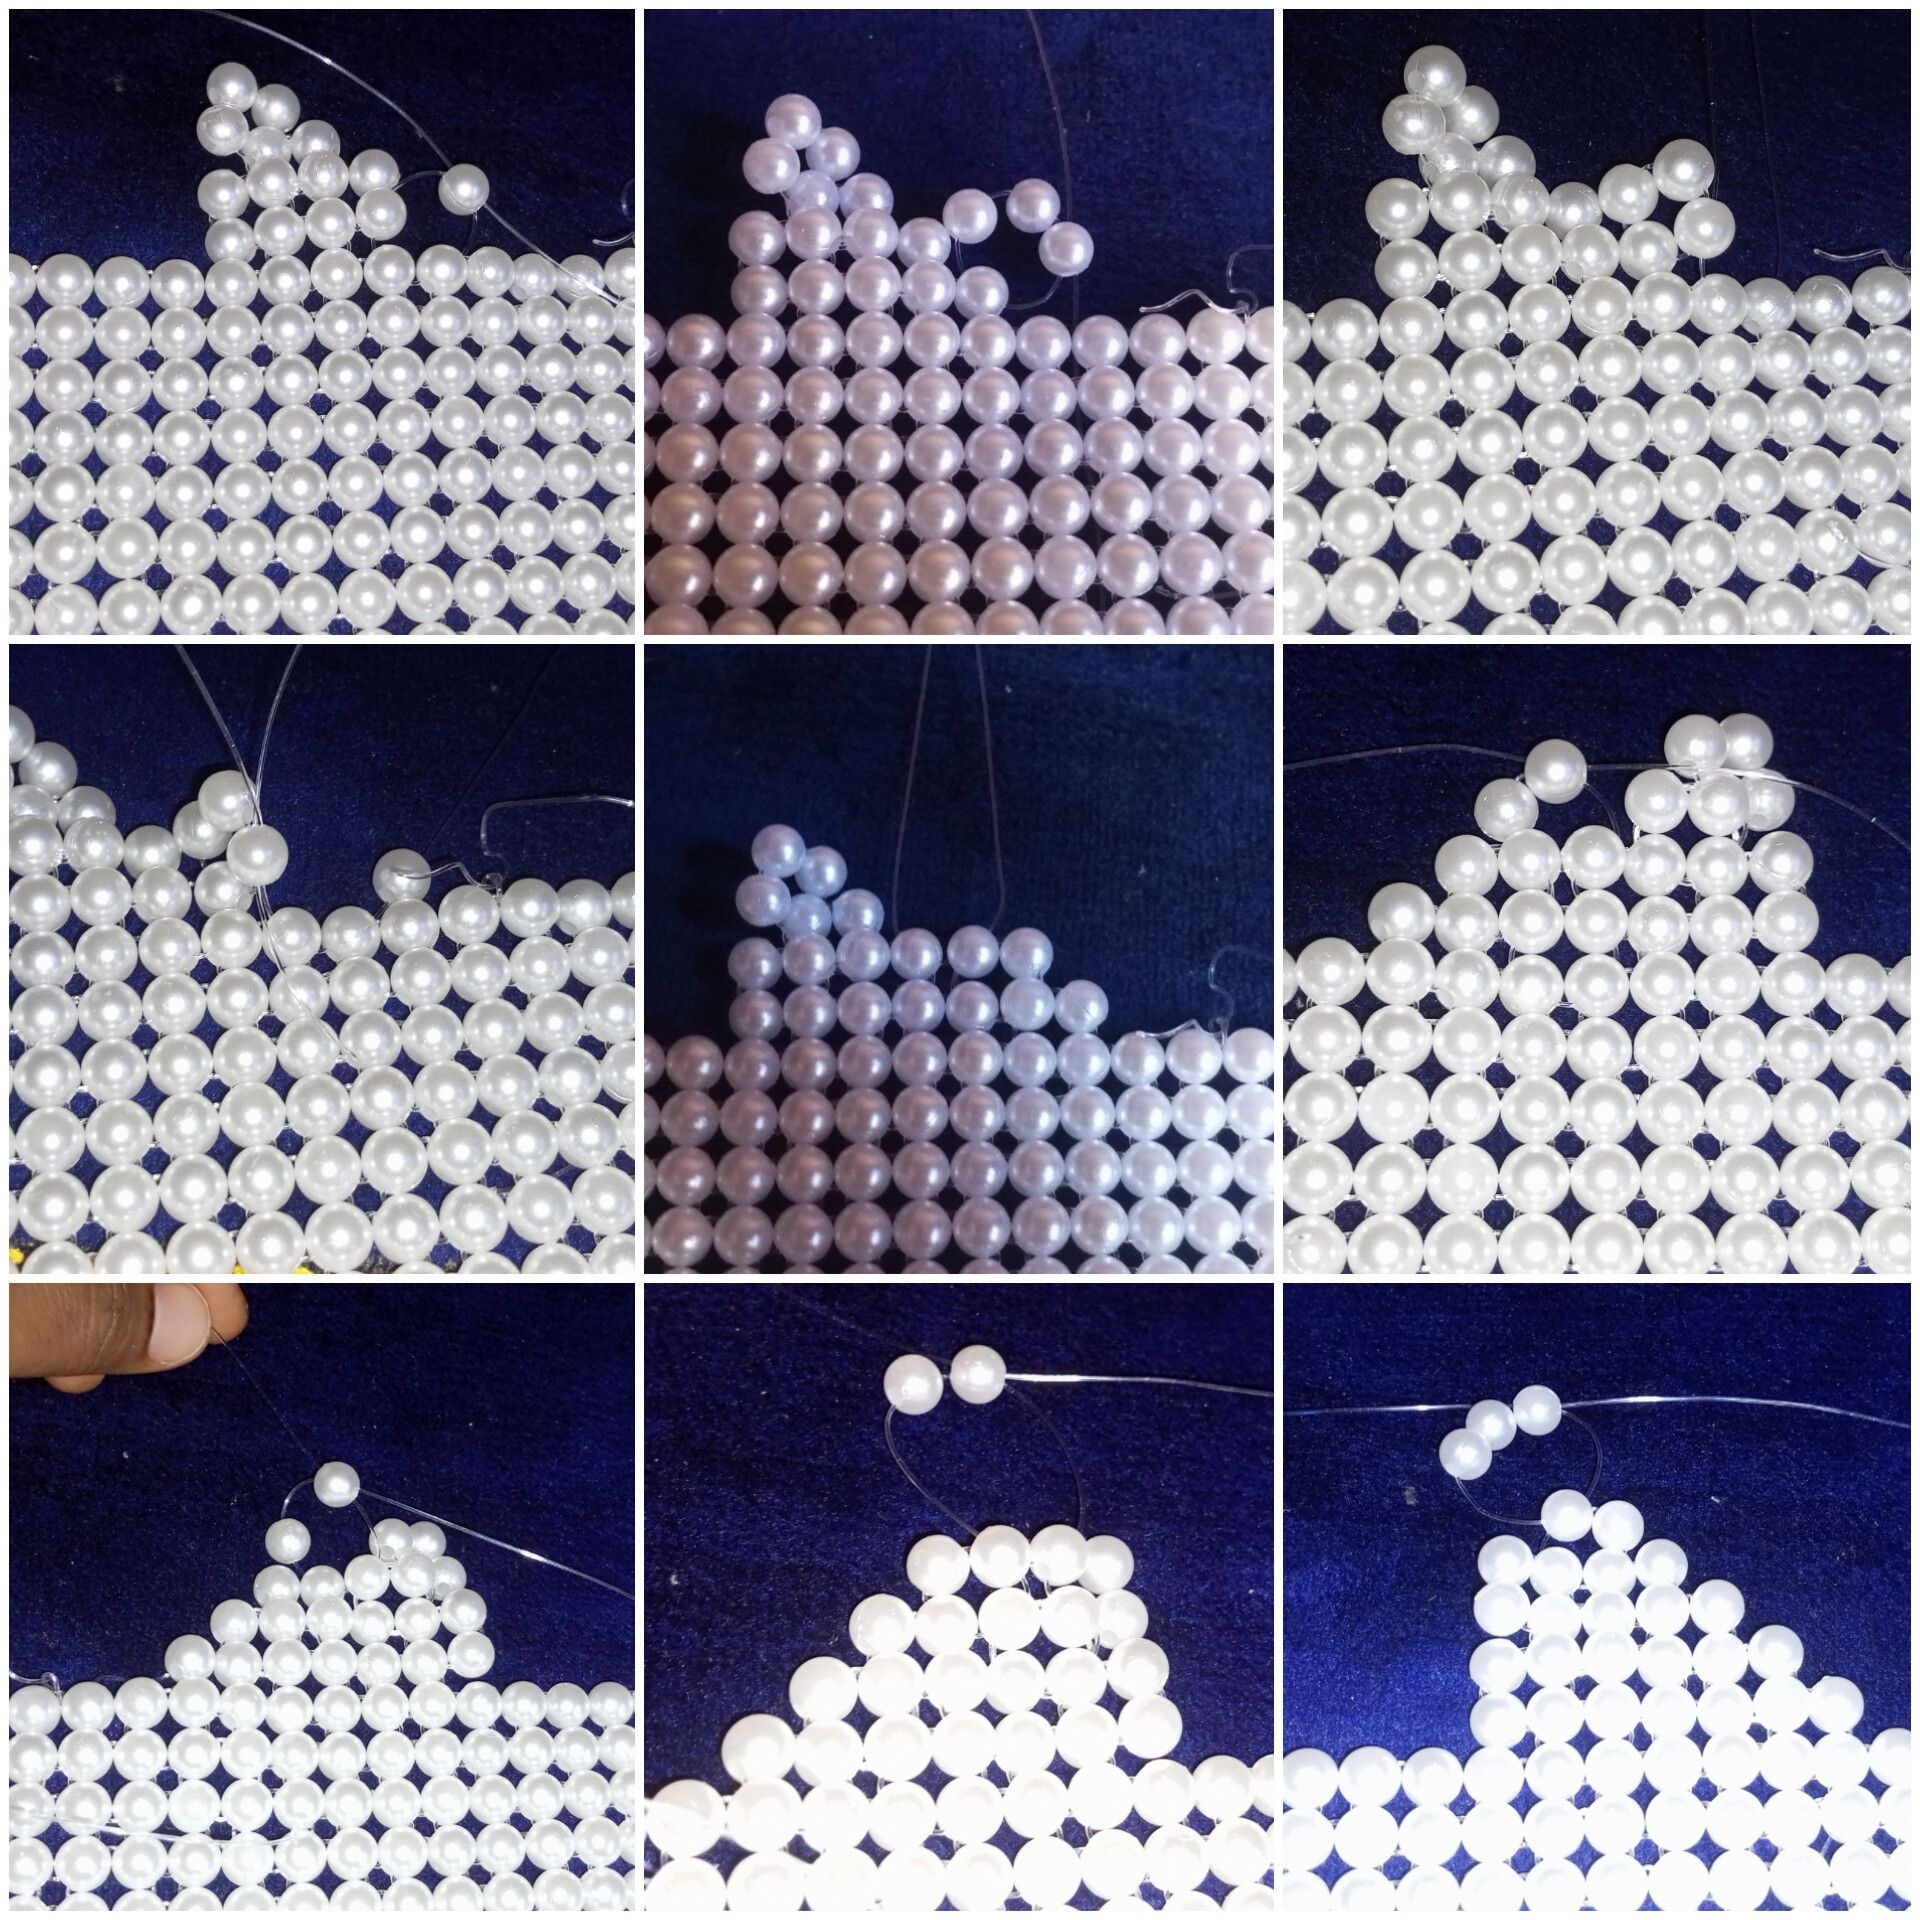
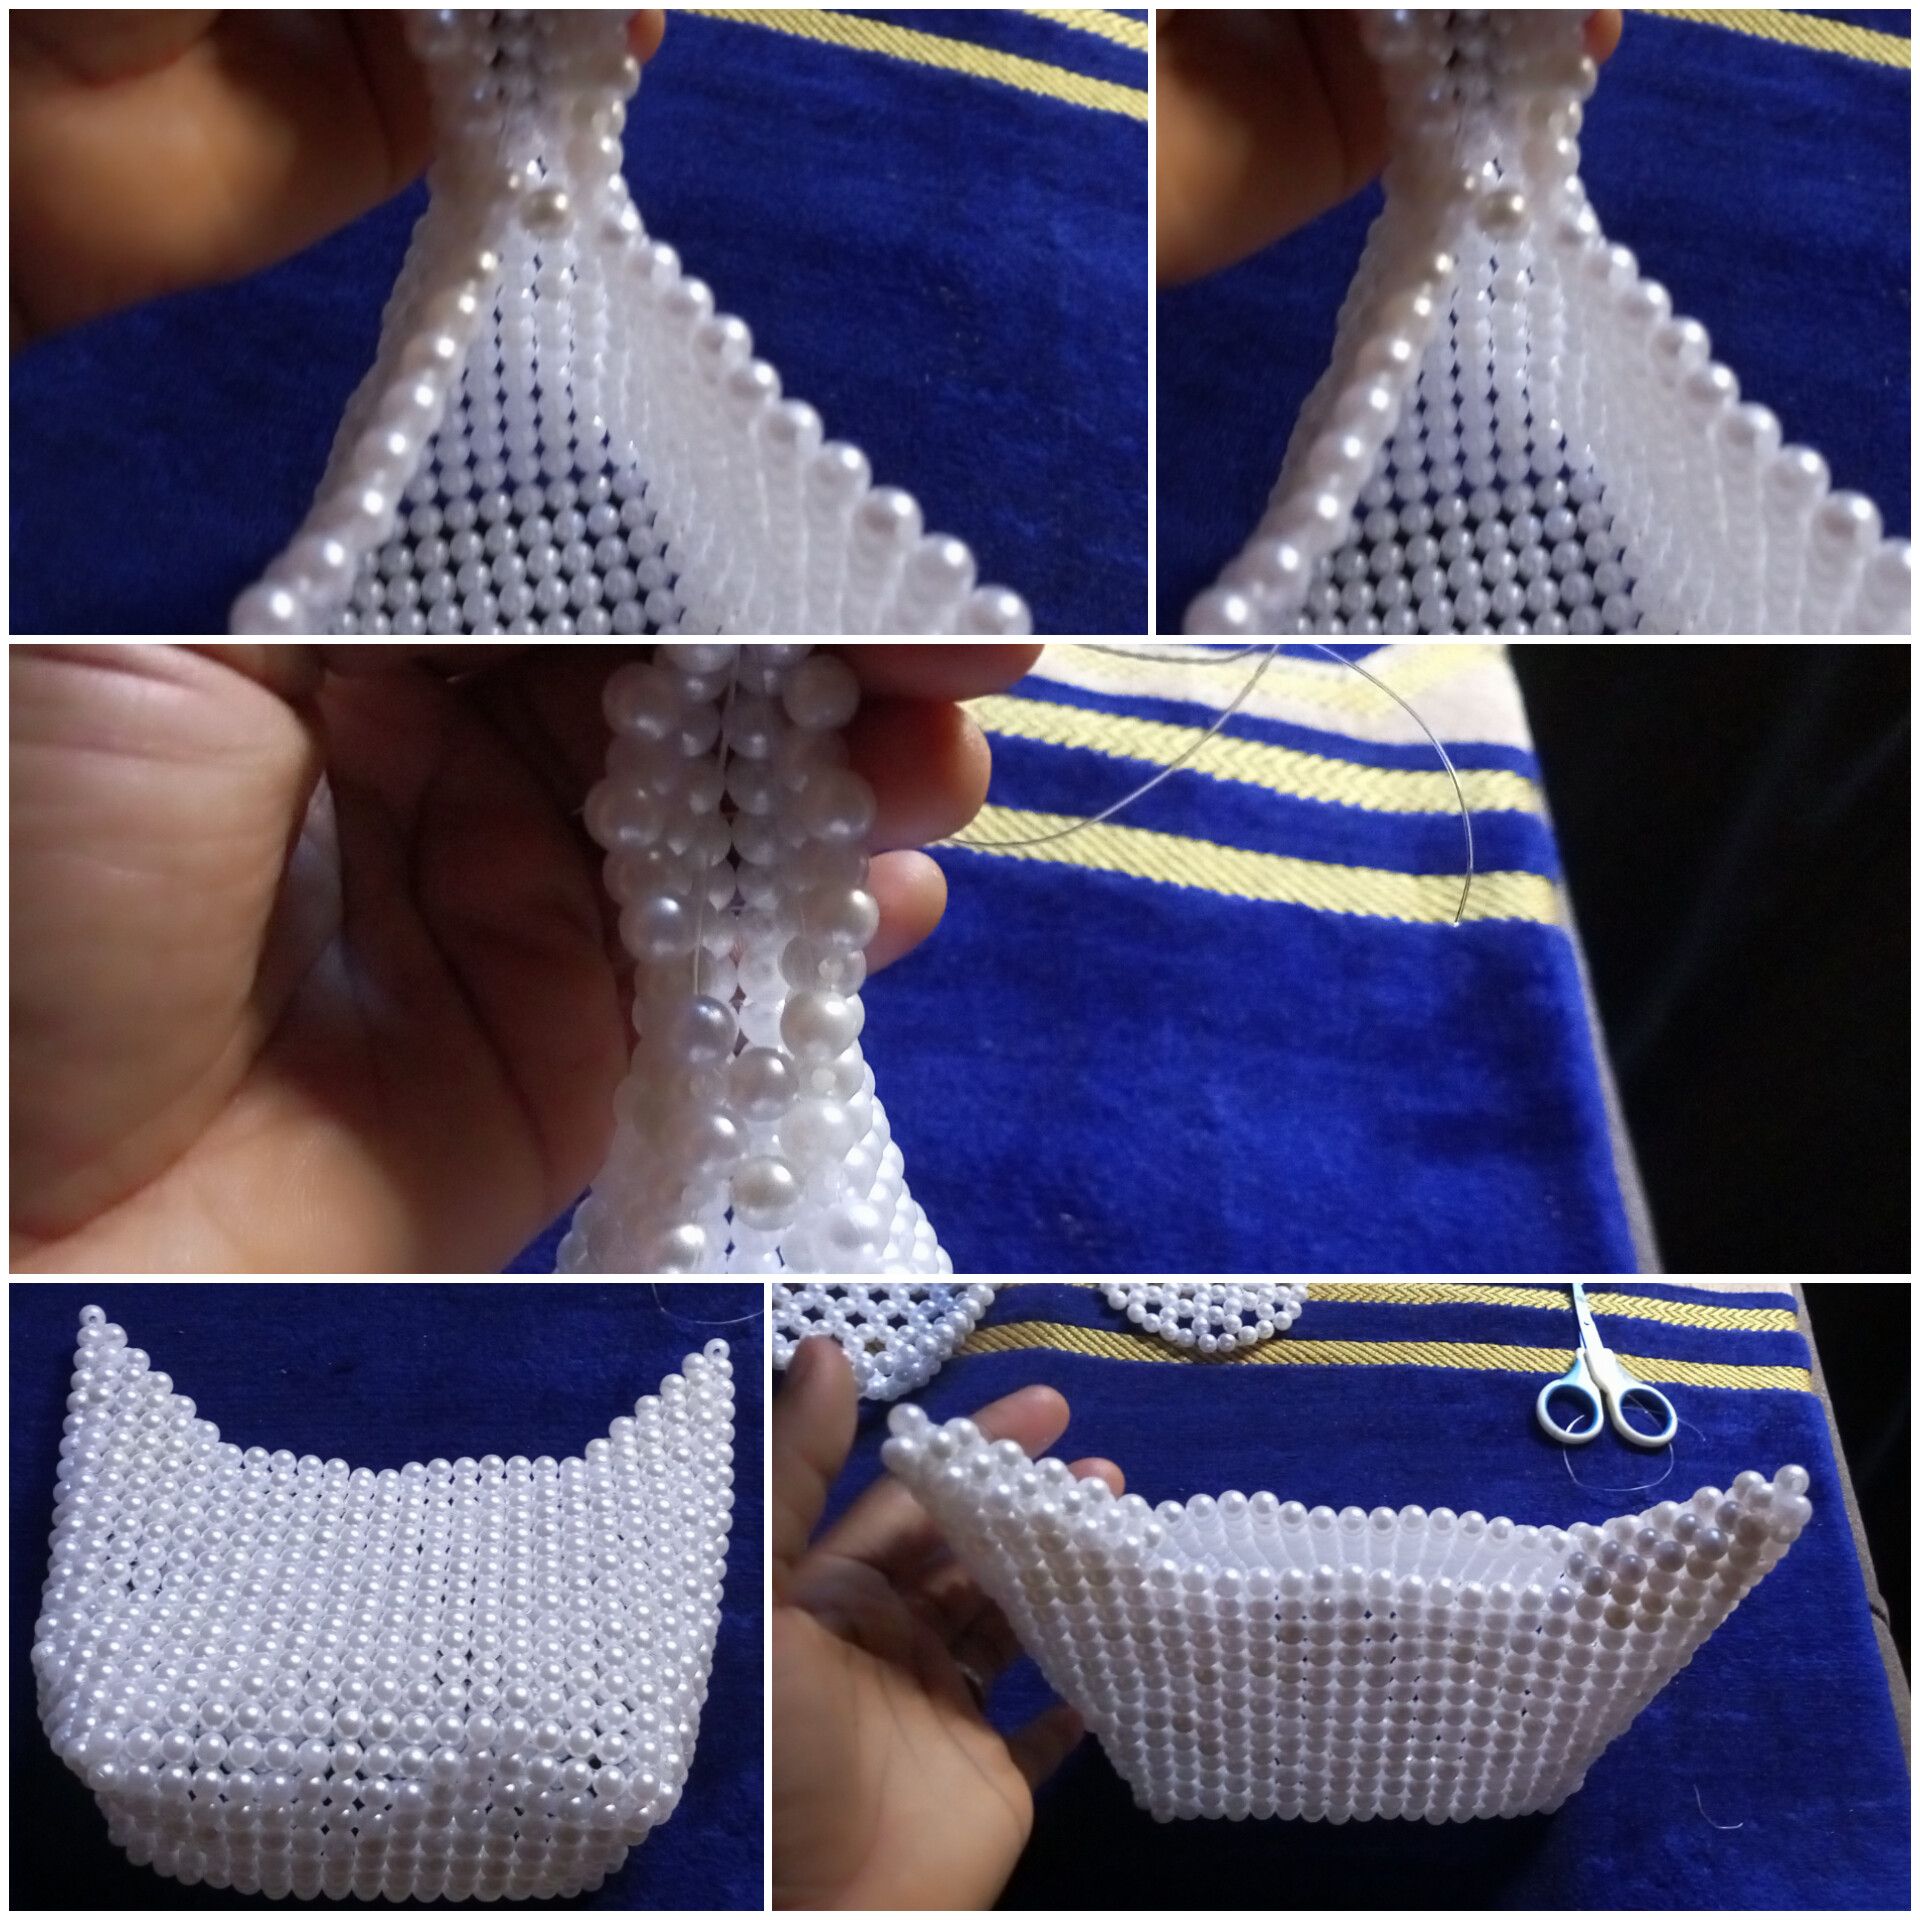
**Step 8:**
I went ahead to build the other three sides and then went ahead to join the four sides with a new fishing line.
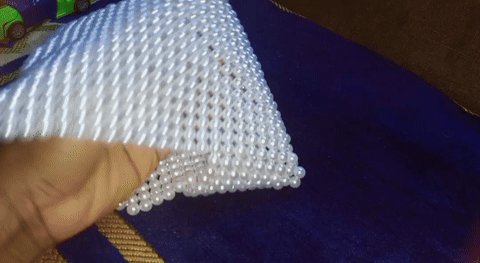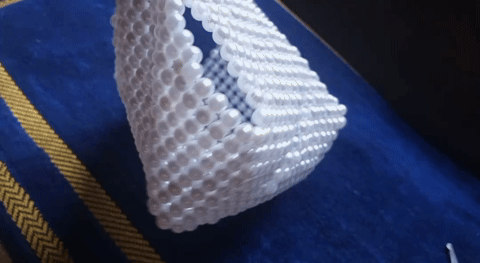
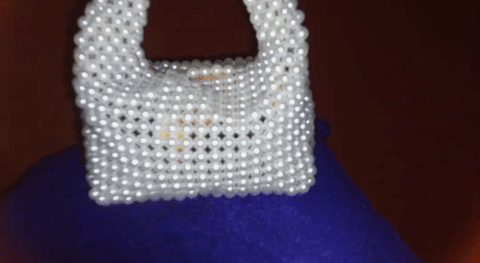
This is what our bag looks like after joining the four sides together.
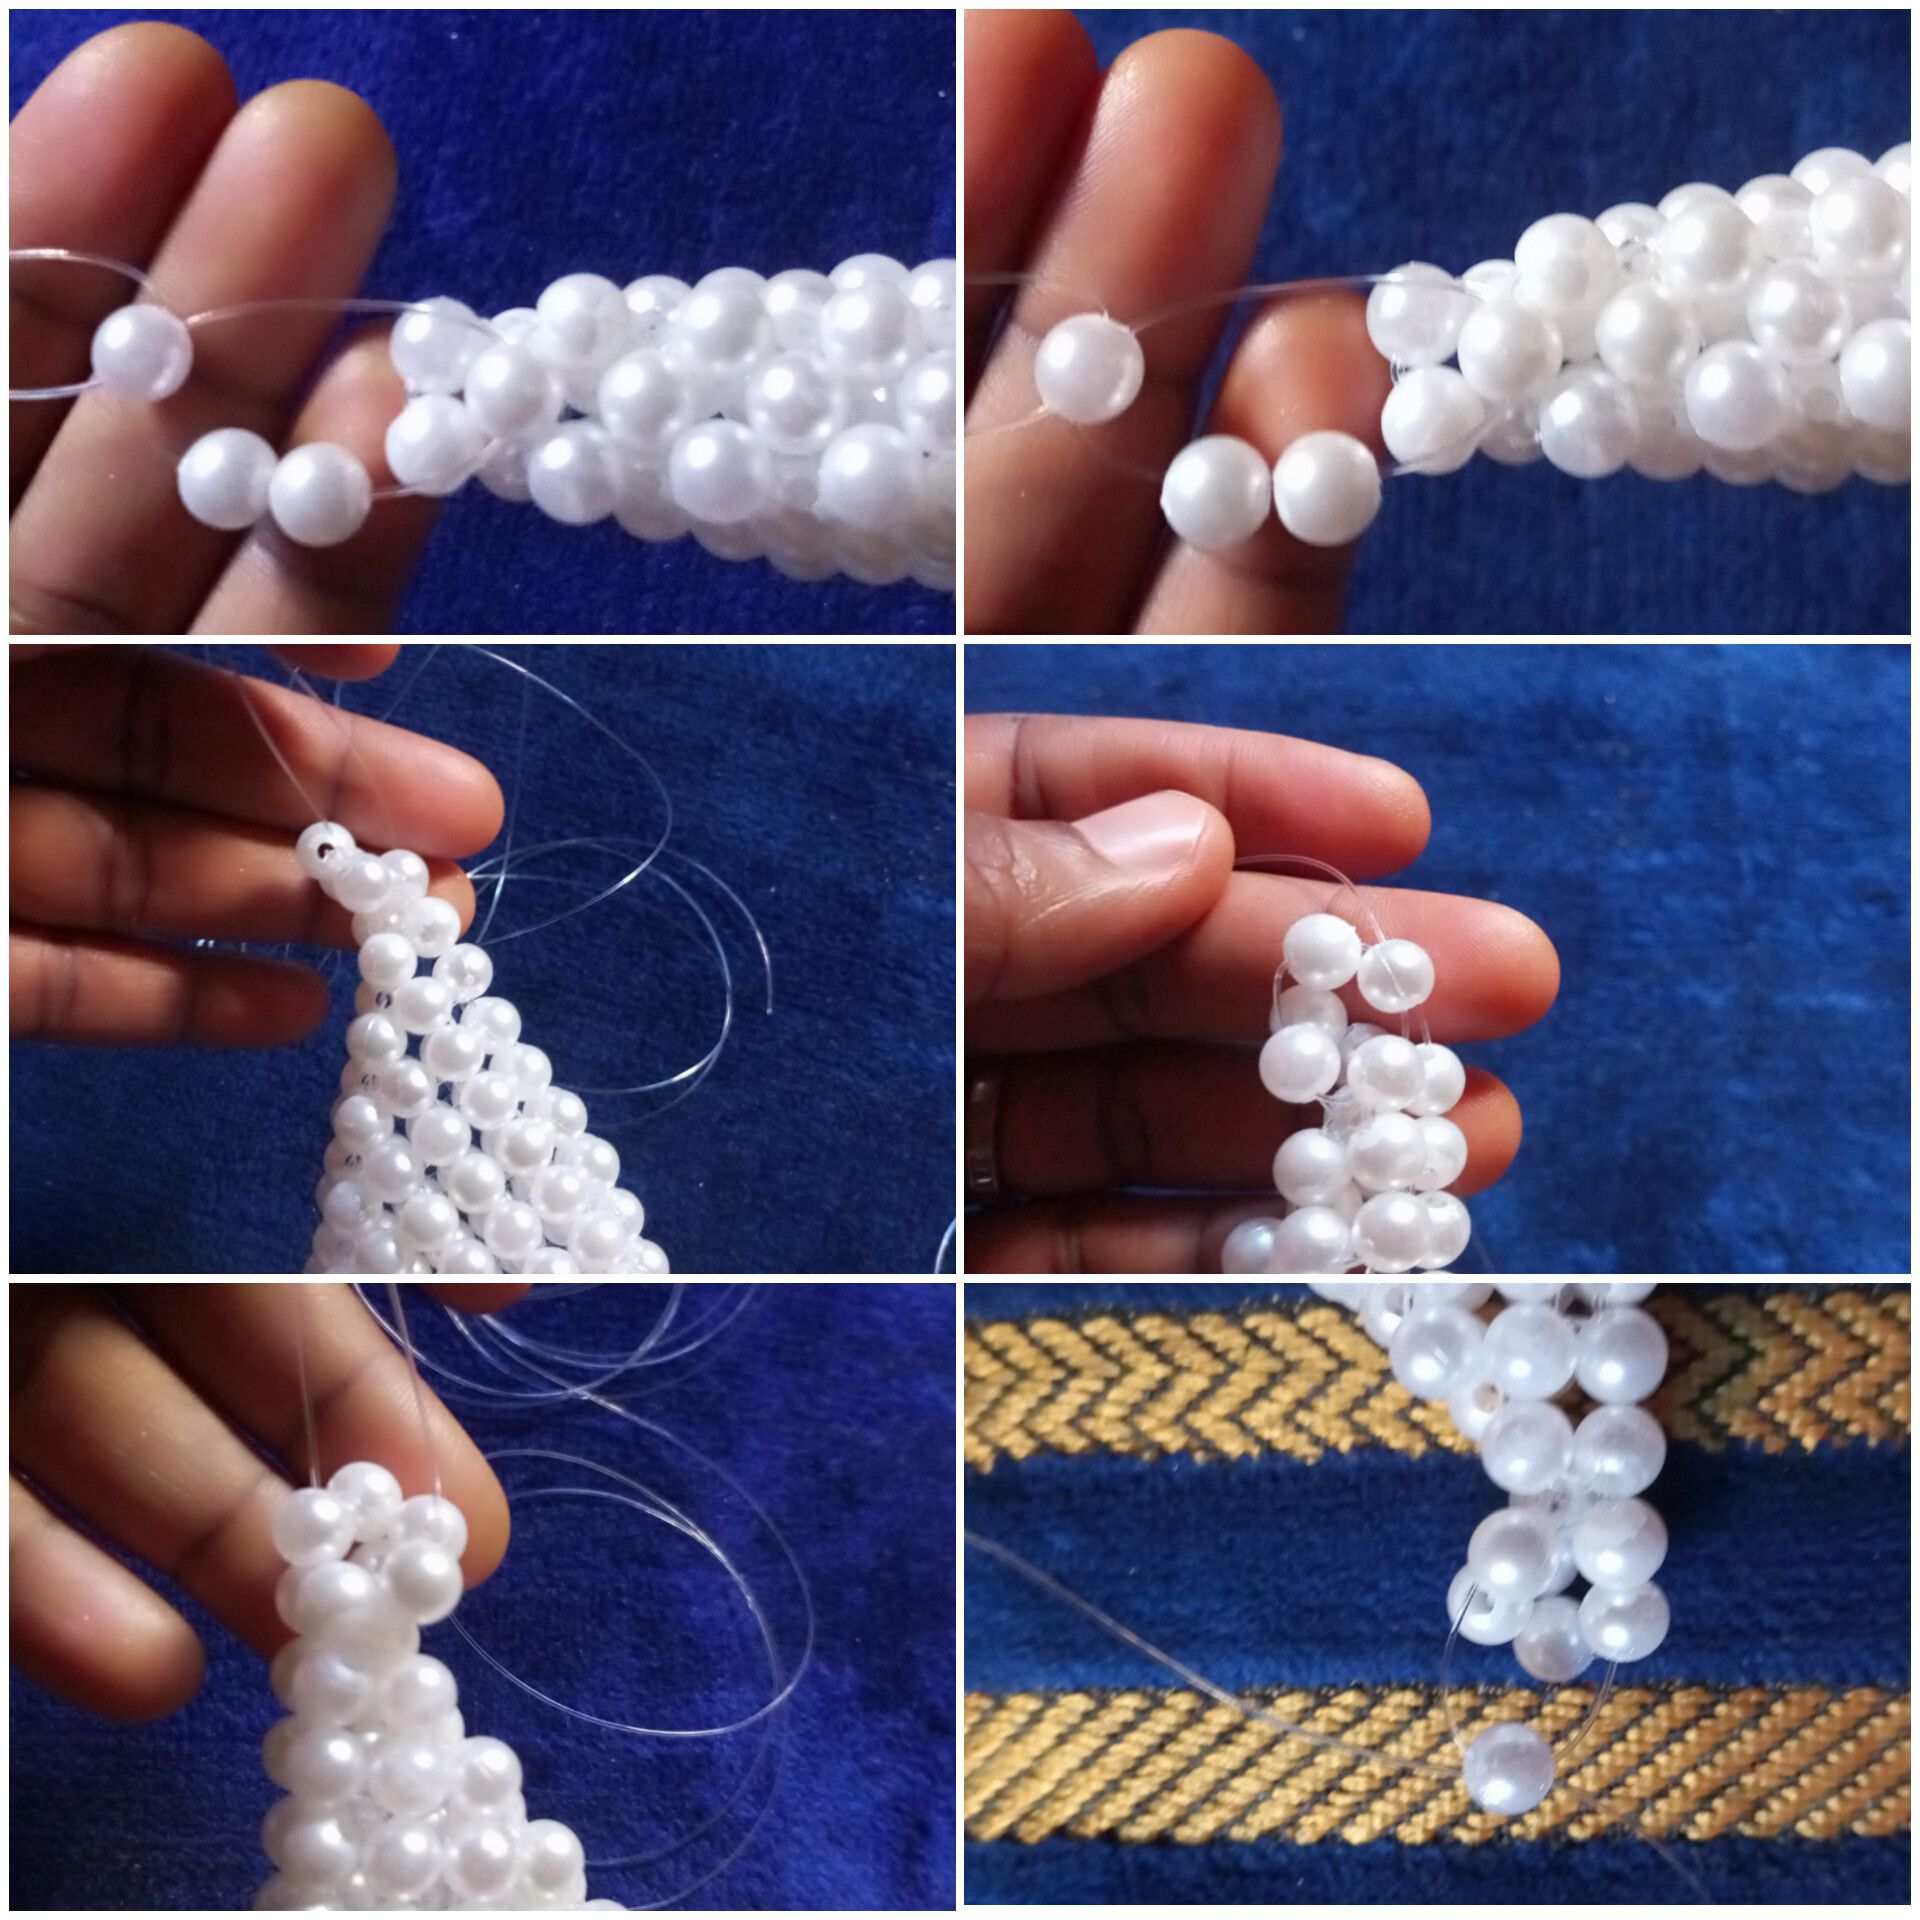
**Step 9:**
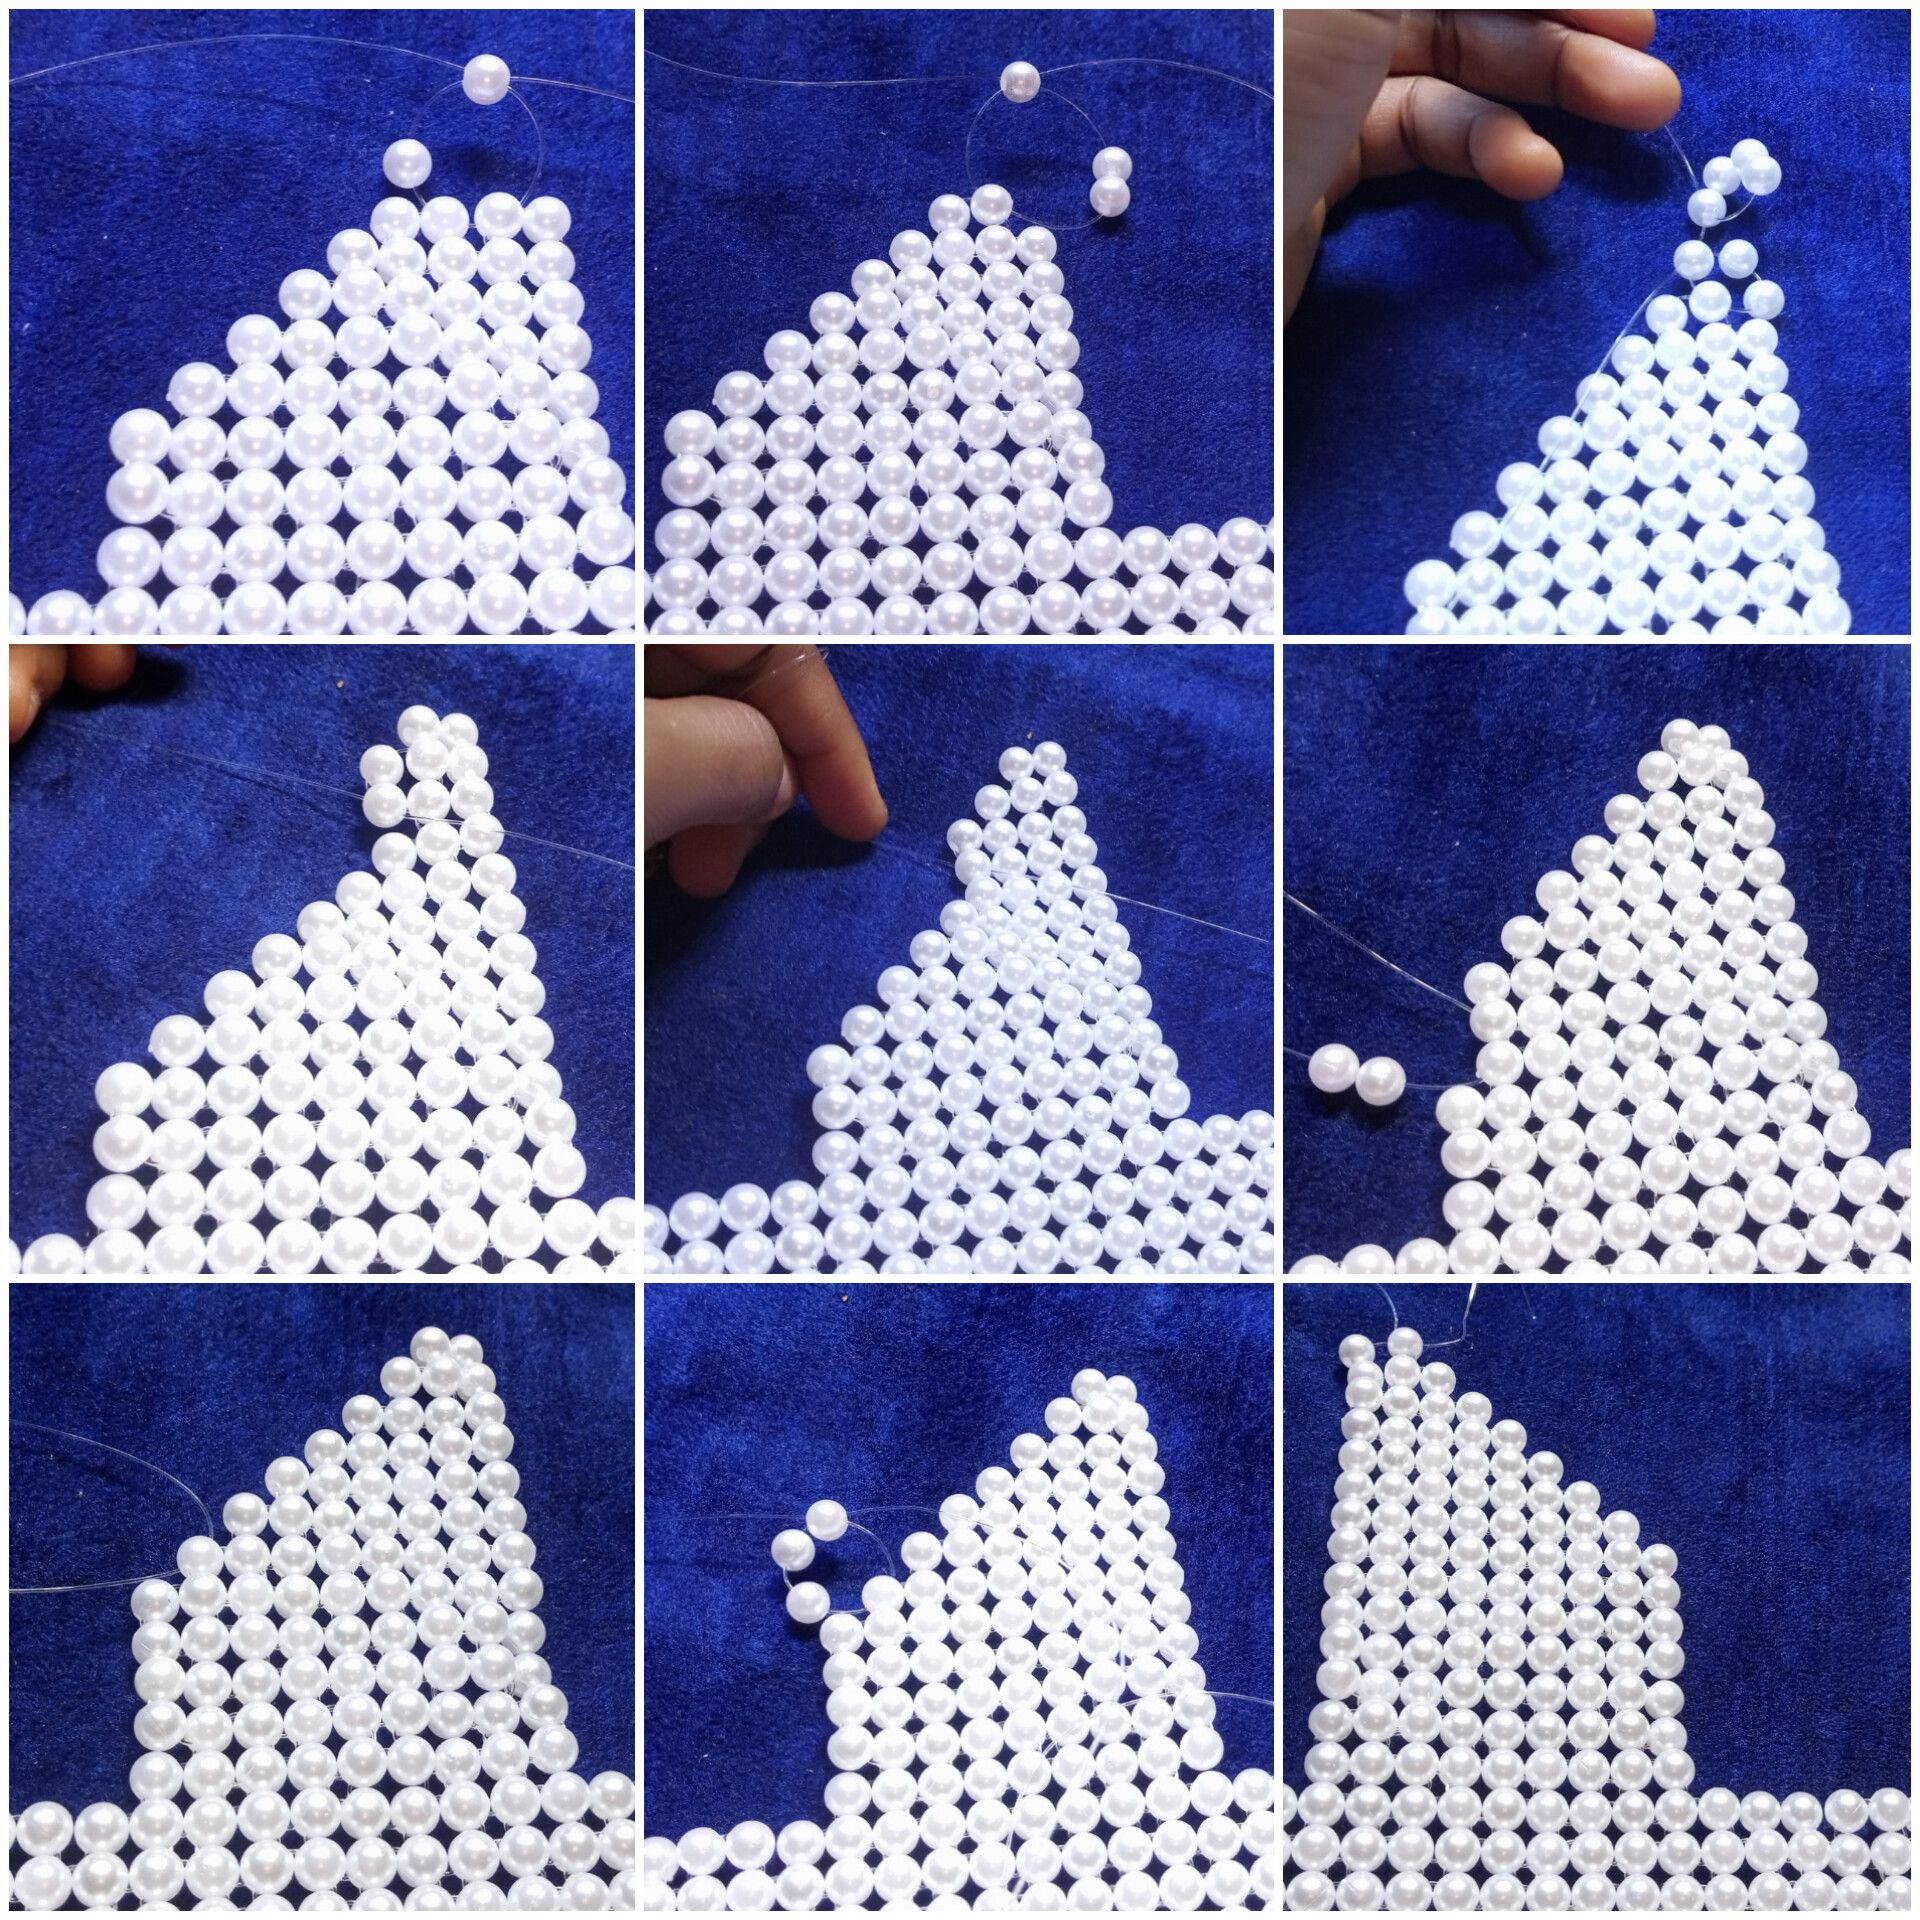
Here I started to build the handle by first raising the middle sides of the bag.
And reducing the sides until I have two beads left at the top

Here, I simply weaved six beads from down to up to form the handle of the bag.
I added two rings of beads at the top of the hand and went ahead to join the two hands with three size 14 beads.
And our beautiful trendy bag is ready to be rocked by my valuable client, and I think I will be making one for myself. 😊
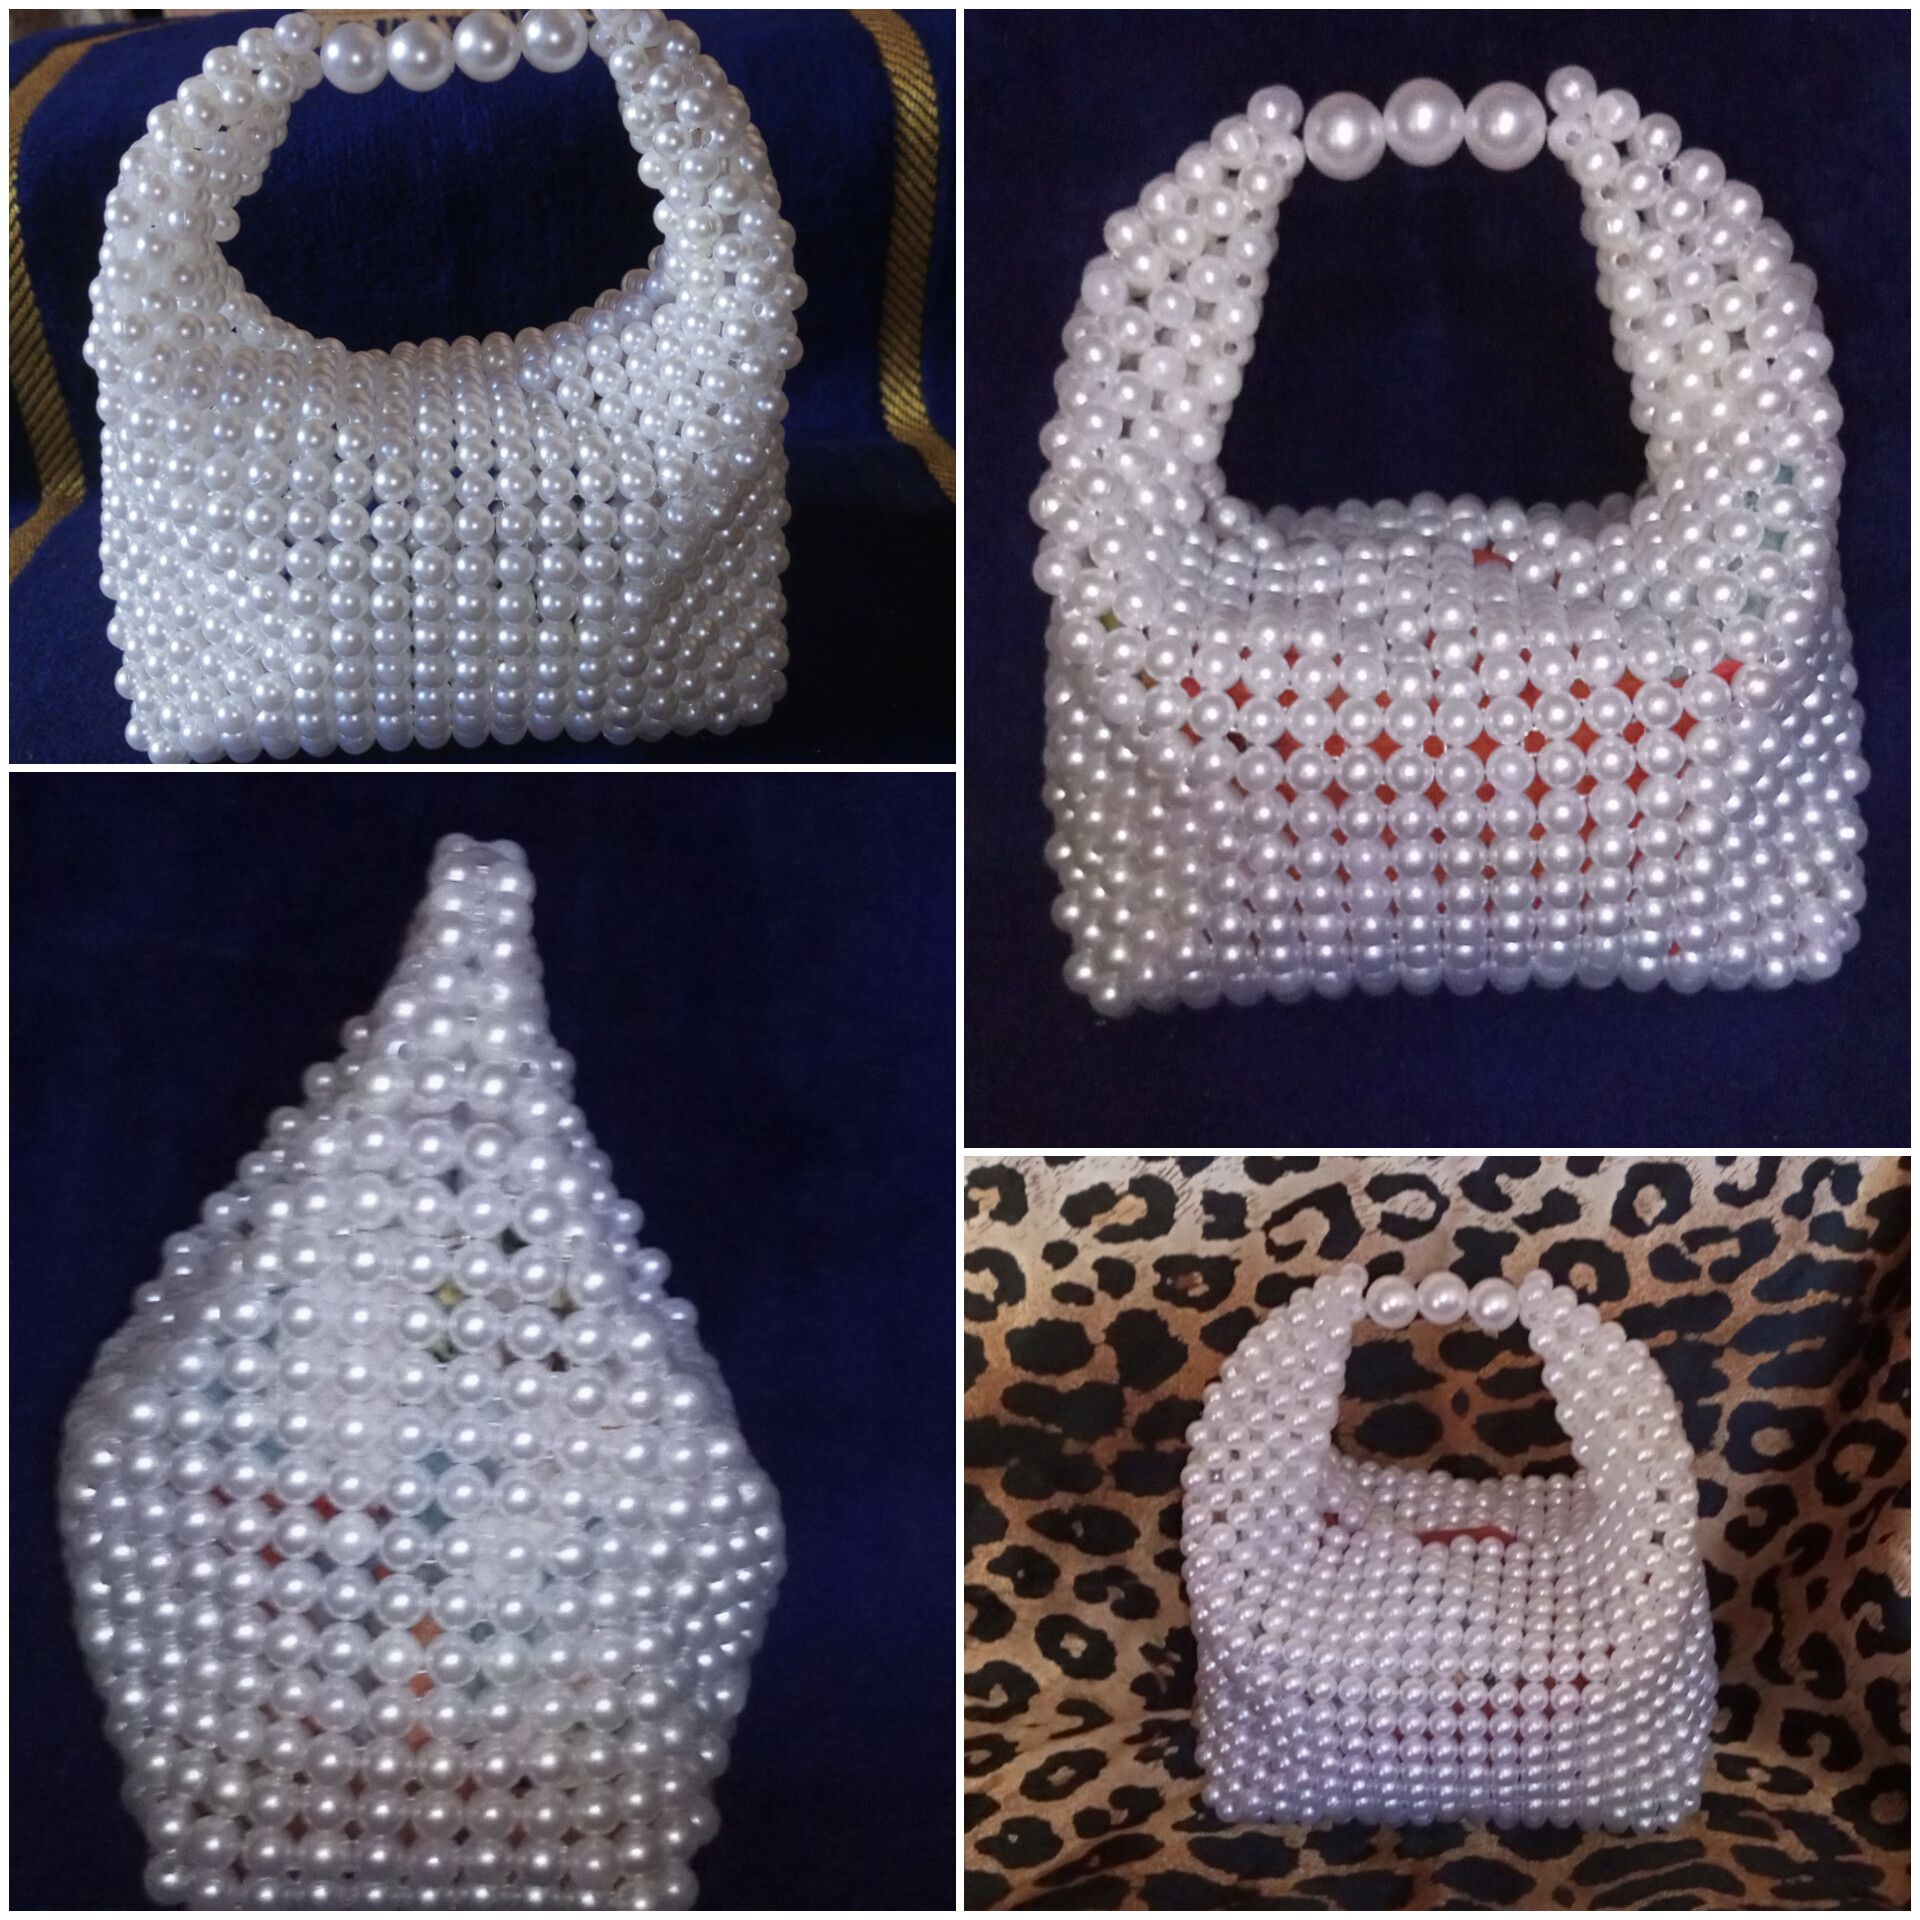
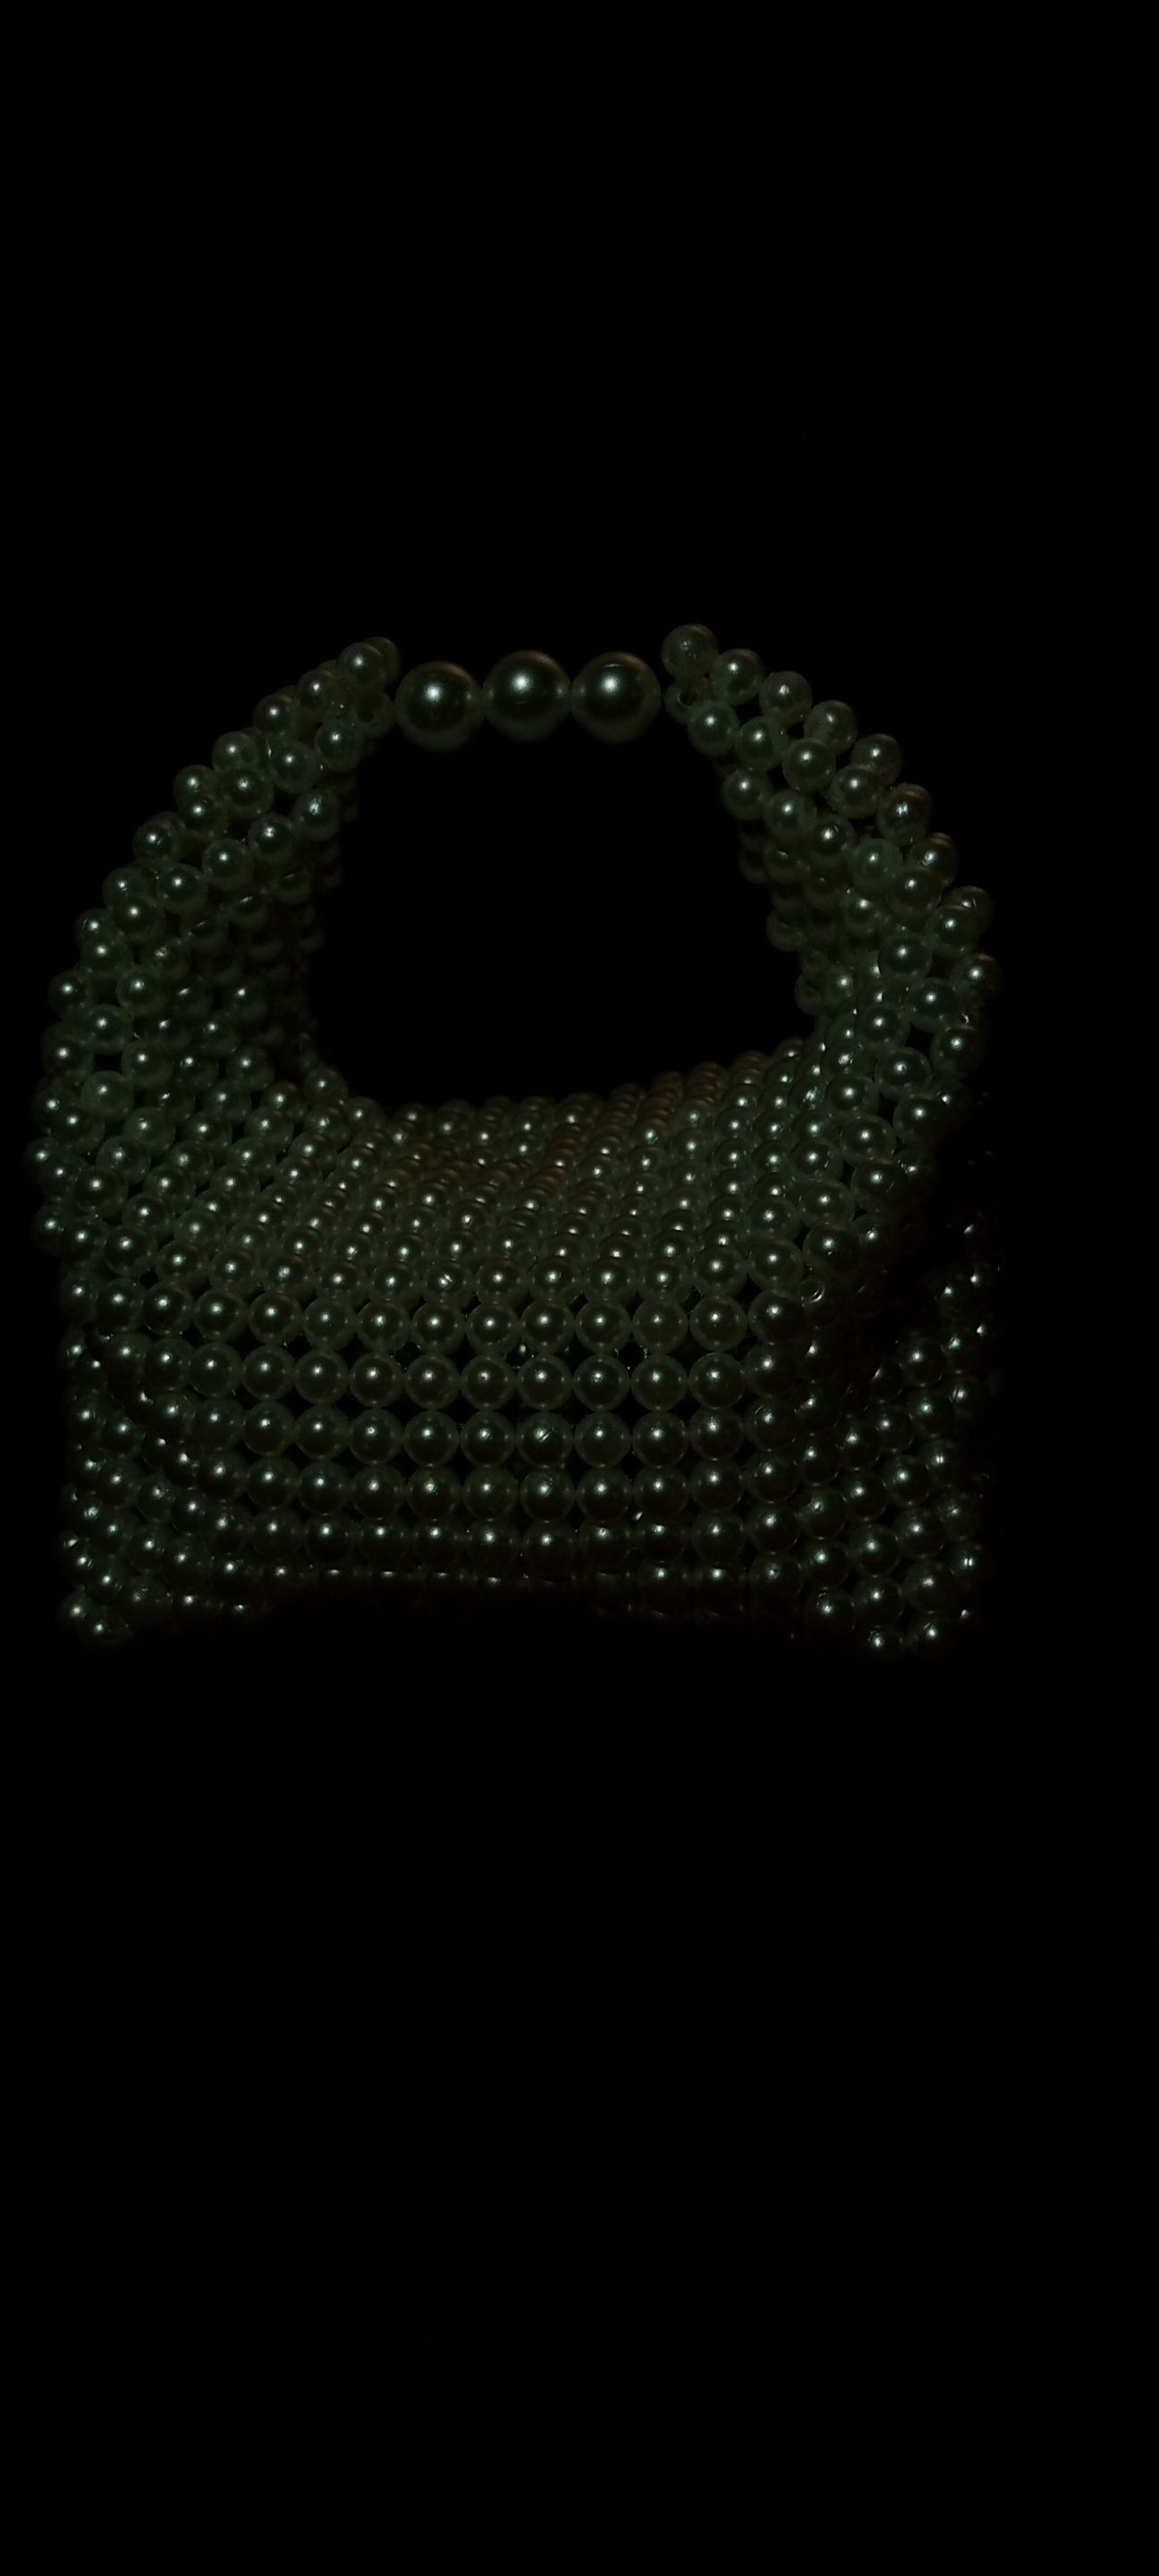
It glows in the dark, hehe.
Thank you very much, guys; this will be all regarding my latest beadwork, and I hope that you love it.
All images are mine @funshee✍️❣️.
Trendy Beaded Bag For A Client
@funshee
· 2025-09-01 16:01
· DIYHub
#hive-189641
#beadedbag
#diy
#ladiesofhive
#proofofbrain
#vyb
#waiv
#thingsidoforfun
#hive-engine
Payout: 0.000 HBD
Votes: 152
More interactions (upvote, reblog, reply) coming soon.