Hola, feliz semana para todos en esta gran comunidad. Les comento que he realizado en otras oportunidades agarra ollas, empleando diversos métodos de elaboración, con materiales que nos quedan de restos de trabajos con telas. Y de verdad, son muy útiles, pues no solo adornan, sino que también nos protegen de quemaduras.
Muchas veces cuando son así de lindos, trato de ni siquiera ensuciarlos, pero la verdad es que el trato que yo les doy es diferente a como lo hacen los demás integrantes de mi familia, pero eso no me quita las ganas de realizar diferentes métodos, para que sean de utilidad en mi cocina. Espero que tú también puedas elaborar unos, aquí te comparto el paso a paso.
Hello, happy week to everyone in this great community. I would like to tell you that I have made pot holders in other opportunities, using different methods of elaboration, with materials that we have left over from fabric work. And really, they are very useful, because they not only decorate, but also protect us from burns.
Many times when they are so cute, I try not to even get them dirty, but the truth is that the treatment I give them is different from how the other members of my family do it, but that doesn't stop me from wanting to make different methods, so that they are useful in my kitchen. I hope you can also make some, here I share with you the step by step.
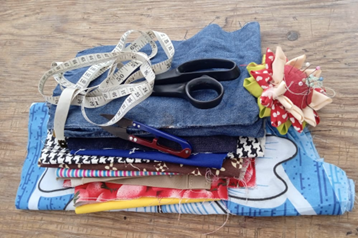
Lo primero es seleccionar el motivo según los materiales que tengas. Así que yo busqué estos materiales y como quiero hacer una hoja, me conviene la tela marrón y las verdes. Además de jean para fortalecer el acabado.
The first thing is to select the motif according to the materials you have. So I looked for these materials and since I want to make a leaf, brown fabric and green ones suit me. Plus jean to strengthen the finish.
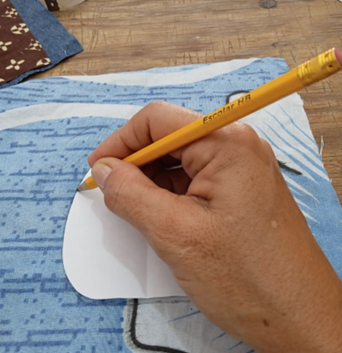
Marque dos rectángulos, en tela marrón y en una que quedará interna, aproximadamente de 25 x 27 cm.
Mark two rectangles, on brown fabric and on one that will remain inside, approximately 25 x 27 cm.
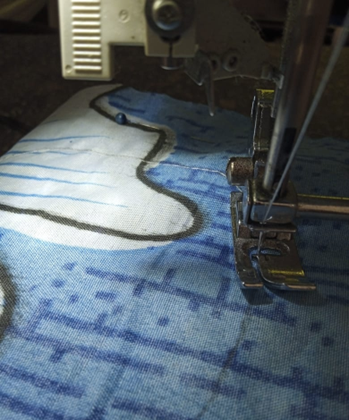
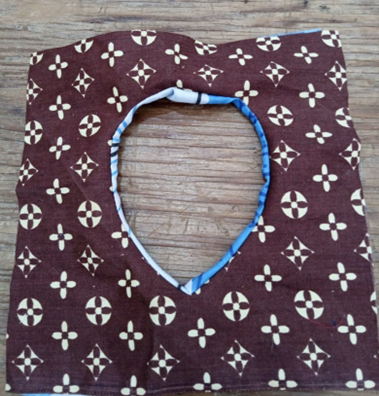
Remarqué la forma deseada como una hoja, pasé con la maquina puntada recta enfrentados revés con revés, haciendo la forma de la hoja. Hago un corte por toda la orilla de la costura y luego lo meto por donde corté para formar la figura. Como te muestro. Para que quede bien, debo pasar plancha.
I stitched the desired shape as a leaf, and with the straight stitch machine, I stitched back to back, making the shape of the leaf. I make a cut all along the edge of the seam and then I put it through where I cut to form the shape. As I show you. To make it look good, I have to iron it.
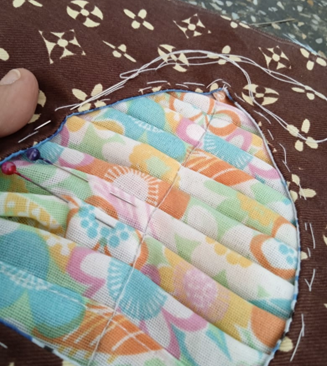
Ahora inicia el otro paso, con la tela verde. Lo que realicé fue llevarla a la maquina y hacer unos pliegues que será el centro de la hoja, tratando que fueran del mismo tamaño.
Now begins the other step, with the green fabric. What I did was to take it to the machine and make some folds that will be the center of the sheet, trying to make them the same size.

Luego de coloca de forma interna a la parte cocida anteriormente, haciendo los pliegues también en las orillas, esto lo realicé con hilván primero y luego lo llevé a la máquina.
Then it is placed internally to the previously sewn part, making the folds also on the edges, this I did with basting first and then I took it to the machine.
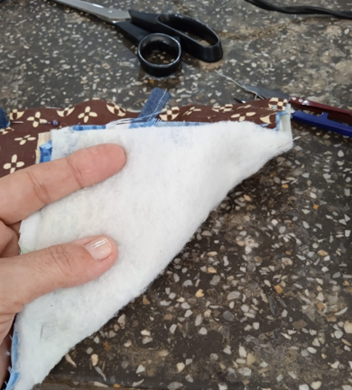
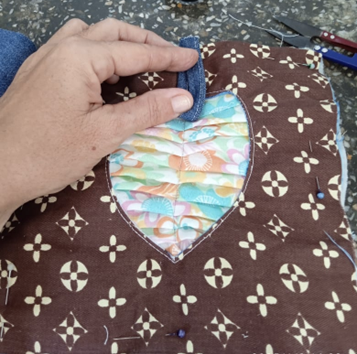
Le coloqué guata, y cerré, colocando también una tira cocida en jean para colgar. Además, pasé una costura de refuerzo por las orillas.
I placed wadding on it, and closed it, also placing a strip sewn in jean for hanging. In addition, I sewed a reinforcement seam around the edges.
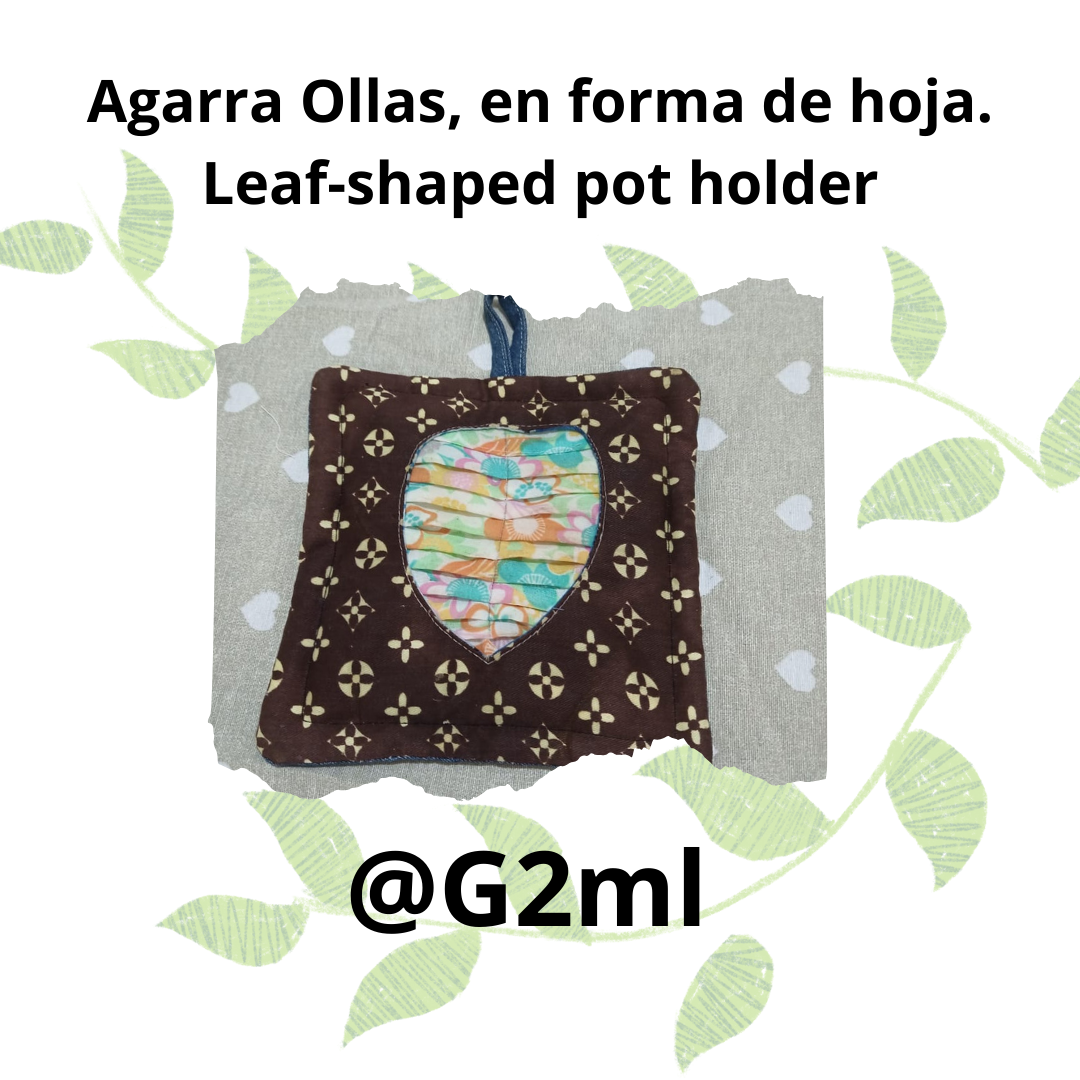
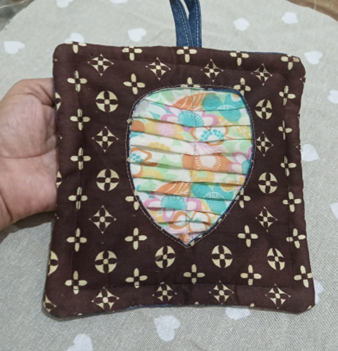
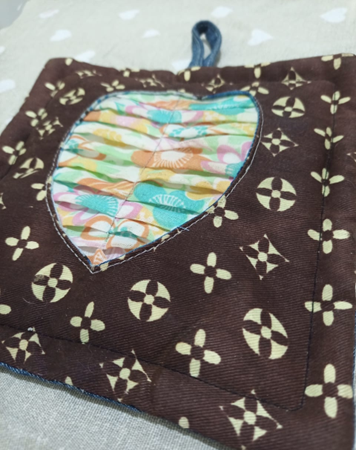
Así queda este tipo de agarra ollas, que además de lindo, es útil para nuestras labores en la cocina.
This is how this type of pot holder looks, which is not only beautiful, but also useful for our work in the kitchen.
Gracias por visitar mi blog. Todas las fotos son con el equipo Umidigi s3pro, la edición de la primera foto con Canva y el traductor es Deepl.
Thanks for visiting my blog. All photos are with Umidigi s3pro equipment, the editing of the first photo with Canva and the translator is Deepl.