Greetings, friends. Receiving gifts is always great, but more than receiving them, giving them is also great. Well, you may know that I'm a Lego fan, so when I saw all these Lego models, I felt the need to have them all, ha ha ha, or at least many of them in my room.
I've already bought several for myself and my girlfriend. Recently, I gave her this Mario Bros. set, and since she doesn't have the patience to build them, I built it for her as a gift.
>># Español
>>Saludos amigos. Recibir regalos siempre es genial, pero más que recibirlos, darlos también es genial. Pues bien, tal vez sepan que soy un fan de lego así que al conocer a todos estos modelos de legos me hizo sentir la necesidad de tenerlos todos jajaja o al menos a muchos en mi habitación.
>>
>>Ya he comprado varios para mi y mi novia, hace poco le regalé a ella este de Mario Bros y como ella no tiene paciencia para armarlos, yo se lo armé para regalárselo.
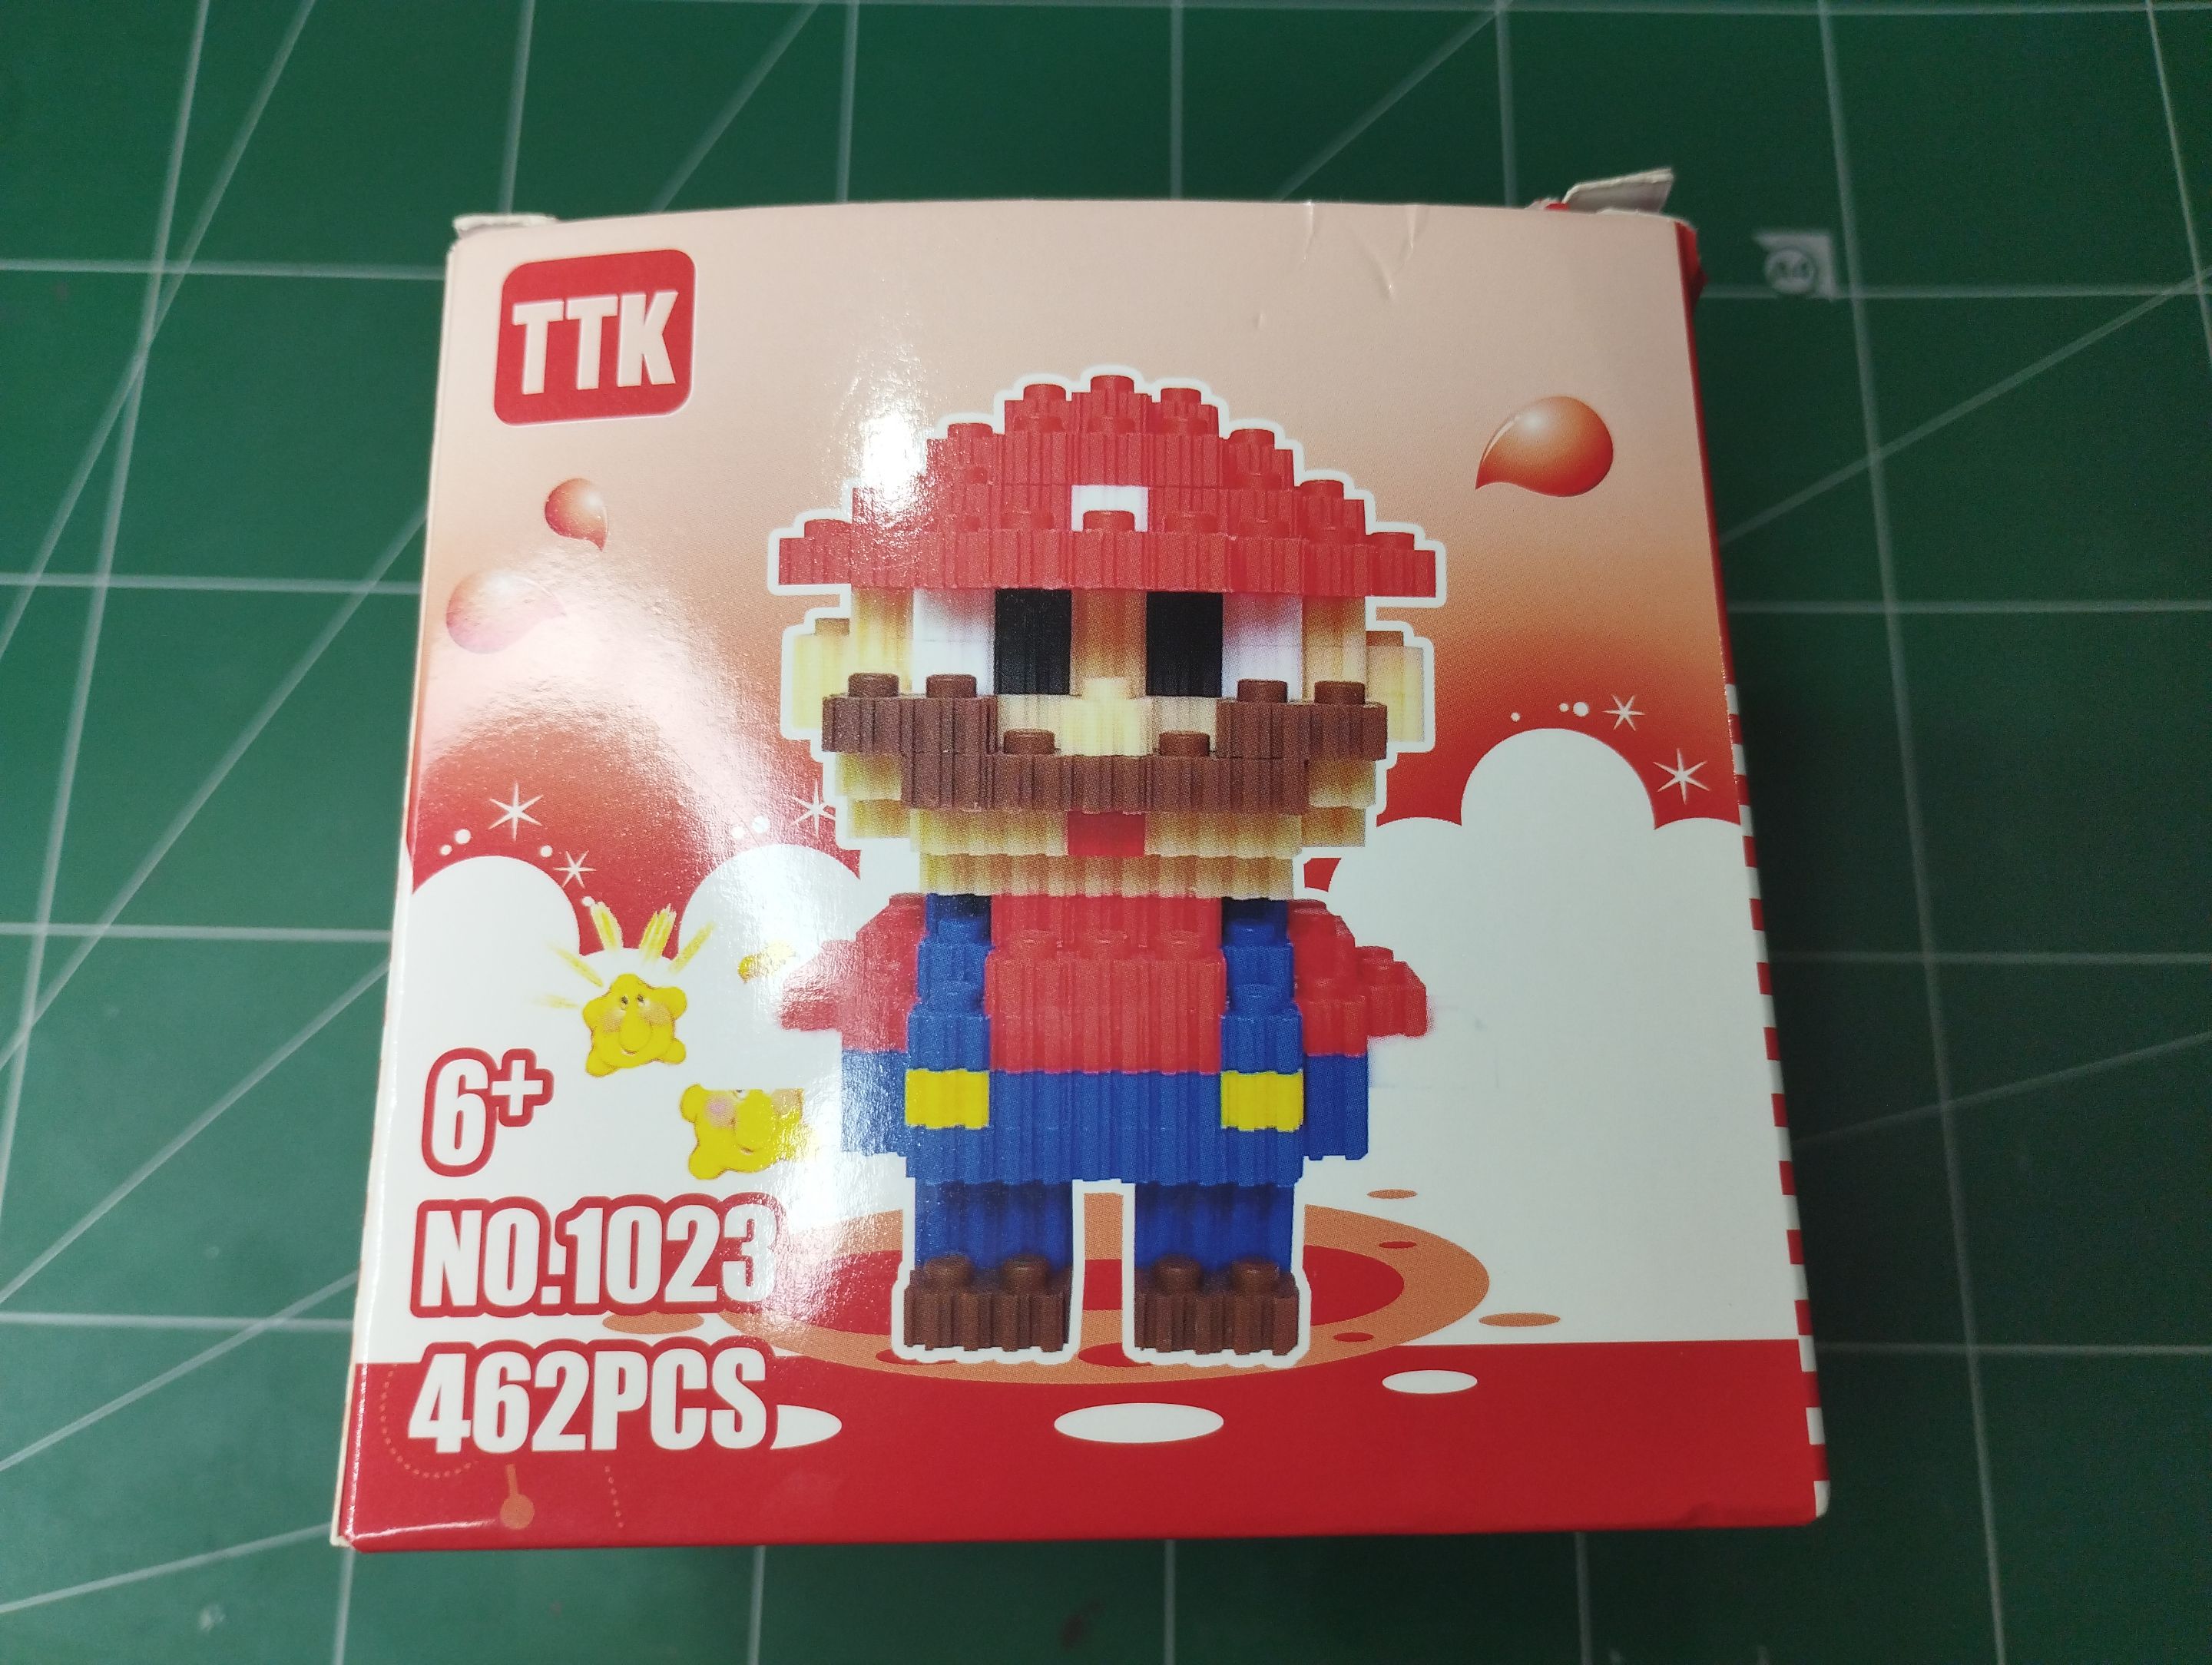
Why Mario? Because Mario Bros, the classic, is one of his favorite games, so I thought it would be pretty cool to give him one to remind him of those great retro games.
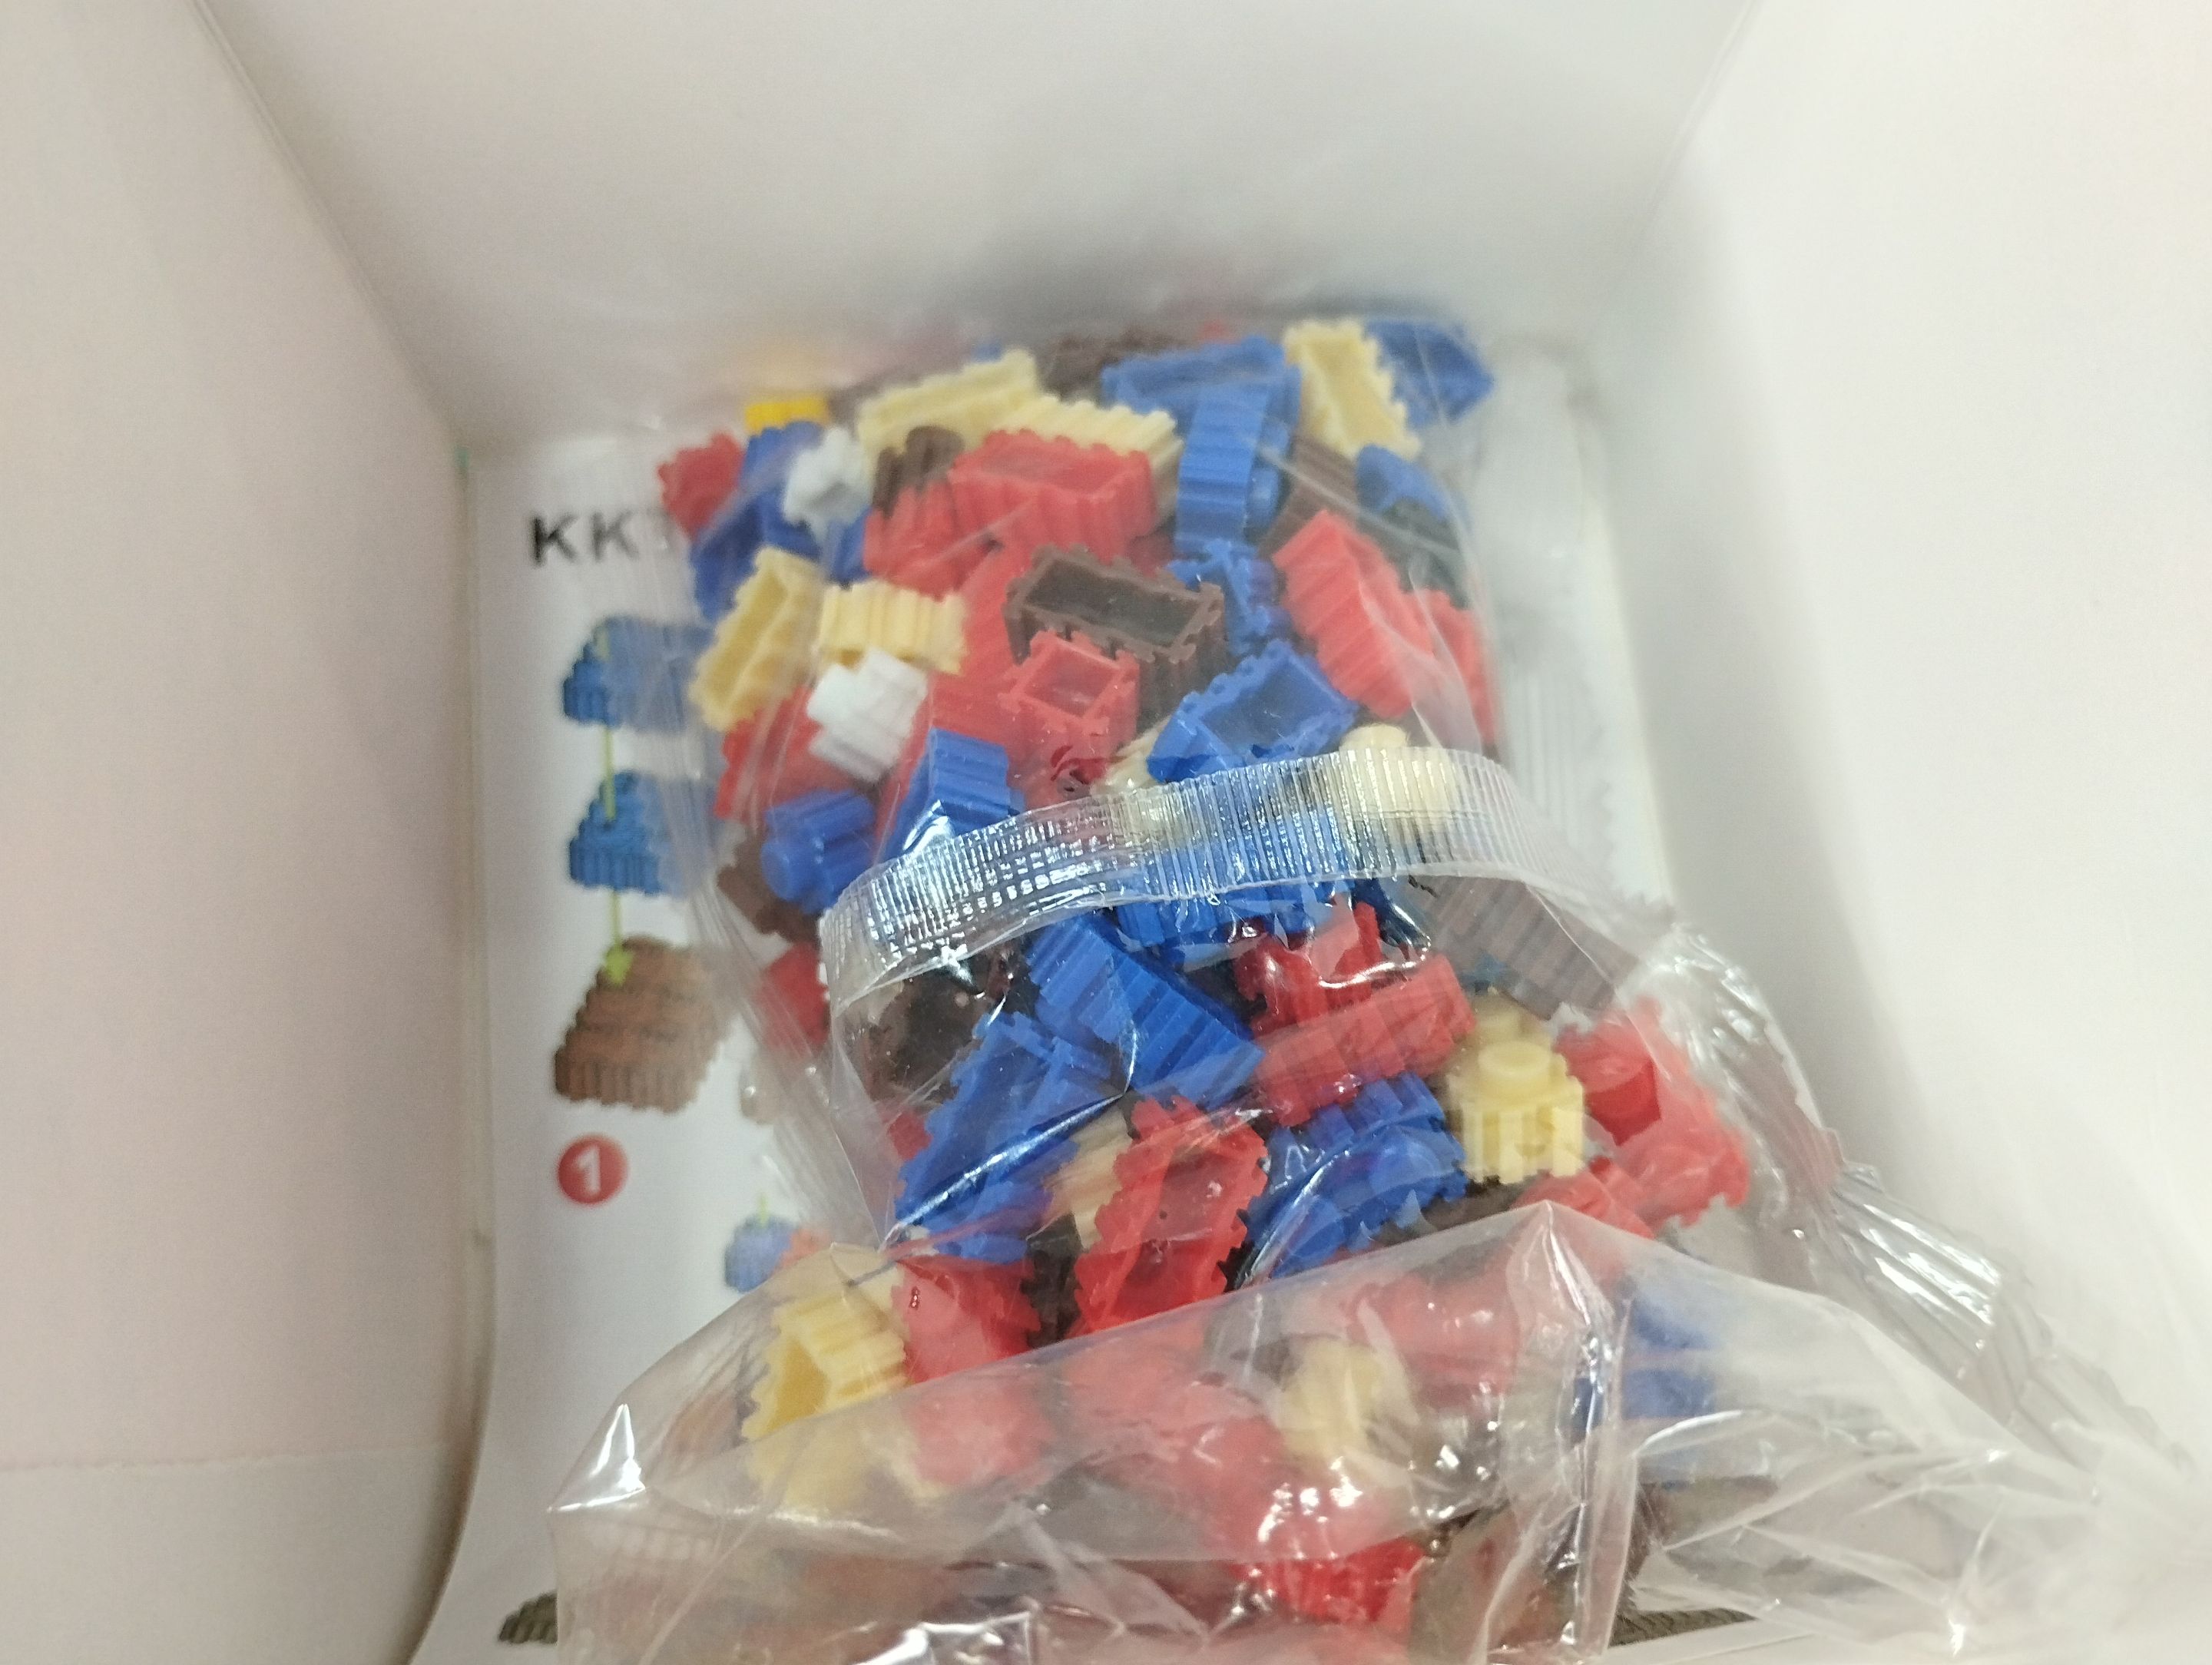
As you can see in the image below, there are lots of tiny pieces to assemble, which come in a small transparent bag along with a small sheet of instructions.
>>¿Por qué Mario? Porque Mario Bros, el clásico, es uno de sus juegos favoritos así que me pareció bastante genial regalarle uno para recordarle aquellos juegos retro tan geniales.
>>
>>Como pueden ver en la imagen de abajo, hay un montón de piecitas diminutas para armar, vienen en una pequeña bolsa transparente junto a una pequeña hoja con las instrucciones.
|||
|-|-|
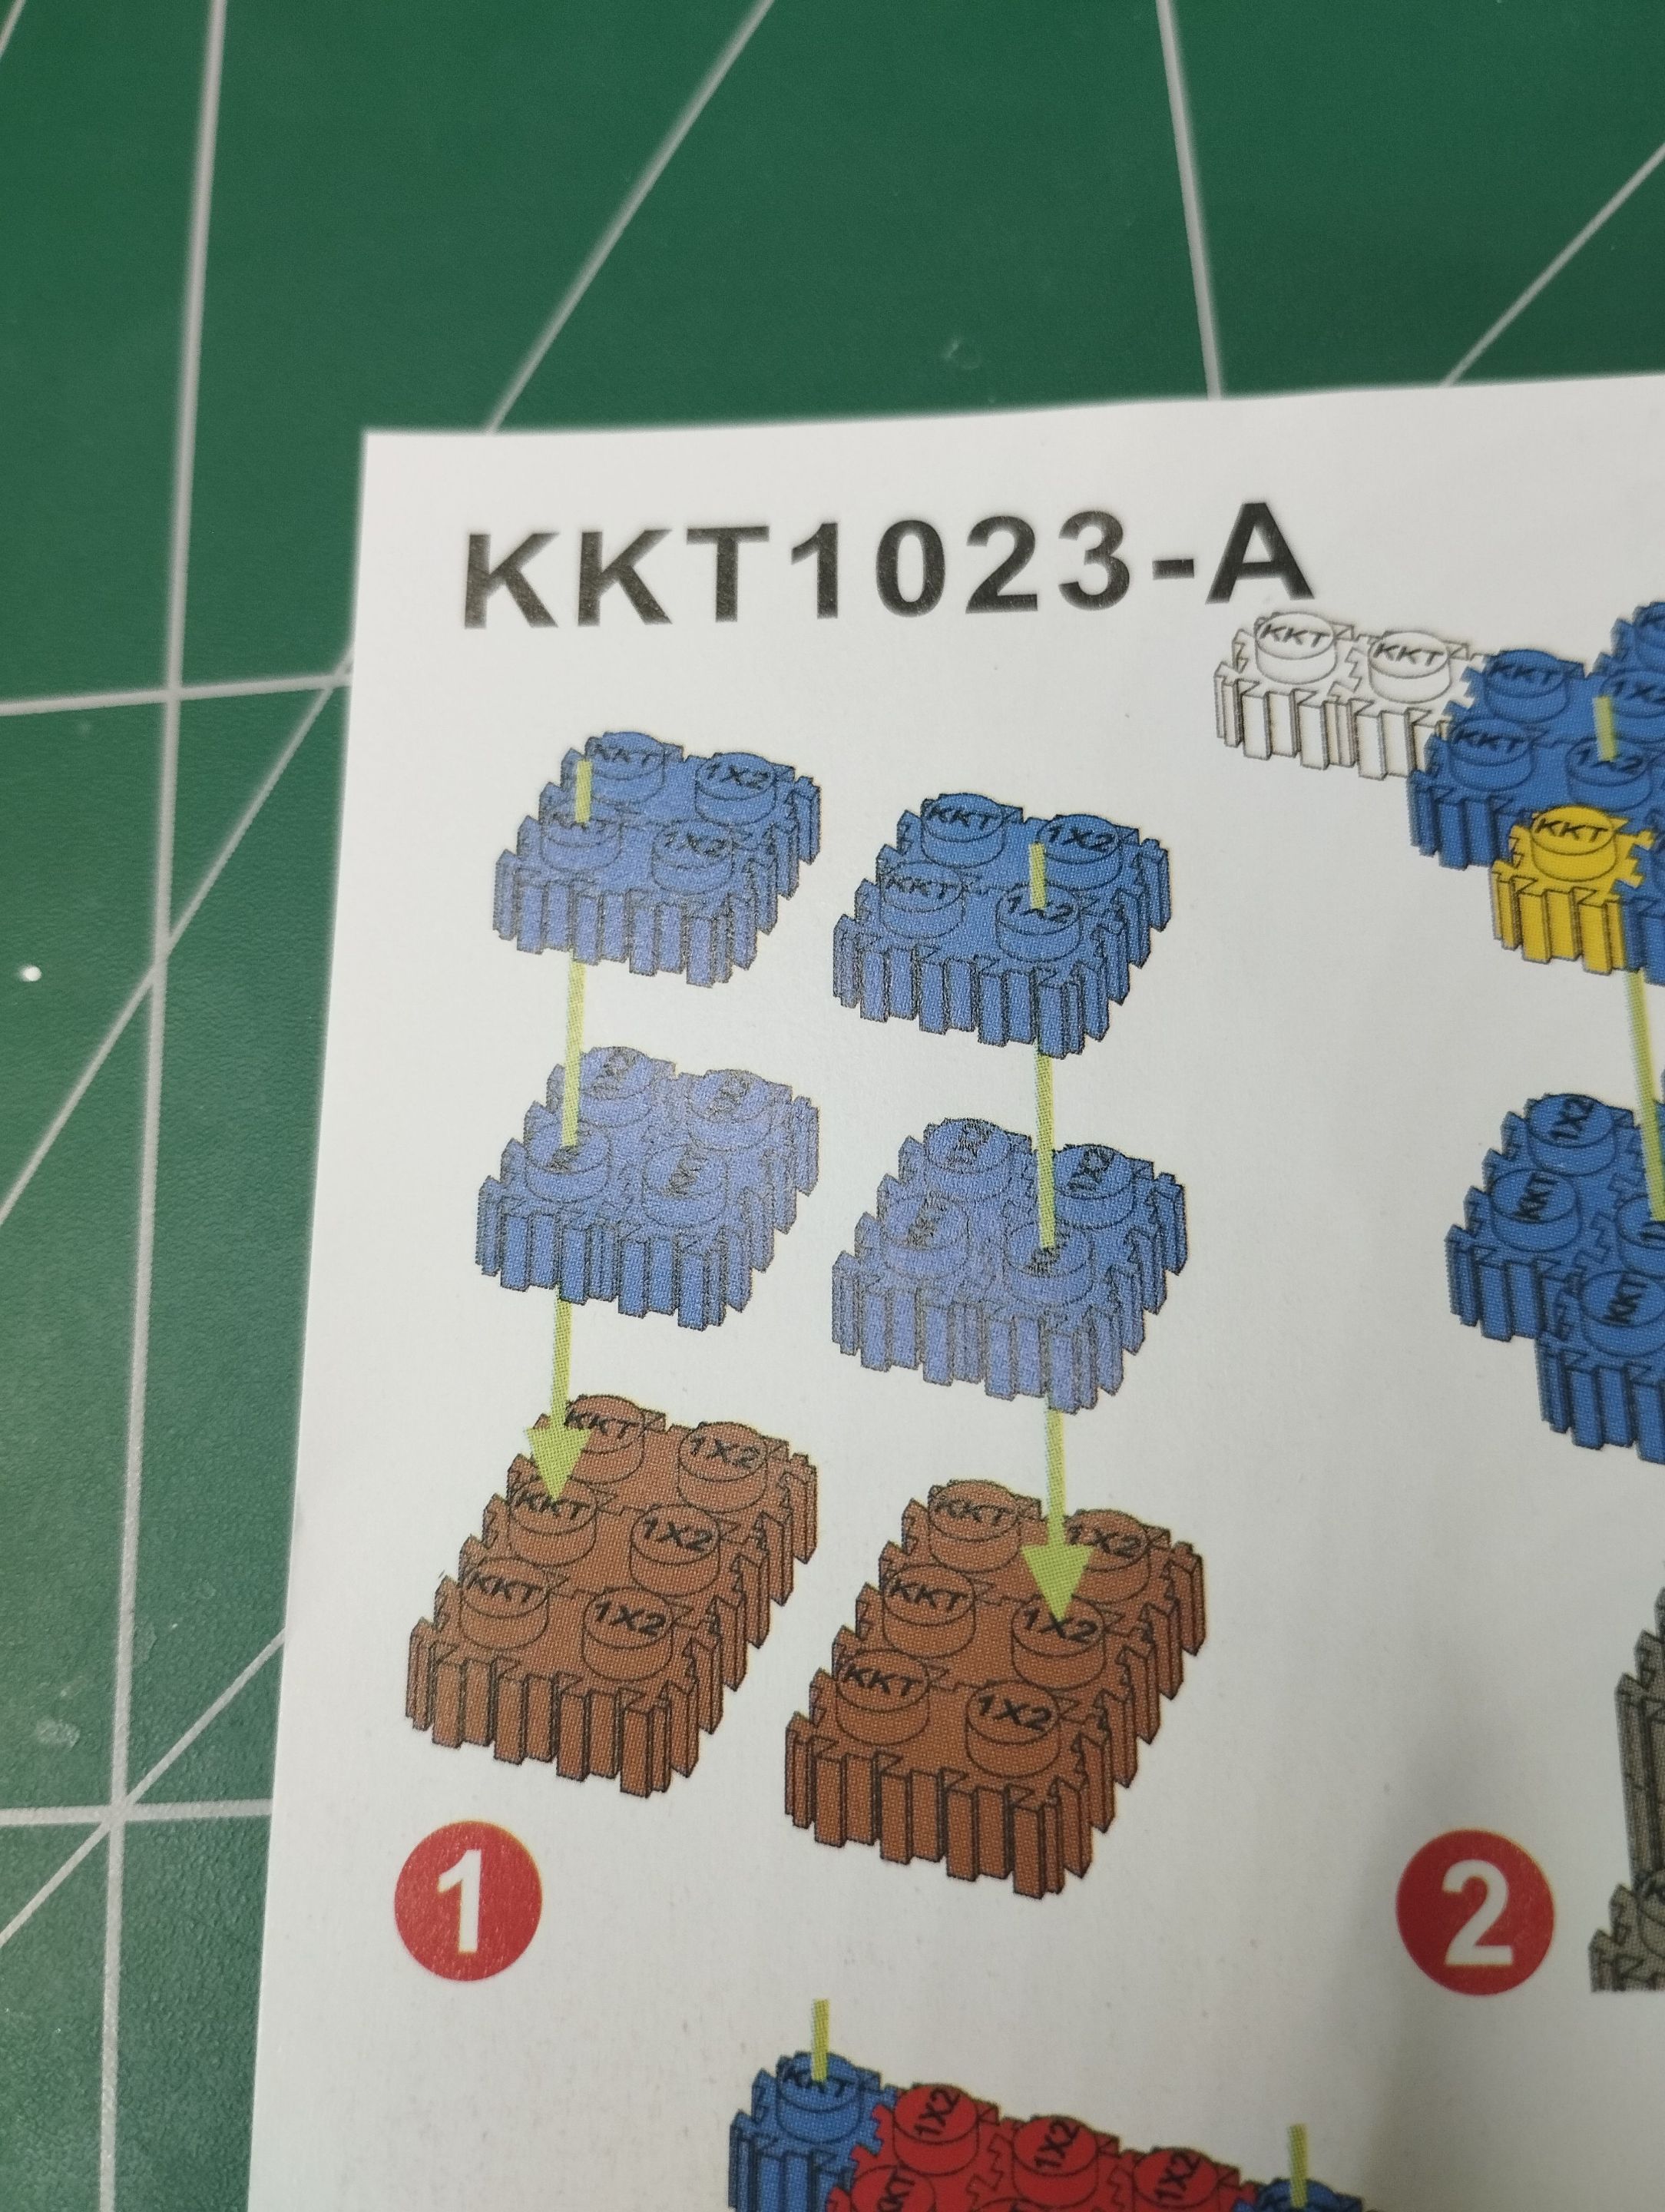
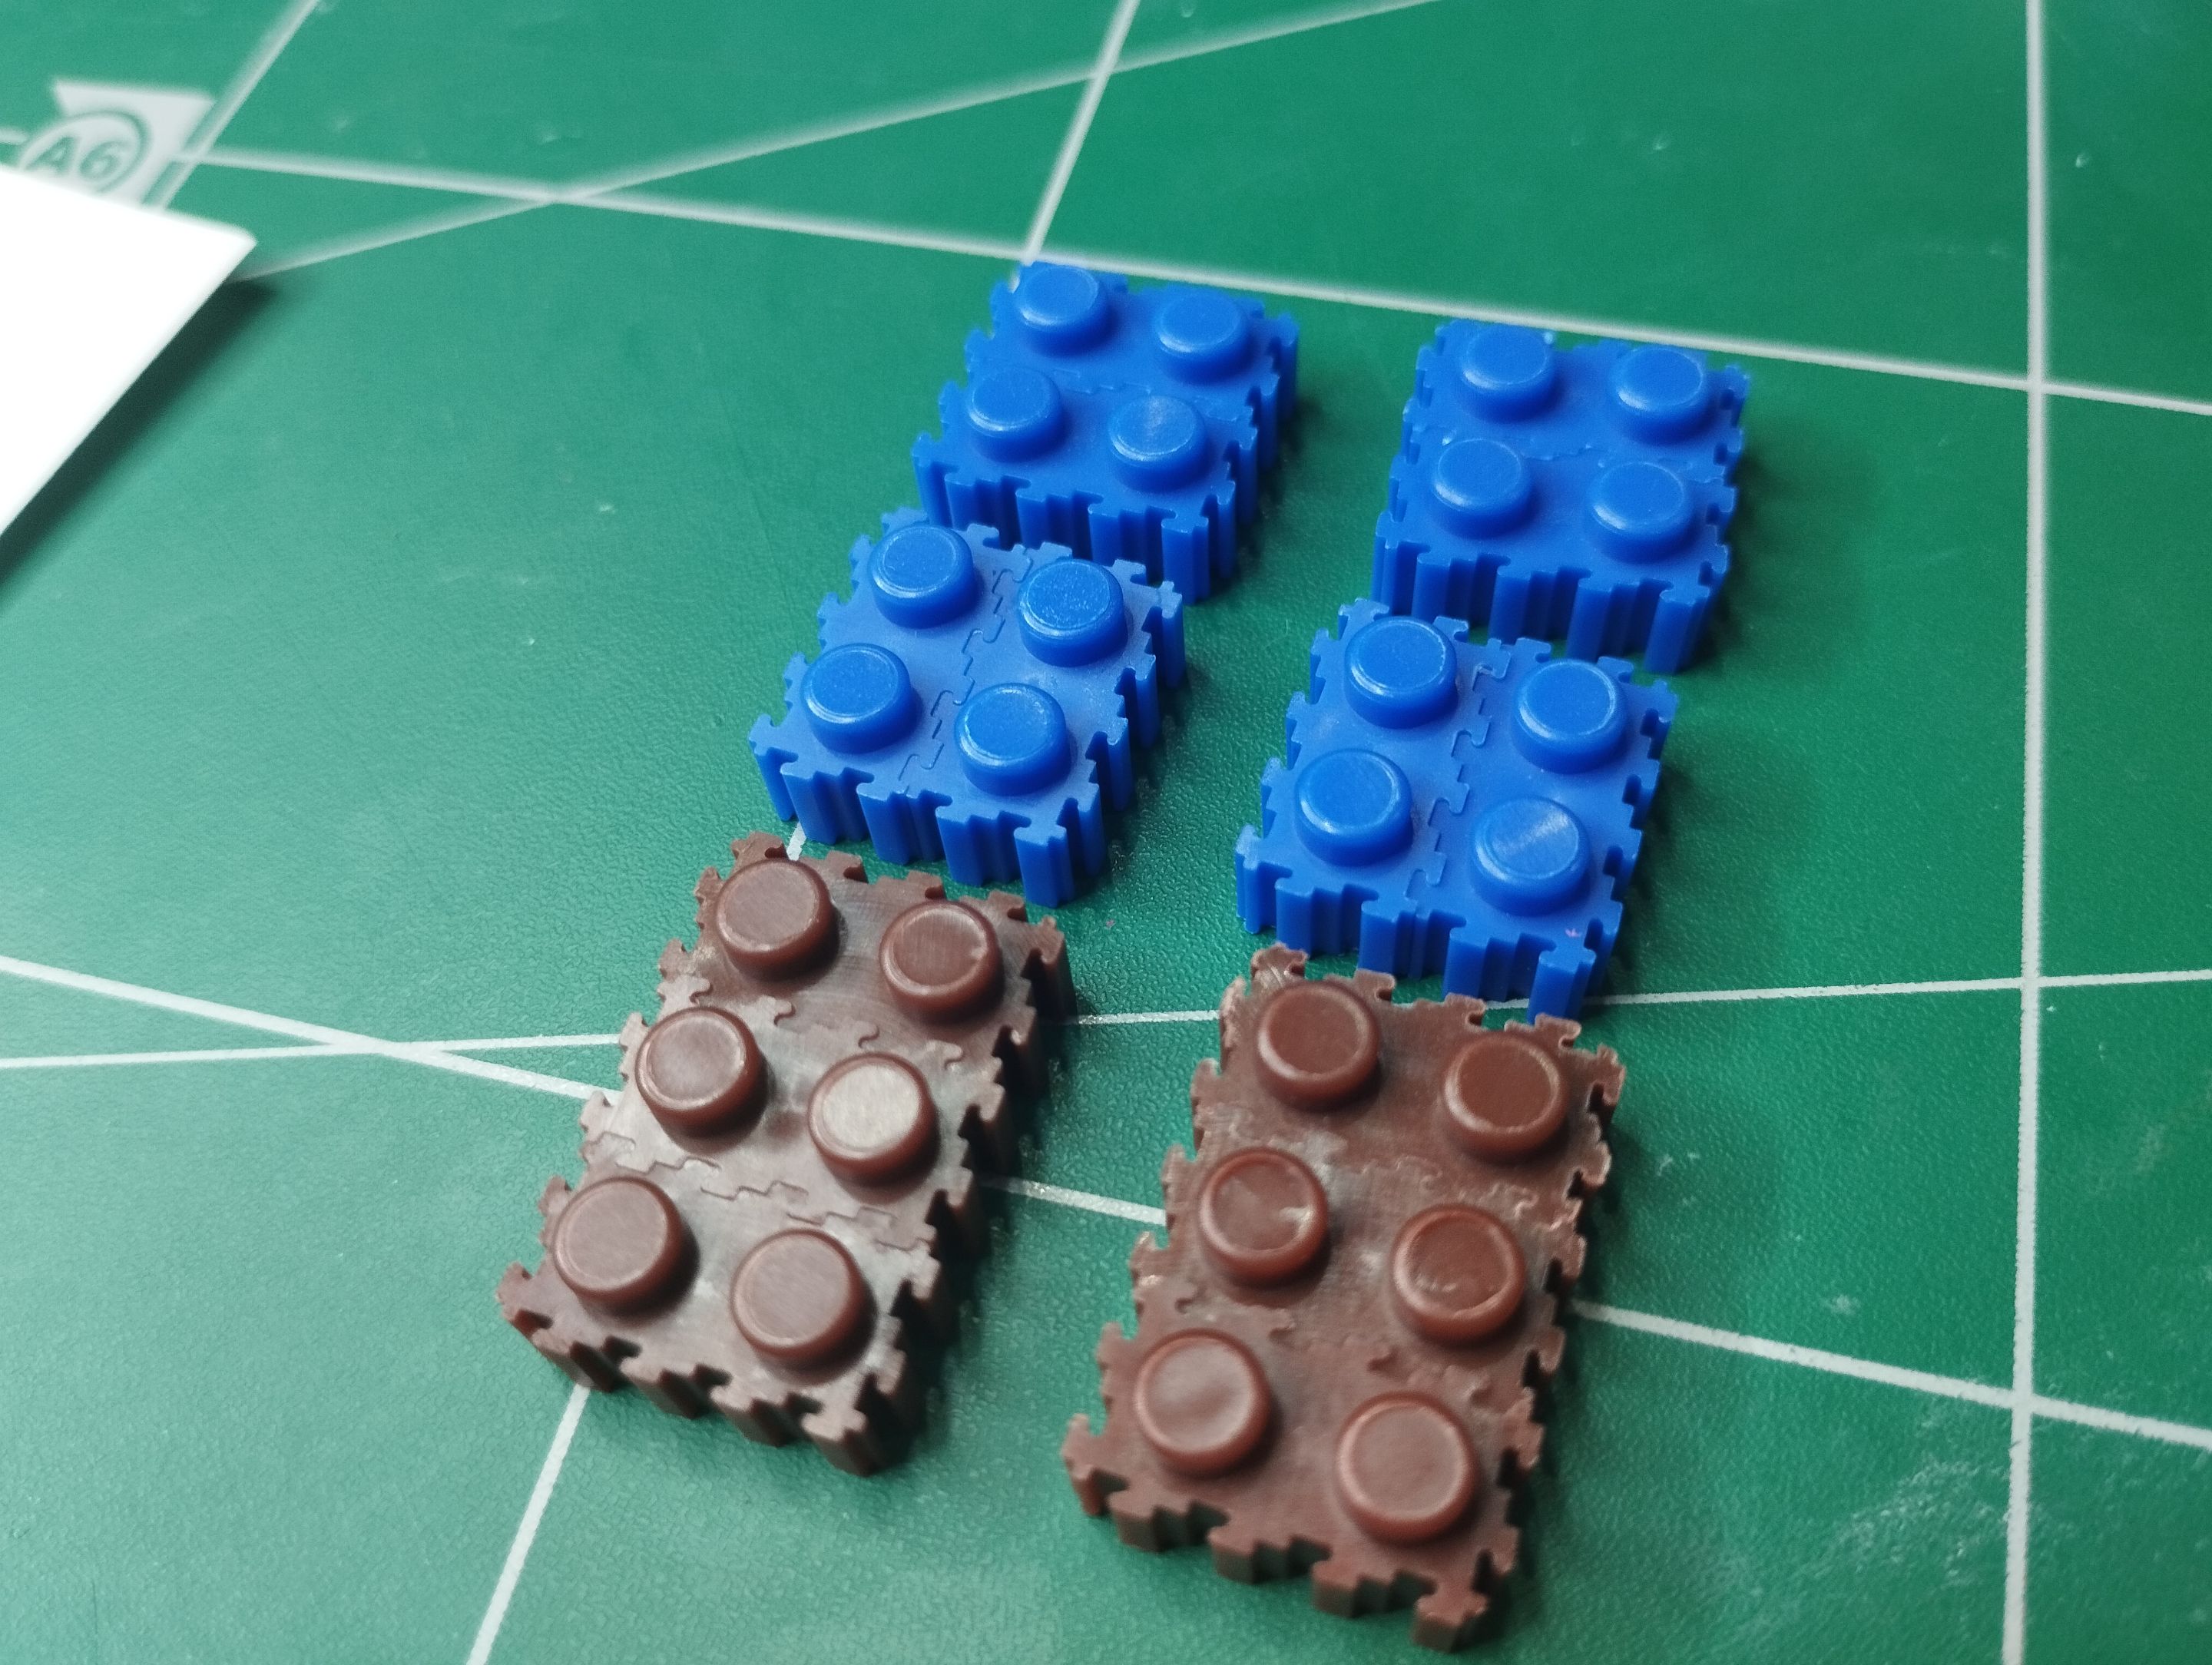
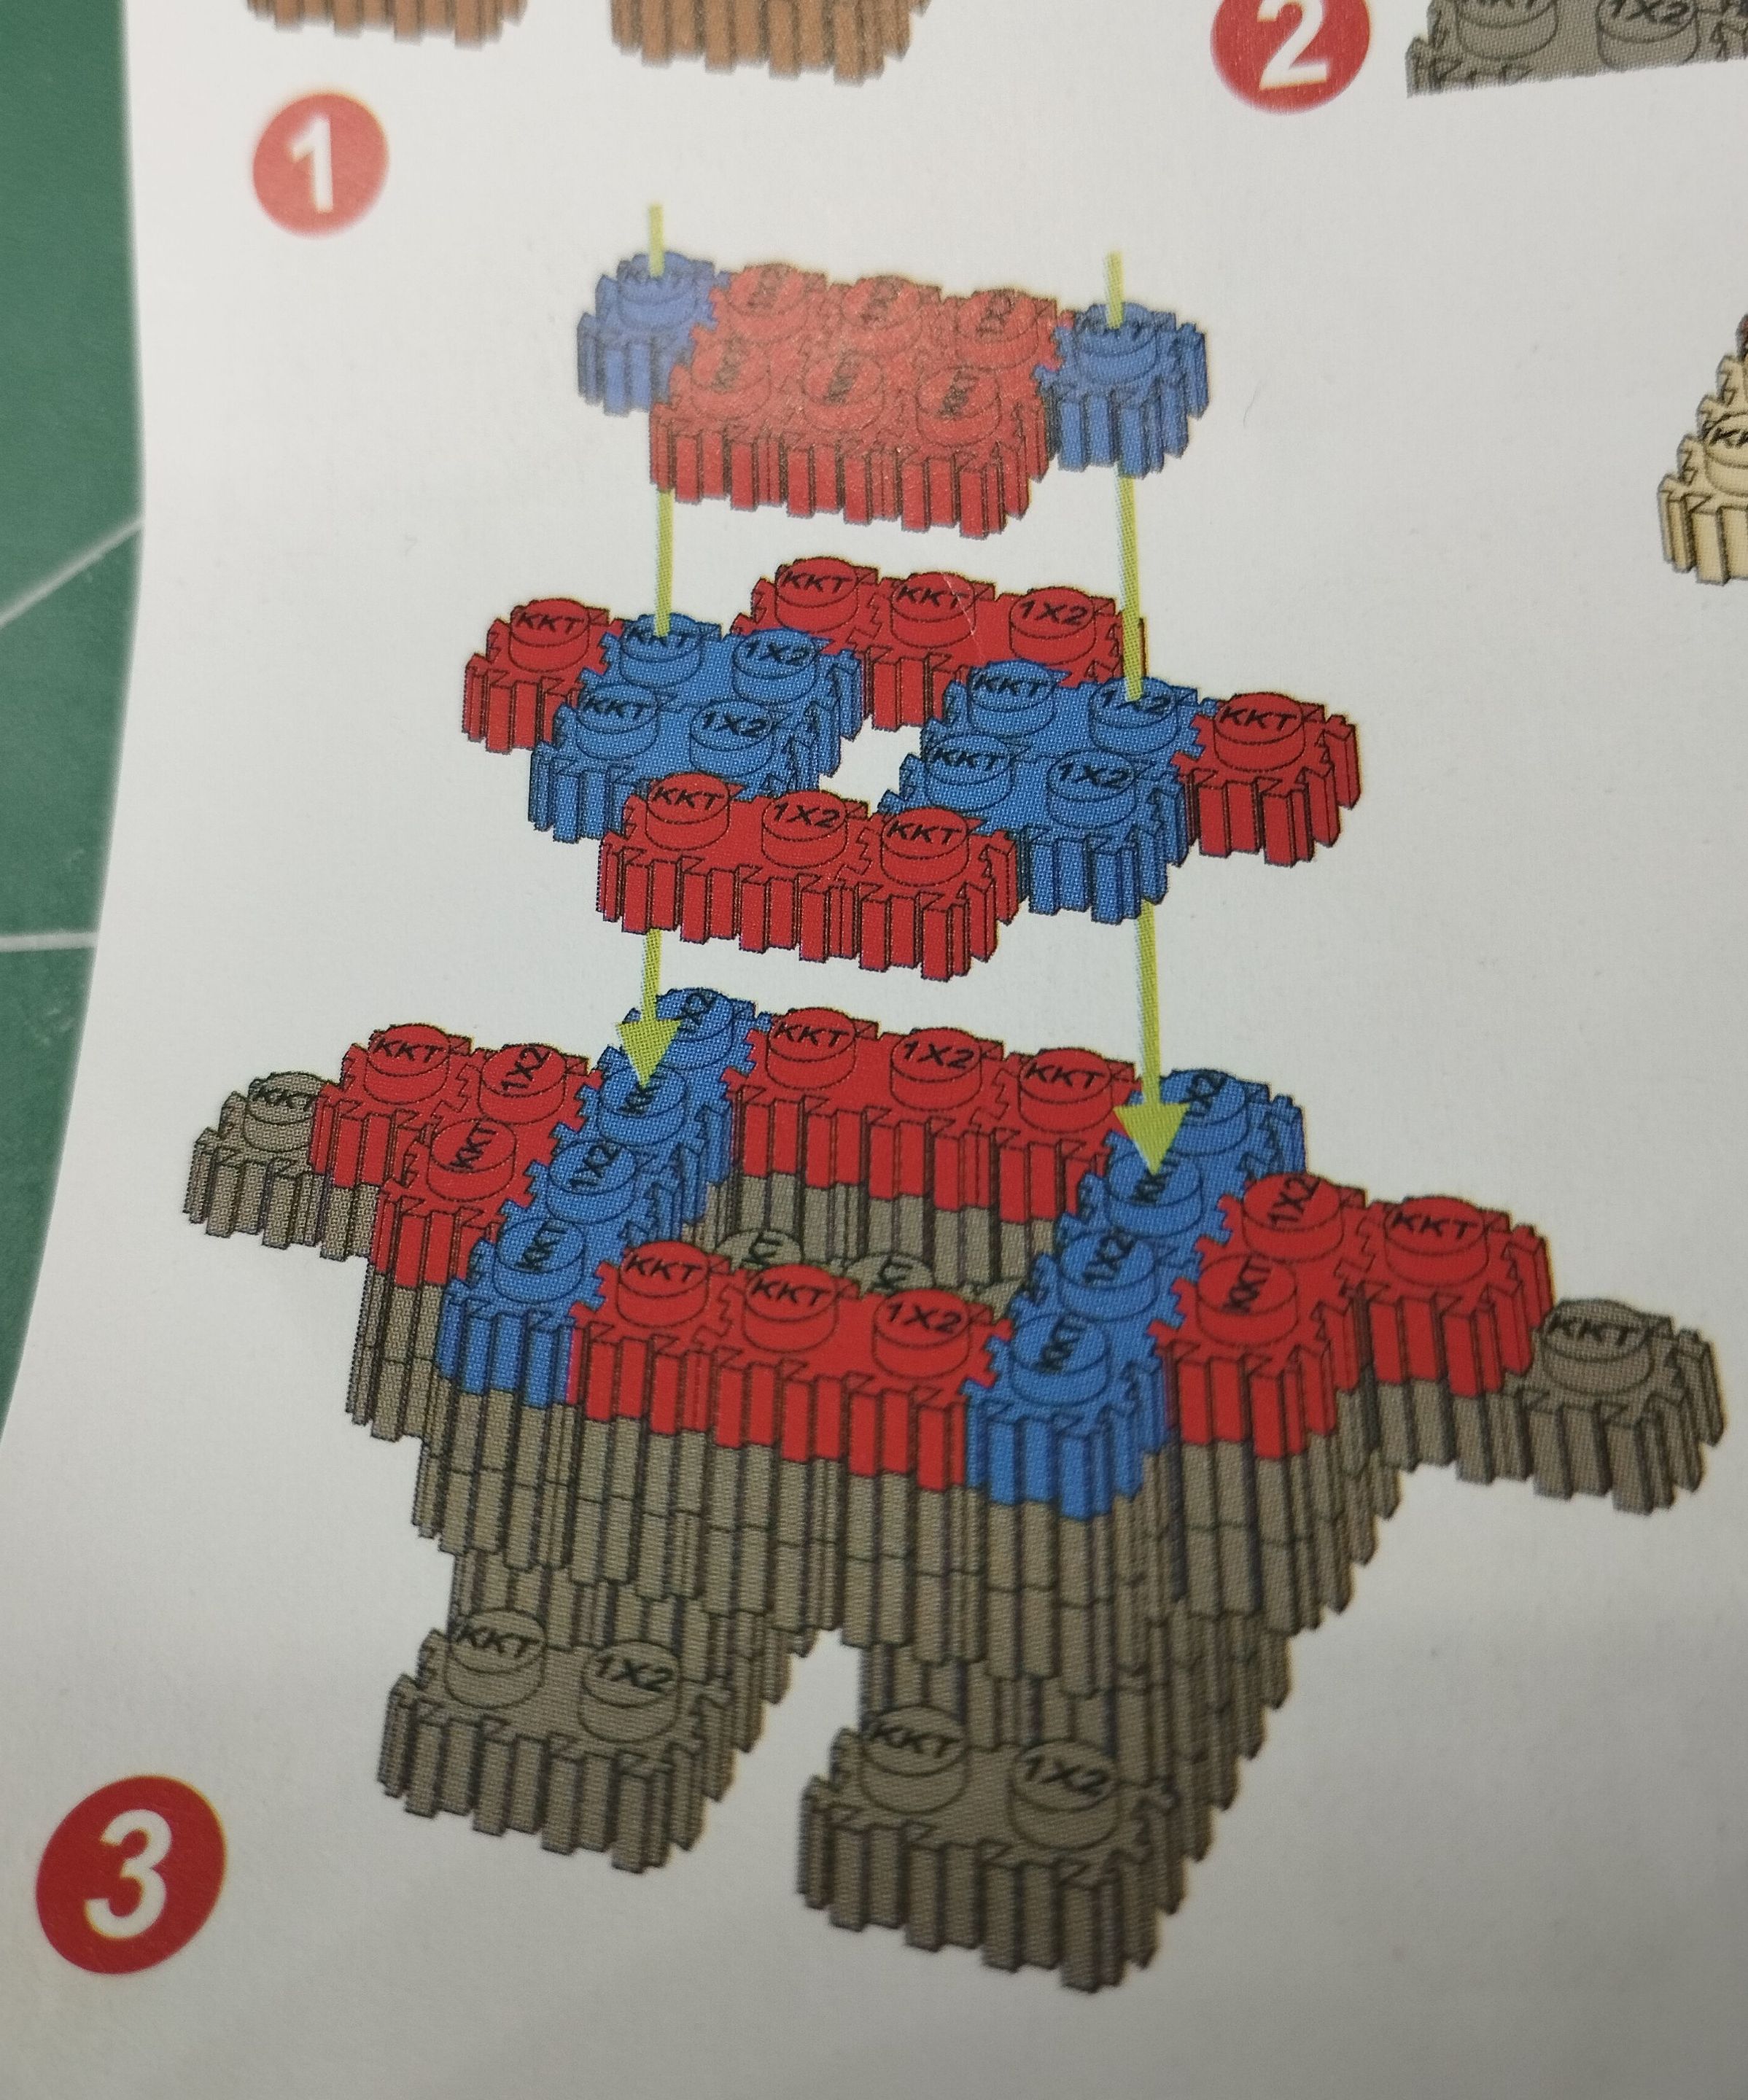
# Step 1
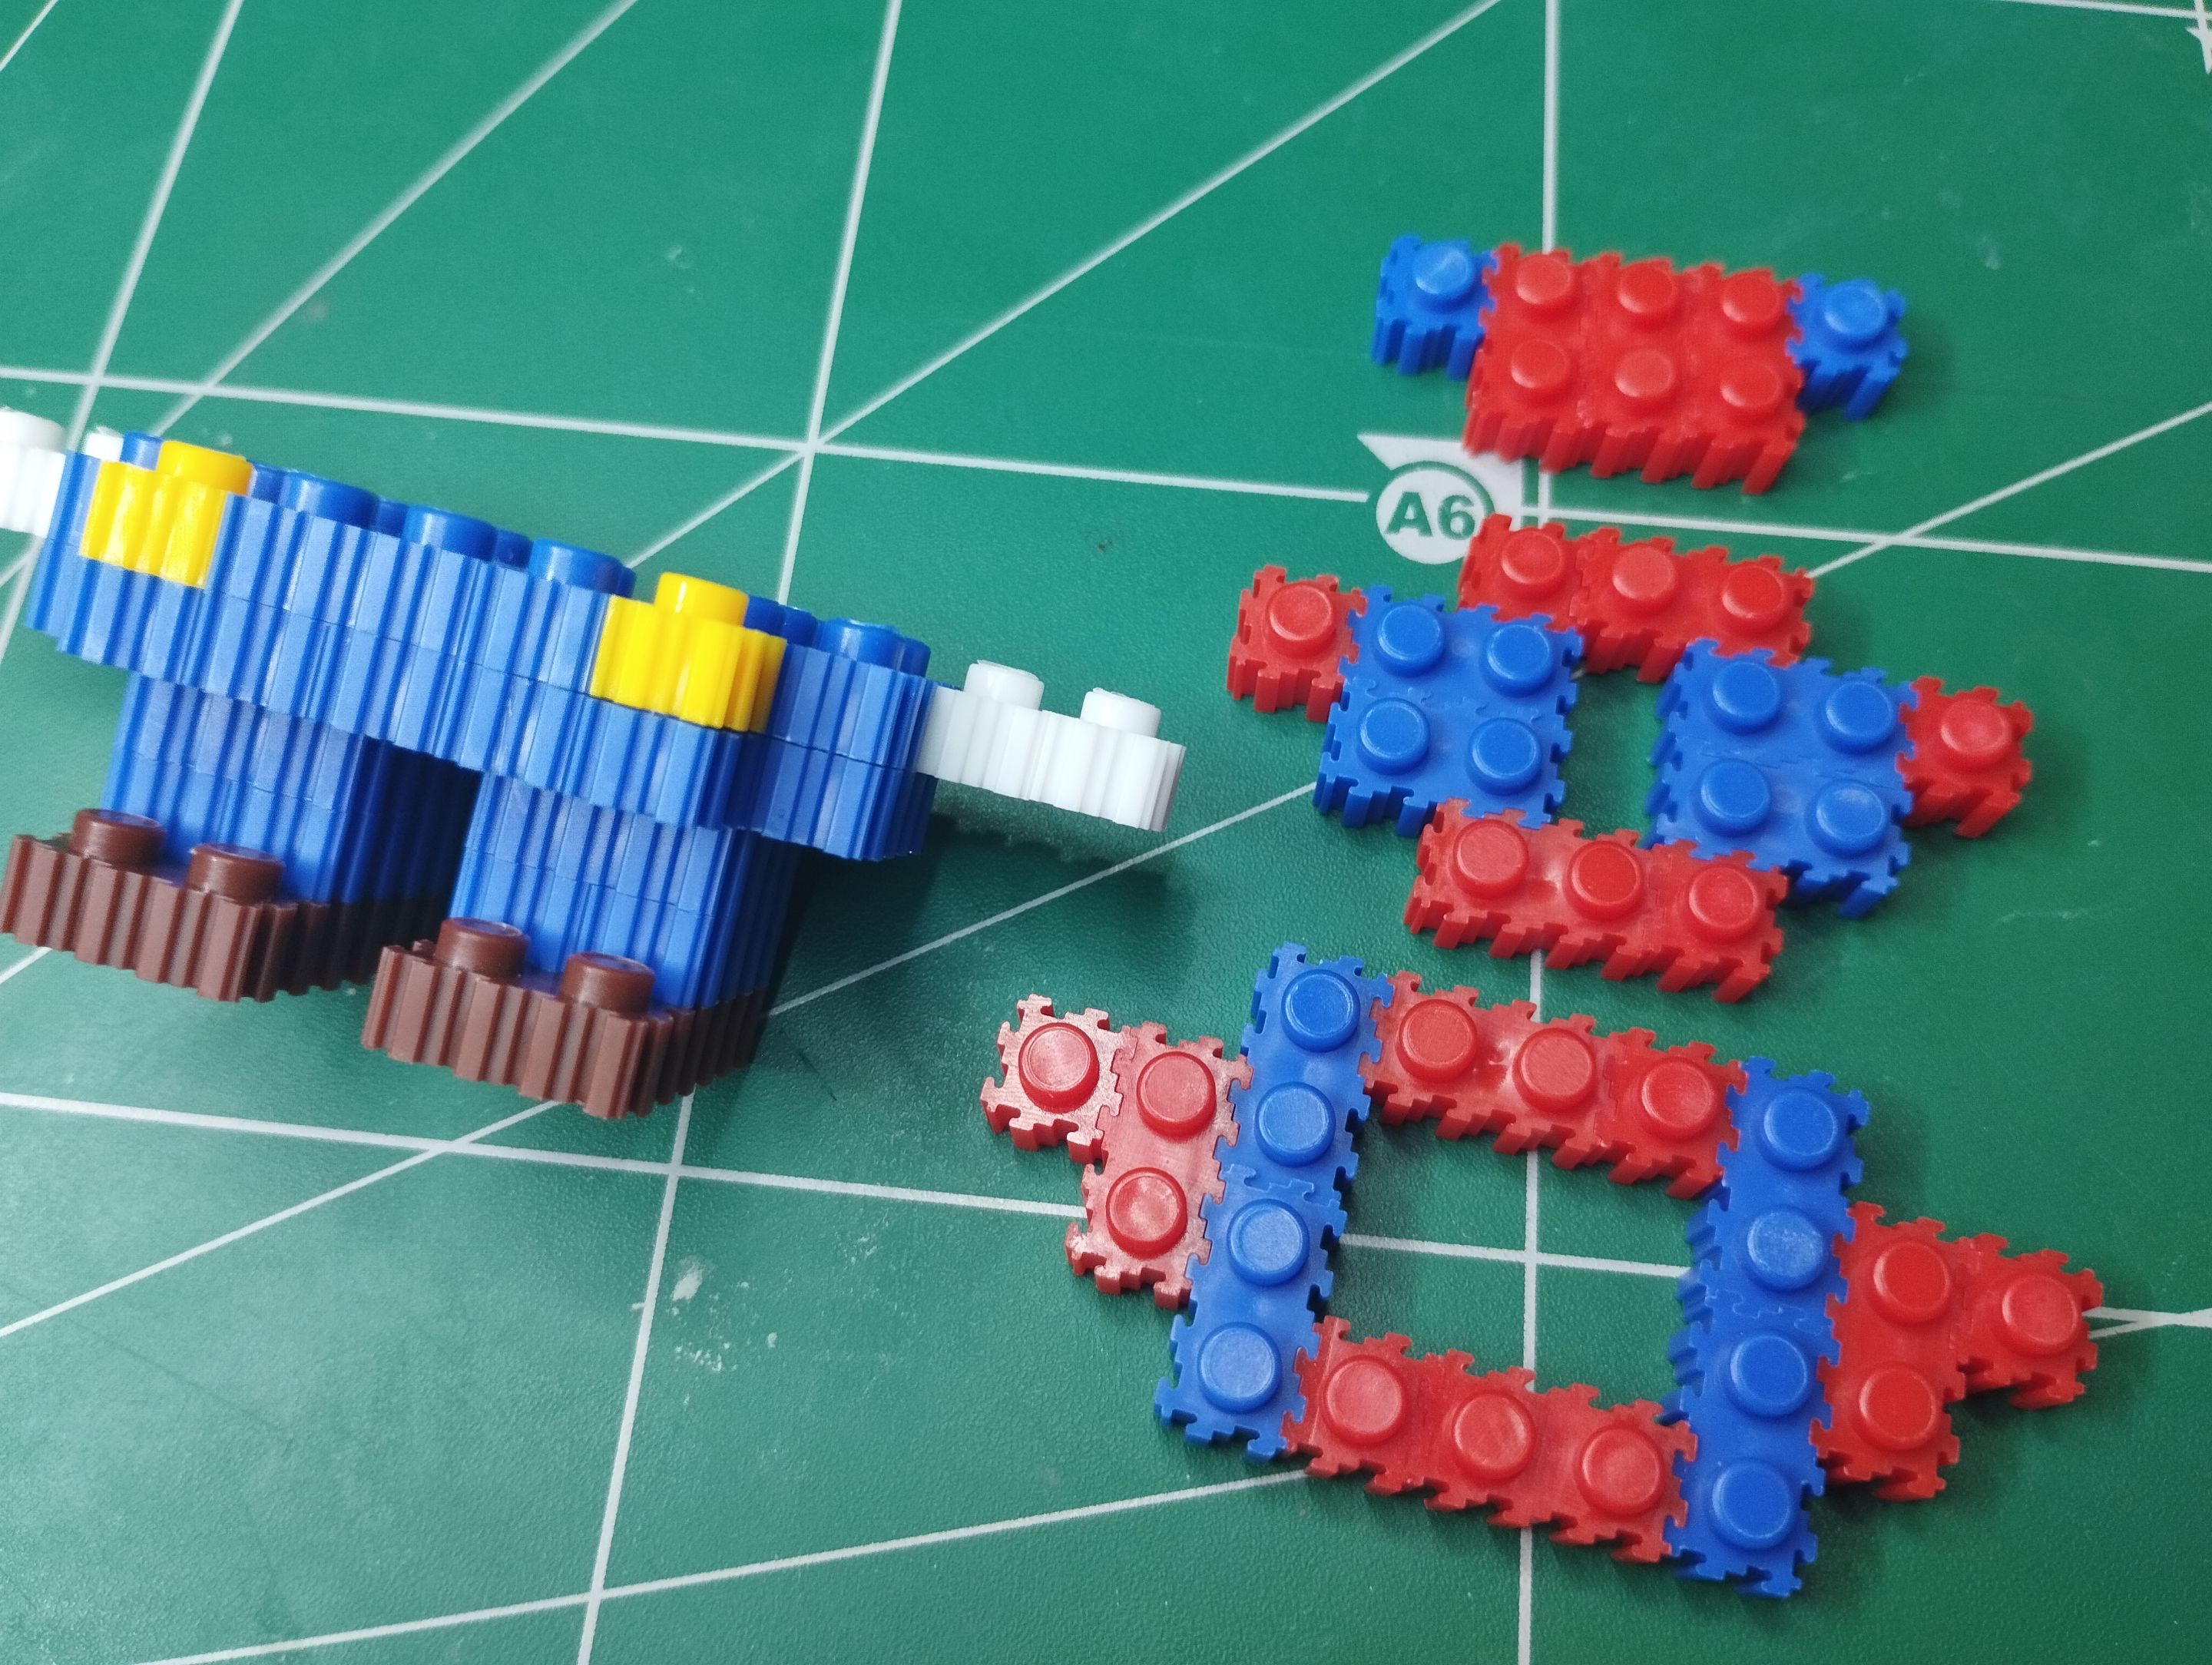
According to the instructions, the first thing to do is make Mario's feet. First, I made the feet by joining brown pieces together to form a 2x6 piece: you need to make two of these brown pieces. Then, join the pieces together to form two 2x2 blue pieces; you need to make two pairs of these blue pieces.
>># Paso 1
>>Según las instrucciones lo primero que hay que hacer son los piecitos de Mario. Primeramente hice los pies, que se hacen uniendo piecitas marrones hasta formar una pieza de 2x6: se deben hacer dos de estas piezas marrones. Luego se unen piezas hasta formar dos piezas de 2x2 de color azul; se deben hacer dos pares de estas piezas azules.
|||
|-|-|
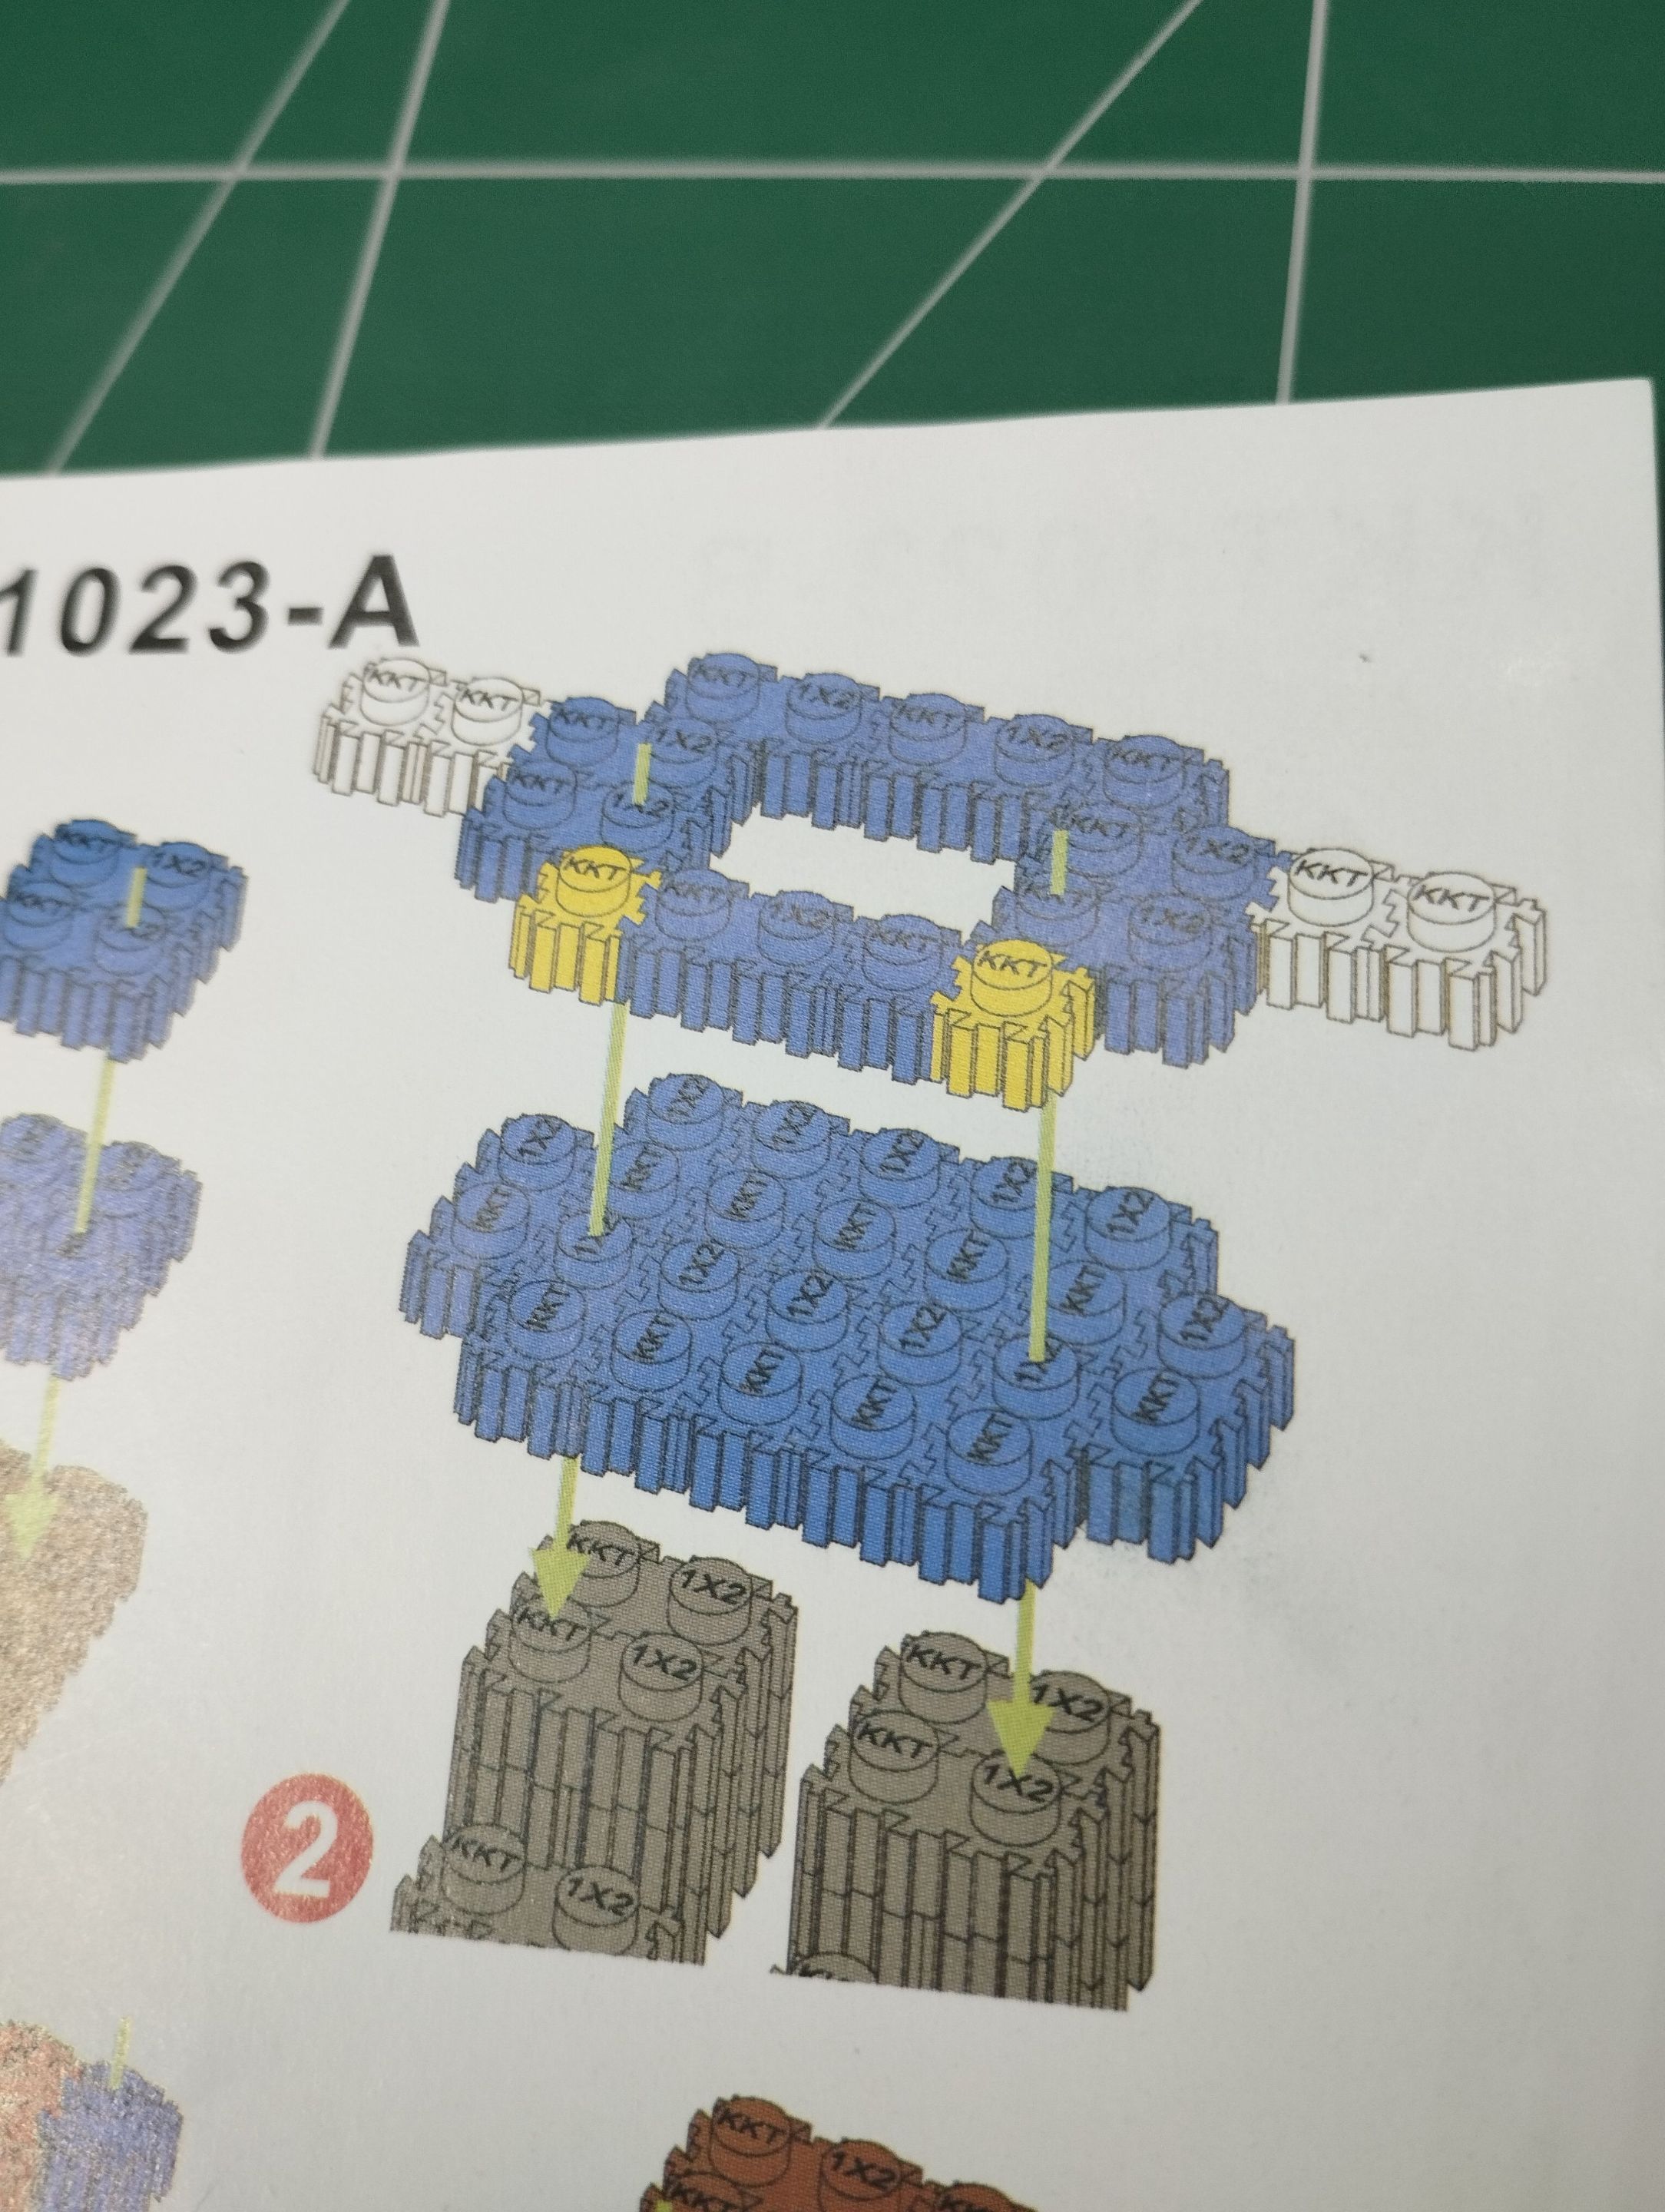
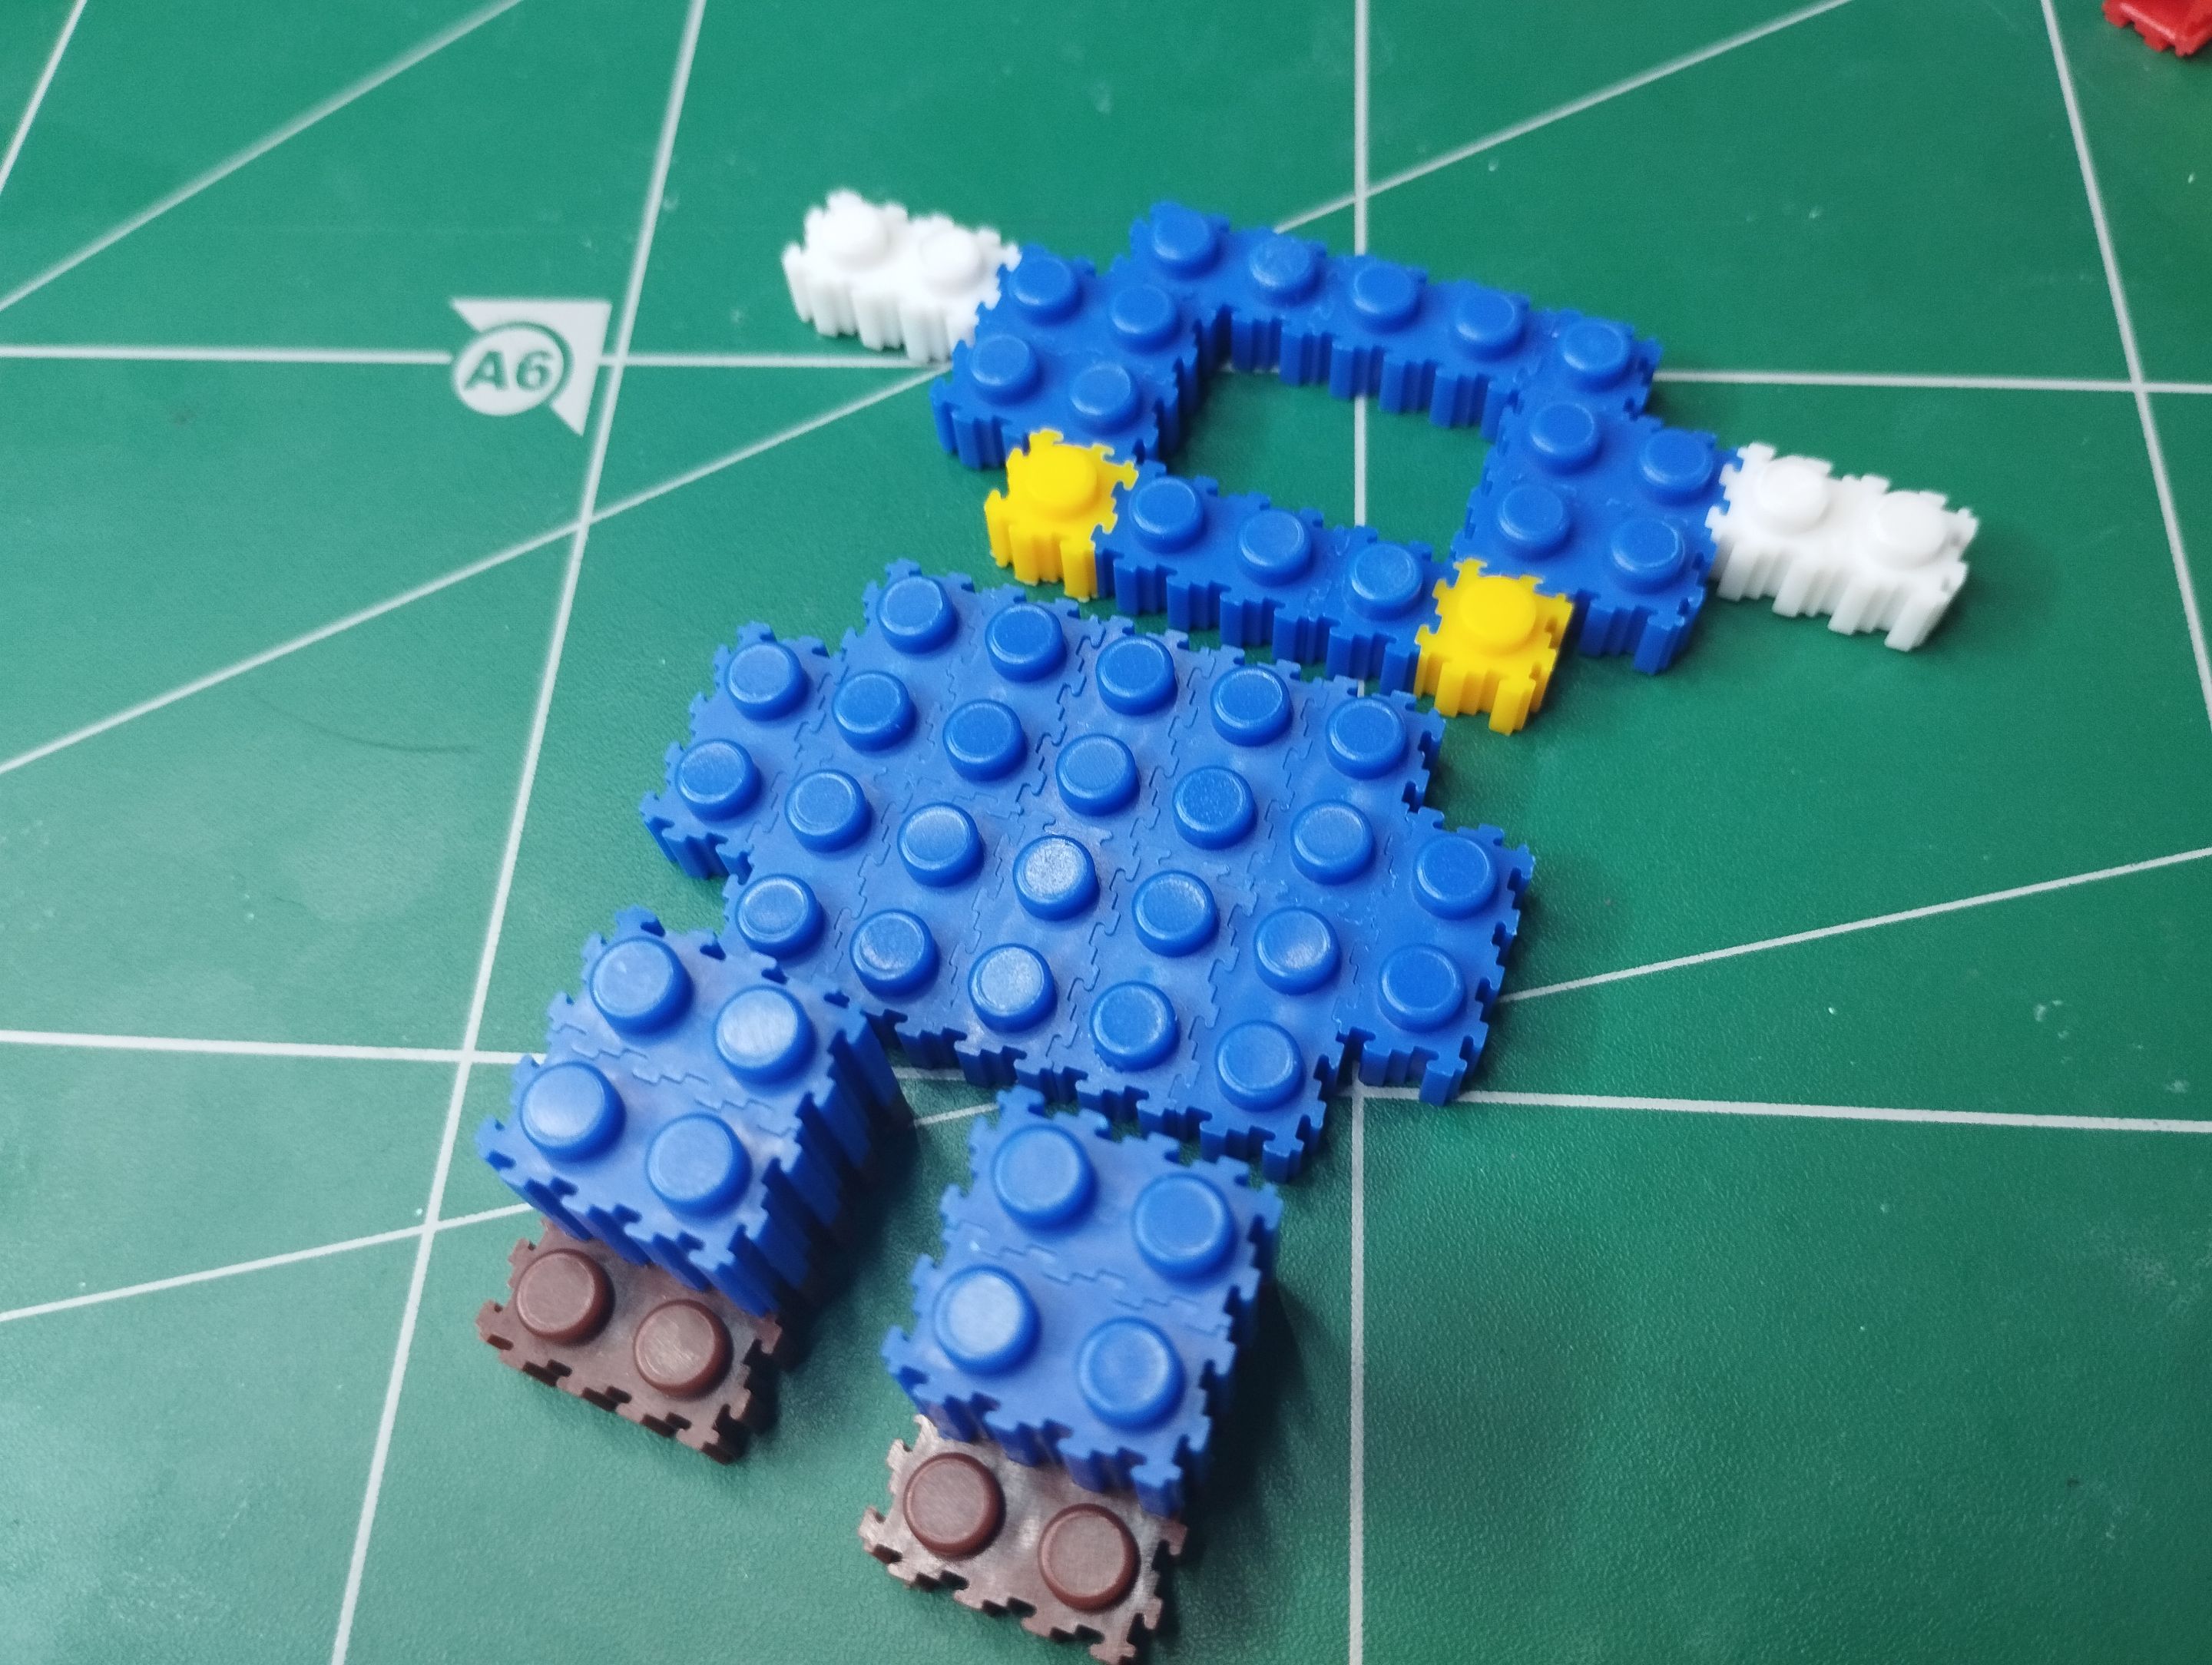
# Step 2
The second step involves the more complex pieces, from the waist up.
The pieces built in this step are almost entirely blue, except for six bricks, two yellow and four white. All these shapes are for joining the legs and making Mario's blue shorts.
>># Paso 2
>>Ya el segundo paso comienzan las piezas más complejas, la cintura hacia arriba.
>>
>>Las piezas que se construyen en este paso son casi en su totalidad de color azul, a excepción de seis ladrillos, dos amarillos y cuatro de color blanco. Todas estas formas son para unir las piernas y hacer la braga azul de Mario.
|||
|-|-|
# Step 3
After making the legs and panties, it's time to make the upper torso, the white T-shirt, and the blue straps on the panties.
Note that this part is hollow. I don't know why, but you simply assemble the bricks around the piece without placing any bricks in the center, even though there are extra bricks left over, because in all these little things there are always extra bricks in case you need them.
>># Paso 3
>>Después de hacer las piernas y las bragas, es hora de hacer la parte superior del torso, la camiseta blanca y los tirantes azules de la braga.
>>
>>Fíjense que esta parte es hueca, no sé por qué, pero simplemente se arman los ladrillos en los alrededores de la pieza, pero no se colocan ladrillos en el centro y eso que sobran ladrillos, porque en todas estas cositas sobran siempre ladrillos por si hacen falta.
|||
|-|-|
# Step 4
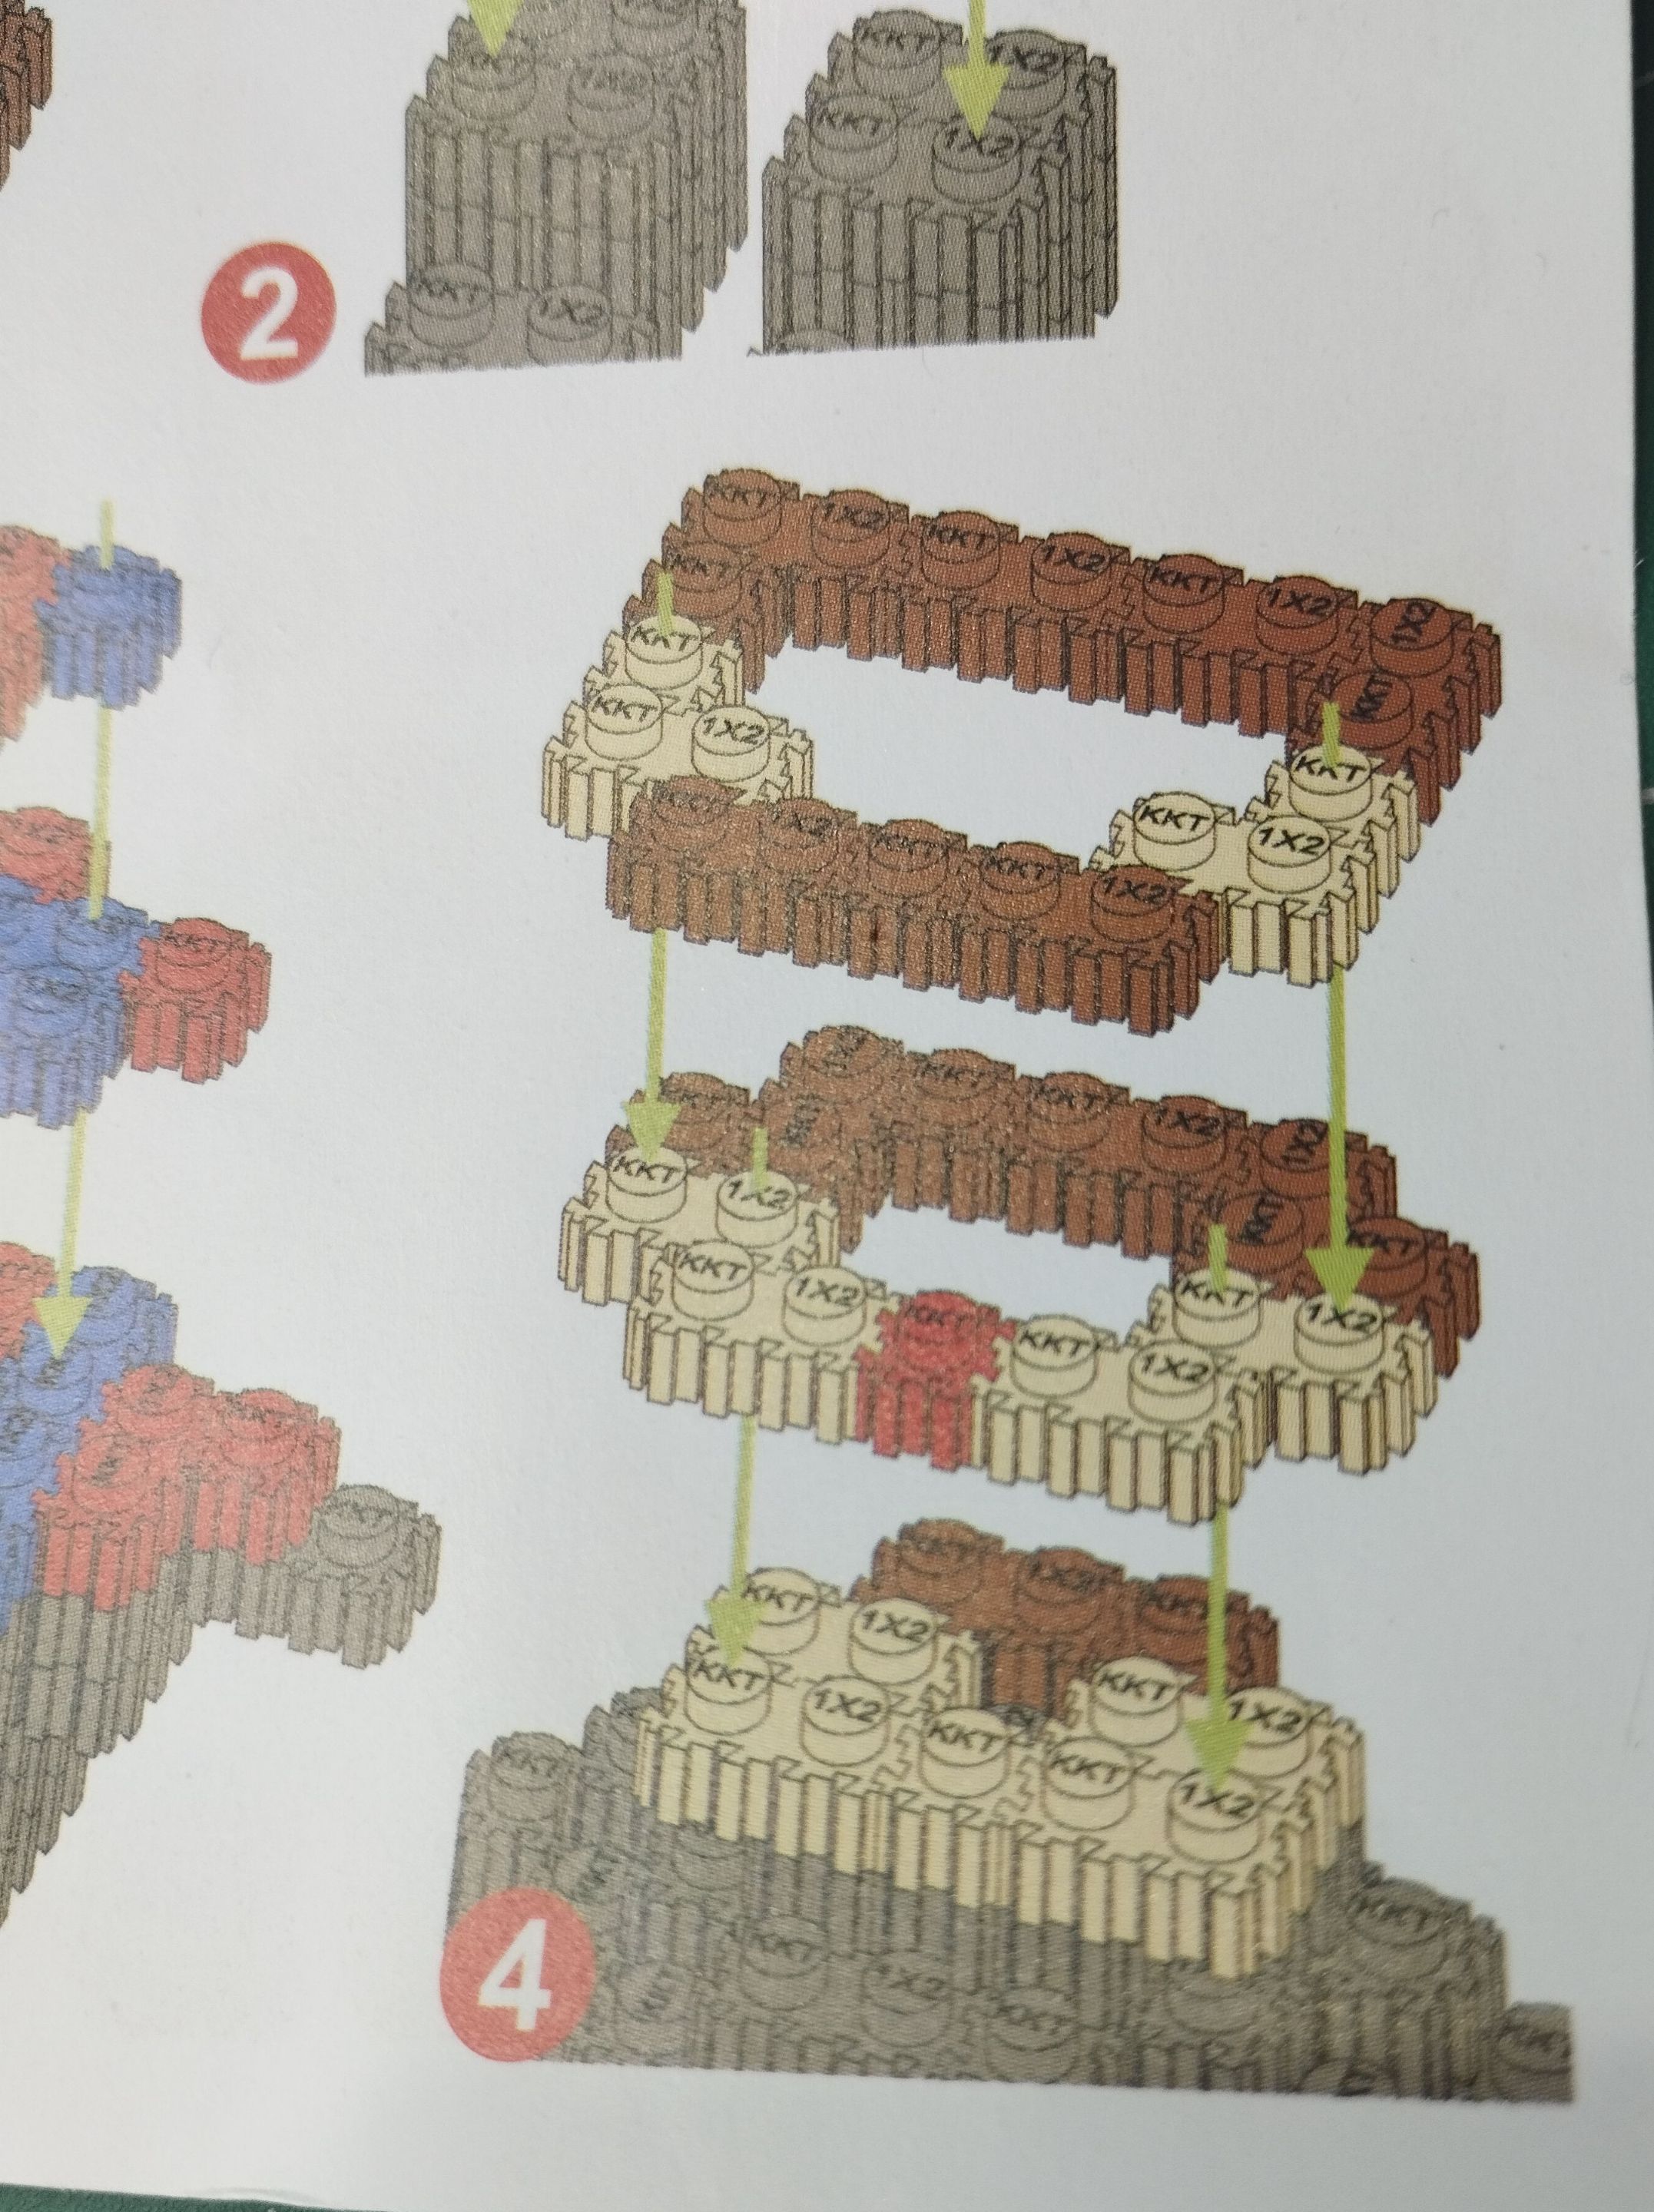
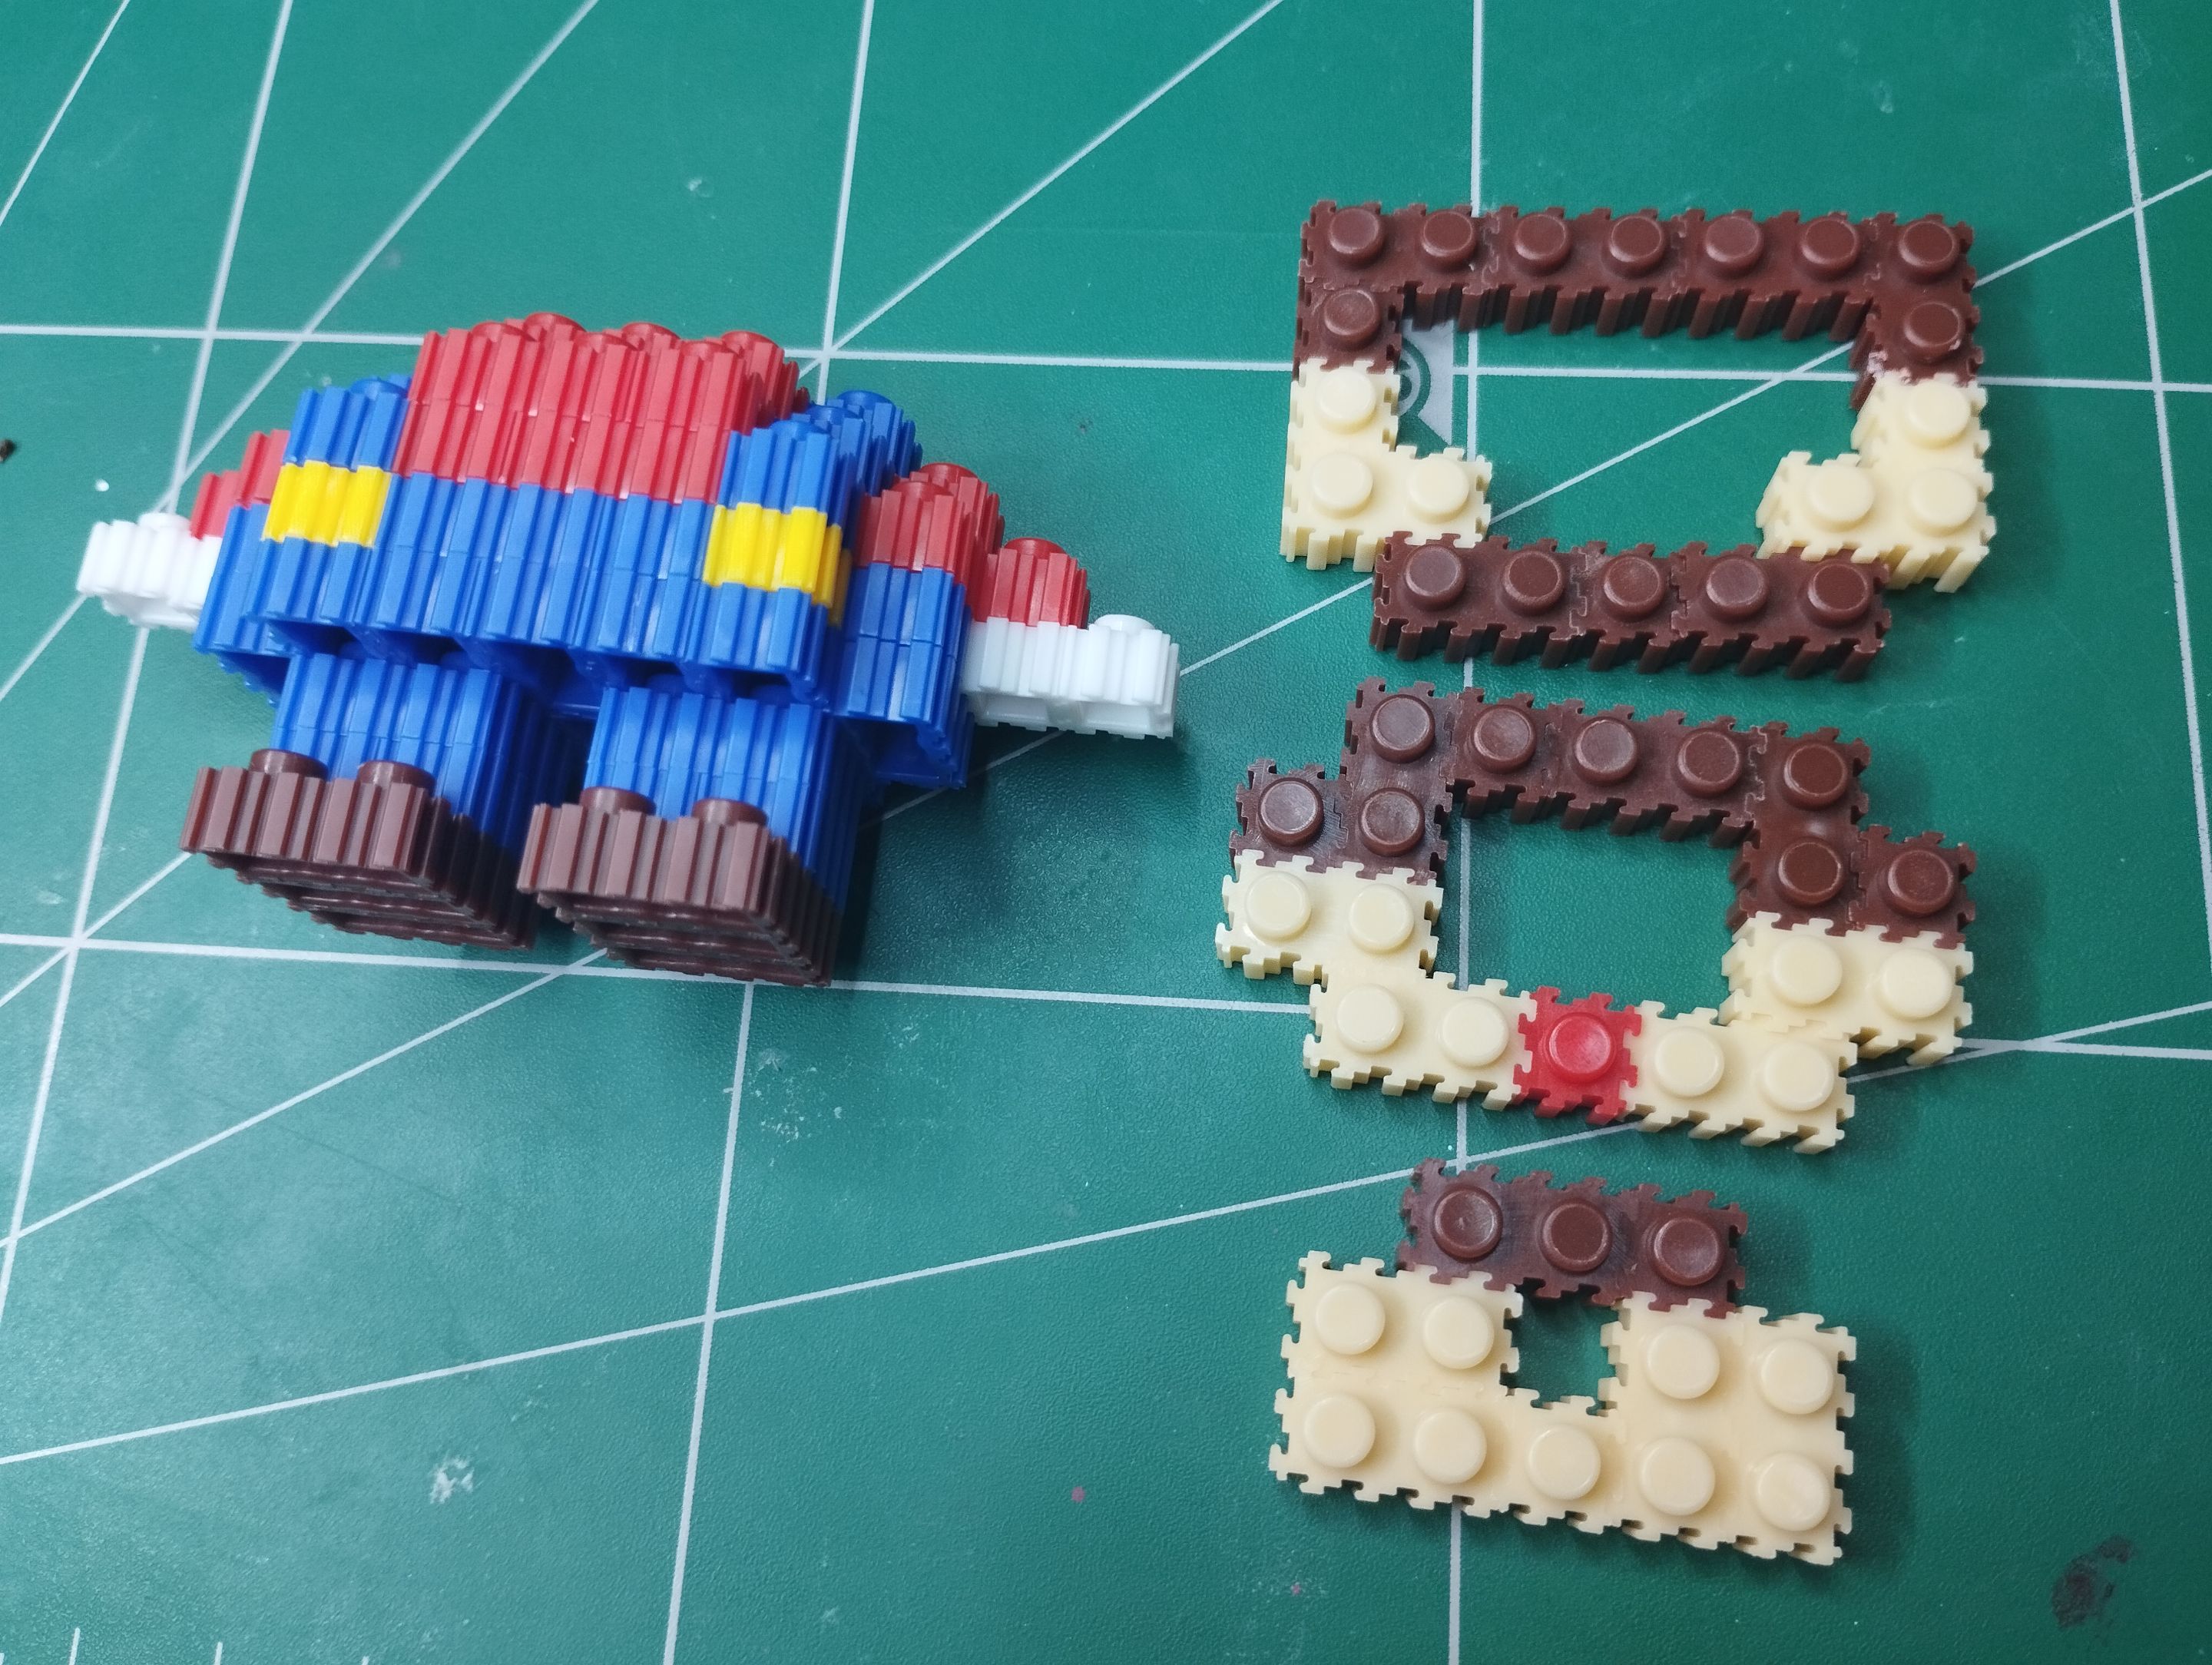
Once the character's torso has been assembled, as shown in the image on the right, the other pieces are made. Note that the image on the left shows the pieces that must be assembled to create Mario's neck and chin. There are three pieces, where only the neck is almost solid, but the other three above are hollow, like the previous ones I showed.
>># Paso 4
>>Una vez armado el torso del personaje, que ahí está en la imagen de la derecha, se hacen las otras piezas. Fíjense que en la imagen de la izquierda están las piezas que se deben armar para crear lo que sería el cuello y la barbilla de Mario. Son tres piezas en donde solo el cuello es casi maciza, pero las otras tres de arriba son huecas, como las anteriores que mostré.
|||
|-|-|
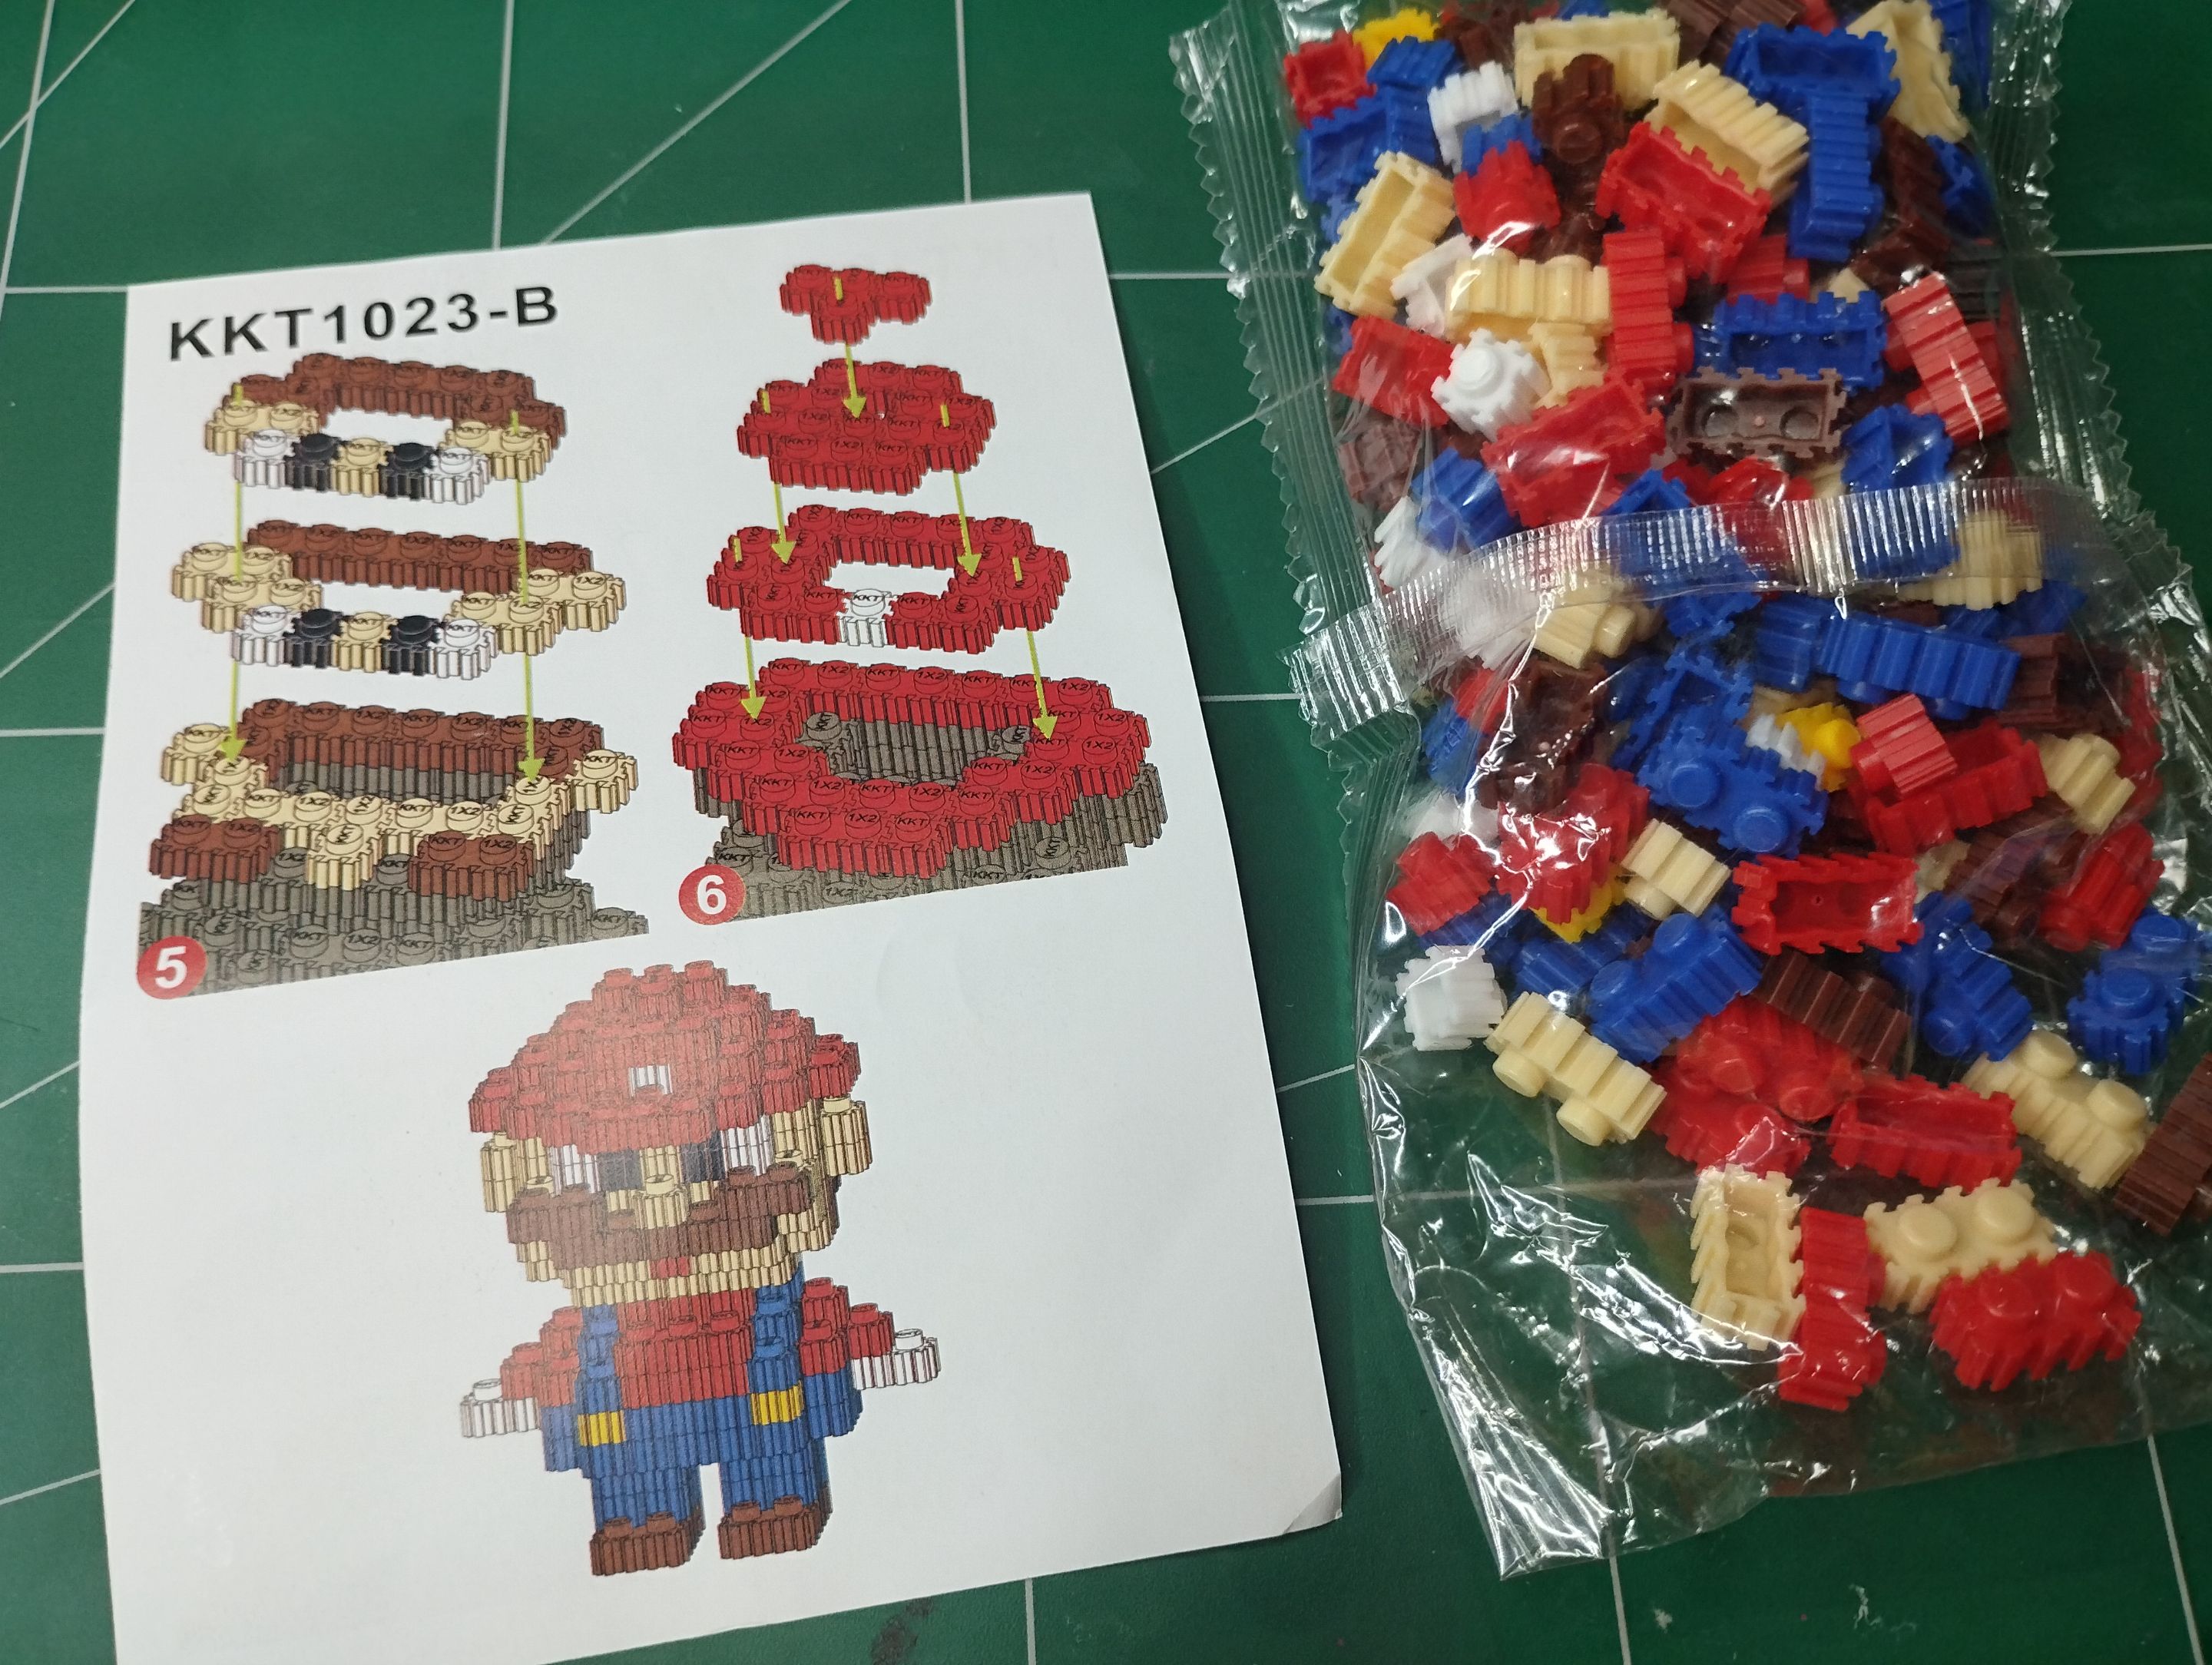
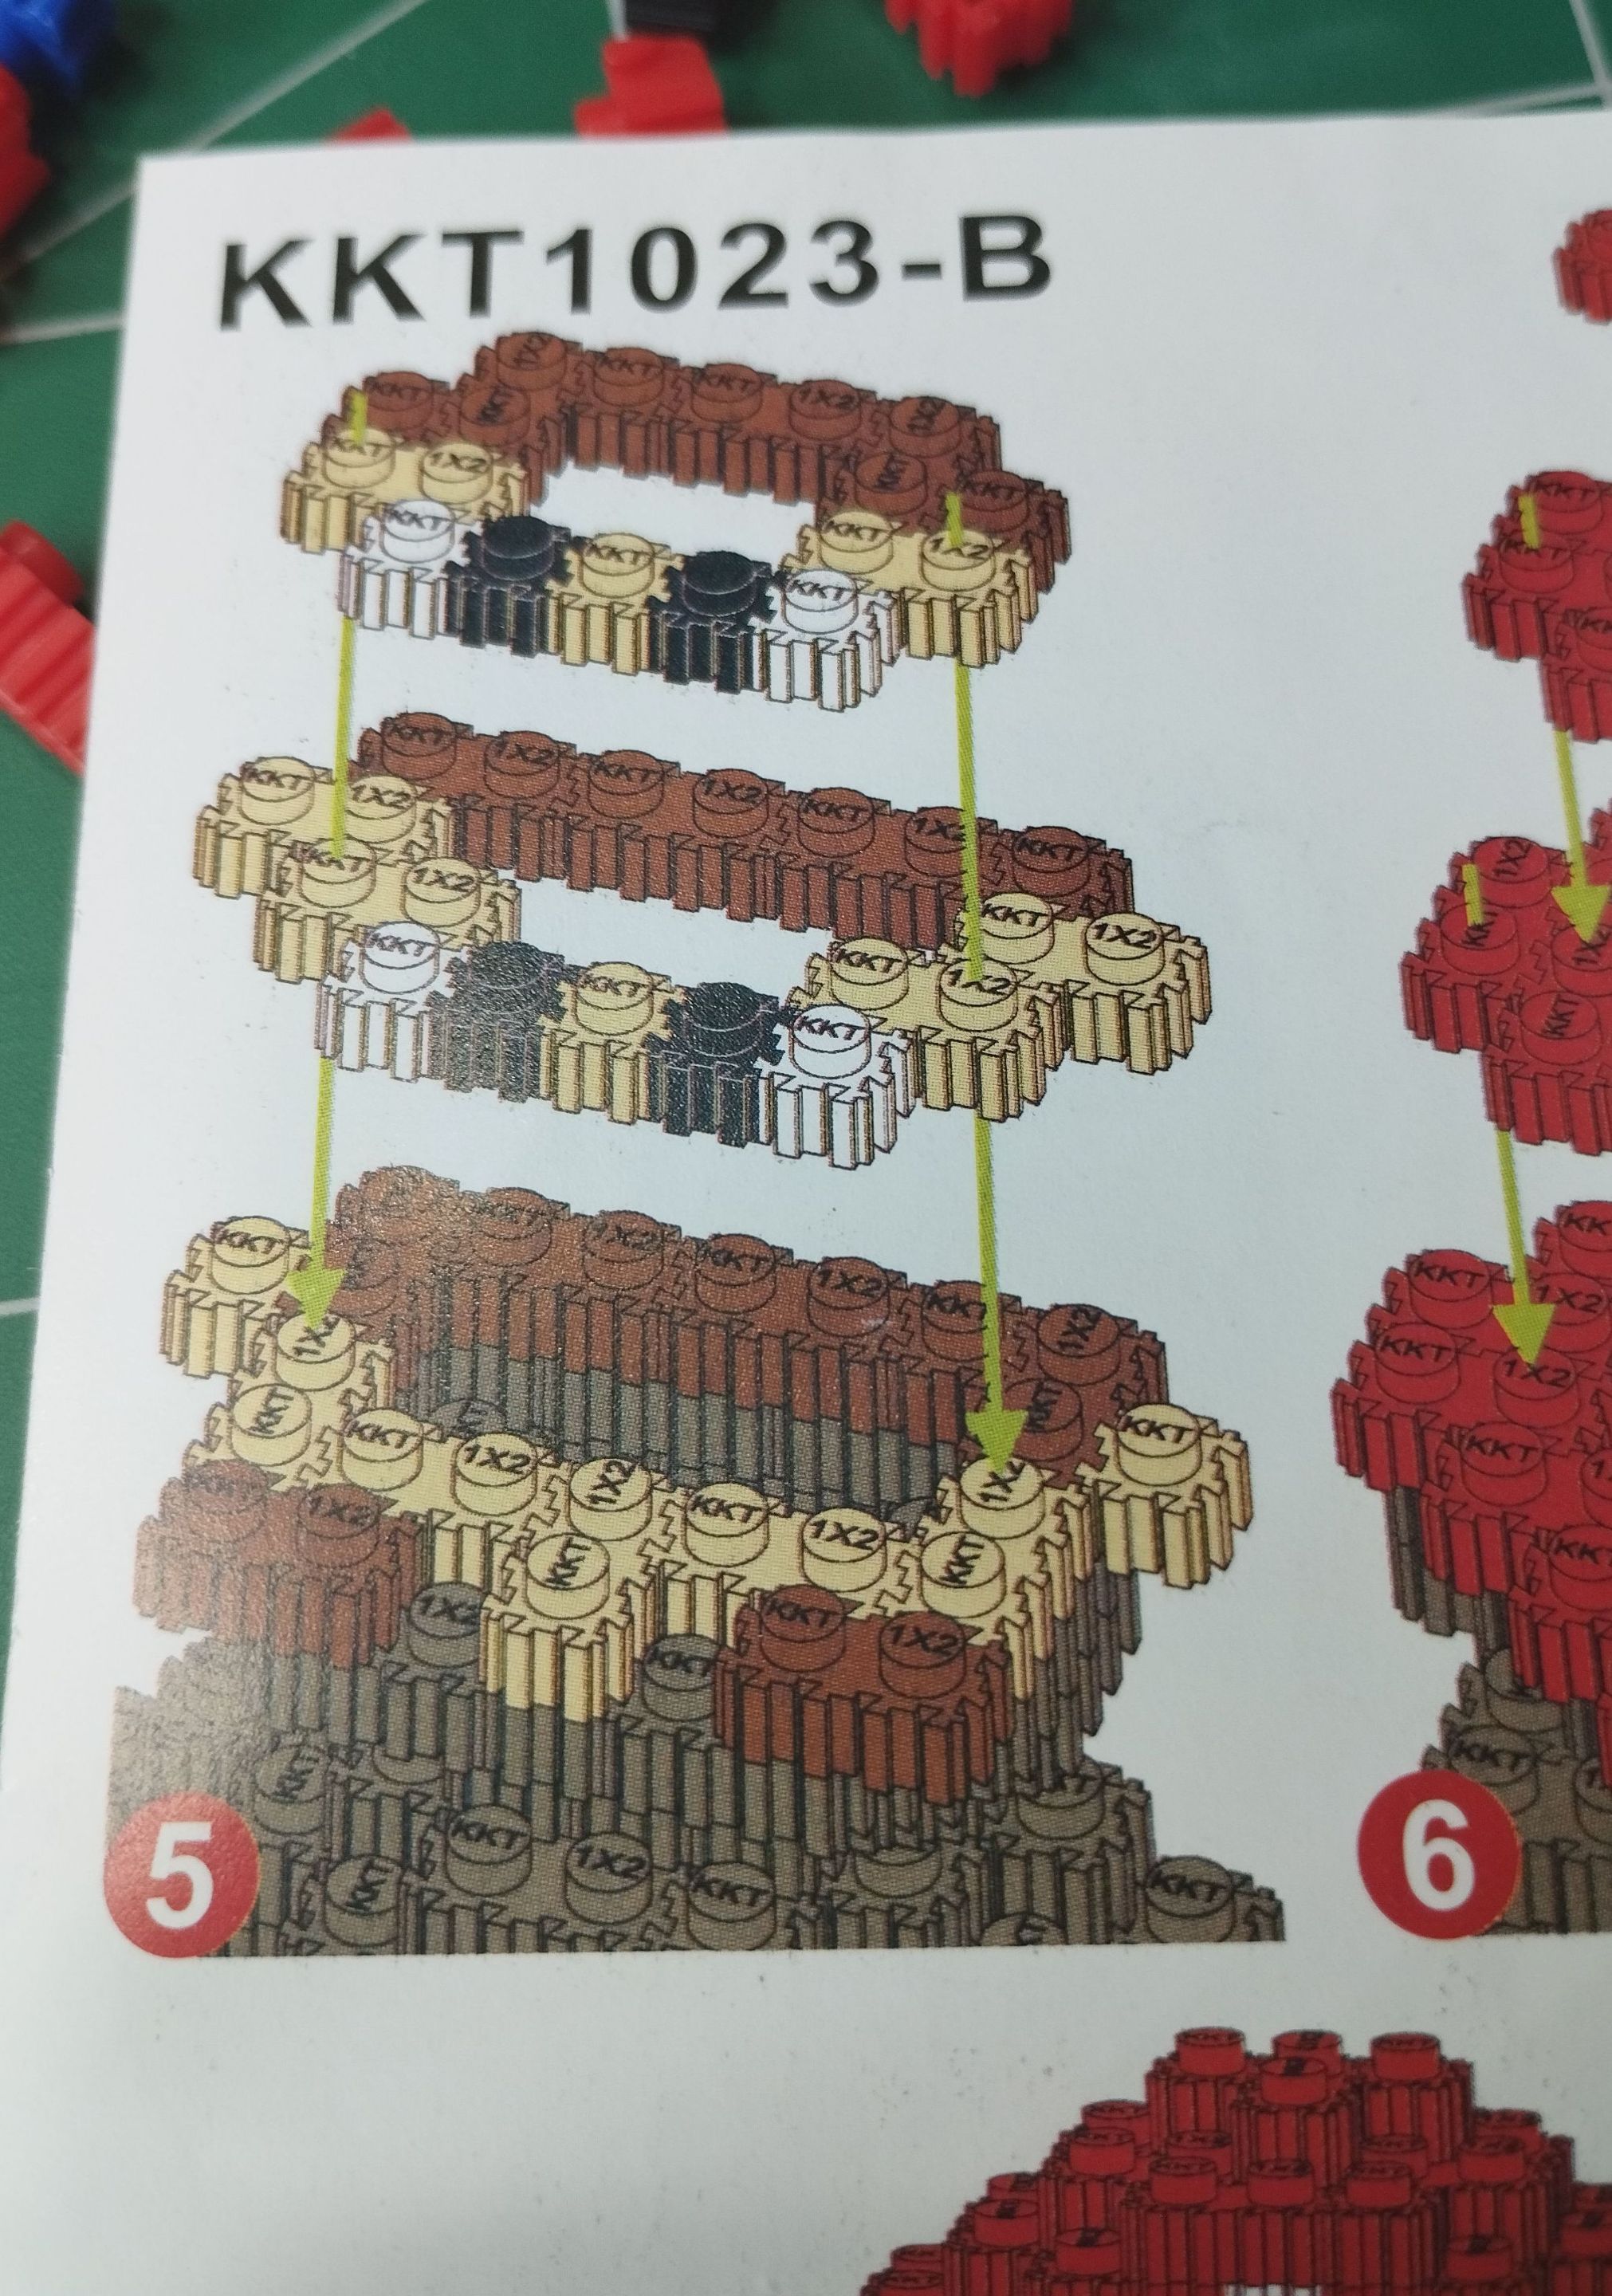
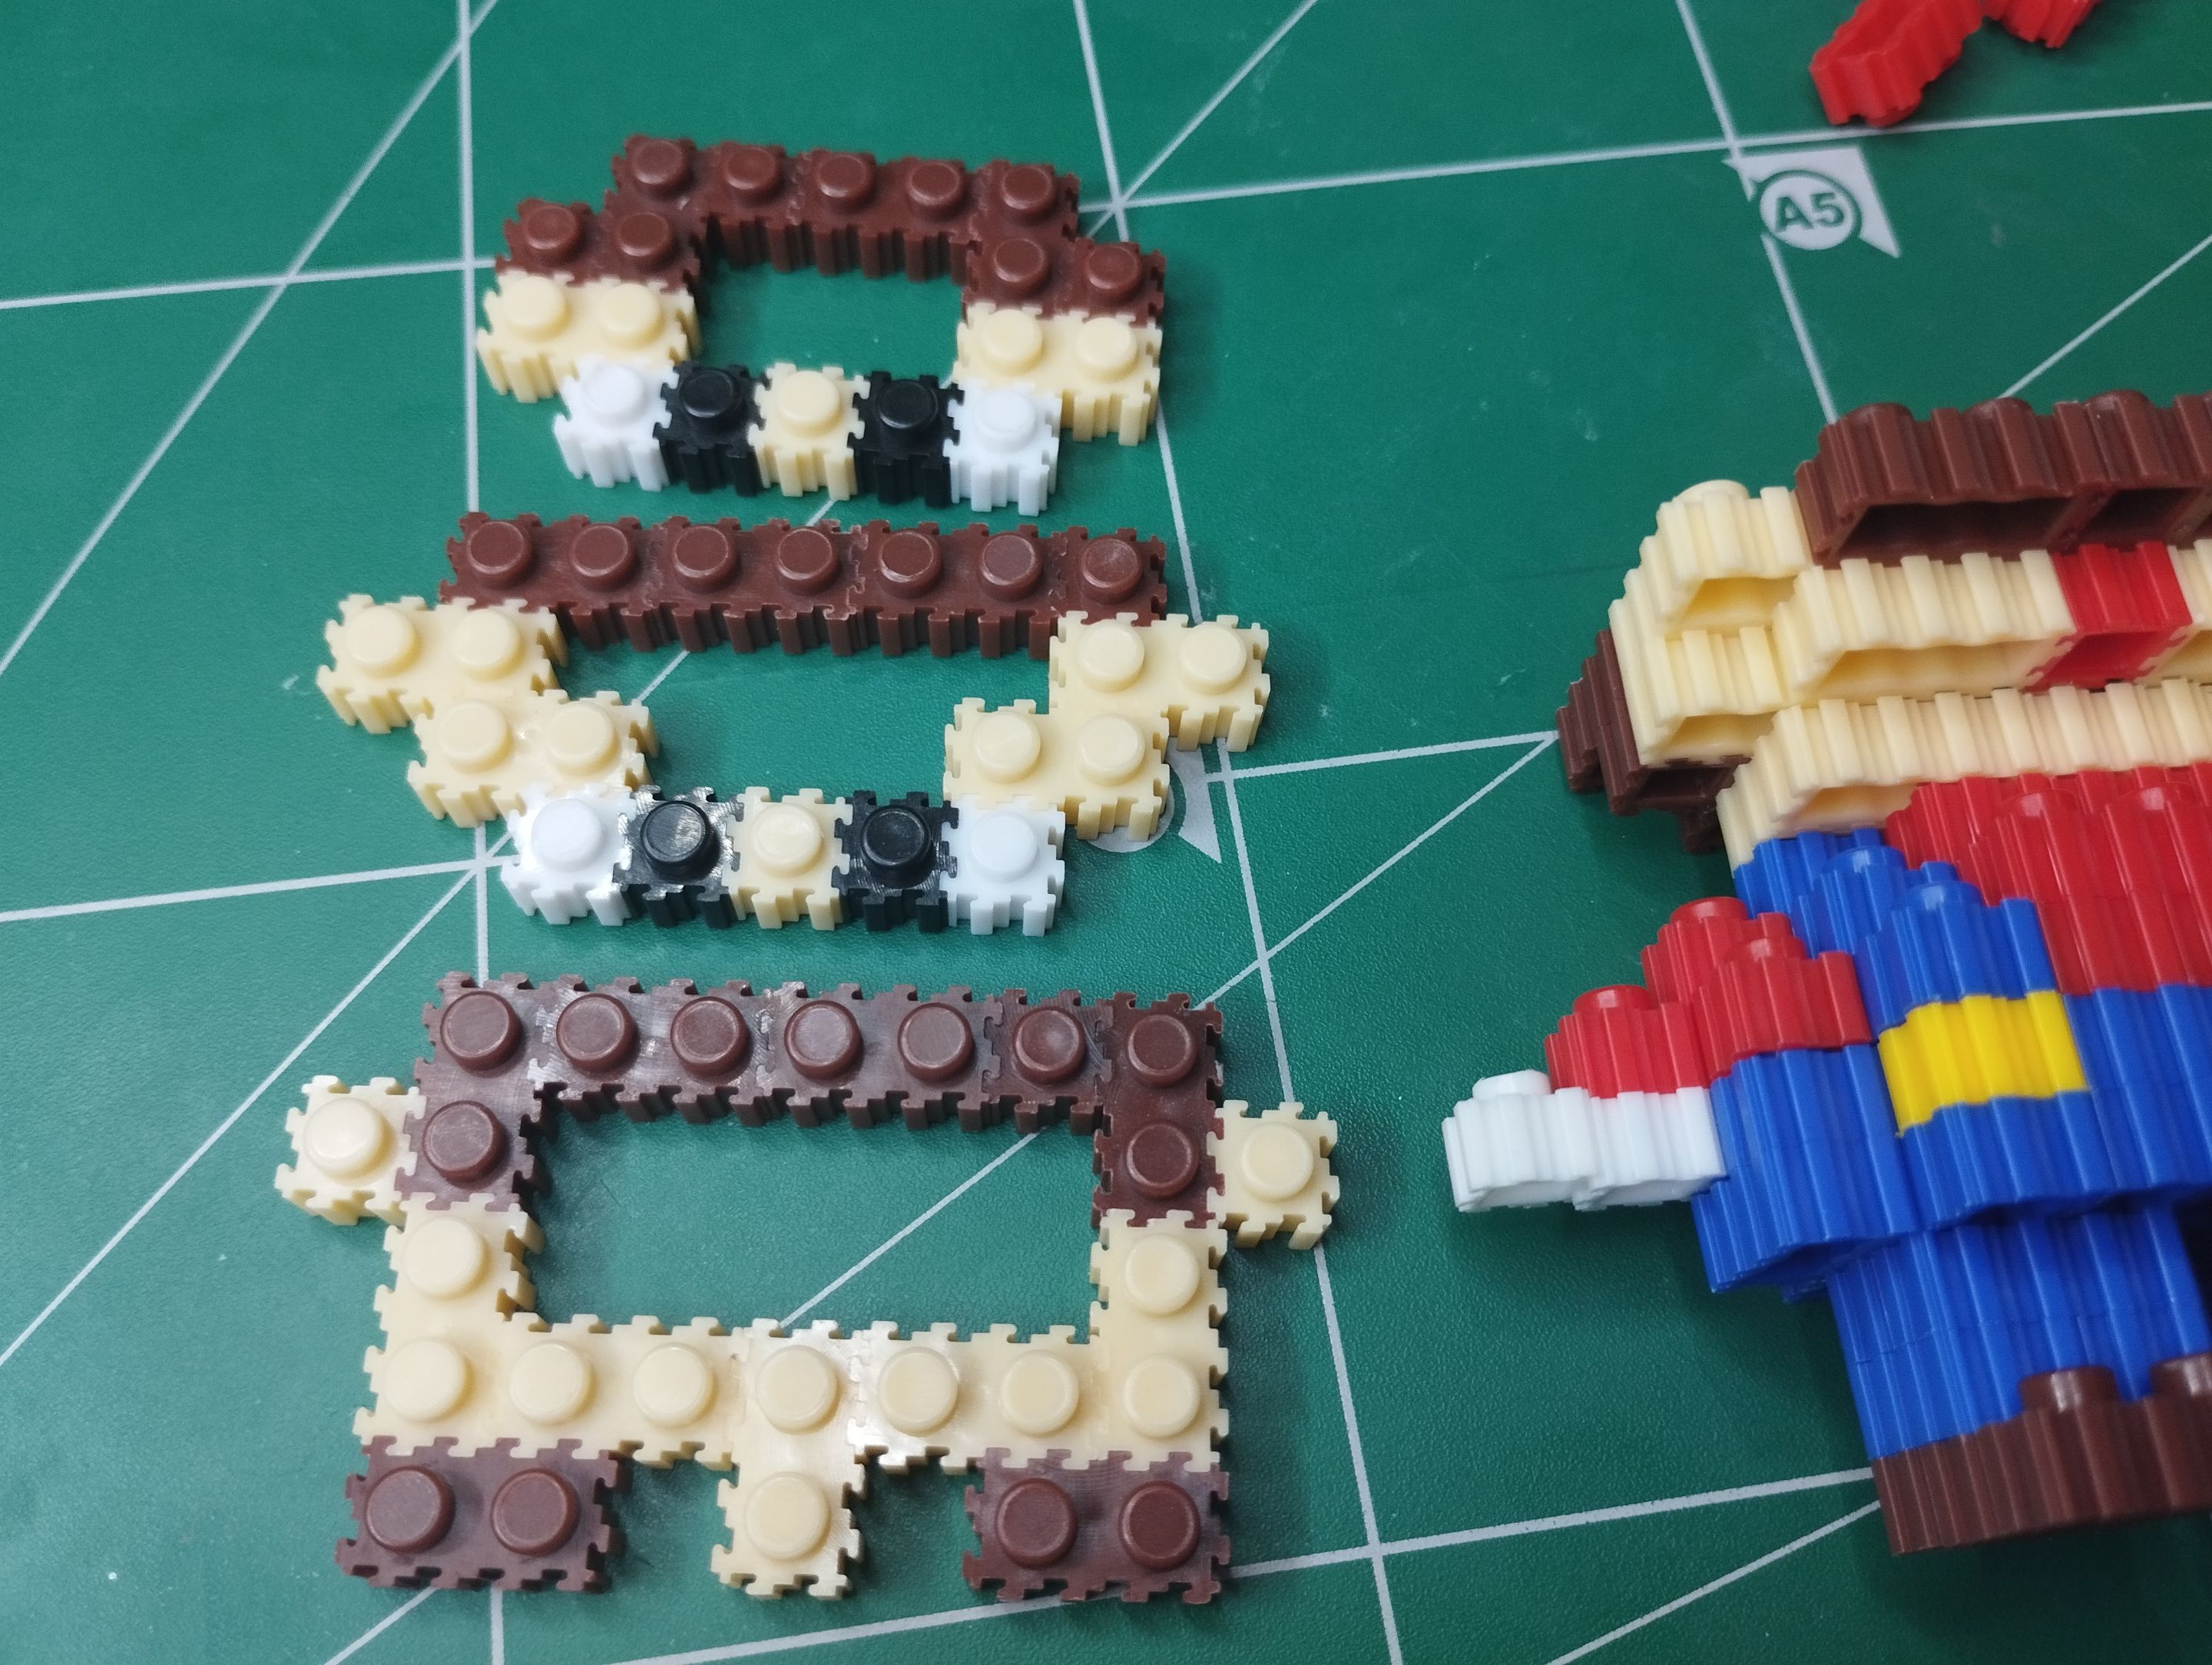
# Step 5
After that, I continued with the top of the head, which is where the eyes and upper part of the mustache are. These pieces are also not easy to assemble because they have very ambiguous shapes and must be assembled carefully so that they look the same as the image in the instructions, as you can see in the images below:
>># Paso 5
>>Luego de esto continué con la parte superior de la cabeza, que es donde están los ojos y la parte superior del bigote. Estas piezas tampoco son fáciles de armar porque tienen formas muy ambiguas y hay que armarlas con cuidado para que queden igual que la imagen de las instrucciones, como ven en las imágenes de abajo:
|||
|-|-|
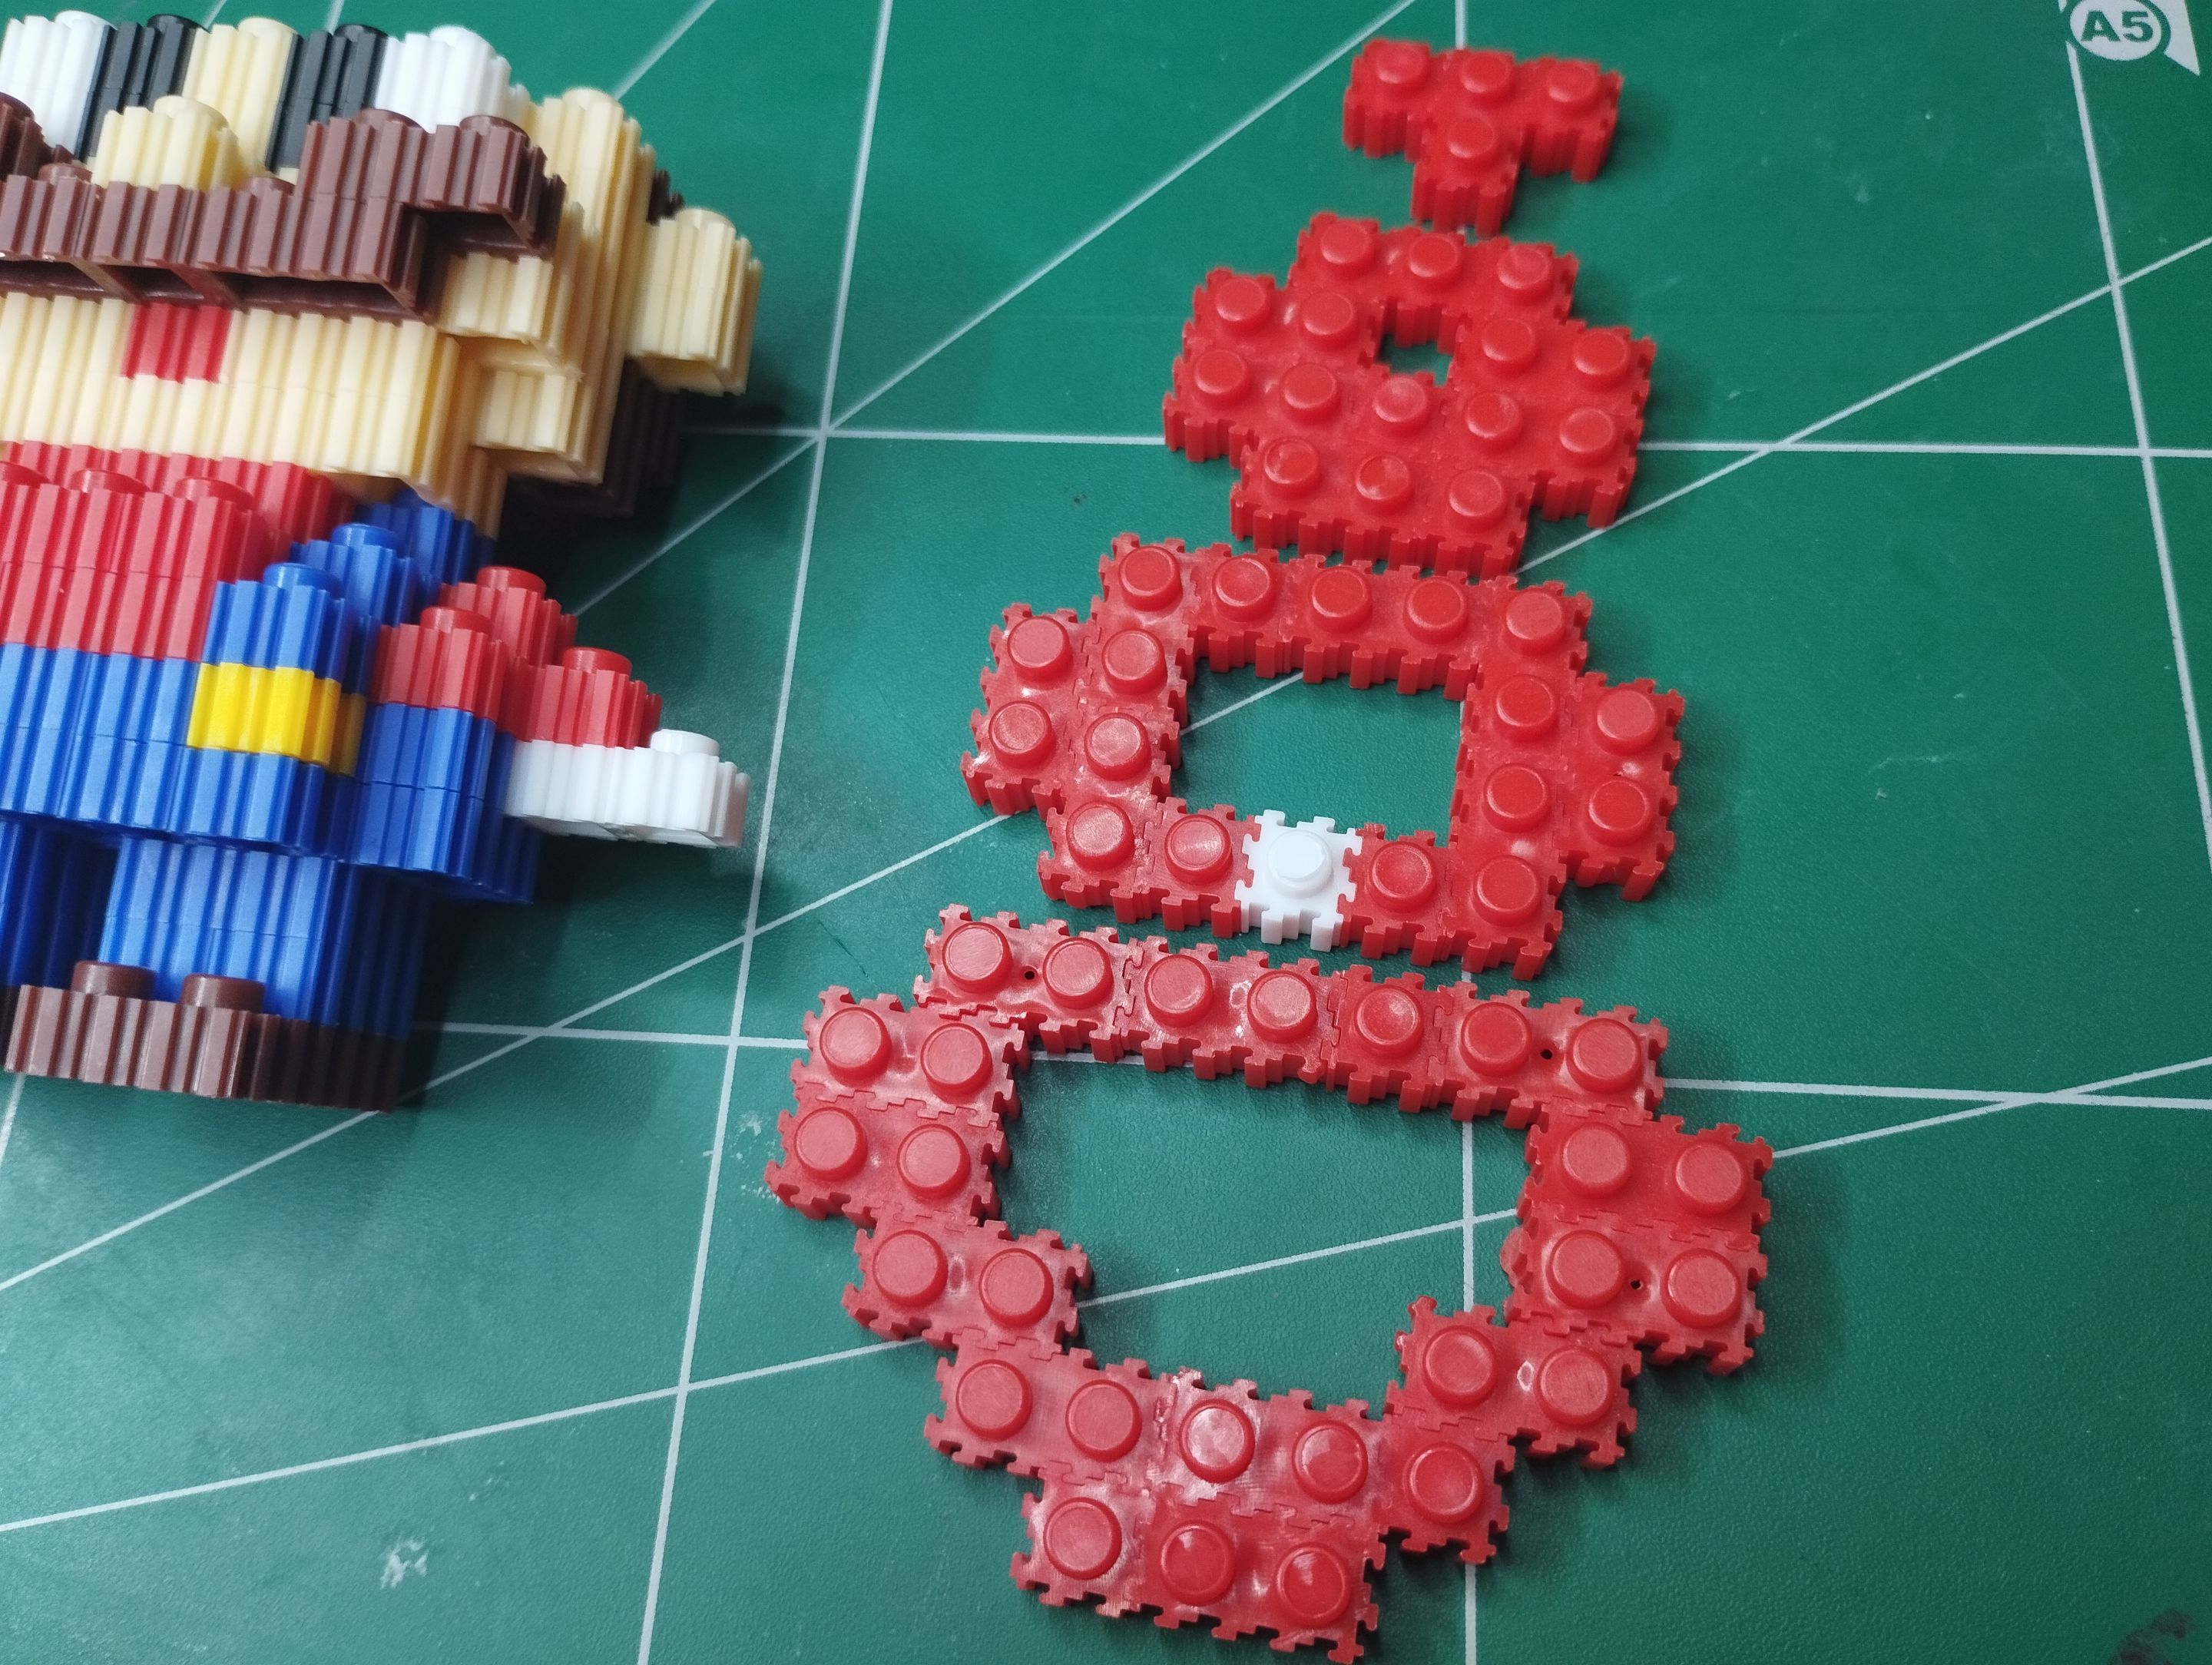
The last thing to do is Mario's hat. It's similar to a pyramid. Notice that the first piece is made like an inverted triangle; another rectangle with two bricks on the sides for the second piece; another vertical rectangle also with two bricks; for the last piece, the top one, it's just a “T” made with four bricks.
>>Ya lo último que hay que hacer es el sombrero de Mario. Es parecido a una pirámide, fíjense que se hace como un triángulo invertido en la primera pieza; otro rectángulo con dos ladrillos a los lados para la segunda pieza; otro rectángulo en vertical también con dos ladrillos; para la última pieza, la de arriba, es solo una "T" hecha con cuatro ladrillos.
|||
|-|-|
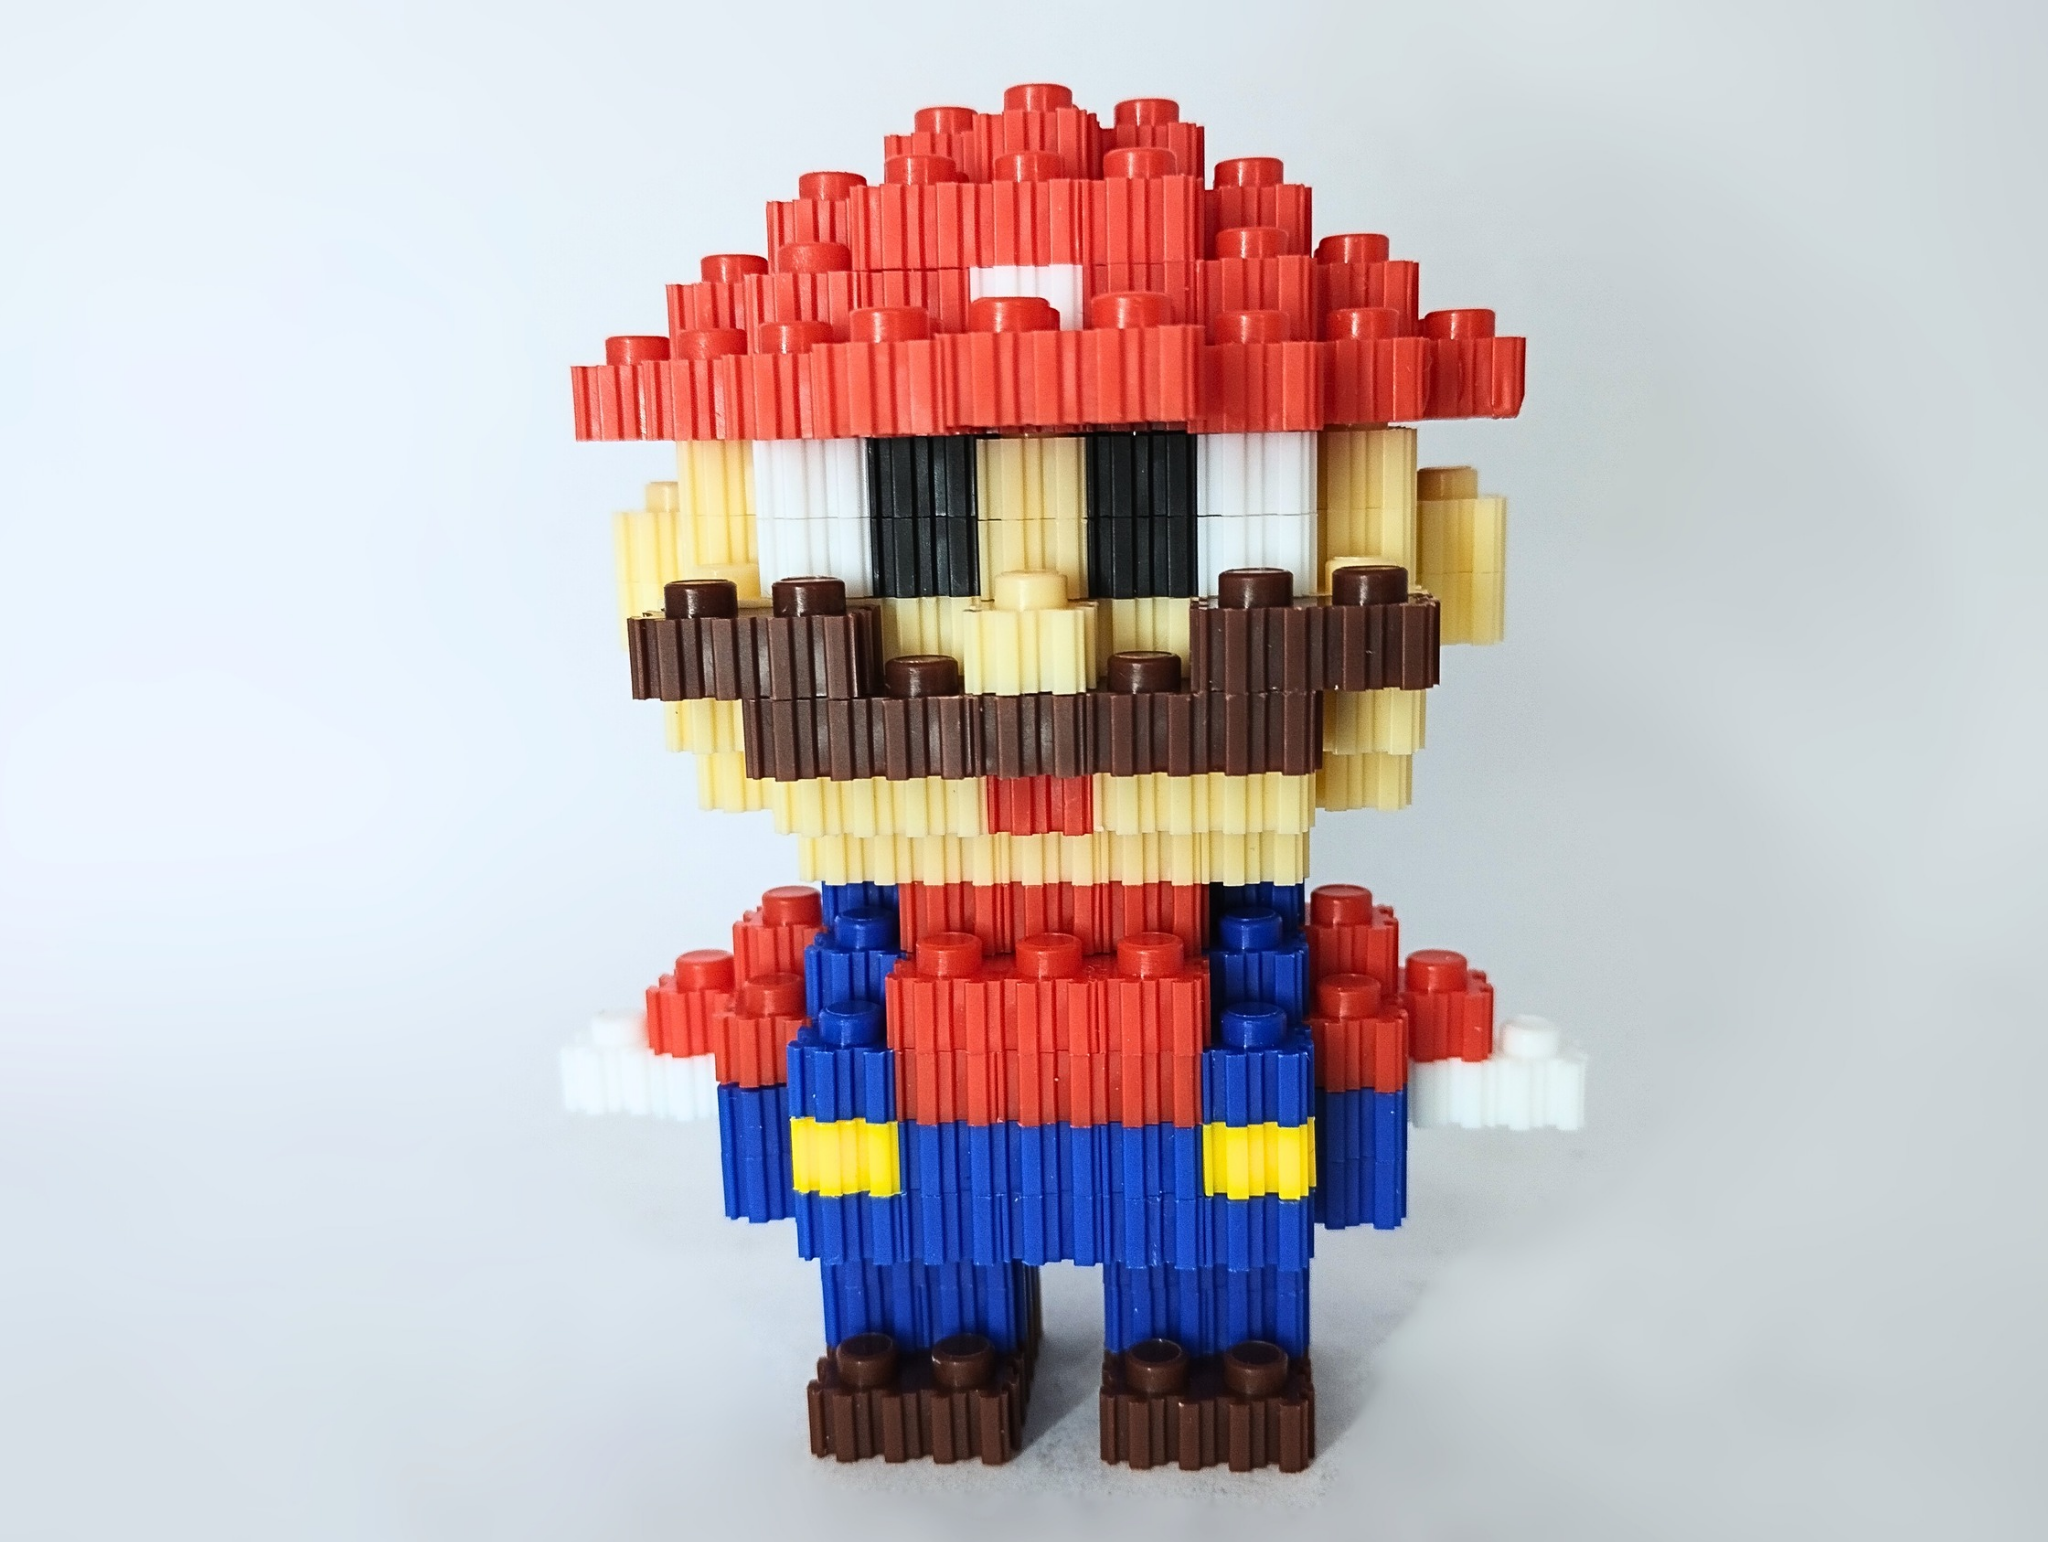
After putting all these pieces together, I checked that the little doll made of Legos had turned out well. Notice that the image with the instructions shows a sample, and it turned out exactly the same, which is pretty cool.
>>Después de unir todas estas piezas verifiqué que el muñequito hecho de legos hubiese quedado bien. Fíjense que en la imagen con las instrucciones trae una muestra y pues quedó igualito, algo bastante genial.

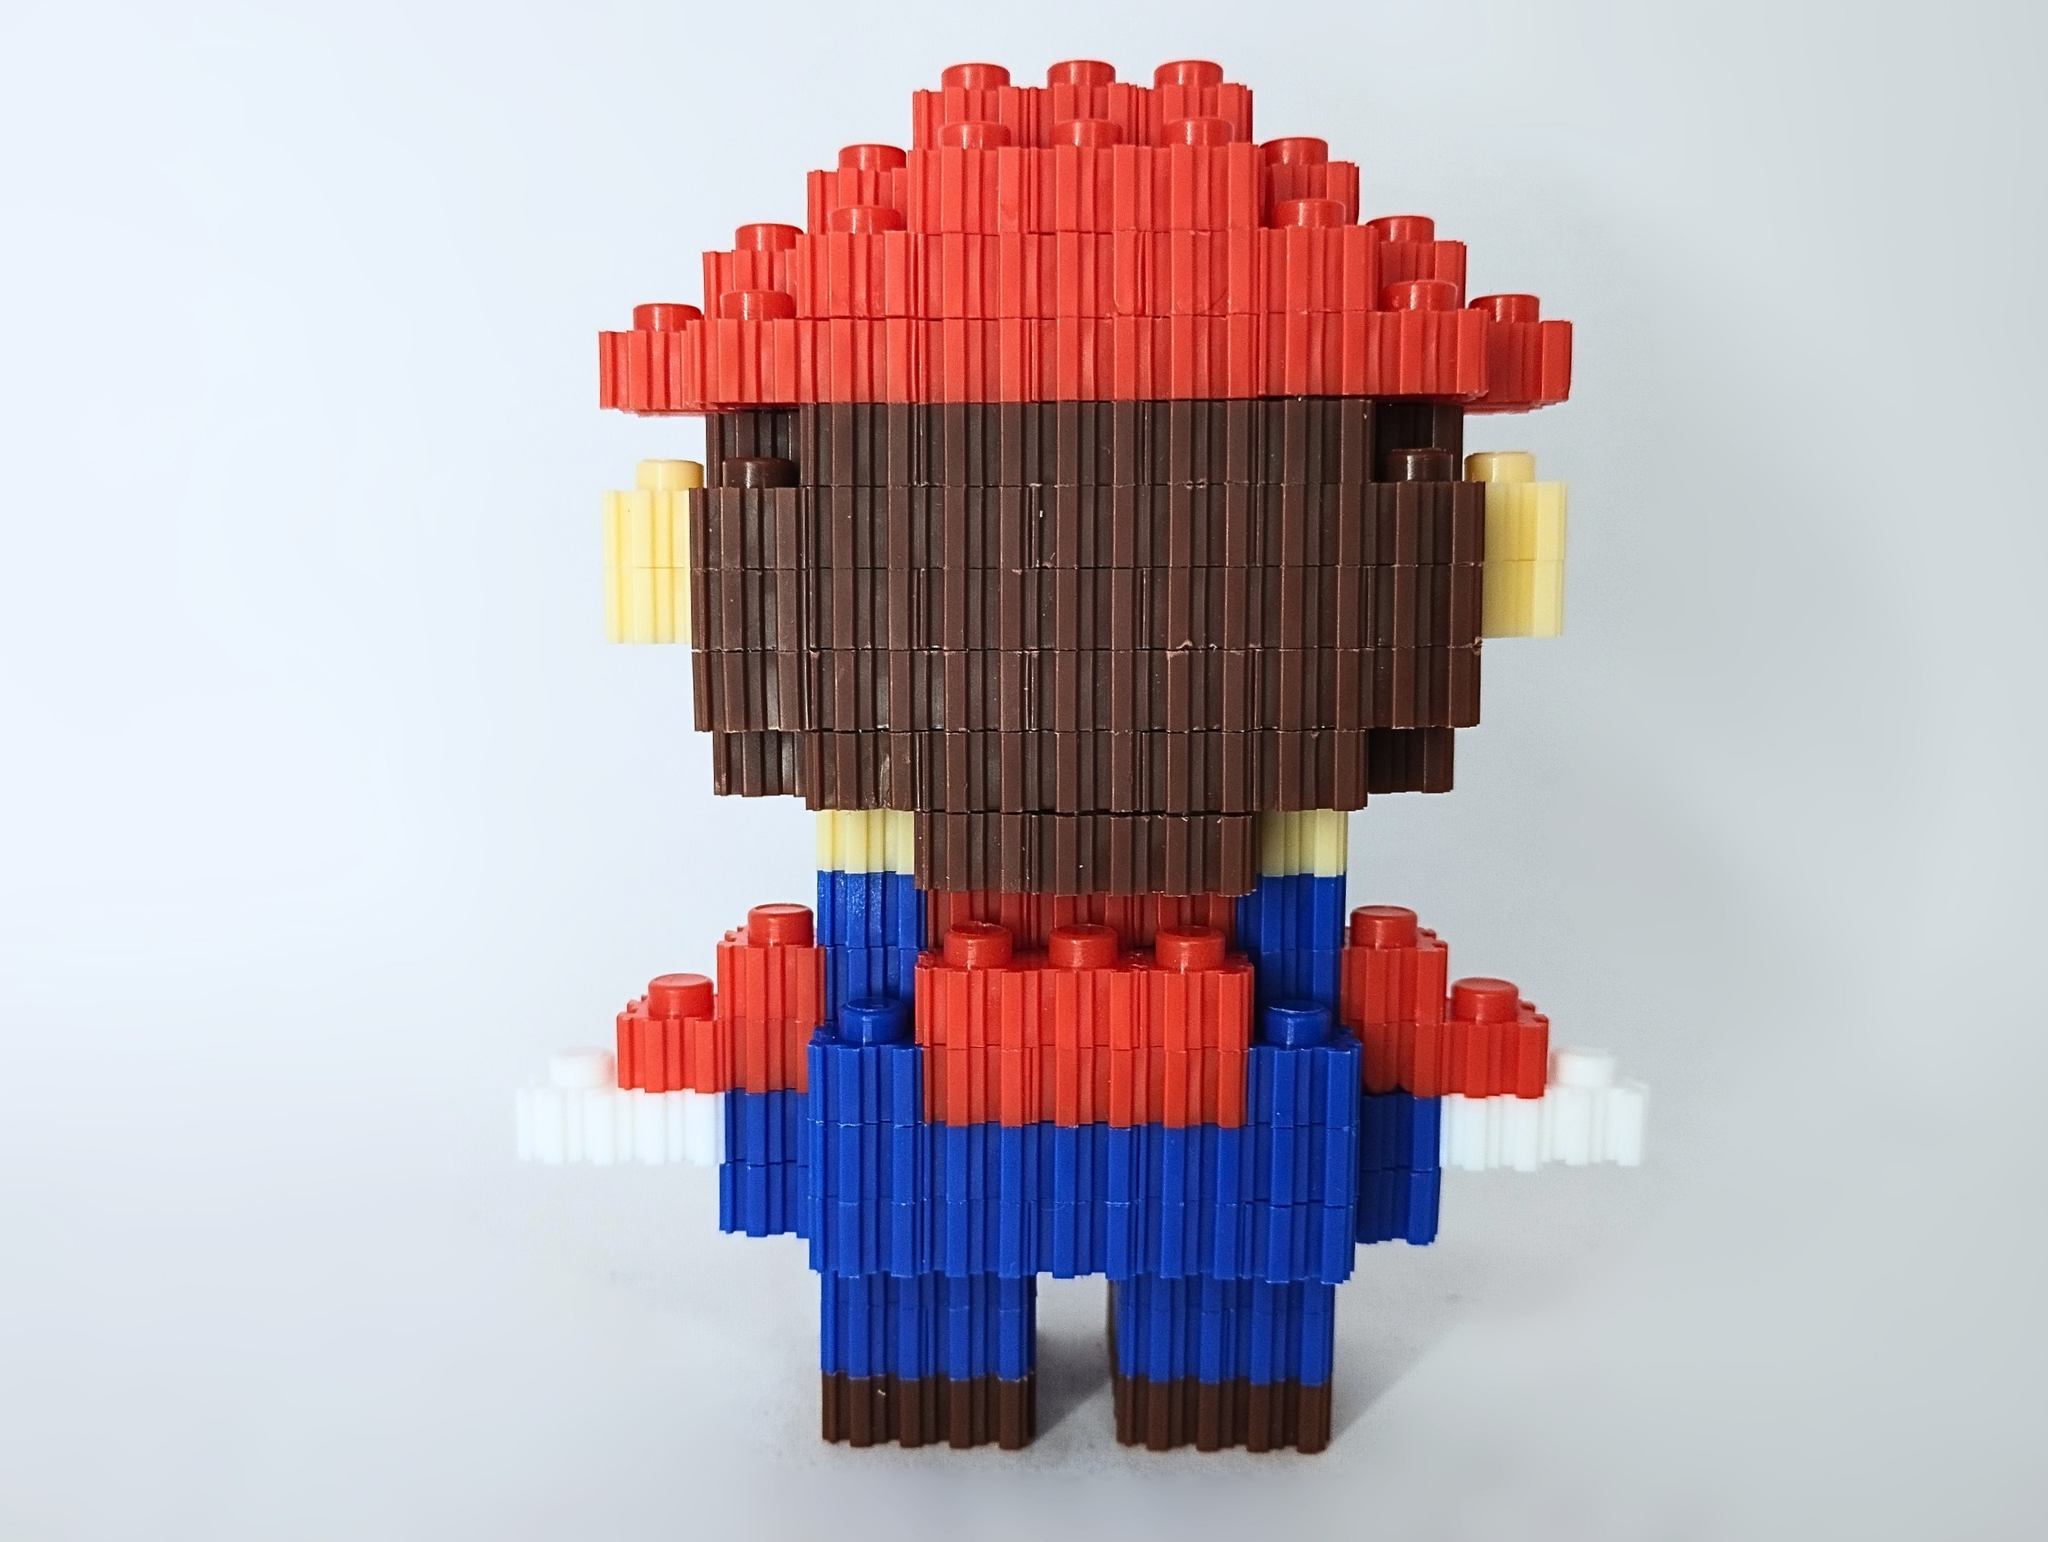
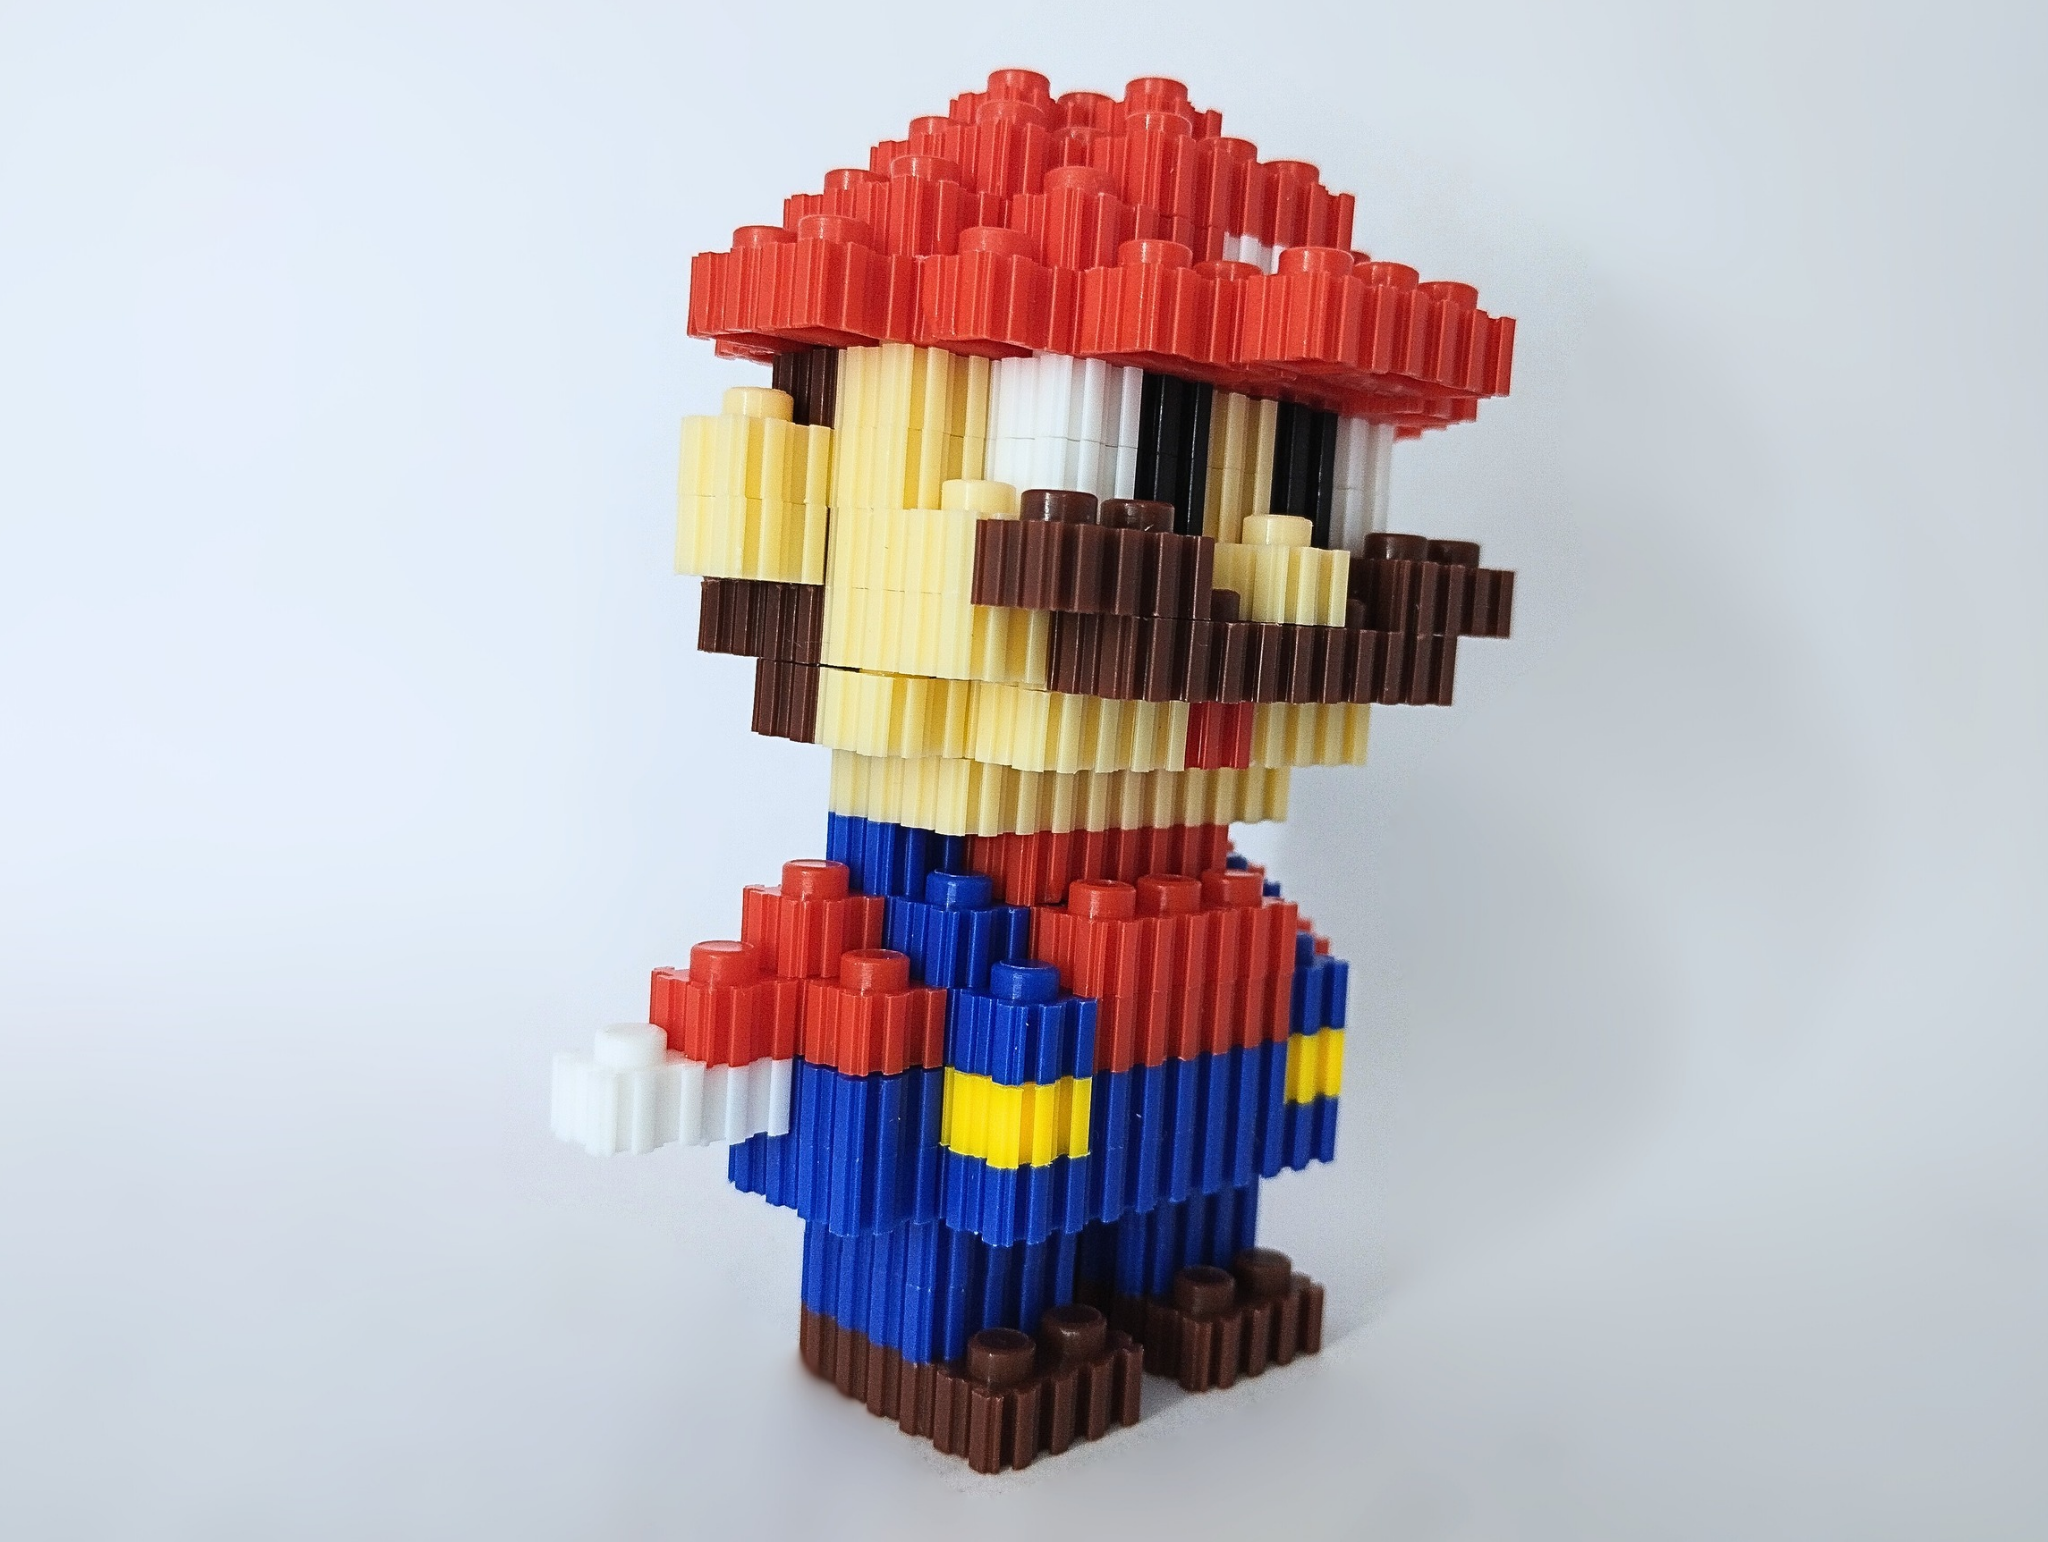
### And so the doll was finished. Below you can see a series of photographs of the final result:
>>#### De esta manera el muñequito quedó terminado. A continuación pueden ver una serie de fotografías del resultado final:
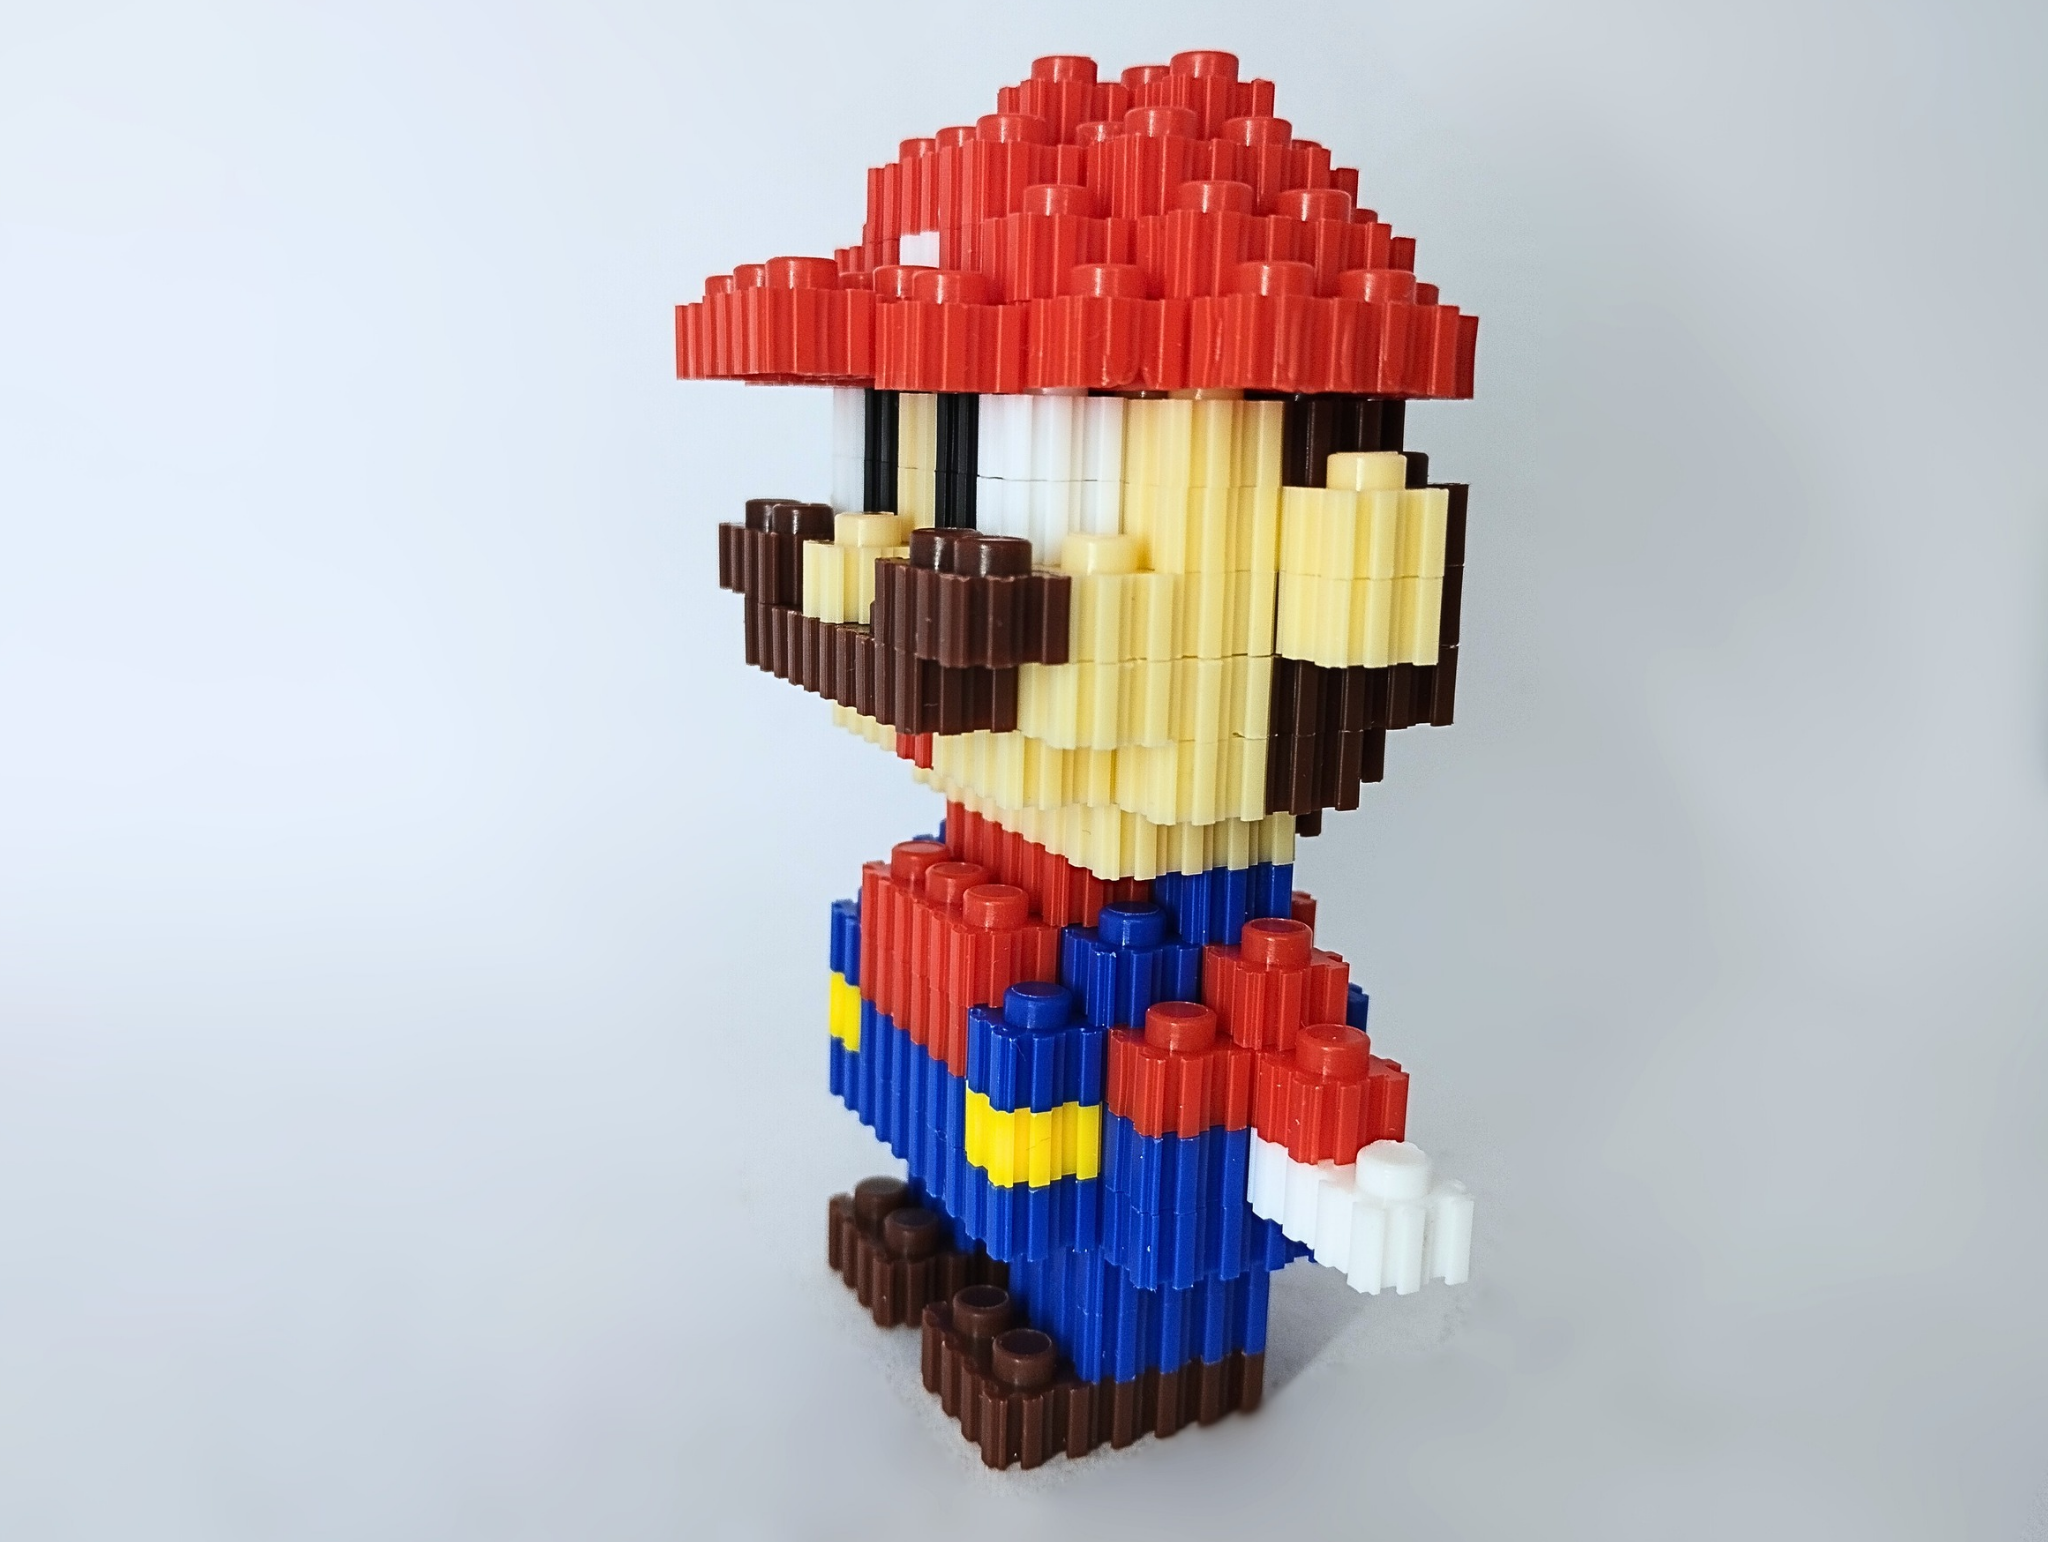
Well, friends, that's all for now. I hope you liked this Mario made with Legos. Although they are not “Lego” as such, understand that they are building blocks. That being the case, the little figure looks pretty cool in this style, even resembling PixelArt.
If you'd like to leave your opinions about this Mario, you can leave them below in the comments. As always, I'll be happy to read them. With nothing more to add, I'll say goodbye for now...
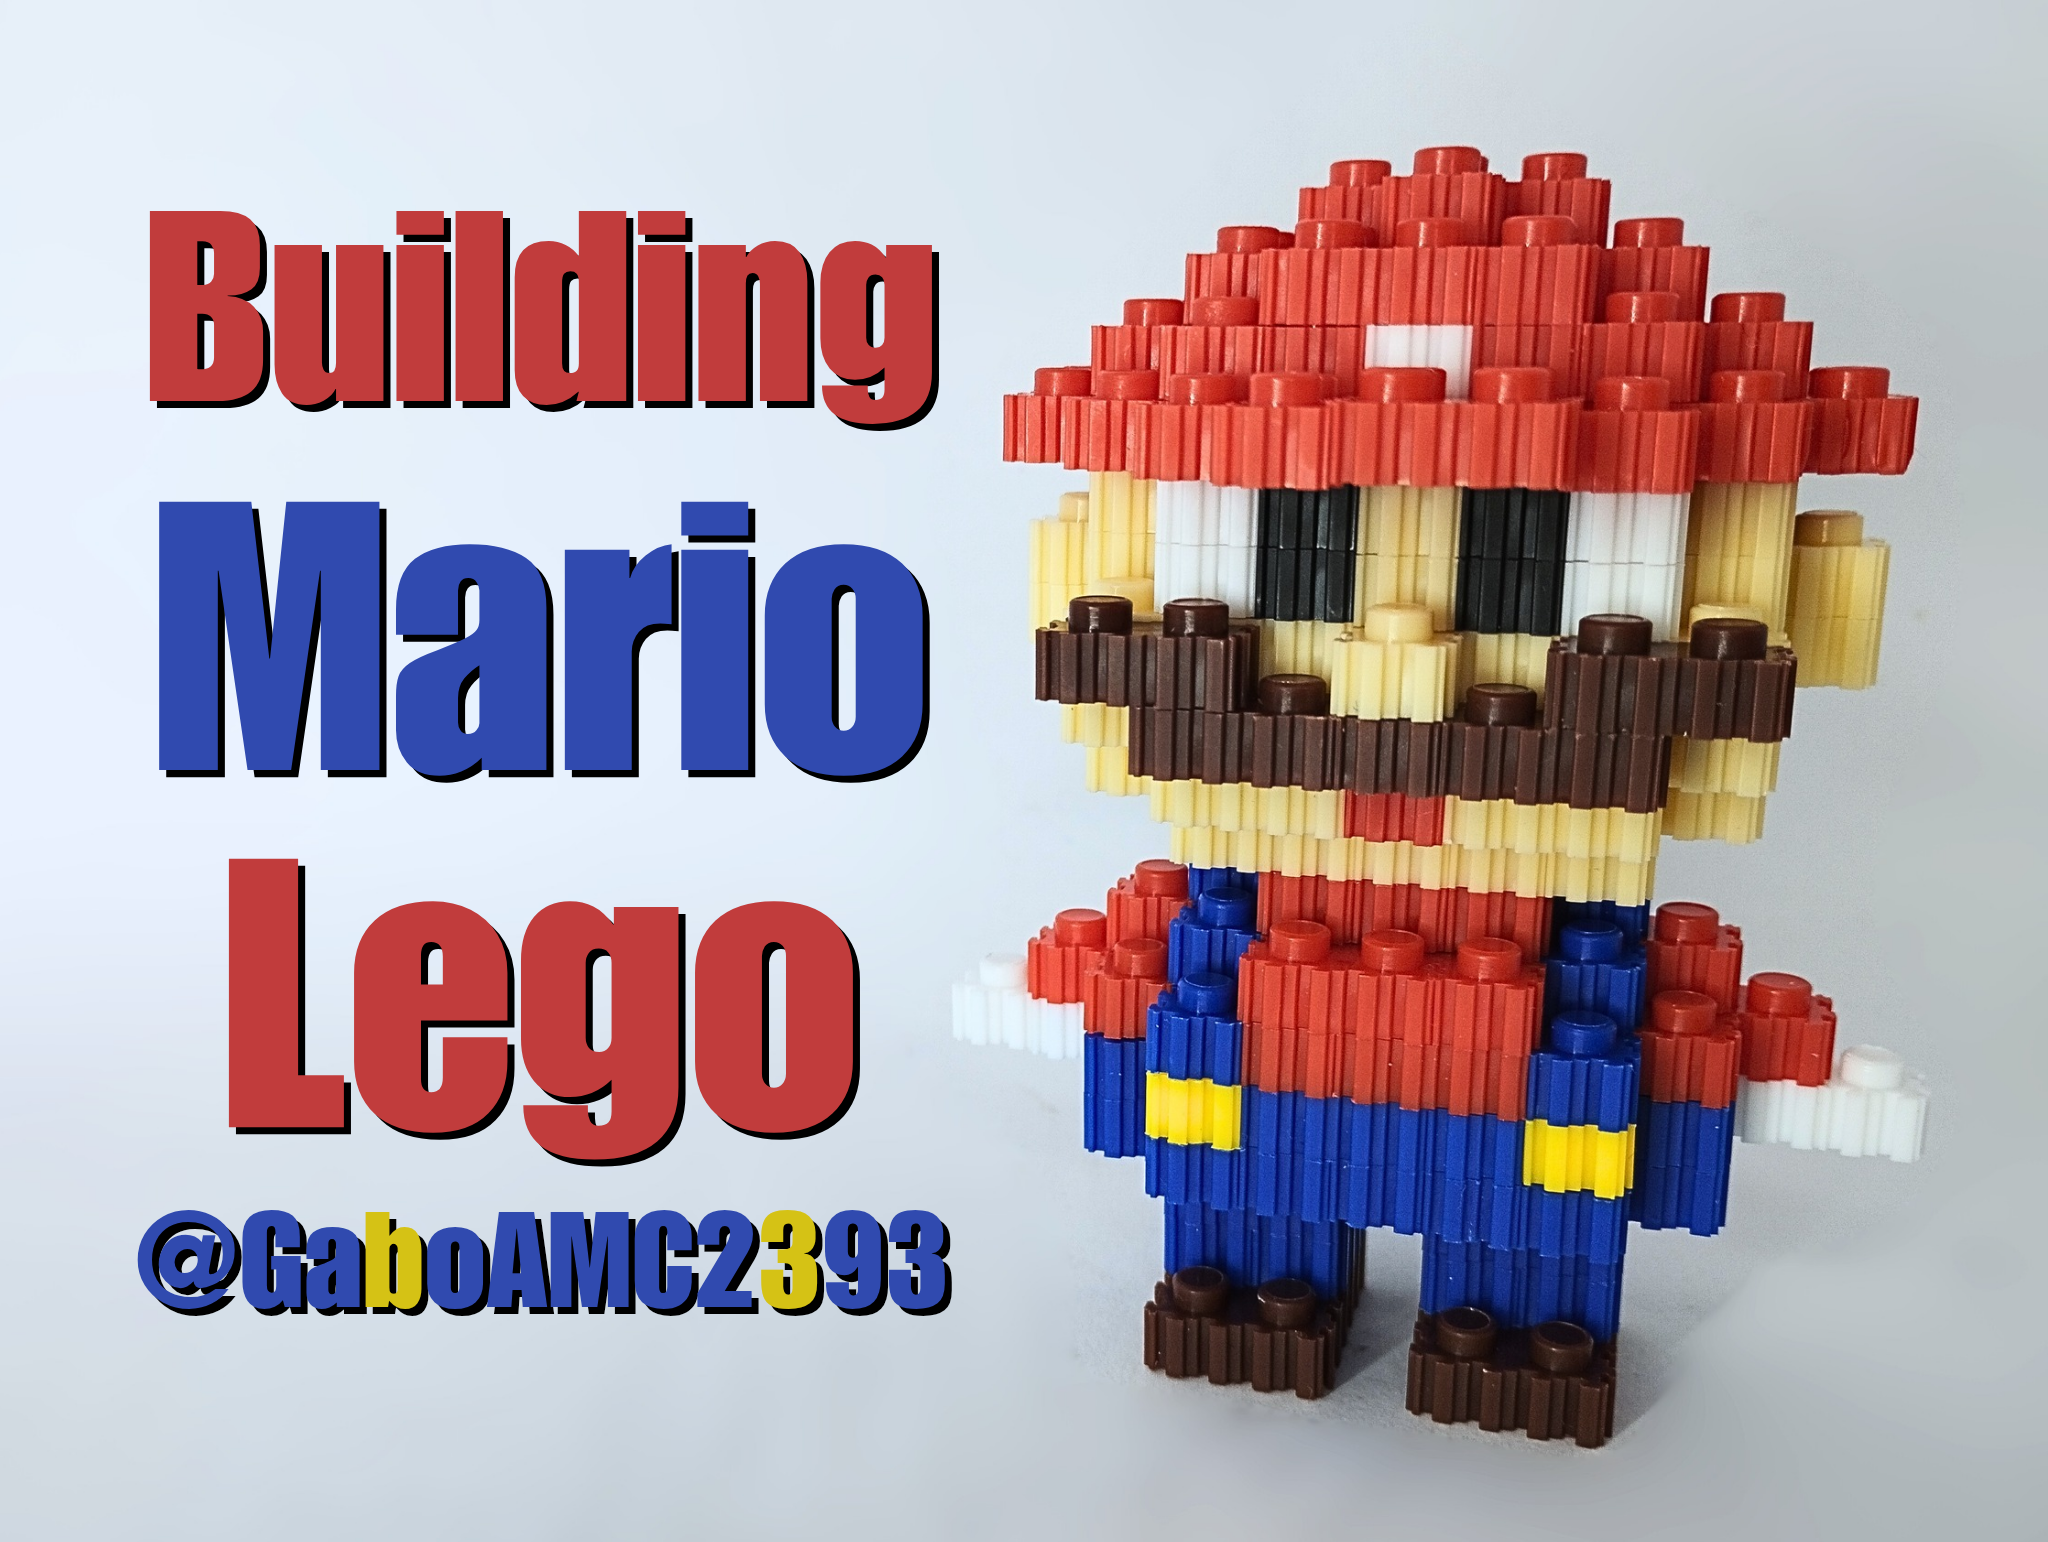
Building Mario Lego [ENG/SPA]
@gaboamc2393
· 2025-09-03 00:36
· Recreational Games
#hive-133578
#games
#lego
#nintendo
#gift
#spanish
#juegos
#pimp
#waiv
#vyb
Payout: 0.000 HBD
Votes: 814
More interactions (upvote, reblog, reply) coming soon.