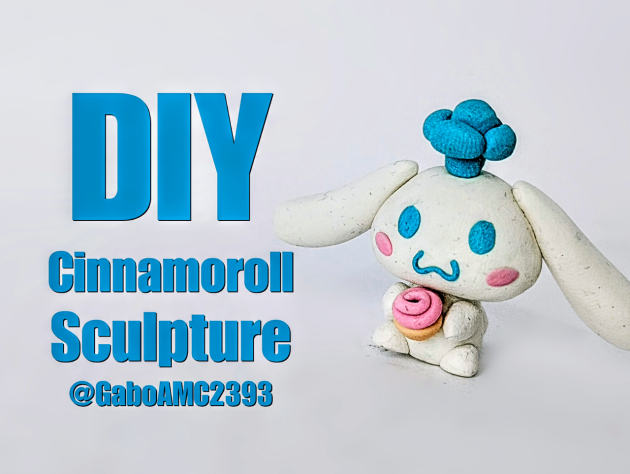
Hello, friends. About two weeks ago, I shared a Pompompurin figurine with the community. This is part of a small Sanrio collection I am putting together, and I plan to make several of these characters.
**You can see the Pompompurin post at the following link:**
https://peakd.com/hive-130560/@gaboamc2393/diy-pompompurin-sculpture-engspa
Well, one of the best-known characters is Cinnamoroll. So today I would like to share with you another Sanrio figurine, one of the character I just mentioned. Join me in the step-by-step process of creating this character:
>># Español
>>Saludos amigos. Hace aproximadamente dos semanas compartí en la comunidad una figurita de Pompompurin. Esta es una pequeña colección de Sanrio que estoy armando y mi intención es hacer varios de estos personajes.
>>
>>**En el enlace a continuación pueden ver la publicación de Pompompurin:**
>>https://peakd.com/hive-130560/@gaboamc2393/diy-pompompurin-sculpture-engspa
>>
>>Pues bien, uno de los personajes más conocidos es el de Cinnamoroll. Así que hoy me gustaría compartir con ustedes otra figurita de Sanrio, una de este personaje que acabo de mencionar. Acompañenme en el paso a paso de este personaje:
# Step by step
The materials I used for this figurine were as follows:
* Plasticine
* Wire
* Glue
The plasticine I used in this case was completely white, because as it is a small figurine, you don't need to use too much plasticine. As I had enough white, I decided to make it in this color and not paint it later.
>># Paso a paso
>>
>>Los materiales que utilicé para esta figurita fueron los siguientes:
>>
>>* Plastilina
>>* Alambre
>>* Pegamento
>>
>>La plastilina que usé en este caso fue completamente blanca, porque al ser una figurita pequeña no hace falta usar demasiada plastilina. Al tener suficiente color blanco, decidí hacerlo así con este color y no pintarlo posteriormente.
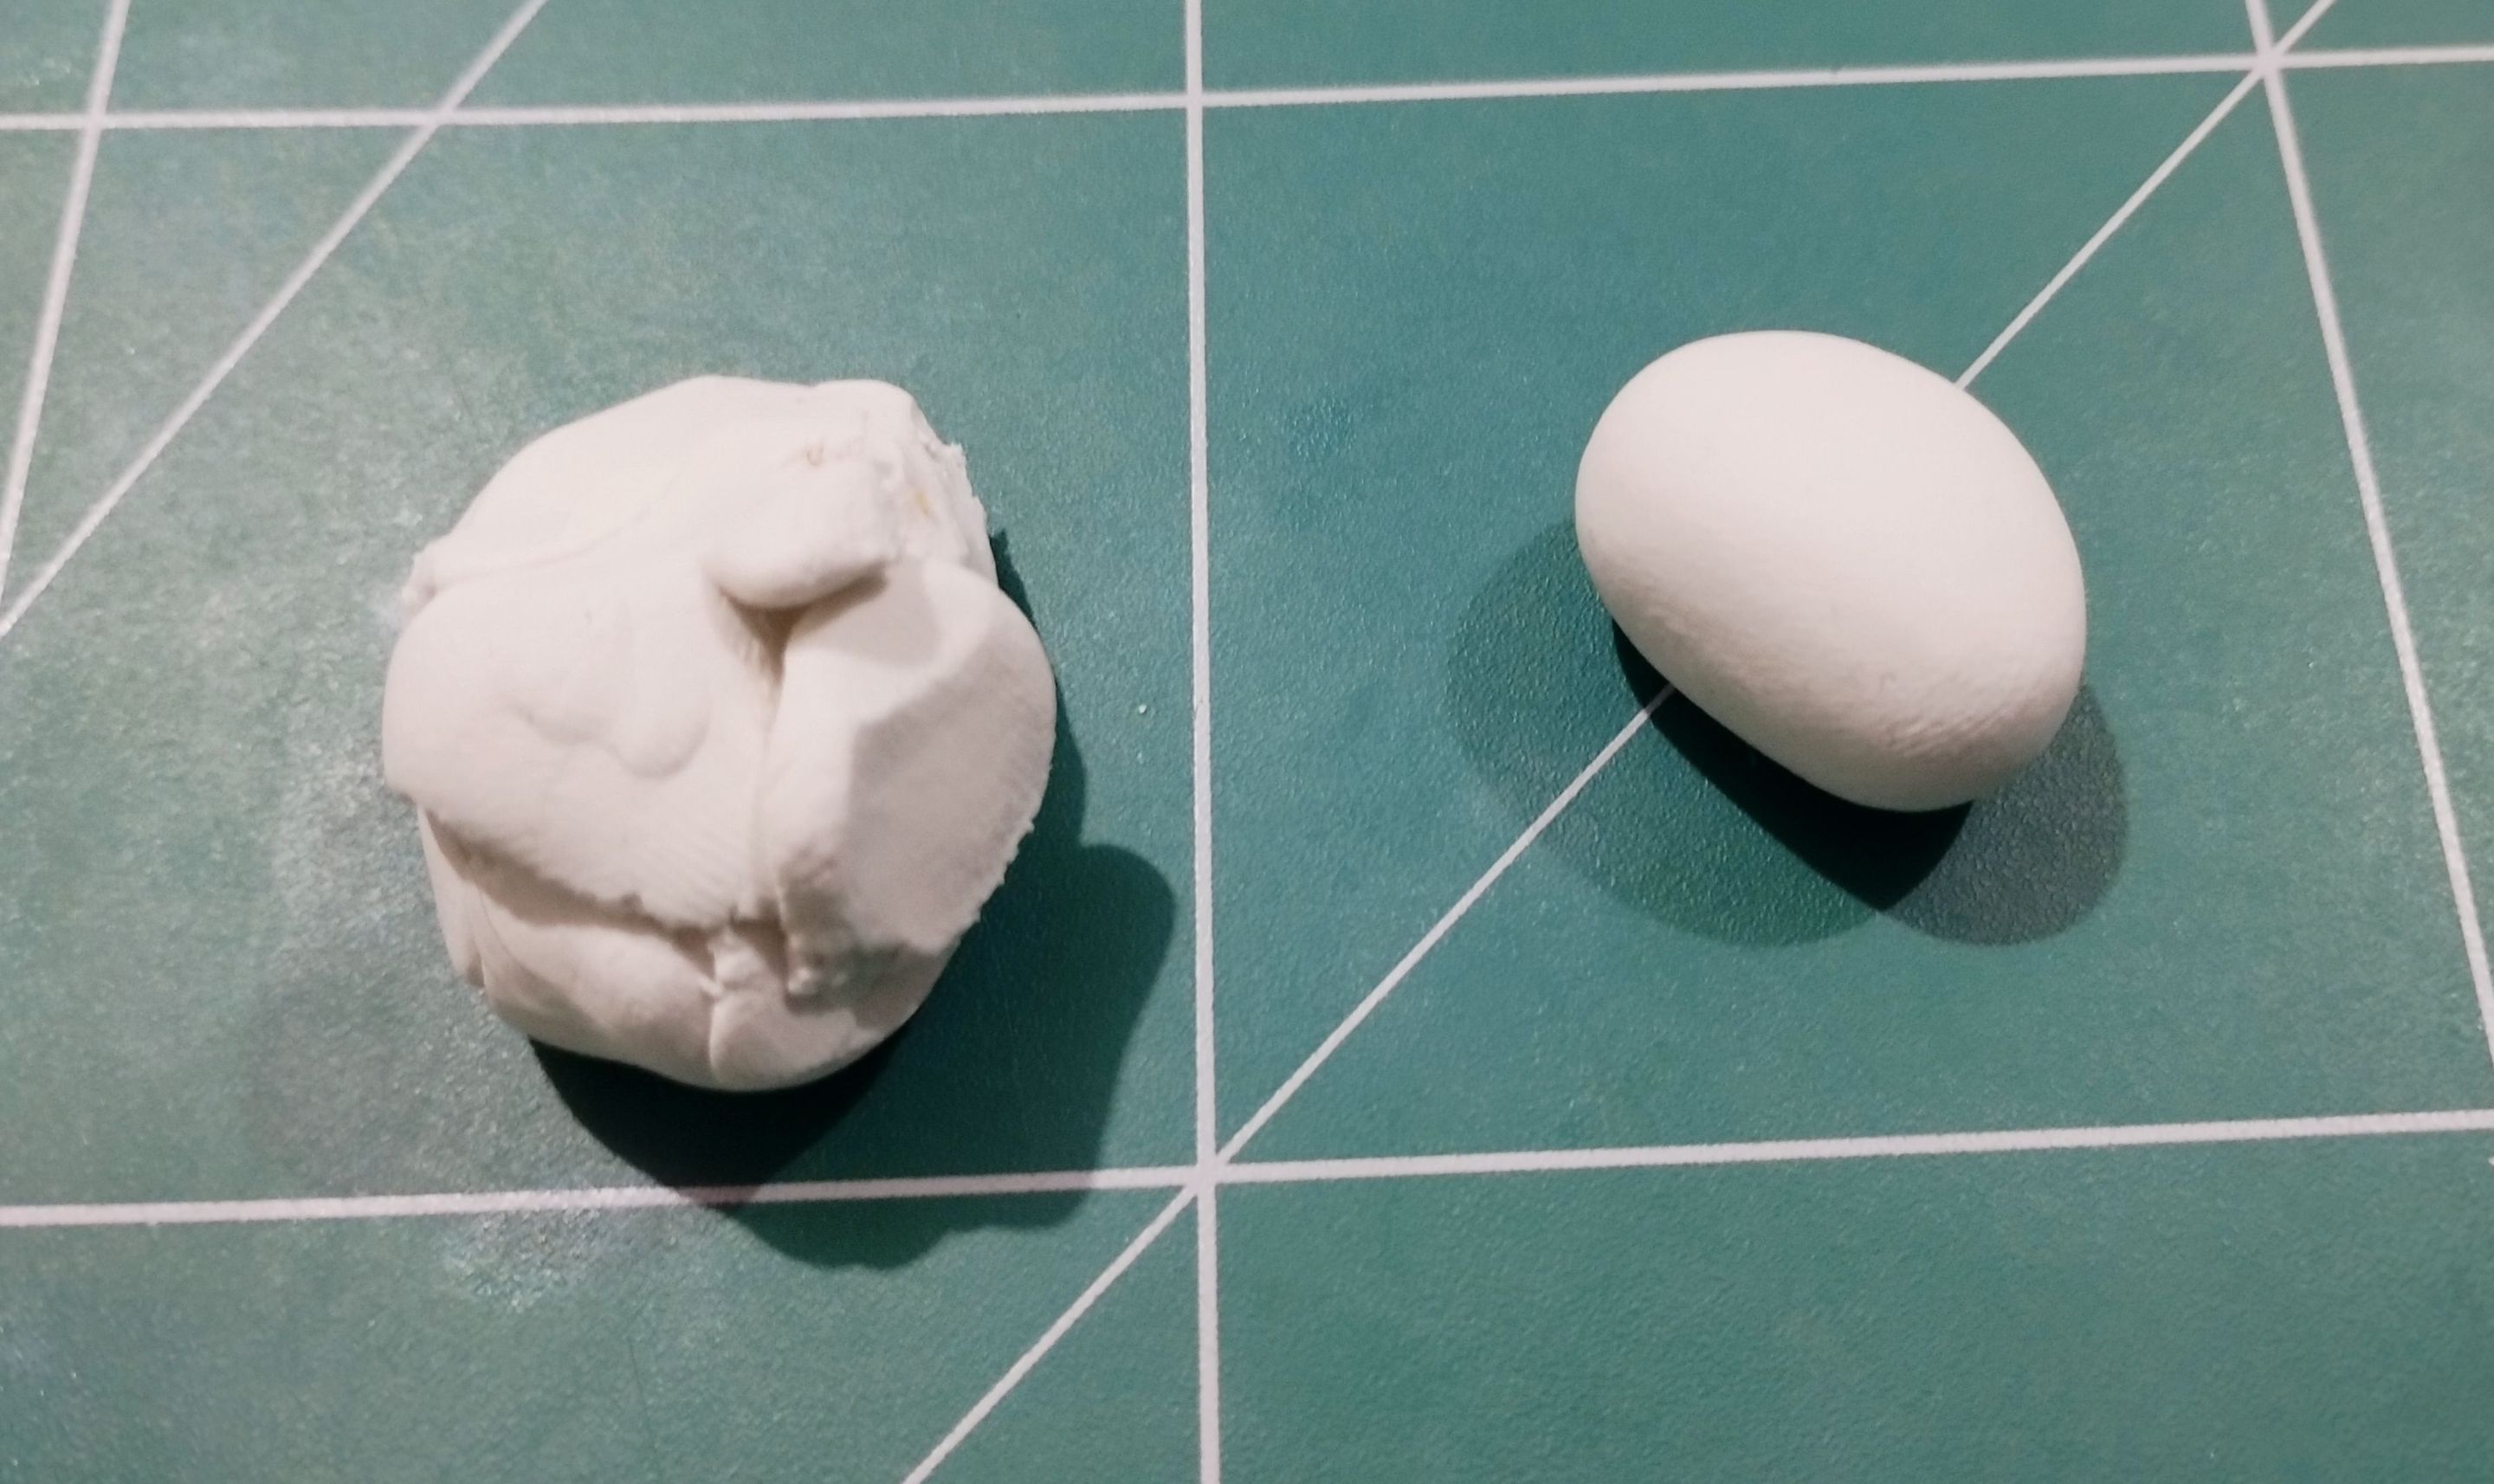
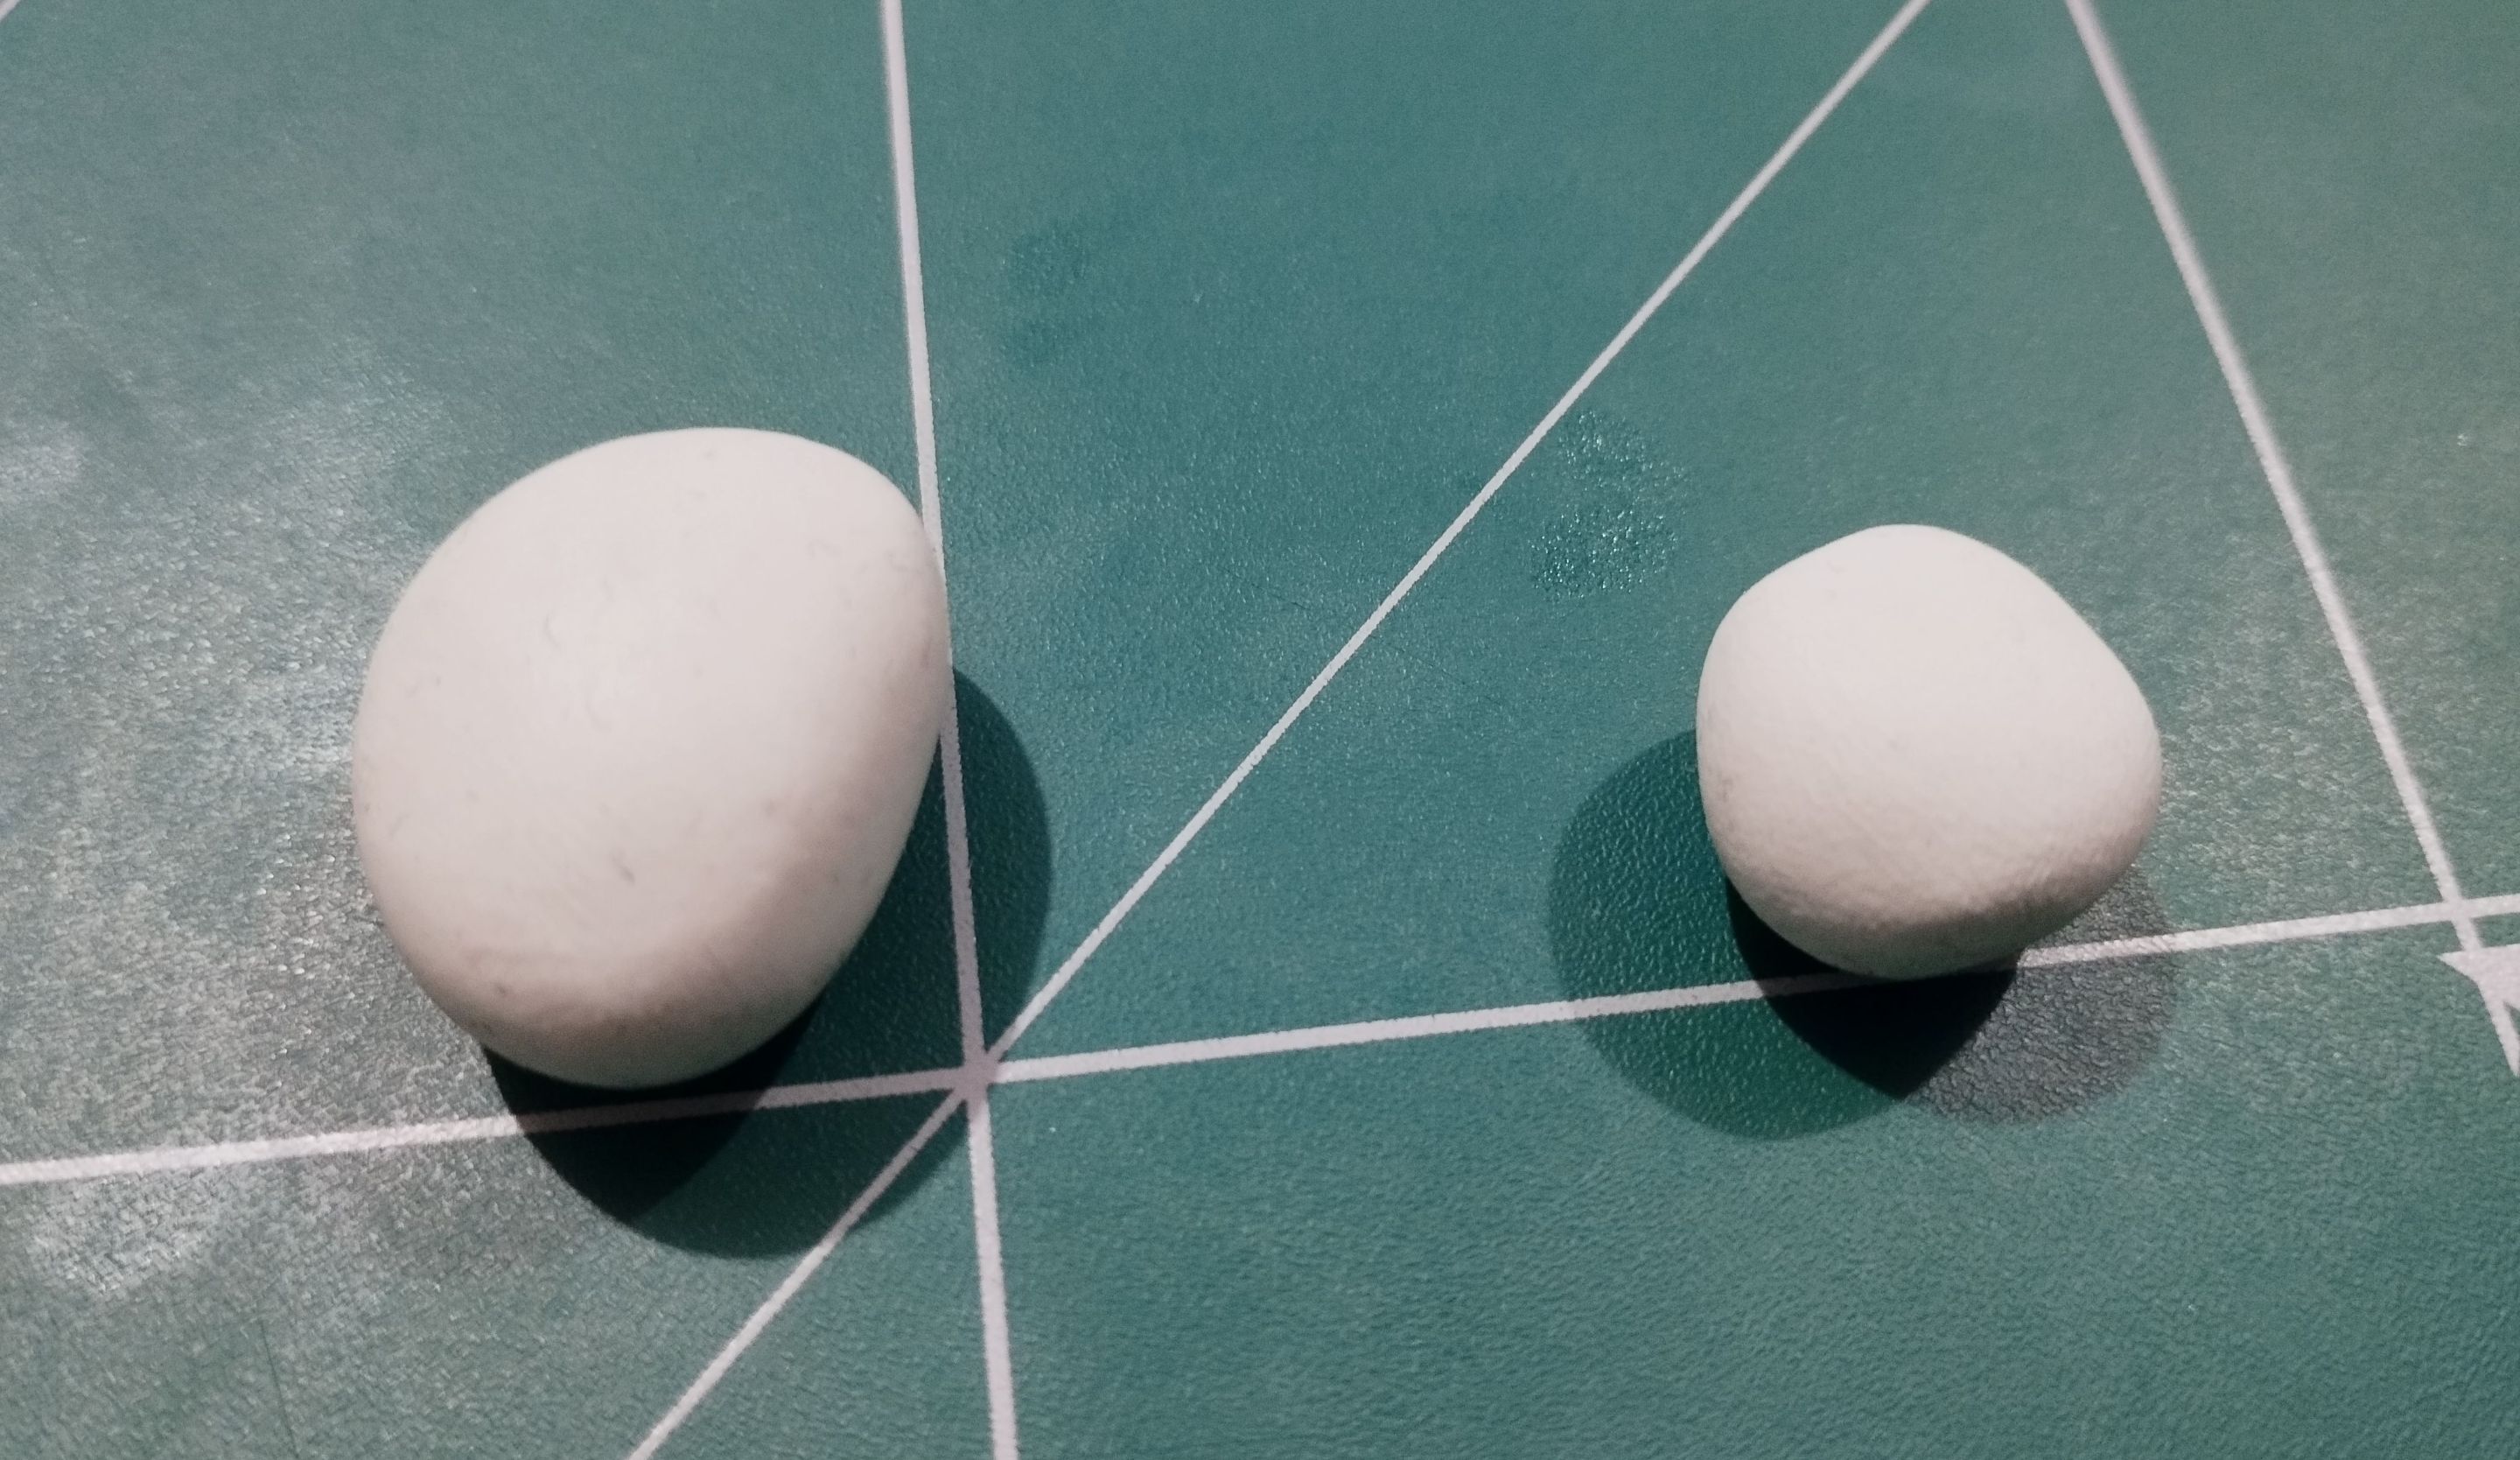
The first shape I made was the head, so that I would have a reference for the other parts of the figurine.
The shape of the head is like a bean, but a little flat on one side. Look at the image below, which shows the initial shape I made for the head. Similar to a bean, as I said above.
>>La primera forma que hice fue la de la cabeza, esto para tener una referencia a las demás piezas de la figurita.
>>
>>La forma de la cabeza es como la de una haba, pero un poco plana por un lado. Fíjense en la imagen de abajo, ahí está la forma inicial que hice para la cabeza. Similar a una haba, como dije mas arriba.
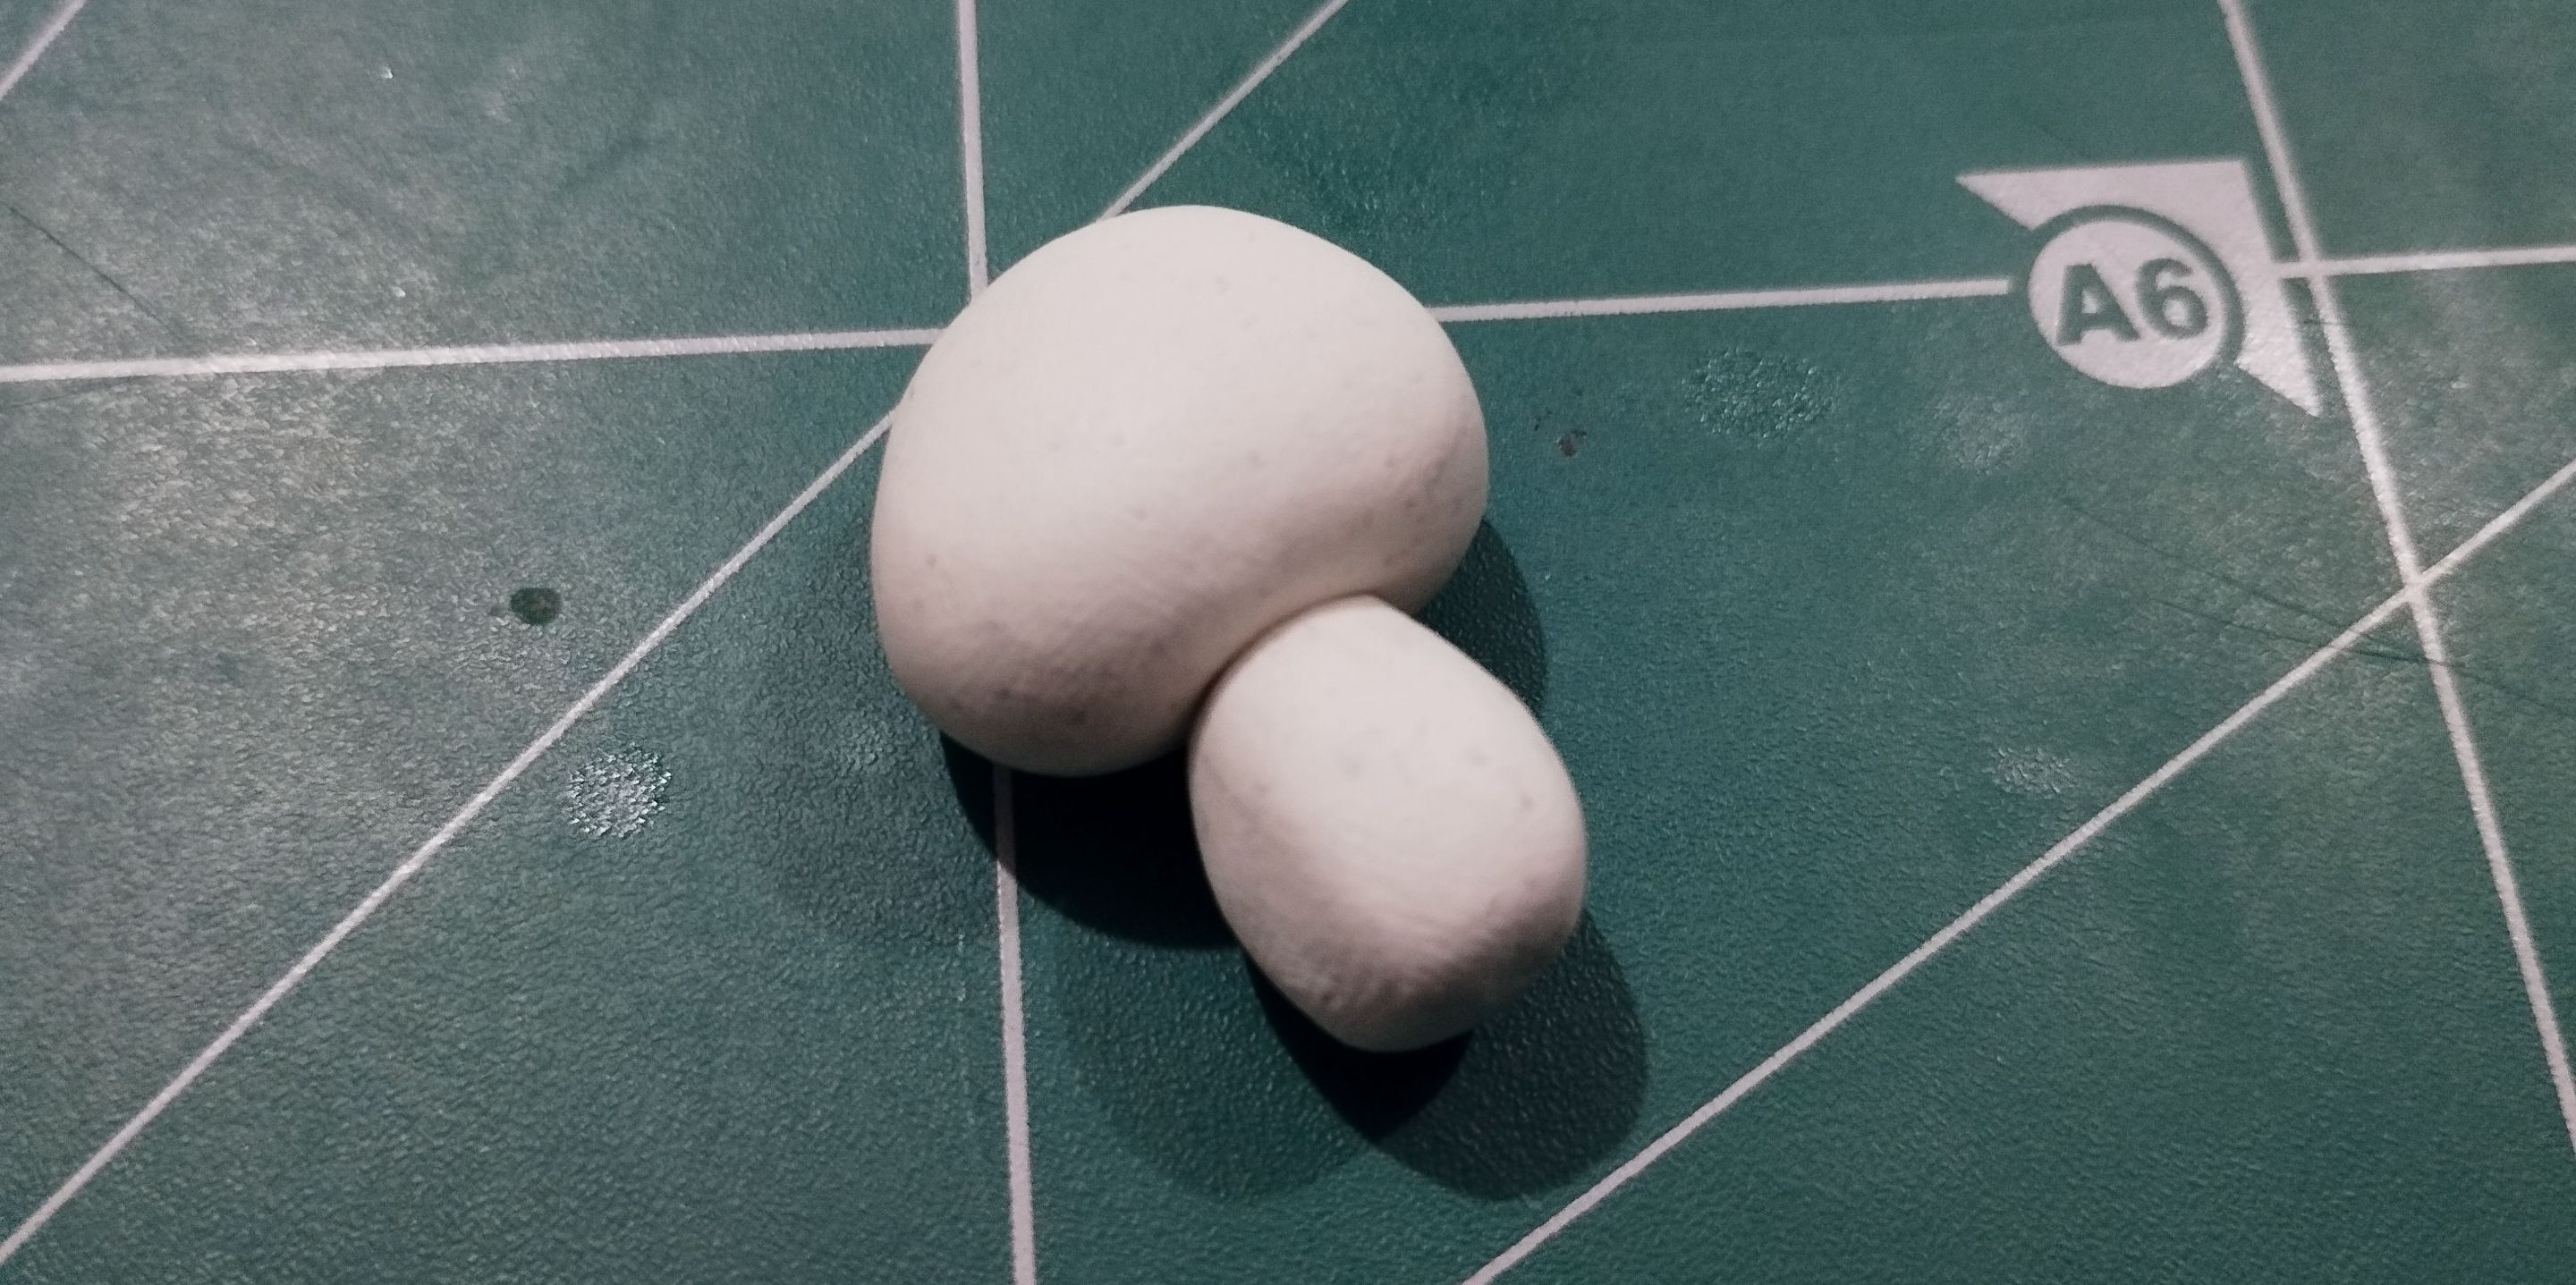
After making the head, I continued with the body, as these are the two main parts of the figurine. I made the torso in a shape similar to an isosceles trapezoid but with rounded corners. To help you understand, it's the little piece on the right.
>>Después de hacer la cabeza continué con el cuerpo, pues estas son las dos partes principales de la figurita. El torso lo hice con una forma parecida a un trapecio isósceles pero don las esquinas redondeadas. Para que entiendan, es la piecita de la derecha.
To join these two pieces, I used a small piece of wire to support them, but I also used glue to make the joints stronger and ensure that the character's body was firmly attached.
>>Para unir estas dos piezas usé un trocito de alambre para dar soporte a las piezas, pero también usé pegamento para dar mayor firmeza a las uniones y que quedase de esta manera bien firme el cuerpo del personaje.
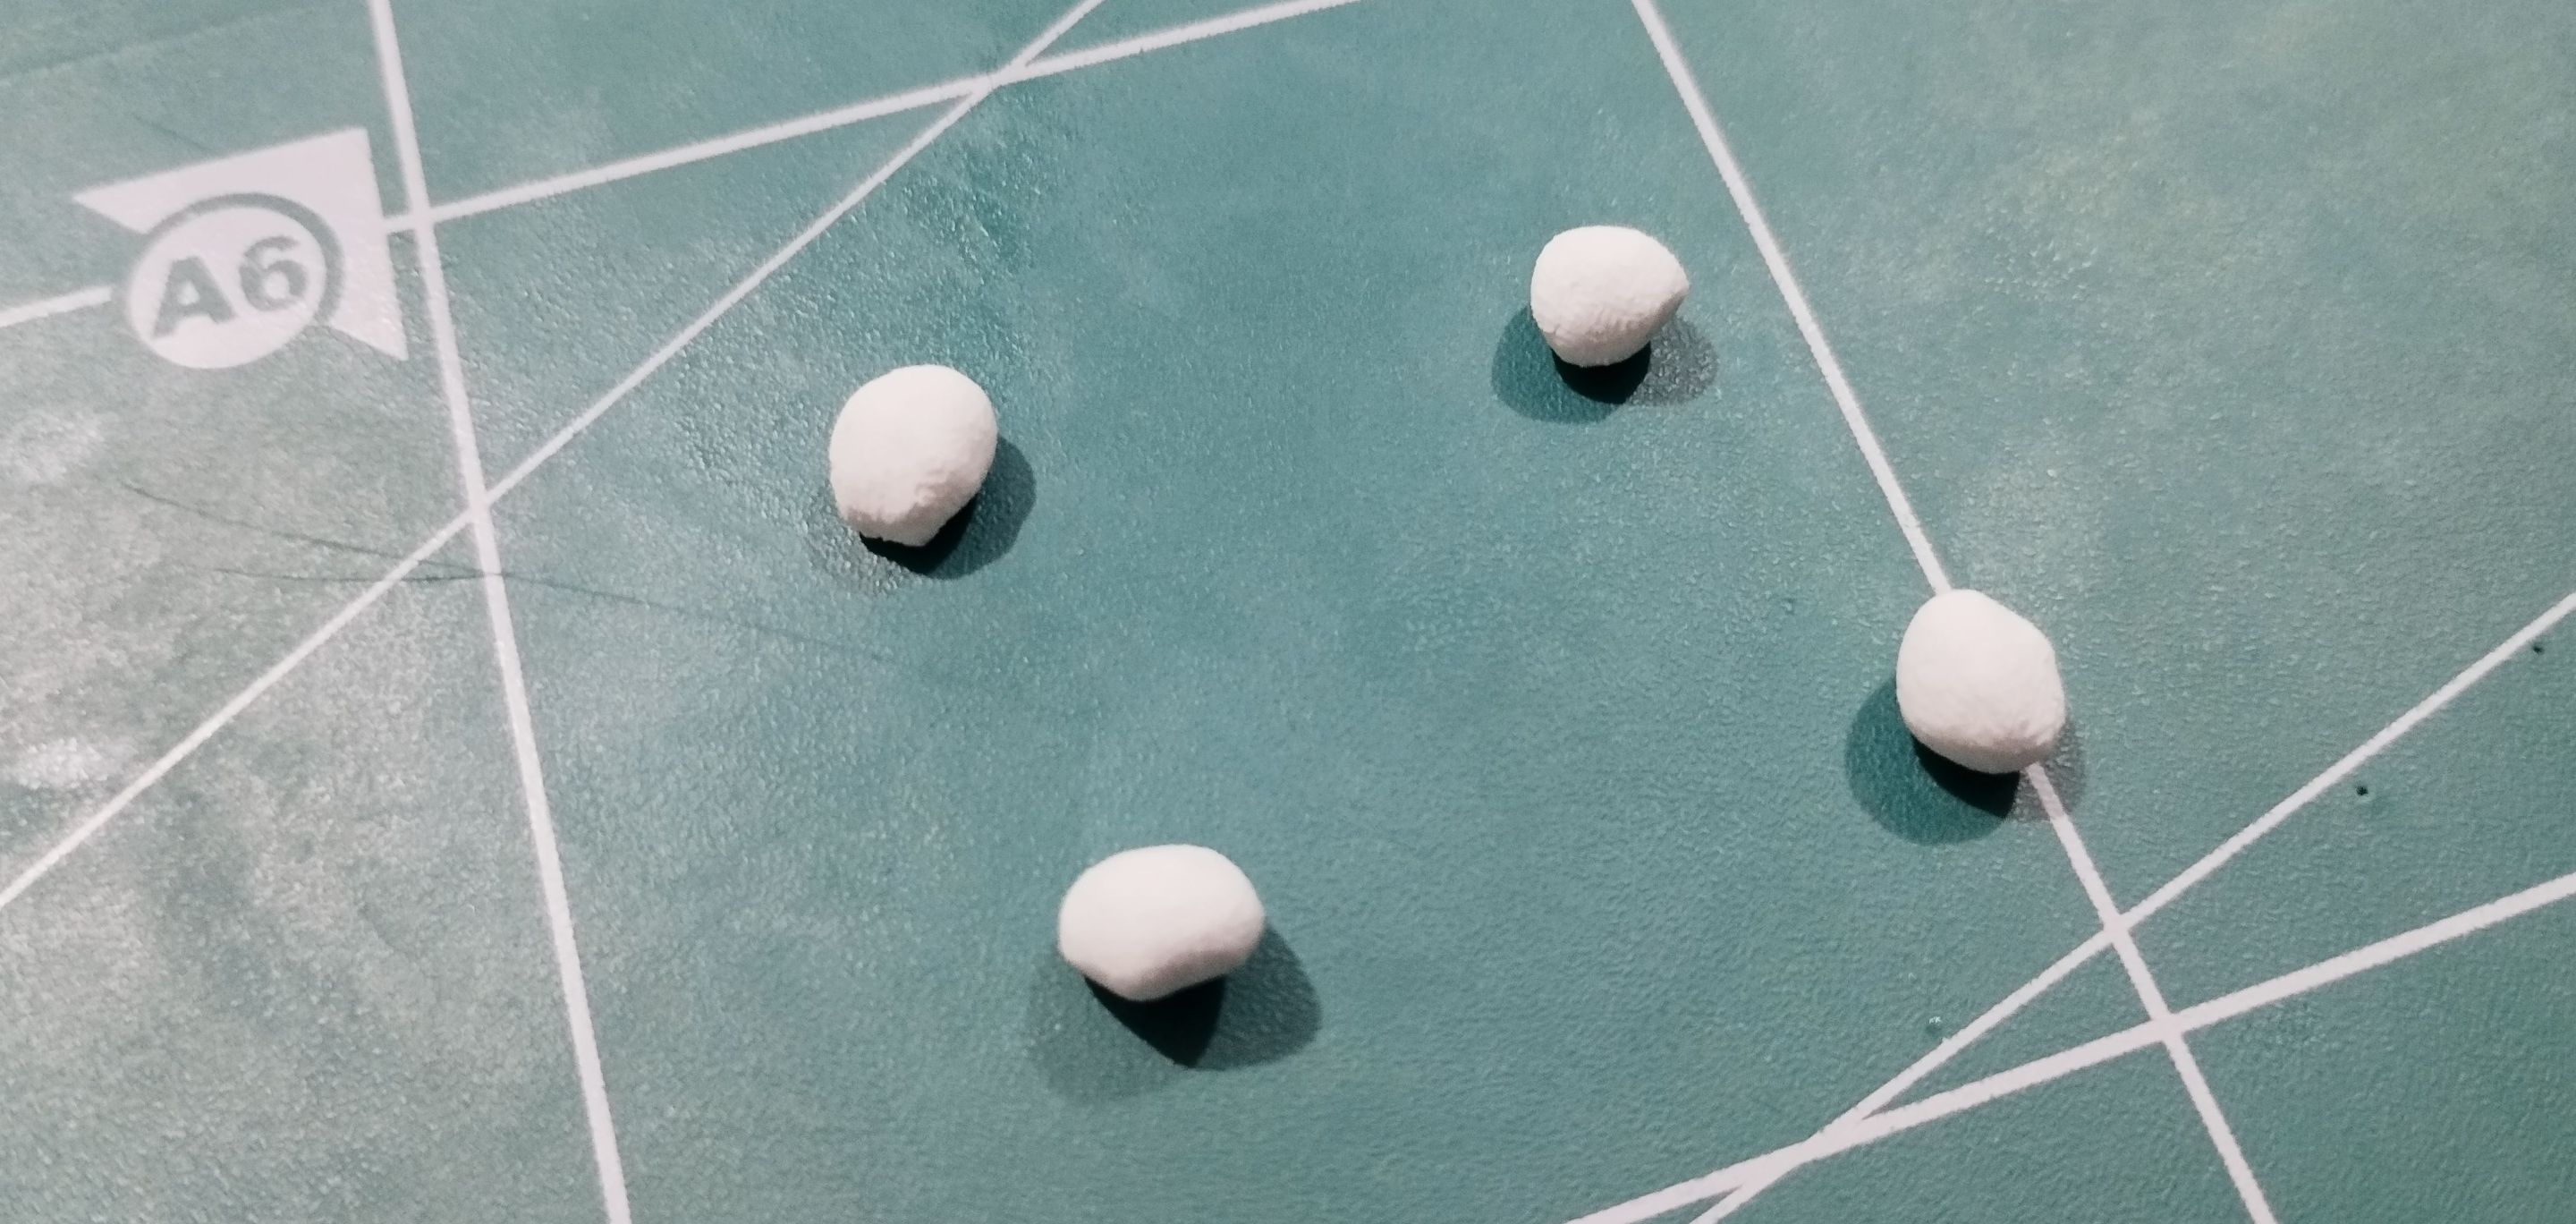
I made the legs as four small circles of white plasticine. They were all the same size, or at least almost the same size. I simply made the circles and stretched the ones that would be the front legs a little, then stuck them onto the body.
>>Las patitas las hice como cuatro circulitos de plastilina de color blanca. Todas eran del mismo tamaño o al menos casi del mismo tamaño. Simplemente hice los circulitos y estiré un poco las que serían para las patas delanteras, luego las pegué en el cuerpo.
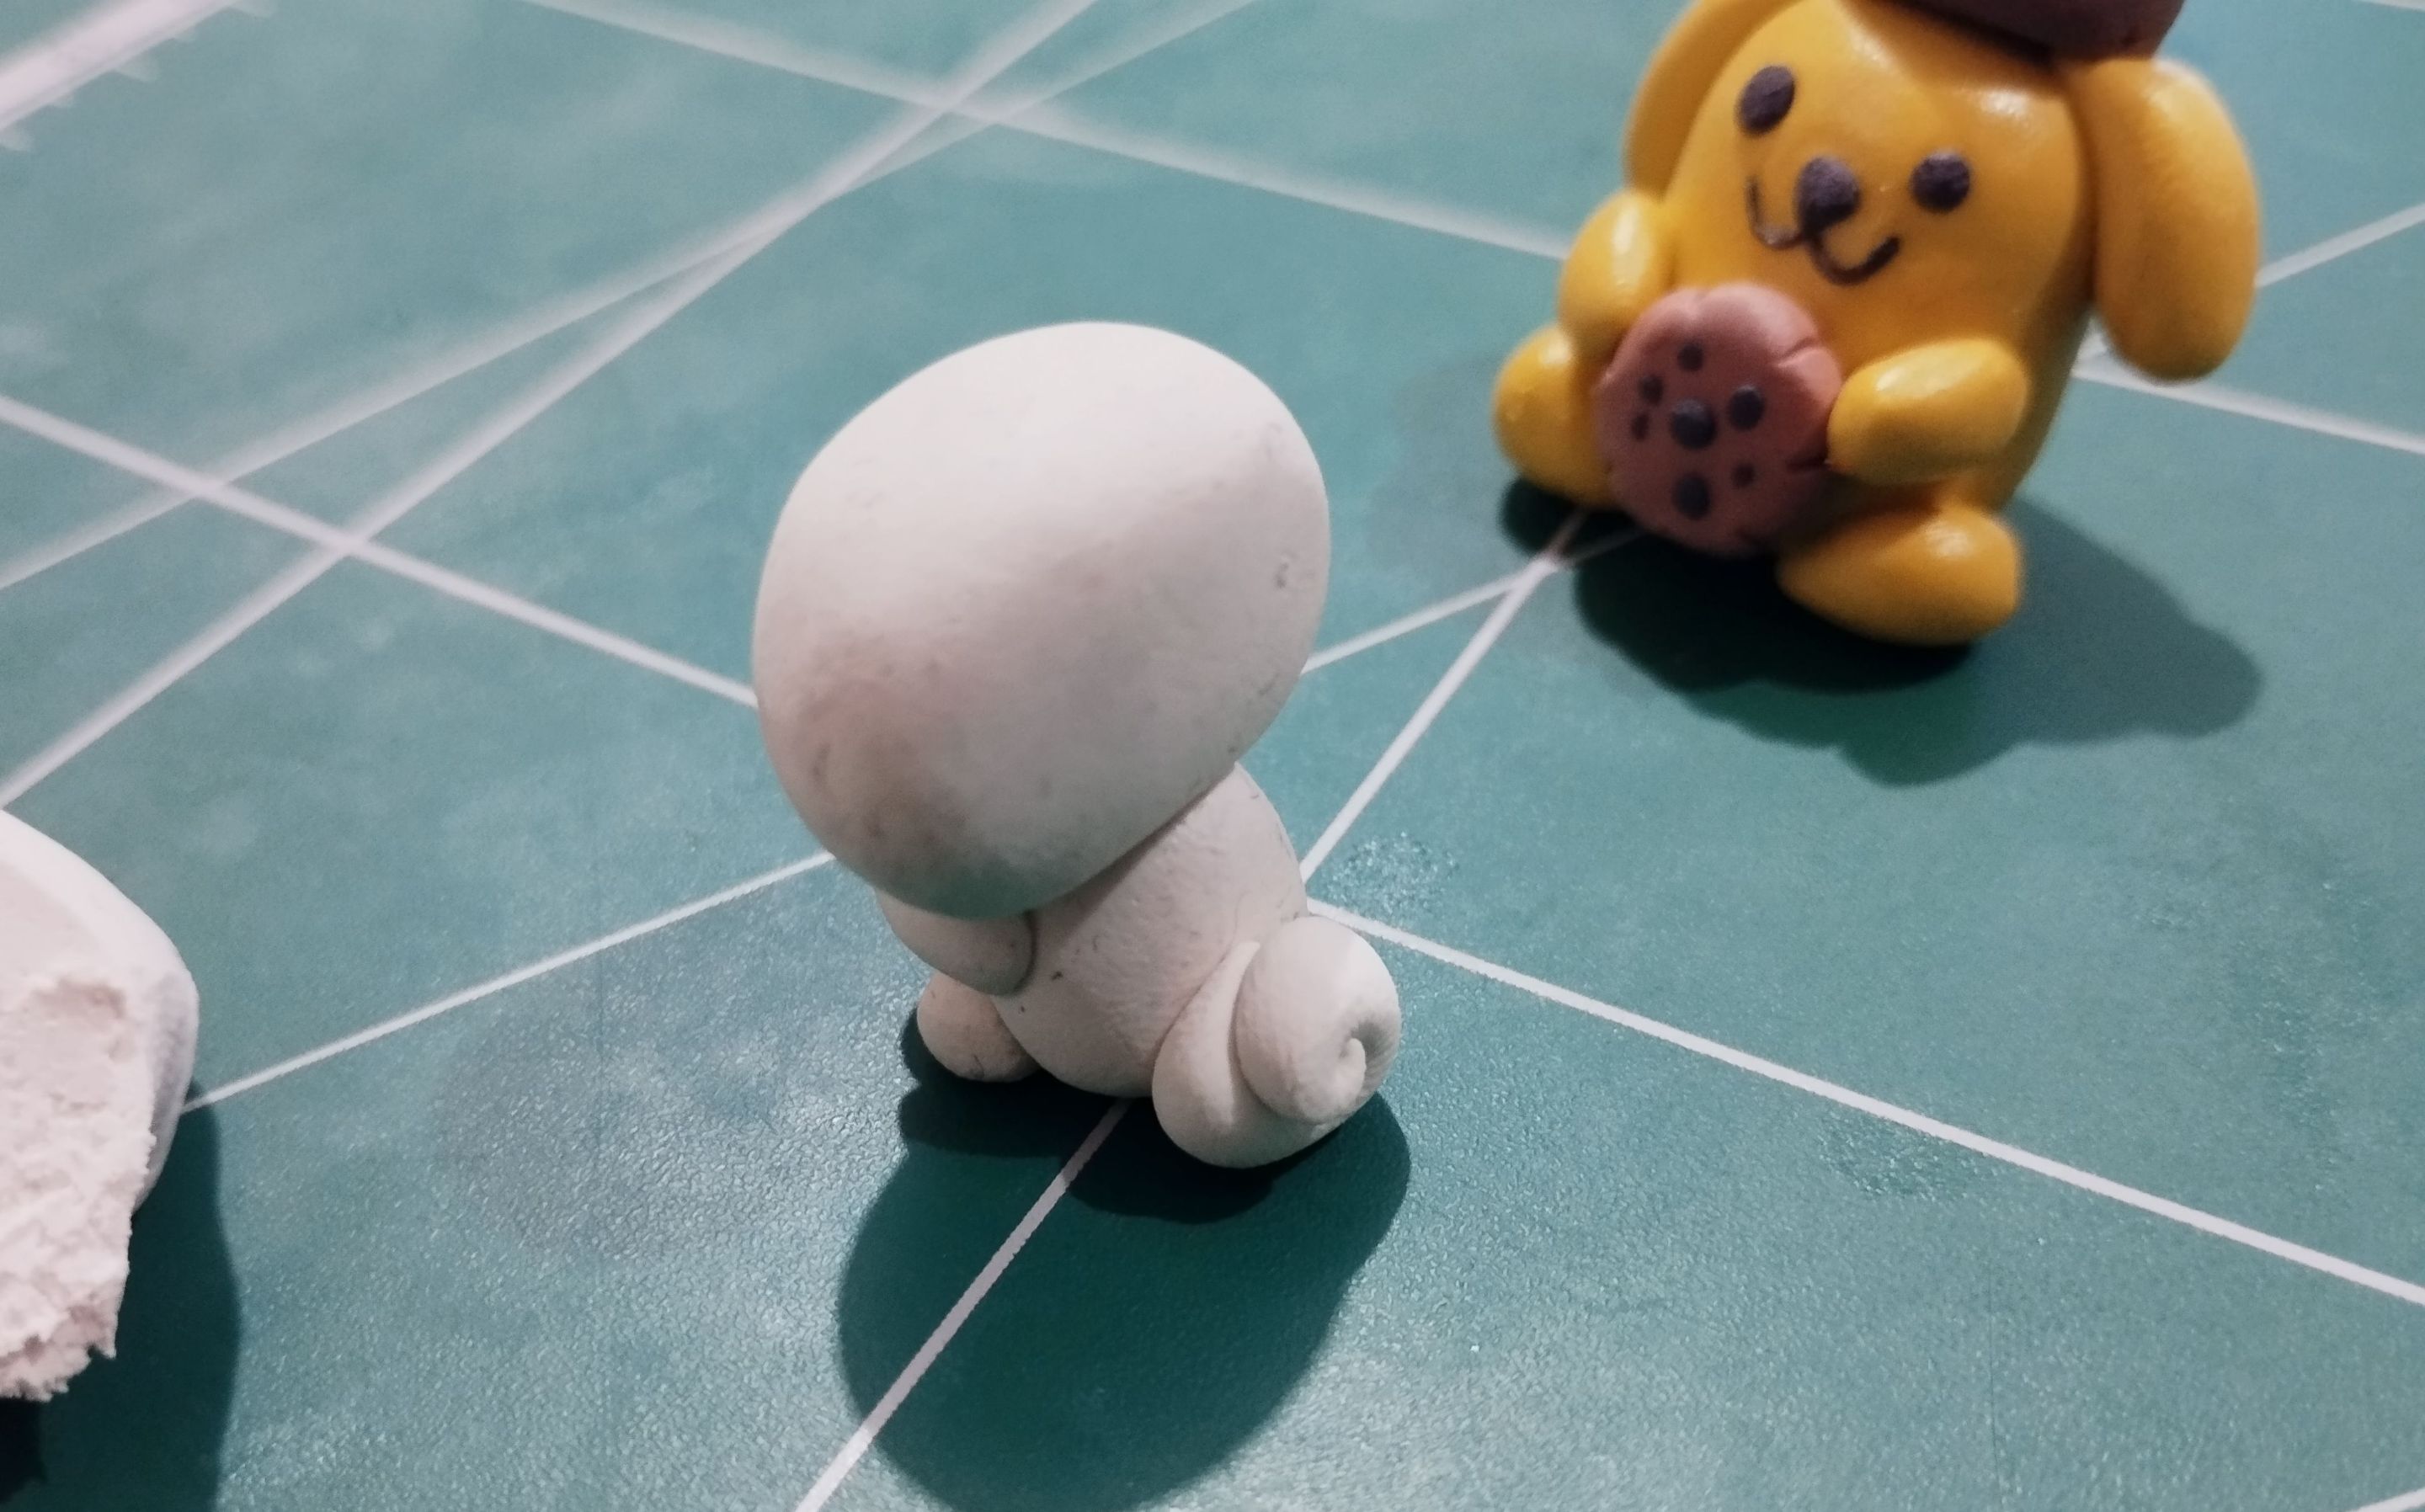
After attaching the four legs, I used another piece of wire to hold a spiral of white modeling clay that I used for Cinnamoroll's tail.
>>Después de colocarle las cuatro patitas, usé otro trocito de alambre para sujetar un espiral de plastilina blanca que usé para la cola de Cinnamoroll.
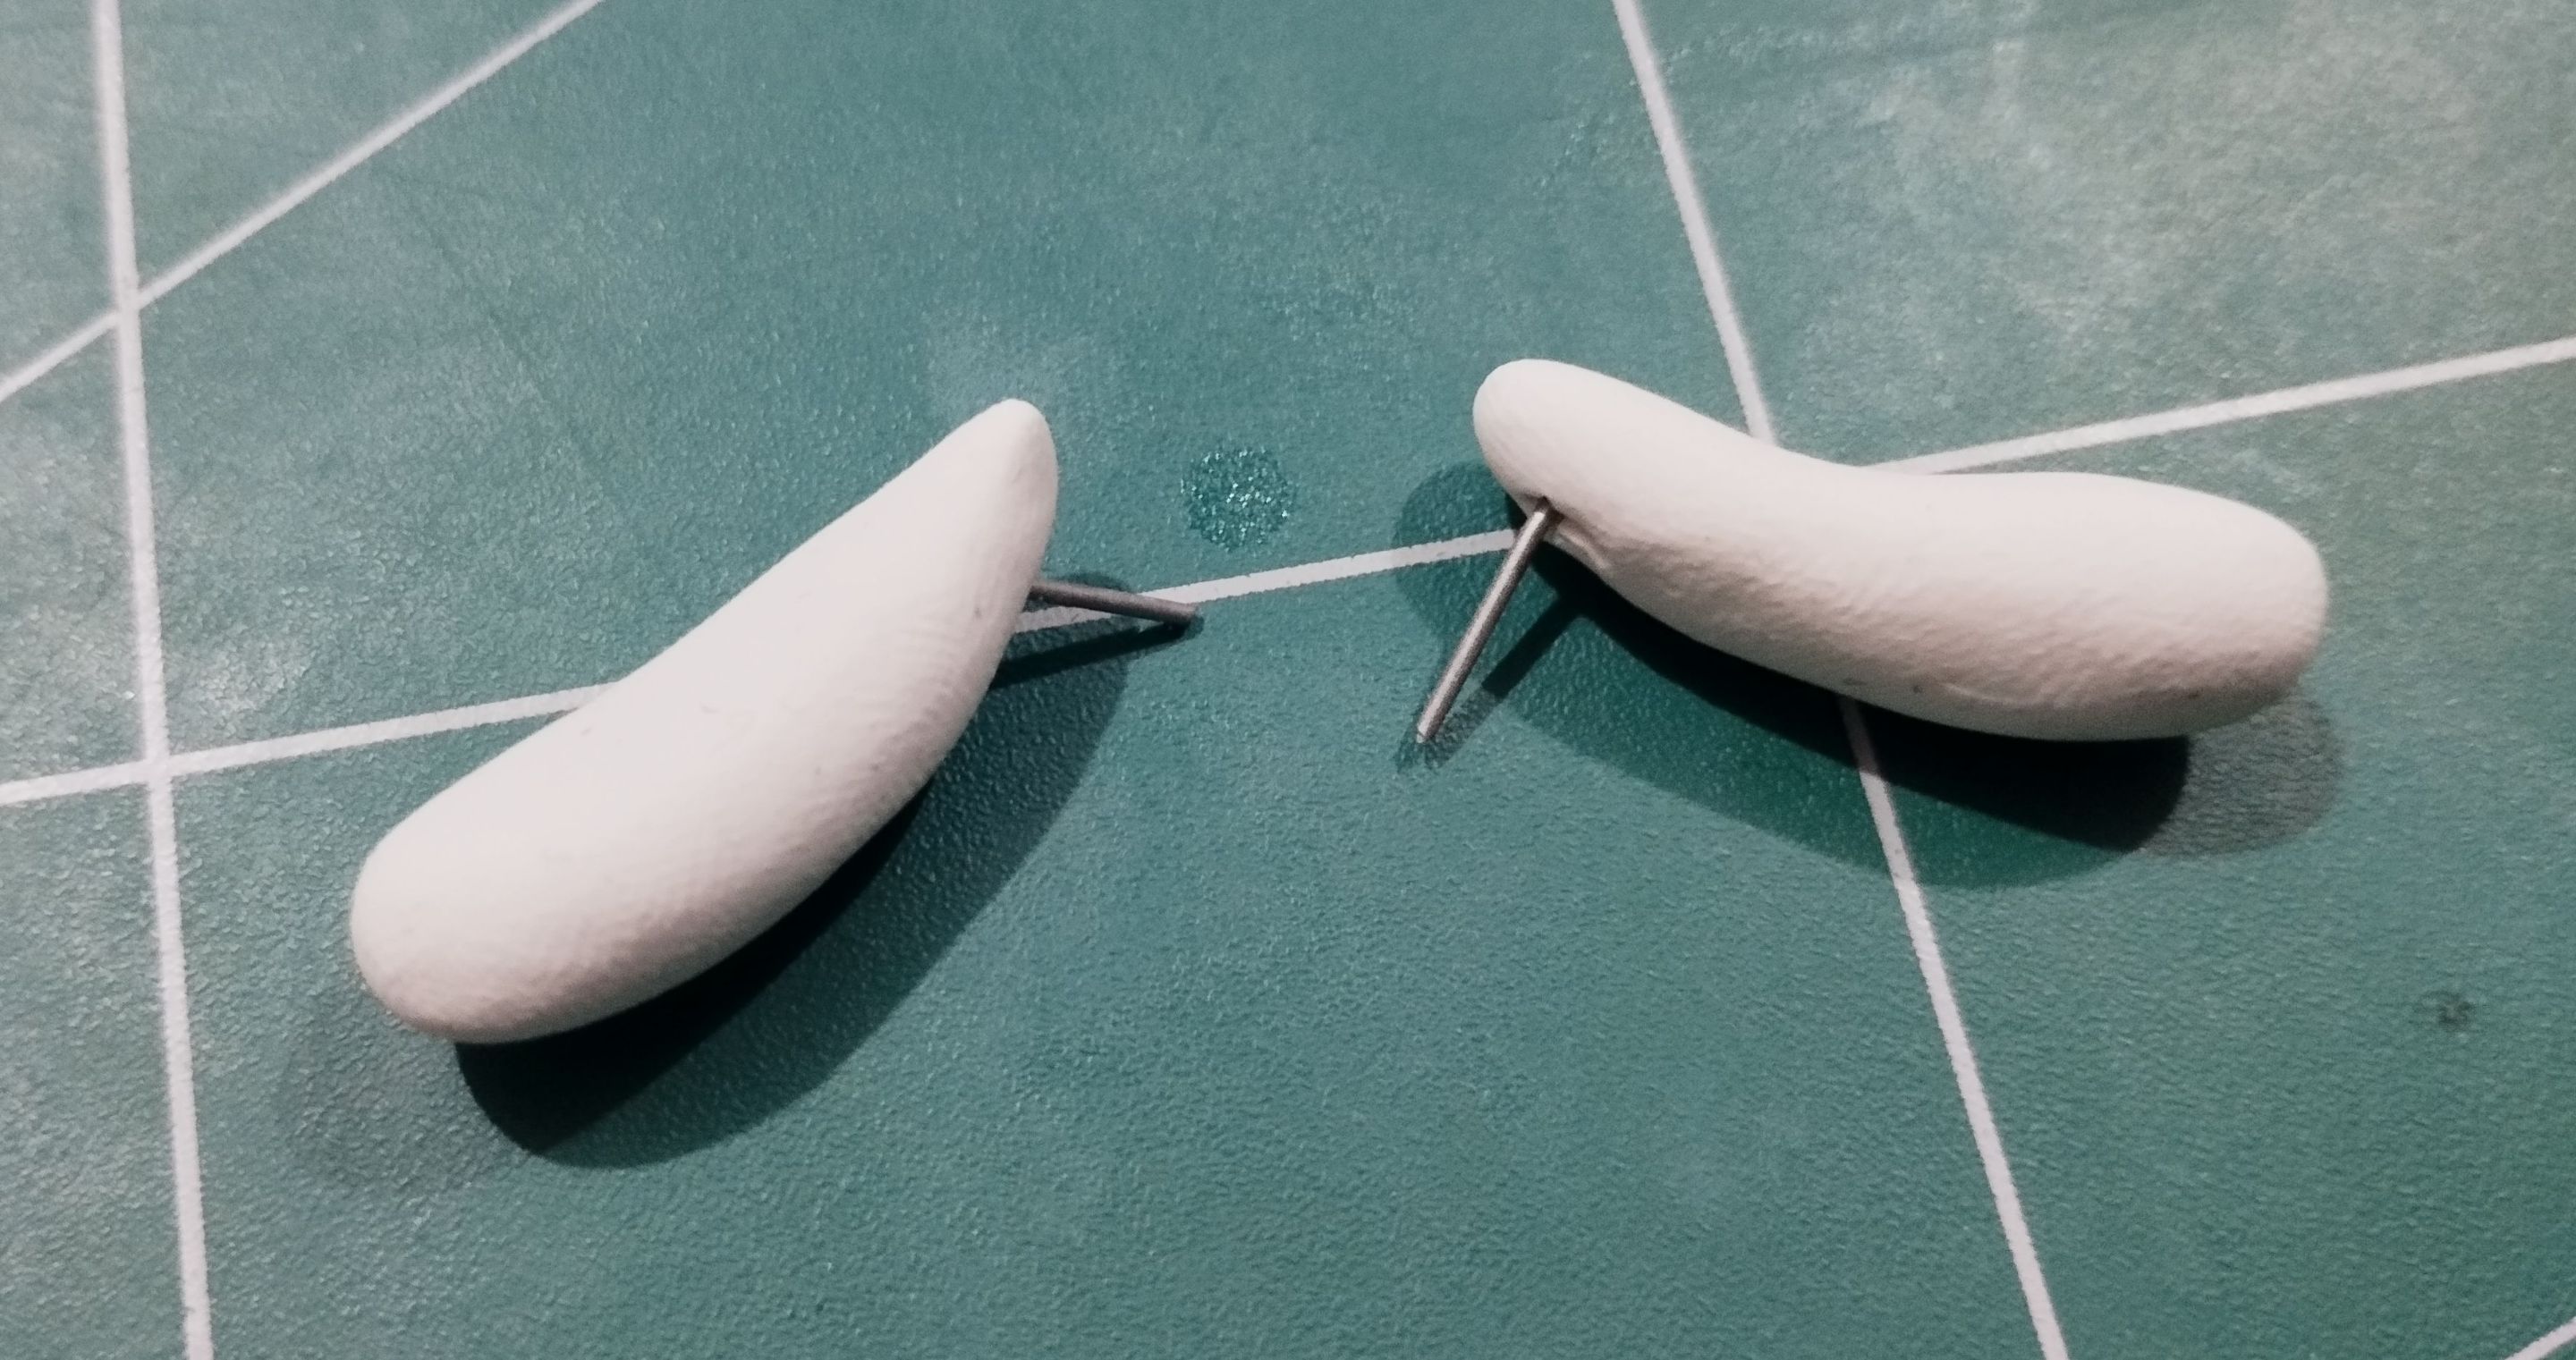
I made the enormous ears as if they were two large raindrops, only a little more elongated. I used a small piece of wire to support the pieces and attach them to the character's head. In the image below, you can see the two pieces with a small wire holding them in place.
>>Las enormes orejitas las hice como si fuesen dos gotas de agua de gran tamaño, solo que un poco más alargadas. Usé un trocito de alambre para dar soporte a las piezas y poder unirlas a la cabeza del personaje. En la imagen de abajo pueden ver las dos piezas con un pequeño alambre que los sostiene.
Finally, I made the face, taking care to add all the details. I made the blue eyes as two small ovals. I also placed two similar shapes, but pink in color, on each side of the cheeks.
Then, for the mouth, I used the same blue plasticine as for the eyes, making a shape similar to a lying 3.
>>Ya para finalizar le hice la carita, teniendo cuidado de hacer todos los detalles. Los ojos azules los hice como dos pequeños óvalos. También le coloqué dos formas similares pero de color rosado a cada lado de las mejillas.
>>
>>Luego, para la boca, también usé la misma plastilina azul de los ojos, haciendo una forma parecida a un 3 acostado.
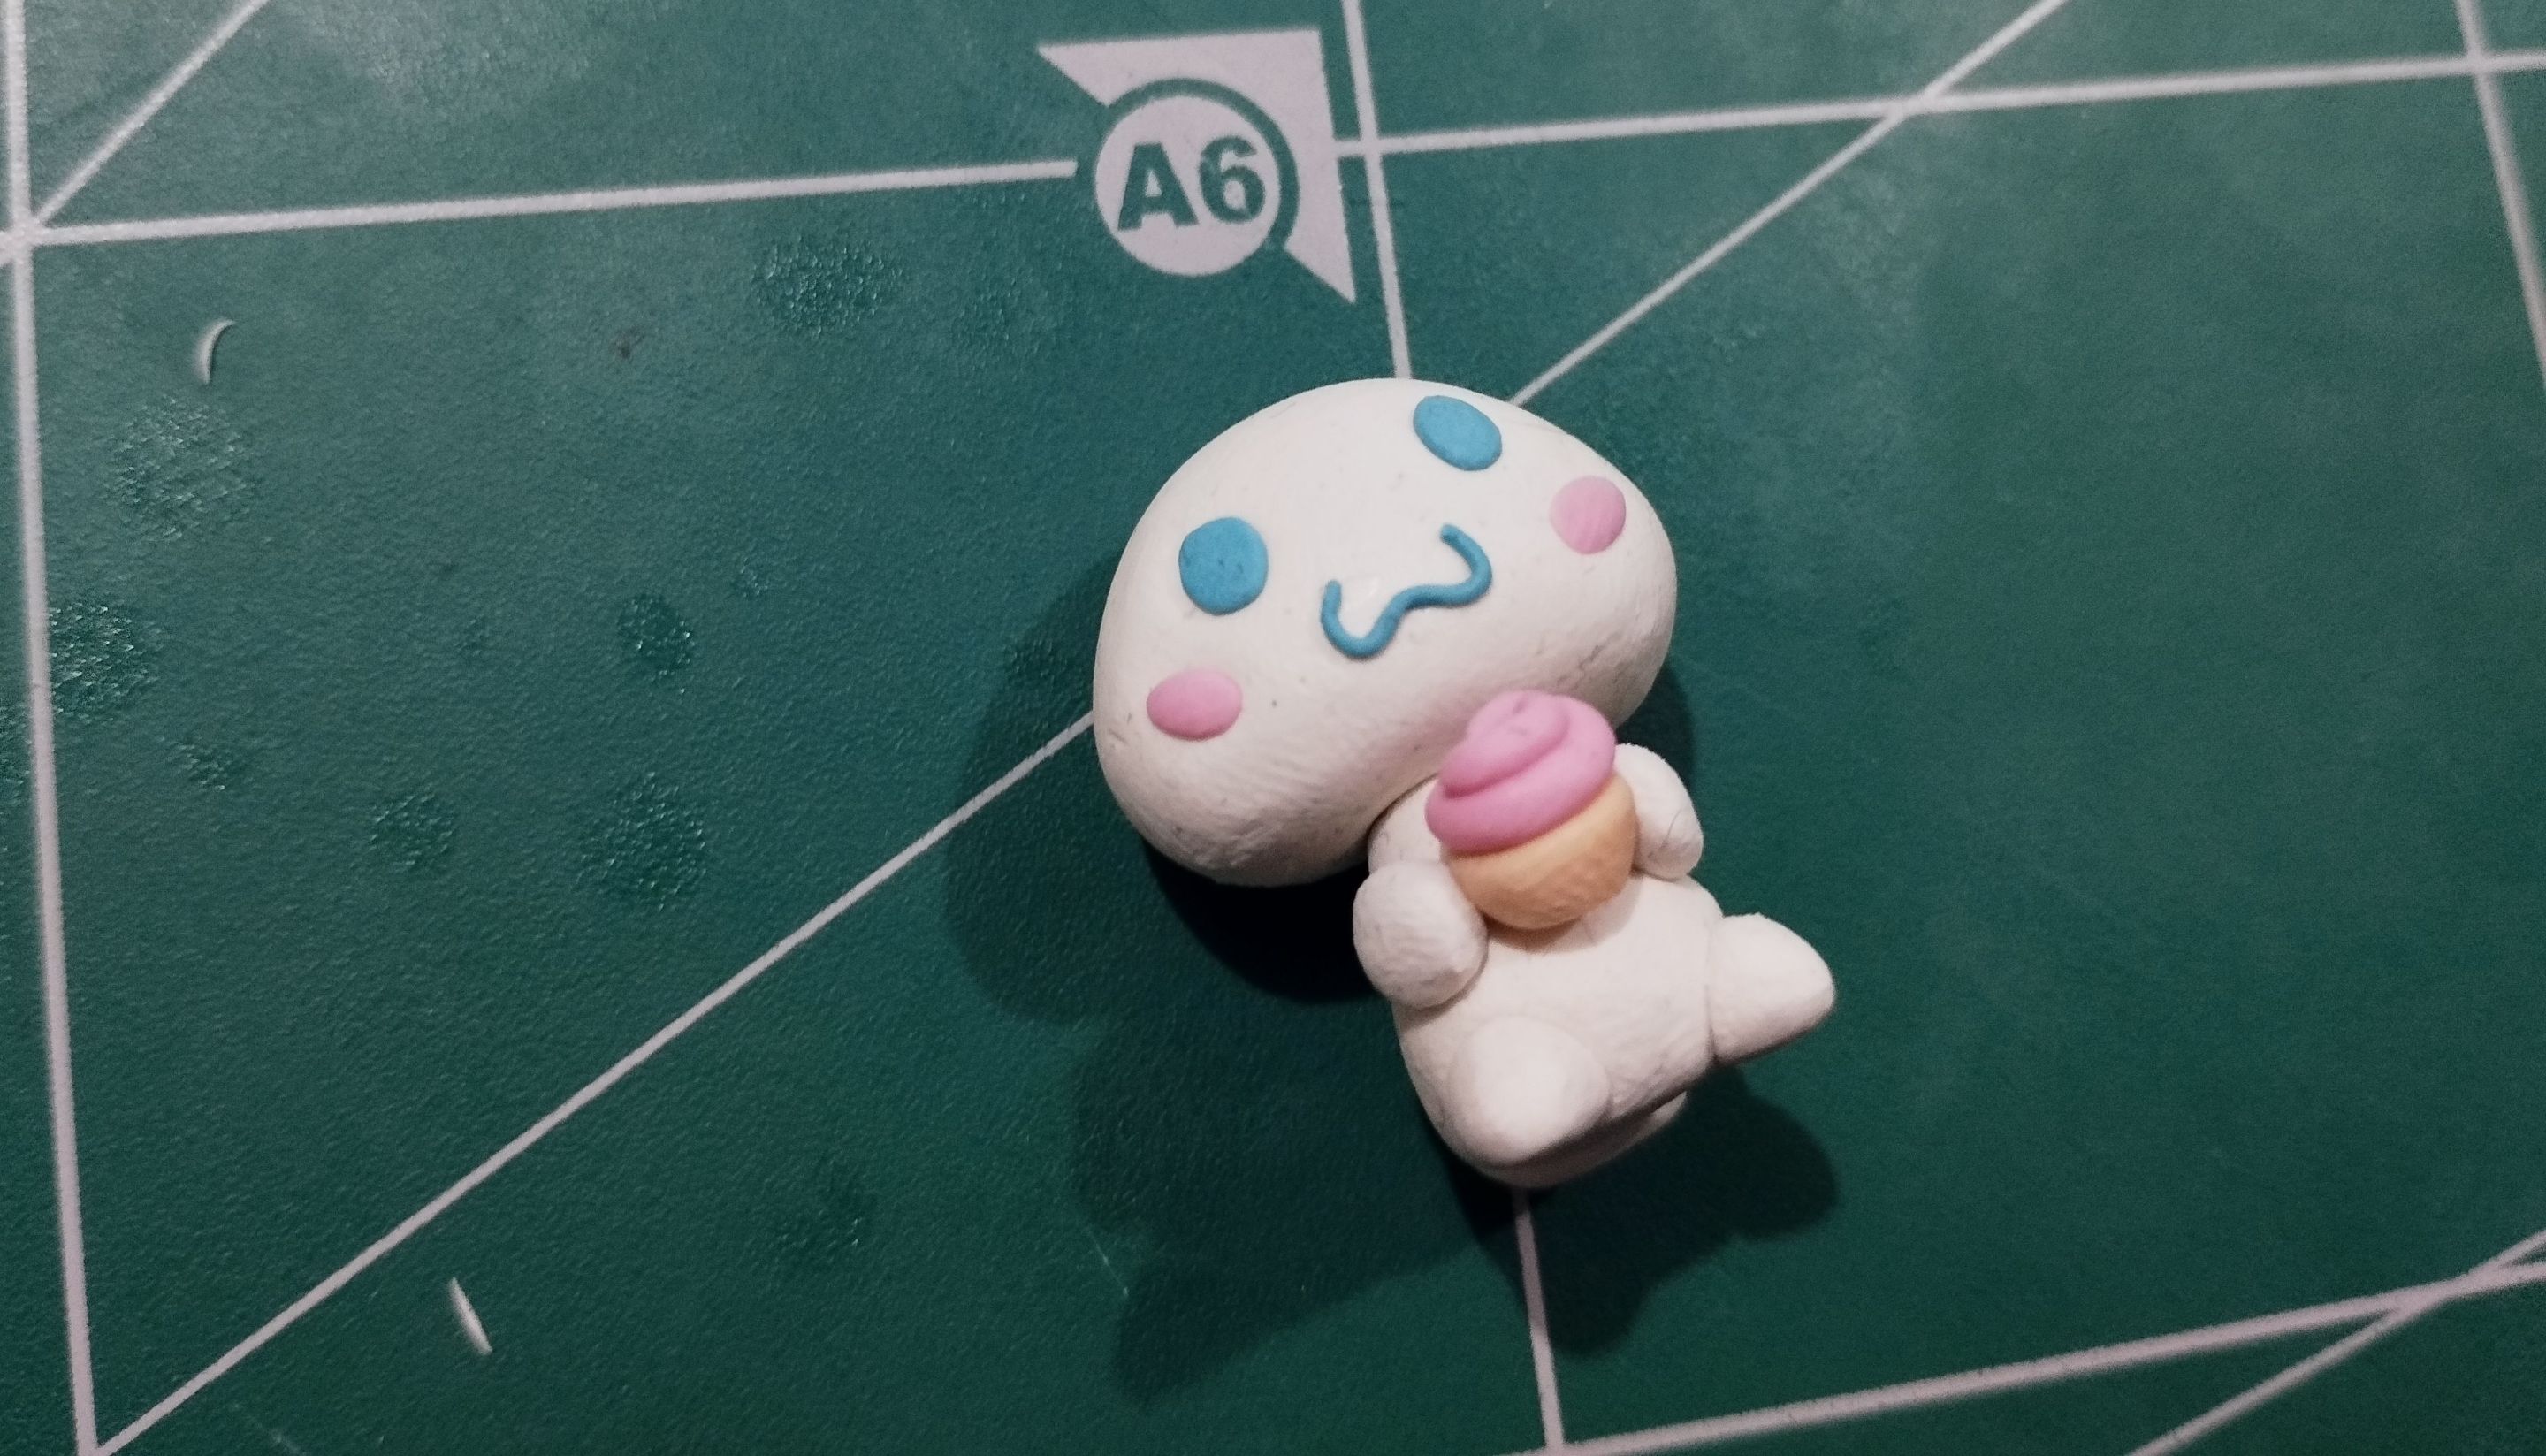
Finally, I made him a little dessert as a detail between his hands, as you can see in the image above. On the other hand, in the image below you can also see a blue hat that I made him, which I also attached to the character's head with wire and glue.
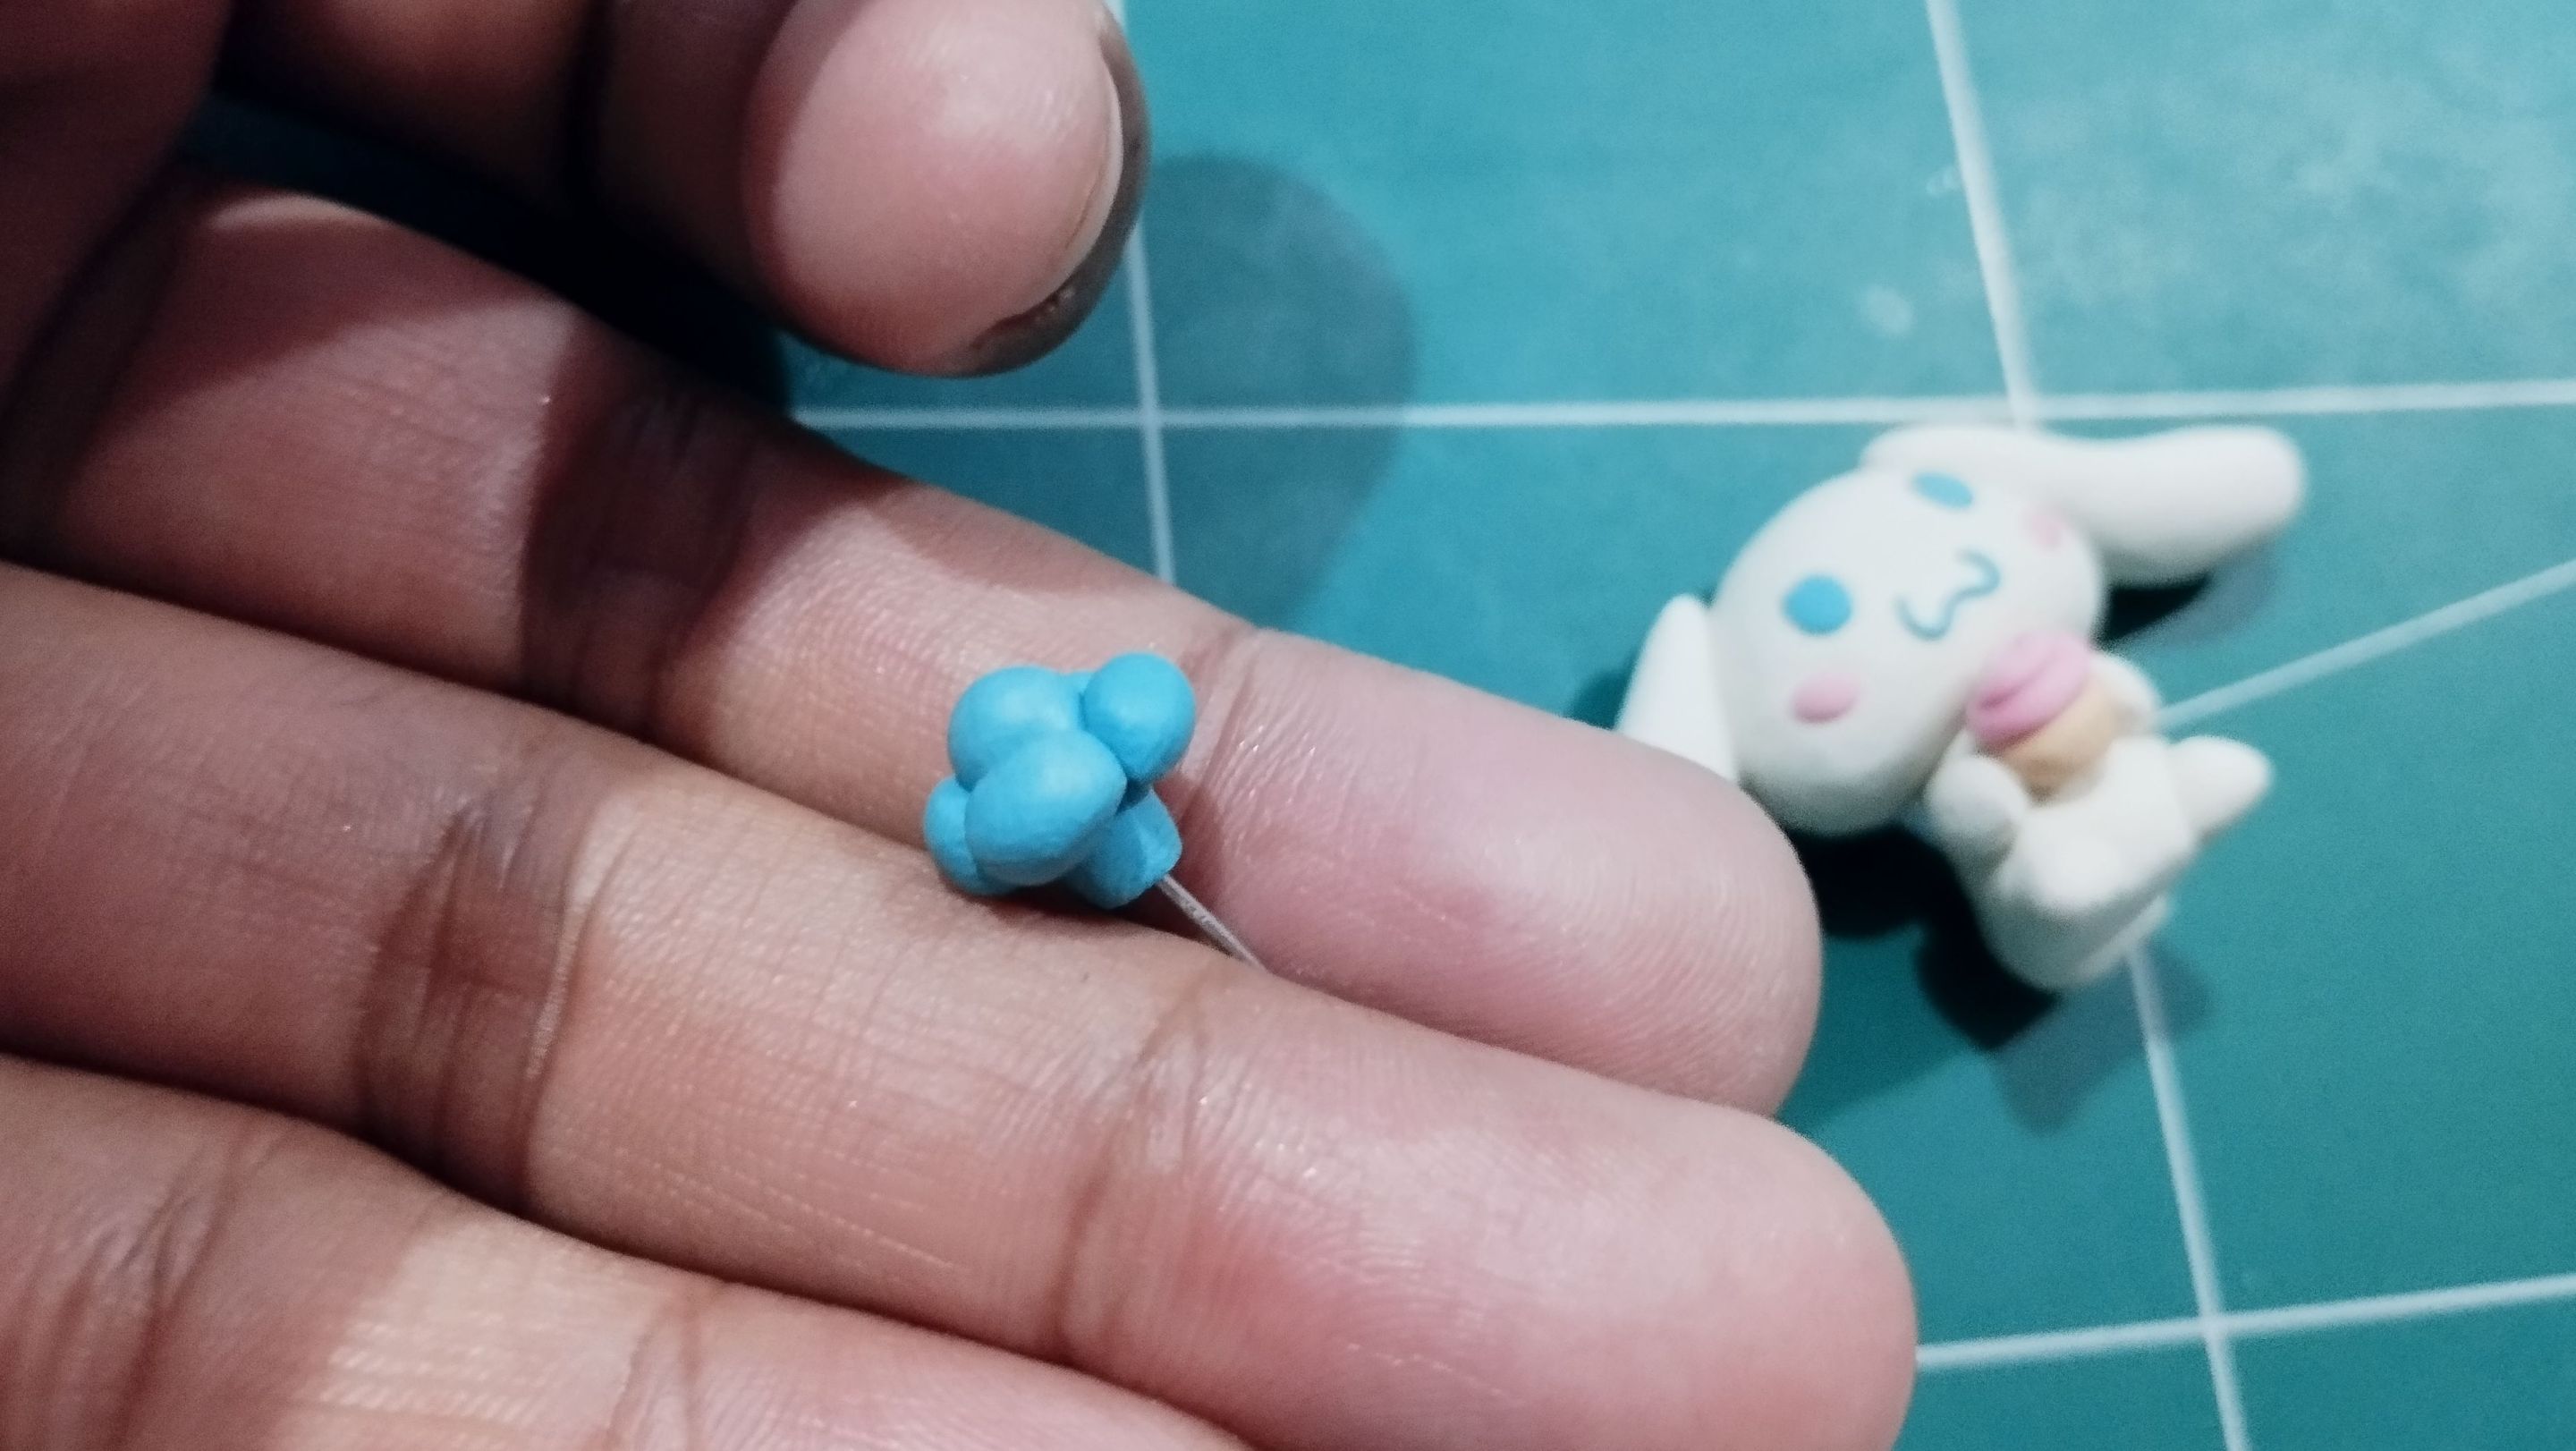
>>Finalmente le hice un pequeño postrecito como detalle entre las manos, como pueden ver en la imagen de arriba. Por otra parte, en la imagen de abajo también pueden ver un gorrito azul que le hice, el cual también pegué encima de la cabeza del personaje con alambre y pegamento.
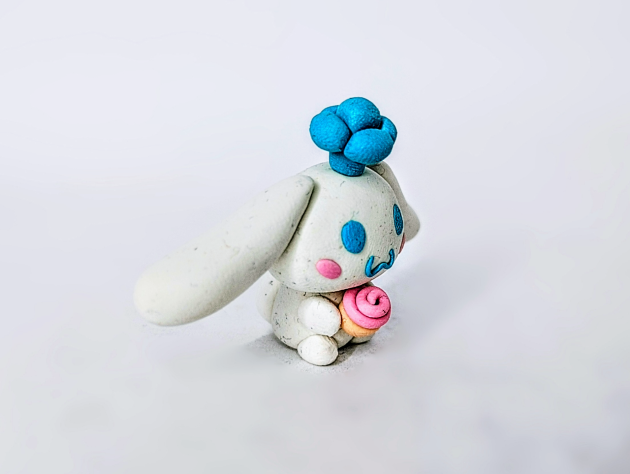
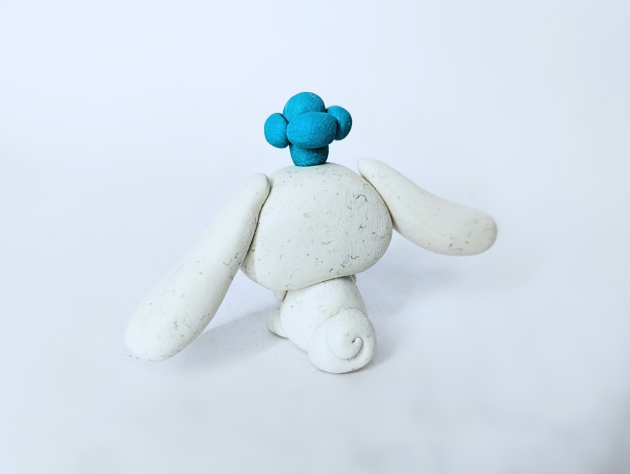
#### This is how the figurine was completed. Below you can see a series of photographs of the final result:
>>##### De esta manera la figurita quedó terminada. A continuación pueden ver una serie de fotografías del resultado final:


Well, friends, that's all for now. I hope you liked my little figure. I'd love to hear what you think, so please leave your comments below. As always, I'll be happy to read them. Without further ado, I'll say goodbye for now...
DIY: Cinnamoroll Sculpture [ENG/SPA]
@gaboamc2393
· 2025-09-18 07:02
· Hive Diy
#hive-130560
#diy
#art
#crafts
#handmade
#spanish
#tutorial
#waiv
#neoxian
#pimp
Payout: 0.000 HBD
Votes: 265
More interactions (upvote, reblog, reply) coming soon.