Greetings, friends. Recently, I've been sharing a series of Pokémon figurines with the community. I recently shared one of Seel. You can see the post at the link below:
https://peakd.com/hive-189641/@gaboamc2393/diy-seel-sculpture-eng-spa
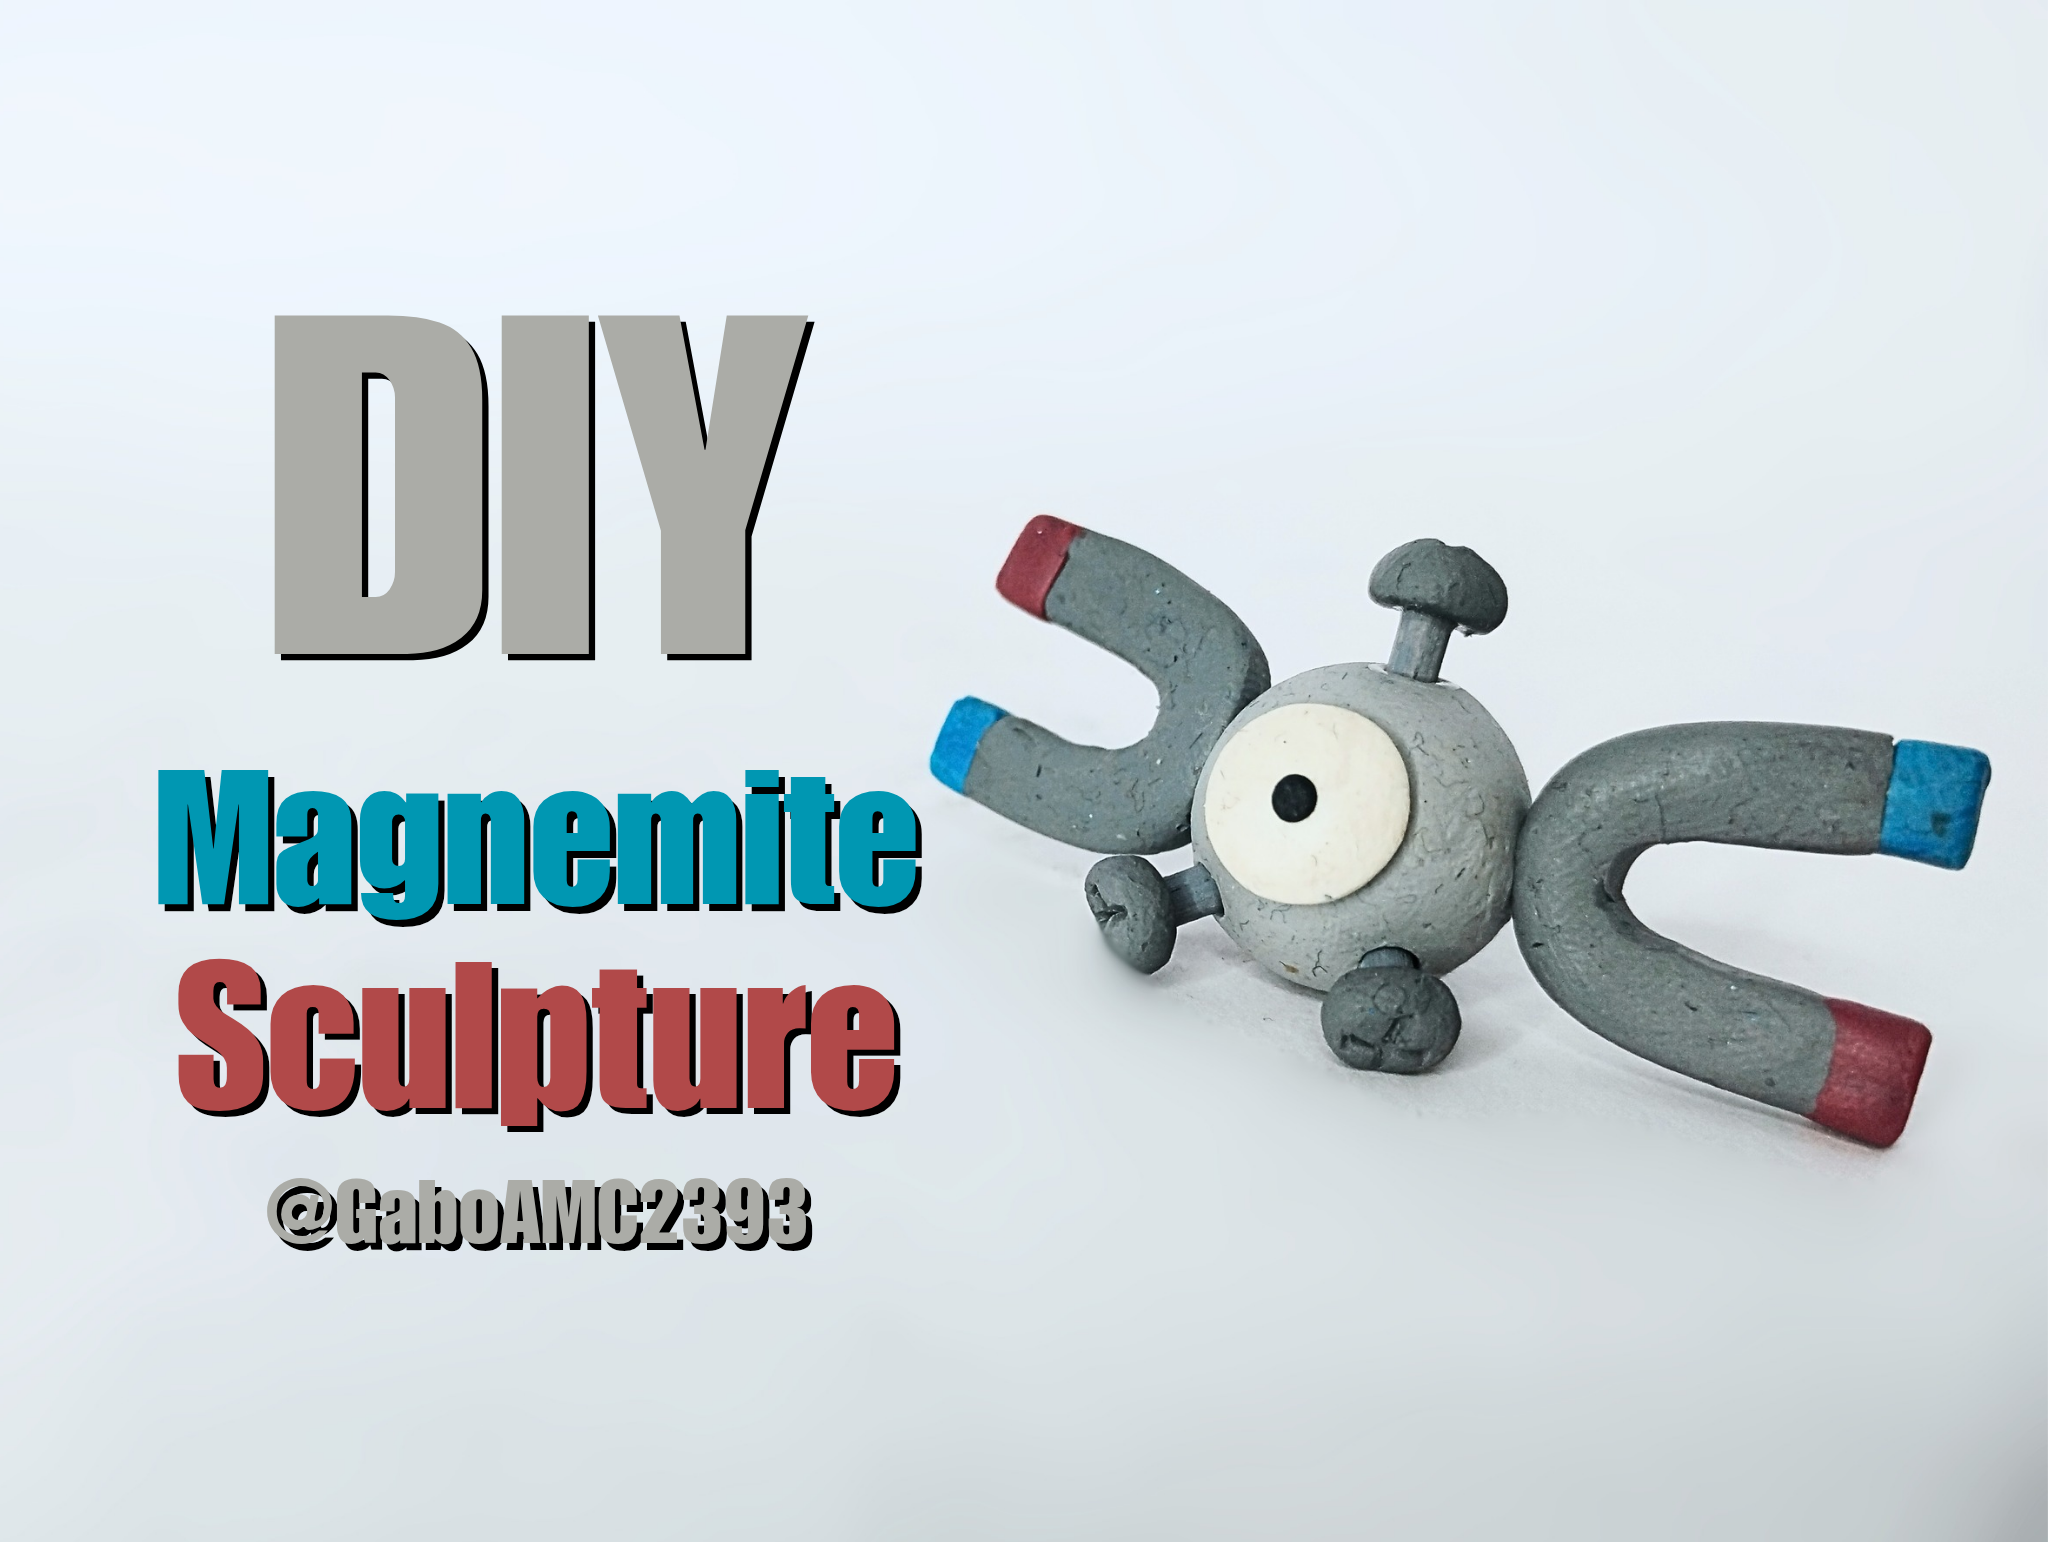
Well, today I would like to share with you another Pokémon that I am adding to my collection, because yes, I am putting together a very nice collection of these first-generation characters. The one I am sharing with you today is a little Magnemite, a very iconic electric Pokémon.
>># Español
>>Saludos amigos. Desde hace poco tiempo he estado compartiendo en la comunidad una serie de figuritas de Pokemon. Hace poco compartí una de Seel. Pueden ver el post en el enlace a continuación:
>>
>>https://peakd.com/hive-189641/@gaboamc2393/diy-seel-sculpture-eng-spa
>>
>>Pues bien, hoy me gustaría compartir con ustedes otro Pokémon que añado a mi colección, porque sí, estoy armando una muy bonita colección de esos personajes de primera generación. El que les comparto hoy es un pequeño Magnemite, un Pokémon eléctrico muy emblemático de Pokémon.
# Step by step
The materials I used for this figurine were as follows:
* Wire
* Wooden sticks
* Glue
* Paint
* Plasticine
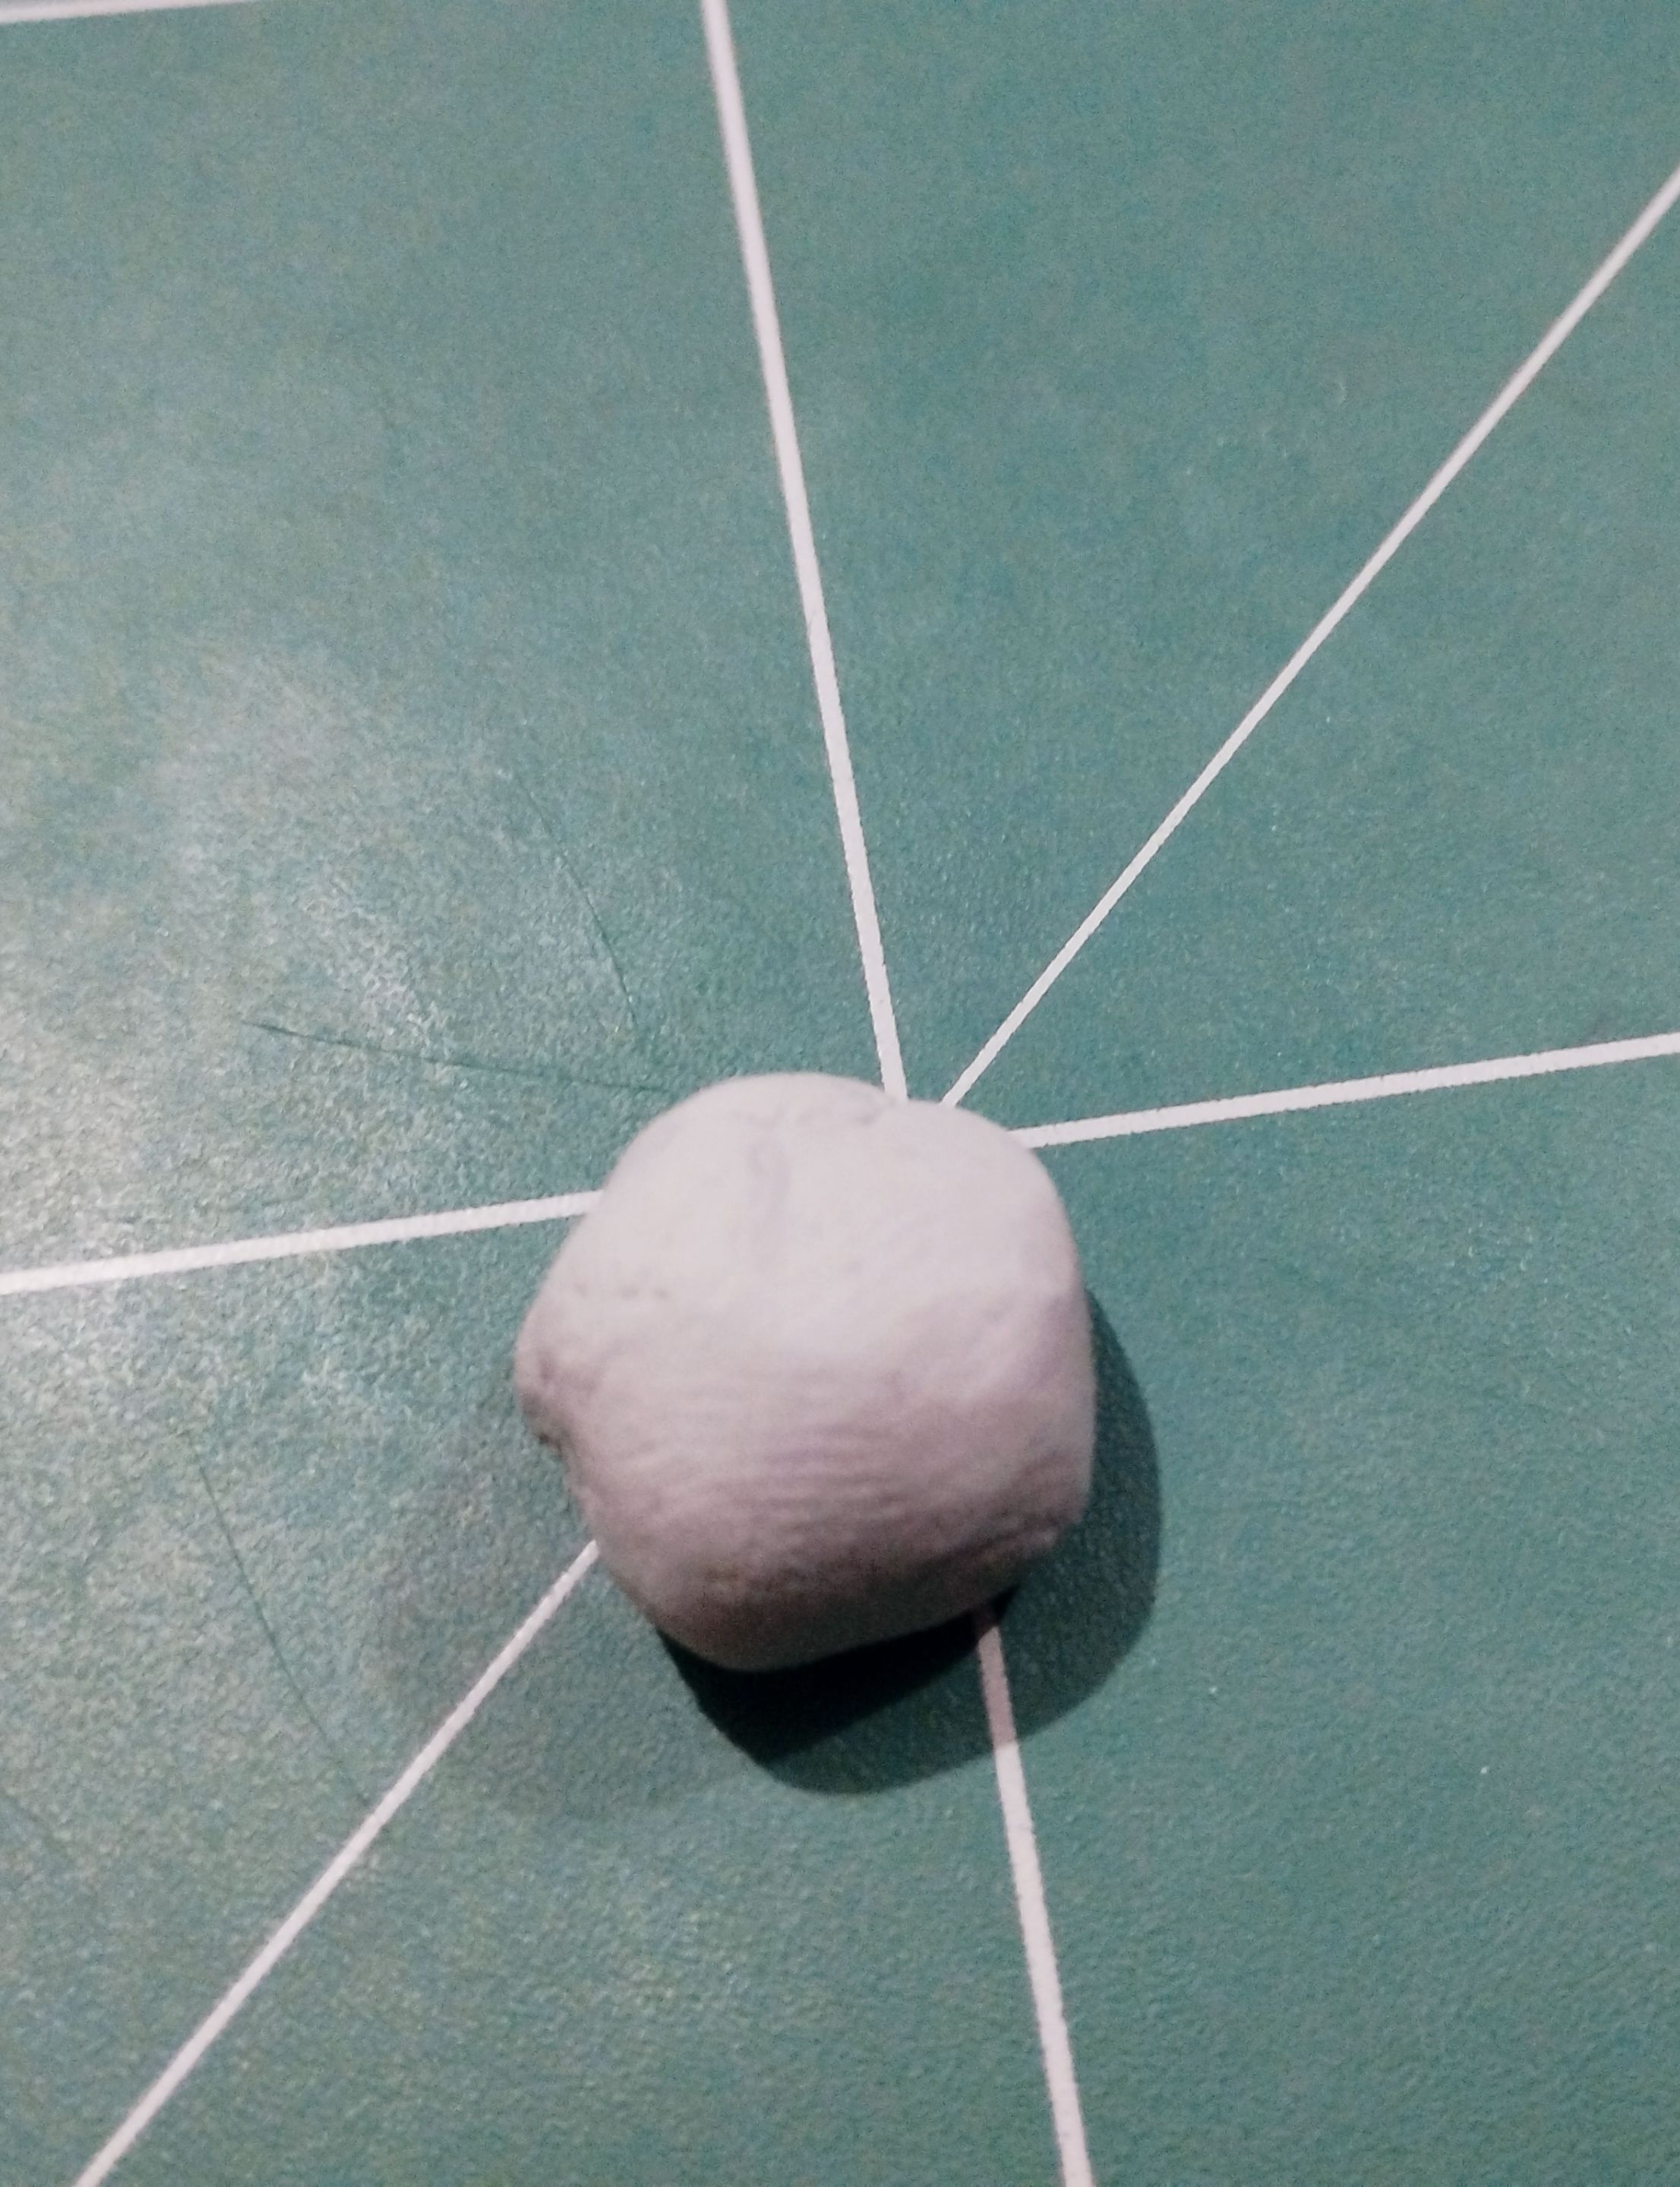
Take a look at the images below. I used gray plasticine directly for what would become the character's body. Its body is simply a sphere, so the first thing I did was this: a small gray sphere.
>># Paso a paso
>>
>>Los materiales que utilicé para esta figurita fueron los siguientes:
>>
>>* Alambre
>>* Palillos de madera
>>* Pegamento
>>* Pintura
>>* Plastilina
>>
>>Fíjense en las imágenes de abajo. Usé directamente plastilina gris para lo que vendría a ser el cuerpo del personaje. Su cuerpo es simplemente una esfera, así que lo primero que hice fue esto, una pequeña esfera de color gris.
|||
|-|-|
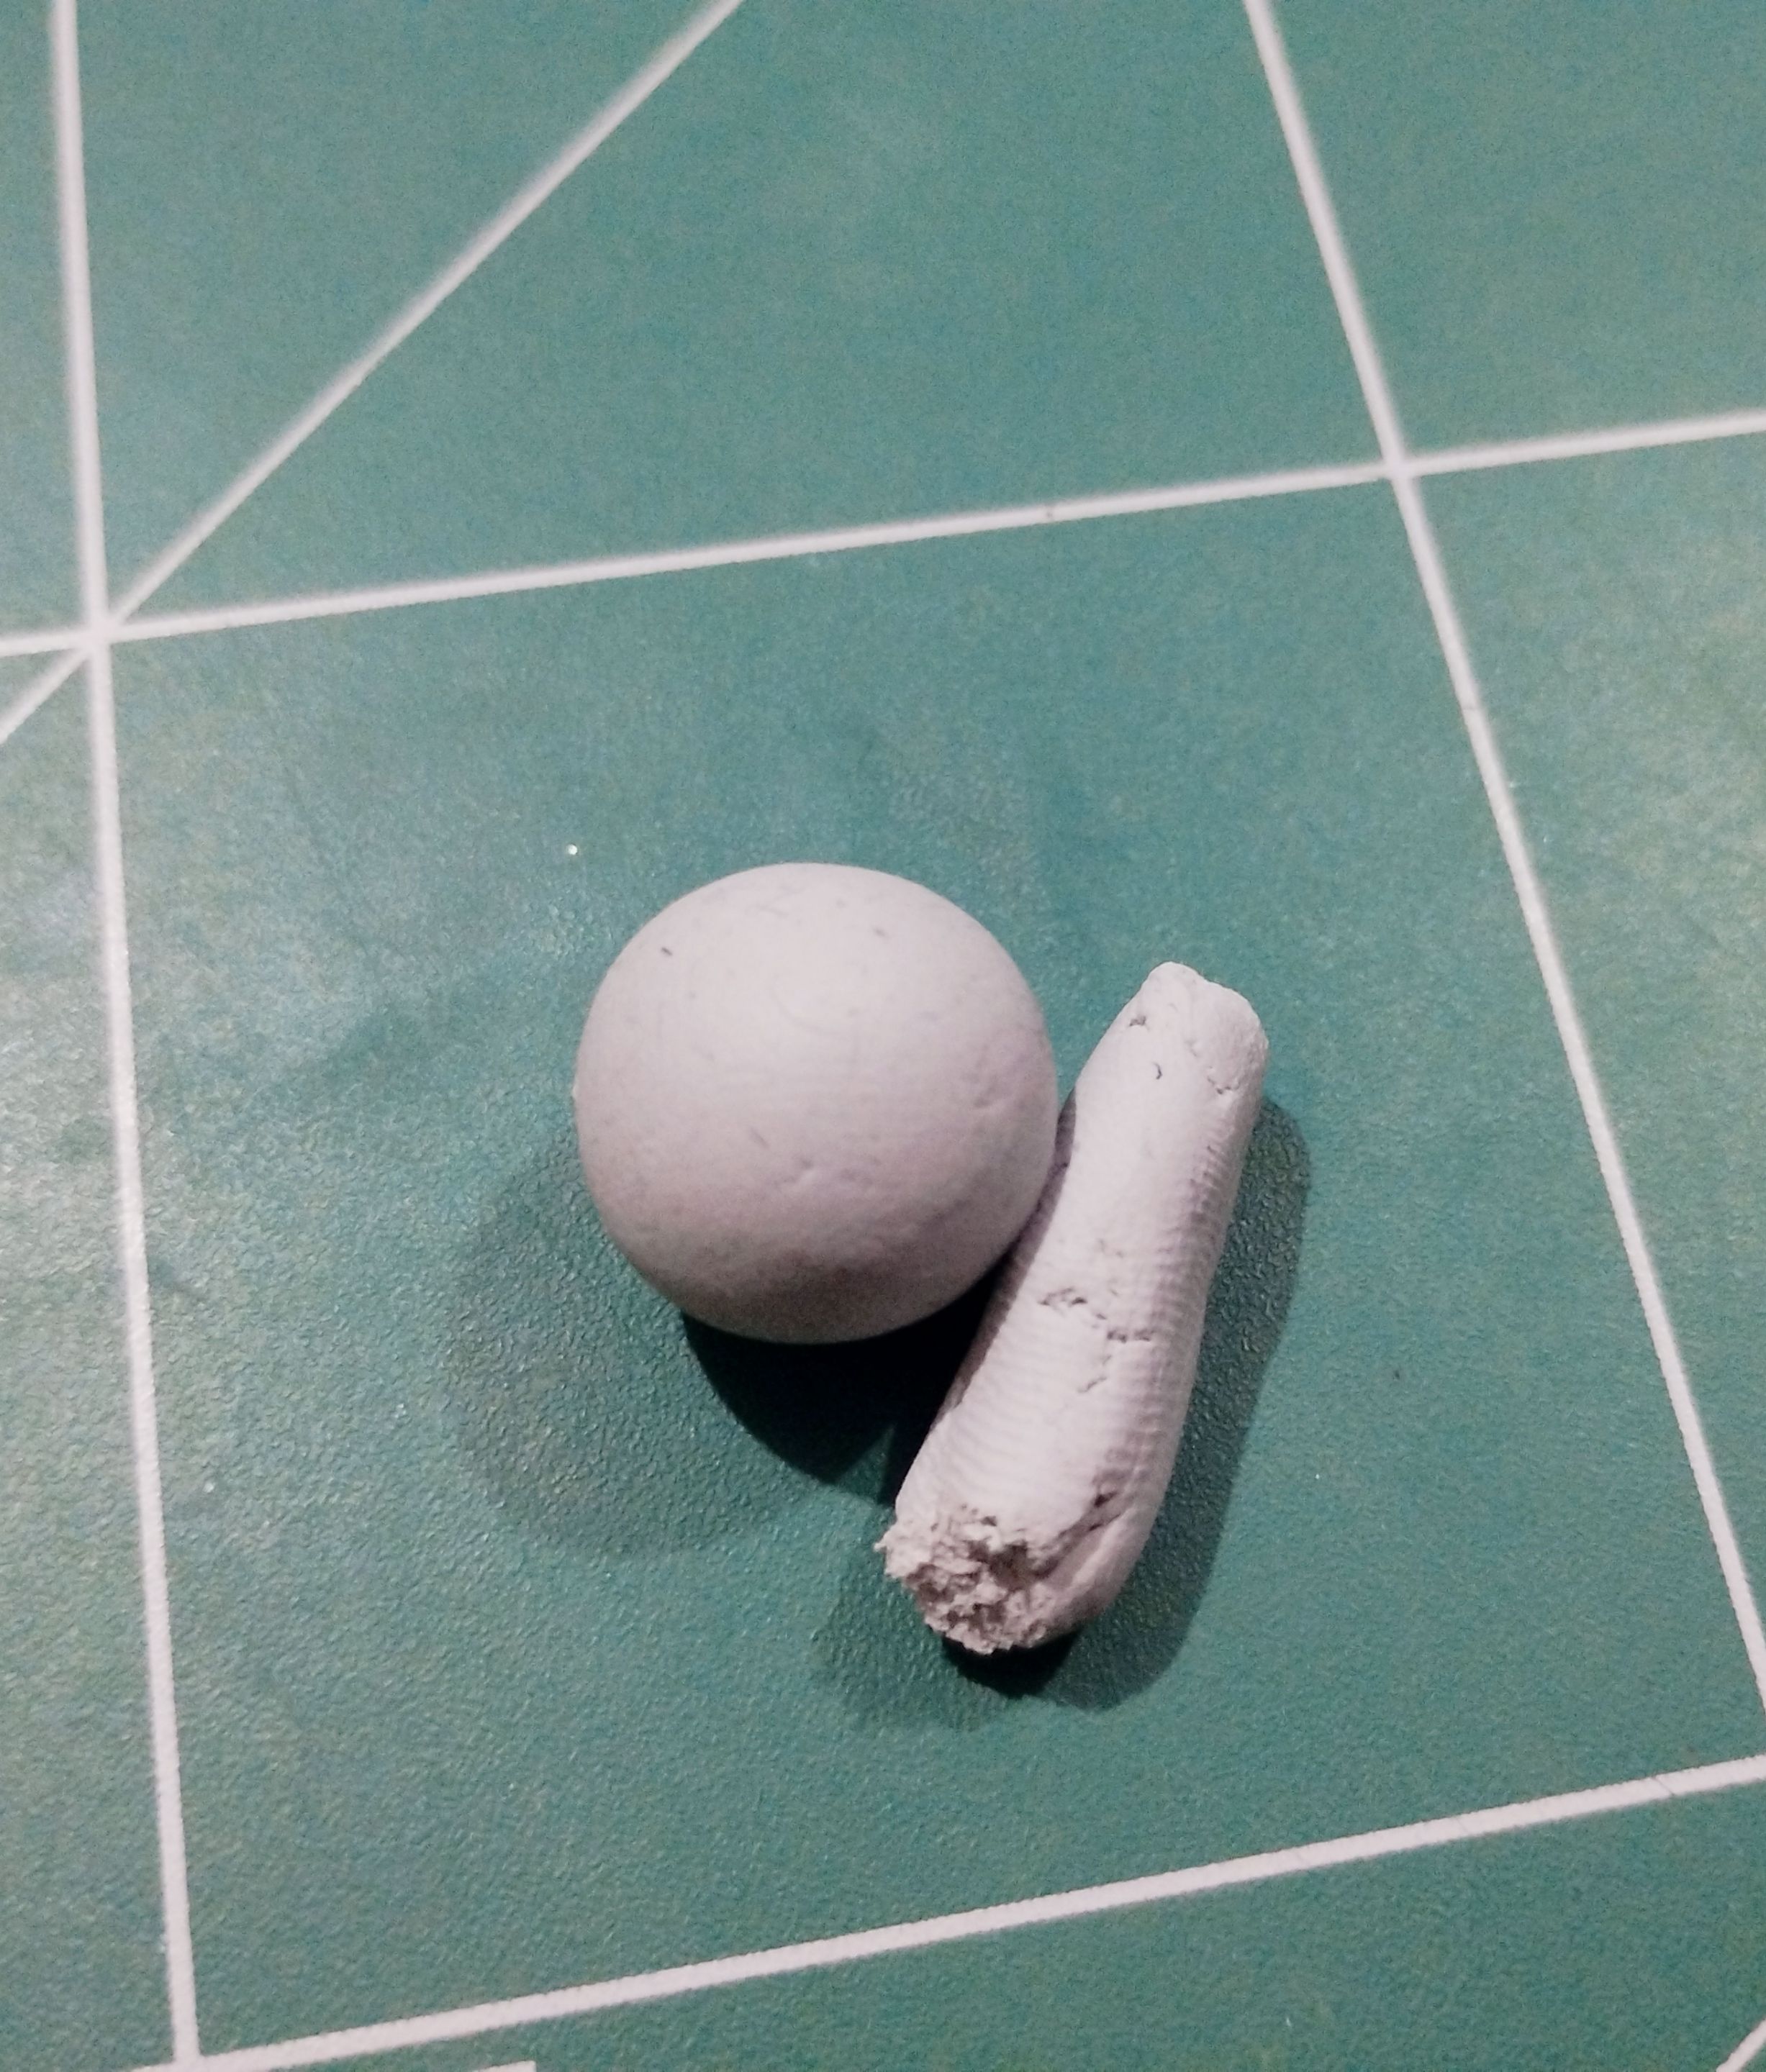
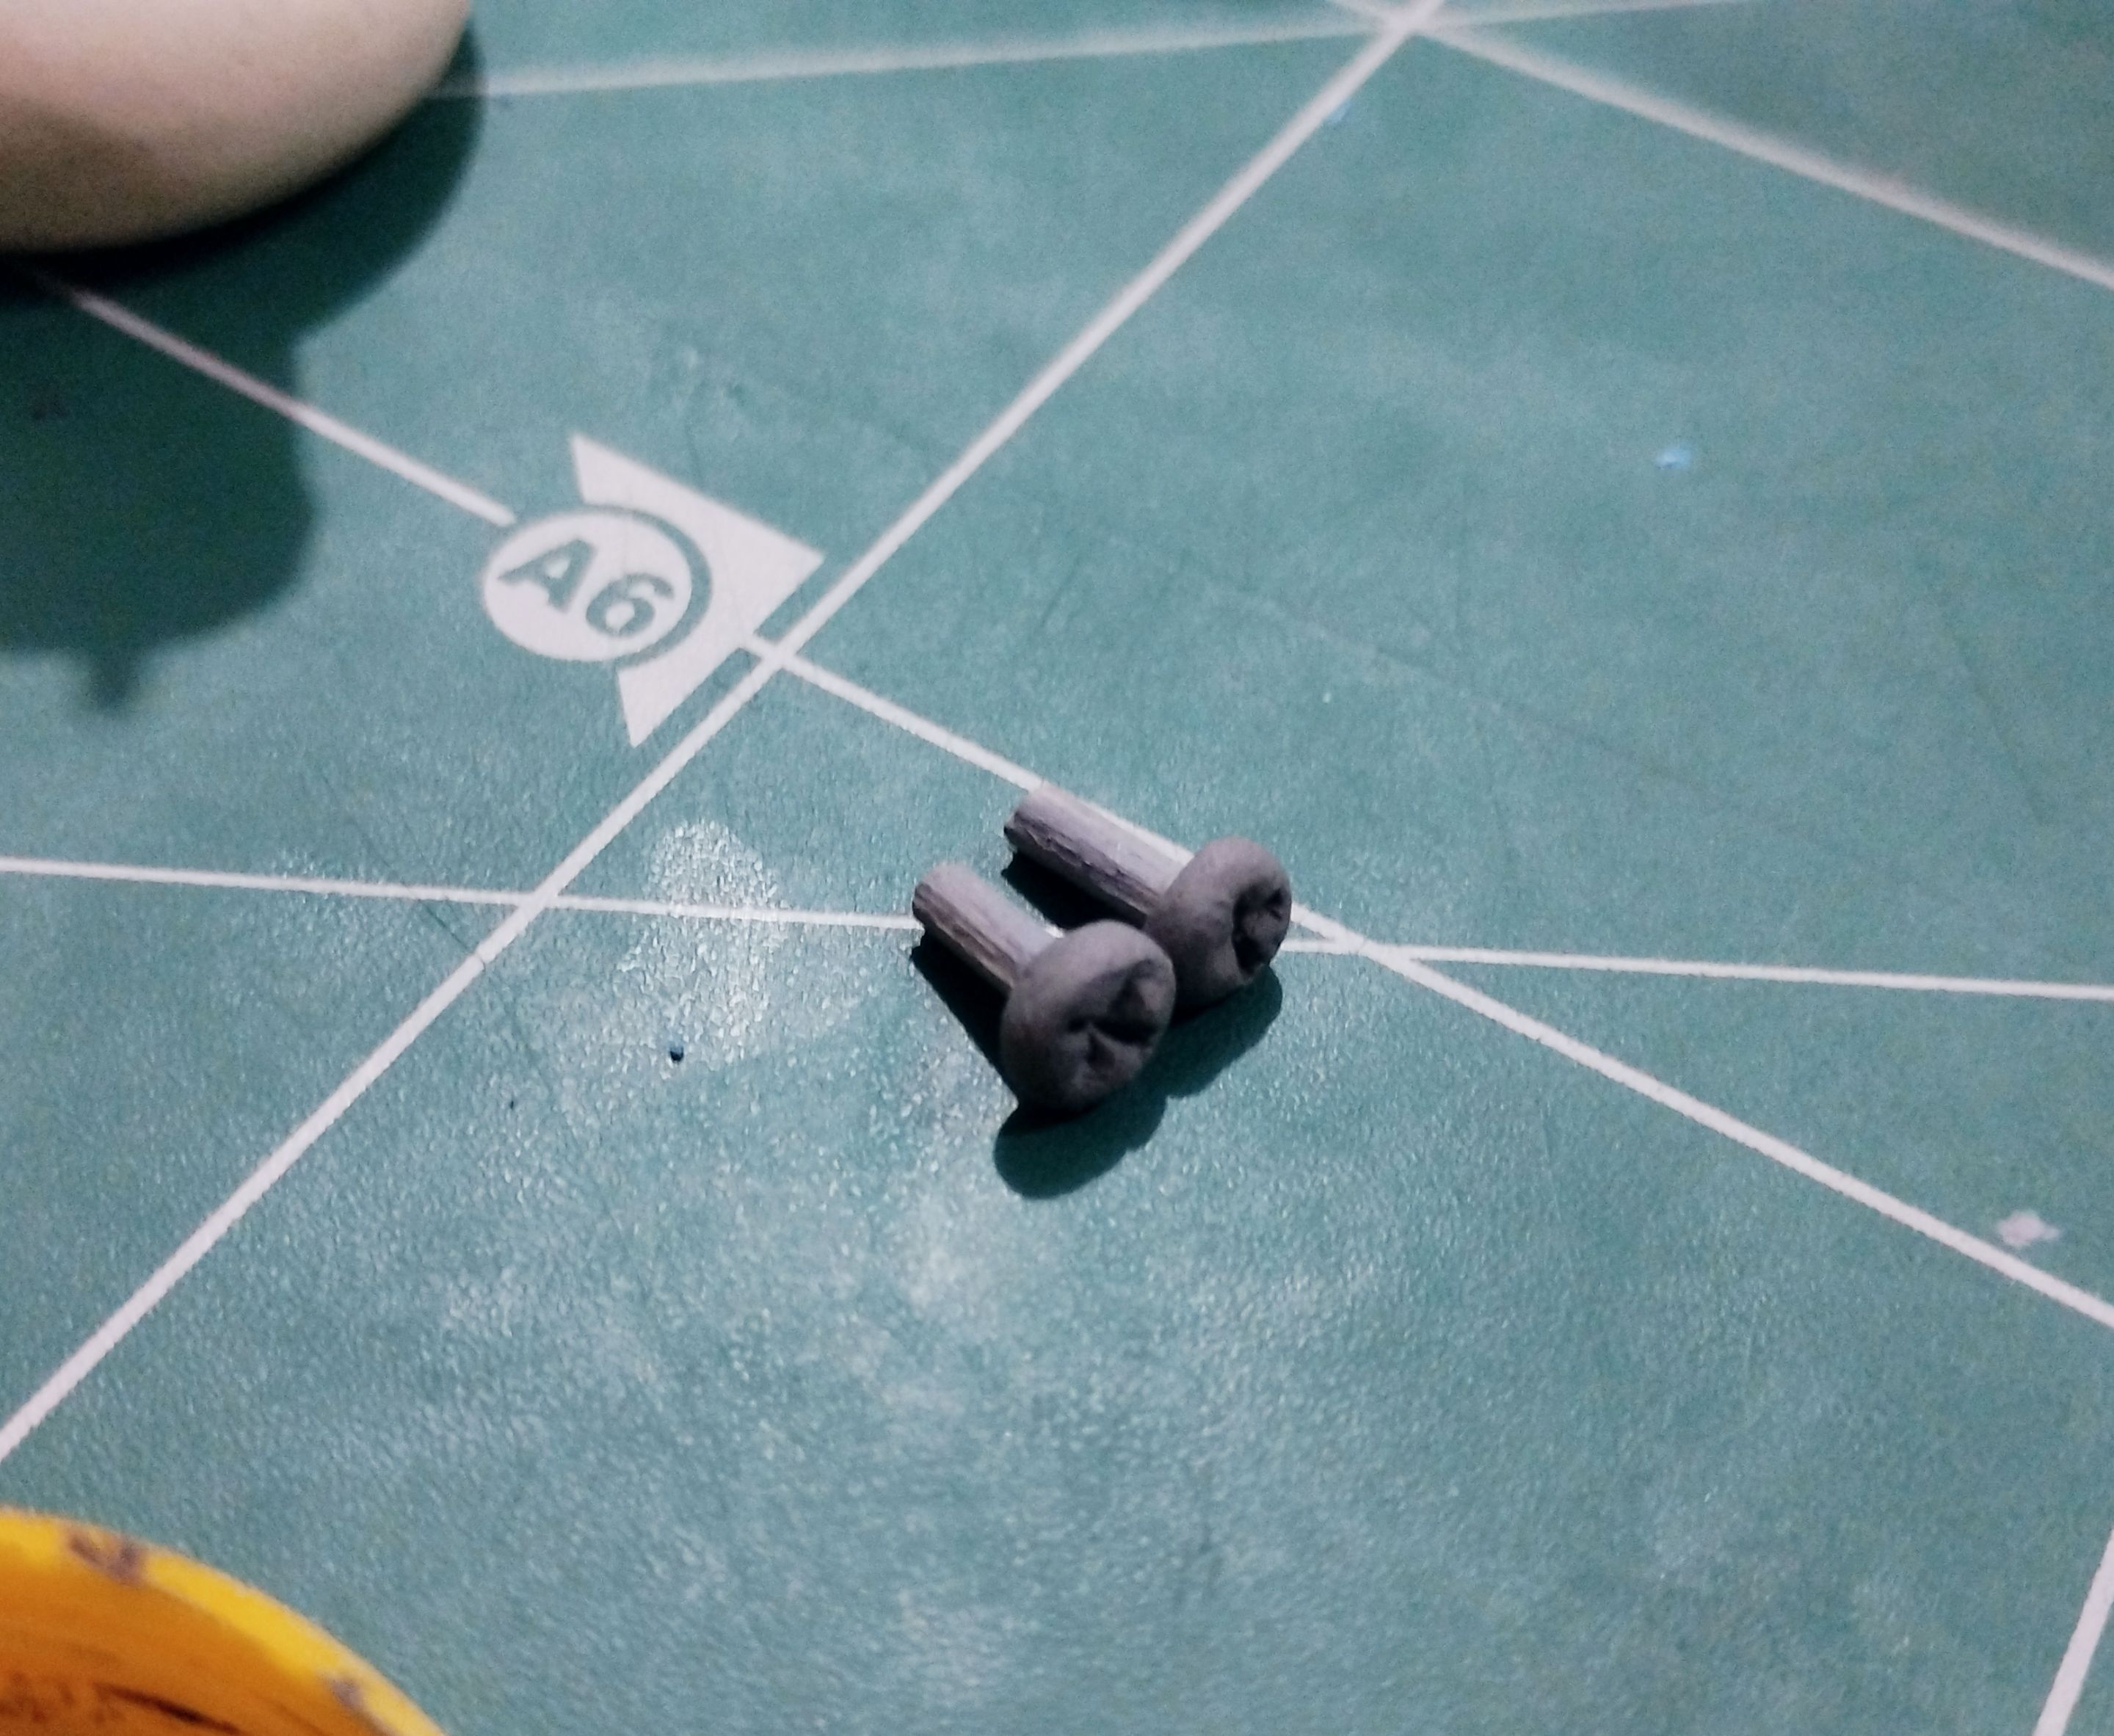
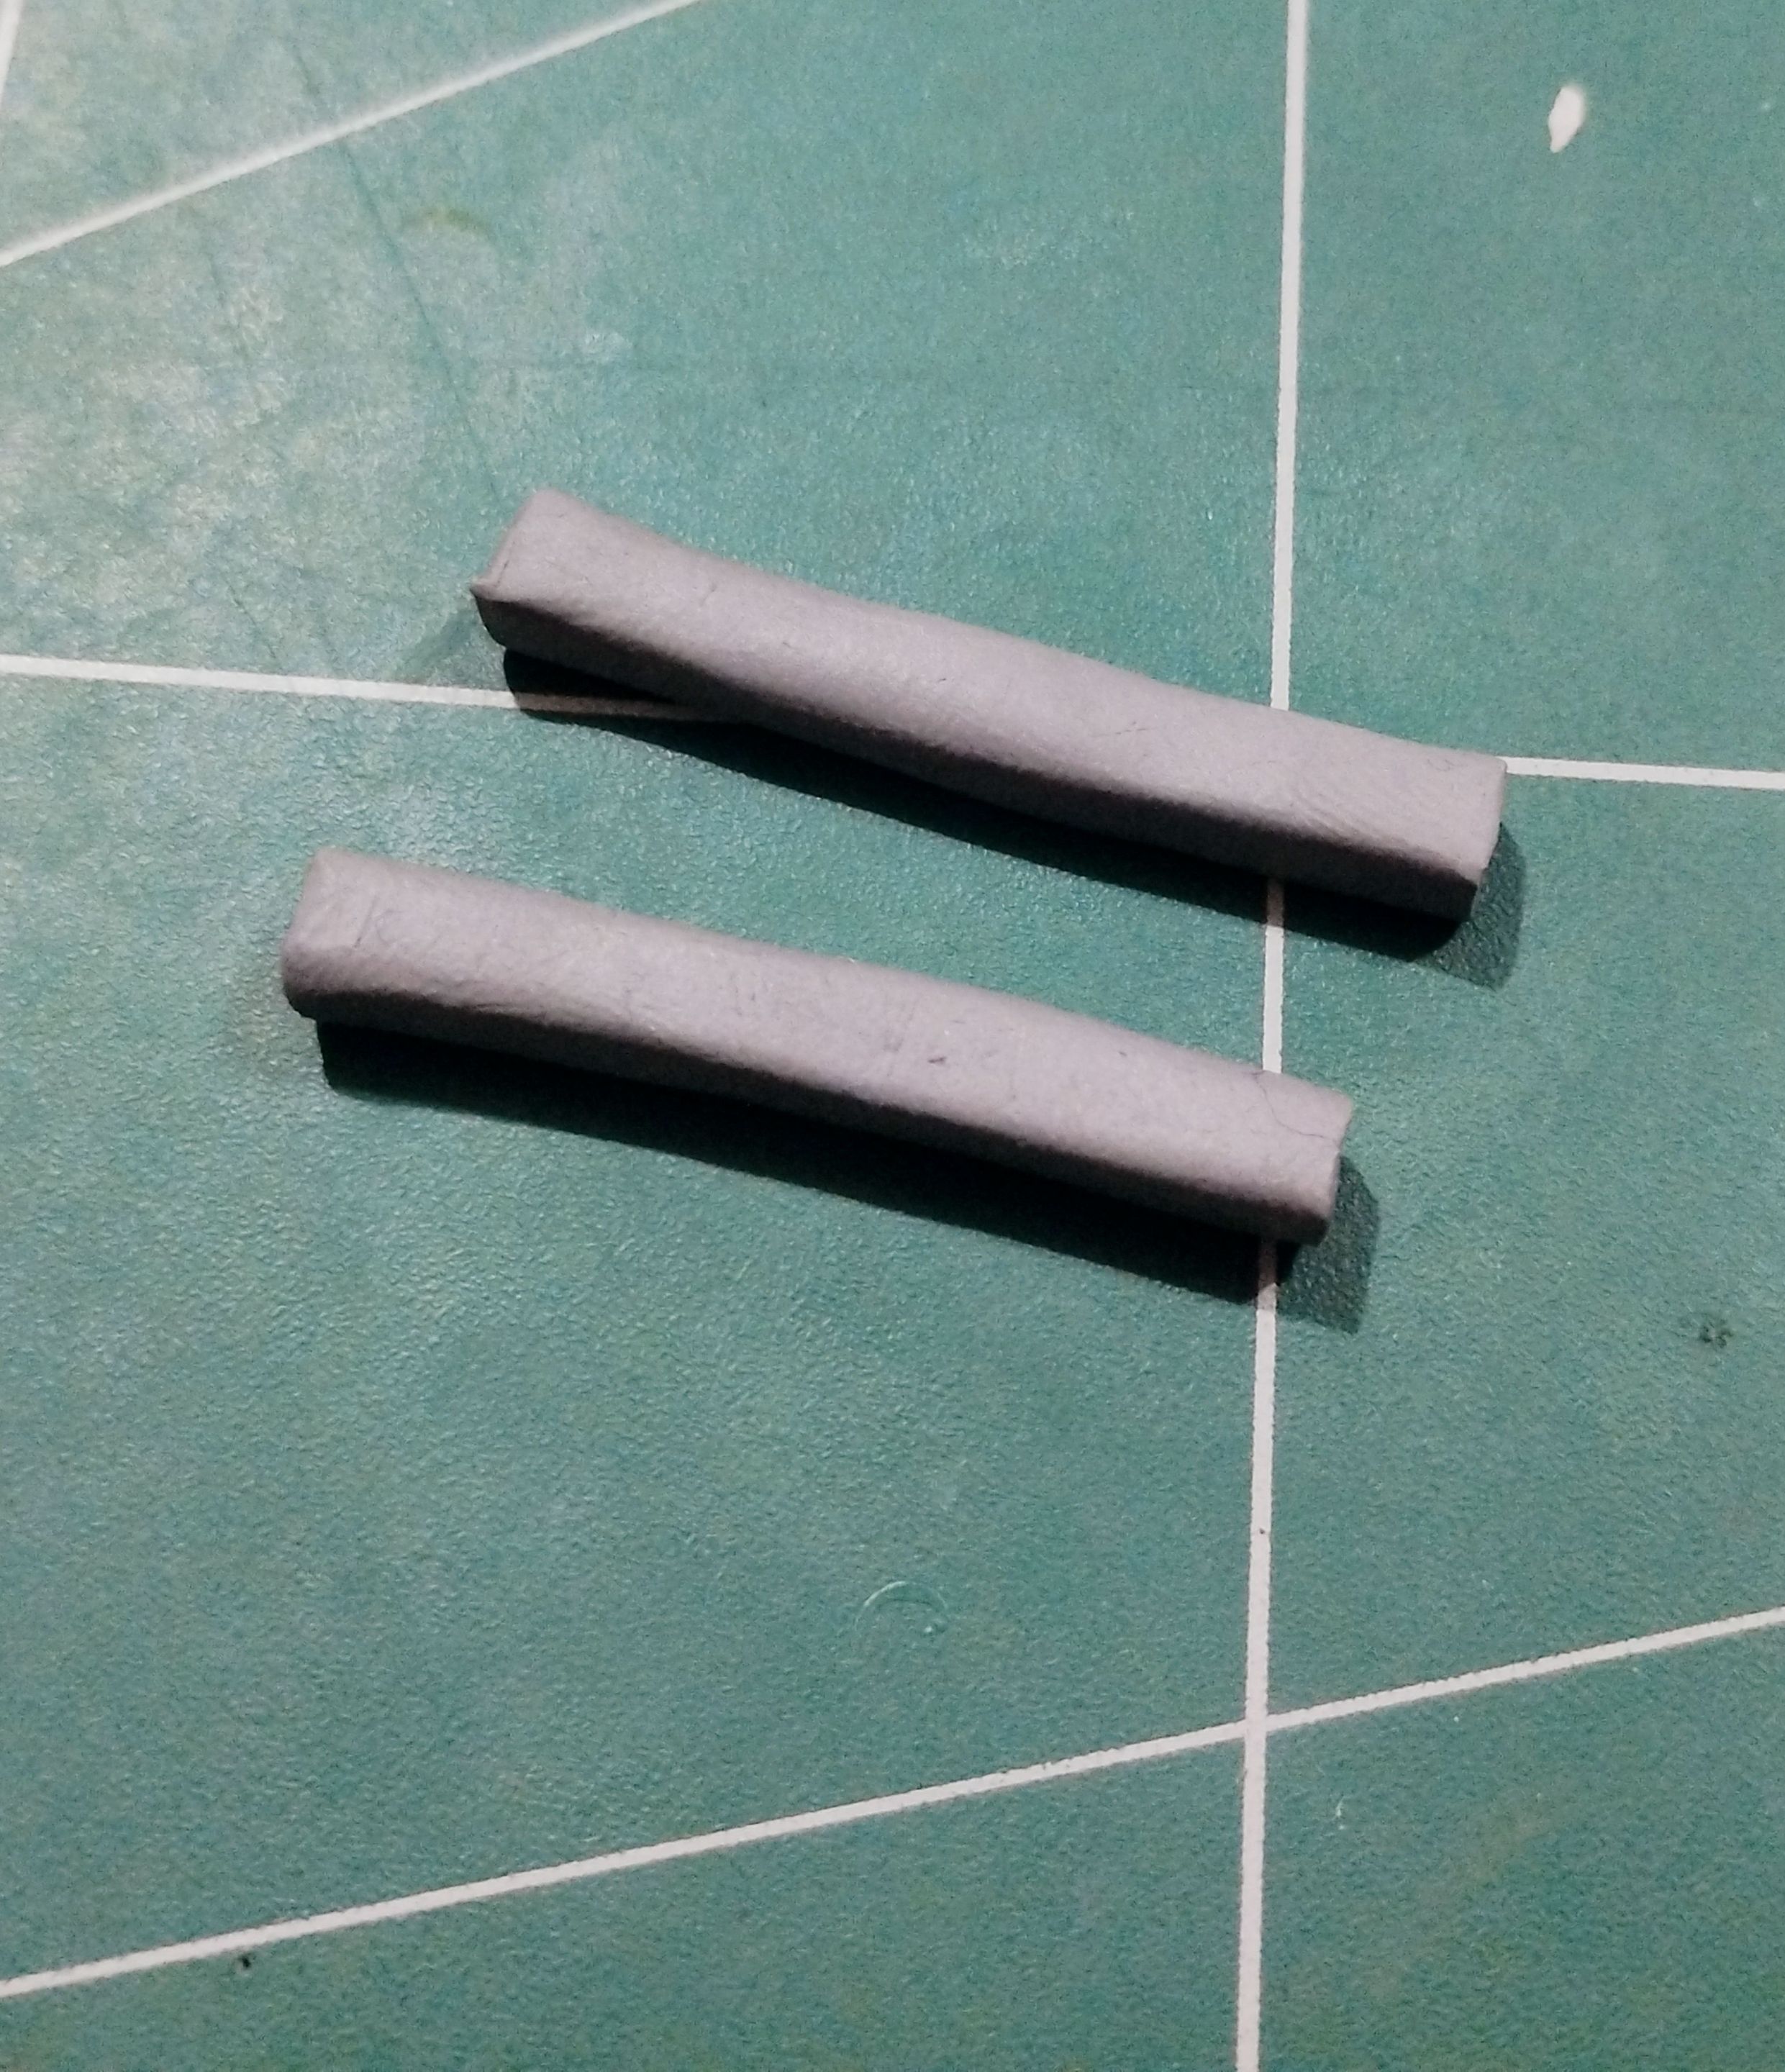
In the materials section, I mentioned some chopsticks. Well, these are small wooden chopsticks, which I cut into very small pieces to make the screws that are so characteristic of Pokémon.
I painted the pieces of wooden chopsticks gray, and once they were dry, I used gray plasticine to create the screw heads, as you can see in the image on the right.
>>En los materiales les mencioné unos palillos. Pues bien, estos son pequeños palillos de madera de toda la vida, los cuales corté en trocitos muy pequeños para hacer los tornillos tan característicos del Pokémon.
>>
>>Pinté de color gris los trocitos de palillos de madera y una vez seco, usé plastilina gris para crear los cabezales de los tornillos, como pueden ver en la imagen de la derecha.
|||
|-|-|
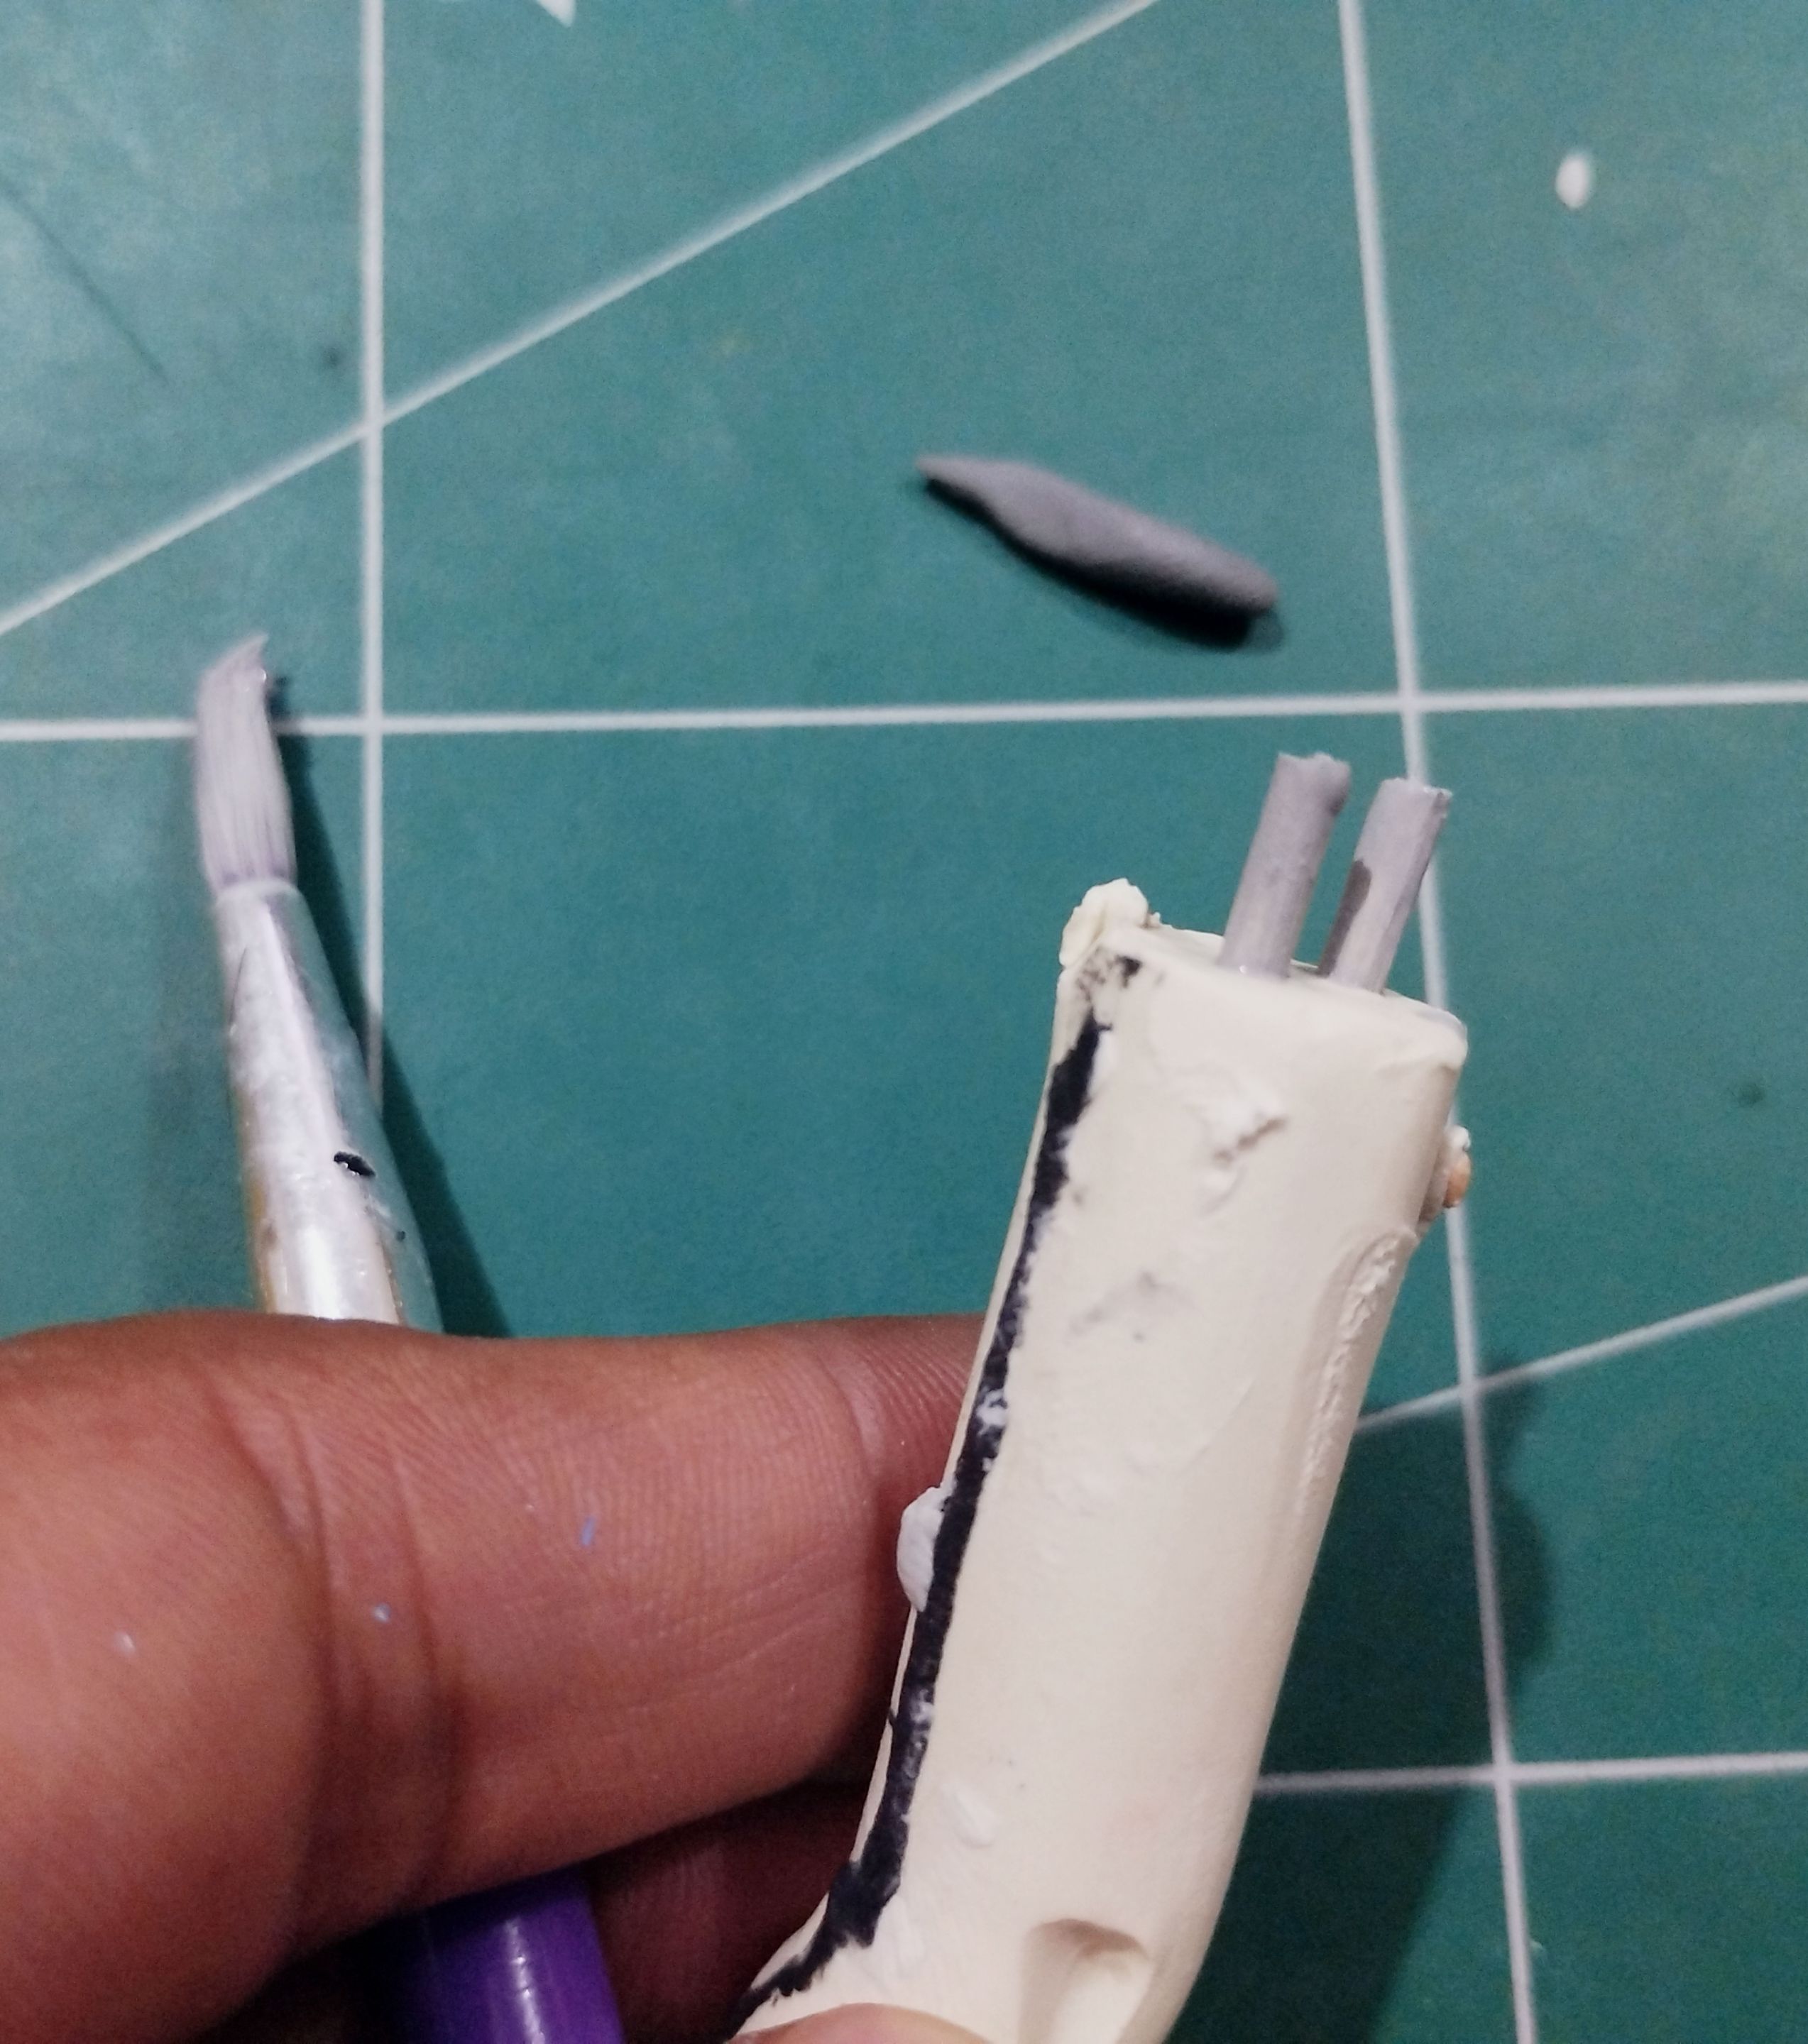
Once the screws were made, I drilled two small holes in Magnemite's body, then applied glue so I could attach each screw to the bottom of the body, one on each side.
>>Una vez hecho los tornillos, hice dos agujeritos en el cuerpo de Magnemite, luego le coloqué pegamento y así pude pegar cada tornillo en la parte inferior del cuerpo, uno a cada lado.
|||
|-|-|
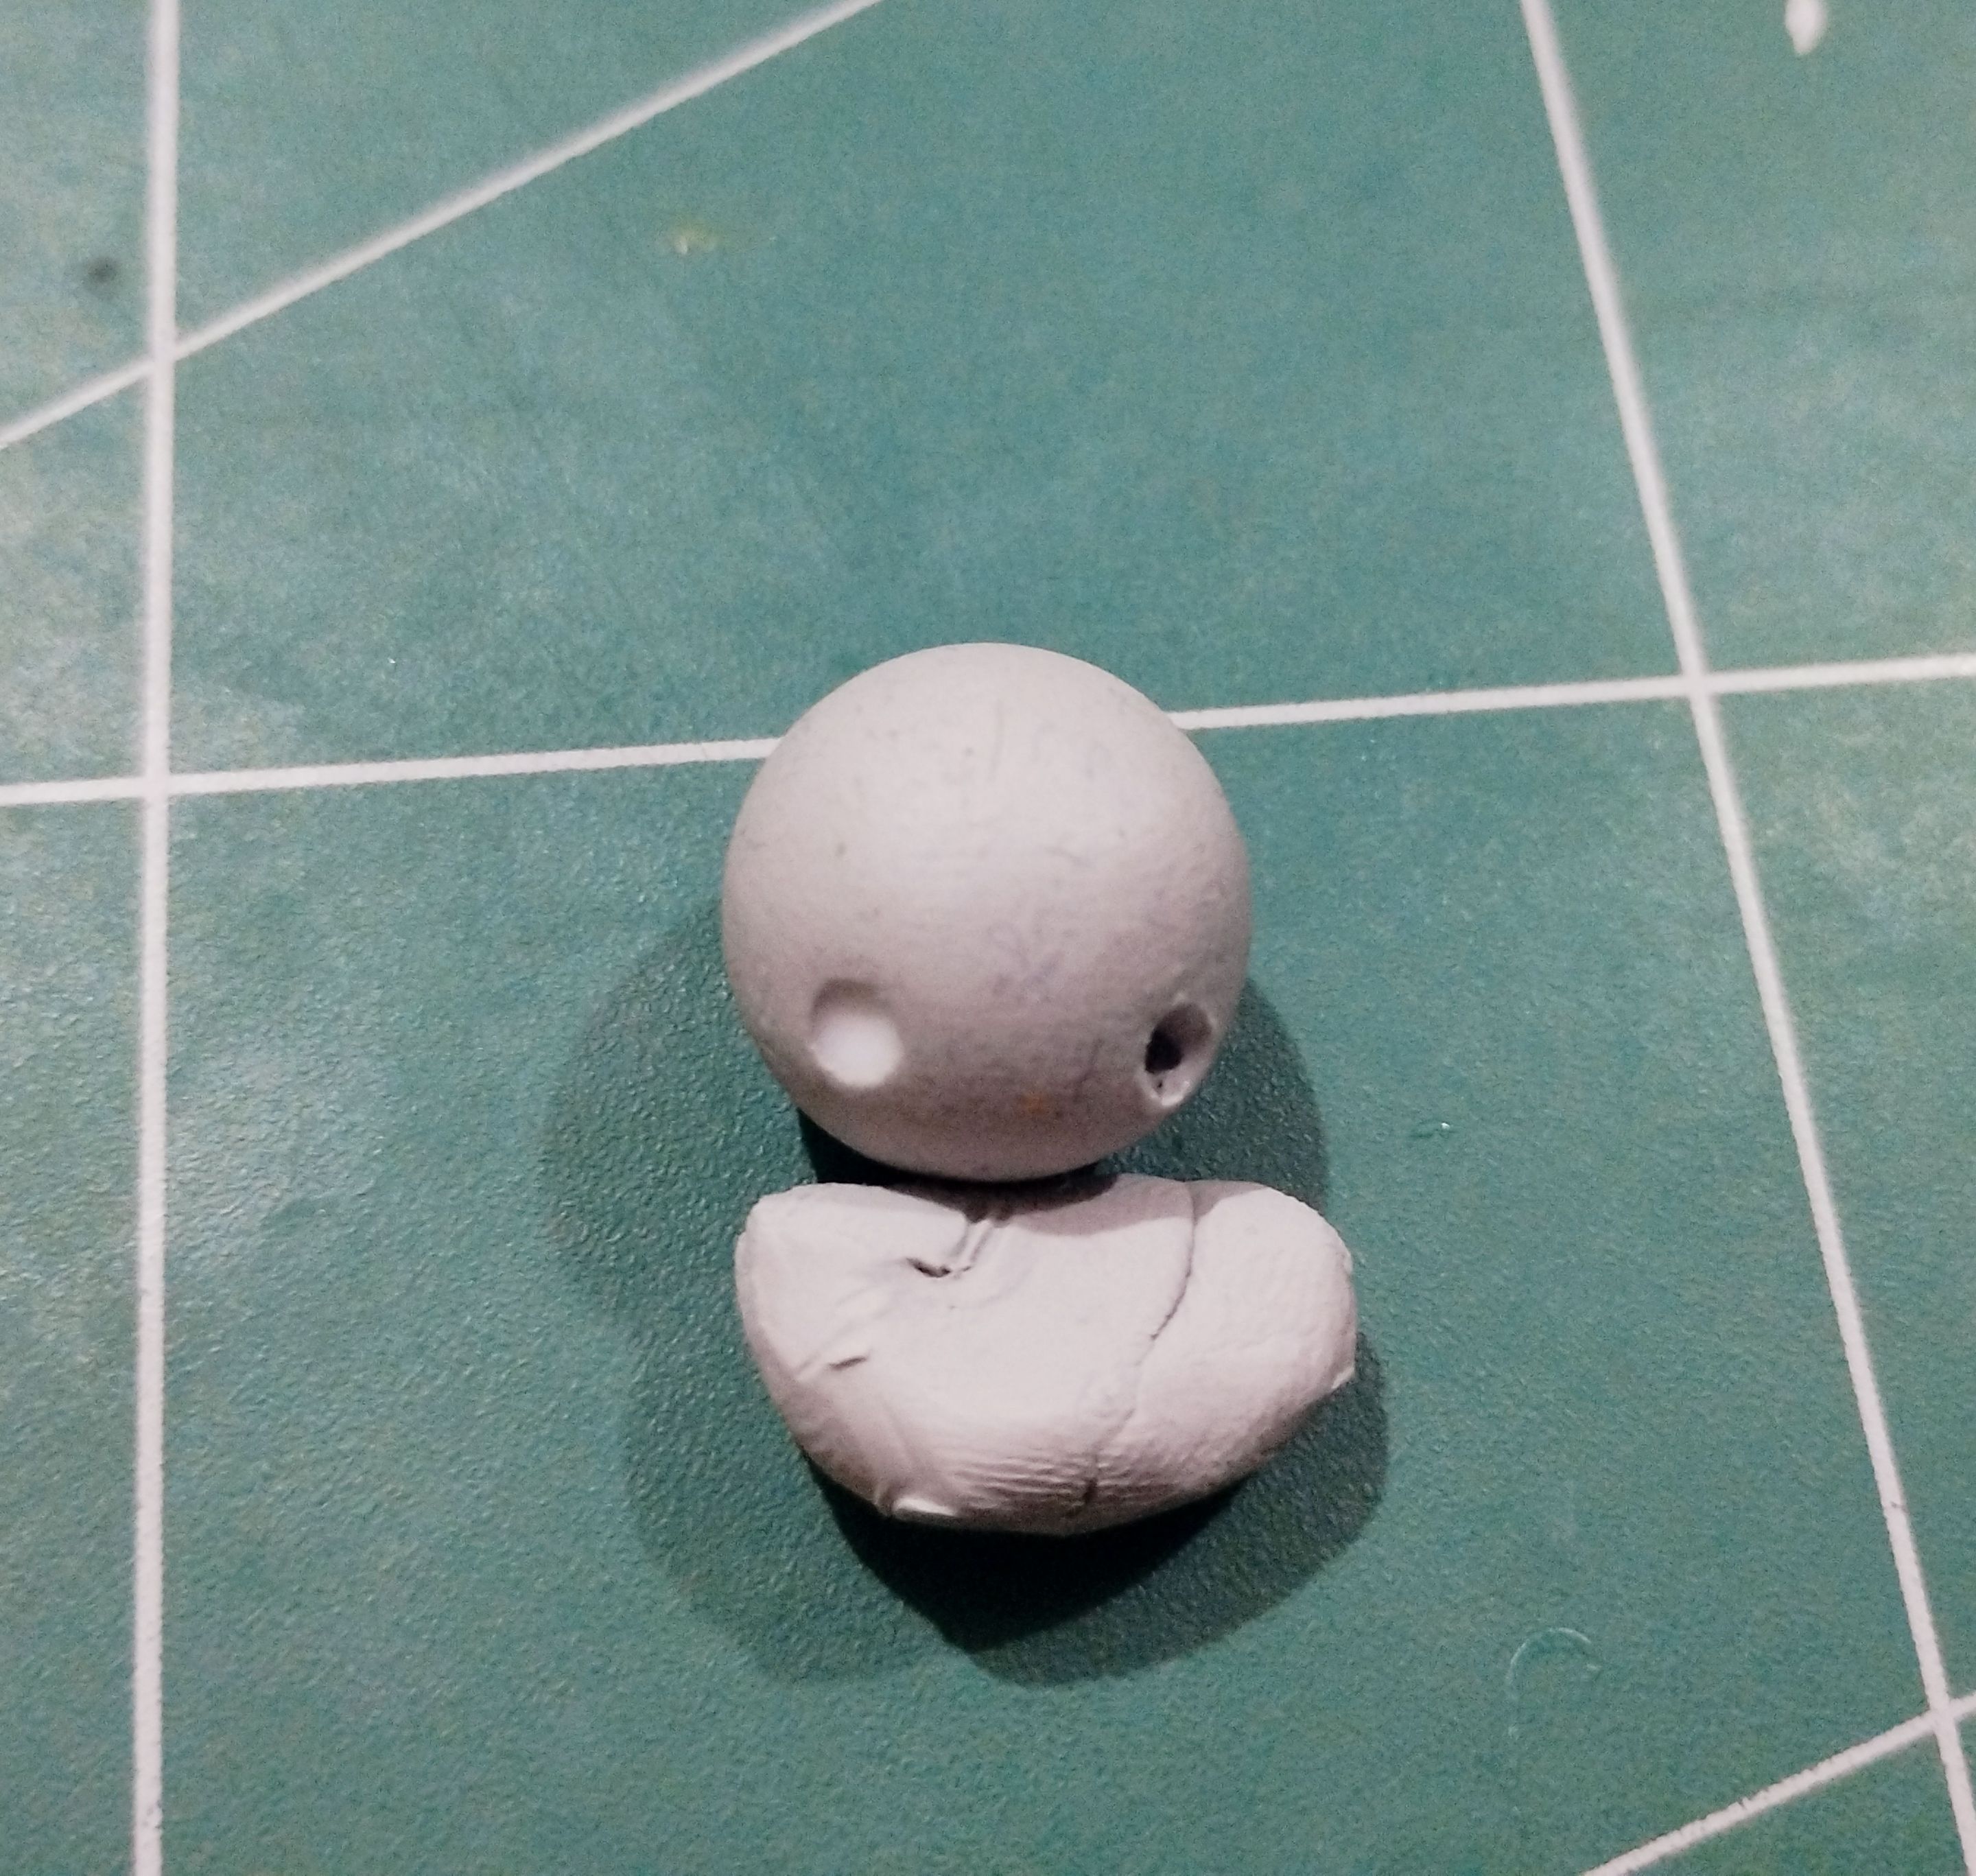
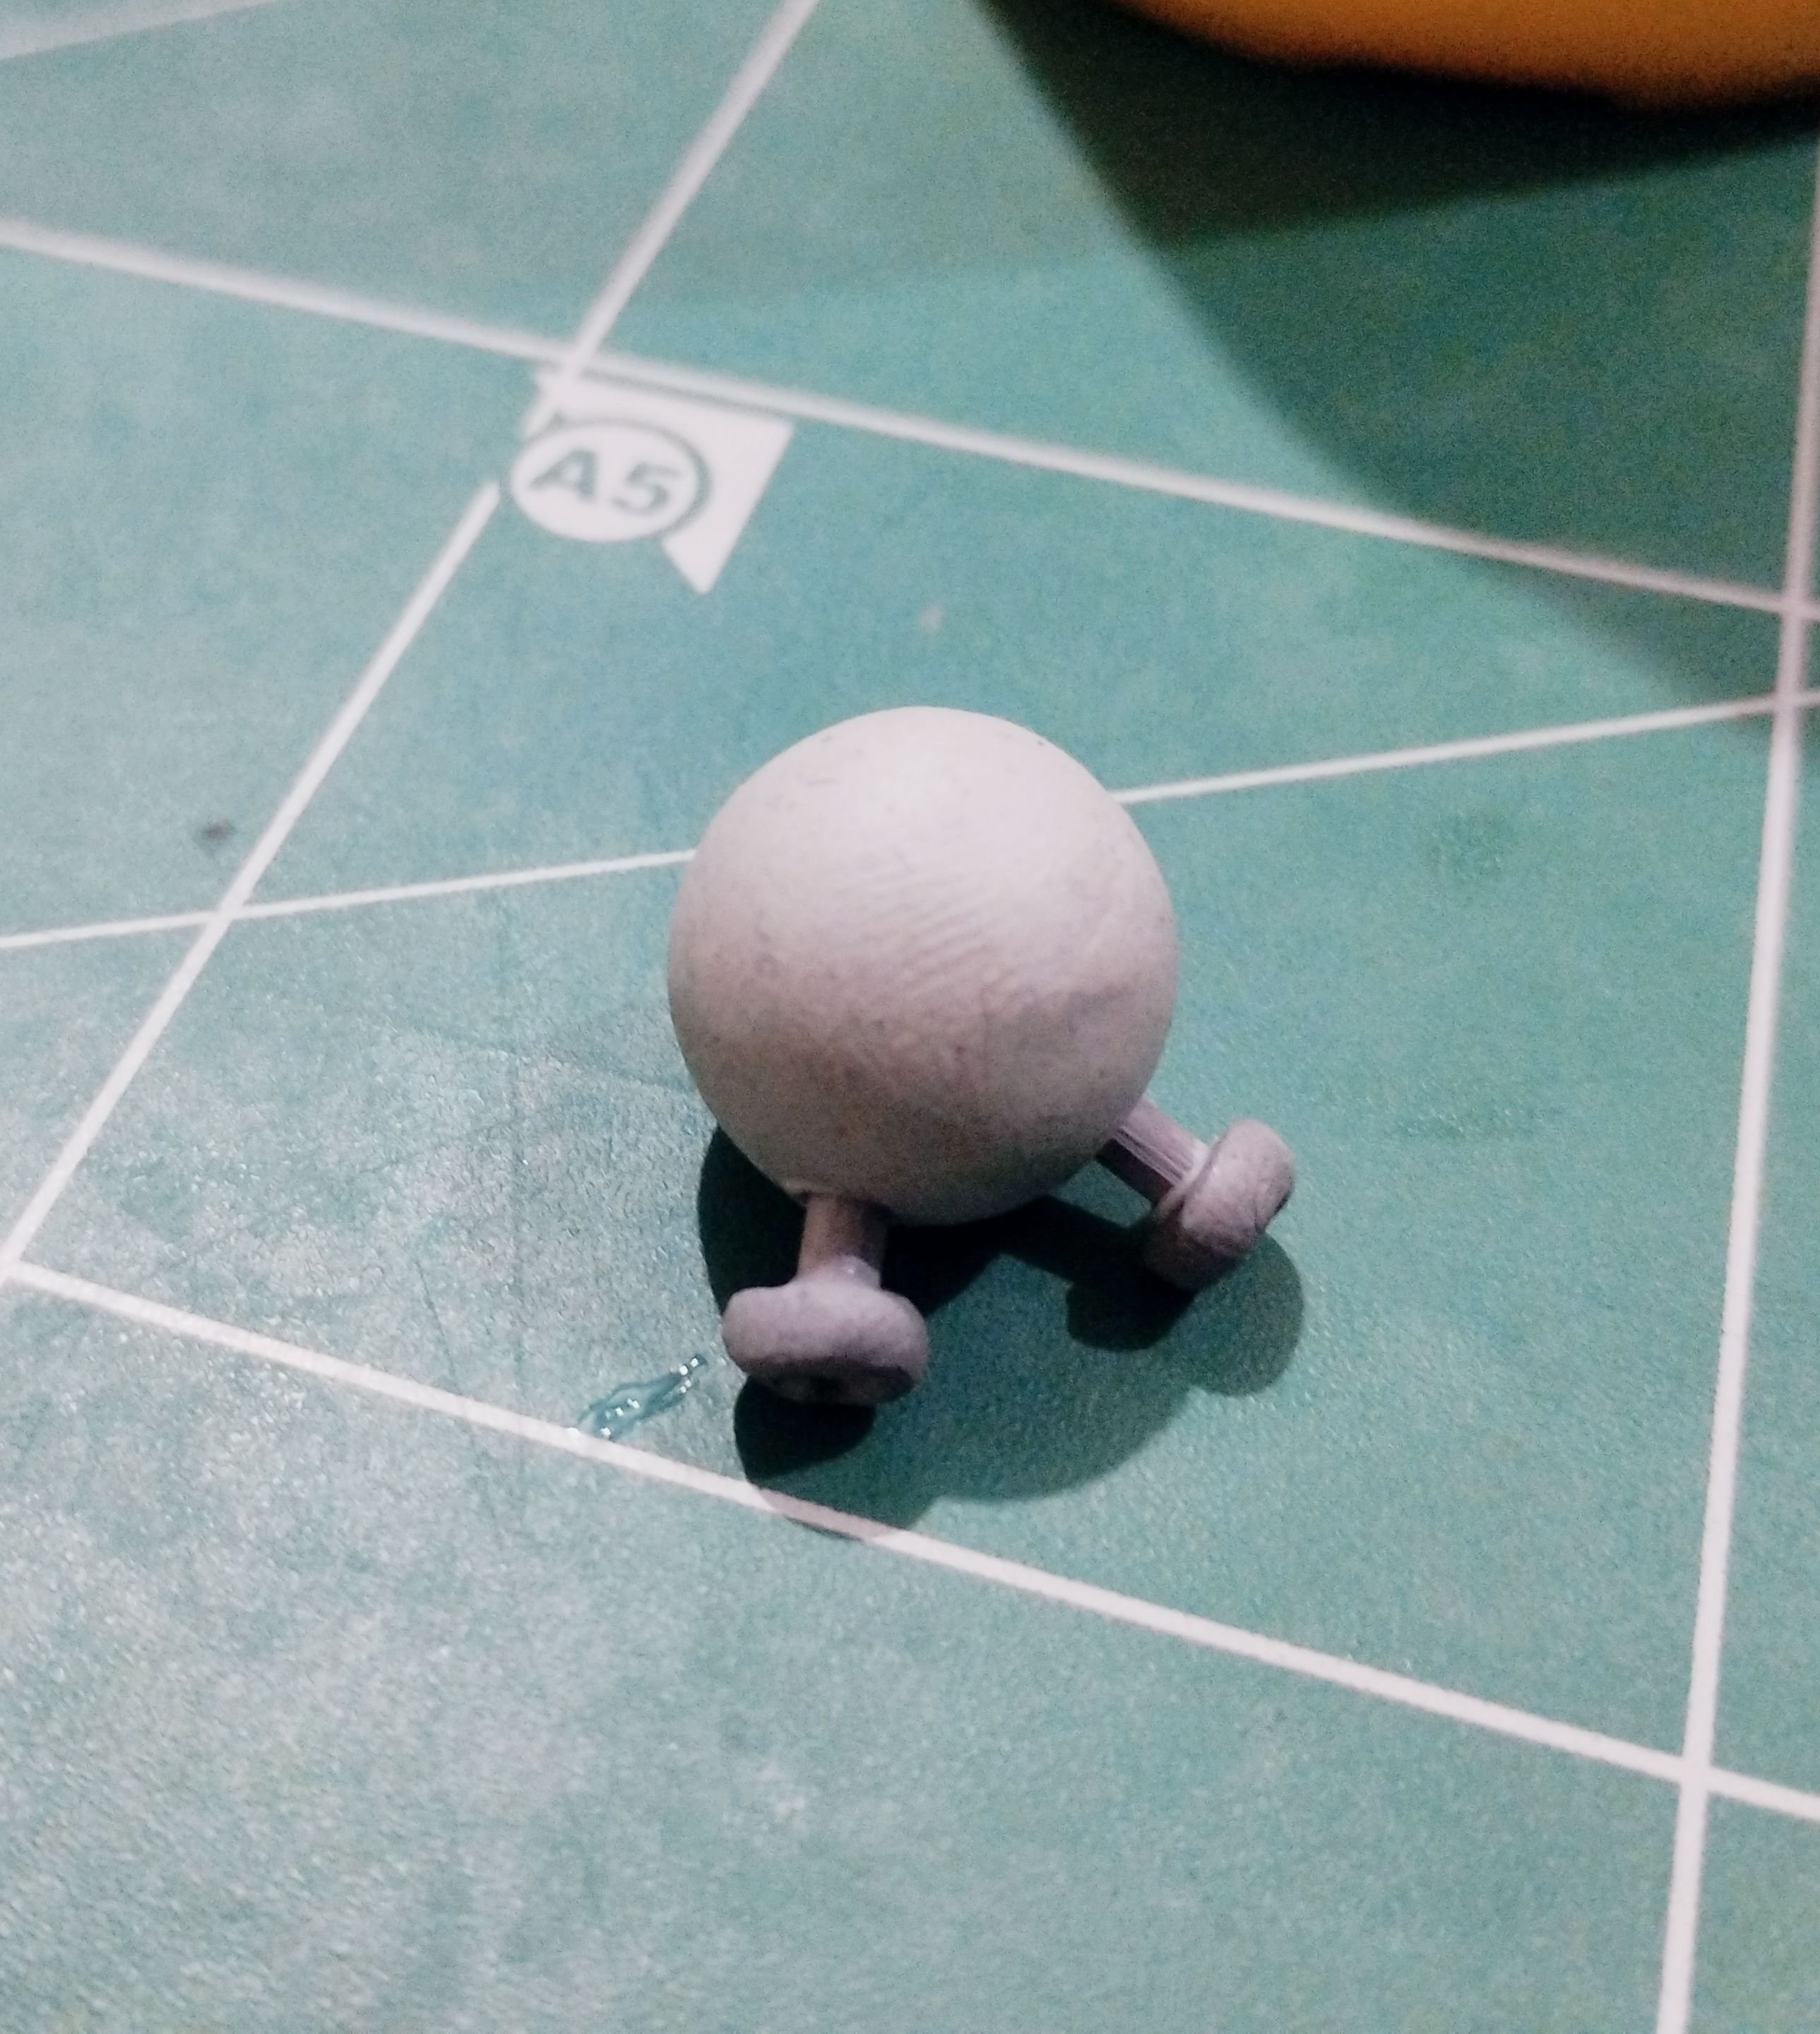
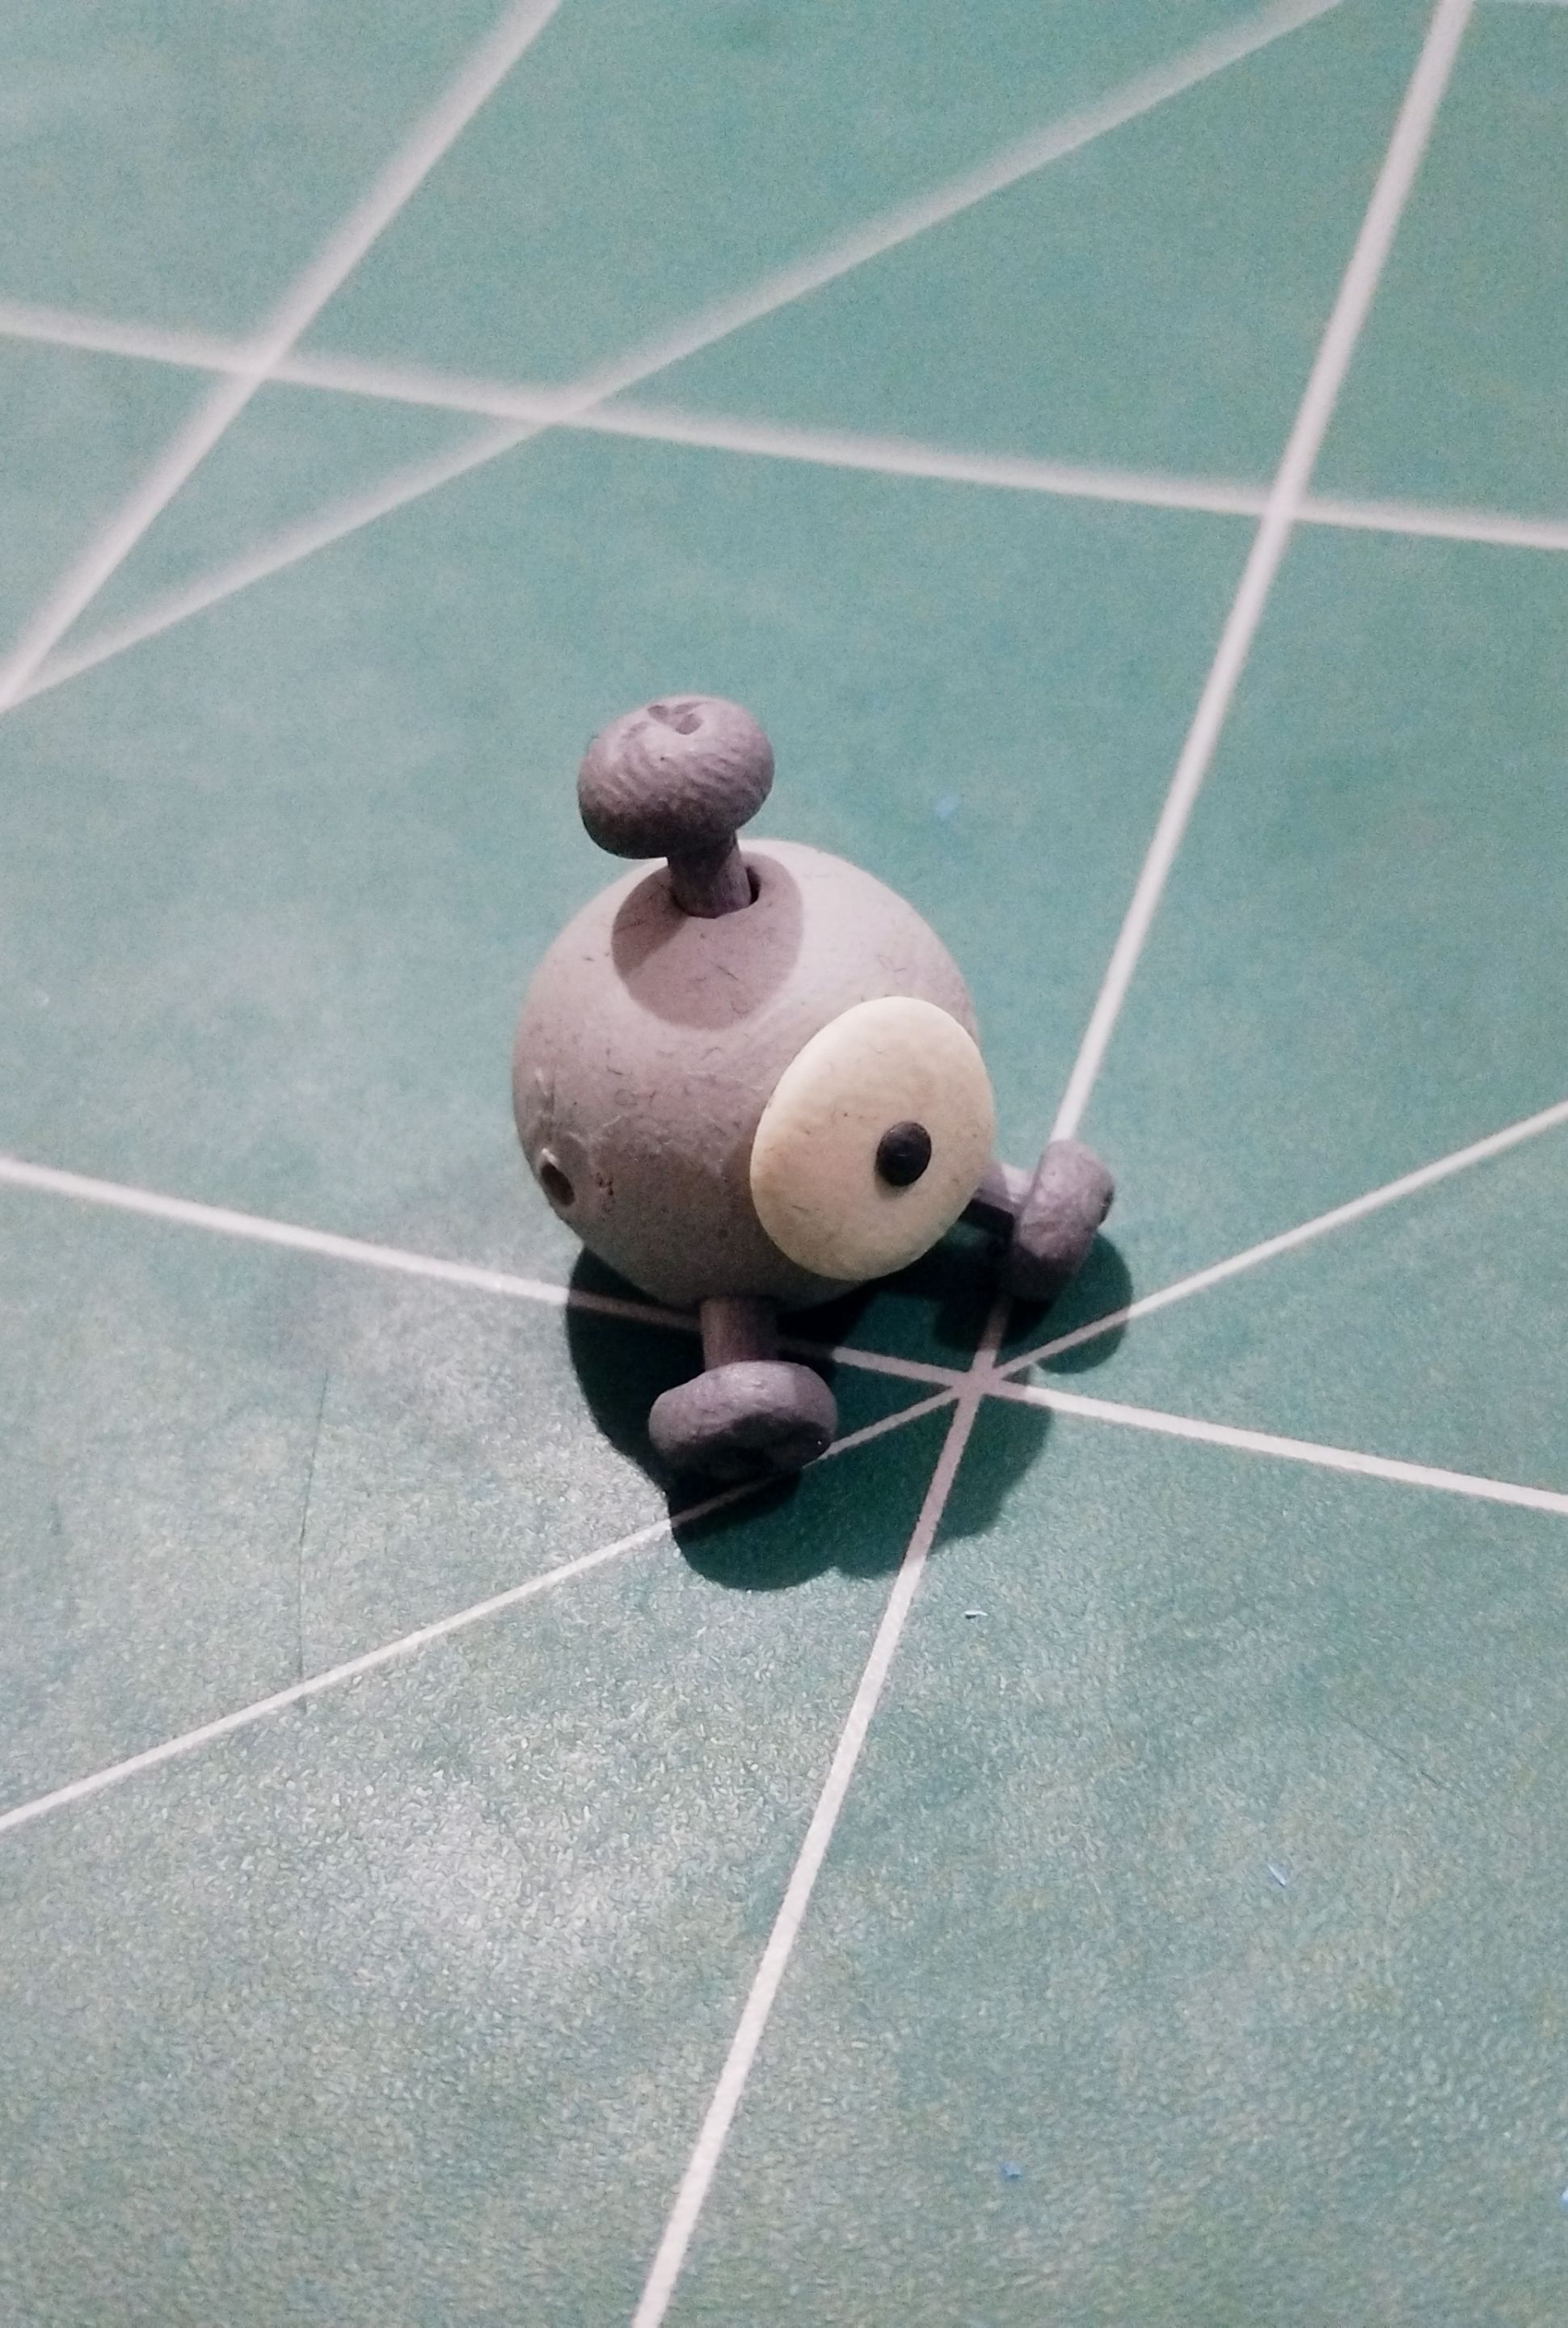
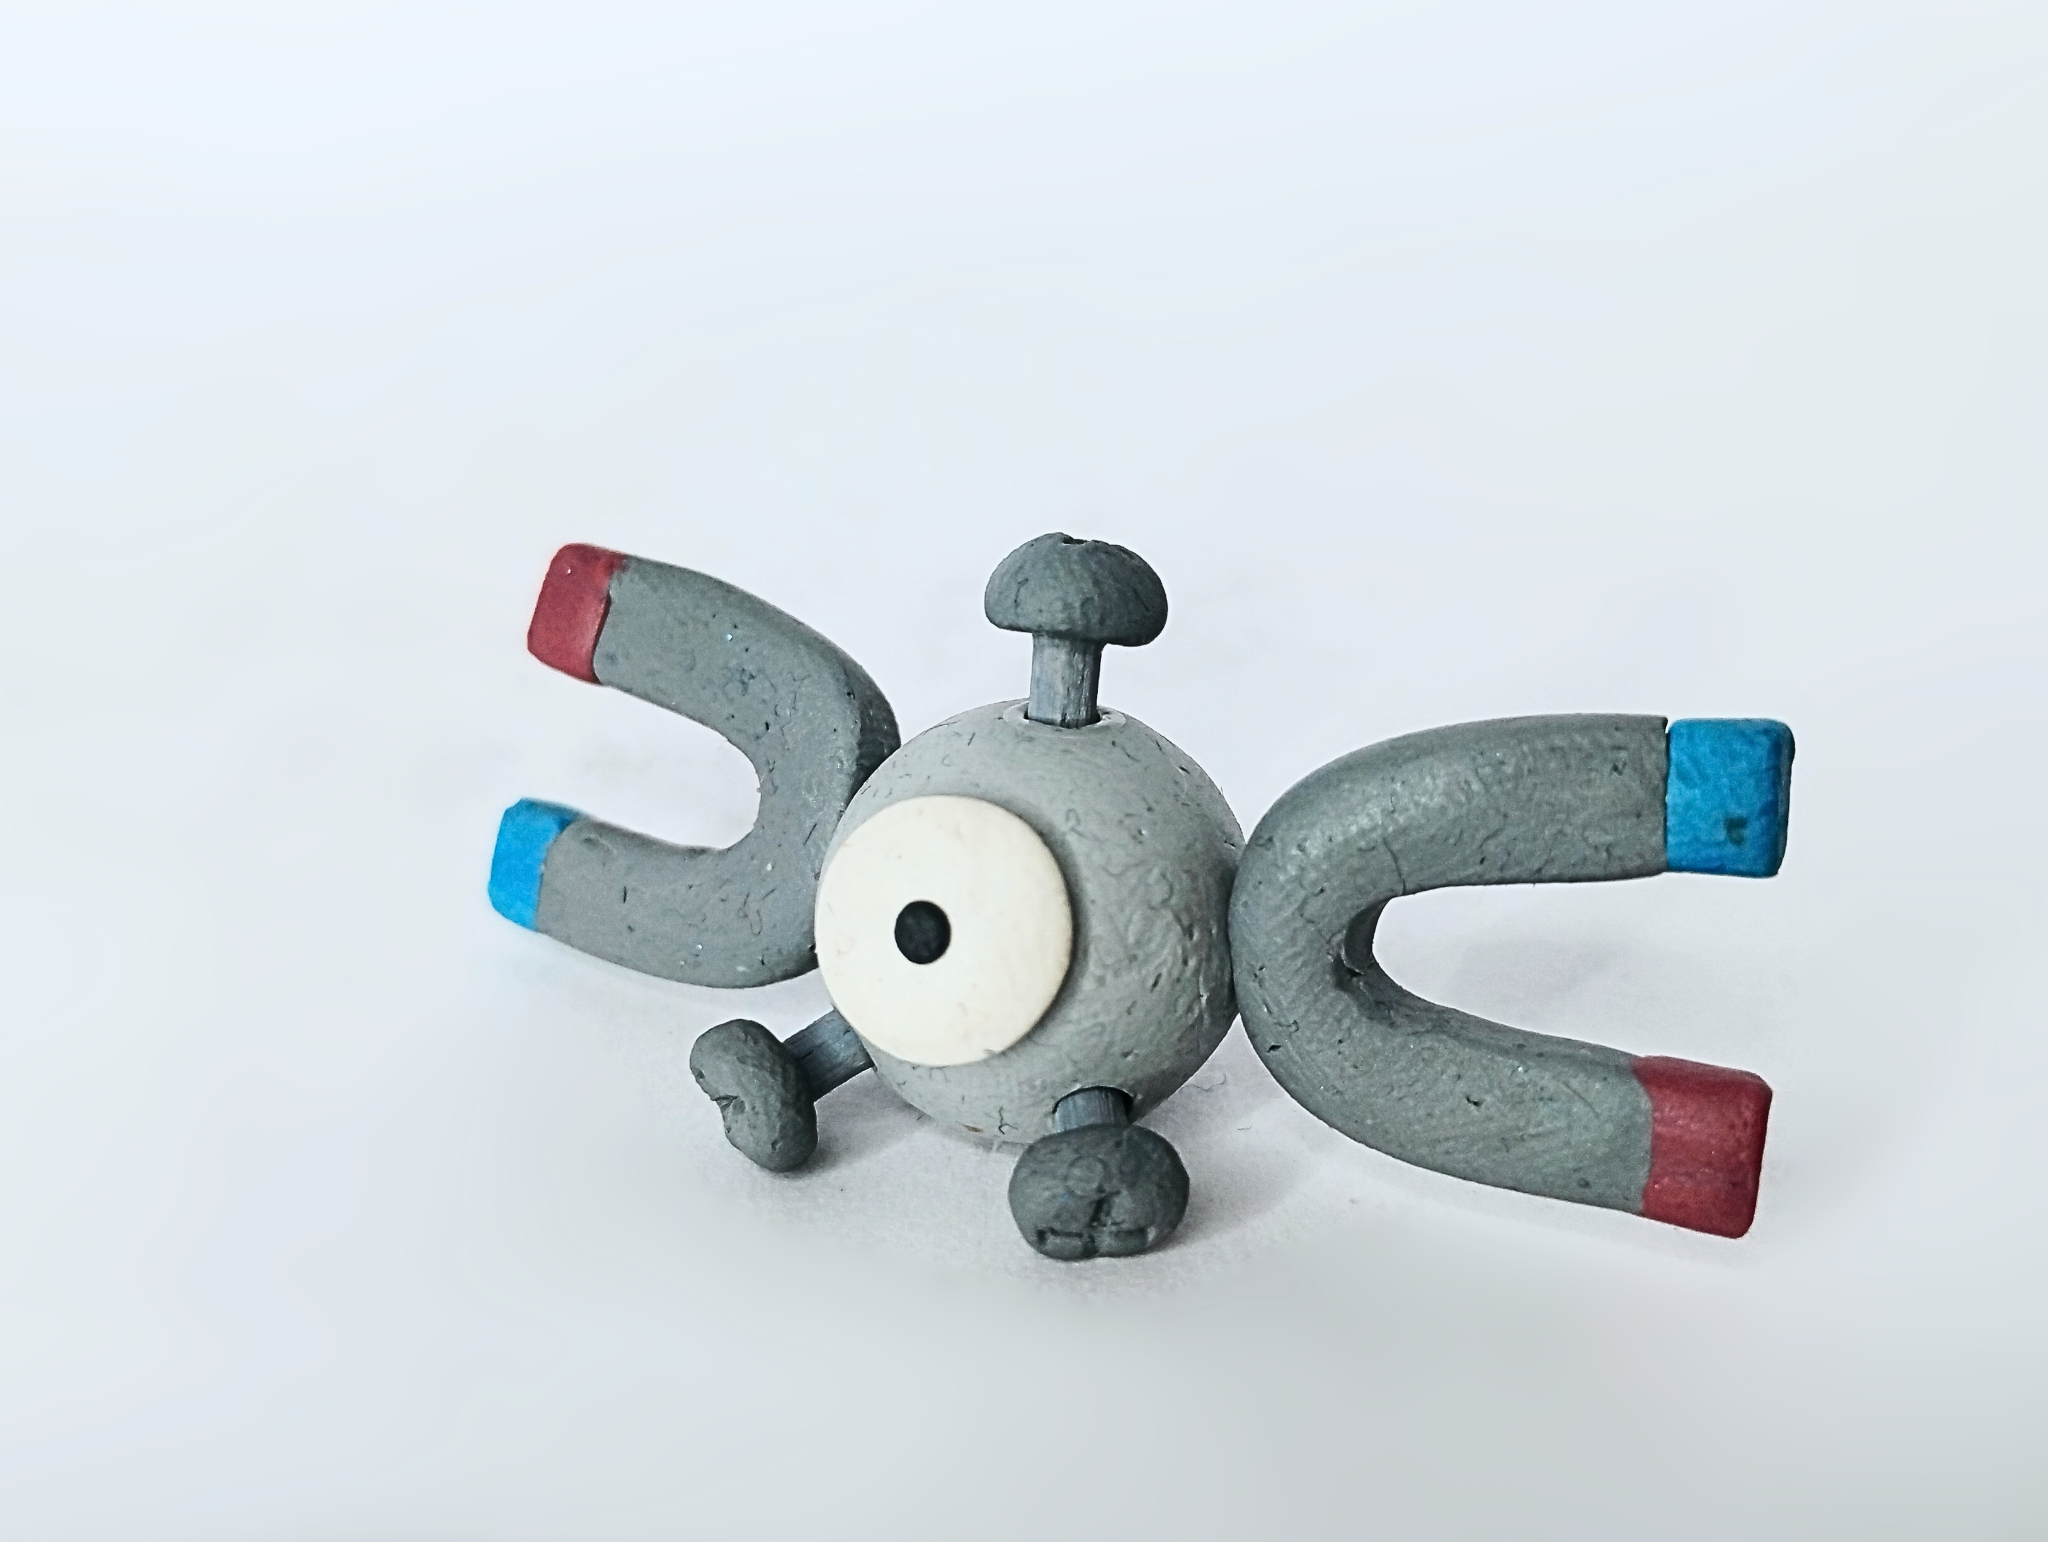
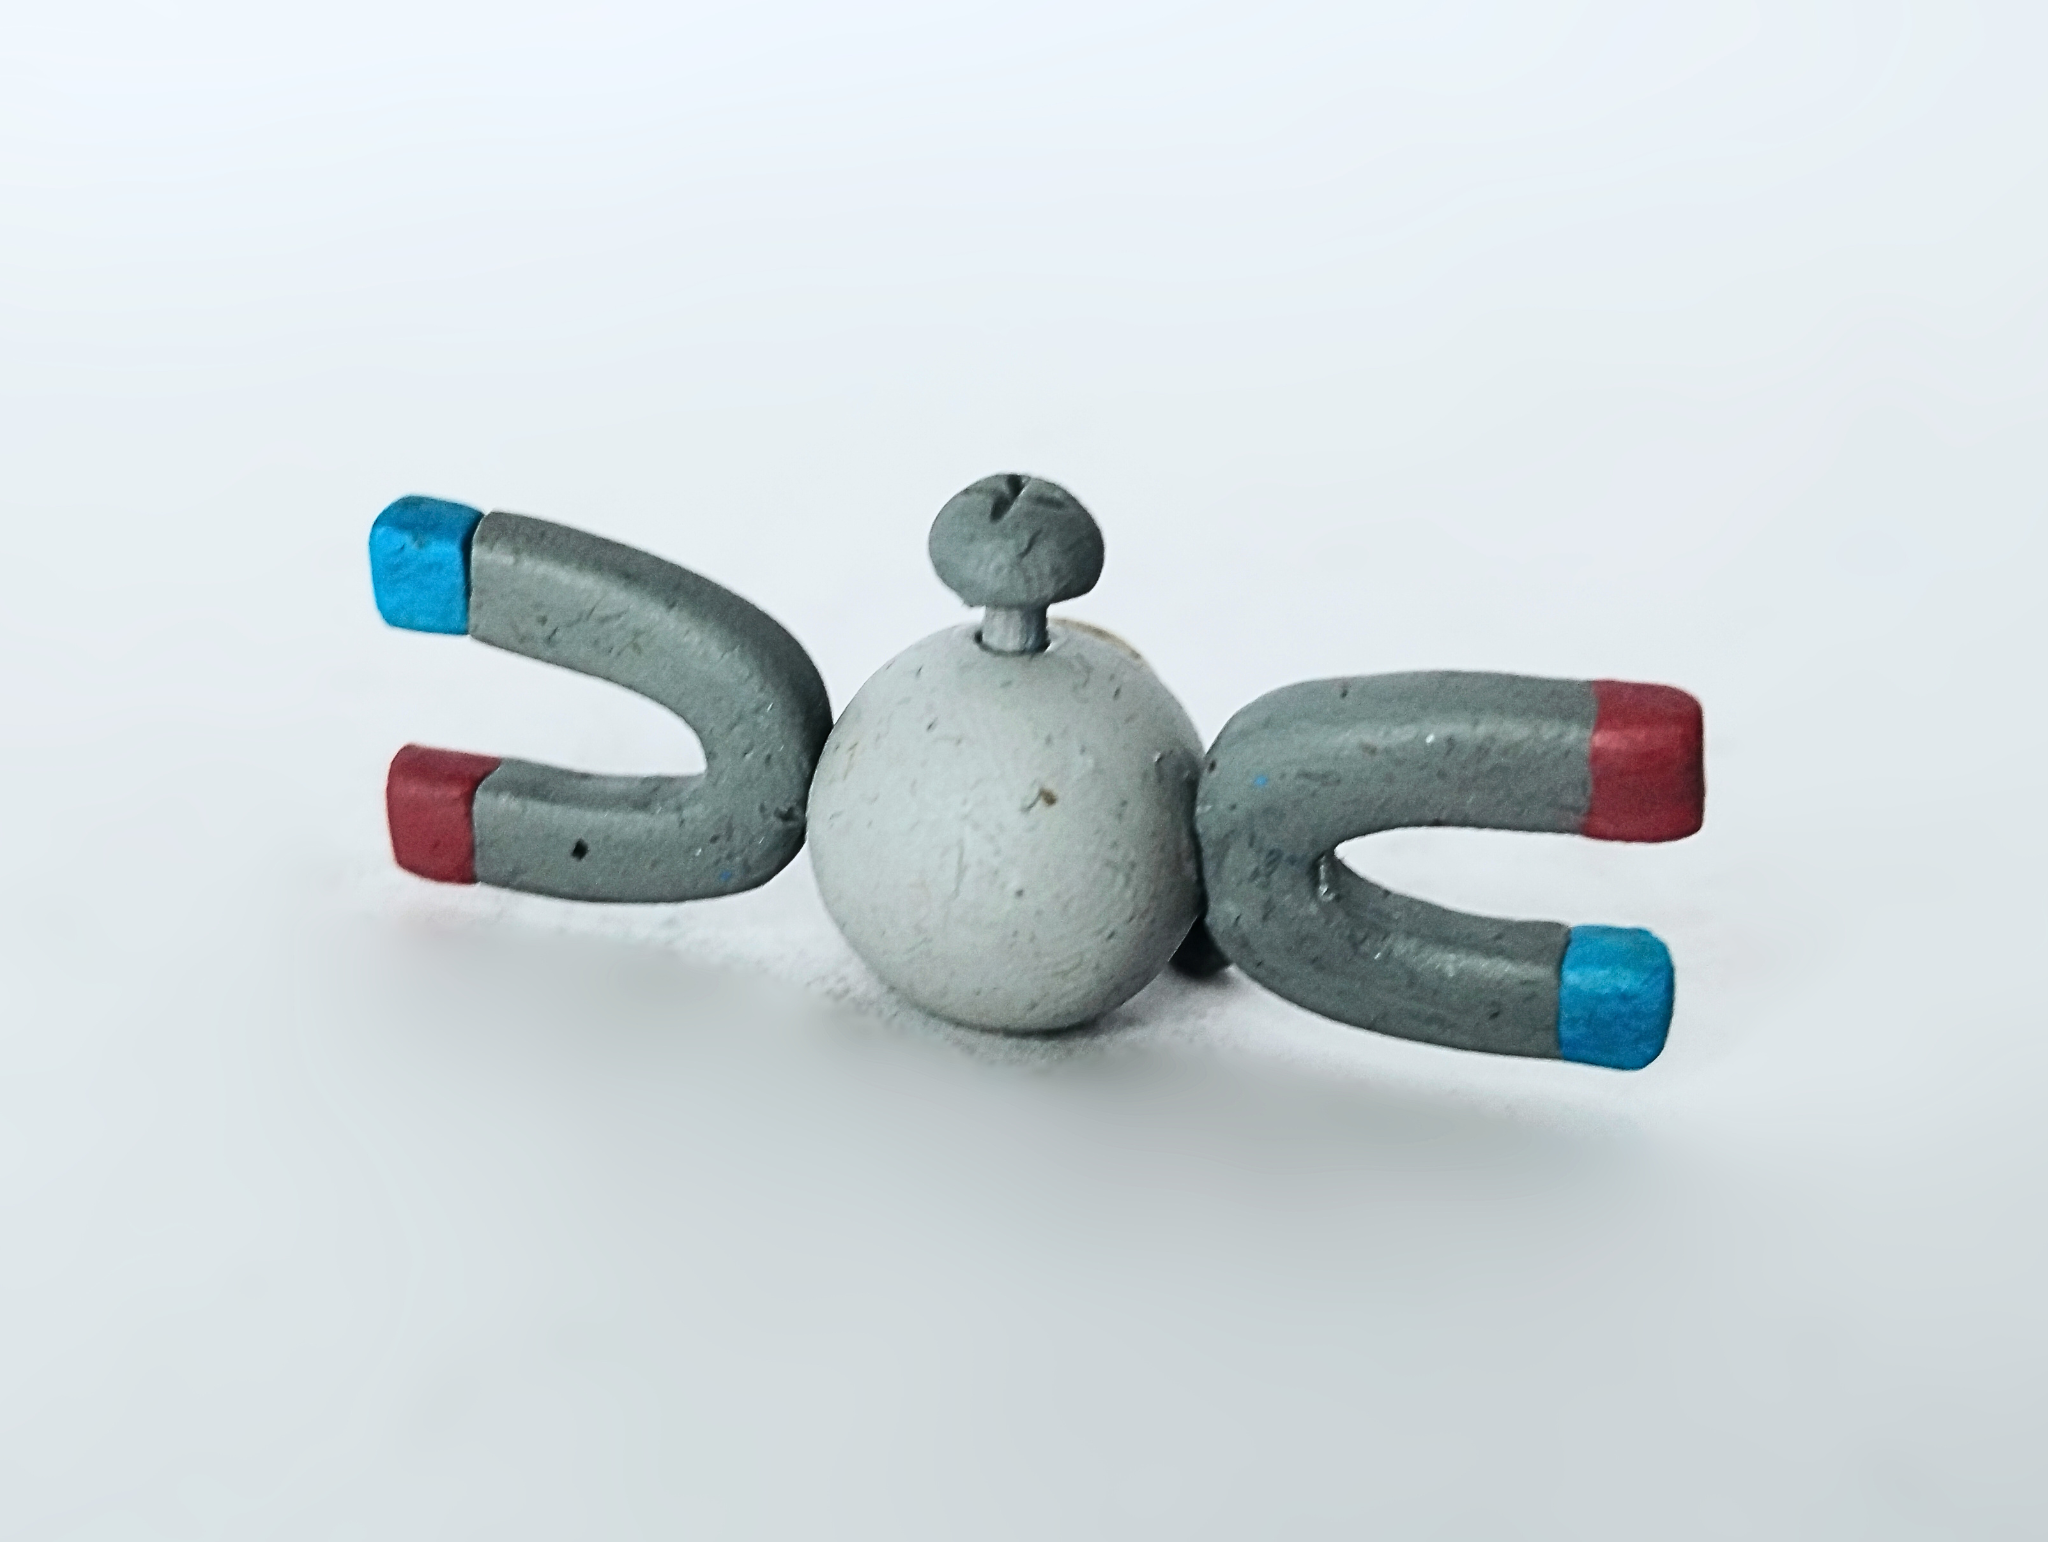
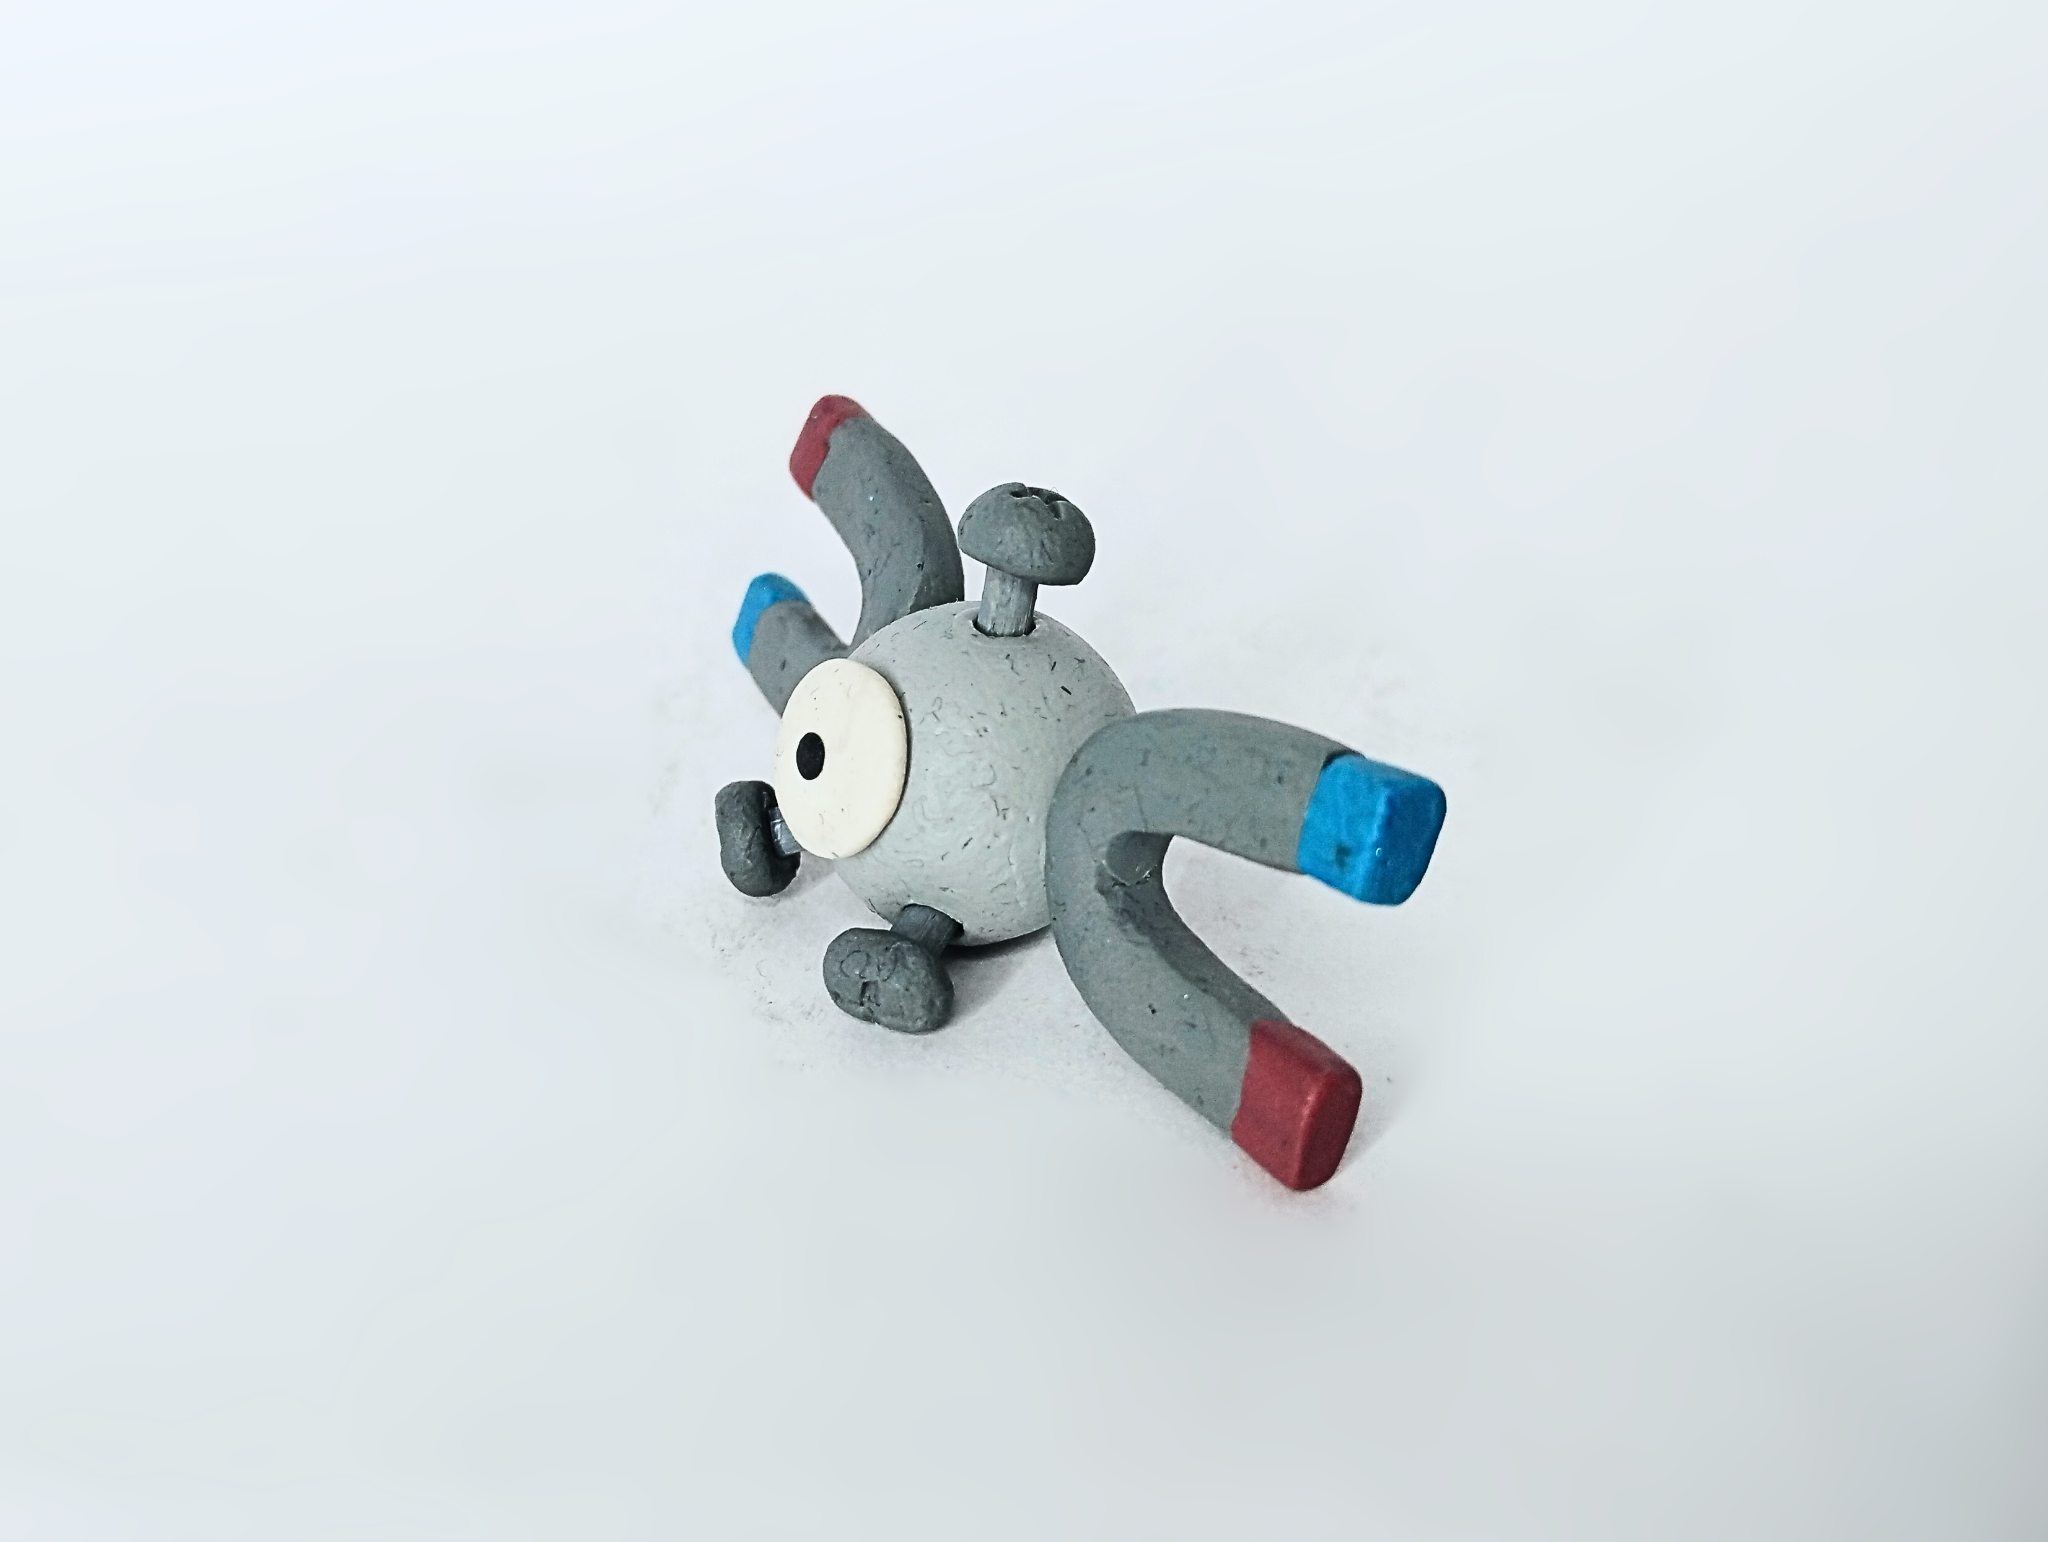
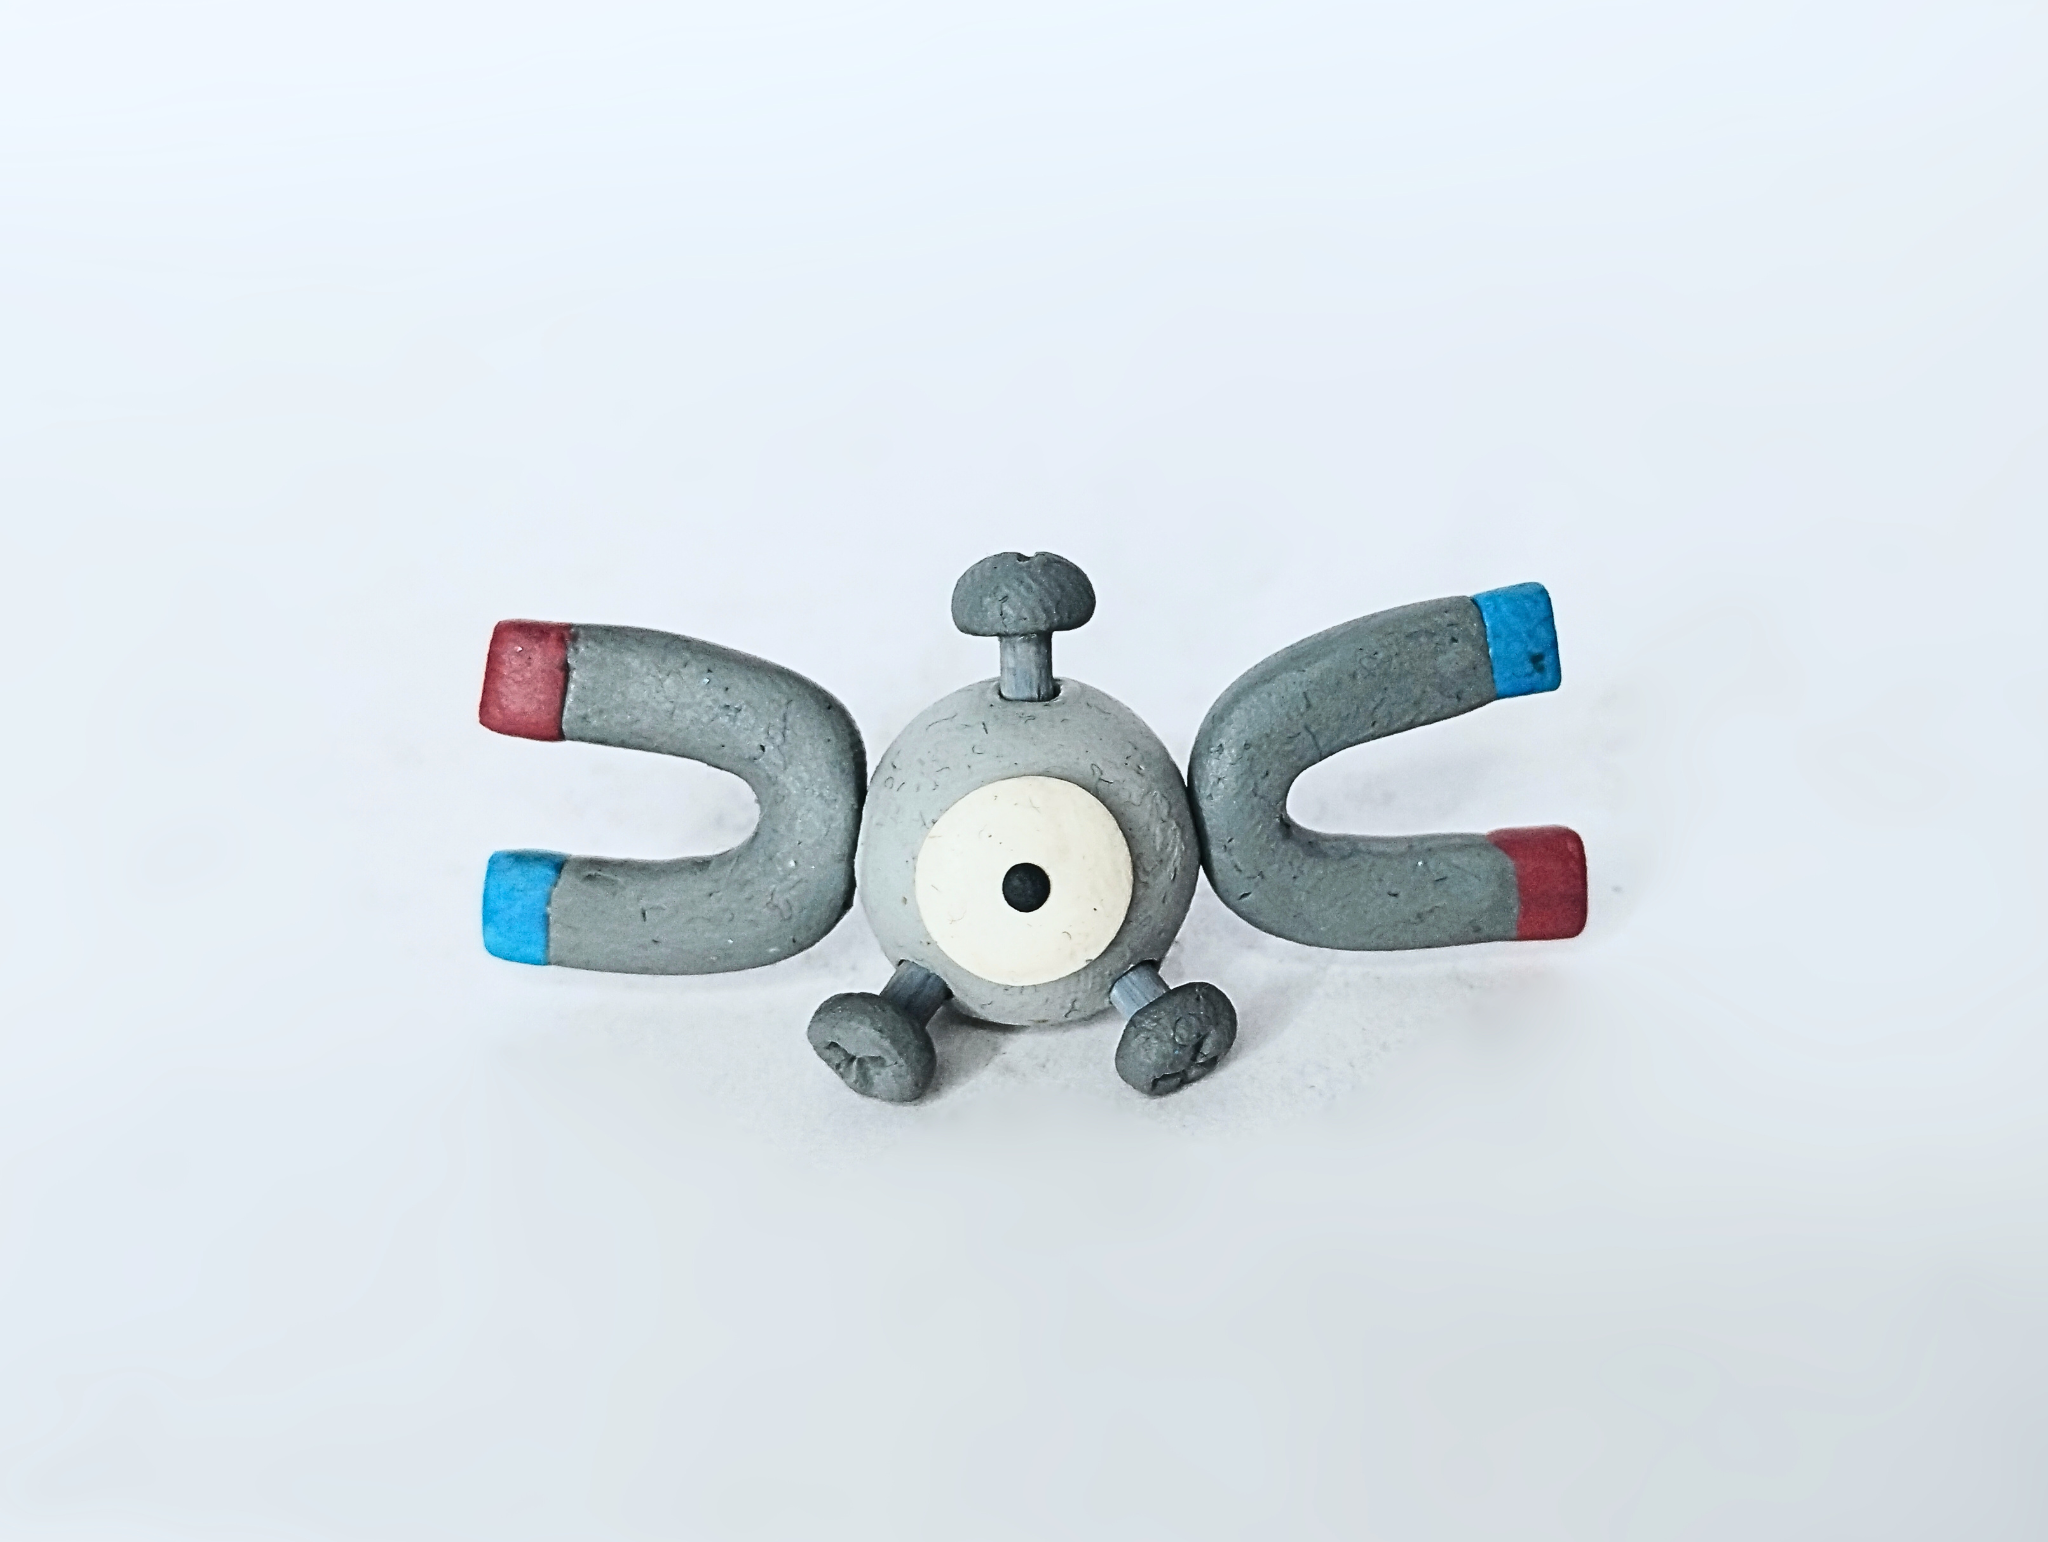
After creating the base, I placed an extra screw on top of the head. Finally, I made a flat white sphere with a small black dot of plasticine in the center for the enormous eye that this Pokémon has in the middle of its body.
As you can see in the image below, thanks to the screws underneath, the Pokémon can remain in a stable position.
>>Luego de crear la base, coloqué un tornillo extra en al parte superior de la cabeza. Finalmente hice una esfera plana de color blanco con un puntito negro de plastilina en el centro, para el enorme ojo que tiene este Pokémon en el centro de su cuerpo.
>>
>>Como pueden ver en la imagen de abajo, gracias a los tornillos de abajo, el Pokémon puede mantenerse en una posición estable.
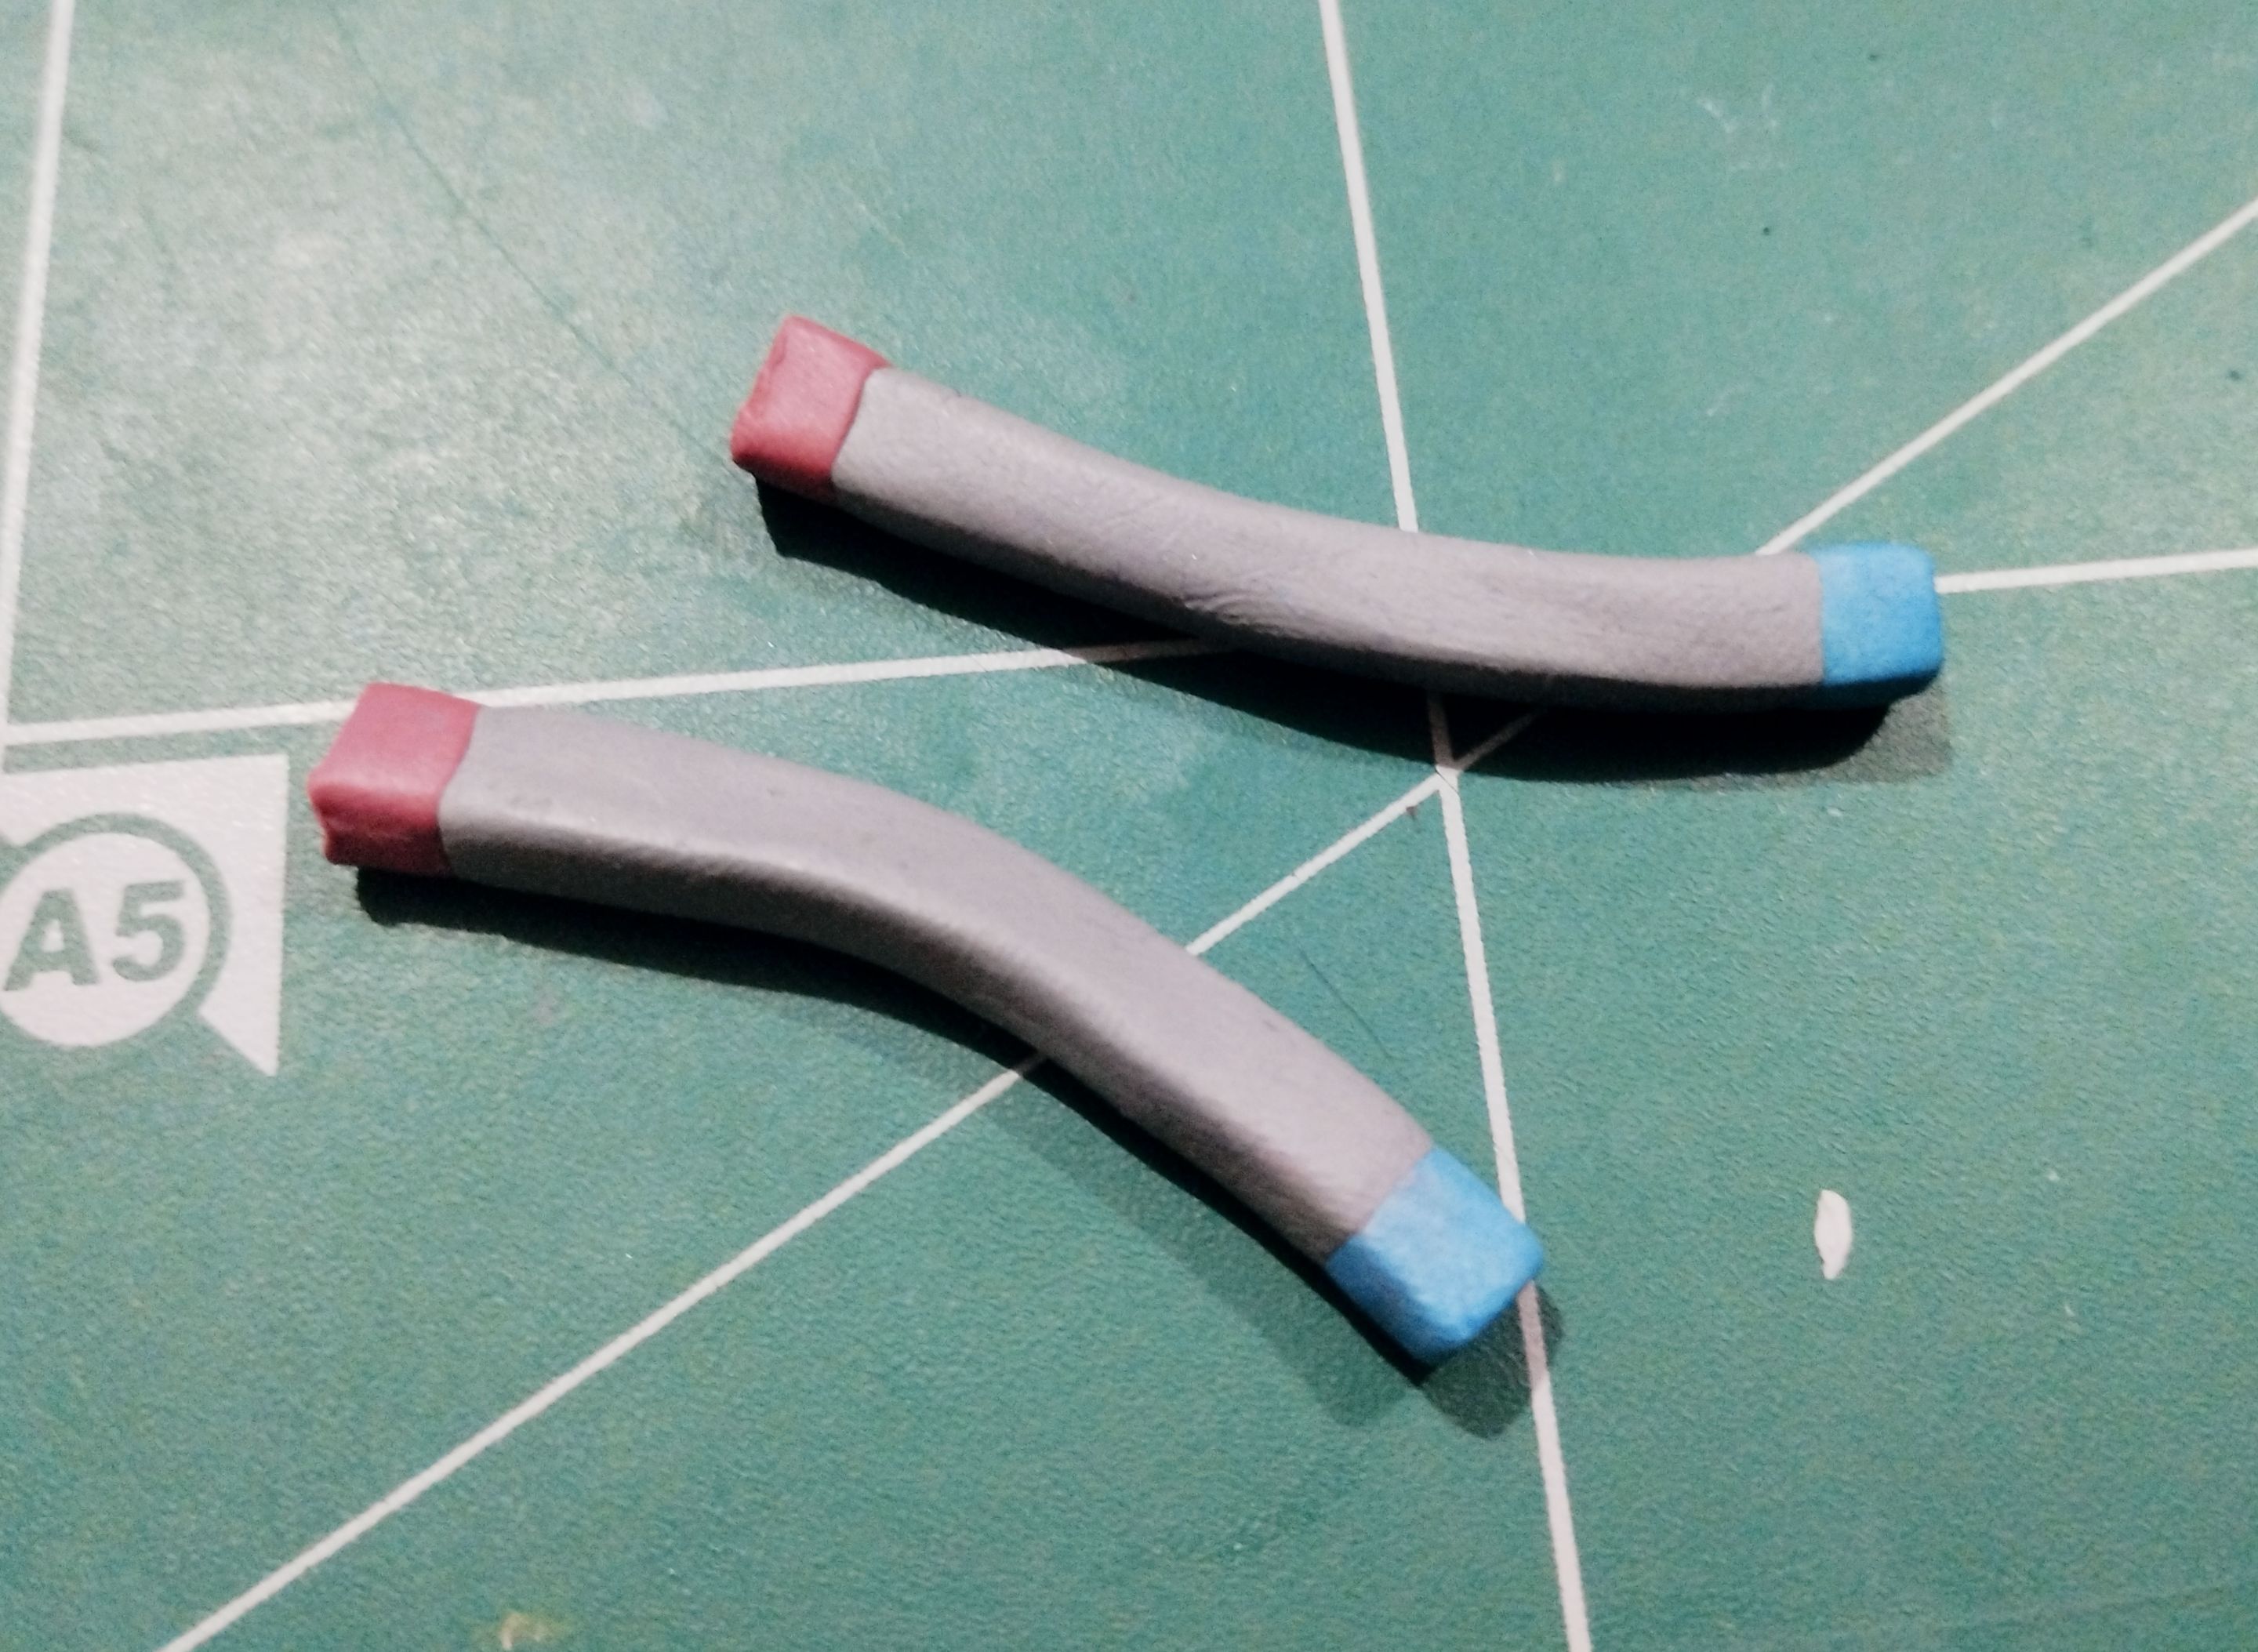
The next thing I did was work on the magnets that the character has on either side of his body.
To make them, I made two strips of gray plasticine. I made them as if they were elongated metal bars with defined angles. At the tip of each of these bars, I placed colored squares, one blue on one side and red on the other.
>>Lo siguiente que hice fue trabajar en los imanes que tiene el personaje a cada lados de su cuerpo.
>>
>>Para hacerlos hice dos tiras de plastilina gris. Los hice como si fuesen barras de metal alargadas y con ángulos definidos. En la punta de cada una de estas barras coloqué cuadritos de colores, uno azul de un lado y rojo del otro.
|||
|-|-|
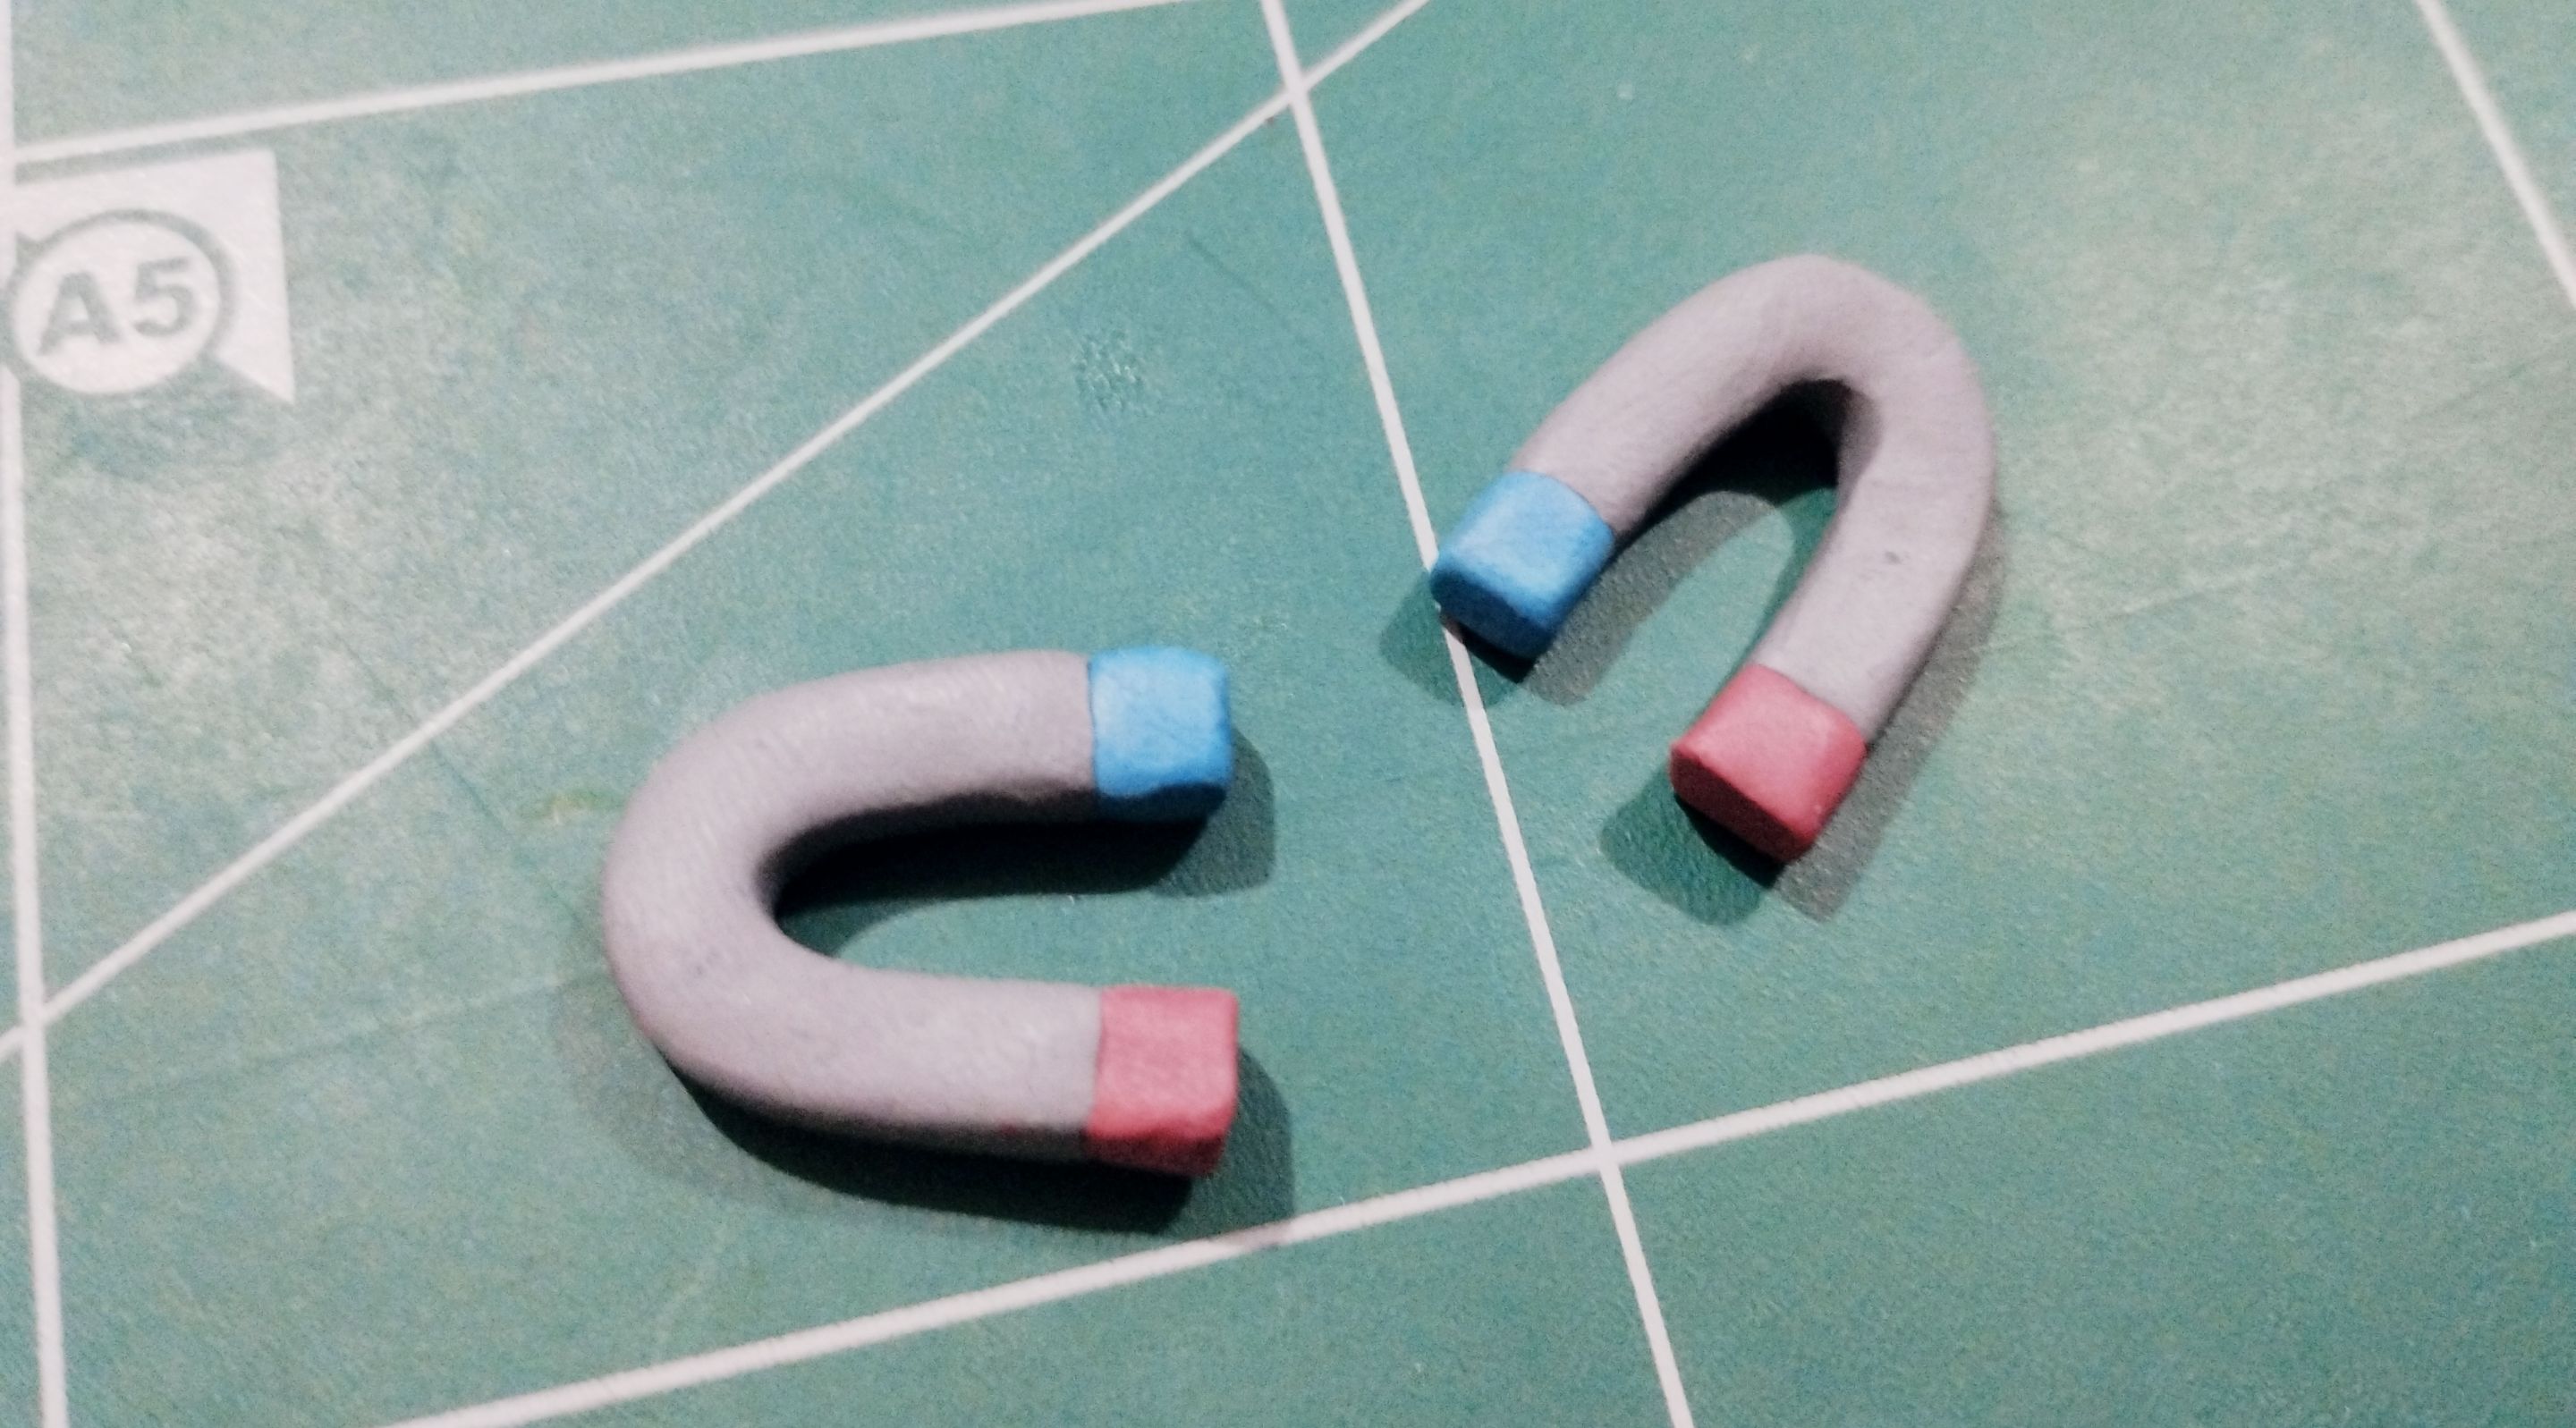
Finally, I bent each of these bars to achieve the shape of the magnets you see in the image below. To attach them to the Pokémon's body, I used a couple of wires and glue as well.
>>Finalmente doblé cada una de estas barras para lograr esta forma de imanes que ven en la imagen de abajo. Para pegarlos en el cuerpo del pokémon usé un par de alambres y pegamento también.
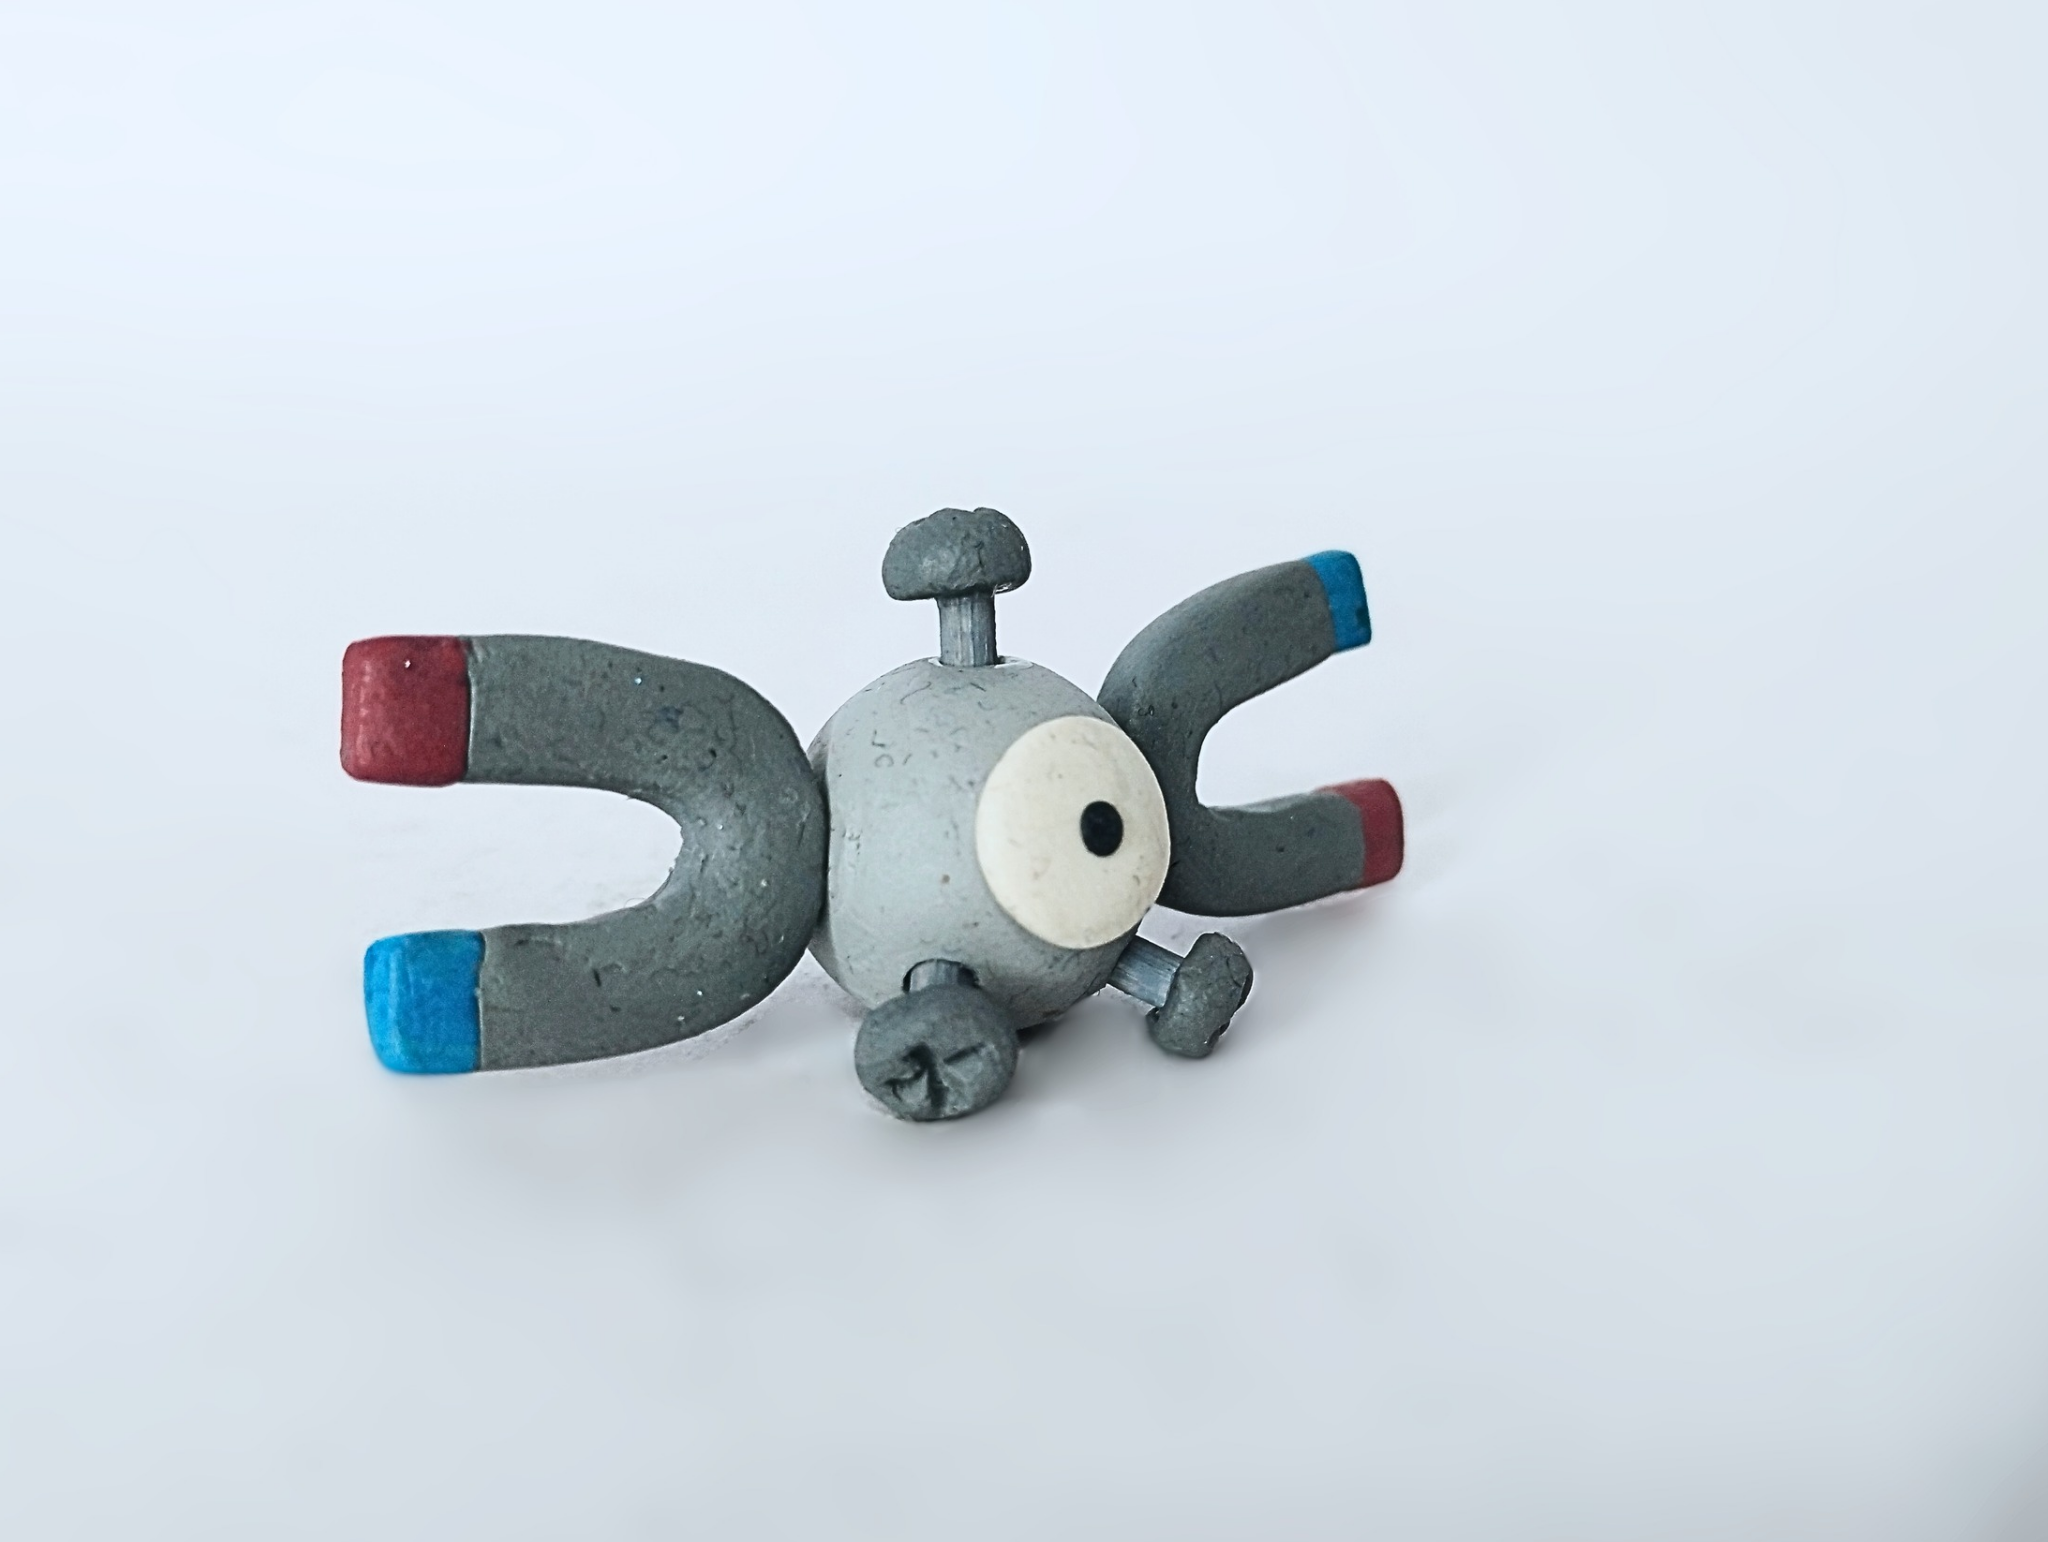
### This is how the figurine was completed. Below you can see a series of photographs of the final result:
>>#### De esta manera la figurita quedó terminada. A continuación pueden ver una serie de fotografías del resultado final:
Well, friends, that's all for now. I hope you liked my Pokémon figurine. Please leave your comments below; as always, I'll be happy to read them. Without further ado, I bid you farewell...
DIY: Magnemite Sculpture [ENG/SPA]
@gaboamc2393
· 2025-09-25 13:57
· DIYHub
#hive-189641
#diy
#art
#anime
#pokemon
#spanish
#tutorial
#waiv
#pimp
#neoxian
Payout: 0.000 HBD
Votes: 357
More interactions (upvote, reblog, reply) coming soon.