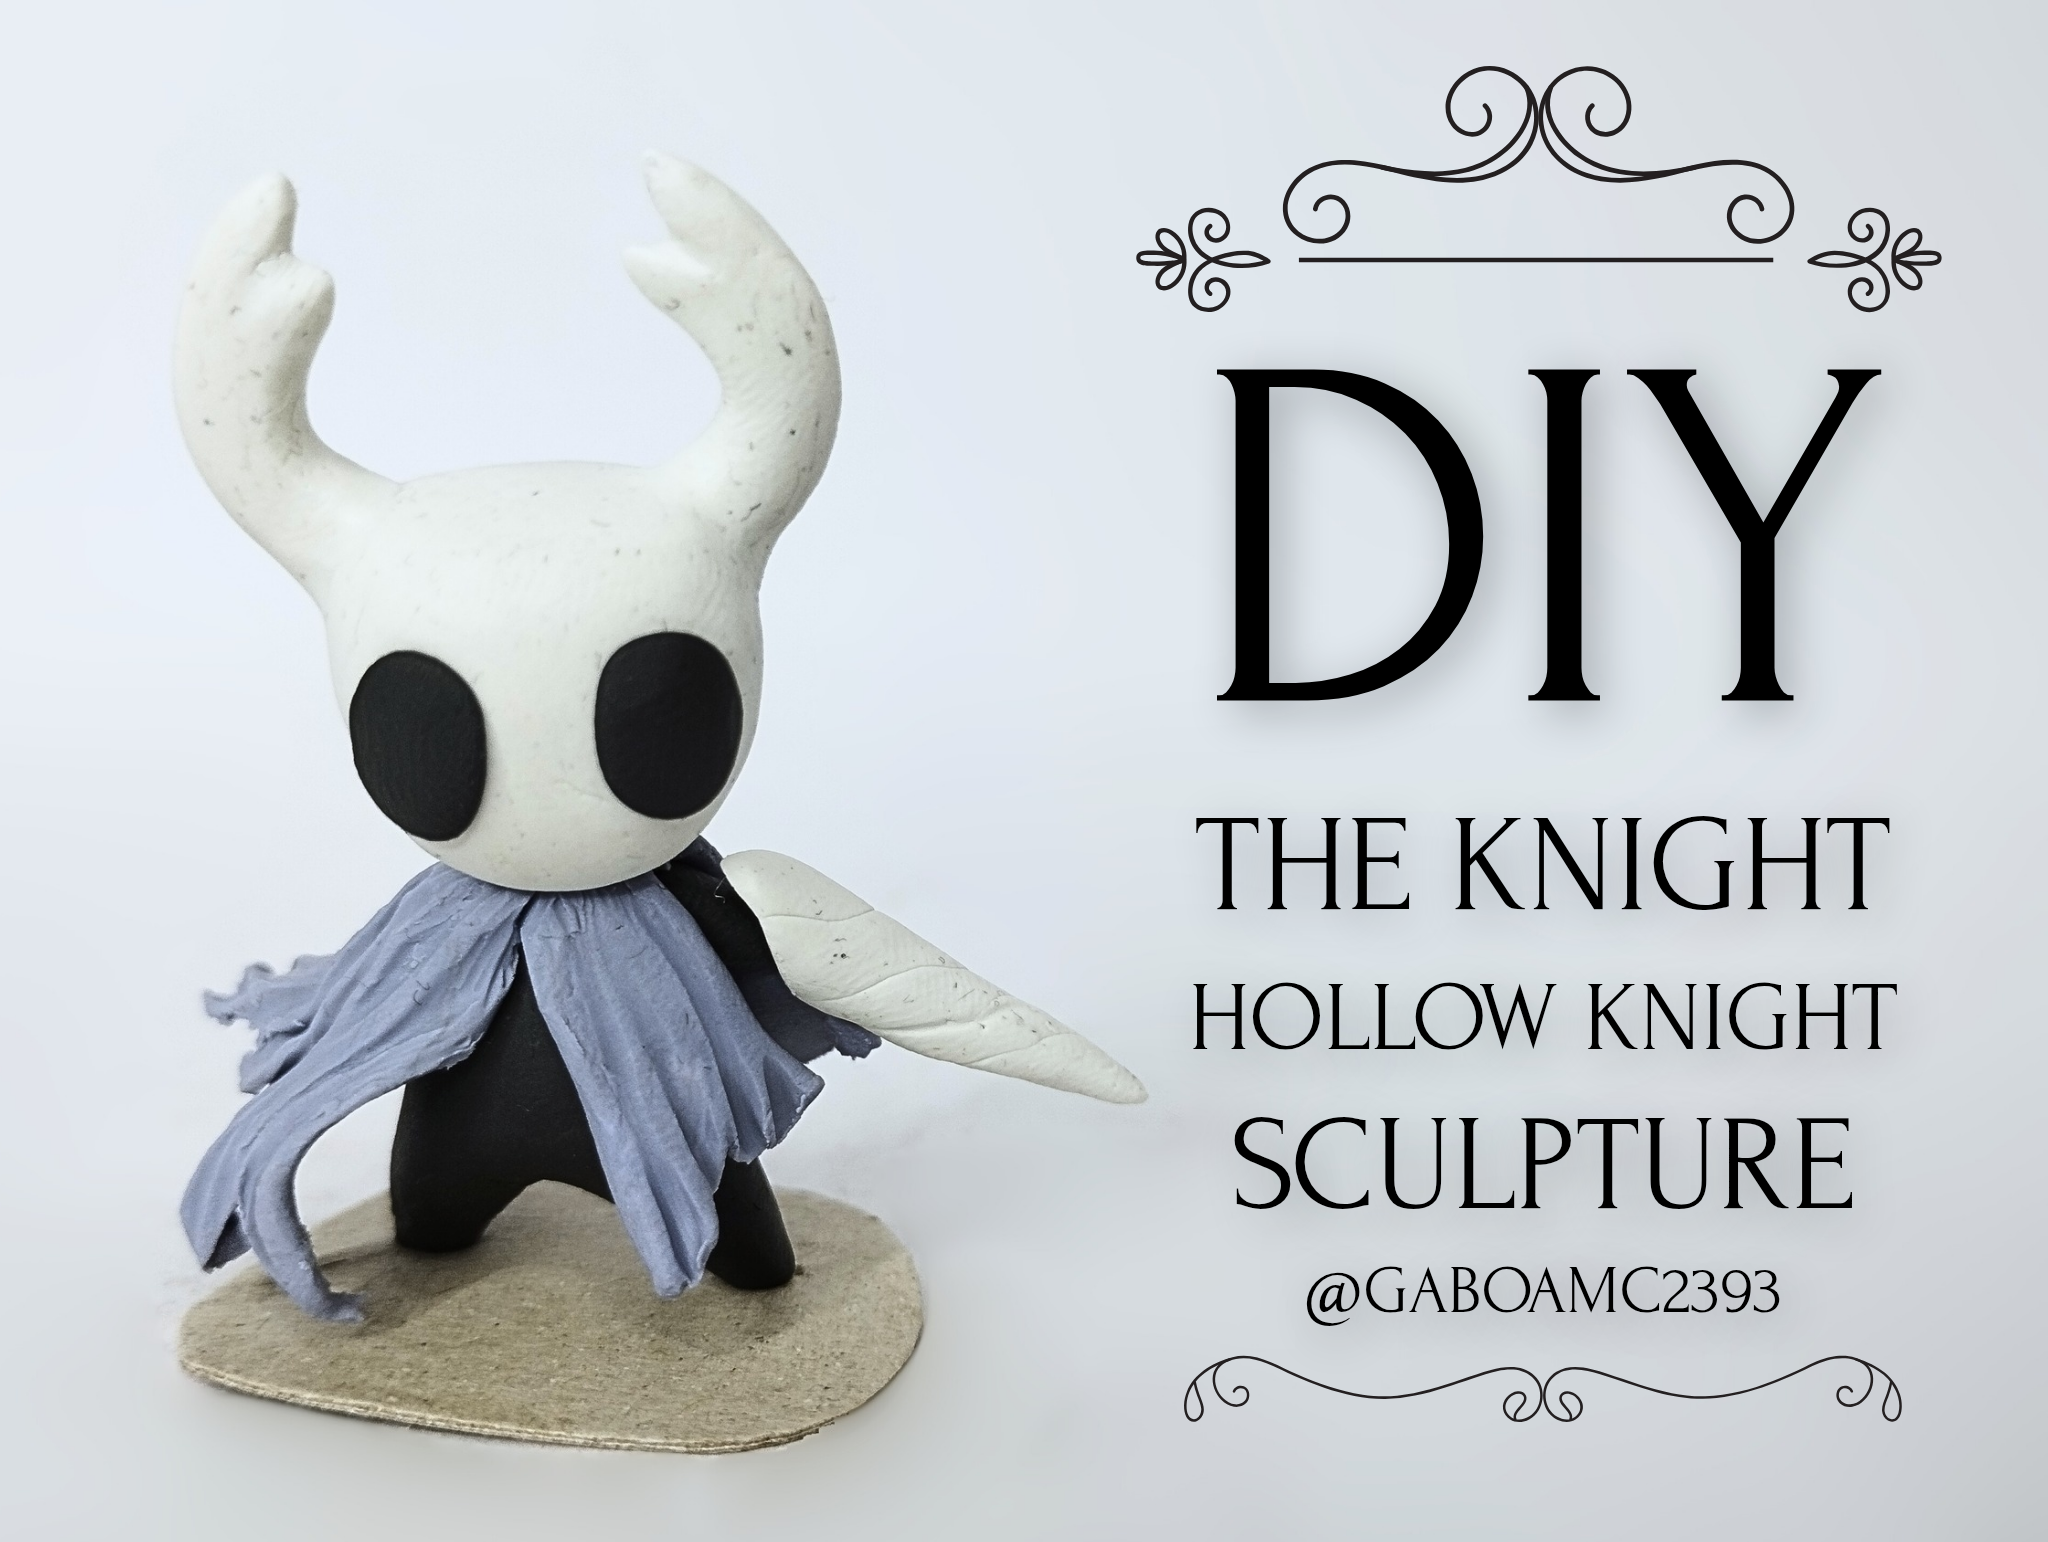
Greetings, friends. On September 4, the sequel to Hollow Knight, Hollow Knight Silksong, was finally released. It was a long wait, but we finally have a sequel to one of the best (if not the best) Metroidvania games in my opinion.
Well, to celebrate this release, I decided to make a couple of figurines inspired by the protagonists of both games. Obviously, I can't start with Hornet, who, although part of the first game, is not the protagonist, unlike the Knight. That's why I'd like to share with you this figurine of such a beloved character.
>># Español
>>Saludos amigos. El 4 de septiembre finalmente ocurrió el lanzamiento de la secuela de Hollow Knight, Hollow Knight Silksong. Fue larga la espera pero por fin tenemos secuela de uno de los mejores (sino el mejor) juego Metroidvania en mi opinión.
>>
>>Pues bien, para celebrar este lanzamiento, se me ocurrió hacer un par de figuritas inspiradas en los protagonistas de ambos juegos. Evidentemente no puedo comenzar por Hornet, que si bien es parte del primer juego, no es la protagonista como sí lo es El Caballero. Por eso me gustaría compartir con ustedes esta figurita de tan entrañable personaje.
# Step by step
The materials I used for this sculpture were as follows:
* Plasticine
* Wire
* Cardboard
* Glue
It may not sound like much, but it's just what you need to make a work of art, because it's not the materials themselves but how we use them that matters. So let's get started.
>># Paso a paso
>>Los materiales que utilicé para esta escultura fueron los siguientes:
>>
>>* Plastilina
>>* Alambre
>>* Cartulina
>>* Pegamento
>>
>>Suena a poco los materiales, pero es lo justo y necesario para hacer una obra de arte, porque no son los materiales sino cómo los usamos. Así que vamos a comenzar.
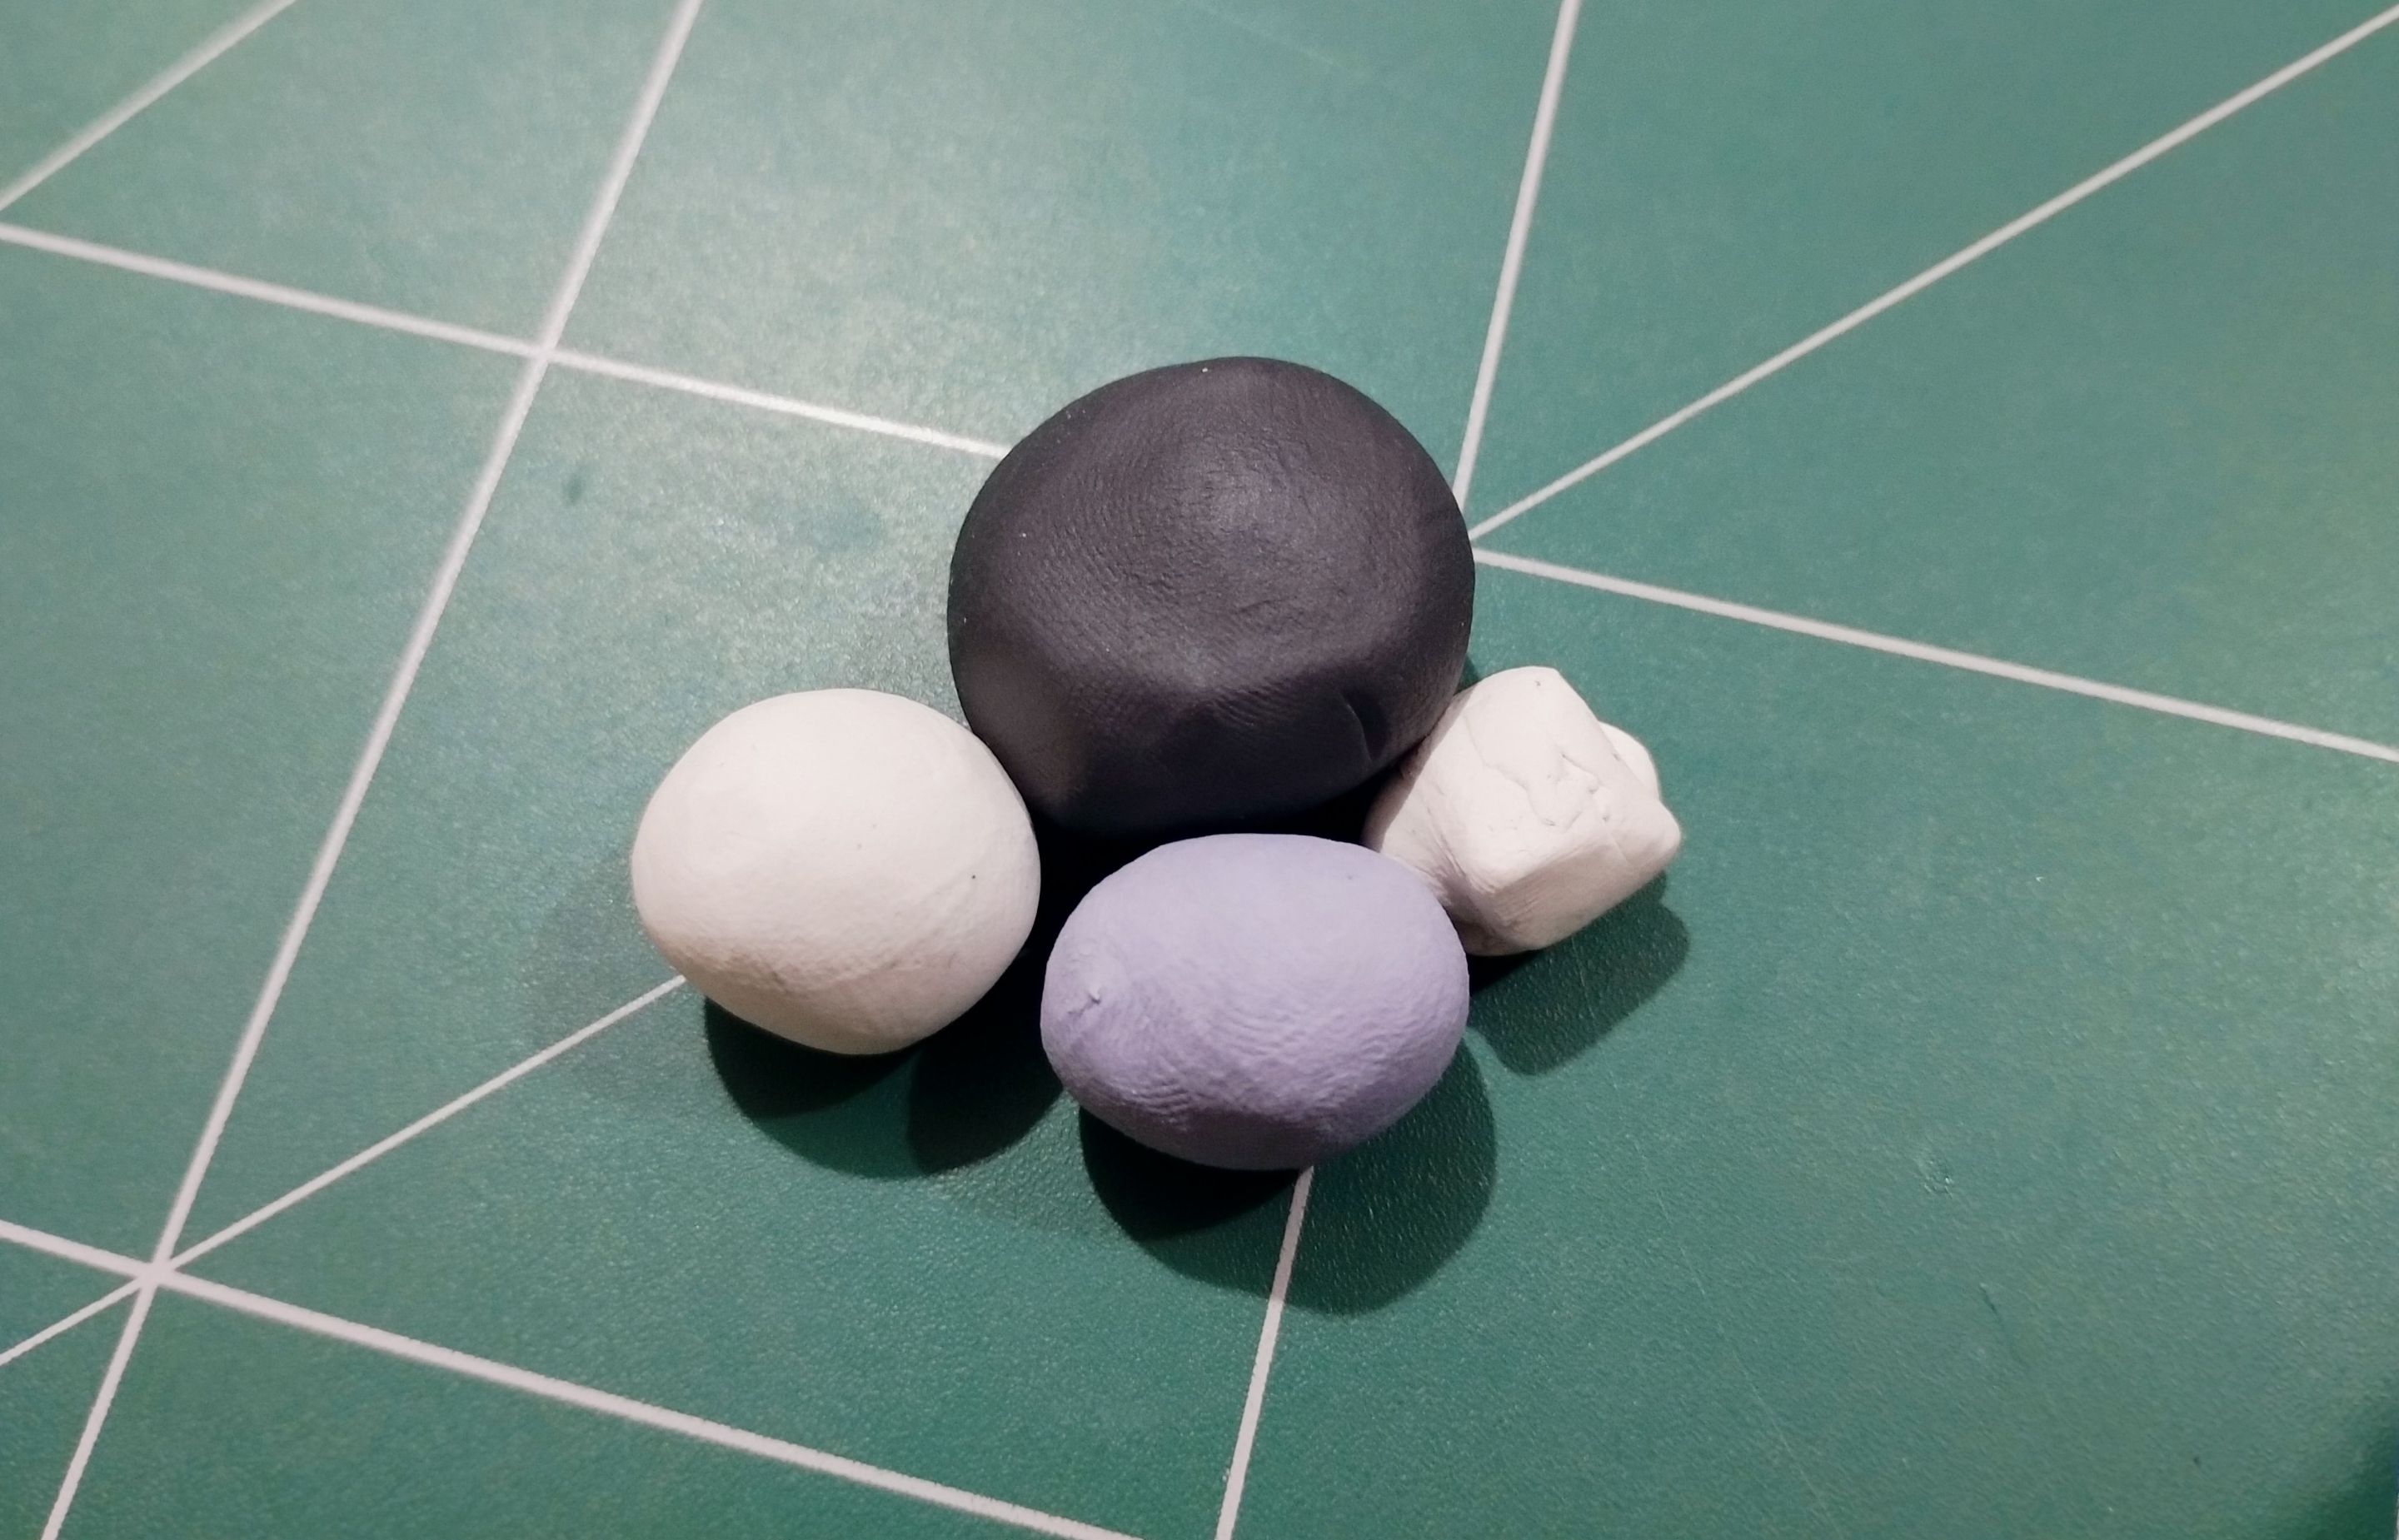
The colors I used were similar to shades of gray: white, black, and gray mixed with a little purple.
To begin, I cut two pieces of wire that would serve as the basic skeleton of the character. Notice that I made the little body in a shape similar to the Star Trek Starfleet insignia. This is the initial shape, the basics.
As you can see in the image on the right, the wires are stuck along the entire length of the legs and body, basically going through the entire sculpture.
>>Los colores que utilicé fueron similares a escalas de grises. blanco, negro y gris mezclado con un poco de morado.
>>
>>Para comenzar, corté dos trocitos de alambre que servirán como esqueleto básico del personaje. Fíjense que el cuerpecito lo hice con una forma similar a la insignia de la Flota Estelar de Stark Trek. Esta es la forma inicial, lo básico.
>>
>>Los mencionados alambres, como pueden ver en la imagen de la derecha, van clavados a lo largo de todas las piernas y el cuerpo, atravesando básicamente toda la escultura.
|||
|-|-|
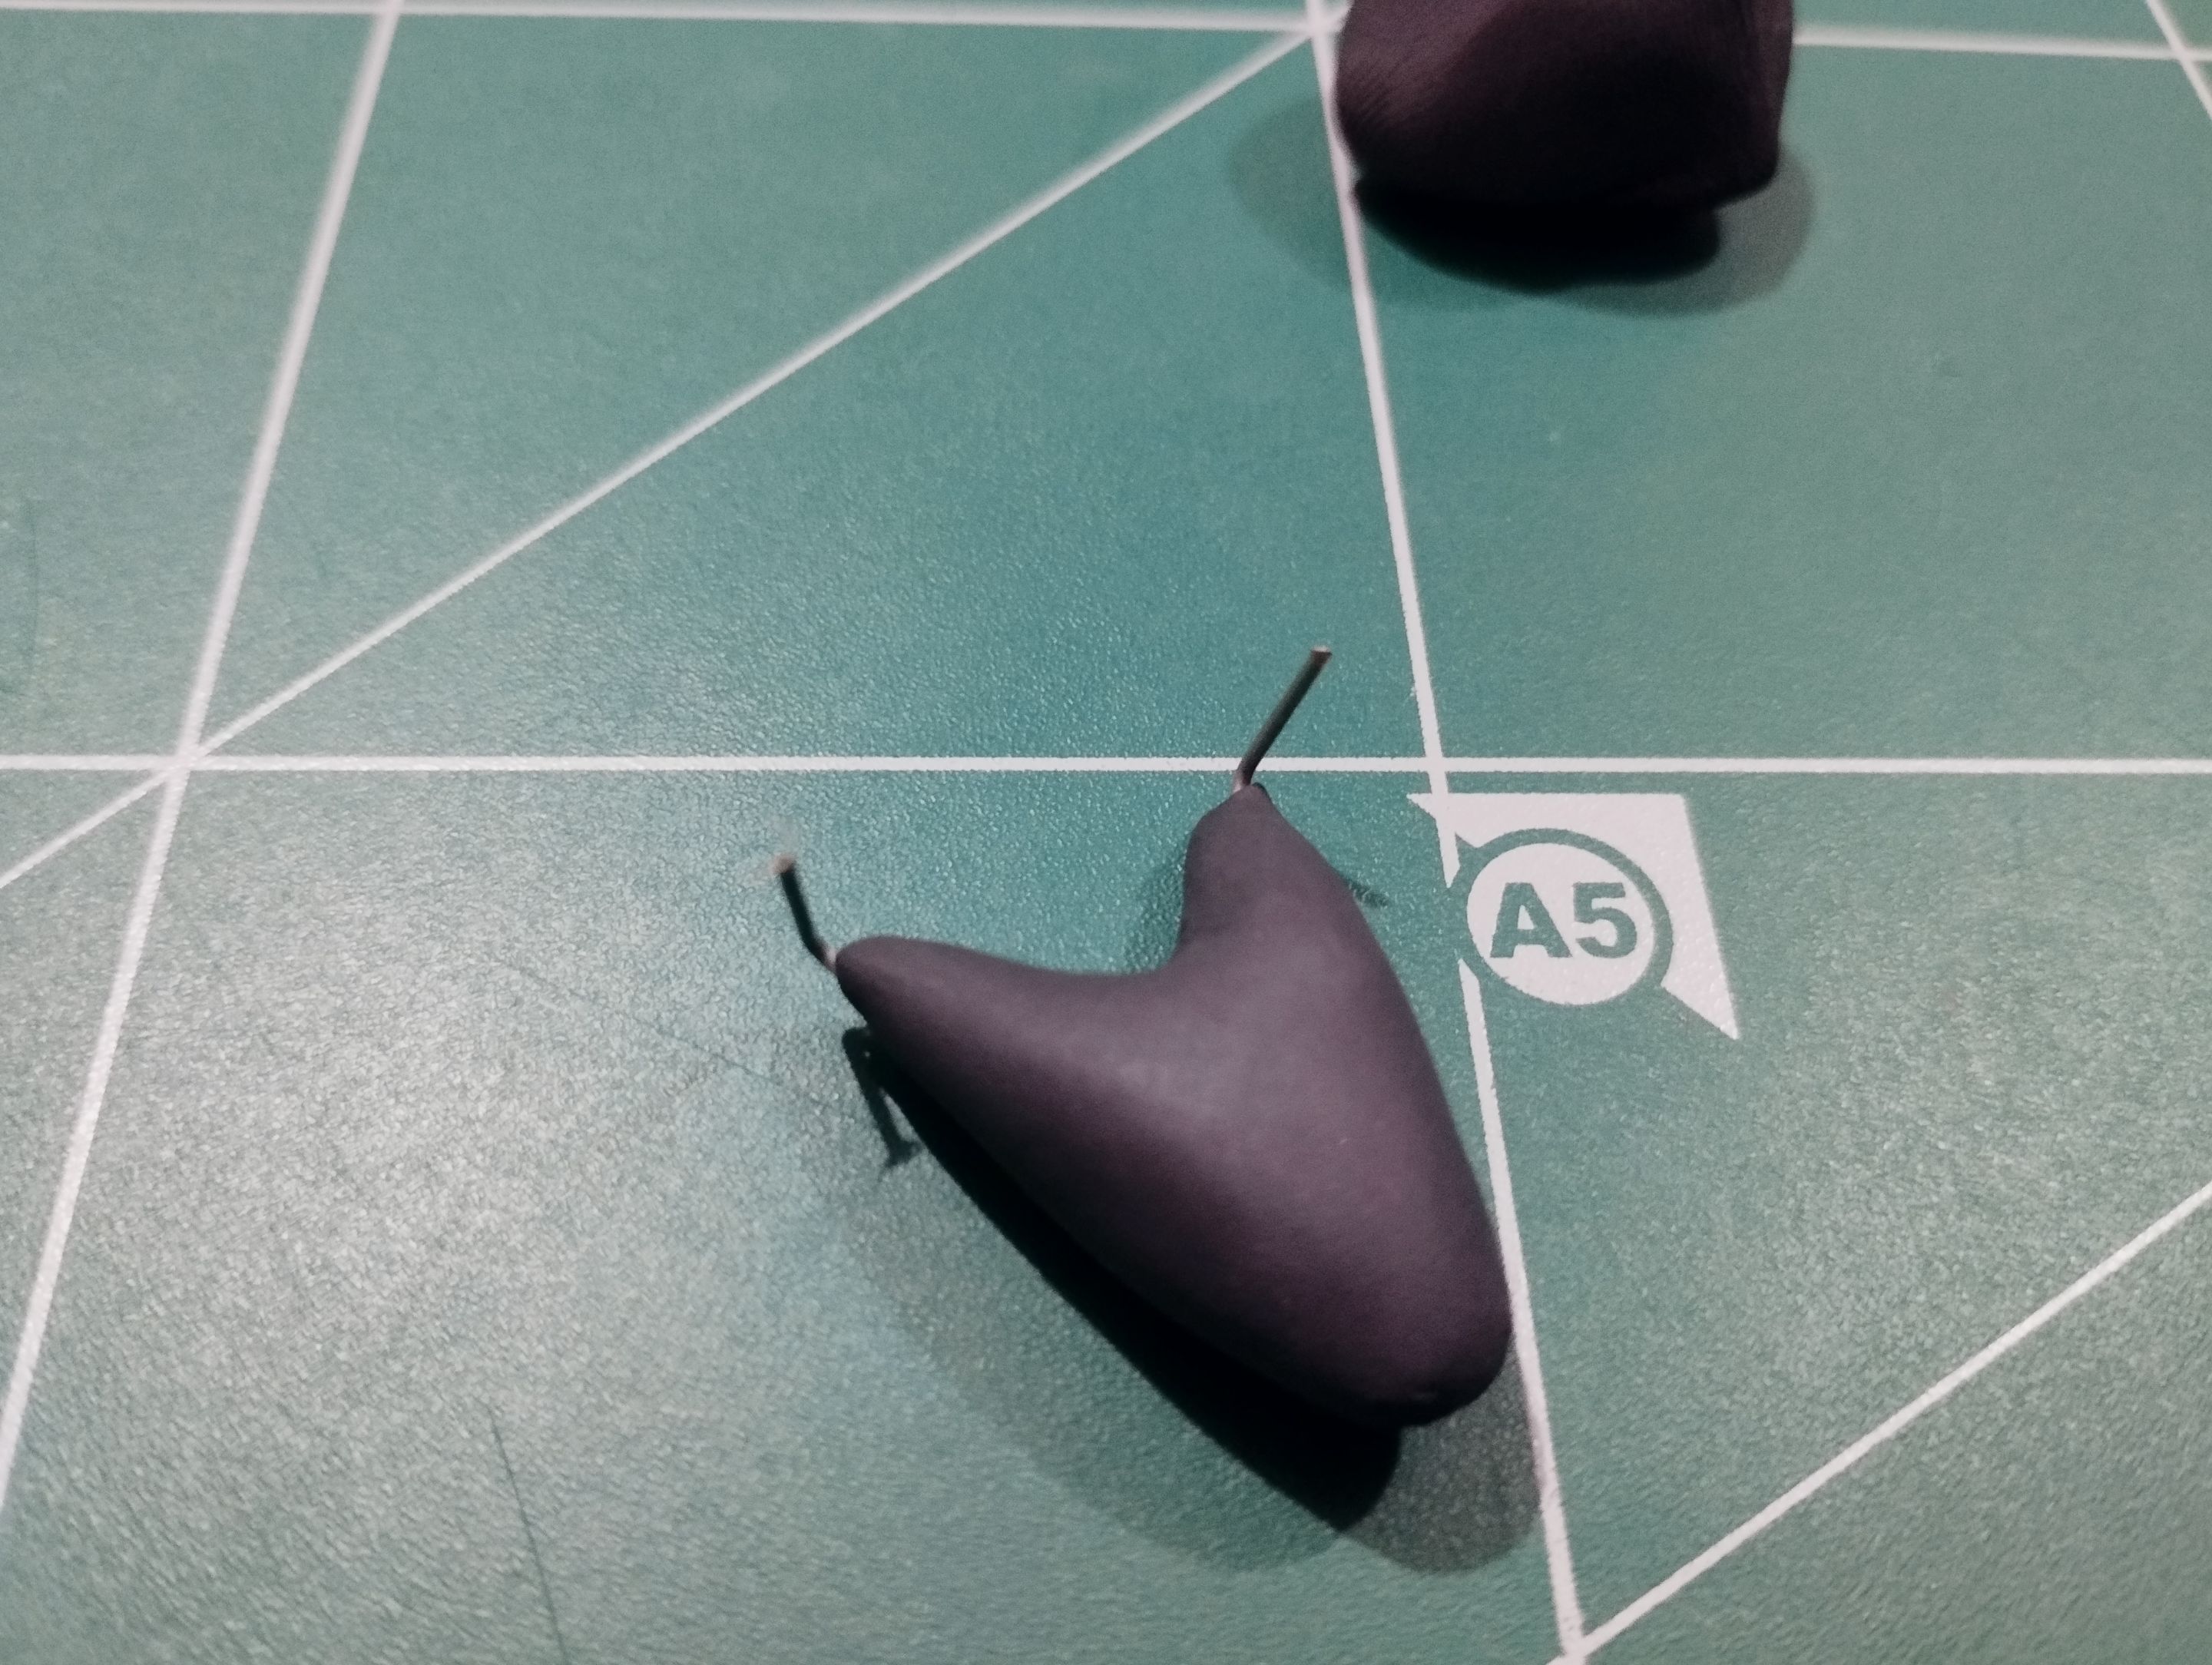
The next step was to make the head. These are the two most important parts of the figurine, as the rest are just details. It's not that the figurine has too many details, but each part has very specific shapes that must be followed in order to achieve the figurine.
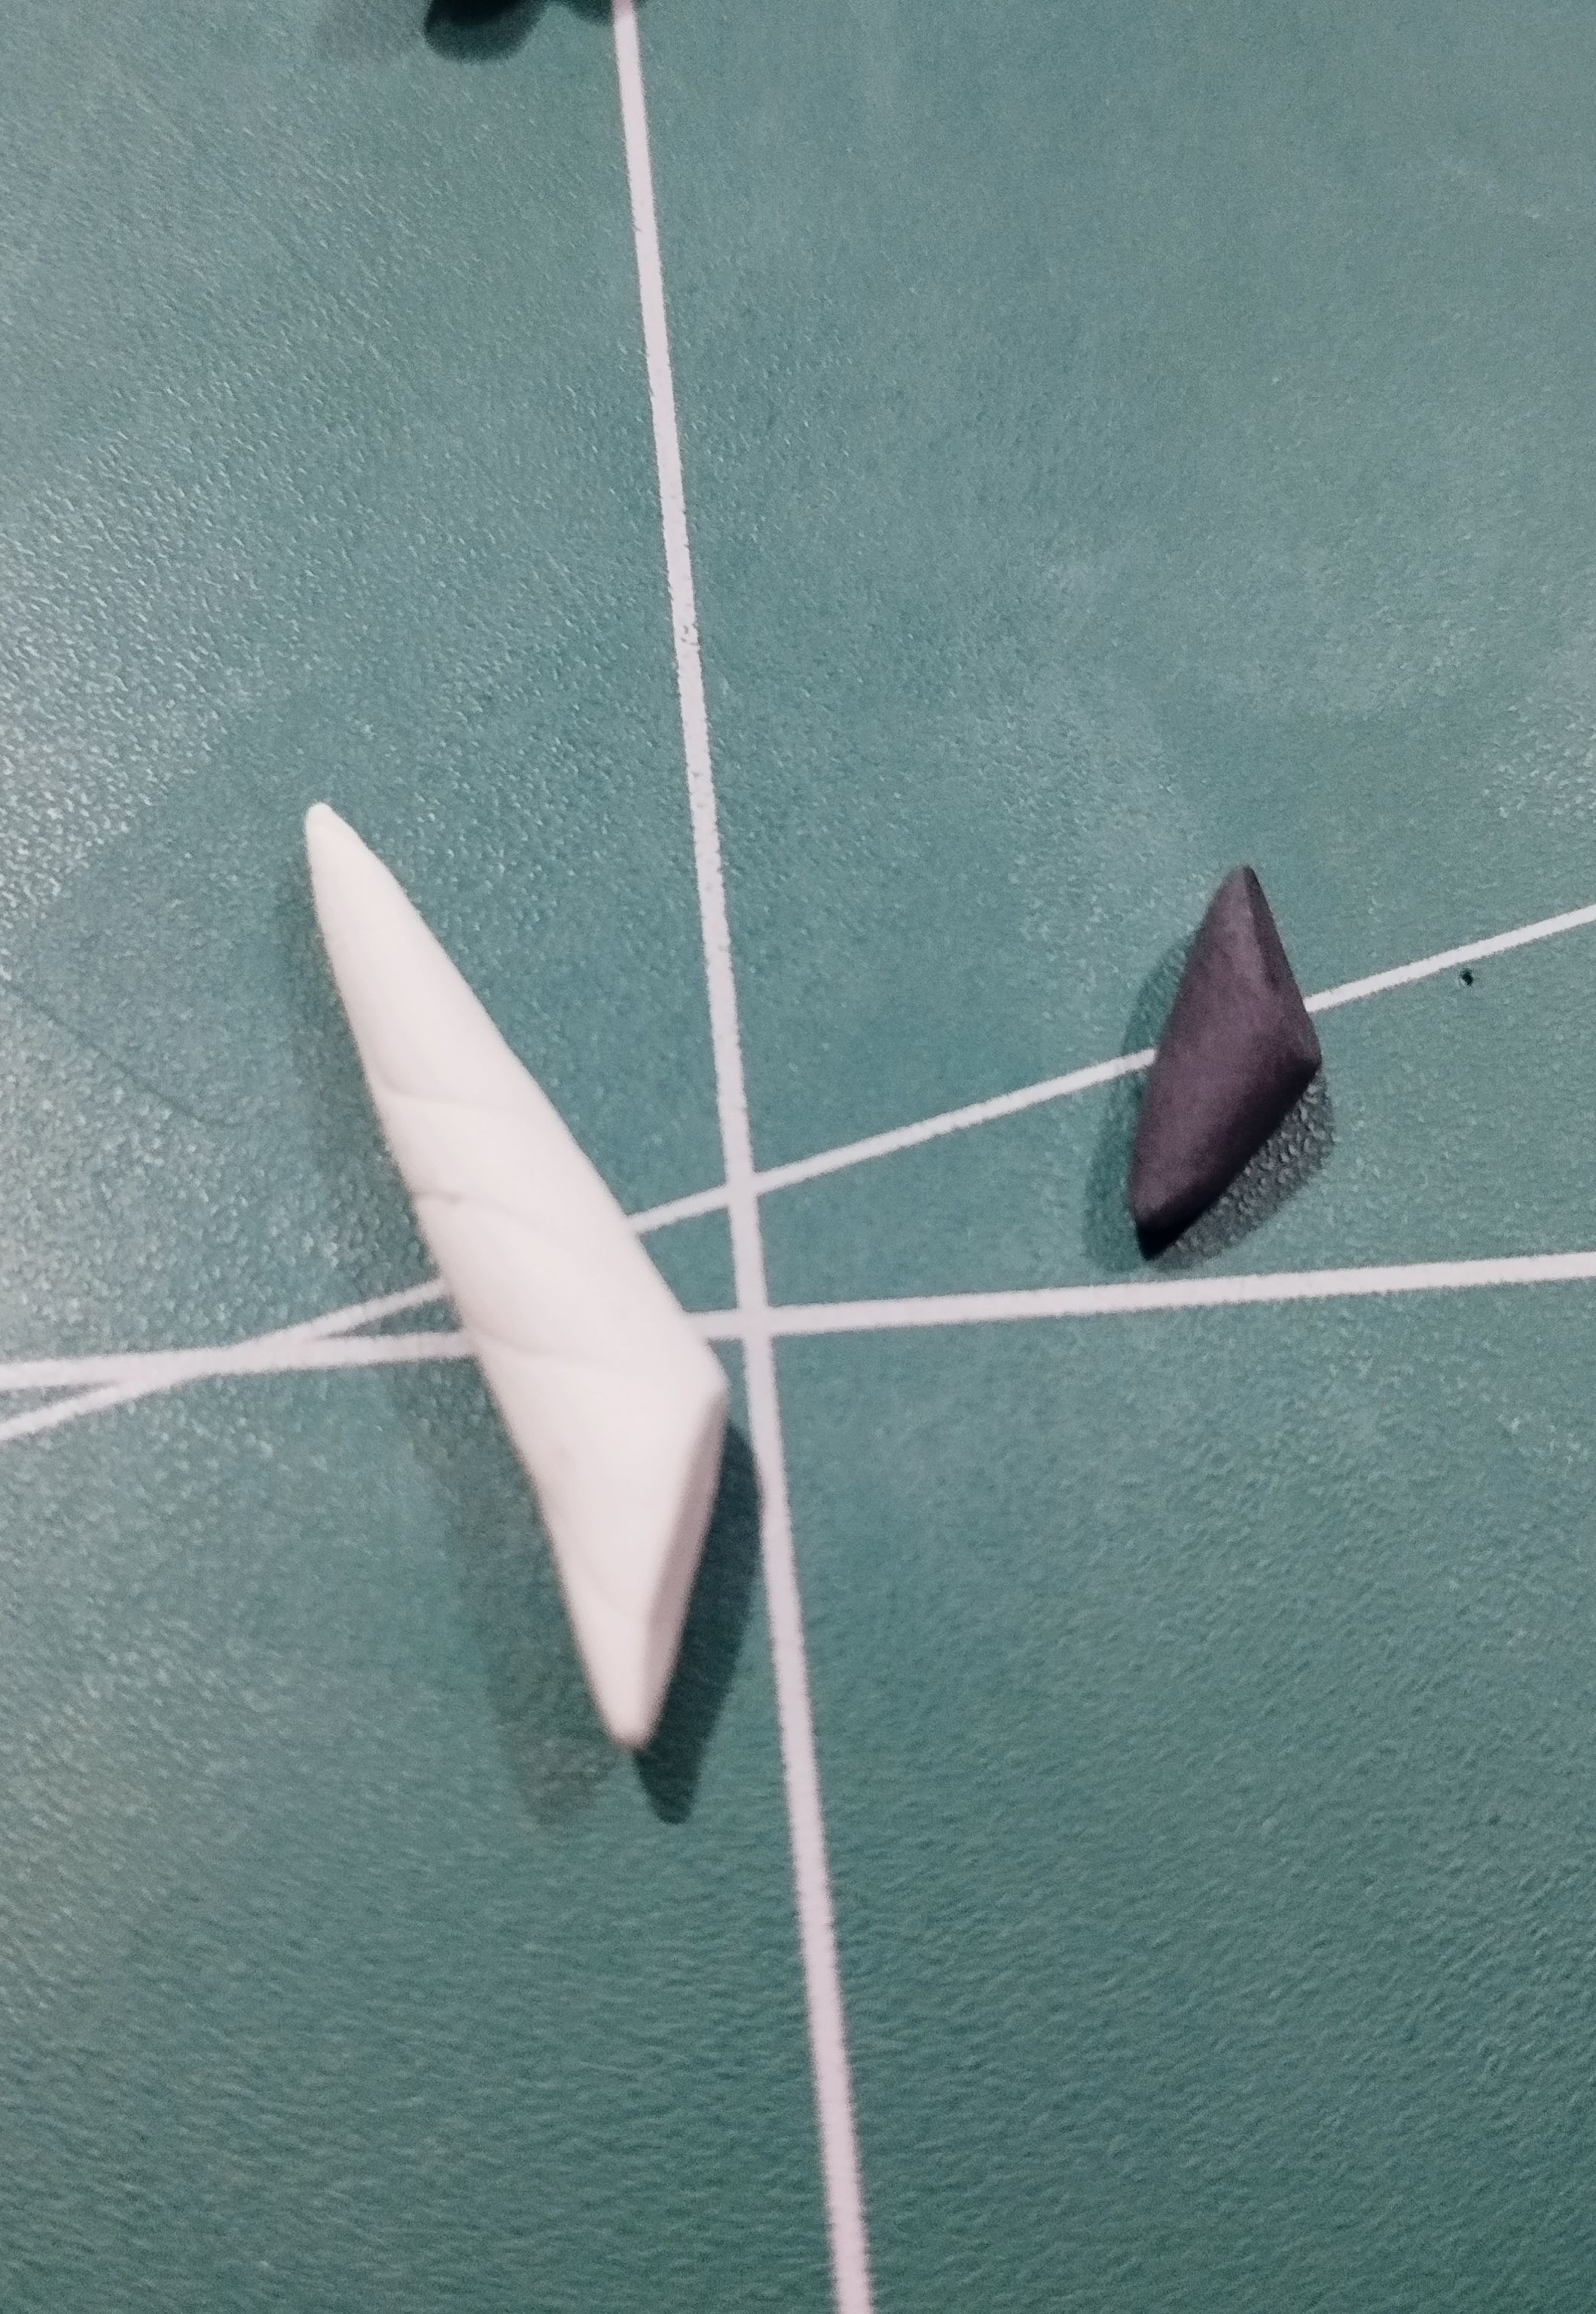
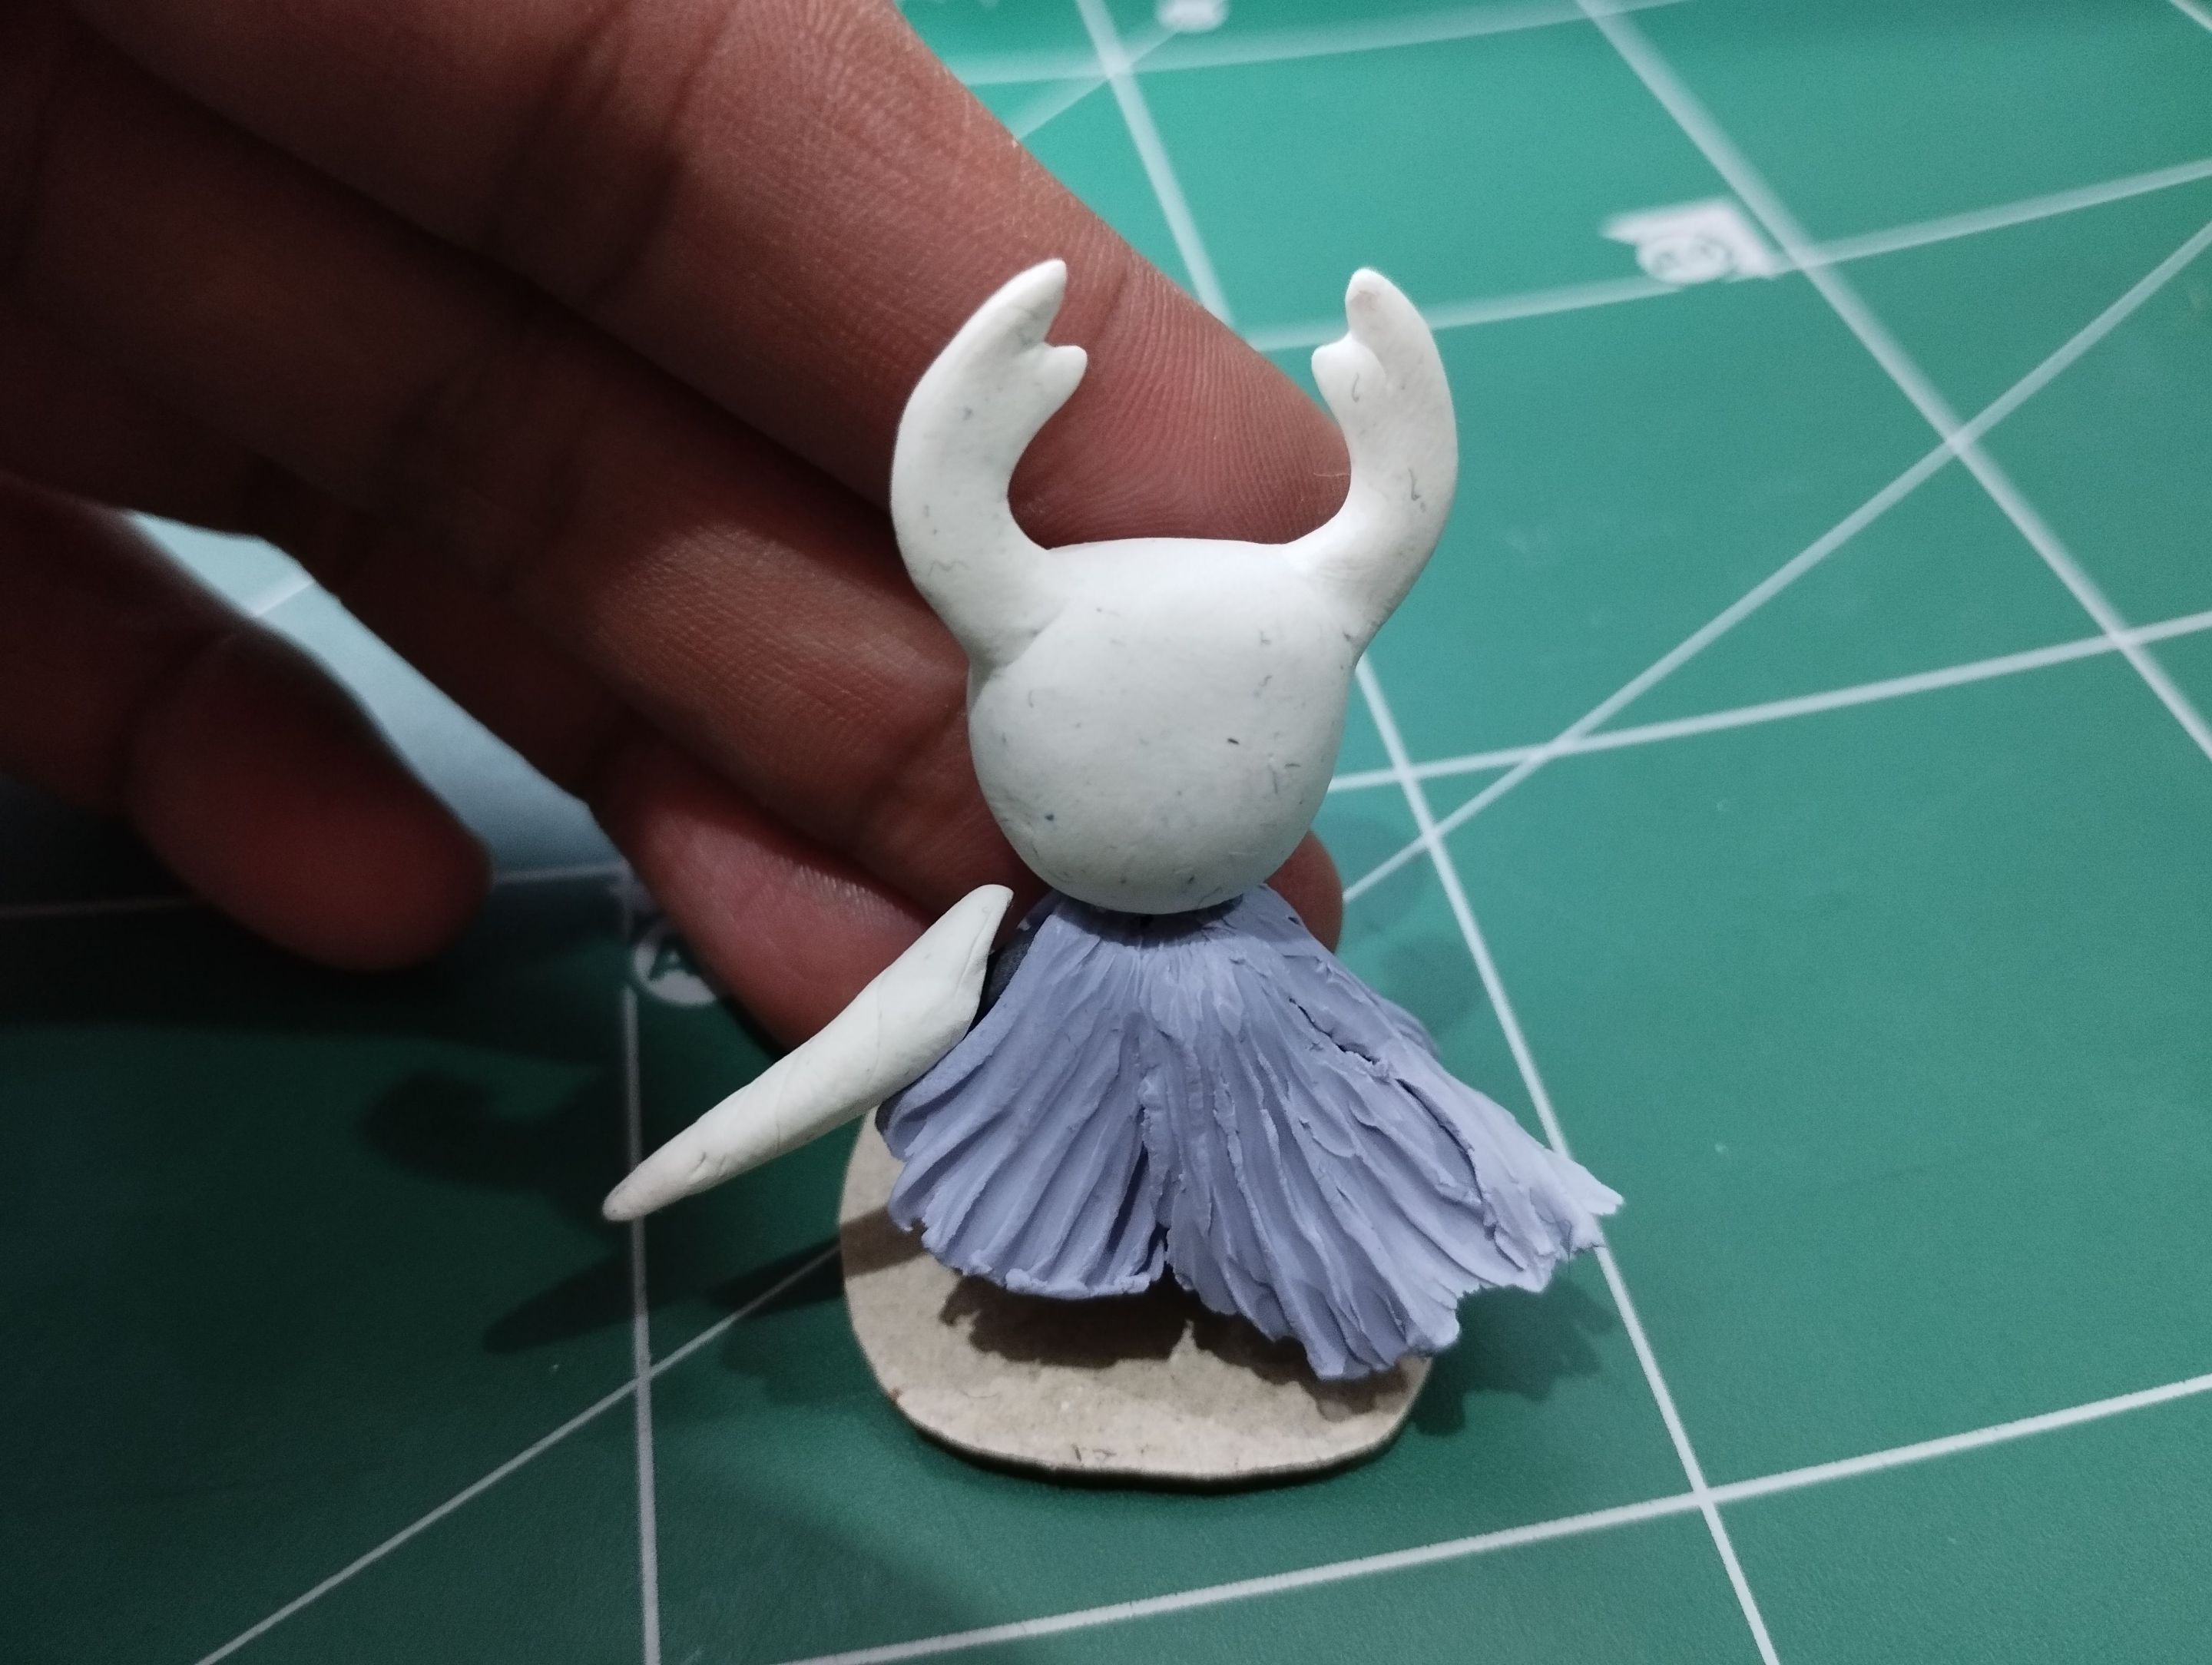
Well, I made the head from a shape similar to a white wooden barrel. Then I made the little horns, which I made to look like the pincers of some kind of beetle. In fact, if you look at the shape in the image on the right, as it is, you could easily make a beetle from that shape.
>>Lo siguiente fue hacer la cabeza. Son las dos partes fuertes de la figurita, pues lo demás son detalles. Tampoco es que la figura tenga demasiados detalles pero cada parte tiene formas muy específicas que hay que seguir para poder lograr la figurita.
>>
>>Pues bien, la cabeza la hice a partir de una forma similar a un barril de madera de color blanco. Posteriormente le hice los cuernitos, los cuales hice como si fuesen pinzas de alguna especie de escarabajo. De hecho, si miran la forma de la imagen de la derecha, así como está, tranquilamente se podría hacer un escarabajo a partir de esa forma.
|||
|-|-|
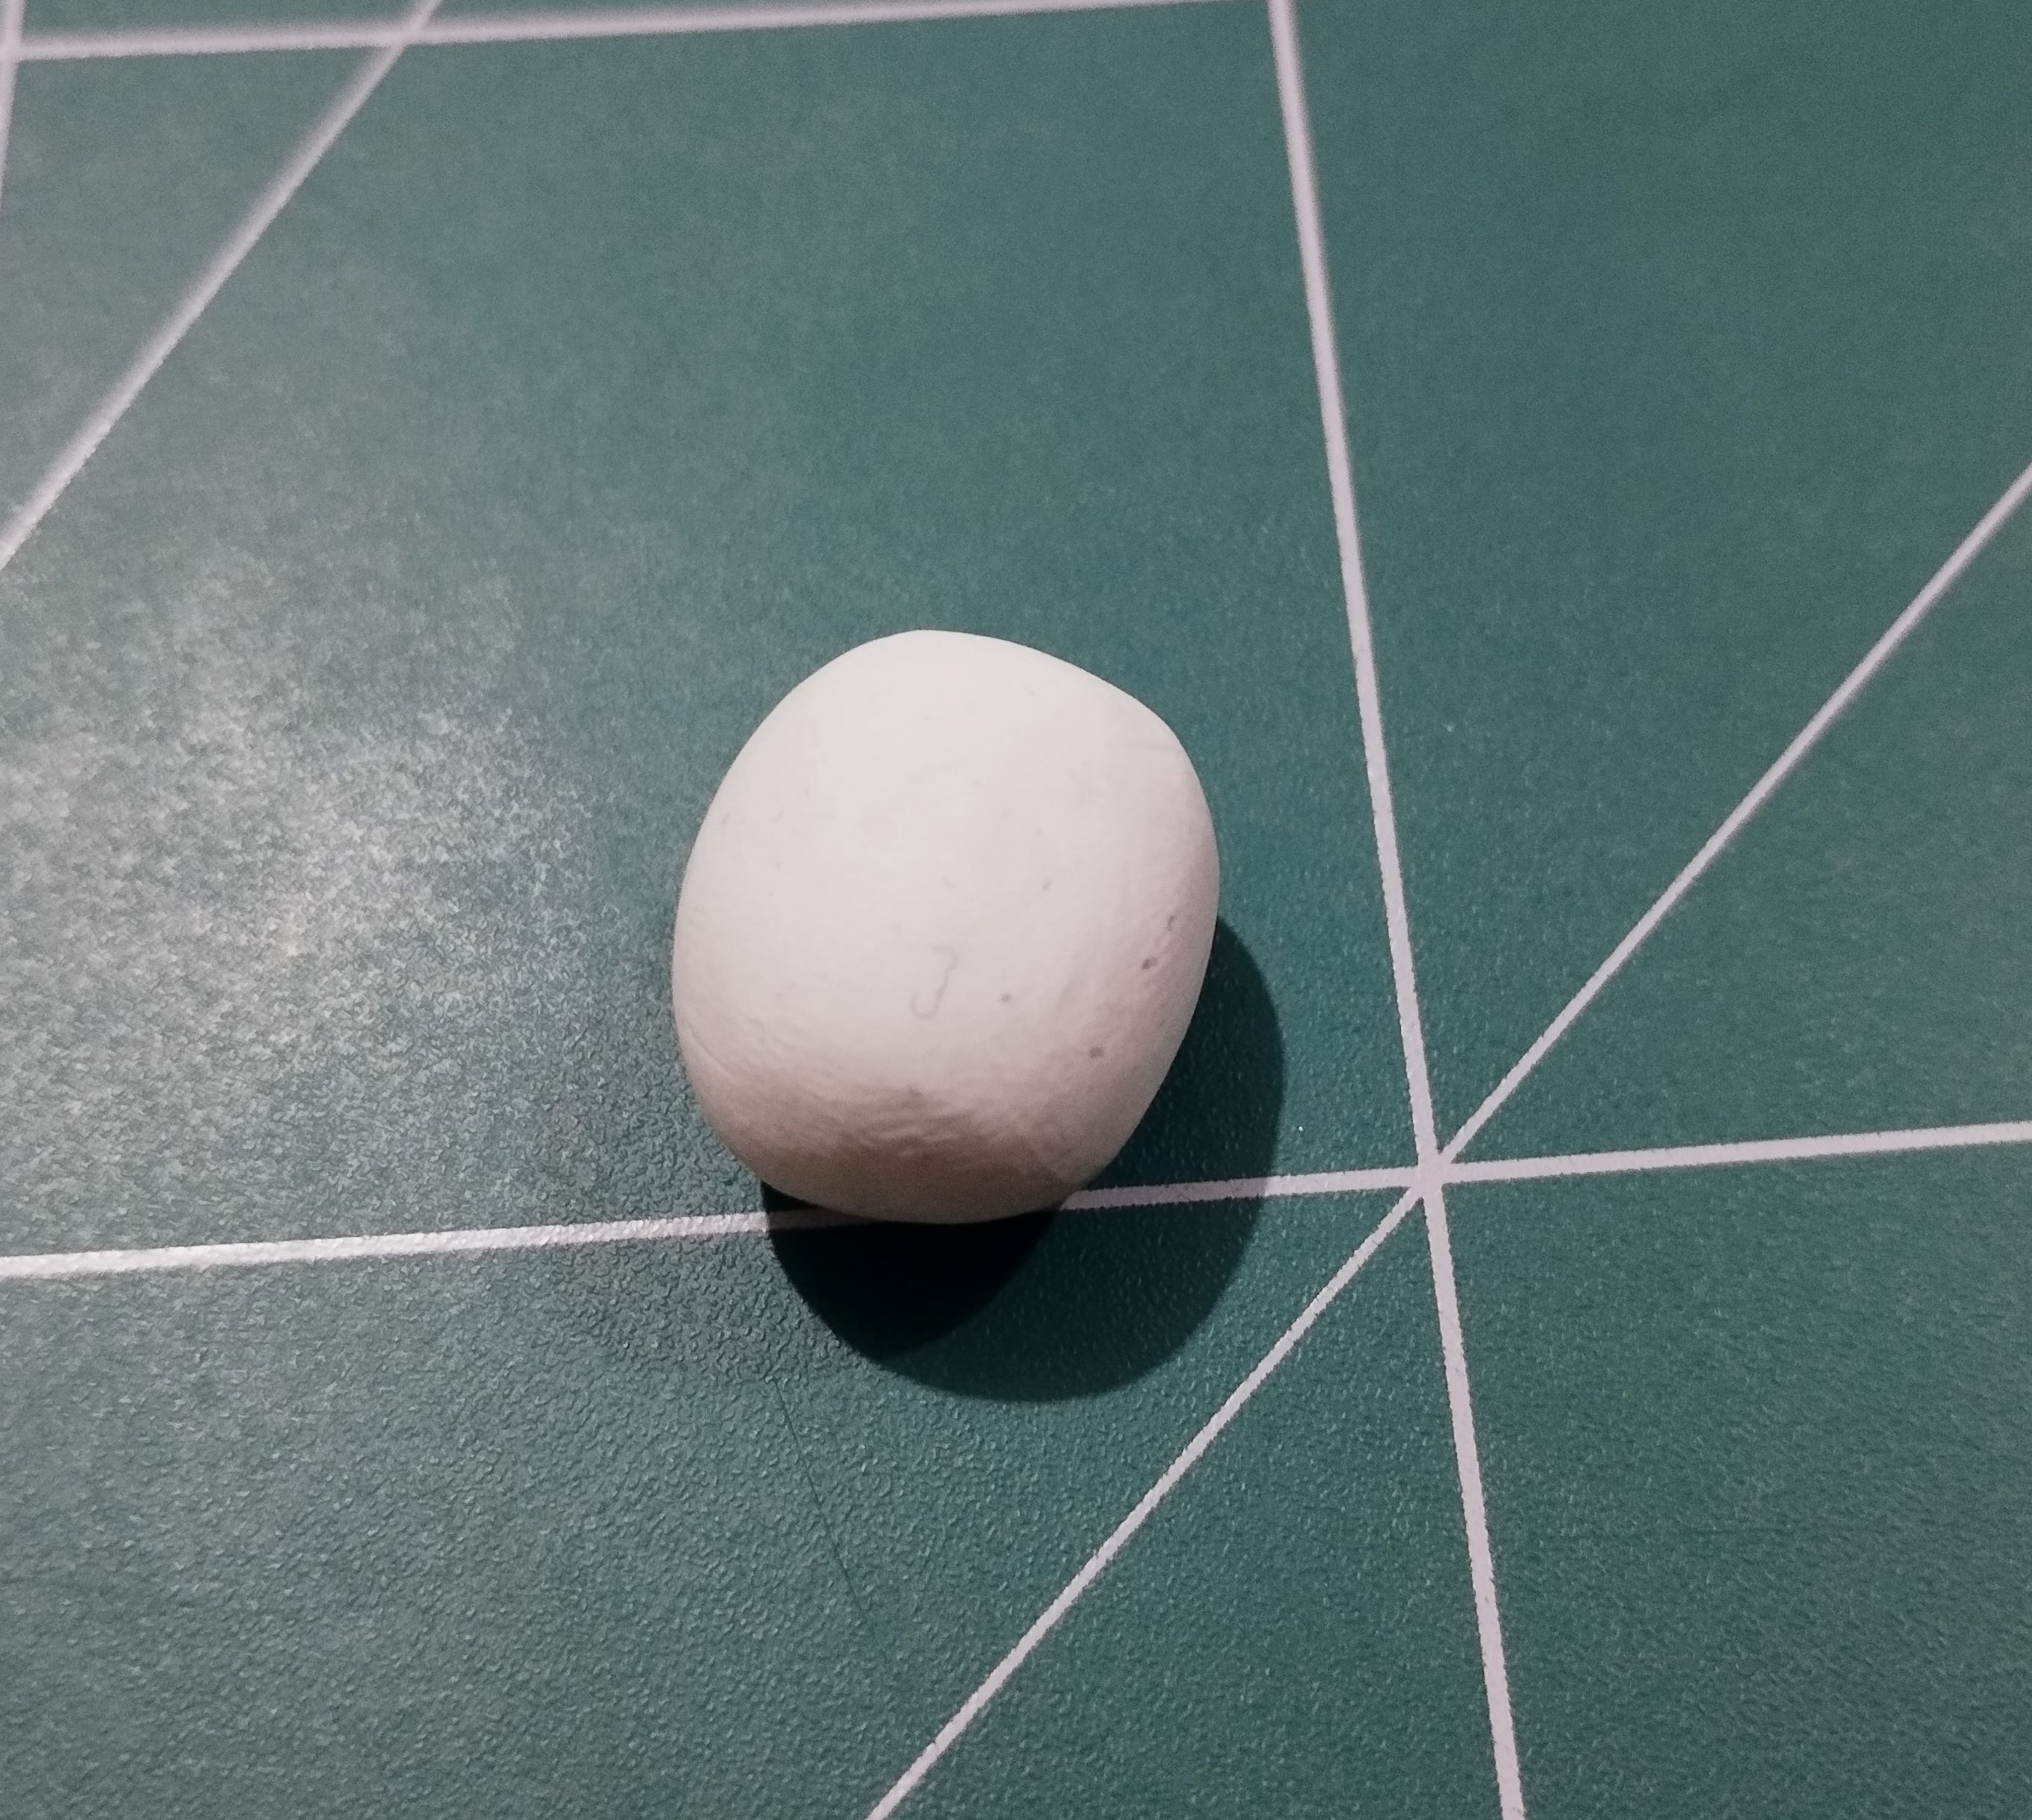
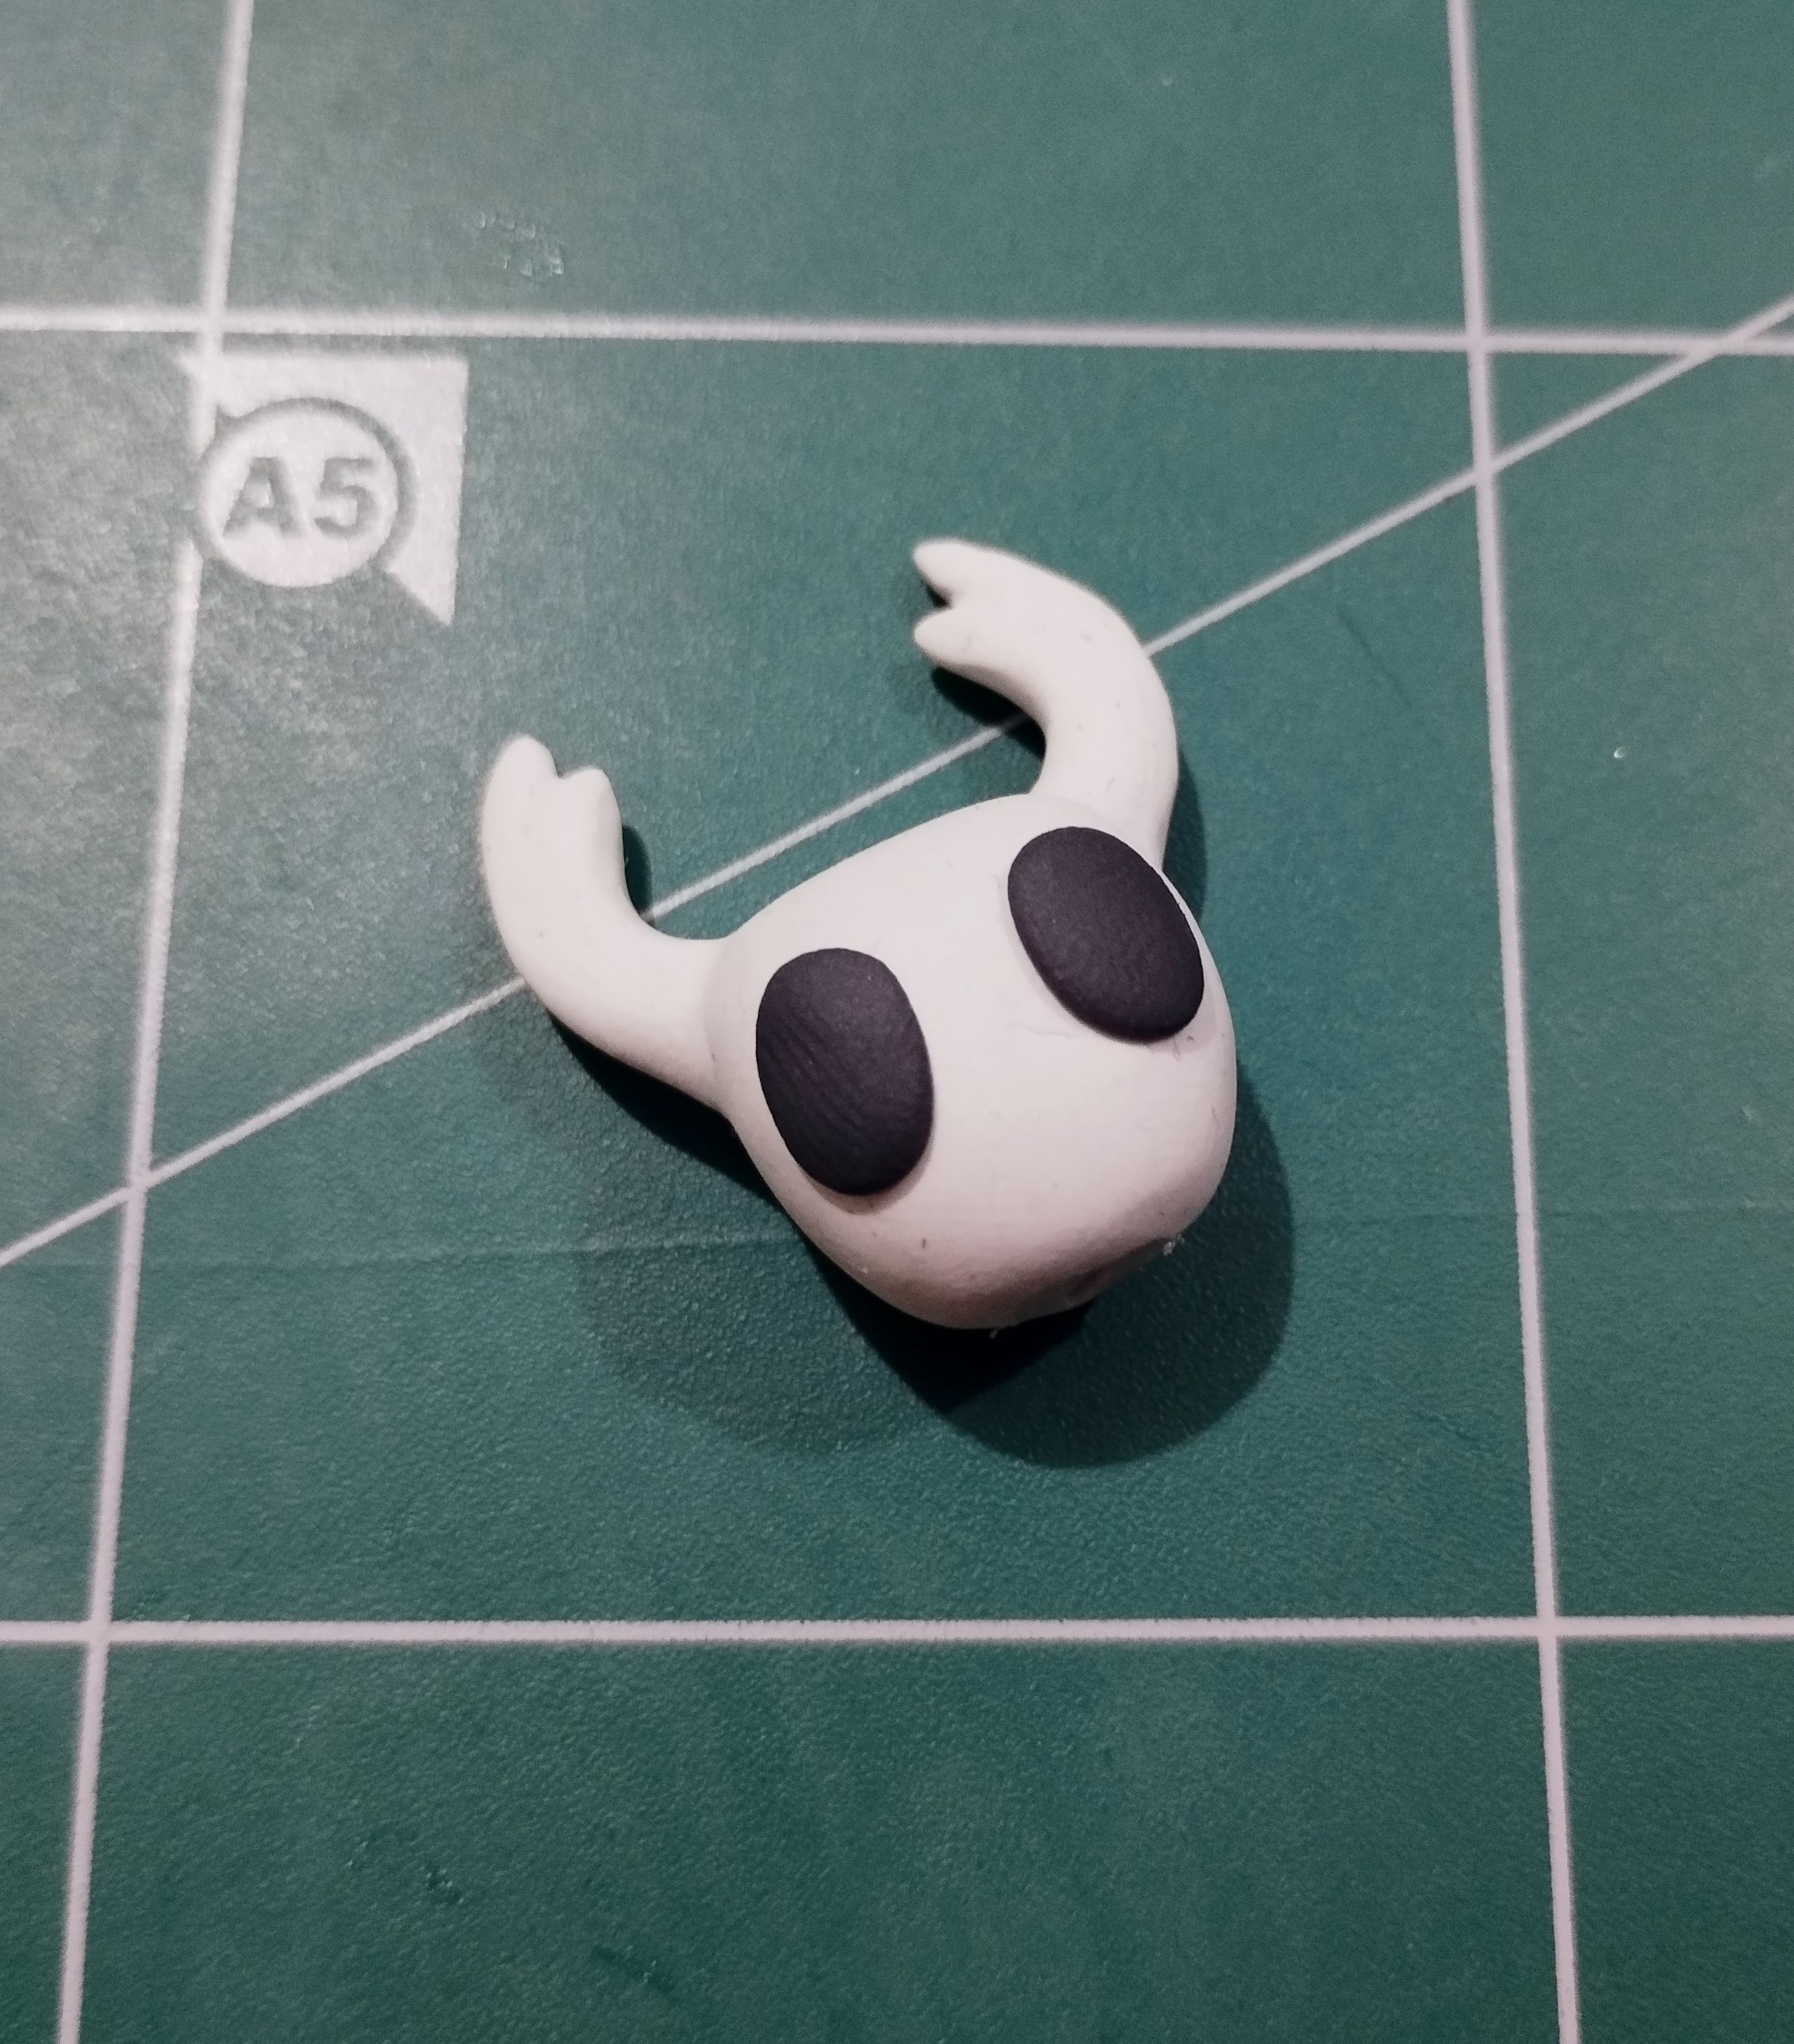
However, to differentiate it from a beetle and make it the character's head, you simply have to do two things: add two black ovals on either side of the head.
I confess that I thought about making two holes and painting them black, but in the end I opted for the simplest solution, thinking of Funko Pop figures, because sometimes eyes like that look good, and this was the case.
>>Sin embargo, para diferenciarlo de un escarabajo y que sea la cabeza del personaje, simplemente hay que hacer dos cosas, dos óvalos de color negro situados a ambos lados de la cabeza.
>>
>>Confieso que pensé en hacer dos agujeros y pintarlos de color negro, pero al final me decanté por lo más simple, pensando en los Funko Pop, porque a veces los ojos así quedan bien y este fue el caso.
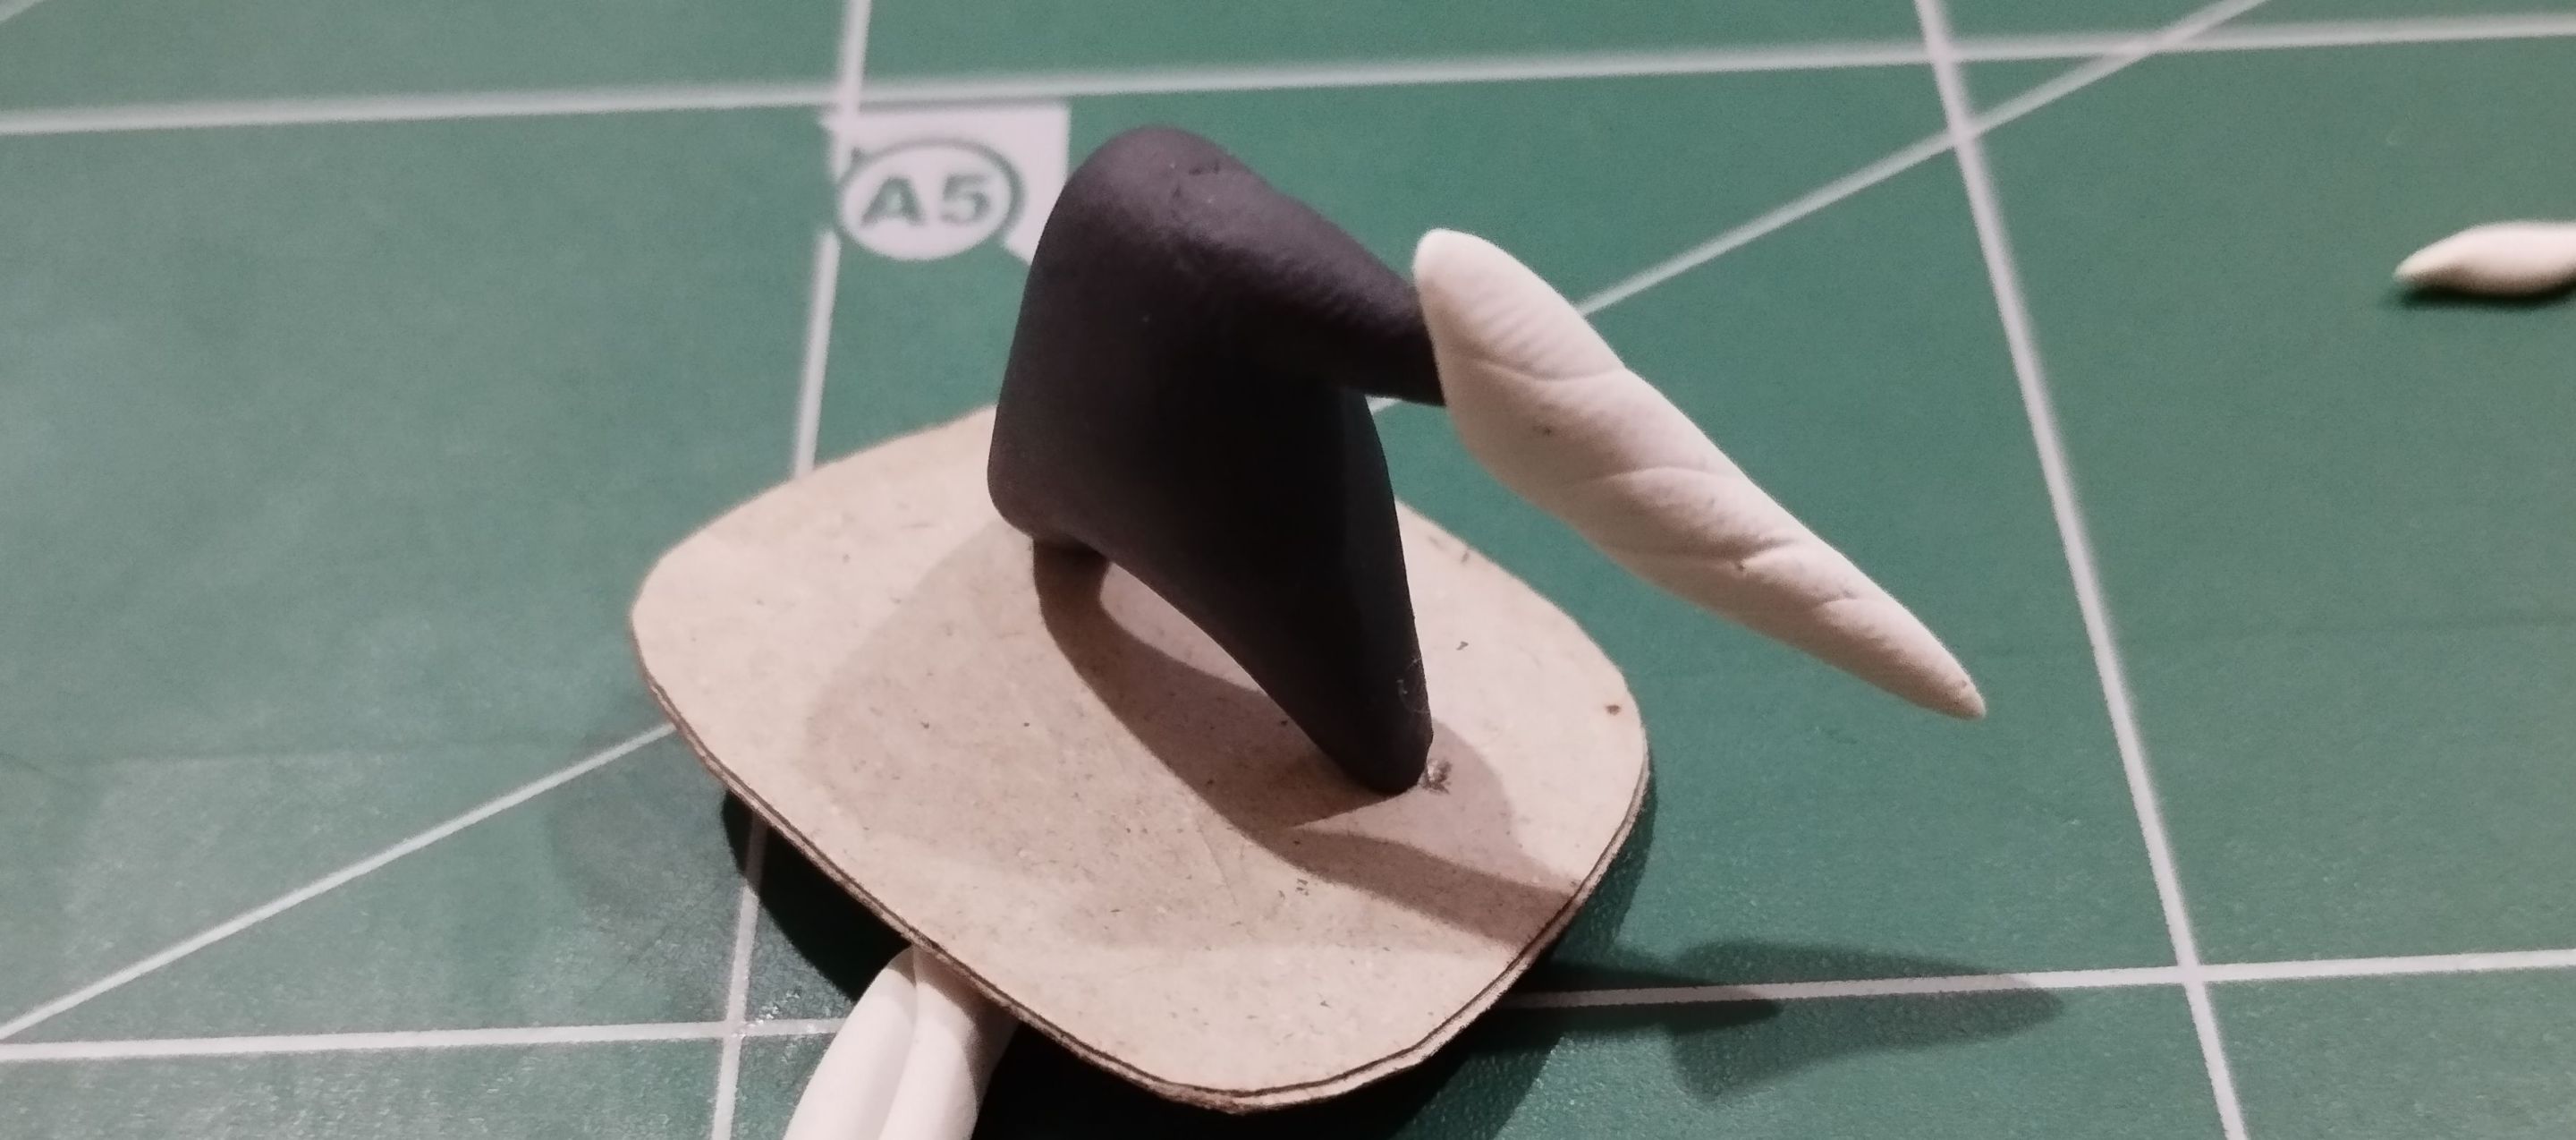
Well, the two main pieces were now ready. Time to make the accessories. Let's start with the arm.
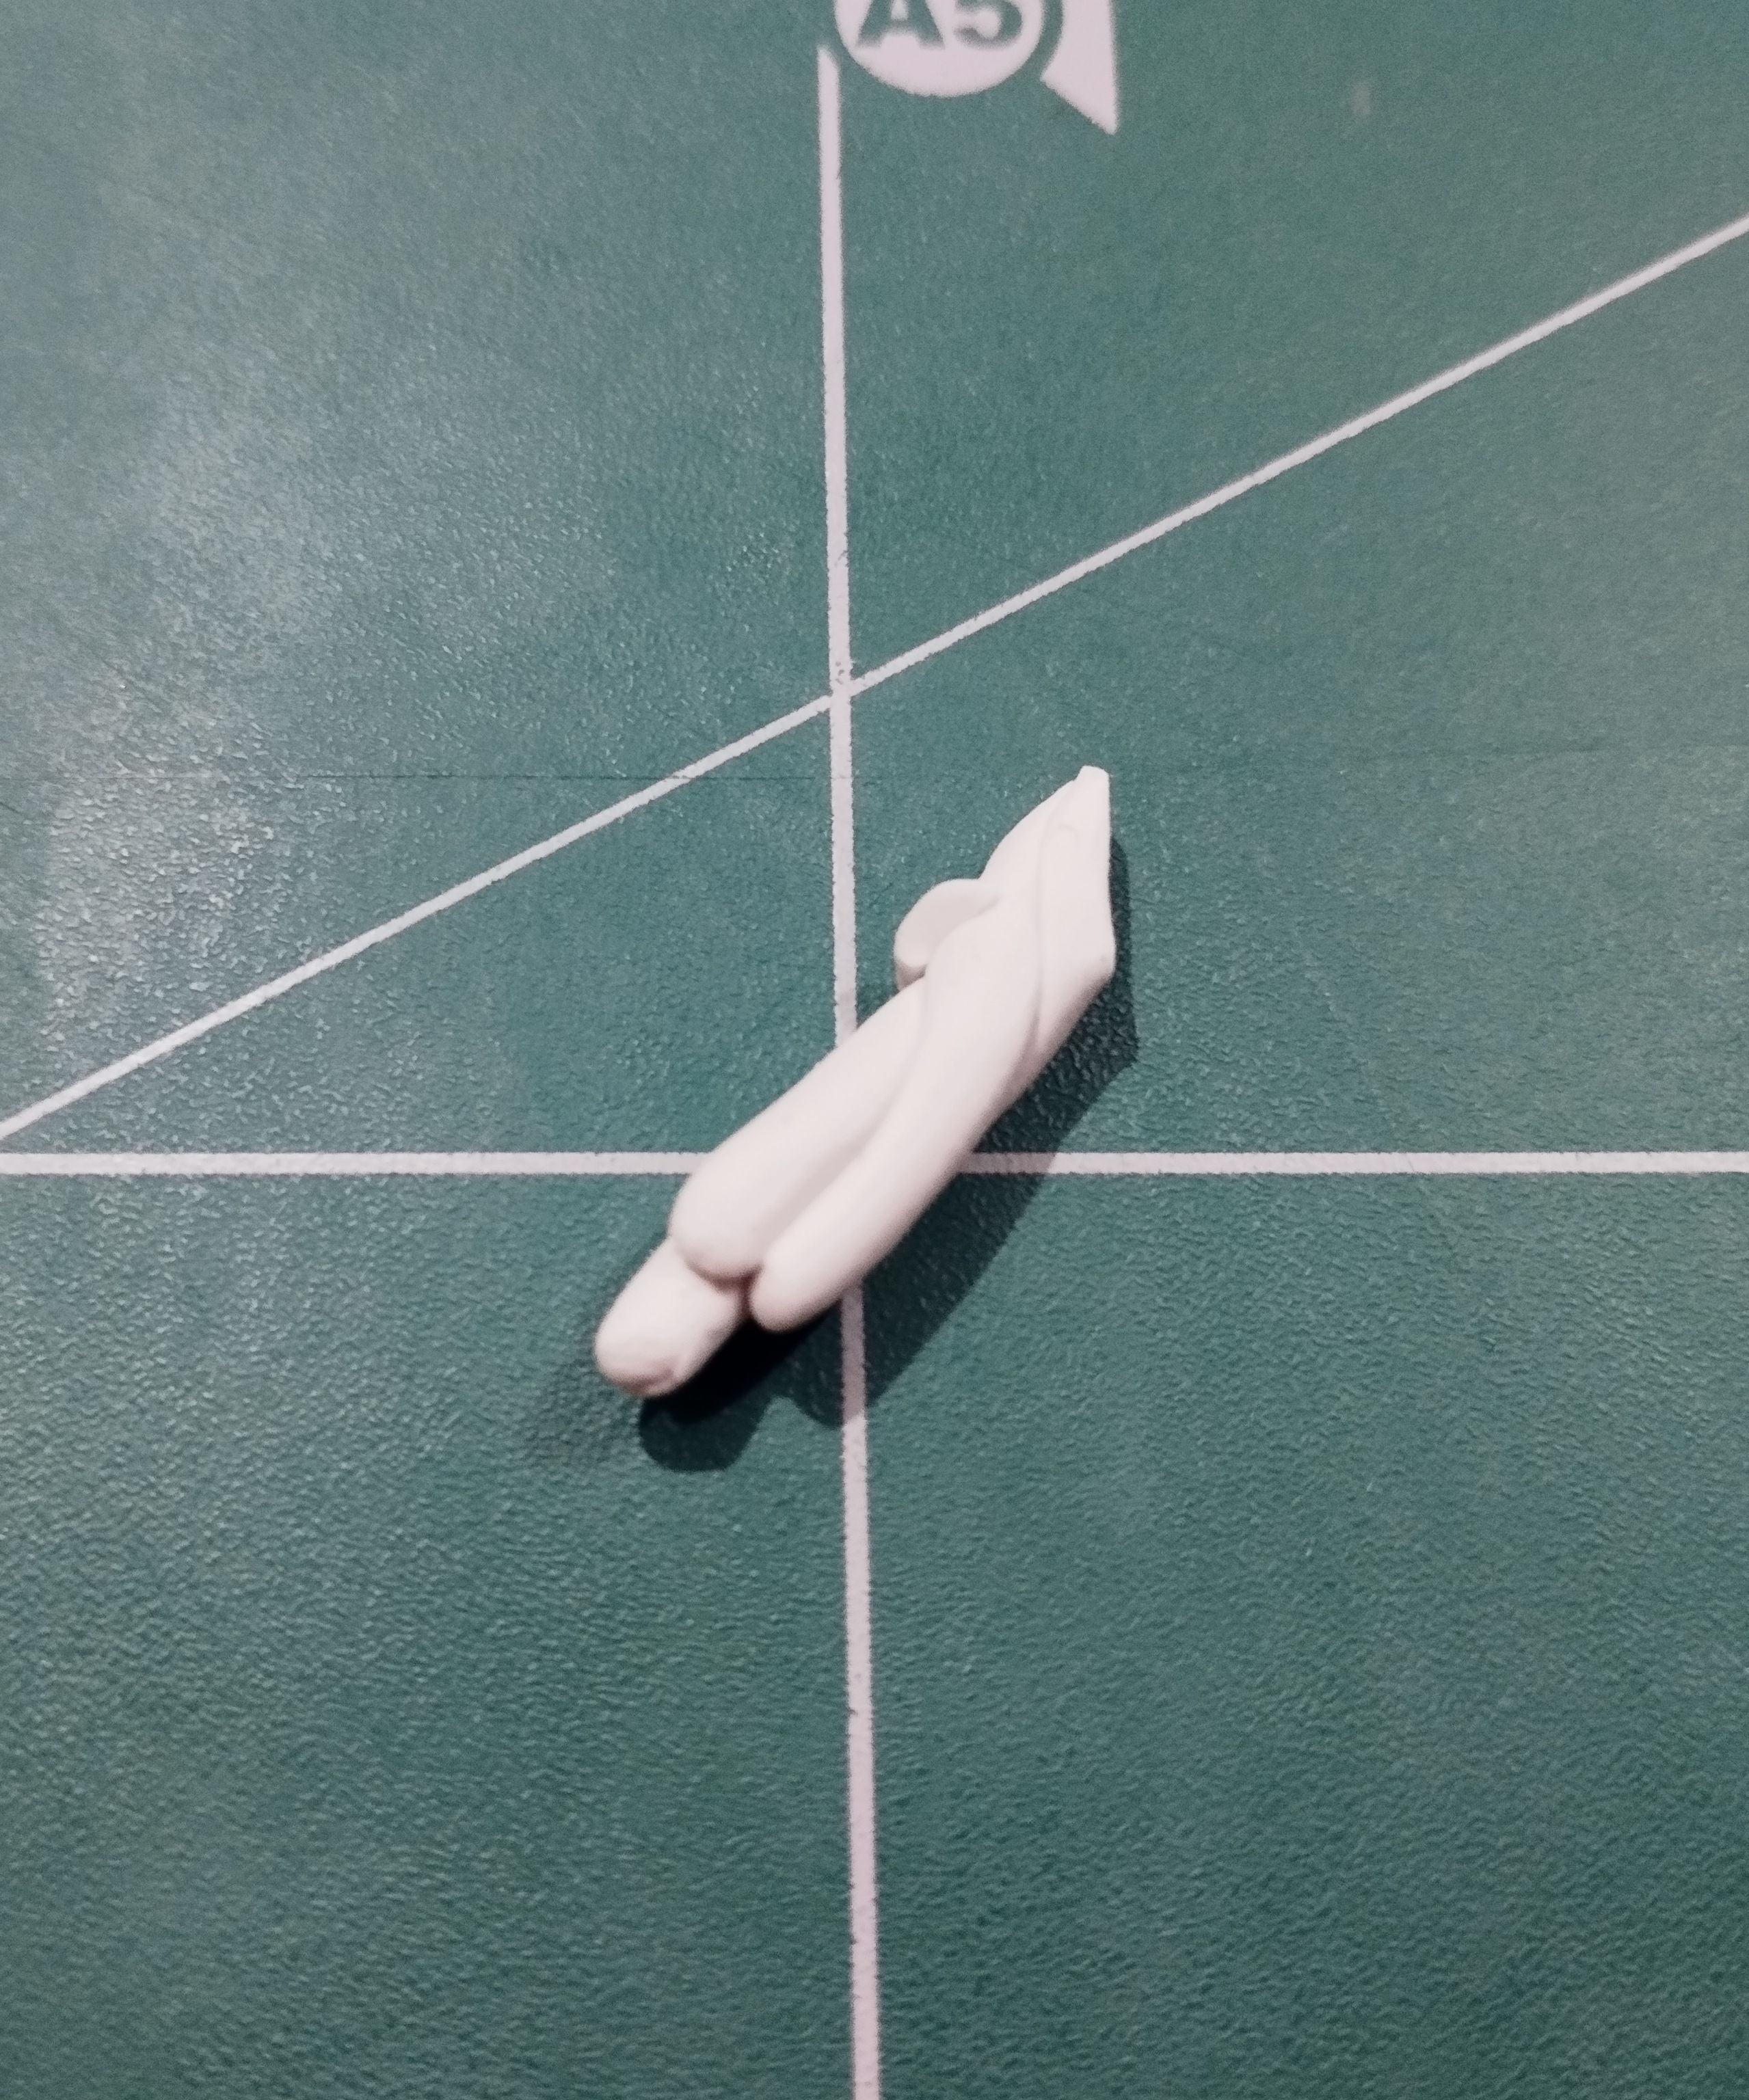
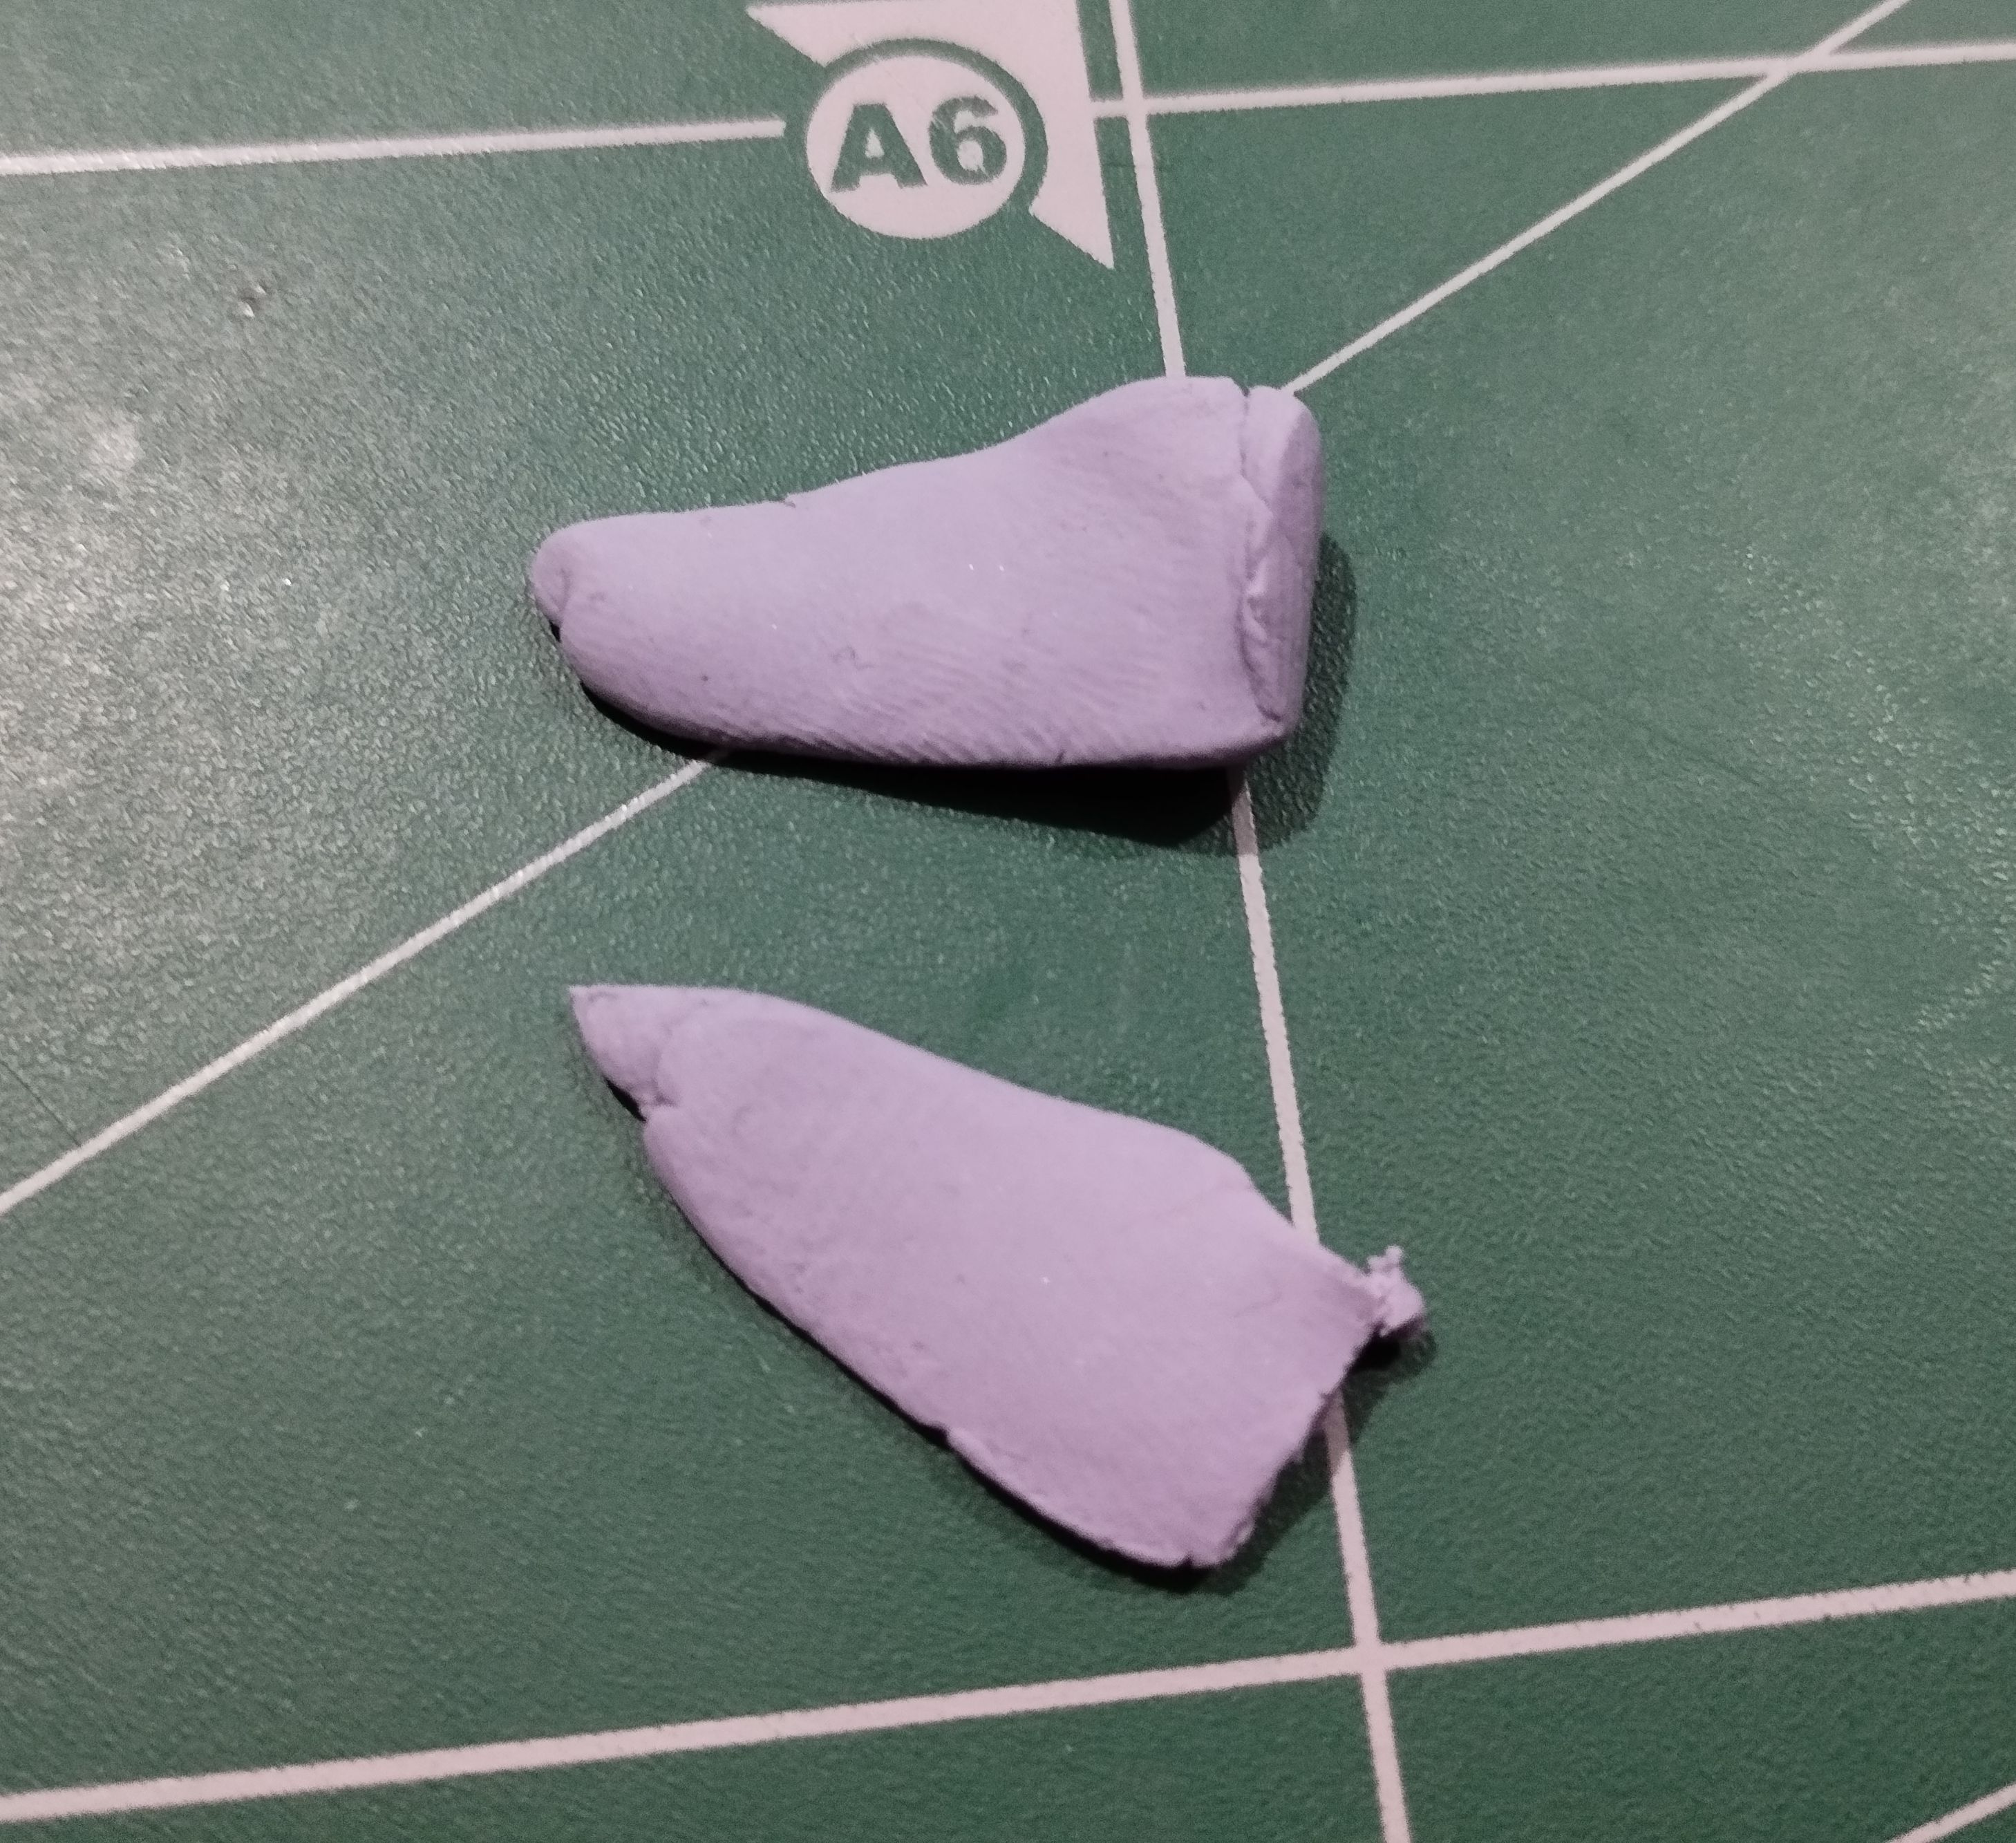
To make it, I took three cylinders of white plasticine and joined them together, then simply rolled them into a cone shape to give them the spiral shape of the character's weapon. I made the little arm out of black plasticine, with a shape similar to a cone cut diagonally at the thick end, as you can see in the image on the right.
>>Pues bien, ya aquí estaban listas las dos piezas principales. Hora de hacer los accesorios. Vamos con el brazo.
>>
>>Para hacerlo tomé tres cilindros de plastilina blanca y los uní, luego fue simplemente enrollarlos en forma de cono, para que tuvieran esa forma en espiral que tiene el arma del personaje. Ya el bracito lo hice con plastilina negra, con una forma similar a un cono cortado en la parte gruesa en diagonal, tal como pueden ver en la imagen de la derecha.
|||
|-|-|
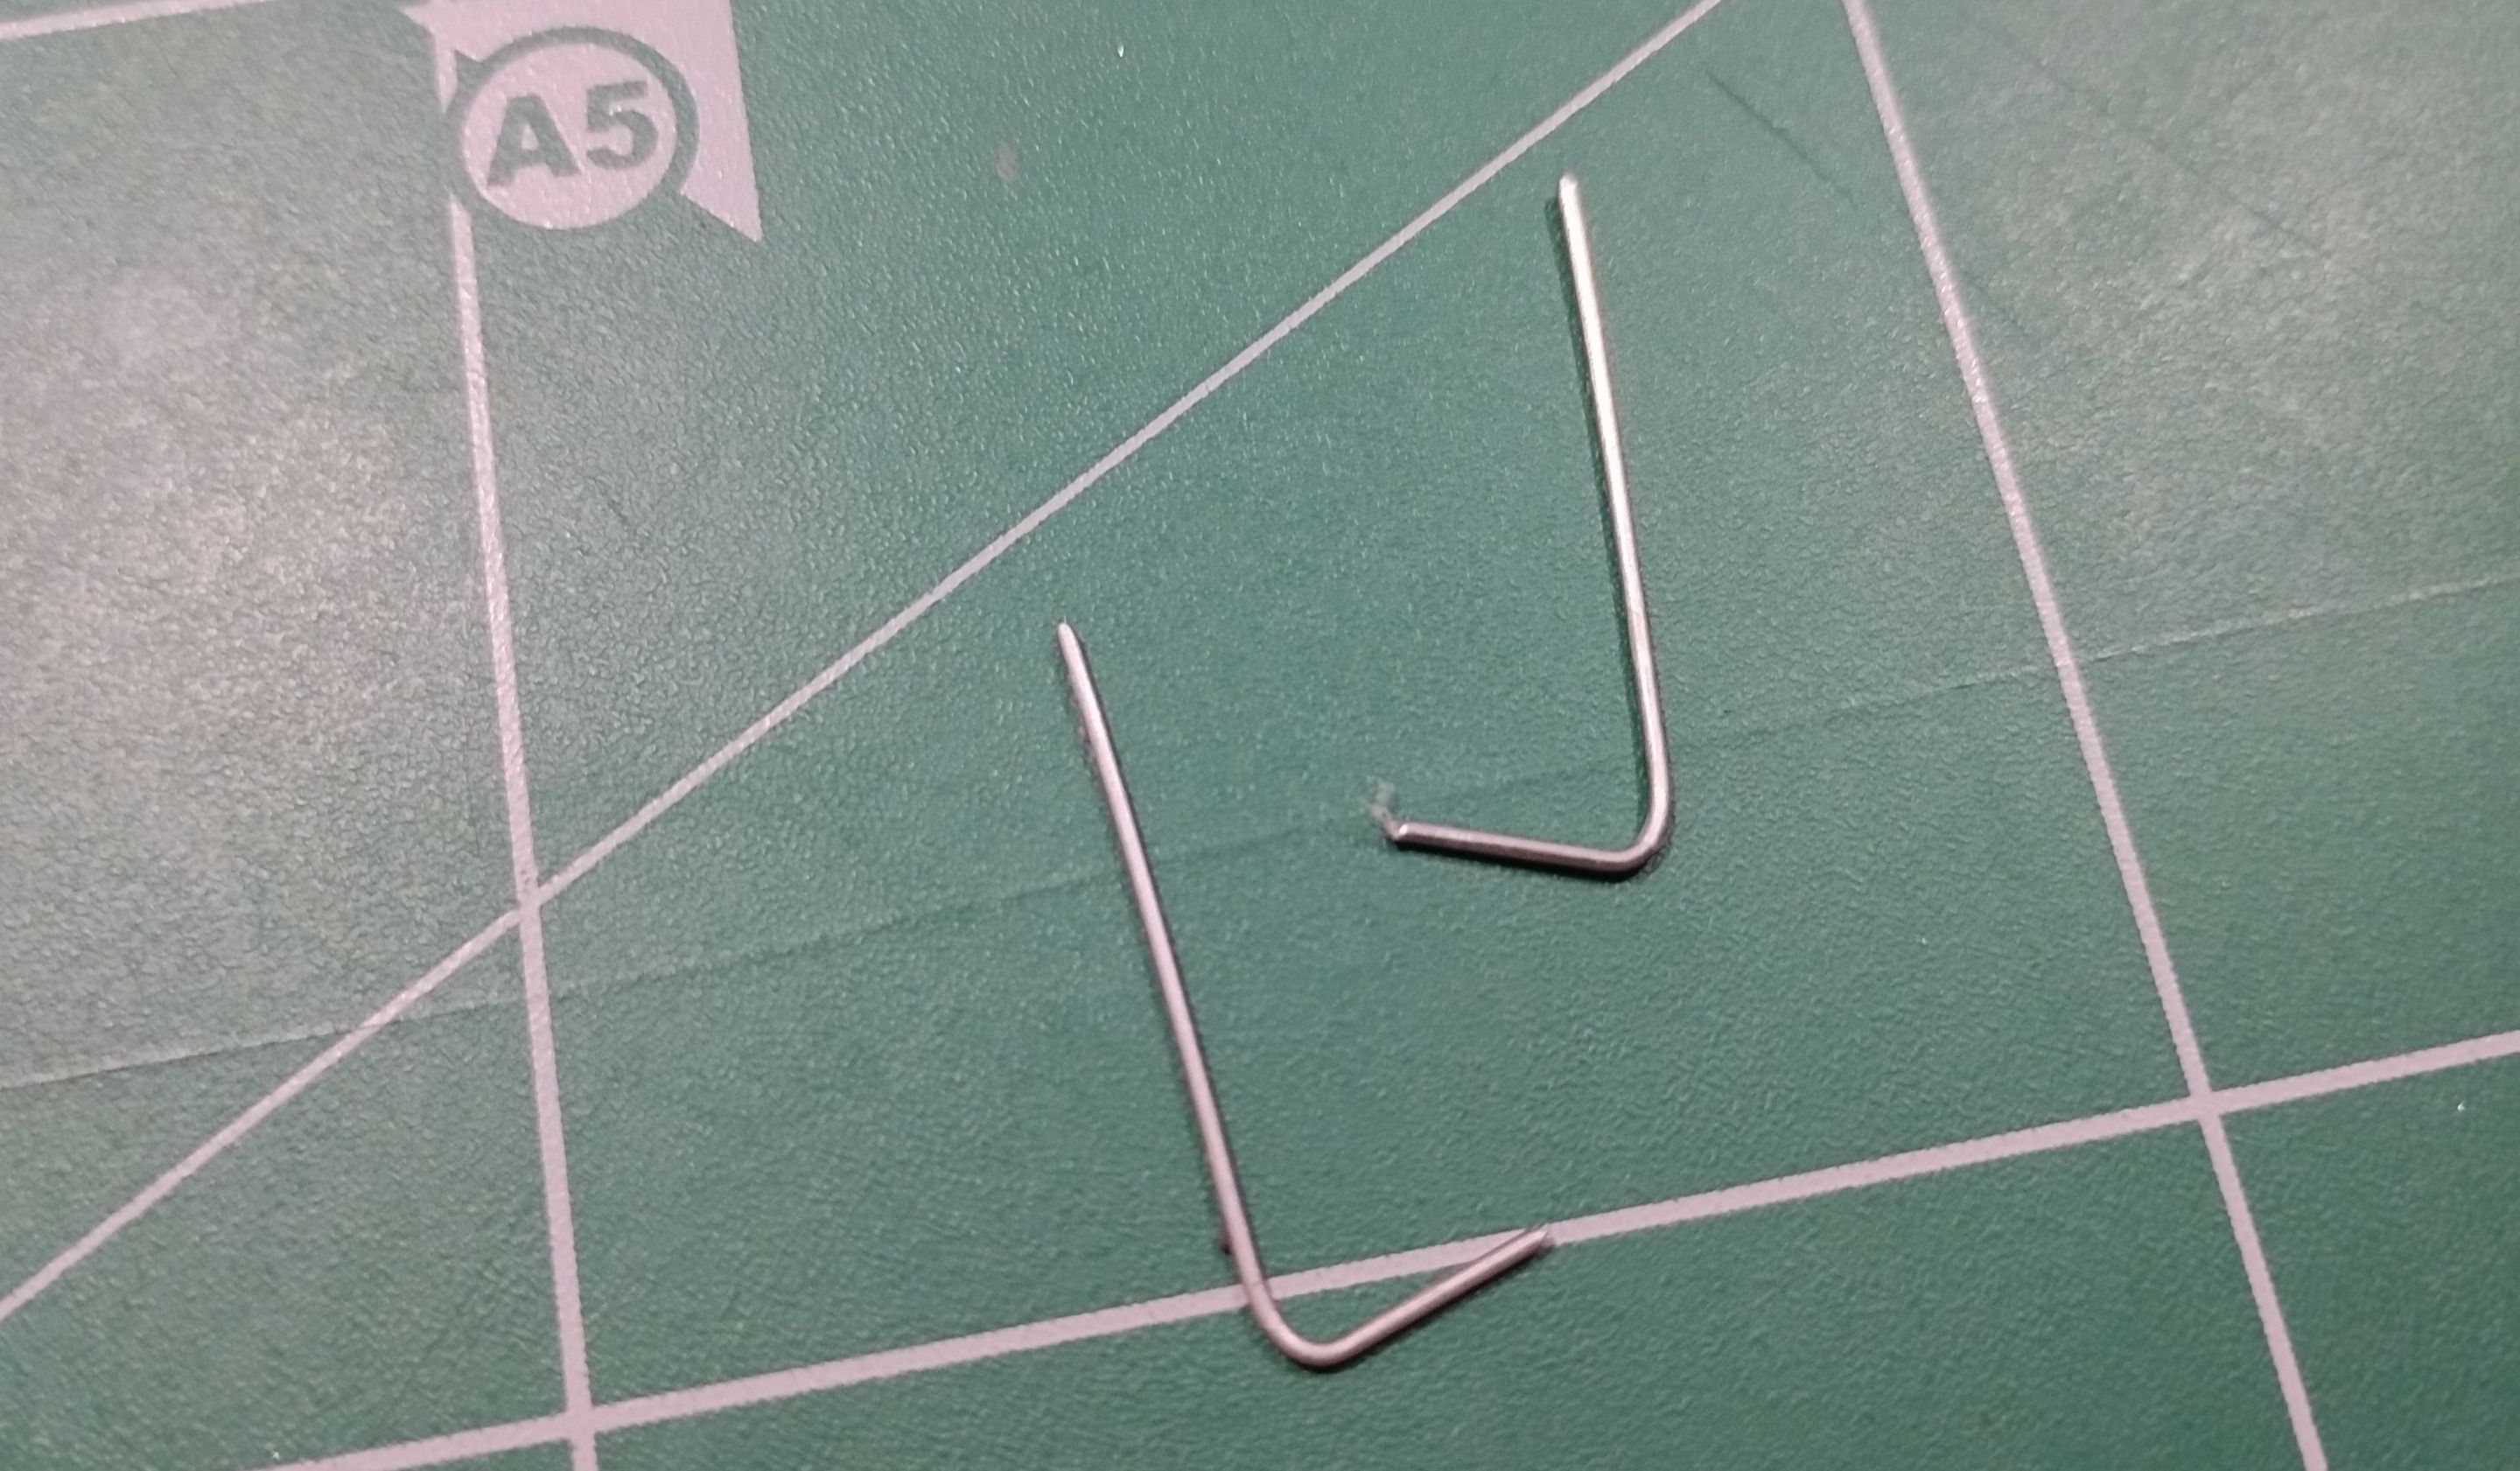
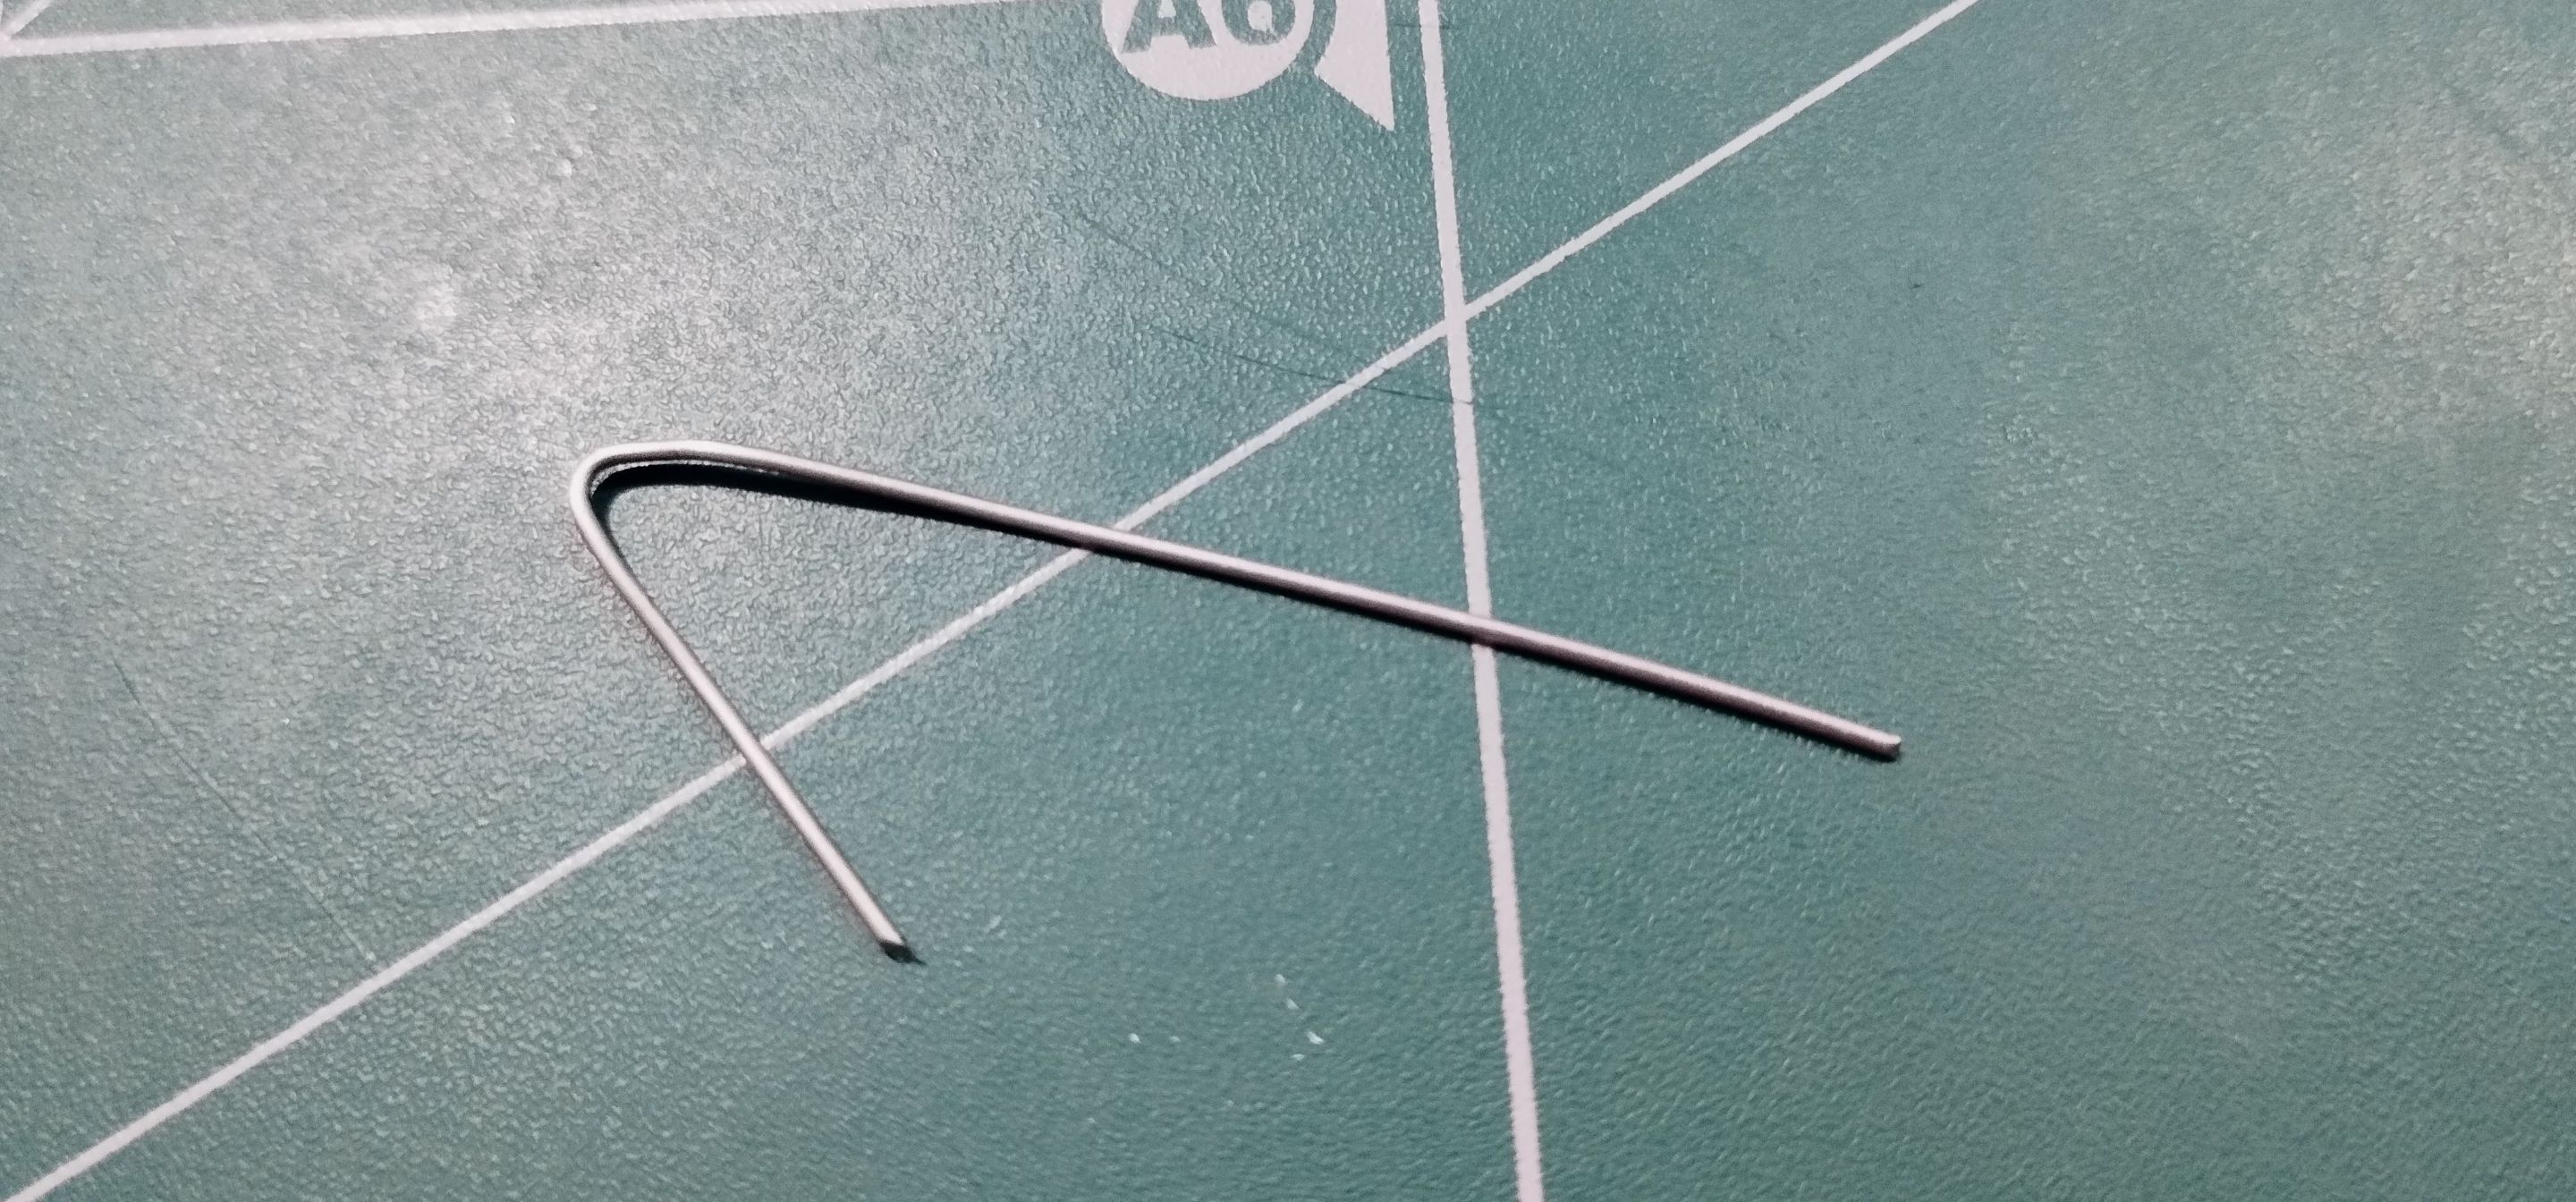
To attach these two pieces to the body, I used this small piece of wire that you can see in the image below. The thinner part is stuck into the body, going all the way through, while the rest of the wire serves as a support to keep the knight's arm and weapon raised.
>>Para unir estas dos piezas al cuerpo usé este trocito de alambre que ven en la imagen de abajo. La parte mas delgada va clavada en todo el cuerpo, atravesándolo por completo, mientras que el resto del alambre sirve como soporte para mantener levantado el bracito y el arma del caballero.
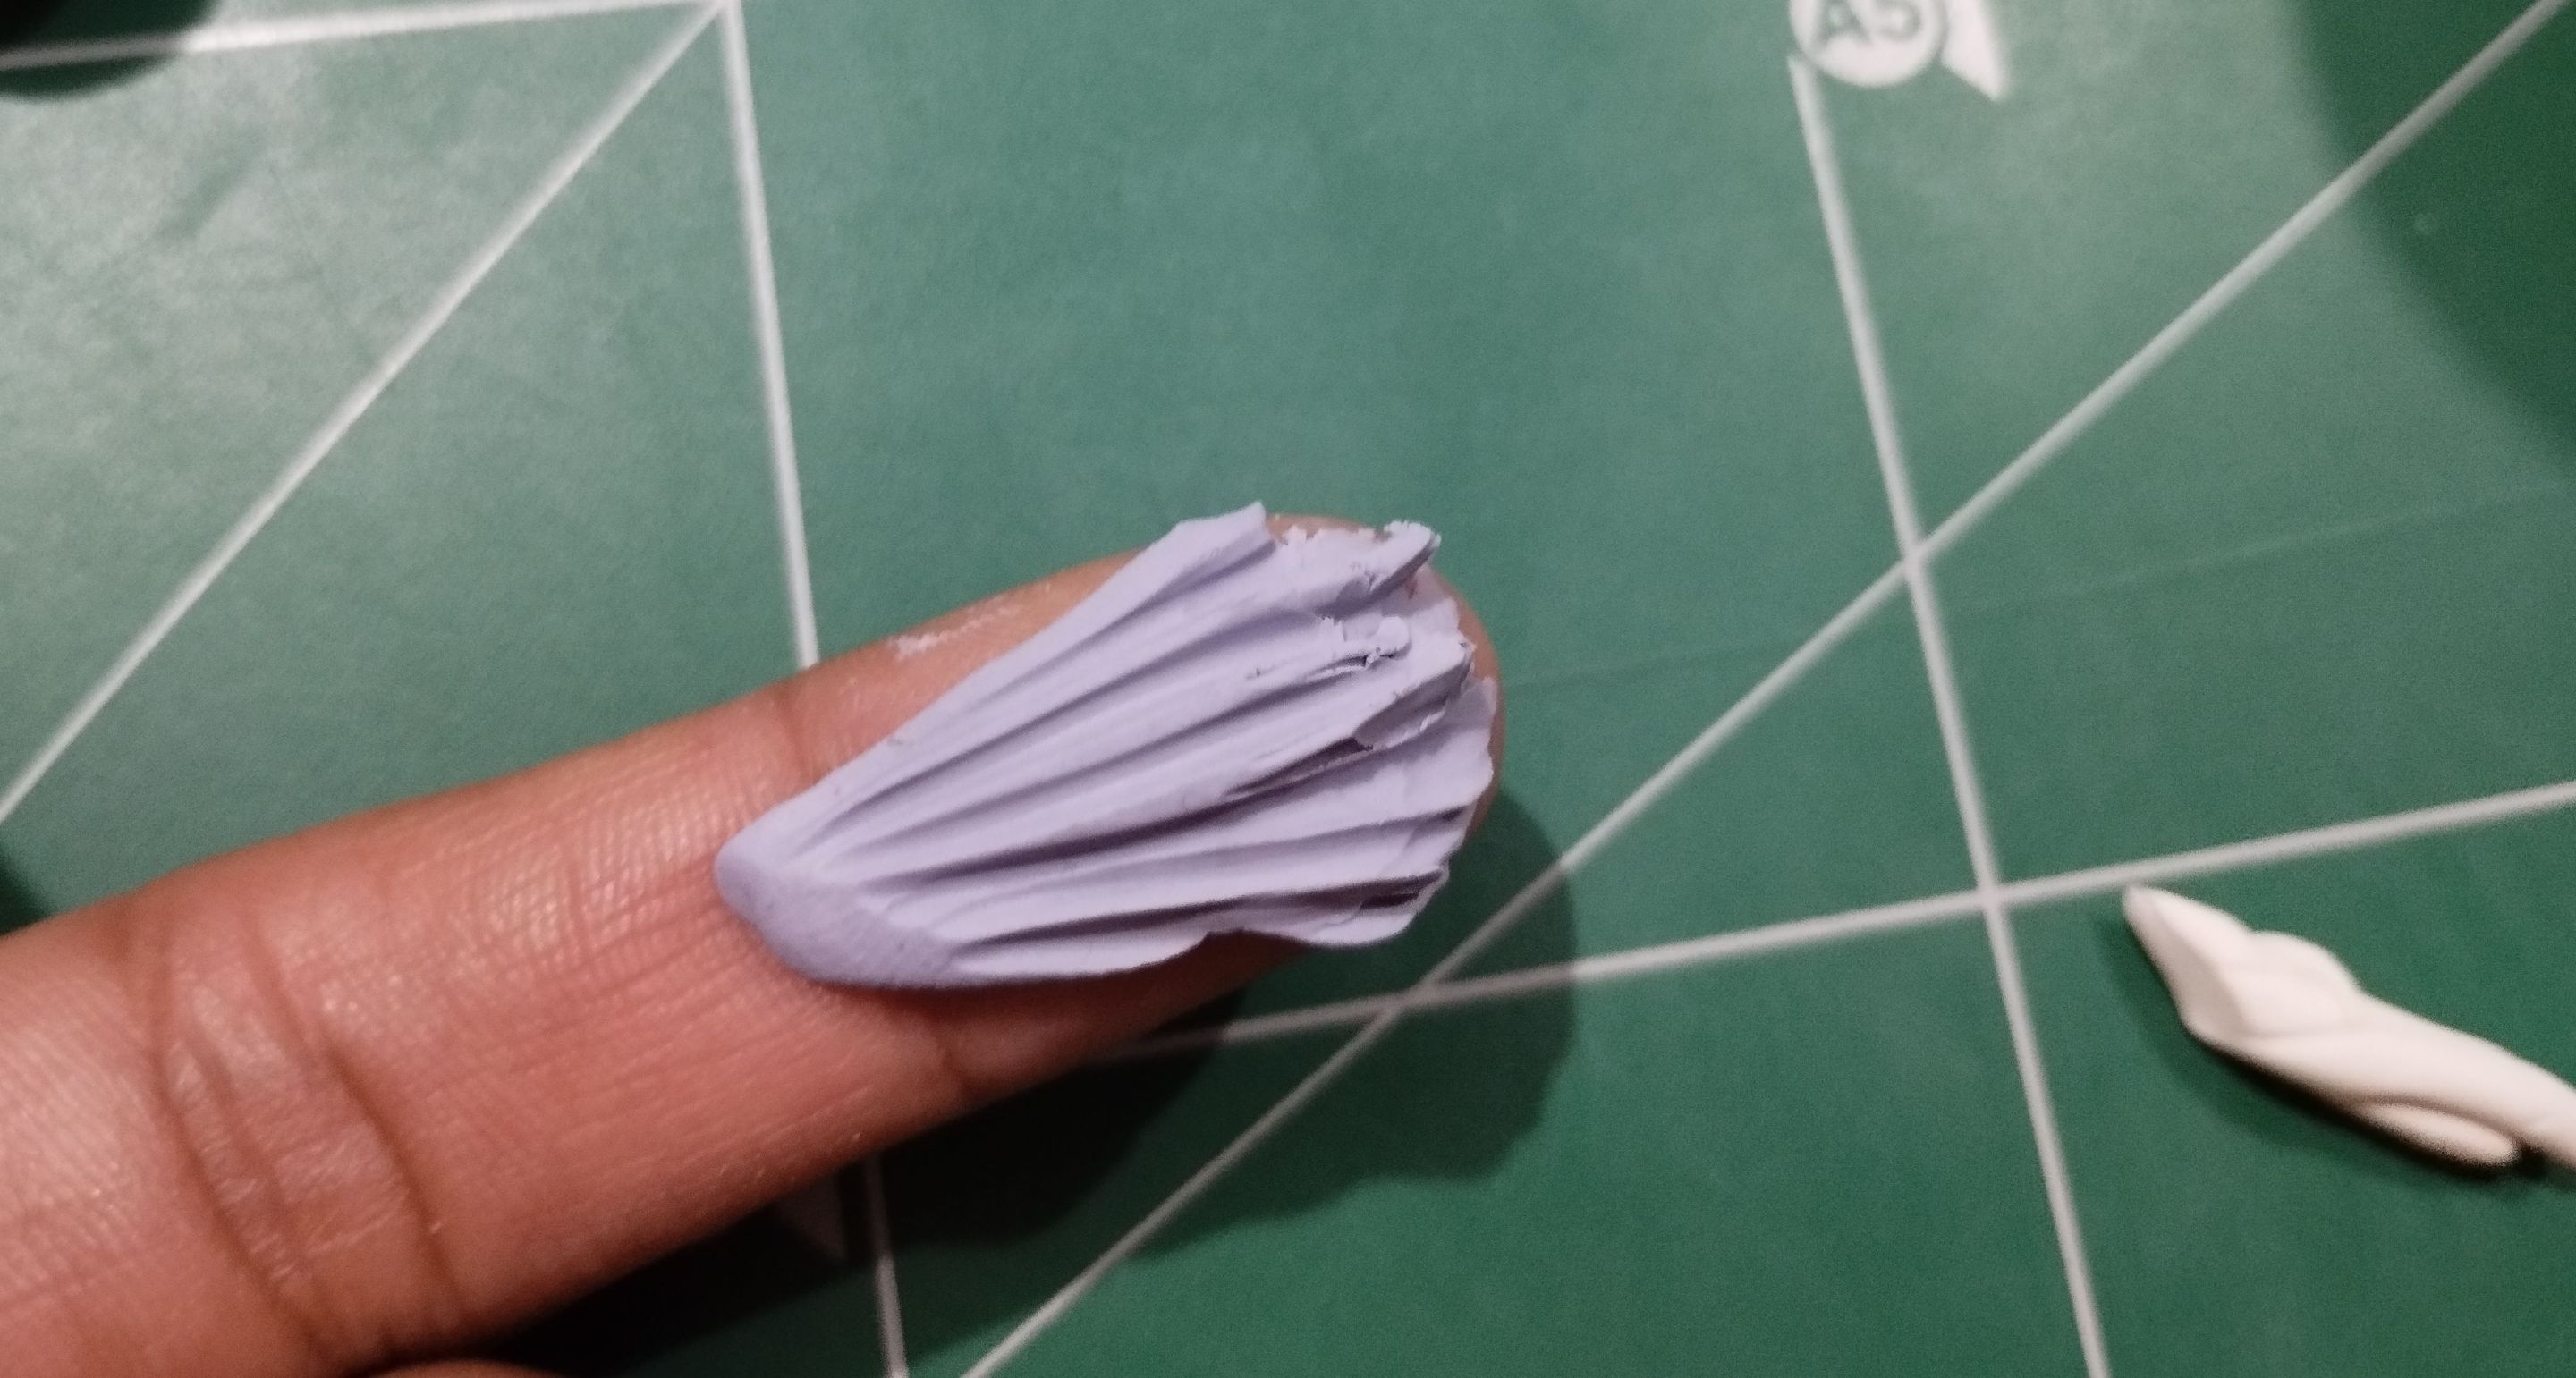
The final elements of the character are the pieces of fabric that cover the character's body like a tunic. To make it, I cut triangles with undefined shapes, then made folds in the garment to give it depth.
>>Los últimos elementos del personaje son los trocitos de tela que cubren el cuerpo del personaje a forma de túnica. Para hacerlo corté triángulos con formas no tan definidas, luego hice los pliegues en la prenda para darle profundidad.
|||
|-|-|
I joined all the pieces together and placed them on top of the body, arranging them in undulating waves to create movement, which is important in static pieces. This gives the sculpture dynamism and, as I said, creates a sense of movement. I used glue and the sticky properties of the plasticine itself to join these pieces together.
>>Uní todas las piezas y las coloqué encima del cuerpo, colocándolas con ondulaciones y ondas para generar movimiento, algo importante en piezas estáticas, esto da dinamismo a la escultura y, como dije, da la sensación de movimiento. Usé pegamento y la propia propiedad pegajosa de la plastilina para unir estas piezas.
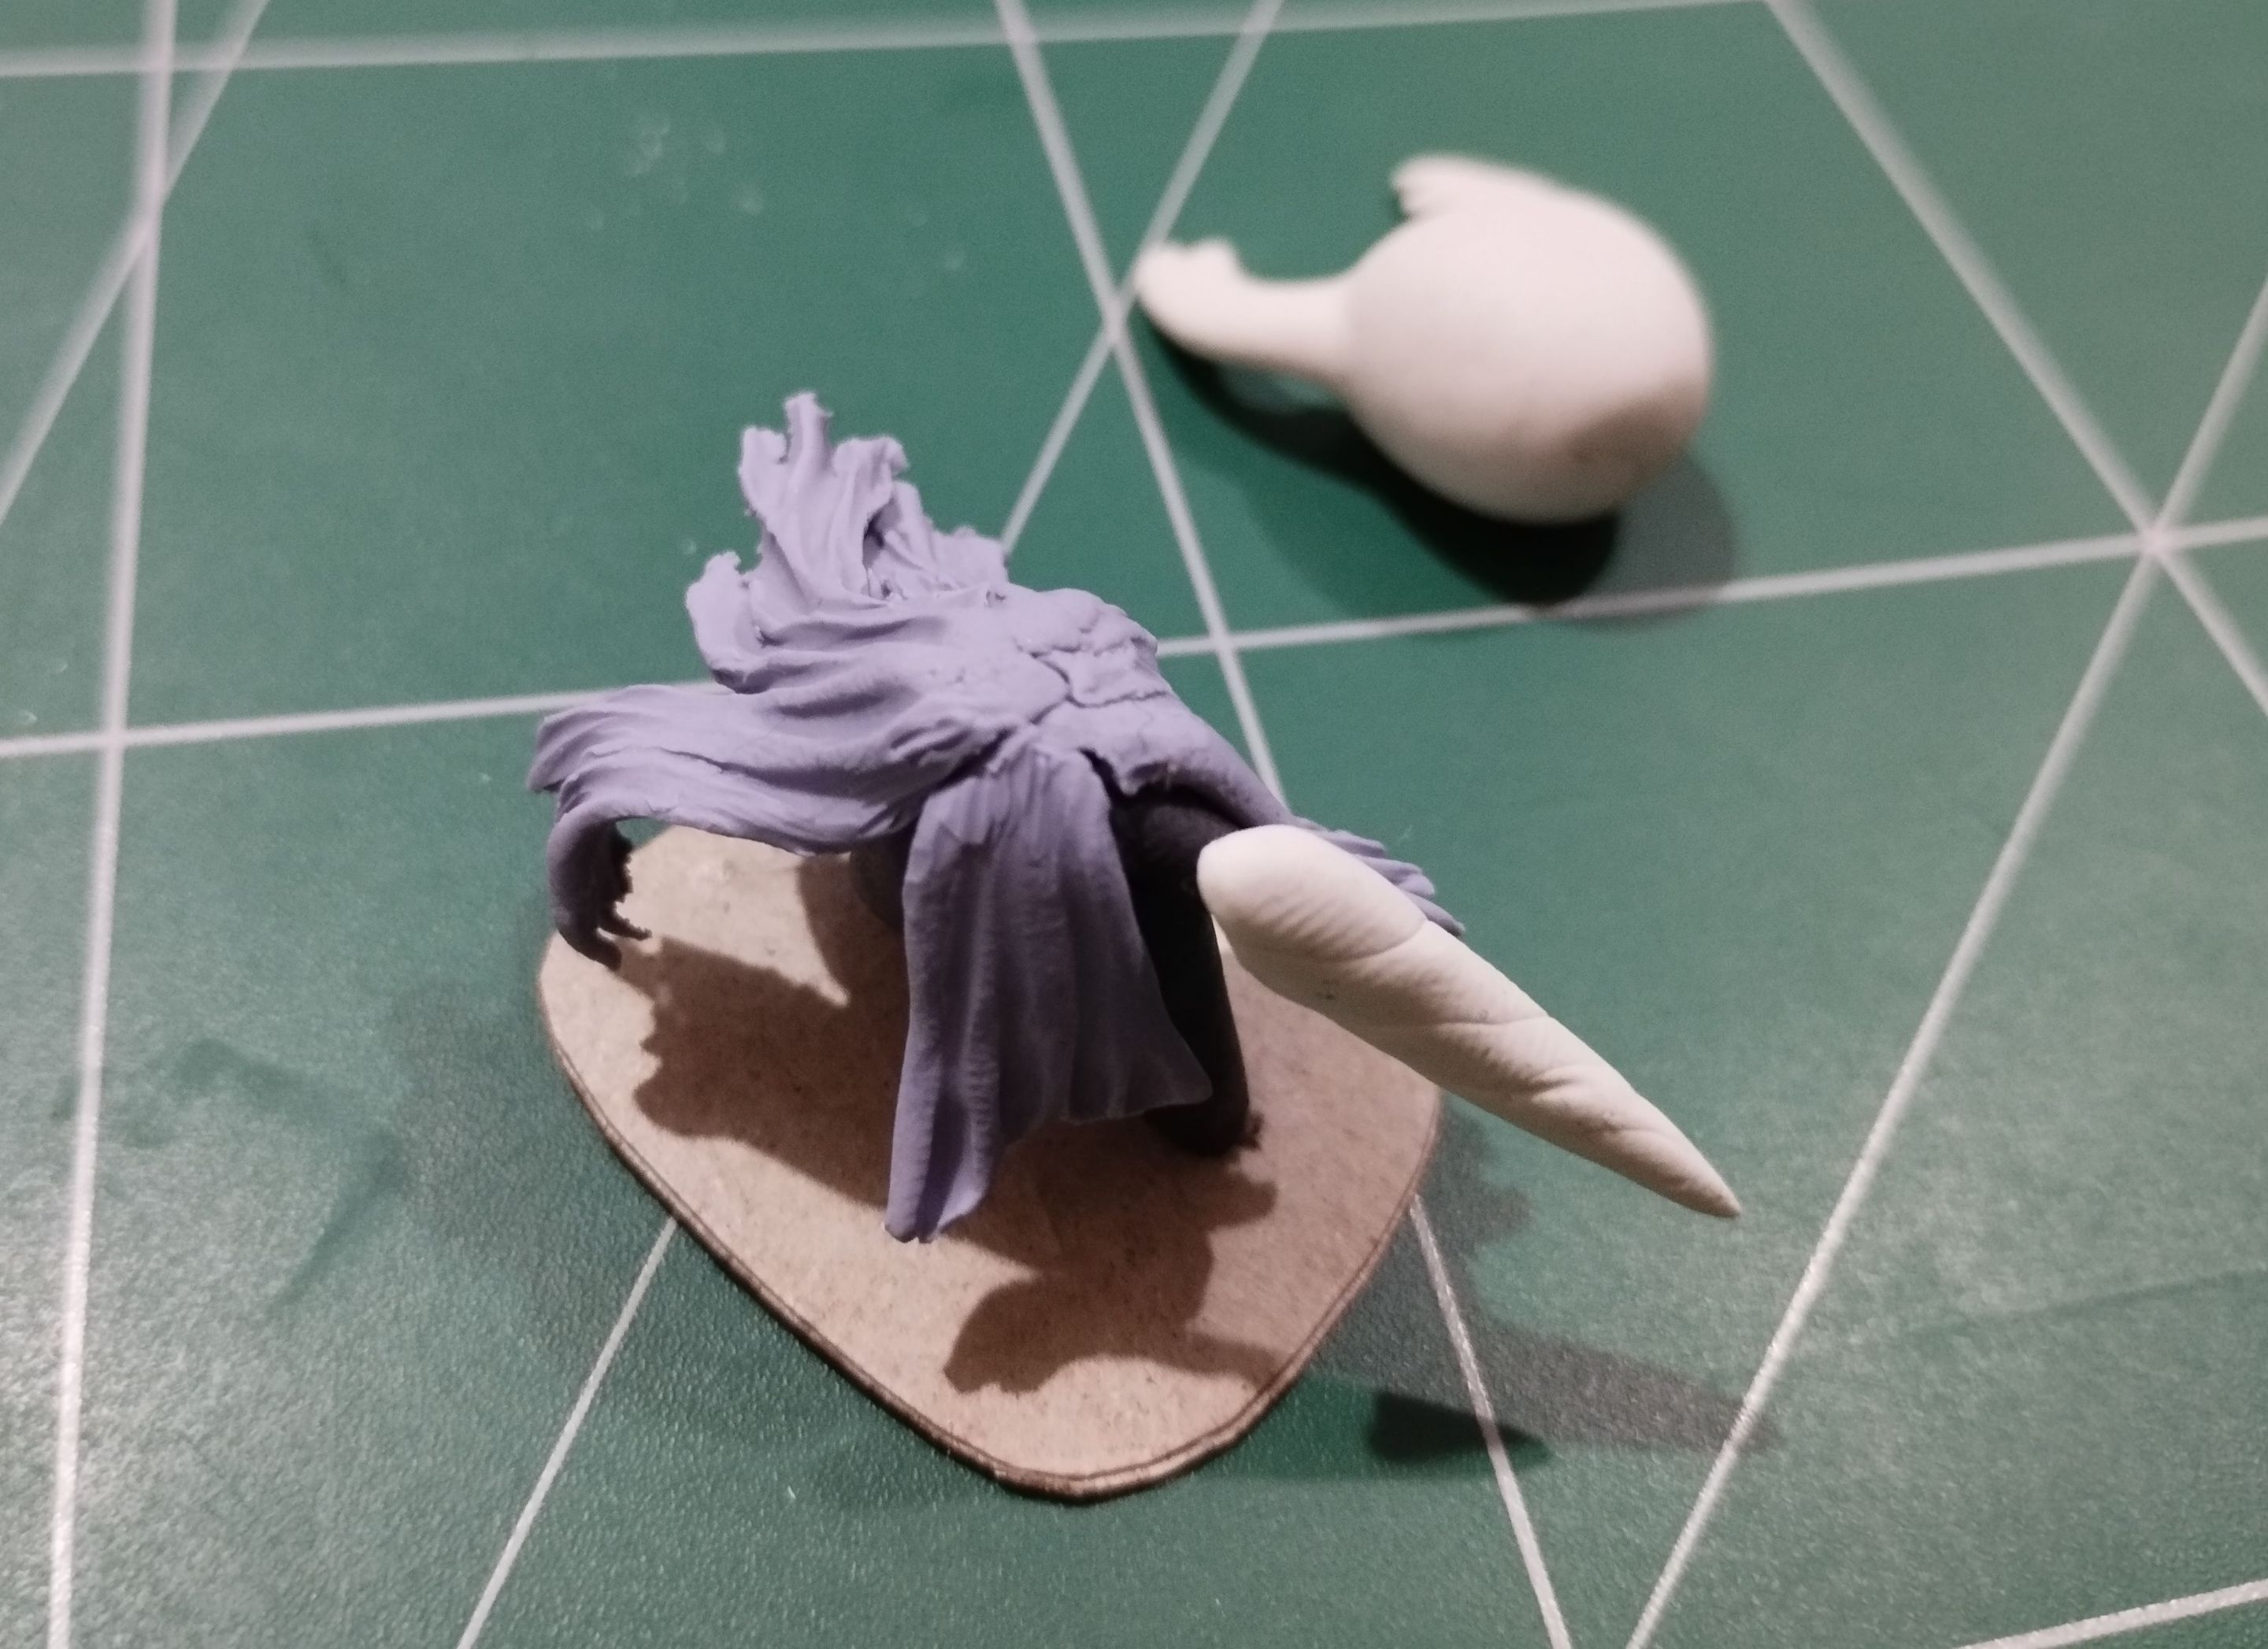
Finally, I attached the head to the rest of the body, using a small piece of wire and more glue to hold the pieces together.
>>Finalmente uní la cabeza al resto del cuerpo, usando un trocito de alambre y más pegamento para mantener unidas las piezas.
### Finally, I attached the head to the rest of the body, using a small piece of wire and more glue to hold the pieces together.
>>#### De esta manera la figurita quedó terminada. A continuación pueden ver una serie de fotografías del resultado final:
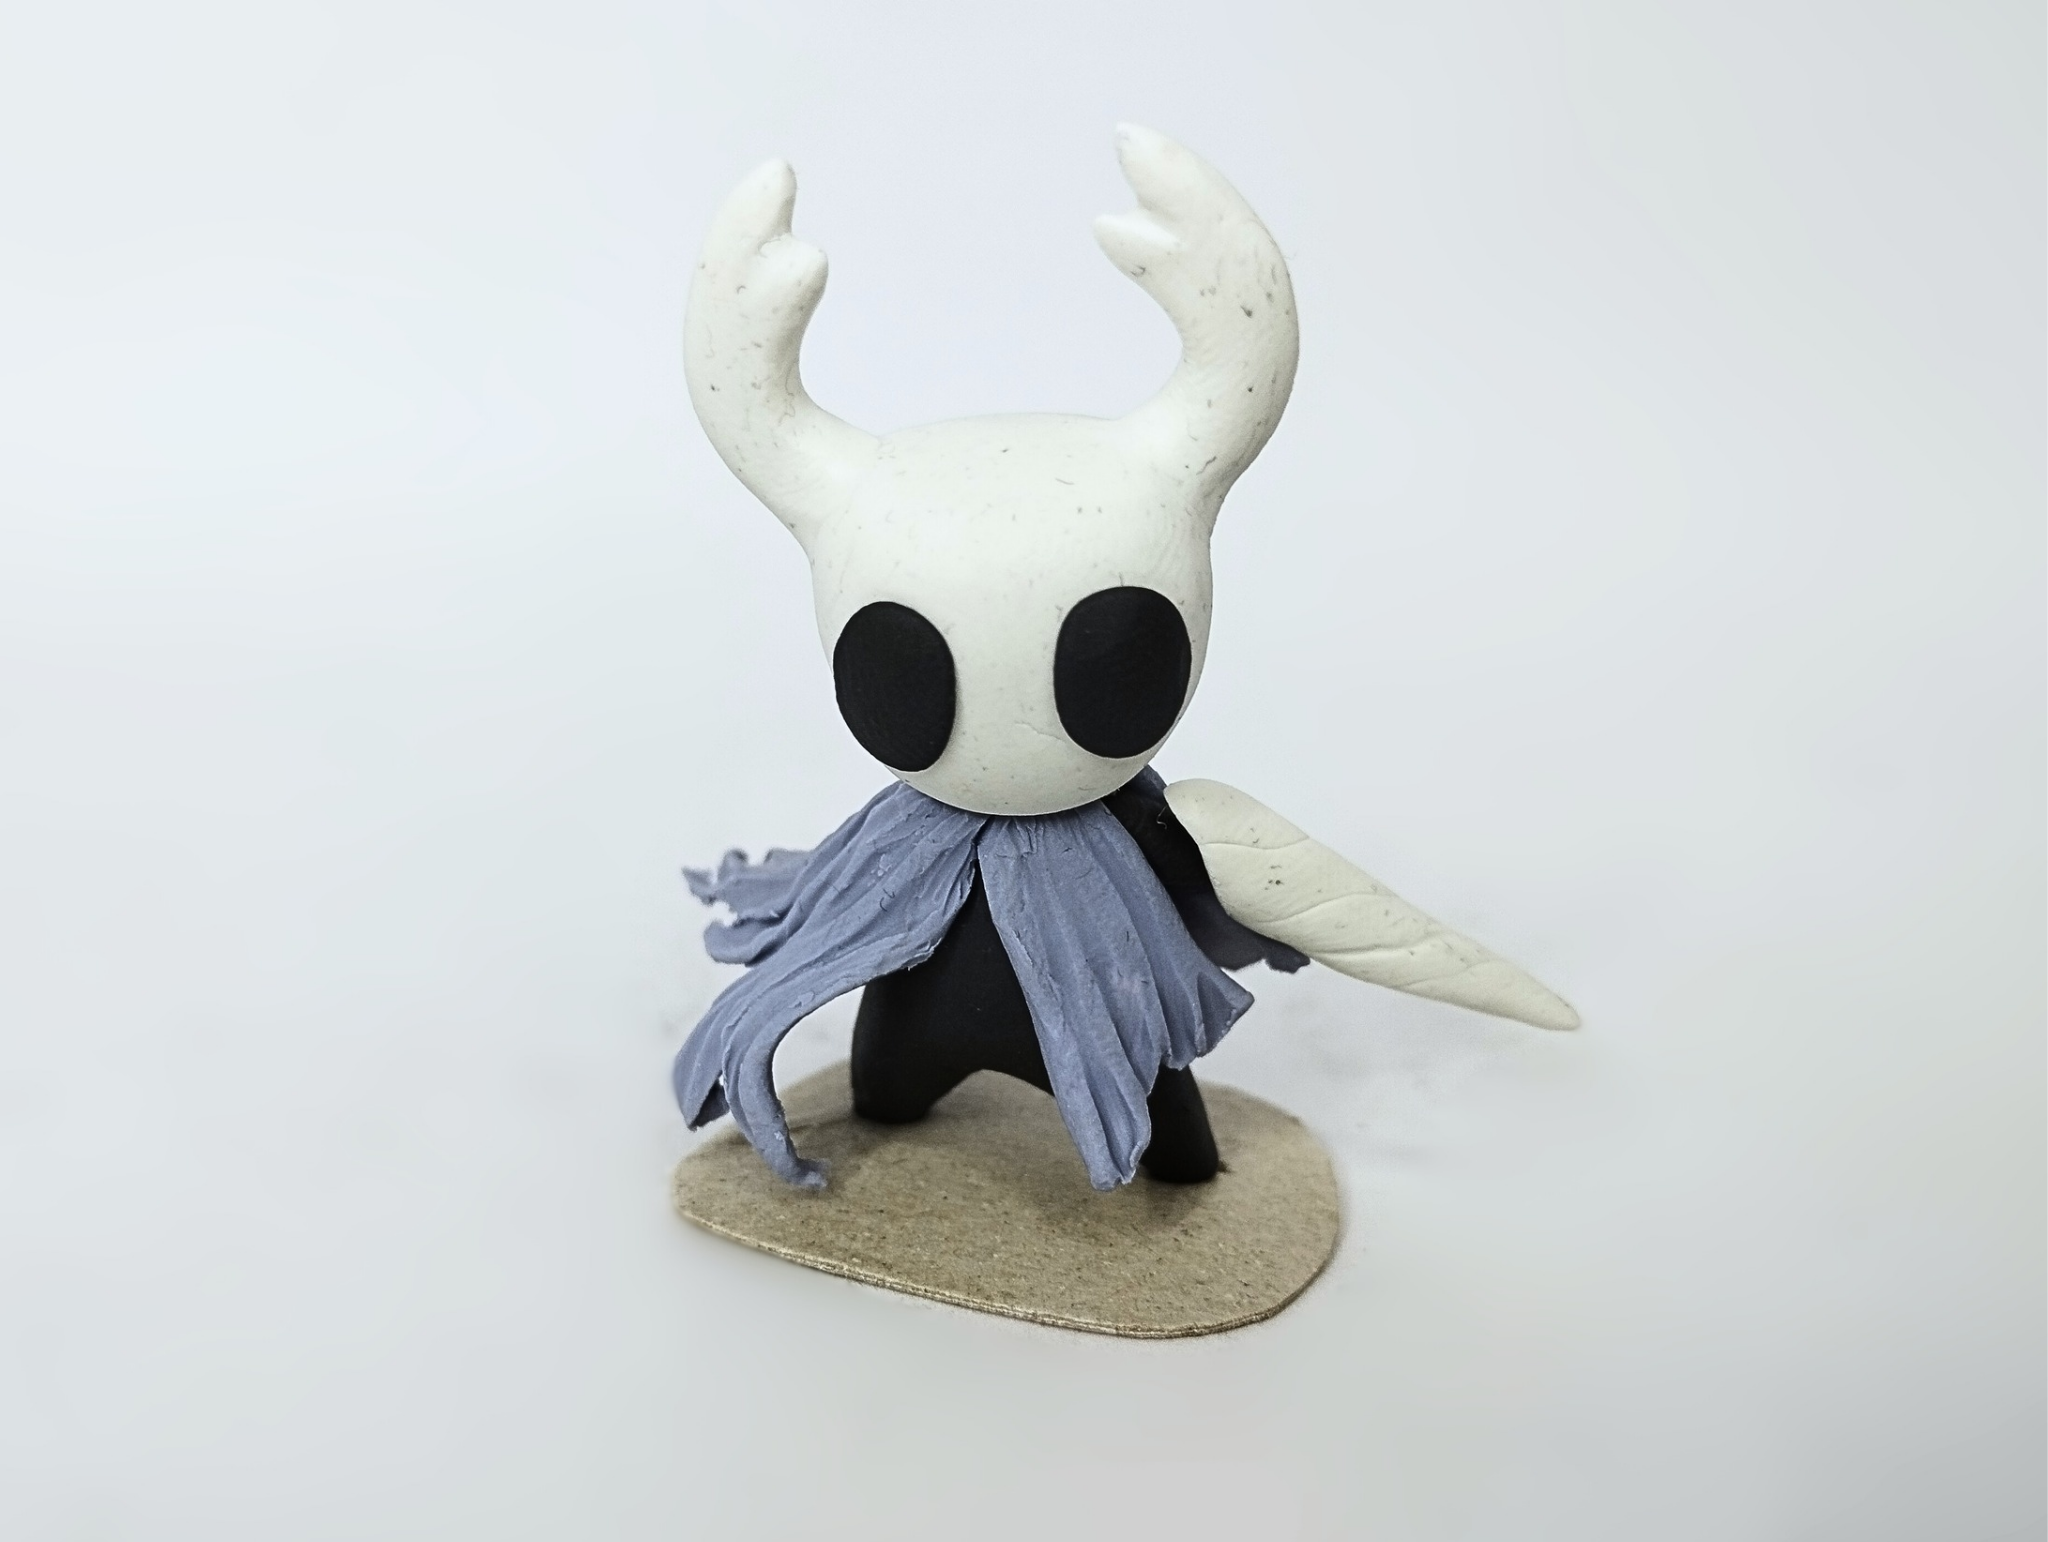
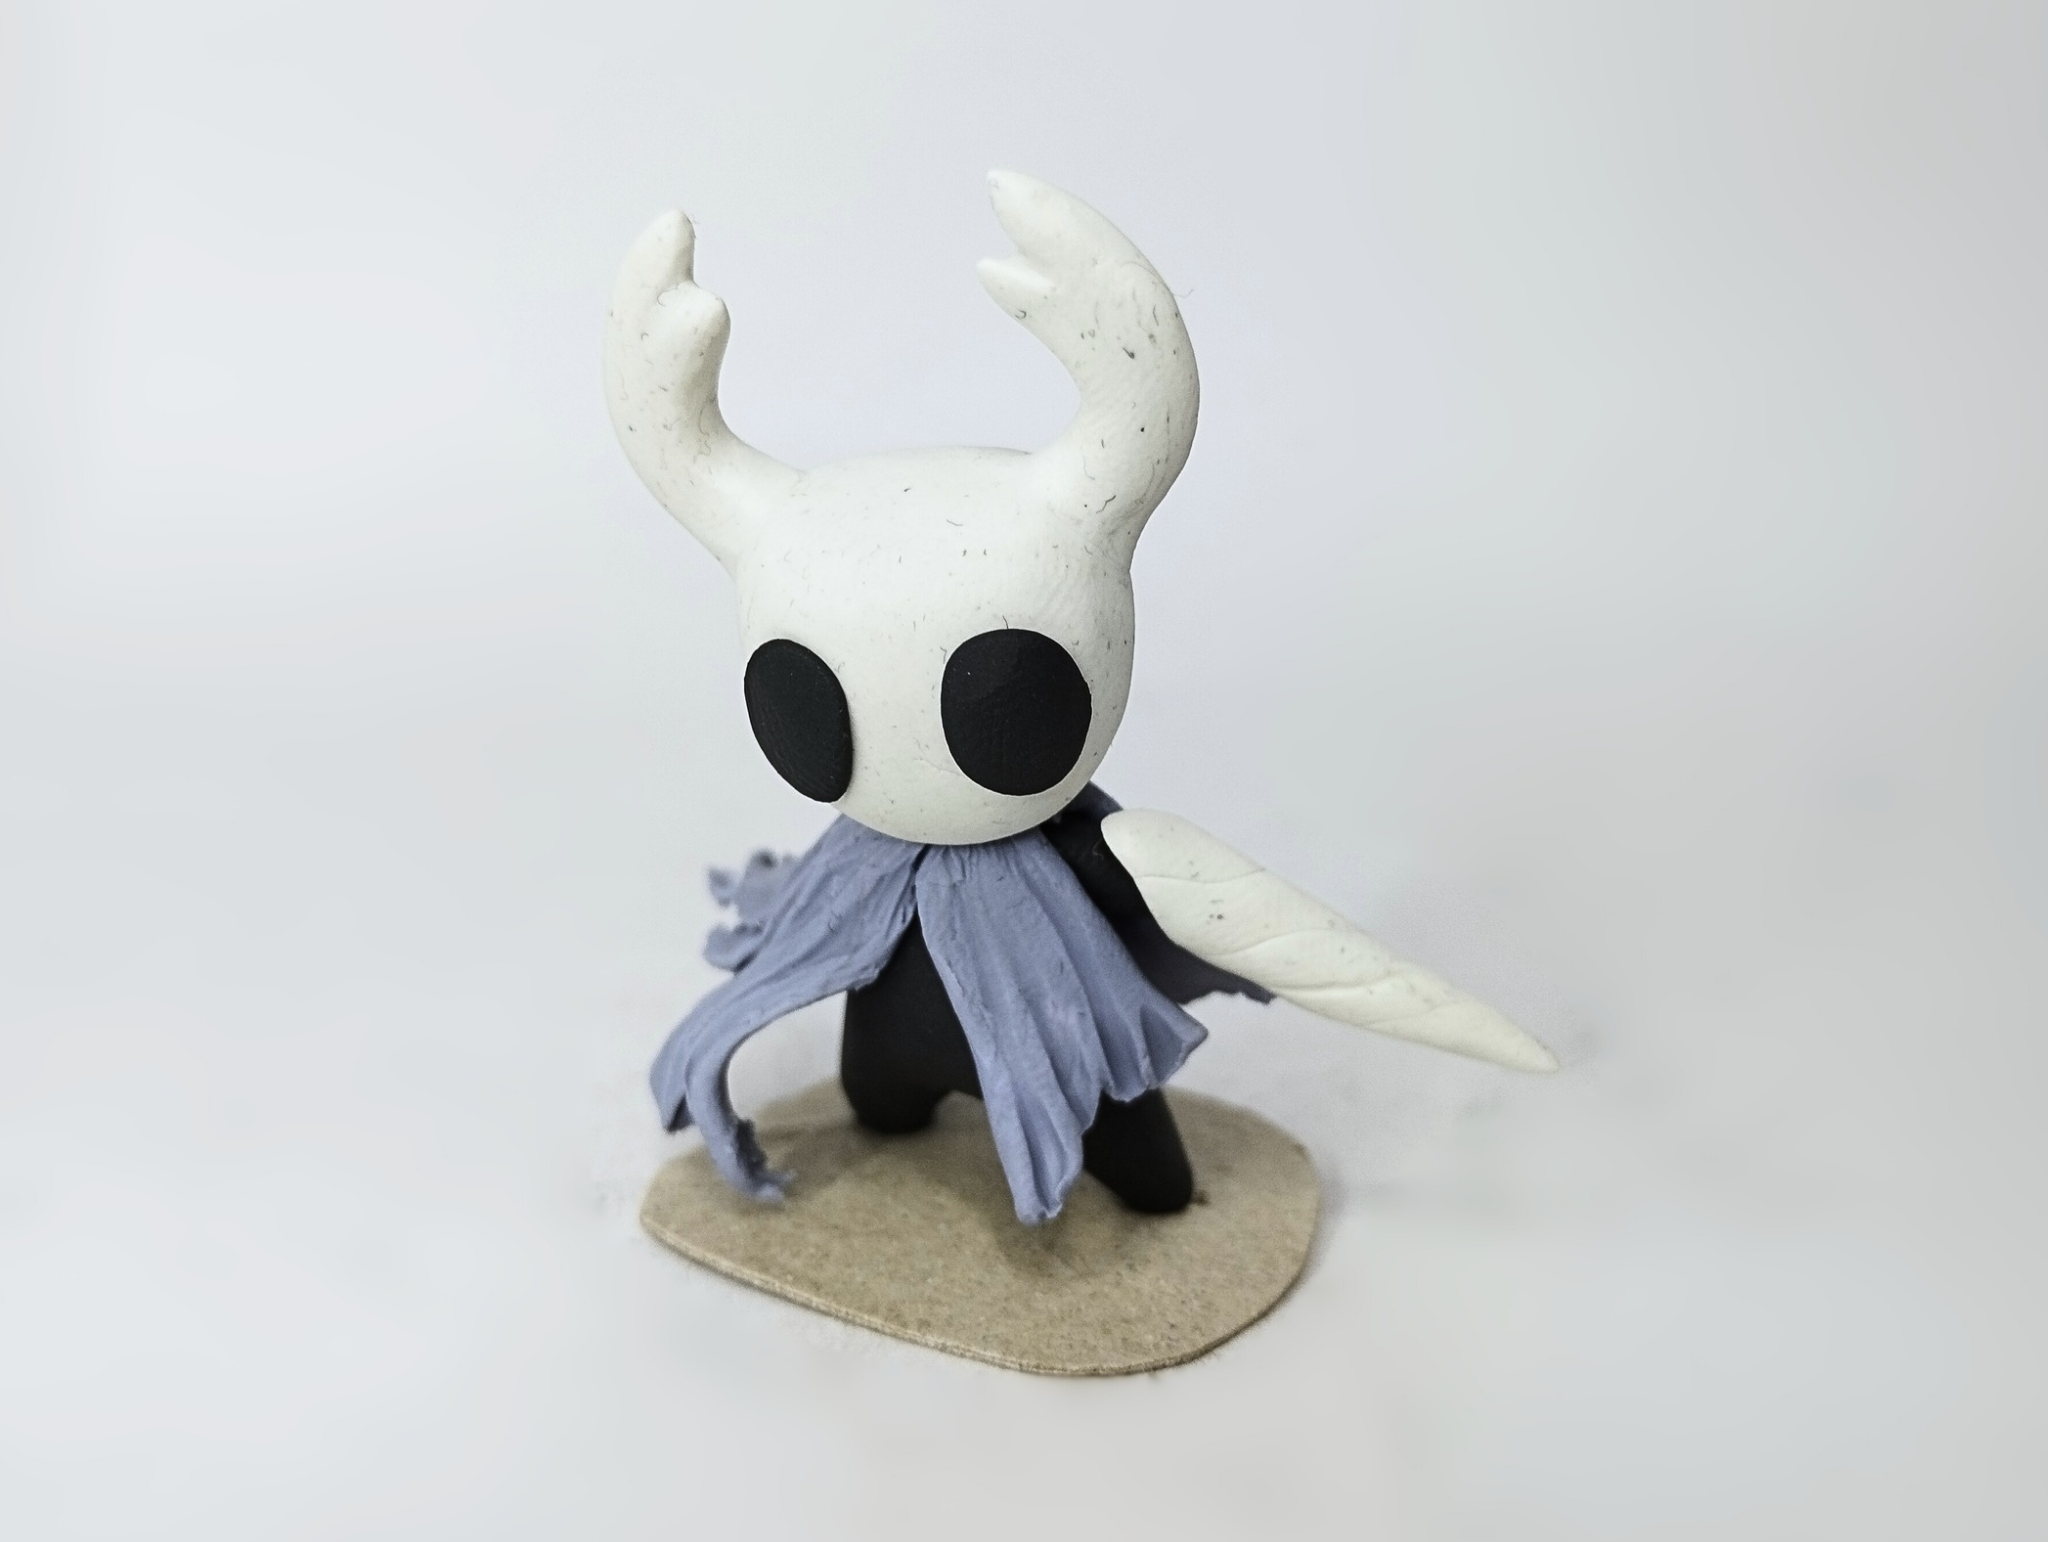
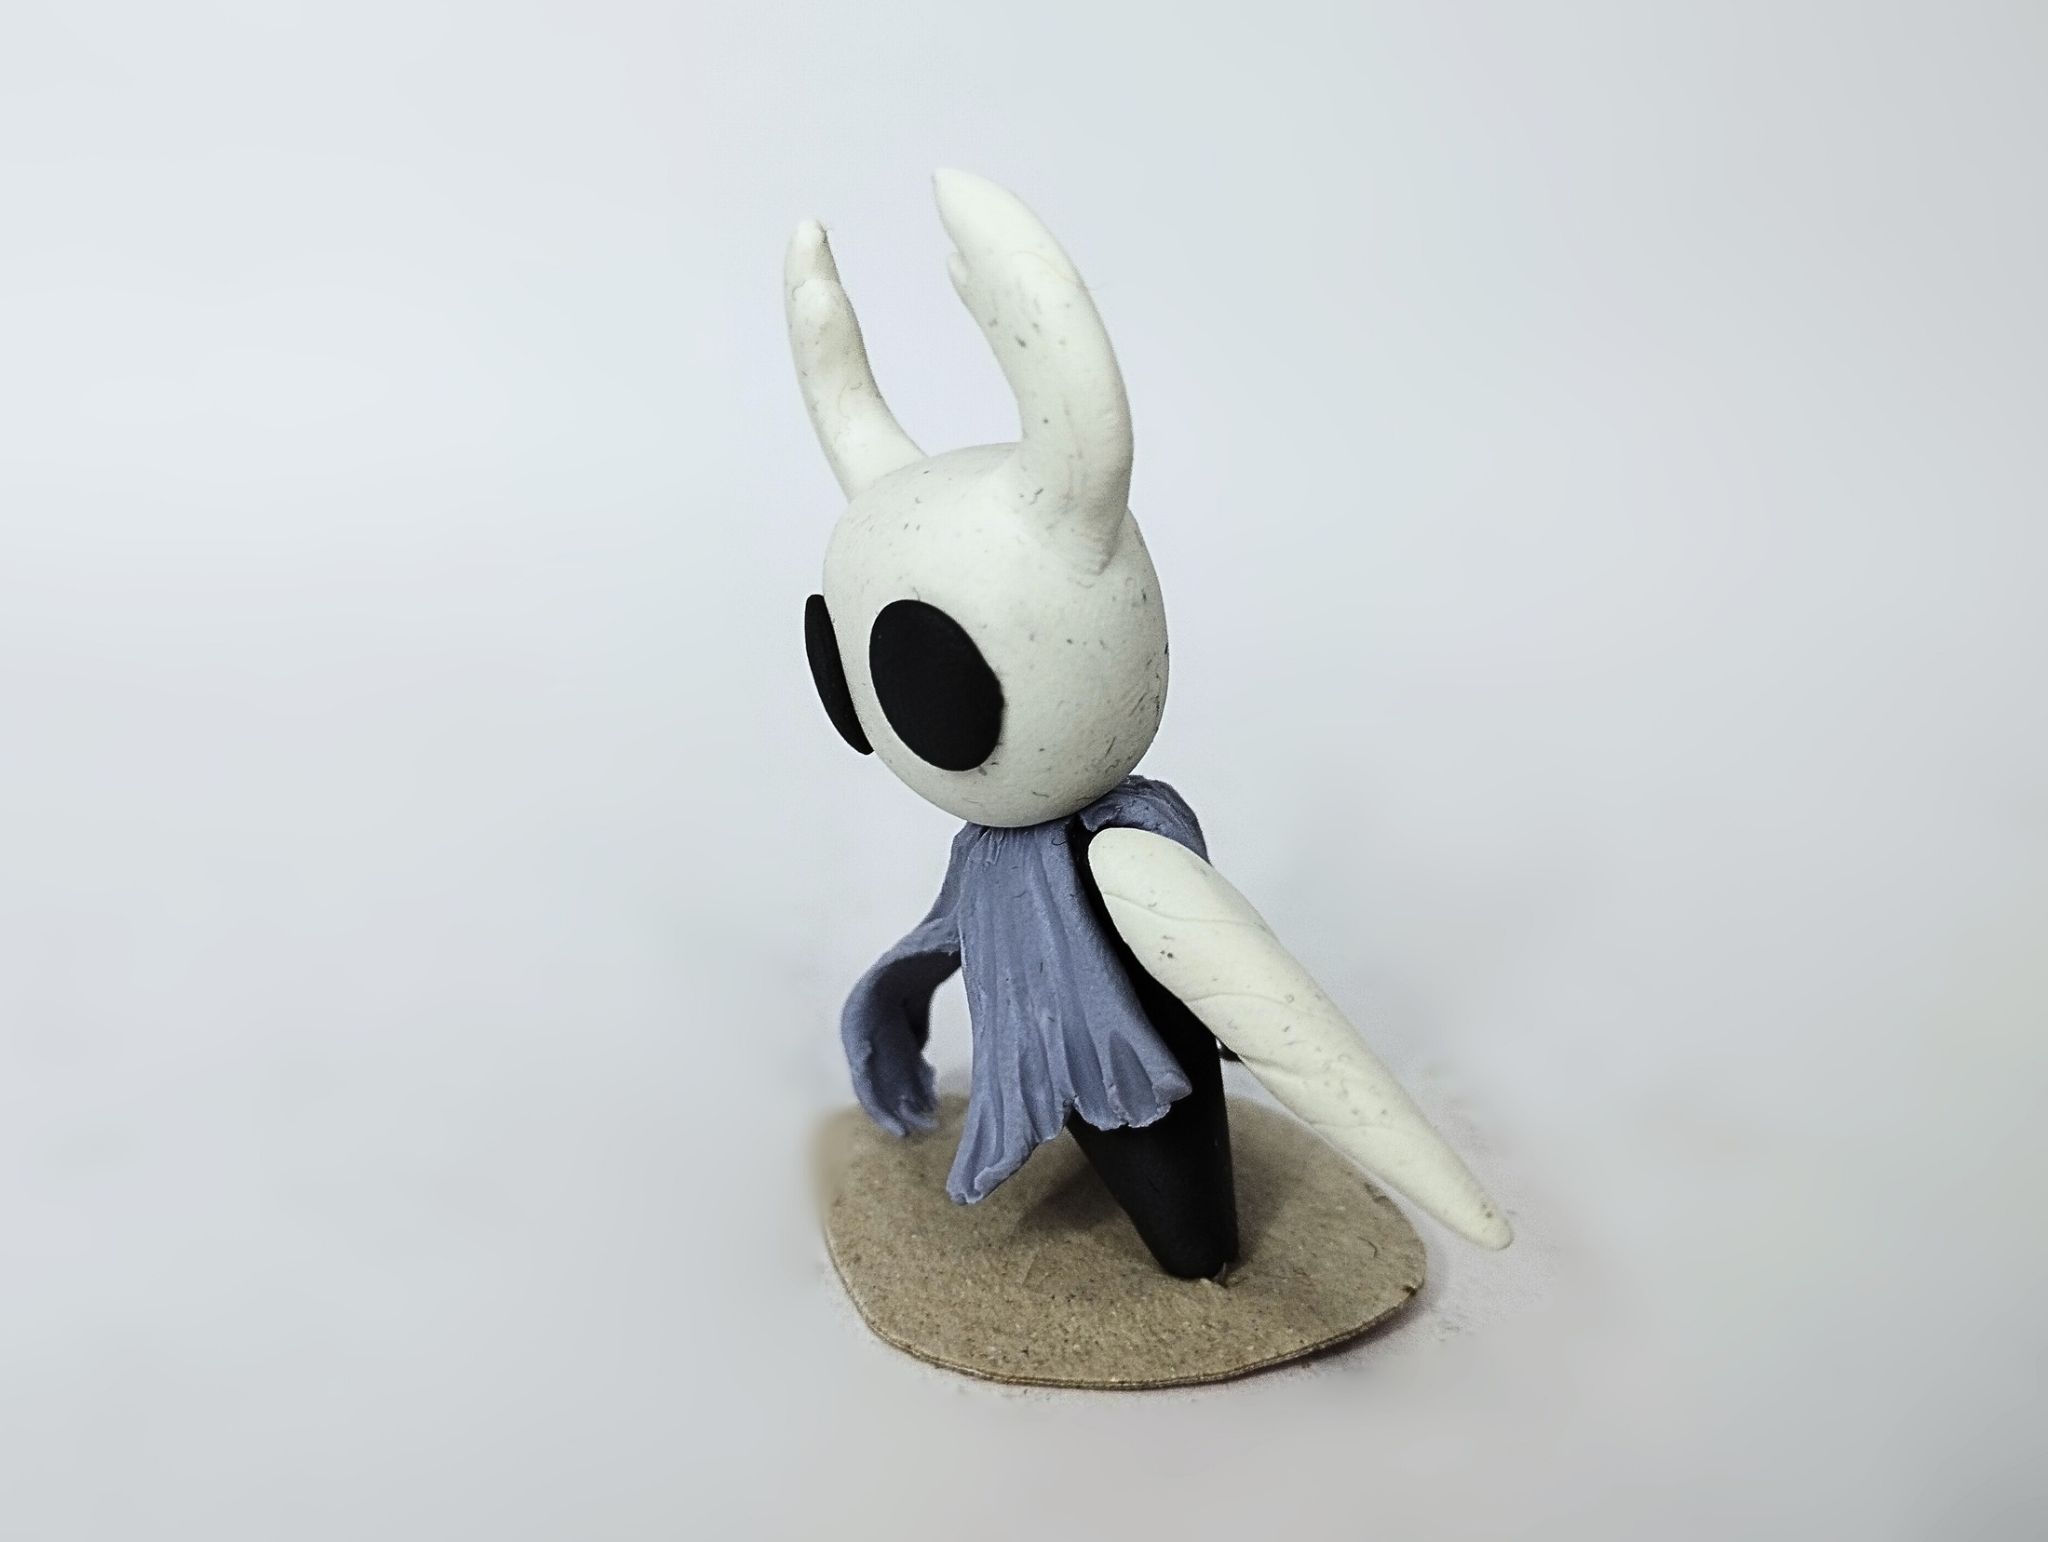
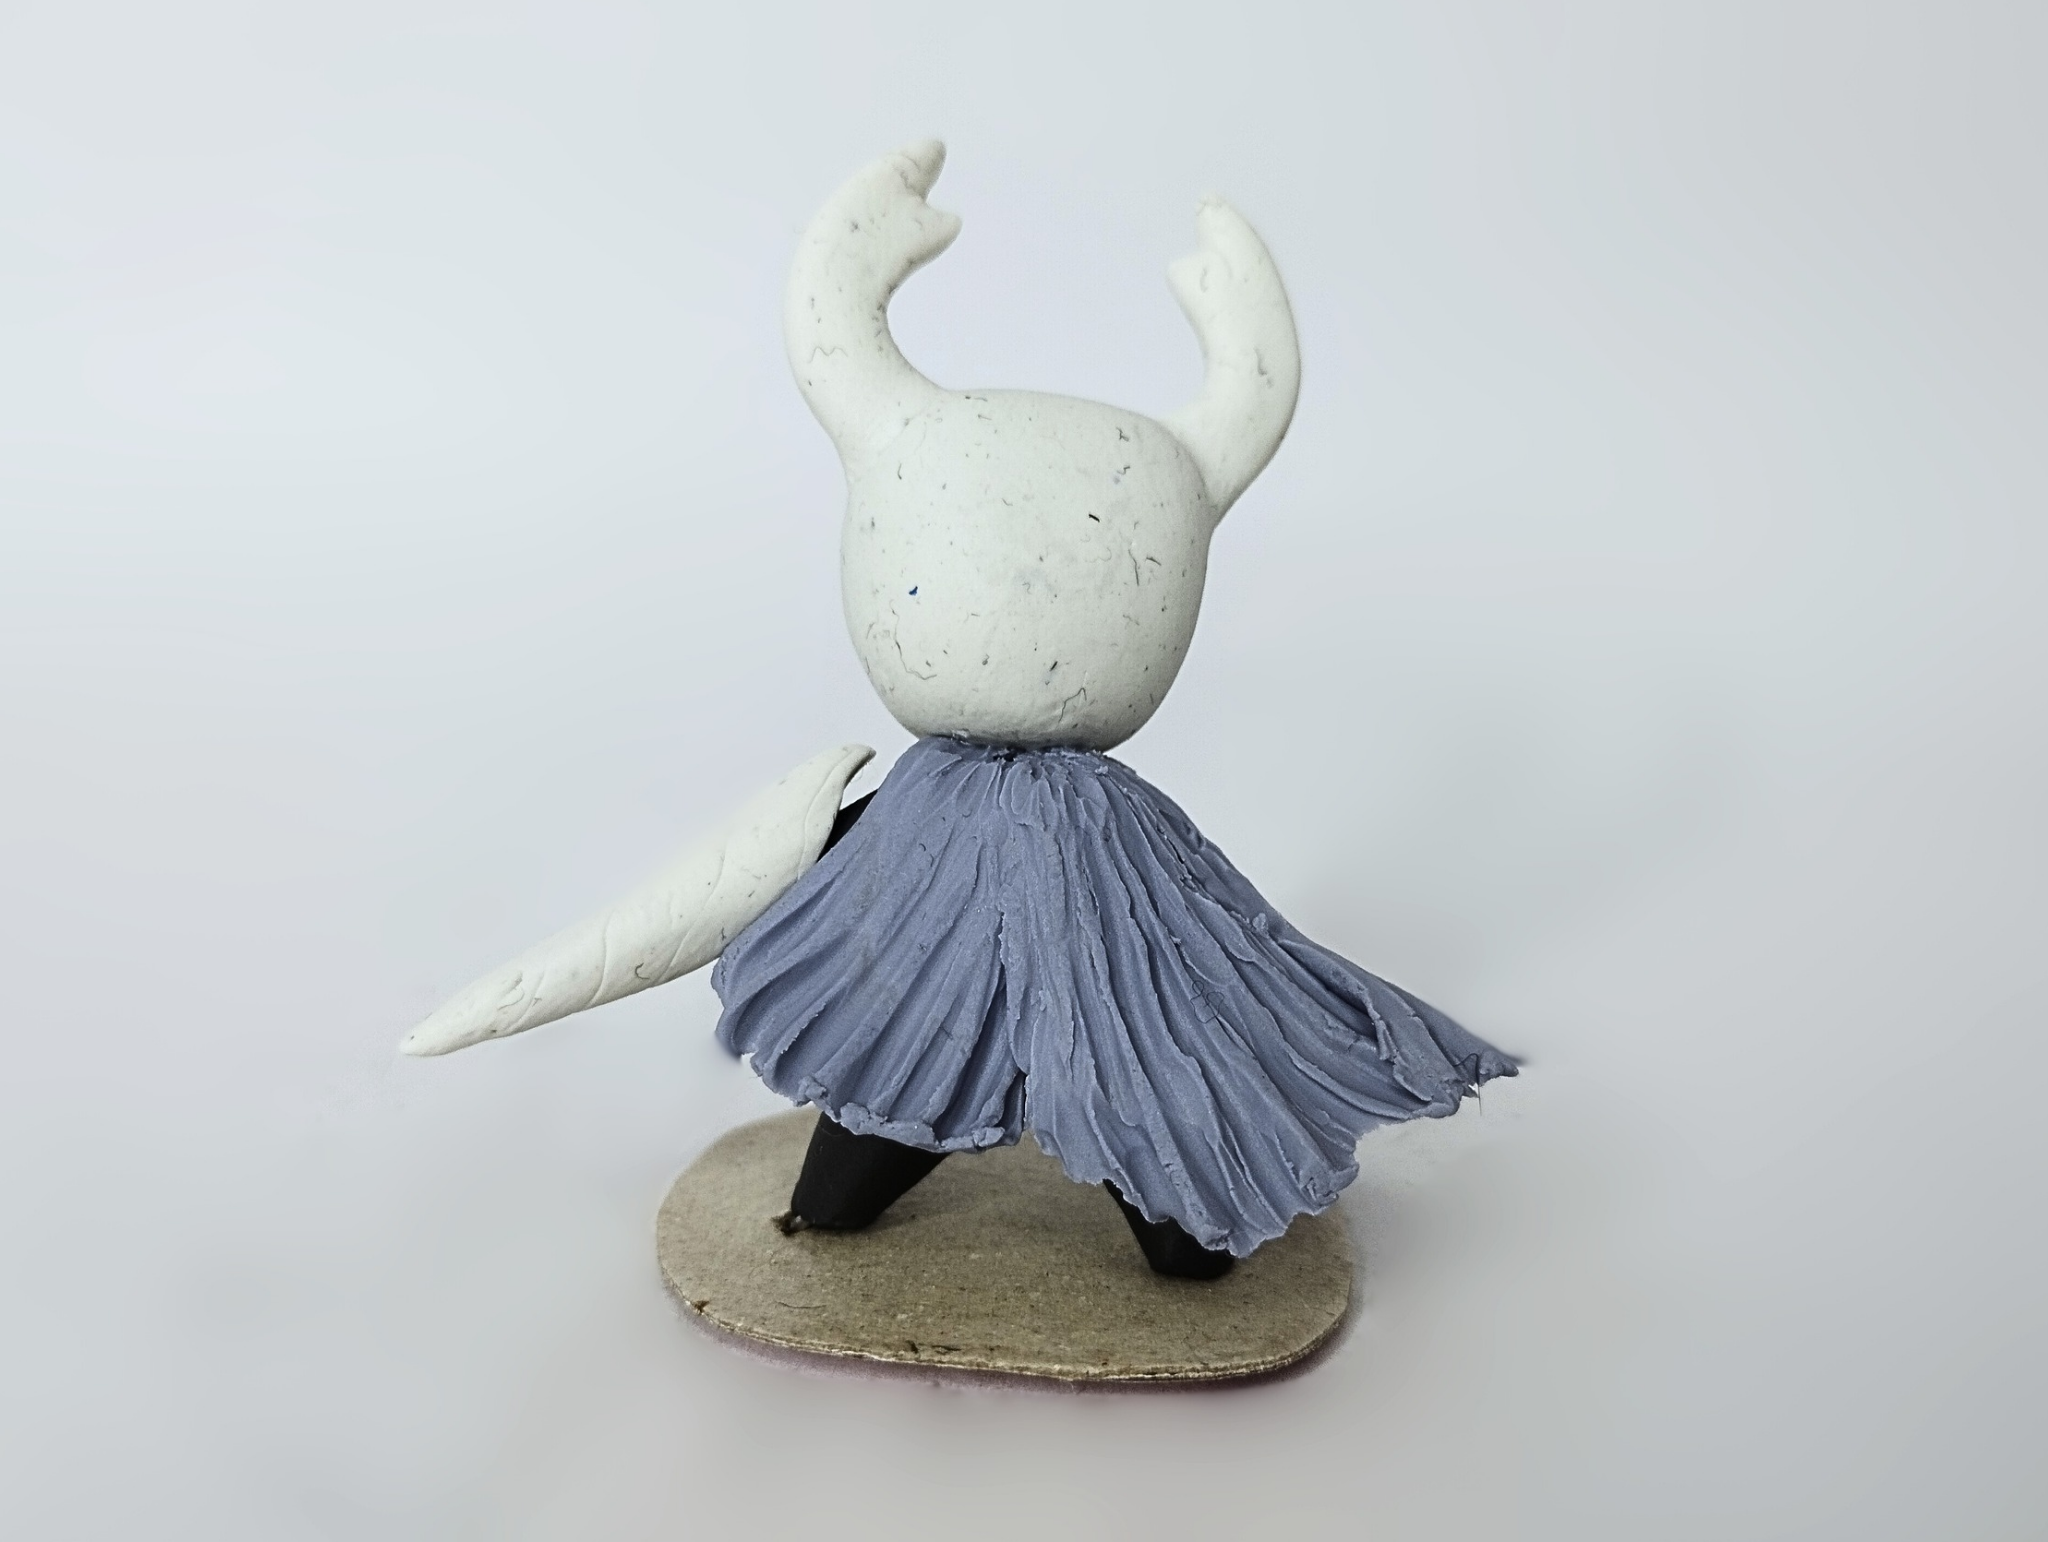
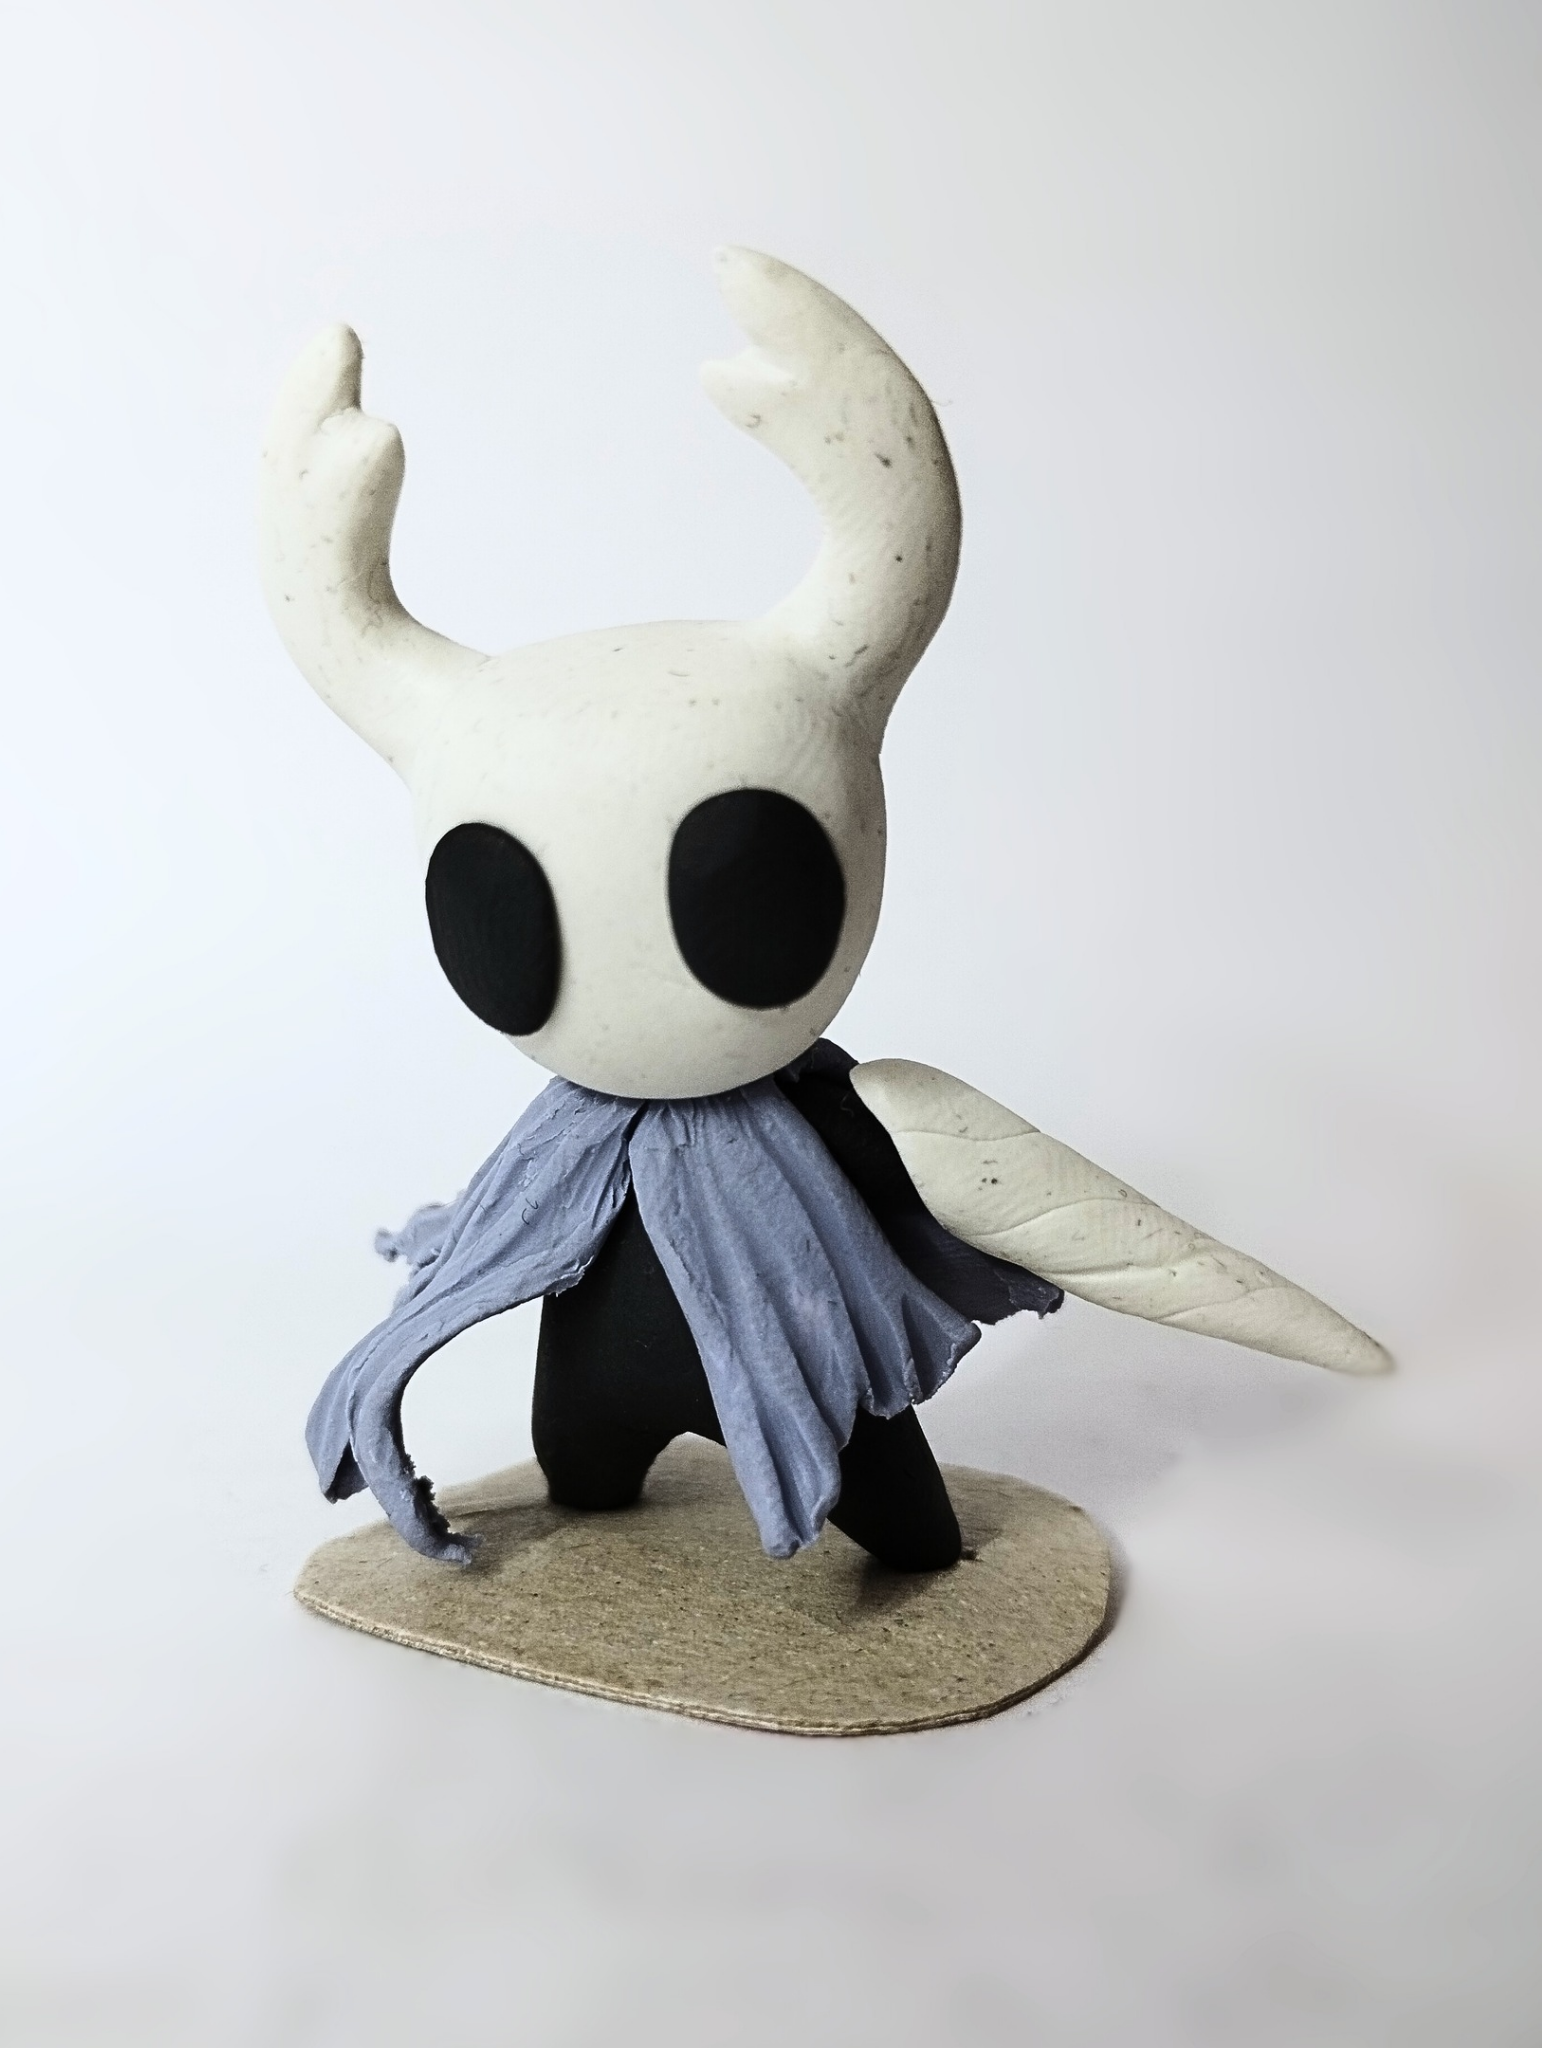
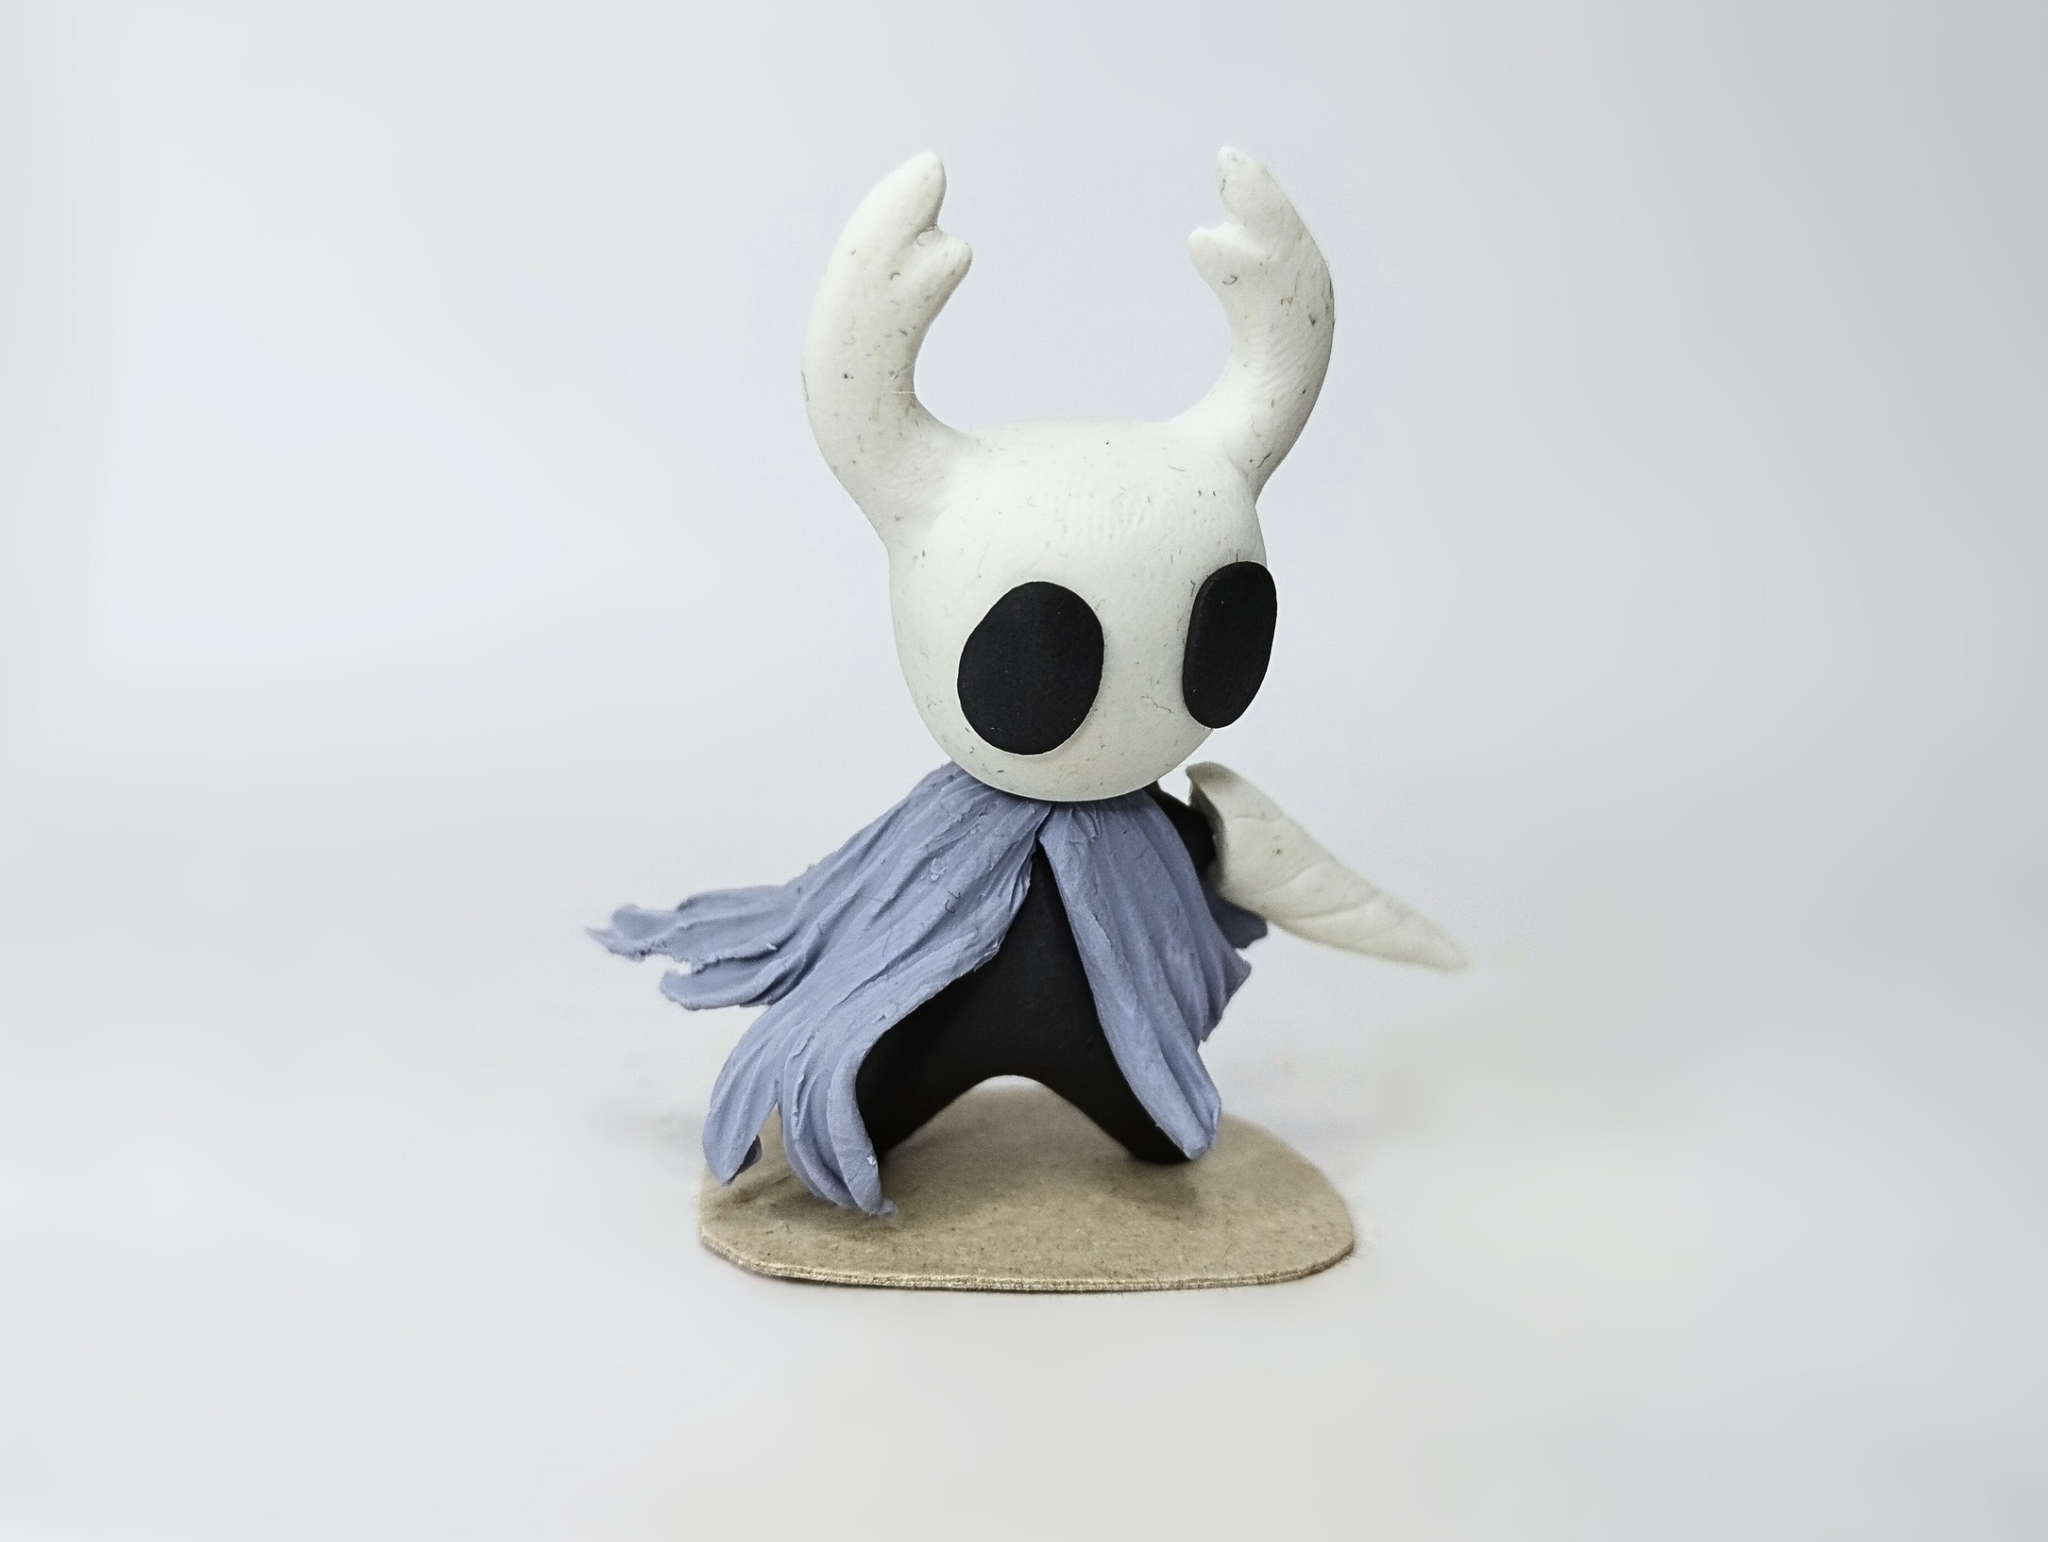
Well, friends, that's all for now. I hope you liked my El Caballero figurine. Soon I'll be sharing with you the second of this pair, Hornet.
I'd like to know what you think of this figurine. Please leave your opinions in the comments below. As always, I'll be happy to read them. Without further ado, I bid you farewell...
DIY: The Knight Sculpture (Hollow Knight) [ENG/SPA]
@gaboamc2393
· 2025-09-09 14:46
· Hive Diy
#hive-130560
#diy
#art
#gaming
#handmade
#spanish
#tutorial
#pimp
#vyb
#waiv
Payout: 0.000 HBD
Votes: 476
More interactions (upvote, reblog, reply) coming soon.