Happy Sunday, dear, lovely creators on Hive. I hope you are all having a relaxing Sunday.
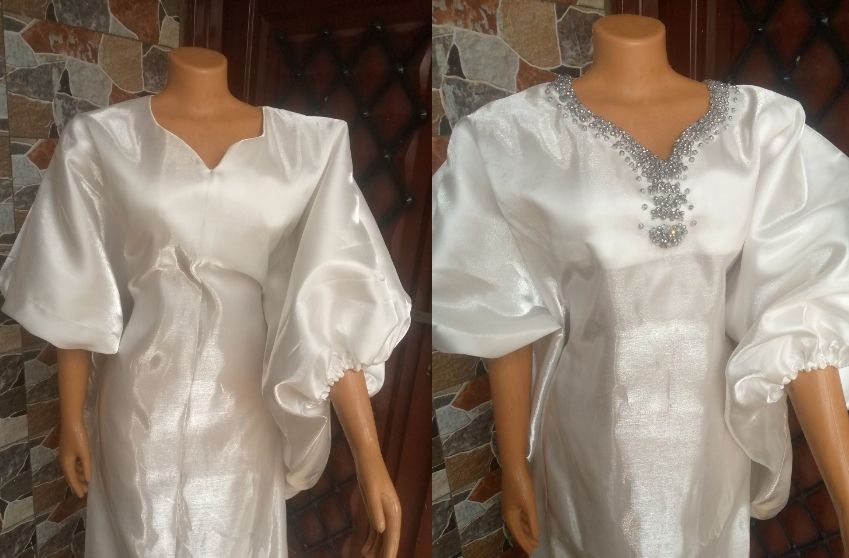
It's another exciting edition of the Hive learners' creative Sunday, where we get to show off our creative talent. Looking forward to reading all your entries today. For mine, I will be sharing with you how I transformed a plain dress neckline with beads, giving it a more beautiful and sophisticated look, a perfect addition that elevated the look of the Bubu dress.
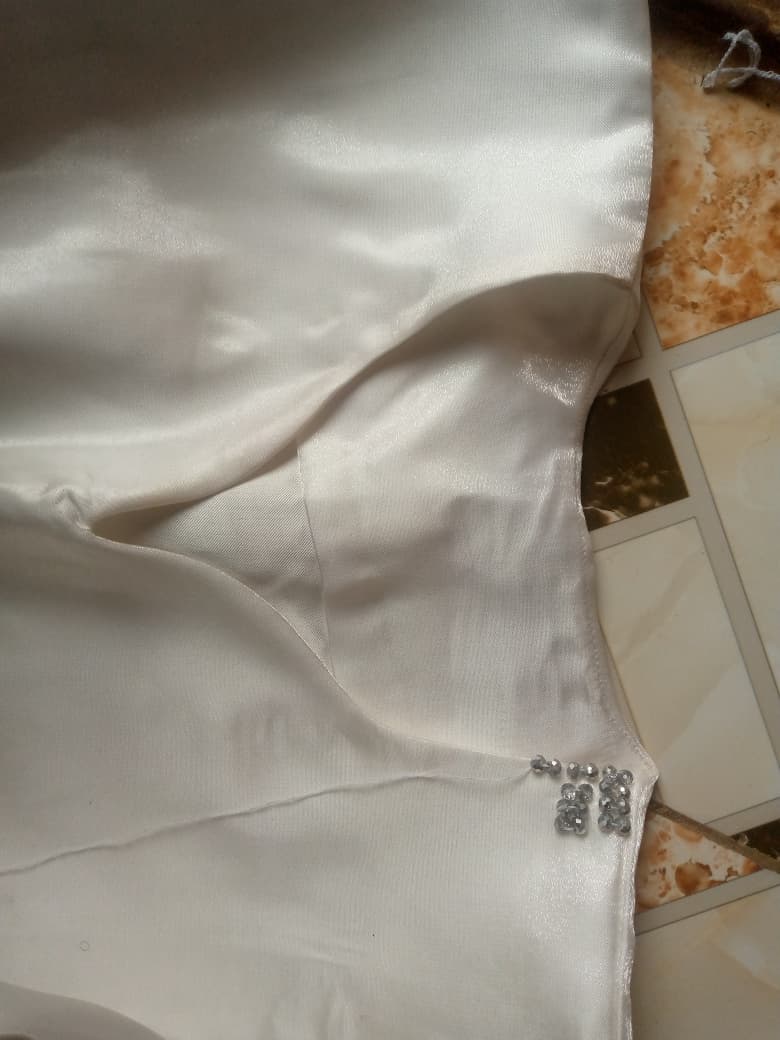
I had made this dress to attend an all white themed party, and after making the dress, I thought it looked too simple, probably because it has just one simple colour - white, so I decided to give it a more classy look using crystal beads. The method of beading I used in achieving this bead-making process is known as clustered beading.
Without further ado, let's get right into the making process
Materials Used
-
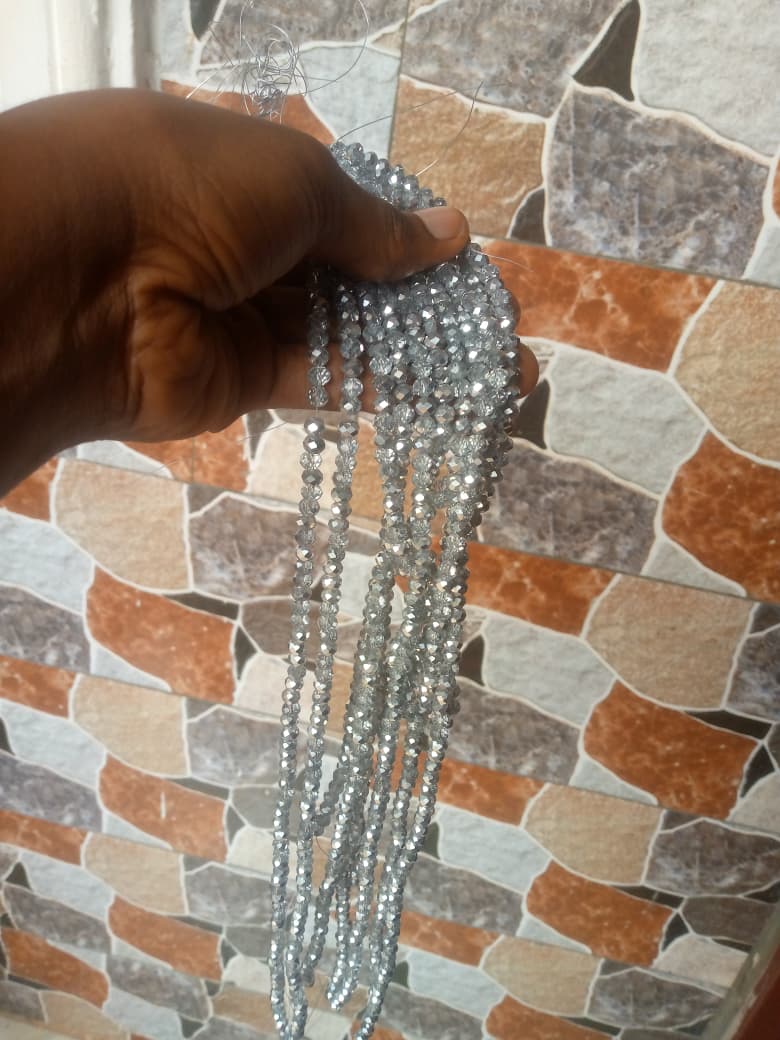
Crystal beading
-
Beading needle
-
Matching coloured thread, I used white, you can also use invisible thread
Making Process*
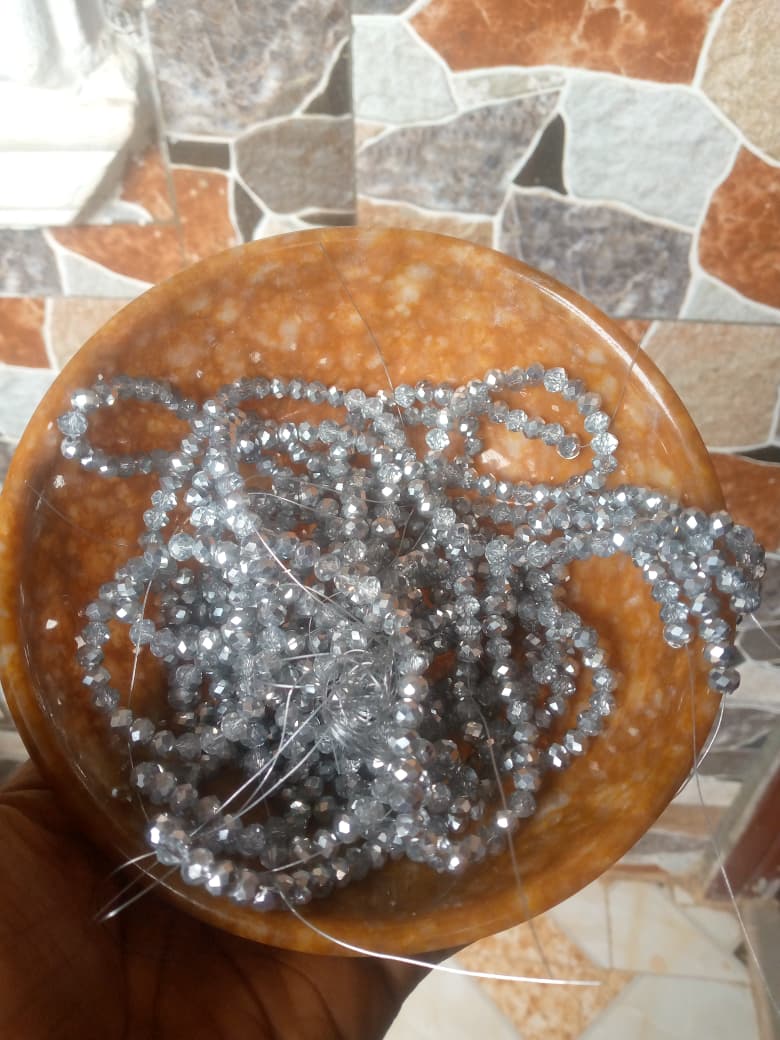
My beads were purchased in strands from the market, so I had to loosen and pour all into a bowl
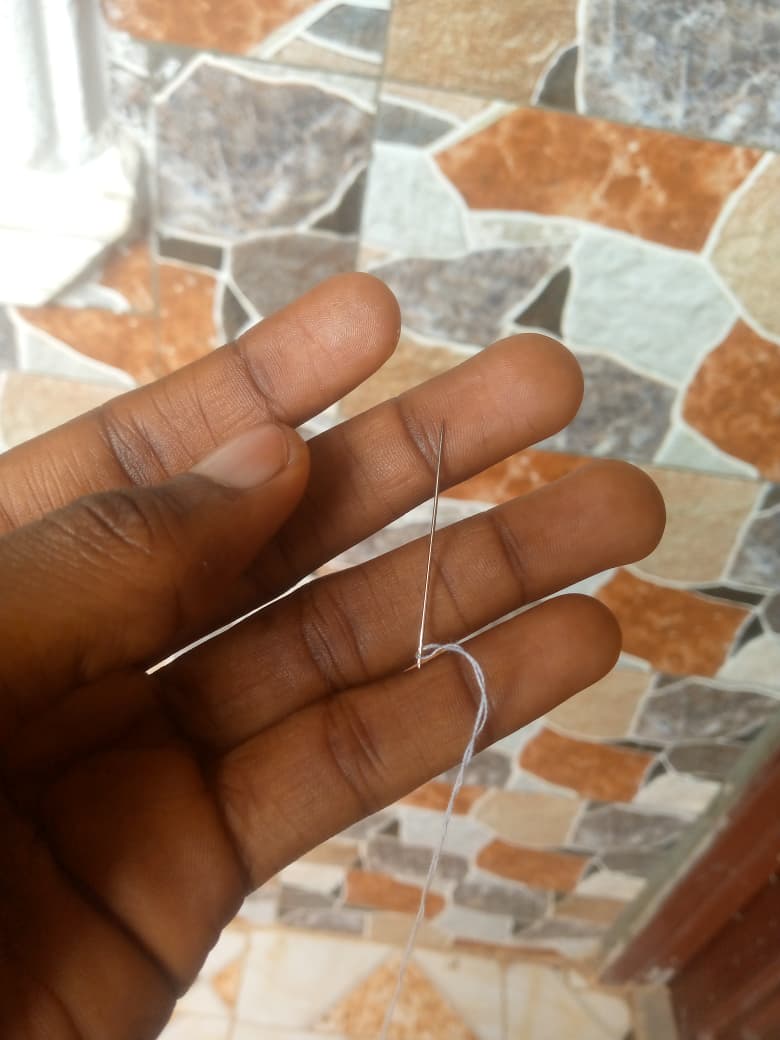
- First, make sure to make a knot on the loose end of the thread after passing it through the needle
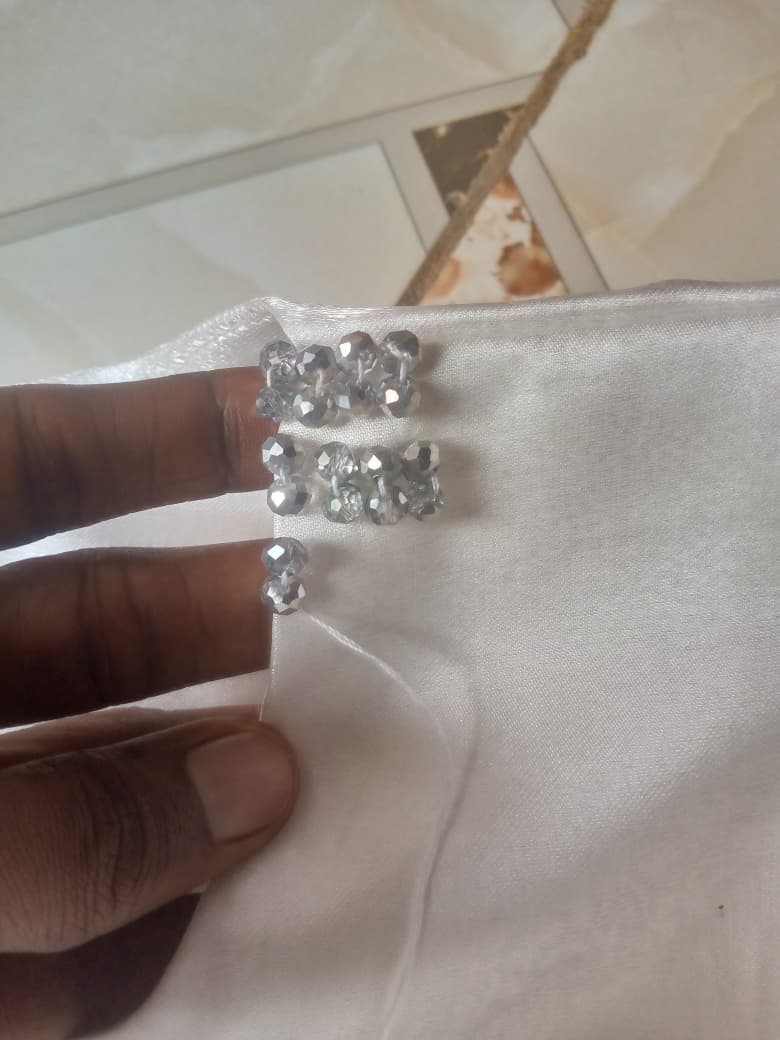
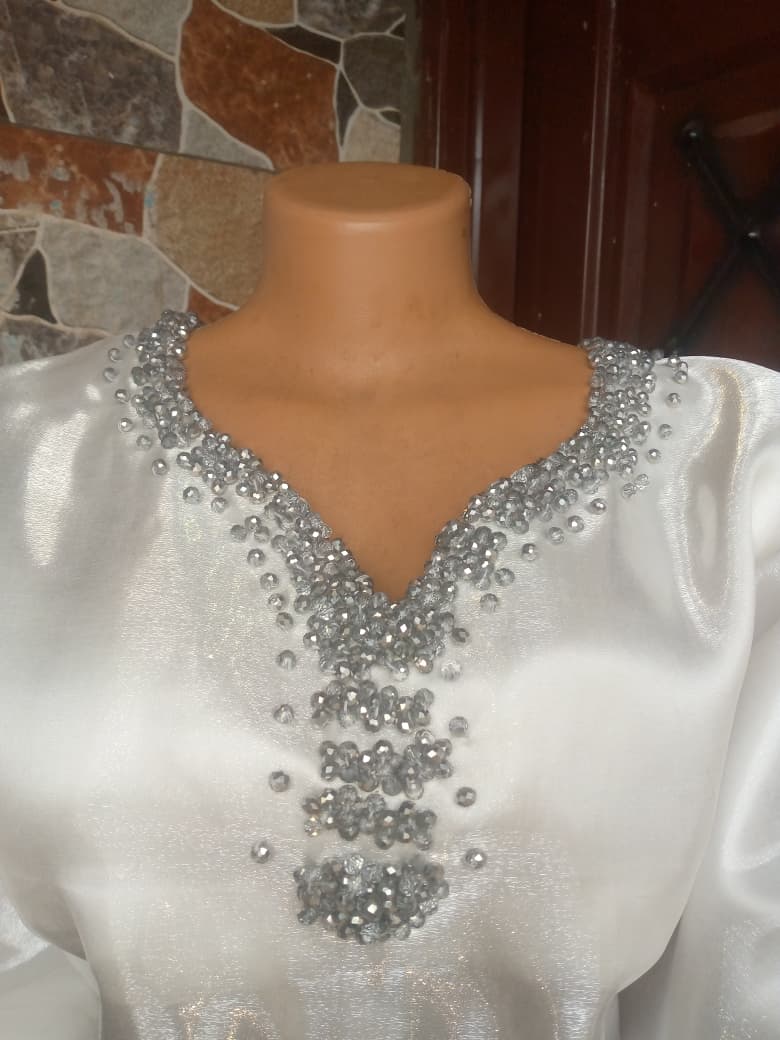
- Then I started the beading process, using three beads at a time, clustered together. For the pattern I'm making, I made three by three on one row, then left a gap before forming another row. This is just the pattern I chose to do; you can get creative with yours.
- Following the pattern, I continued filling up around the neckline of my dress
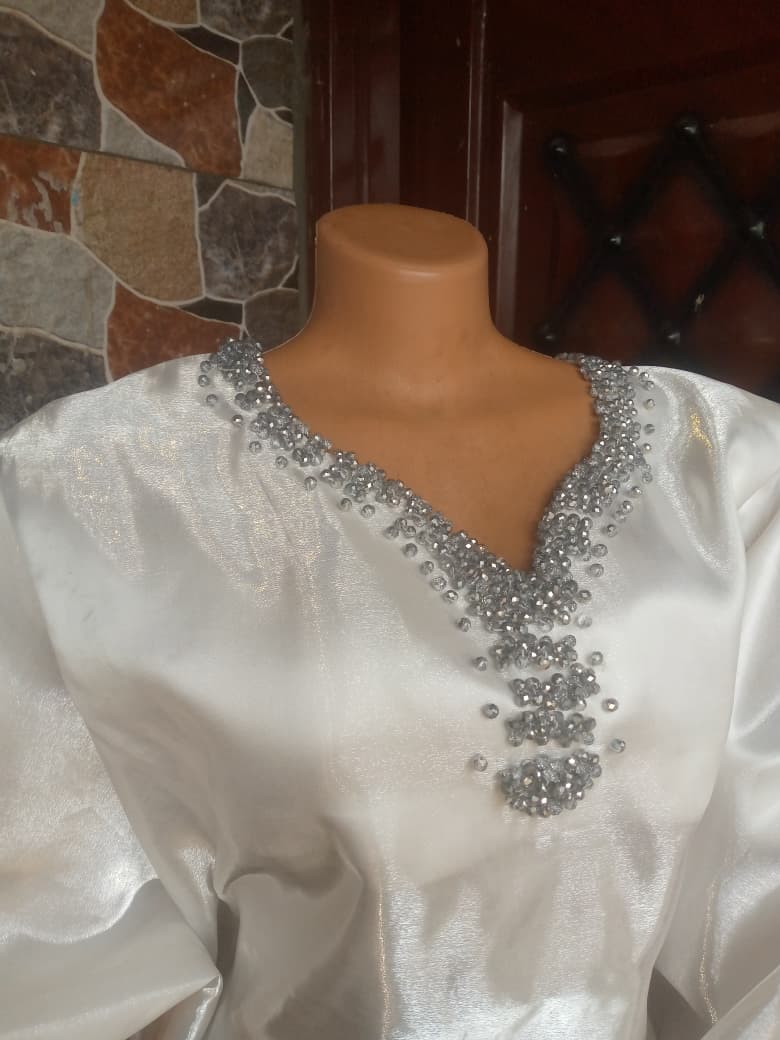
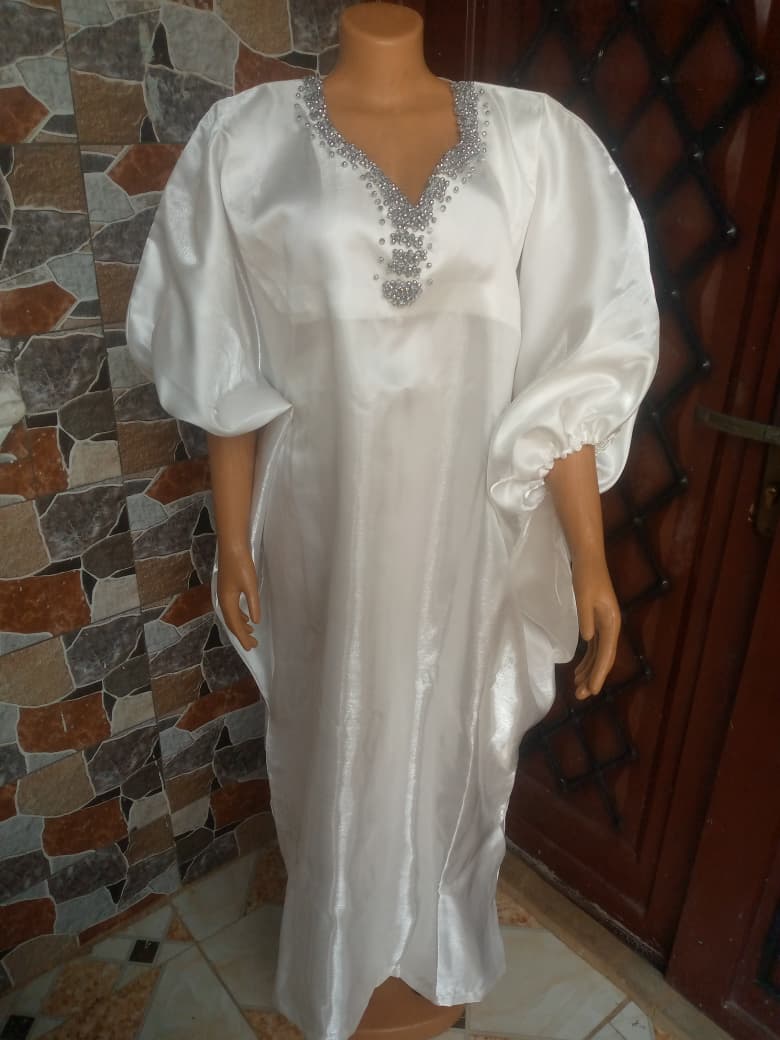
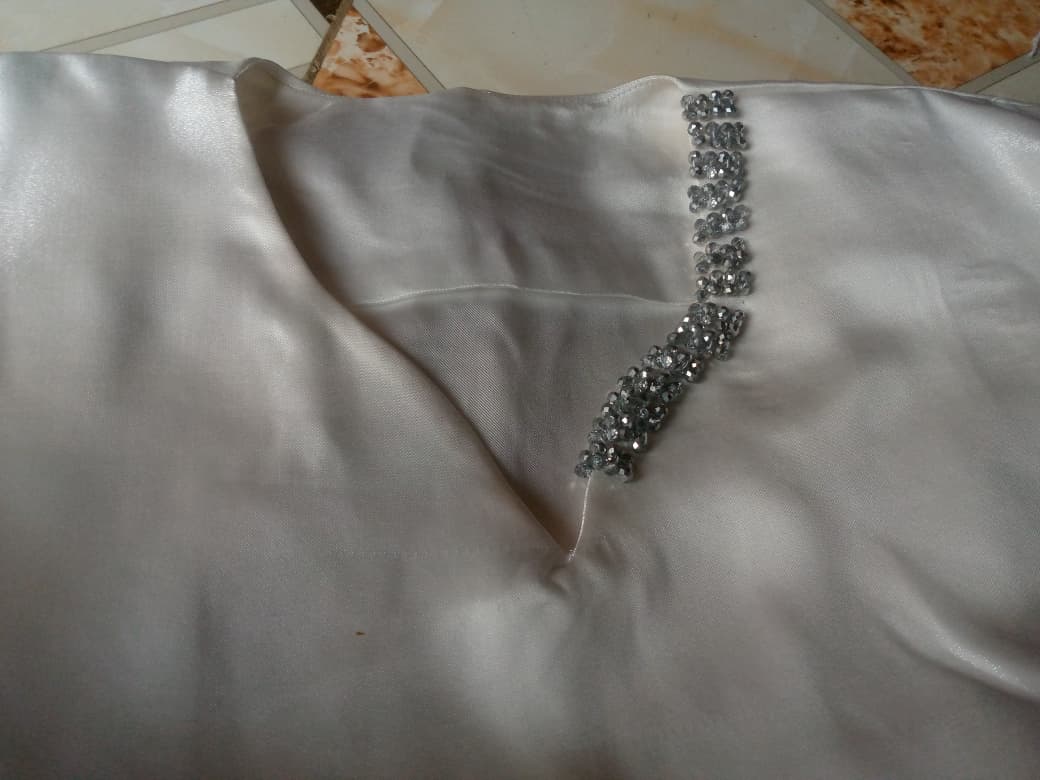
- I still had more beads left after the three rows, so I filled the rows again, making them four, then I placed a single bead at the base of the space between each row. And that completes the bead-making process. It's easy to do, but time-consuming, no doubt. Hand-beading these tiny beads was worth it all. Look how elegant my bubu dress turned out.
I hope you enjoyed reading the bead-making process of my dress.
All images used in this post are mine.