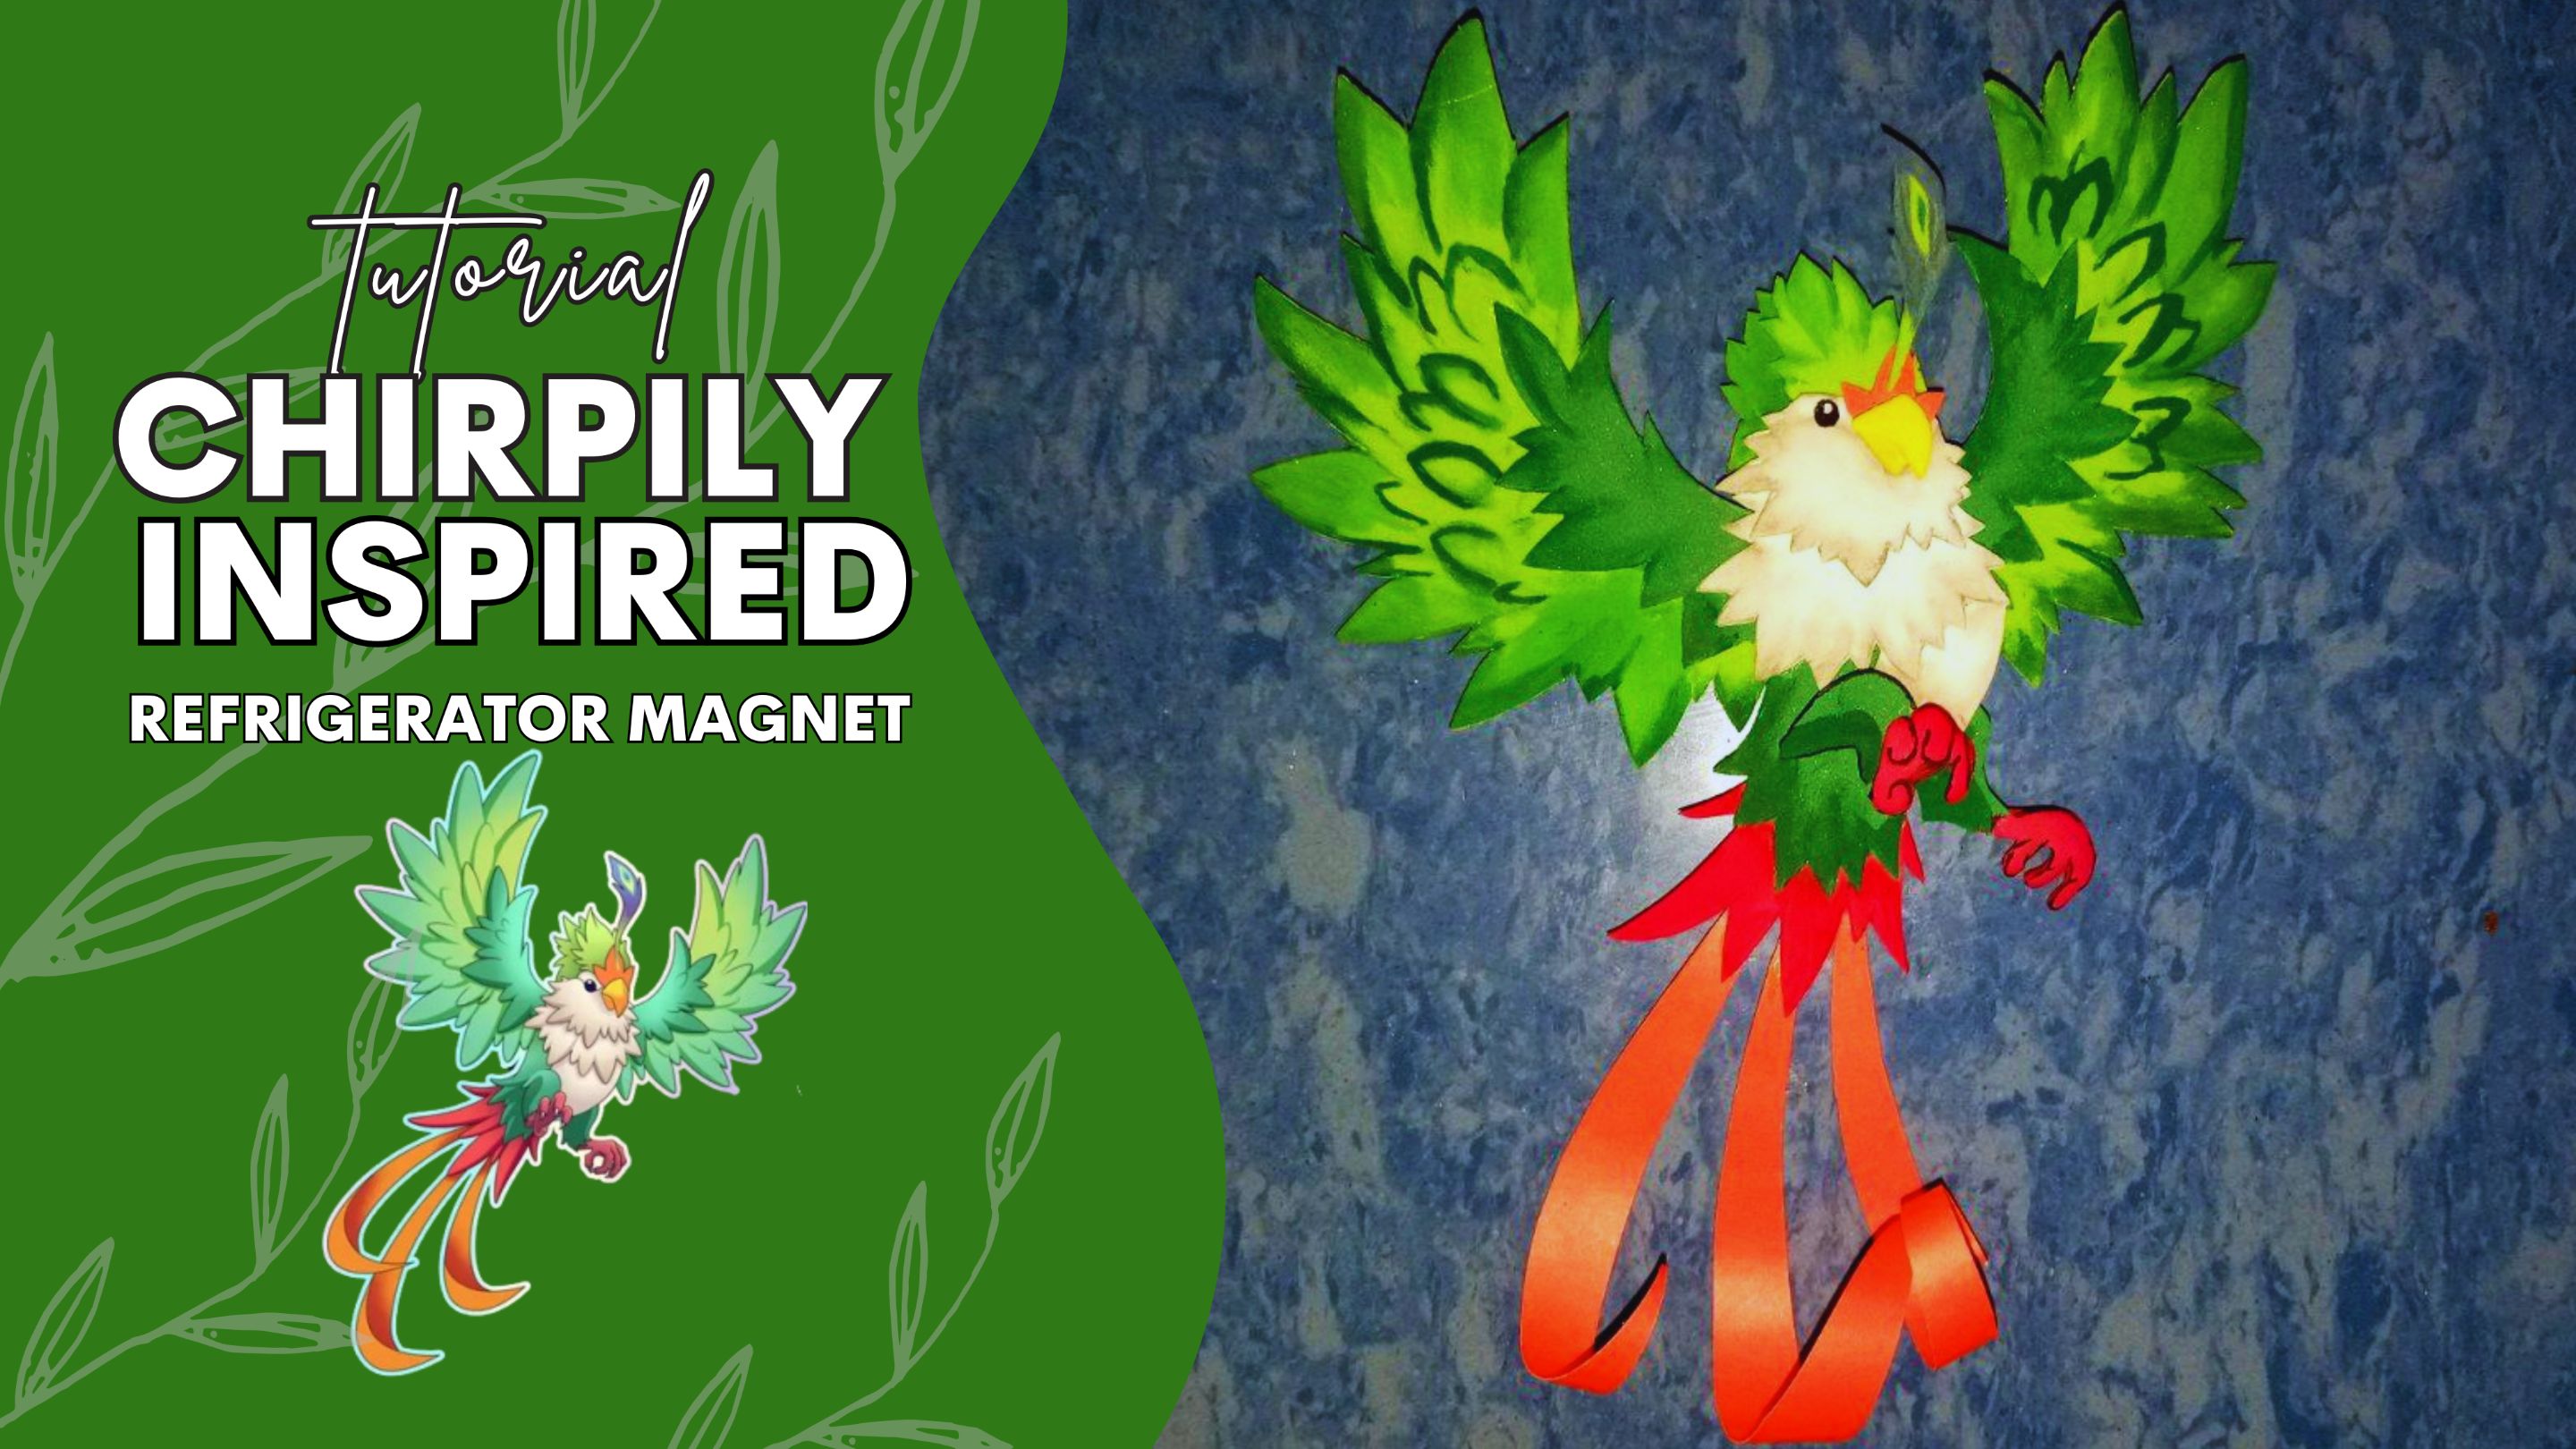
Greetings, Holozing lovers!
Every so often, I look for inspiration for my crafts, and this time I came across the designs of the Holozing creatures, which I find very beautiful.
So, for this occasion, I decided to create a magnet decoration for my refrigerator, inspired by Chirpily. I really like birds, and the design of this creature fascinated me. I hope you like the result as much as I do!
>![Spanish Version]
>¡Saludos amantes de Holozing!
>
>Cada cierto tiempo busco inspiración para mis manualidades, y en esta ocasión me topé con los diseños de las criaturas de Holozing, los cuales me parecen muy bonitos.
>
>Así que para esta ocasión he decidido crear un adorno con imán para mi refrigerador, inmspirado en Chirpily. Me gustan mucho las aves, y el diseño de esta criatura me fascinó. ¡Espero les guste el resultado tanto como a mí!
---
---
### Materials
* Pencil
* Machine paper
* Scissors
* Light green foam
* Dark green foam
* White foam
* Light yellow foam
* Dark yellow foam
* Red foam
* Orange cardstock
* Black, beige, green, red, and blue paint
* Paintbrushes
* Pre-drawn sketch of [Chirpily](https://peakd.com/hive-131131/@holozing/new-capturable-creatures).
>![Spanish Version]
>Materiales
>
>* Lapiz
>* Hoja de maquina
>* Tijeras
>* Foamis verde claro
>* Foamis verde orcuro
>* Foamis blanco
>* Foamis amarillo claro
>* Foamis amarillo oscuro
>* Foamis rojo
>* Cartulina anaranjada
>* Pintura negra, beige, verde, rojo y azul
>* Pinceles
>* Boceto de [Chirpily](https://peakd.com/hive-131131/@holozing/new-capturable-creatures) previamente dibujado.
---
---
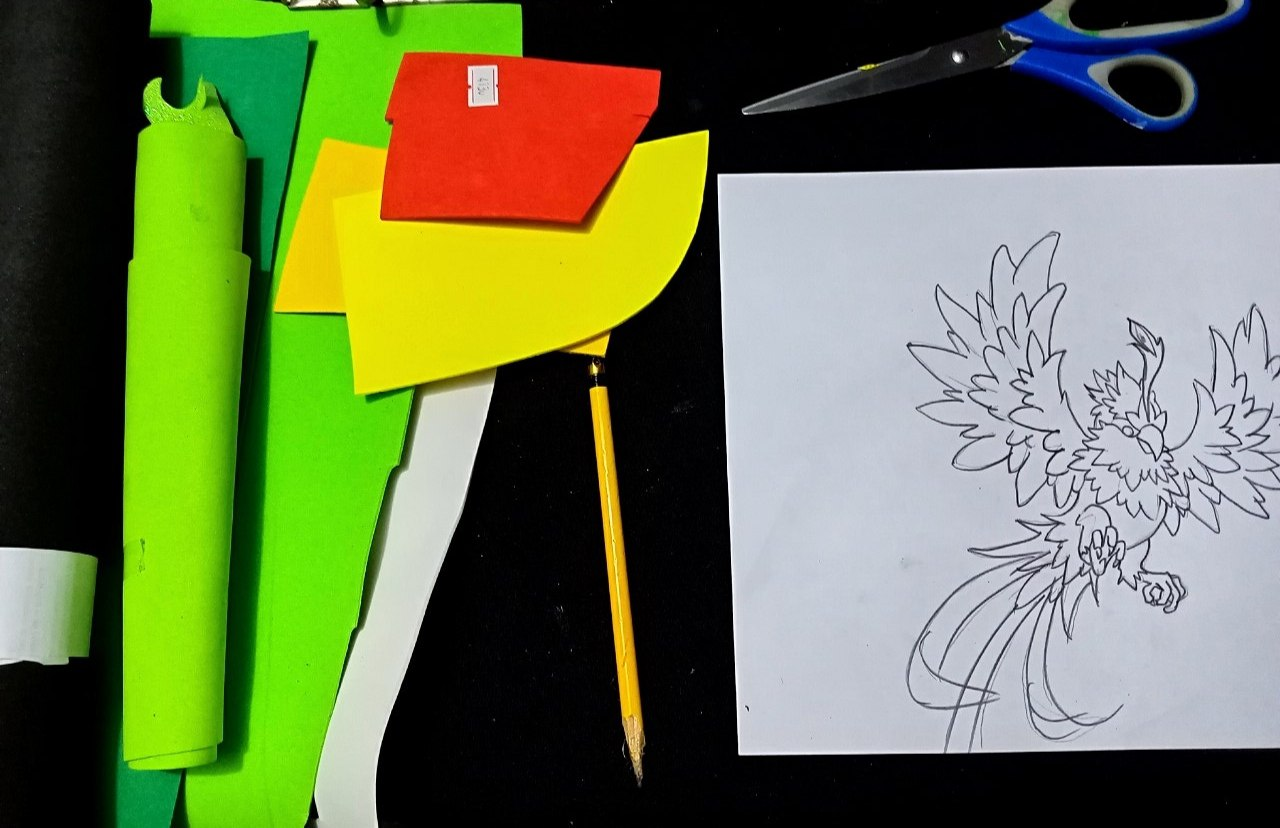
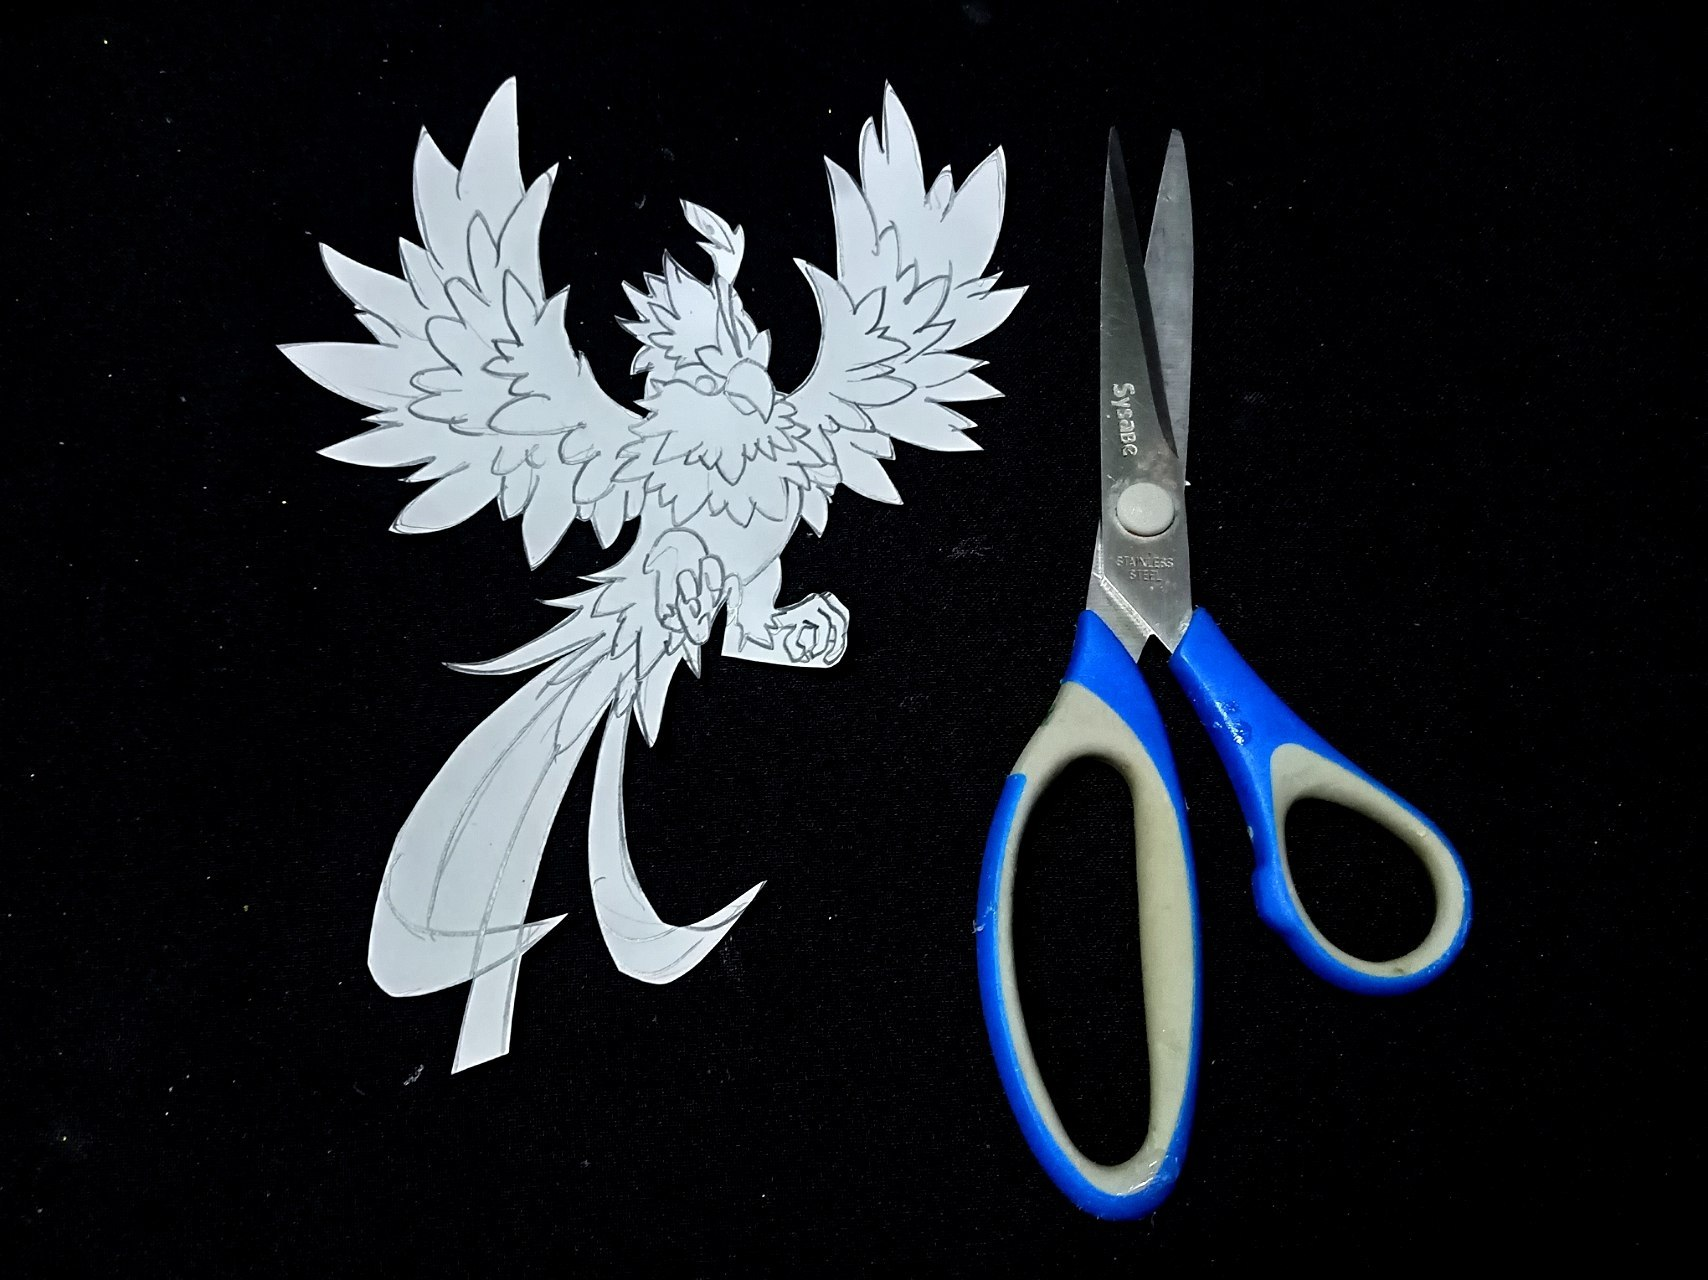
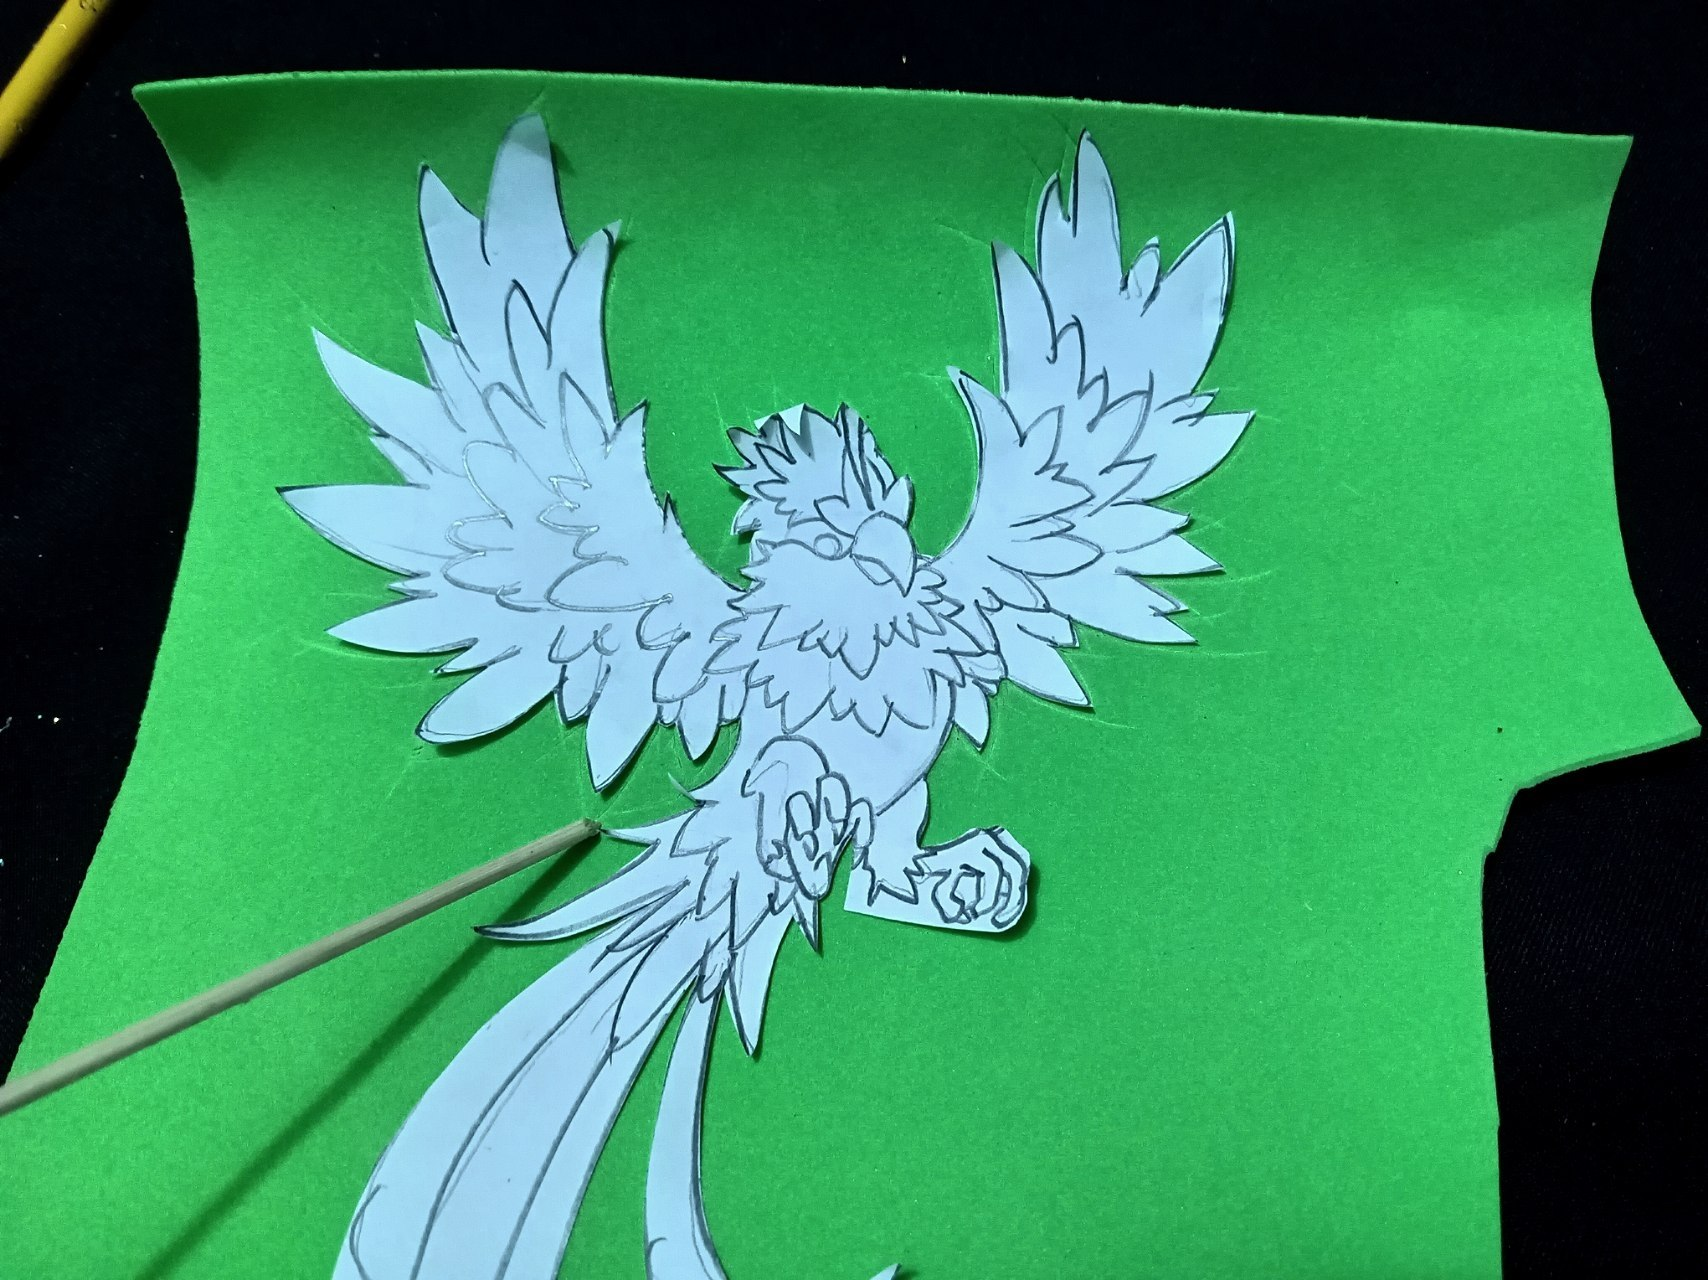
* Step 1:
Getting Started with Chirpily
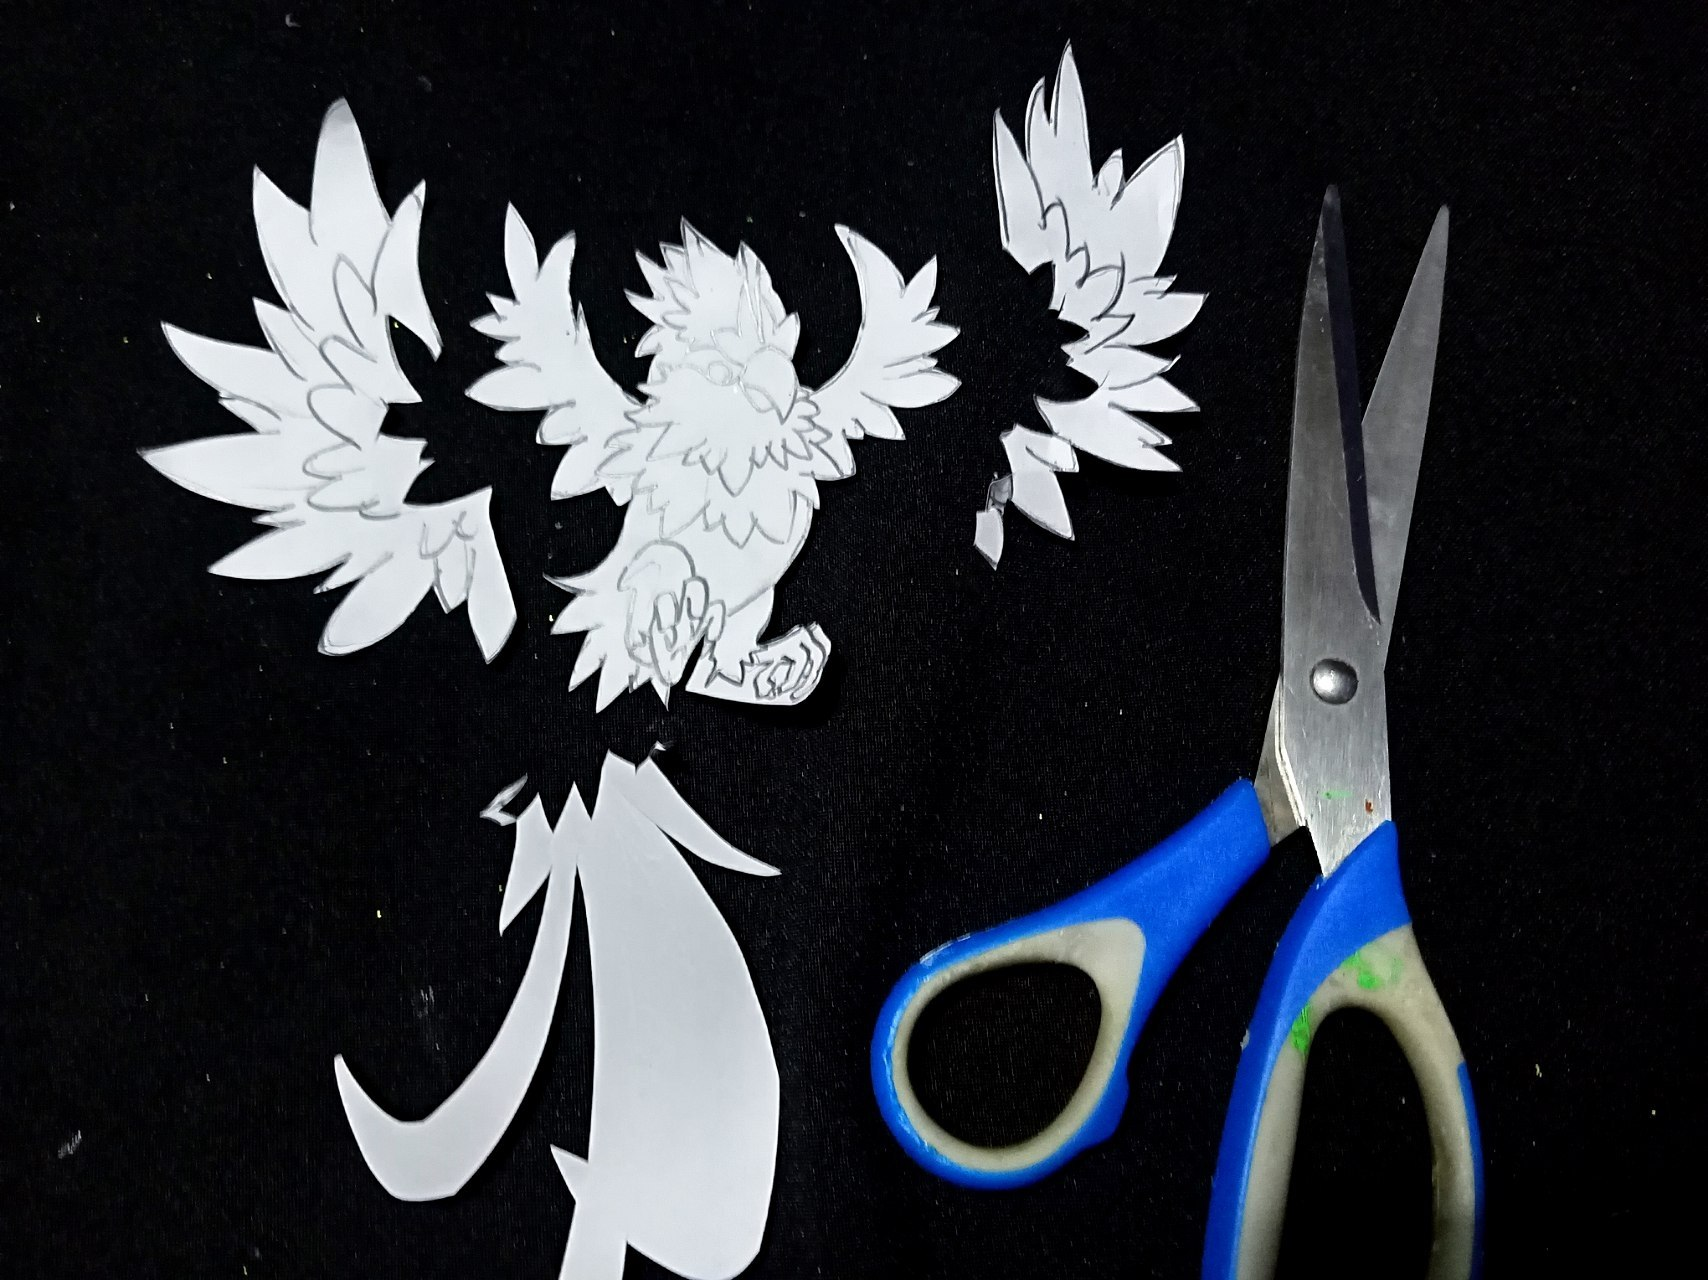
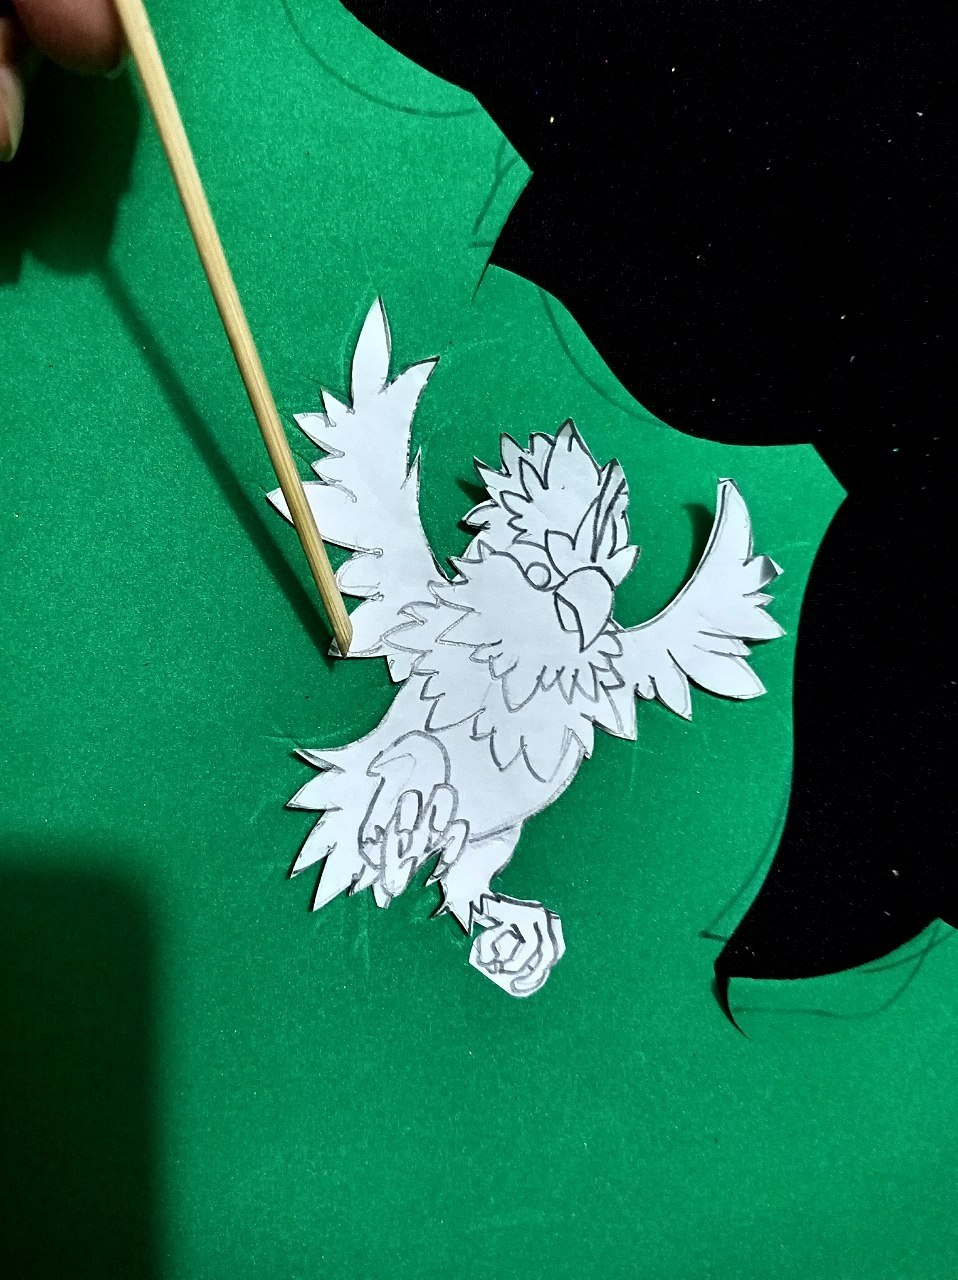
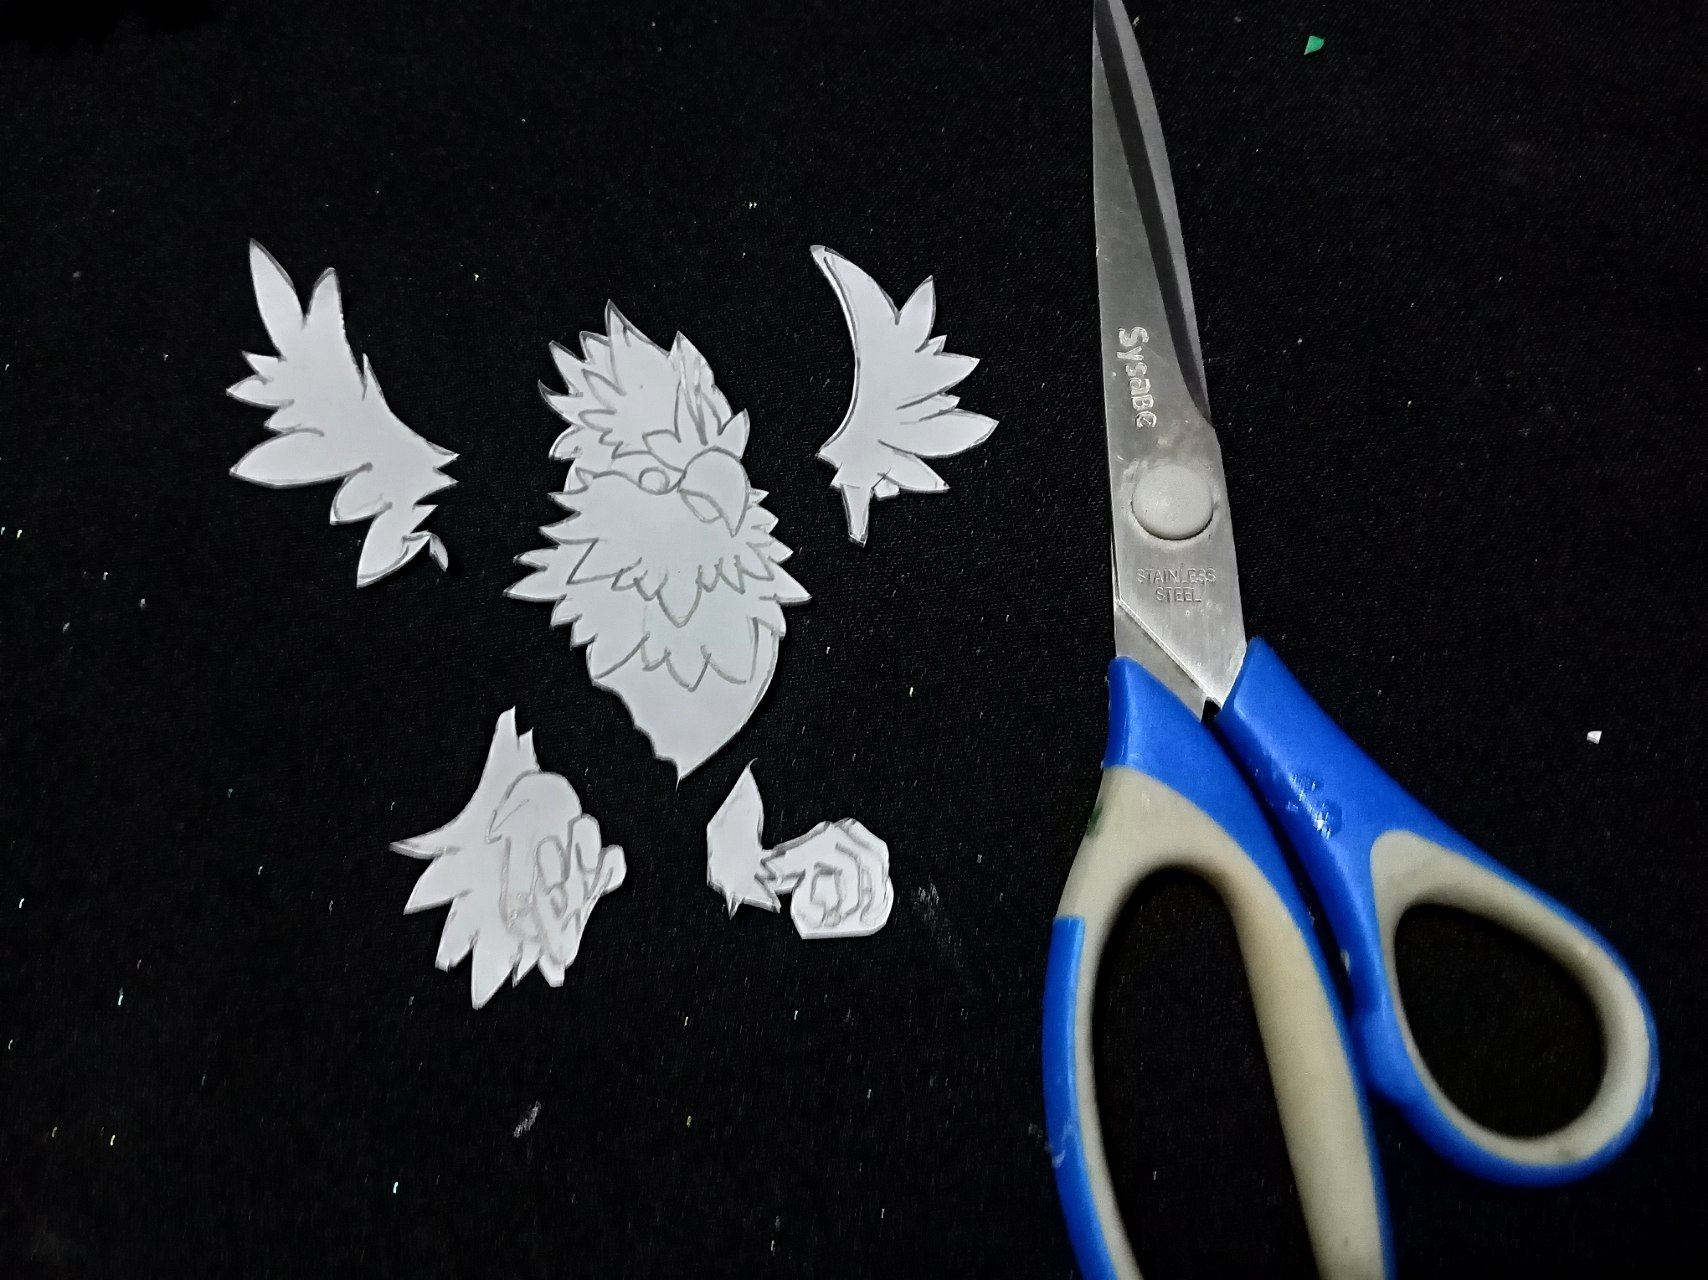
To begin, we find a reference image of the bird, in this case, Chirpily. Based on the image, we draw a sketch, capturing its main shapes. Once the drawing is complete, we carefully cut it out to use as a template.
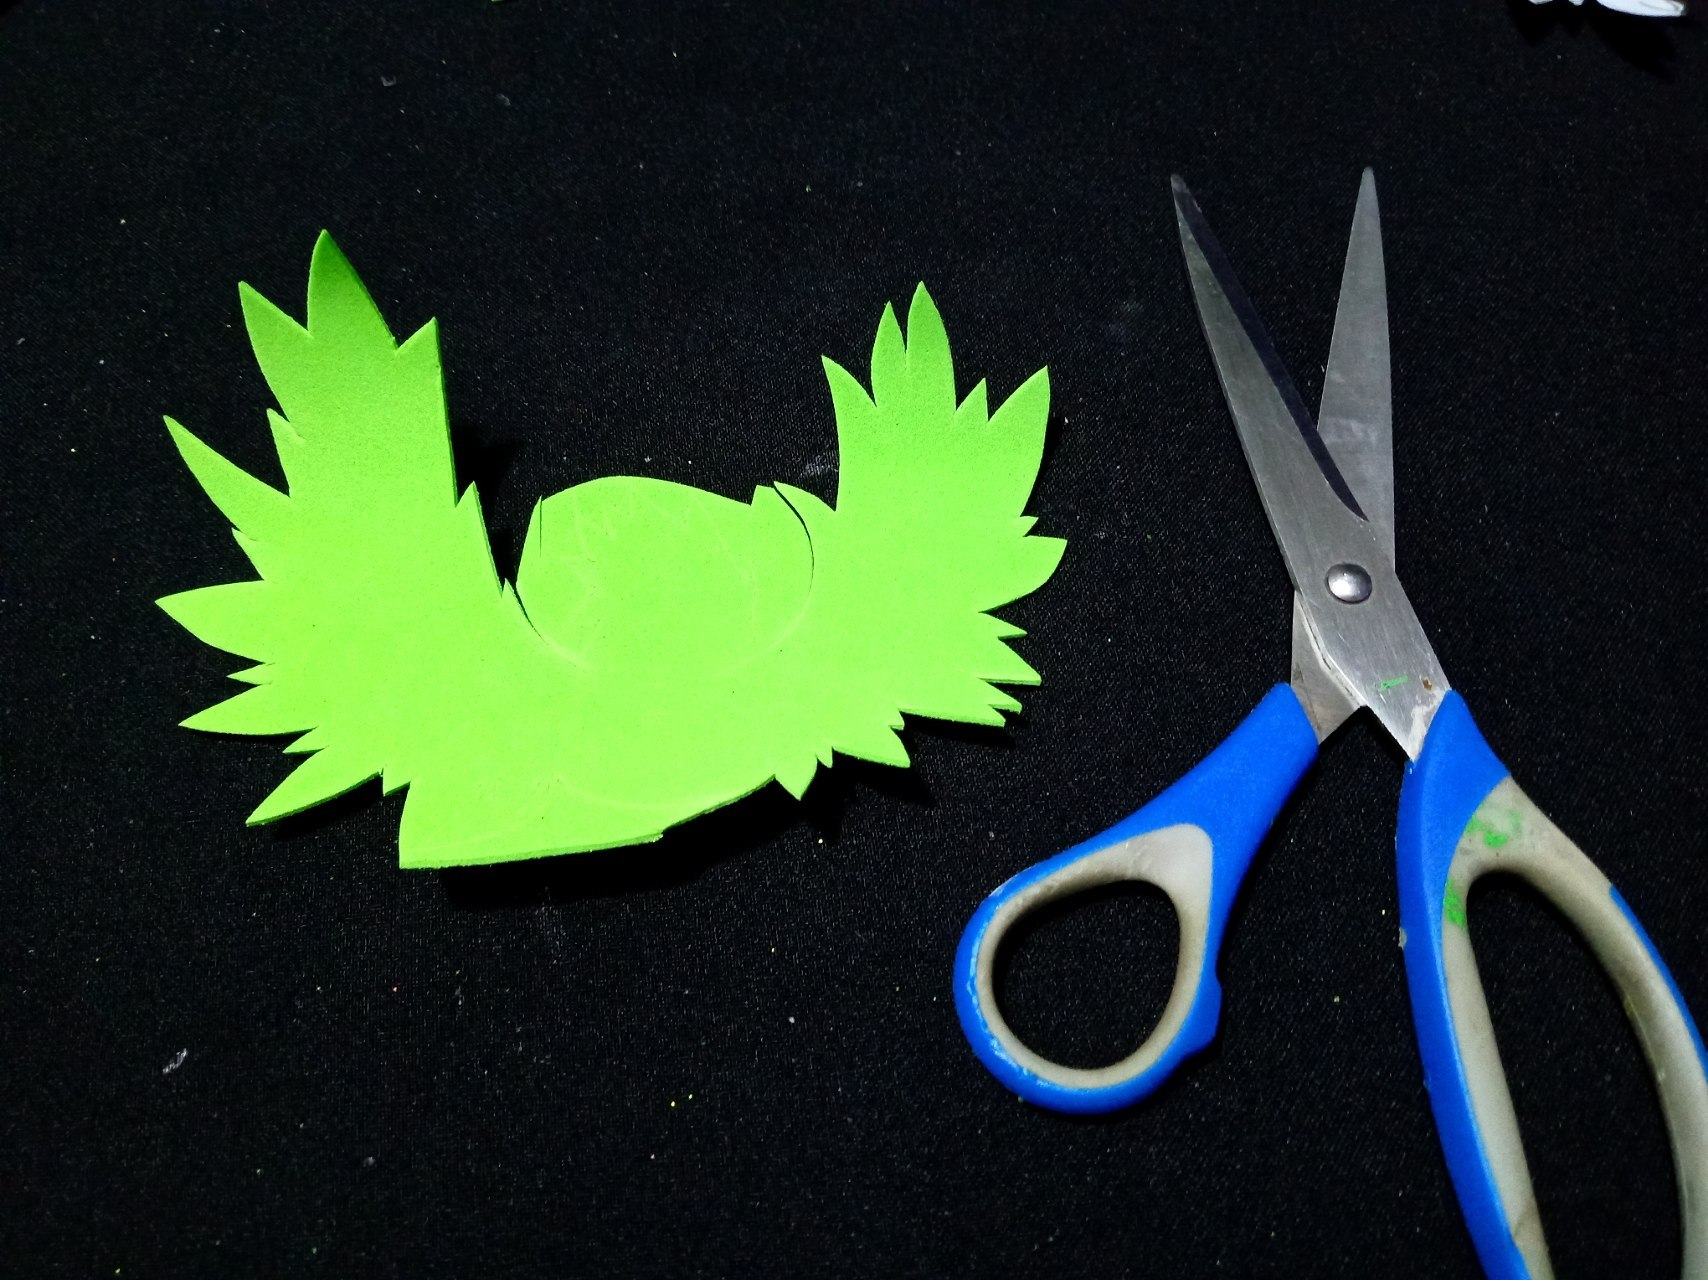
Next, we trace the template onto light green foam. We'll only be marking the wings and the head. Then, we cut them out with scissors.
>![Spanish Version]
>* Paso 1:
>
>Para comenzar, buscamos la imagen de referencia del ave, en este caso, de Chirpily. Con base en la imagen, dibujamos un boceto, capturando las formas principales. Una vez que el dibujo está terminado, se recorta cuidadosamente para usarlo como plantilla.
>
>Seguidamente Calcamos la plantilla al foamis verde claro. Y solo vamos a marcar las alas y su cabecita. Y cortamos con las tijeras.
---
|||
|-|-|
---
* Step 2:
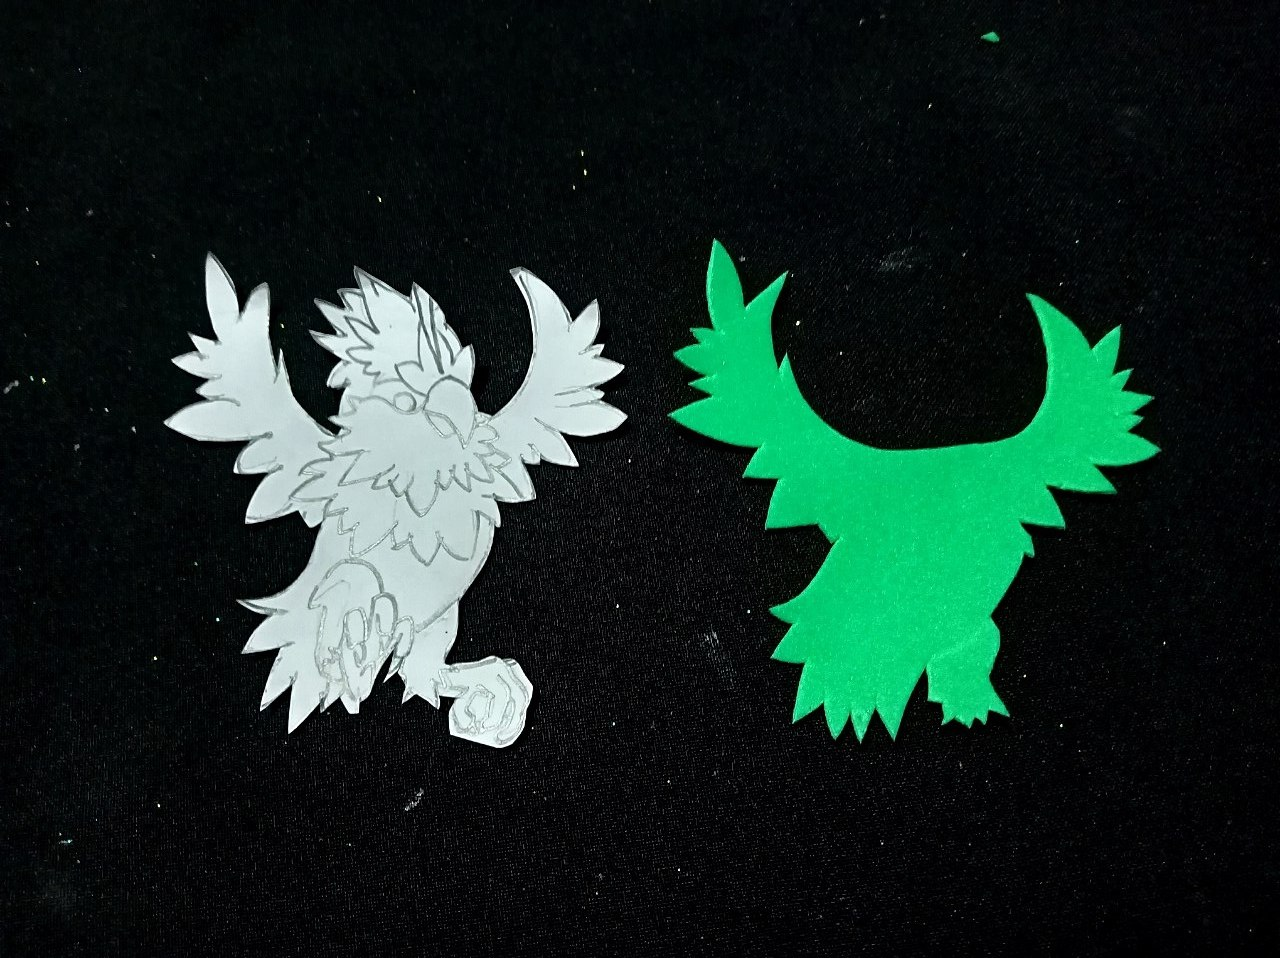
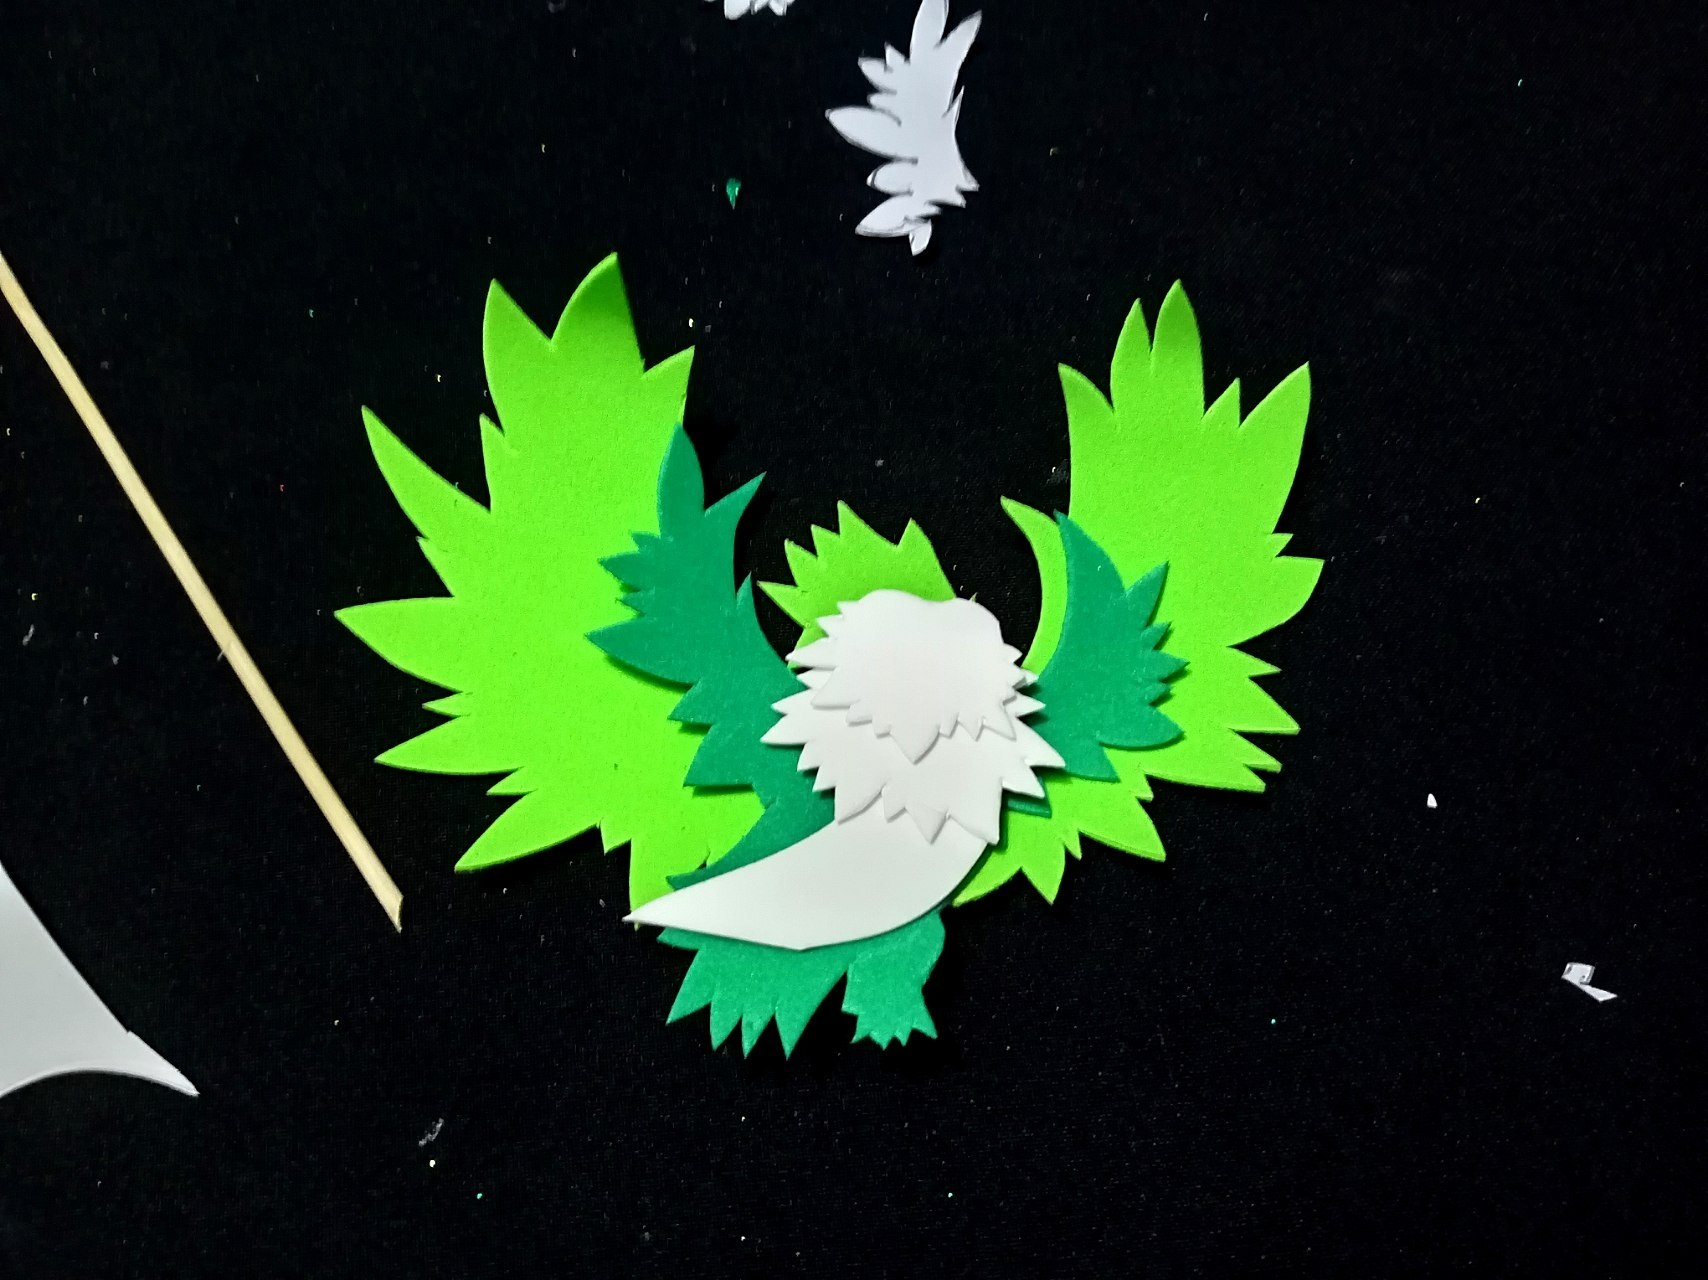
From the original template, we cut off the wing and tail sections to get just the silhouette of the body and part of the small wings. This new shape is then traced onto dark green foam and carefully cut out with scissors.
>![Spanish Version]
>* Paso 2:
>
>A partir de la plantilla original. Se recorta la parte de las alas y la cola para obtener únicamente la silueta del cuerpo y parte de las alitas. Esta nueva forma se calca en foami de color verde oscuro y se recorta cuidadosamente con unas tijeras.
||||
|-|-|-|
---
* Step 3:
Continue using the same base template, modifying it to obtain each of the bird's parts. For the white plumage on the face and belly, cut out the template, removing the parts of the wings and tail. Trace the resulting shape onto white foam and cut it out carefully.
>![Spanish Version]
>* Paso 3:
>
>Se continúa utilizando la misma plantilla base, modificándola para obtener cada una de las piezas del ave. Para el plumaje blanco de la cara y el vientre, se recorta la plantilla, eliminando las partes de las alas y la cola. La forma resultante se calca en foami de color blanco y se recorta cuidadosamente.
|||
|-|-|
---
* Step 4:
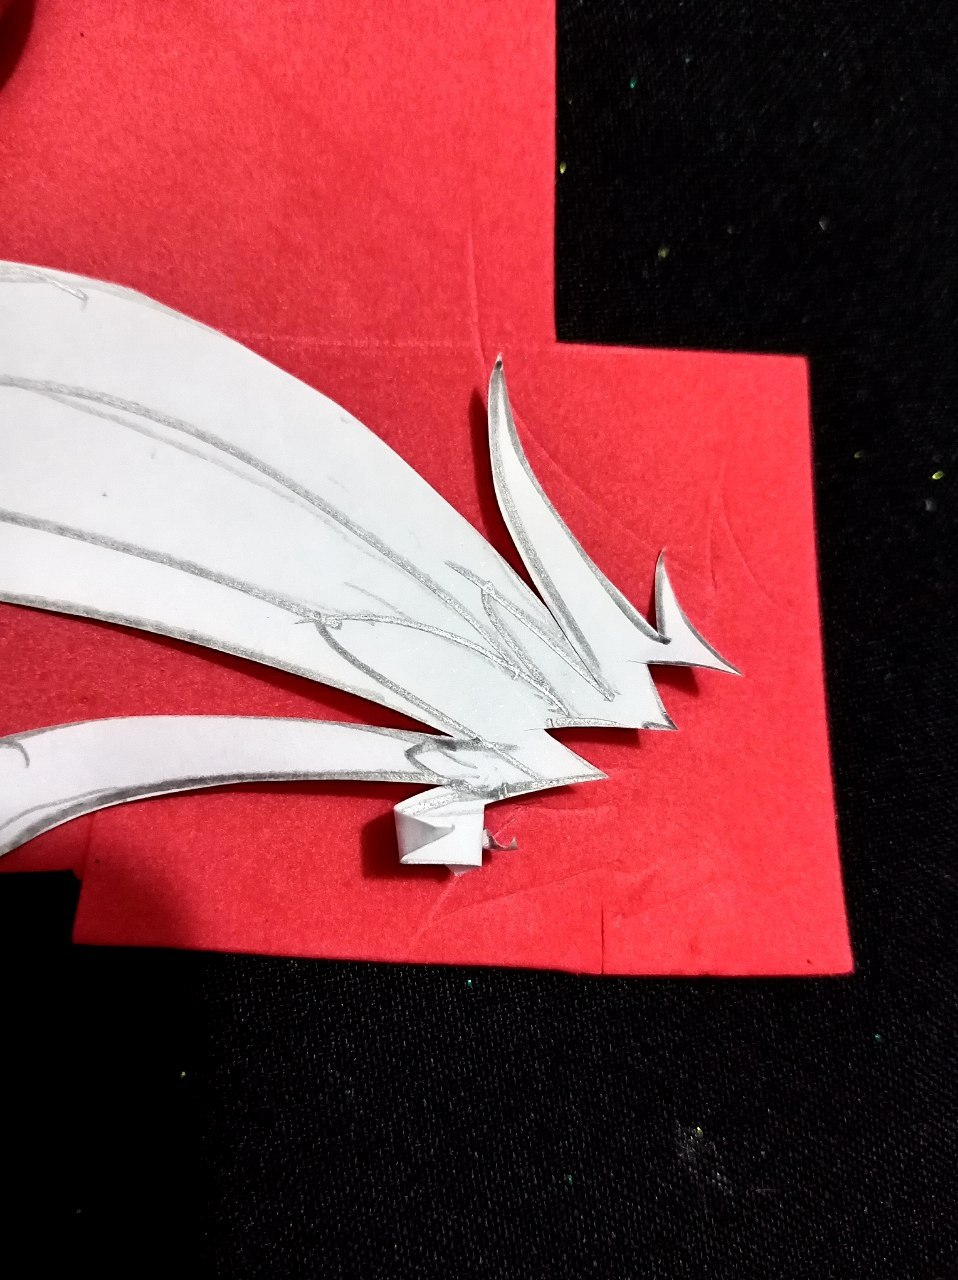
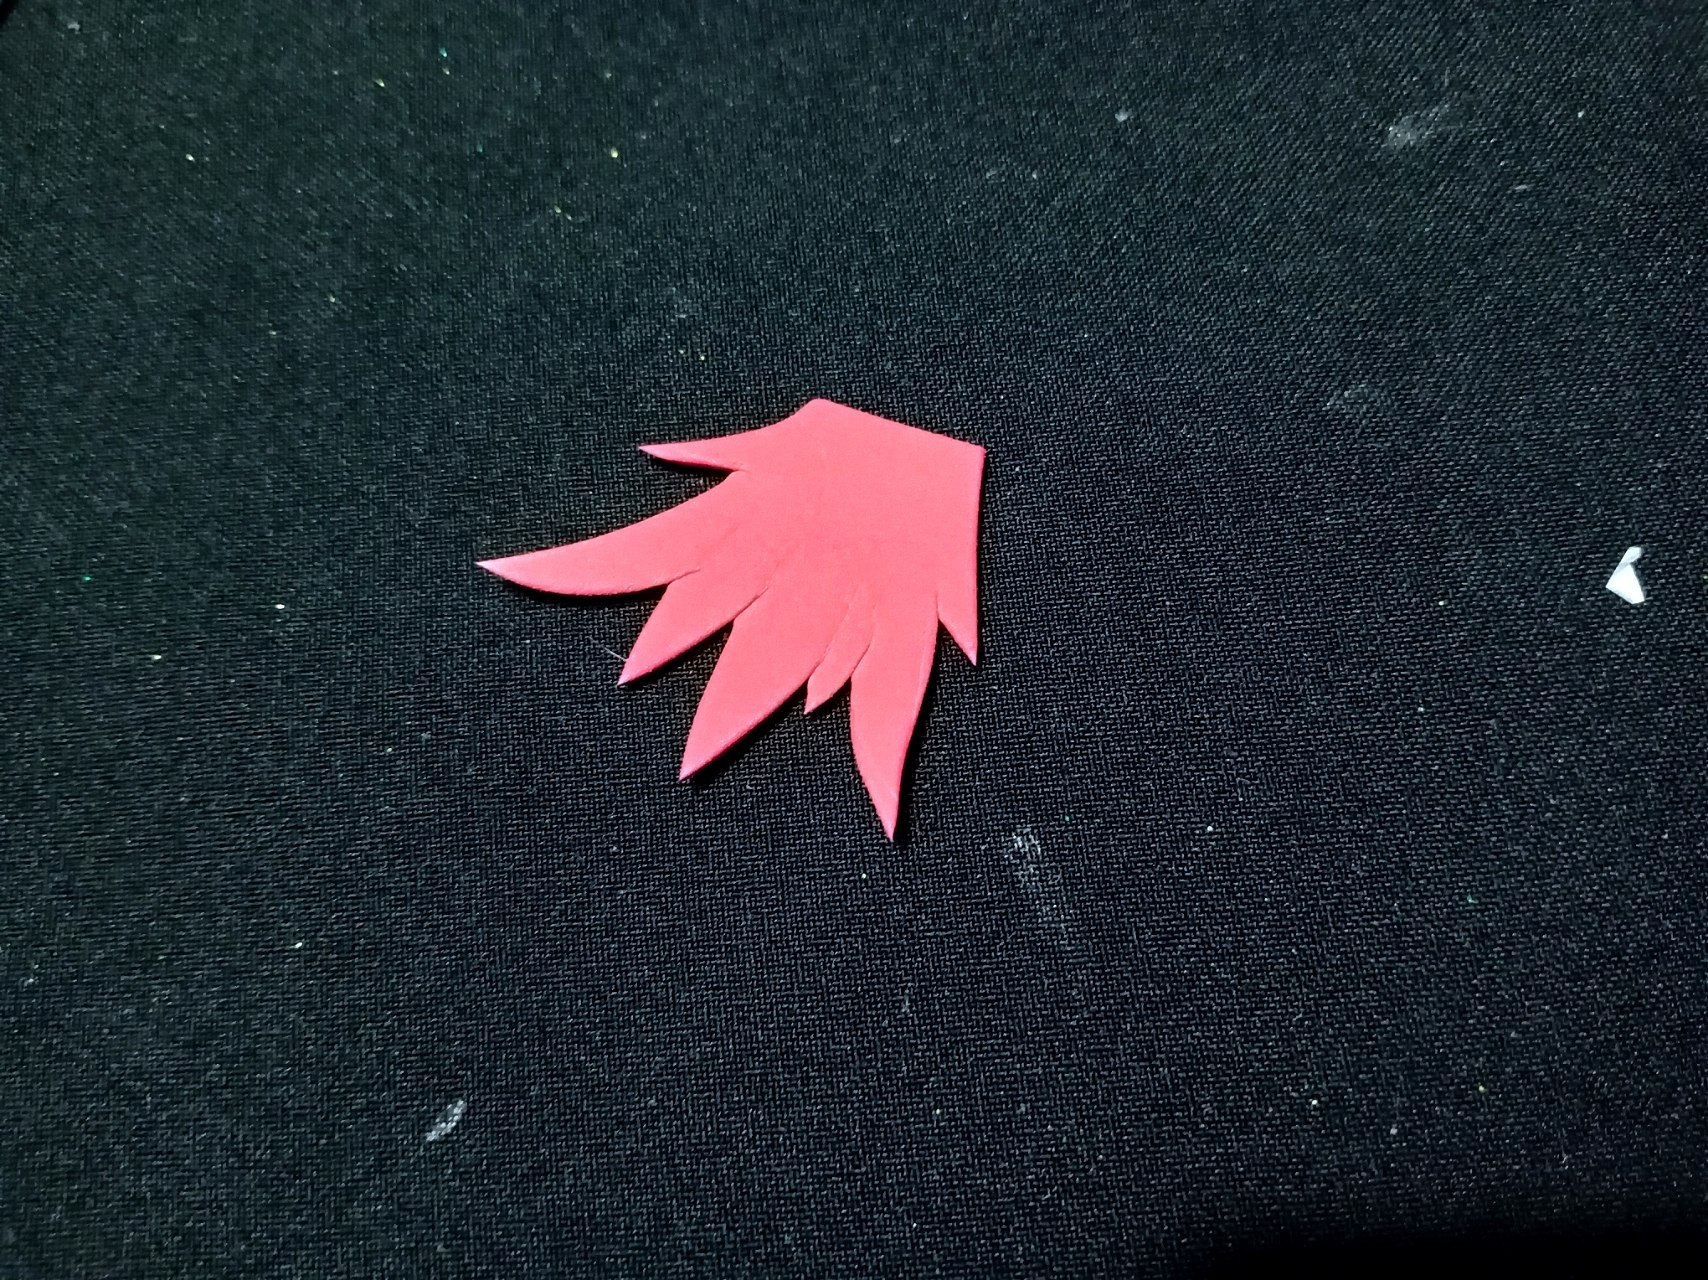
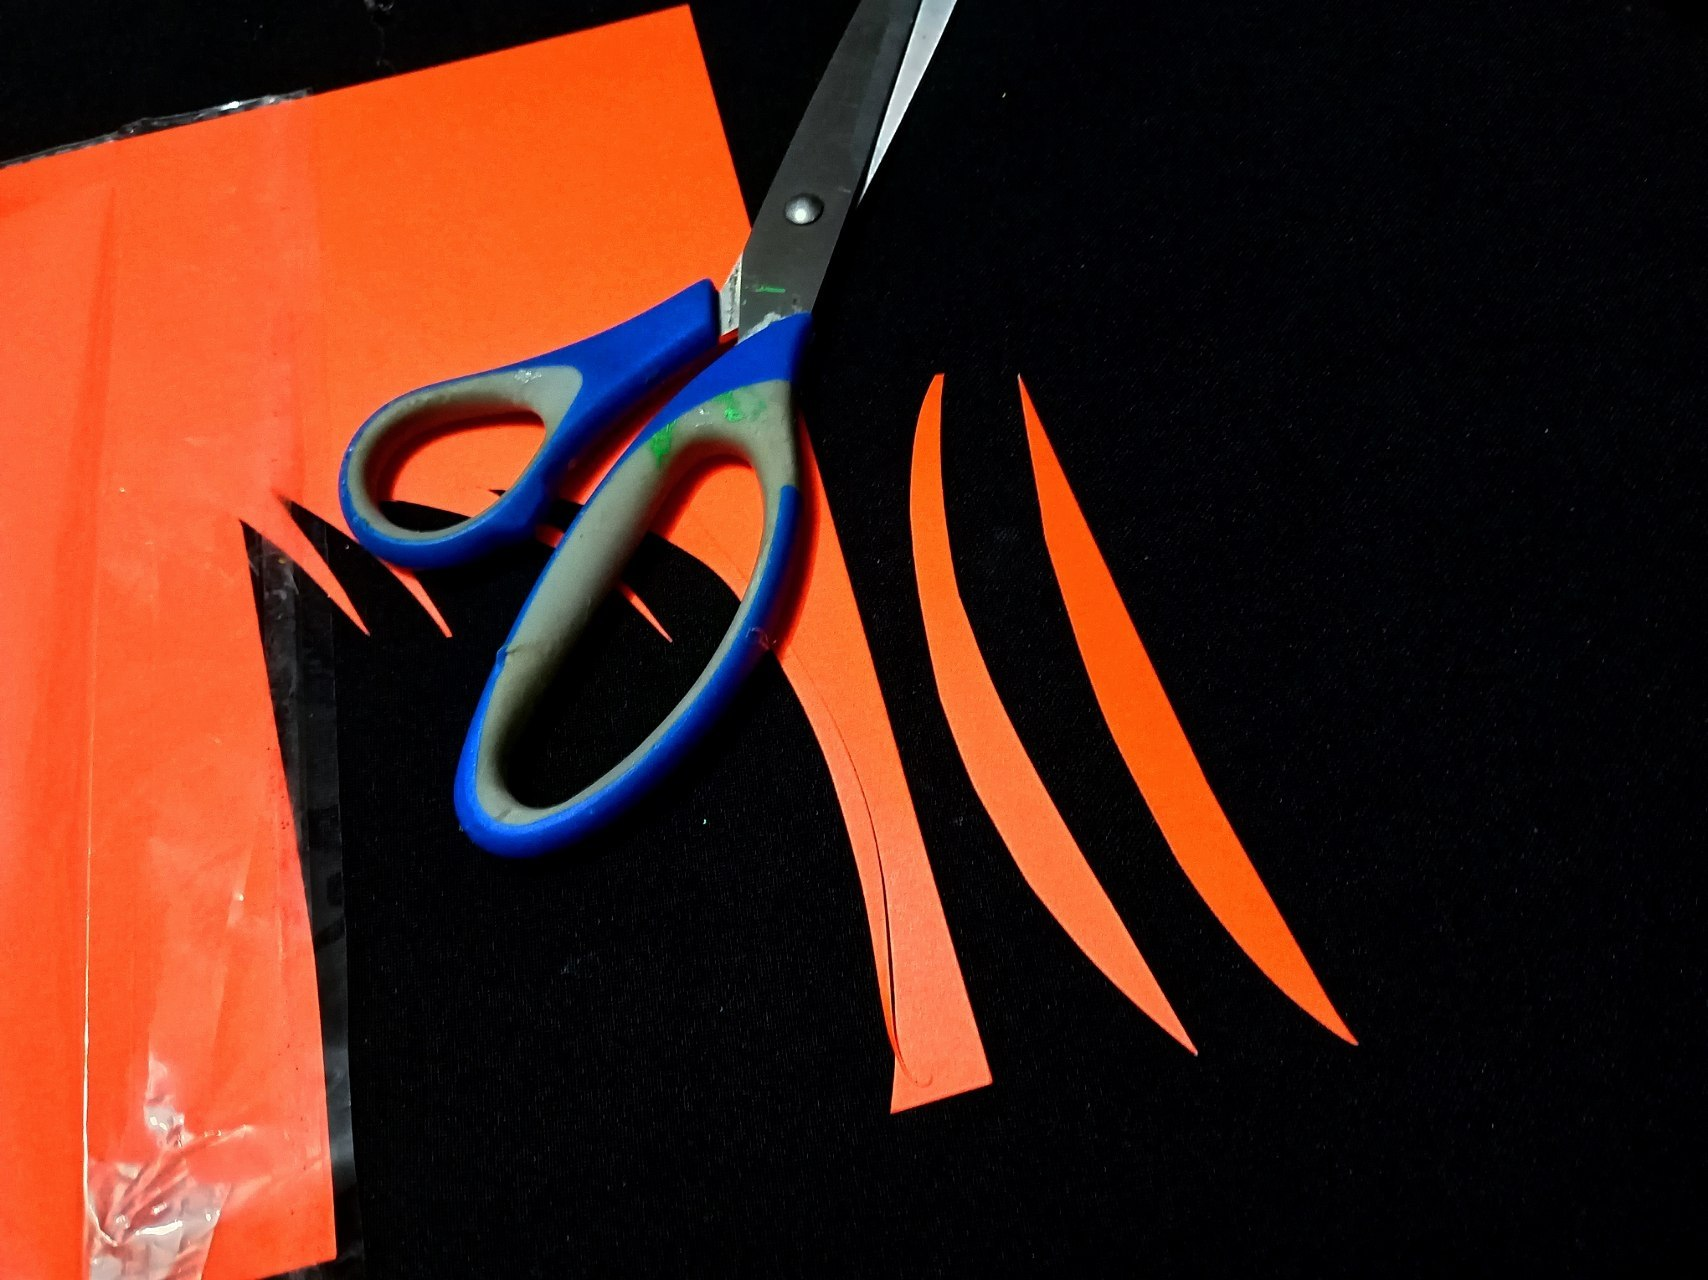
Next, create the tail piece. Use the previously cut-out tail template and trace it onto the red foam. Carefully cut it out with scissors. Finally, cut three long strips of orange cardstock into thin feather shapes.
>![Spanish Version]
>* Paso 4:
>
>A continuación, se crea la pieza de la cola. Se utiliza la plantilla de la cola previamente recortada y lo calcamos en el foami de color rojo. Y acostamos cuidadosamente con las tijeras. Finalmente, con cartulina anaranjada cortamos 3 tiras largas en forma de pluma fina.
||||
|-|-|-|
---
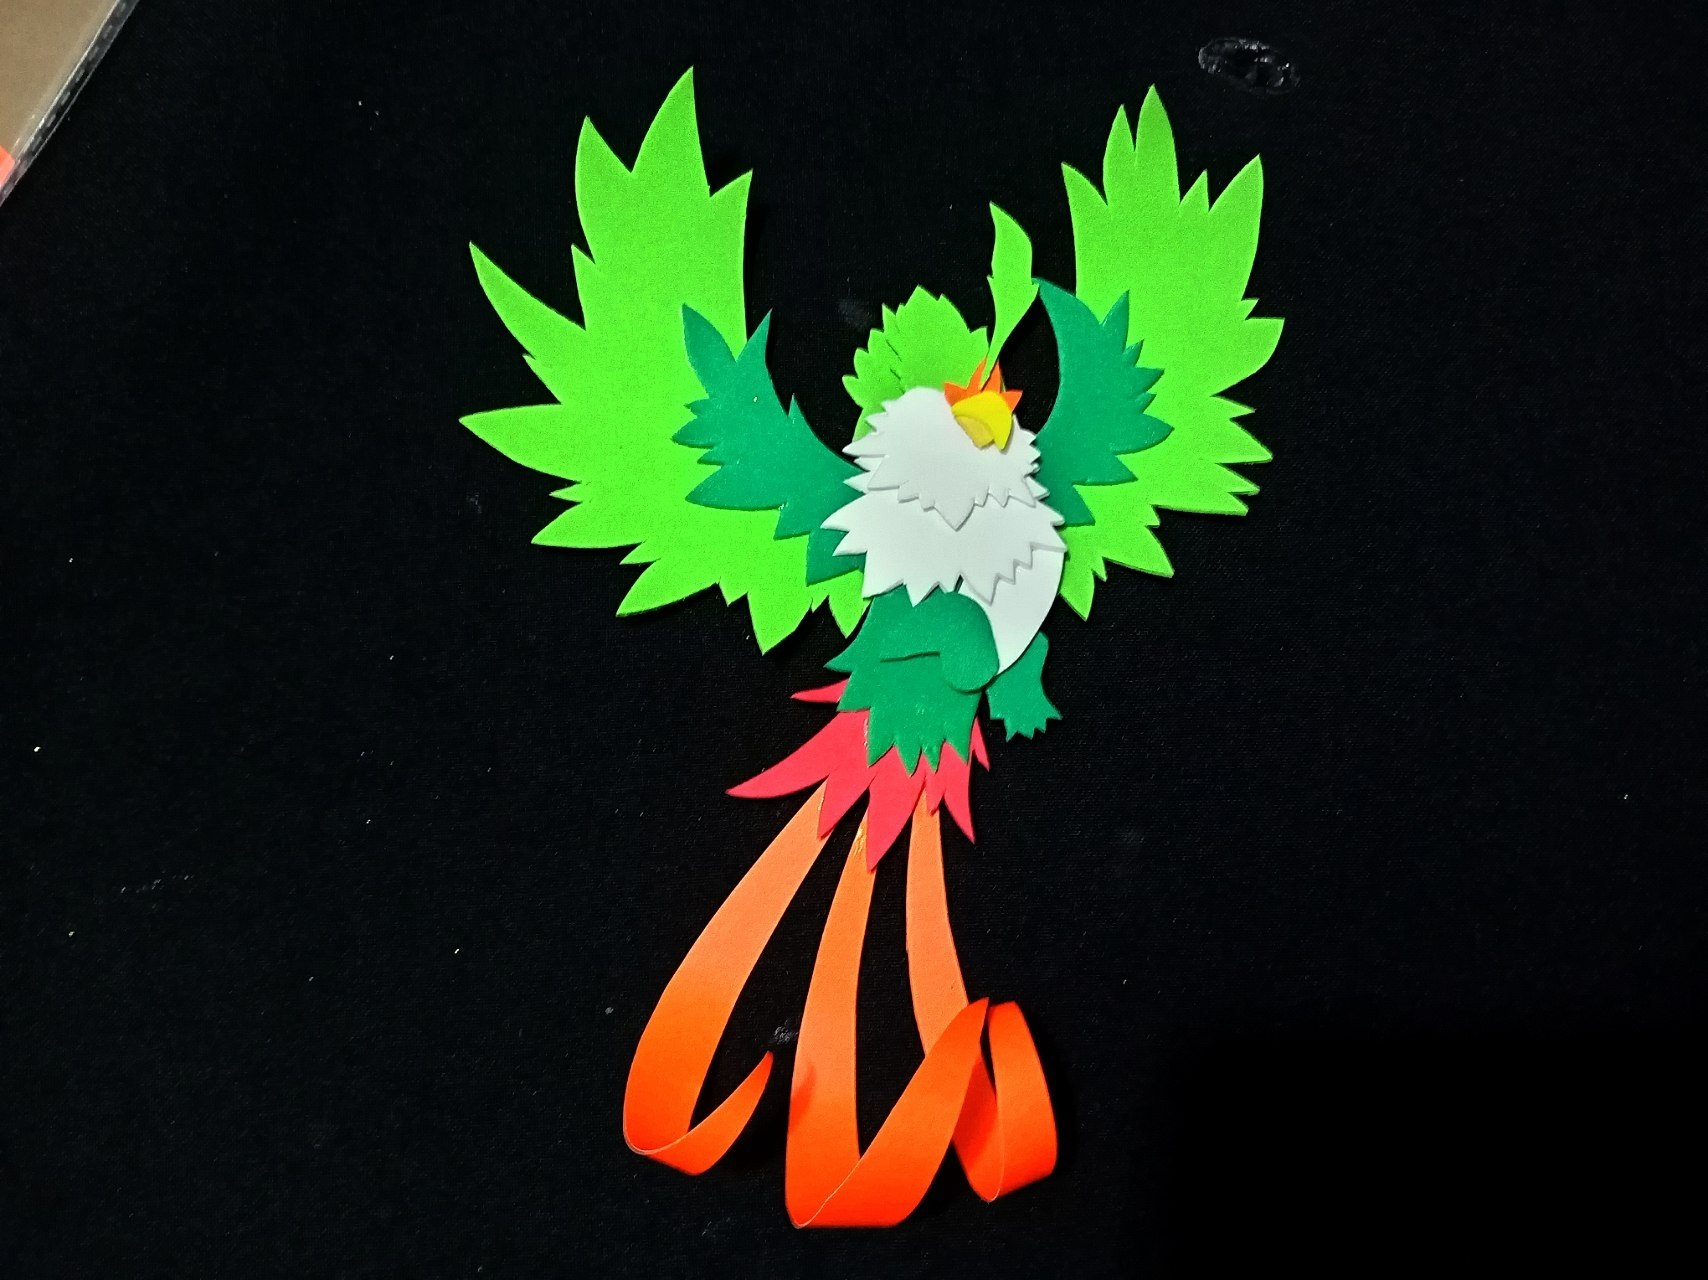
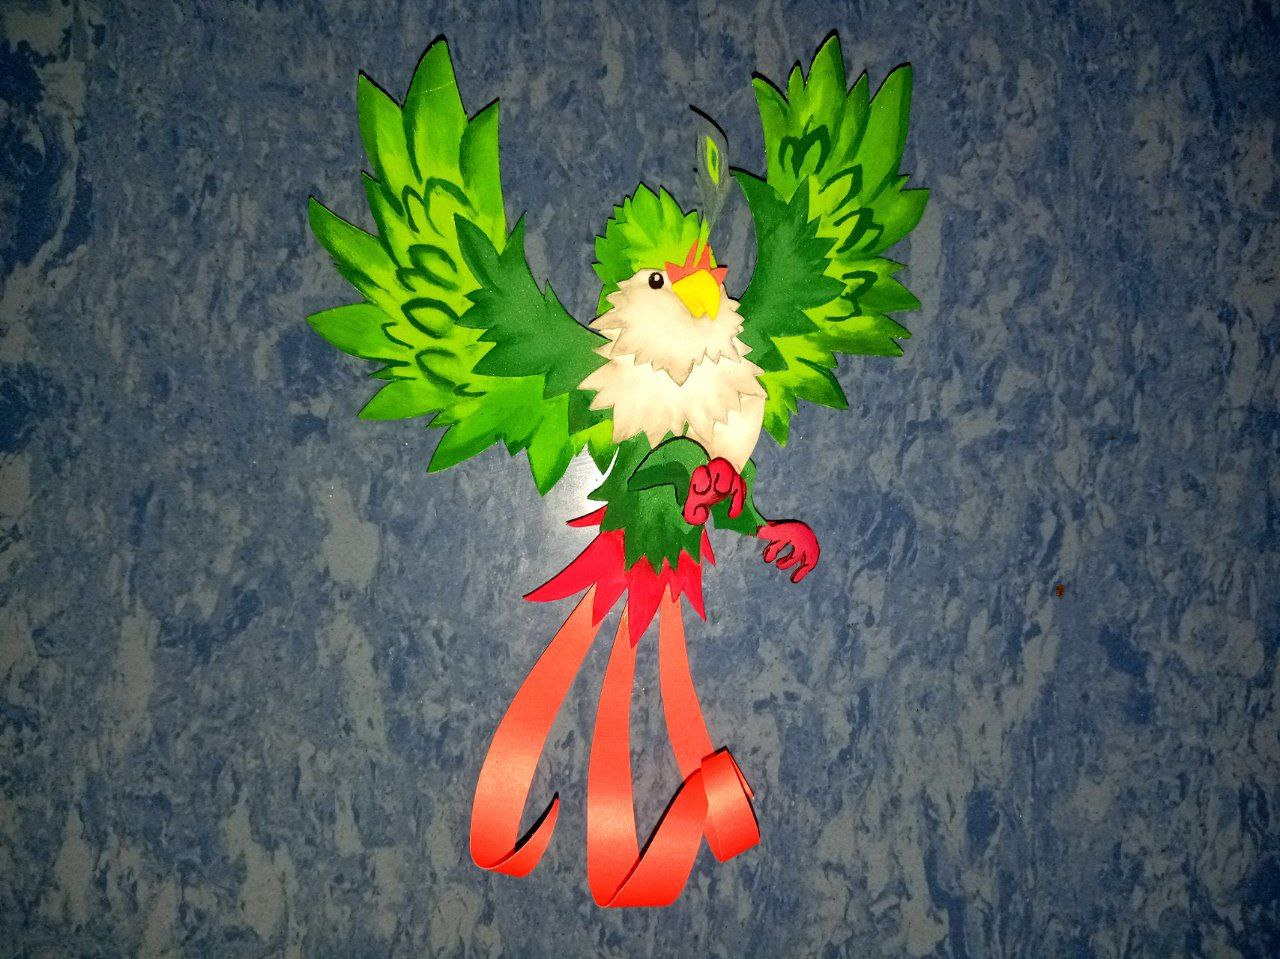
* Step 5:
With all the pieces cut and ready, it was time for the most exciting part: assembly. I took the pieces and, following the design as a guide, I joined all the parts together, using liquid silicone to glue them one by one. First, I glued the wings, which are the base, and on top of them I placed the main body piece and the white plumage.
Then, I added the tail feather to the back. For the beak, I cut out two small triangles of foam, one in light yellow and the other in dark yellow. Its face has such beautiful orange plumage that I made it out of cardboard and glued it to the bird's face.
>![Spanish Version]
>* Paso 5:
>
>Ya con todas las piezas cortadas y listas, llegó la parte más emocionante el ensamblaje. Tomé las piezas y, siguiendo el diseño como guía, las fui uniendo todas estas partes, utilizando el silicón líquido e ir pegando una a una. Primero pegué las alas, que son la base, y sobre ellas coloqué la pieza principal del cuerpo y el plumaje blanco.
>
>Después, añadí la pluma de la cola en la parte trasera. Para el pico, recorté dos pequeños triángulos de foami, uno en amarillo claro y otro oscuro, en su carita tan bien lleva un plumaje naranja que la hice con cartulina y los pegué en la carita del ave.
---
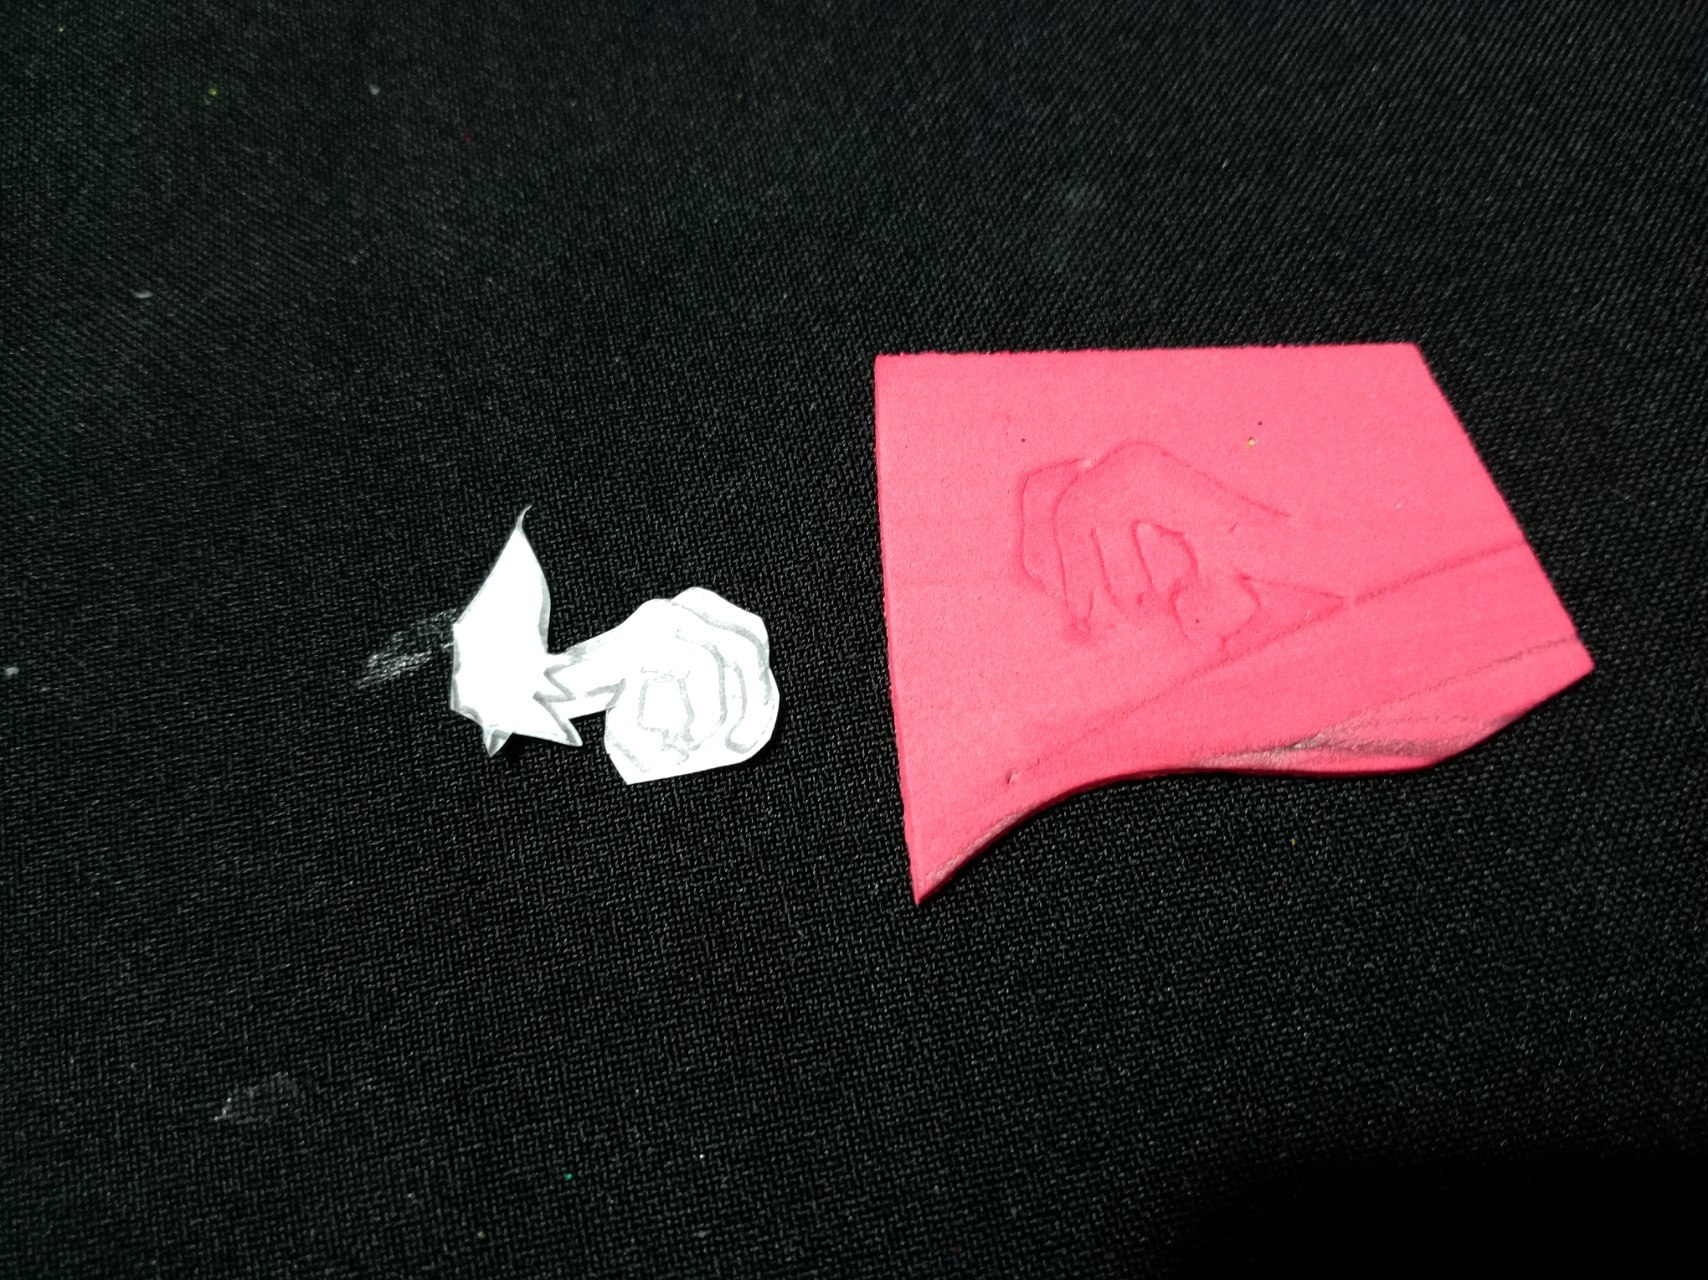
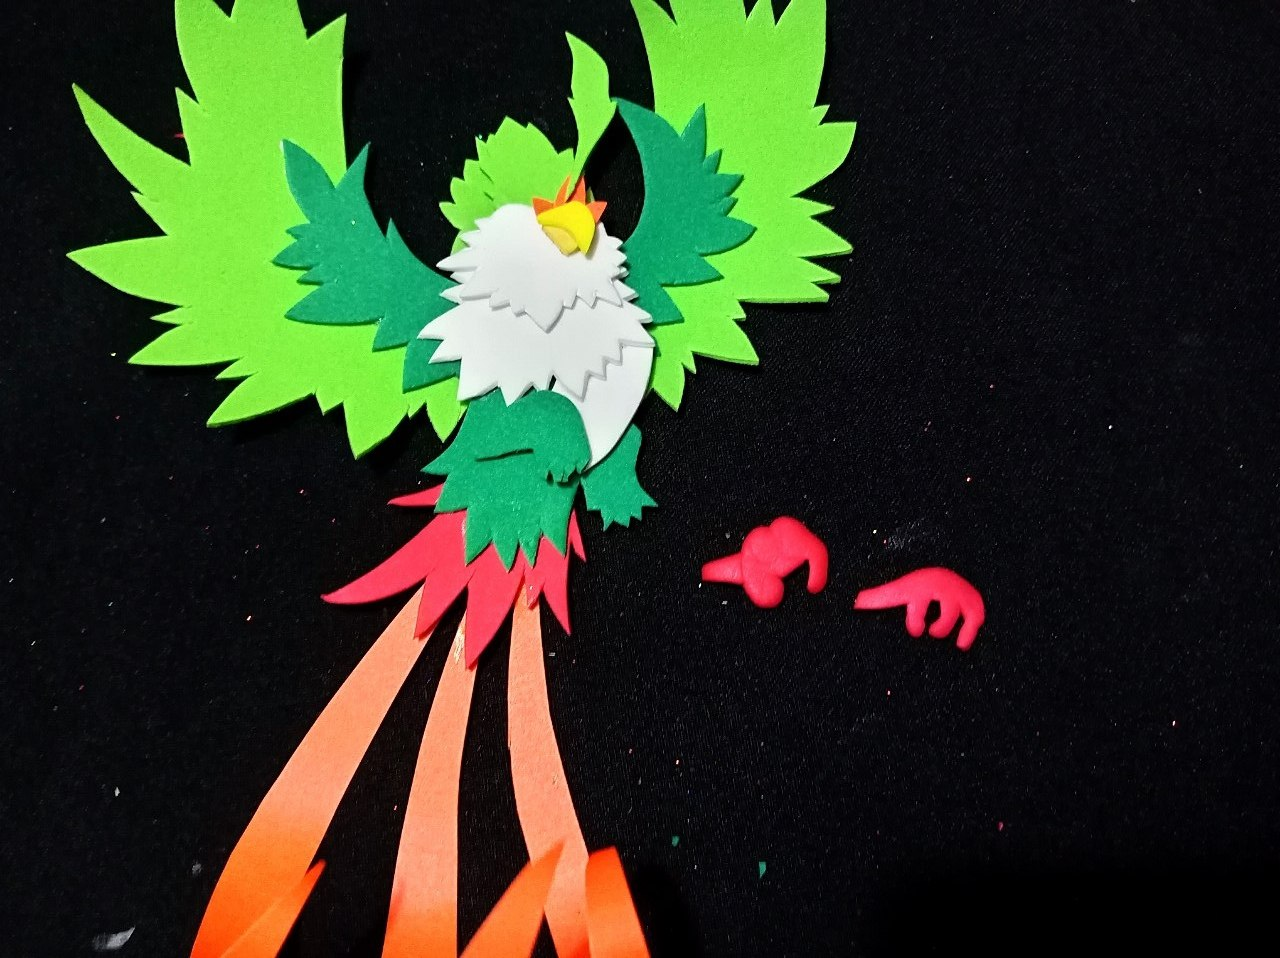
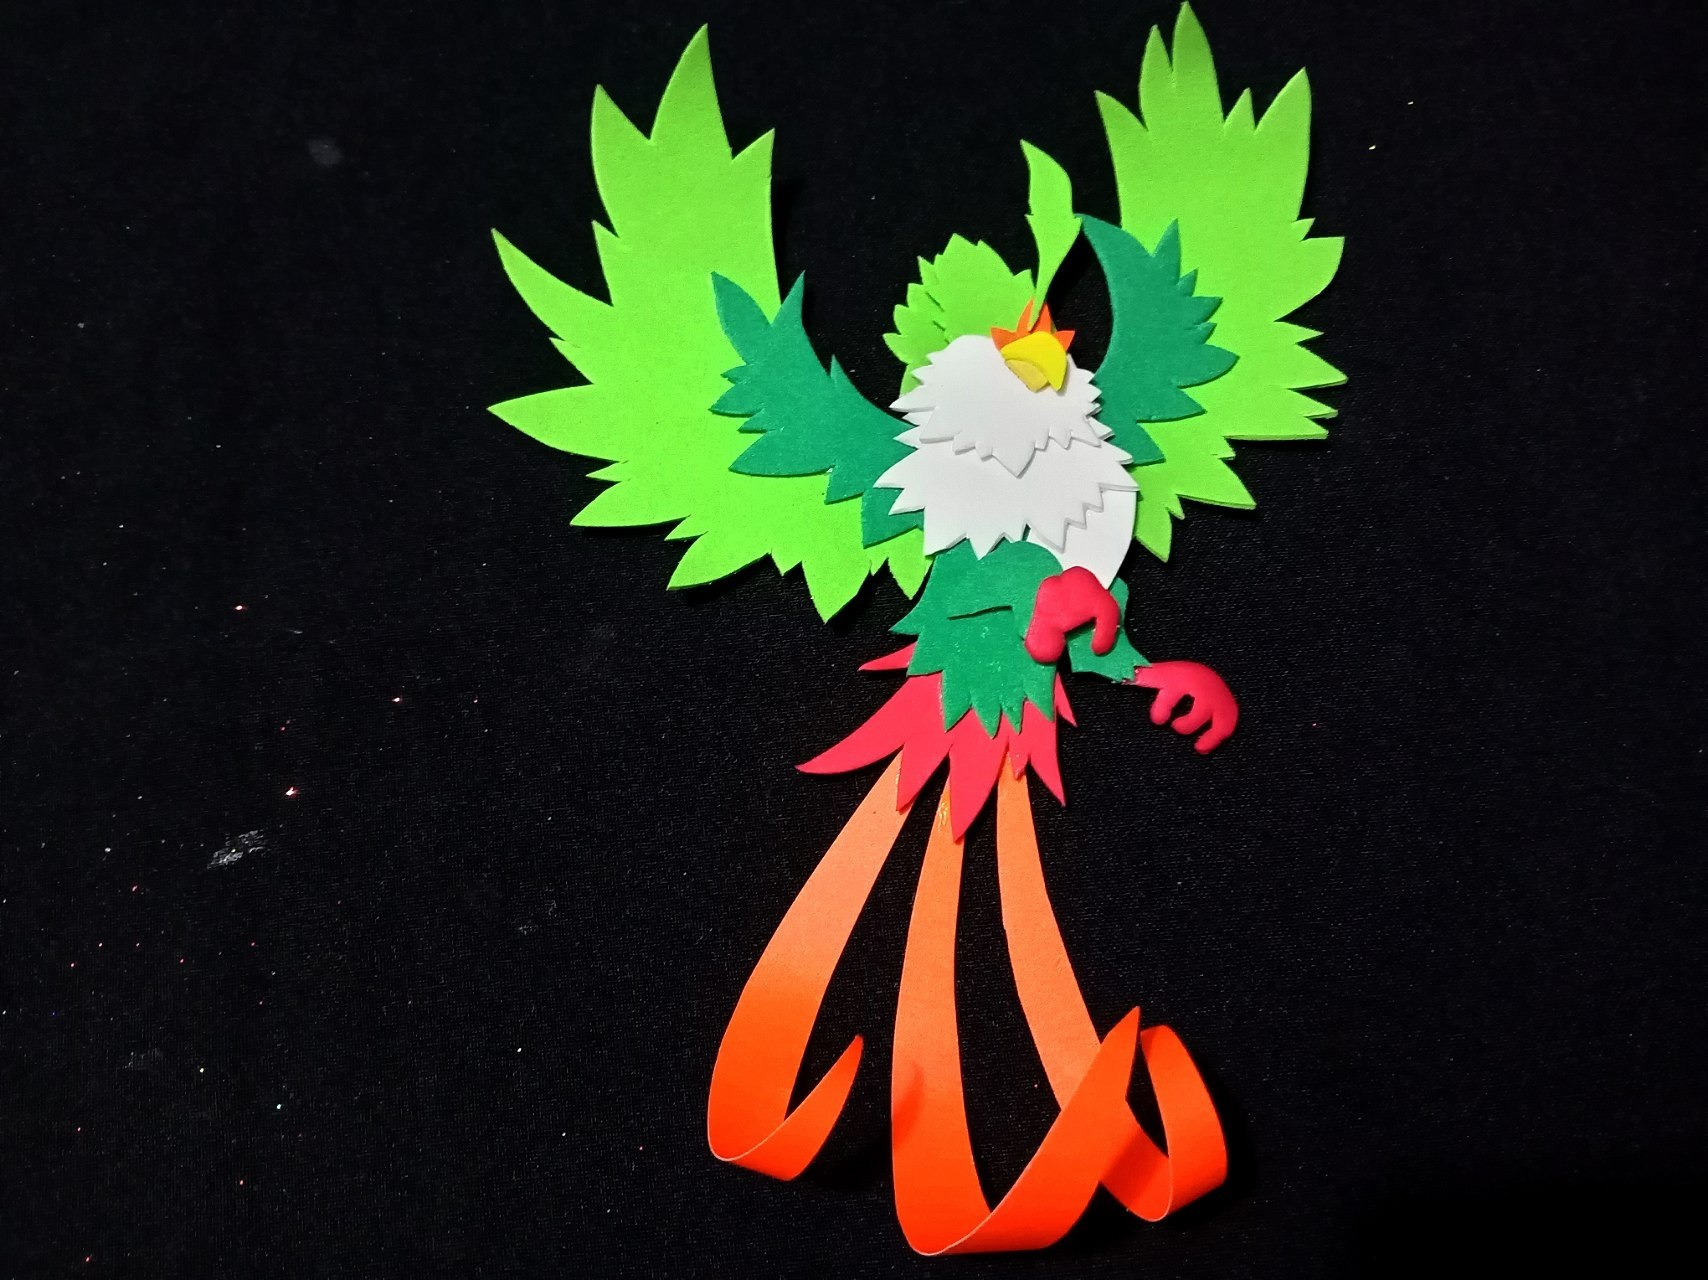
* Step 6:
For the legs, trace the piece onto red foam and cut it out carefully, then glue it on with cold silicone.
>![Spanish Version]
>* Paso 6:
>
>Para sus patitas, Calcamos la pieza en foamis rojo y cortamos cuidadosamente, para luego pegarlas con el Silicon frío.
||||
|-|-|-|
---
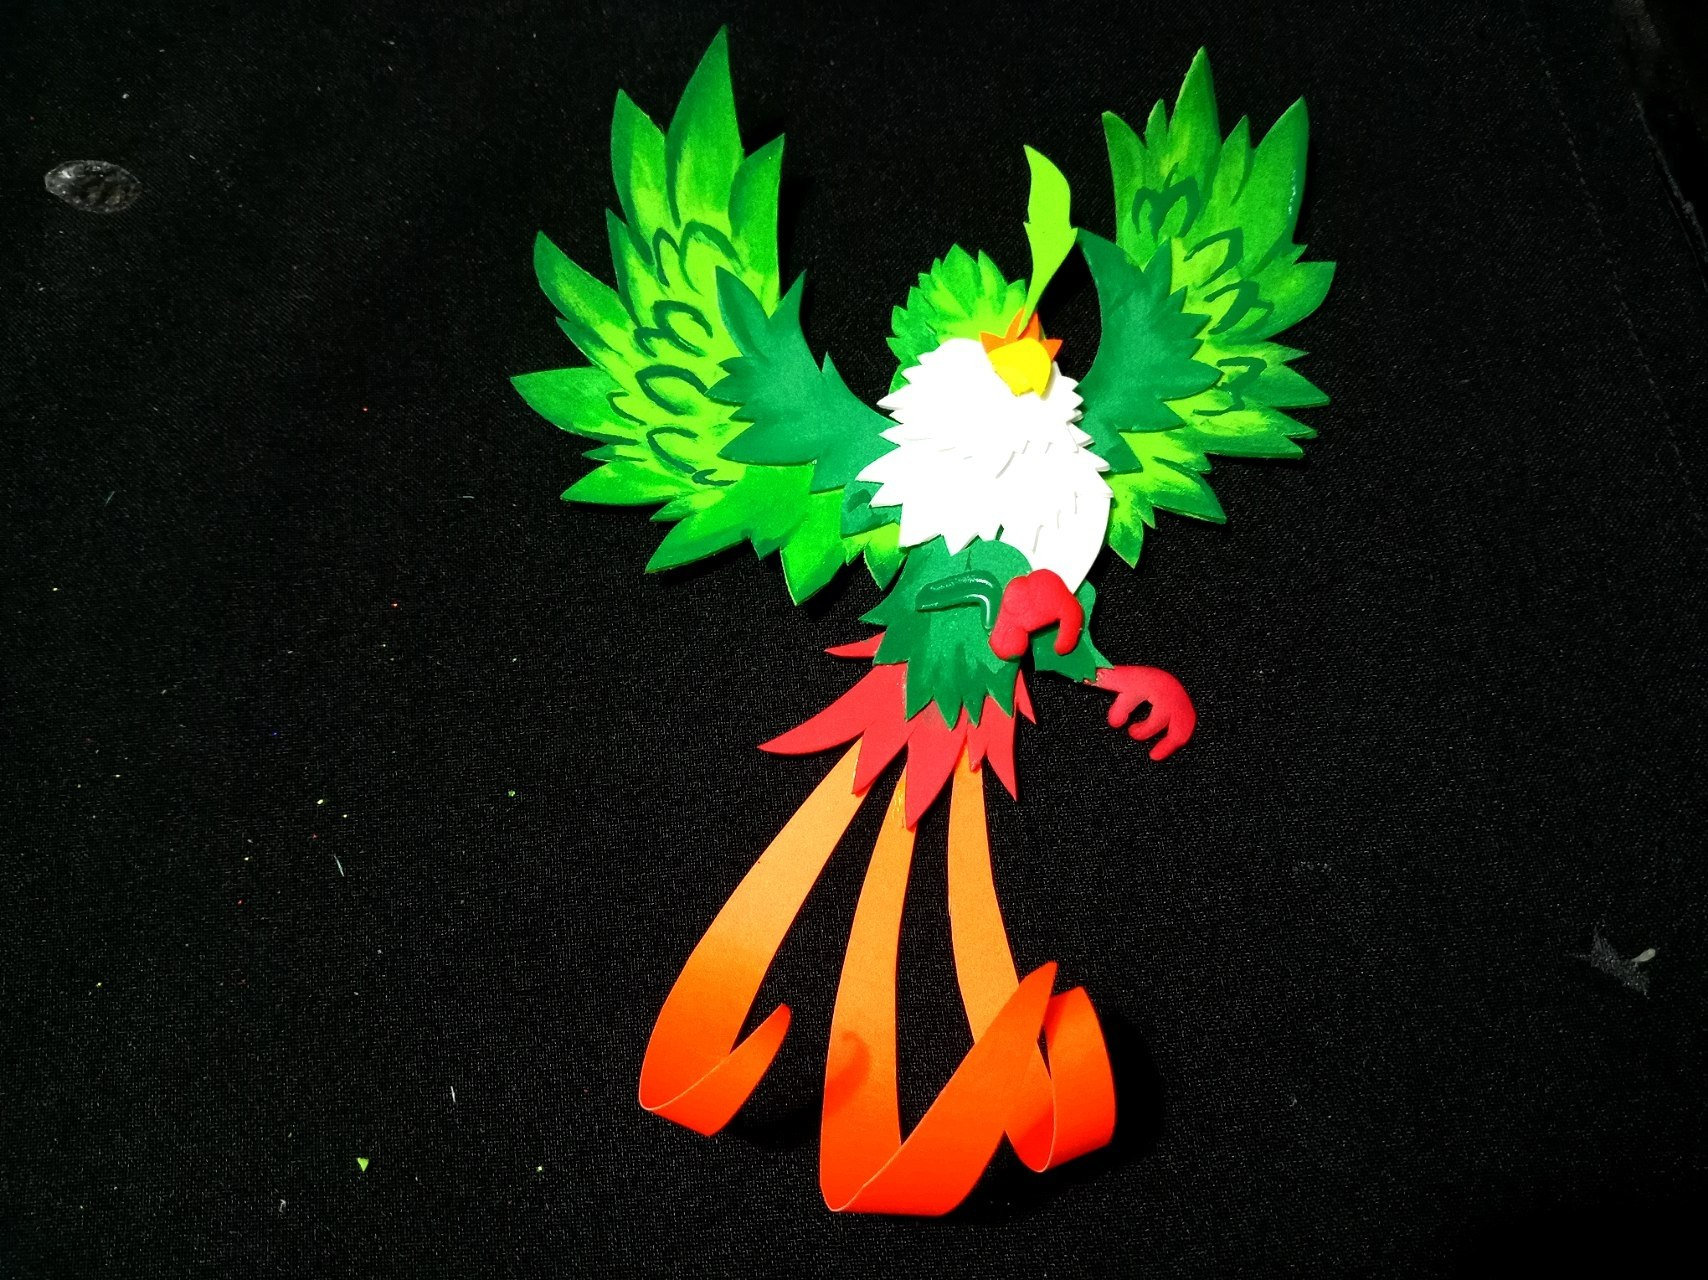
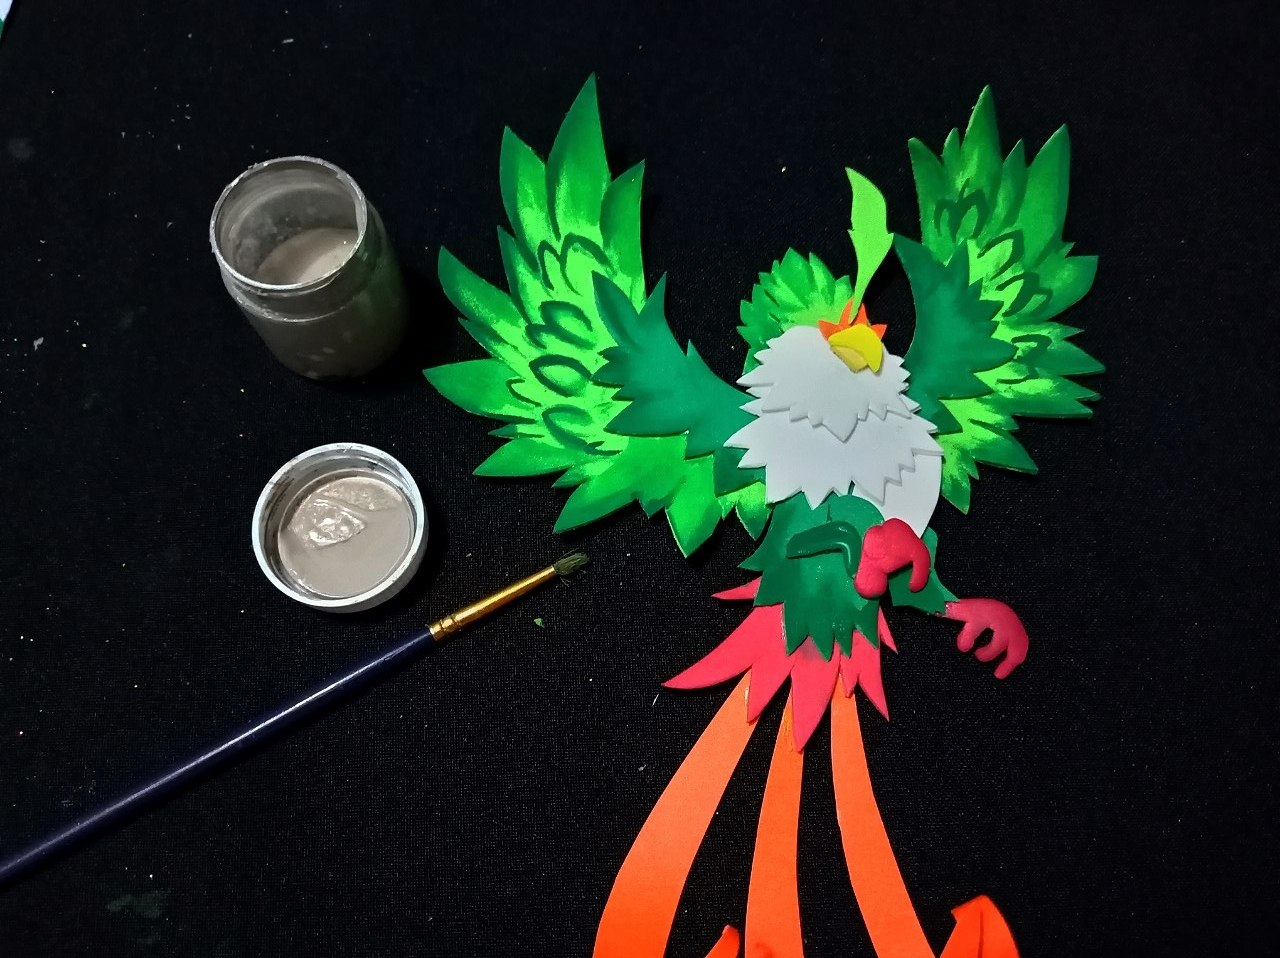
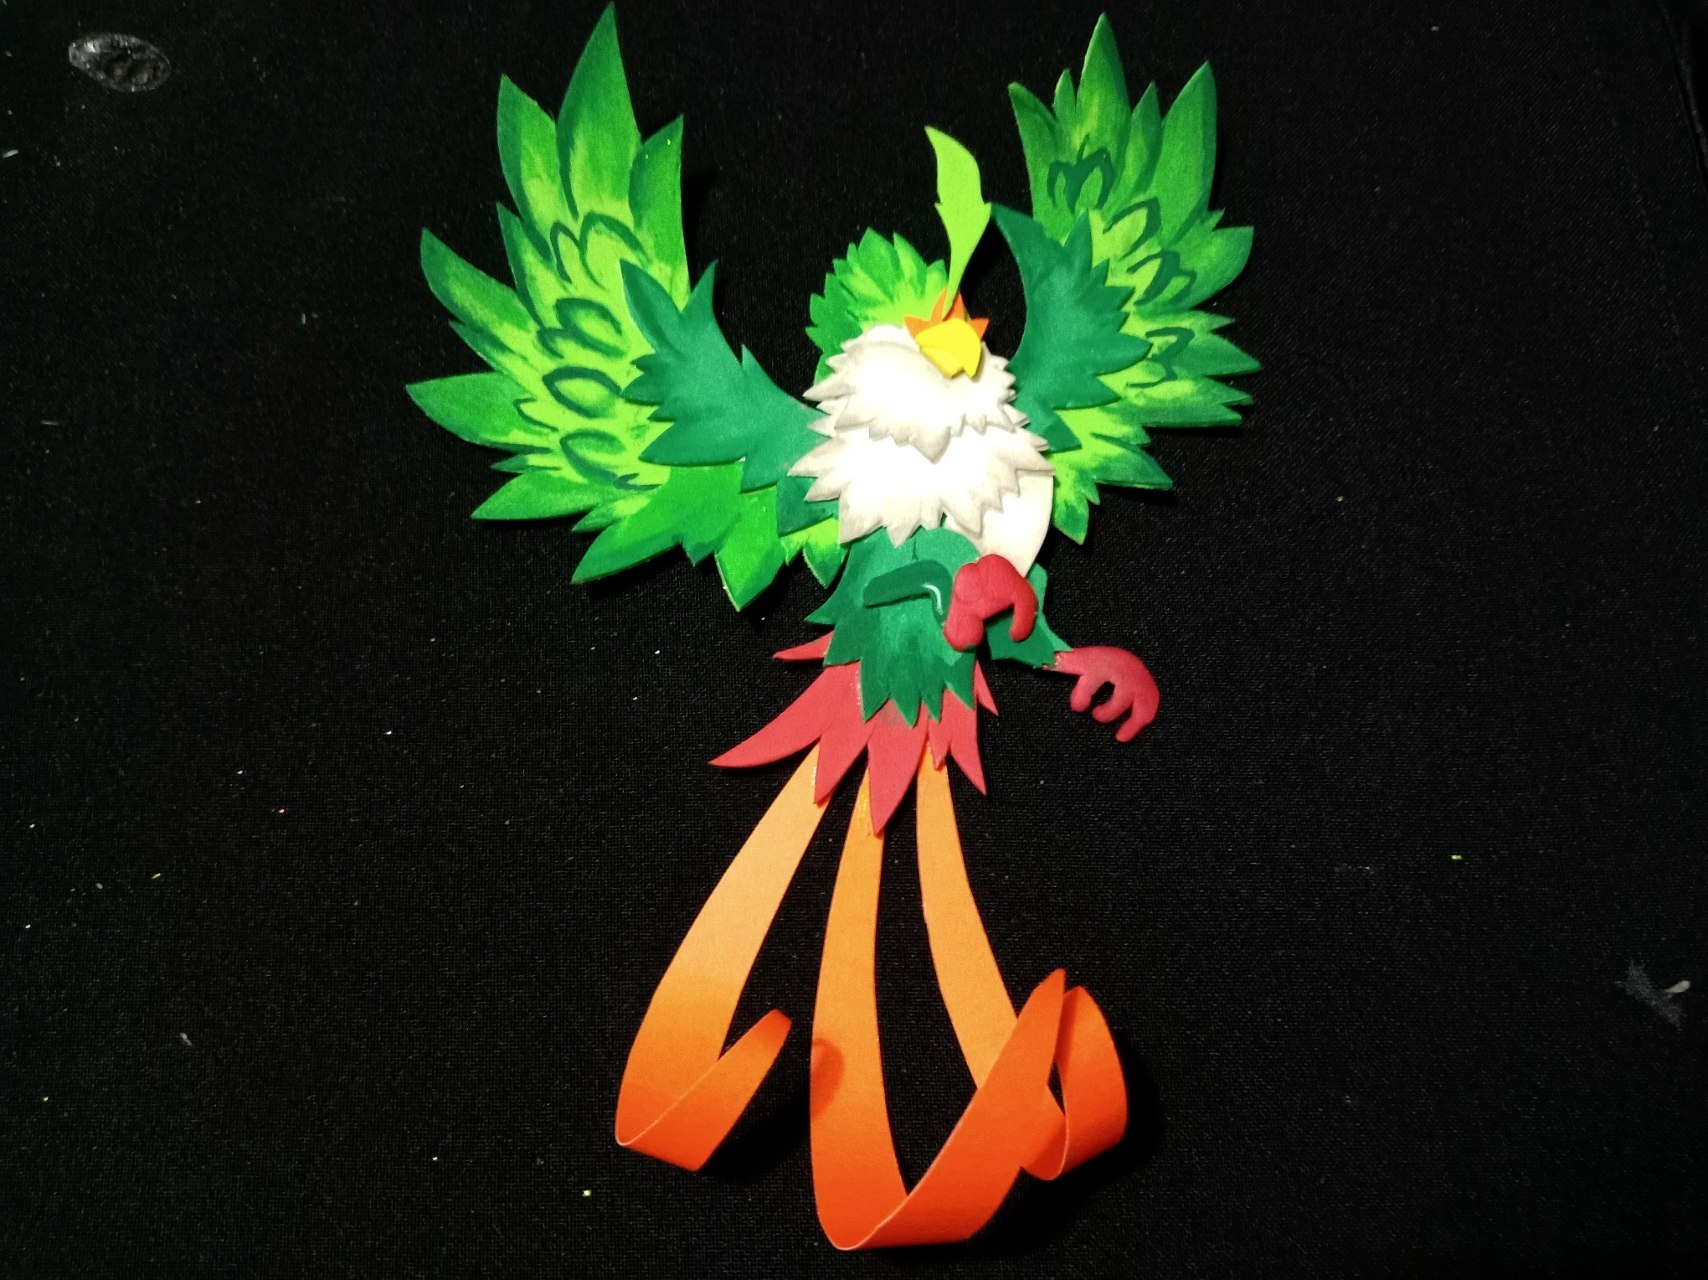
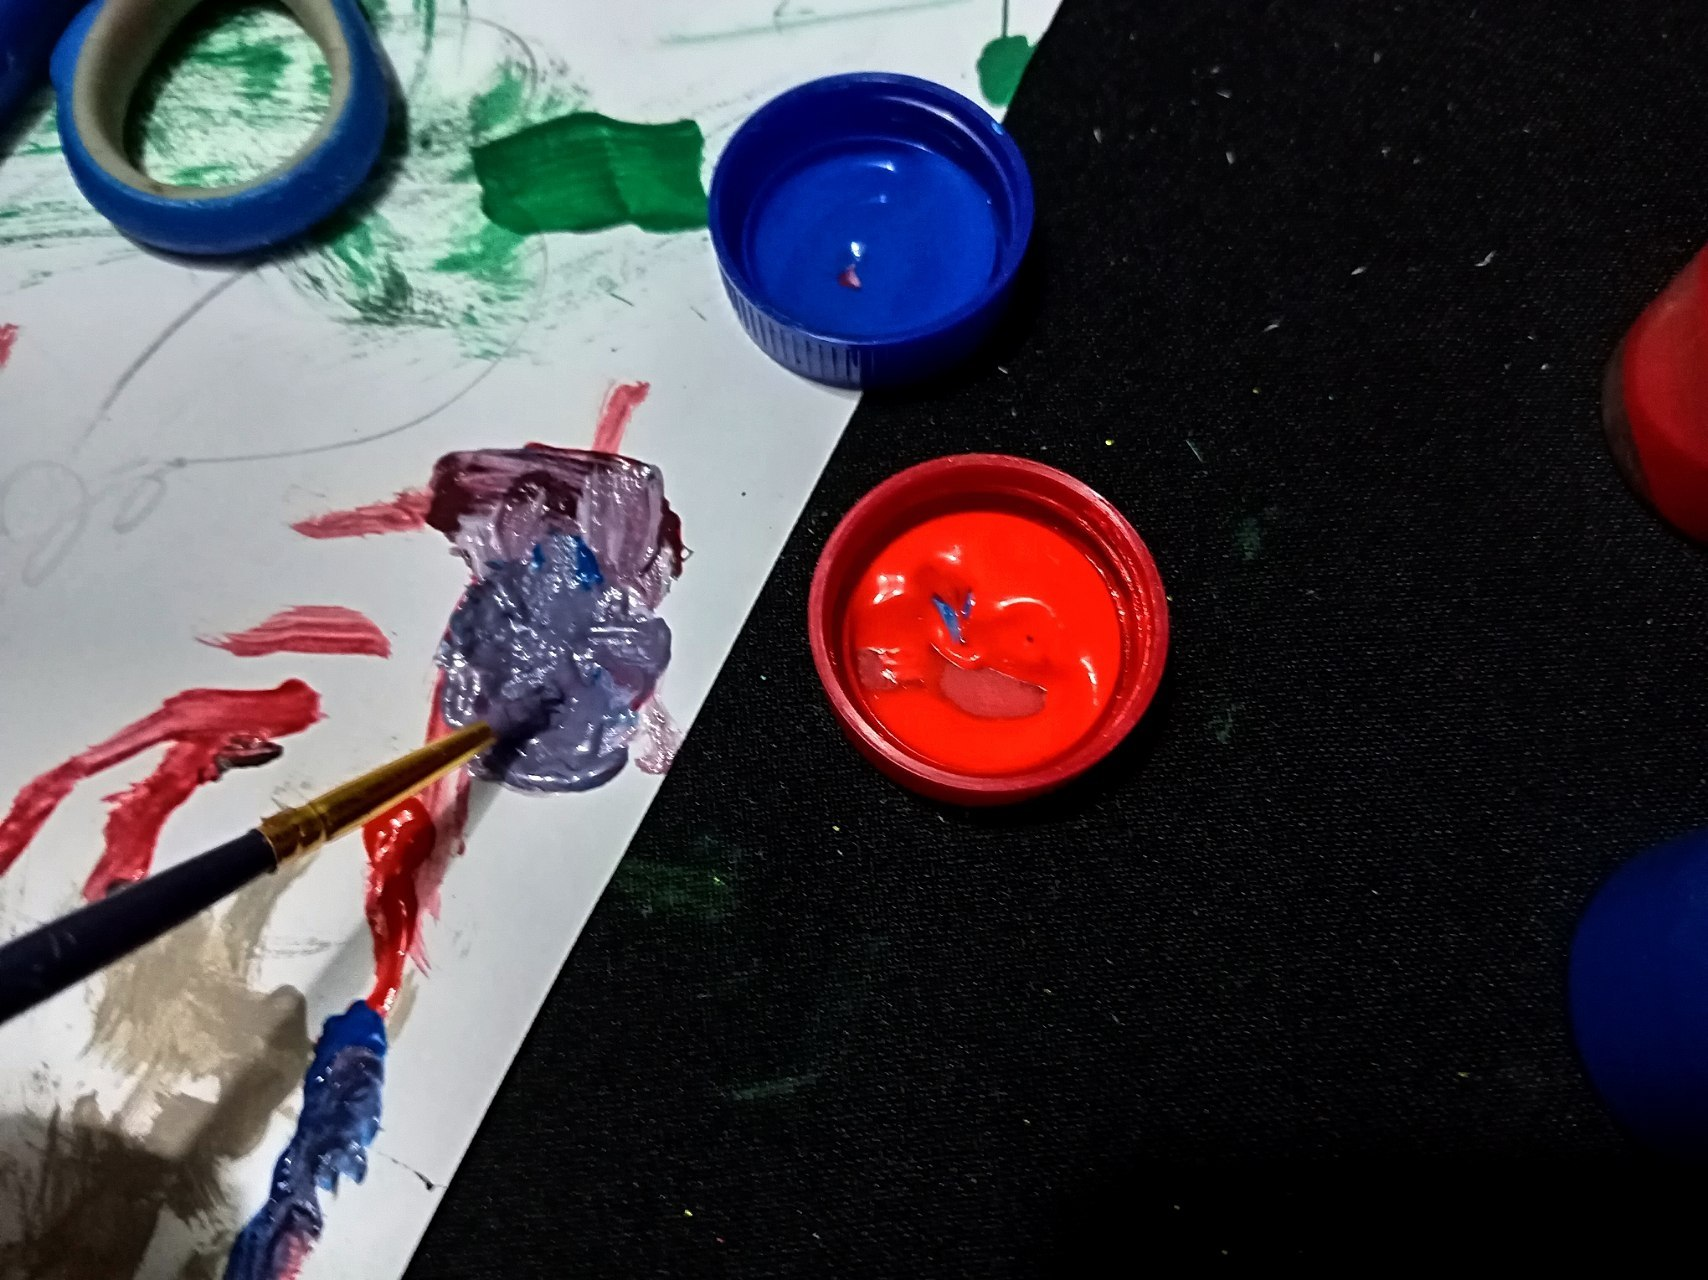
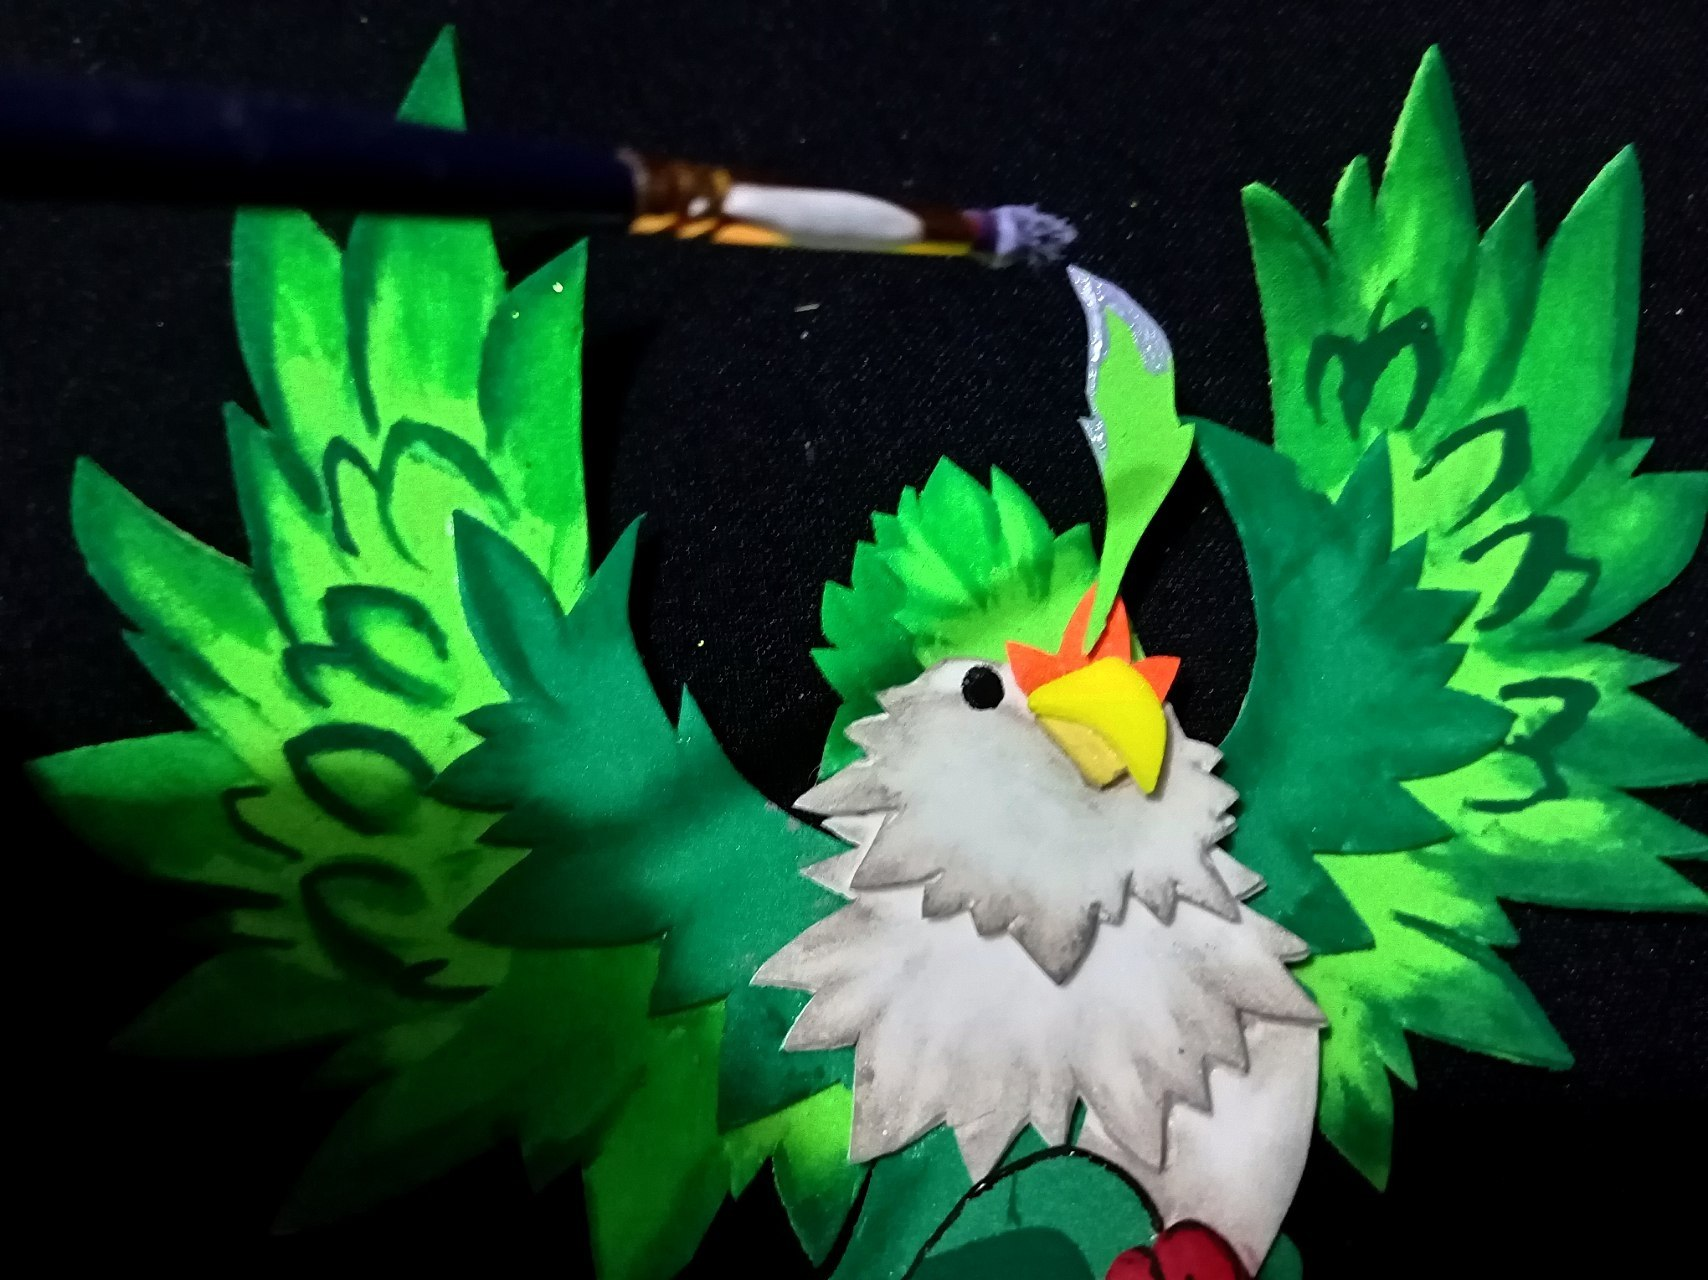
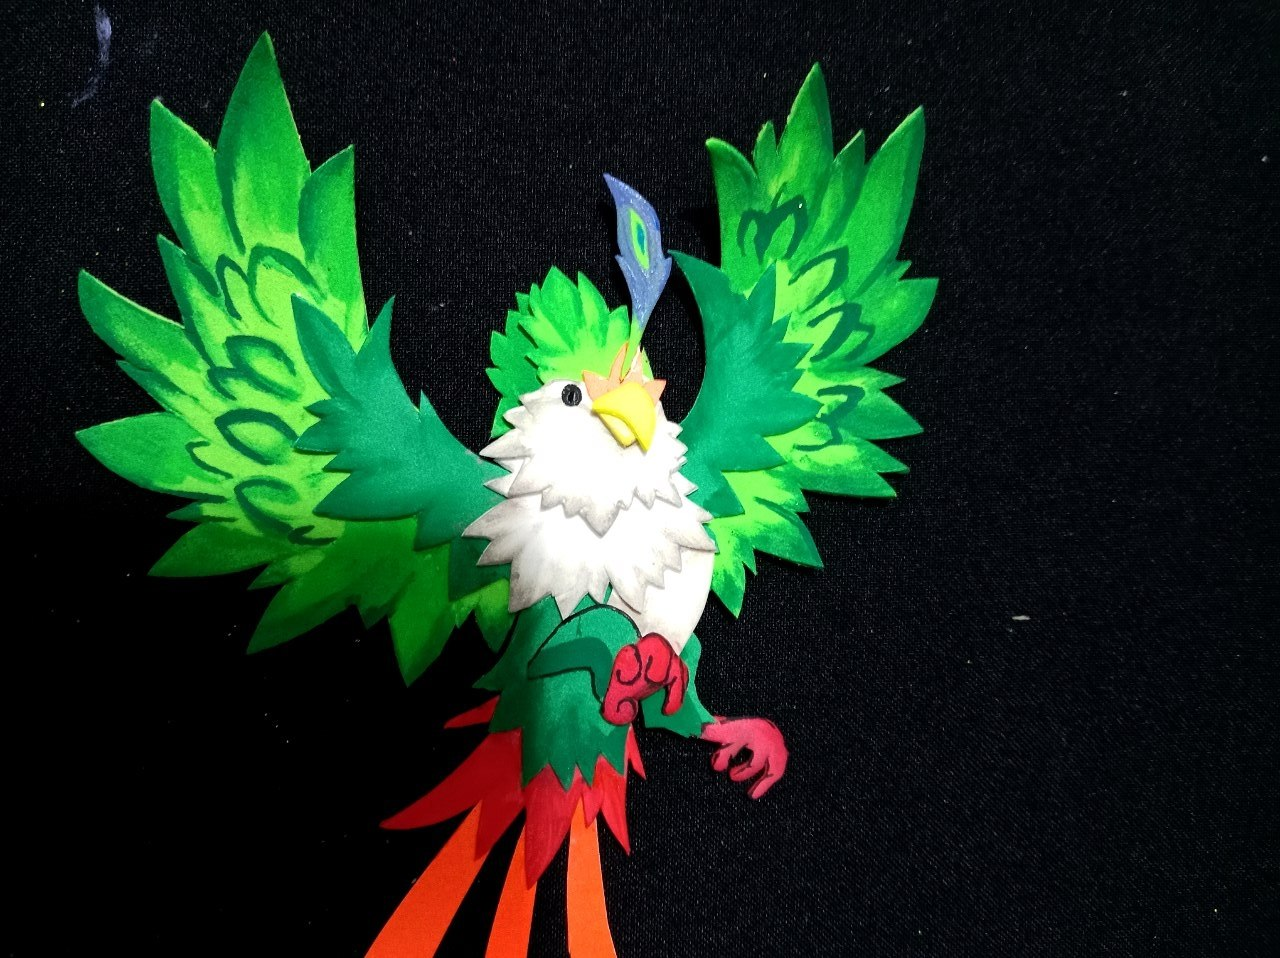
Step 7:
To finish our craft project, use a fine brush and black, green, light and dark green, white, beige, blue, and red paints to bring your bird to life. Use the paints to create shadows, highlights, and details on its plumage to make it look more realistic.
>![Spanish Version]
>* Paso 7:
>
>Para finalizar nuestra manualidad, con un pincel fino y pinturas negra, verde, claro y oscuro, blanca, beige, azul y roja, dale vida a tu ave. Usa las pinturas para crear sombras, luces y detalles en su plumaje y que se vea más realista.
|||
|-|-|
|||
|||
|||
---
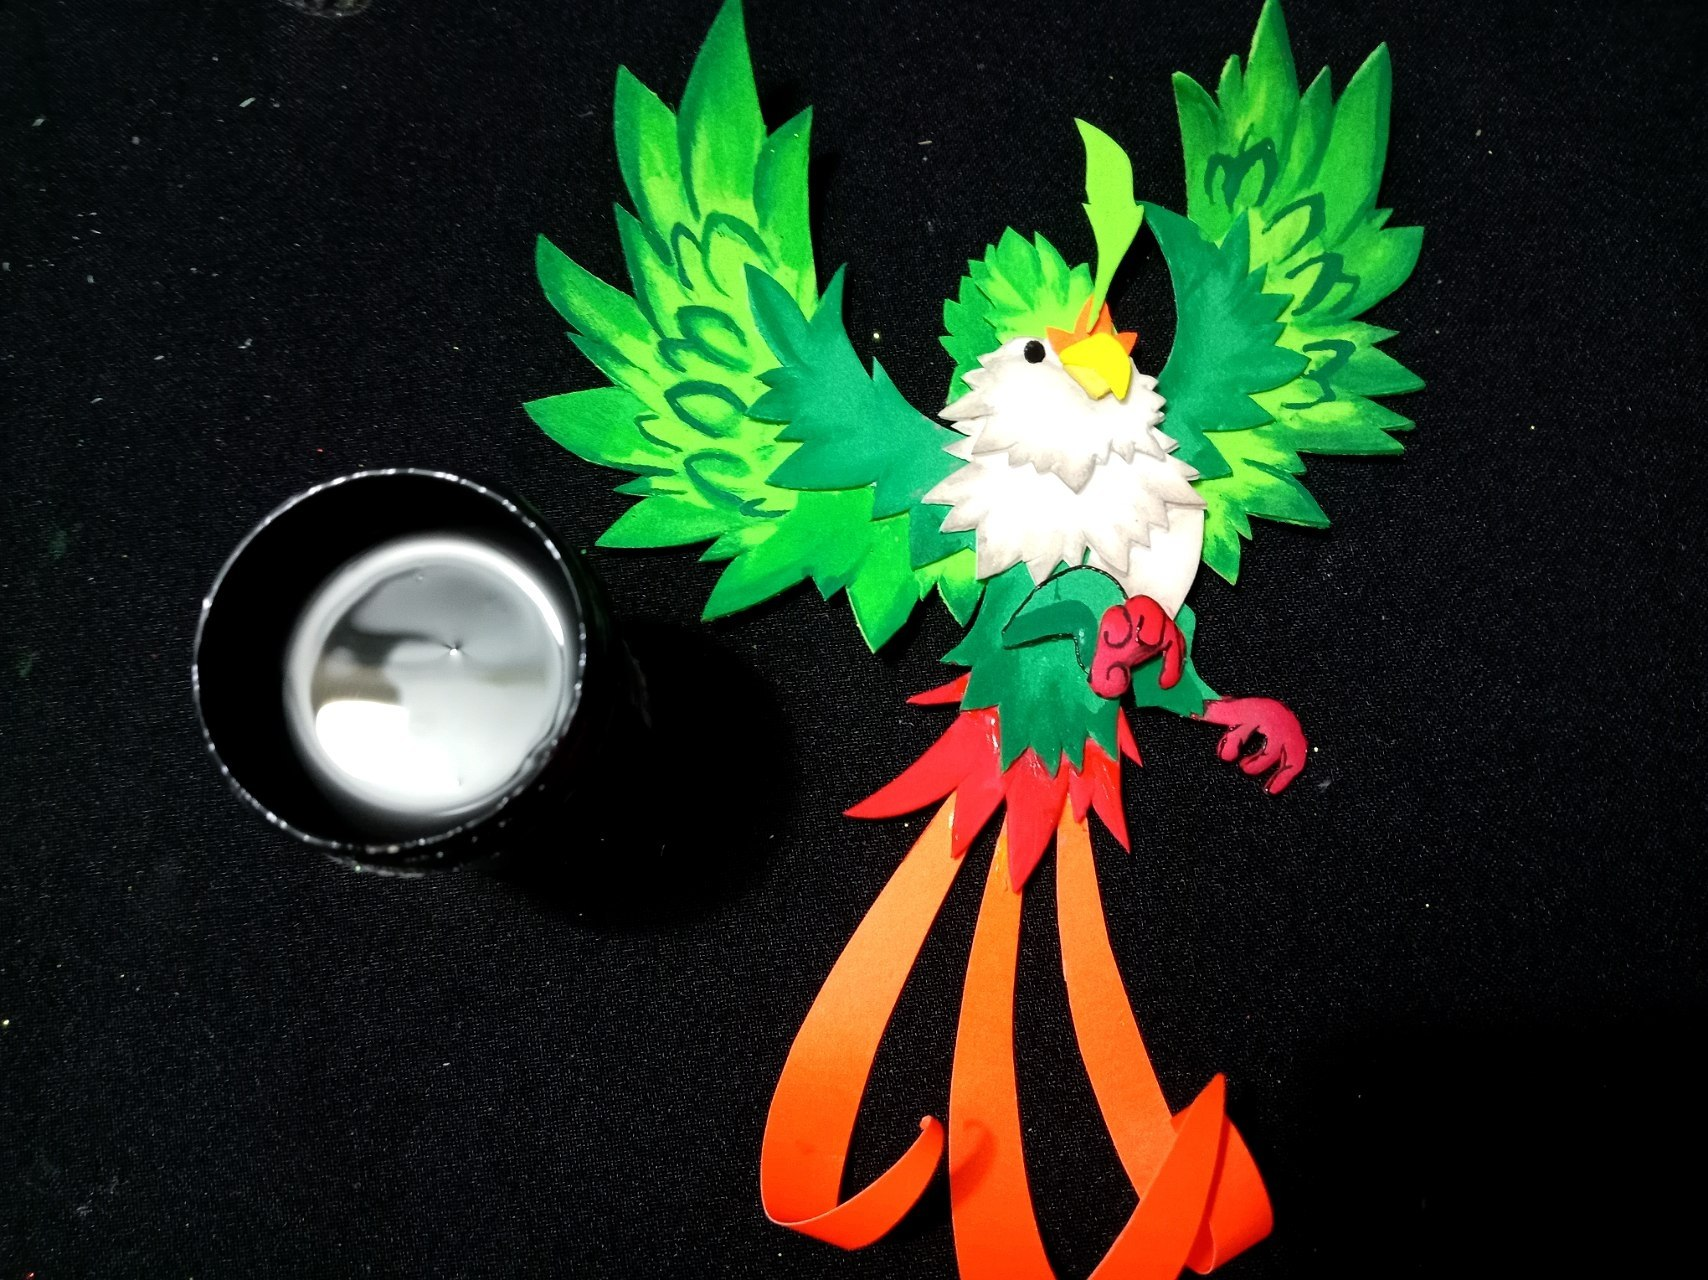
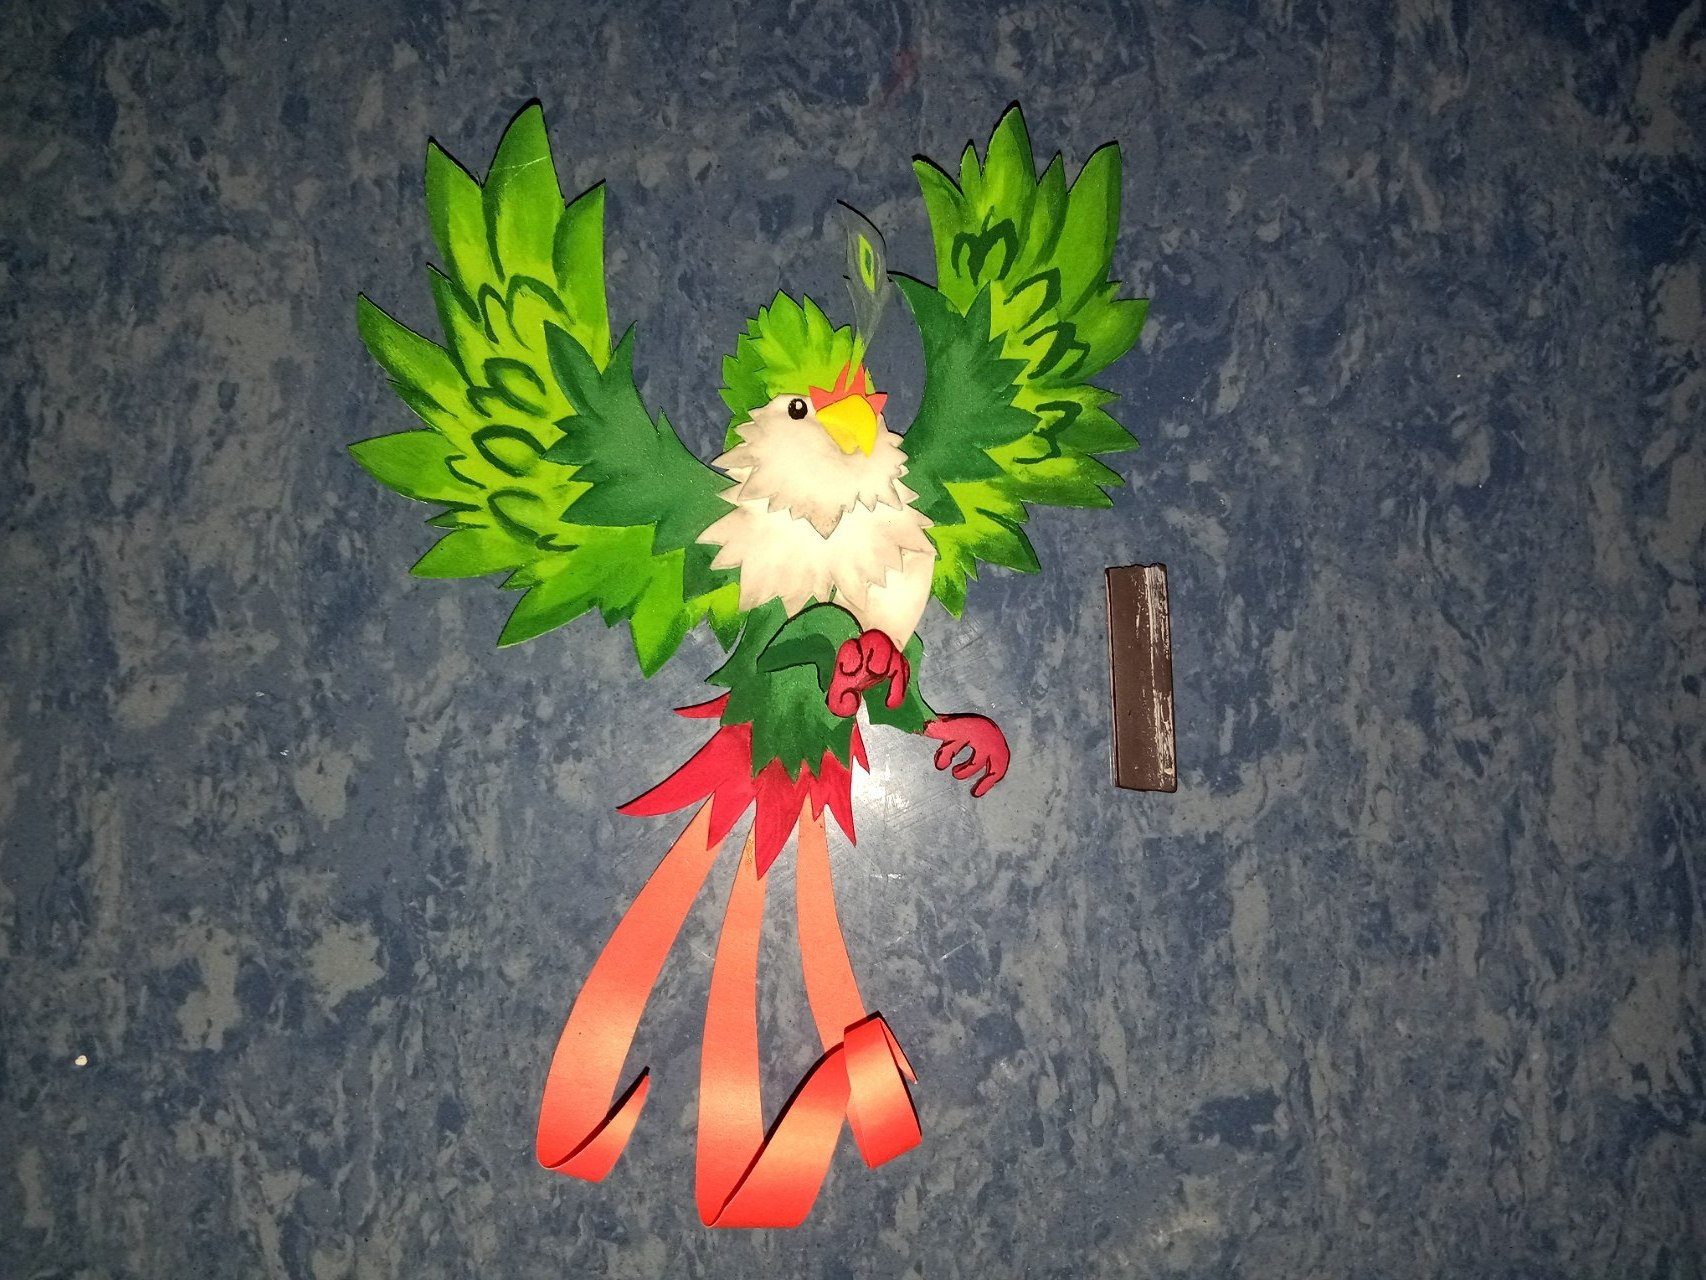
Finally, stick a piece of magnet on the back, and your Chirpily is ready to decorate your fridge at home.
>![Spanish Version]
>Finalmente le pegamos una troso de imán en la parte de atrás, y tendremos nuestro Chirpily listo para adornar nuestra nevera en casa.
|||
|-|-|
---
And that's how you can make a fridge magnet inspired by Chirpily. I hope you like the result as much as I do.
I'm in love with the designs of these creatures and will probably continue to create crafts inspired by them.
See you next time!
>![SPANISH VERSION]
>Y así puedes obtener un adorno para nevera inspirado en Chirpily. Espero que el resultado les haya gustado tanto como a mí.
>
>Estoy enamorado de los diseños de las criaturas y probablemente siga creando manualidades inspiradas en estas.
>
>¡Nos vemos en la próxima manualidad!
---
Thank you for coming this far!
The thumbnail was created with Canva.
The original design belongs to [Holozing](https://peakd.com/@holozing/posts)
---
Tutorial: Chirpily Inspired Refrigerator Magnet [EN-ES]
@gsusart
· 2025-08-17 23:23
· Holozing Community
#holozing
#chirpily
#tutorial
#spanish
#diy
#doityourself
#craft
#fanart
#stepbystep
Payout: 0.000 HBD
Votes: 91
More interactions (upvote, reblog, reply) coming soon.