
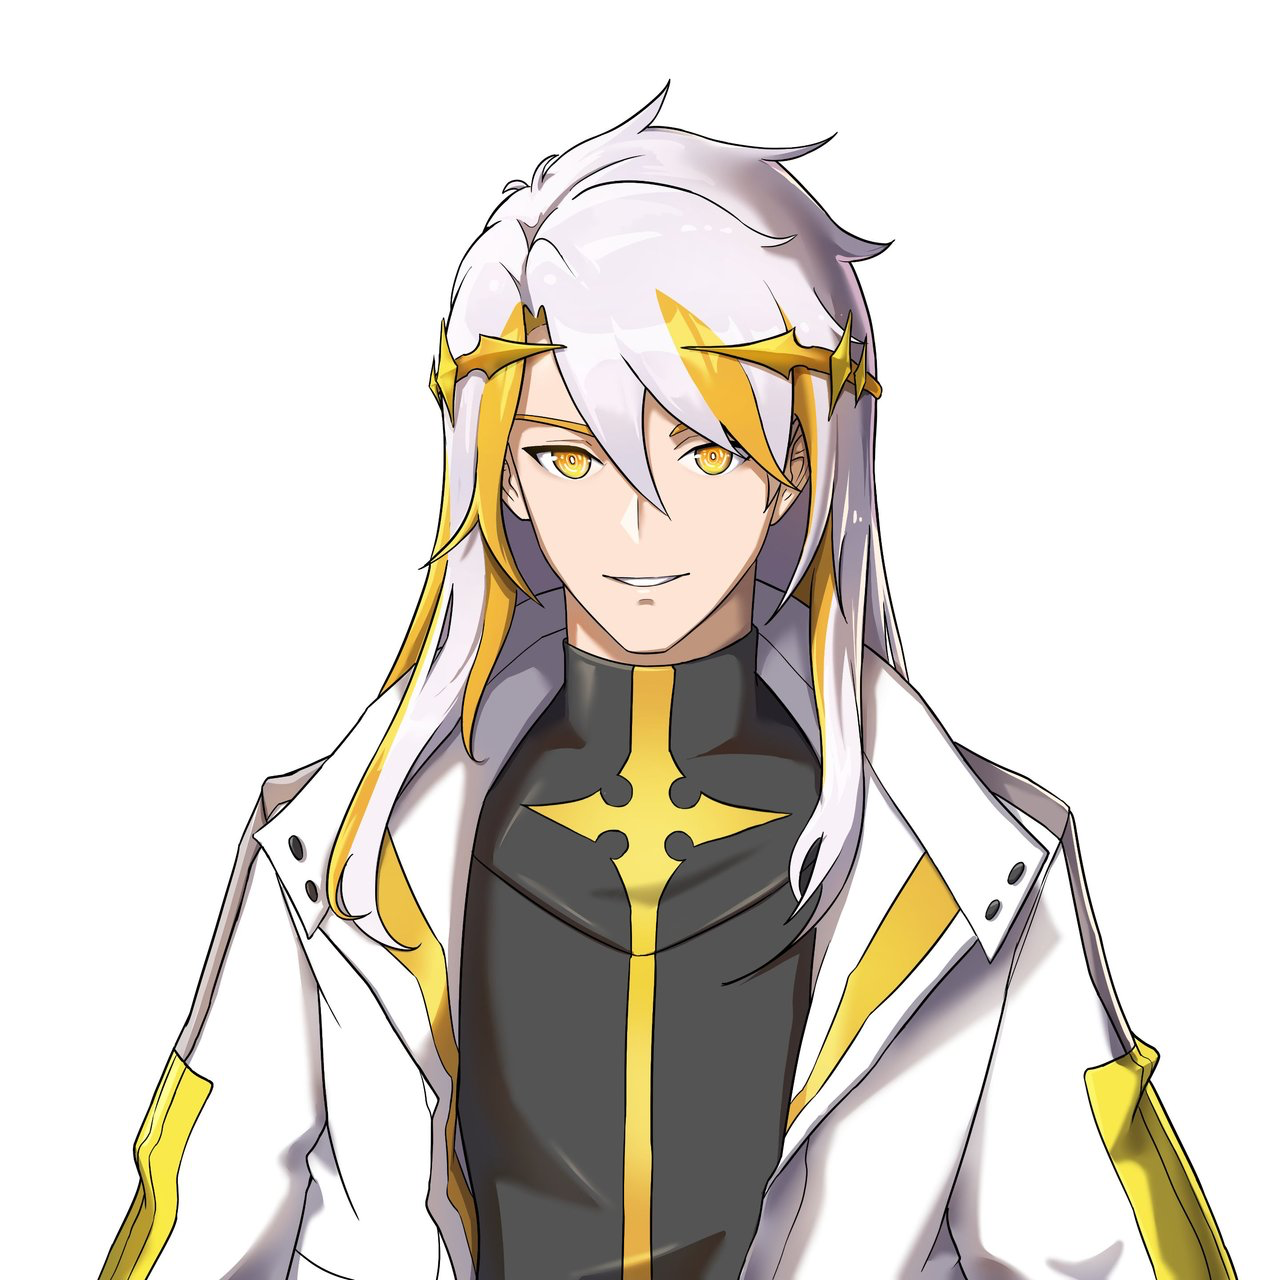
REFERENCE:
sheeeshhh 😮🔥
THE MATERIALS USED AND THE PROCESS
Materials used:
- Pencil
- Sketchpad
- Laptop
- Mouse
- Krita (application I used)
Process:
In the process of making this fanart, I think it took me around 17-20 hours😭. This includes the sketching of the template in my sketchpad. The greatest challenge for me when I was still making this fanart was the shading. Im still a infant when it comes to digital art and belnding is now my new enemy, especiall blending in the face.
CREATING TEMPLATE
In creating the template, I use a sketchpad and pencil. I did this because it's difficult to directly draw my template in kirta since I'm using a mouse. I think its more efficient for me in doing so, I could just take a picture of the finished template and import it in the application when I'm done.
As you can see the template that I uploaded in krita and the final image I used for my line art is different because I felt I little bit of with the original one so I deceded to play around with the transform tool.
LINE ART
After uploading the template I proceeded with creating the lineart and applied the first layers of colors. In the line art I just turn the opacity of the template layer so I could see the lines im tracing clearer.
SHADOWS & HIGHLIGHTS
COLORS SHADOWS & HIGHLIGHTS
In this fanart, its actually my first time using the masing group or clipping group. I made think alot easier for me. For the shadows and highlights of male light healer, I only used the soft air brush. I just adjust it's size and color depending on the contrast of colort I want for a particular part, wether im highlighting or making a shadow. But for his hair, I used texture brush atleast to not make it very flat.
I started shading in the necj region then worked my way up the face and then the other part of the illustration. The shading oh the skin really took a lot of time, all I was capable of using was the soft air brush. If it werent for that, I could never have finish this art work wiht my current capabilities and skills. The rest I used some textured brush preset in the krita application...
BACKGROUND
Following my story for this fan art, I created canas sort of art as a background. I also added a shaddow effect casted on the background to create more effect that he is in front of the canvas.
The shadow effect is actually a new layer above the background layer. I used hard edge brush and used gaussian blur to have that shadowy effect. I lowered the opacity to 85% adn used the transform tool to move it around to have a more naatural look.
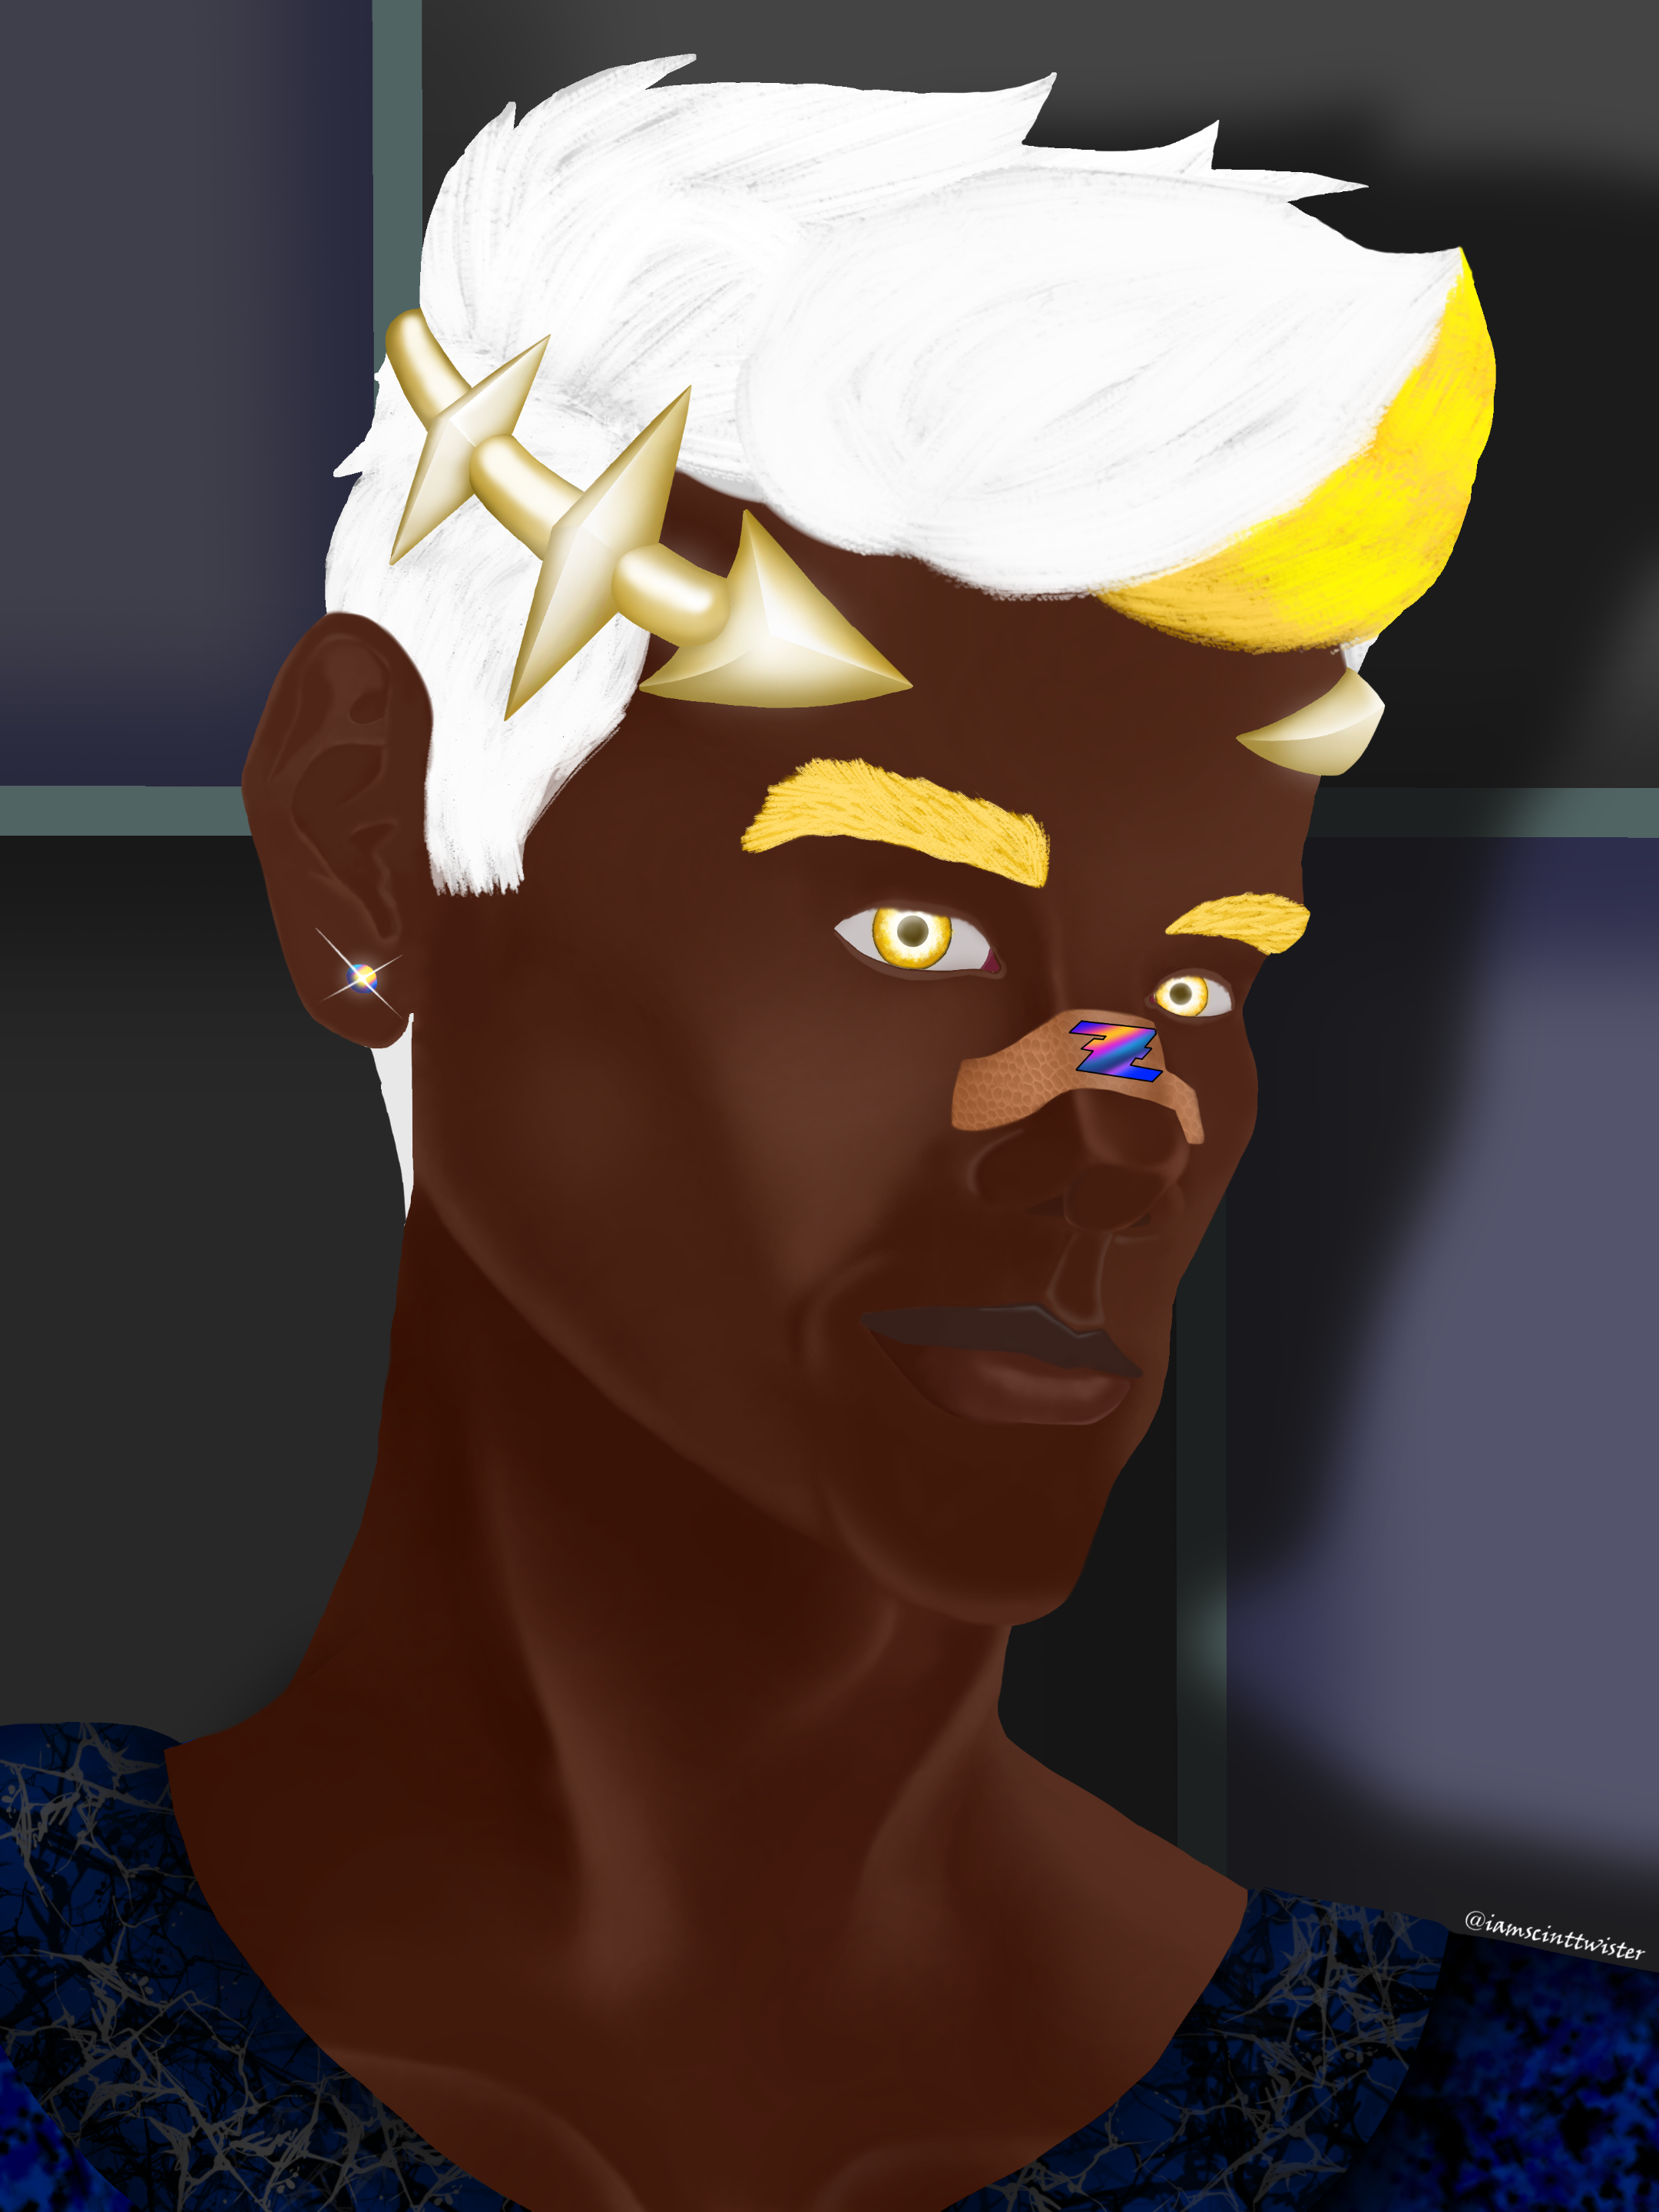
FINAL ARTWORK:
That's it for this blog guys... I hope that you liked my fanart and enjoyed reading through this blog, I really appriciate your time! I'll see you guys next time, have a great day ahead friends! Take care! 👋👋😁