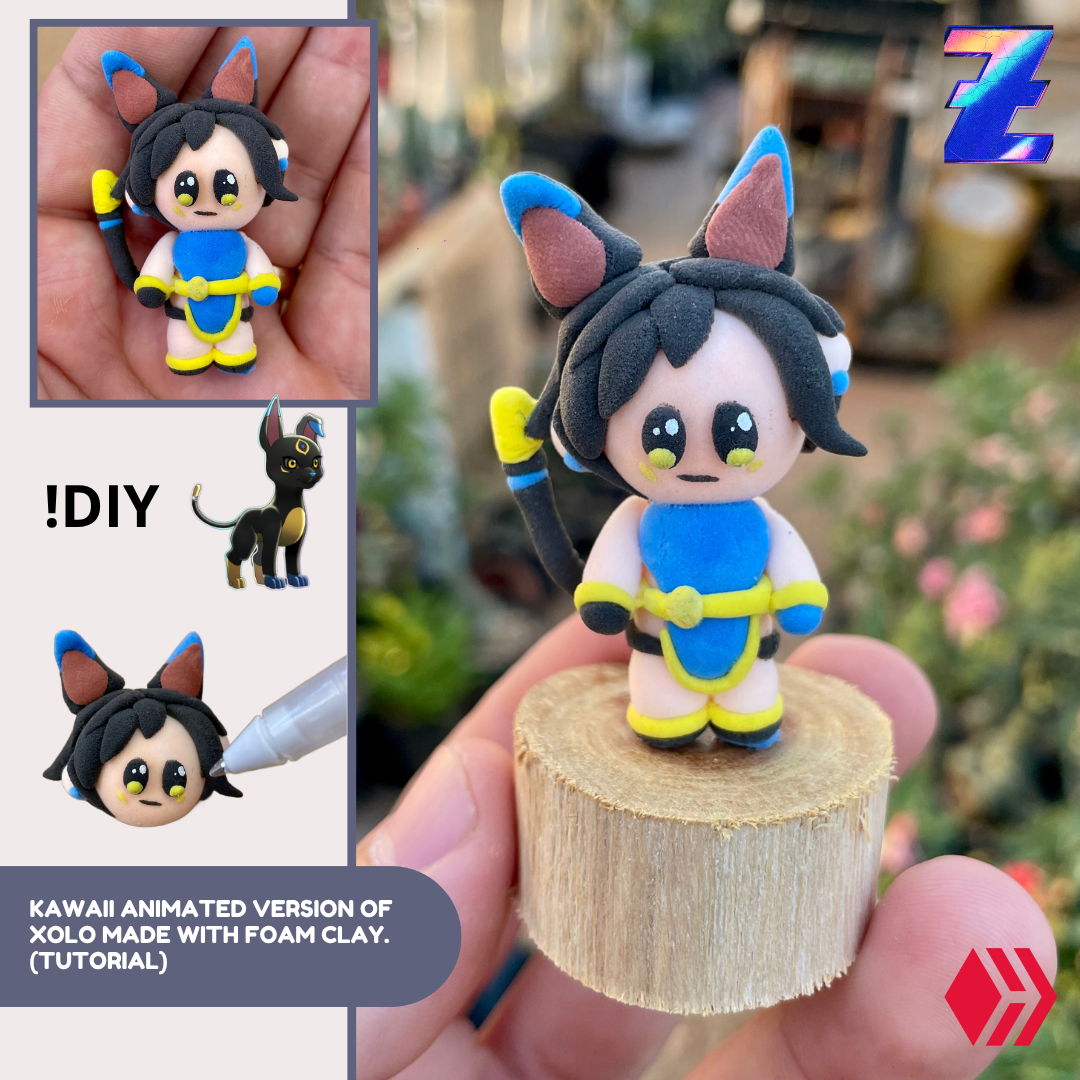
Hello!! Good morning ☀️ Holozing community, video game and Web3 gaming lovers! Today, I’ll teach you how to make the creature 'Xolo' using moldable foam clay (foam clay), but this time in an adorable kawaii animated version designed by me. I hope you all love this creation—this is for the entire community! I’m super excited to share my experience working with this flexible material. Join me! 😊
Next I will show you step by step the realization of my work. To start with, I will mention all the materials used:

Foami moldeable Blanco / White foam clay
Foami moldeable Negro / Black foam clay
Foami moldeable Azul / Blue foam clay
Foami moldeable Amarillo / Yellow foam clay
Foami moldeable Carmelita / Carmelite foam clay
Foami moldeable Beige / Beige Green foam clay
Herramientas para pasta foami / Kit of foami
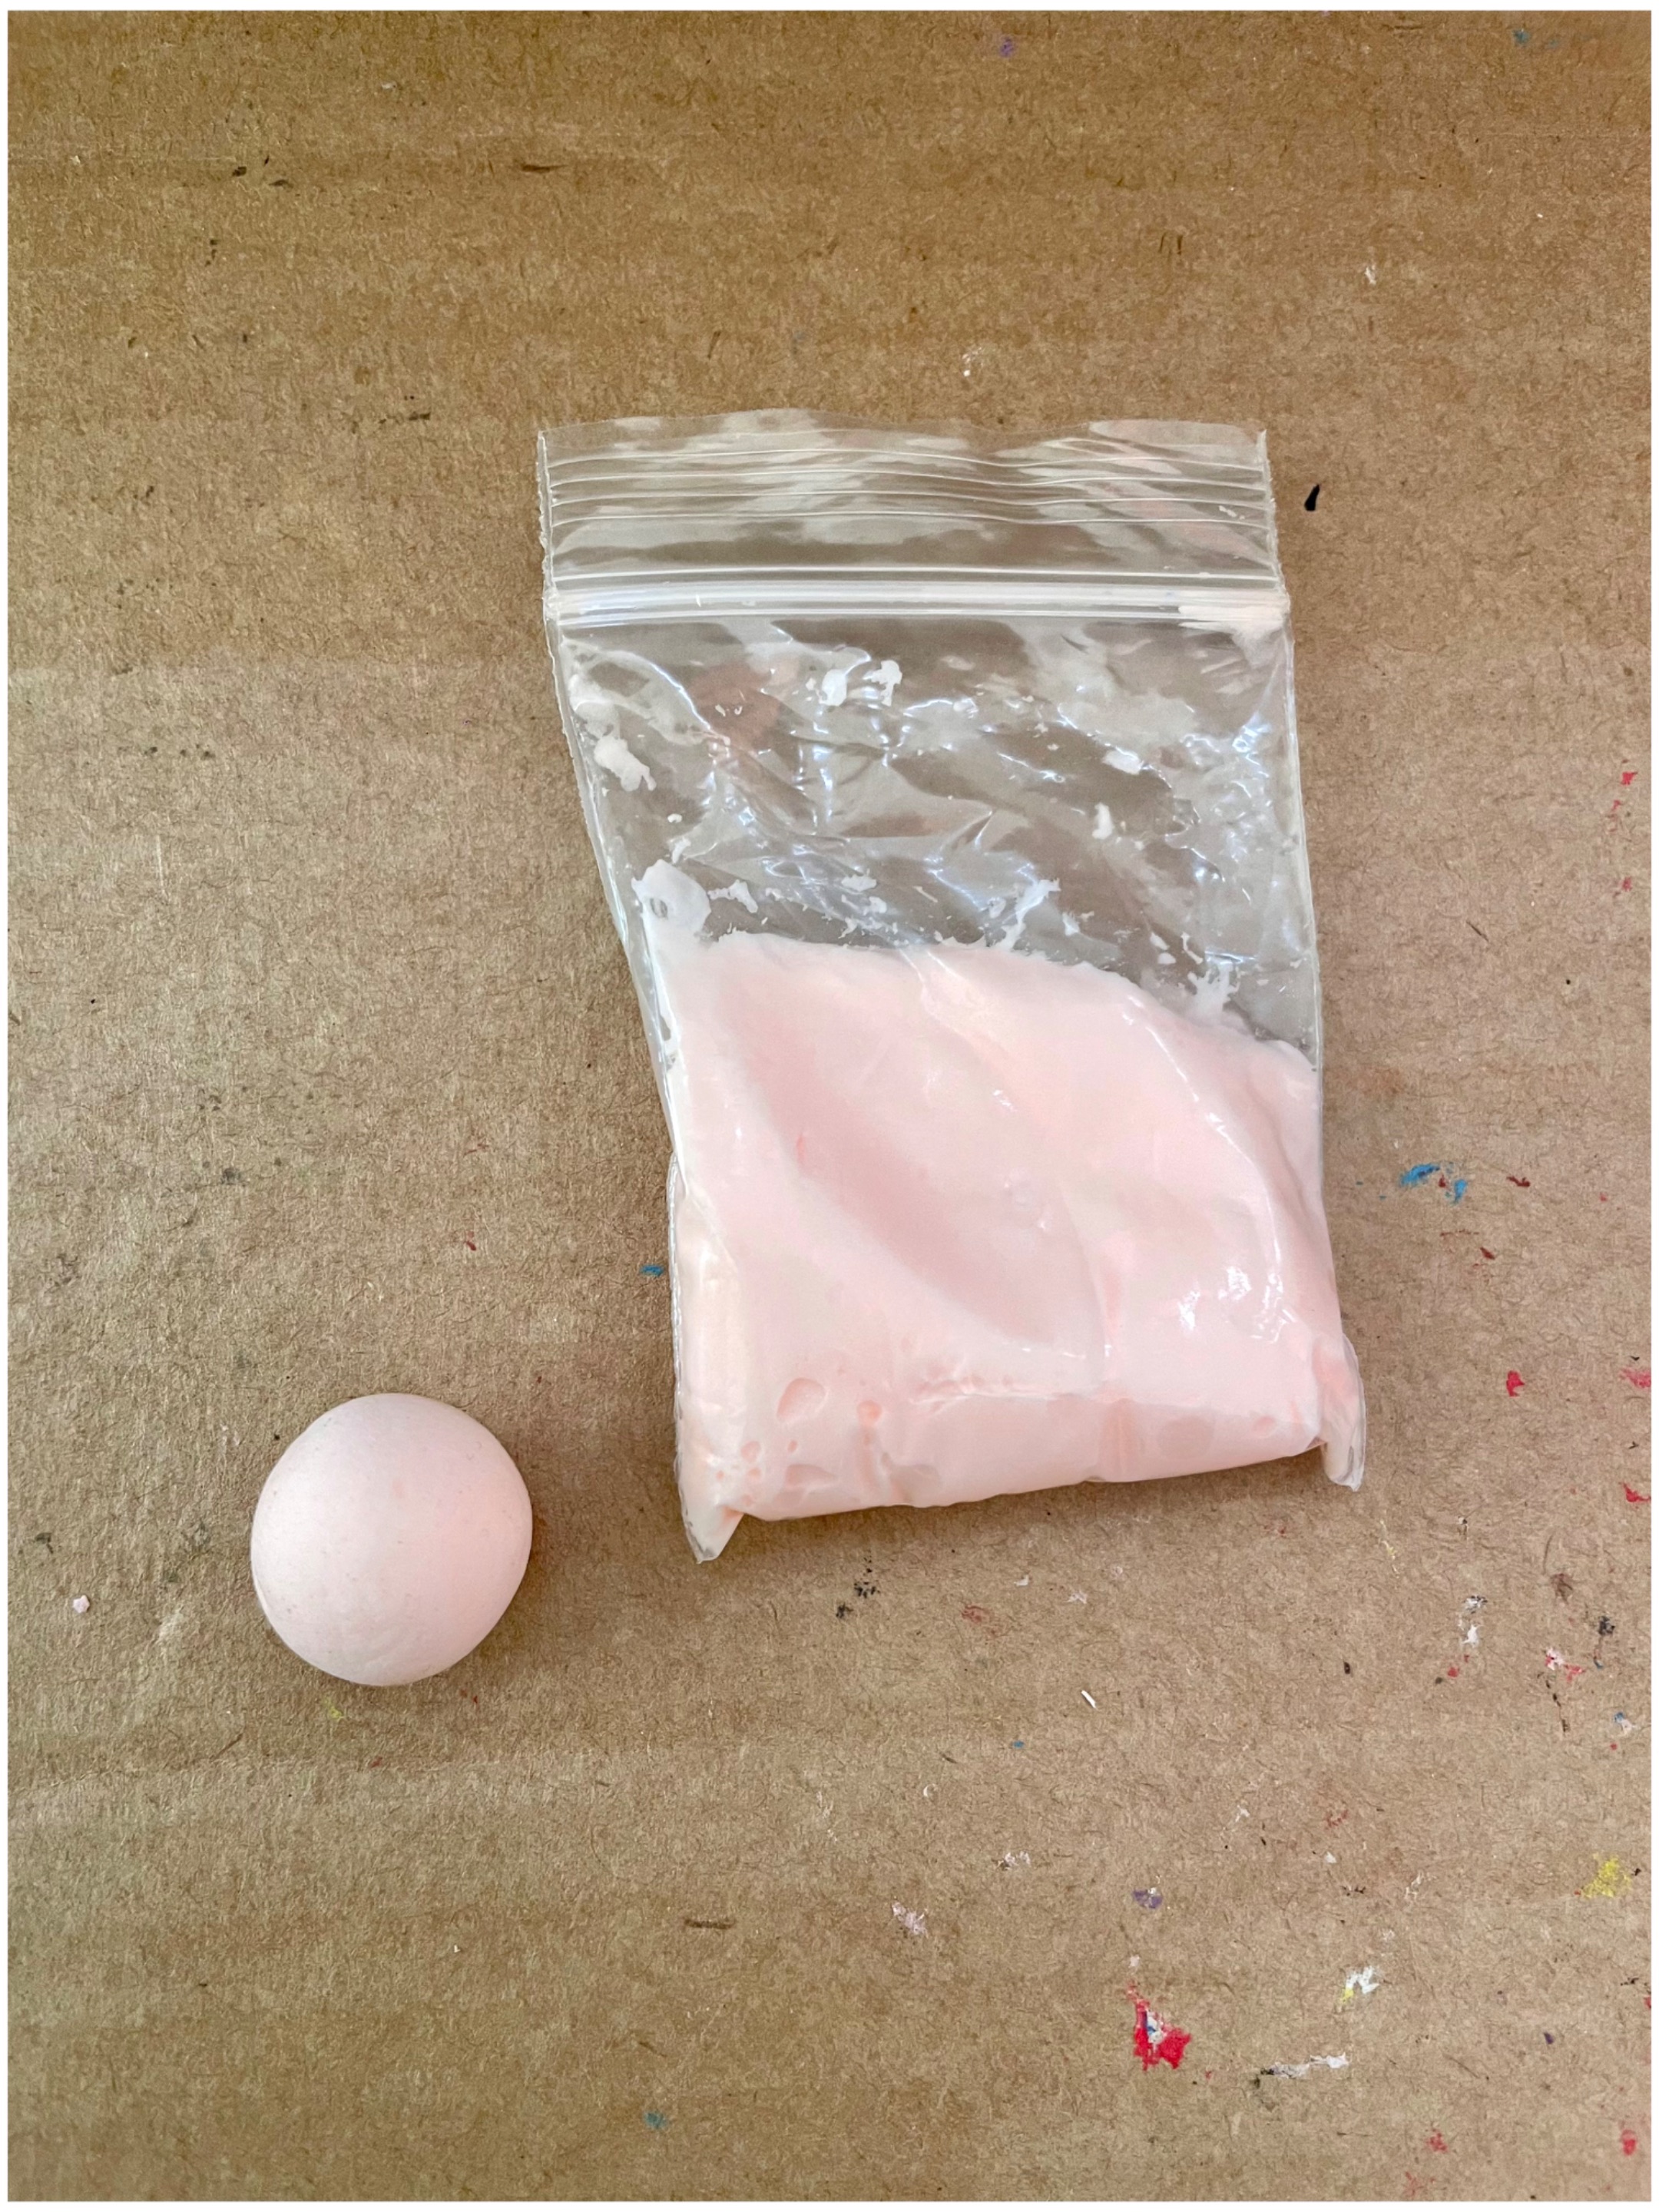
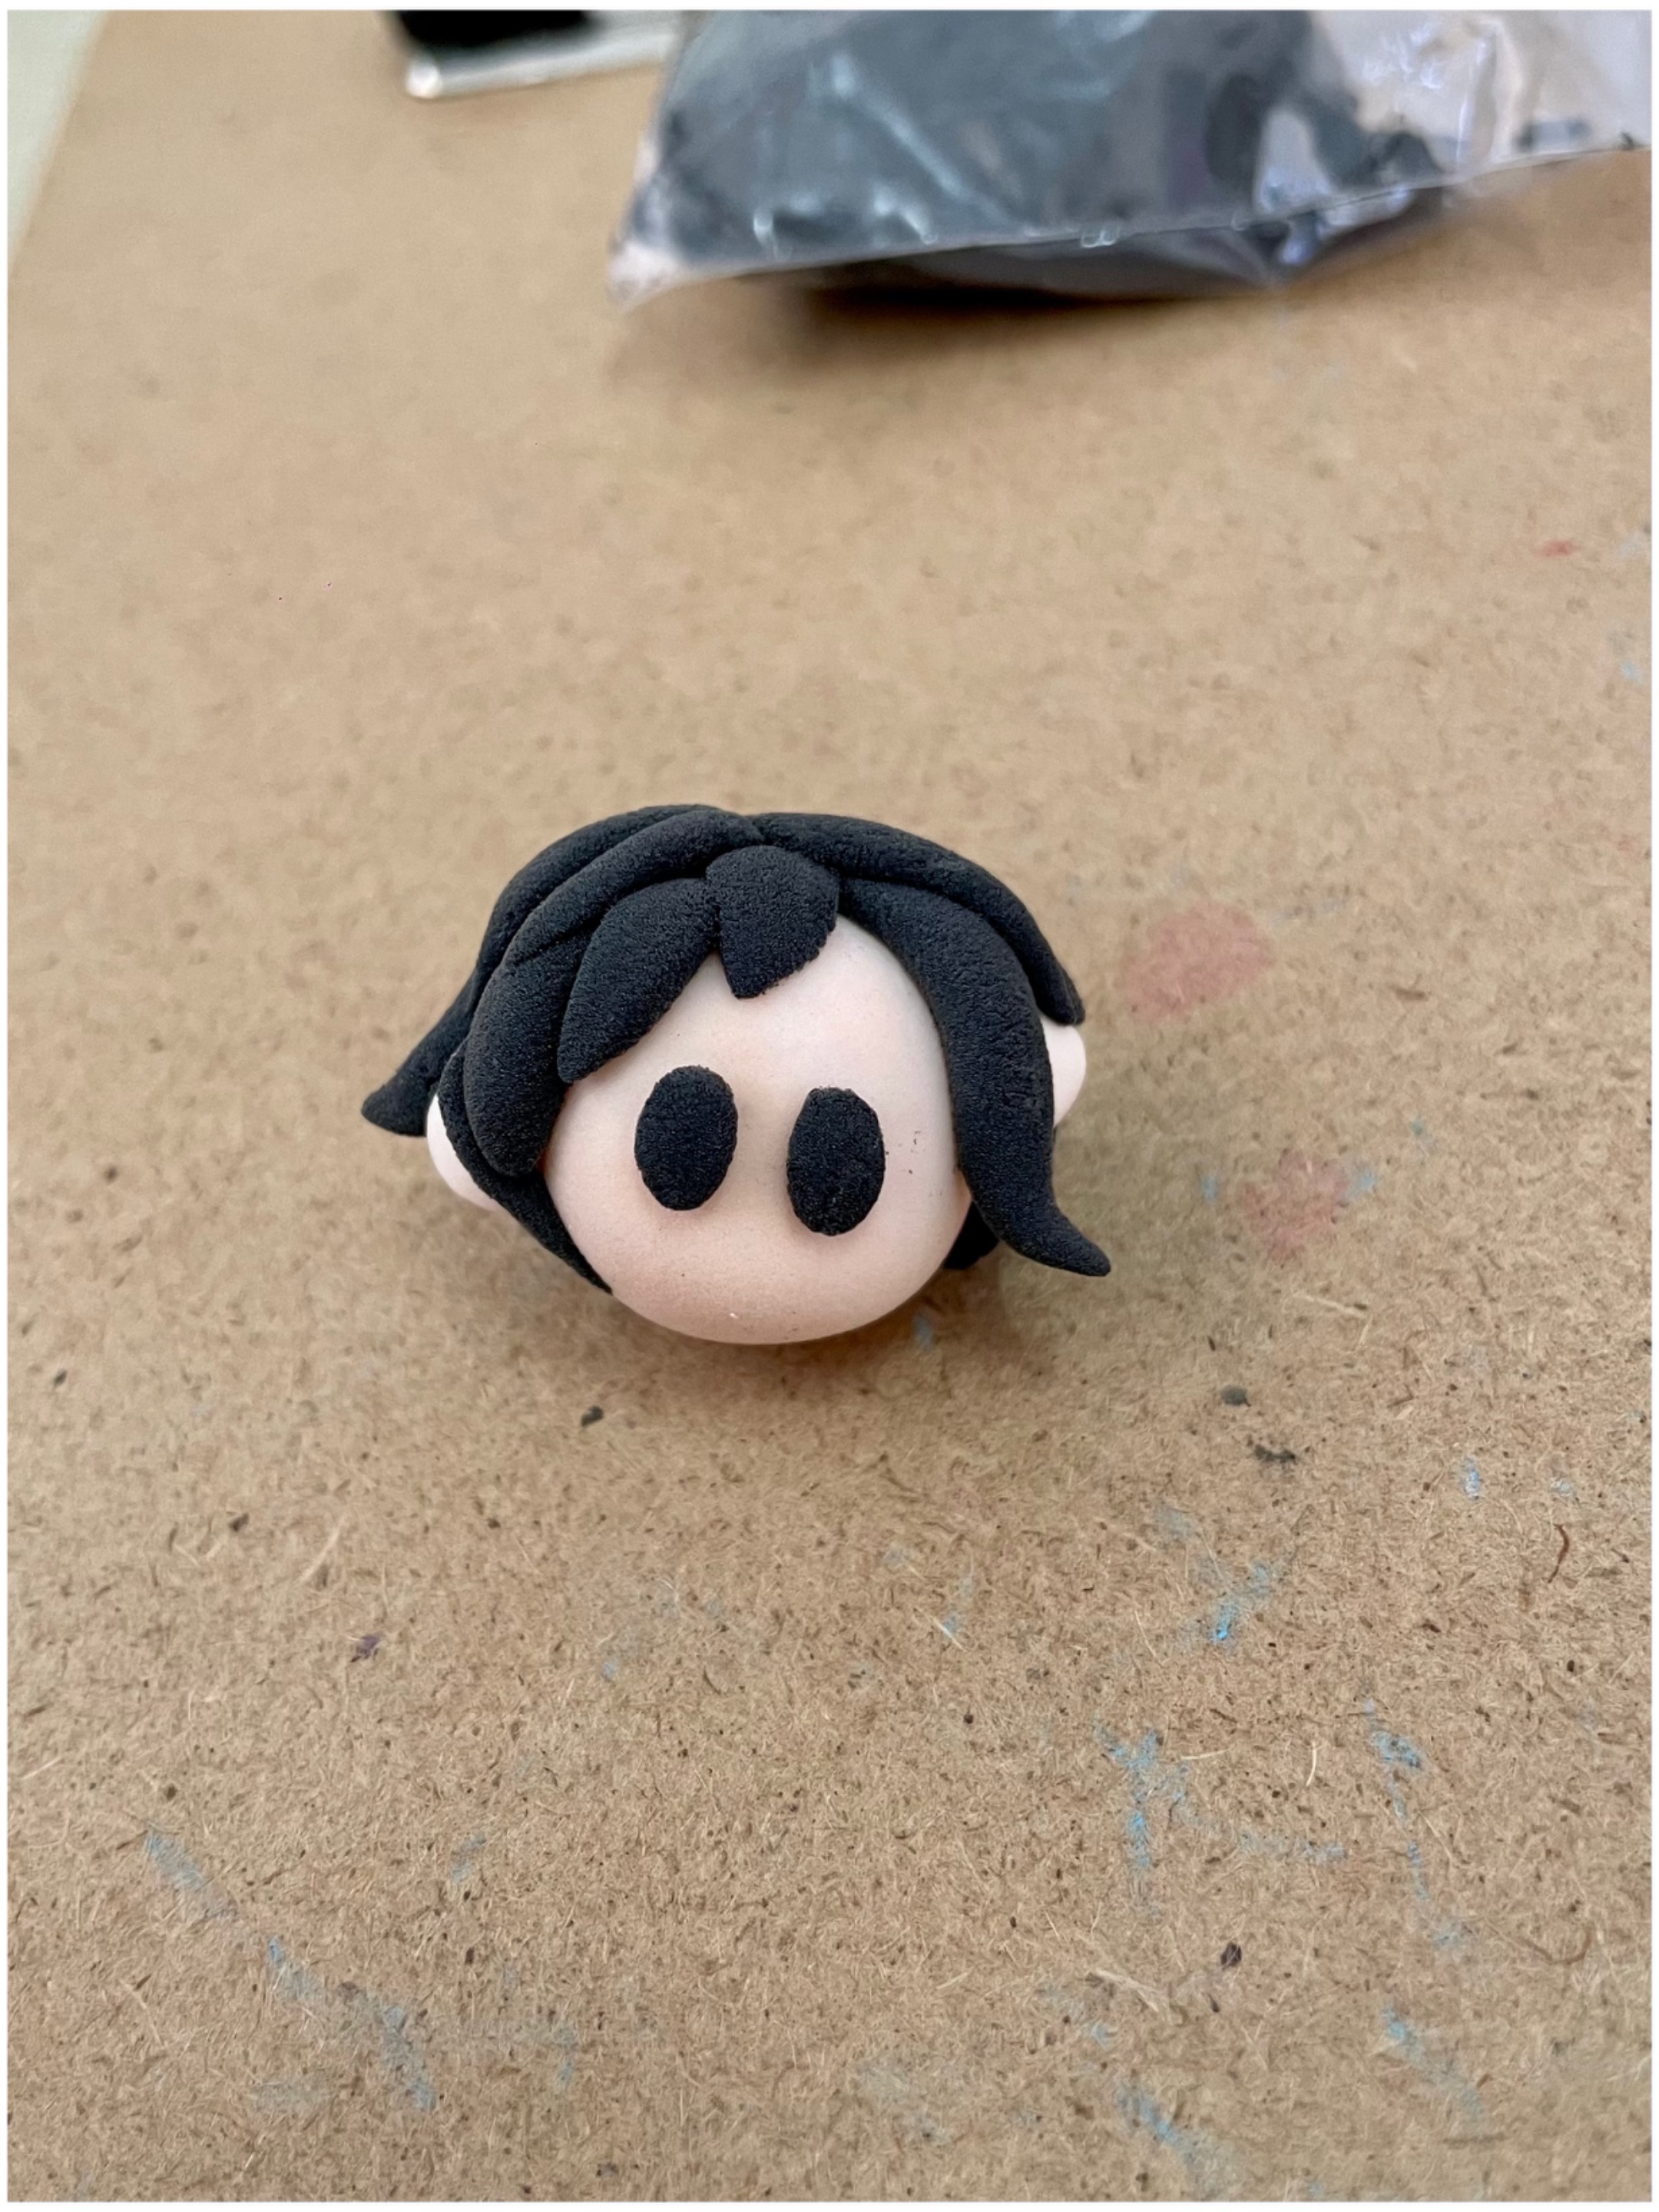
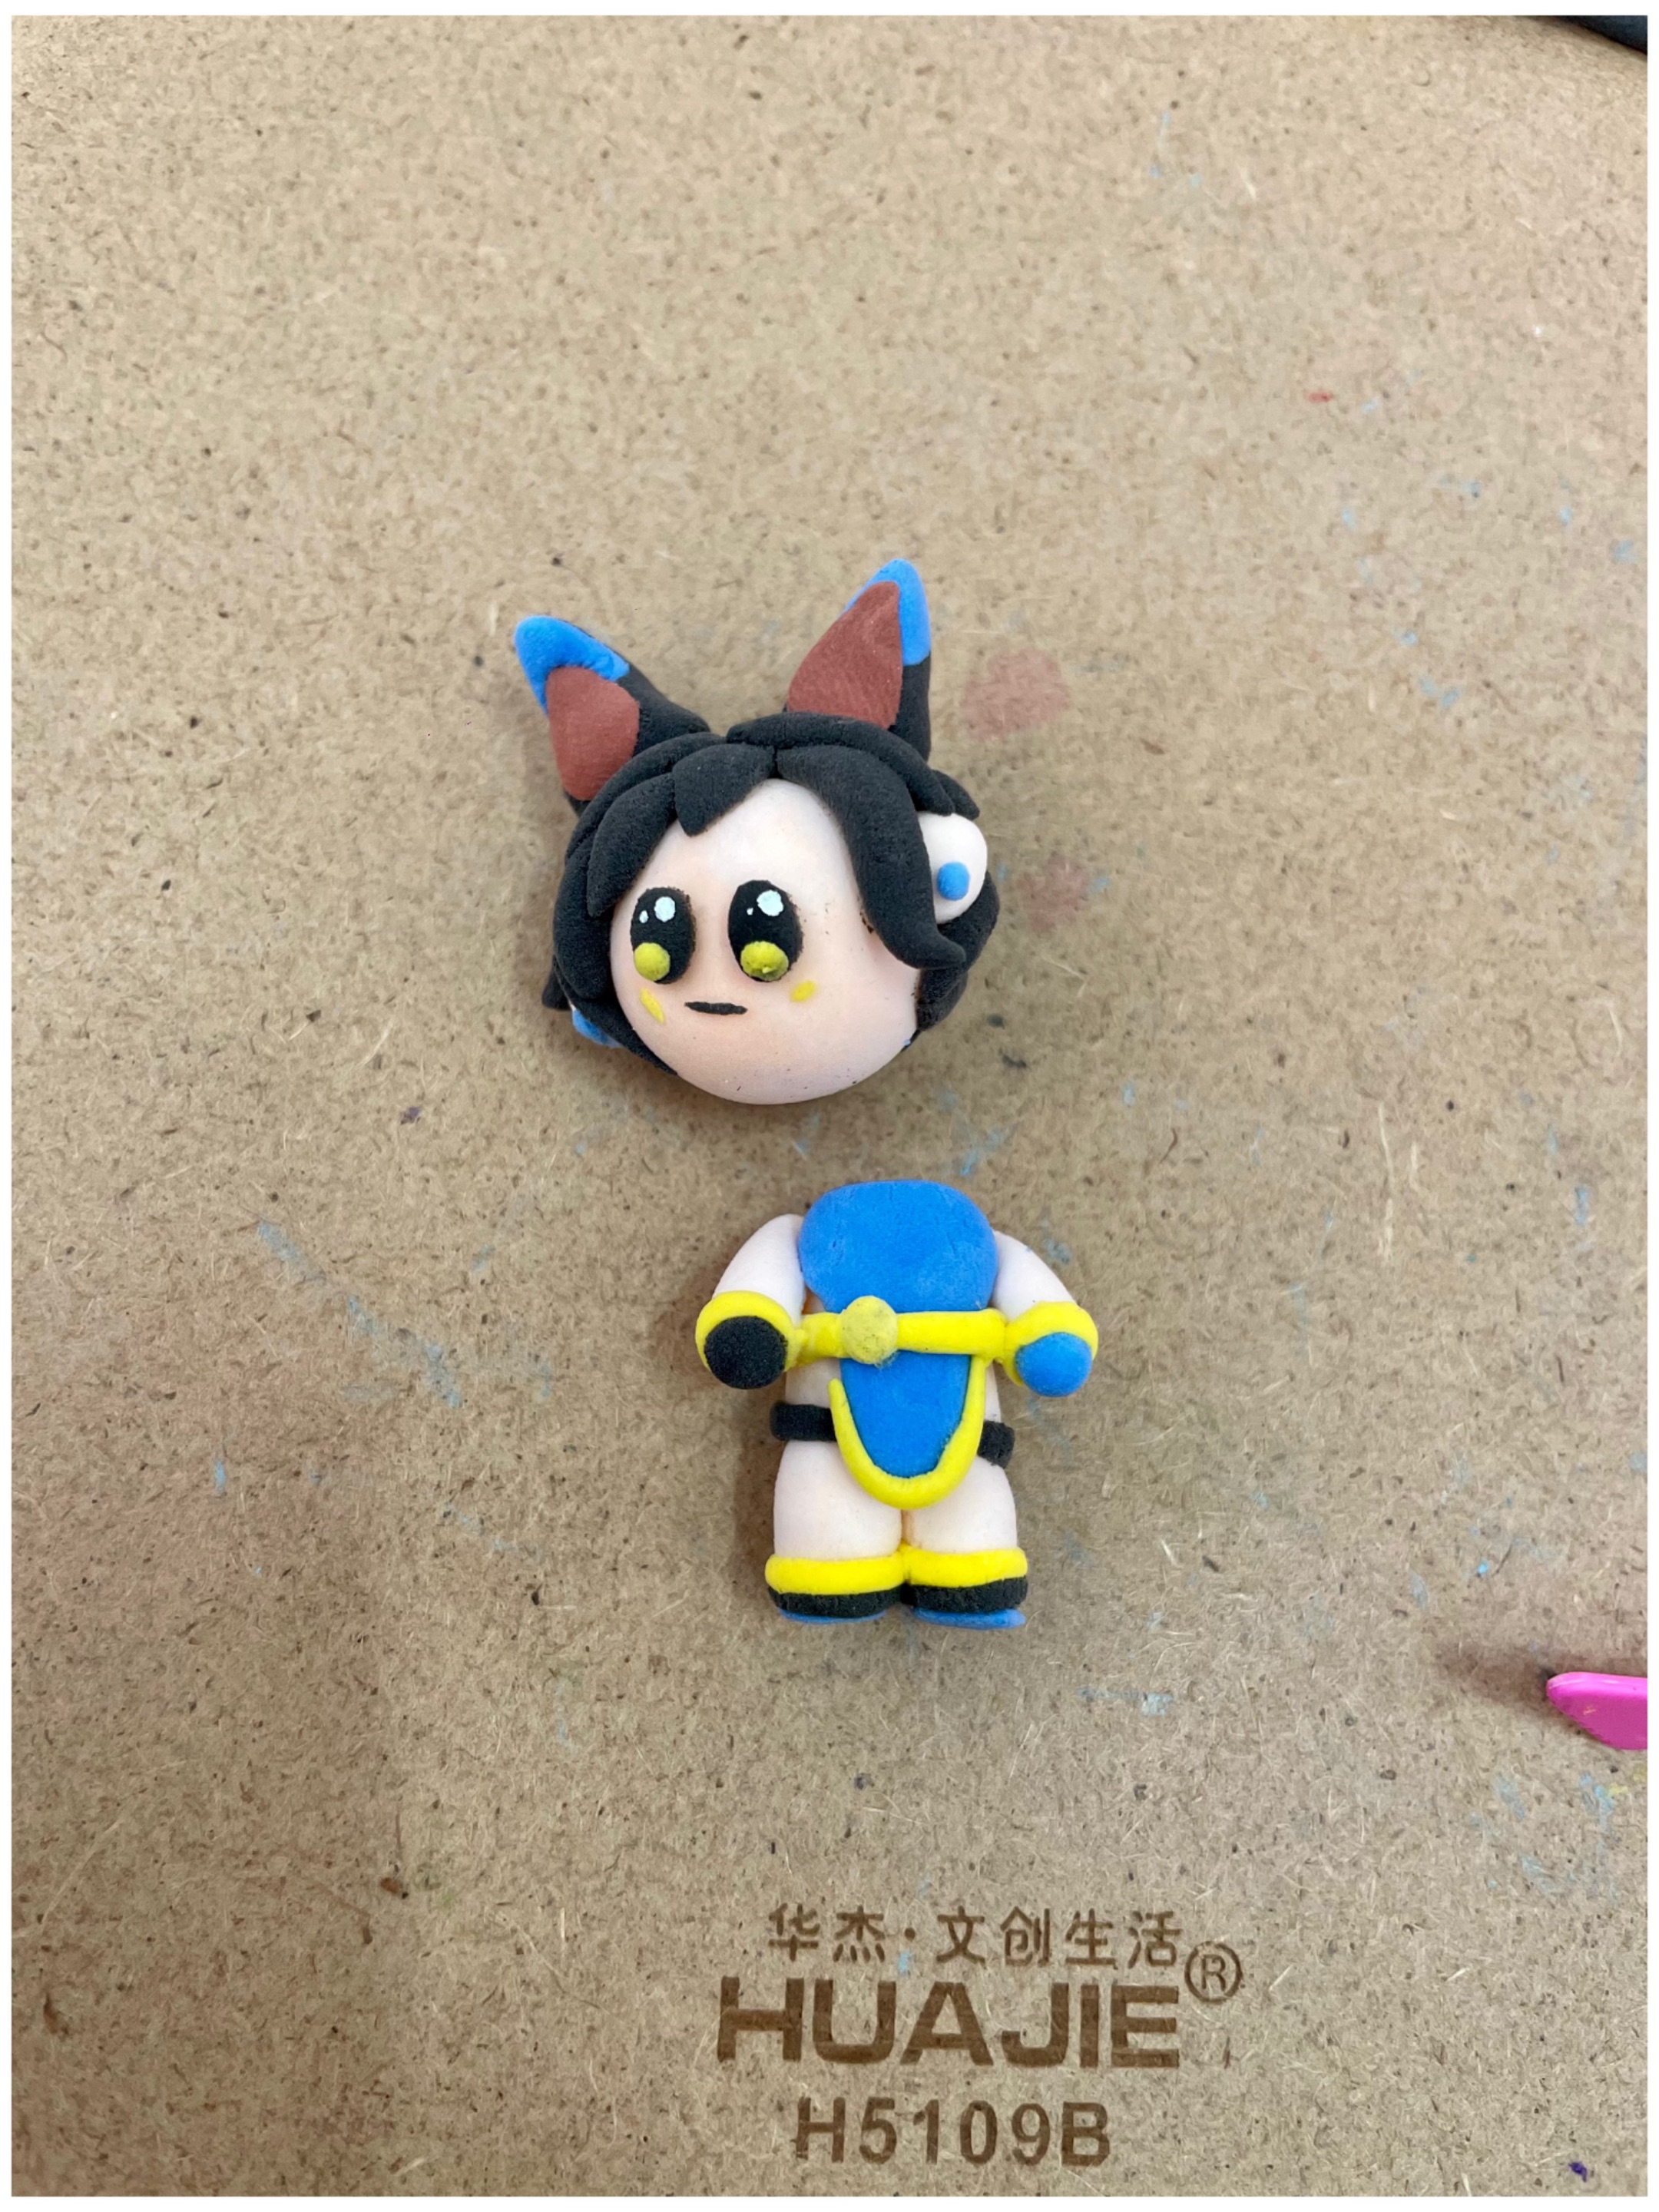
In the initial phase, I start by taking a portion of beige color clay to create the body of our cute character. Then, with my hands, I shape it into a ball, giving it a smooth and playful finish.
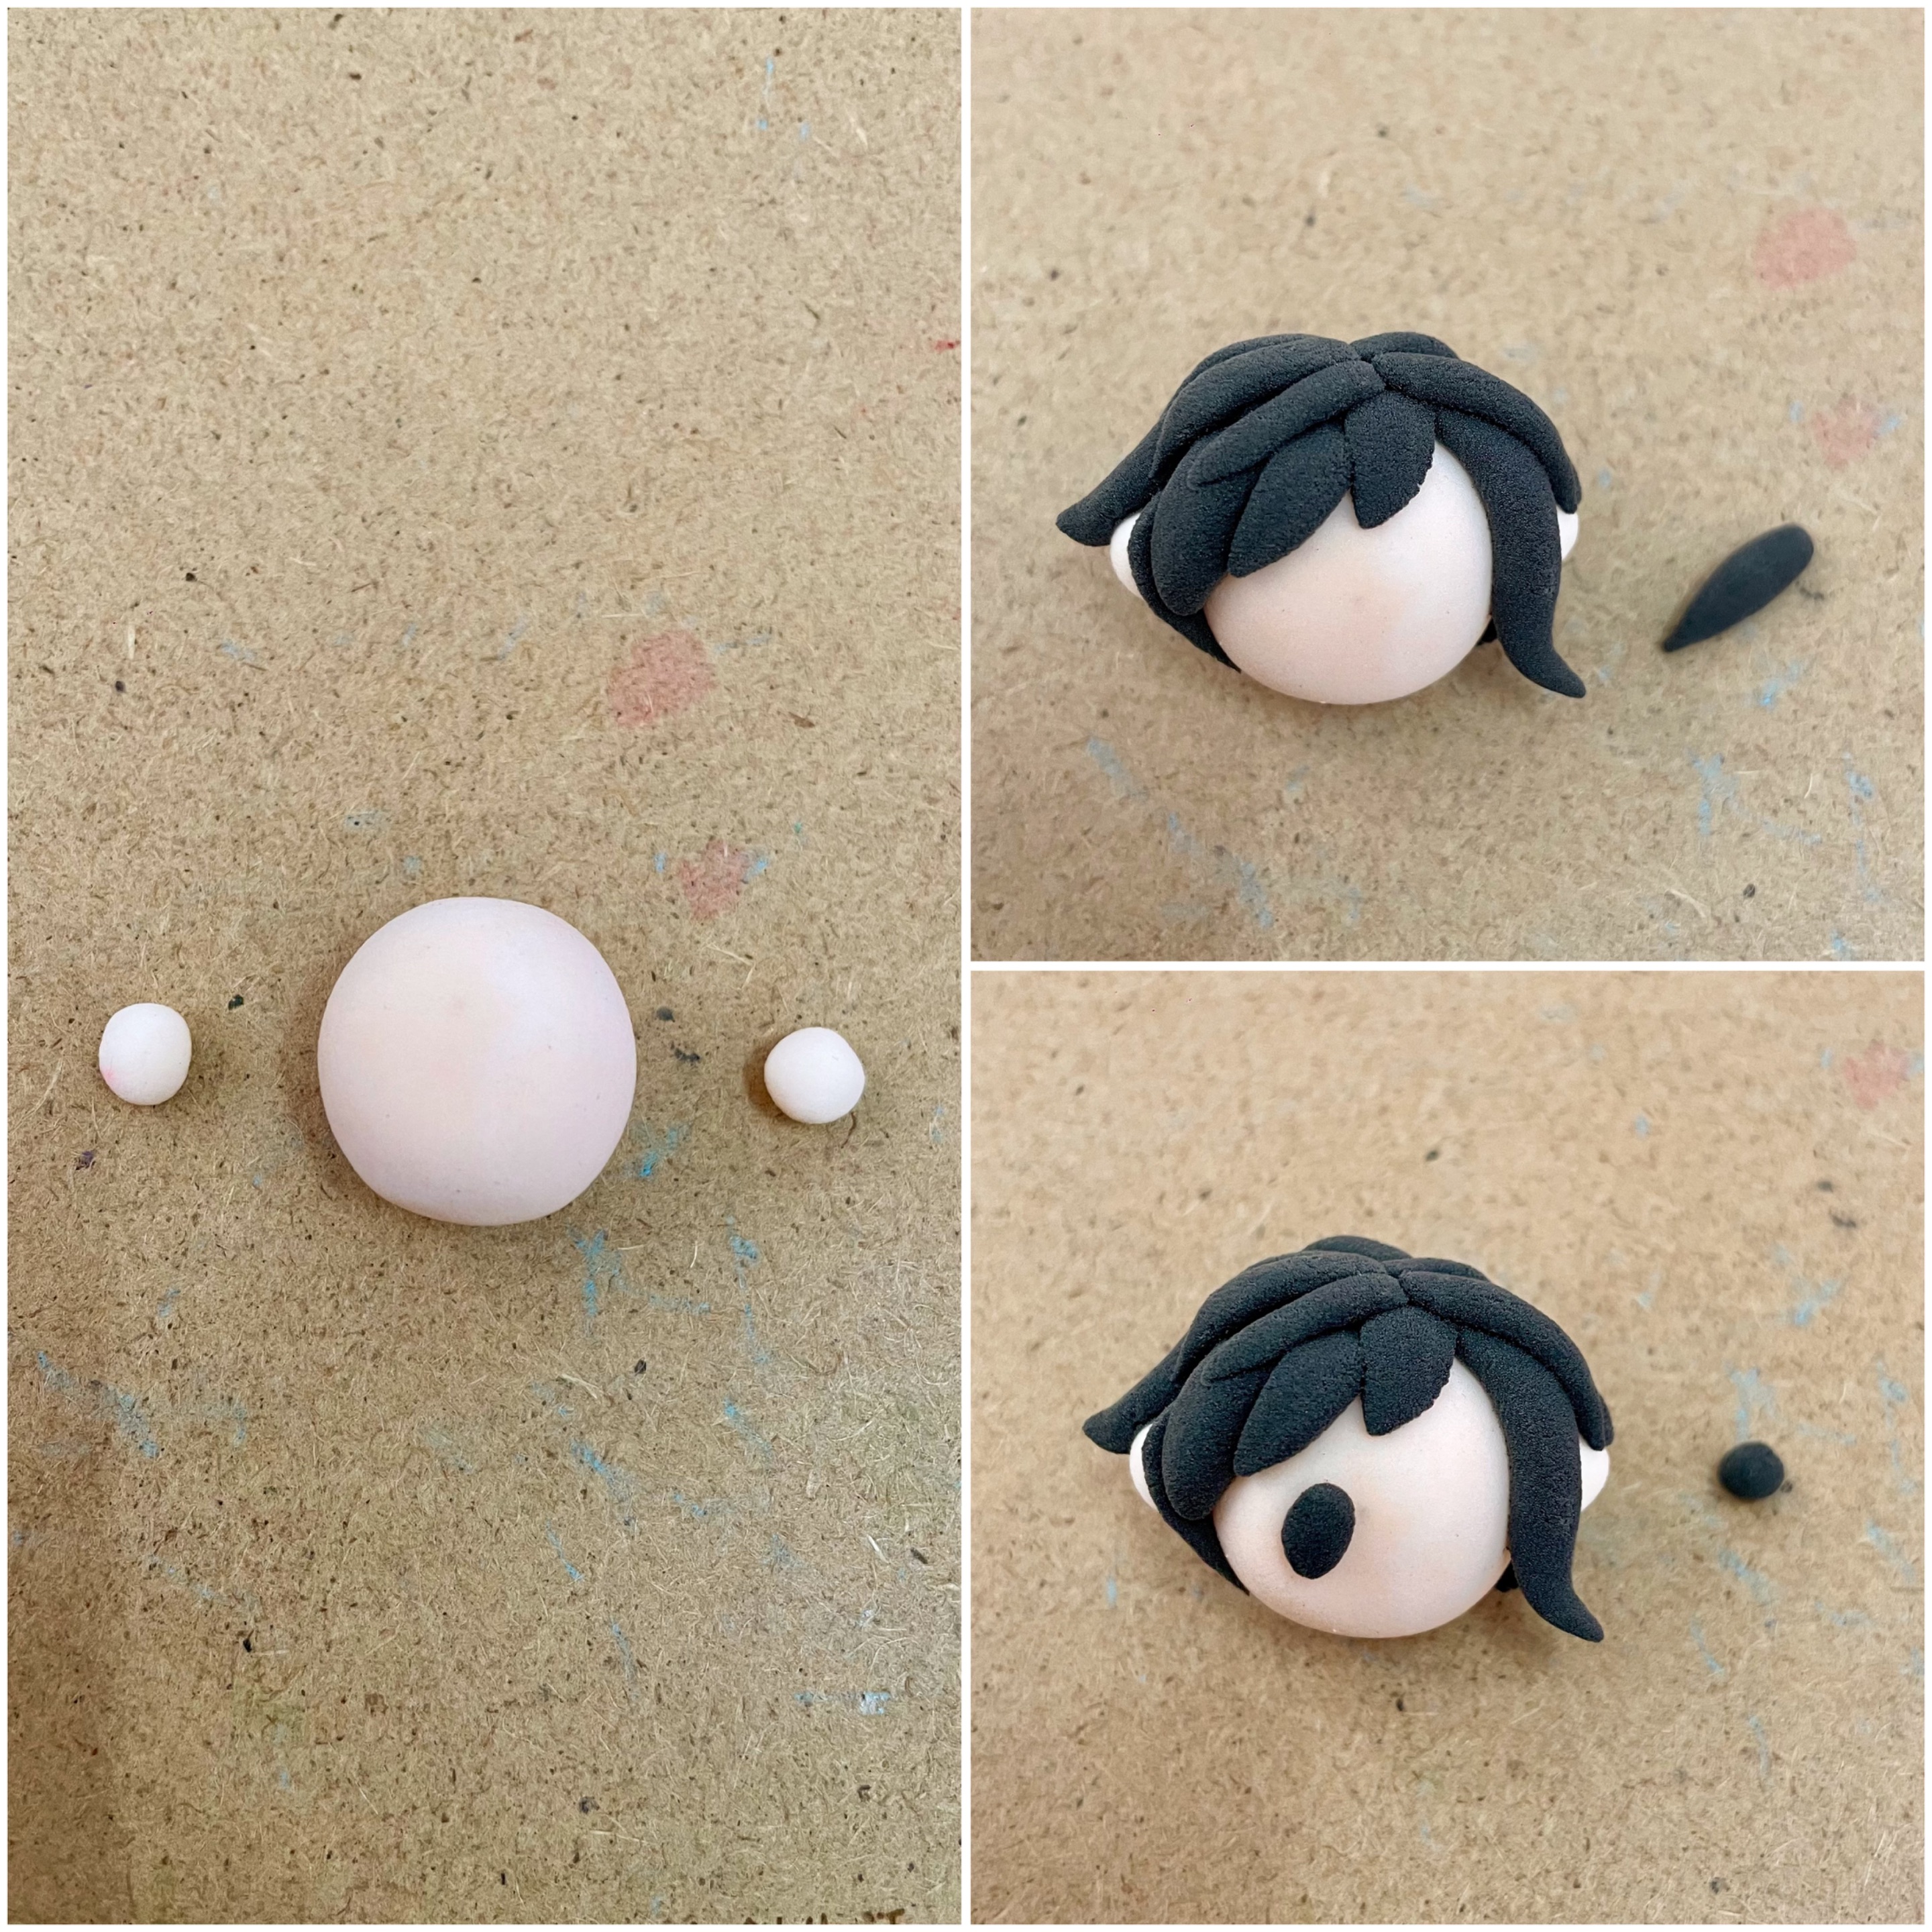
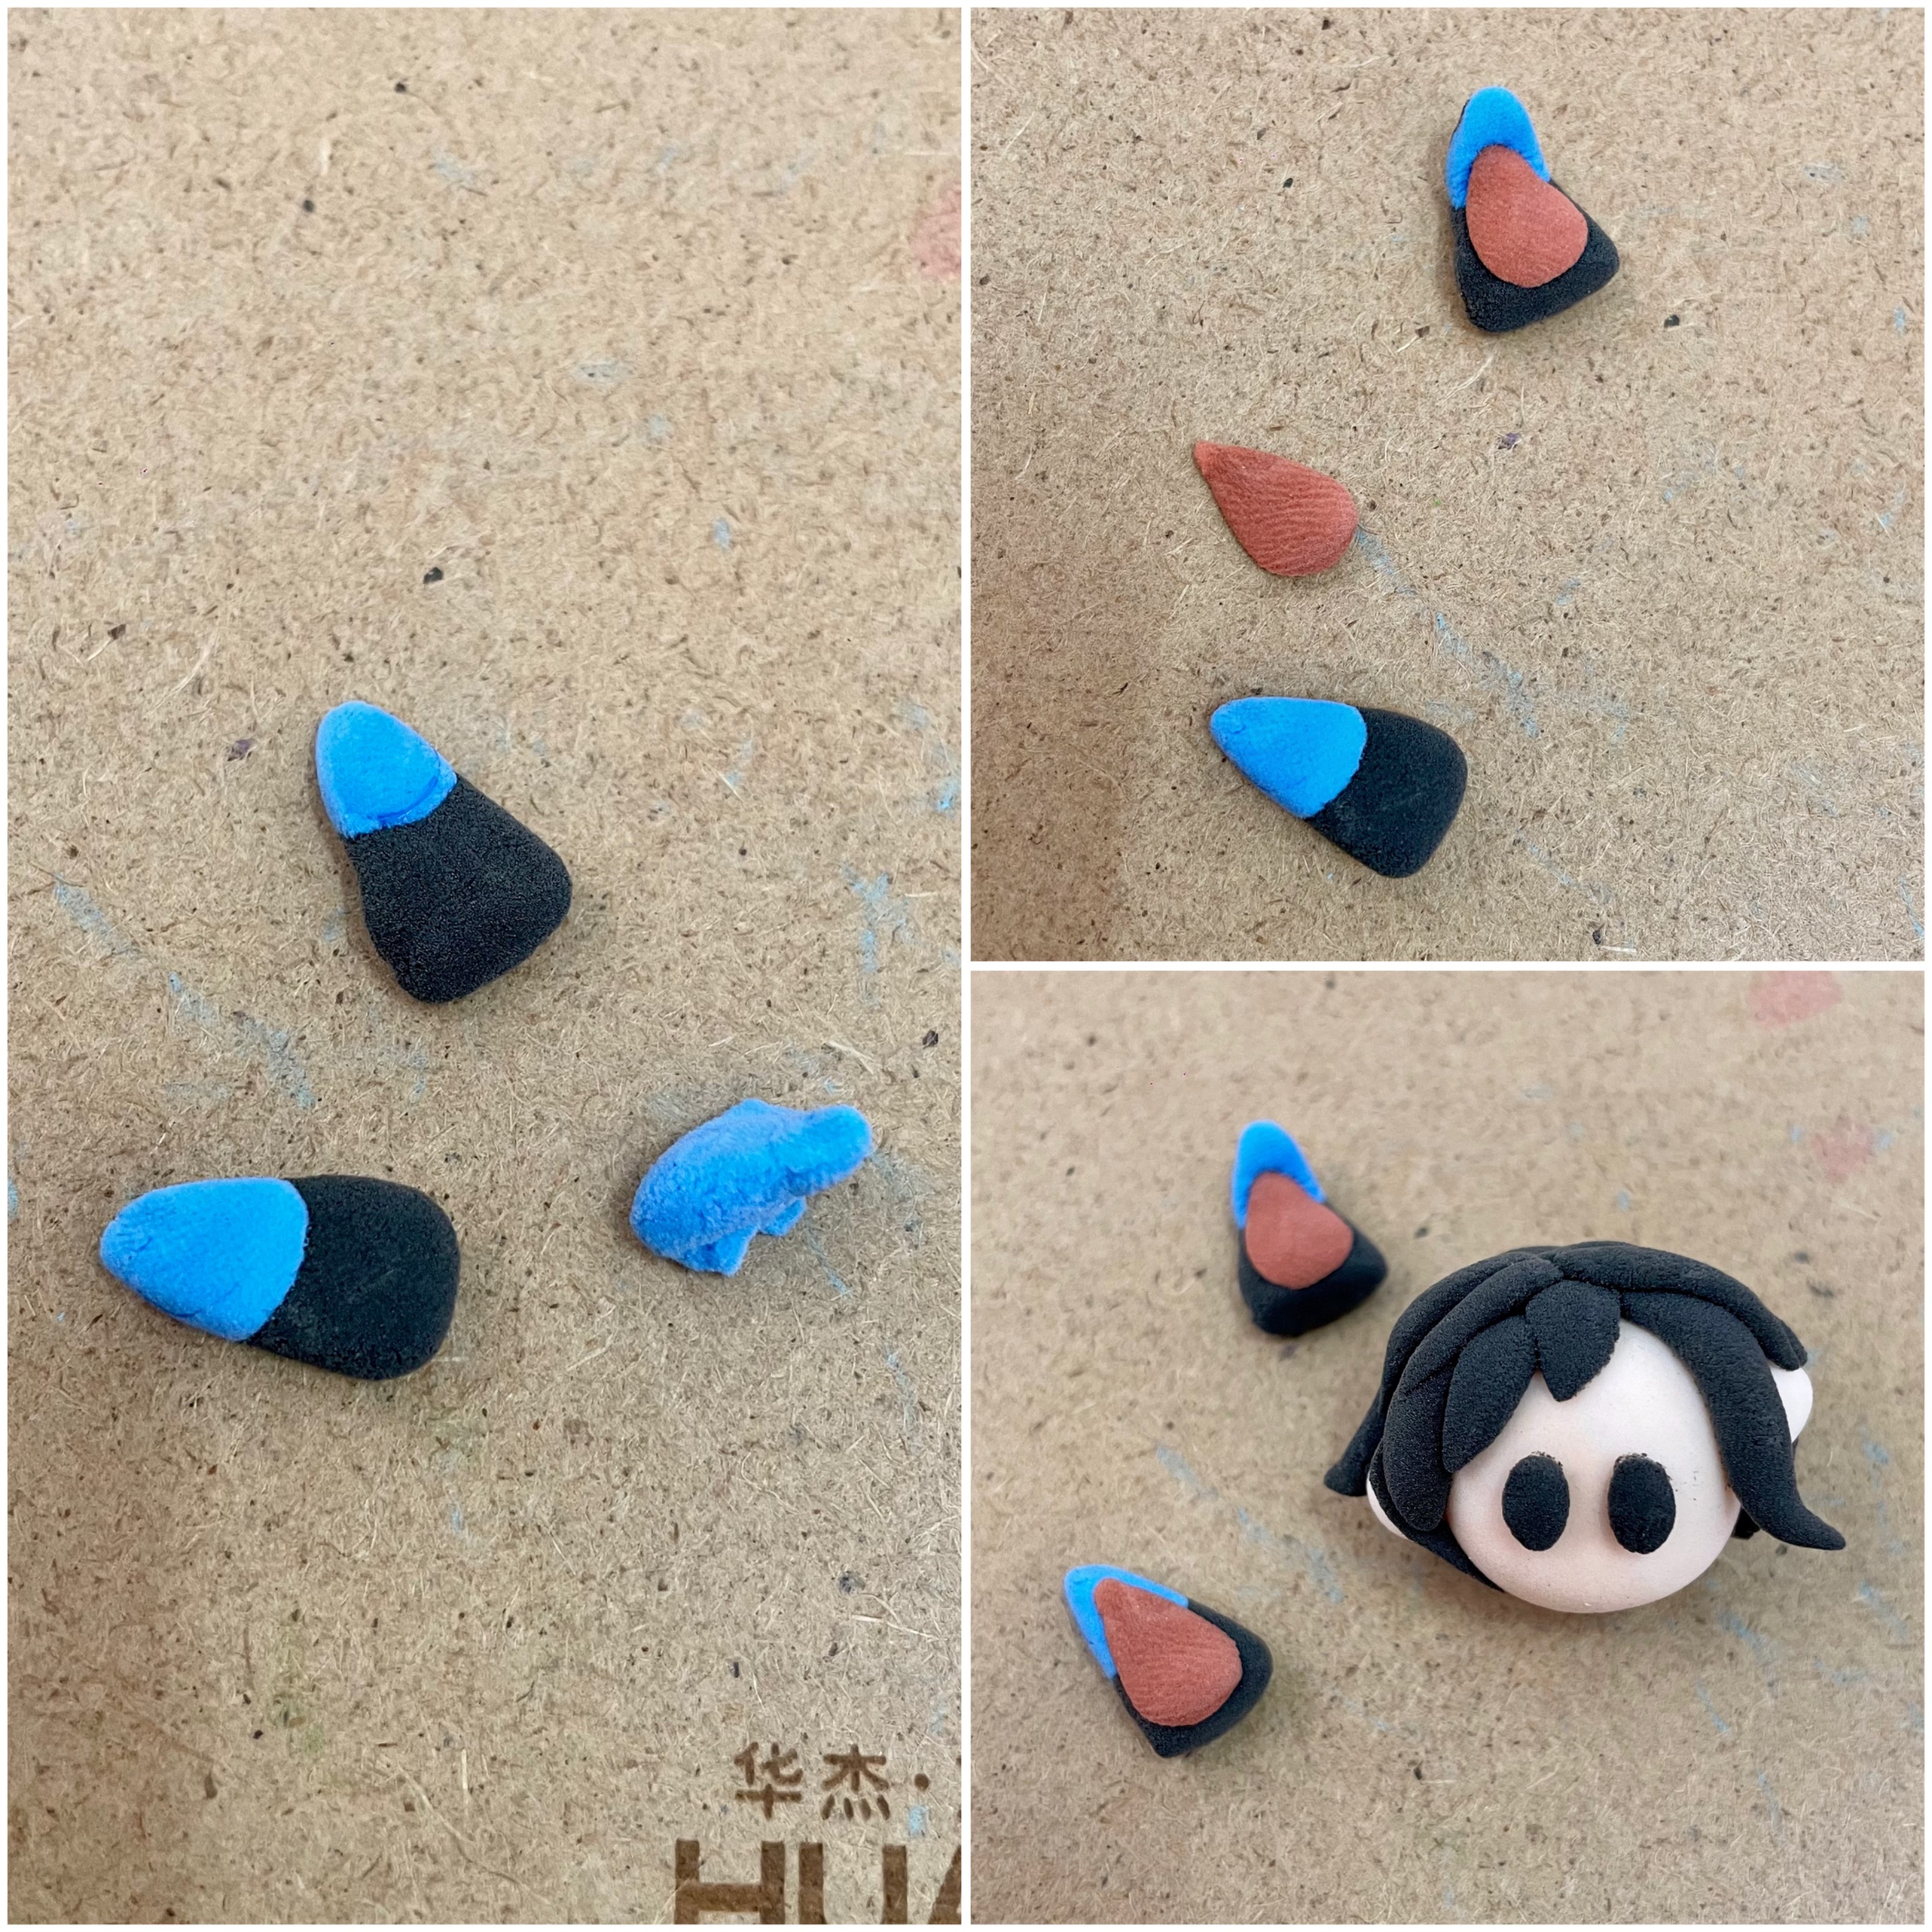
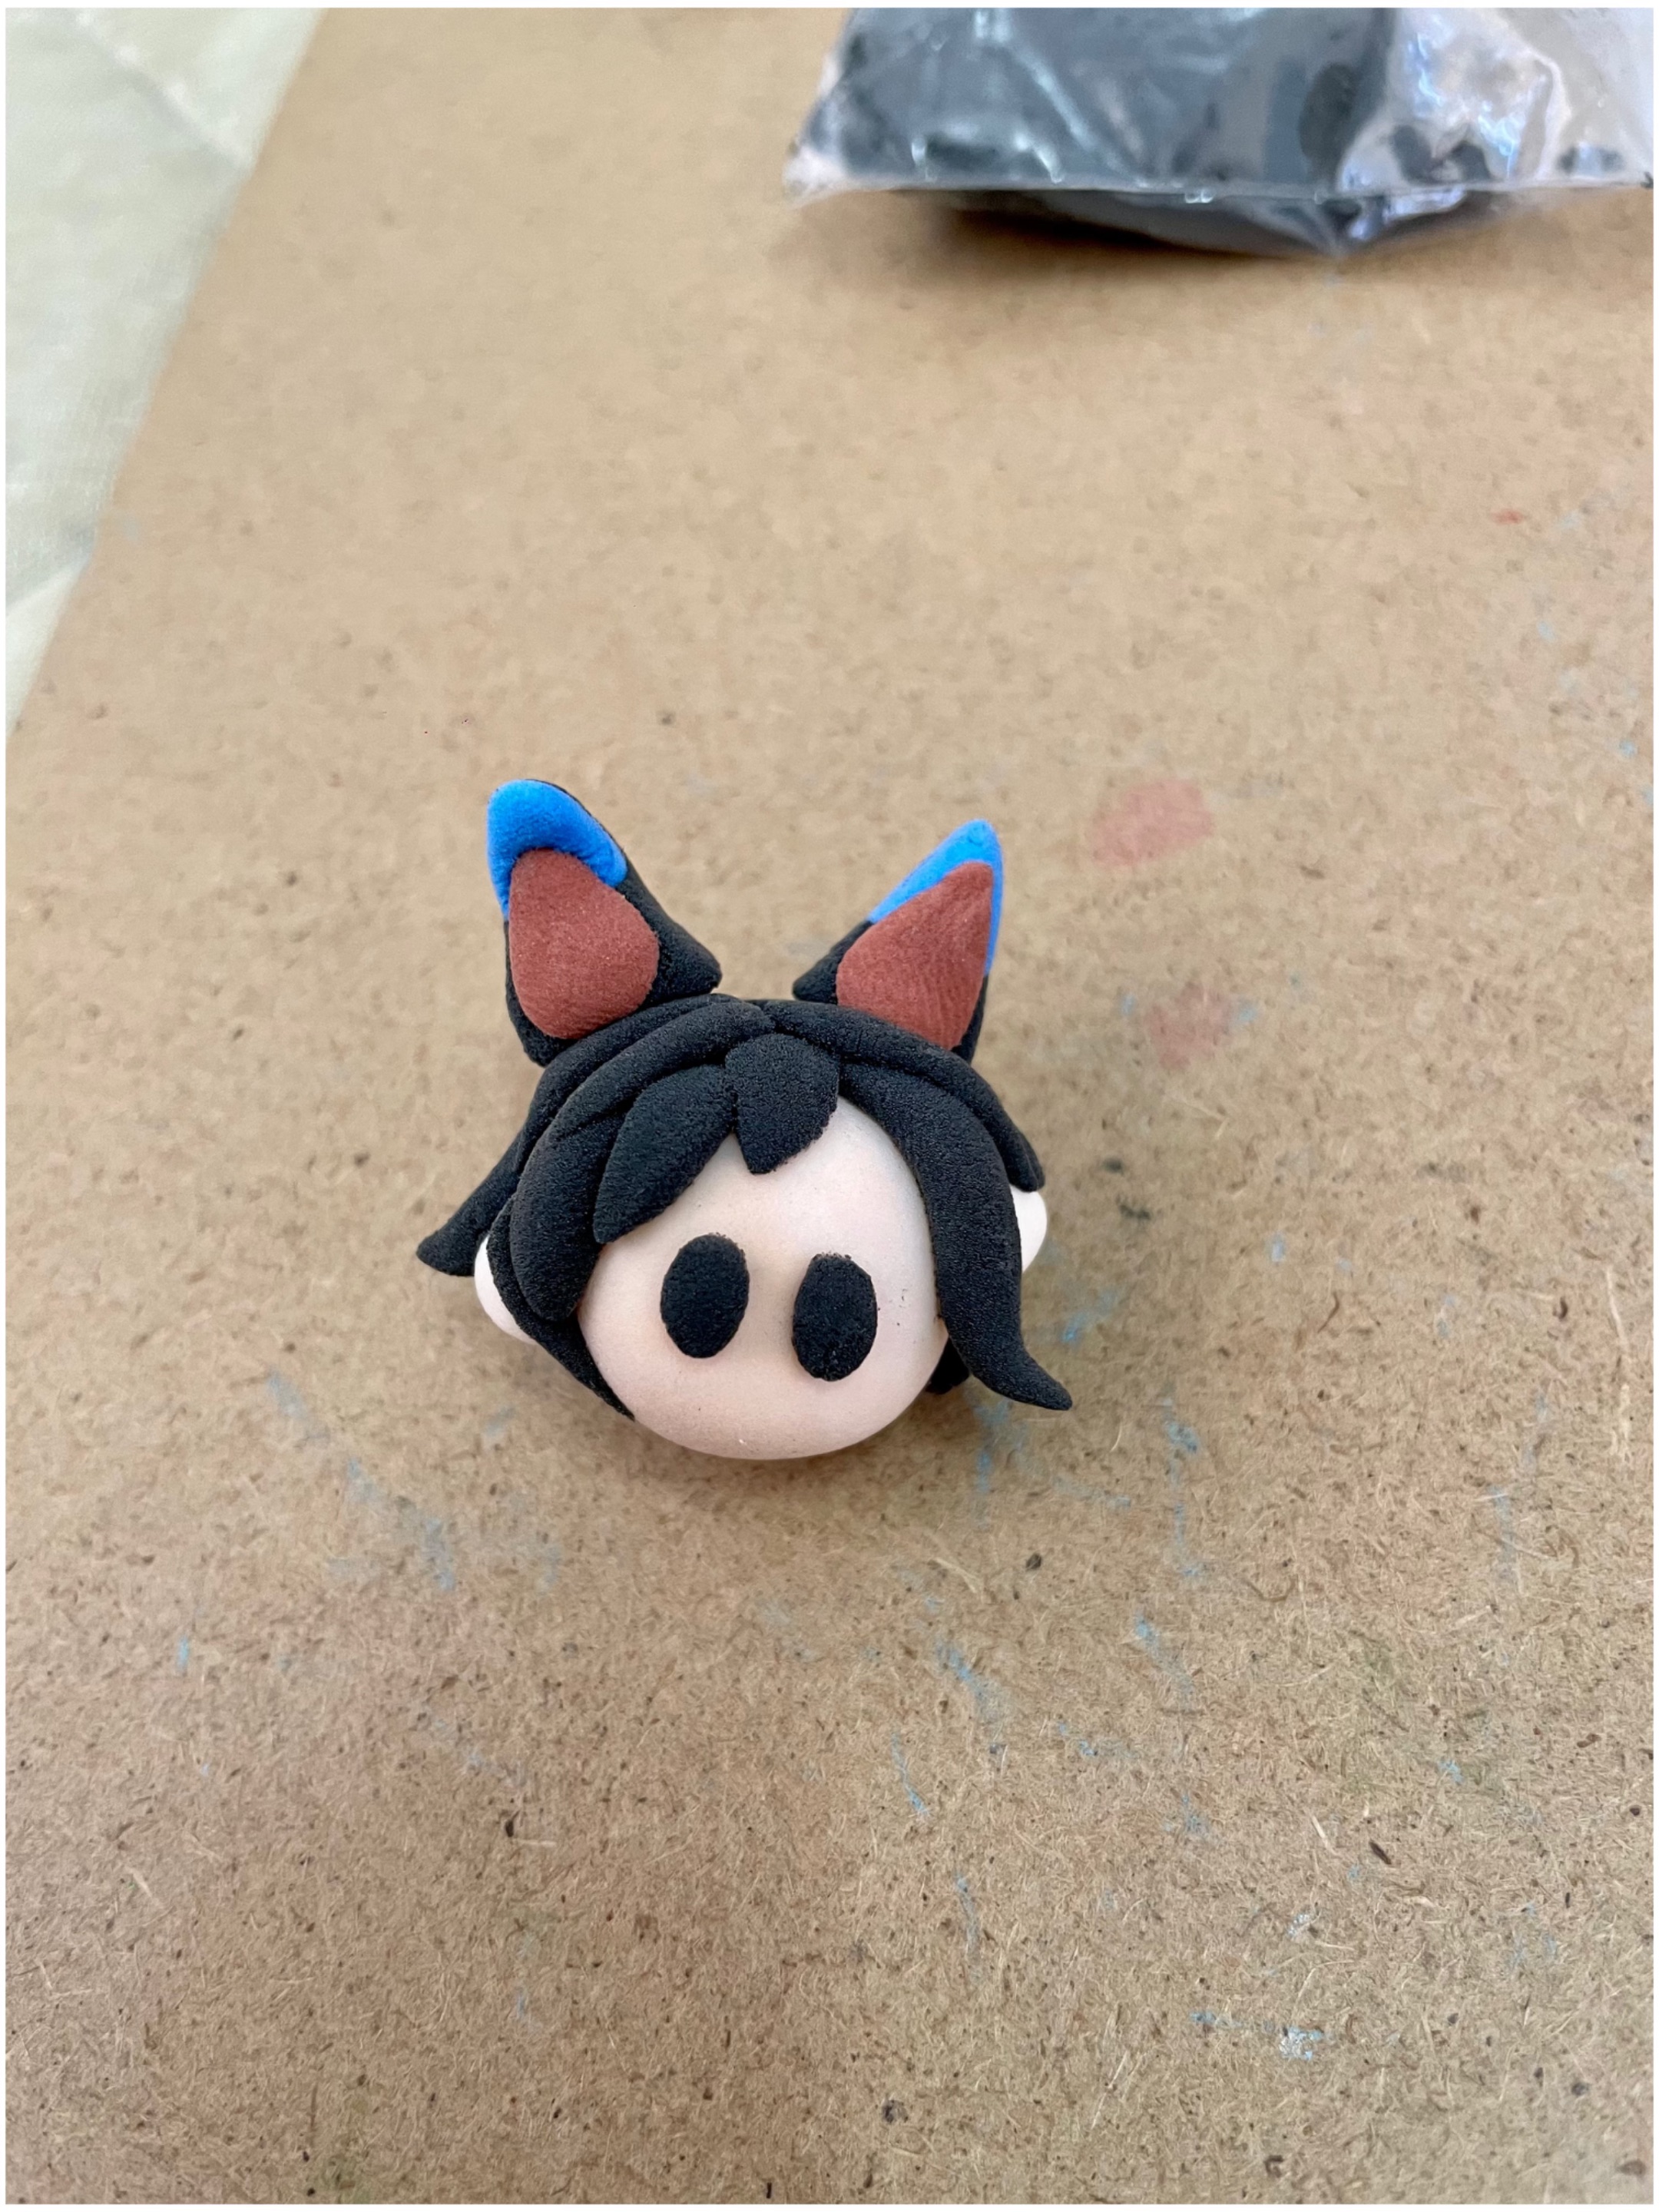
 Next, I’ll work on the kawaii body parts—the head, hands, eyes, hair, ears, paws, and outfit—always giving it my best.

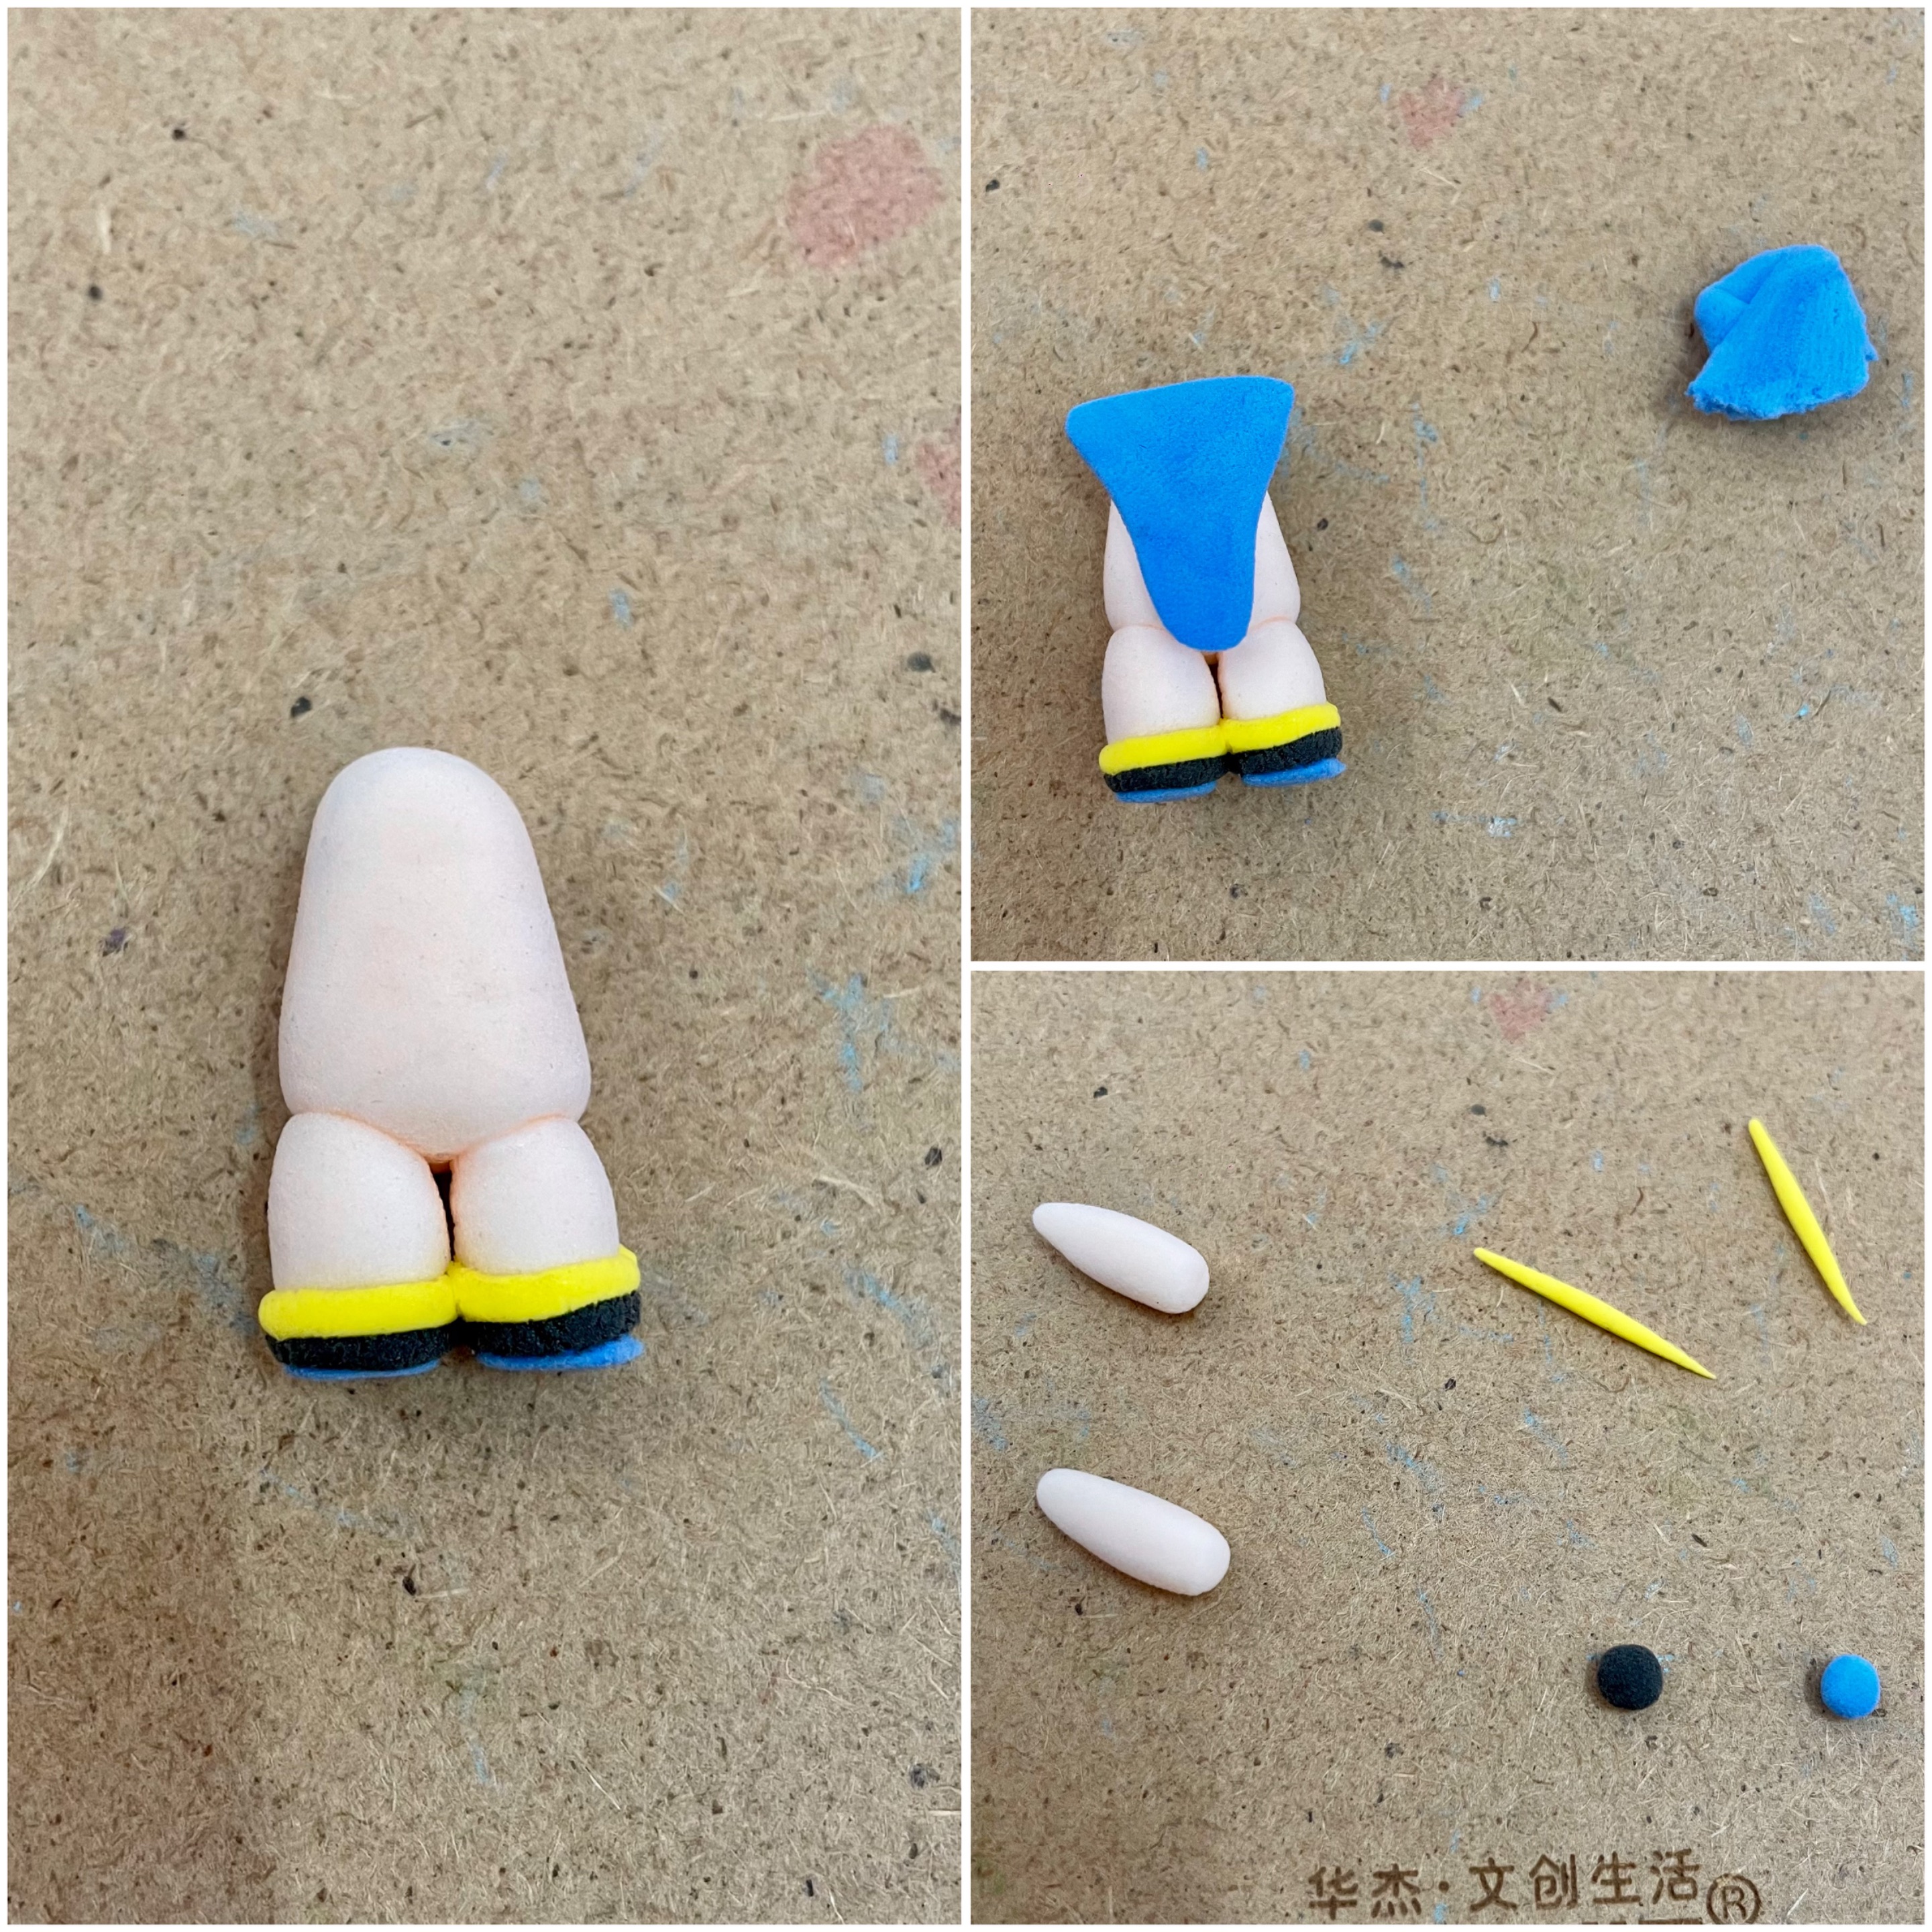
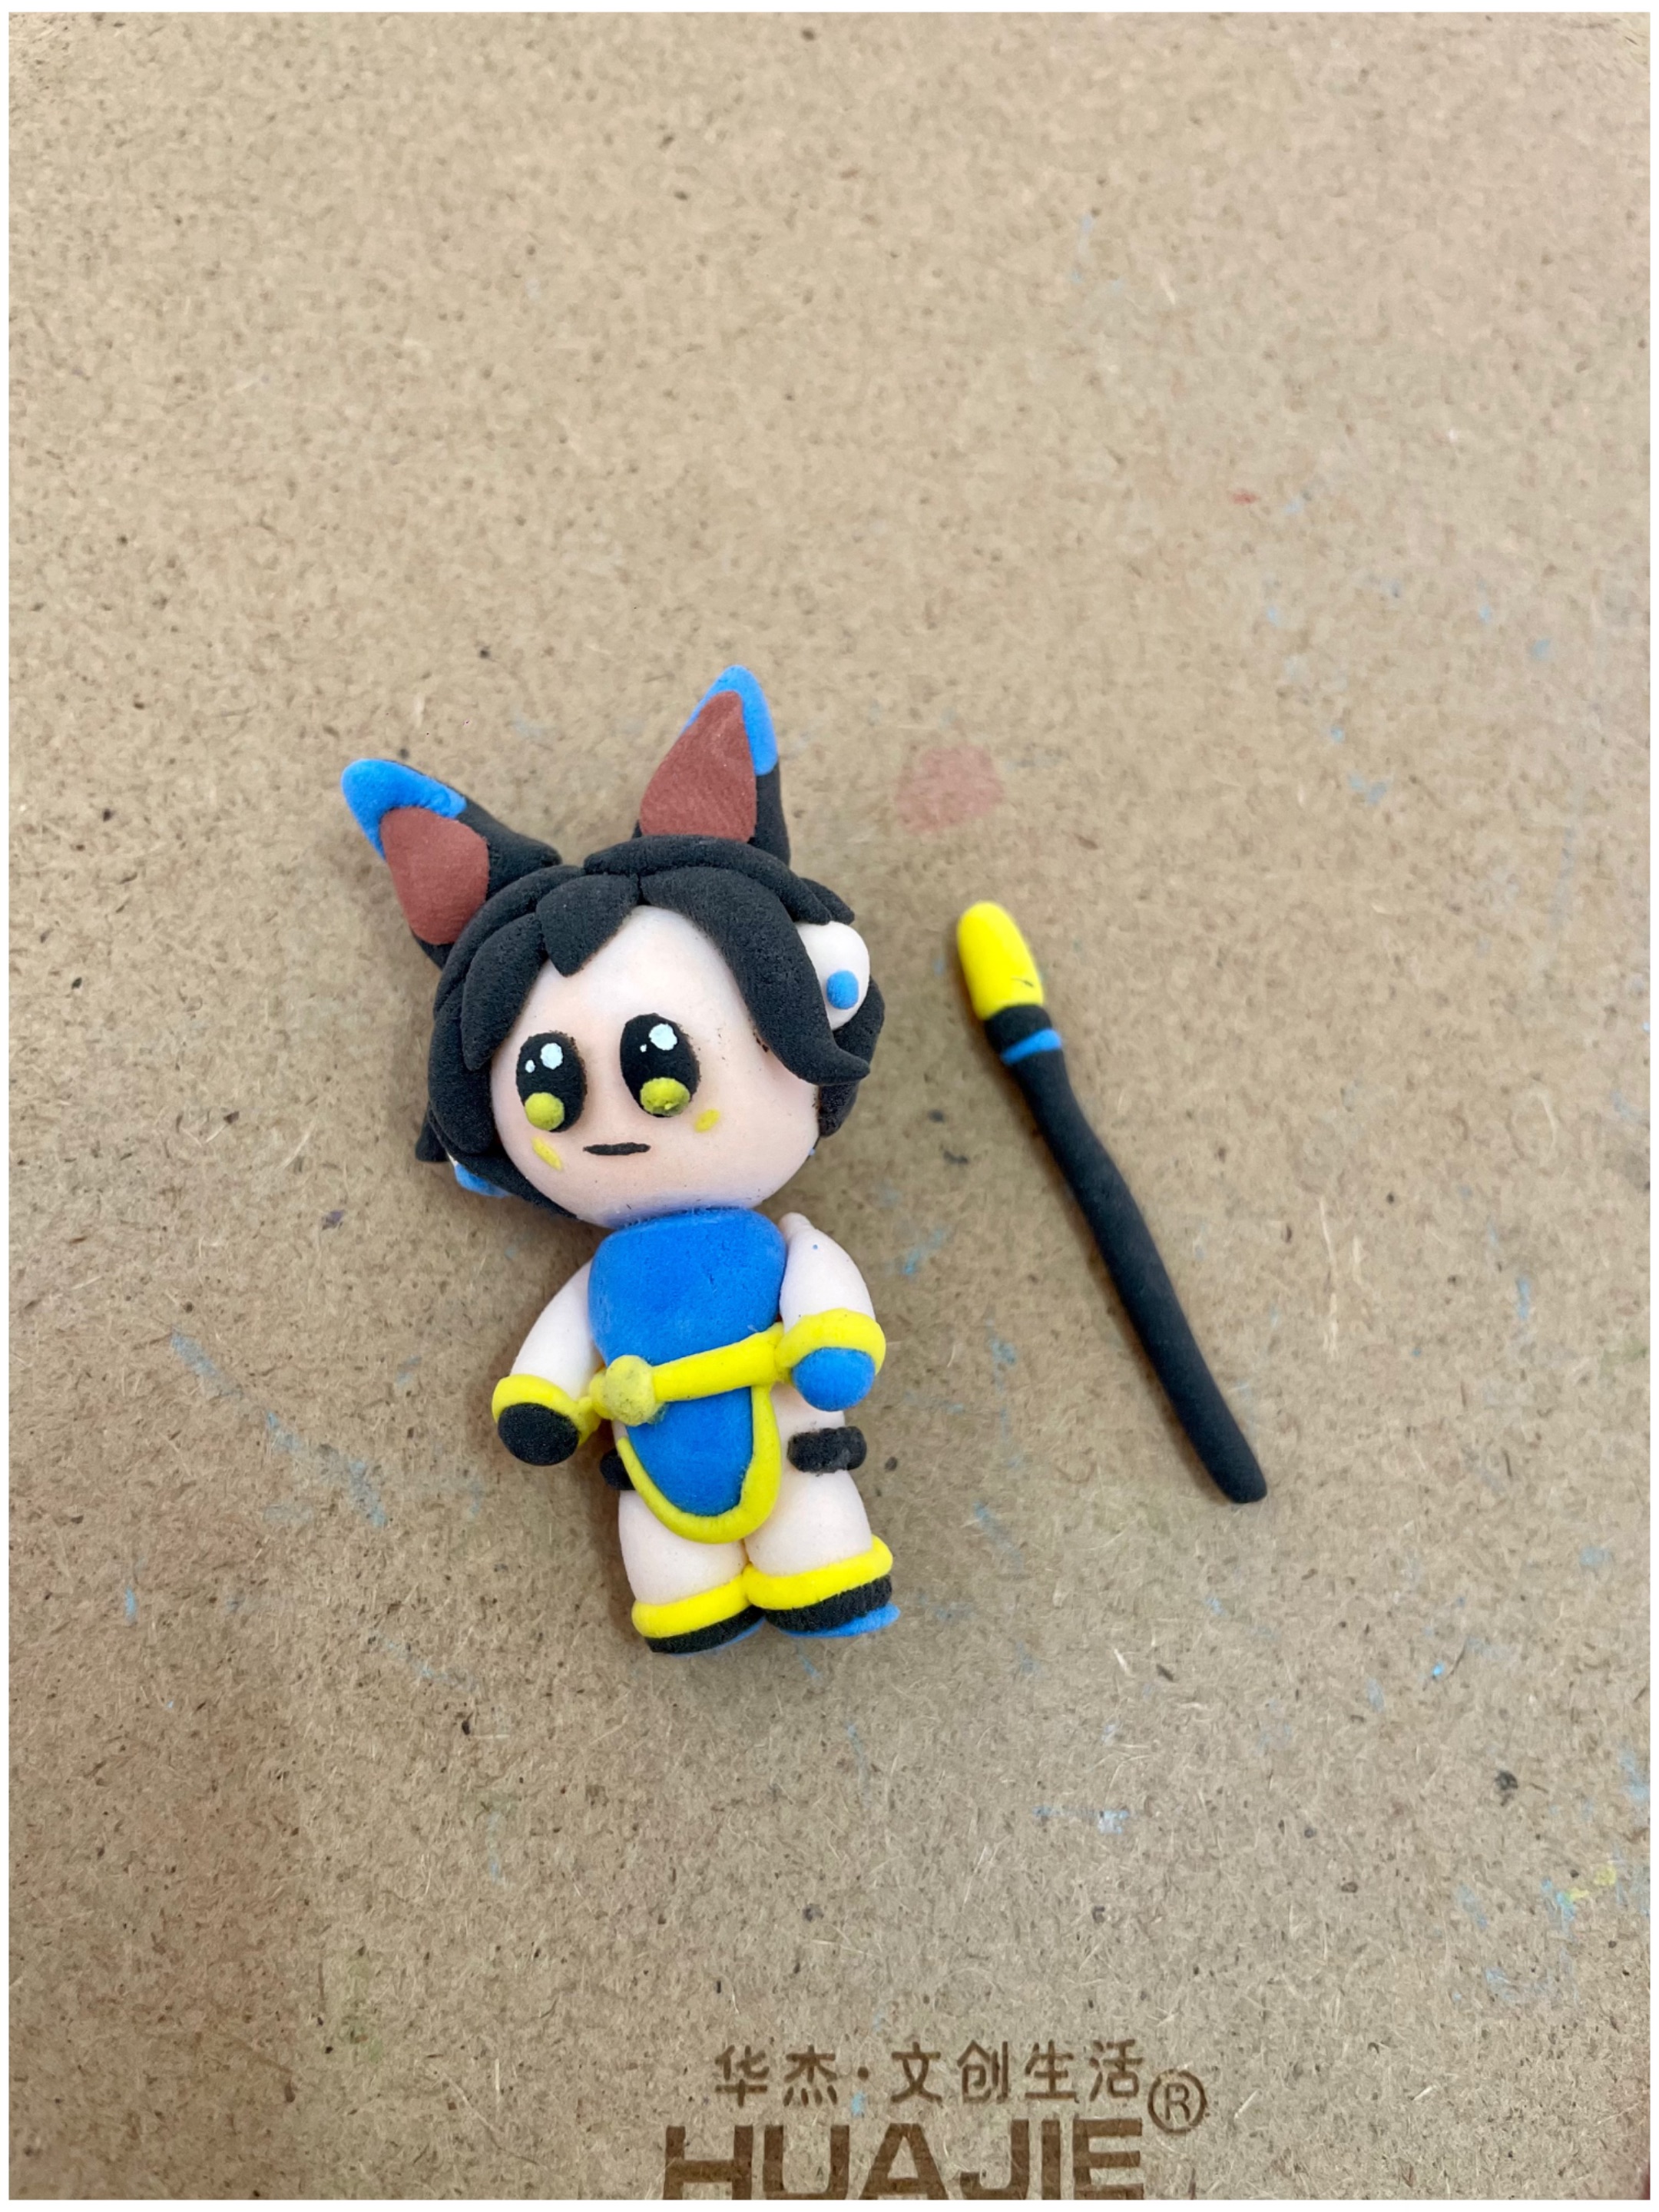
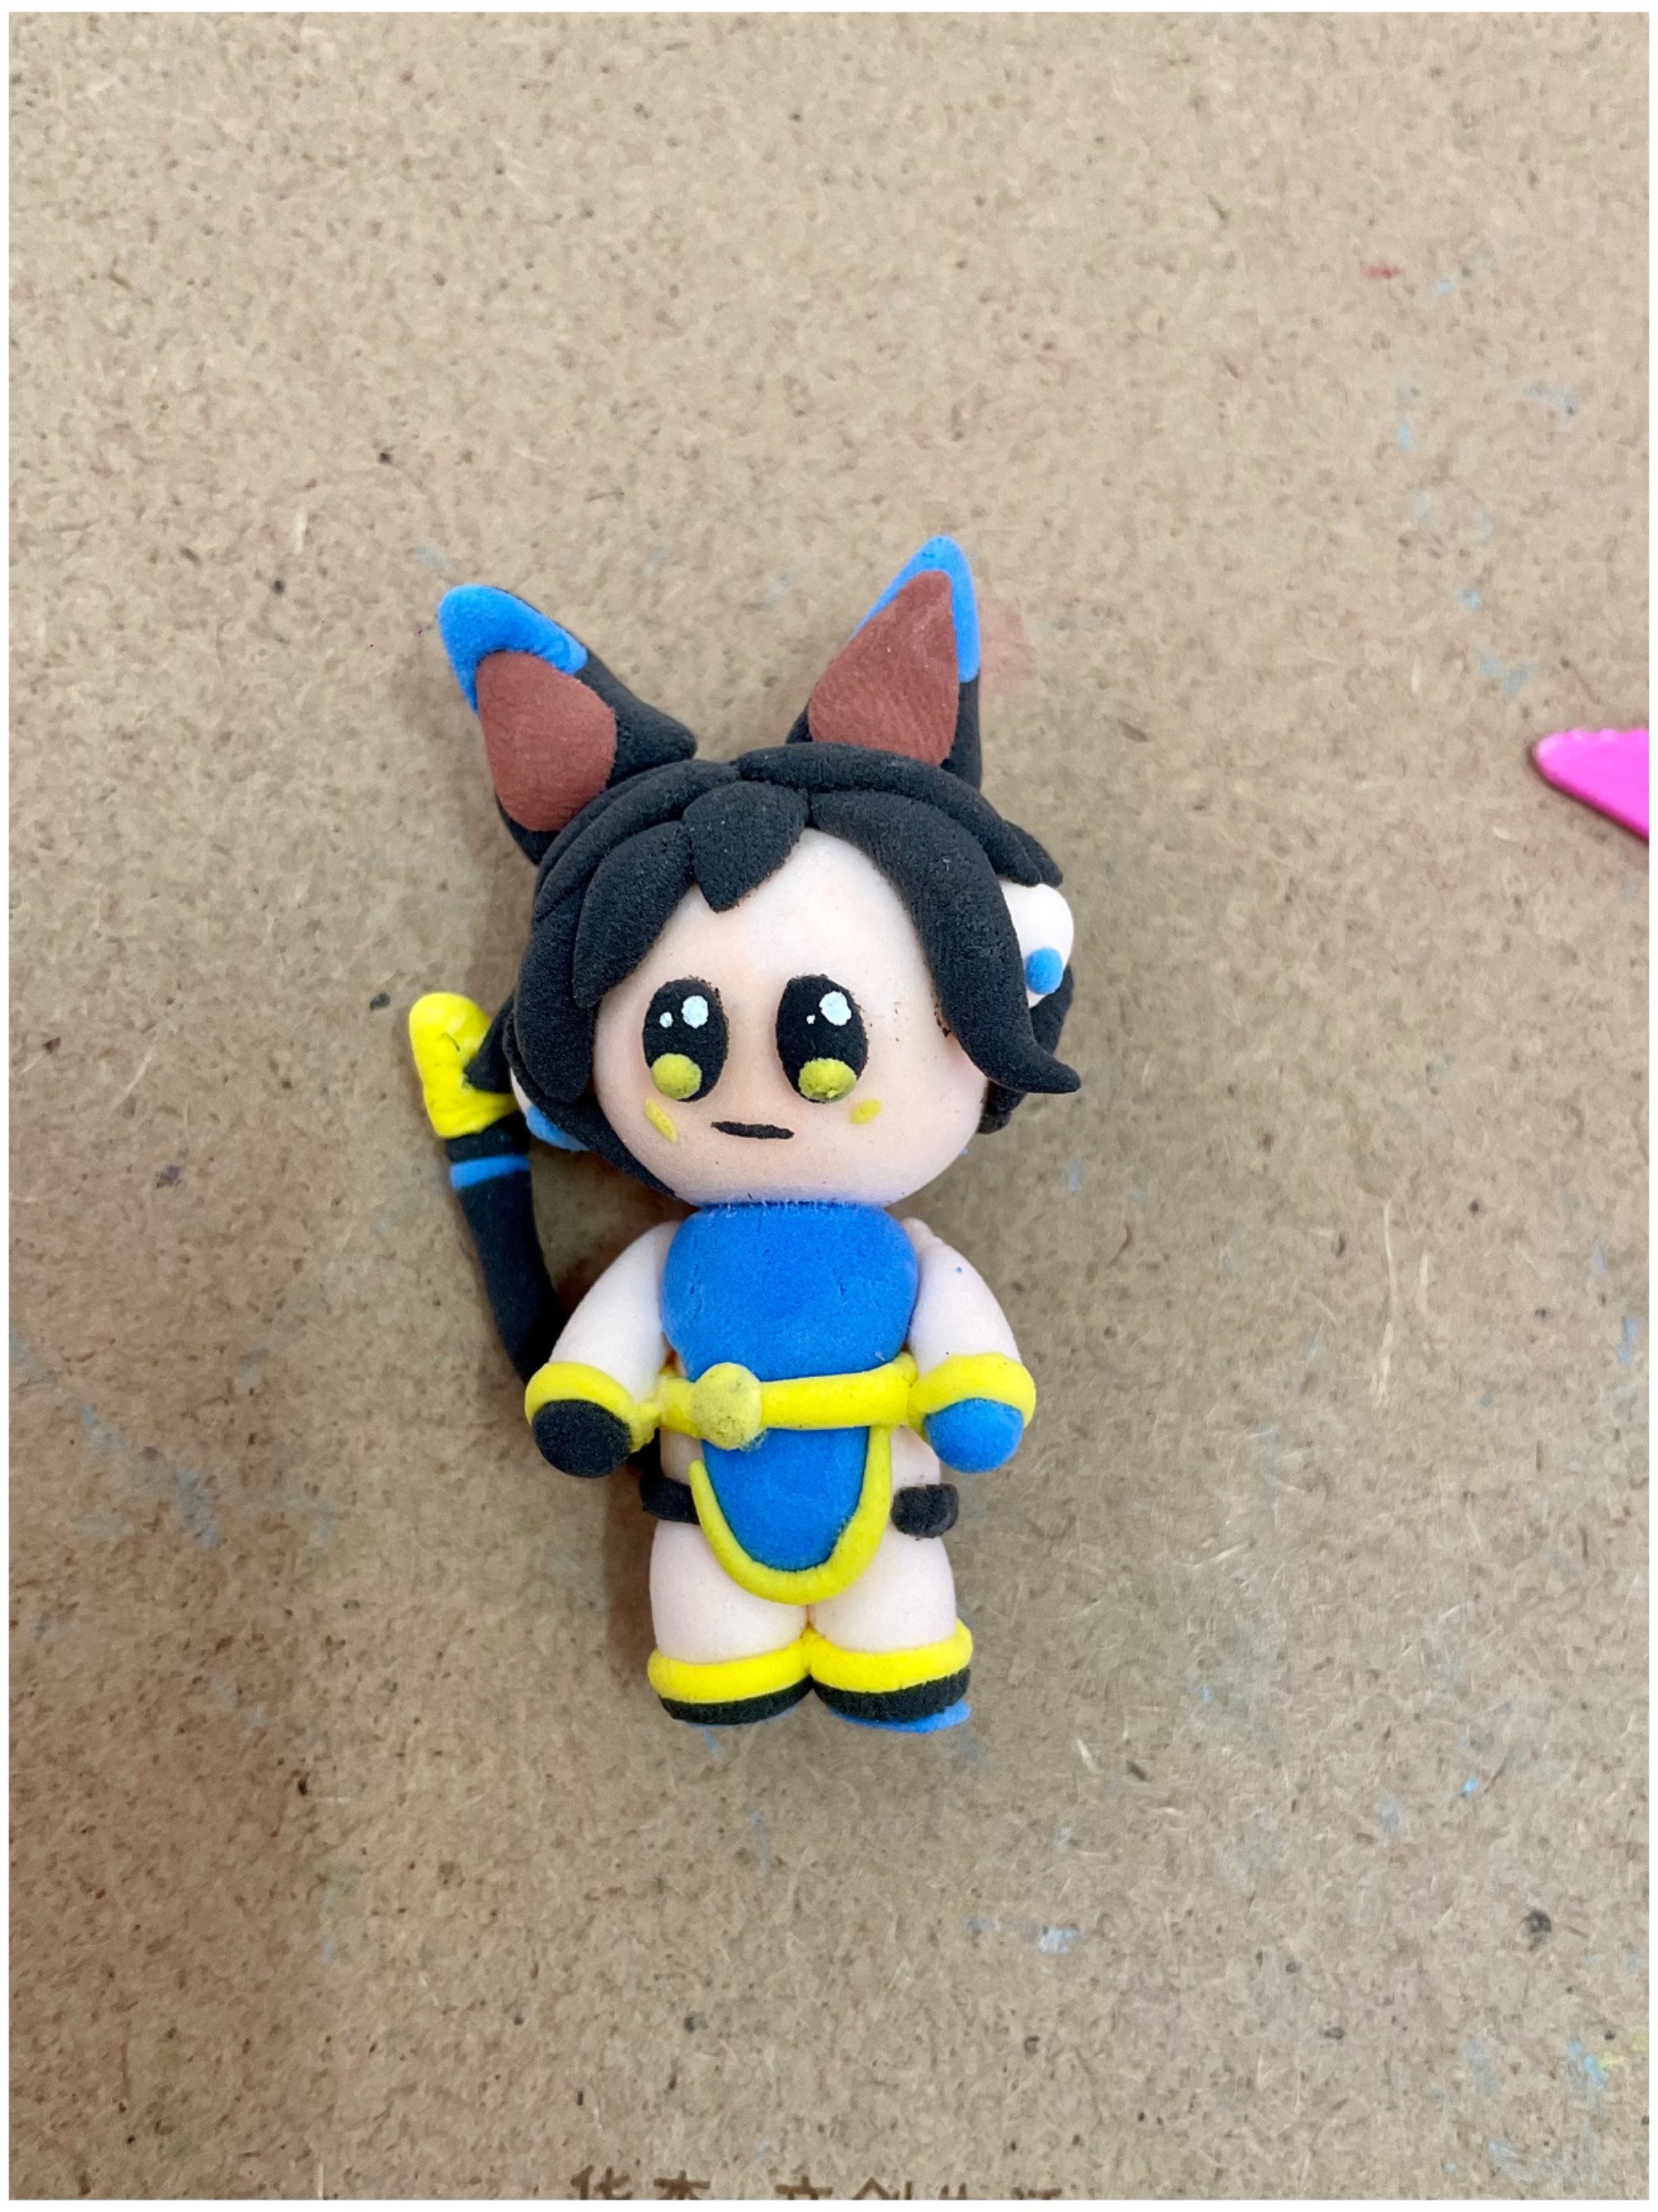
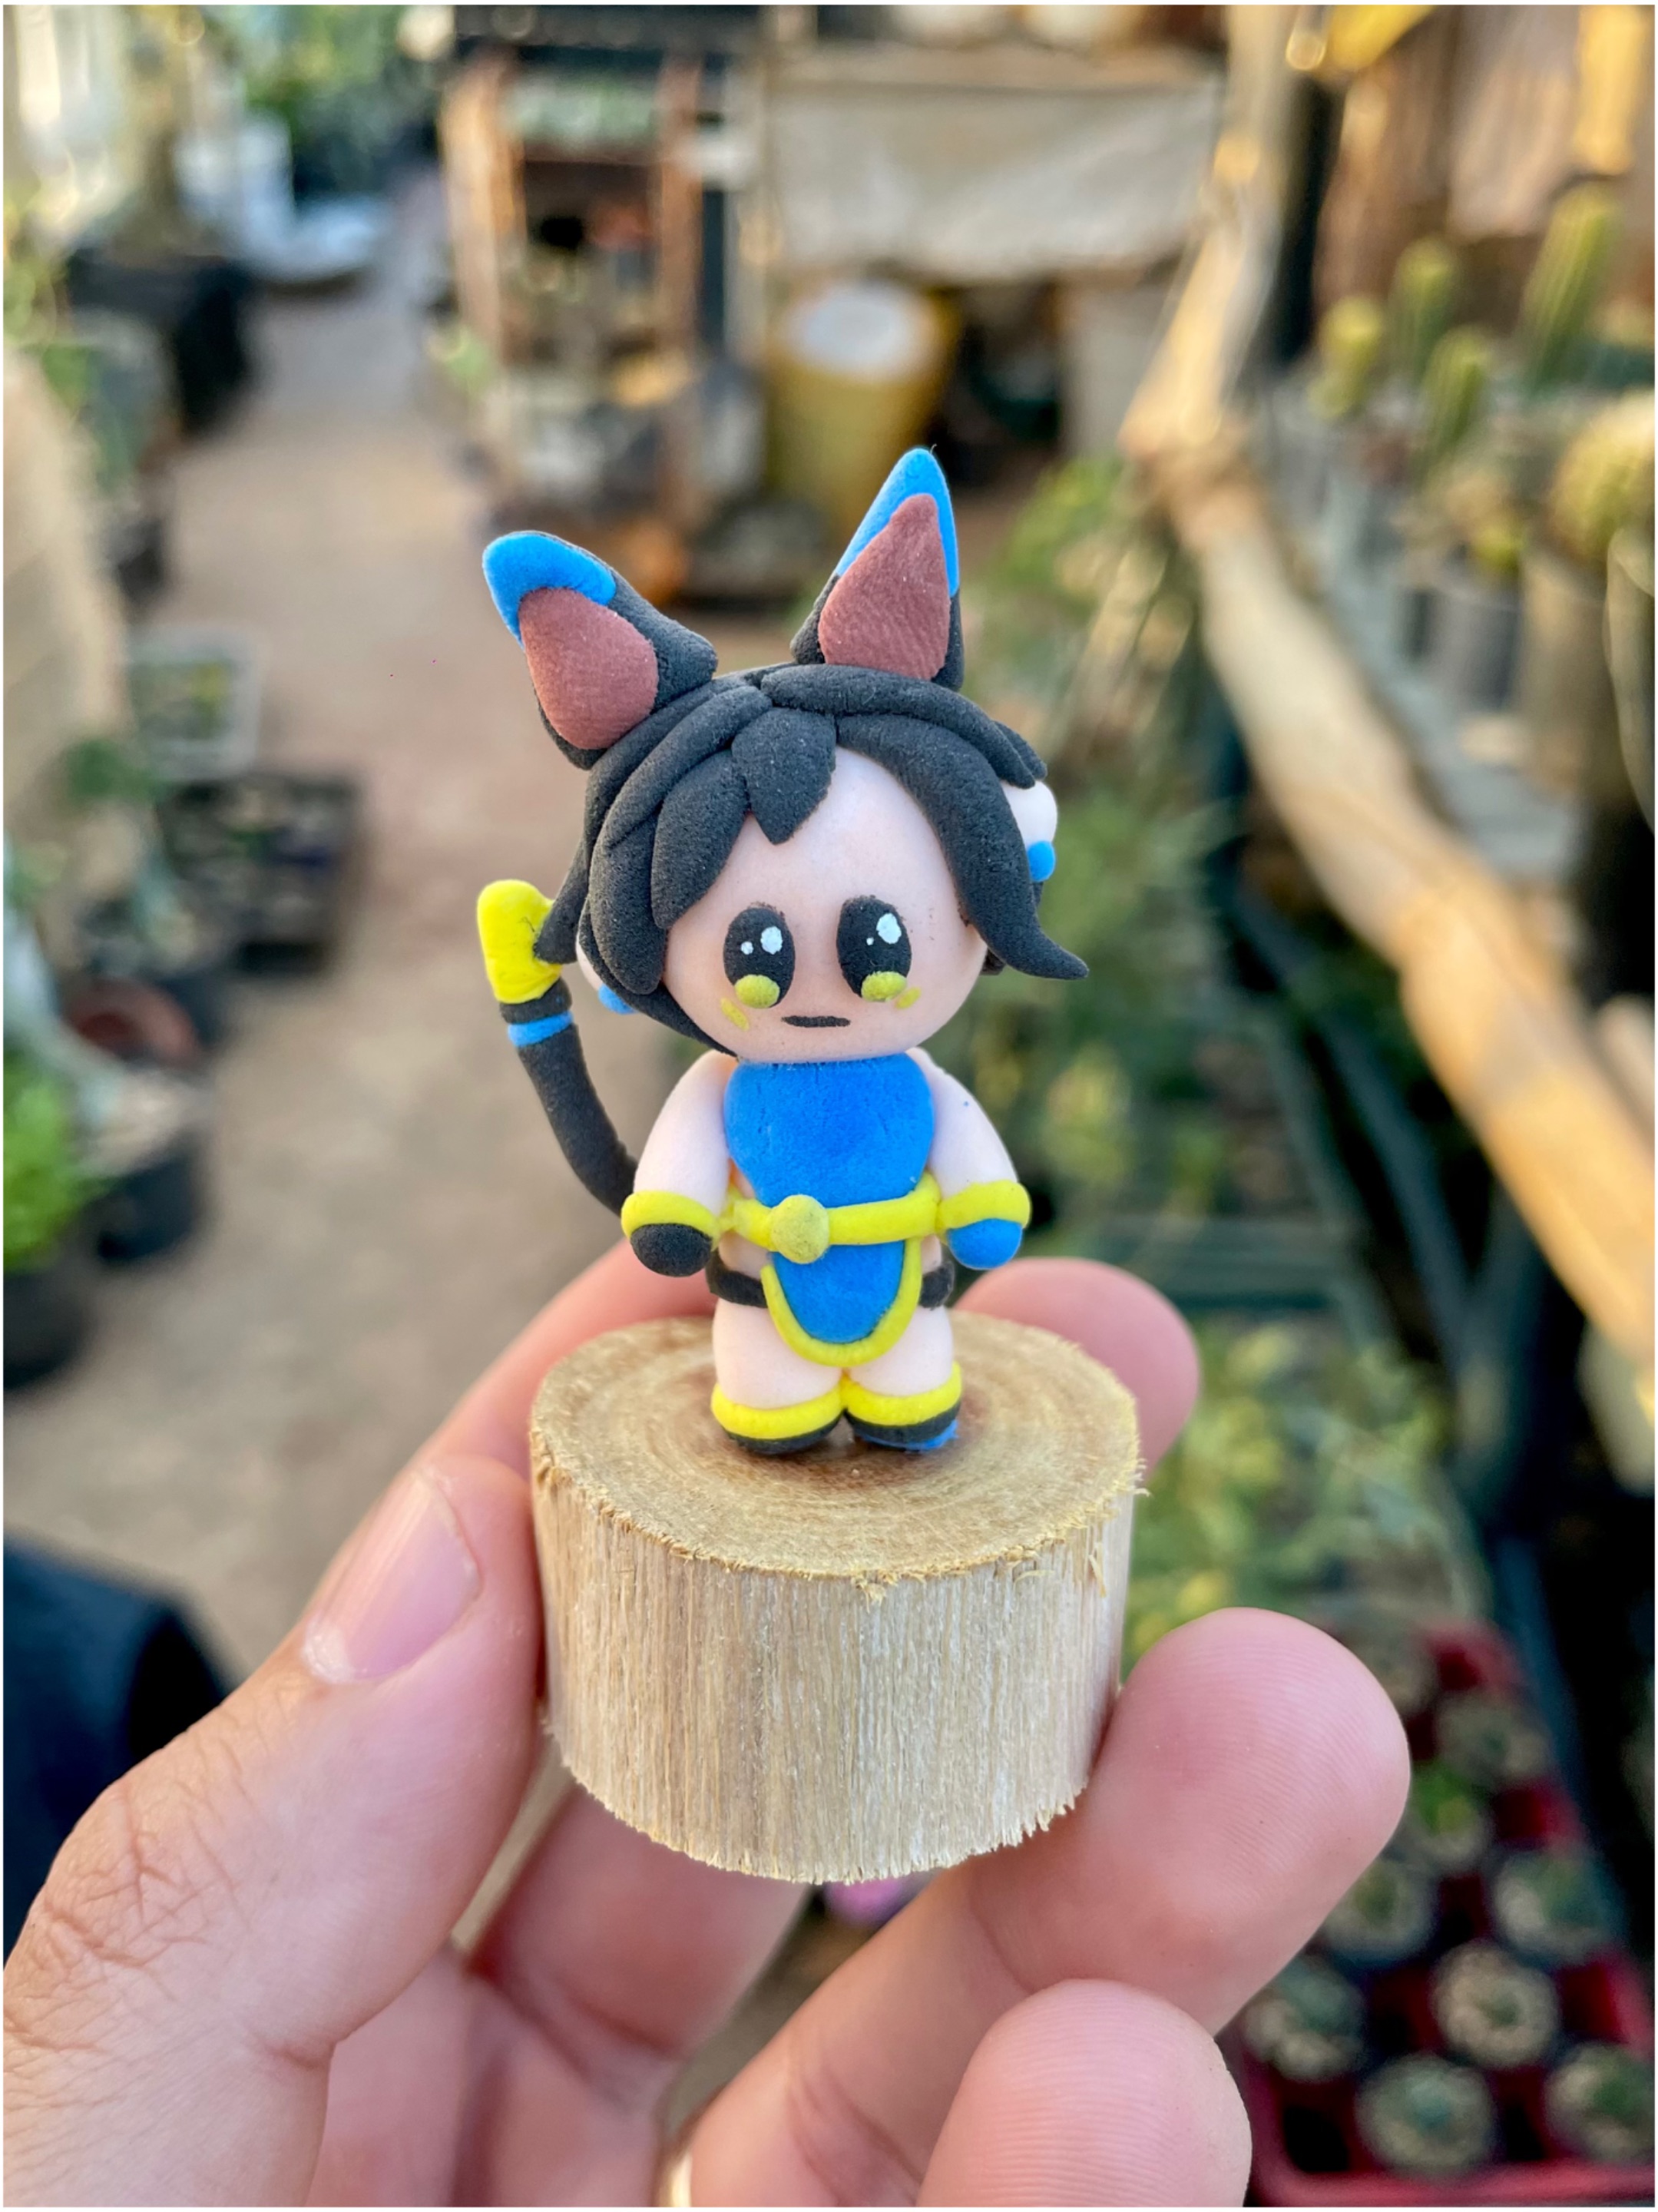
 Finally, we make the eyes and final touches on its head and tail, using the colors blue, yellow, black, and white for the shine. This design is a bit more complex, as the parts are smaller when molding.
 It should be noted that this design was sought in the Holozing community; but the realization are made by me, with dedication to look more beautiful in the home or bedroom, I will return with new ideas to share with you, see you soon and excellent week.
 ---
If you liked it, don't forget to leave a comment and follow me for future posts. I'd love to know your opinion and ideas for the next one. Regards
---
If you liked it, don't forget to leave a comment and follow me for future posts. I'd love to know your opinion and ideas for the next one. Regards
Hola!! Buenos días ☀️ comunidad Holozing, amantes de los videojuegos y juegos Web3, el día de hoy les enseñaré a realizar con foami moldeable (foam clay) a la criatura Xolo, pero esta vez en una versión kawaii animada diseñada por mí. Espero les guste mucho la creación, a toda comunidad en general y yo súper contento en presentarles mi experiencia con este material flexible. ¡Acompáñame! 😊 A continuación les mostraré paso a paso la realización de mi trabajo. Para empezar, mencionaré todos los materiales utilizados:
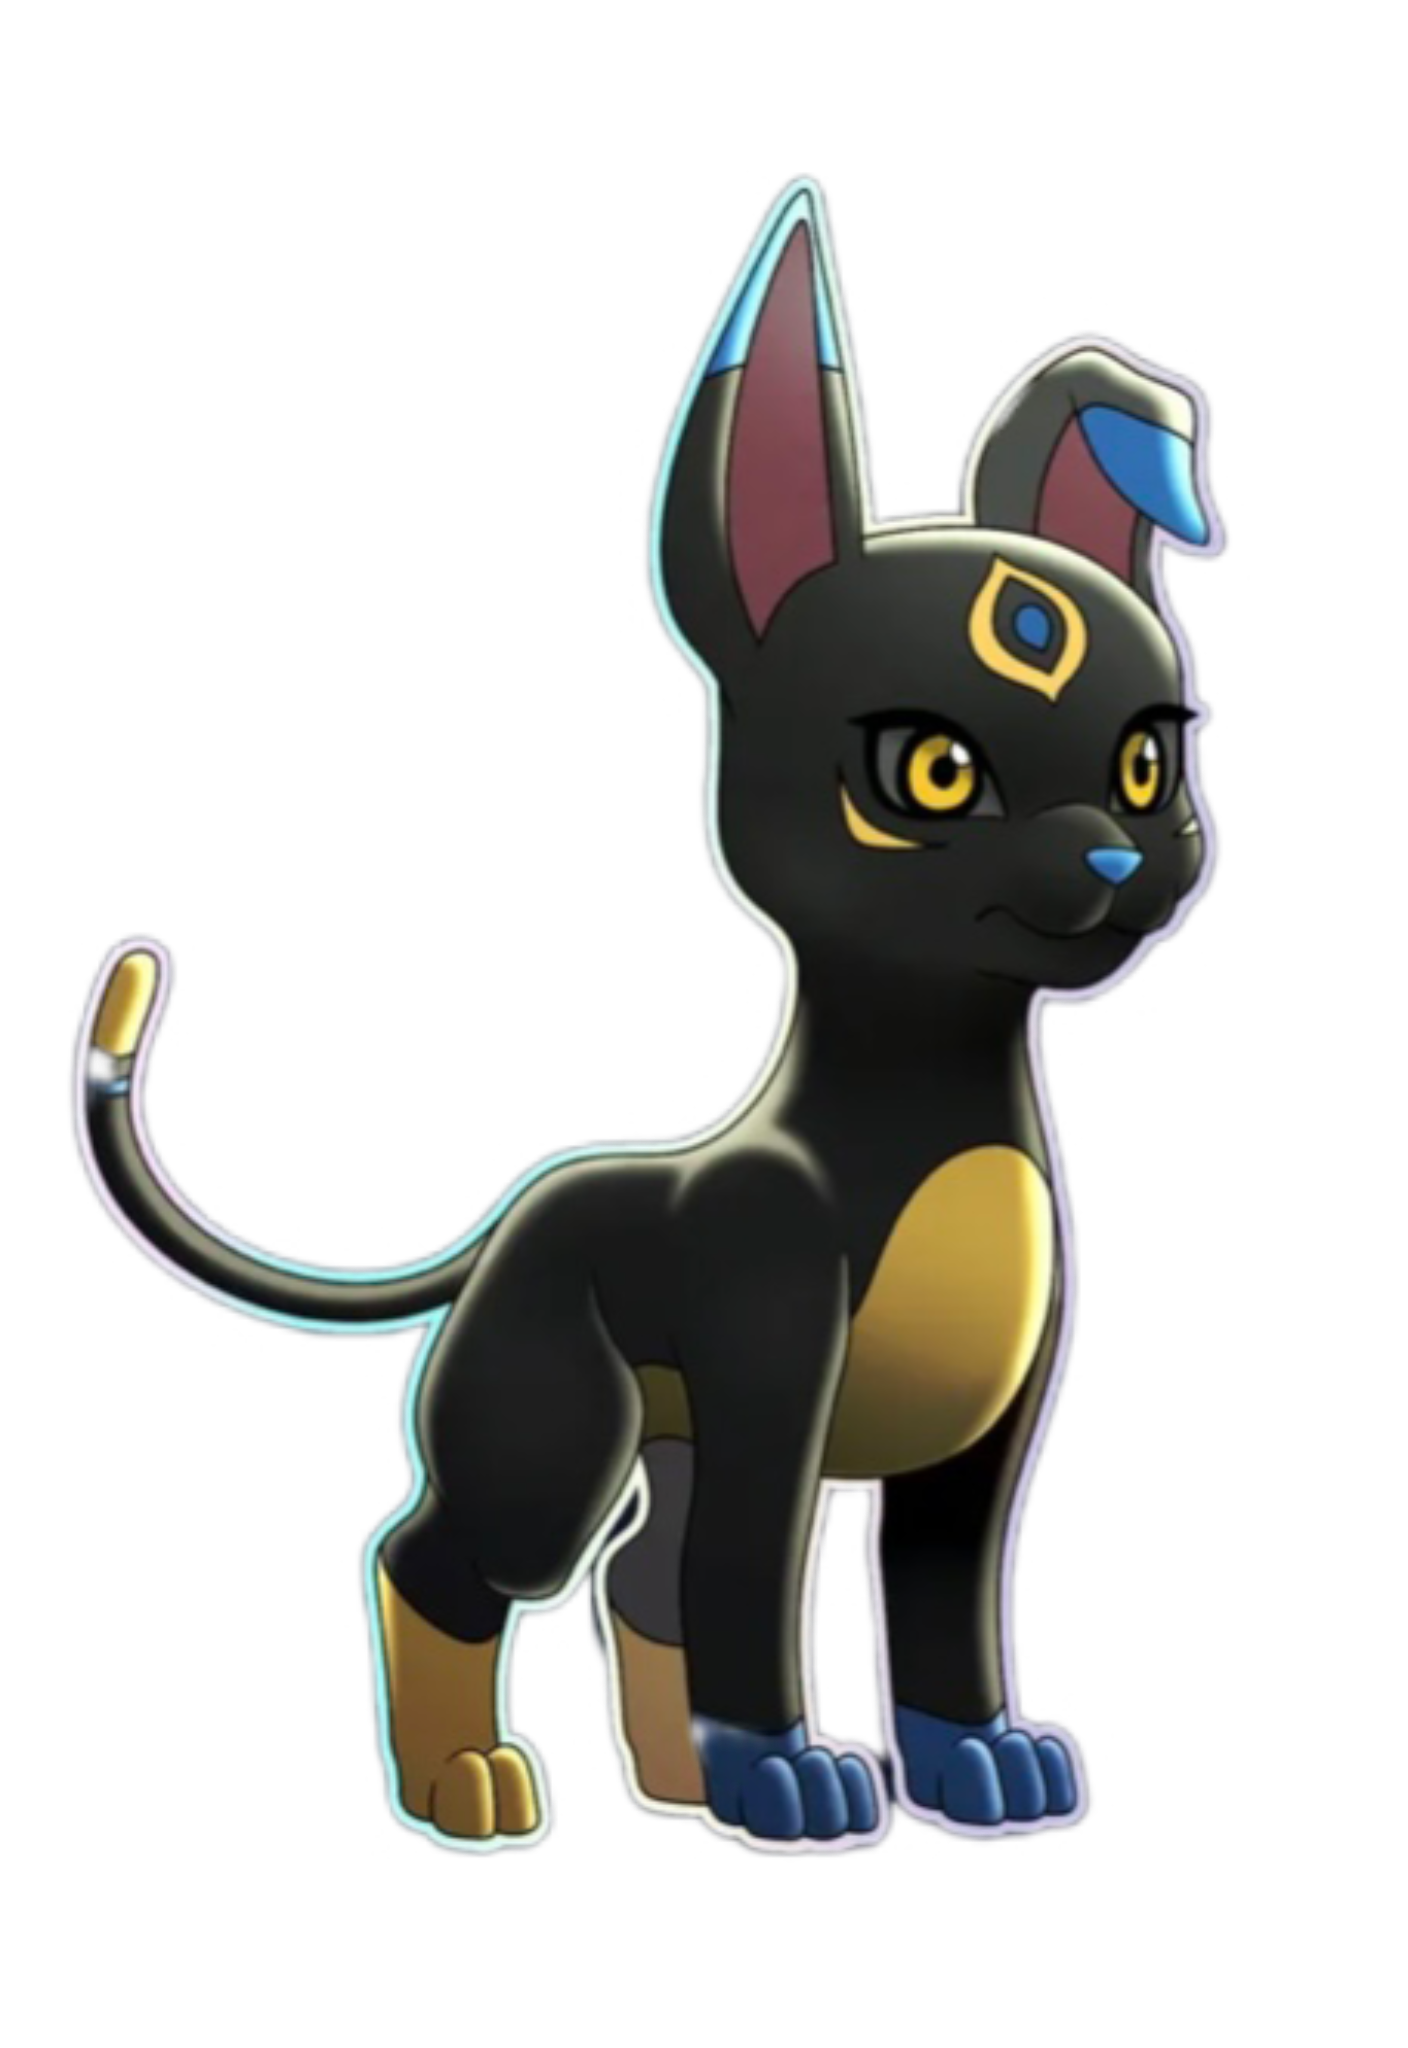
Reference Image taken from @holozing / Imagen de Referencia tomada de @holozing.
Materiales / Materials
STEP / PASO 1
En la fase inicial, comienzo tomando una porción de arcilla en color beige para realizar el cuerpo del animado. Luego, con las manos moldeó en forma de bola, dándoles una terminación curiosa.
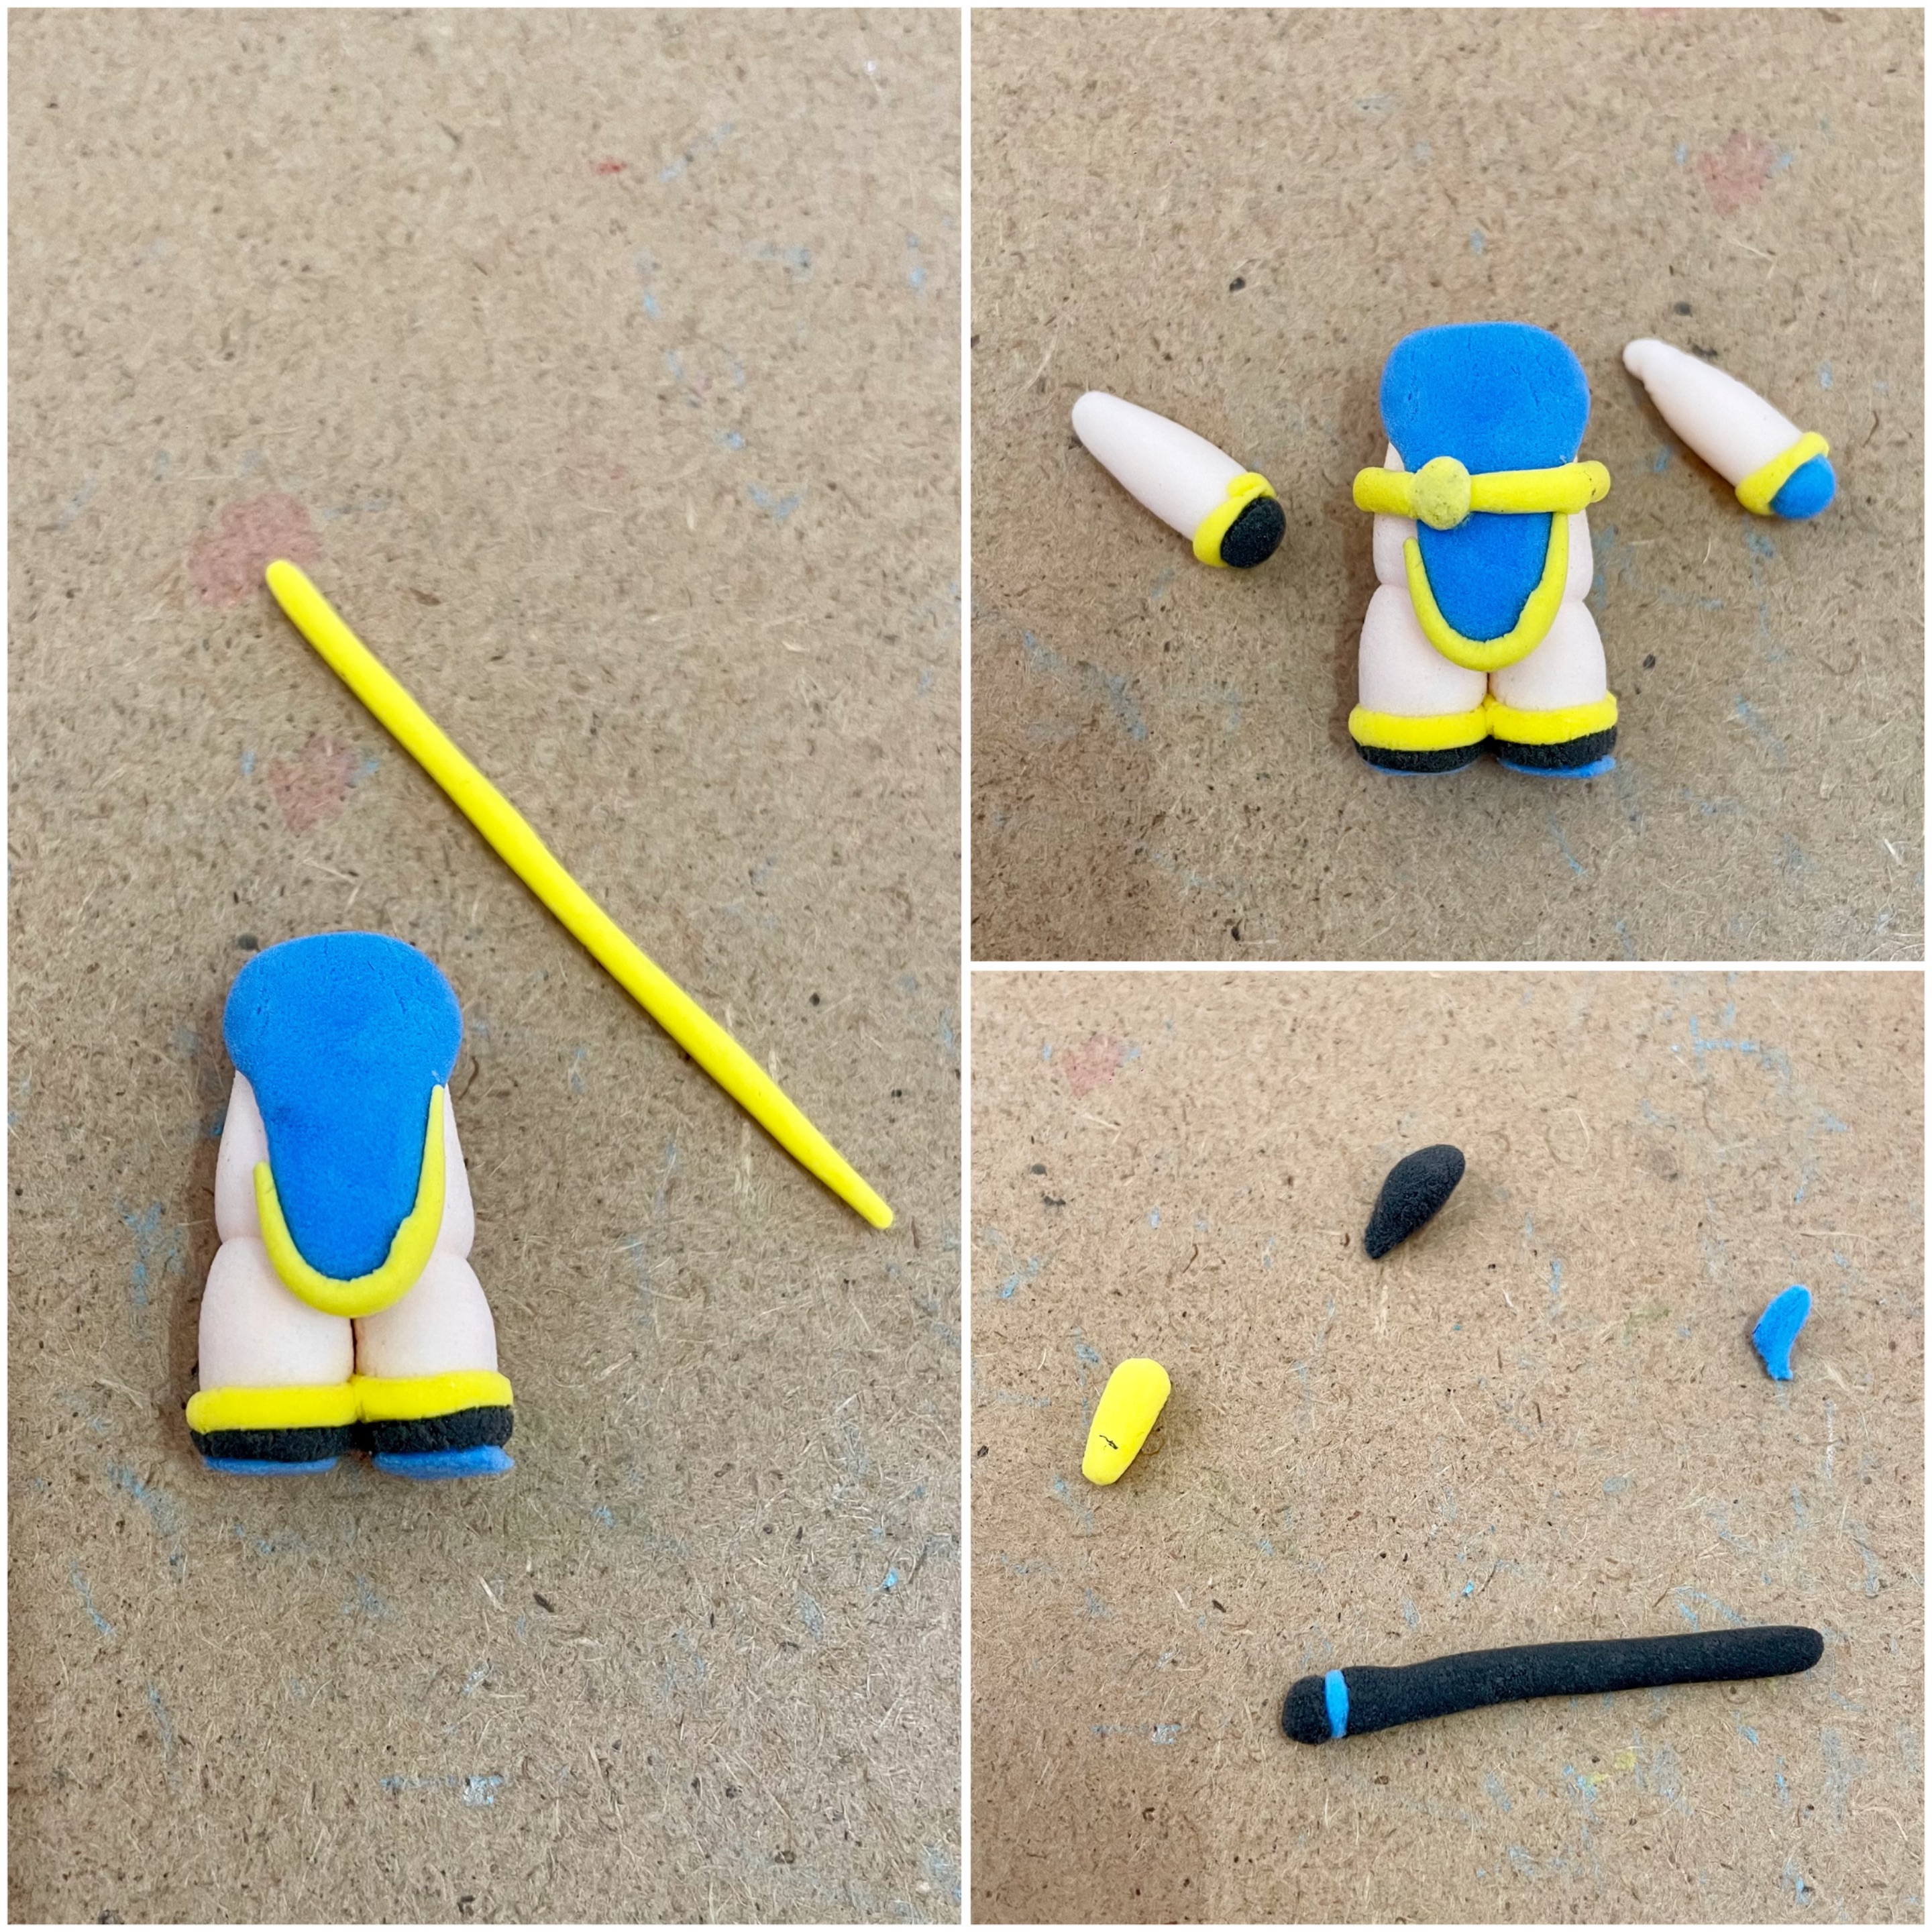
STEP / PASO 2
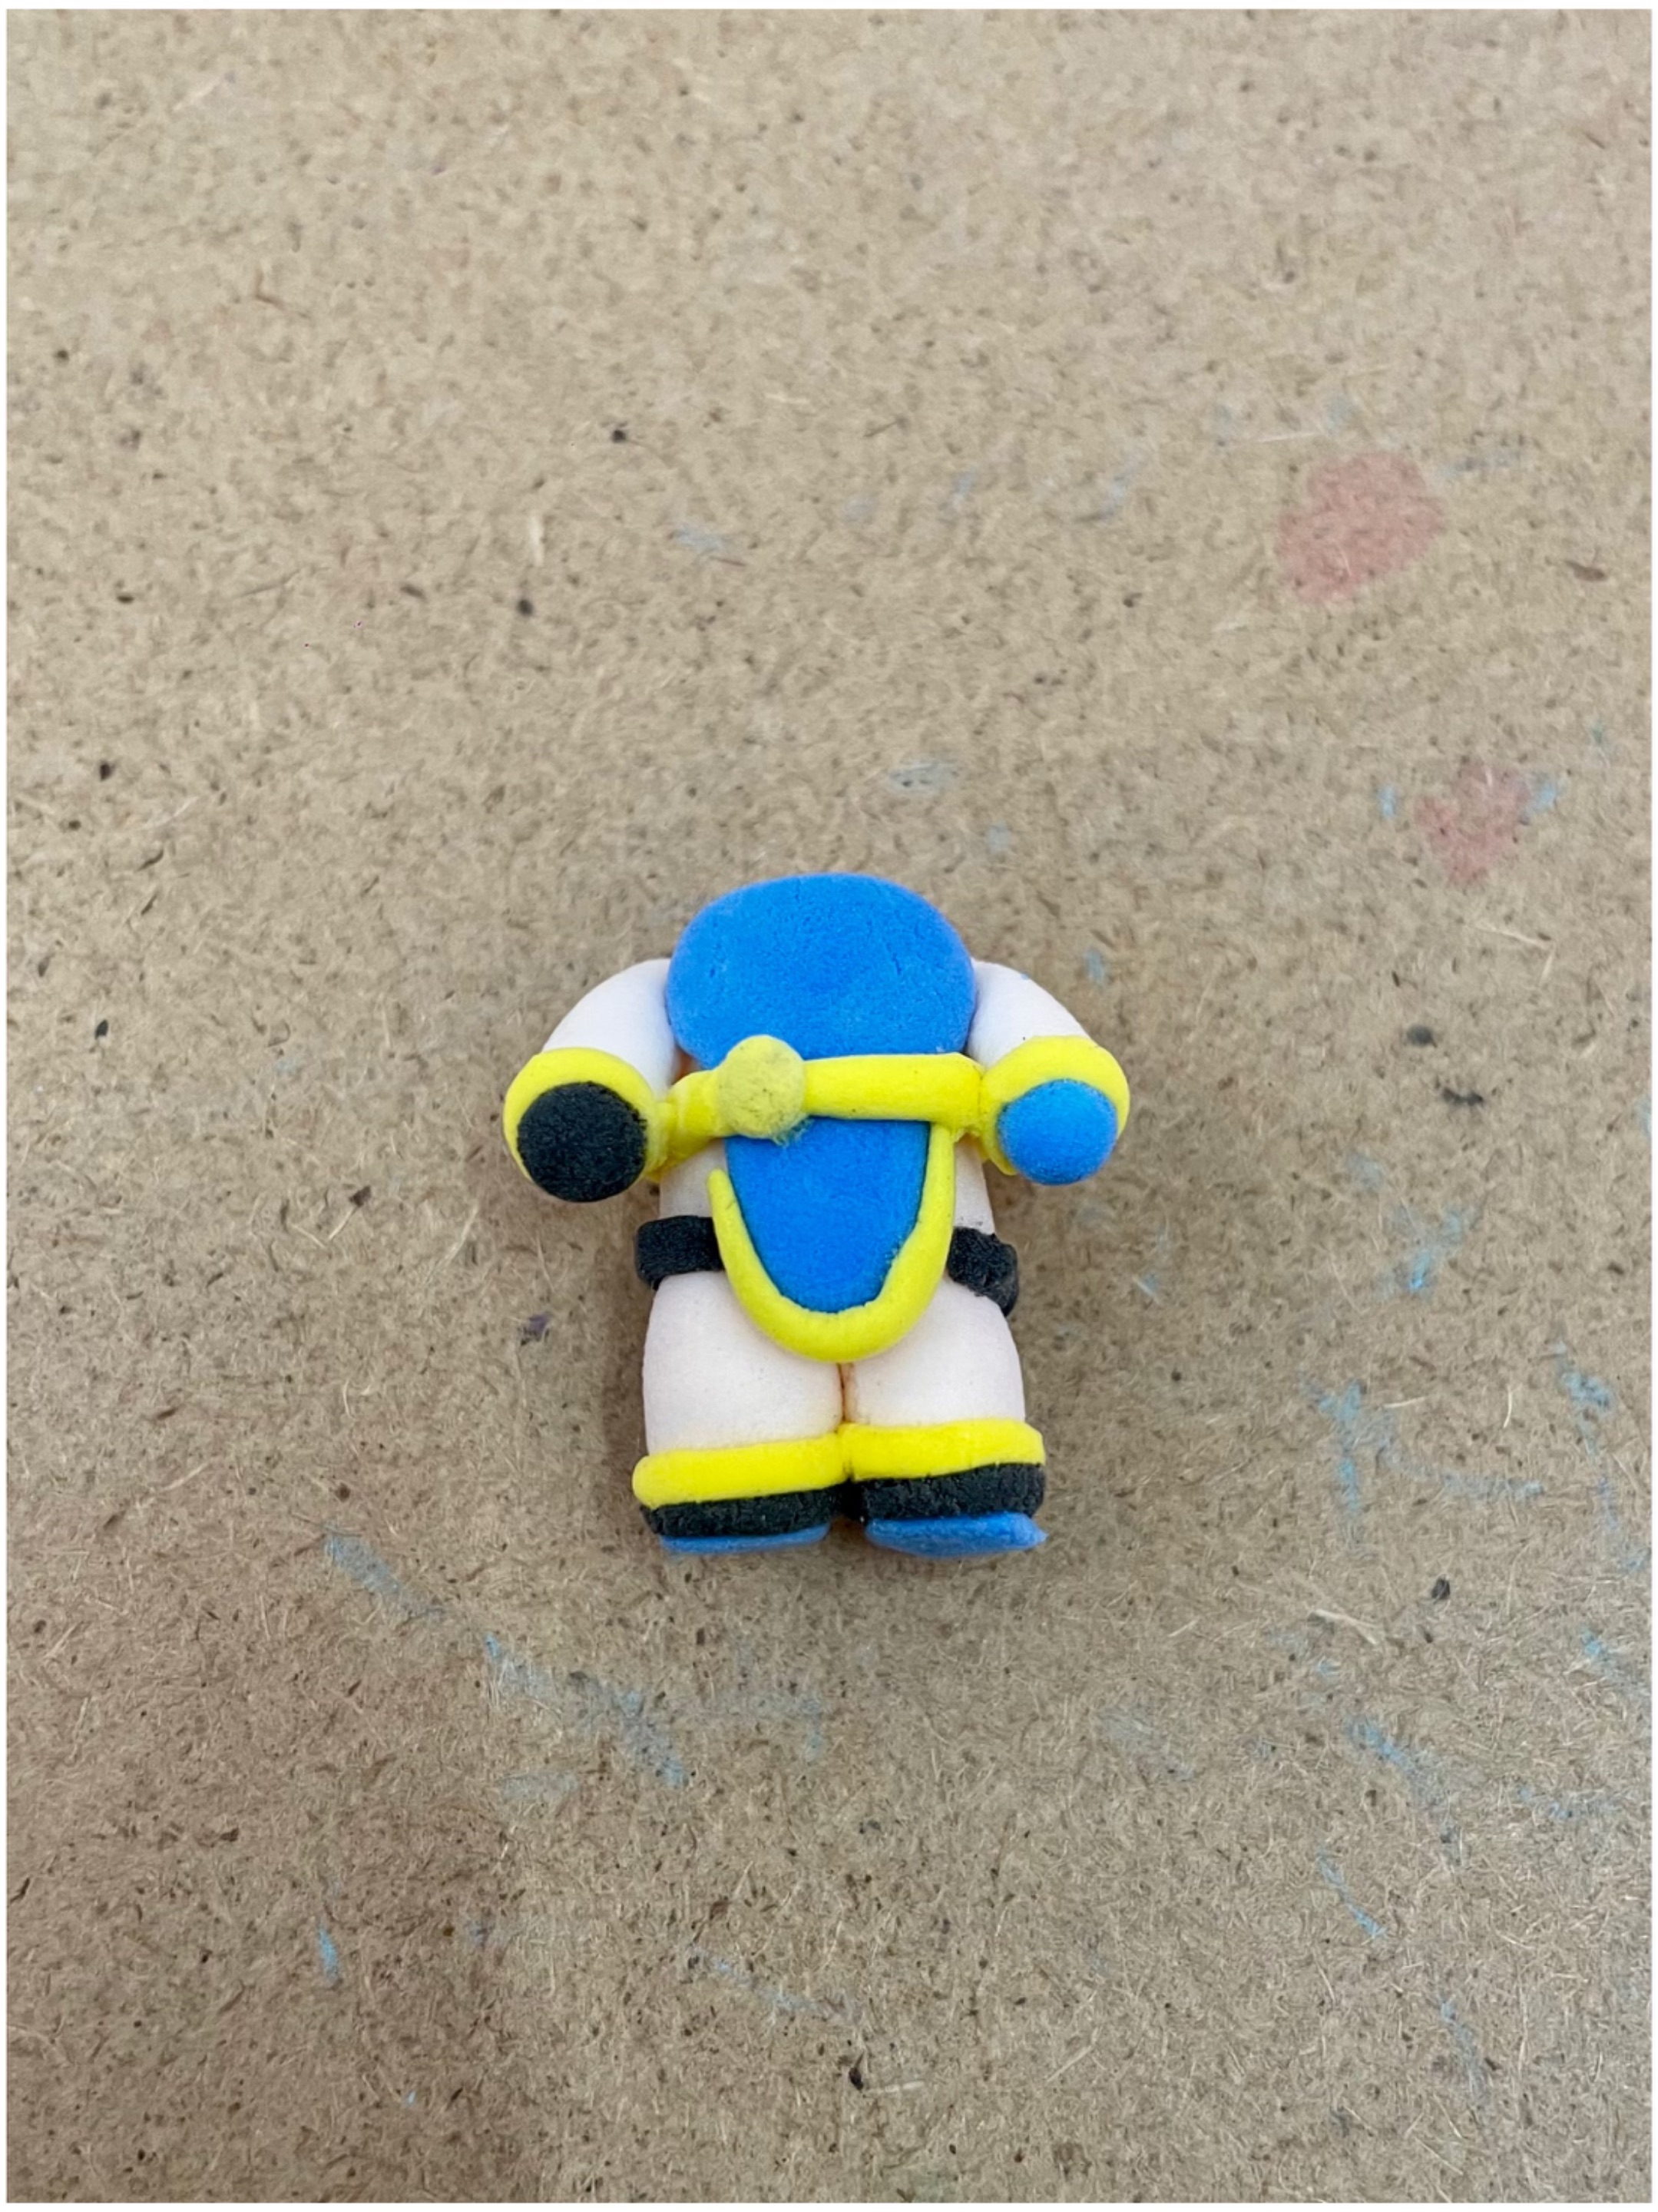
Seguidamente, desarrollo las piezas del cuerpo kawaii, su cabeza, sus ojos, sus manos, el cabello, sus orejas, las patas y su traje, siempre dando lo mejor de mi.
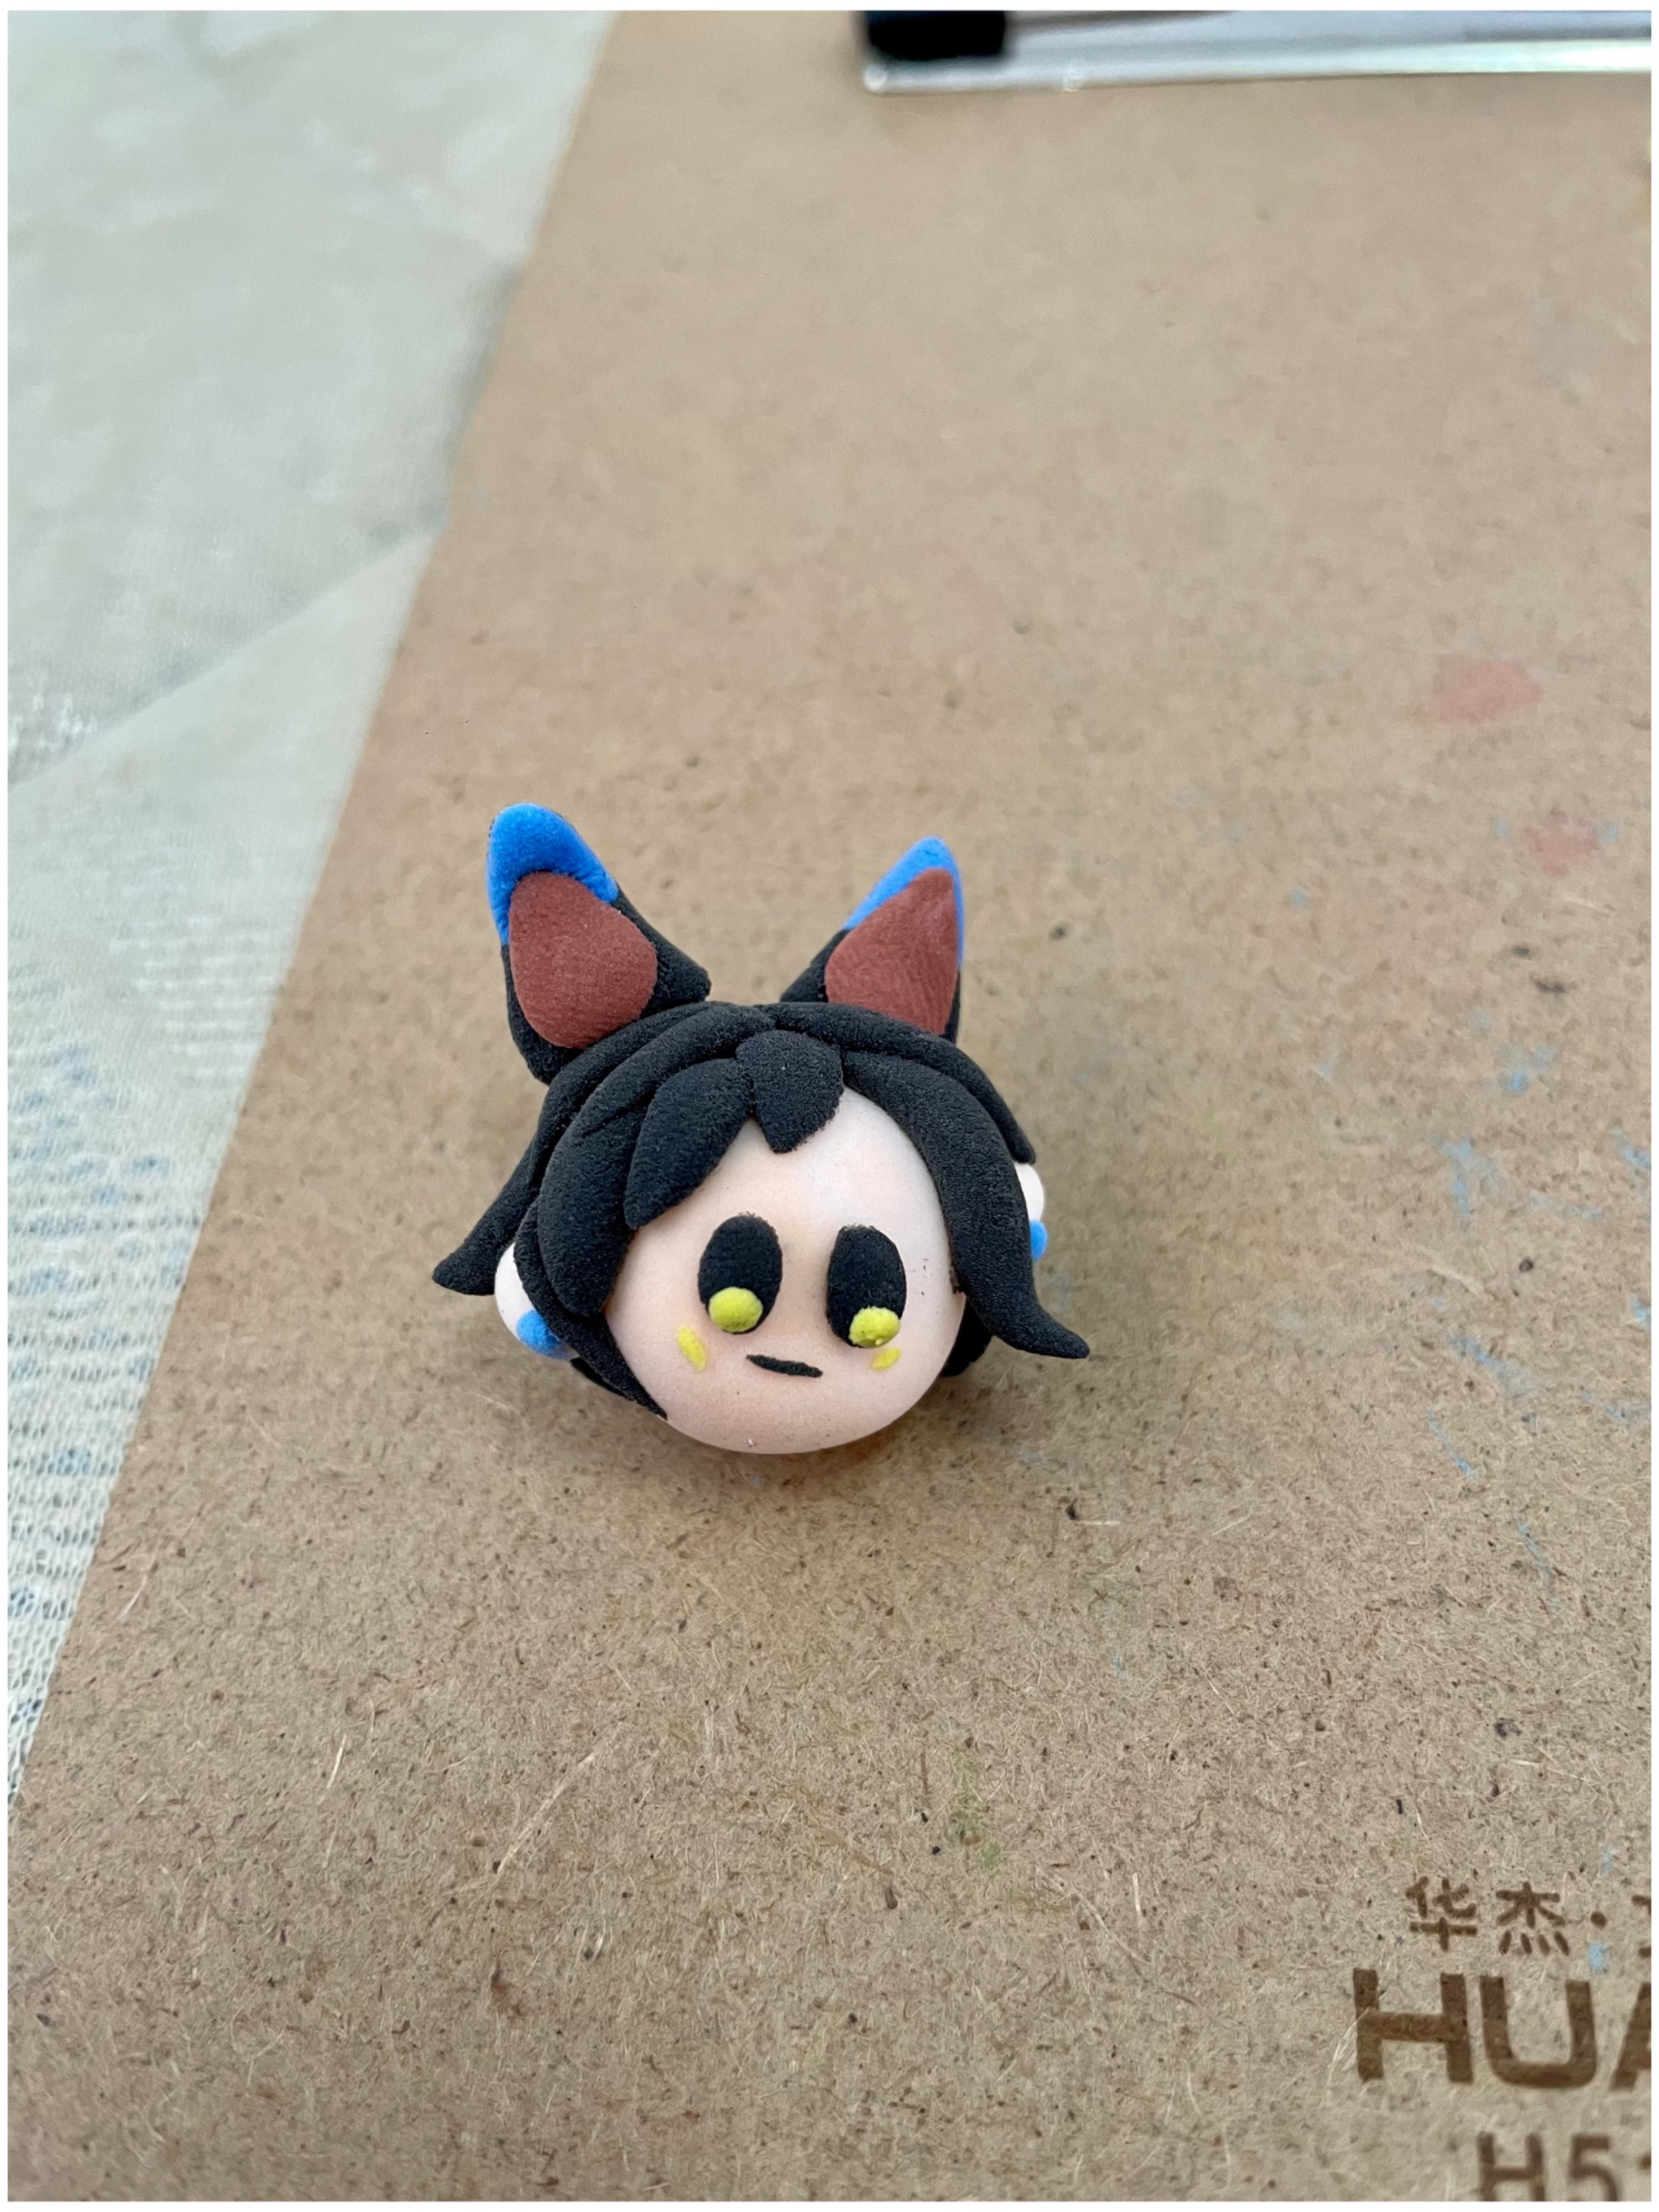
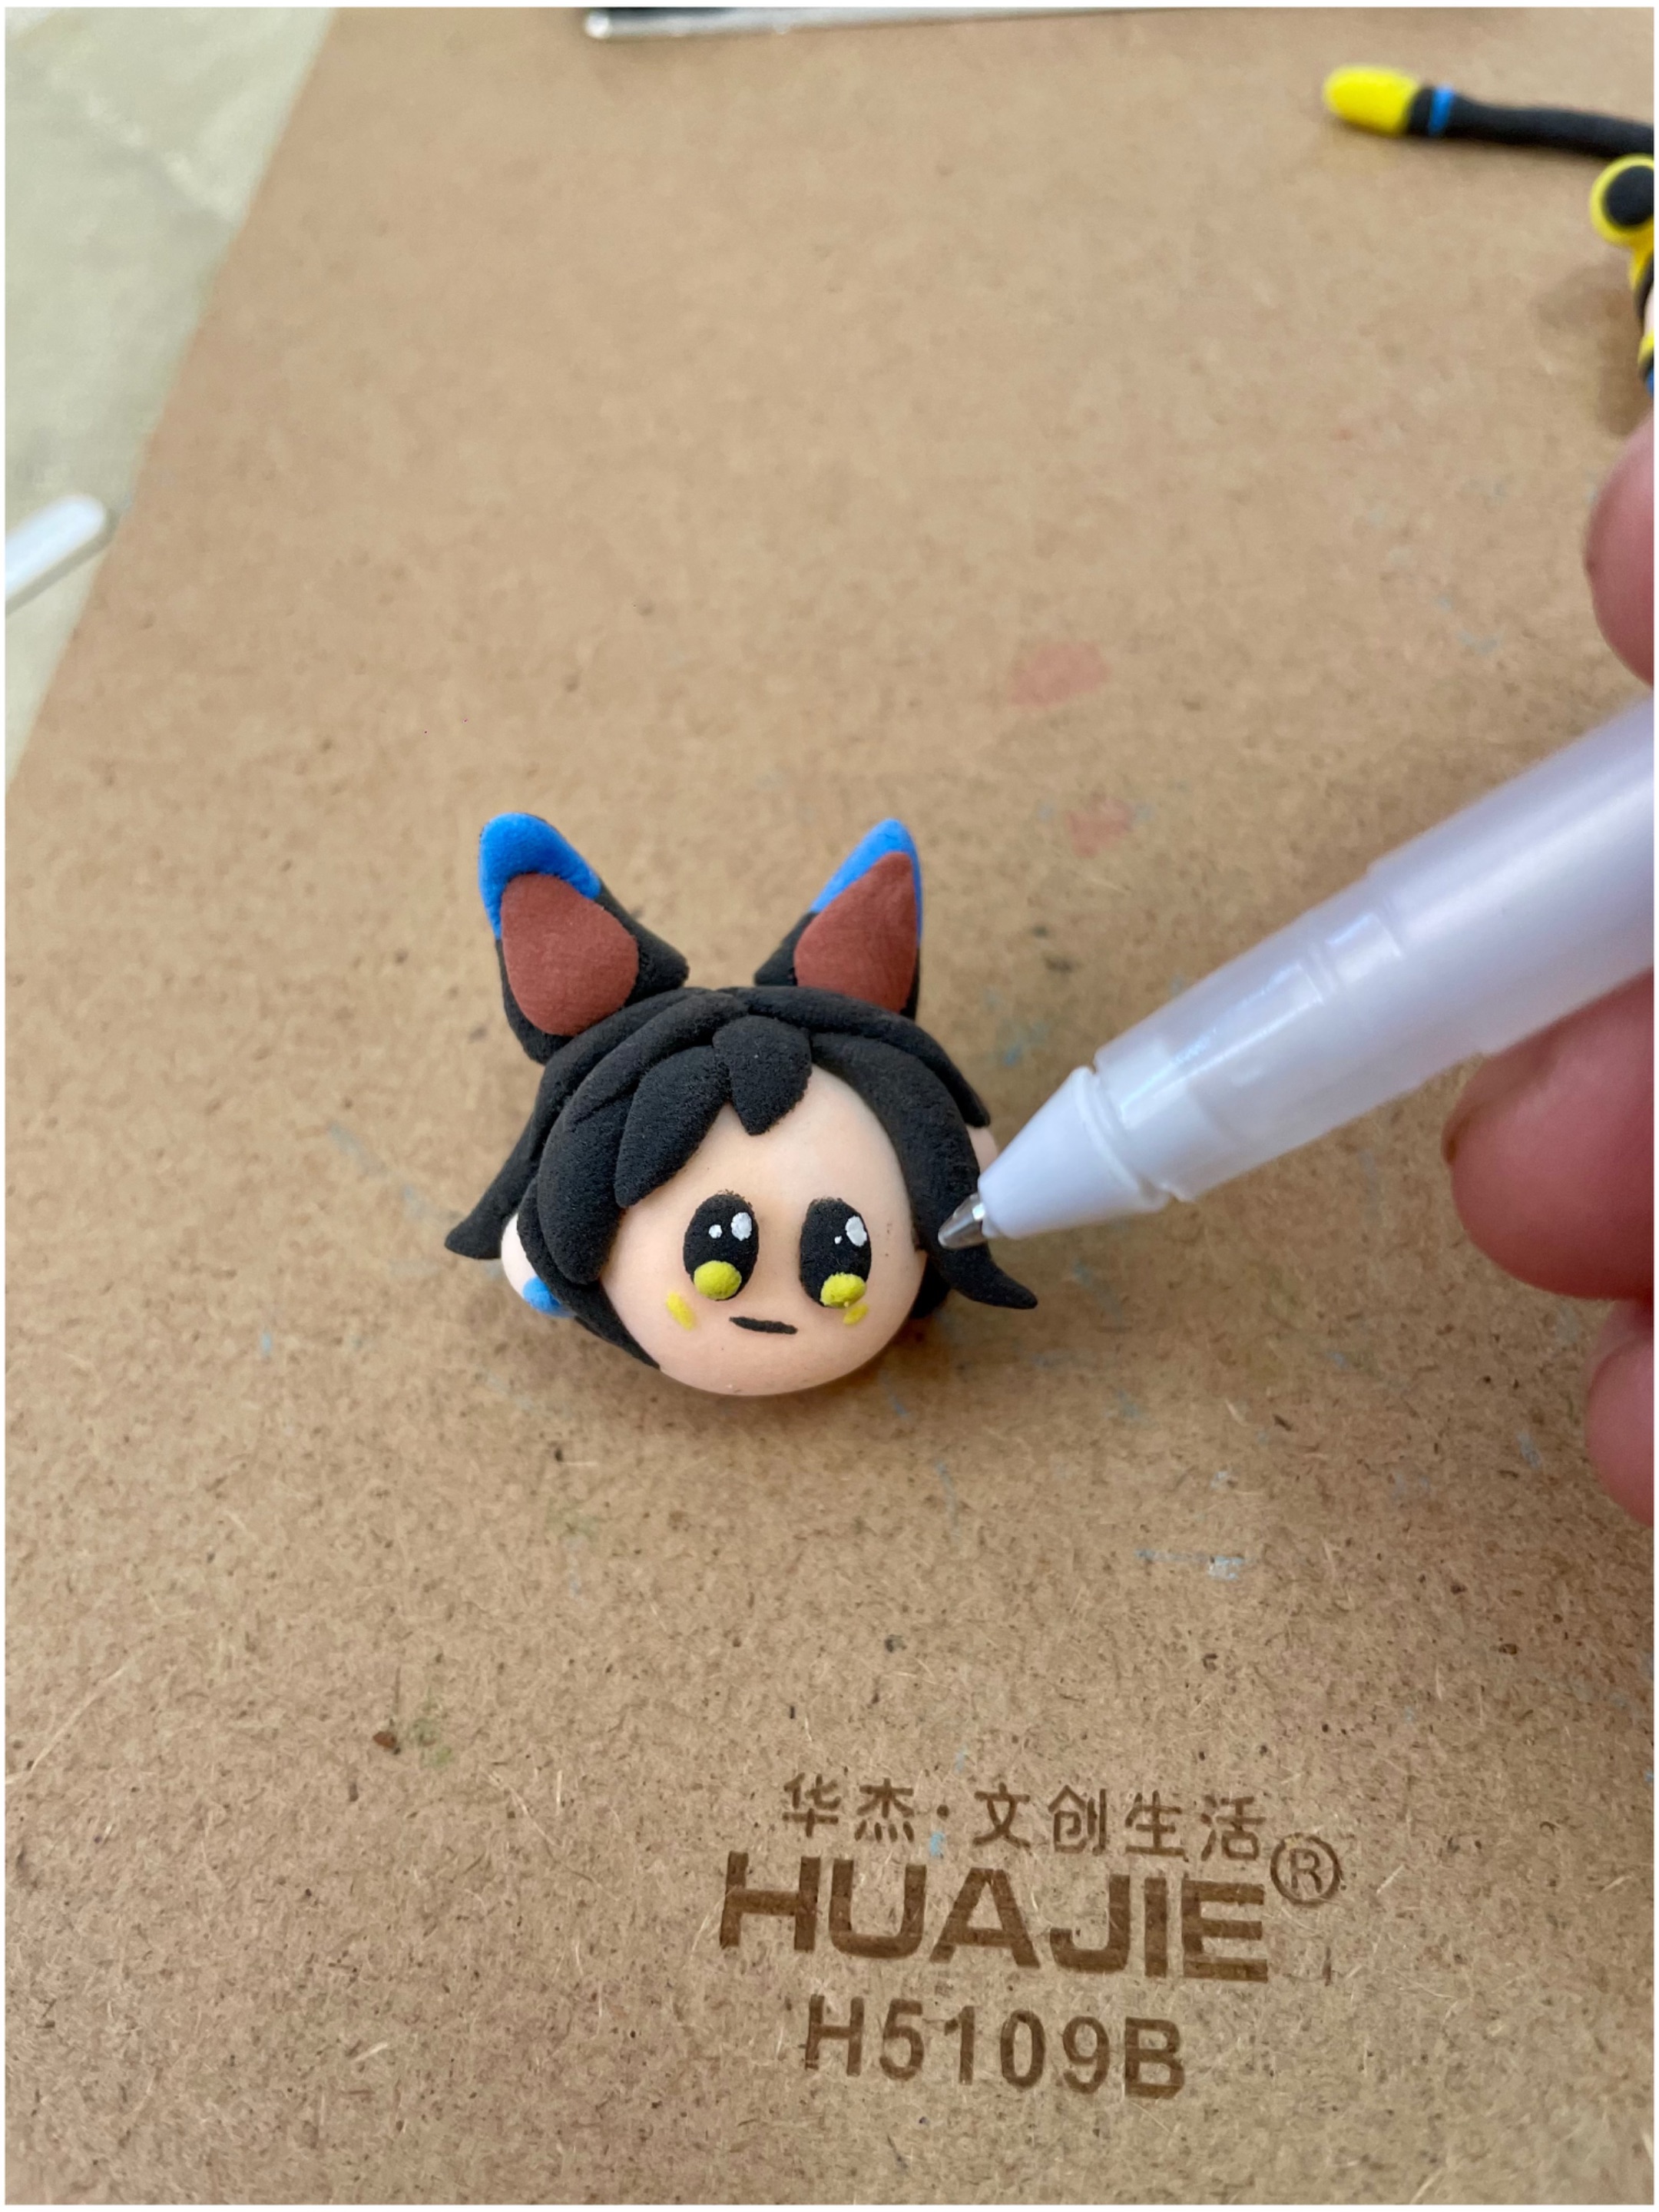
STEP / PASO 3
Ya por último, realizamos los ojos y retoques finales en su cabeza y cola , utilizando los colores azul, amarillo, negro y blanco para el brillo. Este diseño es un poco más complejo, pues son más pequeñas las partes a la hora de moldear.
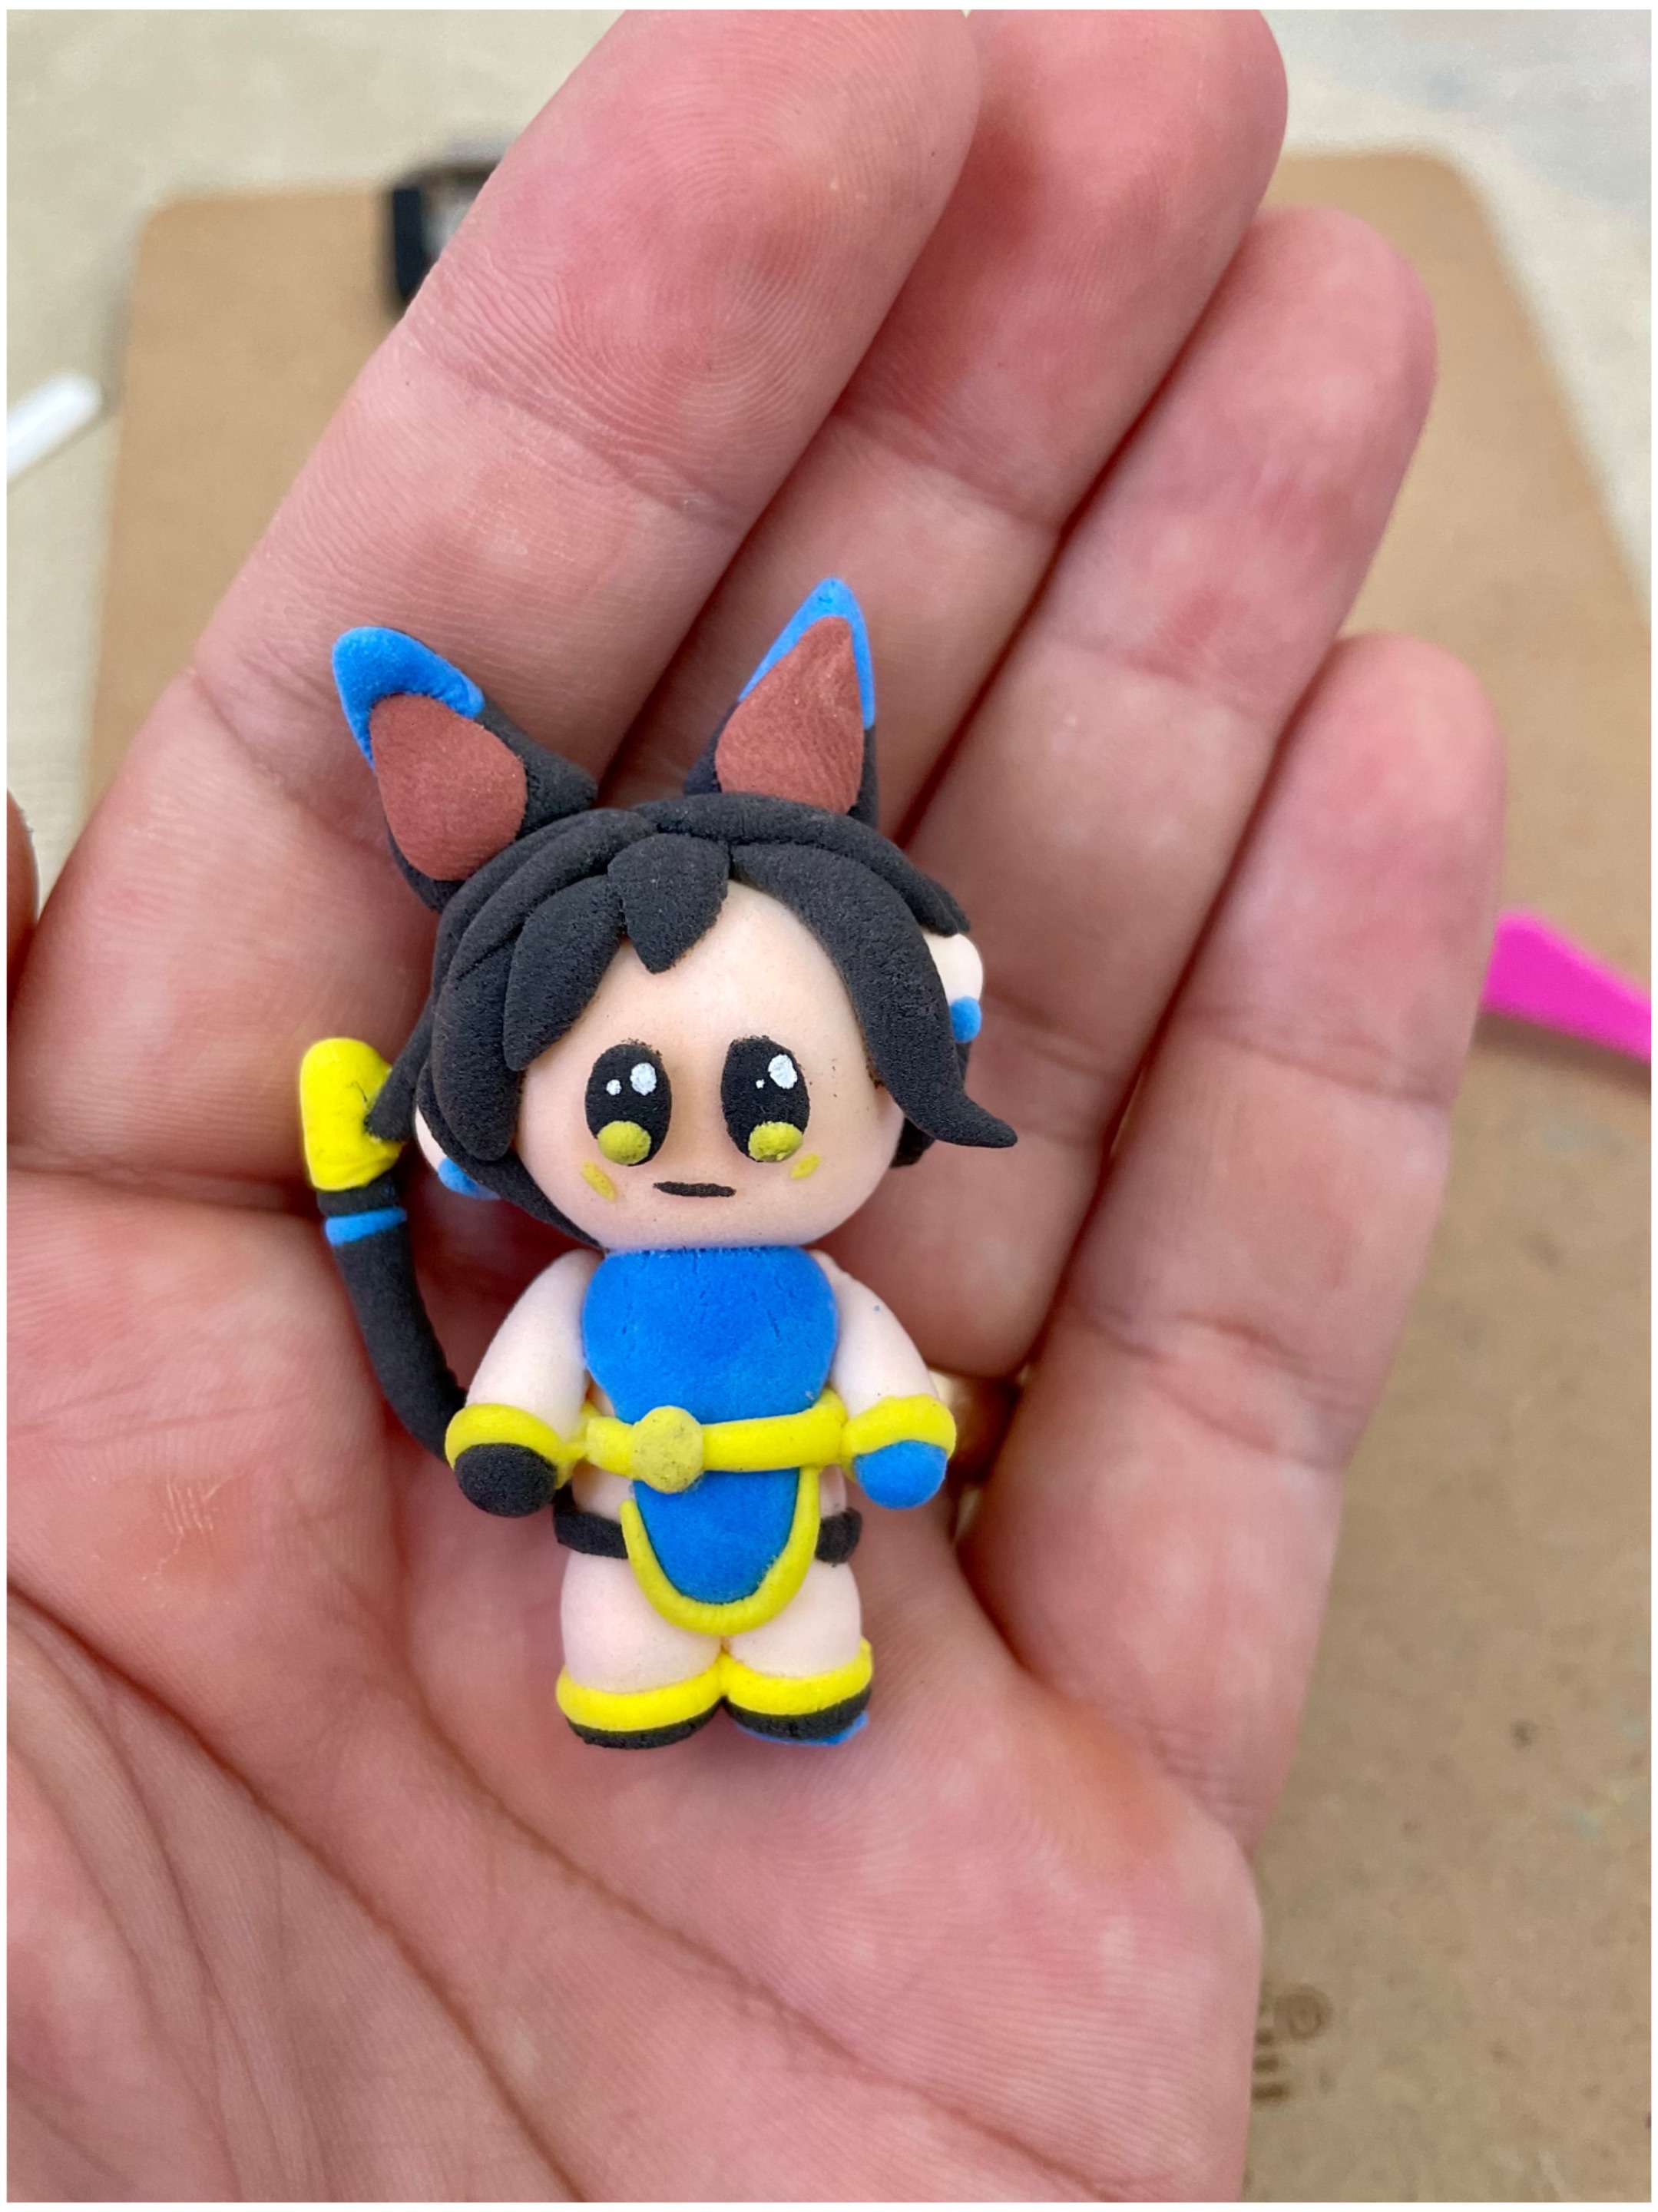
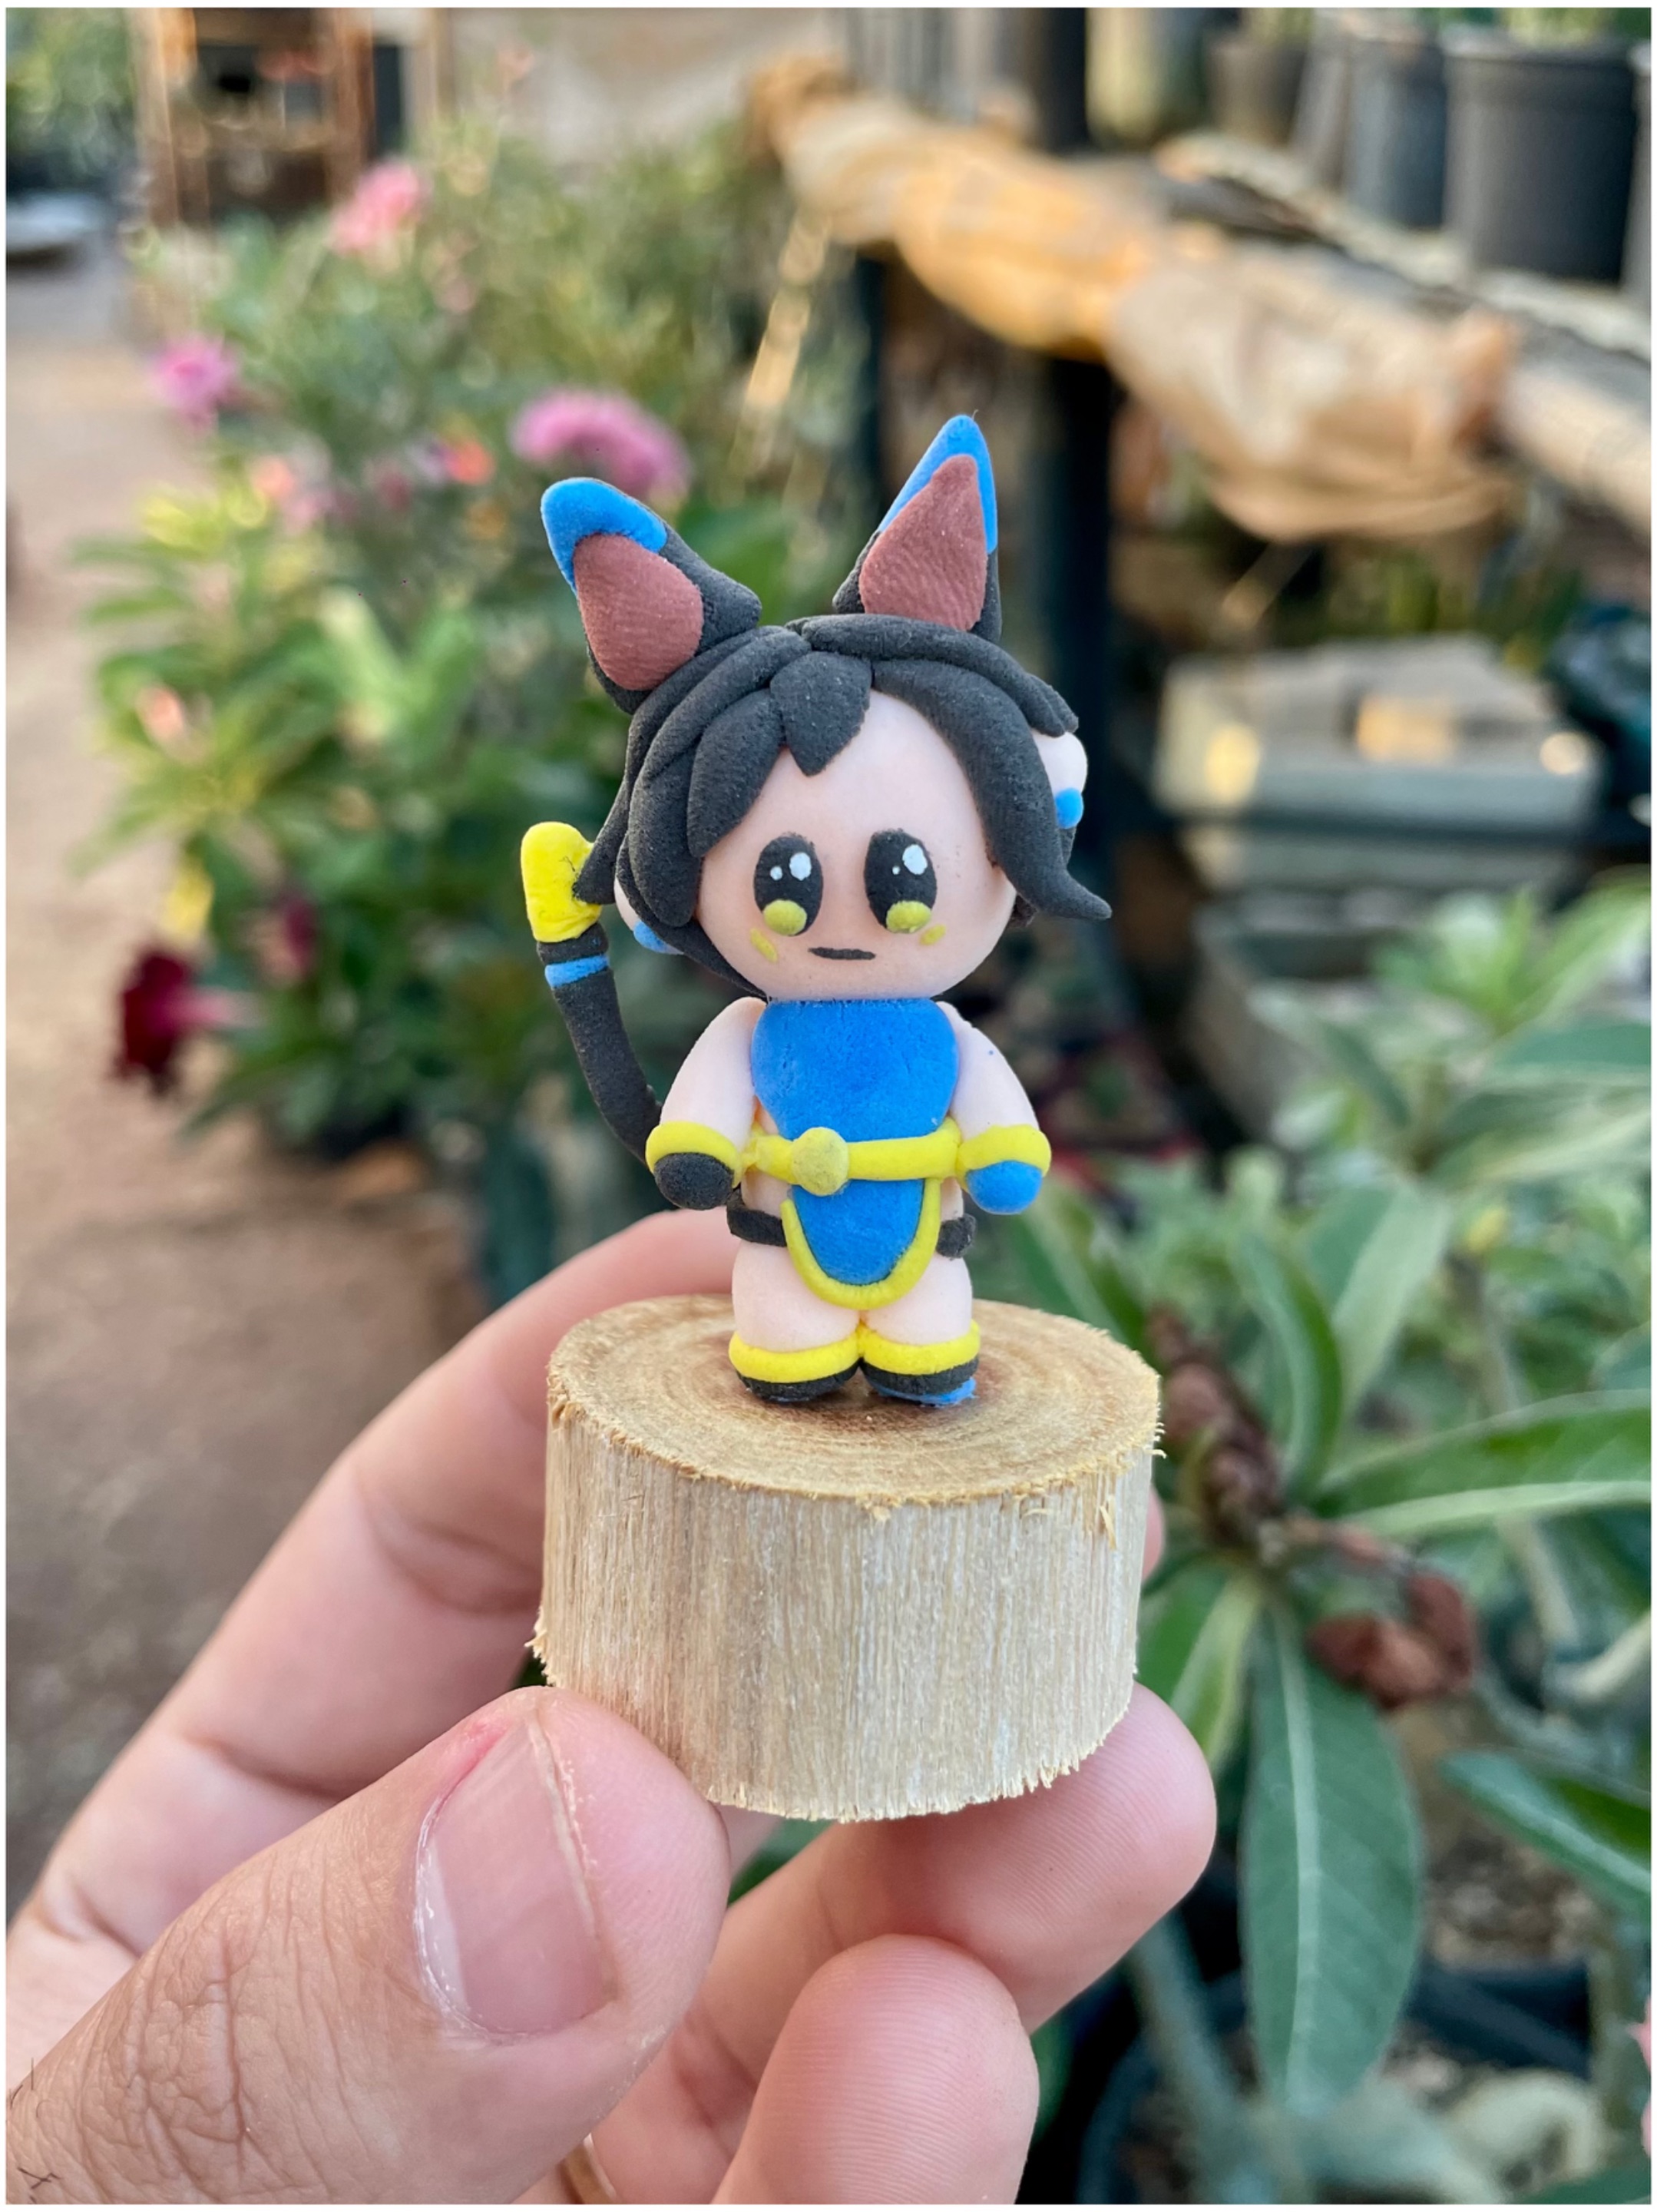
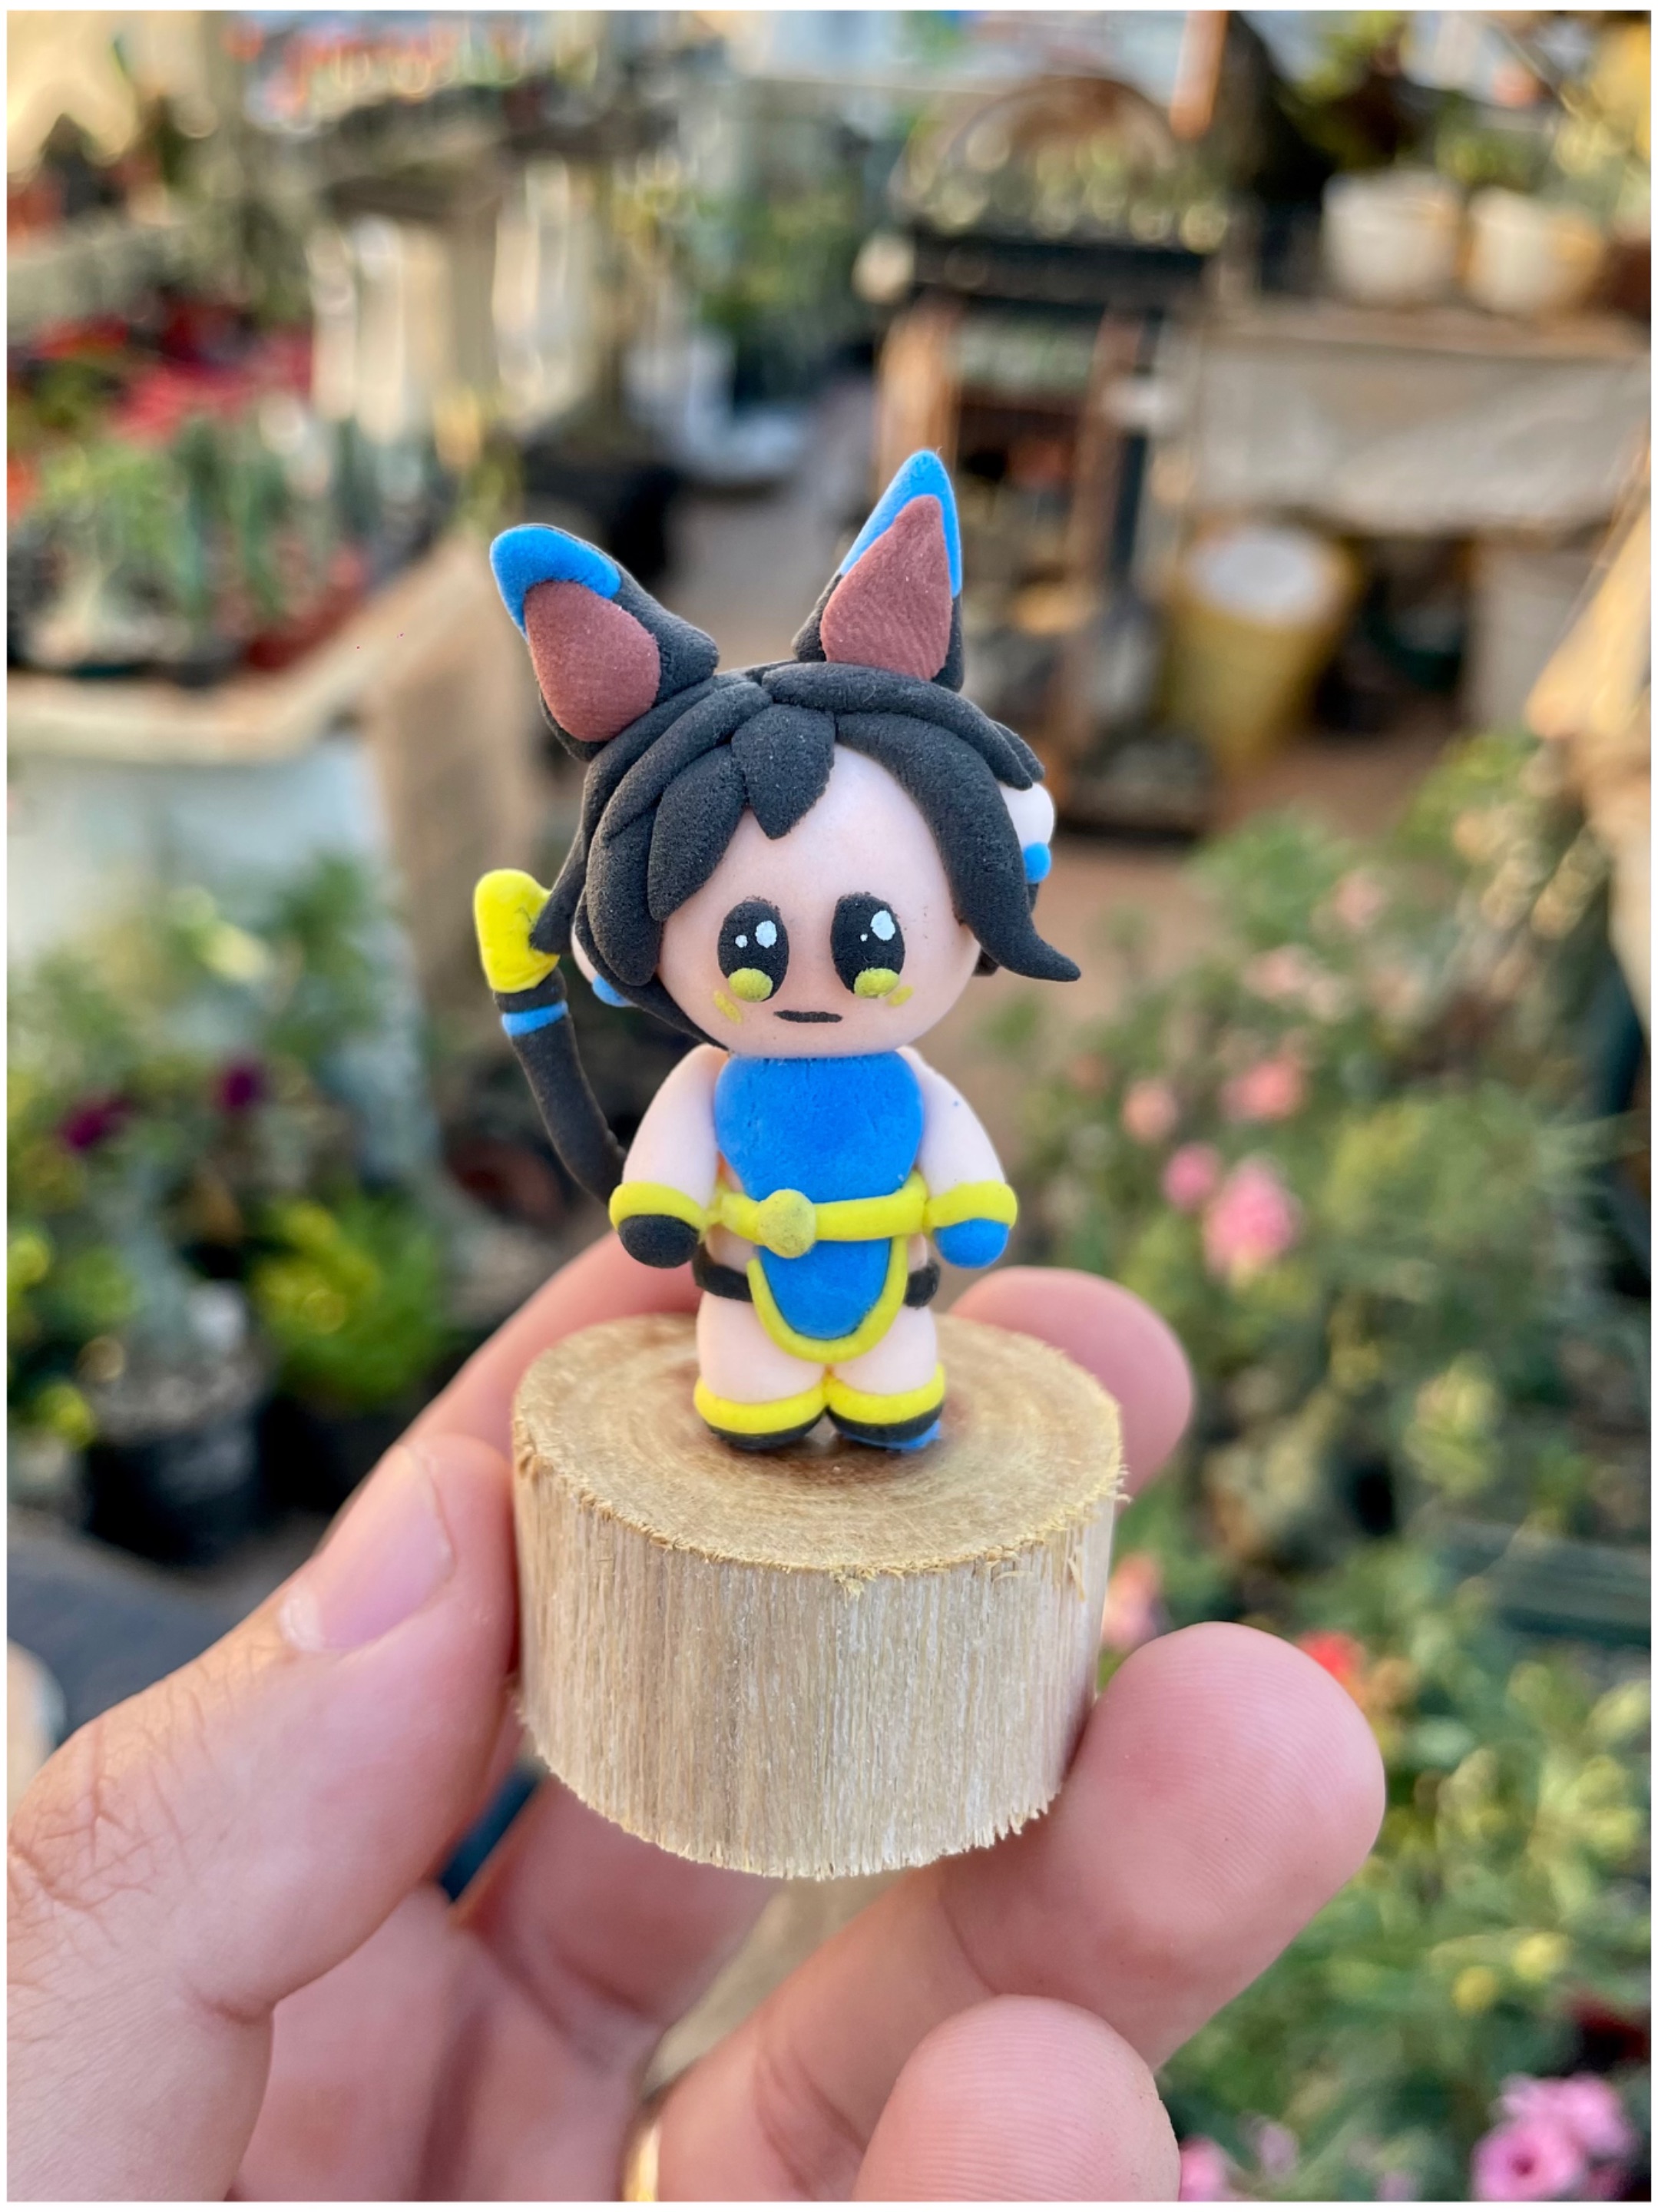
Final result / Resultado final
Cabe destacar que este diseño fue buscado en la comunidad de Holozing; pero la realización son hechos por mí, con dedicación para que luzcan mas bonitos en el hogar o dormitorio, volveré con nuevas ideas para compartir con vosotros, nos vemos pronto y excelente semana.
---
If you liked it, don't forget to leave a comment and follow me for future posts. I'd love to know your opinion and ideas for the next one. Regards
Si te ha gustado, no olvides dejar tu comentario y seguirme para próximas publicaciones. Me encantaría saber tu opinión e ideas para el siguiente. Saludos


Splinterlands #Soulkeep #Demonicore #Crownrend #AracadeColony #GenesisLeagueGoals #MoonKarts #Holozing #GolemOverlord #dCrops #StakeHouseDen #CasinoGames @sanjeevm
All photos were taken by my IPhone 12 Pro and edited at InShot. English is not my native language, I used www.DeepL.com/Translator.
Todas las fotos fueron tomadas por mi IPhone 12 Pro y editadas en InShot. El Inglés no es mi idioma nativo, usé www.DeepL.com/Translator.