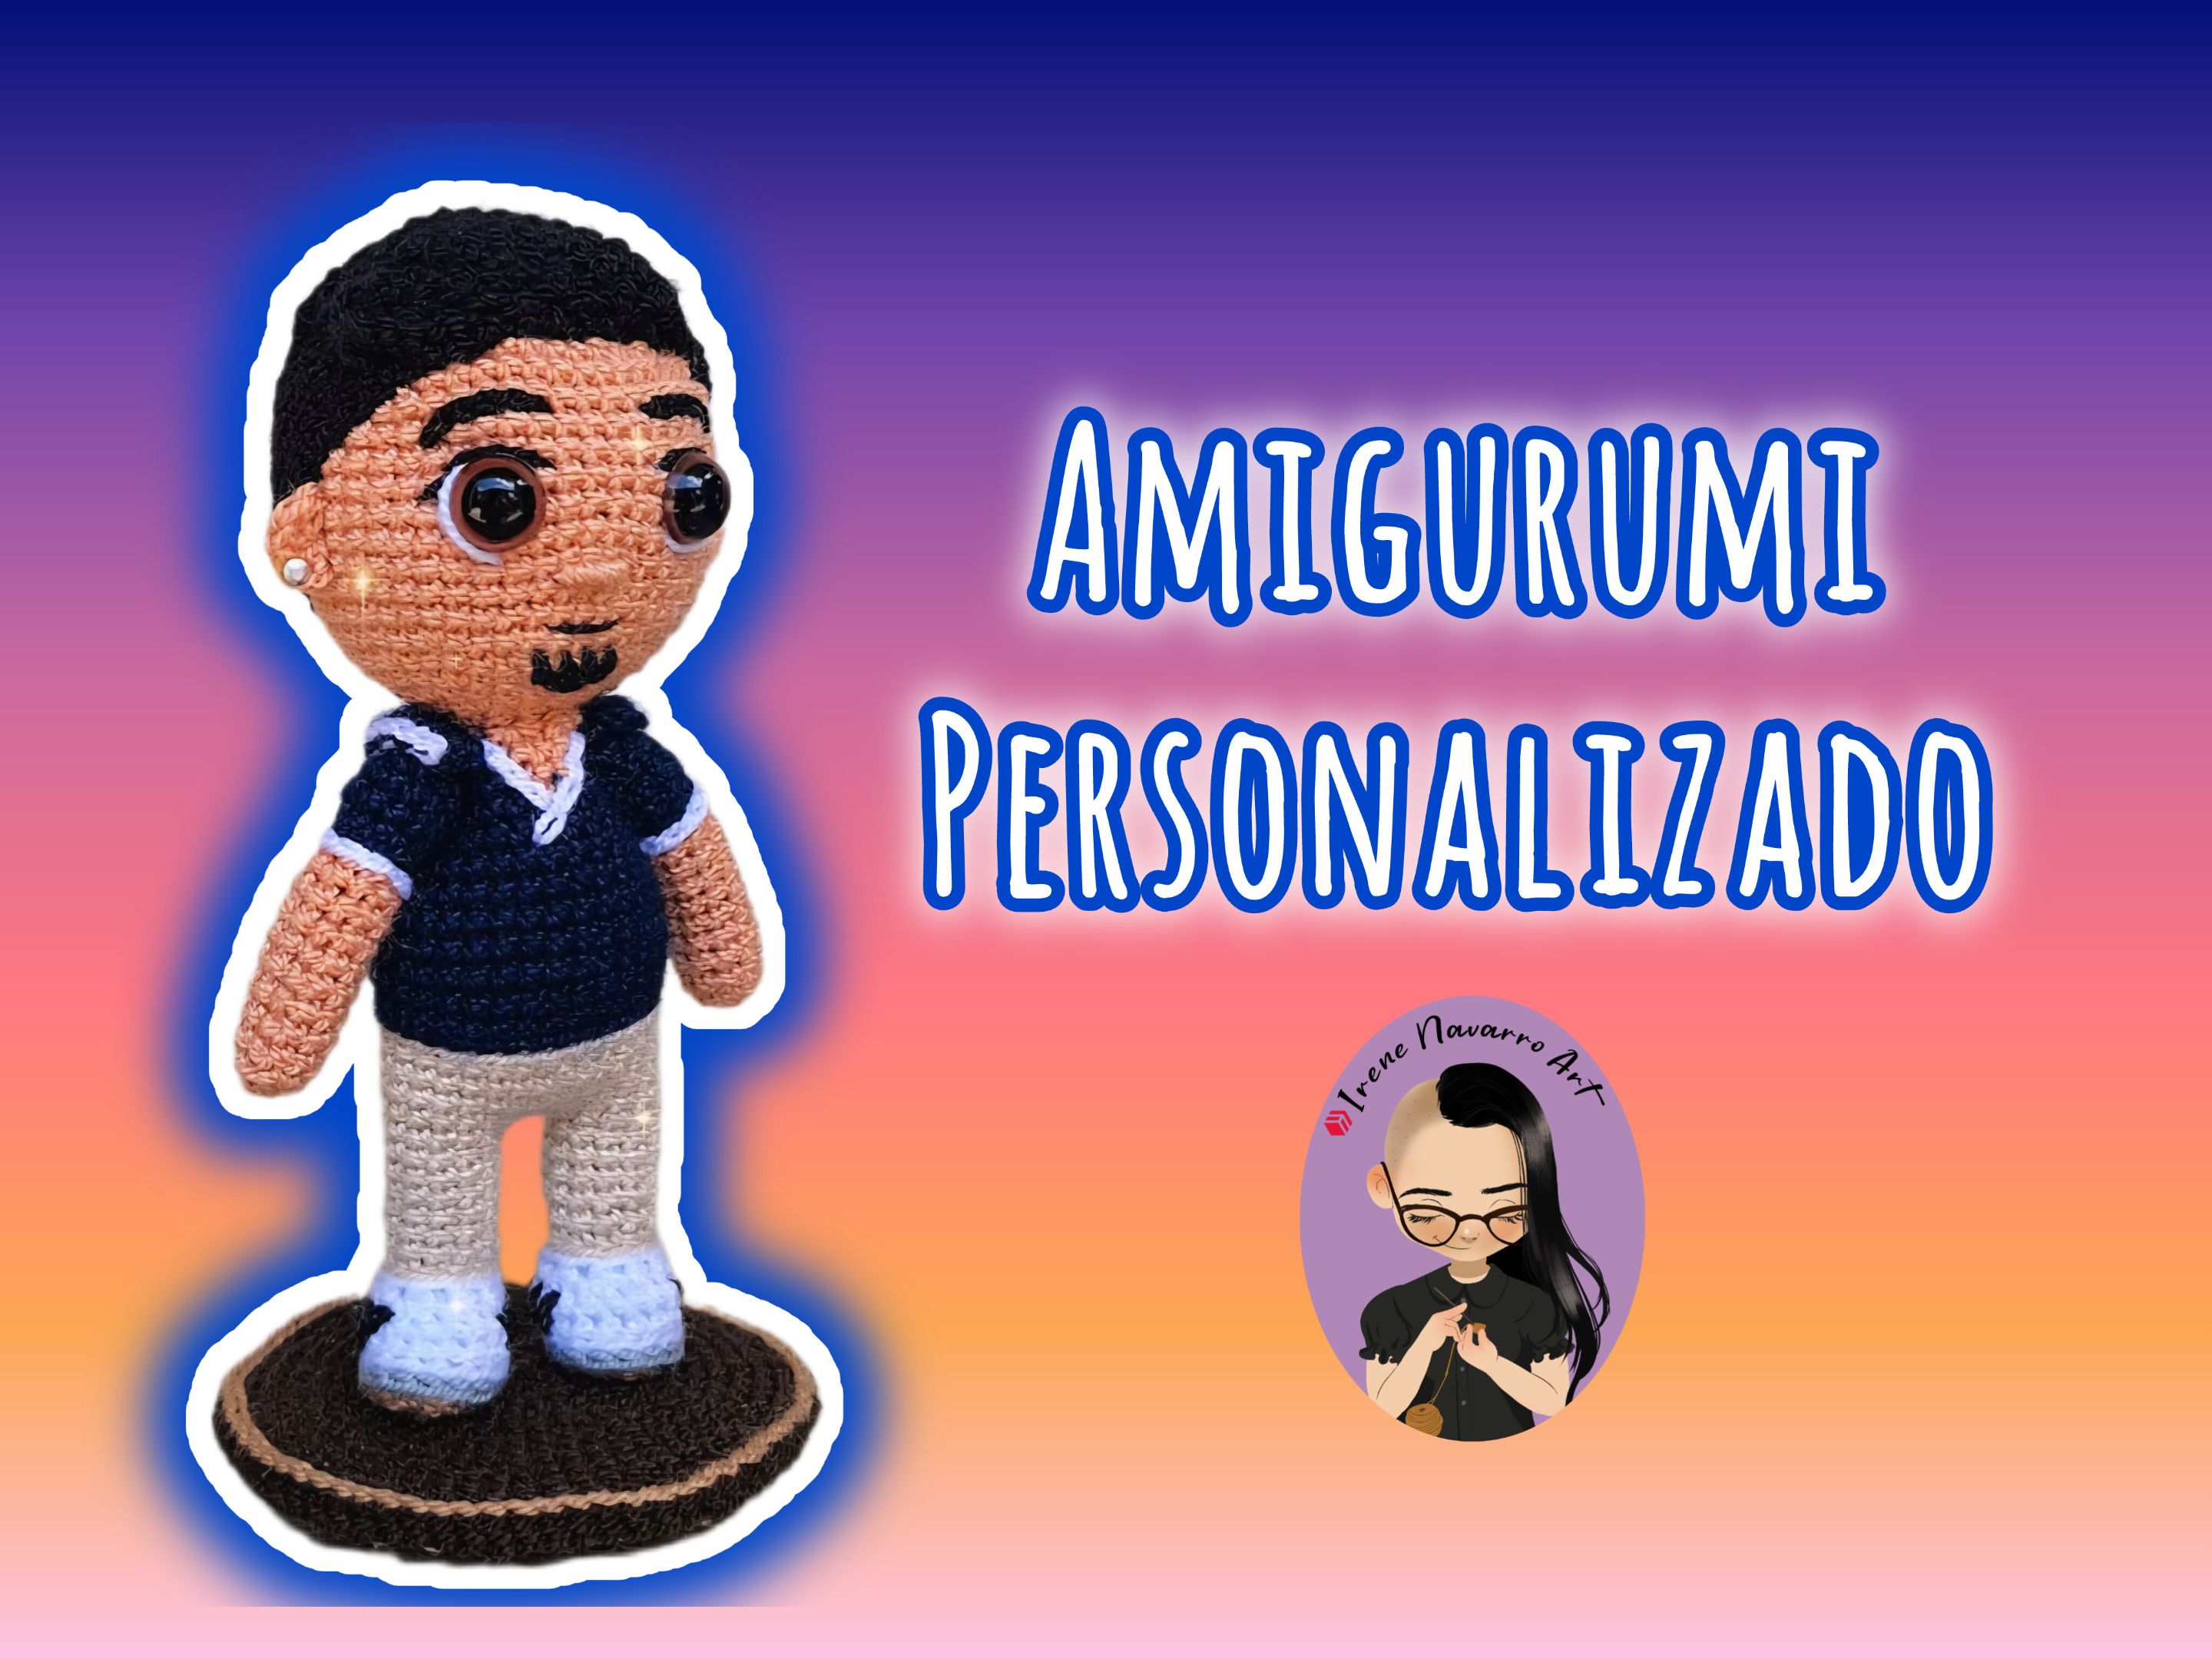
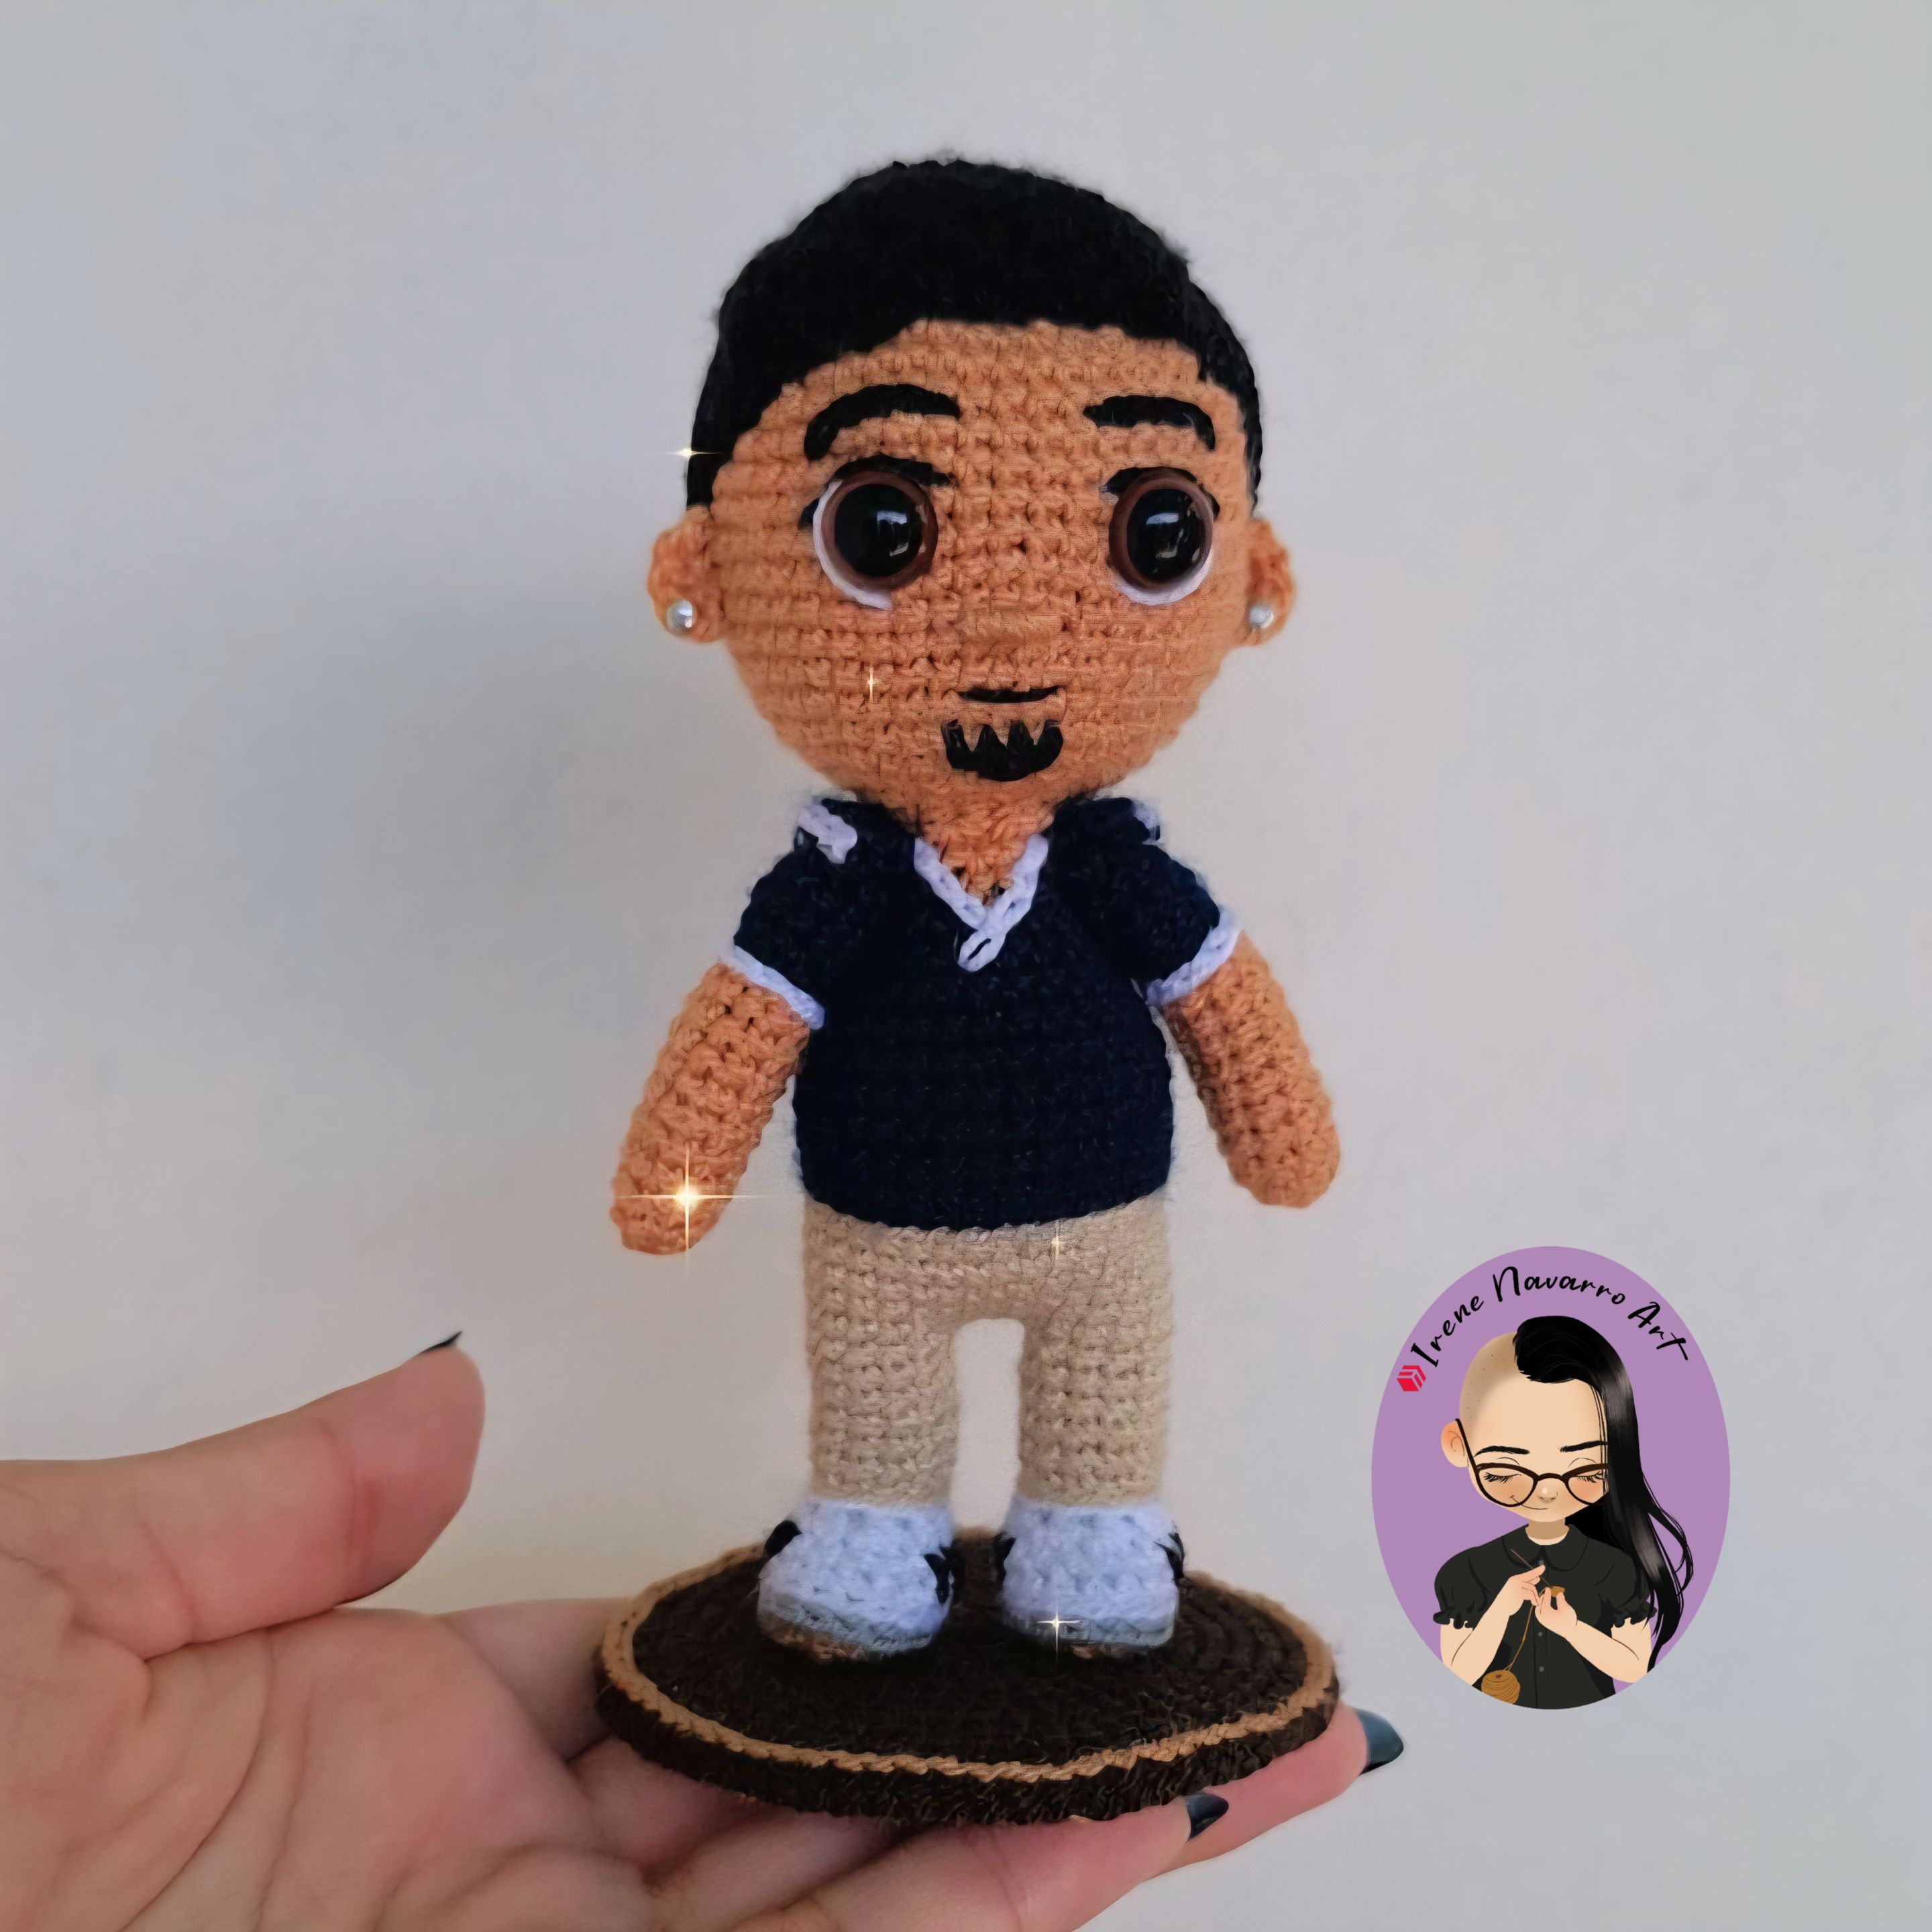
Saludos querida comunidad, feliz #needleworkmonday, les cuento que le fin de semana me hicieron un encargo muy especial, en primer lugar porque el cliente me escribió diciéndome que una persona que había sido mi cliente le había dado mi información de contacto, esto me alegró mucho porque esto quiere decir que mi cliente anterior esta tan complacida con el amigurumi que me recomendó a otra persona, eso me motiva porque significa que mi trabajo está hablando por mi, en esta ocasión el encargo se trataba de una amigurumi completamente personalizado, es decir, es el retrato de una persona de la cual obviamente no puedo subir imagen aquí pero me complace decir que el amigurumi tiene los atributos físicos que le distinguen a la persona el cual era el objetivo principal, además es primera vez que hago un soporte o base para mantener el amigurumi de pie de manera más segura, acá les comparto el paso a paso para hacer esa parte y que ustedes también puedan darle ese toque especial a sus creaciones 😊
> Greetings dear community, happy #needleworkmonday, I tell you that this weekend I received a very special order, first of all because the client wrote to me telling me that a person who had been my client had given her my contact information, this made me very happy because this means that my previous client is so pleased with the amigurumi that she recommended me to another person, that motivates me because it means that my work is speaking for me, on this occasion the order was for a completely personalized amigurumi, that is, it is the portrait of a person of which obviously I cannot upload an image here but I am pleased to say that the amigurumi has the physical attributes that distinguish the person which was the main objective, also it is the first time that I make a support or base to keep the amigurumi standing more safely, here I share with you the step by step to do that part so that you can also give that special touch to your creations 😊


##### Imágenes tomadas con dispositivo Samsung A54. Portada editada en Inshot >##### Pictures taken with Samsung A54 device. Cover edited in Inshot 
##### Espero les haya gustado. Les invito a leer mis próximas publicaciones y siempre estaré dispuesta a responder sus preguntas y comentarios, también pueden seguirme y contactarme en cualquiera de mis redes sociales. ¡Muchas gracias! >##### I hope you liked it. I invite you to read my next publications and I will always be willing to answer your questions and comments, you can also follow me and contact me on any of my social networks. Thank you! [Facebook](https://www.facebook.com/irenenavarroart) [Twitter](https://twitter.com/irenenavarroart) [Instagram](https://www.instagram.com/irenenavarroarte/) [Ko-Fi](https://ko-fi.com/irenenavarroart) Discord: irenenavarroart#0361
Proceso / Process
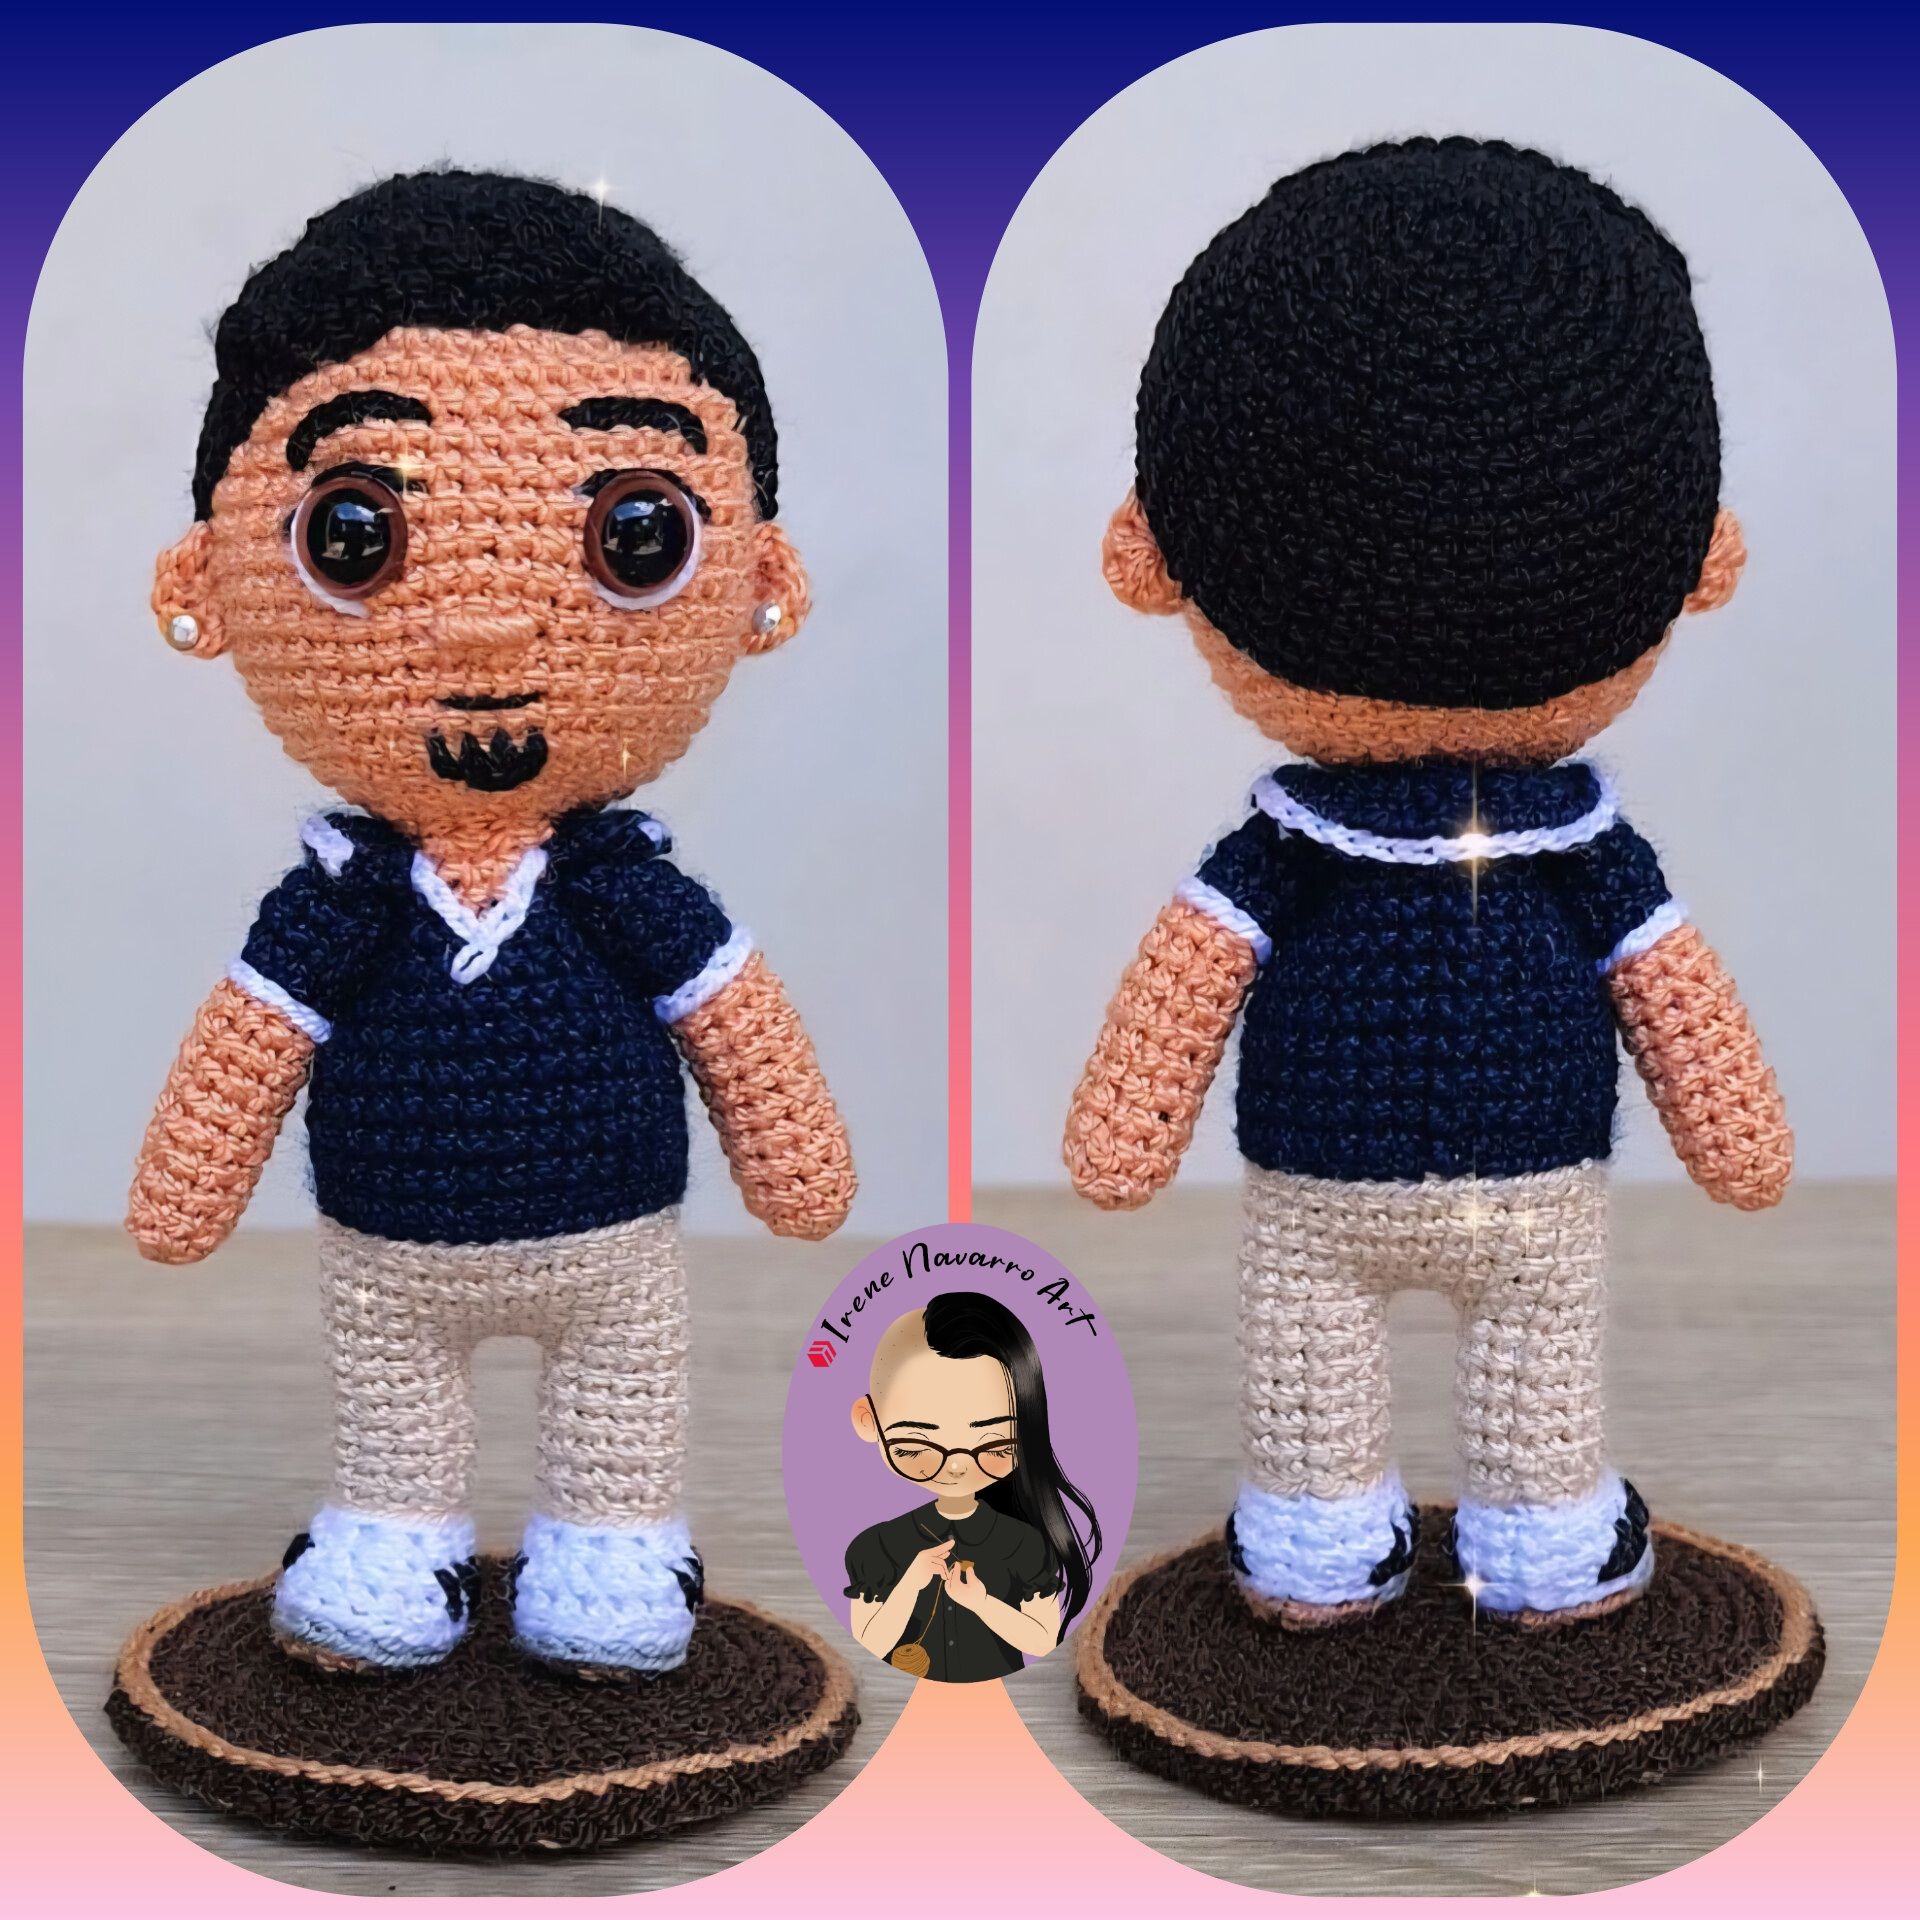
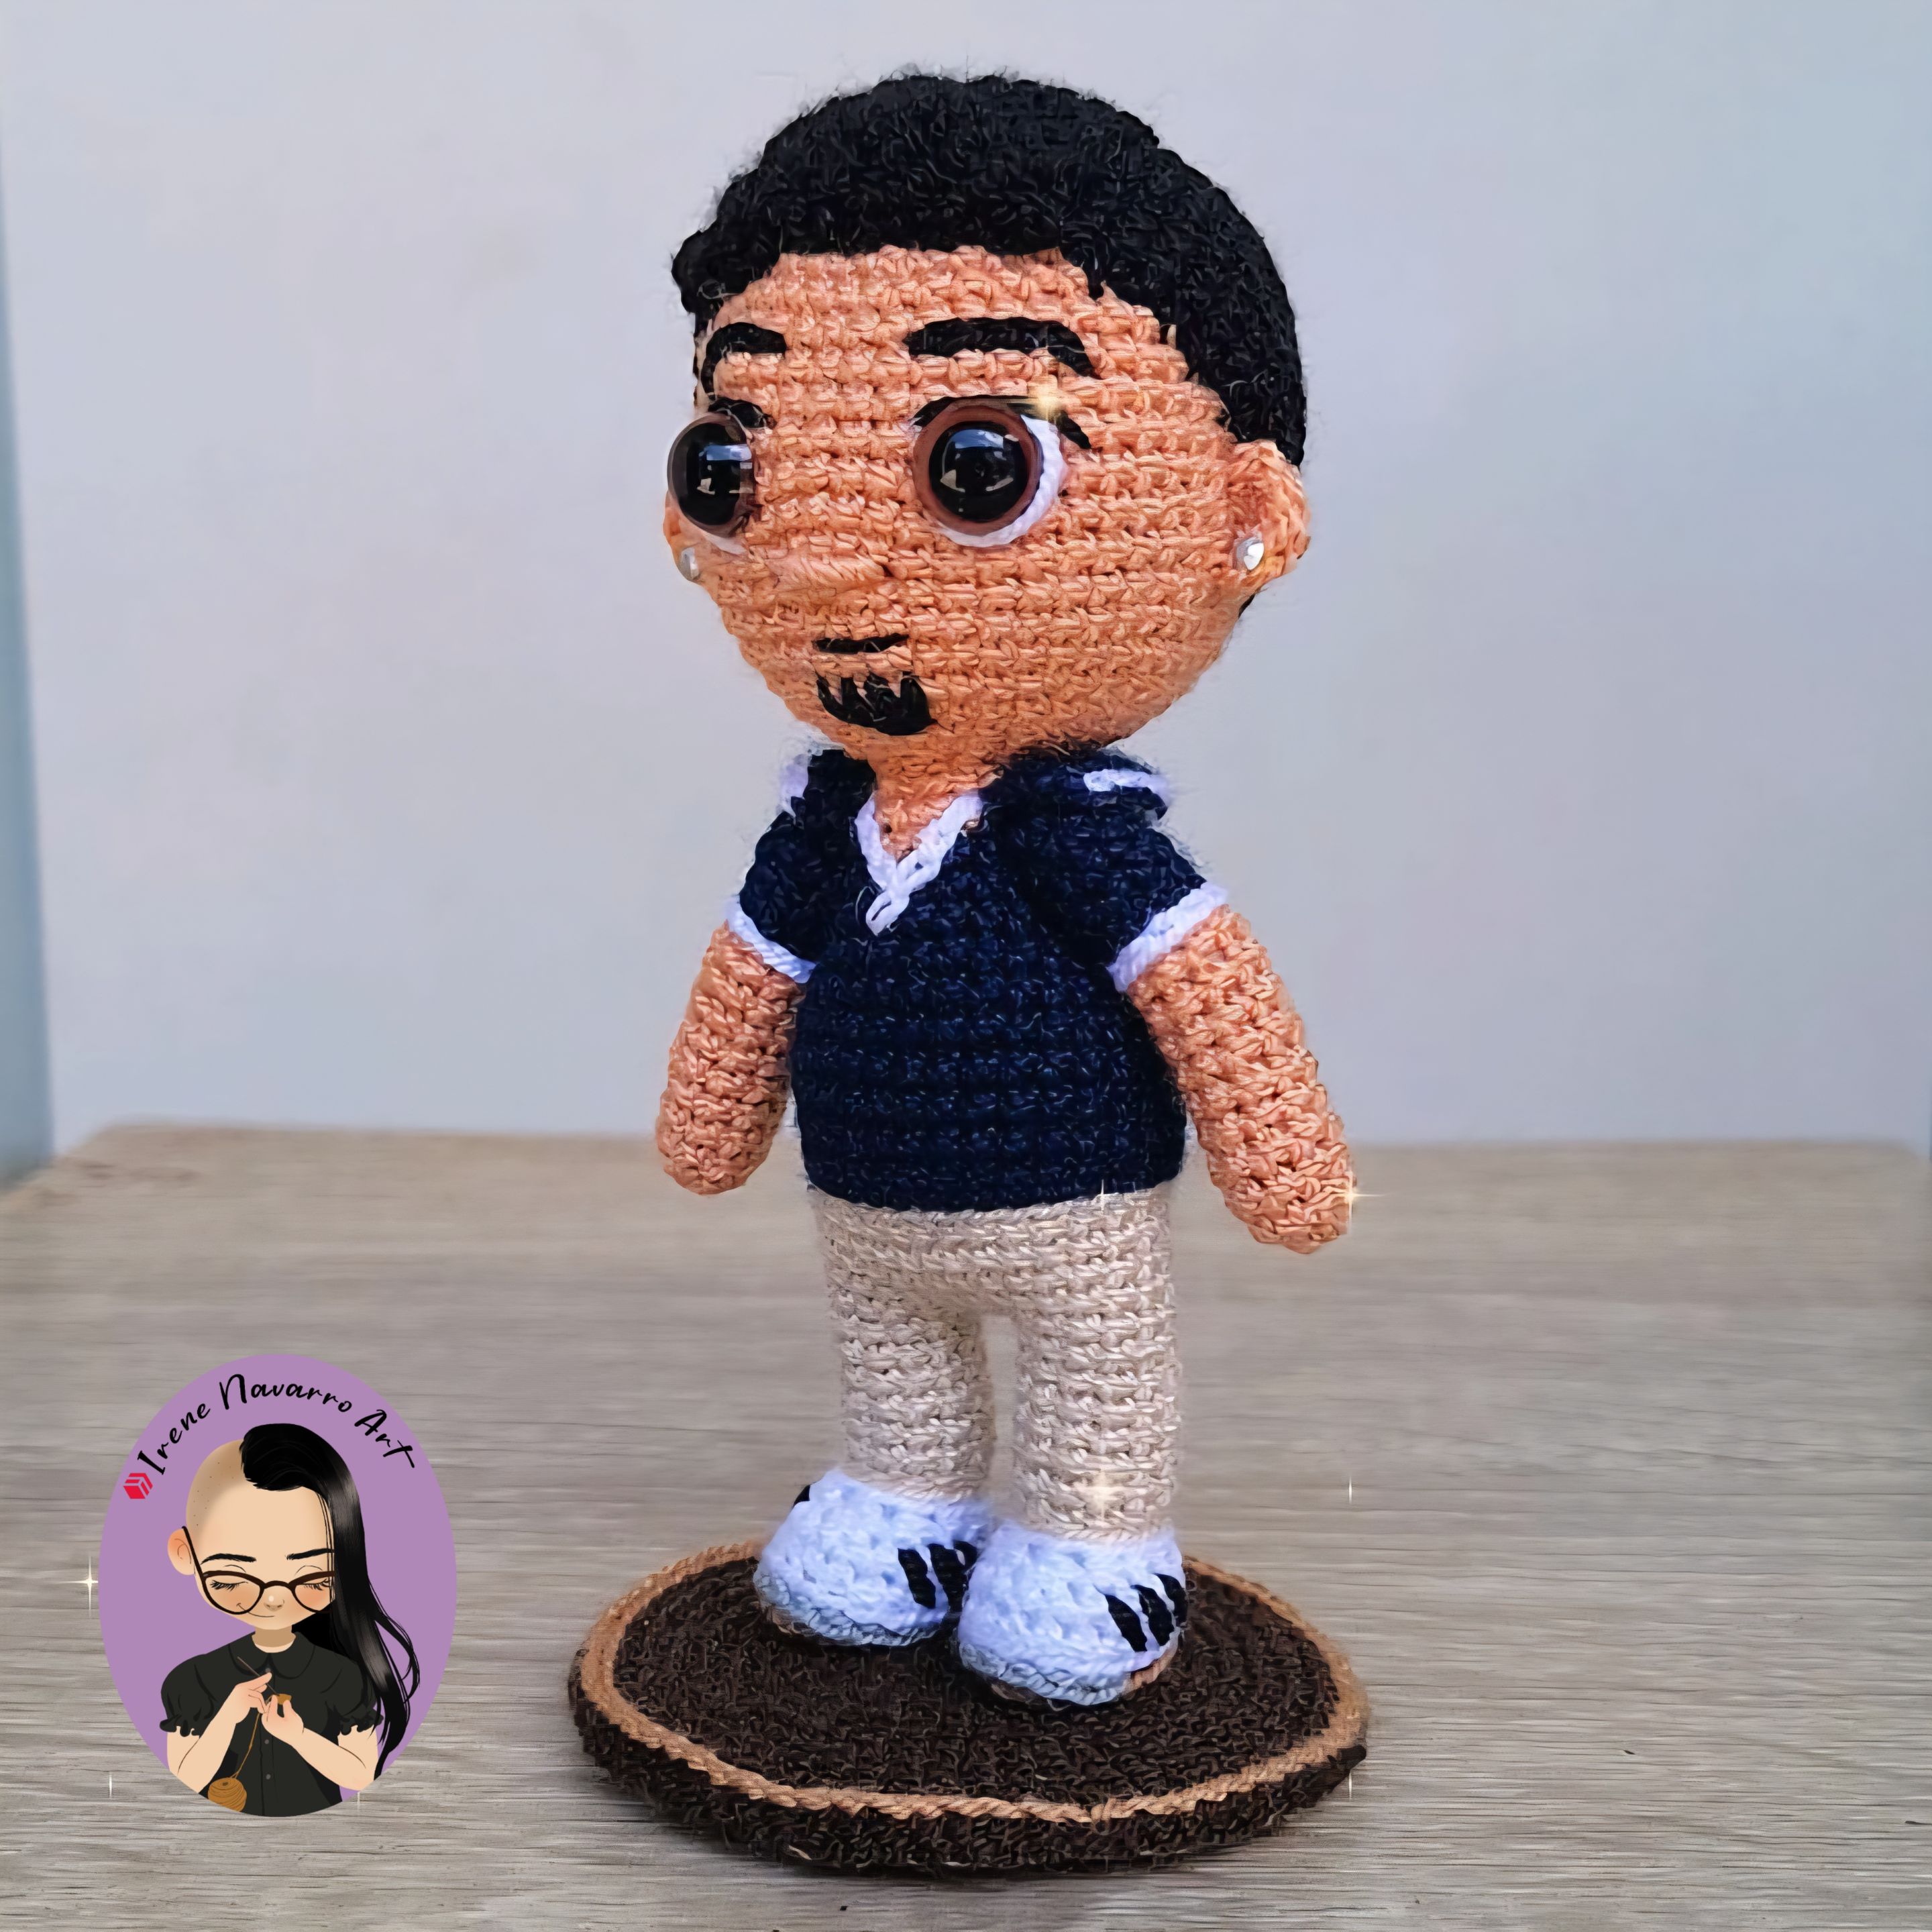
Comencé desde los pies a la cabeza, con hilo acrílico para crochet y ganchillo de 1.25mm, con el hilo beige oscuro hice 4 cadenas de base, hice 4 aumentos por dos hileras para obtener un ovalo de 16 puntadas, cambié a hilo blanco e hice dos hileras de puntos ajos, en la siguiente hilera hice 4 disminuciones en la punta para crear el zapato obteniendo 12 puntadas, cambié a hilo beige claro e hice seis hileras, hice las dos piernas iguales y las uní por 3 cadenas, hice 30 puntos por seis hileras. Para el torso cambié a hilo azul e hice cinco hileras, luego hice dos disminuciones por seis hileras agregando el color beige en las puntadas centrales en las últimas tres, terminando con 18 puntadas, con el hilo azul tomando solo el lado del frente de las puntadas azules hice puntos altos para crear el cuello de la chemise. > I started from head to toe, with 1.25mm acrylic crochet yarn and crochet hook, with the dark beige yarn I made 4 foundation chains, I made 4 increases for two rows to get an oval of 16 stitches, I changed to white yarn and made two rows of garlic stitches, in the next row I made 4 decreases at the toe to create the shoe obtaining 12 stitches, I changed to light beige yarn and made six rows, I made the two legs the same and joined them by 3 chains, I made 30 stitches for six rows. For the torso I changed to blue yarn and made five rows, then I made two decreases for six rows adding the beige color in the central stitches in the last three, finishing with 18 stitches, with the blue yarn taking only the front side of the blue stitches I made double crochets to create the collar of the chemise. 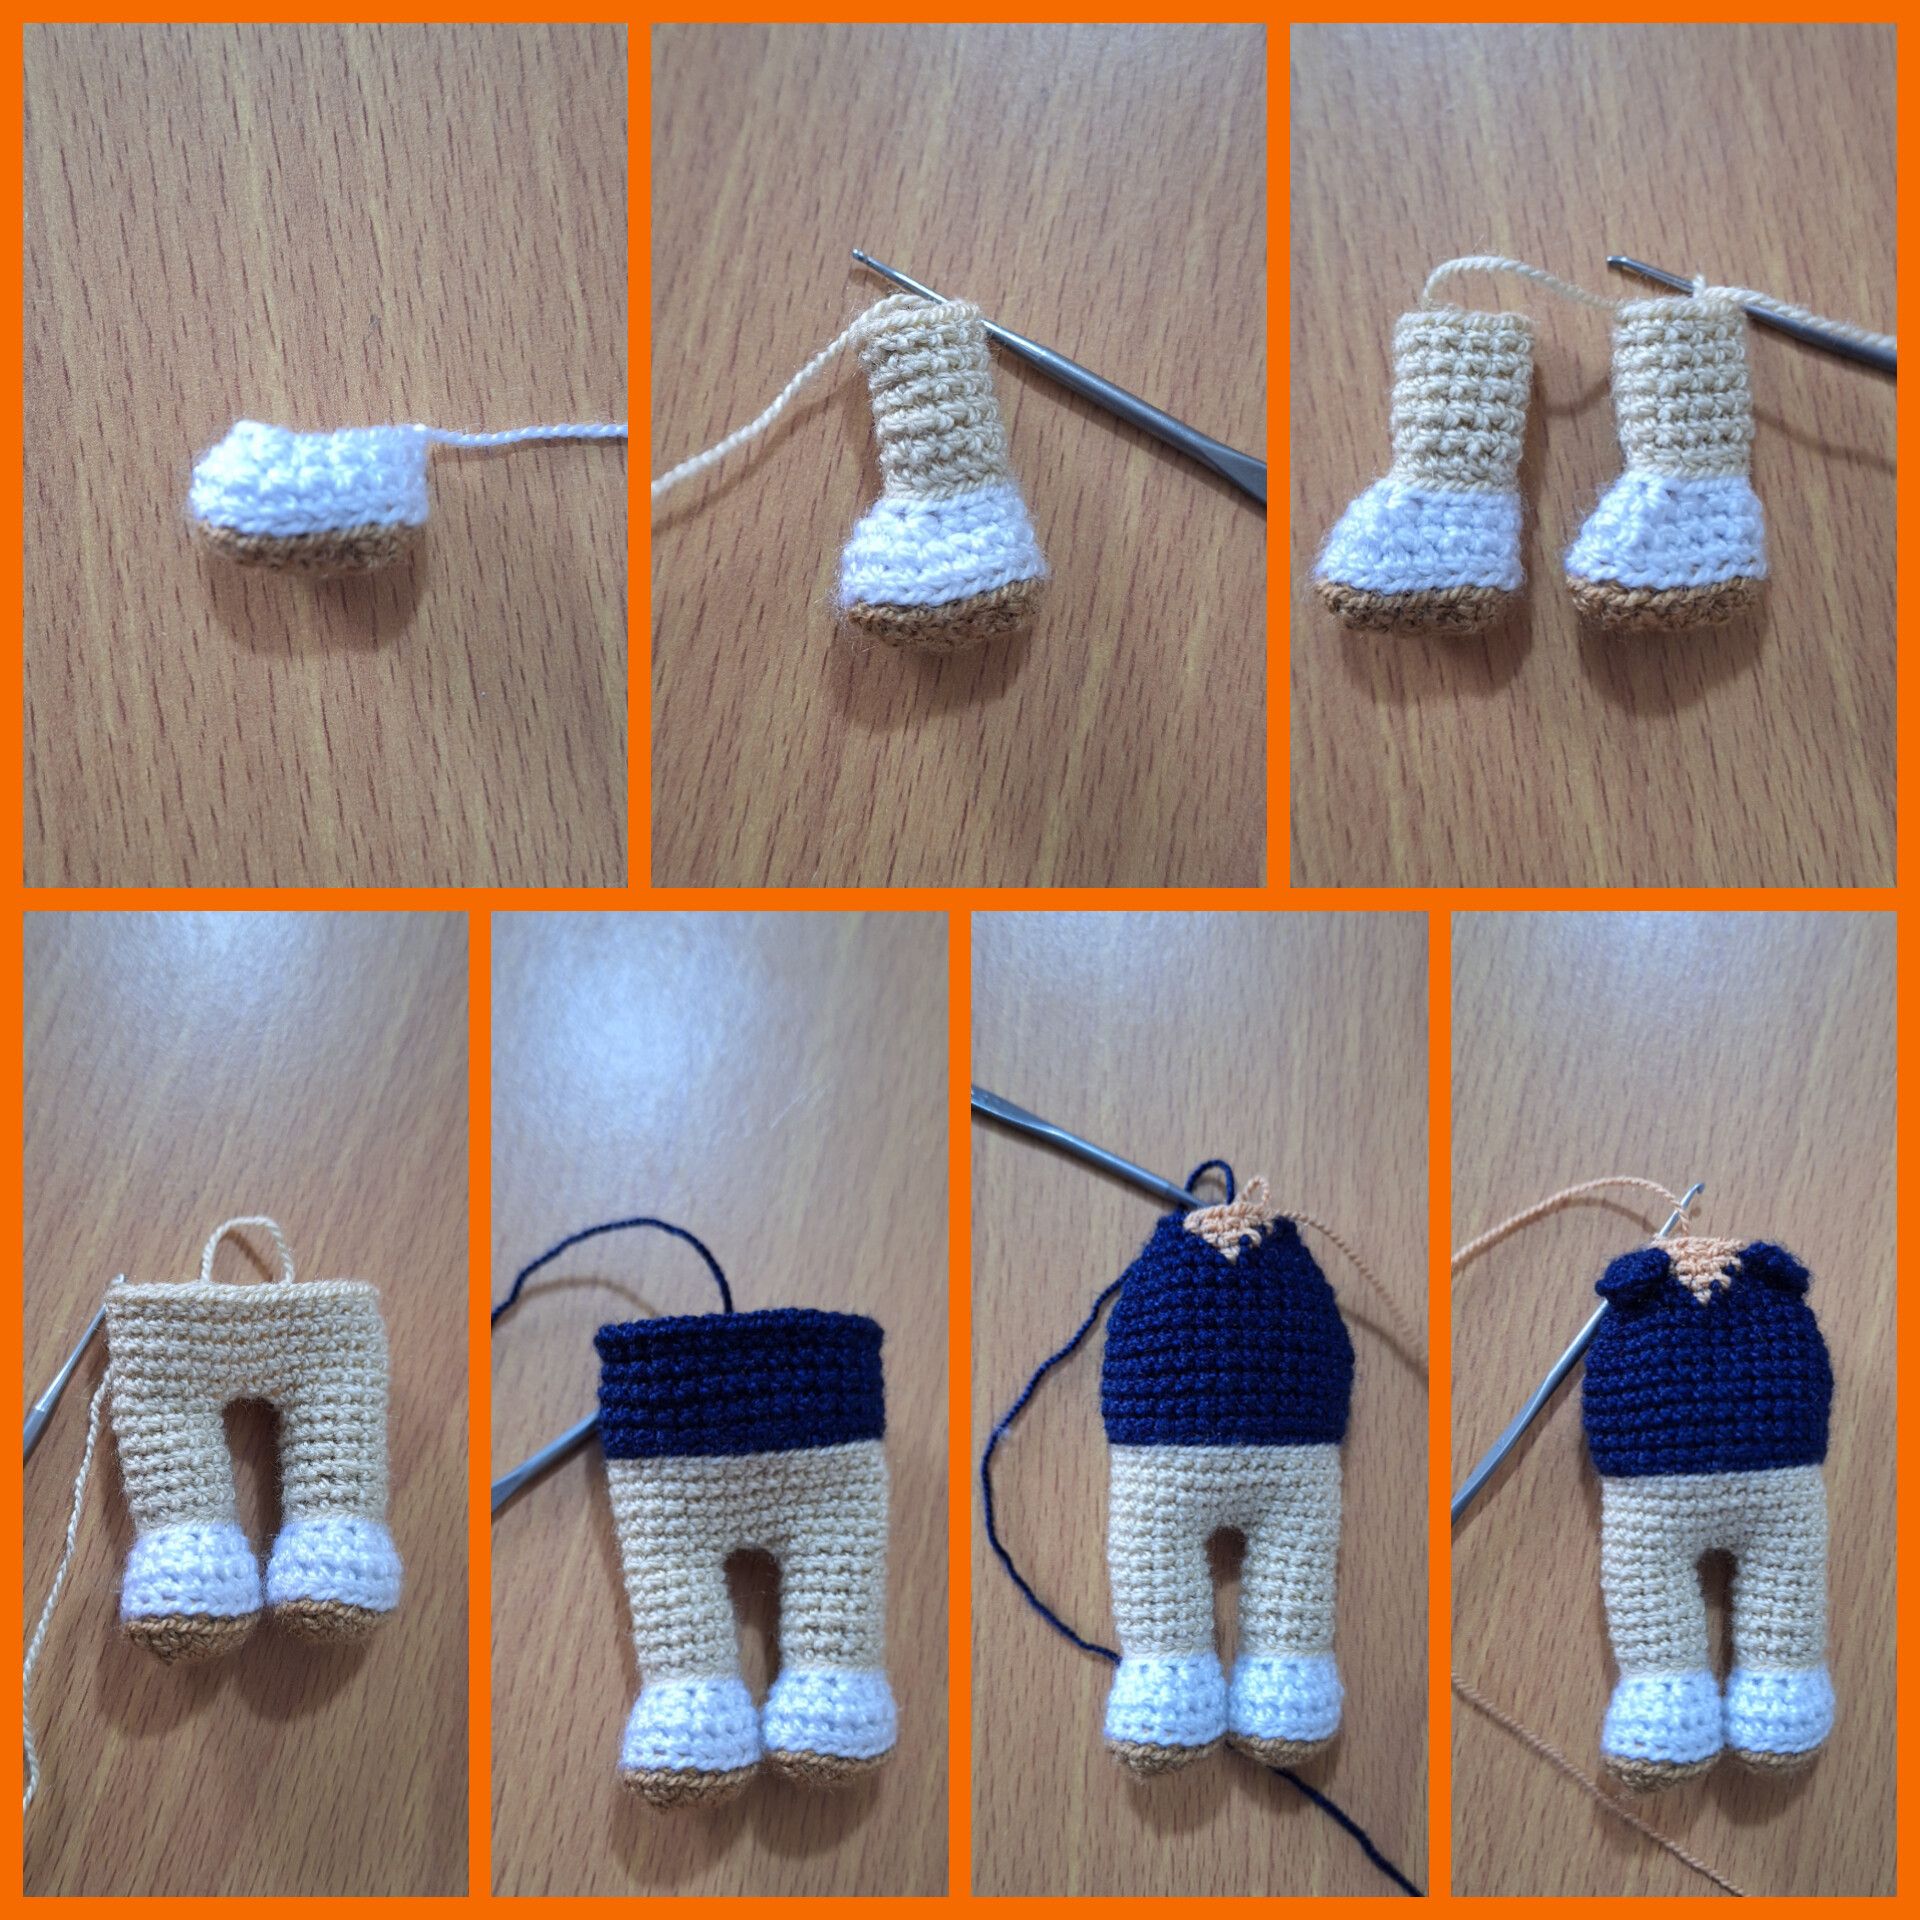  Con el hilo beige tomando el lado de atrás de las puntadas hice una hilera con 6 disminuciones para obtener 12 puntadas, luego hice 6 aumentos por siete hileras para obtener 48 puntadas, hice diez hileras de puntos bajos, coloqué los ojos de plástico, luego hice 6 disminuciones por siete hileras para cerrar. Con hilo blanco borde el cuello de la chemise y con hilo gris y negro bordé los detalles de los zapatos. > With the beige yarn taking the back side of the stitches, I made a row with 6 decreases to get 12 stitches, then I made 6 increases for seven rows to get 48 stitches, made ten rows of single crochets, added the plastic eyes, then made 6 decreases for seven rows to close. With white yarn I edged the collar of the shirt and with gray and black yarn I embroidered the details of the shoes. 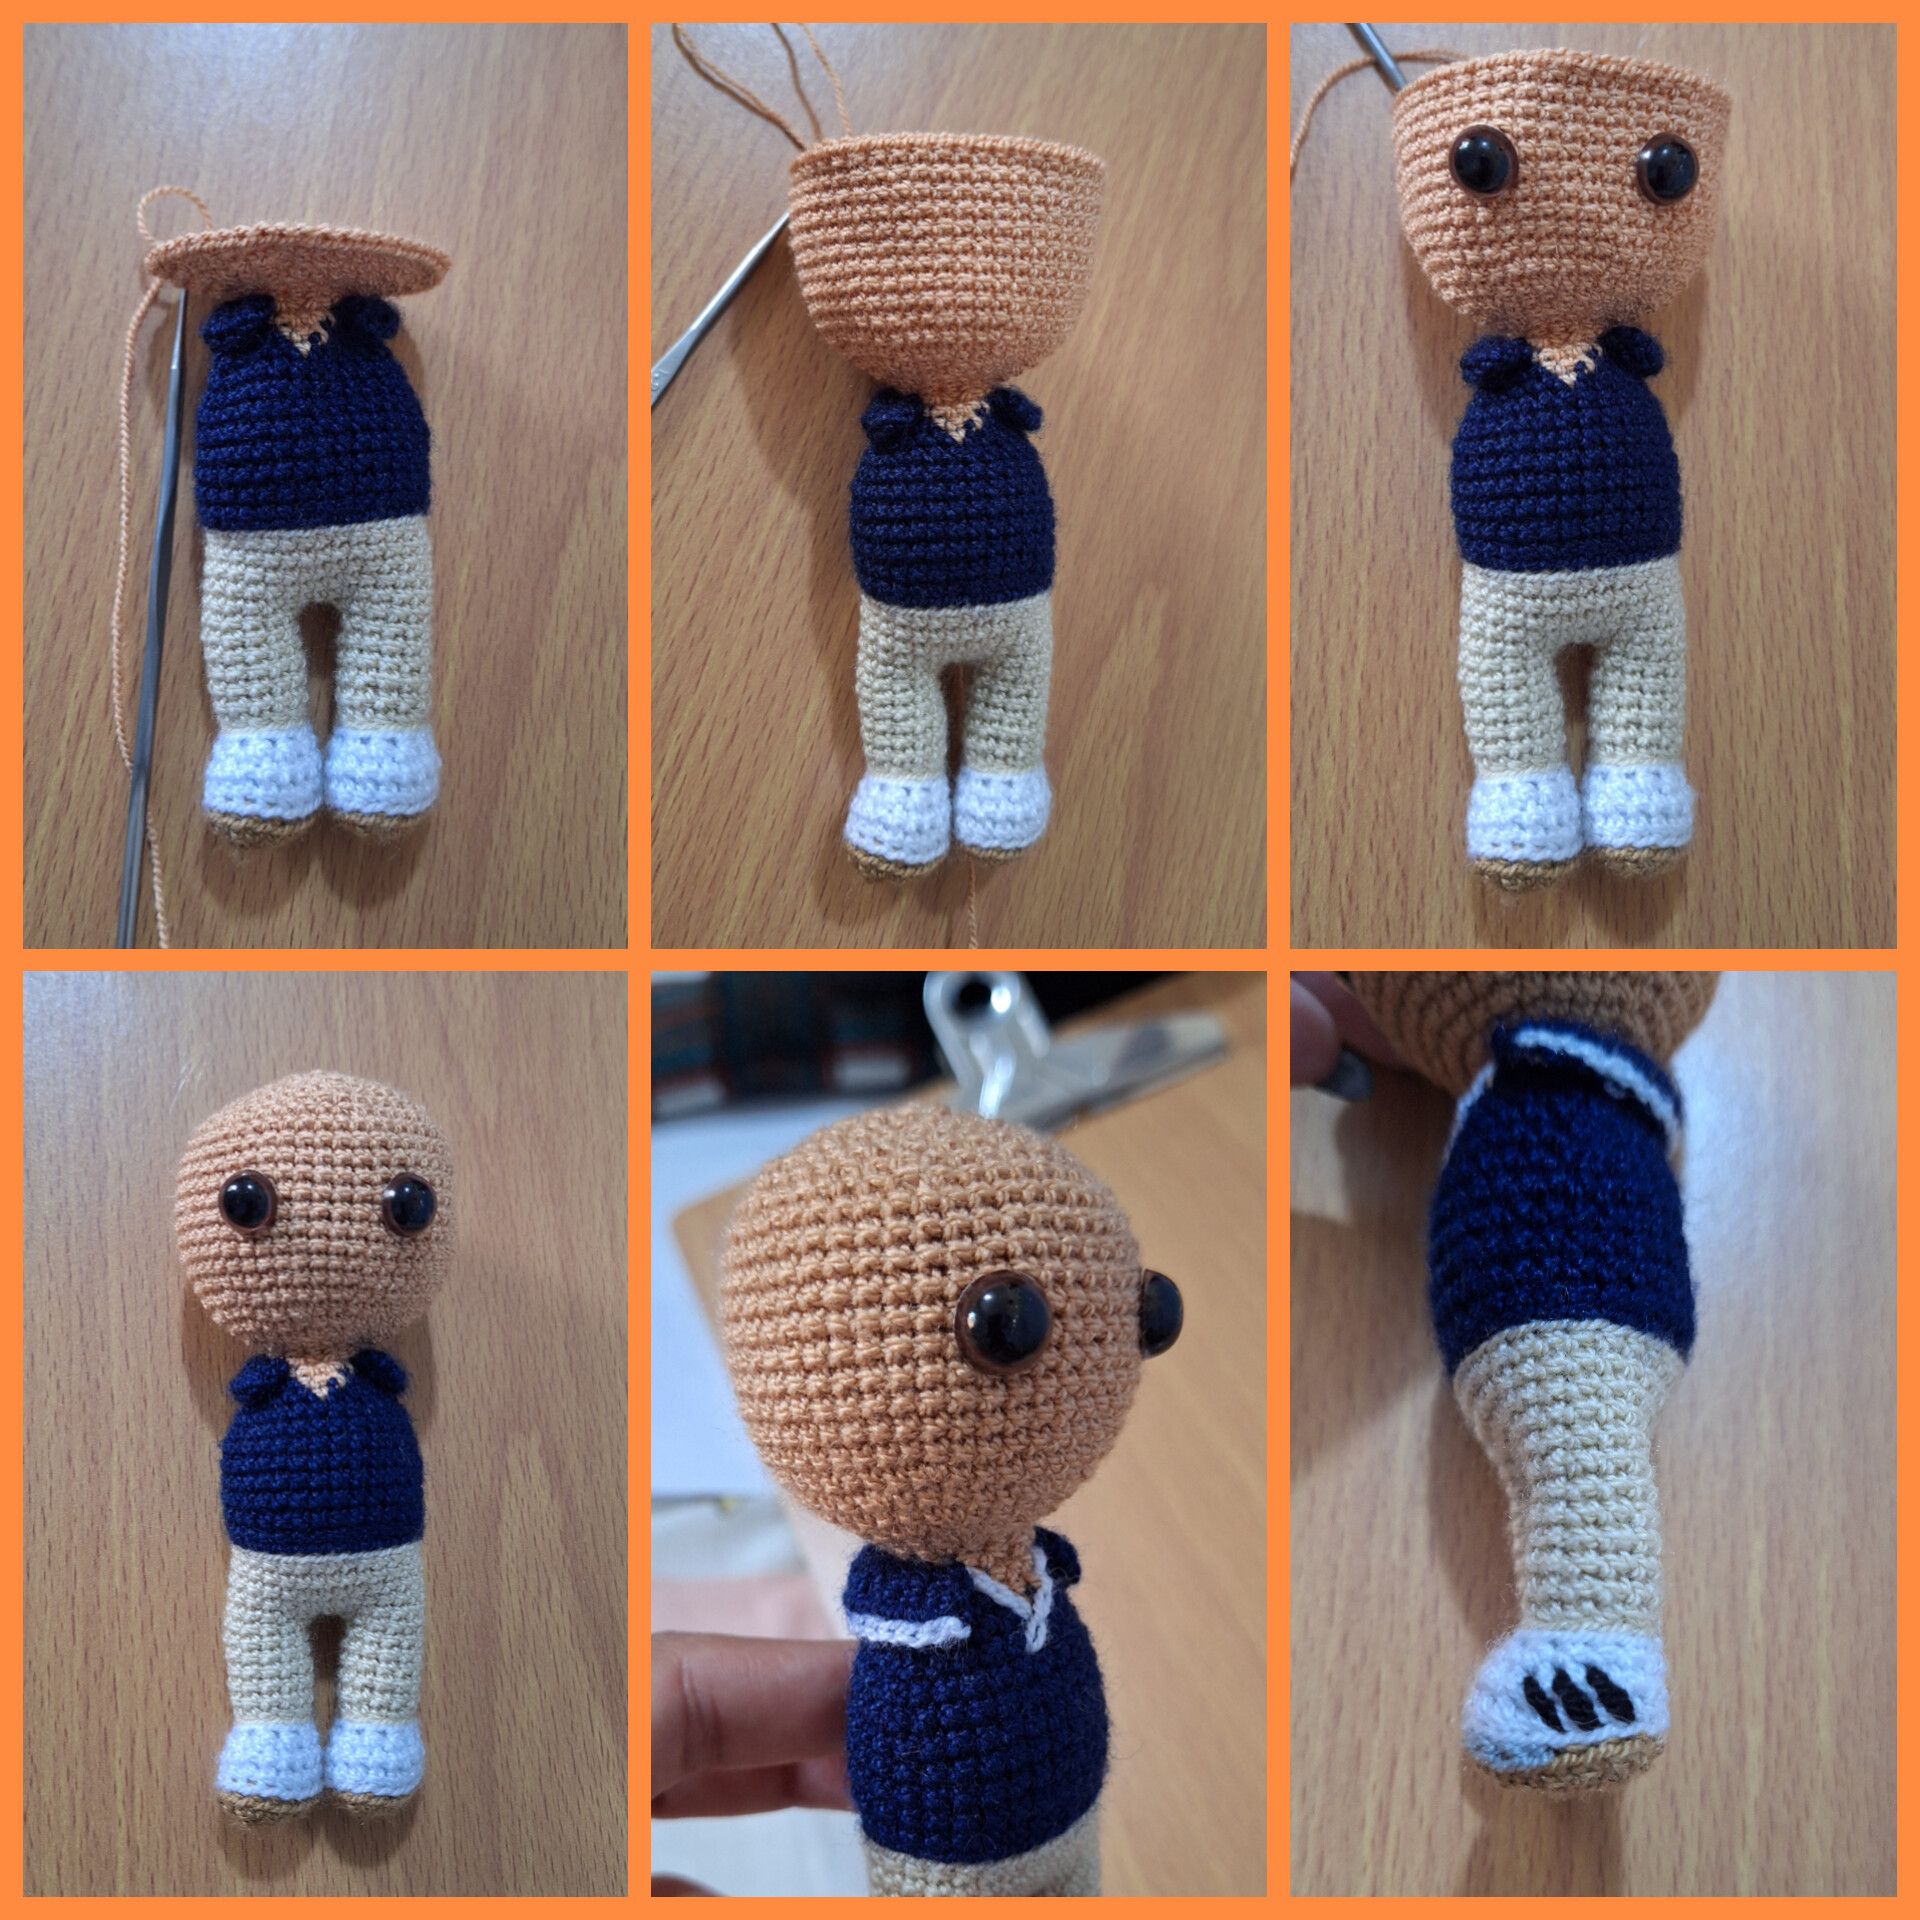  Para los brazos con hilo beige hice 6 puntos ajos en un anillo, luego hice 3 aumentos en la siguiente hilera para obtener 9 puntadas, hice ocho hileras de puntos bajos, cambié a hilo azul e hice tres hileras más, luego hice una hilera de disminuciones para cerrar, hice los dos brazos iguales y con hilo blanco bordé la orilla de la manga, cosí los brazos al cuerpo. Con hilo beige hice las orejas y la nariz, mientras que con hilo negro y blanco bordé los detalles del rostro. Para el cabello con hilo negro hice 6 puntos bajos en un anillo, 6 aumentos por siete hileras, ocho hileras de puntos bajos, luego hice nueves mechones de cabello de diferentes longitudes haciendo cadenas y puntos bajos sobre estas cadenas, para después coser los mechones en la dirección del peinado. > For the arms, I made 6 single crochet stitches in a ring with beige yarn, then 3 increases on the next row to get 9 stitches. I made eight rows of single crochet stitches. I switched to blue yarn and made three more rows. Then I made a row of decreases to close. I made both arms the same size. I embroidered the sleeve hem with white yarn and sewed the arms to the body. > > I made the ears and nose with beige yarn, while I embroidered the facial details with black and white yarn. For the hair, I made 6 single crochet stitches in a ring with black yarn, 6 increases for seven rows, and eight rows of single crochet stitches. Then I made nine strands of hair of different lengths by chaining and single crocheting over these chains. I then sewed the strands in the direction of the hairstyle. 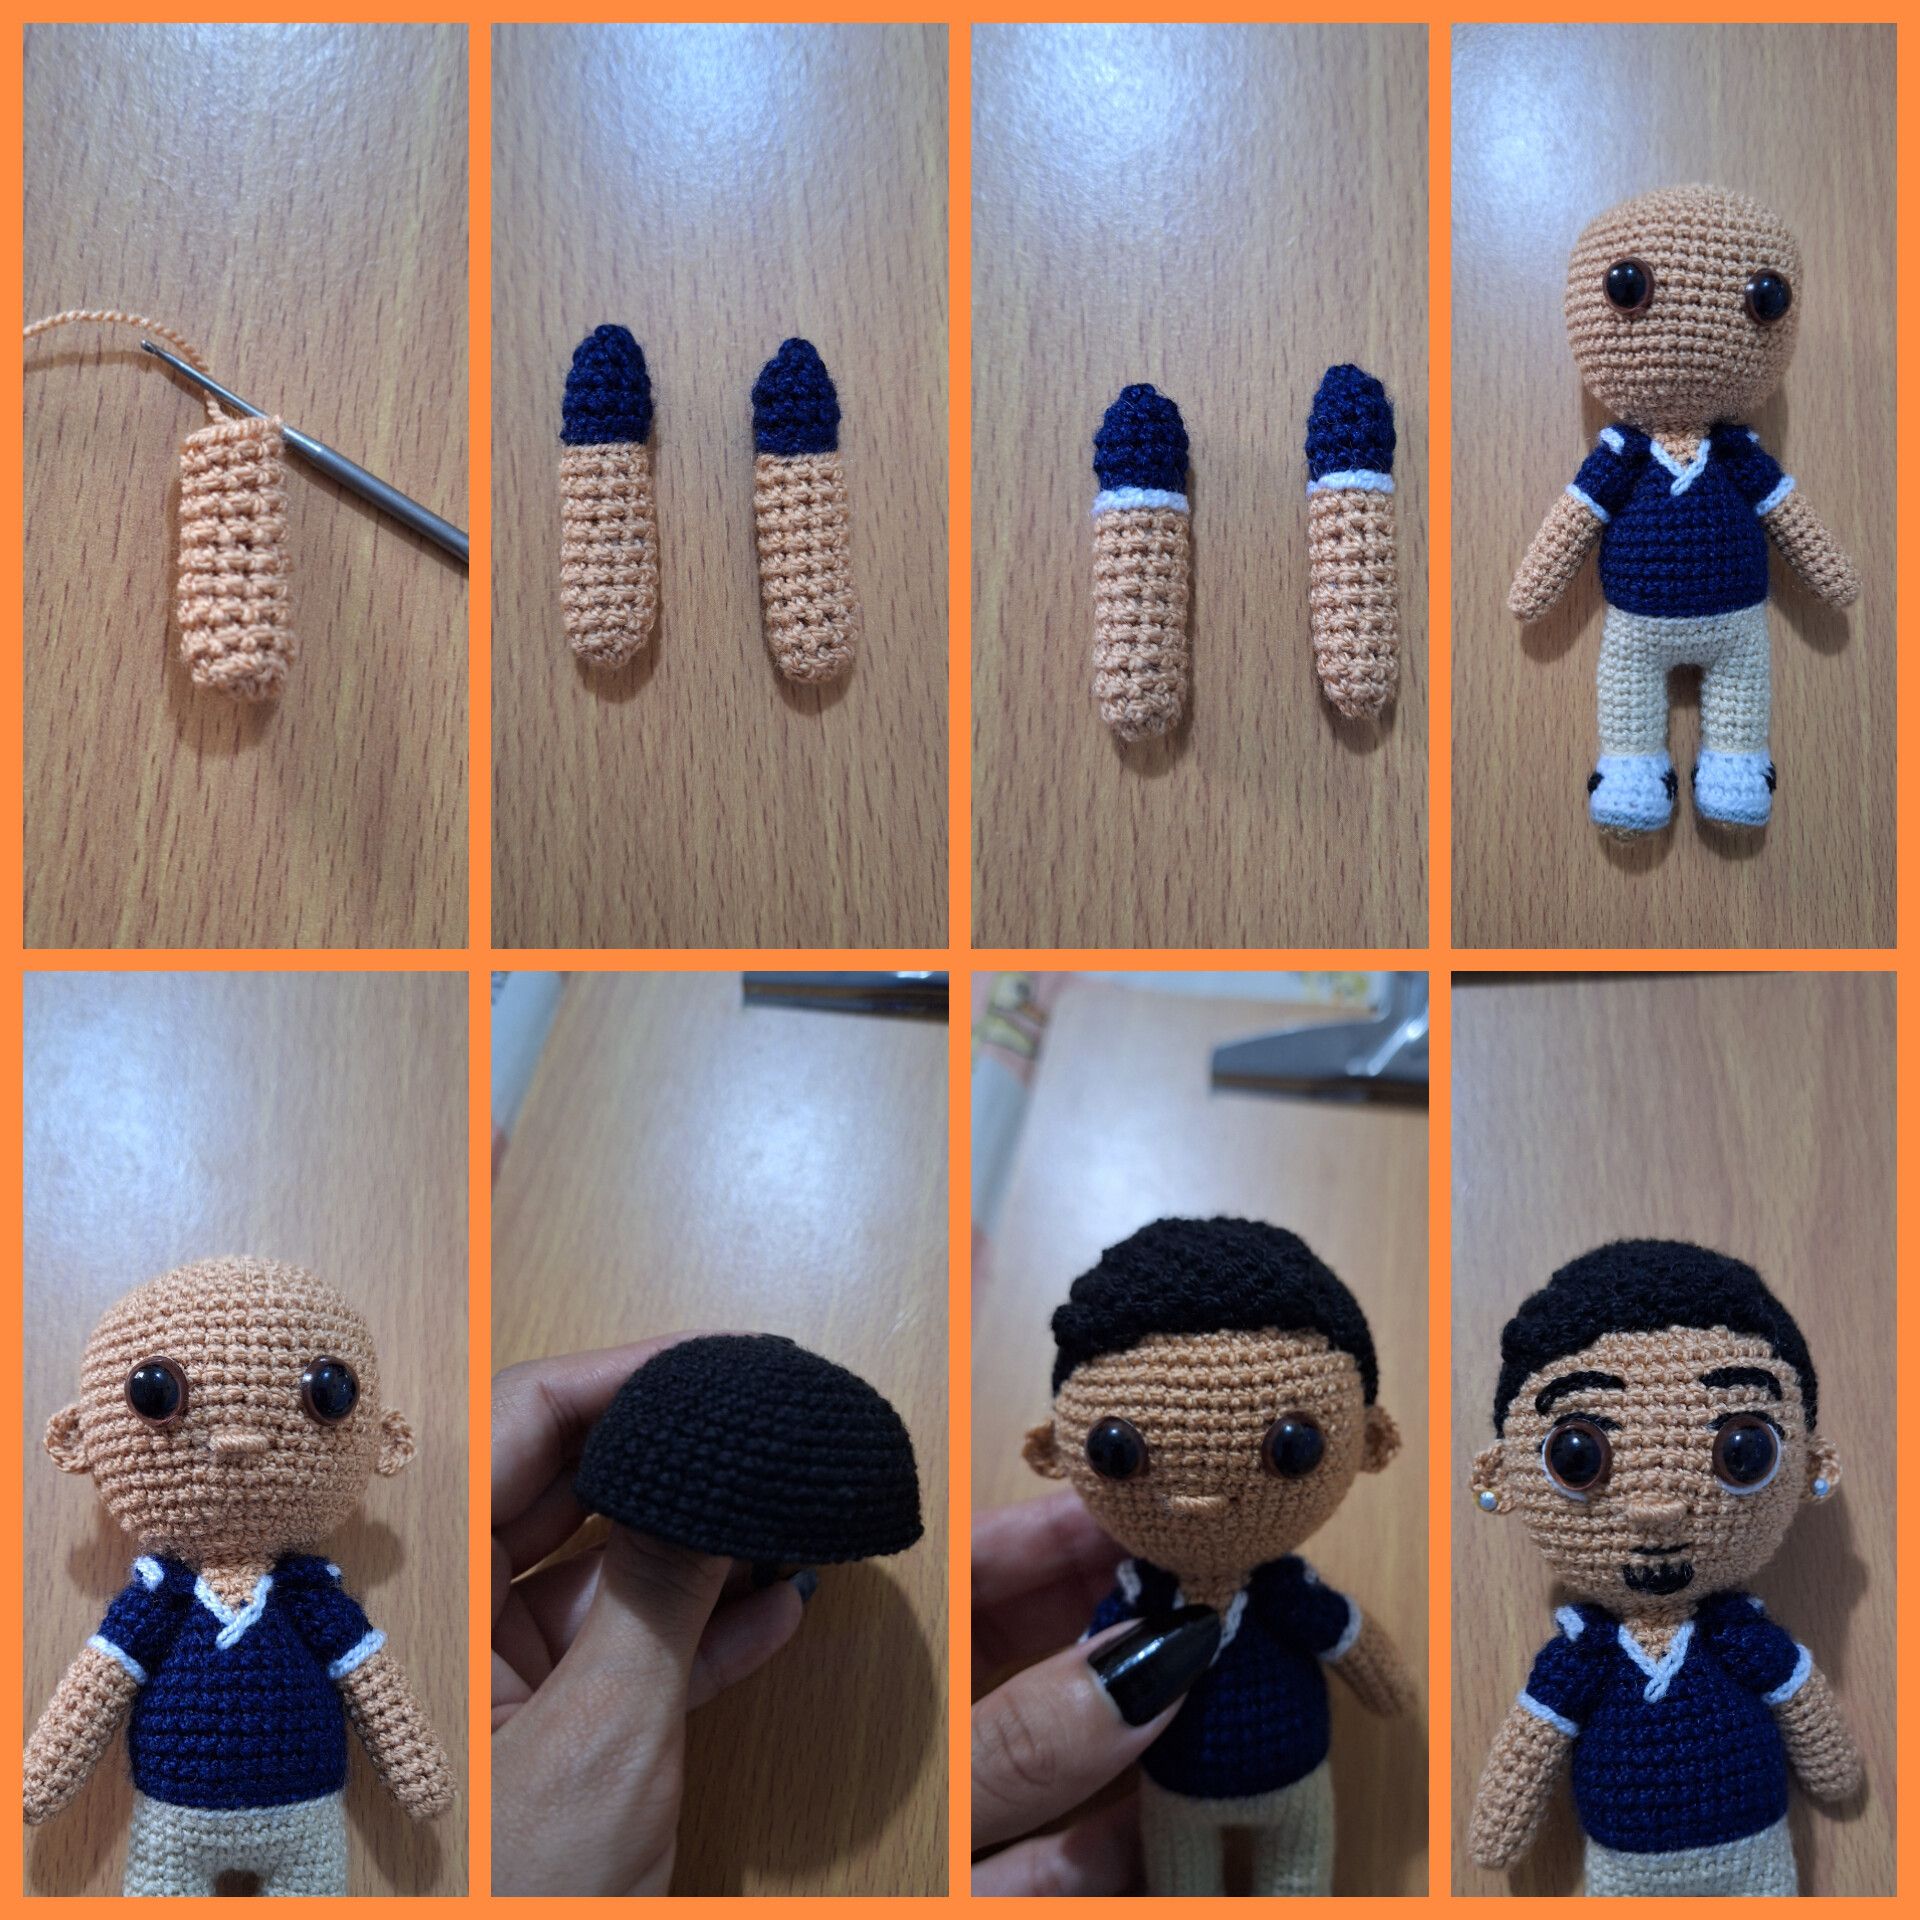  Para la base o soporte del amigurumi con hilo marrón hice 8 puntos bajos en un anillo, hice dos hileras de 8 aumentos por una hilera sin aumentos y repetí tres veces, terminando con dos hileras de 8 aumentos, obteniendo 72 puntadas. Hice dos círculos iguales, luego corté un círculo de plástico reciclado de un diámetro solo medio centímetro menor que los círculos crochet. Luego corté dos alambres de unos 7 centímetros, media la distancia entre las piernas del amigurumi, introduje el alambre en el primer círculo y luego hice dos agujeros en el plástico para pasar los alambres, doble los alambres hacia adentro a una distancia de 2 cm, pegué con silicón caliente los alambres al plástico. Coloqué el otro círculo a crochet por debajo y con hilo beige dorado los uní con una hilera de puntos deslizados, obteniendo una base o soporte sobre la cual introducir las piernas del amigurumi y este se pueda mantener en pie 😊 > For the base or support of the amigurumi, I made 8 single crochet stitches in a ring with brown yarn, two rows of 8 increases for one row without increases, and repeated three times, finishing with two rows of 8 increases, obtaining 72 stitches. I made two identical circles, then cut a circle out of recycled plastic with a diameter just half a centimeter smaller than the crochet circles. > > Then I cut two wires about 7 centimeters long, measuring the distance between the amigurumi's legs. I inserted the wire into the first circle and then made two holes in the plastic to pass the wires through. I bent the wires inward at a distance of 2 cm. I glued the wires to the plastic with hot glue. > > I placed the other crochet circle underneath and, using golden beige yarn, joined them with a row of slip stitches, creating a base or support on which to insert the amigurumi's legs so it could stand upright. 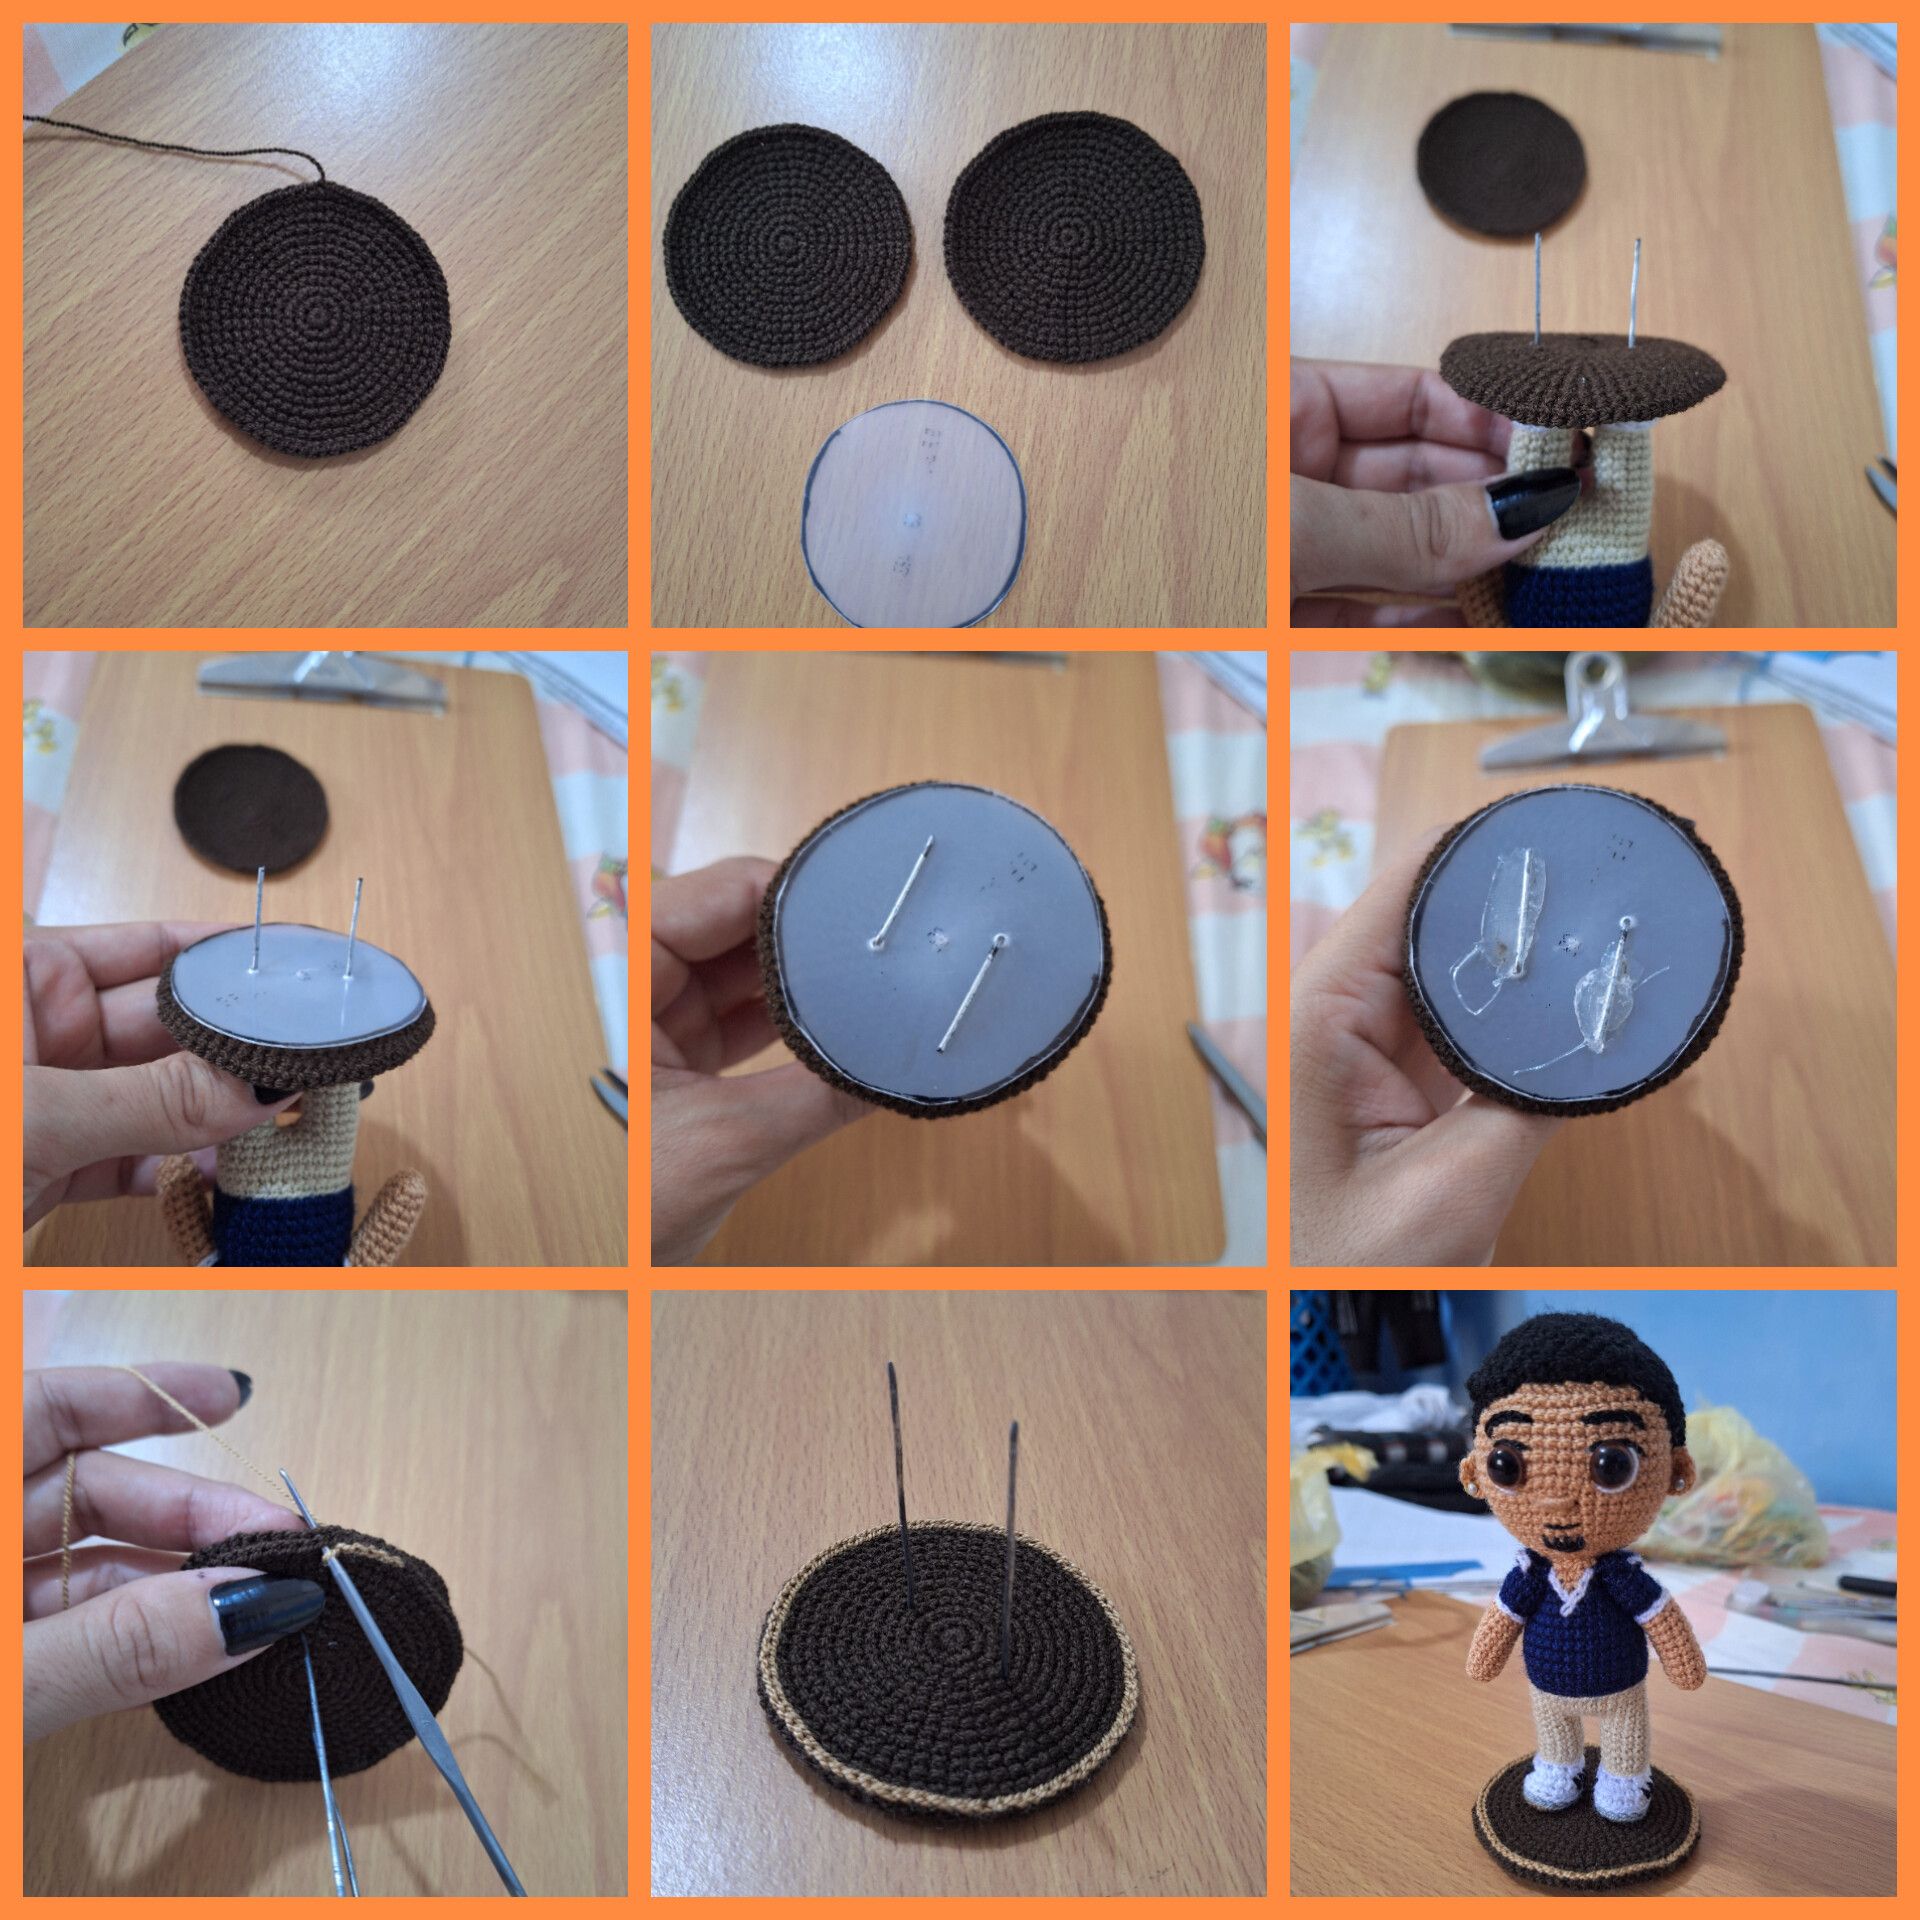 Resultado / Resultado
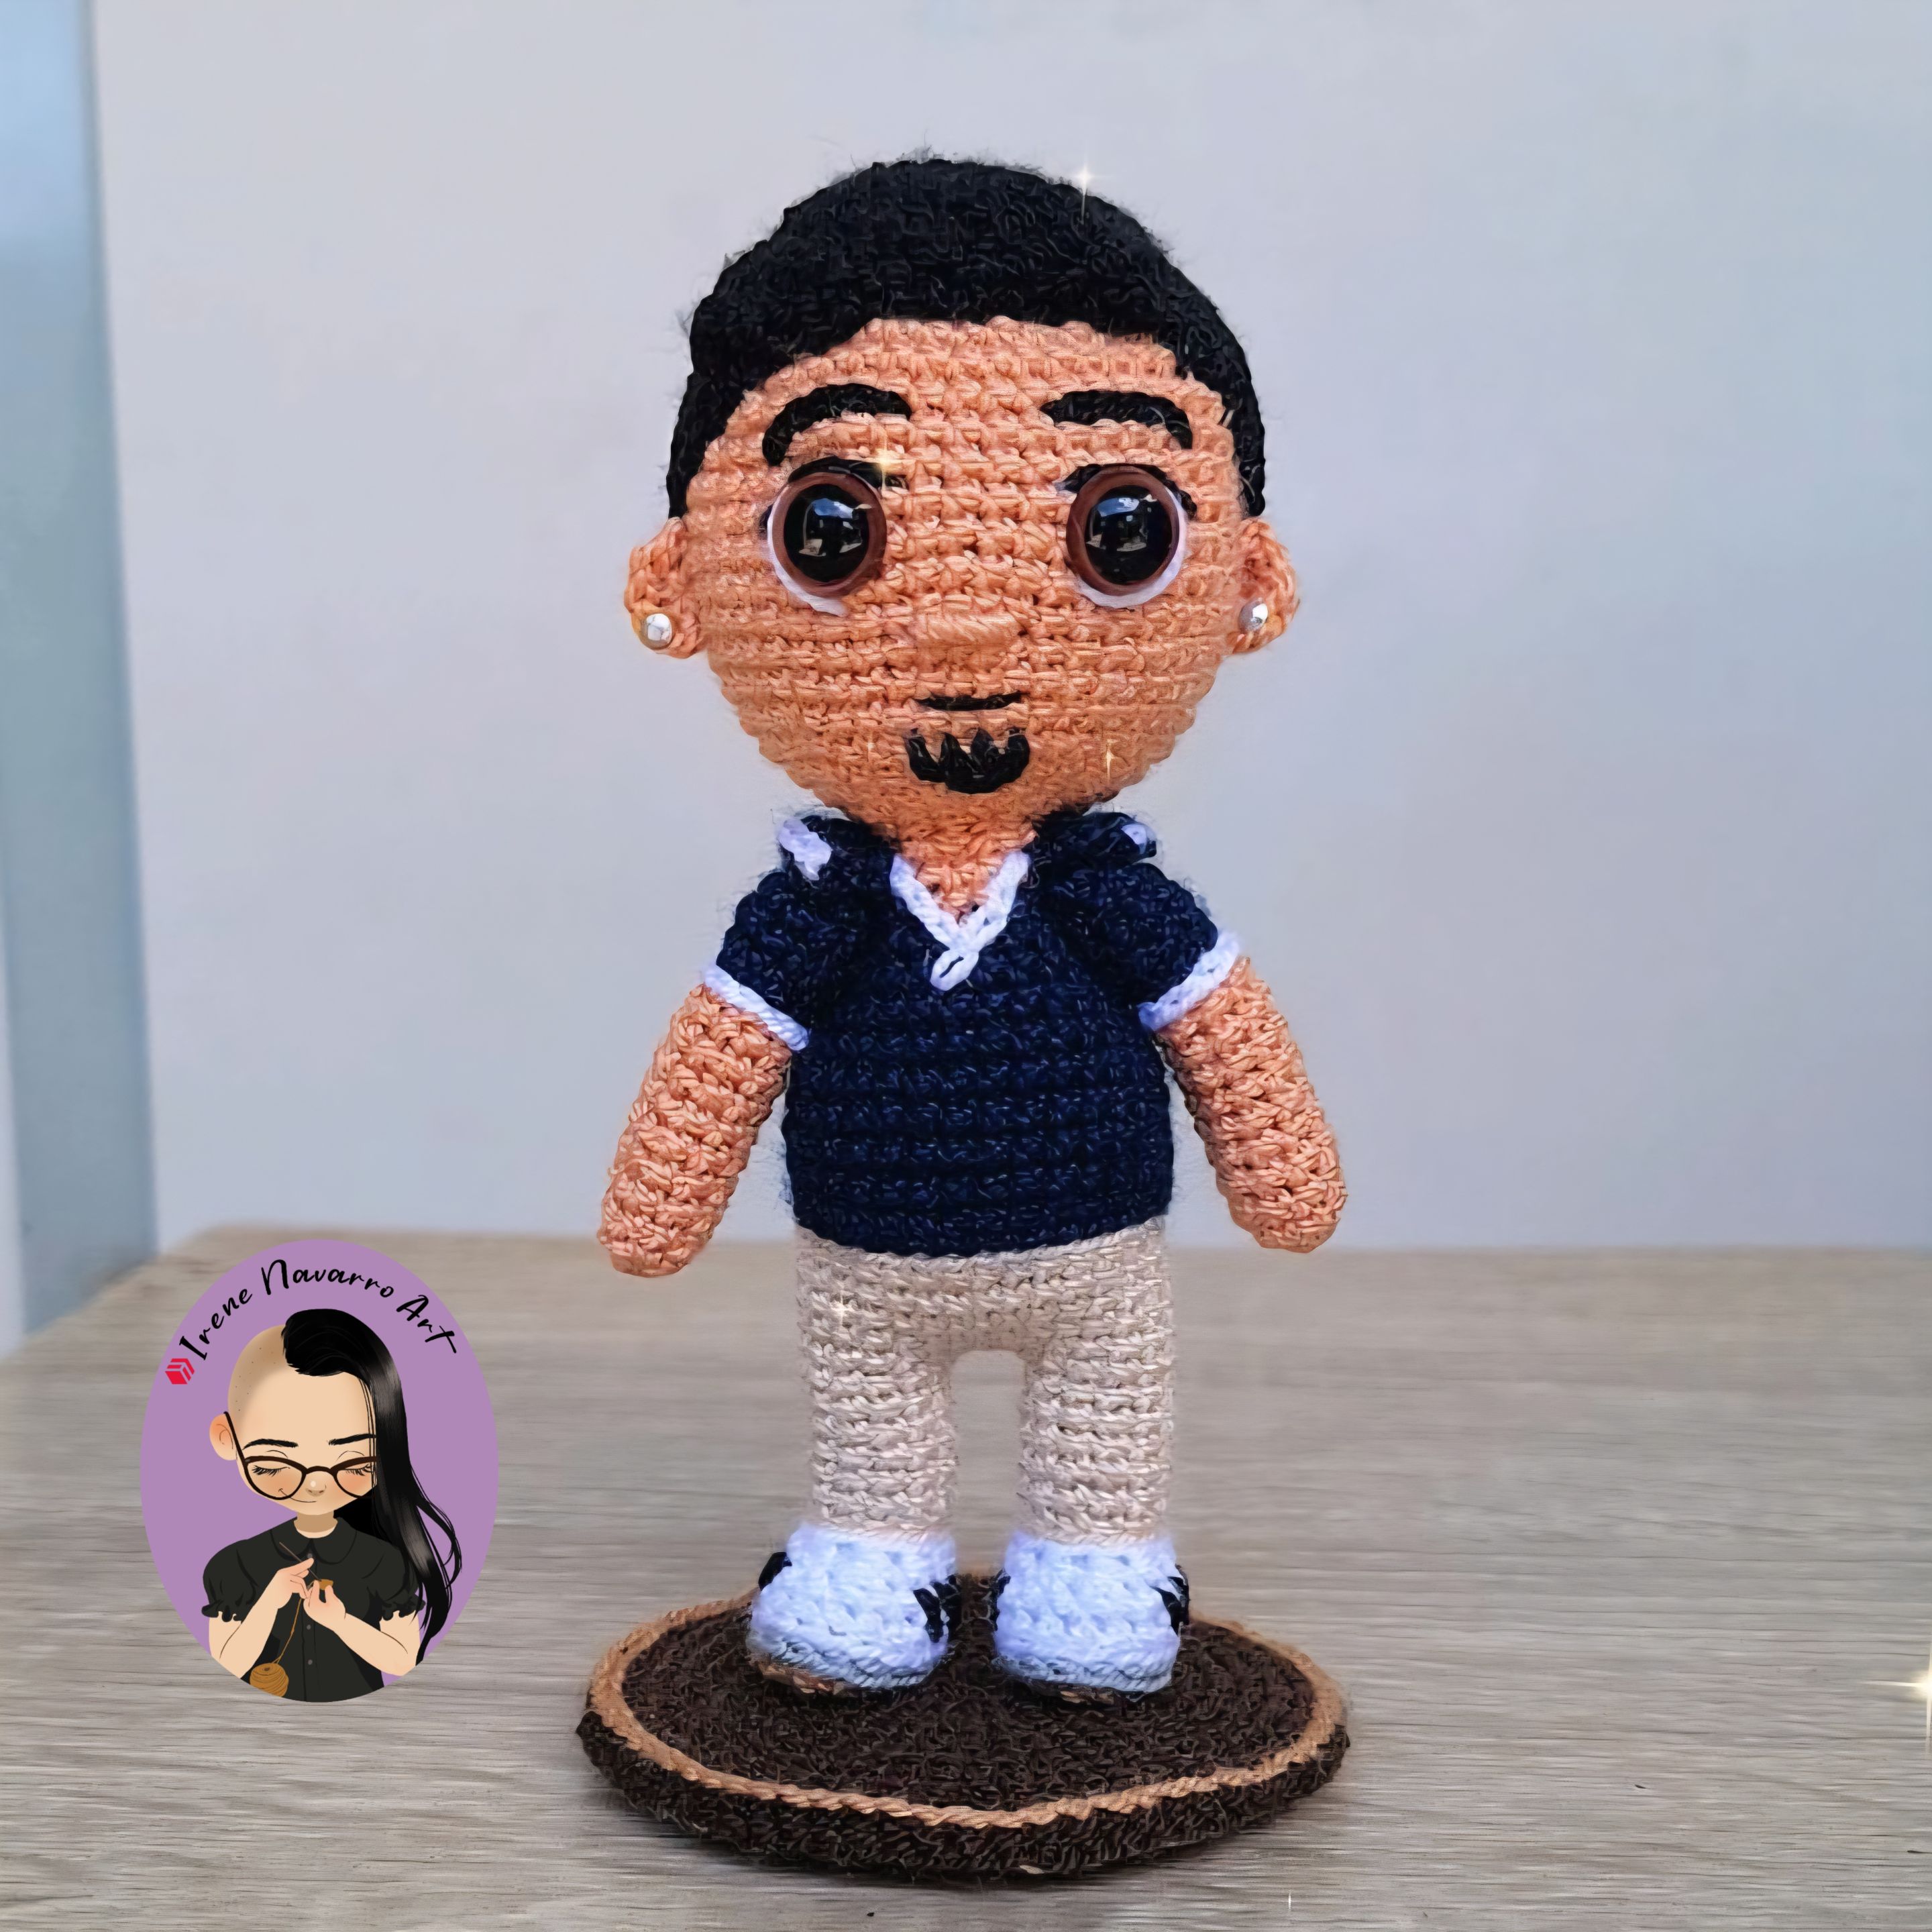
Realmente estoy muy complacida con el resultado y muy feliz con el trato del cliente, no hubo ningún inconveniente con el encargo, todo salió muy bien, lo hice bastante rápido y el cliente estaba muy contento, ver su reacción también es parte de la recompensa por amar mi trabajo 😊. Espero que para ustedes haya sido de utilidad mu publicación. > I'm really pleased with the result and very happy with the client's treatment. There were no problems with the order, everything went very well, I did it quite quickly, and the client was very happy. Seeing their reaction is also part of the reward for loving my work 😊. I hope my post has been helpful for you.##### Imágenes tomadas con dispositivo Samsung A54. Portada editada en Inshot >##### Pictures taken with Samsung A54 device. Cover edited in Inshot 
##### Espero les haya gustado. Les invito a leer mis próximas publicaciones y siempre estaré dispuesta a responder sus preguntas y comentarios, también pueden seguirme y contactarme en cualquiera de mis redes sociales. ¡Muchas gracias! >##### I hope you liked it. I invite you to read my next publications and I will always be willing to answer your questions and comments, you can also follow me and contact me on any of my social networks. Thank you! [Facebook](https://www.facebook.com/irenenavarroart) [Twitter](https://twitter.com/irenenavarroart) [Instagram](https://www.instagram.com/irenenavarroarte/) [Ko-Fi](https://ko-fi.com/irenenavarroart) Discord: irenenavarroart#0361