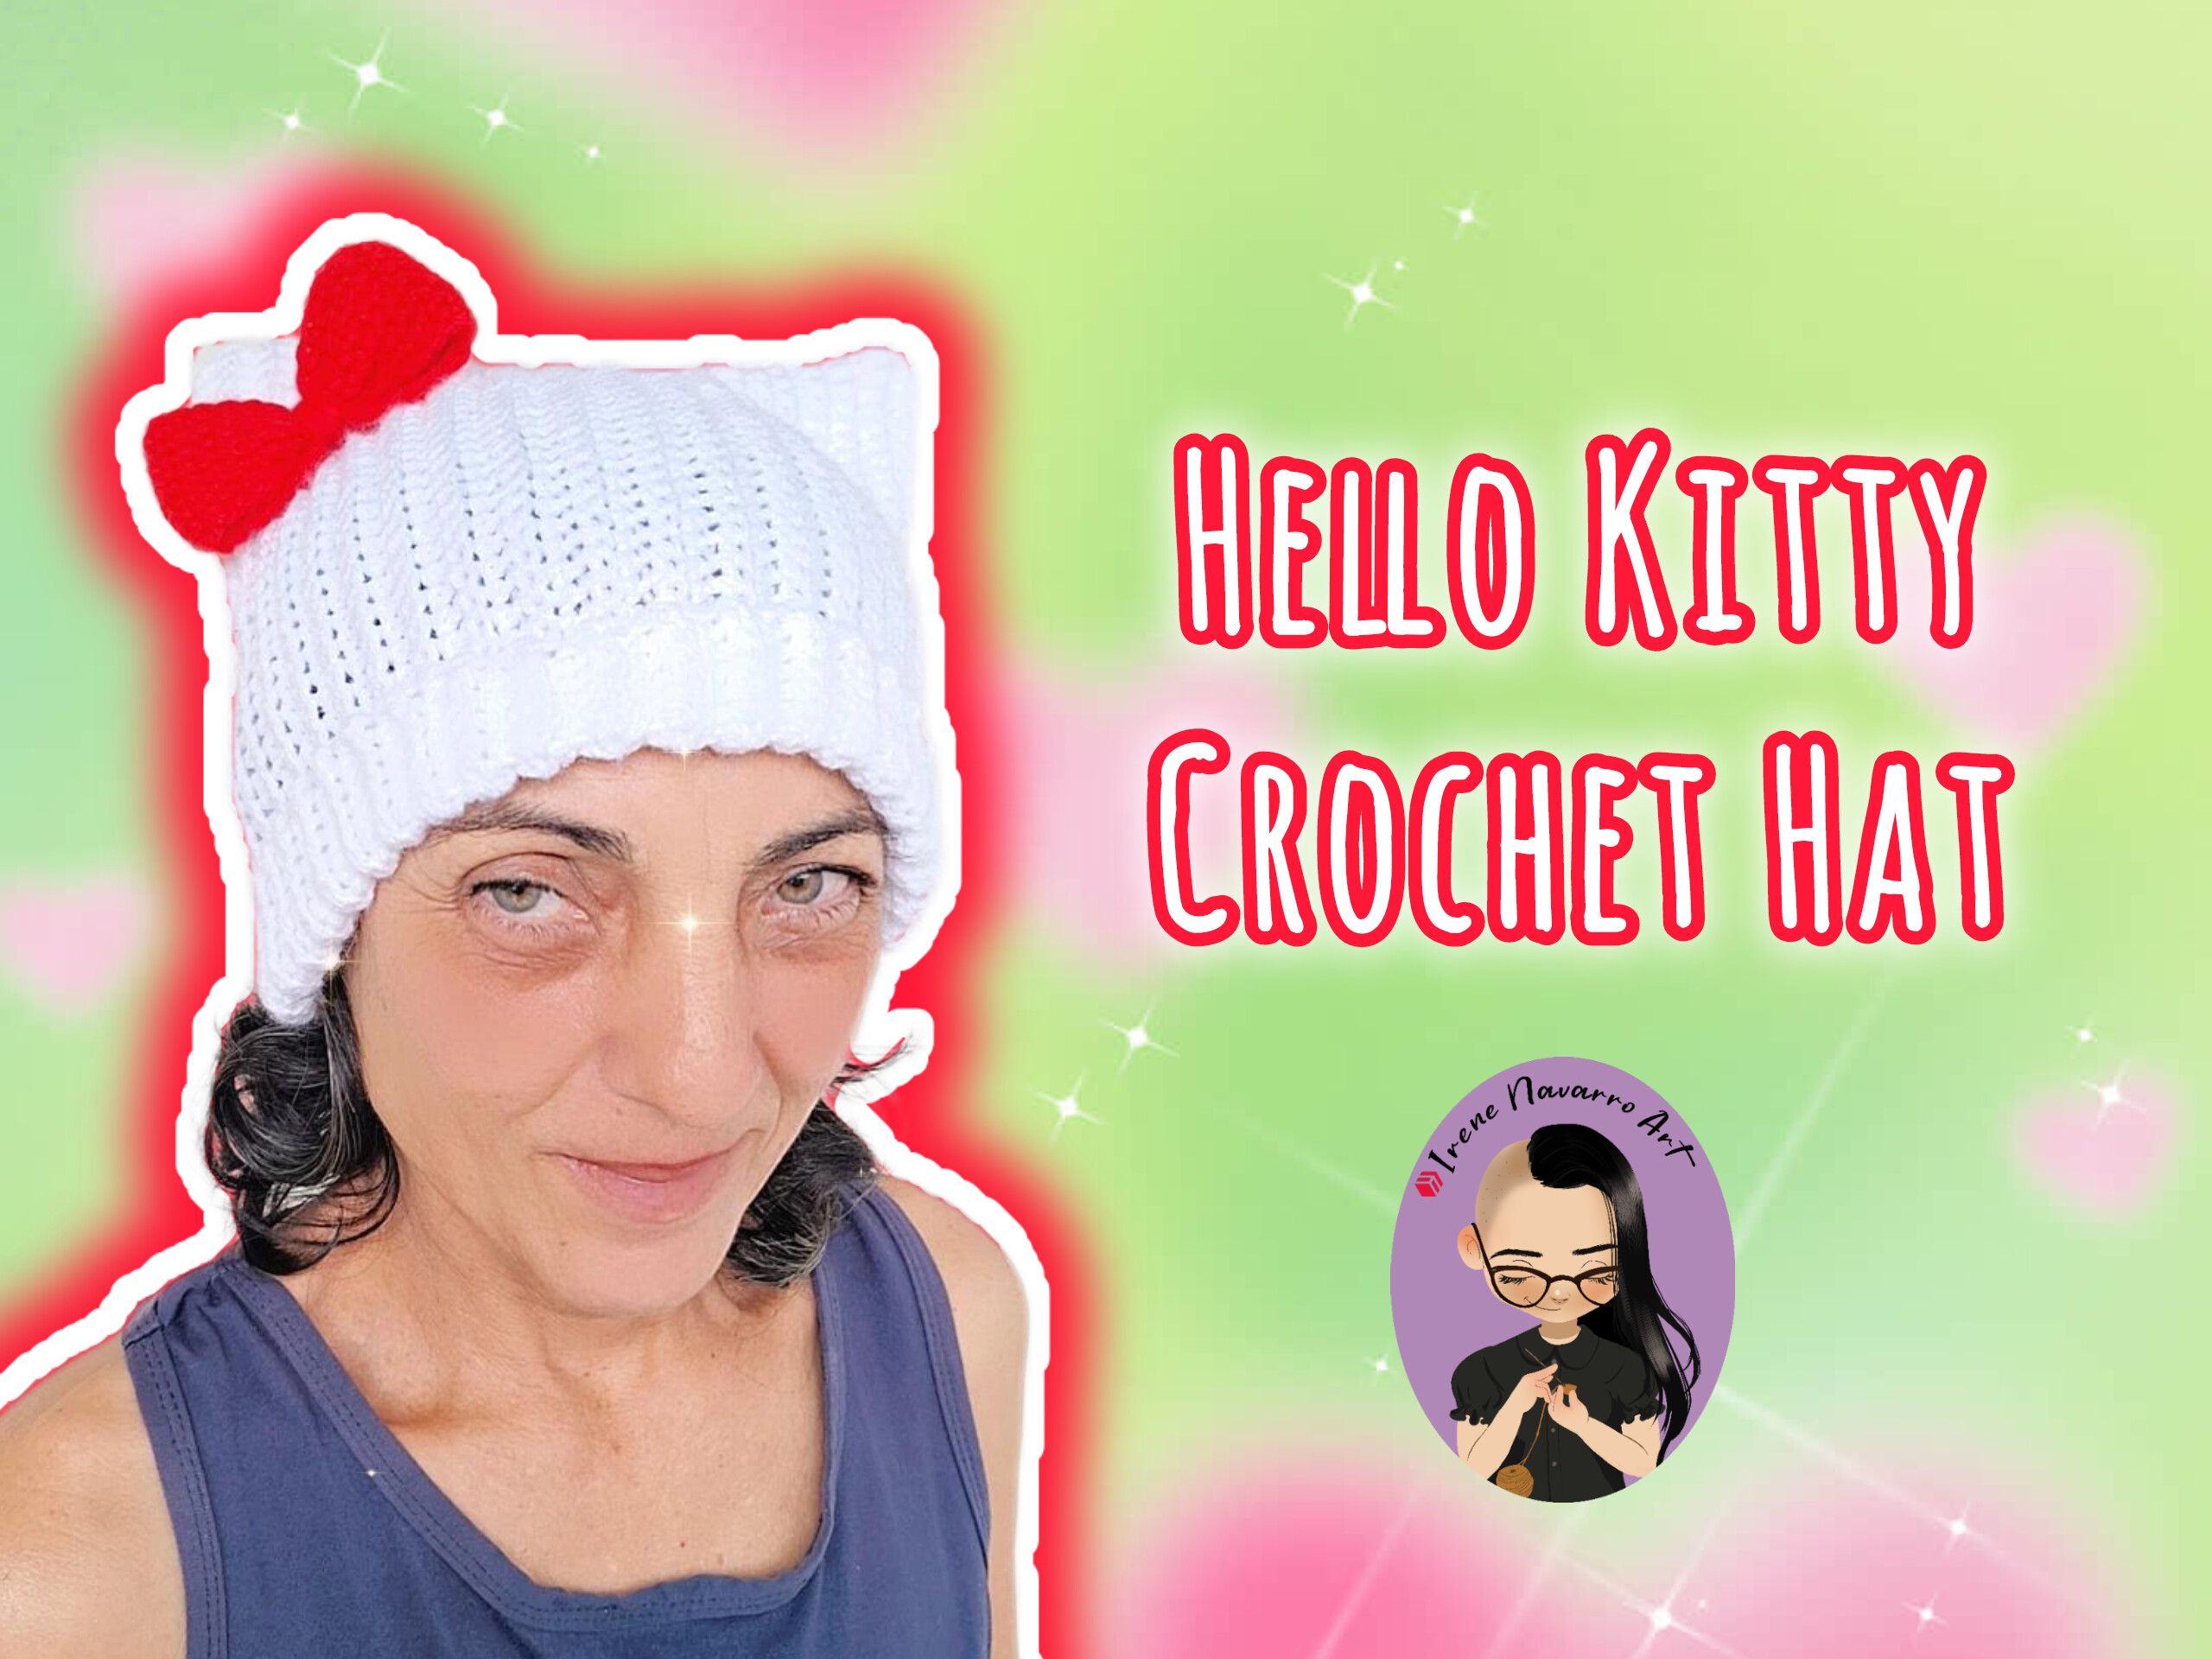
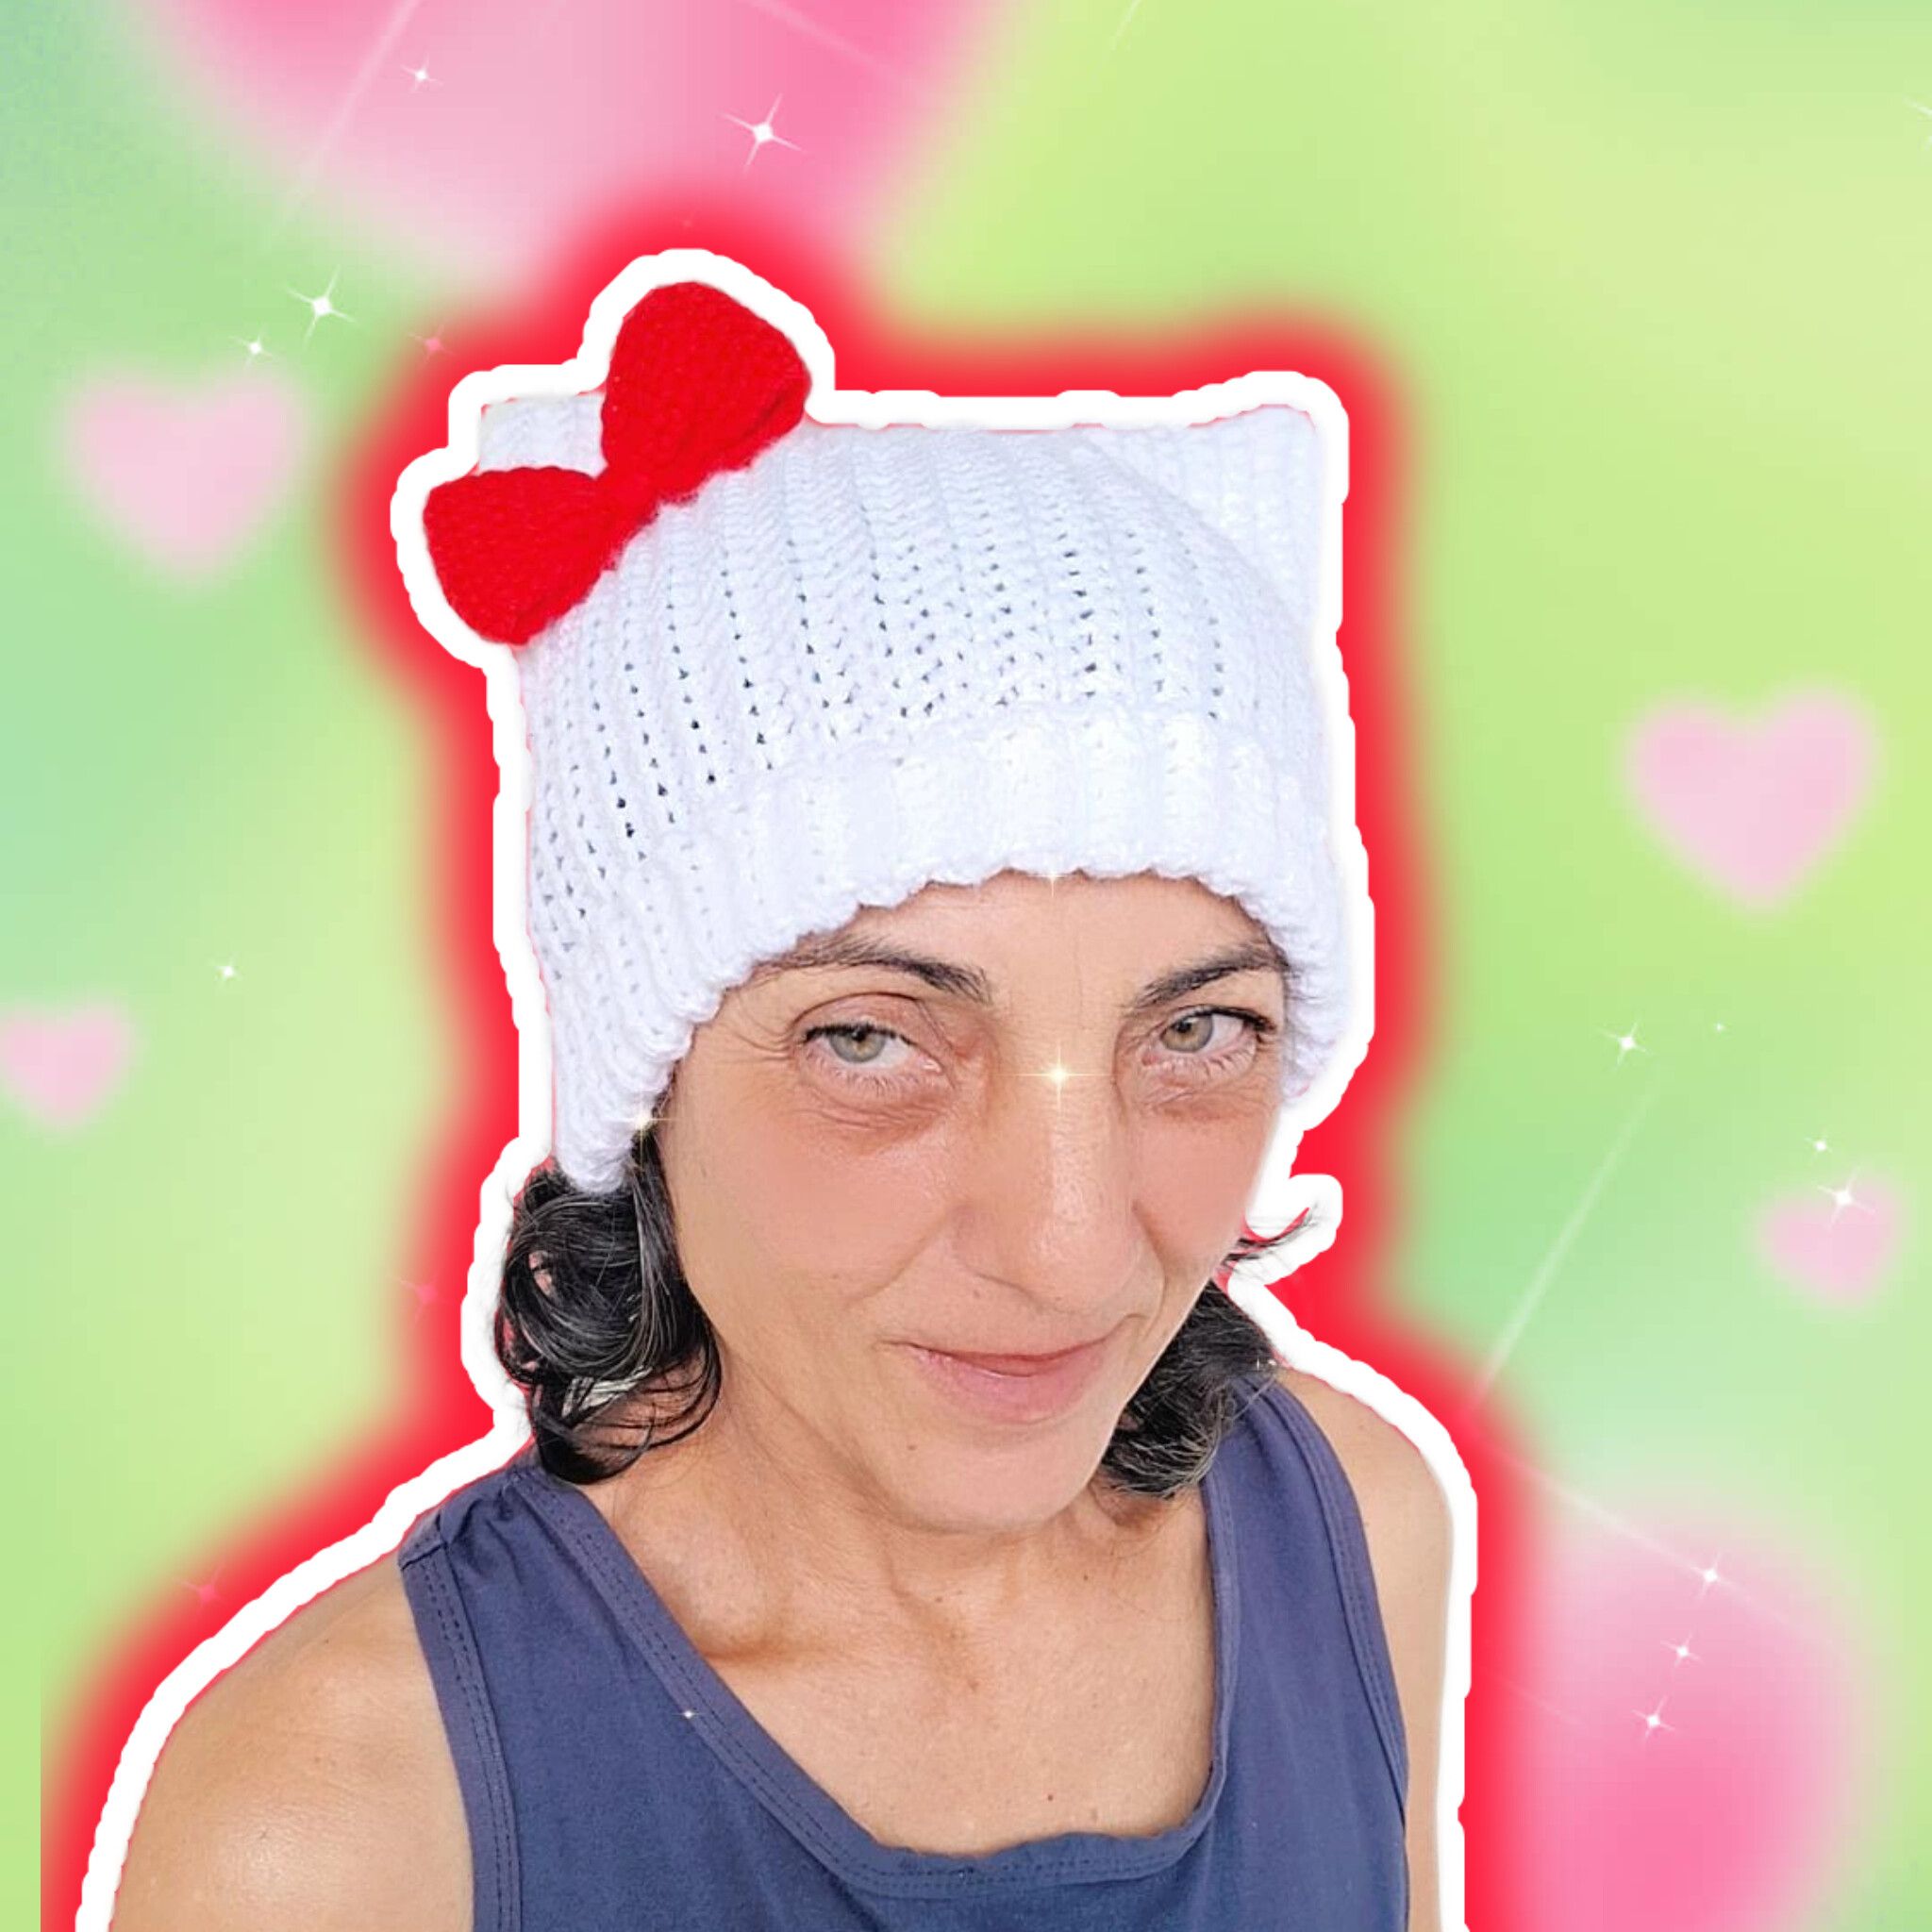
Saludos a toda la comunidad amante de las manualidades, siempre que tengo un encargo de tejido evalúo si tiene un nivel de complejidad conveniente para un tutorial o no, cuando esto finalmente sucede me siento muy feliz porque se podé compartir con ustedes cada detalle del proceso, además que me gusta aportar un contenido que se de utilidad para otros, en esta ocasión hice un gorro a crochet inspirado en Hello Kitty para lo cual me enviaron una imagen de referencia, sin embargo yo a ojo saqué mi patrón sin problema, además este gorro tiene puntadas son muy sencillas por lo cual se me hace idóneo para un tutorial básico, espero les guste.
> Greetings to all the crafting enthusiasts! Whenever I receive a knitting or crocheting project, I always consider whether it's complex enough to warrant a tutorial. When that happens, I'm so happy because I get to share every detail of the process with you. I also enjoy creating content that is useful and helpful to others. This time, I crocheted a hat inspired by Hello Kitty, based on a reference image provided to me. I was able to create the pattern myself without any problems. Plus, the stitches used in this hat are very simple, making it perfect for a beginner-level tutorial. I hope you like it!


##### Imágenes tomadas con dispositivo Samsung A54. Portada editada en Inshot >##### Pictures taken with Samsung A54 device. Cover edited in Inshot 
##### Espero les haya gustado. Les invito a leer mis próximas publicaciones y siempre estaré dispuesta a responder sus preguntas y comentarios, también pueden seguirme y contactarme en cualquiera de mis redes sociales. ¡Muchas gracias! >##### I hope you liked it. I invite you to read my next publications and I will always be willing to answer your questions and comments, you can also follow me and contact me on any of my social networks. Thank you! [Facebook](https://www.facebook.com/irenenavarroart) [Twitter](https://twitter.com/irenenavarroart) [Instagram](https://www.instagram.com/irenenavarroarte/) [Ko-Fi](https://ko-fi.com/irenenavarroart) Discord: irenenavarroart#0361
Materiales / Materials
+ 75 gramos de lana color blanco. + 10 gramos de lana color rojo + Ganchillo de 4 mm + Aguja de ojal grande > + 75 grams of white yarn > + 10 grams of red yarn > + 4 mm crochet hook > + Large tapestry needle 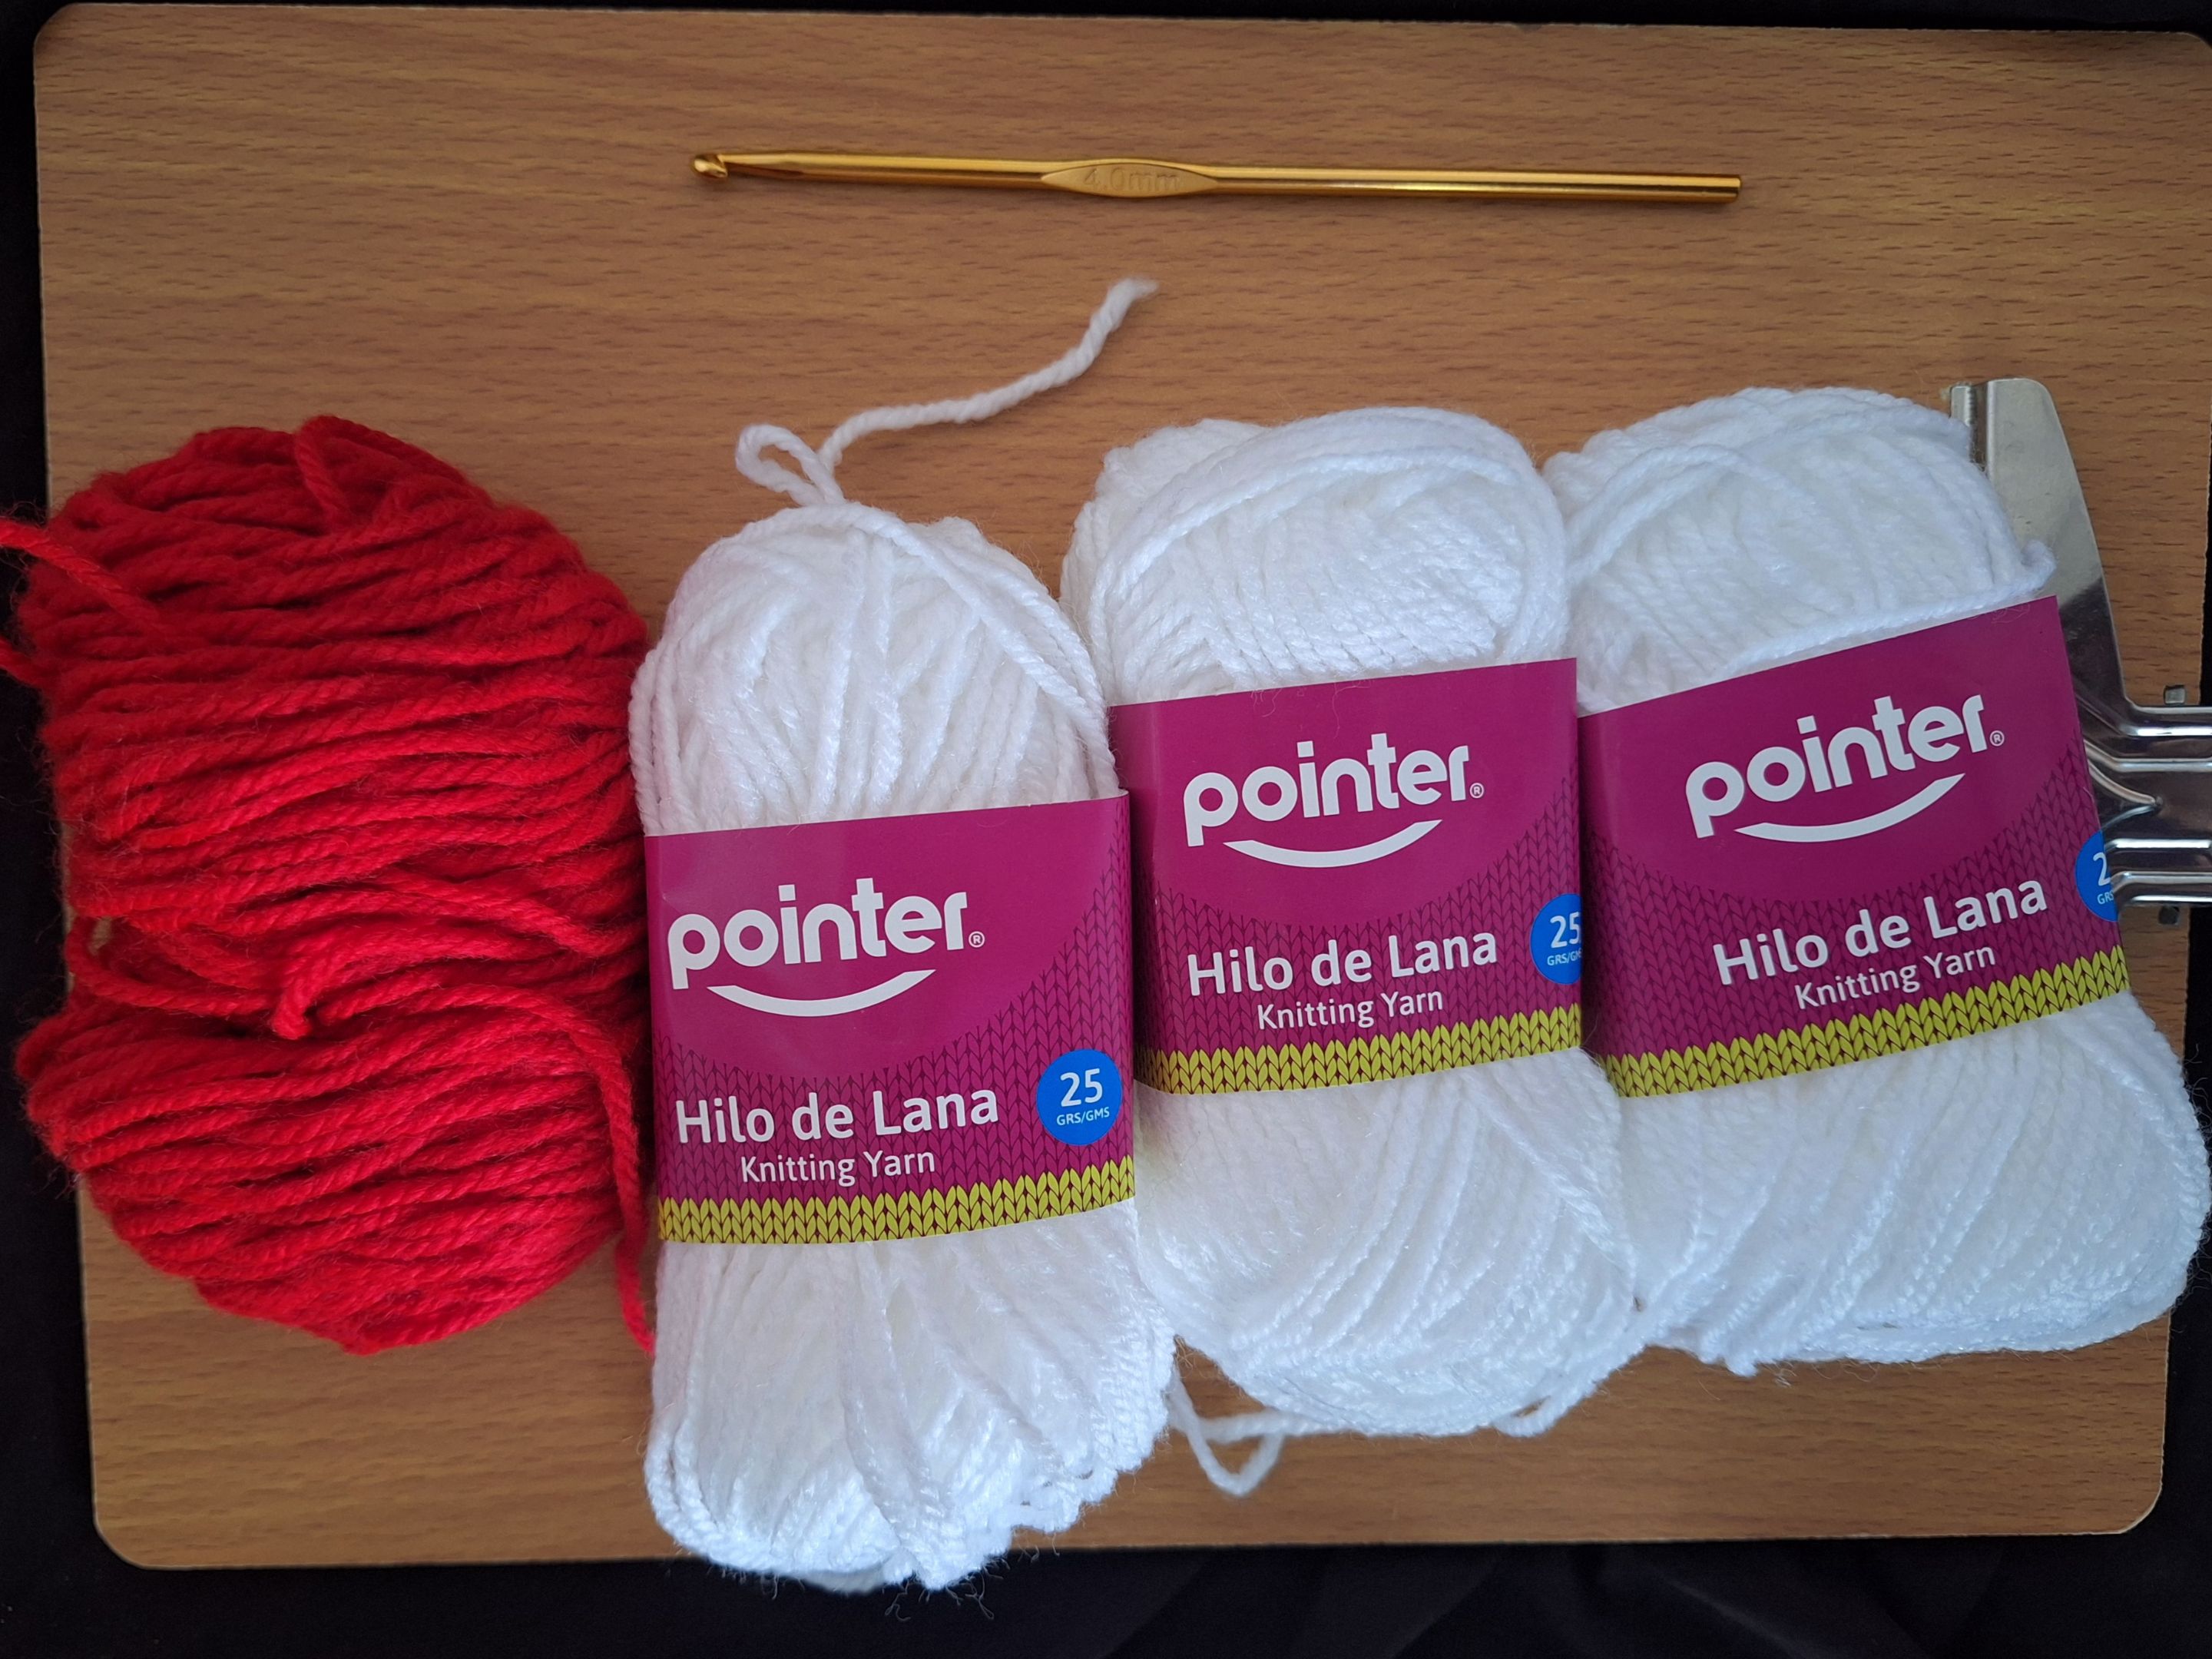 Proceso / Process
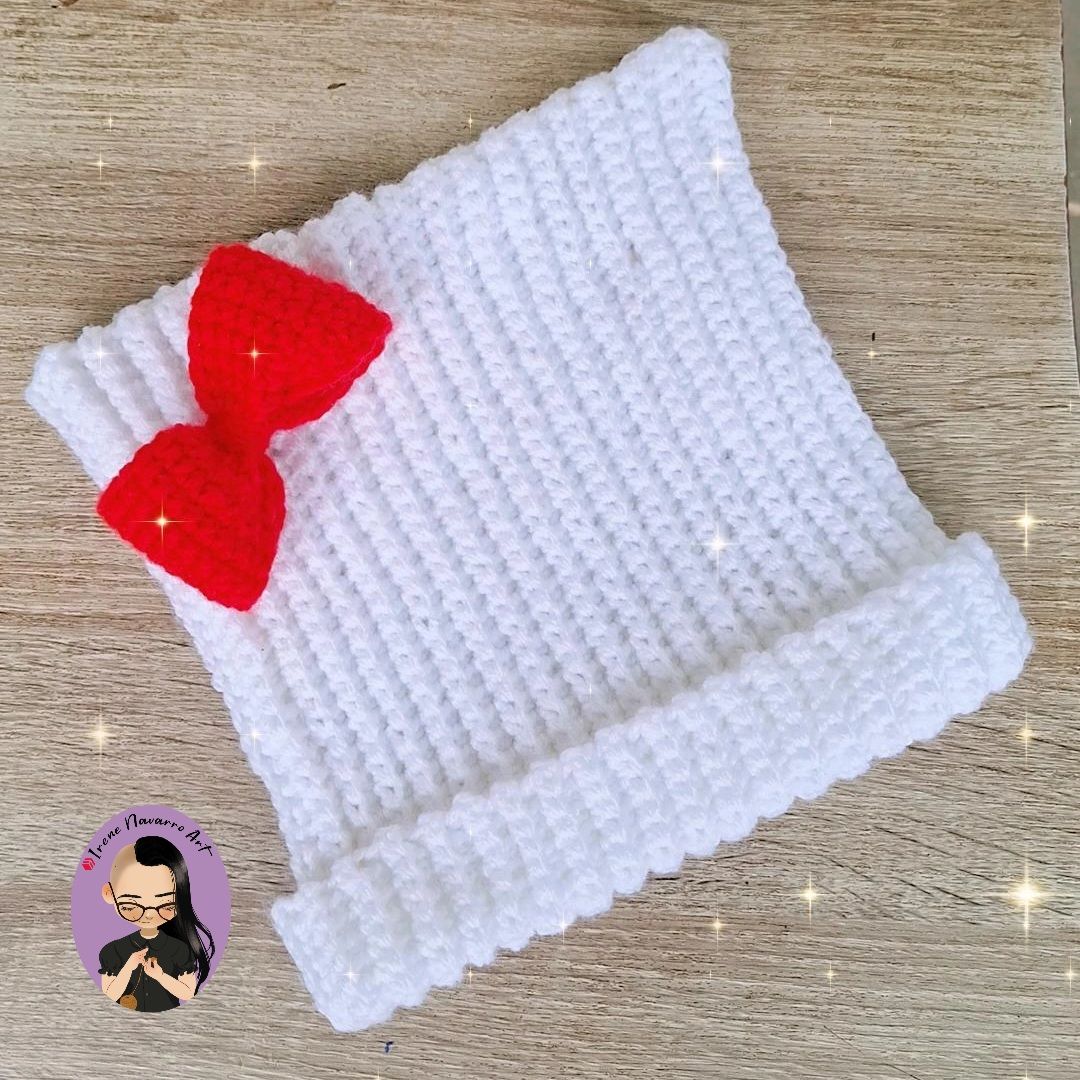
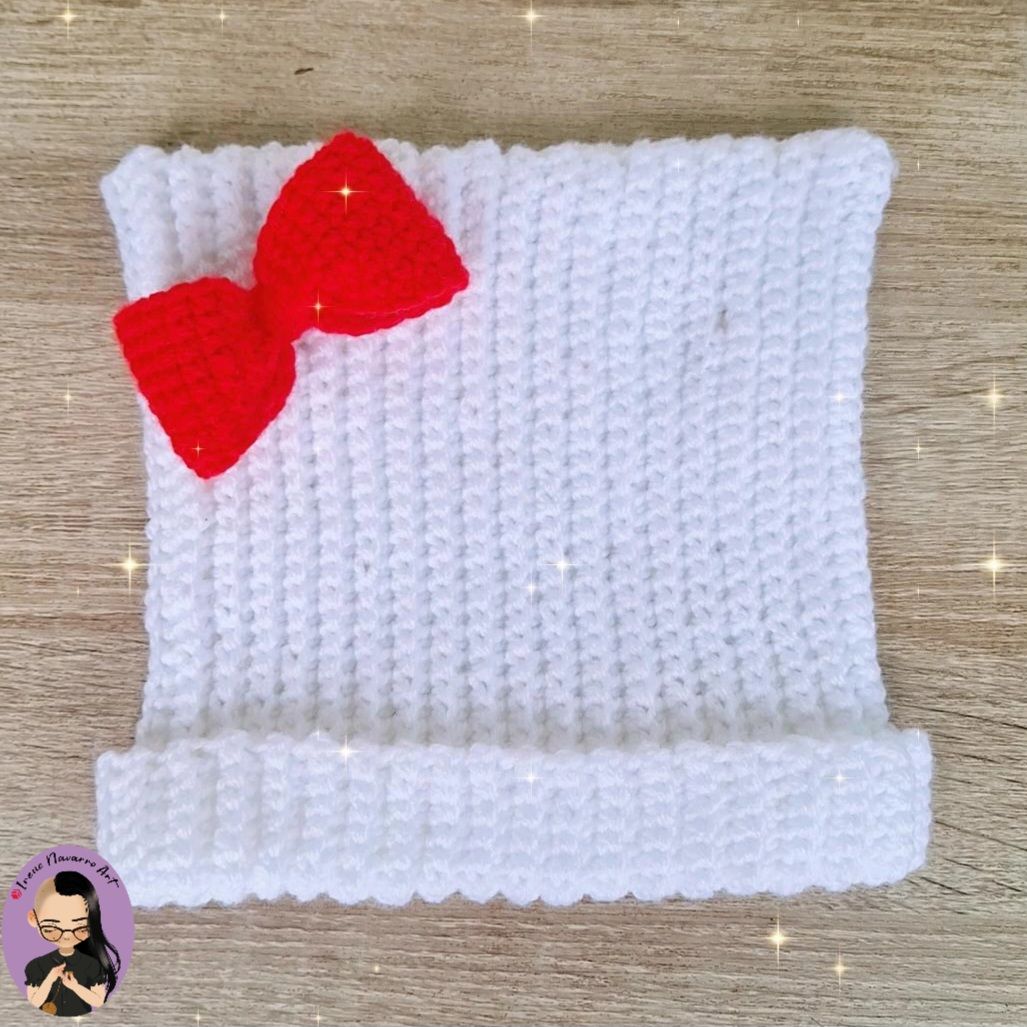
Con la lana blanca hacer 40 cadenas de base, realizar un primer hilera de puntos bajos, para este paso recomiendo tomar la hebra del lado de atrás de cada cadena, de este modo queda un inicio mucho más prolijo, a partir de la segunda hilera se debe hacer puntos bajos pero tomando solo la hebra de atrás de cada cadena. > Using the white yarn, make 40 foundation chains. For the first row, work single crochet stitches, and for this step, I recommend picking up the loop on the back of each chain. This will give you a neater start. From the second row onwards, continue working single crochet stitches, but only pick up the back loop of each chain. 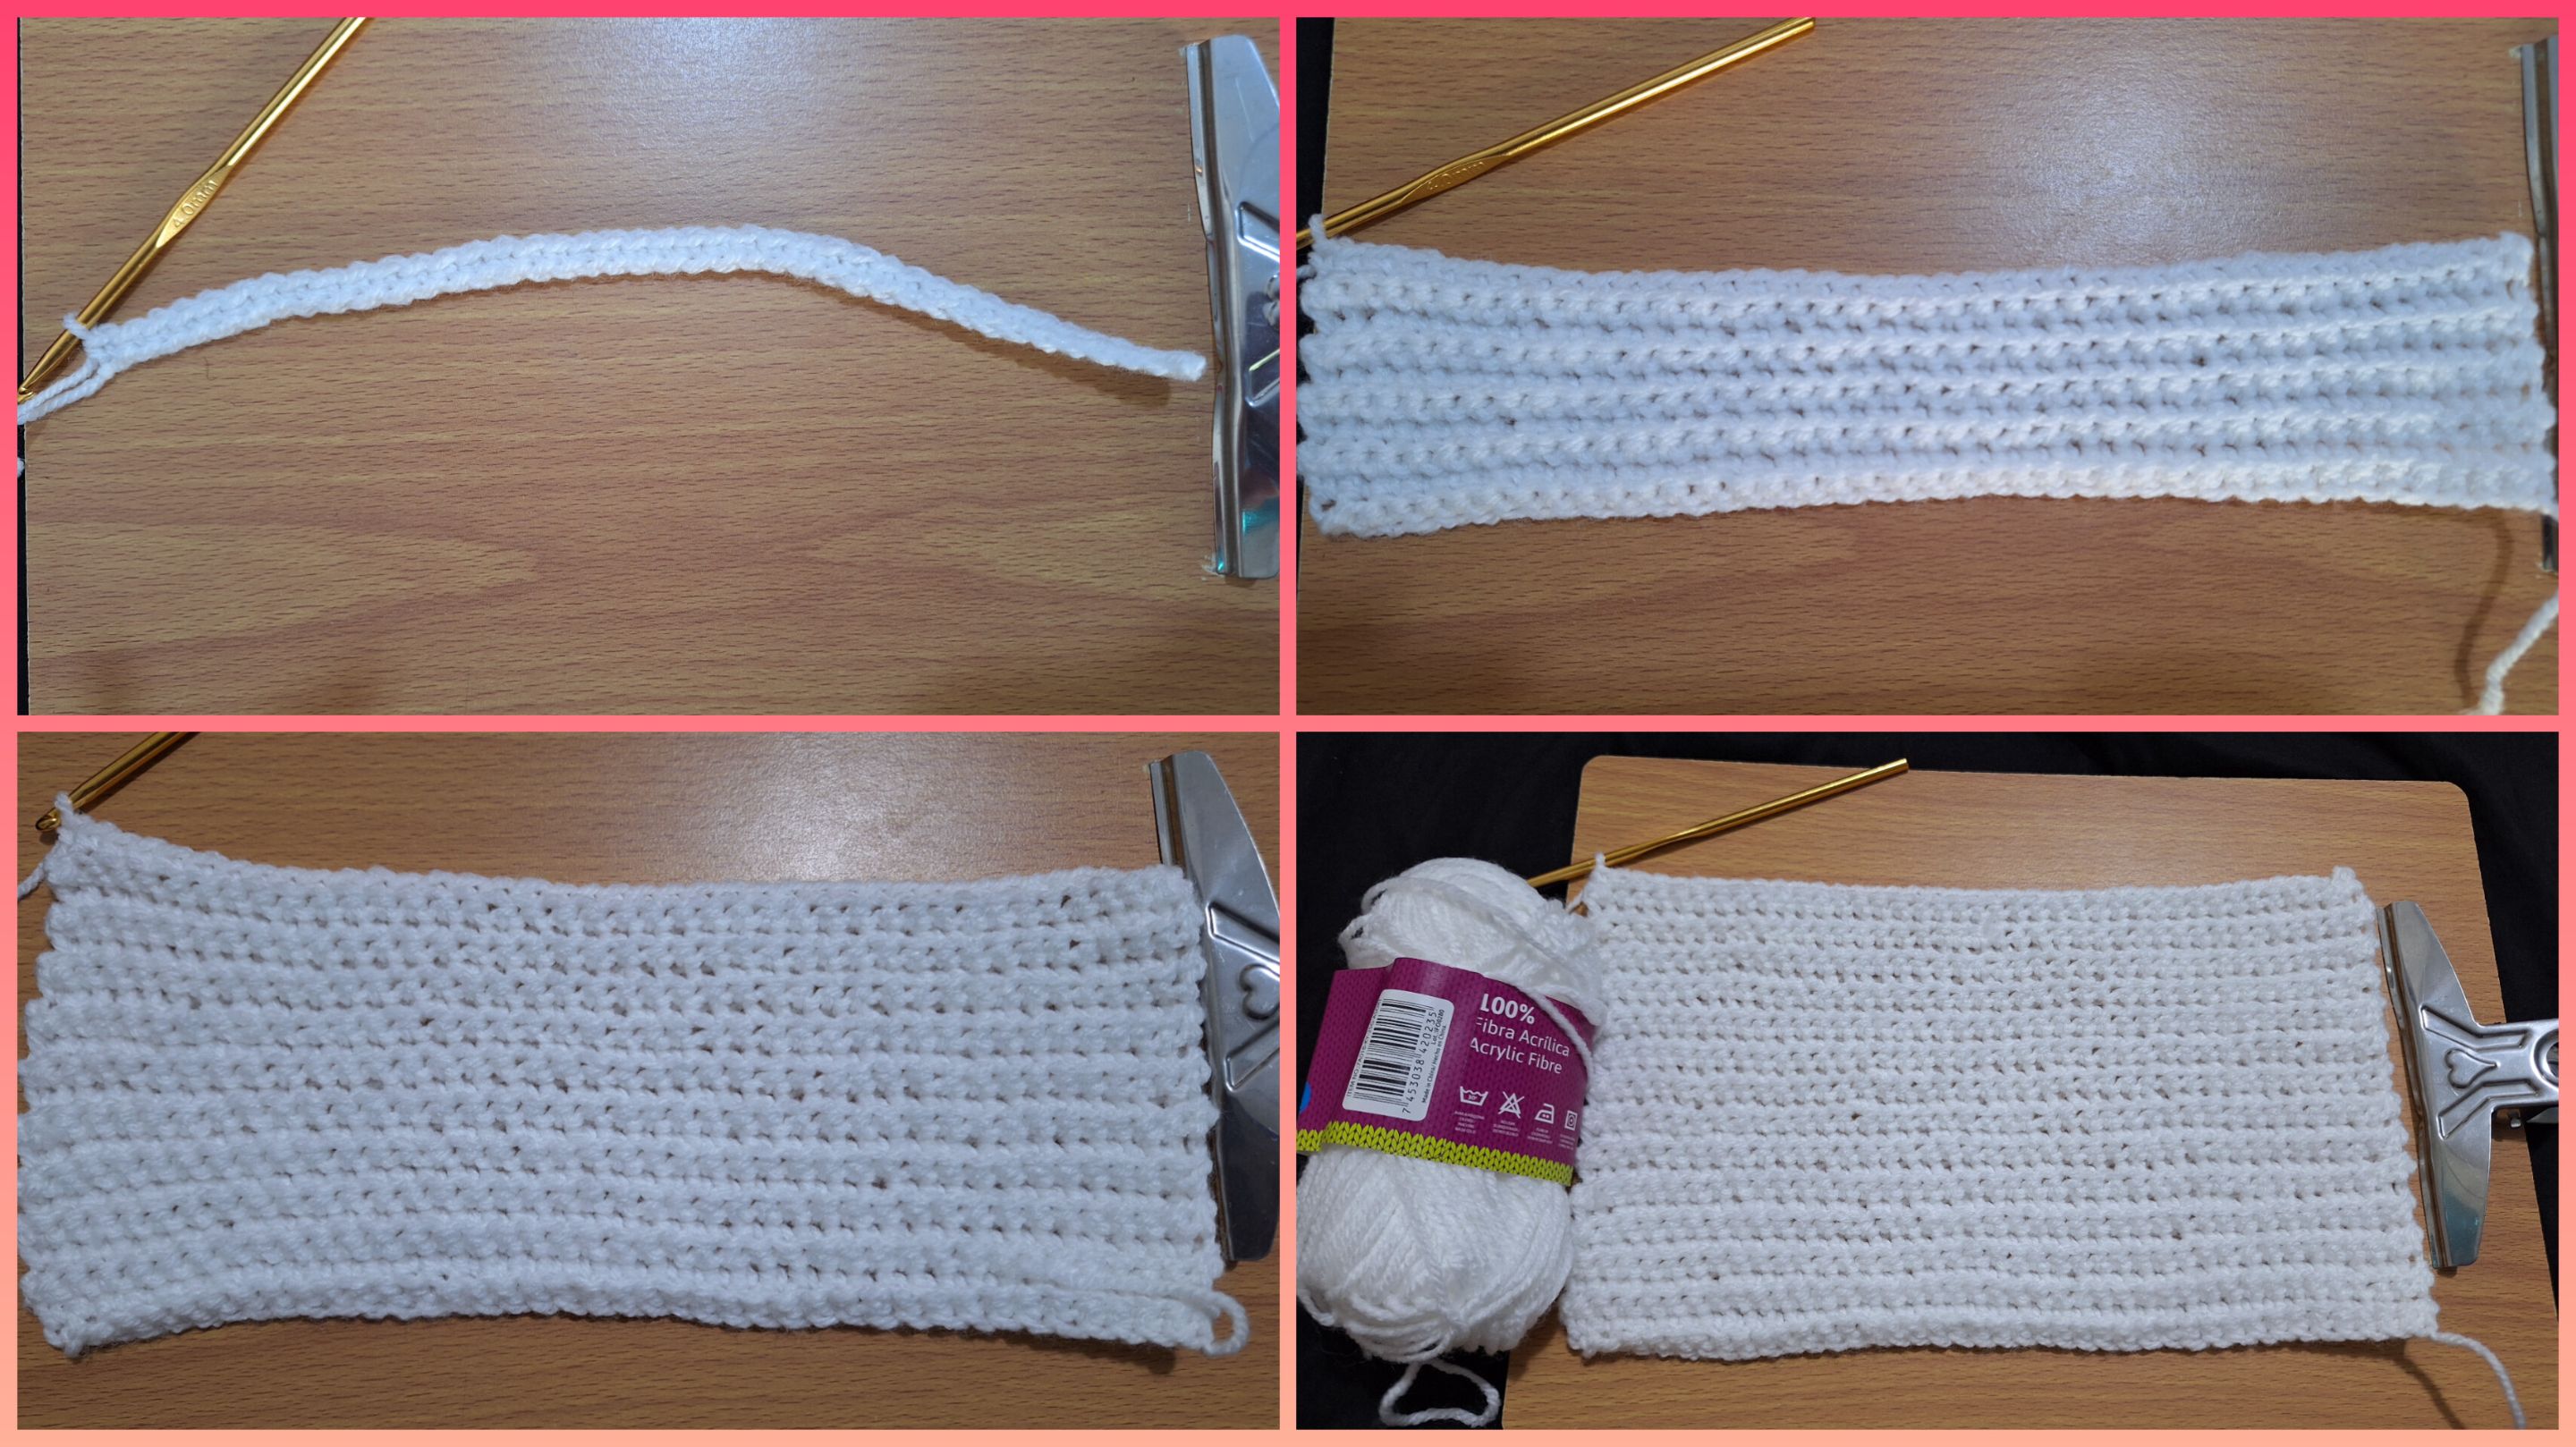  Continuar haciendo puntos bajos tomando solo la hebra de atrás hasta completar 77 hileras, como algunas lanas tiene diferentes espesores y también las personas tienden a apretar o aflojar mas las puntadas que otras, recomiendo ir midiendo el gorro con la circunferencia de la cabeza, de este modo podría ser un poco más o un poco menos las hileras hacer, pero a mi me salió con 77 para un tamaño como el de mi cabeza. > Continue working single crochet stitches, picking up only the back loop, until you reach 77 rows. Since different yarns have varying thicknesses, and people also tend to knit more loosely or tightly, I recommend measuring the hat against your head circumference as you go. This way, you might need a few more or fewer rows. For my head size, 77 rows worked perfectly. 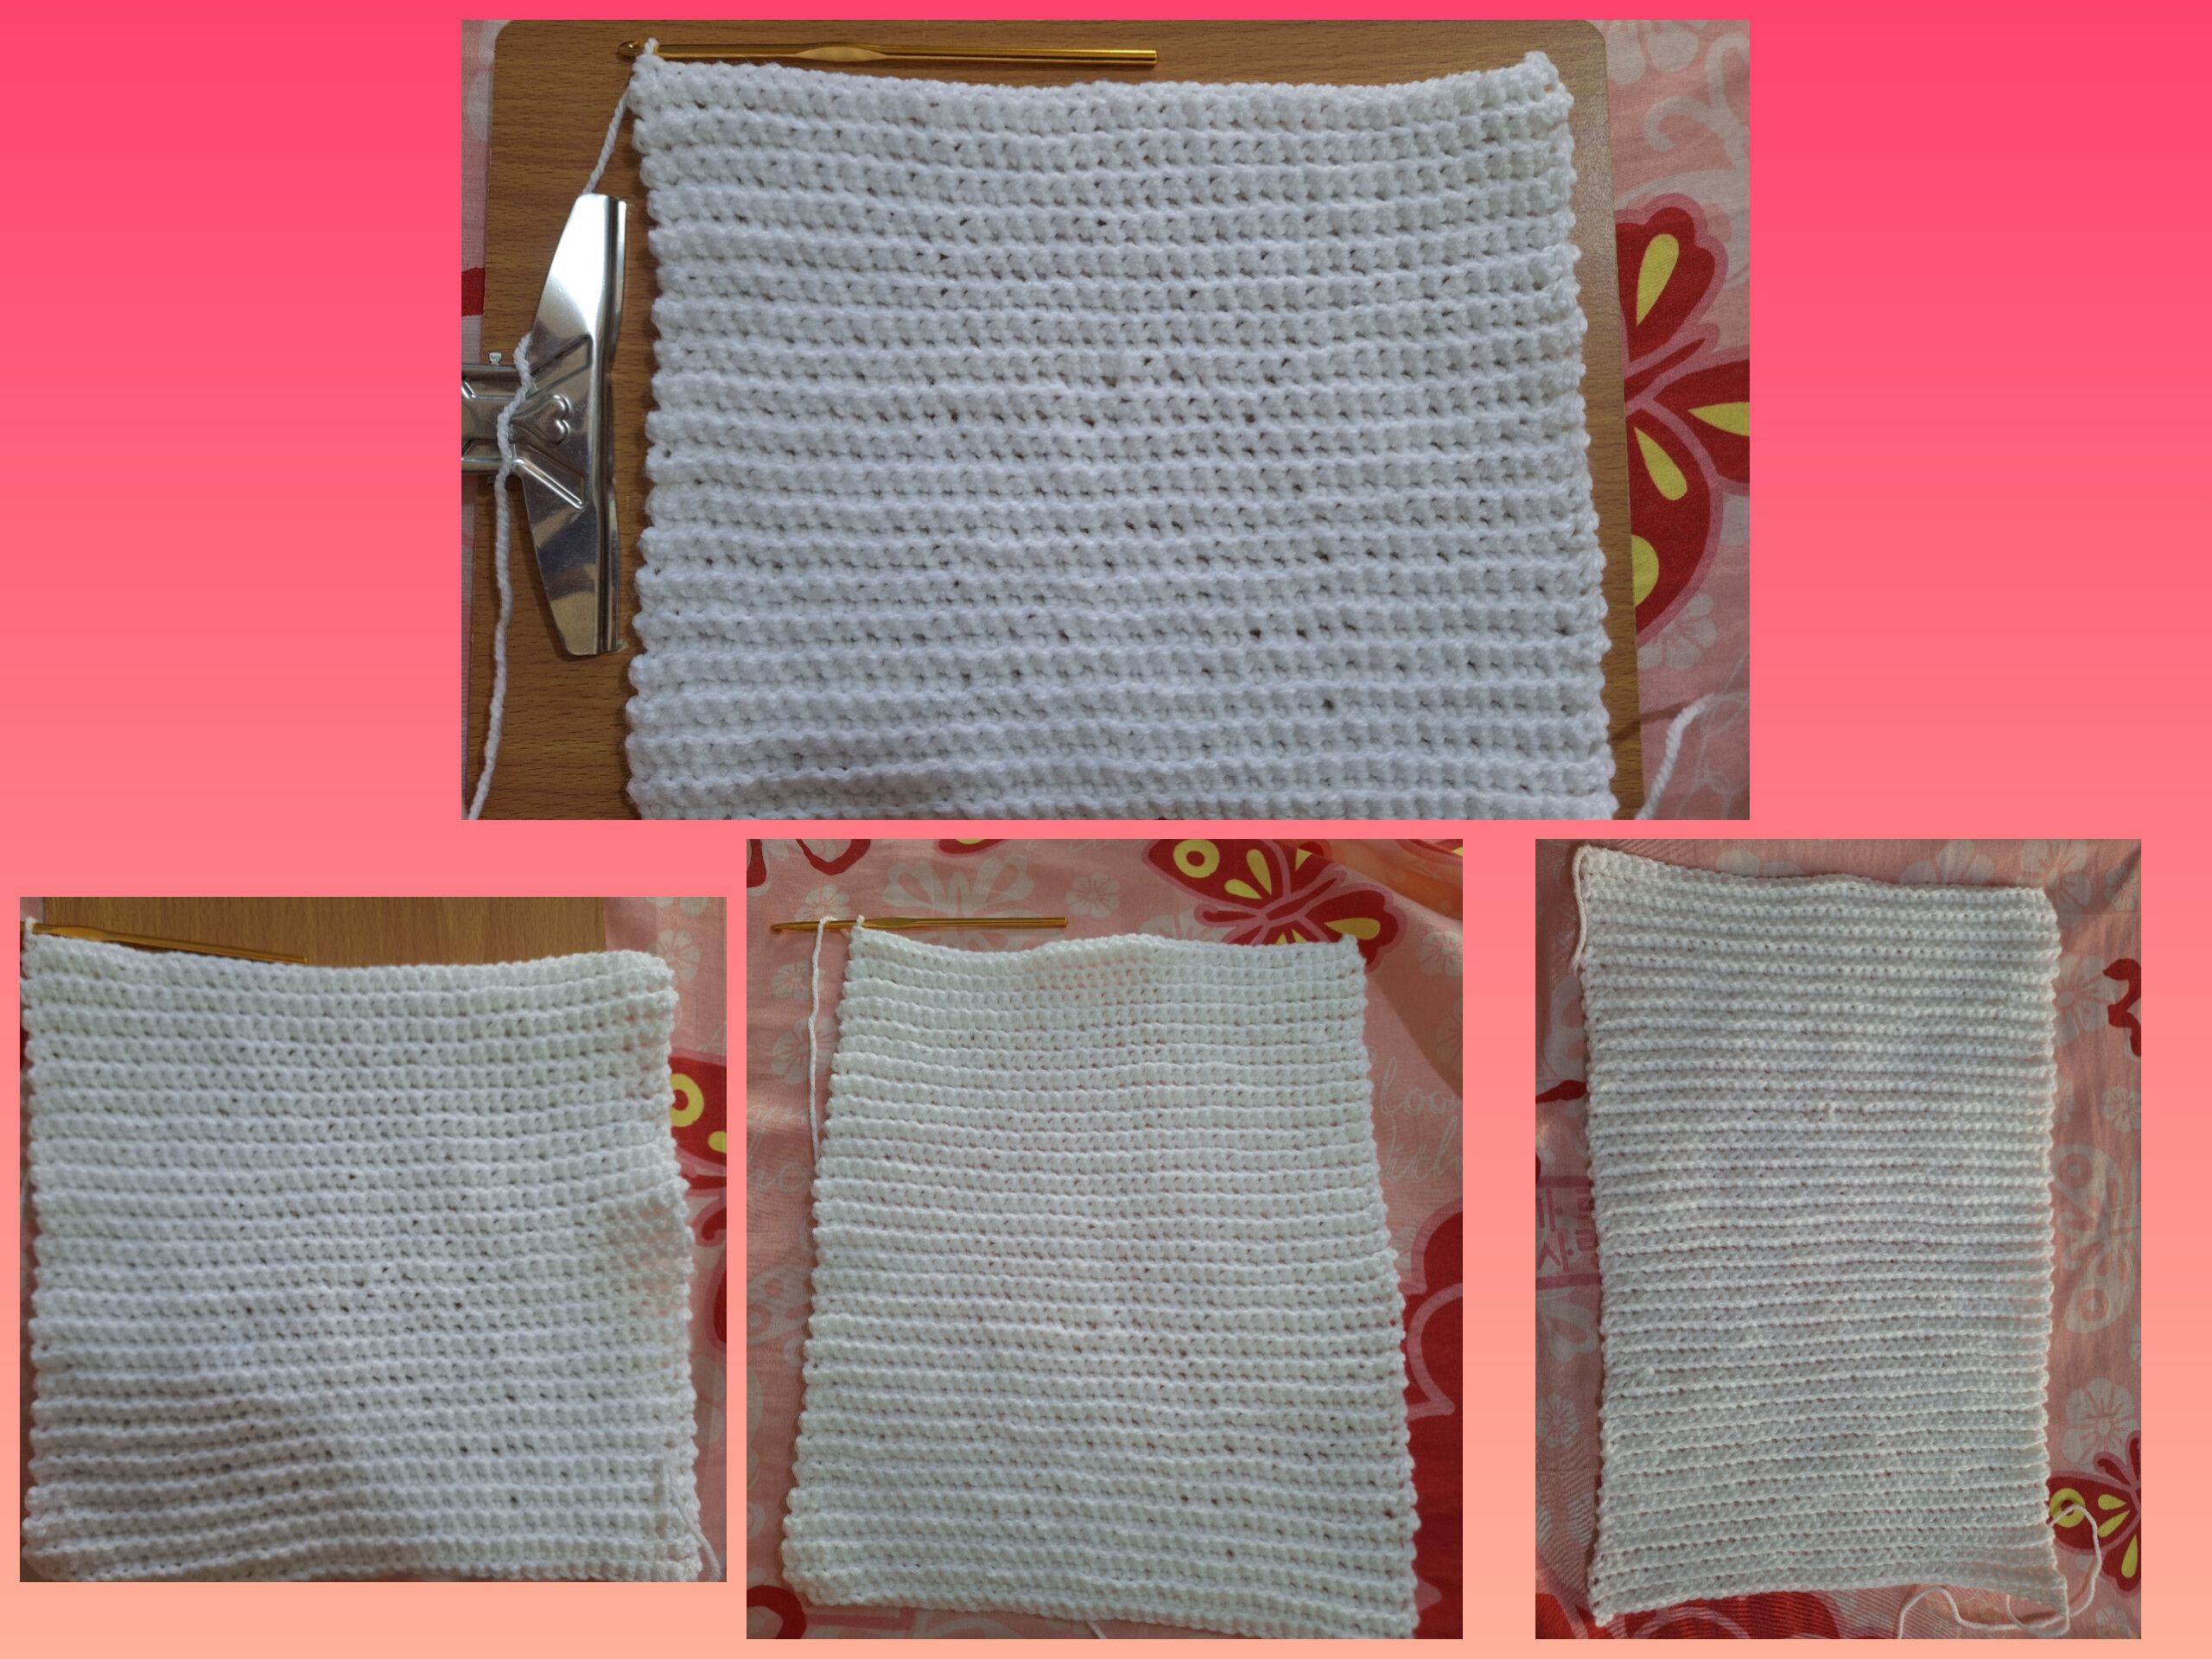  Enfrentar ambos lados del gorro y con ayuda de la aguja de ojal grande coser los lados, recomiendo emparejar las puntadas de modo que se pueda tomar cada lado la puntada con su opuesto creando una costura invisible. Coser de manera recta la parte superior del gorro, luego con la aguja y lana hacer una puntada de costura a cuatro dedos de distancia de cada esquina de manera diagonal, de este modo cuando se ponga el gorro en la cabeza se dará forma a las orejas de gatito. > Place the two sides of the hat together, right sides facing, and using a large needle, sew along the edges. I recommend matching the stitches on each side so that you sew through corresponding layers, creating an invisible seam. > > Sew the top of the hat straight across. Then, using the needle and yarn, make a stitch diagonally, four finger-widths away from each corner. This will help to shape the cat ears when the hat is worn. 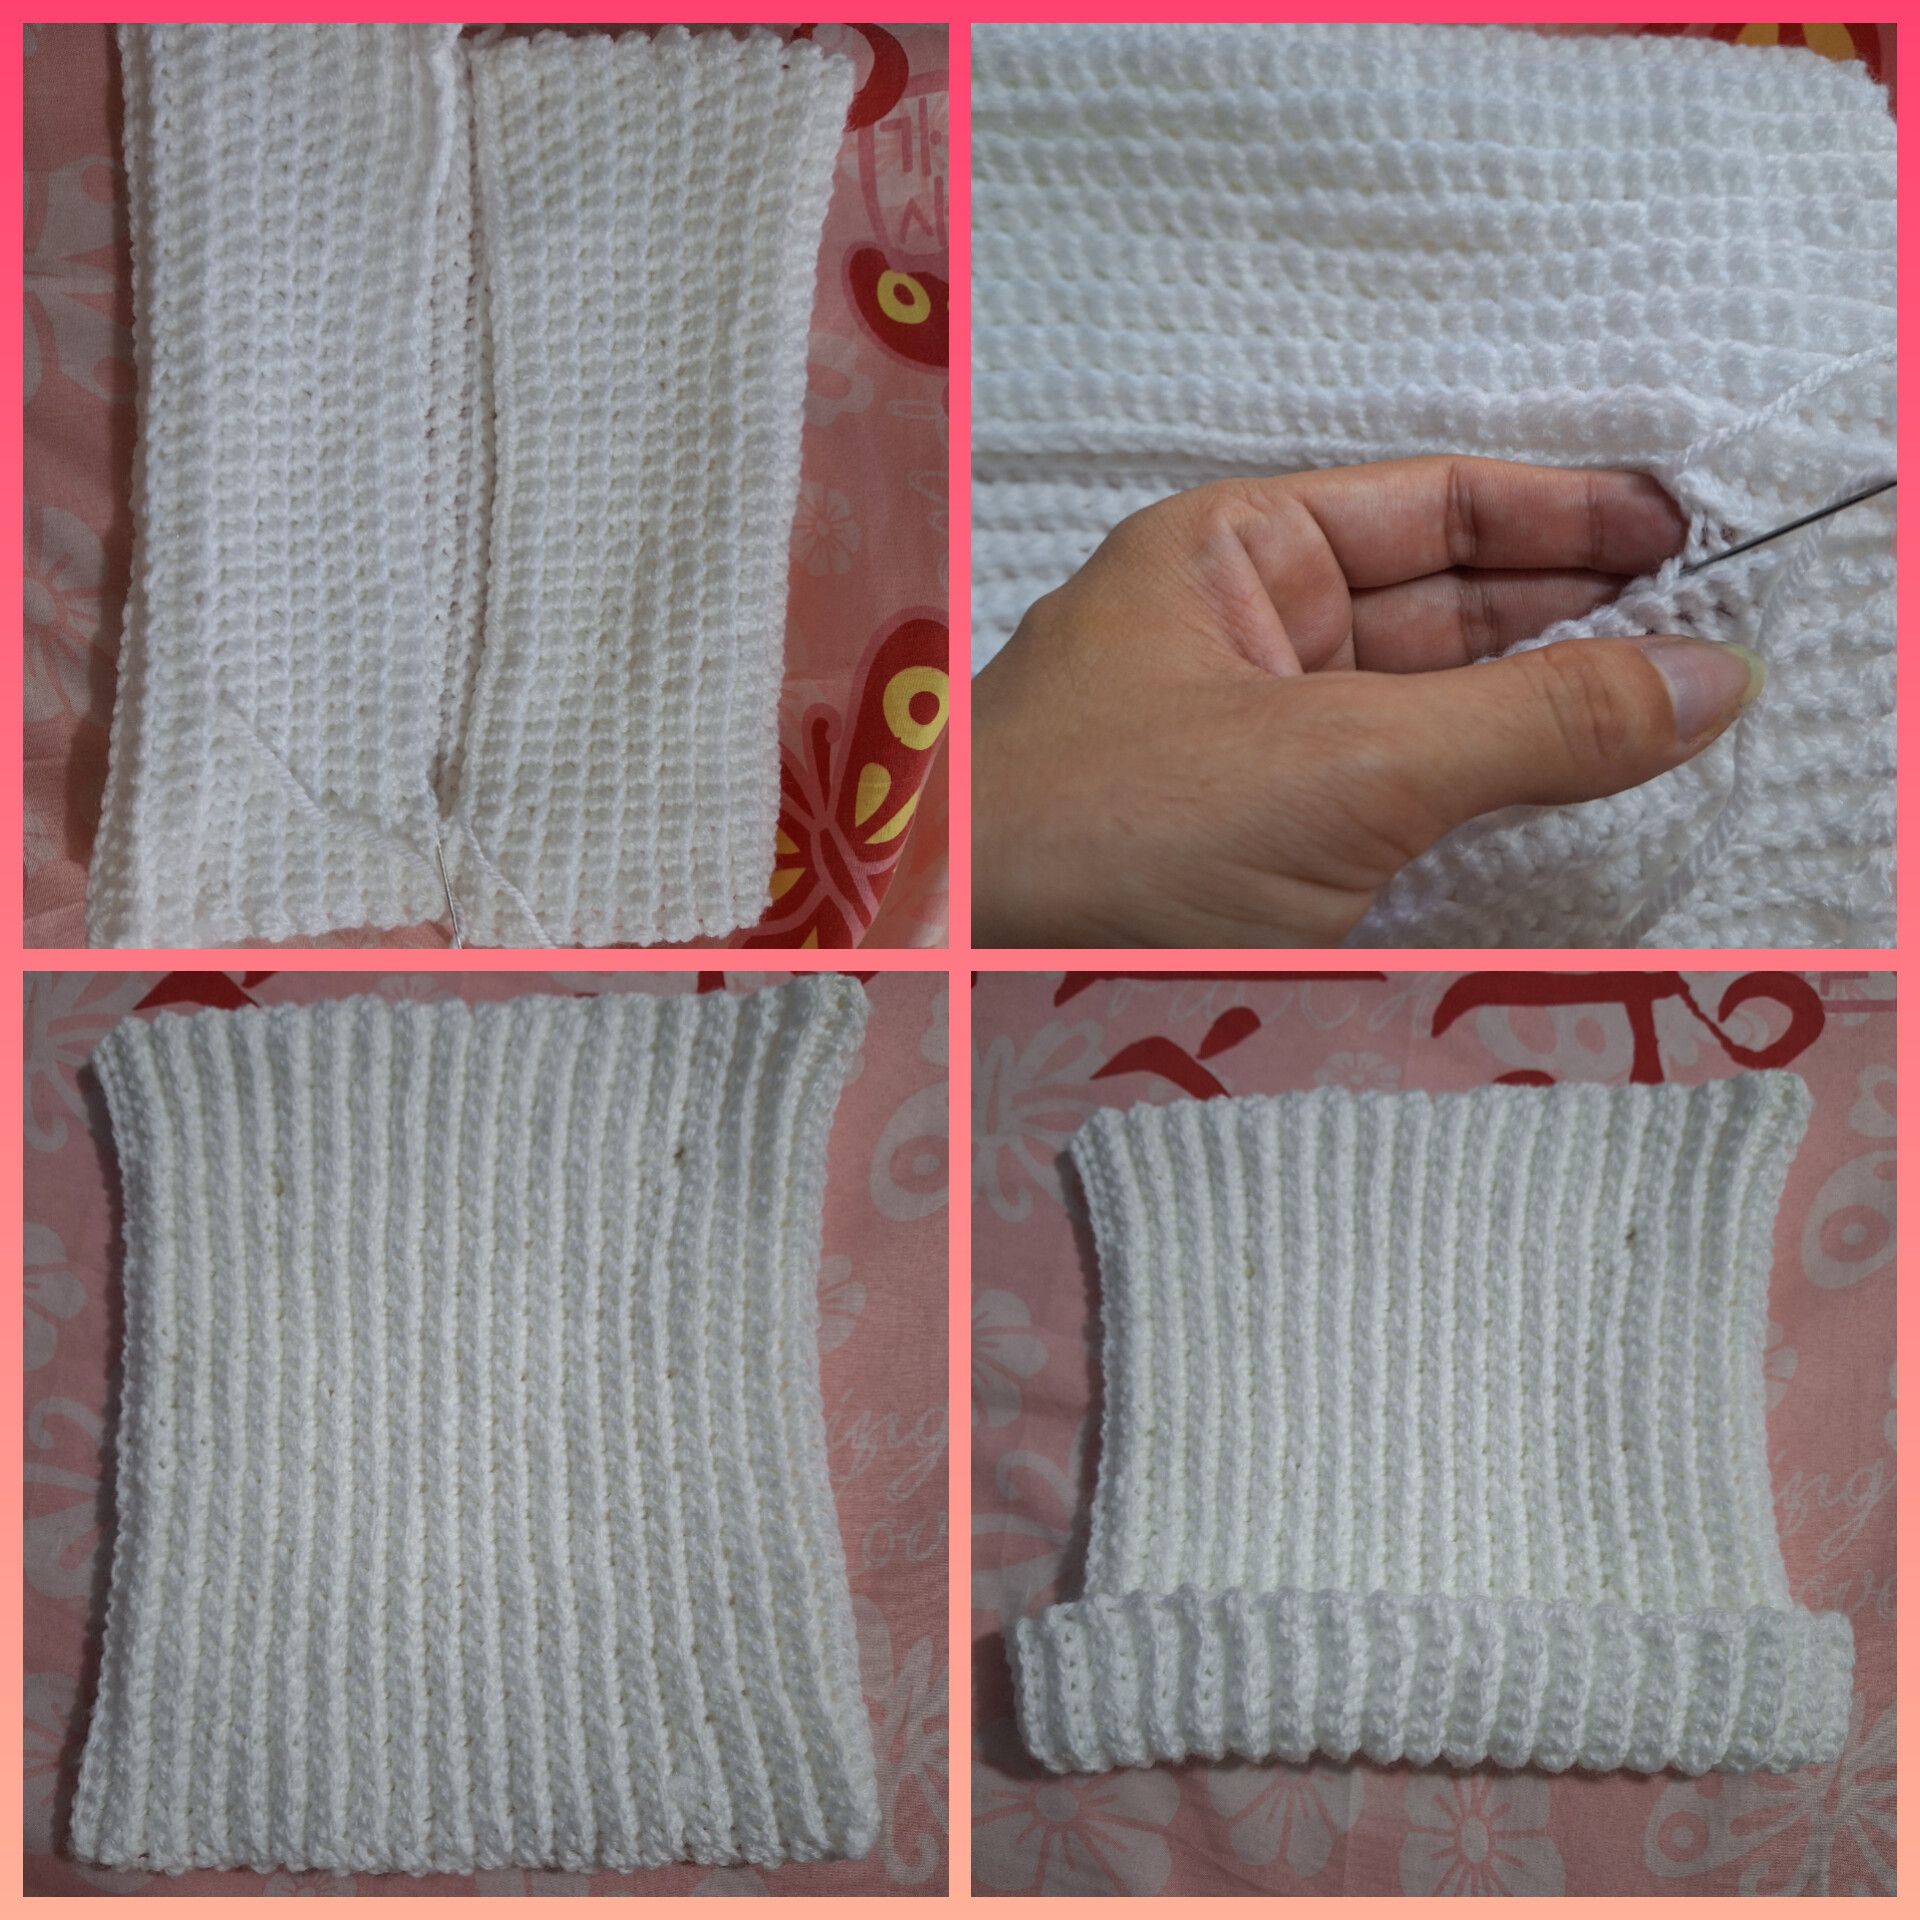  Para el lacito con lana de color rojo, hacer 30 cadenas de base y cerrar en círculo, luego hacer 8 hileras de puntos bajos, terminar con punto deslizado y dejar una hebra larga para dar vuelta en el centro del lazo, luego coser en la orejita del lado derecho del gorro. > For the bow made with red yarn, make 30 foundation chains and join them to form a circle. Then, work 8 rows of single crochet stitches, ending with a slip stitch and leaving a long tail of yarn. Fold the yarn in half and tie a knot in the center of the bow, then sew it onto the right ear of the hat. 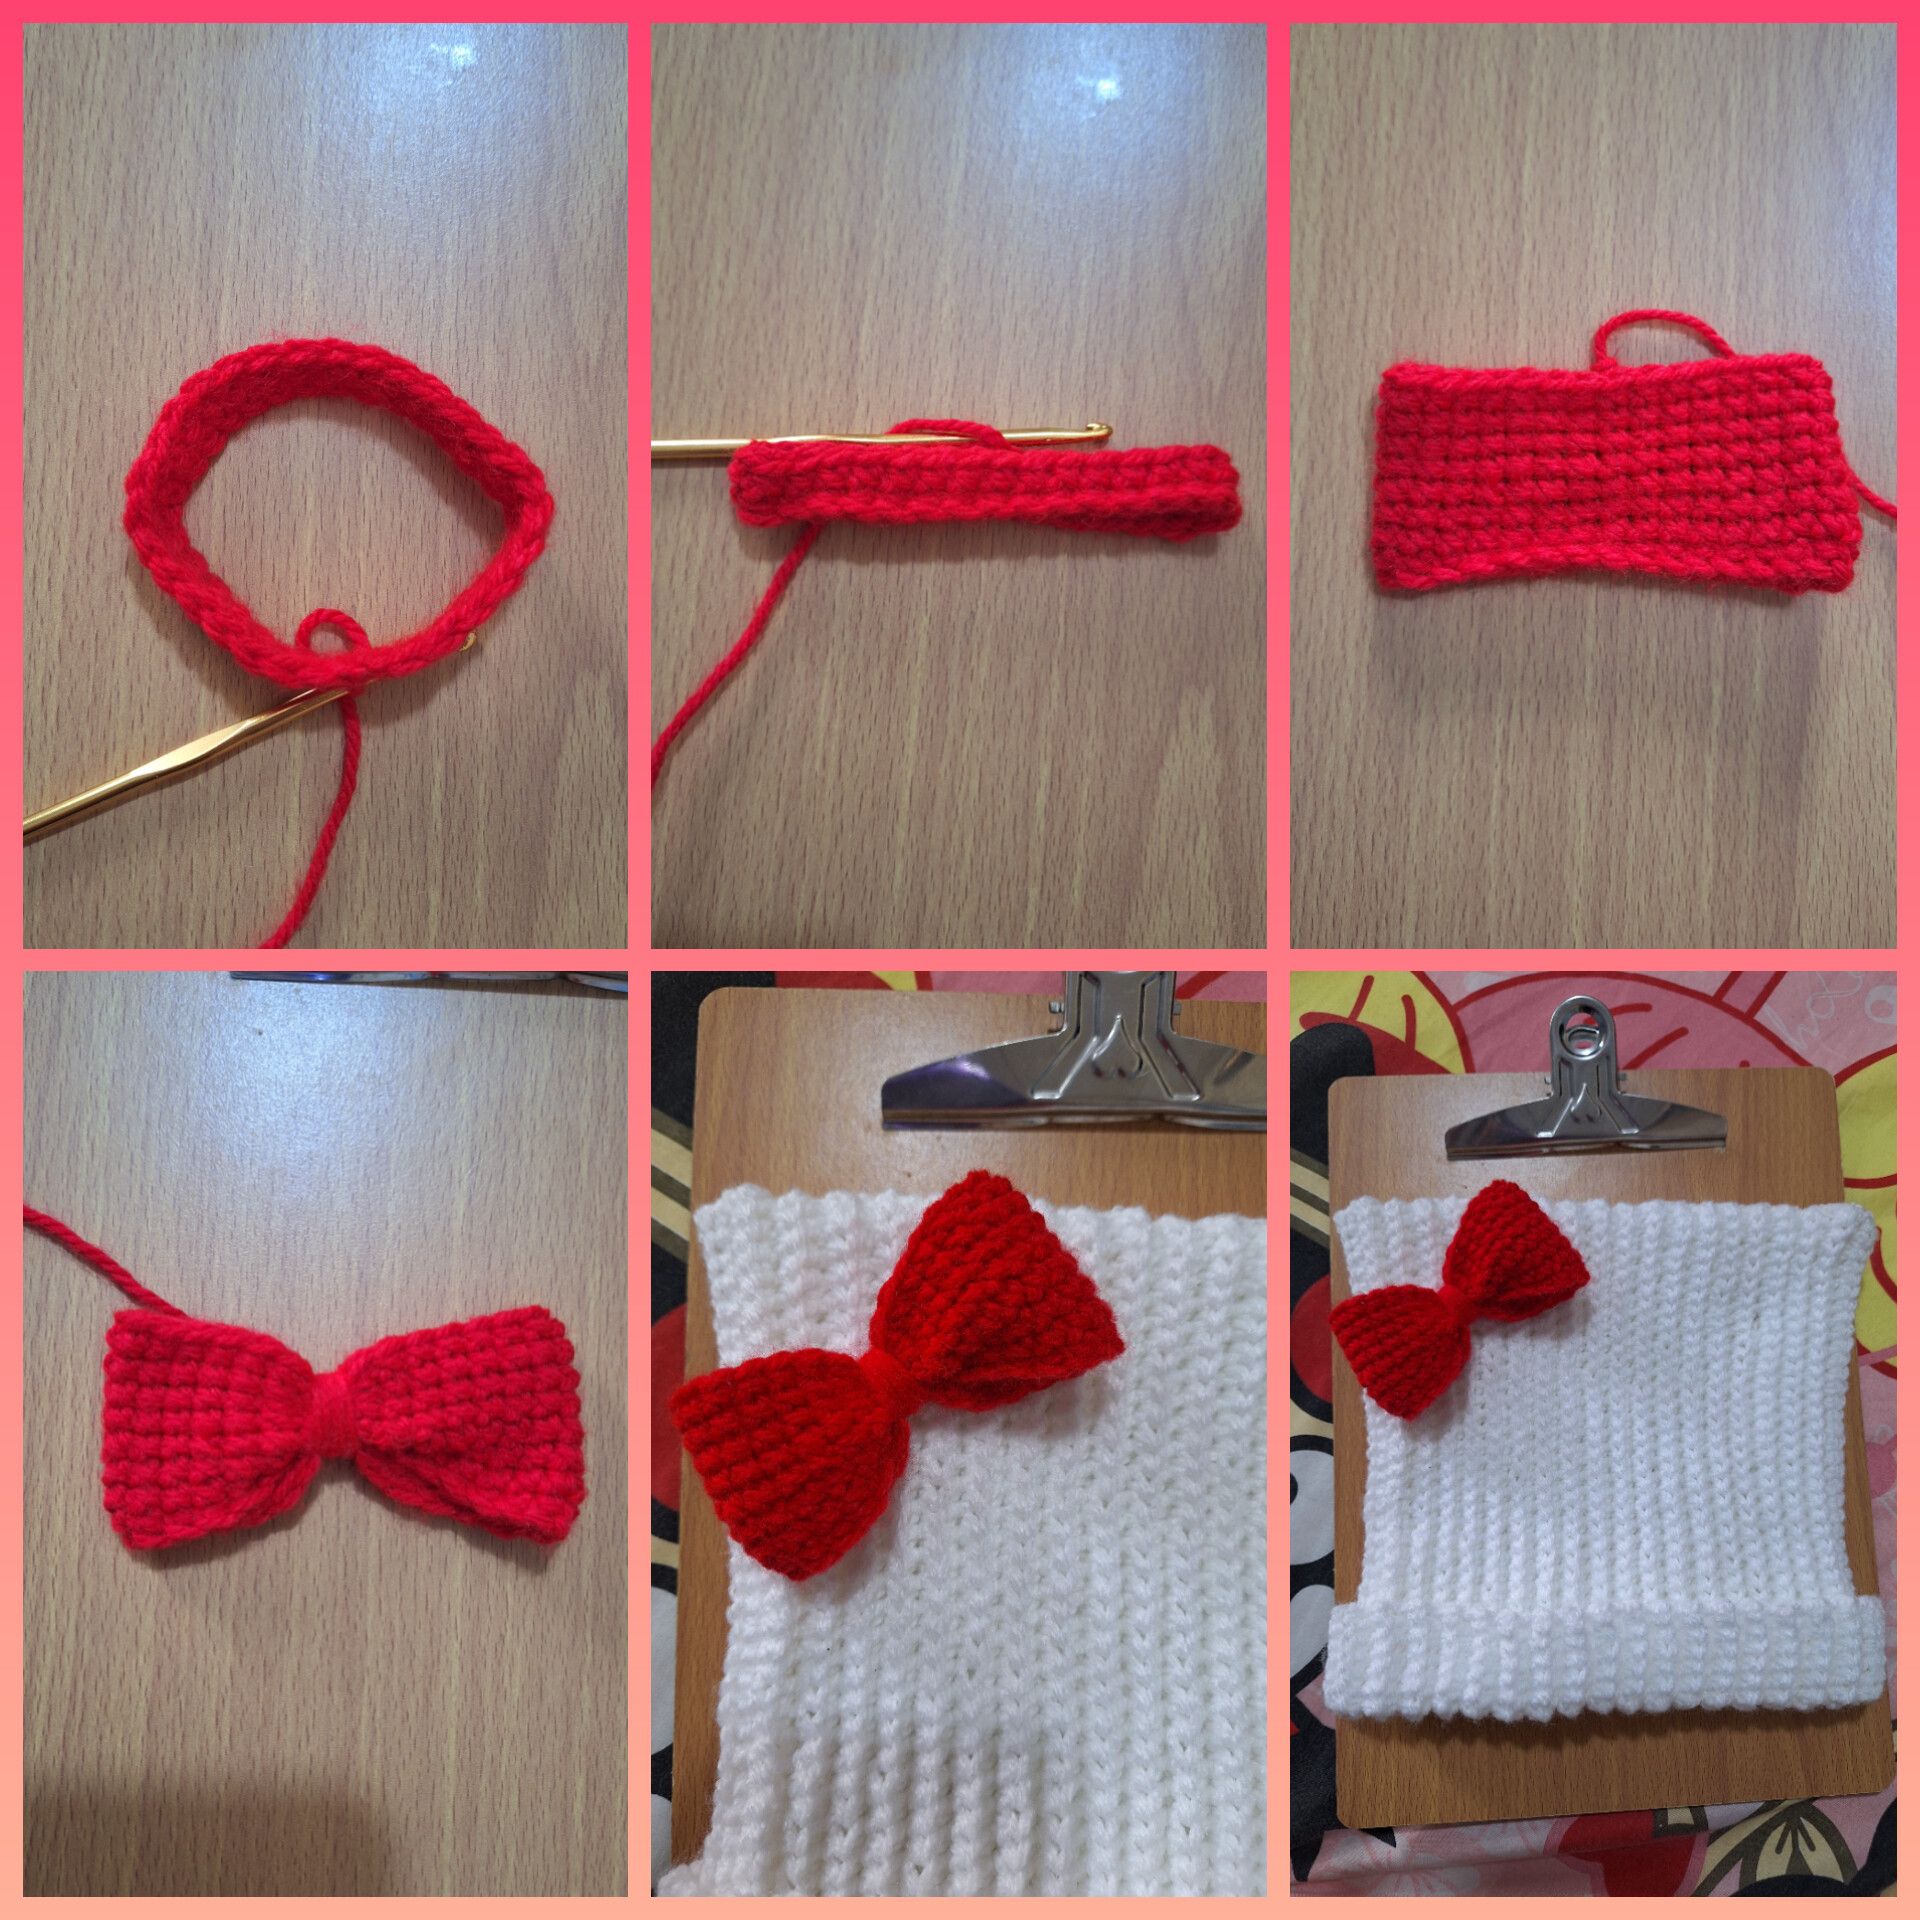 Resultado / Result
##### Imágenes tomadas con dispositivo Samsung A54. Portada editada en Inshot >##### Pictures taken with Samsung A54 device. Cover edited in Inshot 
##### Espero les haya gustado. Les invito a leer mis próximas publicaciones y siempre estaré dispuesta a responder sus preguntas y comentarios, también pueden seguirme y contactarme en cualquiera de mis redes sociales. ¡Muchas gracias! >##### I hope you liked it. I invite you to read my next publications and I will always be willing to answer your questions and comments, you can also follow me and contact me on any of my social networks. Thank you! [Facebook](https://www.facebook.com/irenenavarroart) [Twitter](https://twitter.com/irenenavarroart) [Instagram](https://www.instagram.com/irenenavarroarte/) [Ko-Fi](https://ko-fi.com/irenenavarroart) Discord: irenenavarroart#0361