¡Hola a todos! 👋
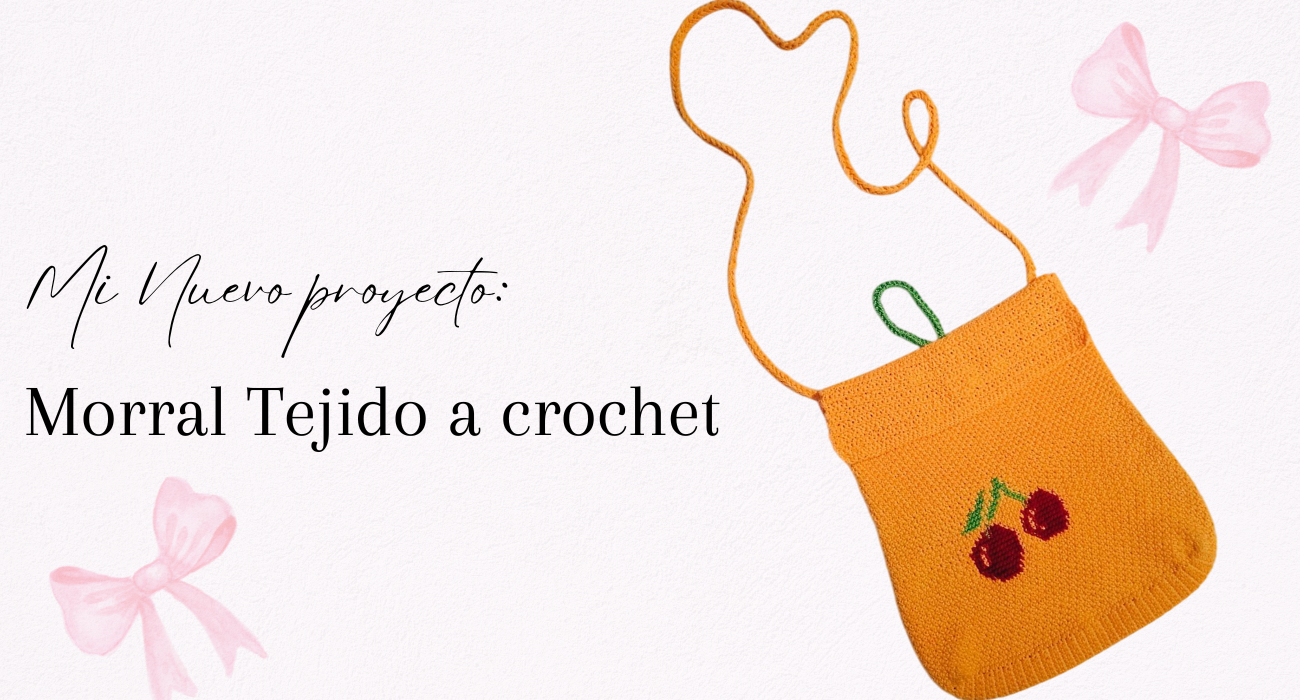
Hace un tiempo tenía planeado hacer un pequeño morral cruzado a crochet para mi mamá. Quería regalarle algo hecho con mis manos, algo que tuviera un toque especial y que pudiera usar en su día a día. En un principio pensé hacerlo solo con puntos básicos, algo sencillo y rápido, pero mientras lo planificaba se me ocurrió incorporar también la técnica del tapestry para darle un diseño diferente.
Mi idea inicial era tejer un cuadrado con el motivo hecho en tapestry y luego continuar el resto del morral con puntos normales. Sin embargo, mientras avanzaba me di cuenta de que podía integrar todo, sin separar una parte del diseño. Así que decidí mantener el mismo punto en toda la pieza y combinar el motivo directamente en el tejido principal. Fue un proceso que requirió más atención, pero también resultó mucho más entretenido y creativo.
Este pequeño morral cruzado no solo fue un regalo para mi mamá, sino también una experiencia bonita de aprendizaje, donde pude unir la simplicidad de los puntos básicos con la belleza de los diseños en tapestry.
>**Hello everyone! 👋**
>Some time ago, I had planned to make a small crossbody bag in crochet for my mom. I wanted to give her something handmade, something with a special touch that she could use in her everyday life. At first, I thought of making it only with basic stitches — something simple and quick — but while planning it, I came up with the idea of adding the tapestry technique to give it a different design.
>My initial idea was to crochet a square with the tapestry pattern and then continue the rest of the bag with regular stitches. However, as I went along, I realized I could integrate everything without separating one part of the design from another. So I decided to keep the same stitch throughout the piece and include the tapestry pattern directly into the main fabric. It required more attention, but it turned out to be much more fun and creative.
>This little crossbody bag was not only a gift for my mom but also a beautiful learning experience, where I was able to combine the simplicity of basic stitches with the beauty of tapestry designs.
---
#####
Materiales / Materials
#####
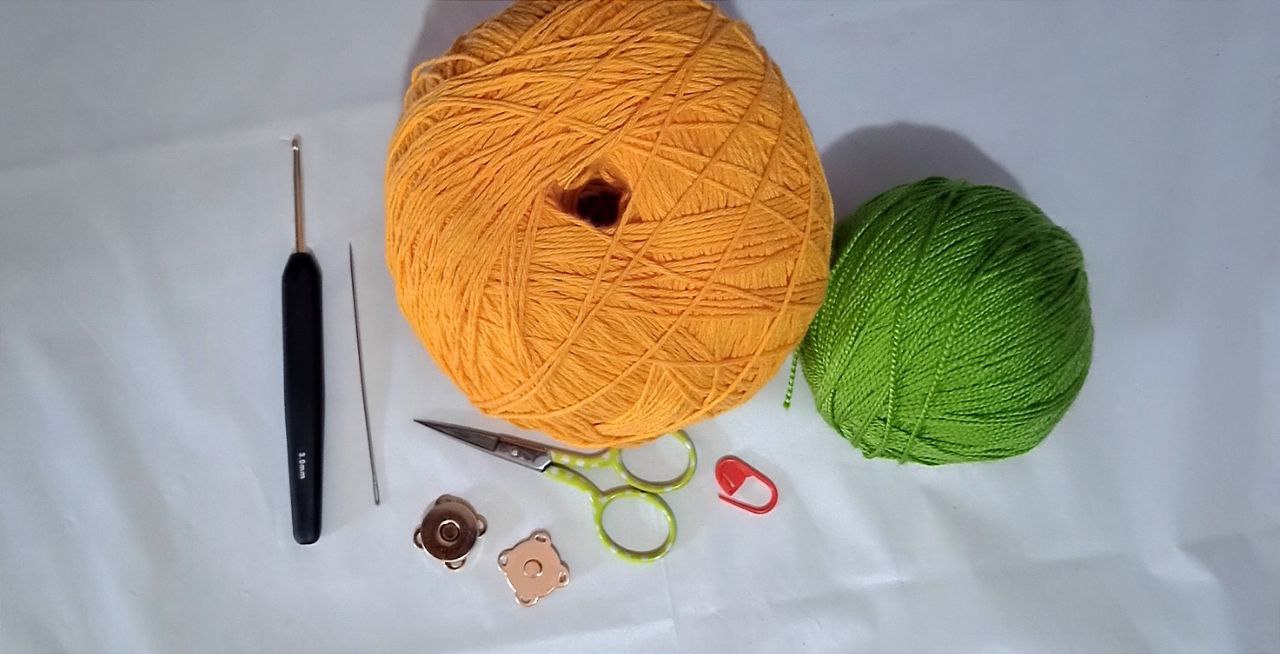
- Hilos de algodón verde, amarillo y rojo
- crochet 3 mm
- Tijeras.
- Aguja
- Marcadores
- Broche magnético para coser
>* Green, yellow, and red cotton yarn
>* 3 mm crochet hook
>* Scissors
>* Needle
>* Stitch markers
>* Magnetic snap for sewing
---
##
Elaboración / Elaboration
##
|
|
|
|
|
|
|
|
|
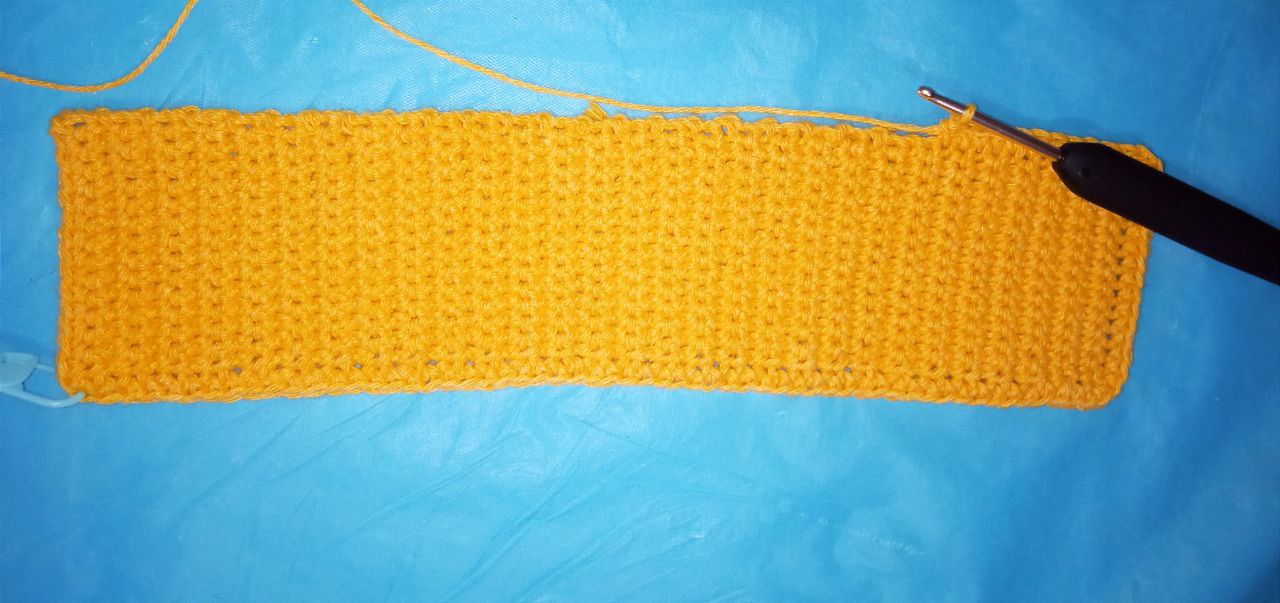
Comencé tejiendo 16 cadenas y luego hice puntos bajos en cada una de ellas. Al terminar, tejí una cadena al aire, giré el tejido y continué por el otro lado, también con puntos bajos hasta llegar al final.
Nuevamente hice una cadena al aire para seguir con puntos bajos, y repetí este proceso hasta formar un rectángulo con el tamaño que quería para la base del morral. Cuando llegué a la medida deseada, corté el hilo y escondí la hebra.
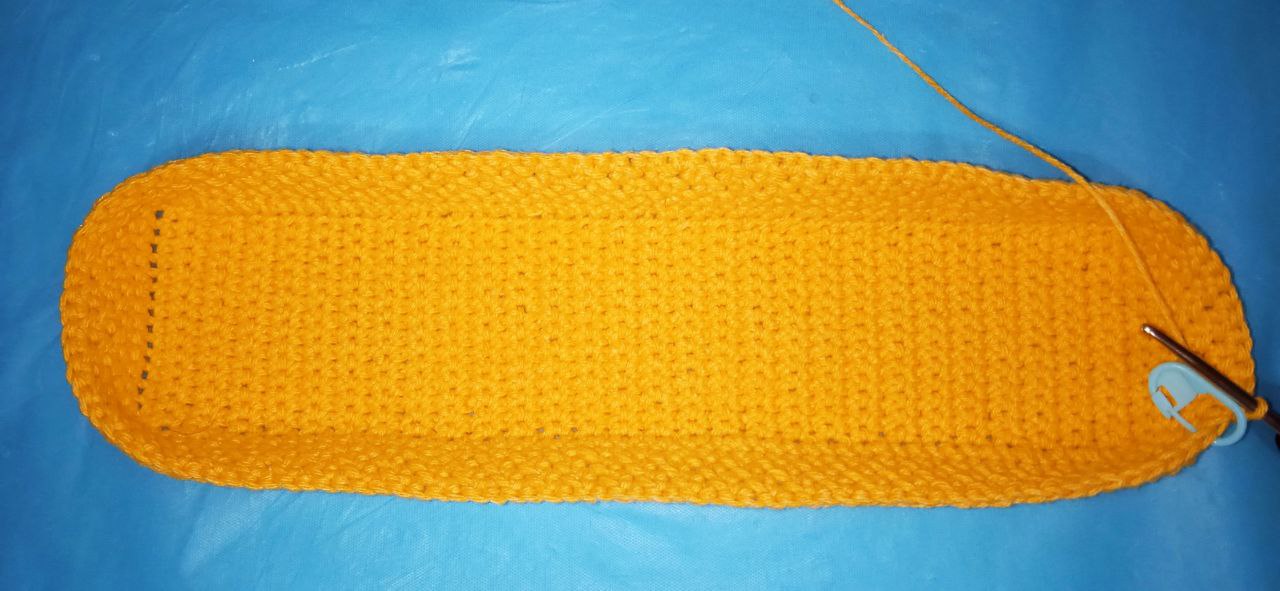
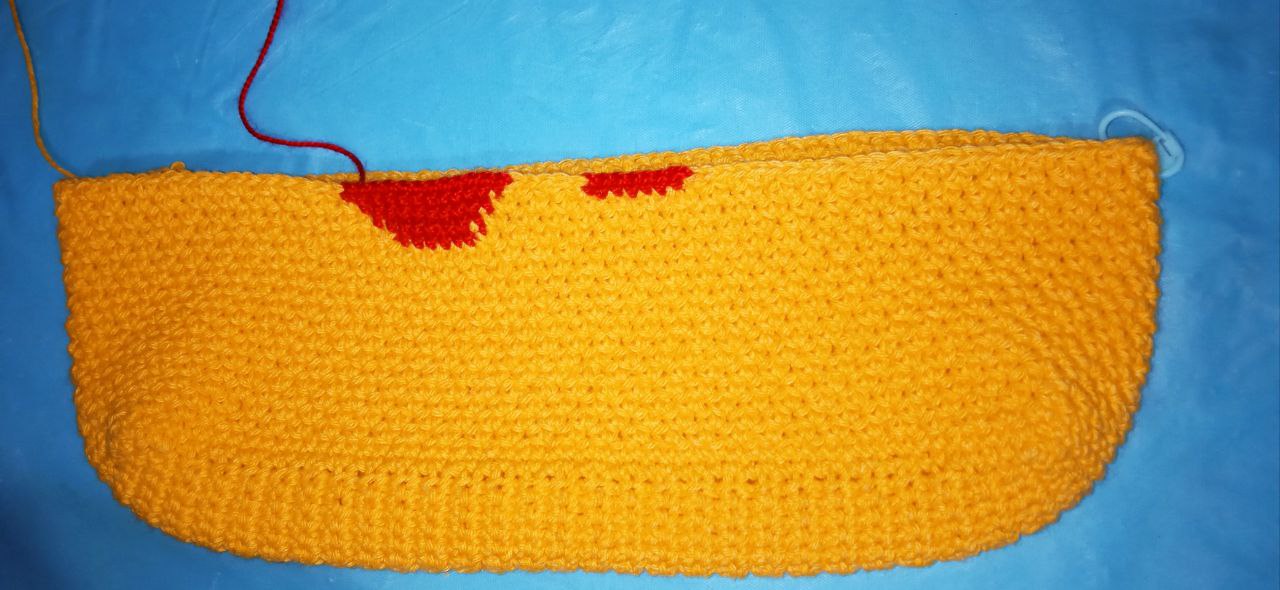
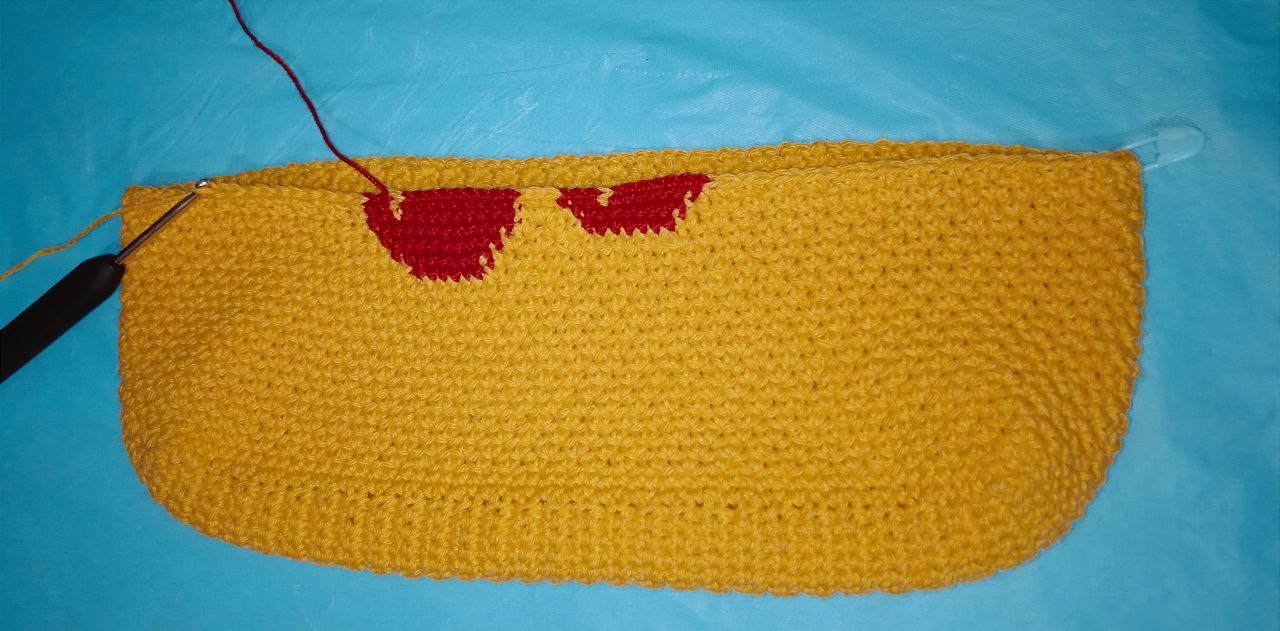
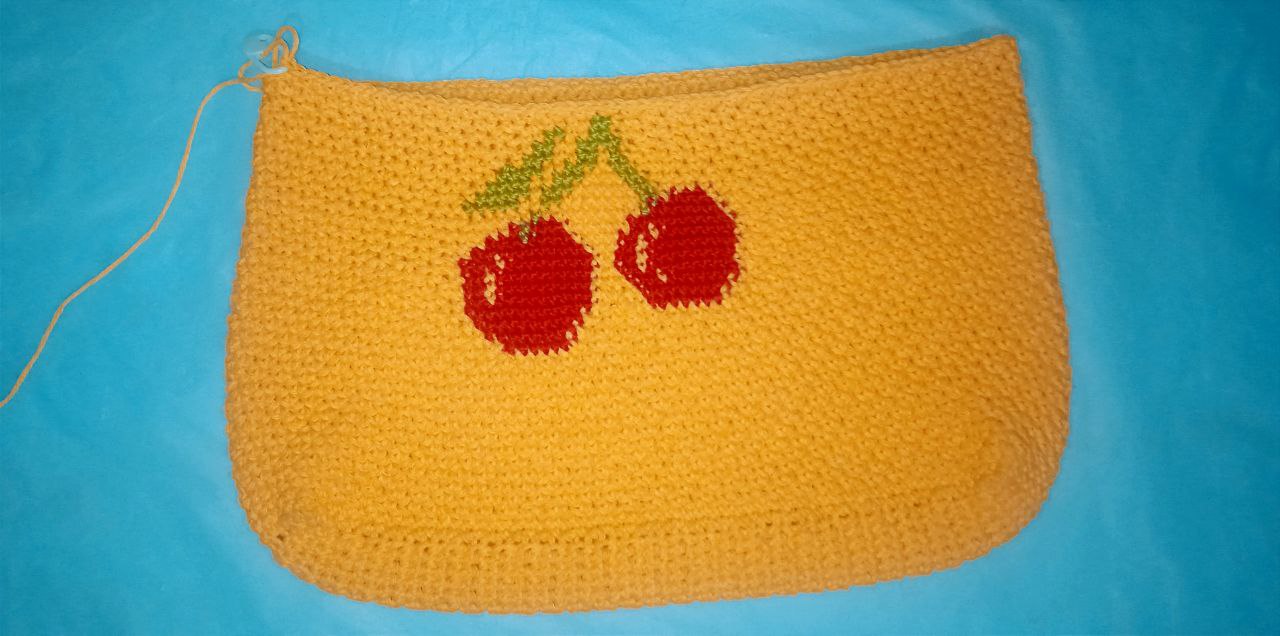
Para seguir con el morral, retomé el tejido desde una esquina y comencé a hacer aumentos, saltándome un punto cada vez. Continué de esta manera alrededor de toda la base, completando un total de 15 vueltas. A partir de ahí, empecé a tejer el motivo en tapestry que había elegido: dos cerezas.
El diseño lo realicé con puntos bajos, alternando los colores rojo y verde, y guiándome con un esquema cuadriculado para mantener la forma correcta. No podía usar el mismo tipo de punto con aumentos, ya que eso habría dejado el tejido muy abierto y las cerezas perderían su forma. Por eso mantuve los puntos bajos para el motivo, y cuando llegaba a la parte amarilla del morral, volví a combinar aumentos intercalando entre un punto bajo y un salto. De esta manera, fui dando forma al morral completo.
>I started by making 16 chains and then worked single crochet stitches into each one. When I finished, I made one chain, turned the work, and continued on the other side, also using single crochet stitches until reaching the end.
Once again, I made a chain to continue with single crochet stitches, and I repeated this process until I formed a rectangle the size I wanted for the base of the bag. When I reached the desired size, I cut the yarn and wove in the end.
>To continue with the bag, I began working from one corner and started making increases, skipping one stitch each time. I continued this way all around the base, completing a total of 15 rounds. From there, I started crocheting the tapestry pattern I had chosen — two cherries.
>I made the design using single crochet stitches, alternating between red and green yarns, and followed a small grid chart to keep the correct shape. I couldn’t use the same stitch pattern with increases, since that would have made the fabric too loose and the cherries would lose their shape. So I kept working single crochets for the tapestry section, and when I reached the yellow part of the bag, I went back to alternating increases — making an increase and then skipping a stitch. This way, I shaped the entire bag.
---
|
|
|
|
|
|
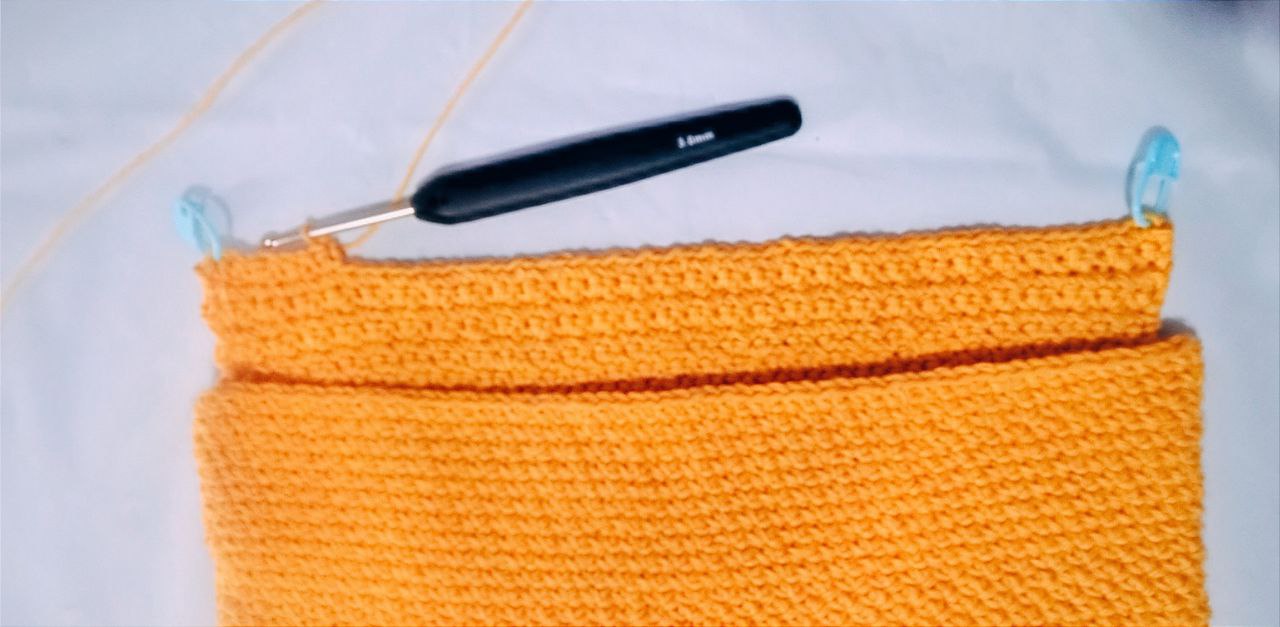
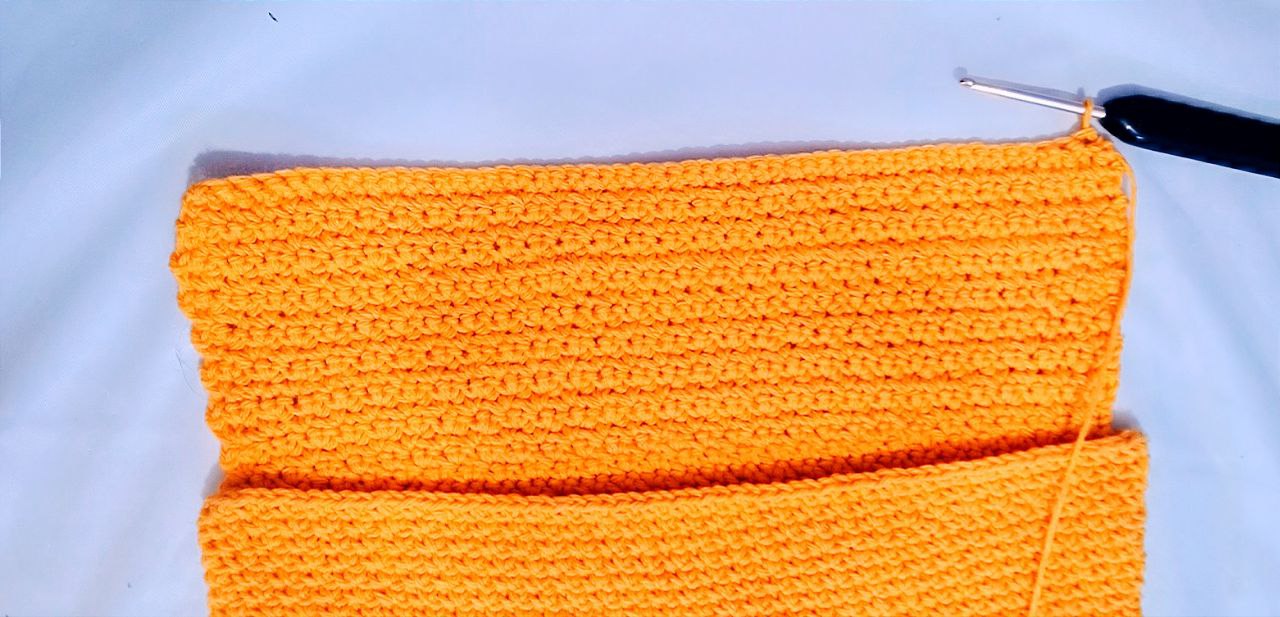
A continuación, comencé a tejer la solapa para cerrar el morral. Tomé uno de los extremos en la parte trasera del bolso y empecé a tejer utilizando los mismos puntos que antes, es decir, haciendo aumentos y saltándome un punto.
Al llegar a una esquina, tejí una cadena al aire, giré la labor y continué del mismo modo, repitiendo el patrón hasta alcanzar el largo que quería para la solapa. Esta parte la realicé únicamente en la parte trasera del morral.
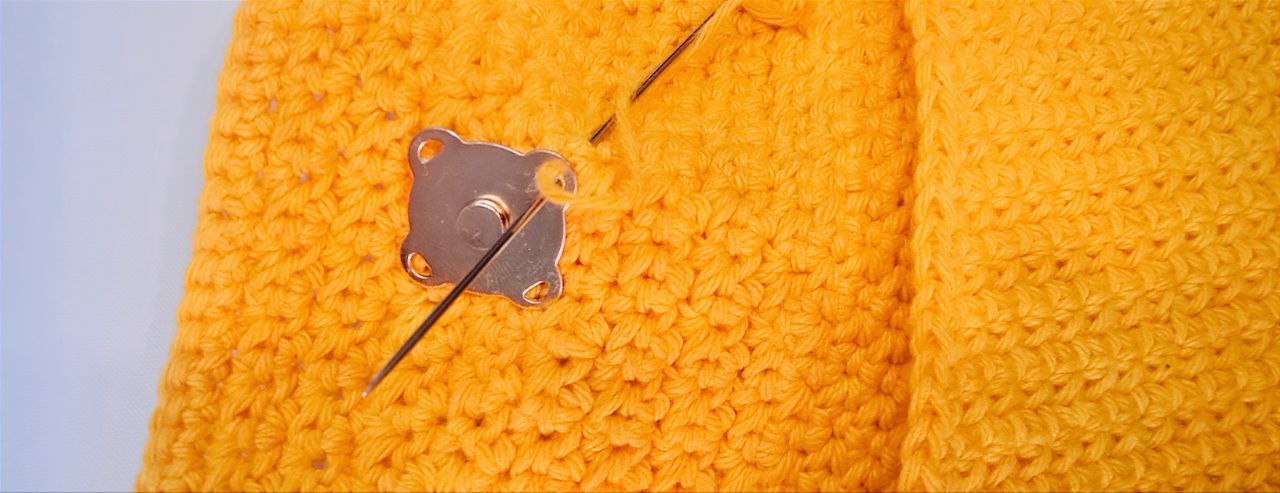
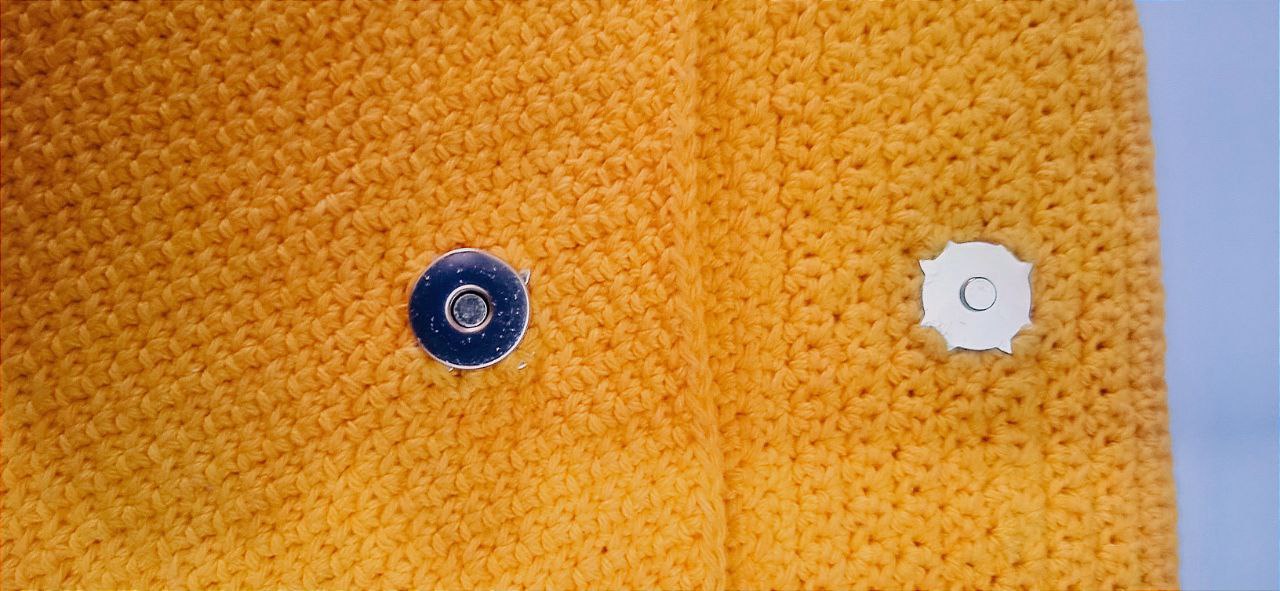
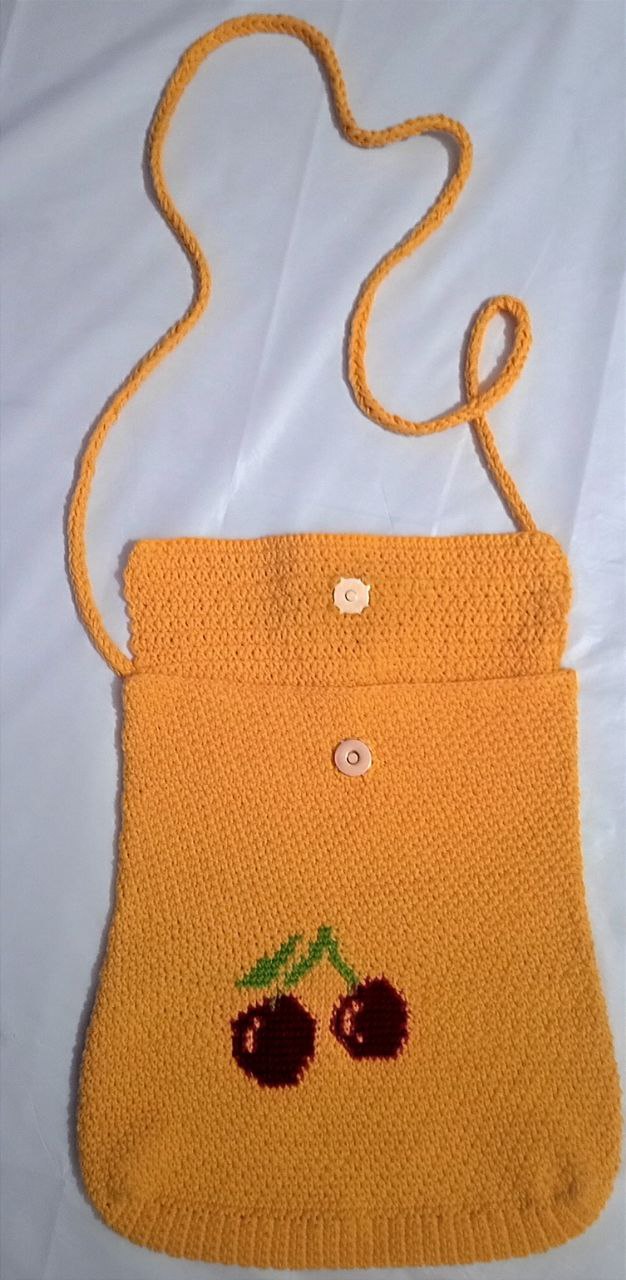
Finalmente, tomé el broche magnético y lo cosí a la solapa para poder cerrar el bolso de manera práctica y segura.
>Next, I started crocheting the flap to close the bag. I took one of the ends on the back side of the bag and began working using the same stitches as before — making increases and skipping one stitch.
When I reached a corner, I made one chain, turned the work, and continued in the same way, repeating the pattern until I reached the desired length for the flap. This part was done only on the back side of the bag.
Finally, I took the magnetic snap and sewed it onto the flap to close the bag in a practical and secure way.
---
|

|
|
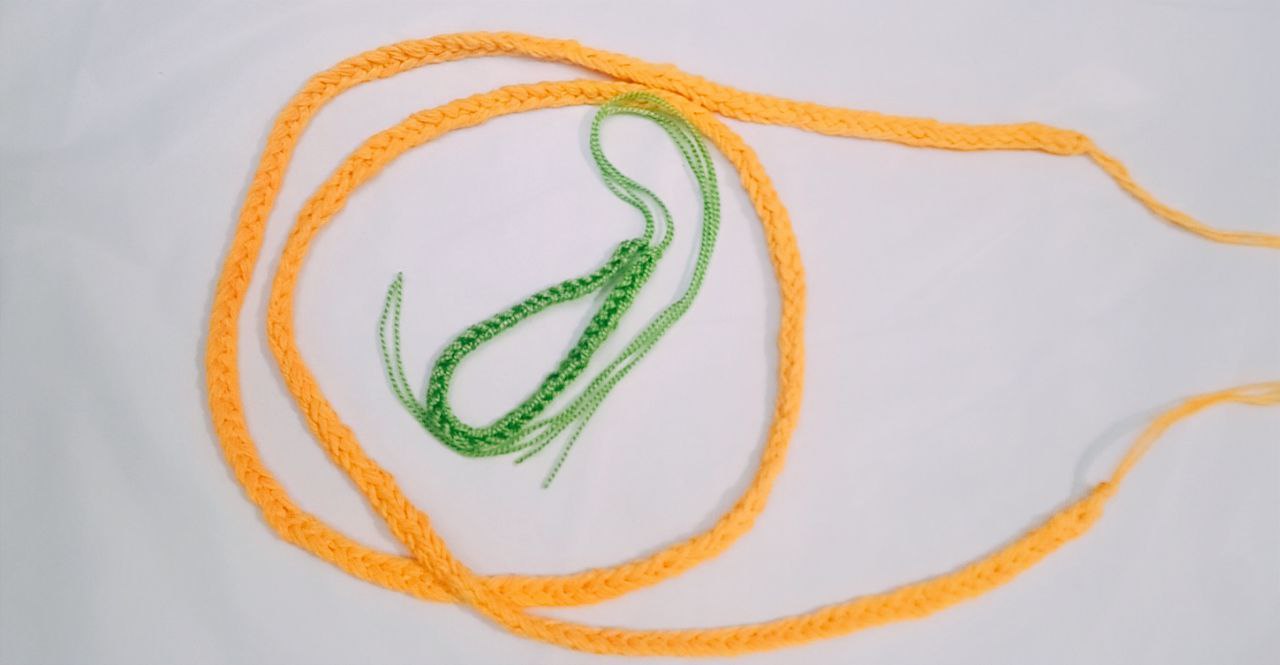
Para hacer la correa, opté por un diseño básico y luego simplemente la cosí al morral. No quise agregar herrajes, ya que se trata de un bolso sencillo y los que tenía eran demasiado grandes.
También hice un pequeño lazo en color verde para poder colgarlo.
Para tejer la correa, comencé con dos cadenas. En la segunda cadena hice un punto bajo, luego saqué el crochet de la primera cadena e hice un punto bajo en la segunda. Después tomé la cadena que había dejado fuera del crochet y también hice un punto bajo en ella.
Nuevamente me quedaron dos cadenas en el crochet: saqué la primera y tejí un punto bajo en la segunda, luego volví a tomar la cadena que había dejado afuera e hice otro punto bajo allí. Fui repitiendo este proceso una y otra vez hasta alcanzar el largo que quería para la correa.
Como pueden ver, el resultado es una especie de trenza. Para darle más firmeza y grosor, utilicé el hilo de algodón doble.
>For the strap, I chose a simple design and then just sewed it onto the bag. I didn’t want to add any hardware since it’s a small, simple bag, and the ones I had were too large.
I also made a small green loop so it could be hung up.
>To crochet the strap, I started with two chains. In the second chain, I made a single crochet stitch, then removed the hook from the first chain and made another single crochet in the second chain. After that, I picked up the chain I had left off the hook and made a single crochet in it as well.
Once again, I had two loops on the hook — I removed the first one and made a single crochet in the second, then went back to the loop I had left aside and worked another single crochet into it. I repeated this process over and over until the strap reached the length I wanted.
>As you can see, the result looks like a kind of braid. To make the strap thicker and sturdier, I used double strands of cotton yarn.
---
|
|
|
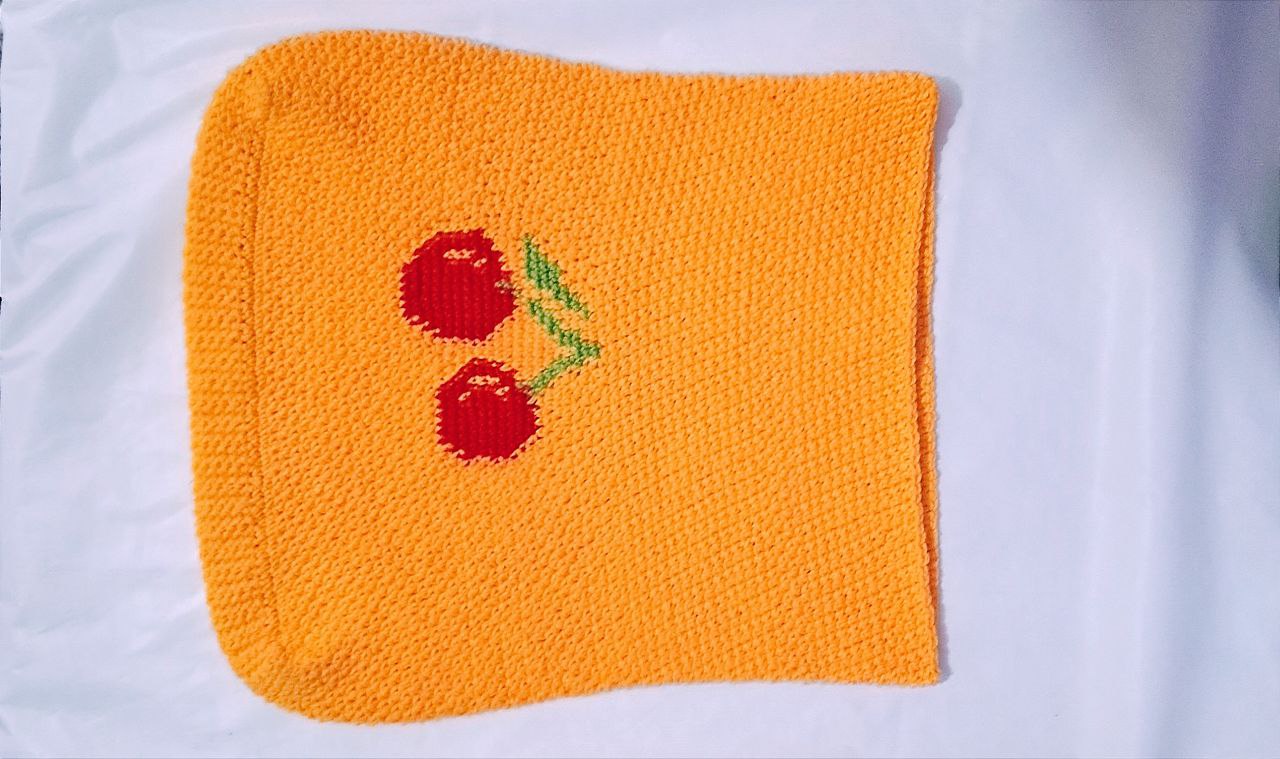
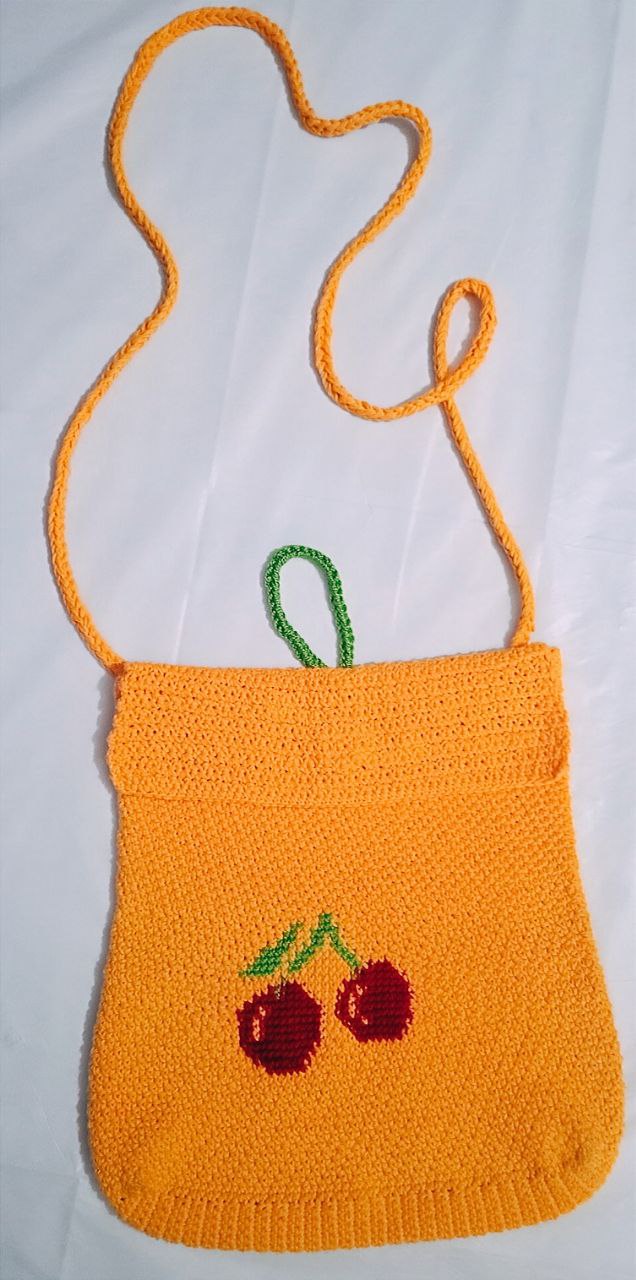
Y bueno, aquí les muestro el resultado final. No fue nada fácil, ¡pero valió la pena cada puntada! Al final, entre tanto hilo, paciencia… y uno que otro pinchazo, salió algo que me dejó muy contenta 😊.
La idea de este morral nació de la necesidad de hacer algo práctico, pero también bonito. Siempre me han gustado los bolsos tejidos, sobre todo los que tienen un toque artesanal y único. Pensé que hacer algo con mis propias manos sería un detalle especial para mi mamá, algo que no se consigue en ninguna tienda. Cada puntada tiene un poco de paciencia, cariño y dedicación, y eso es lo que más valoro de este tipo de creaciones.
>And well, here’s the final result. It wasn’t easy, but every stitch was worth it! In the end, after all the yarn, patience… and a few little pricks along the way, it turned into something I’m really happy with 😊.
>The idea for this bag was born from the need to make something practical, but also beautiful. I’ve always loved handmade bags, especially those with a unique, artisanal touch. I thought creating something with my own hands would be a special gift for my mom — something you just can’t find in any store. Each stitch carries a bit of patience, love, and dedication, and that’s what I value most about this kind of creation.