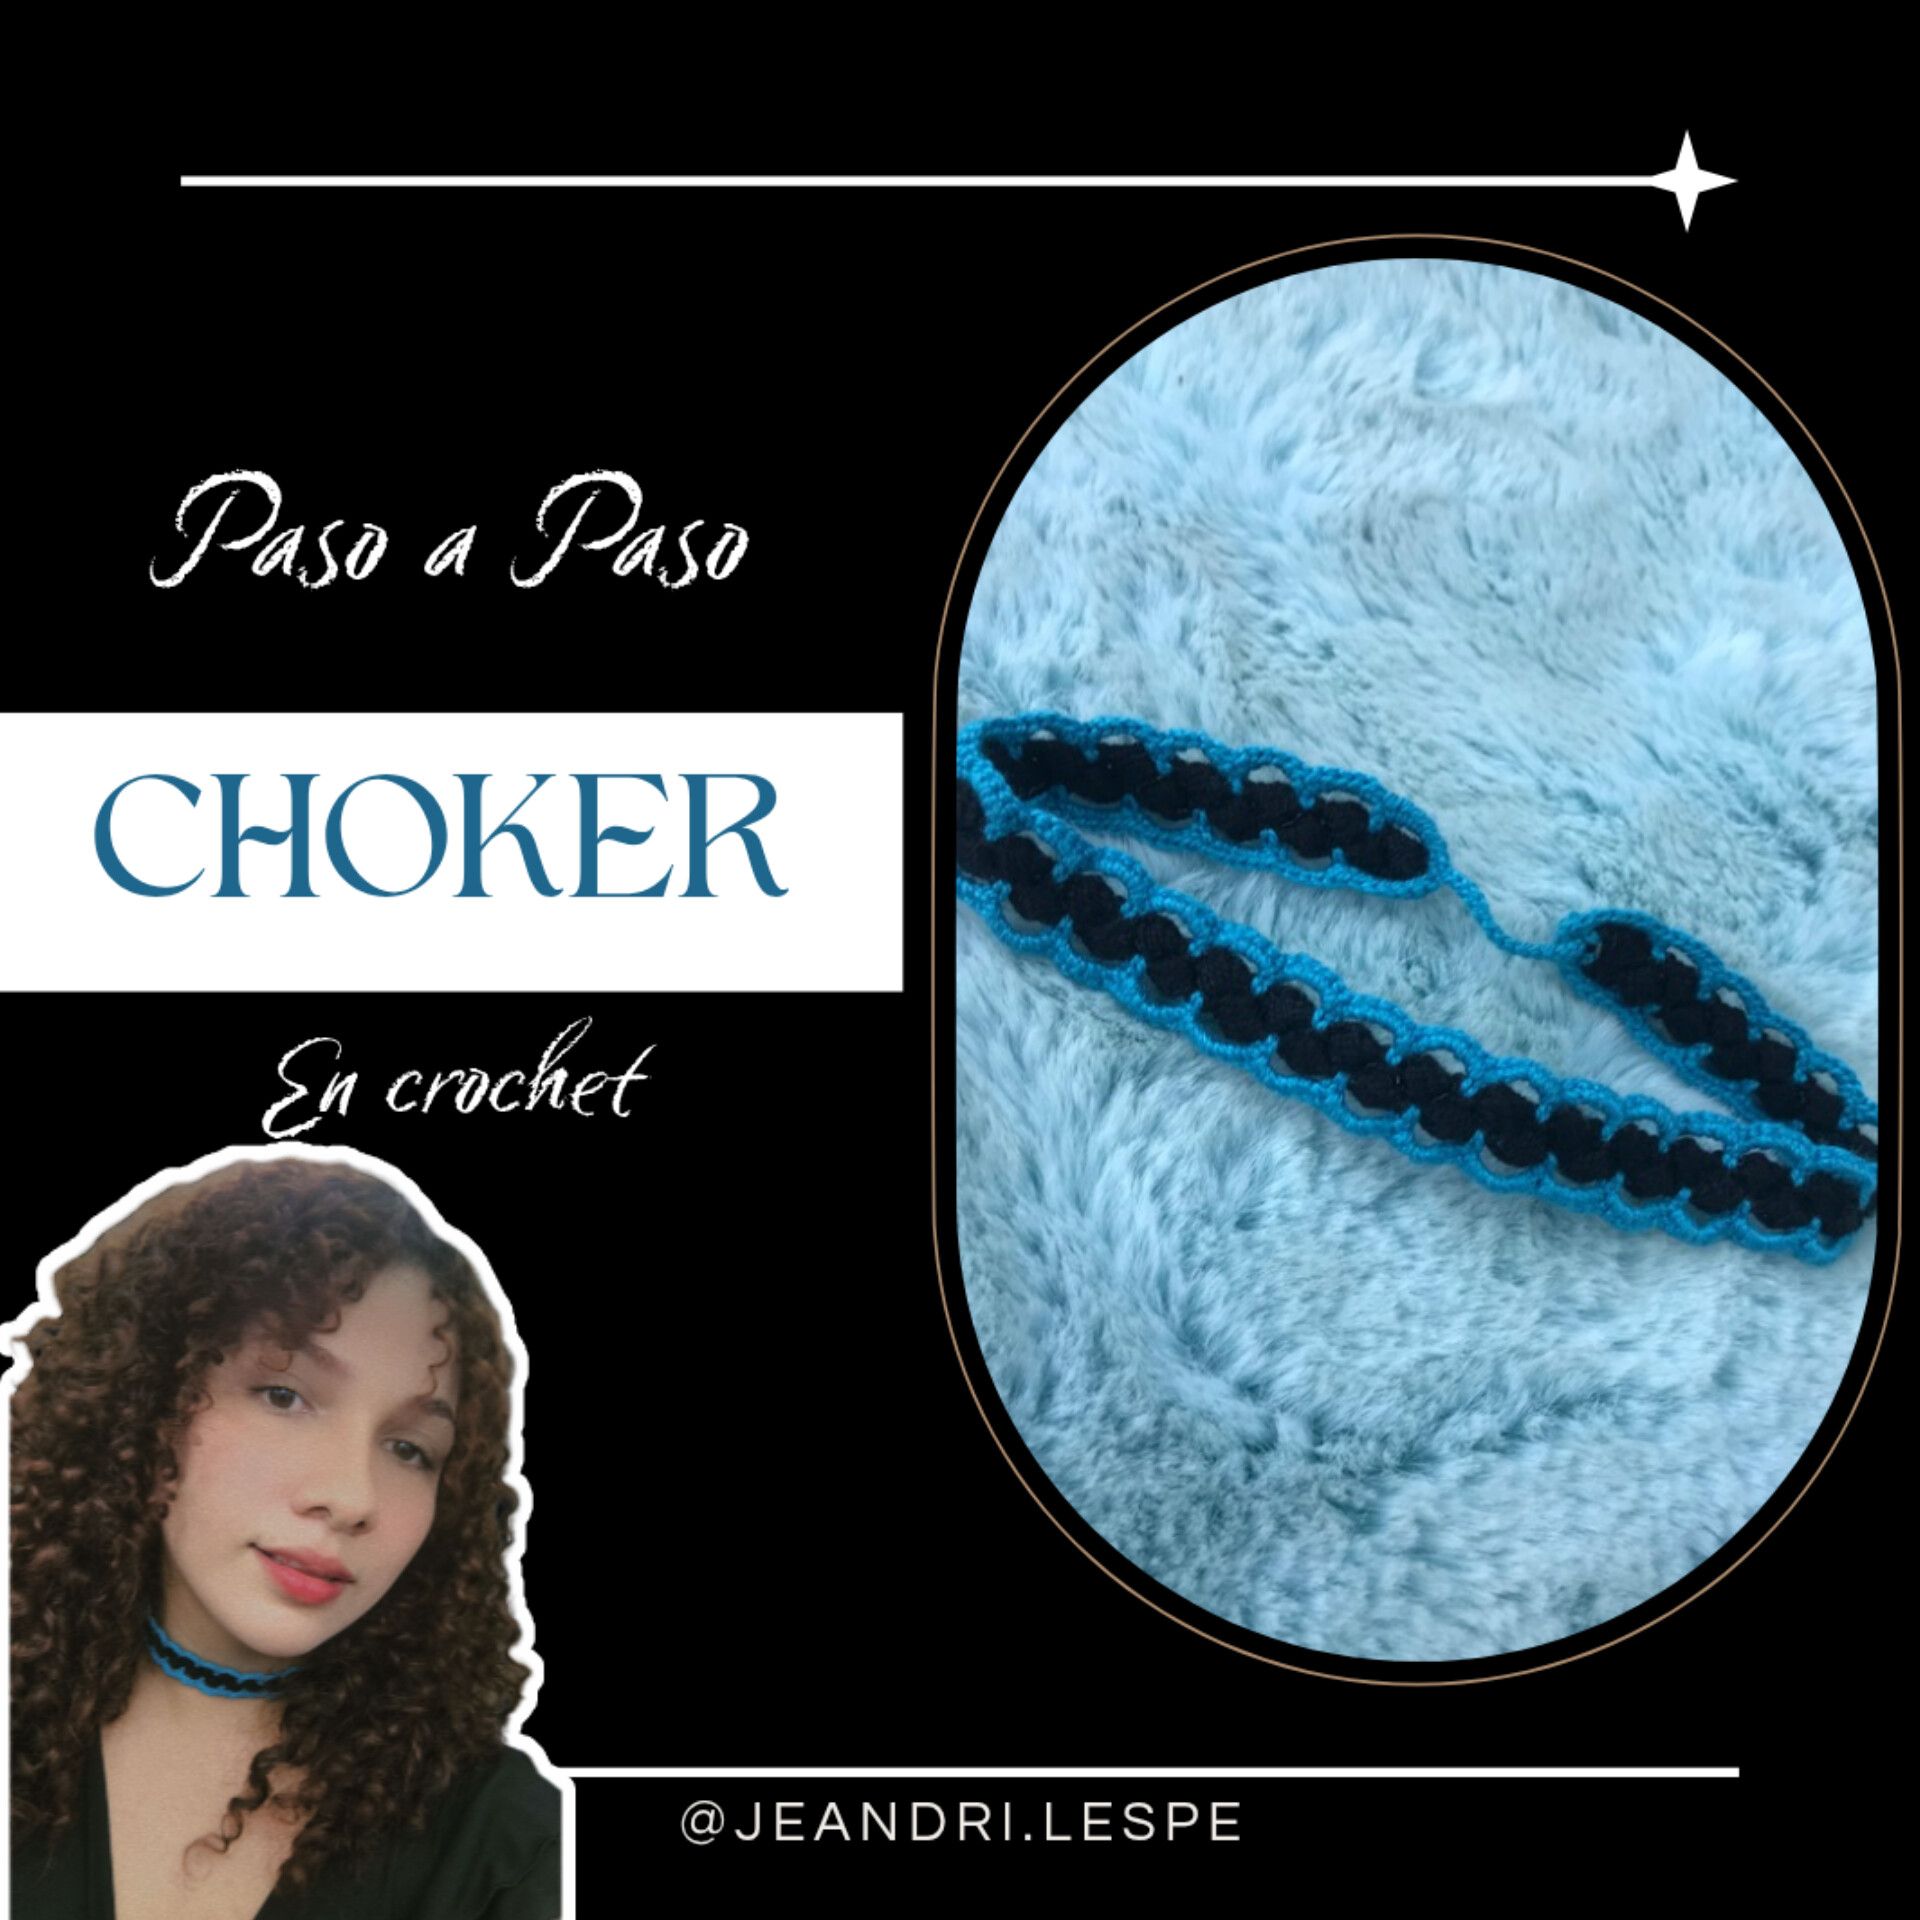
Hola mi gente linda de Needleworkmonday, me contenta una vez más estar por acá compartiendo con ustedes un hermoso choker que realice el día de hoy, ya que el que hice anteriormente les encantó tanto al igual que a mí, decidí está vez hacer uno con una combinación de colores, me encantan los accesorios bicolor y esté no ha sido la excepción, me gustó muchísimo y por eso lo quise compartir con ustedes, espero les guste 🩵 ¡Vamos con los materiales y el paso a paso! >Hello my lovely Needleworkmonday people, I'm happy to be here once again sharing with you a beautiful choker I made today. Since you loved the previous one I made as much as I did, this time I decided to make one with a color combination. I love two-tone accessories, and this one was no exception. I loved it so much, and that's why I wanted to share it with you. I hope you like it 🩵 Let's get to the materials and the step-by-step instructions! ____ # Materiales / Materials 🩵✨ Hilo coral / Coral thread ✨ Aguja (número 4) / Needle (size 4) ✨ ____ Paso 1️⃣ / Step 1️⃣ 🩵✨ Lo primero que haremos será un nudo y seguidamente haremos 6 cadenas, las cuales vamos a cerrar con un punto deslizado en la primera cadena, ahora levantaremos 3 cadenas, enlazamos y vamos a hacer un punto puff, que consiste en enlazar, tomar la hebra como si fueras a hacer un punto alto pero no lo terminas de cerrar, vuelves a enlazar y tomar hebra, esto lo haremos 5 veces hasta formar nuestro punto puff, ahora pasamos el hilo por todas las hebras, menos por las ultimas dos, tomamos hilo nuevamente y las cerramos, ahora levantamos 3 cadenas, damos vuelta al tejido y vamos a ubicar las primeras 3 cadenas que hicimos y en ese espacio haremos nuevamente un punto puff, lo cerramos, levantamos 3 cadenas y repetimos la misma secuencia, hasta completar el tamaño que desees en tu choker, en mi caso lo dejé de 34 centímetros. 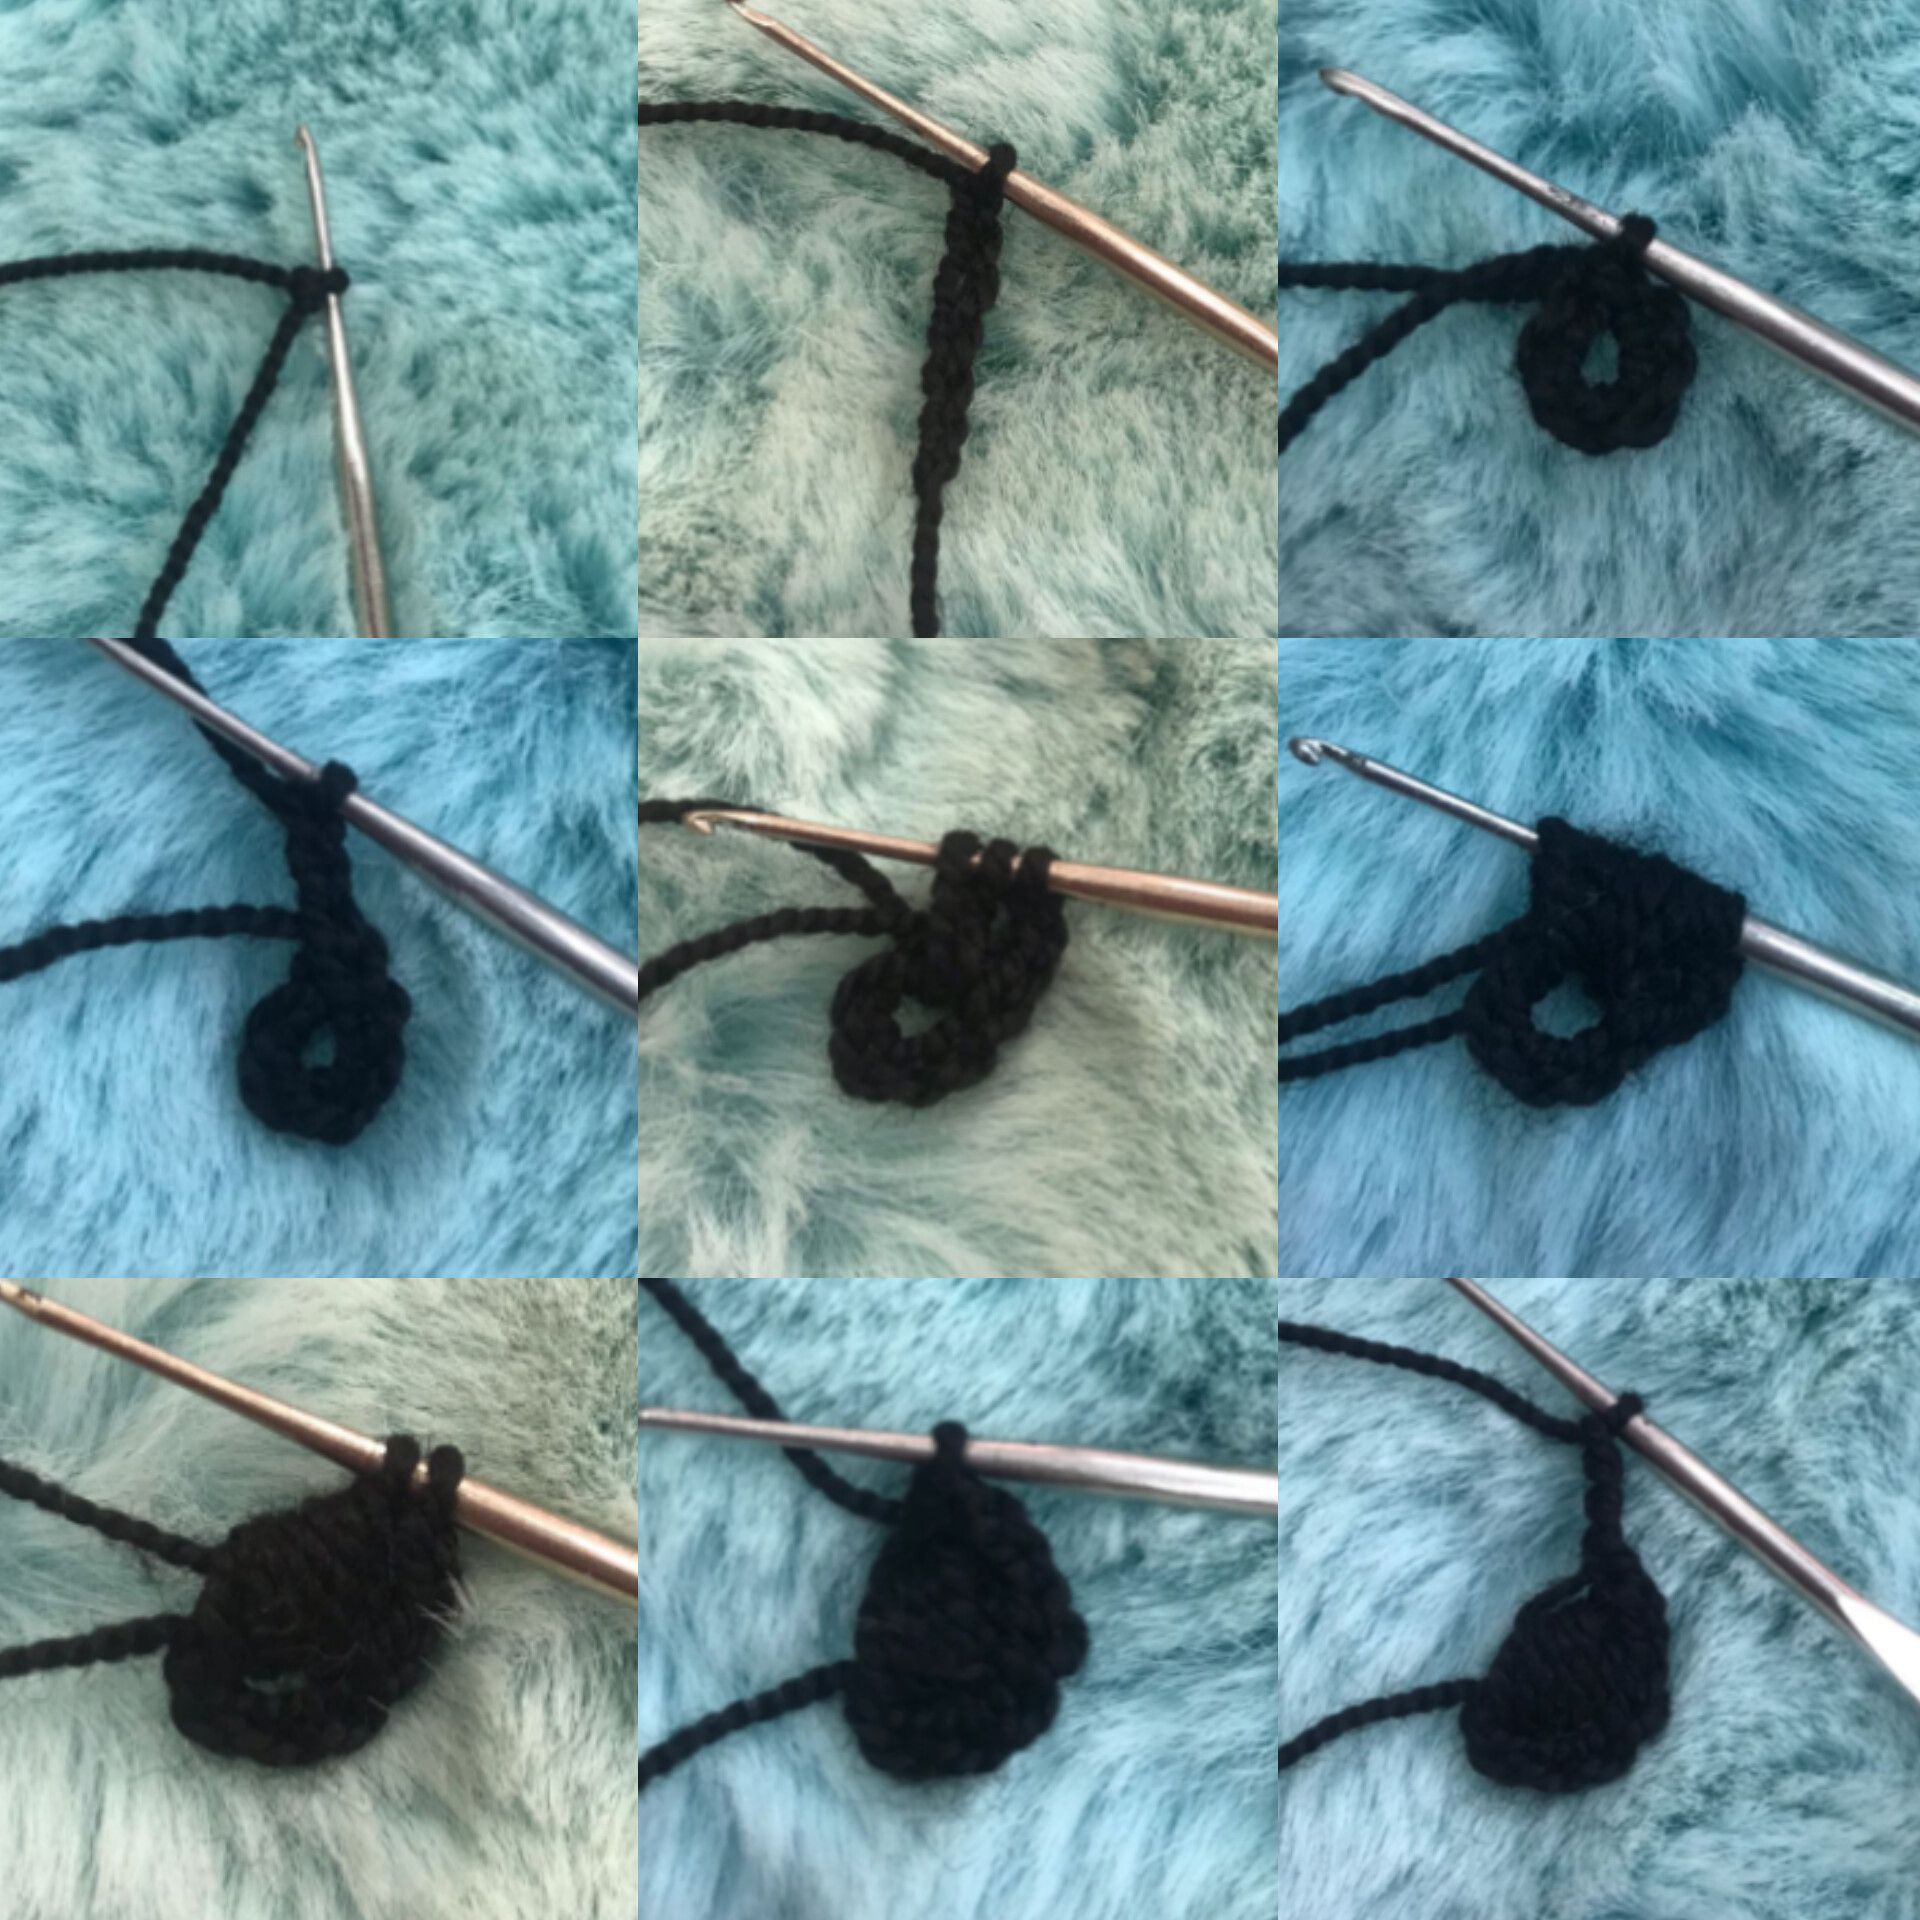 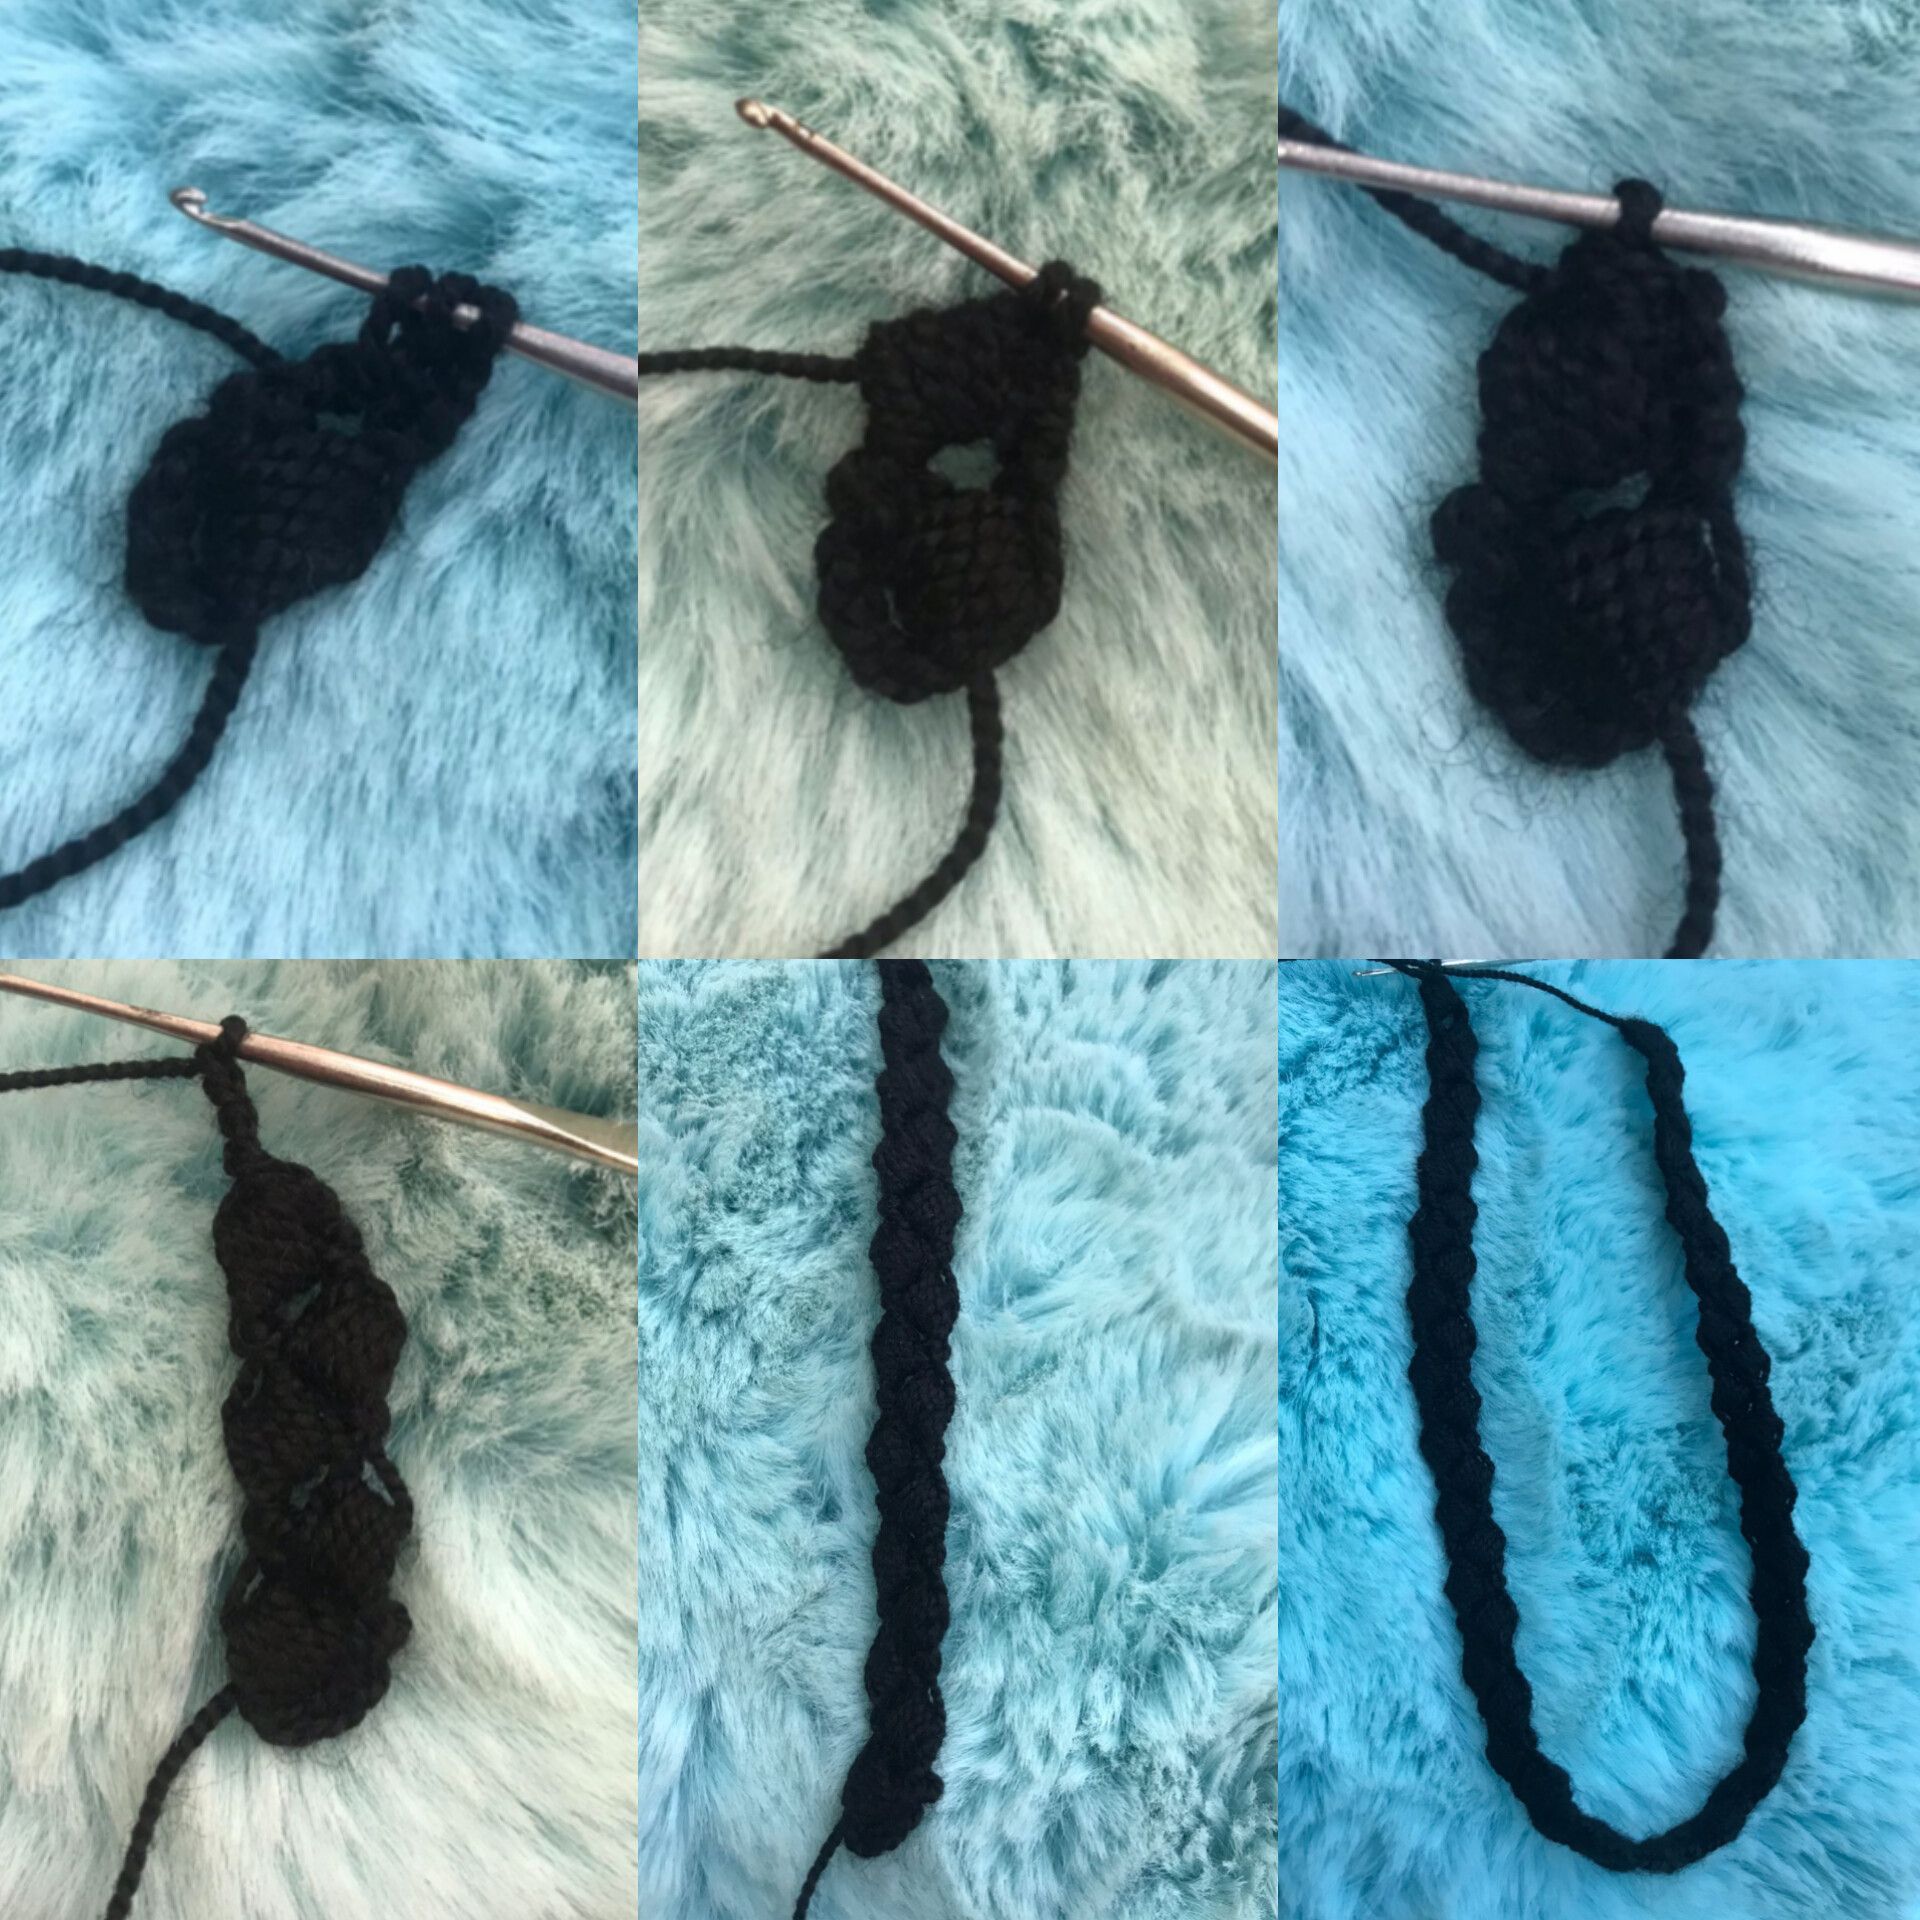 >The first thing we'll do is a knot, then we'll make 6 chains, which we'll close with a slip stitch in the first chain. Now we'll pick up 3 chains, link, and make a puff stitch. This consists of linking, taking the yarn as if you were going to make a double crochet, but don't finish closing it. Link again and take a yarn. We'll do this 5 times until we form our puff stitch. Now we'll pass the yarn through all the strands except the last two. We take yarn again and close them. Now we pick up 3 chains, turn the fabric, and we'll place the first 3 chains we made. In that space, we'll make another puff stitch. We close it, pick up 3 chains, and repeat the same sequence until we reach the desired size for your choker. In my case, I left it at 34 centimeters. ____ Paso 2️⃣ / Step 2️⃣ 🩵✨ Ahora haremos el cambio de color, aseguramos el nuevo hilo y enseguida levantamos 6 cadenas, las cuales vamos a cerrar en el espacio que hay en medio de los dos puntos puff con un punto bajo, volvemos a levantar 6 cadenas y repetimos lo mismo, hasta llegar al otro extremo donde haremos las mismas 6 cadenas, pero las vamos a cerrar en el espacio de 3 cadenas que hicimos al comienzo con un punto bajo, enseguida levantamos 3 cadenas y en ese mismo espacio la cerraremos con un otro punto bajo, eso será para hacer el orificio por donde vamos a cerrar nuestro choker, ahora sí vamos a repetir la misma secuencia del primer lado, 6 cadenas, cerramos en el medio de los dos puff y así sucesivamente hasta llegar a la punta donde comenzamos y cerraremos con un punto deslizado en la primera cadena. 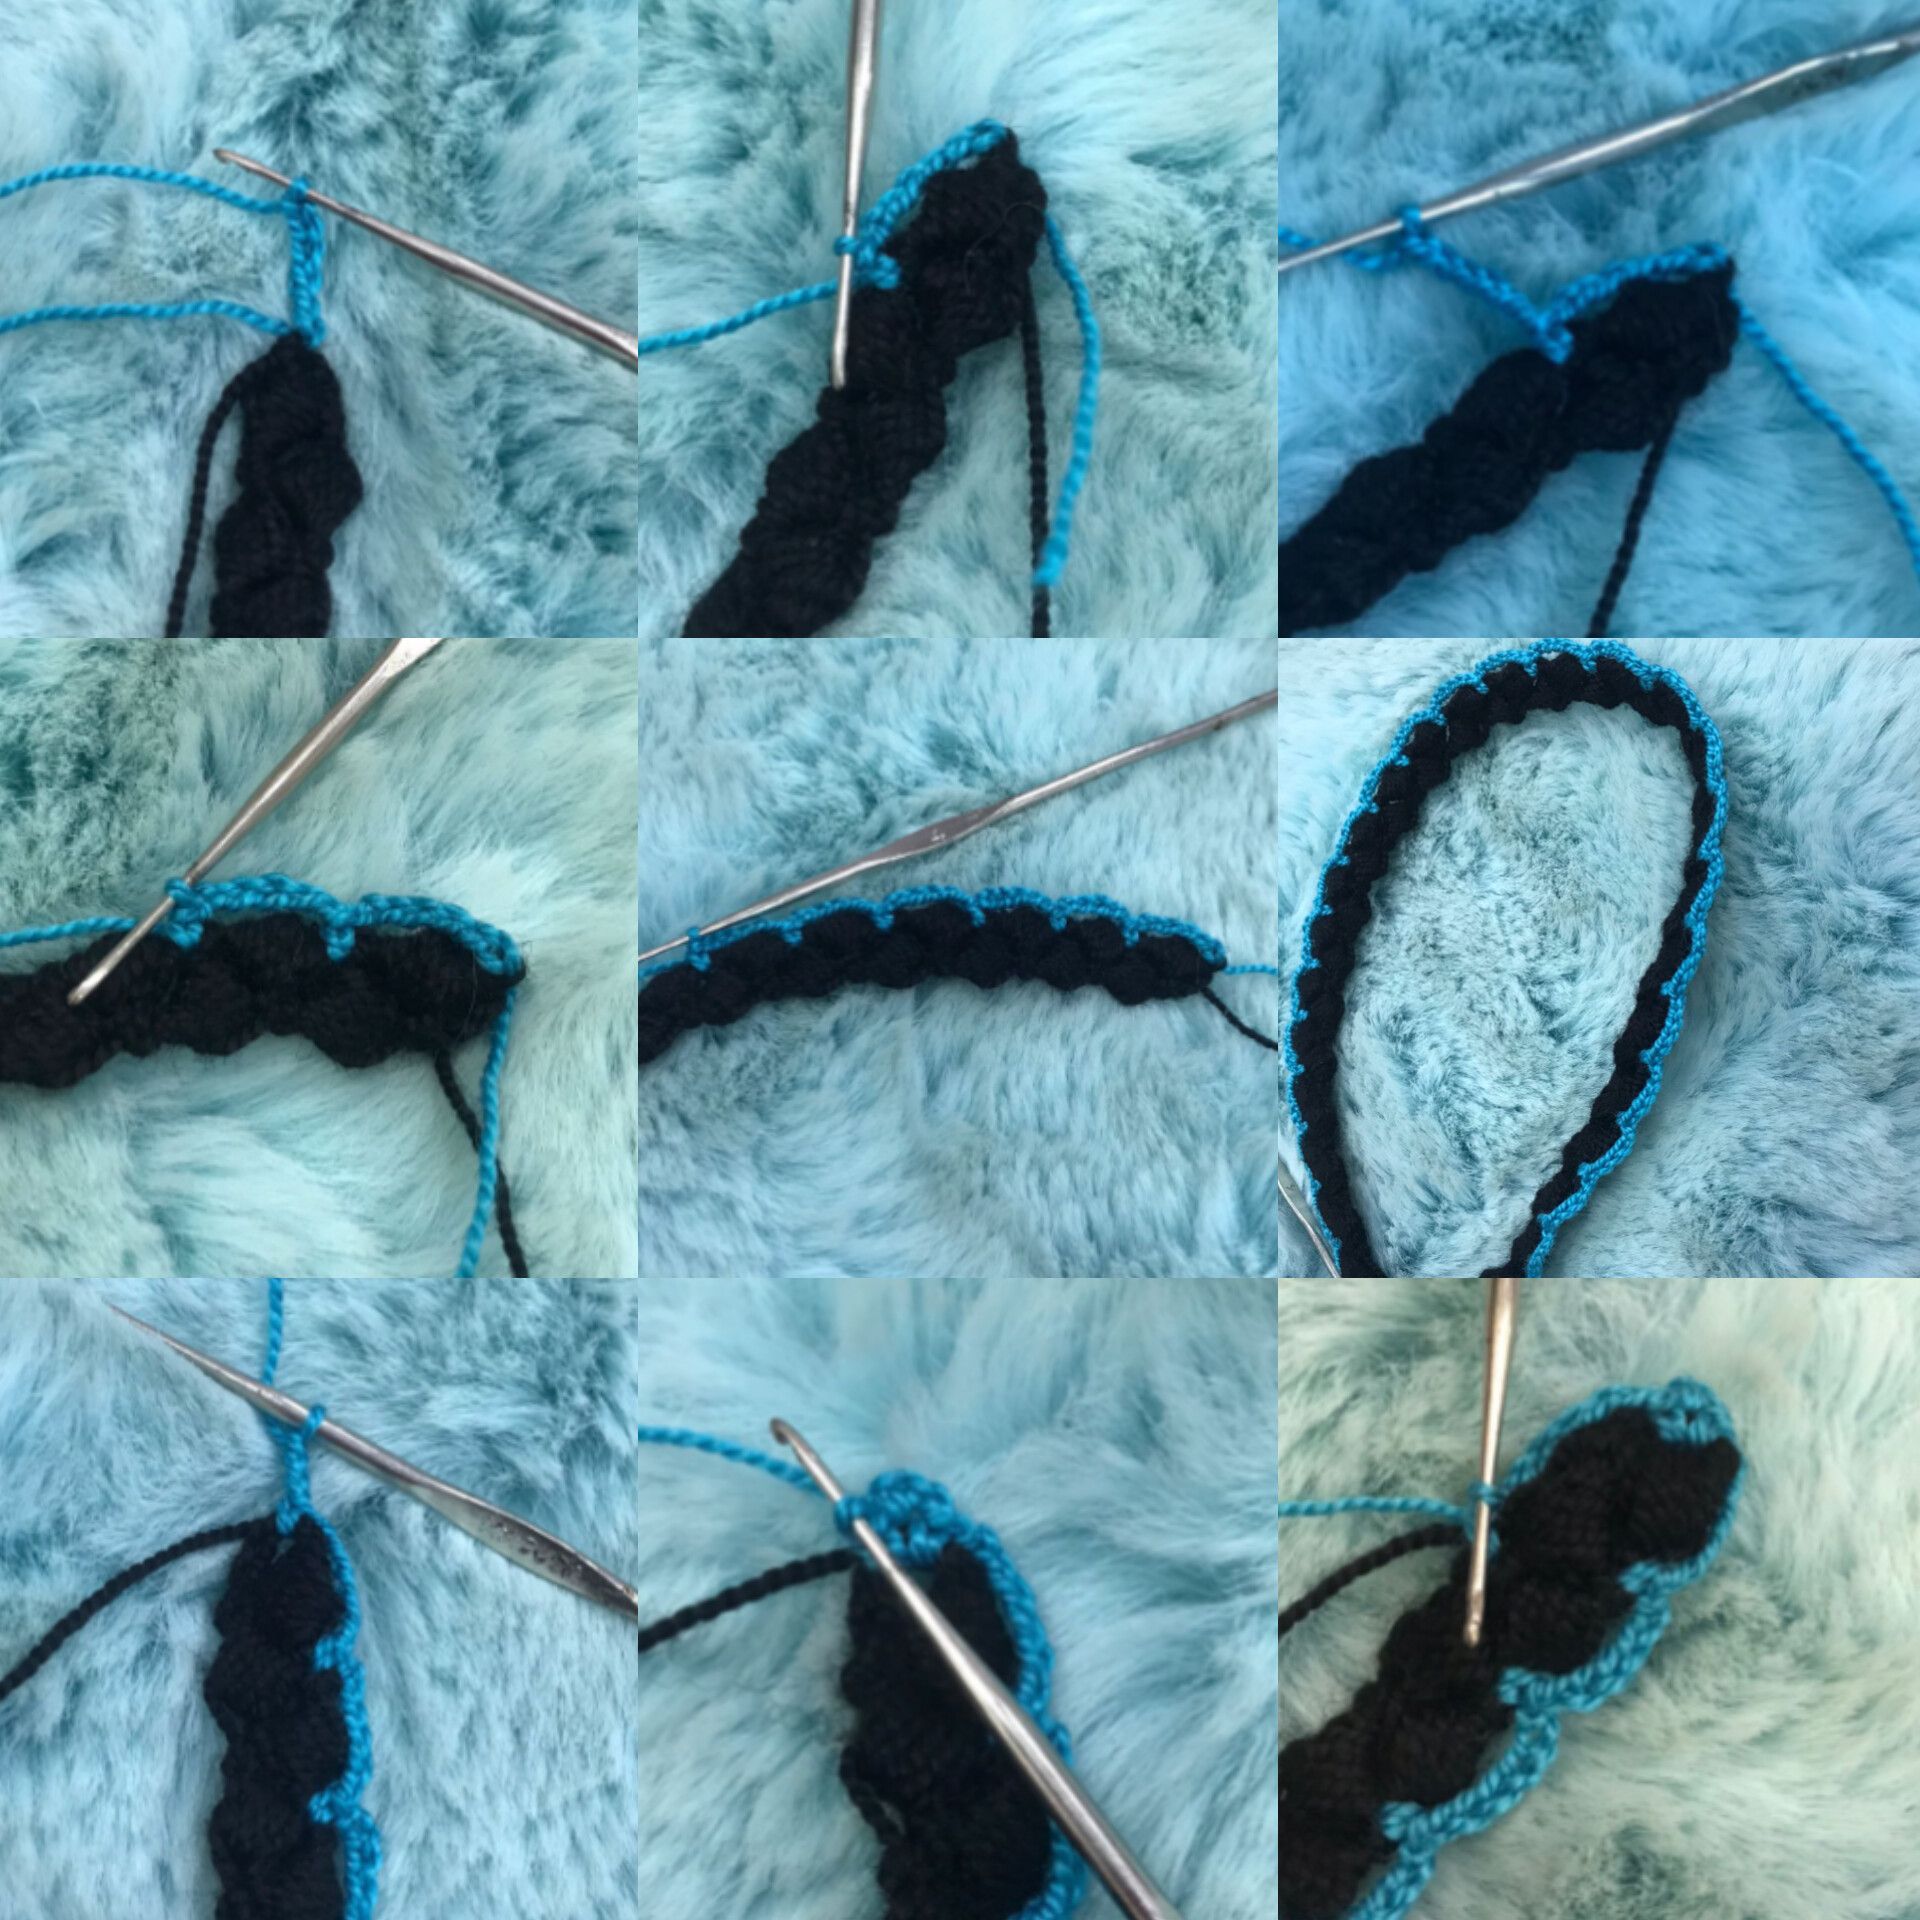 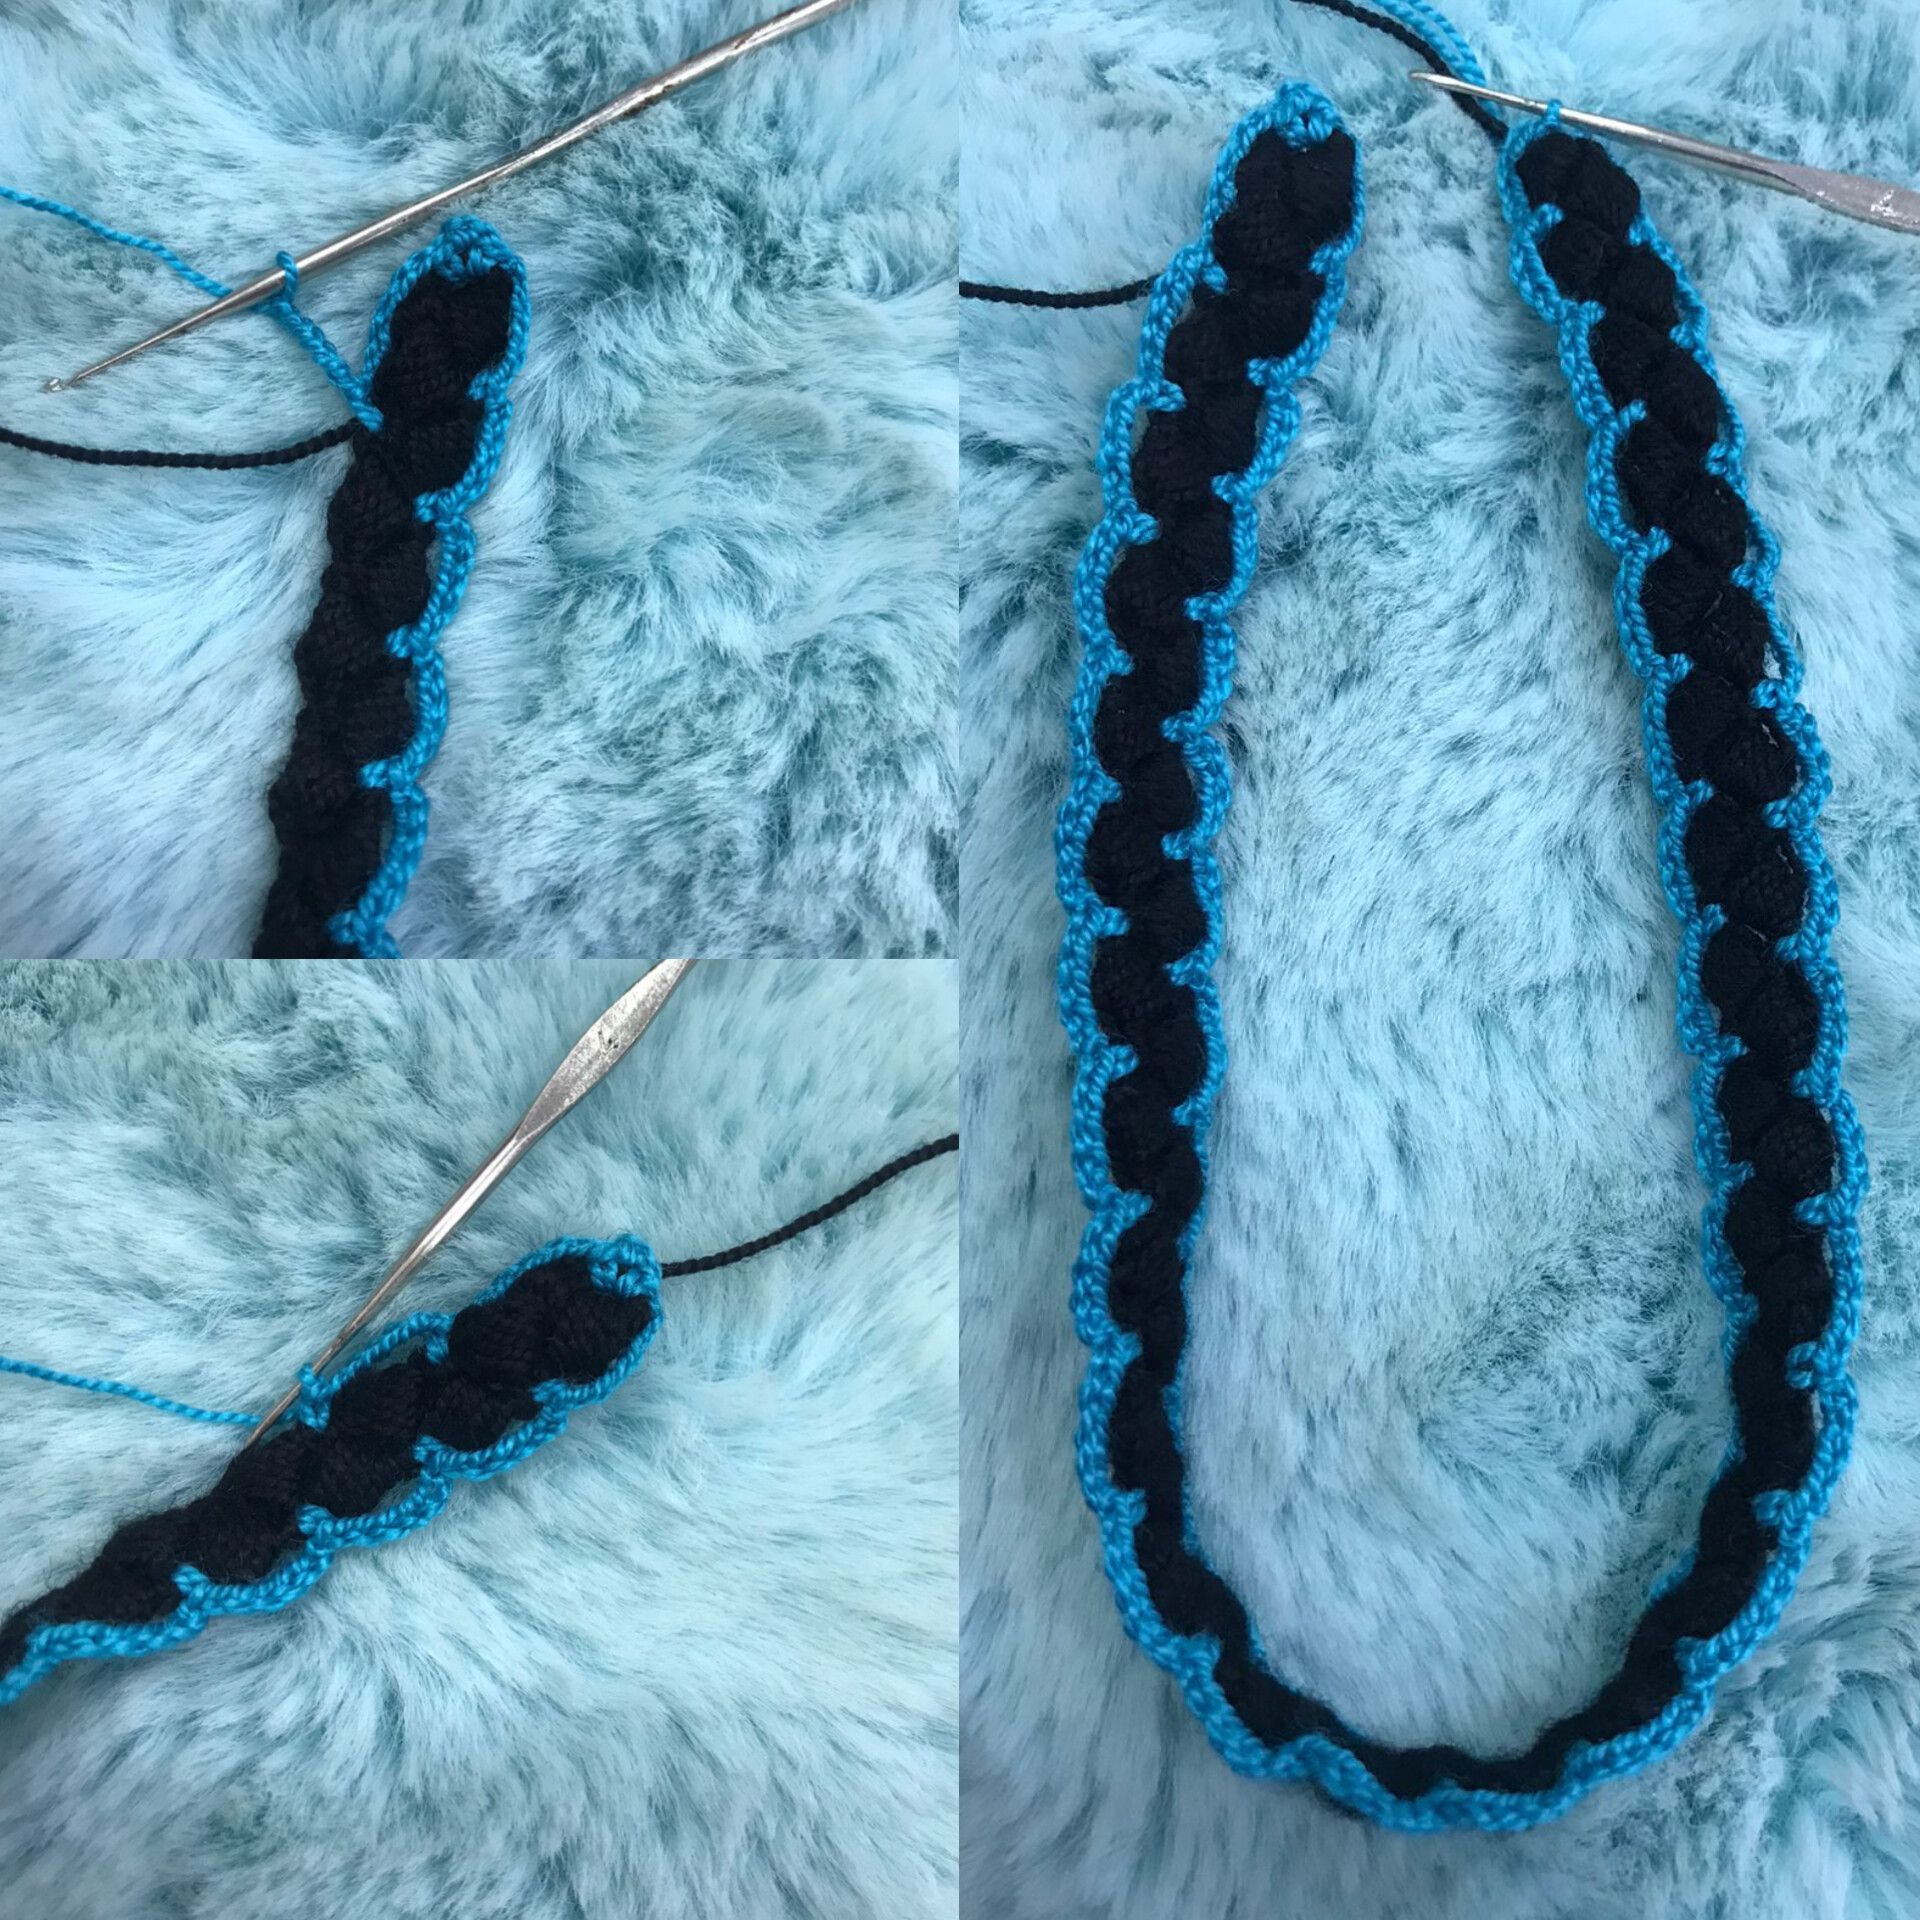 >Now we'll change the color, secure the new thread, and then lift 6 chains. We'll close them in the space between the two puff stitches with a single crochet. We'll lift 6 chains again and repeat the same thing until we reach the other end, where we'll make the same 6 chains, but we'll close them in the 3-chain space we made at the beginning with a single crochet. Next, we lift 3 chains and close them in that same space with another single crochet. This will make the hole where we'll close our choker. Now we'll repeat the same sequence as the first side: 6 chains, close them in the middle of the two puff stitches, and so on until we reach the tip where we started. We'll close with a slip stitch in the first chain. ____ Paso 3️⃣ / Step 3️⃣ 🩵✨ Ahora vamos a reformar las orillas de nuestro choker con puntos bajos, comenzamos levantando una cadena y en el primer espacio de 6 cadenas haremos 6 puntos bajos, así mismo en cada espacio de 6 que cadenas que hicimos, al llegar al espacio de 3 cadenas haremos 3 puntos bajos y seguimos con la secuencia de 6 puntos bajos en cada espacio de 6 cadenas, hasta llegar al final donde cerraremos con un punto deslizado en el primer punto bajo. 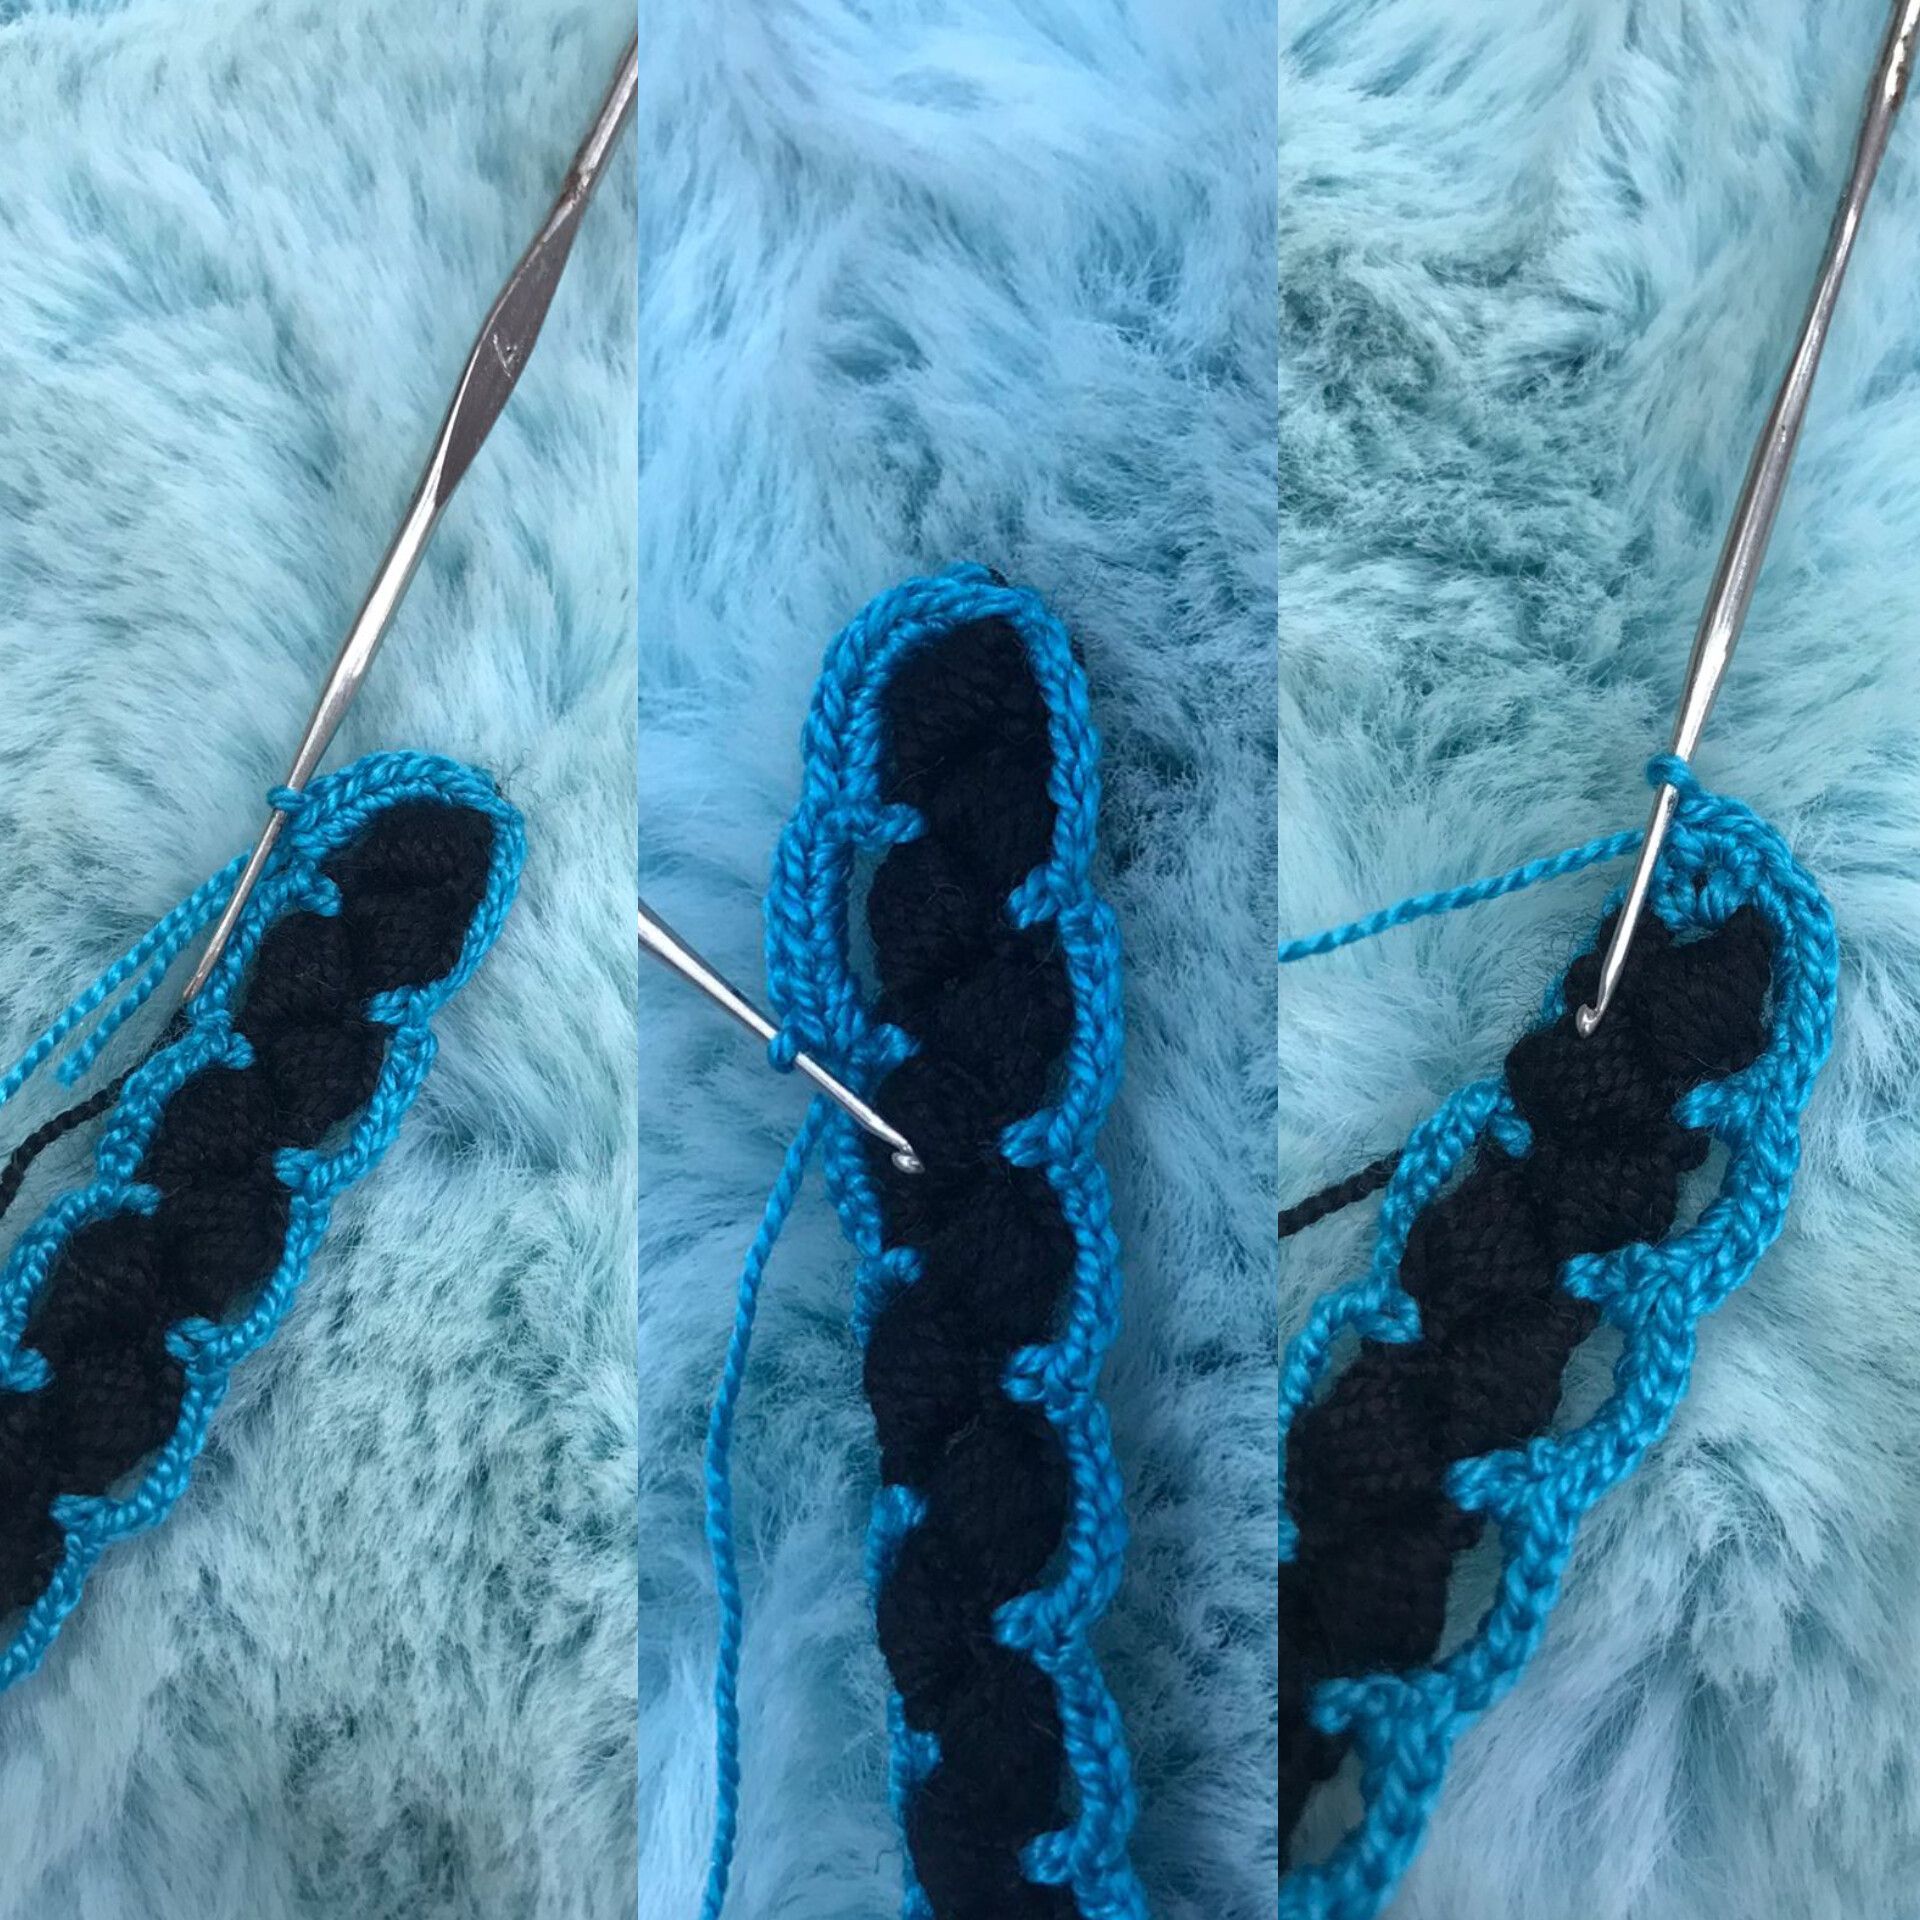  >Now we're going to rework the edges of our choker with single crochets. We'll start by picking up a chain and in the first 6-chain space, we'll make 6 single crochets. Likewise, in each 6-chain space we made, when we reach the 3-chain space, we'll make 3 single crochets. We continue with the sequence of 6 single crochets in each 6-chain space until we reach the end, where we'll close with a slip stitch in the first single crochet. ____ Paso 4️⃣ / Step 4️⃣ 🩵✨ Como último paso habiendo cerrado la vuelta vamos ahora a subir 15 cadenas, subimos dos más que será para crear la bolita que servirá para cerrar el choker y vamos a cerrarlas en la cadena 15, para reforzar las cadenas vamos a devolvernos con puntos deslizados sobre cada cadena hasta llegar al comienzo donde cerraremos con un punto deslizado en el siguiente punto bajo, ahora sí cortamos la hebra, la escondemos y así es como queda listo nuestro choker.  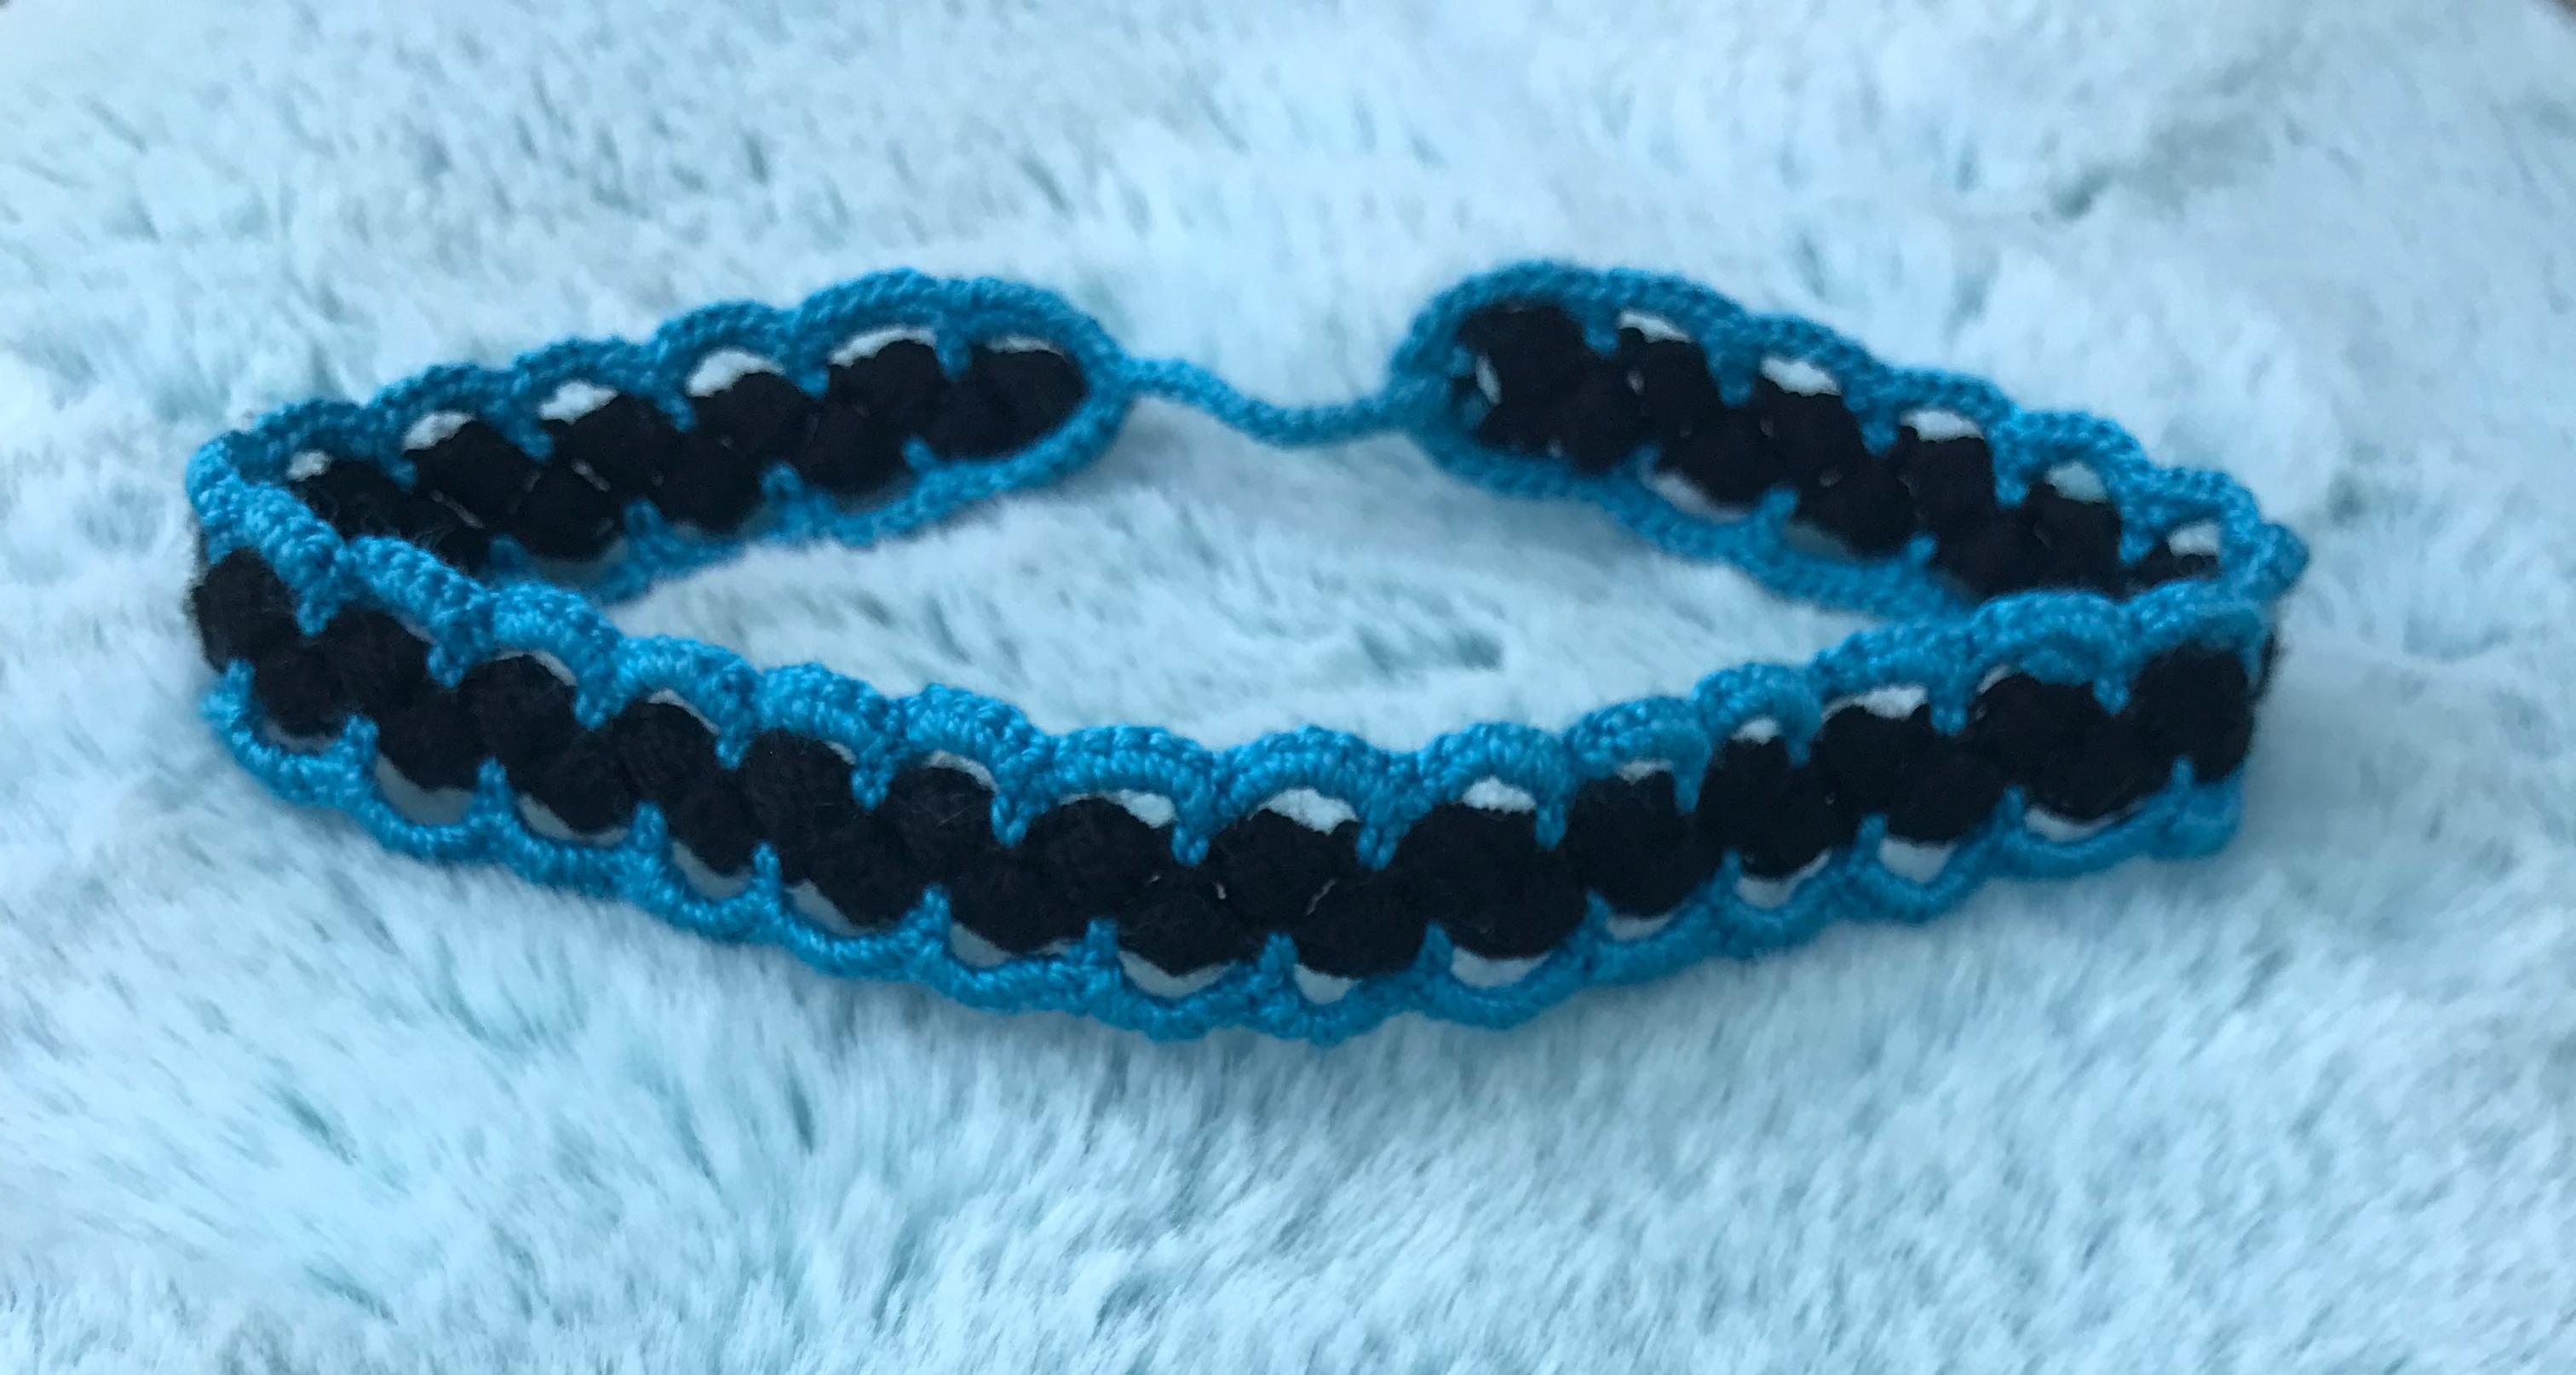 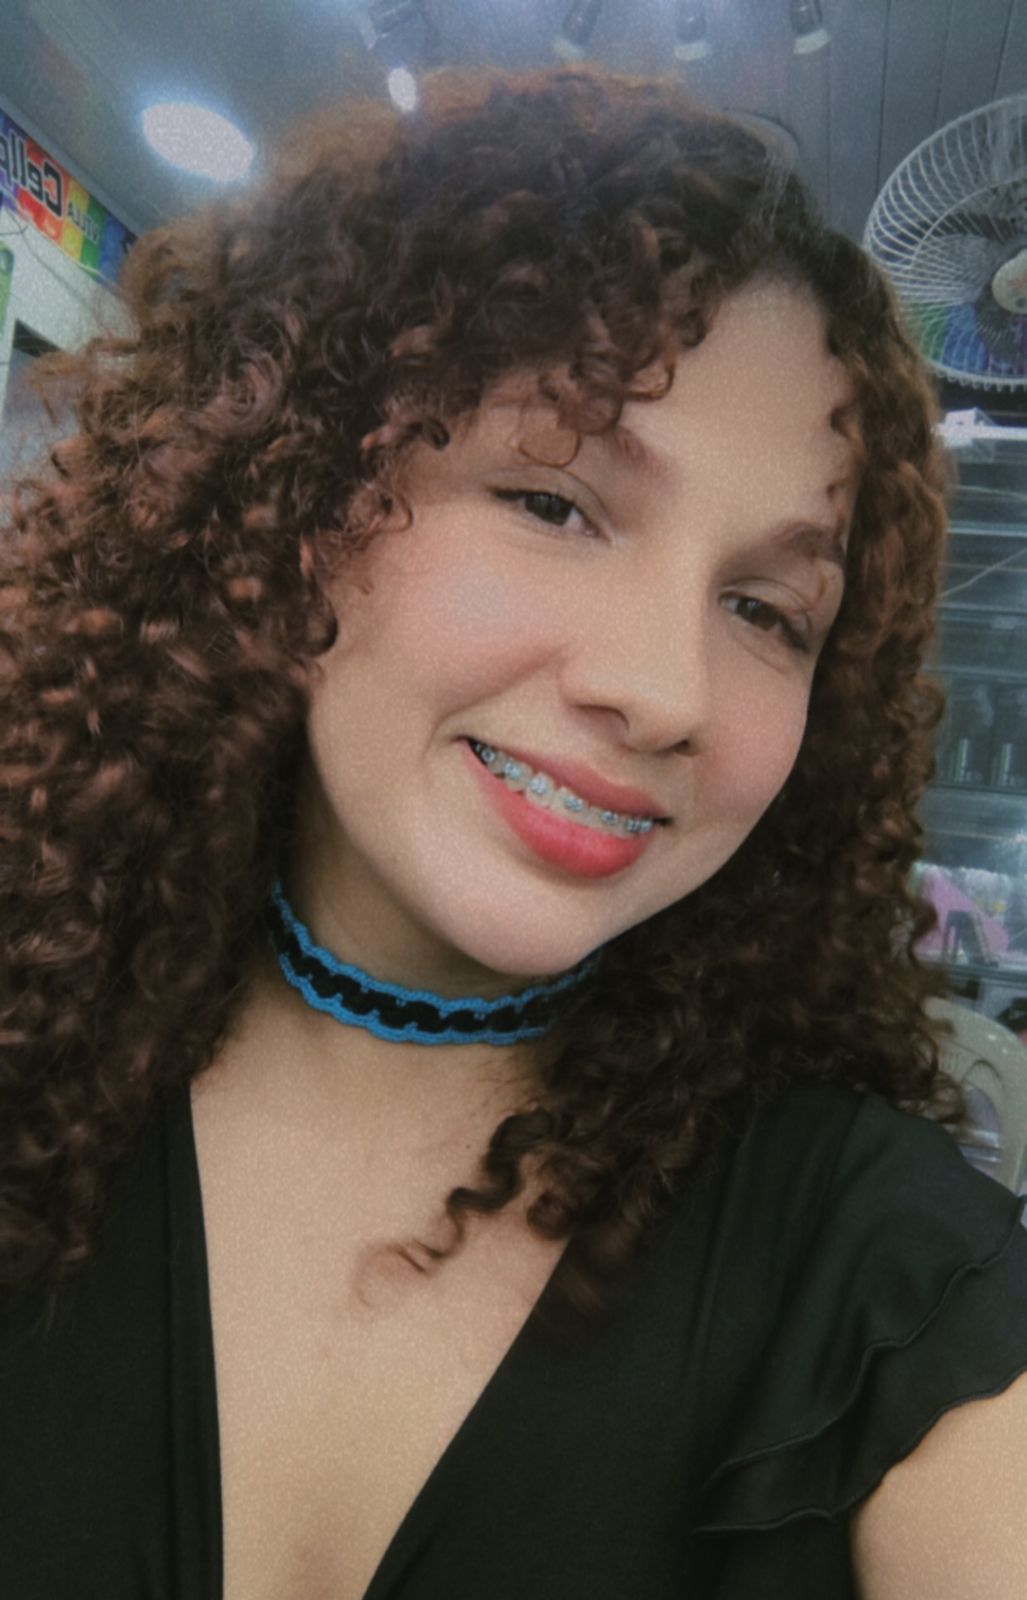 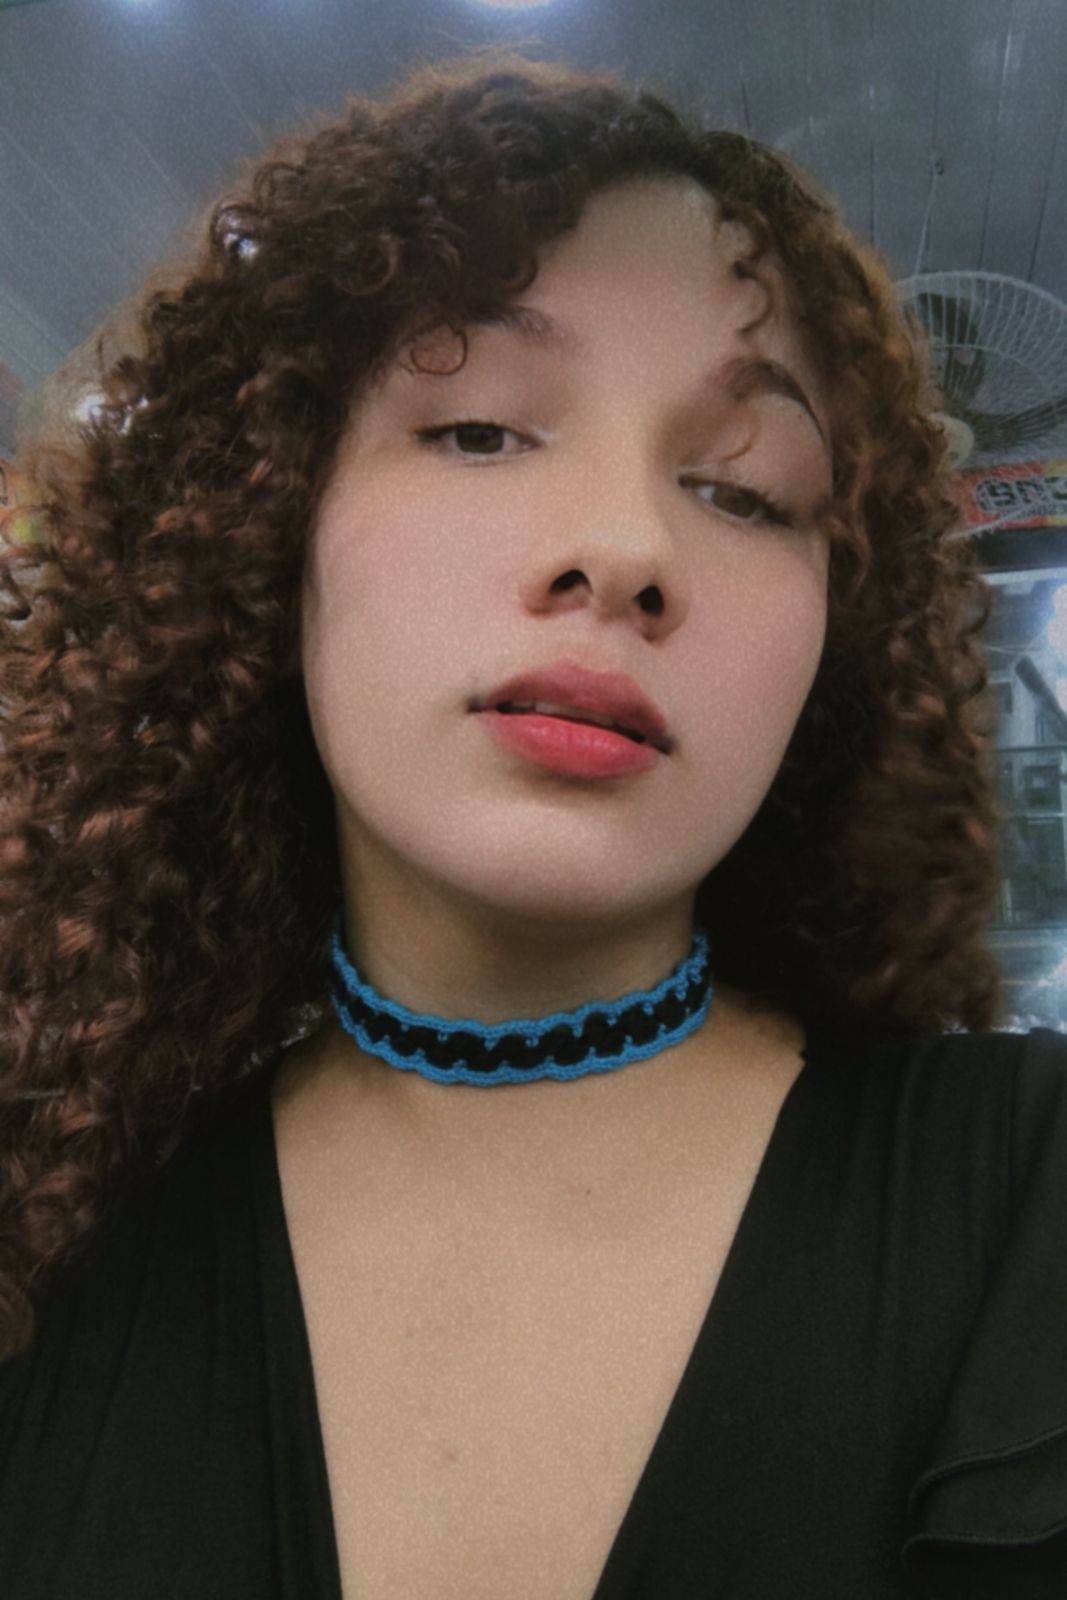 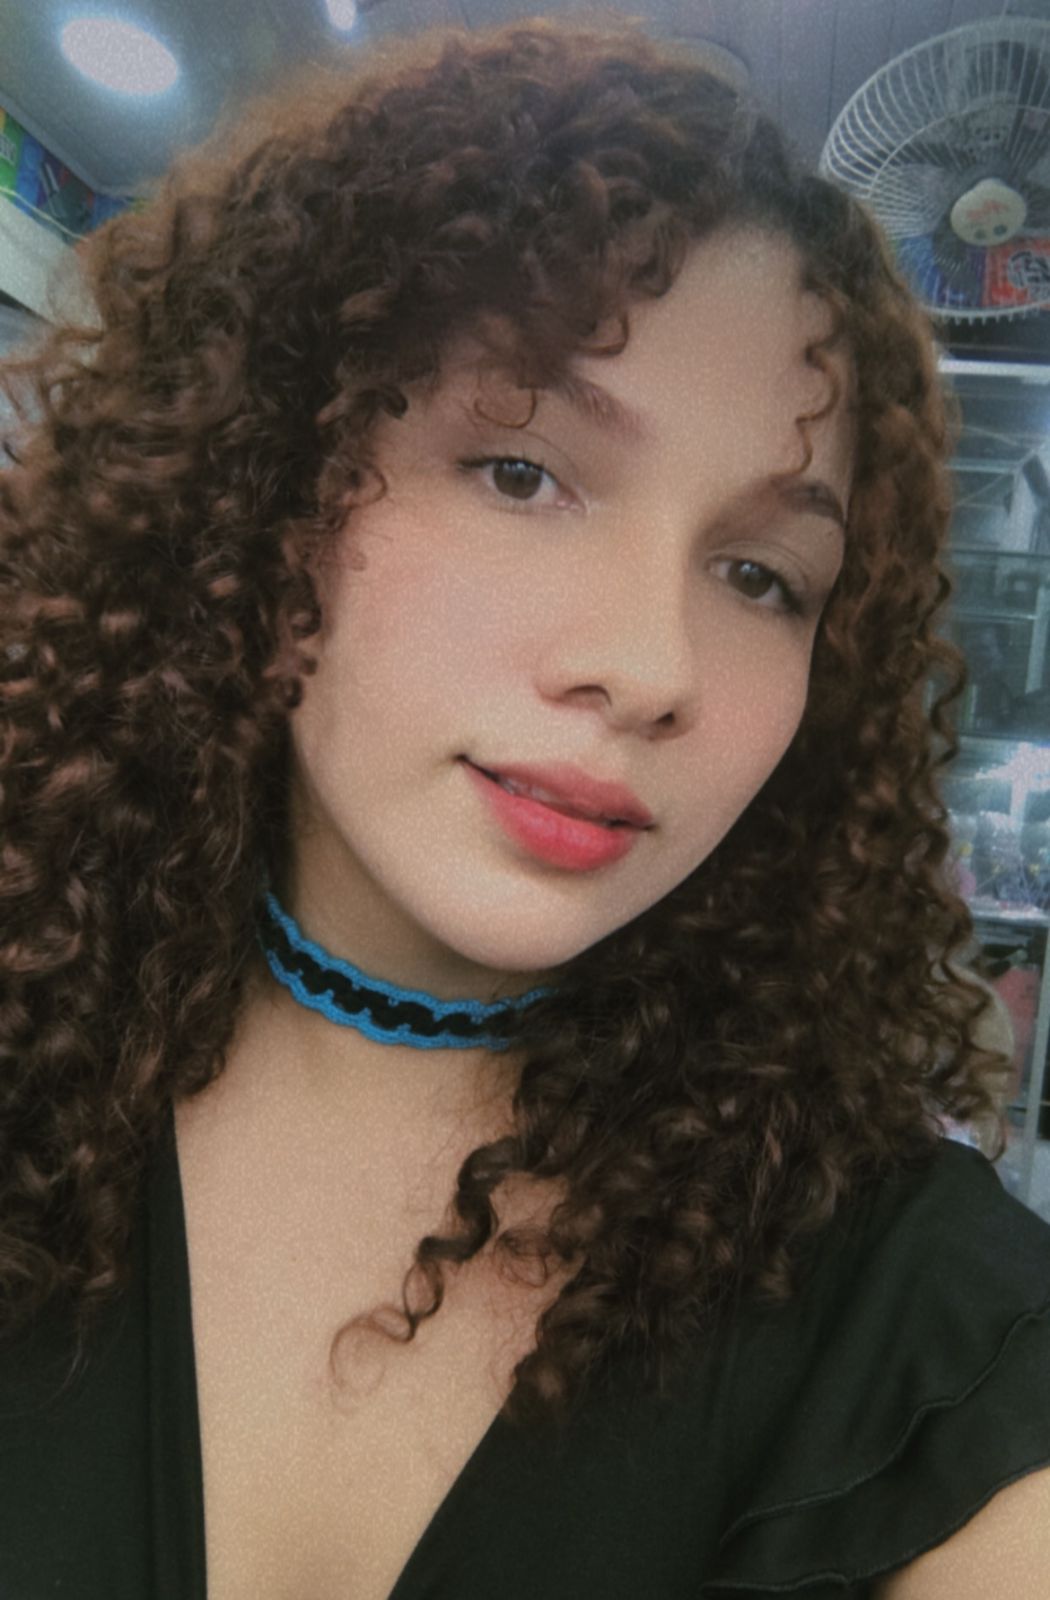 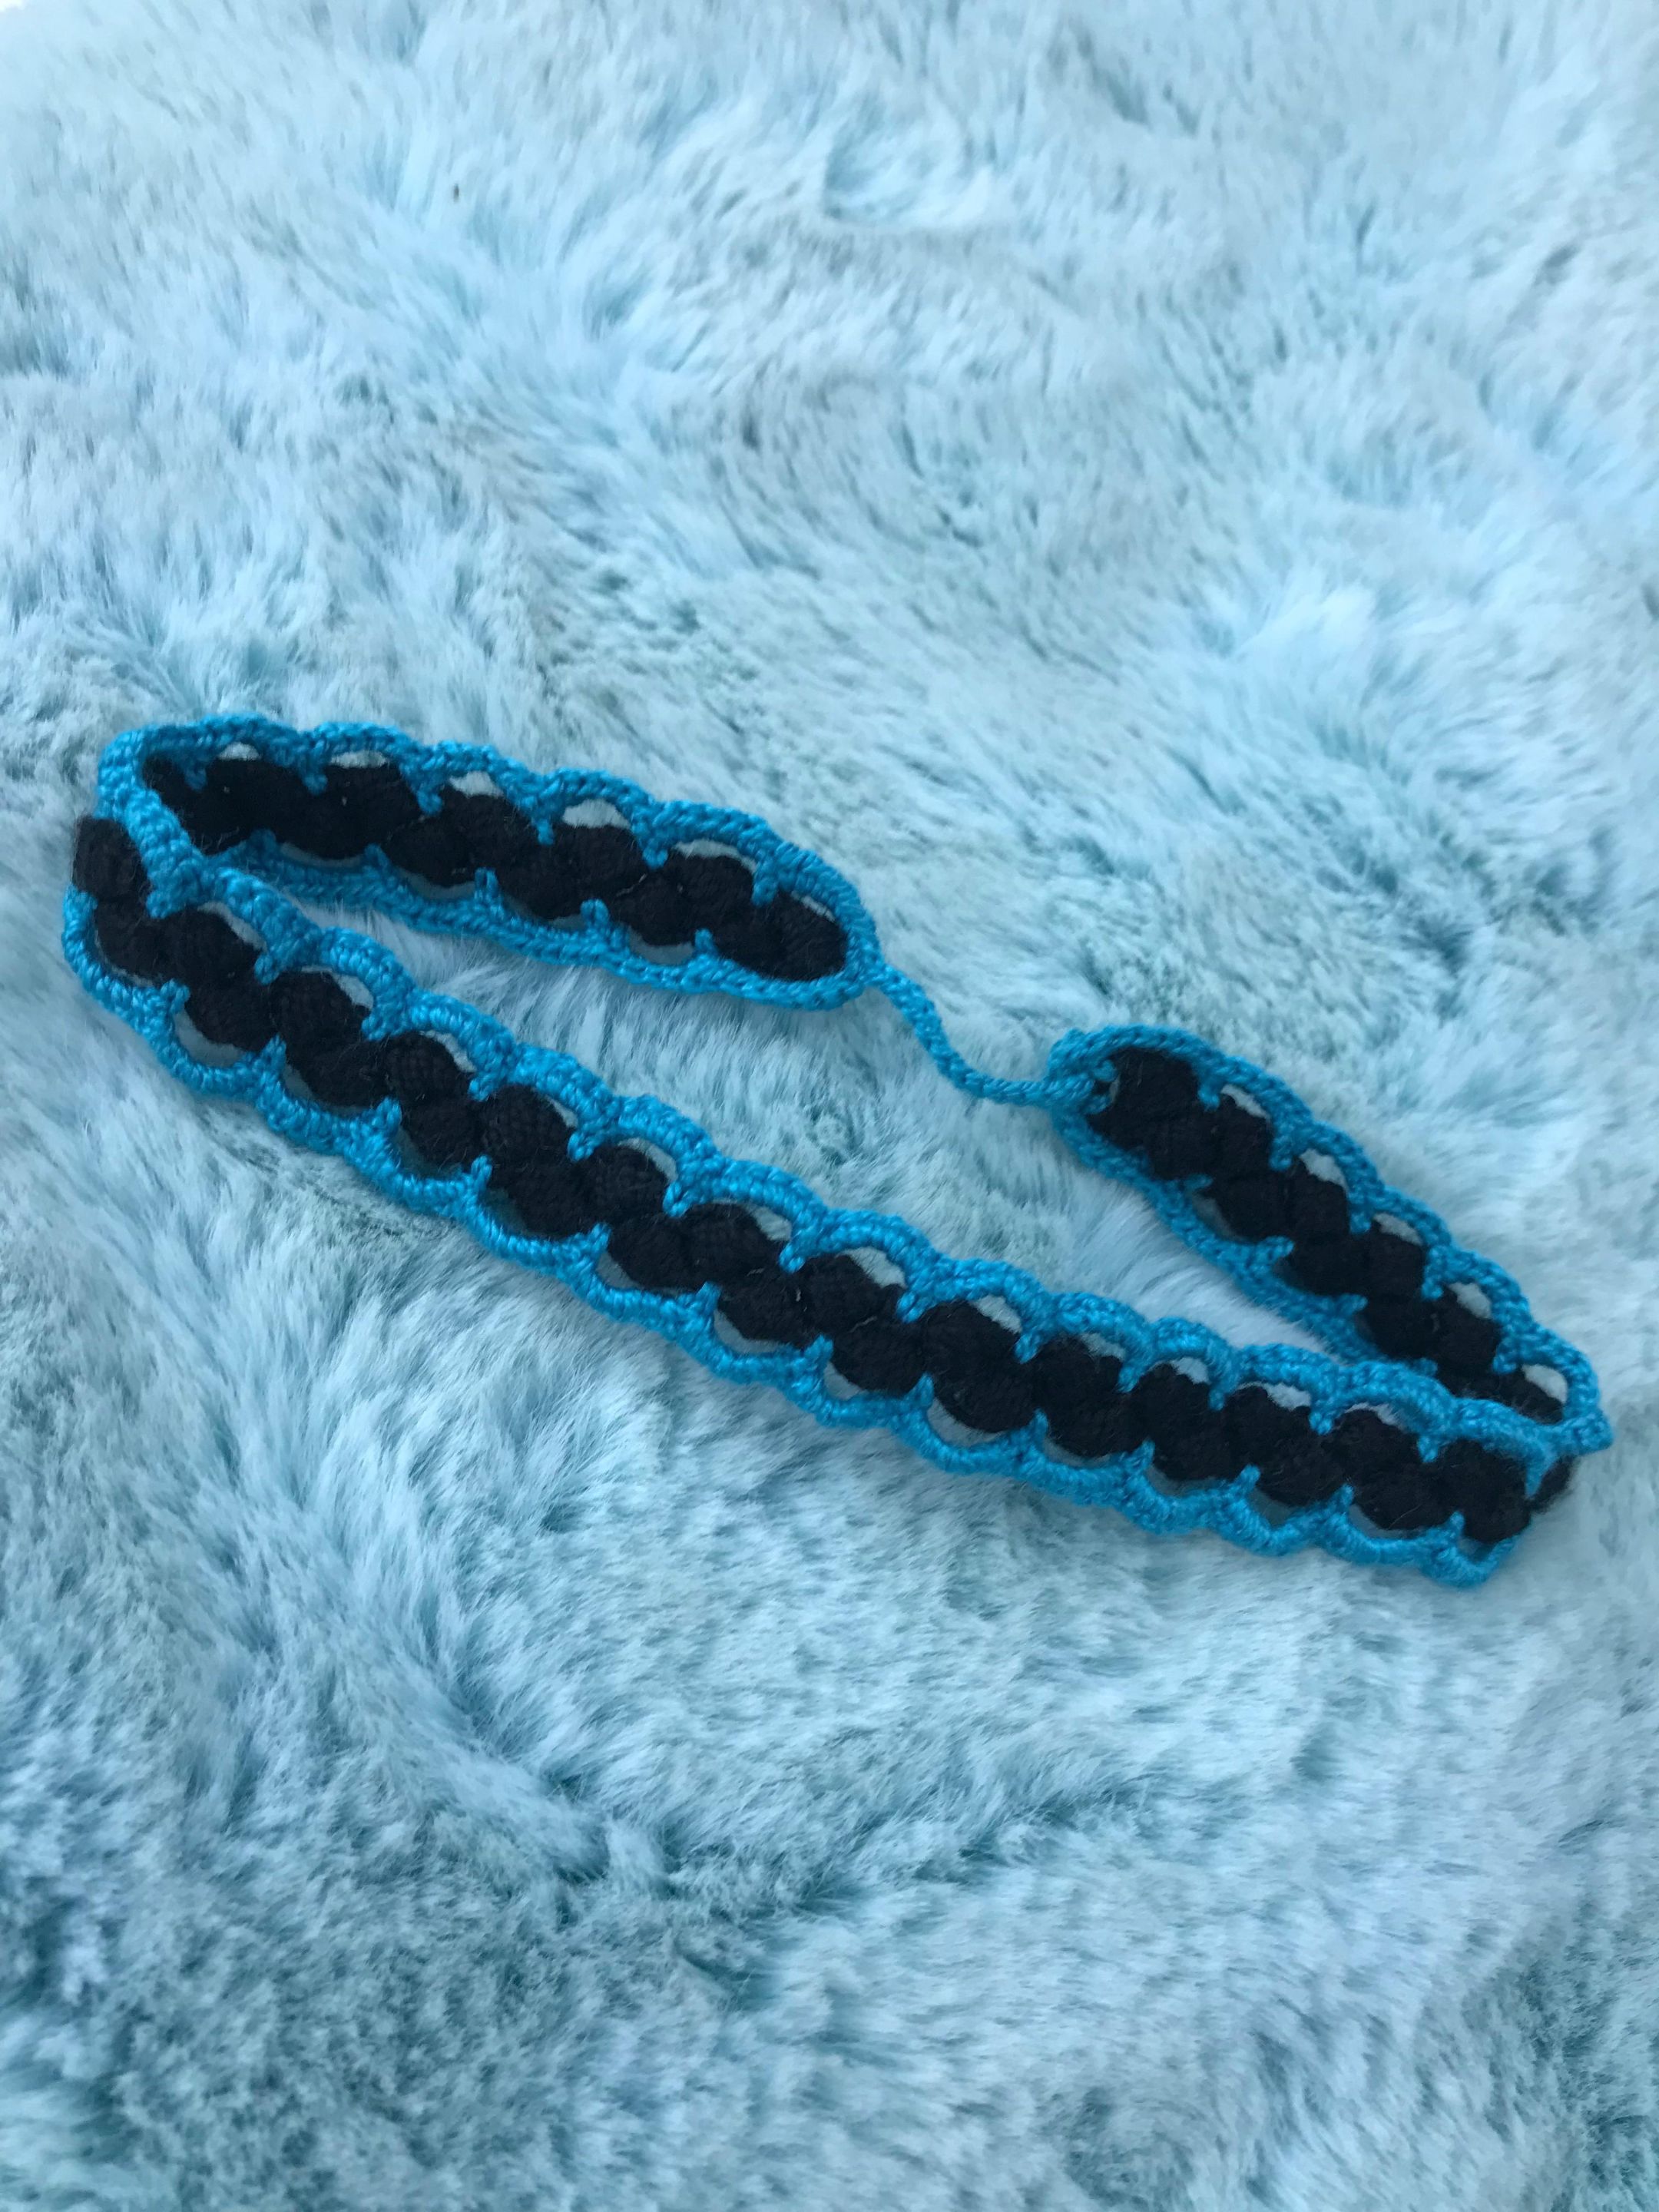 >As a final step, having closed the round, we'll now chain 15. We'll chain two more to create the little ball that will be used to close the choker, and we'll close them on the 15th chain. To reinforce the chains, we'll return with slip stitches on each chain until we reach the beginning, where we'll close with a slip stitch in the next single crochet. Now, we cut the thread, hide it, and that's how our choker is ready. Honestamente pensé que me tomaría menos tiempo, sin embargo los puntos puff siempre han sido un poco desafiantes para mí, por lo que si demore un poco más de lo que pensé, sin embargo el resultado final hizo que valiera 100% la pena, agradezco mucho que hayan llegado hasta acá y que siempre apoyen mis proyectos, les mando un fuerte abrazo ❤️ >I honestly thought it would take me less time, however puff stitches have always been a bit challenging for me, so it took a little longer than I thought, however the final result made it 100% worth it, I am very grateful that you have come this far and that you always support my projects, I send you a big hug ❤️