#### ¡Bienvenidos a mi blog!
Hola , feliz lunes a todos los miembros de esta comunidad #diyhub , espero que estén bien y ya estén descansando en la comodidad de su hogar junto a sus familiares.
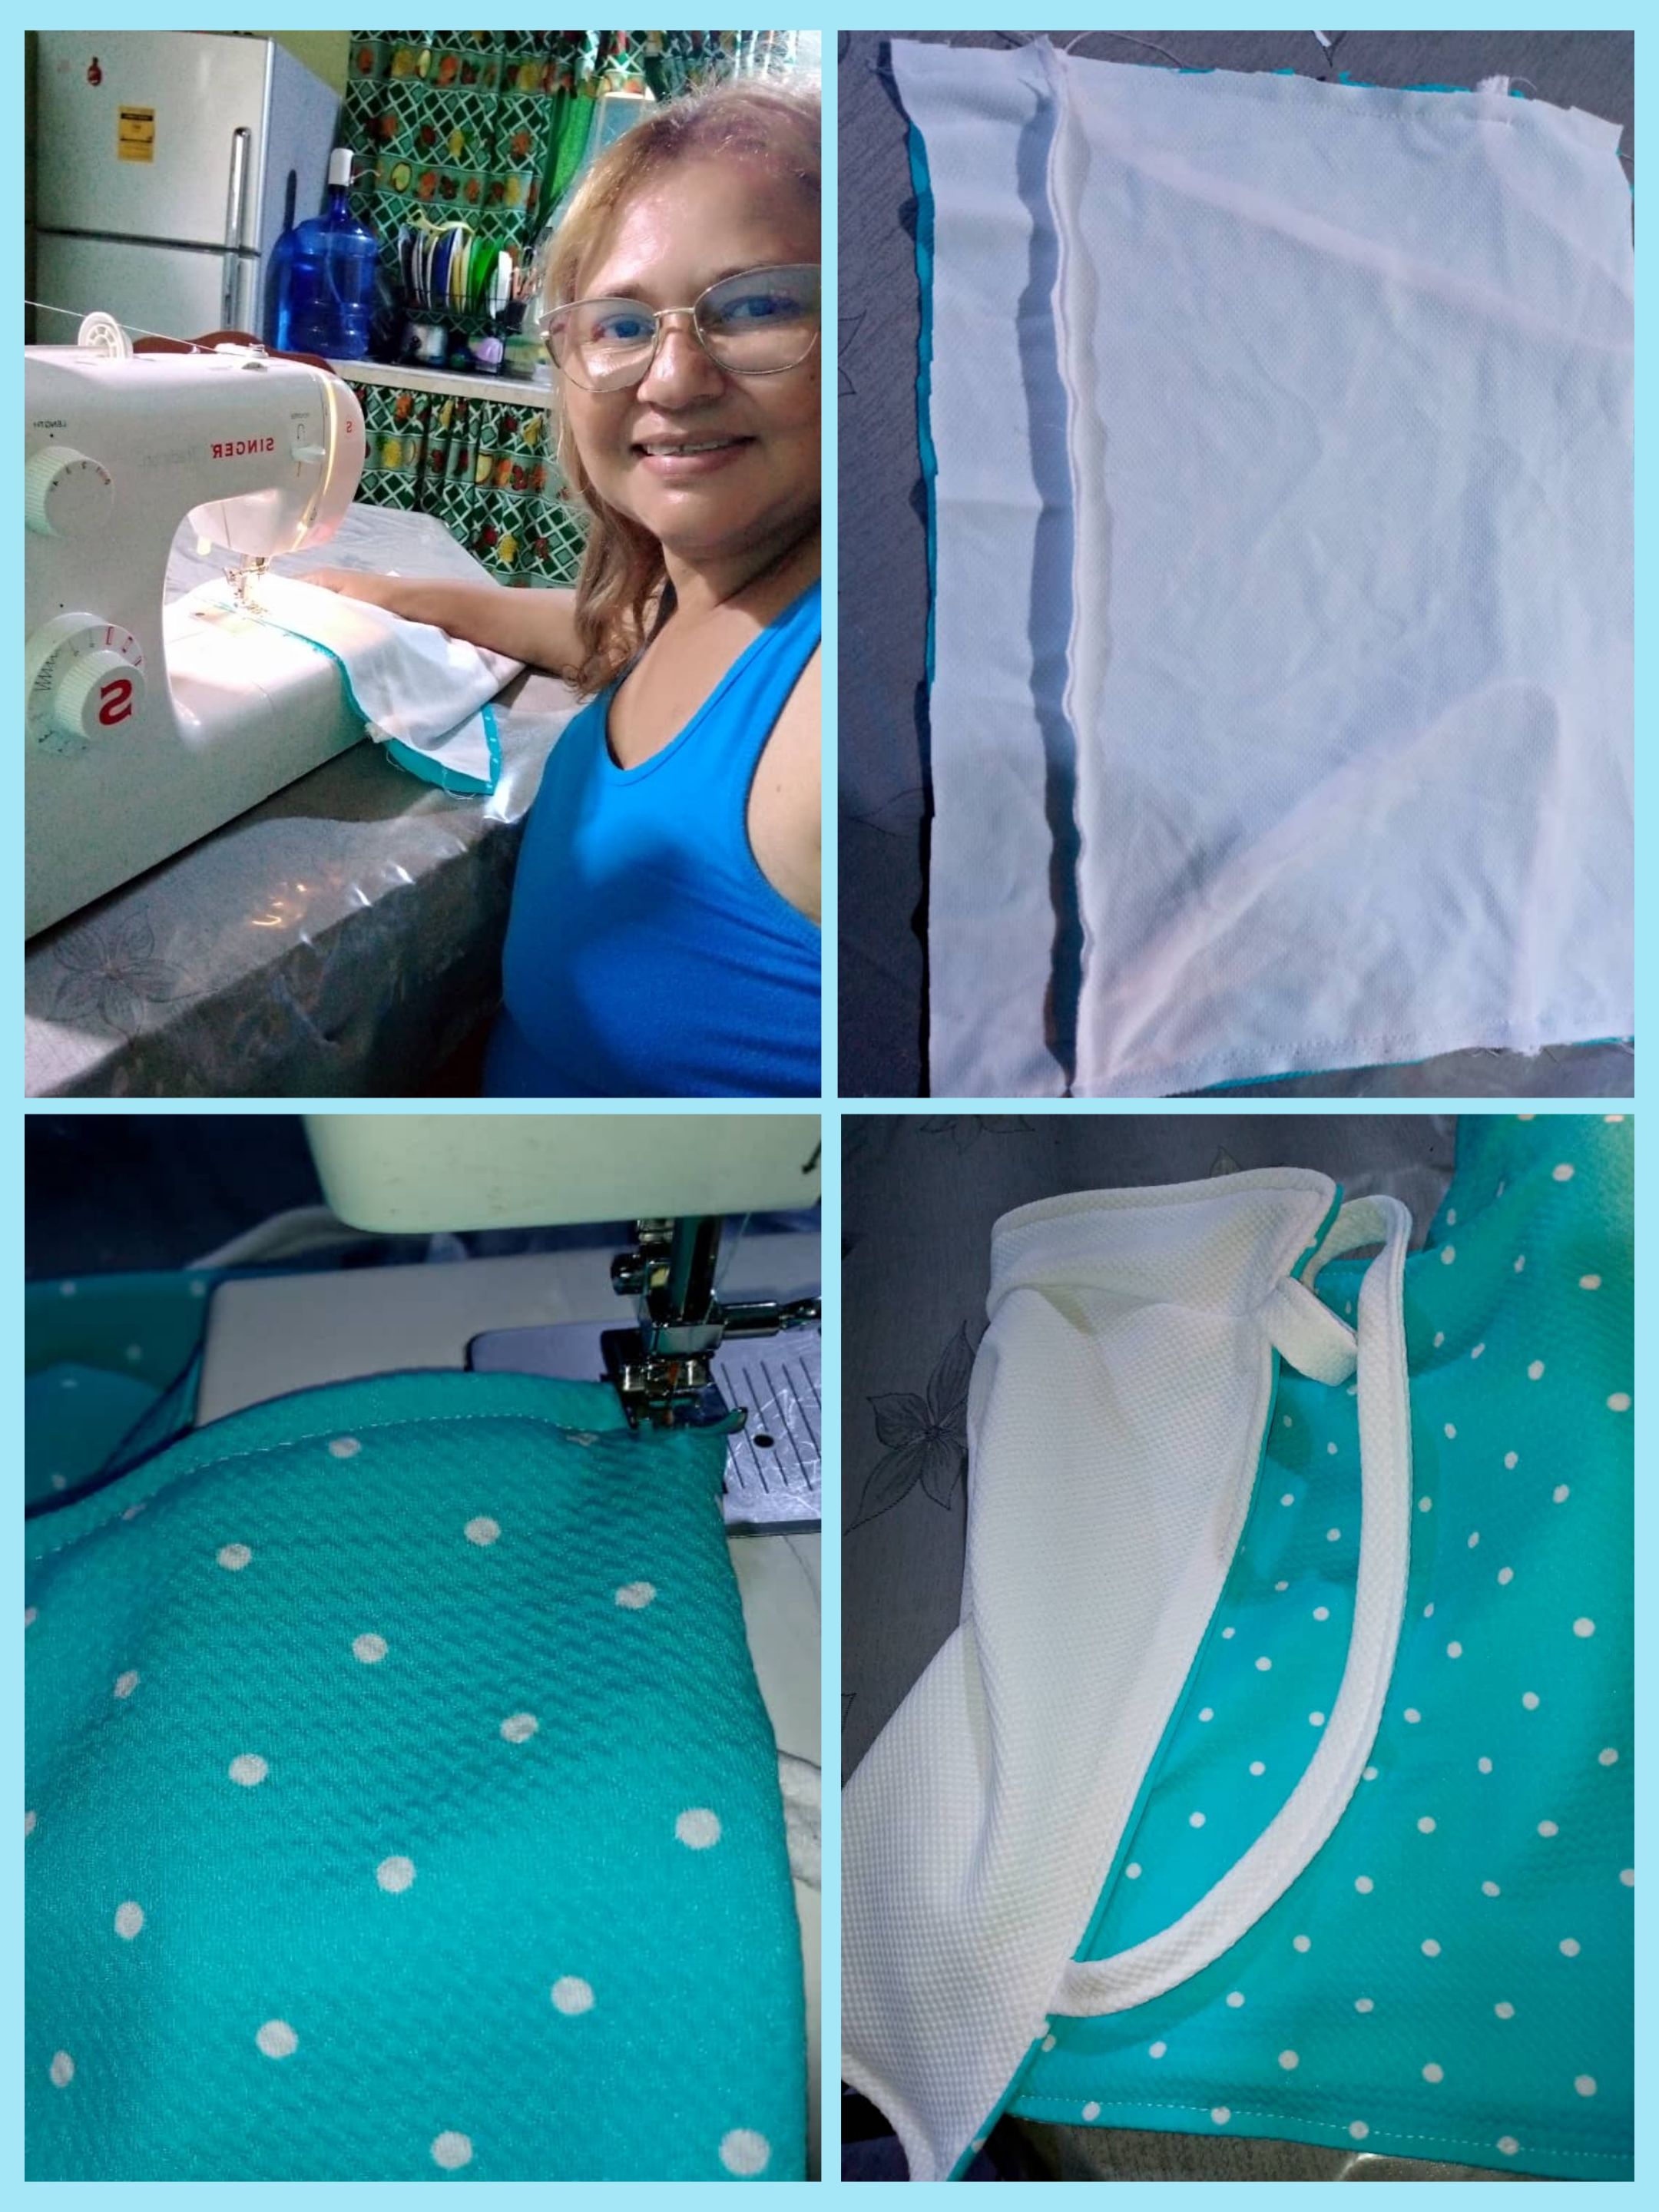
Mi proyecto de hoy , es uno de los que me gusta ,pero no me da tiempo en hacerlo. Ya que requiere de tiempo.
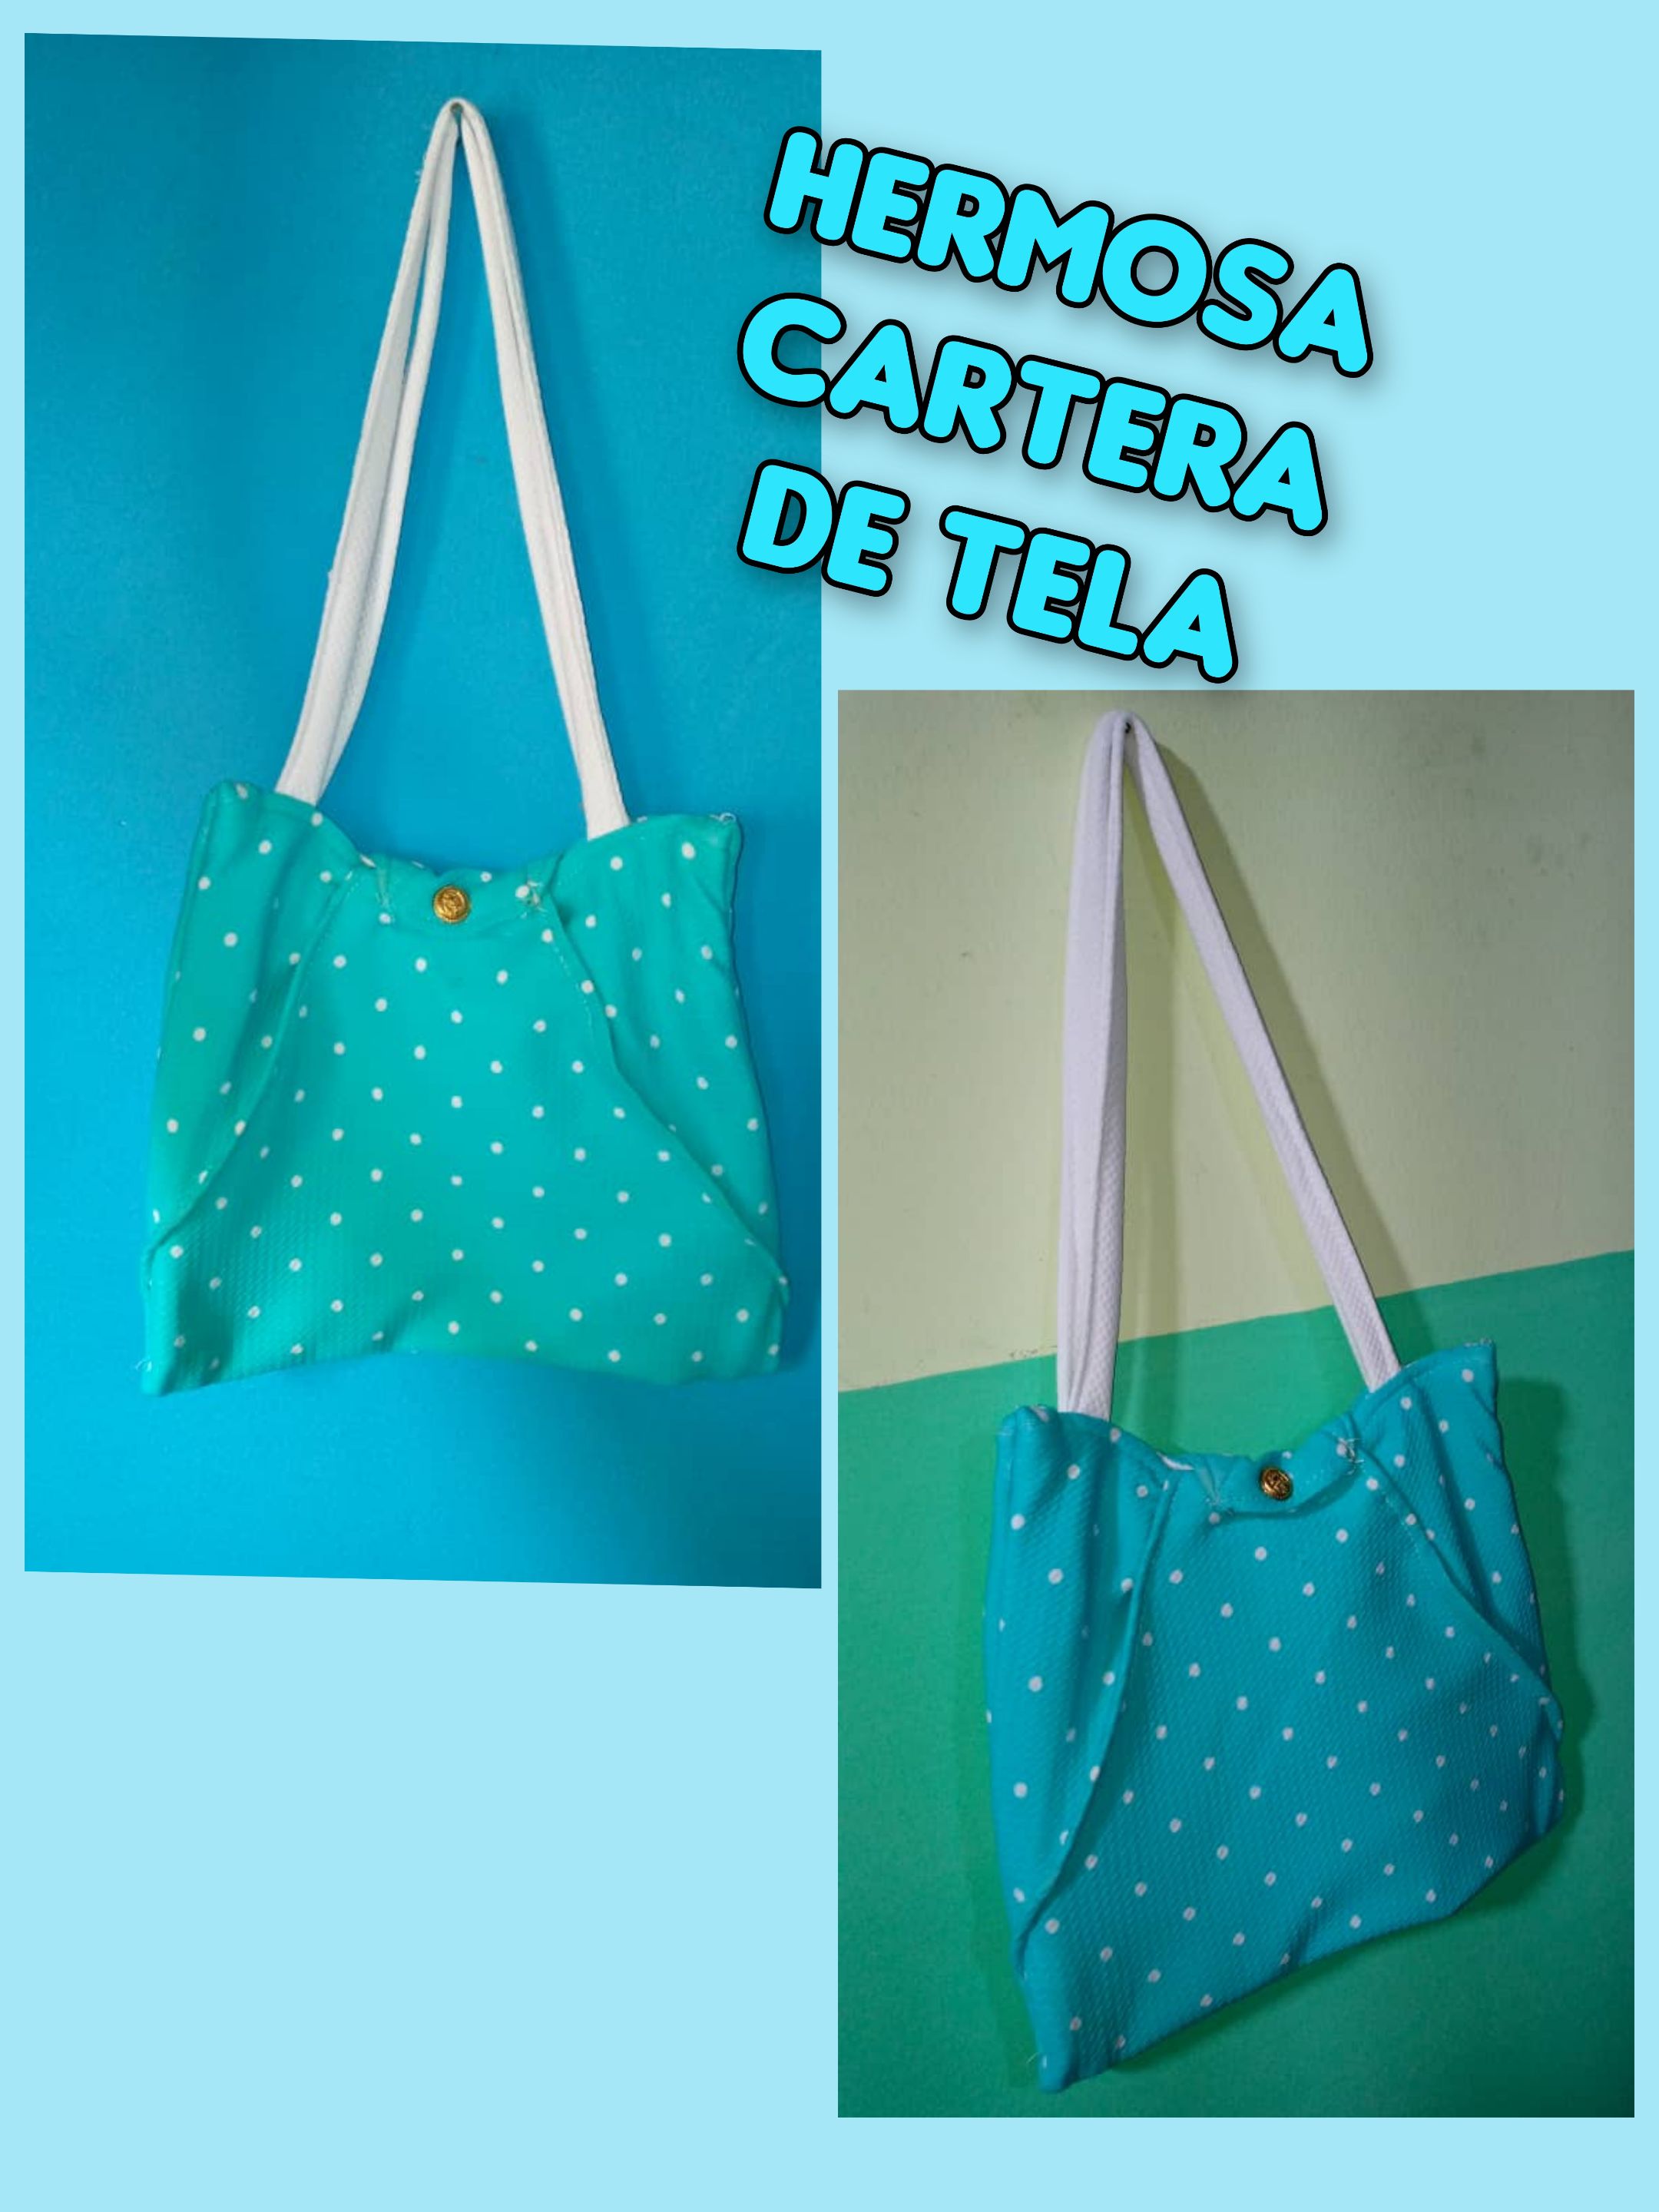
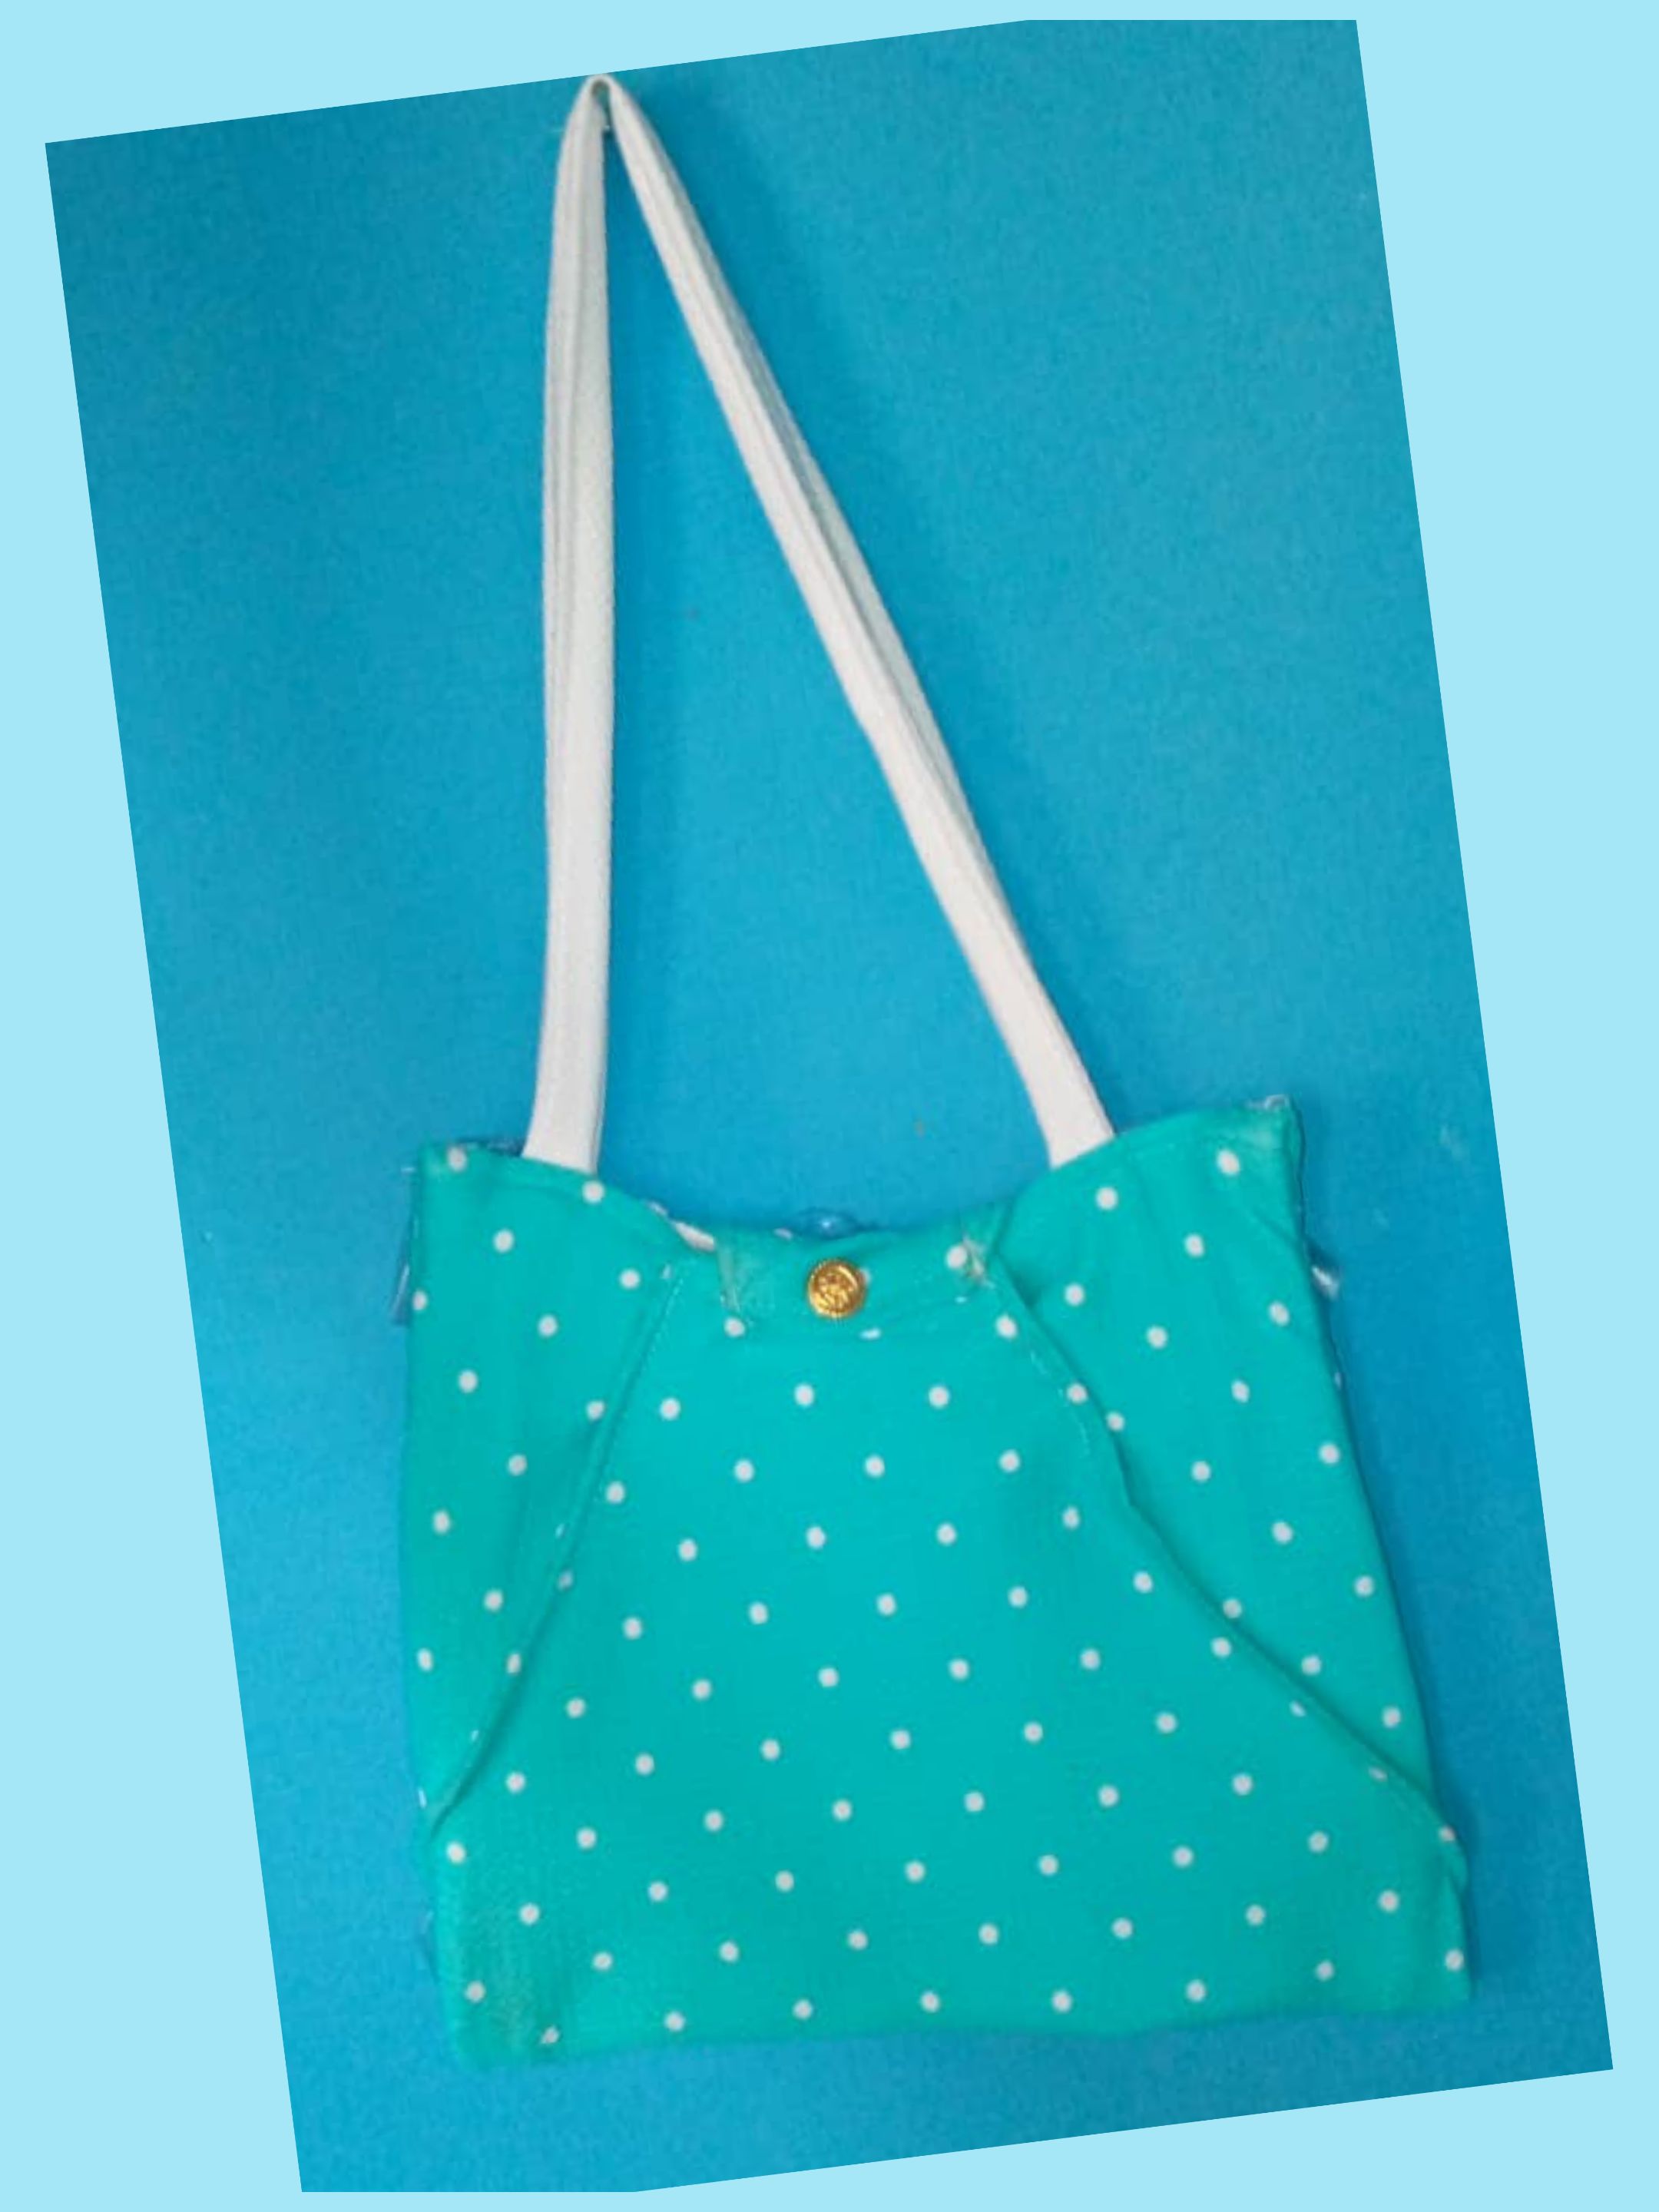
**Por lo tanto realice una cartera de tela , fácil de hacer y en poco tiempo.**
**Está cartera puede servir para meter cosas pequeñas , como: monedero, teléfonos, entre otros.**
También pueden hacerla del color de su preferencia, estampado o único color. Así que vamos a los materiales y a su realización.
>#### Welcome to my blog!
>Hello , happy Monday to all members of this community #diyhub , I hope you are well and are already resting in the comfort of your home with your families.
>My project today, is one of those that I like, but I do not have time to do it. Since it requires time.
**Therefore I made a fabric wallet, easy to make and in a short time.**
**This wallet can be used to put small things, such as: purse, phones, among others.**
>You can also make it in the color of your choice, patterned or single color. So let's go to the materials and its realization.
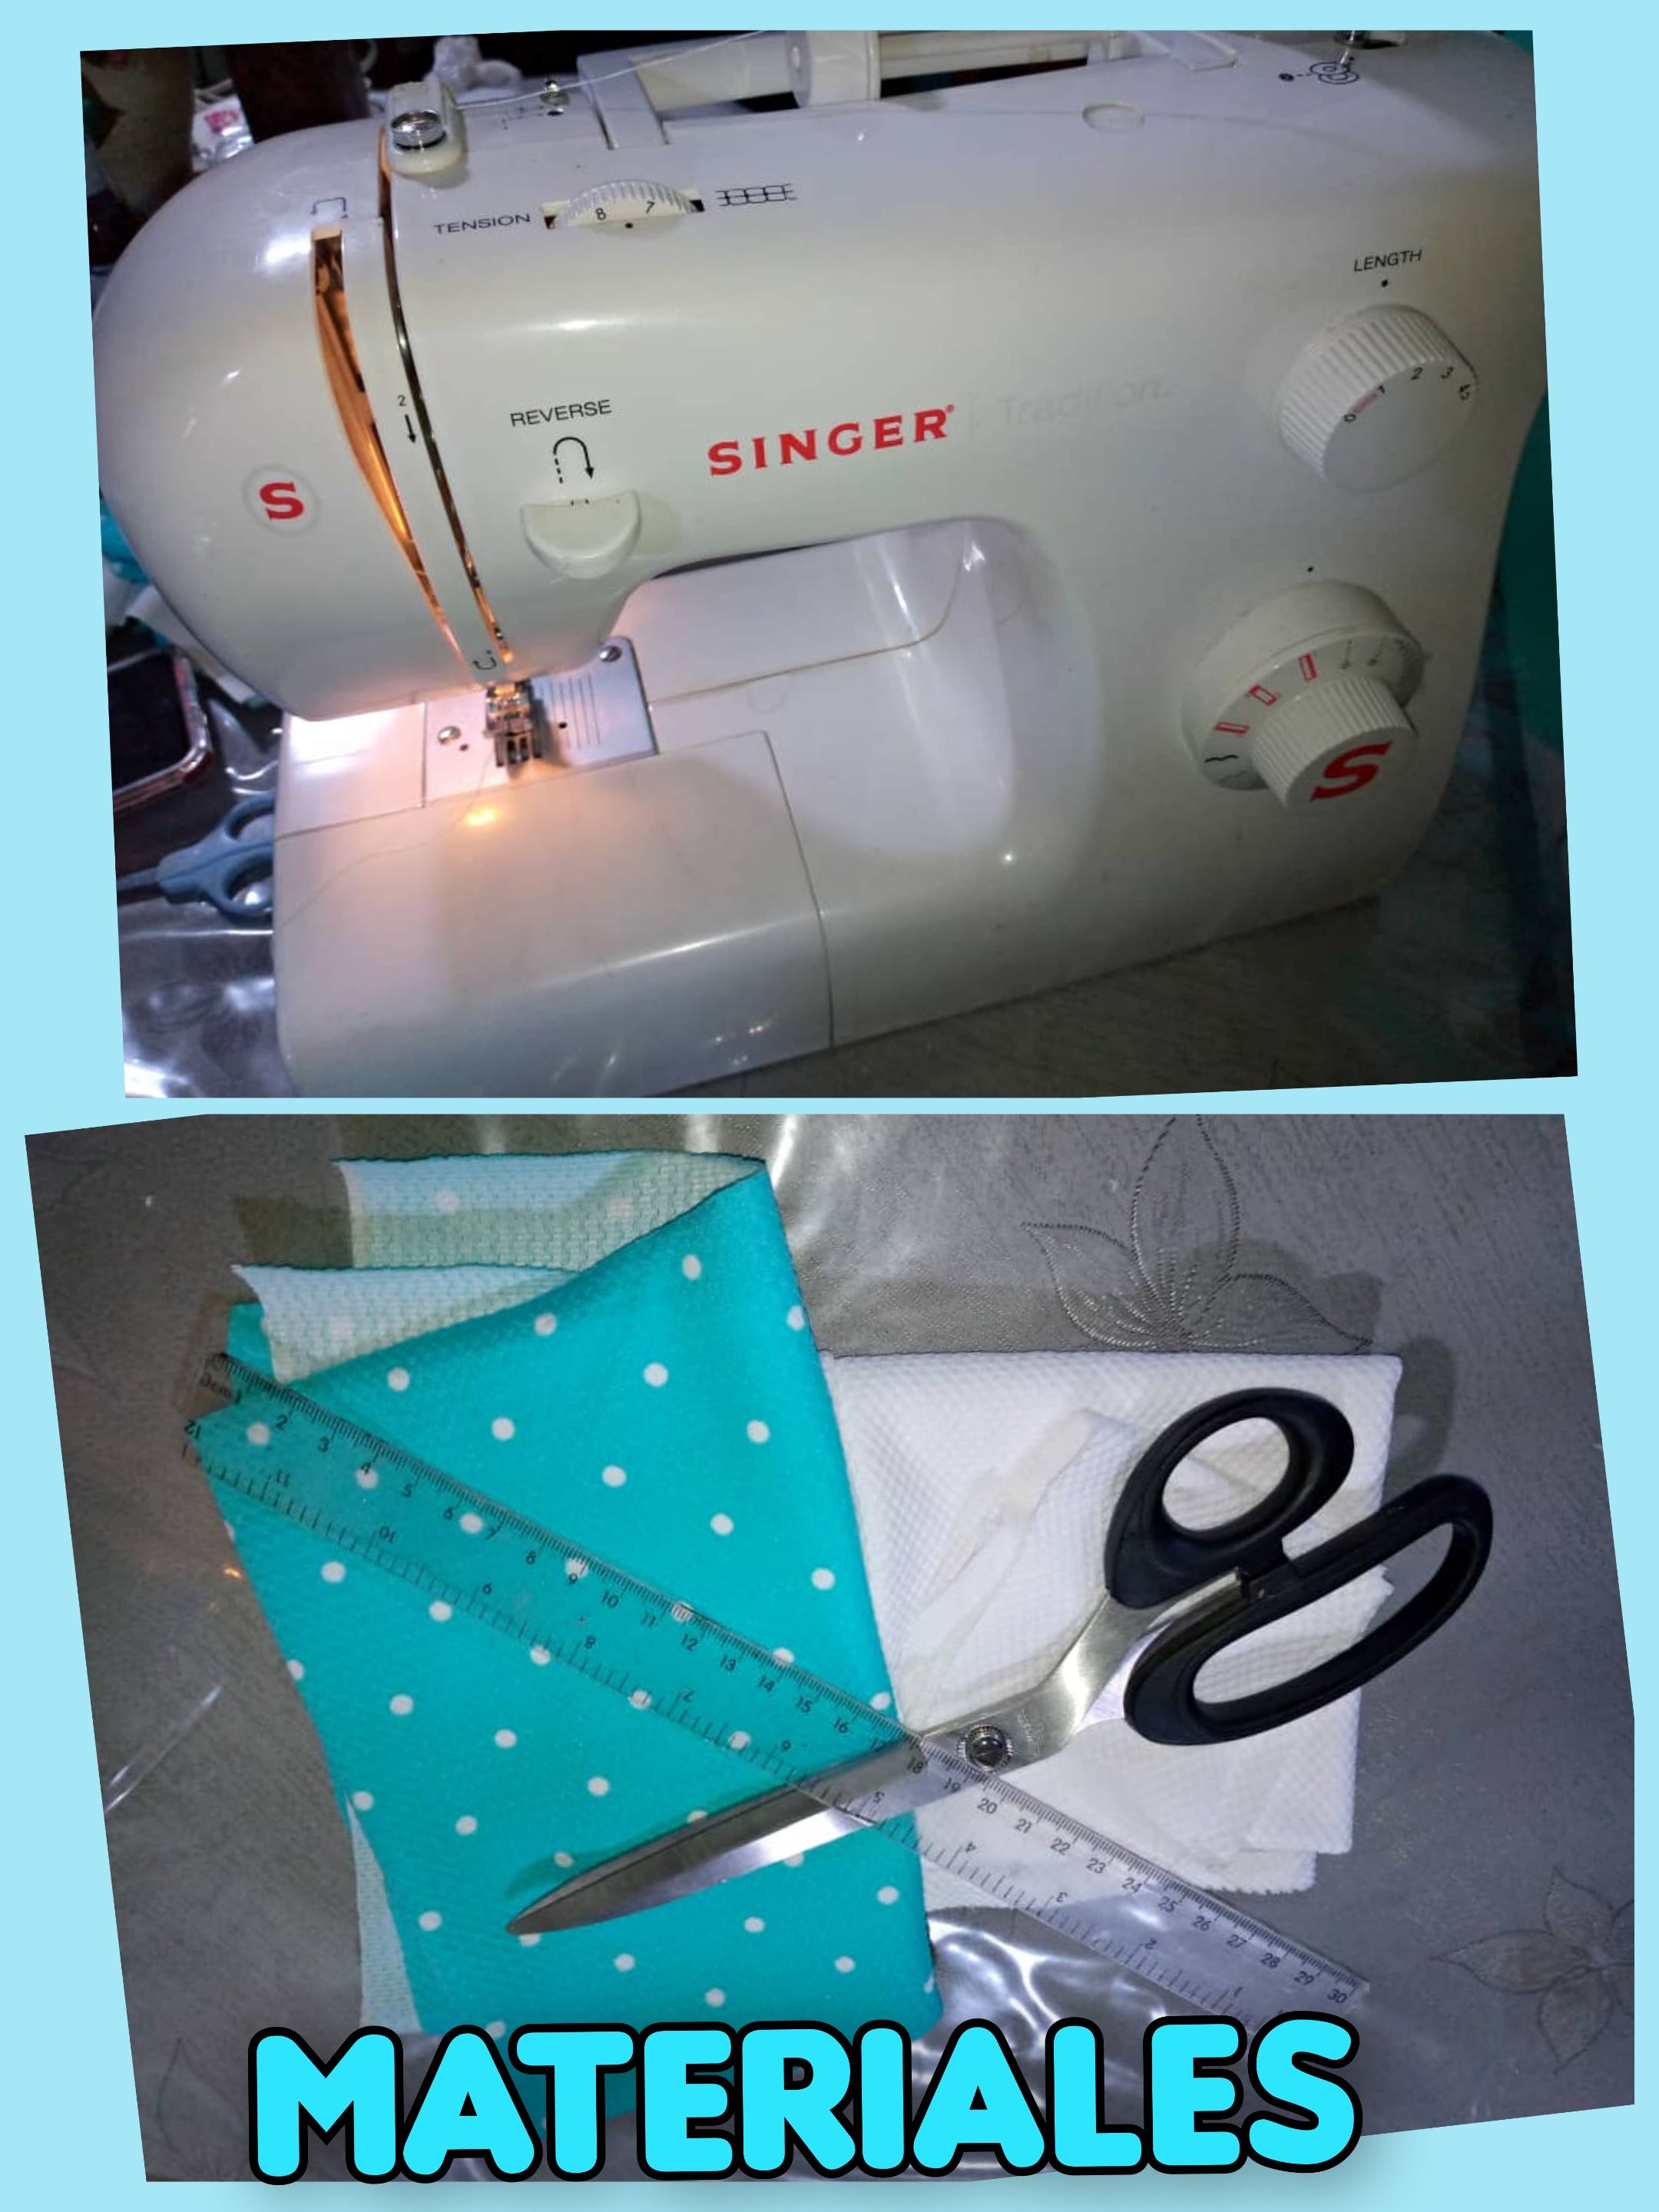
#### Materiales que se necesitan para la realización del lindo bolsito de tela:
- Tela de franela, color verde azulado con Pepas blancas o estampado.
- Tela de franela, color blanca.
- Hilo color blanco.
- Tijera.
- Maquina de coser.
- Regla.
- Tiza de colores.
- Botón dorado.
>#### Materials needed for the realization of the cute fabric bag:
>- Flannel fabric, teal color with white Pepas or print.
>- Flannel fabric, white color.
>- White thread.
>- Scissors.
>- Sewing machine.
>- Ruler.
>- Colored chalk.
>- Golden button.
#### Paso a paso del lindo bolsito de tela:
- Lo primero que se debe hacer ,es picar la tela estampada ,56 x 37 cm , quedará un rectángulo . La tela blanca también se corta con las medidas: 56 x 37 cm.
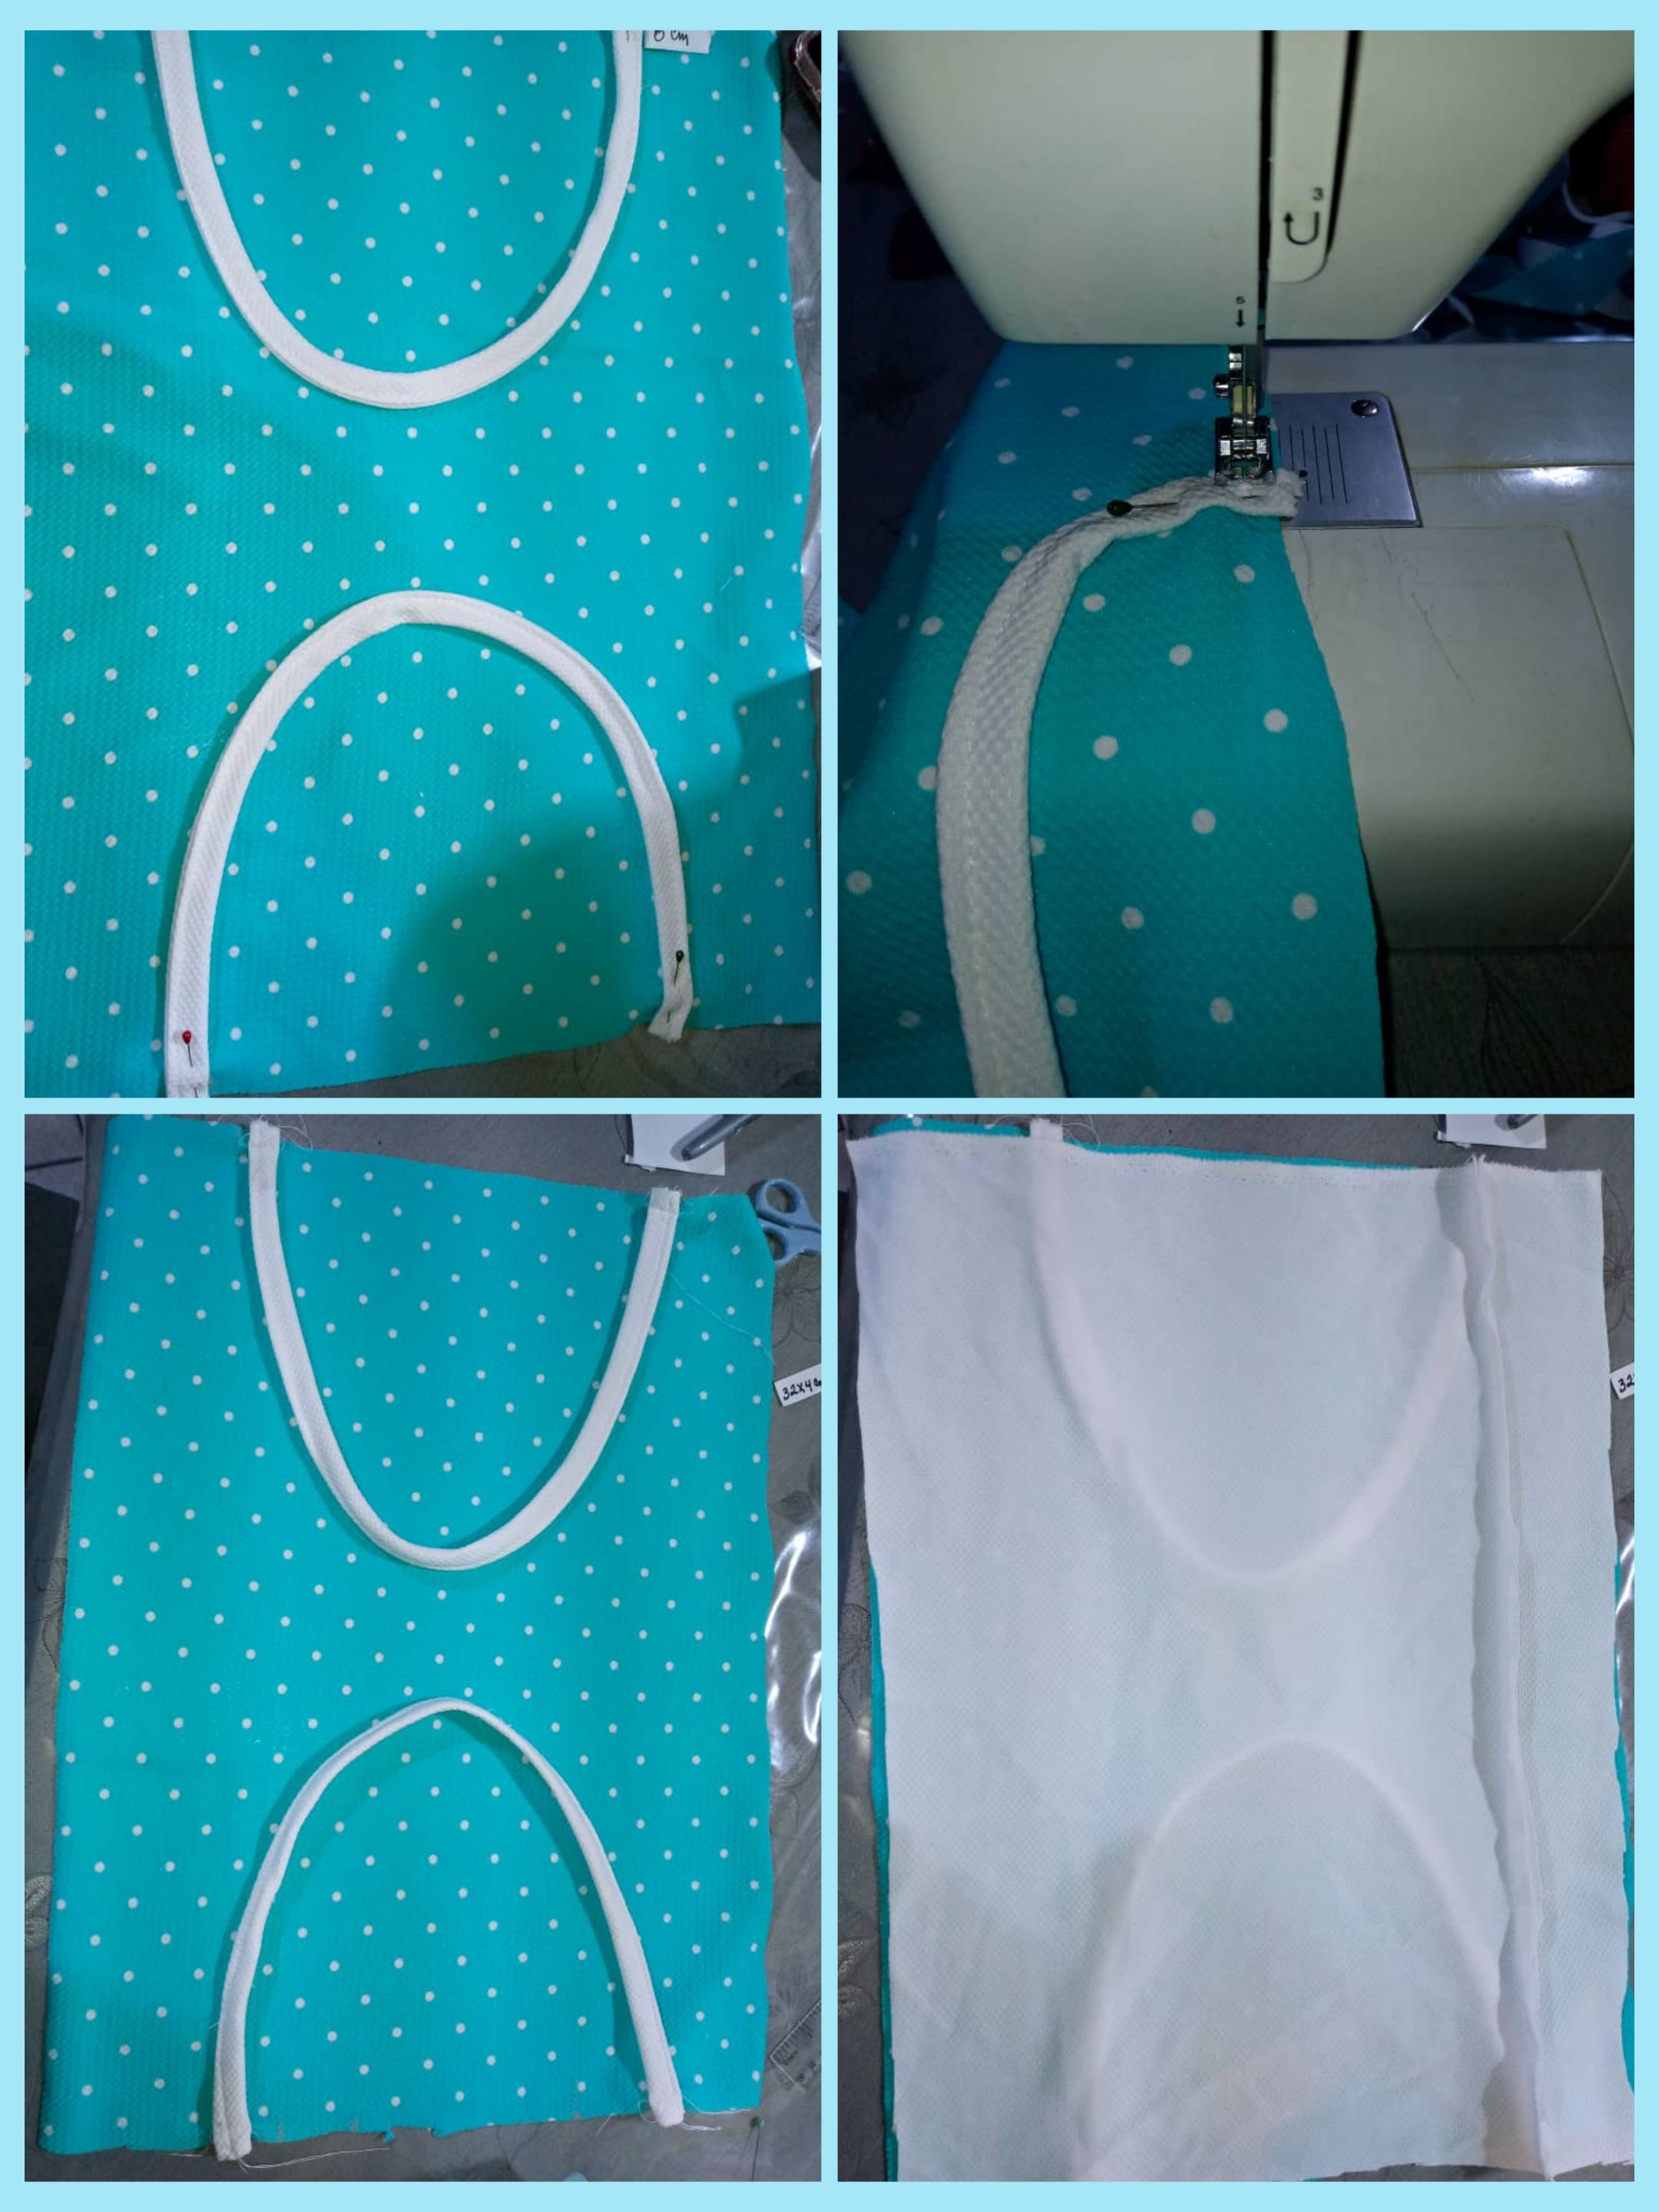
- Luego para el asa ,con la tela blanca, se recorta 34 x 4 cm.
- Se cose la tela y se le da la vuelta a a la tela , para que se haga más fácil , con un gancho de pelo ,se mete dentro de la tela cosida y se pone al derecho. Se cose por los extremos.
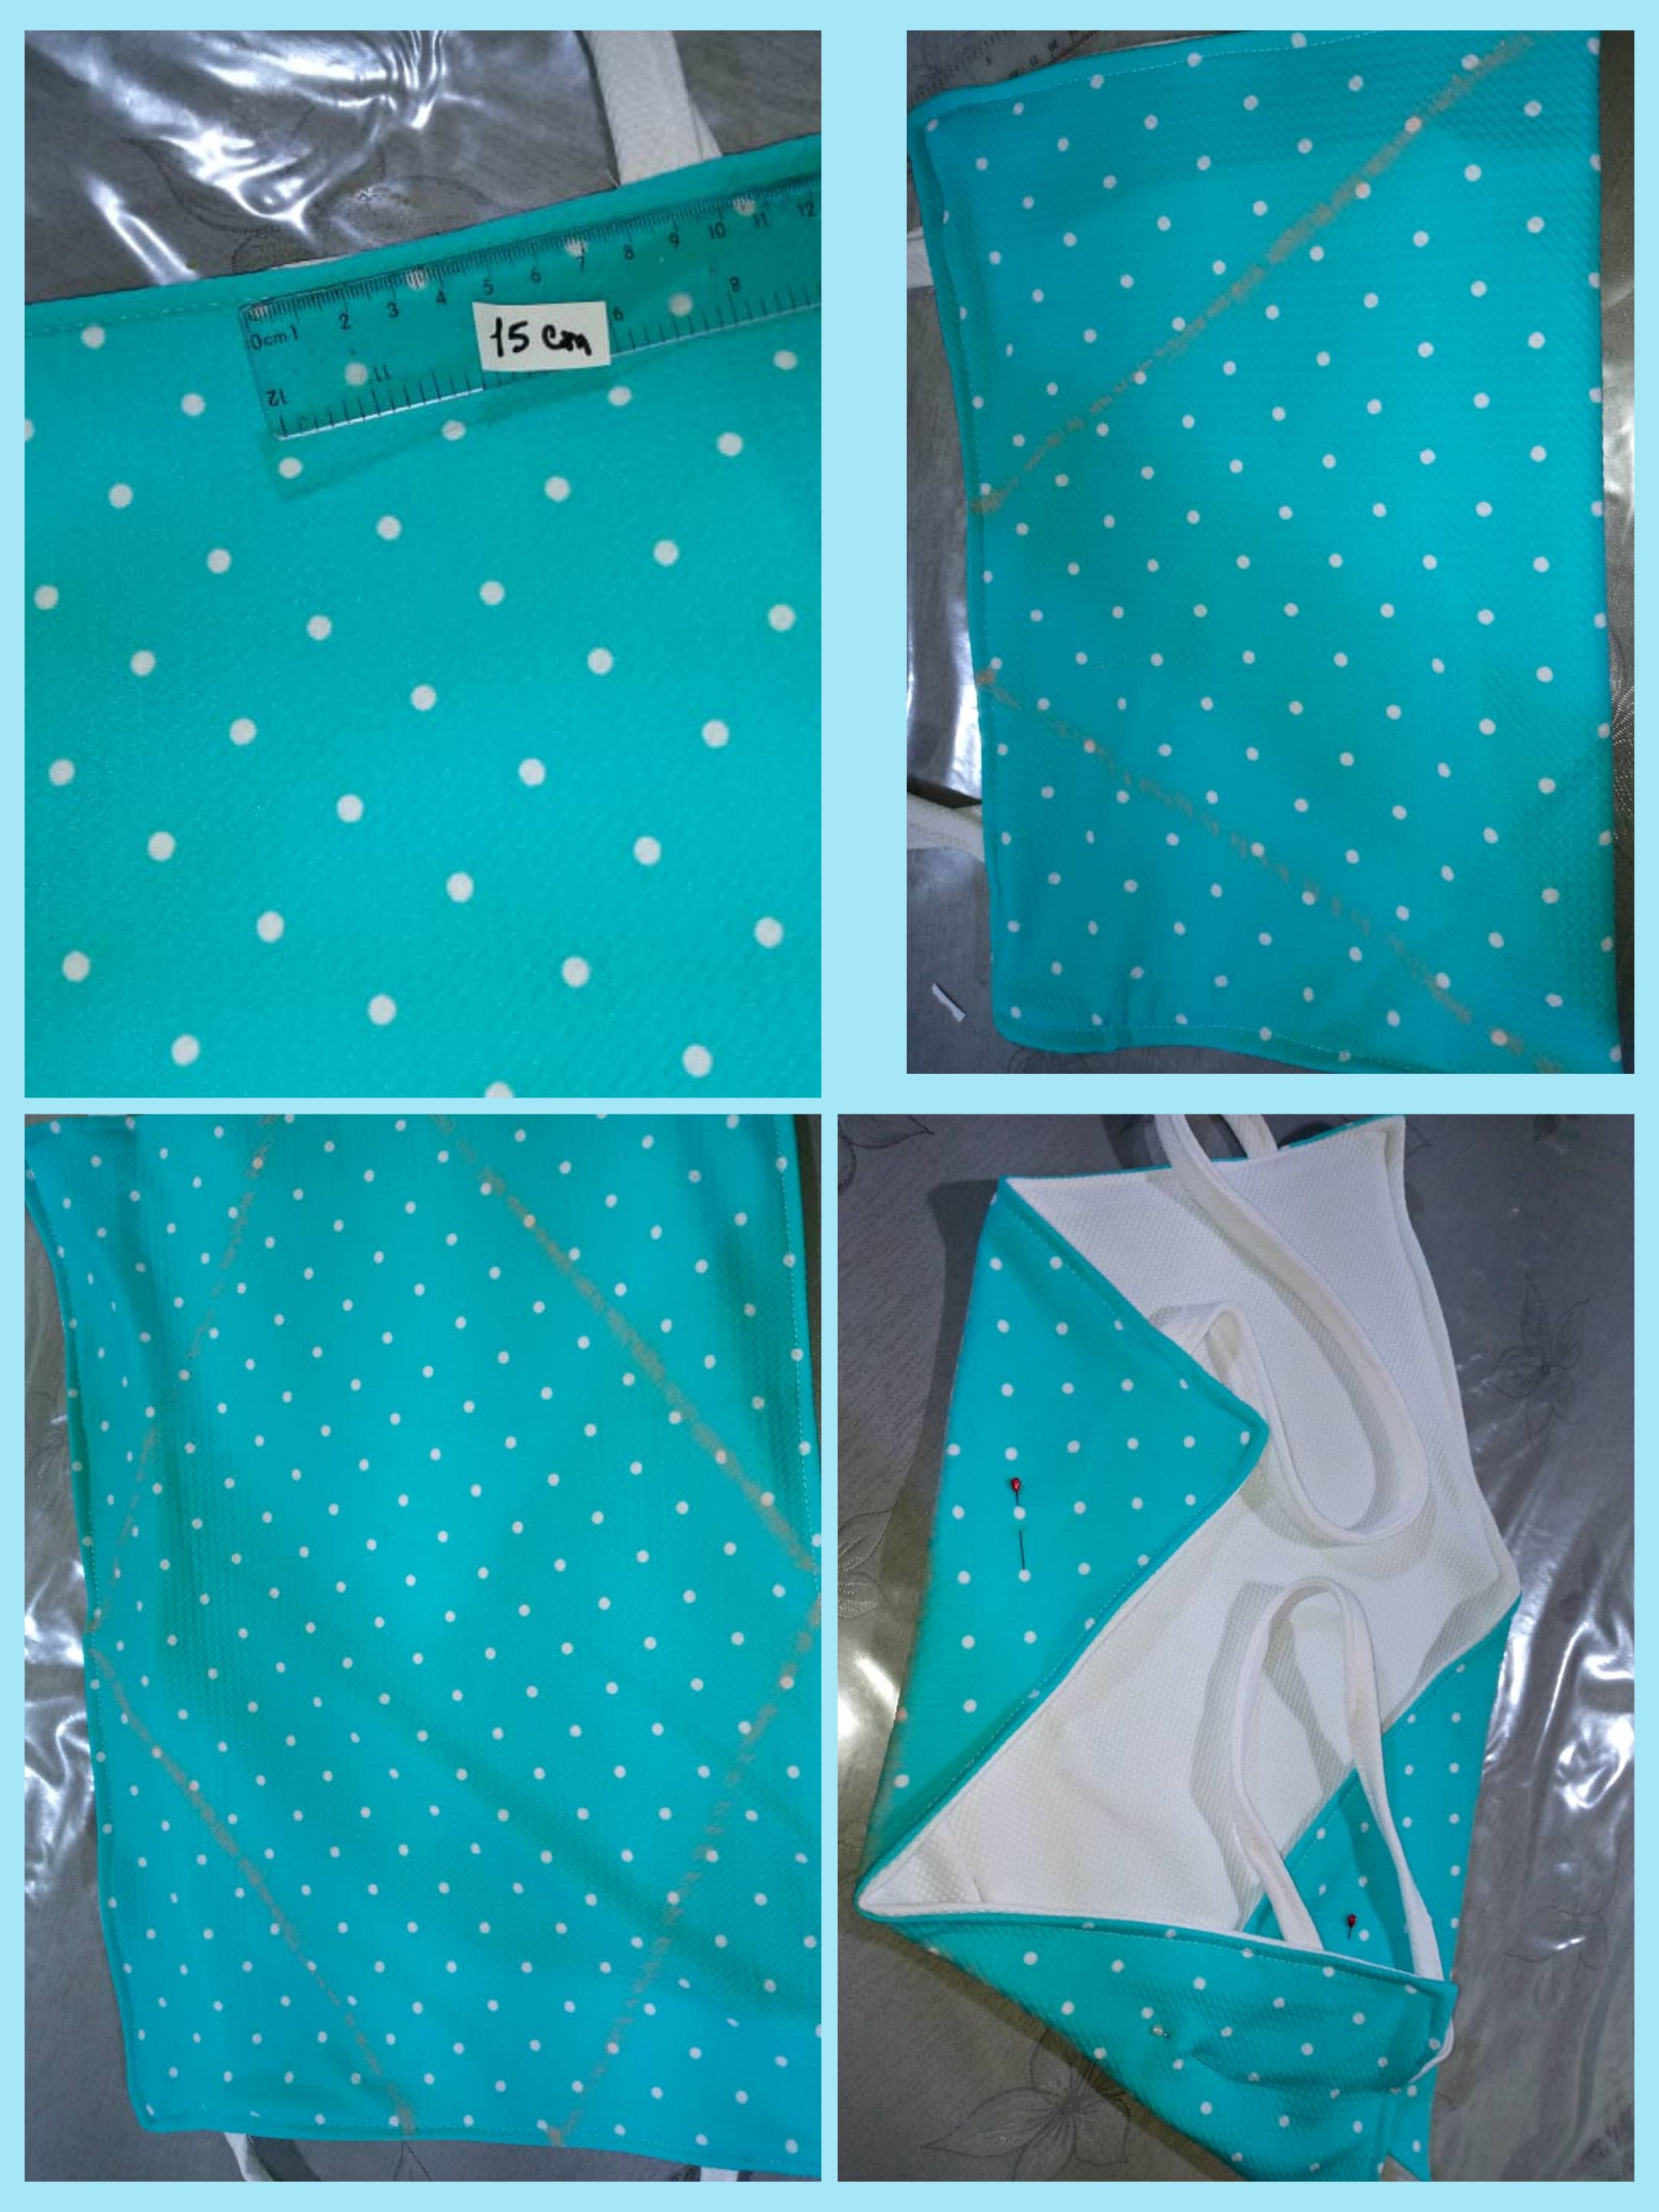
- Ya teniendo el asa del bolso. Se procede a colocarlo en ambos lados de la tela estampada de pelotas o estampada, dejando 15 cm de medida de un lado y otro lado. Pueden guiarse por la imagen para que se le haga más fácil.
- Después de hacer cosido el asa en ambos lados . Colocar encima la tela blanca y coserla solo en los lados.
- Voltear el bolso por el derecho y coserla por toda las orillas.
- Marcar 12 cm de un lado y 12 del otro lado. Con una tiza y la regla medir y marcar una raya de arriba hacia la punta. Igual para el otro ro lado.
Después de marcar pasar costura por todo lo marcado.
.Luego doblar una parte de lo que sé doblo para la parte de arriba. - Pueden guiar la imagen.
- Se pega el botón ,en la parte delantera de cartera y ya está lista .
>#### Step by step of the cute fabric bag:
>- The first thing to do ,is to chop the printed fabric ,56 x 37 cm , it will be a rectangle . The white fabric is also cut with the measures: 56 x 37 cm.
>- Then for the handle, with the white fabric, cut out 34 x 4 cm.
>- Sew the fabric and turn the fabric inside out, to make it easier, with a hairpin hook, put it inside the sewn fabric and put it right side out. It is sewn by the ends.
>- Already having the handle of the bag. Proceed to place it on both sides of the fabric printed with balls or printed, leaving 15 cm of measure from one side to the other side. You can be guided by the image to make it easier.
>- After sewing the handle on both sides. Place the white fabric on top and sew it only on the sides.
>- Turn the bag right side out and sew along the edges.
>- Mark 12 cm on one side and 12 cm on the other side. With a chalk and a ruler measure and mark a line from the top to the tip. The same for the other side.
>- After marking, pass the stitching all over the marked area.
>-Then fold a part of what I folded for the top. - You can guide the image.
>- Glue the button on the front of the wallet and it is ready.

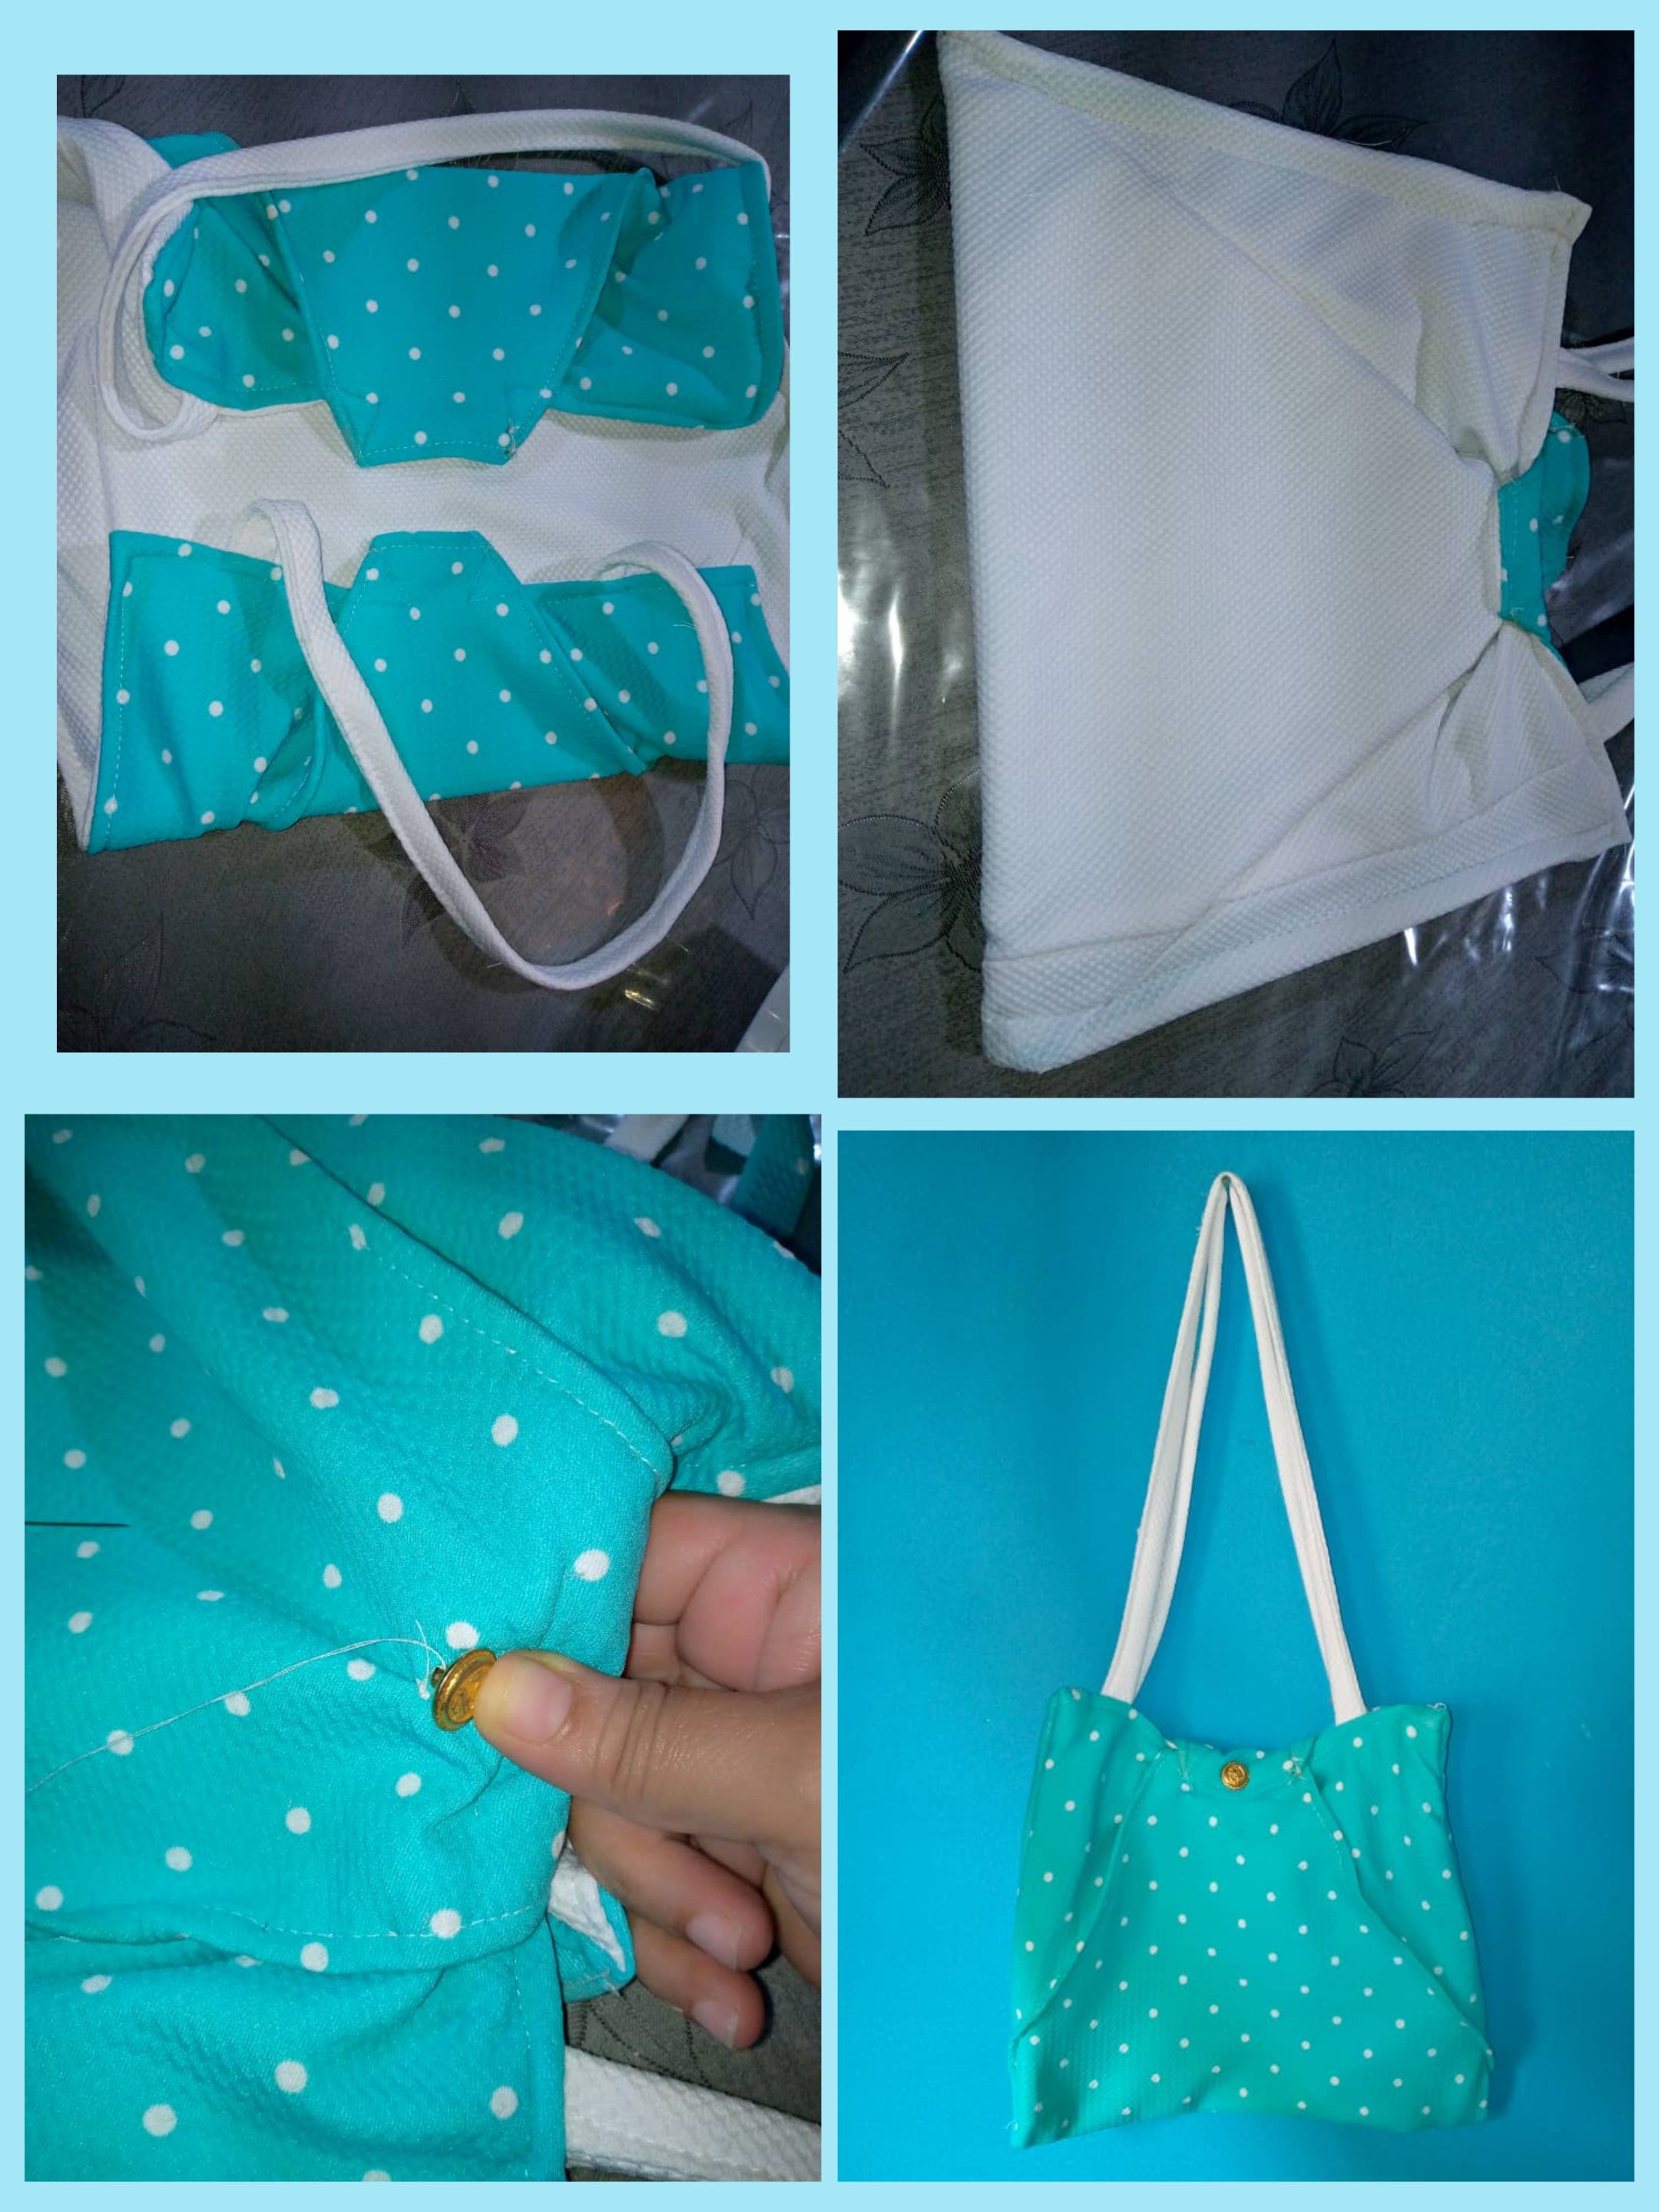
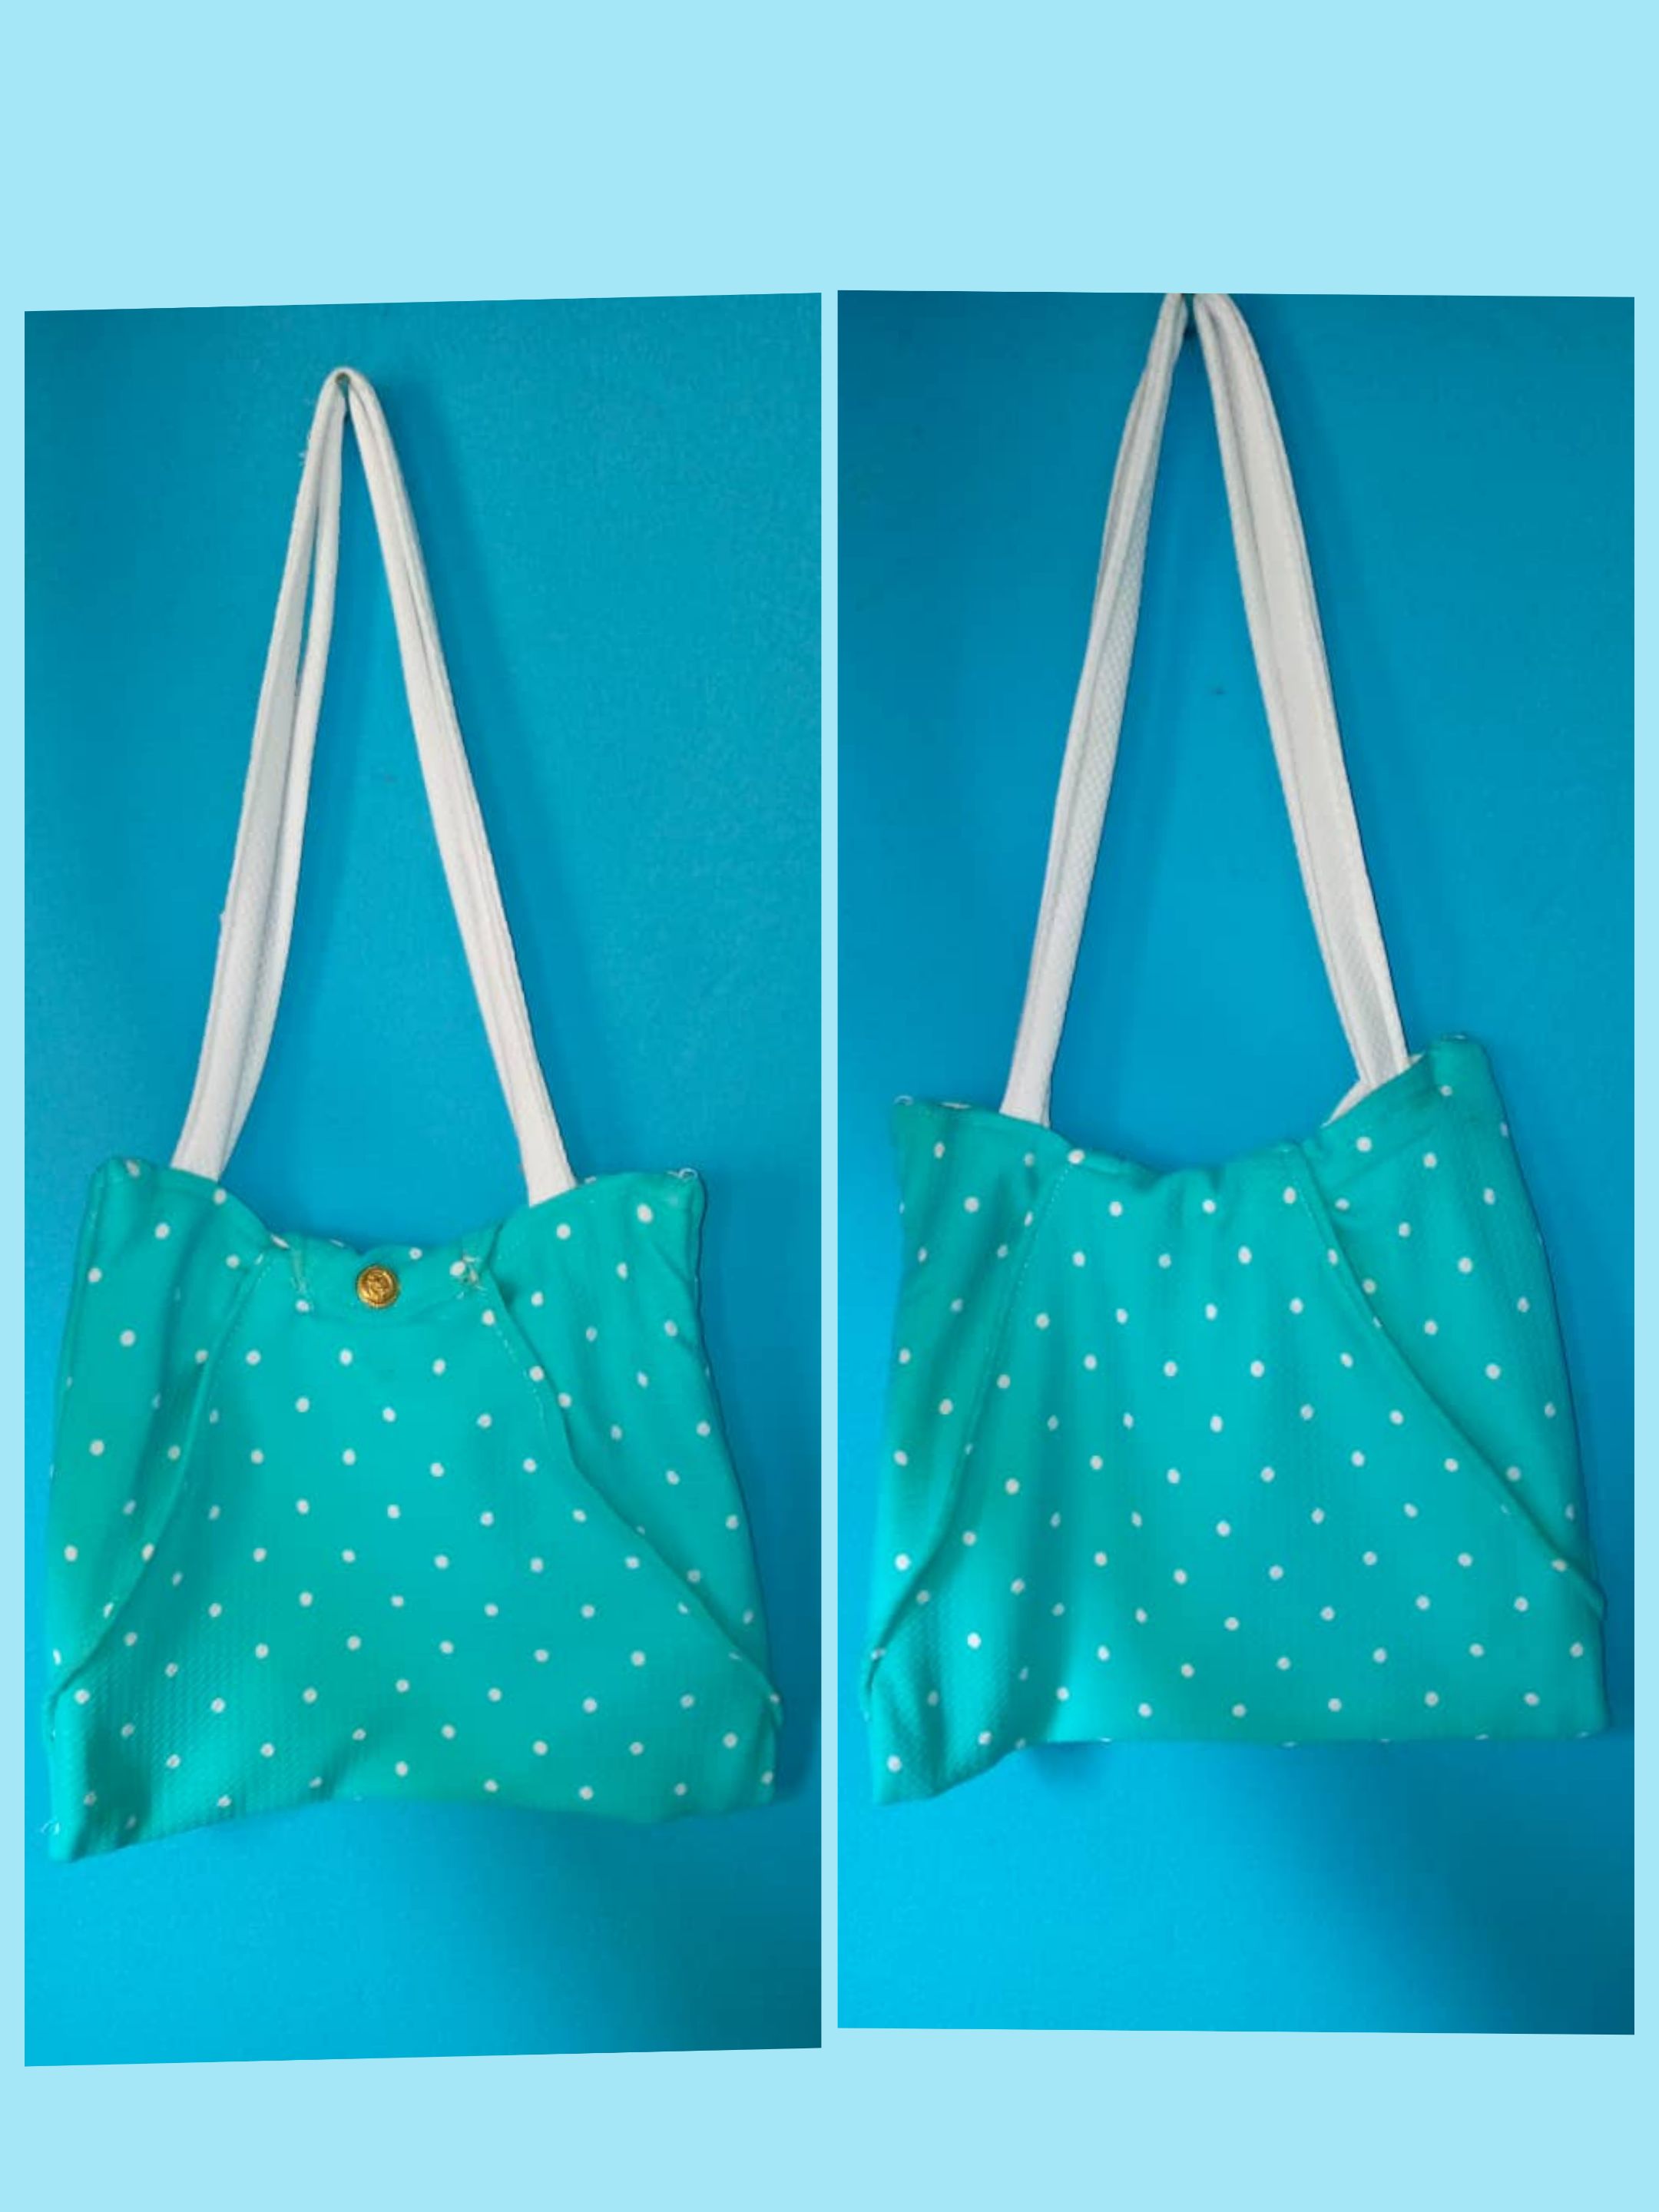
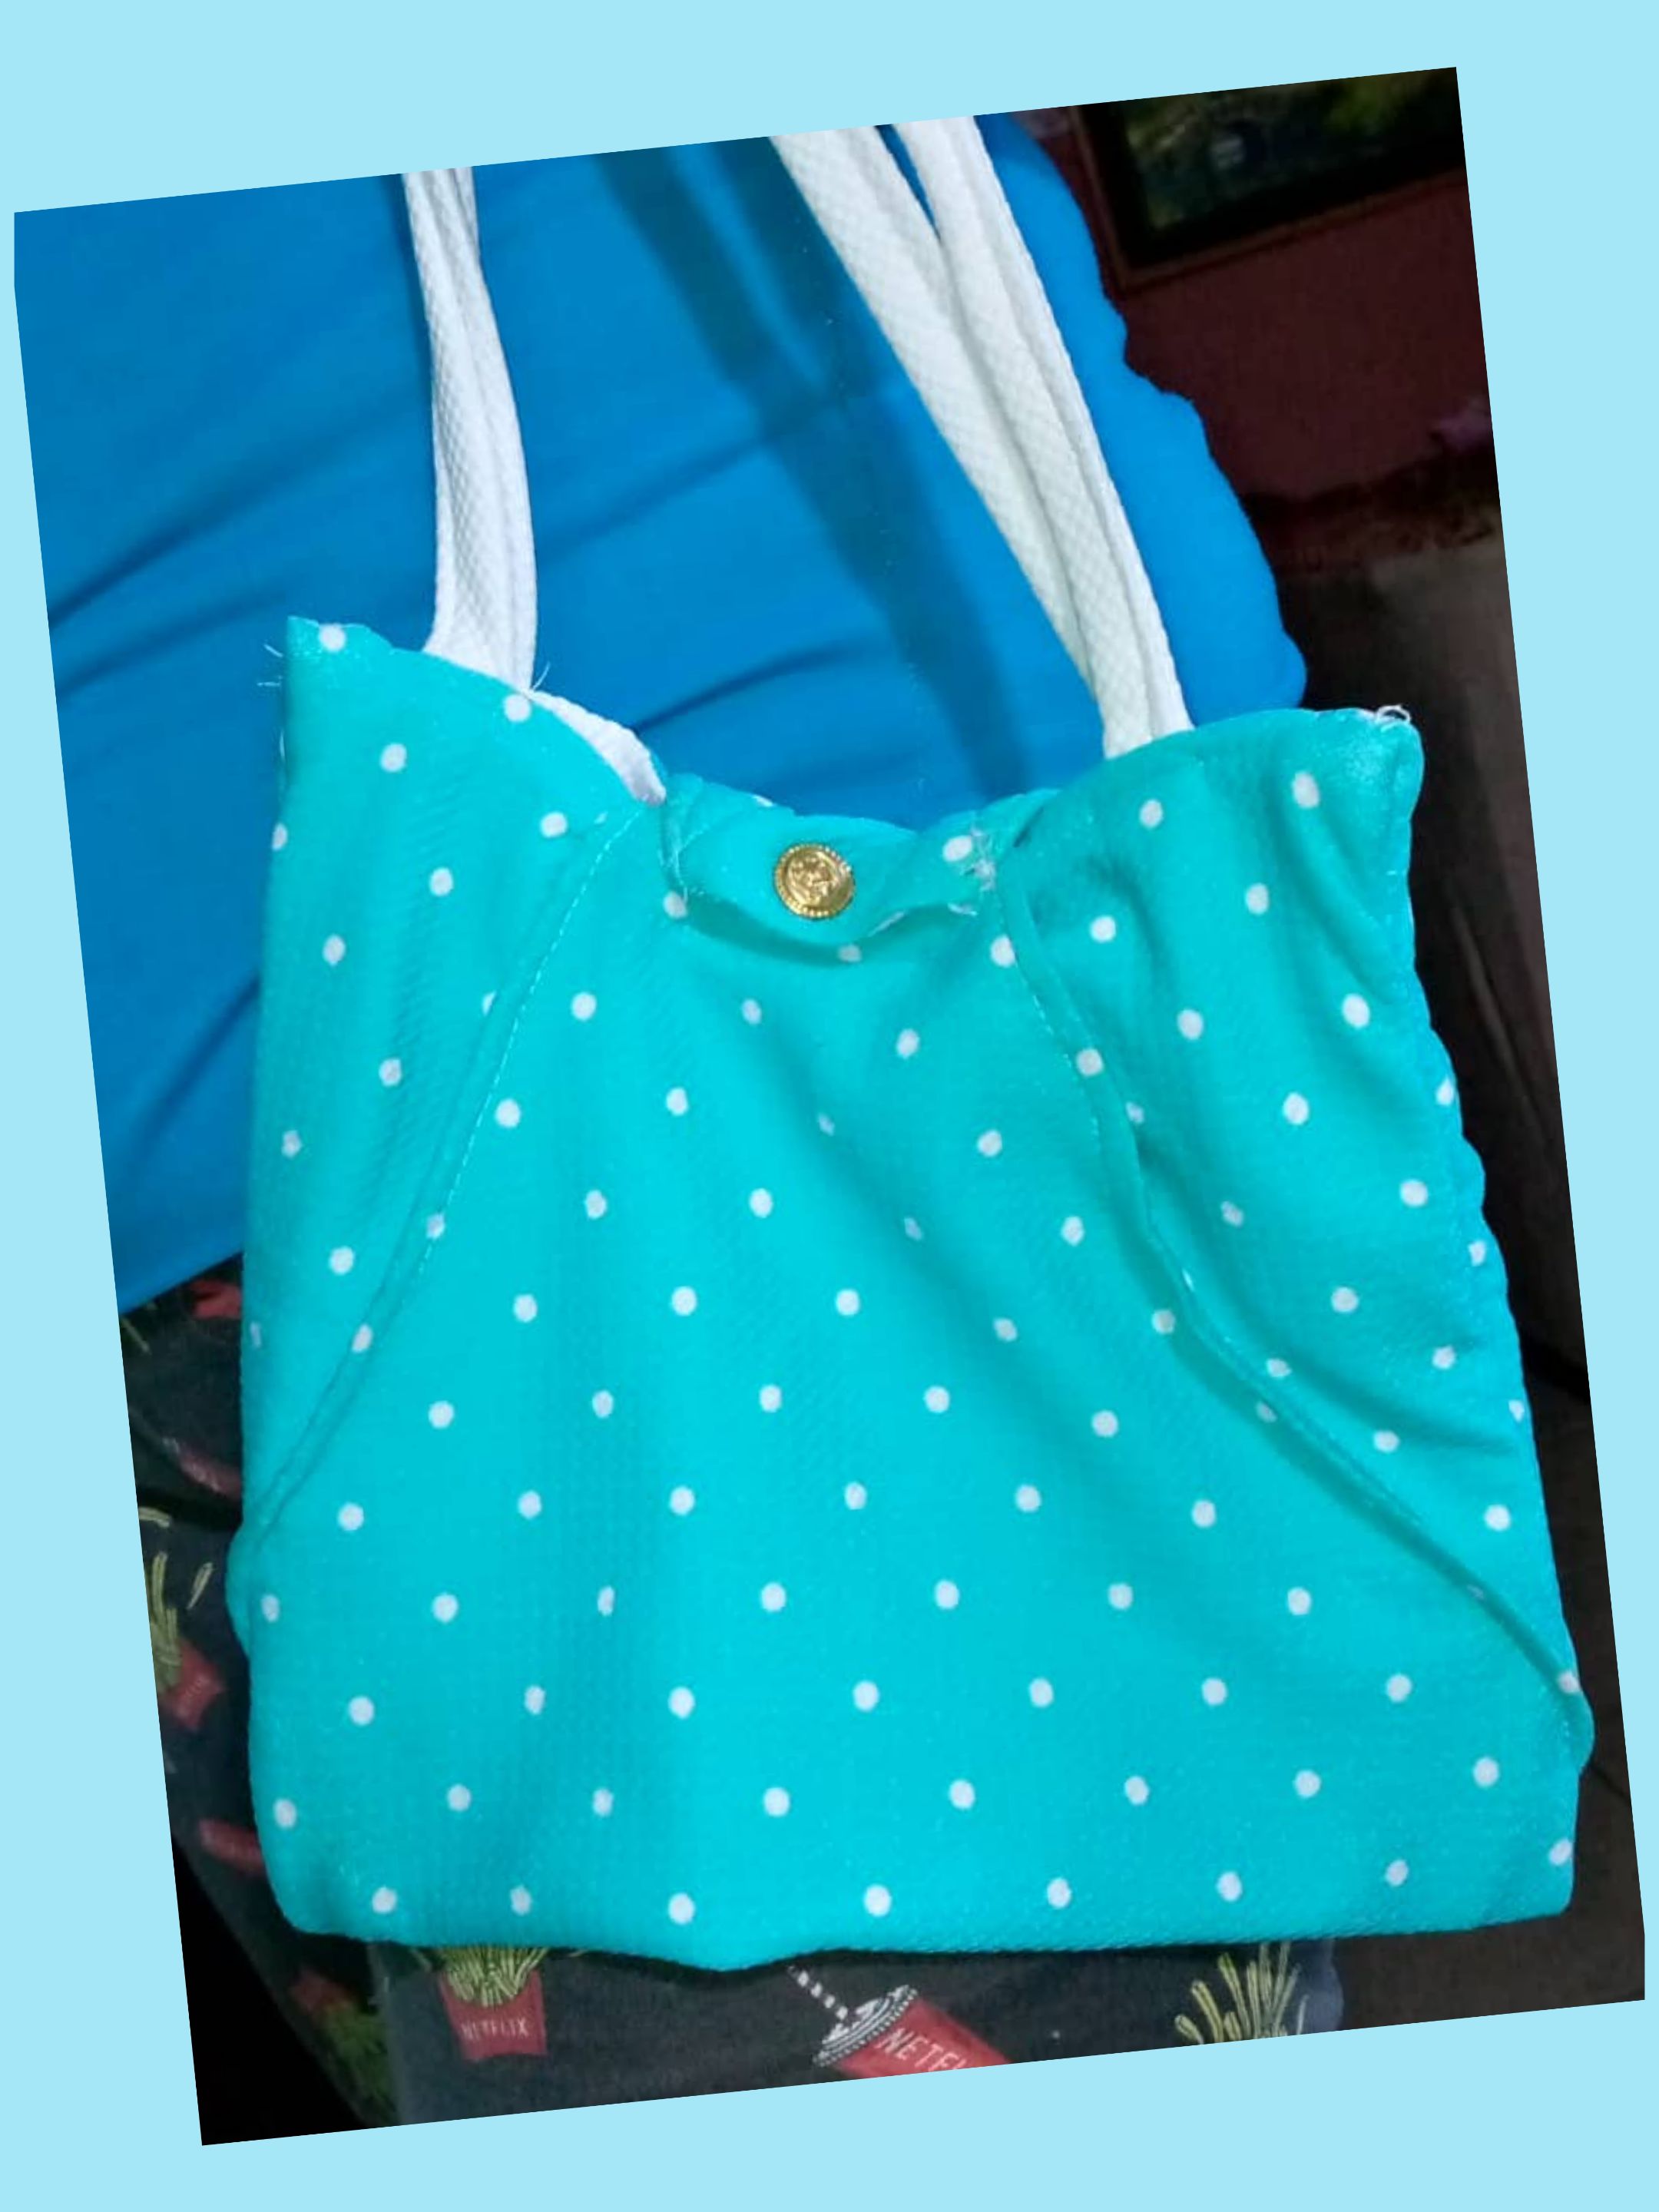
##### Aquí el resultado final del lindo bolsito de tela hecho en pocos minutos.
>##### Here is the final result of the cute fabric bag made in a few minutes.

Gracias por leer y comentar mi post ,las fotos son mías . Tomadas con teléfono Infimlx, editfasy con incollage y traducida por Deepl
>Thanks for reading and commenting on my post ,the photos are mine . Taken with Infimlx phone, editfasy with incollage and translated by Deepl
(Esp/Eng) Diy: Cartera de tela hecha en pocos minutos / Diy: Fabric wallet made in a few minutes
@josdelmi
· 2025-09-09 03:13
· DIYHub
#diyhub
#spanish
#bricolaje
#tutorial
#costura
#creativo
#reciclaje
#creativecoin
#neoxian
Payout: 8.121 HBD
Votes: 284
More interactions (upvote, reblog, reply) coming soon.