Hola , buenas noches a todos los miembros de esta comunidad #diyhub , espero que se encuentren bien junto a toda su familia. Dios les bendiga
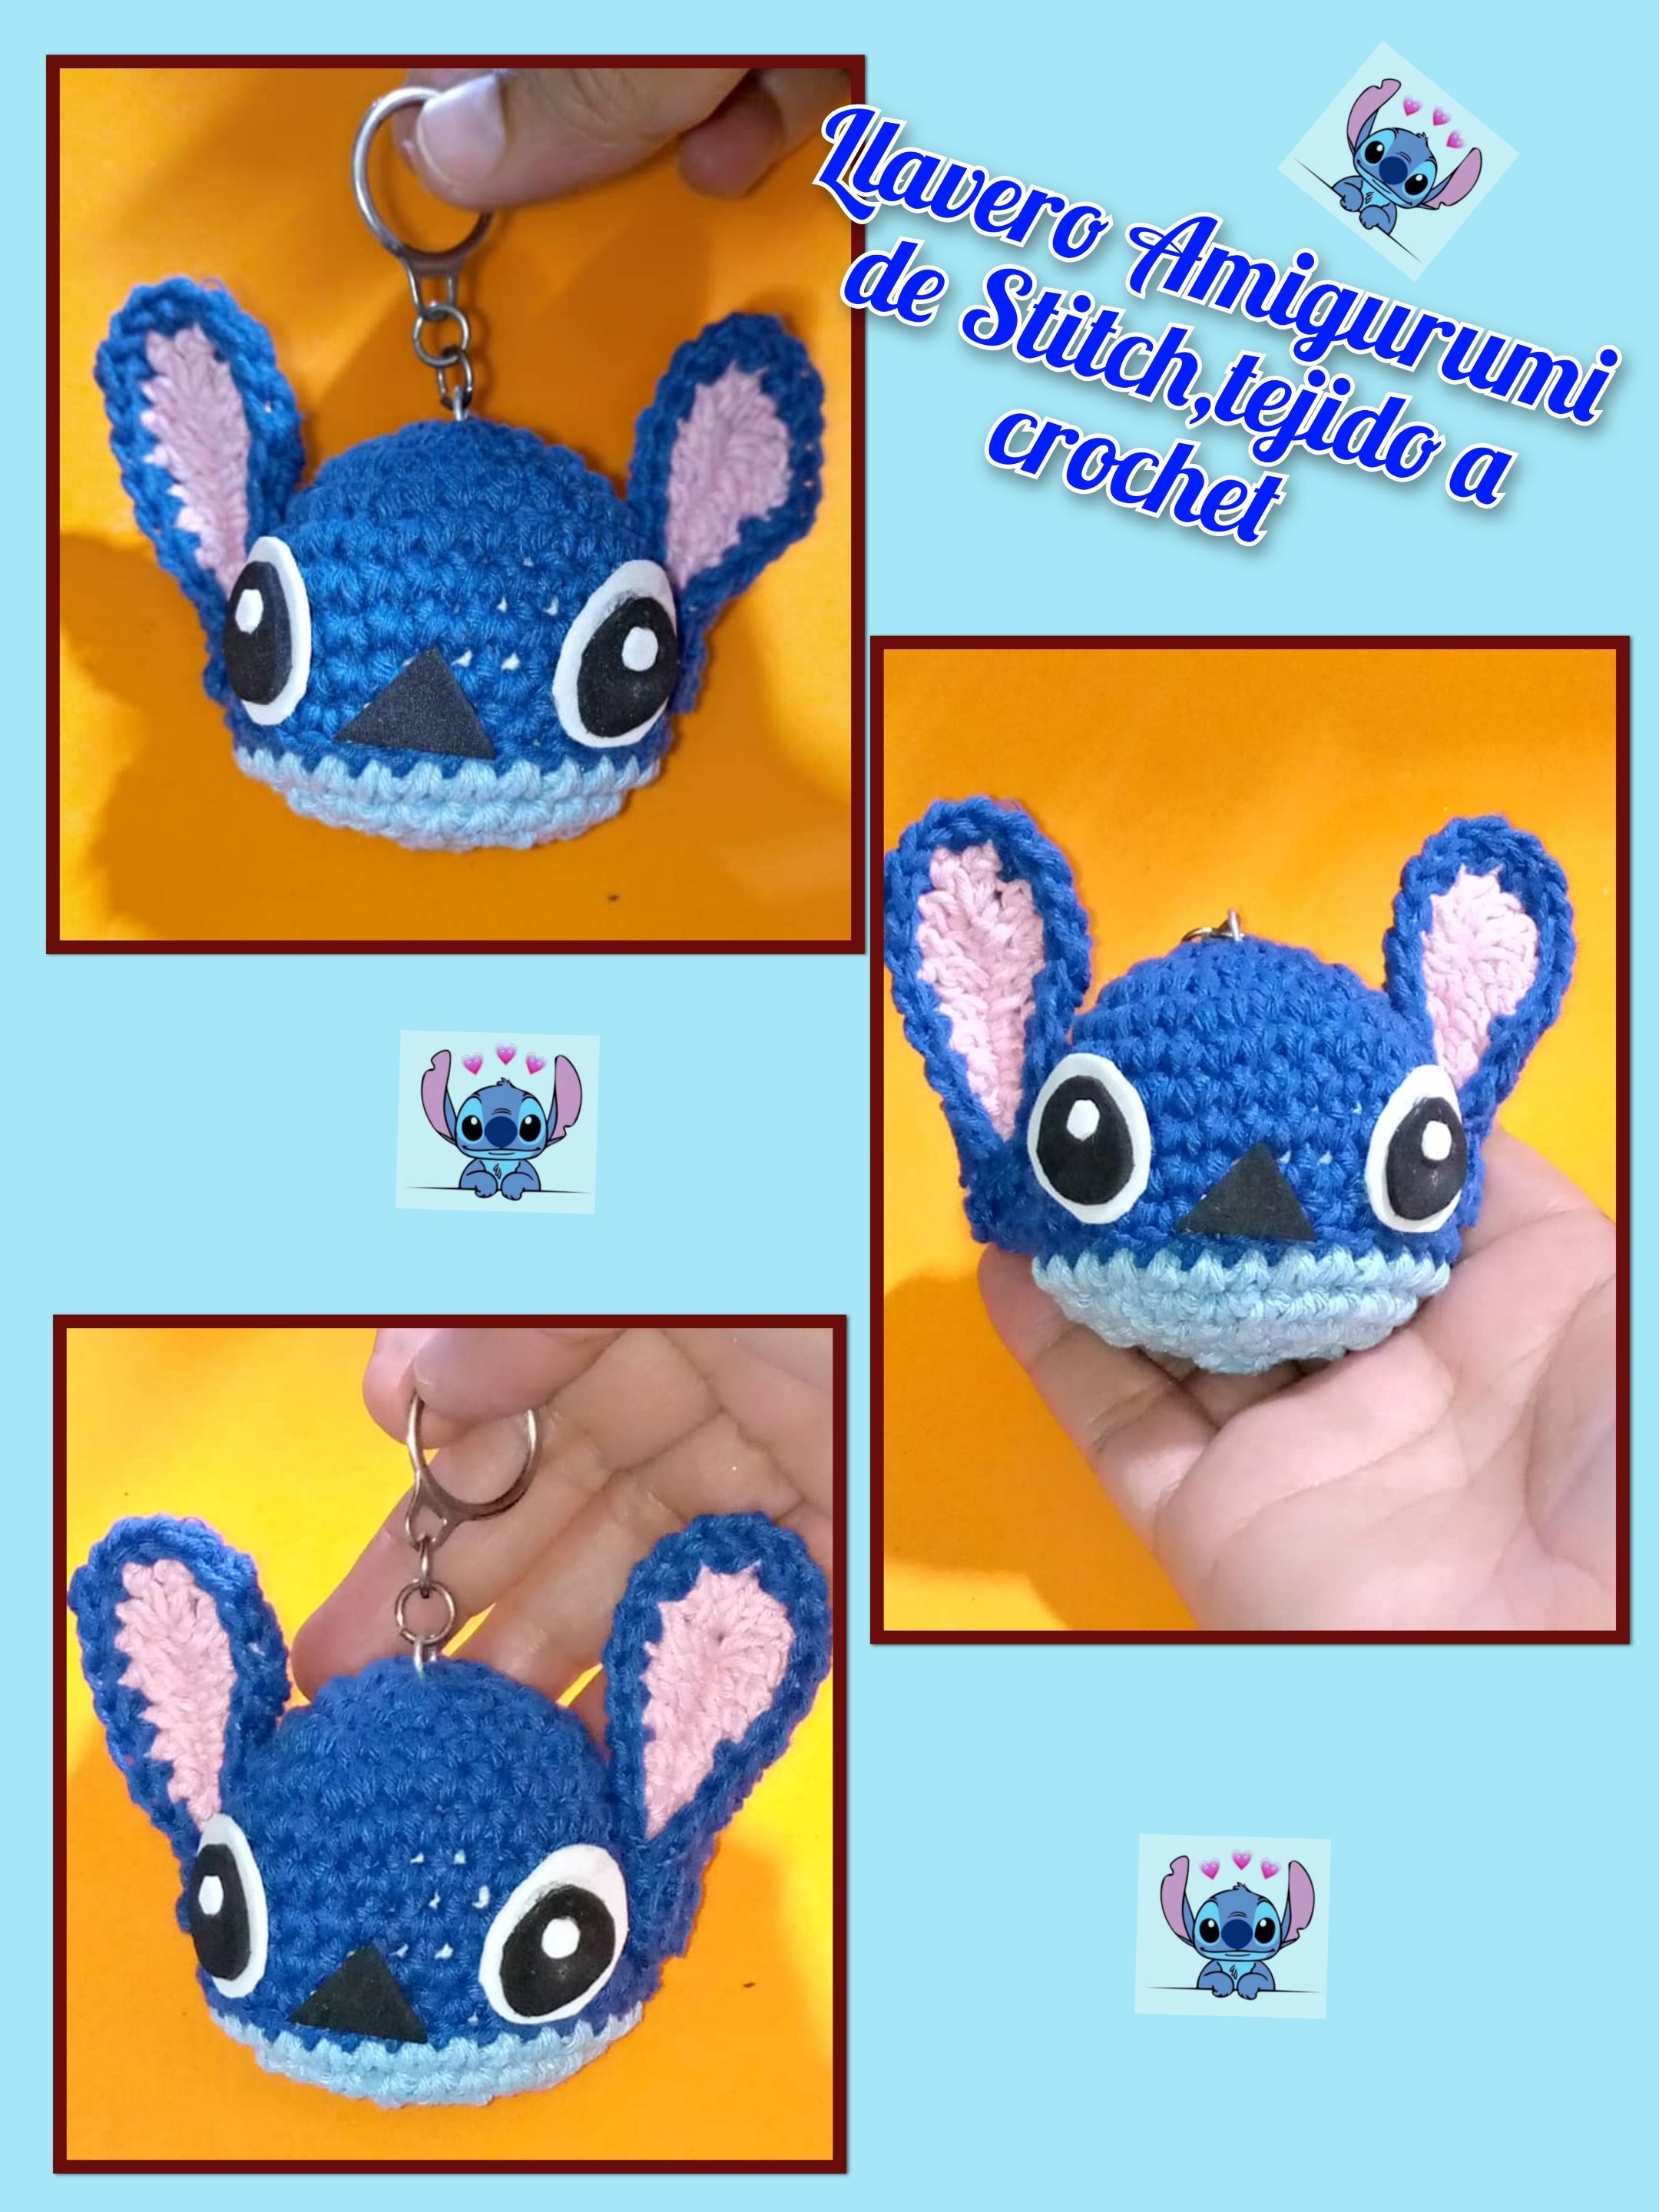
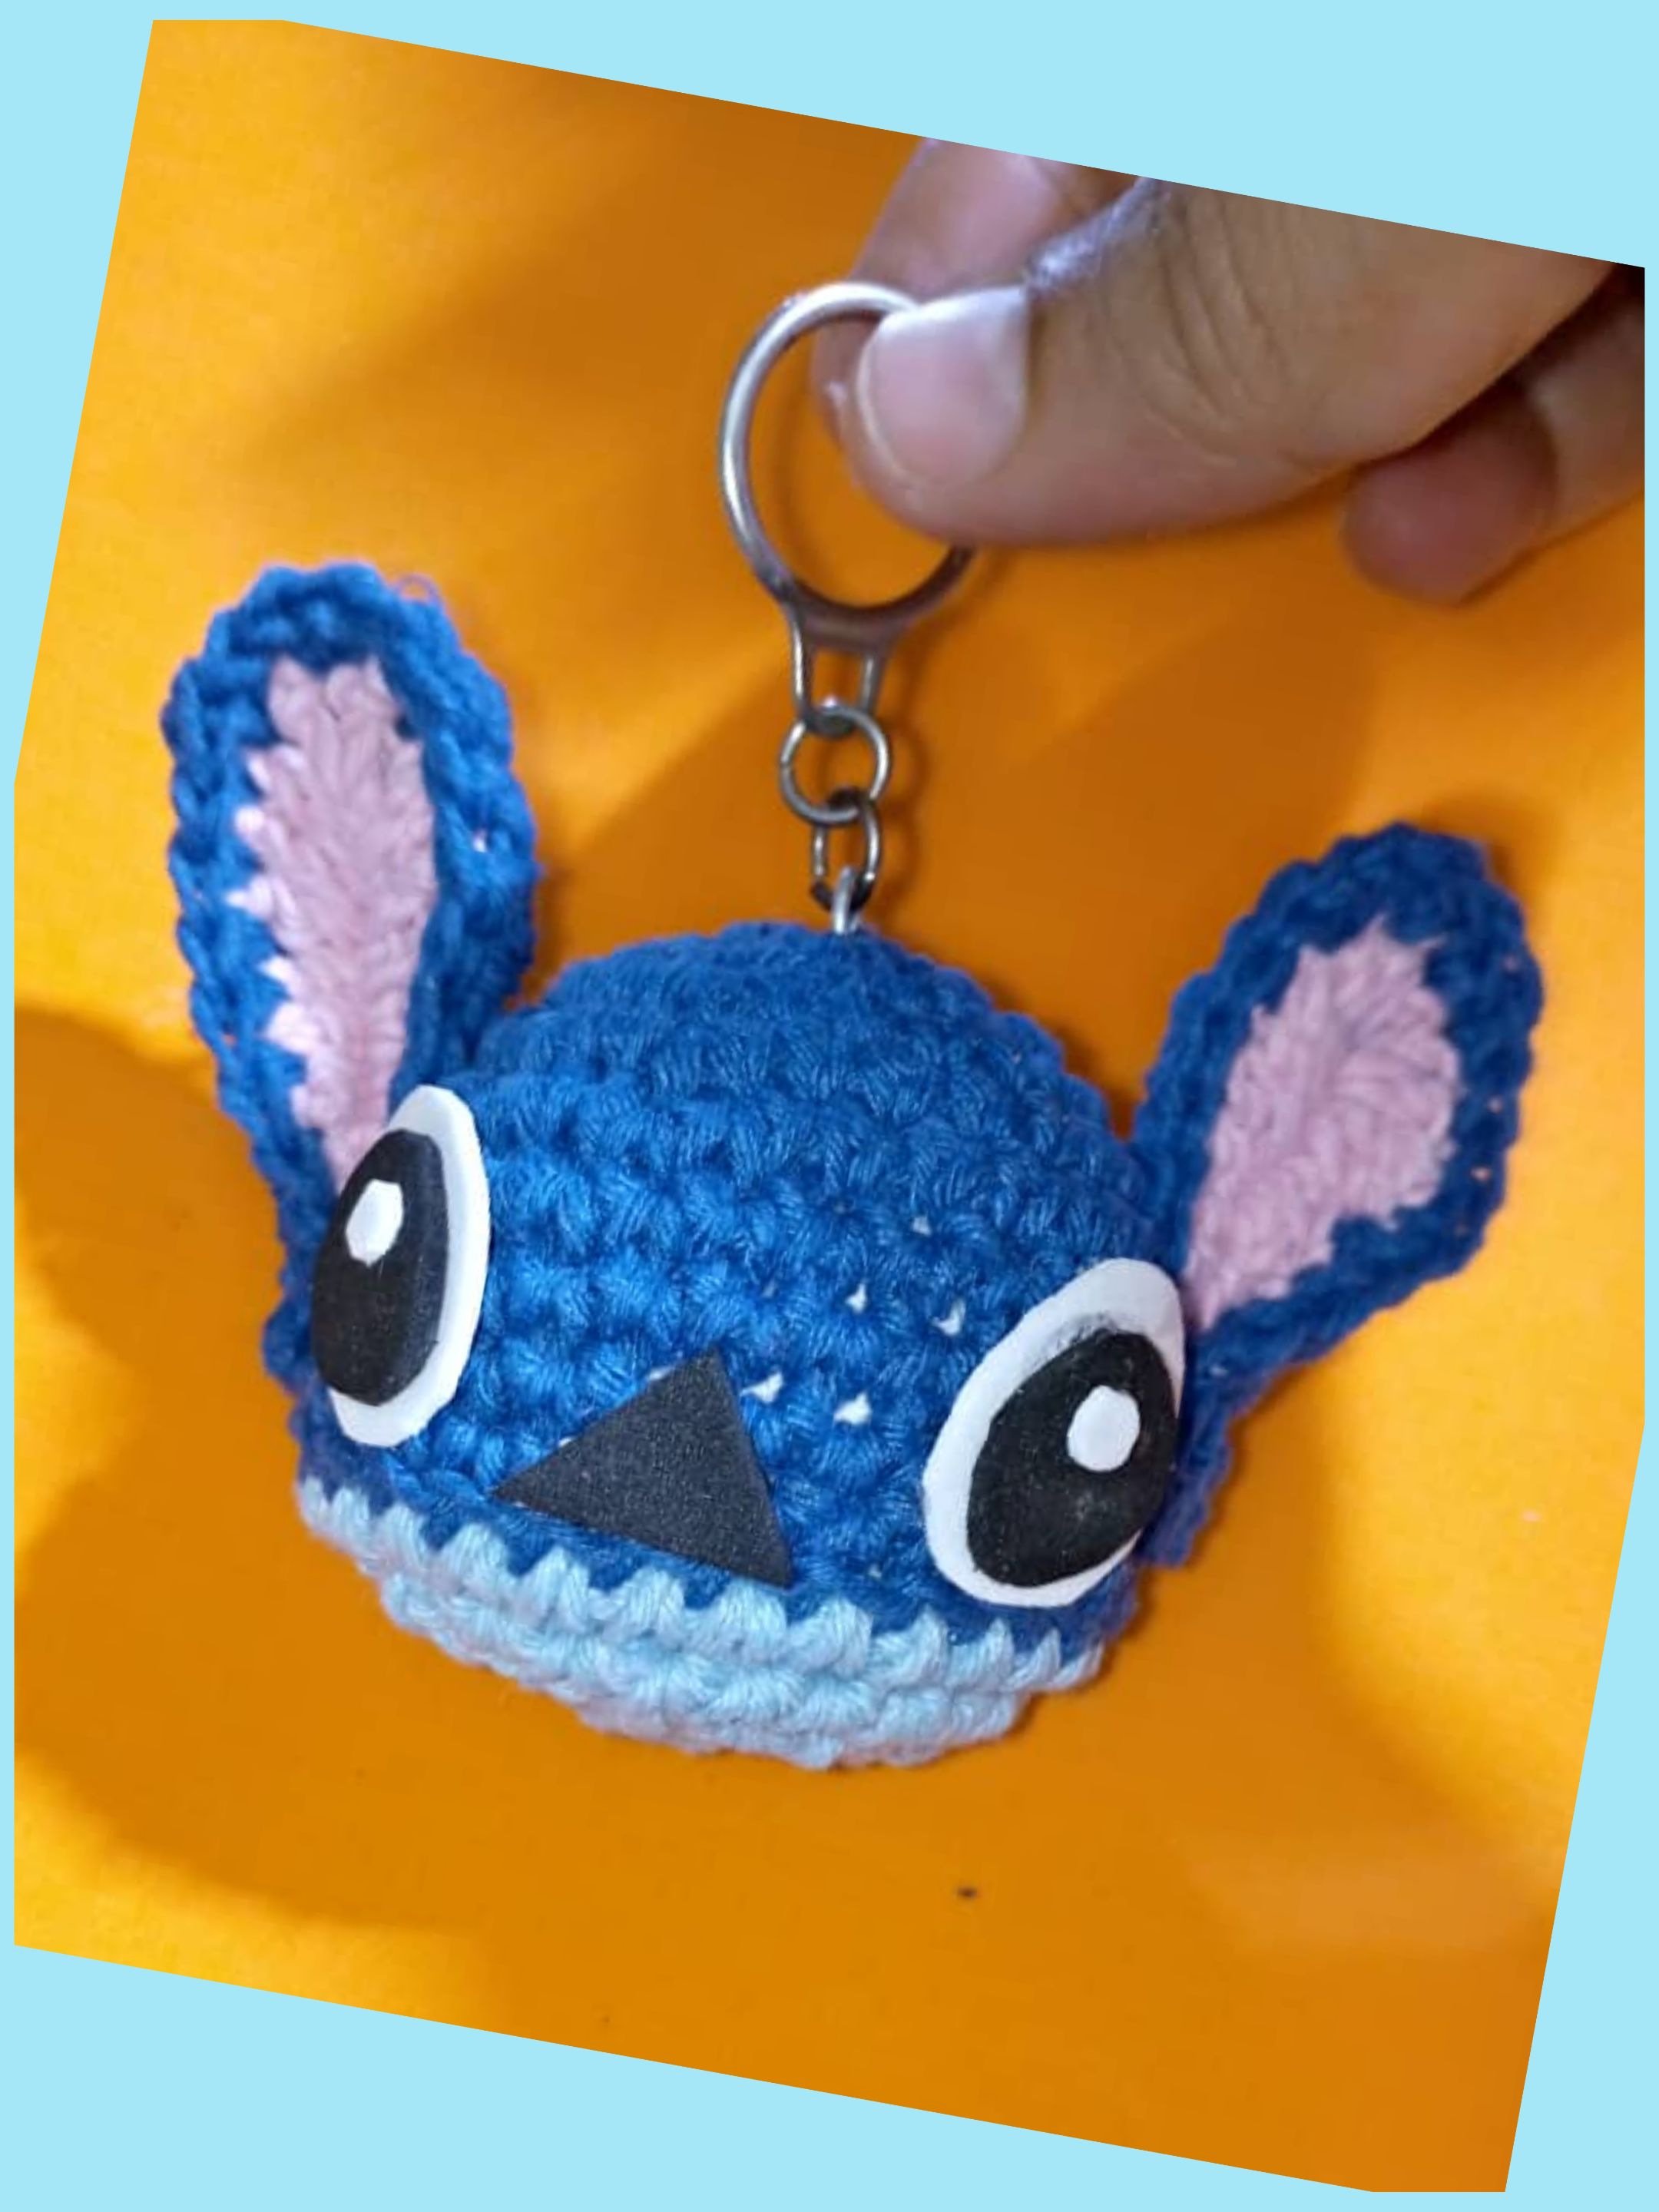
**Hoy quiero mostrar un lindo proyecto, siguiendo con los llaveros, este es especial, por lo tanto realicé un lindo llavero Amigurumi de Stitch, tejido a crochet.**
Puede ser usado como llavero o como peluche, sirve para regalar en fiesta o a la persona favorita.
Me he divertido al realizar este lindo proyecto, ahora vamos con los materiales y el paso a paso. Espero que le guste y lo realicen, es muy fácil de hacer.
>Hello, good evening to all members of this #diyhub community. I hope you and your families are doing well. God bless you all.
**Today I want to show you a cute project, continuing with the key chains. This one is special, so I made a cute Stitch Amigurumi key chain, crocheted.**
>It can be used as a keychain or a stuffed animal, and it makes a great gift for a party or your favorite person.
>I had fun making this cute project. >Now let's get started with the materials and step-by-step instructions. I hope you like it and give it a try. It's very easy to make.
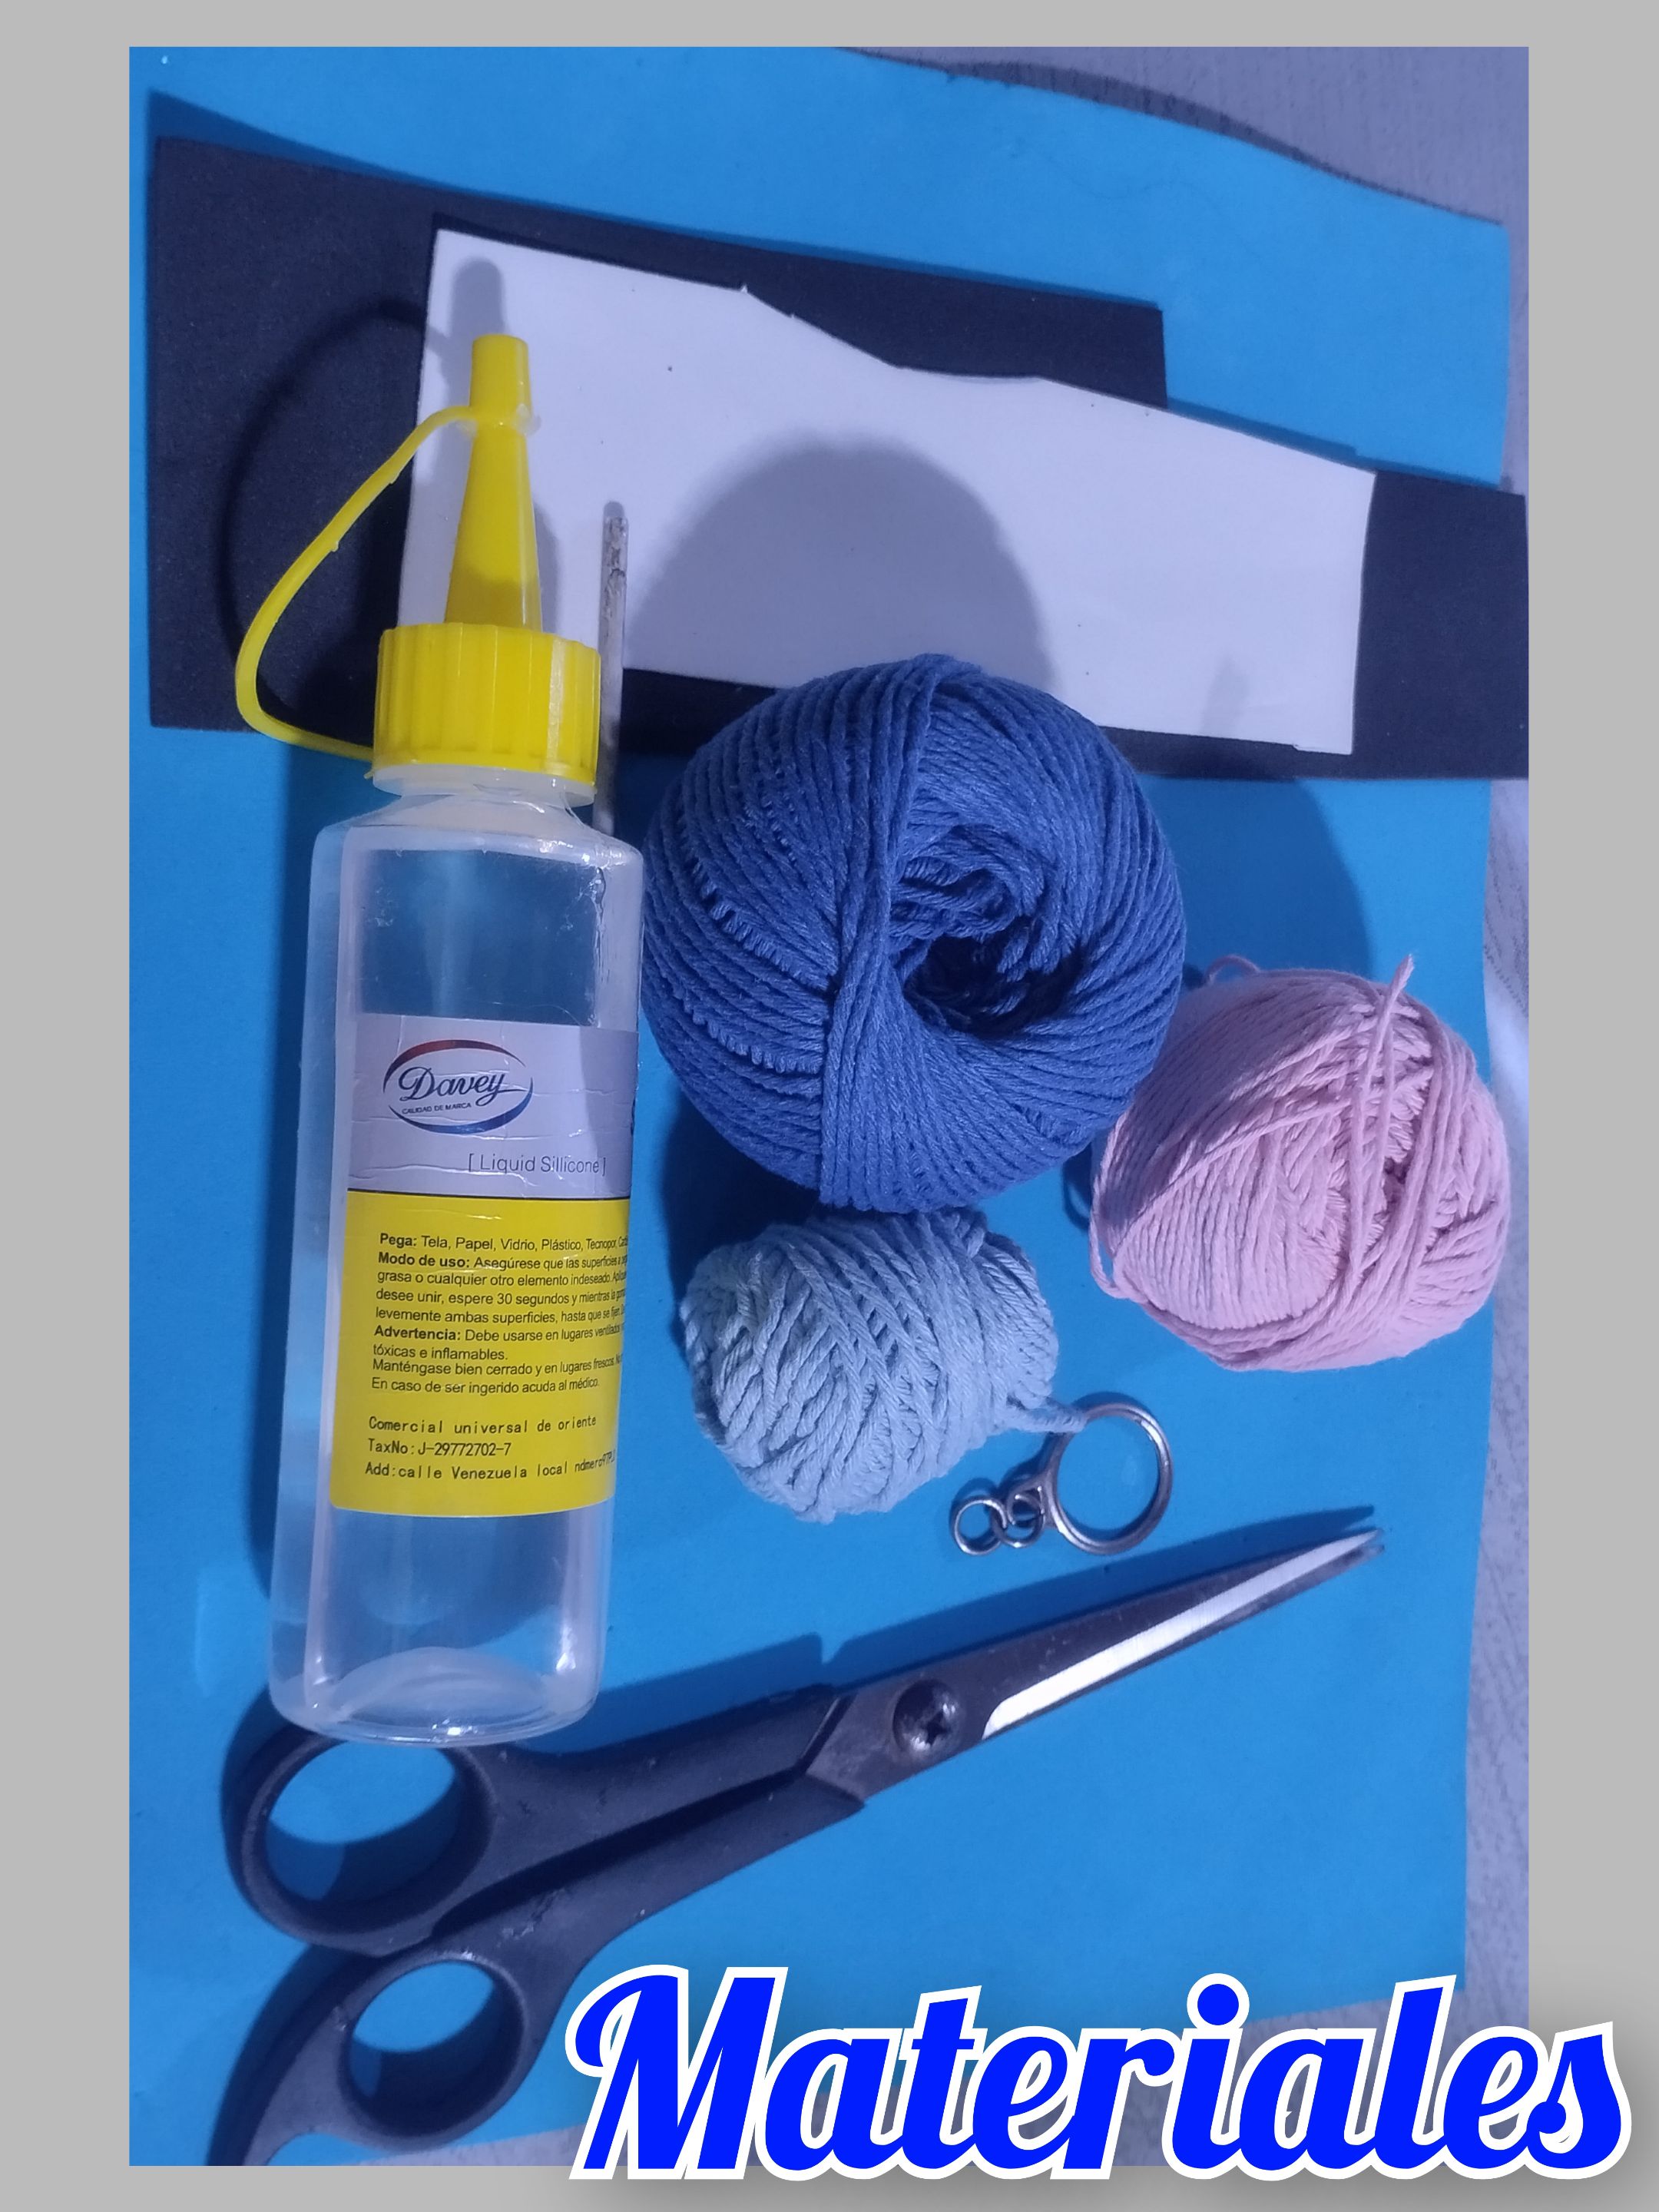
#### Materiales que se necesitan para la realización del lindo Stitch,tejido a crochet:
- Hilo de tejer , color: azul oscuro, rosado y azul claro.
- Aguja de tejer, número 3.
- Tijera.
- Silicona líquido.
- Foami de colores: blanco y negro.
- Llavero.
- Relleno.
>#### Materials needed to make the cute crocheted Stitch:
>- Yarn, colors: dark blue, pink, and light blue.
>- Crochet hook, size 3.
>- Scissors.
>- Liquid silicone.
>- Colored foam: white and black.
>- Keyring.
>- Filling.
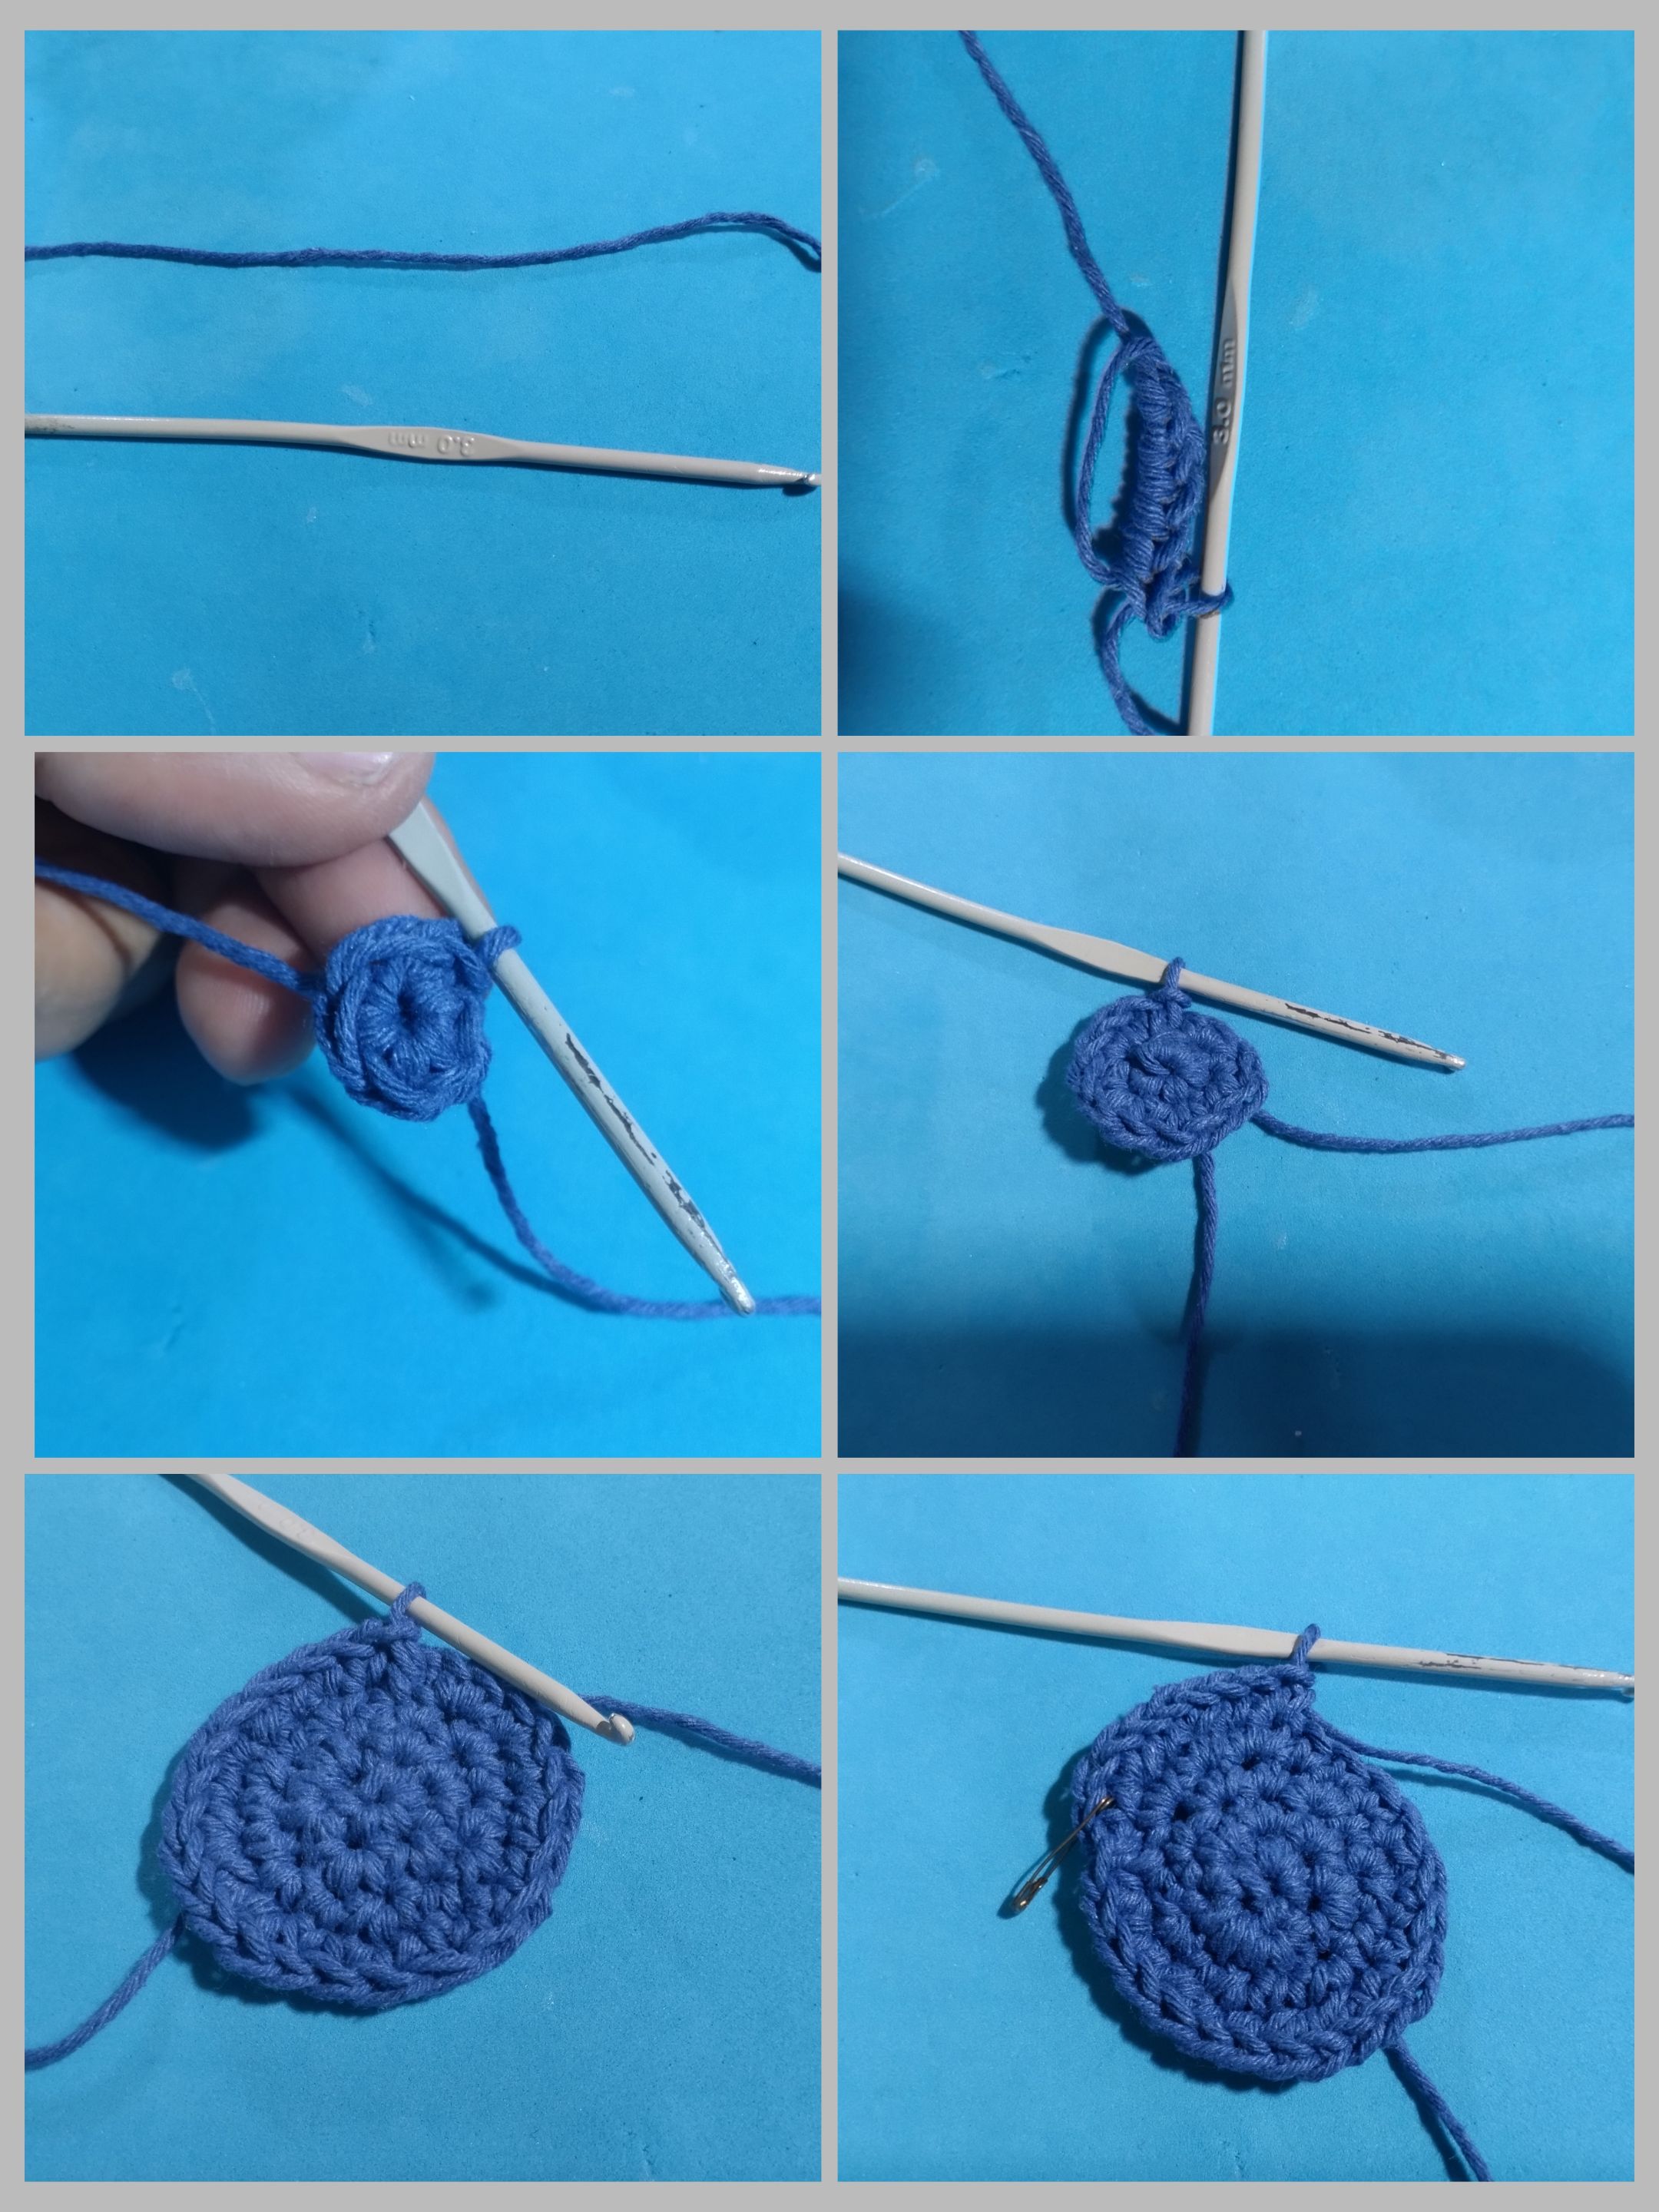
#### Paso a paso para la realización del lindo Stitch, tejido a crochet :
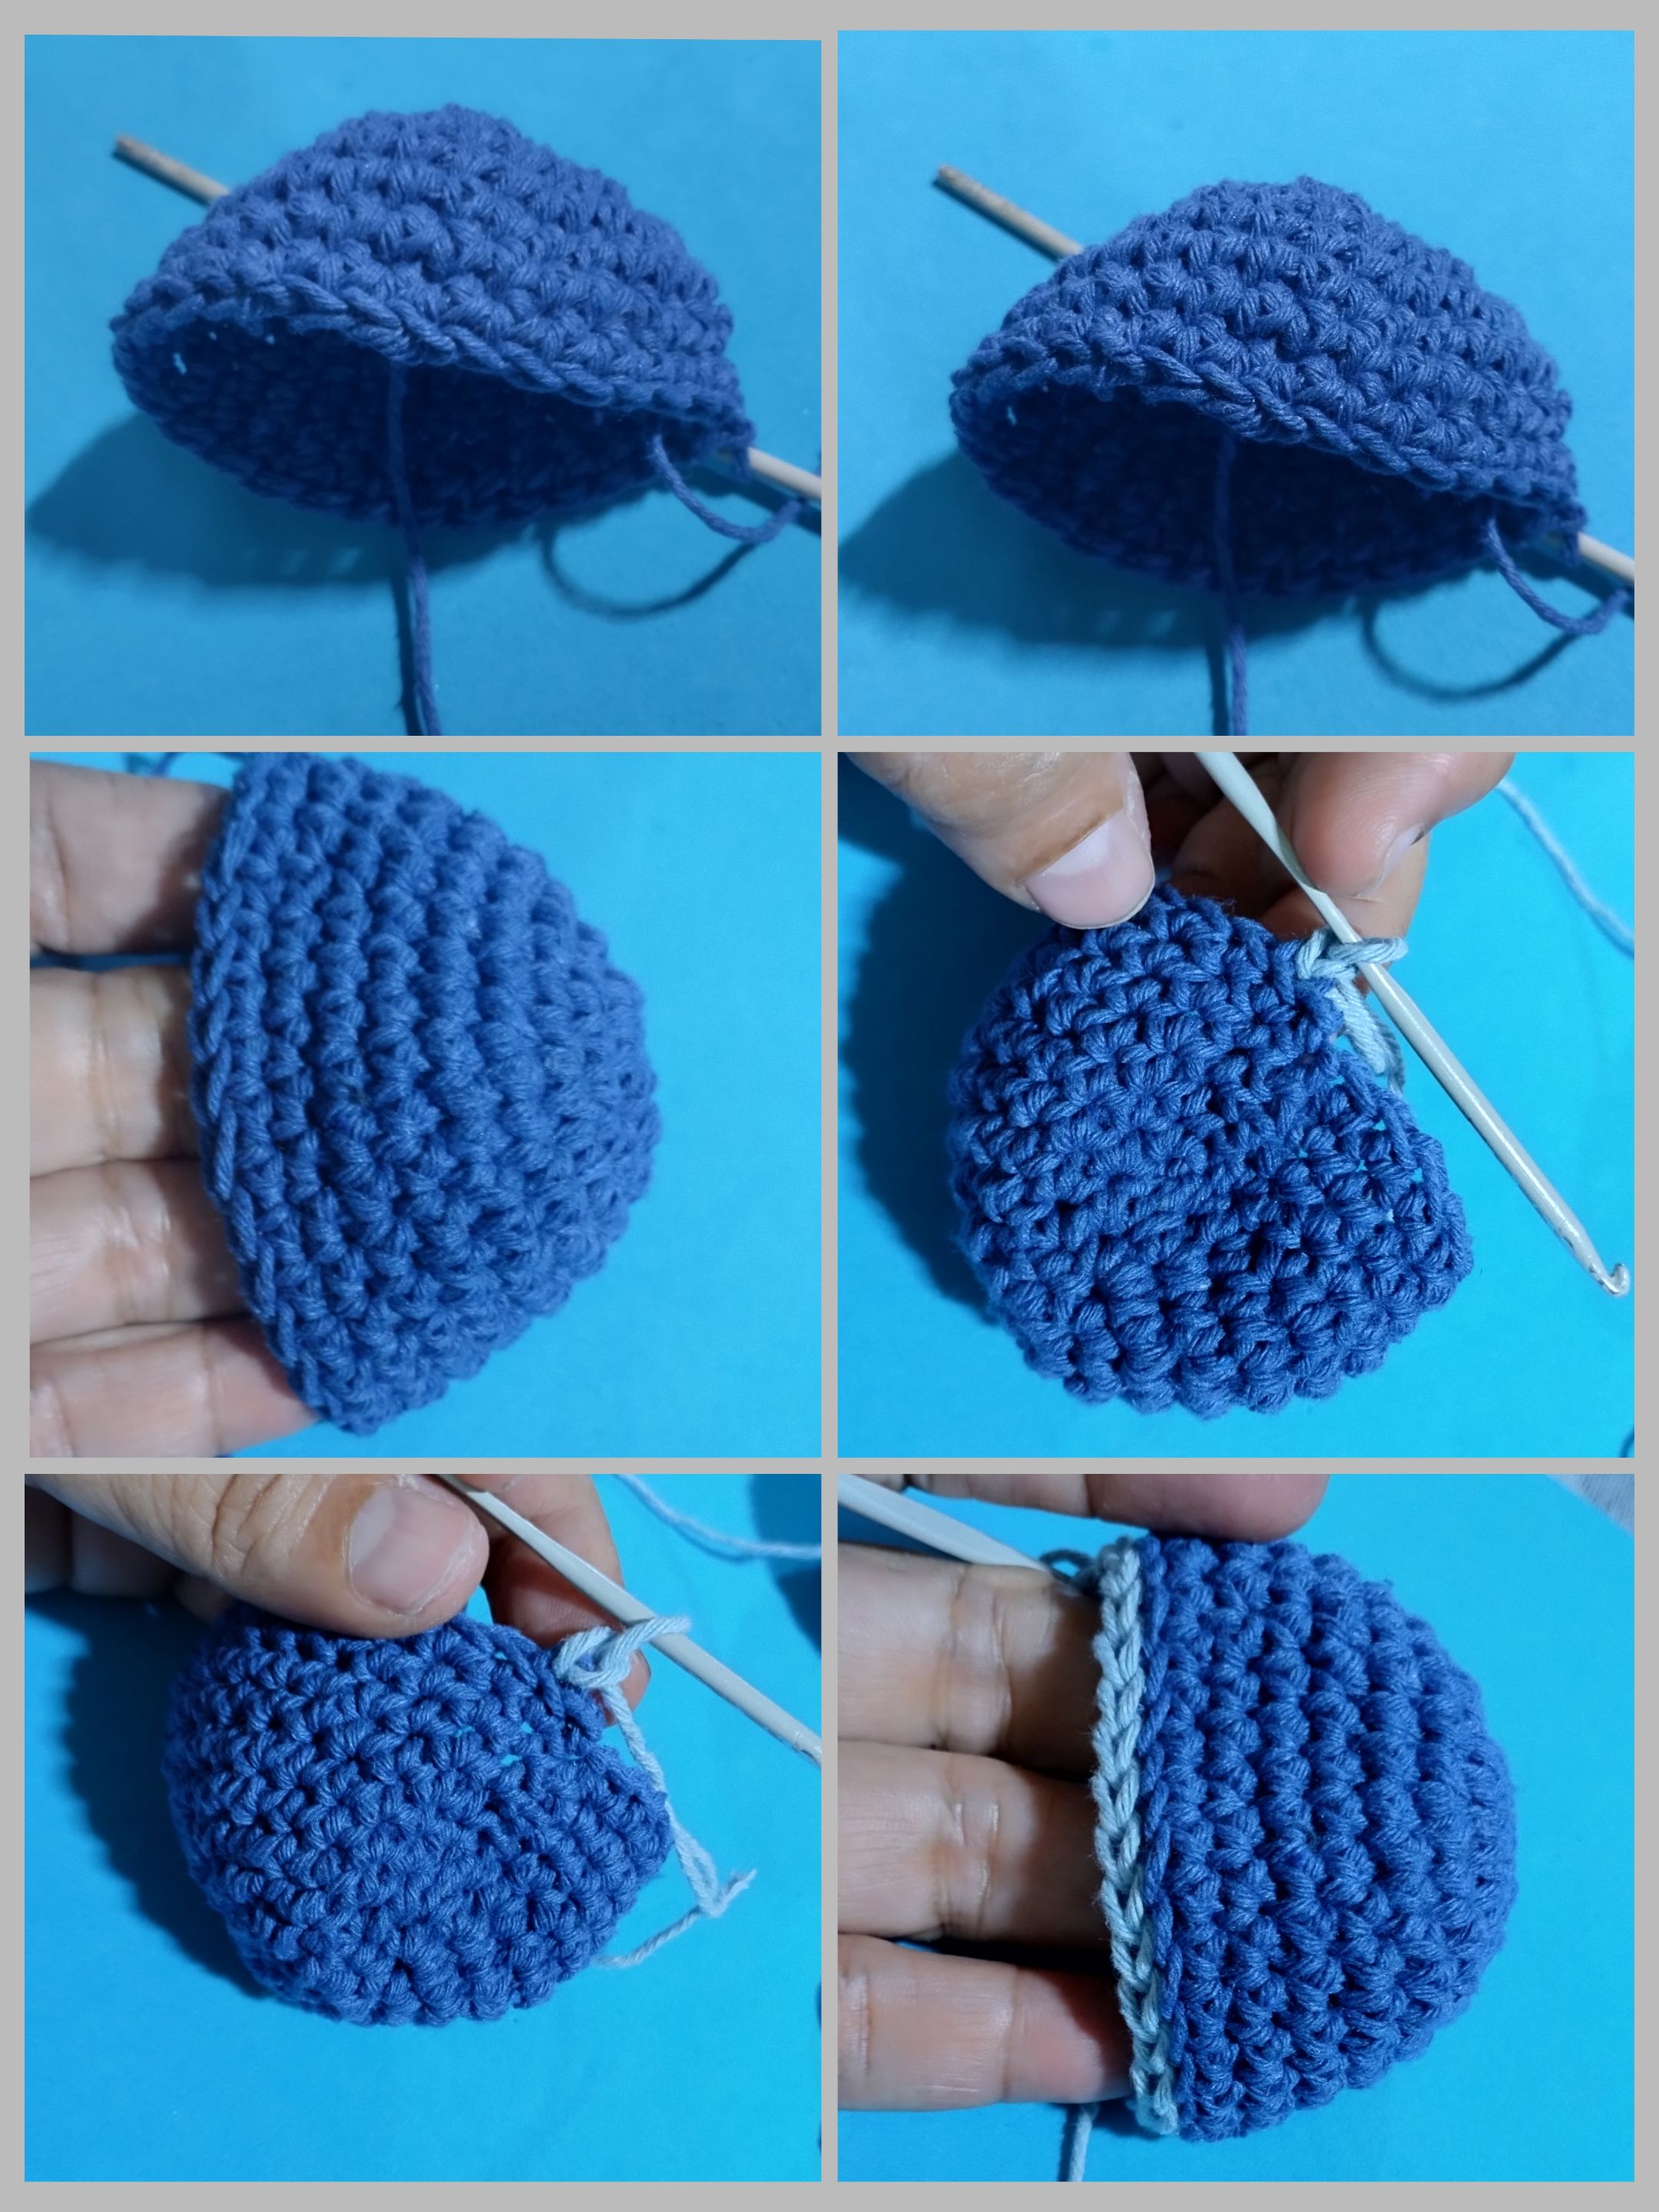
- Lo primero que debemos hacer es , un anillo mágico.
- Meter dentro del anillo 6 puntos bajos.
- Para la segunda vuelta, se debe hacer un aumento en cada punto con un total de 12 puntos bajos.
- Para la tercera vuelta: se debe hacer un punto bajo y un aumento, se hará 18 puntos. Ahora se hacen 5 vueltas de 18 puntos.
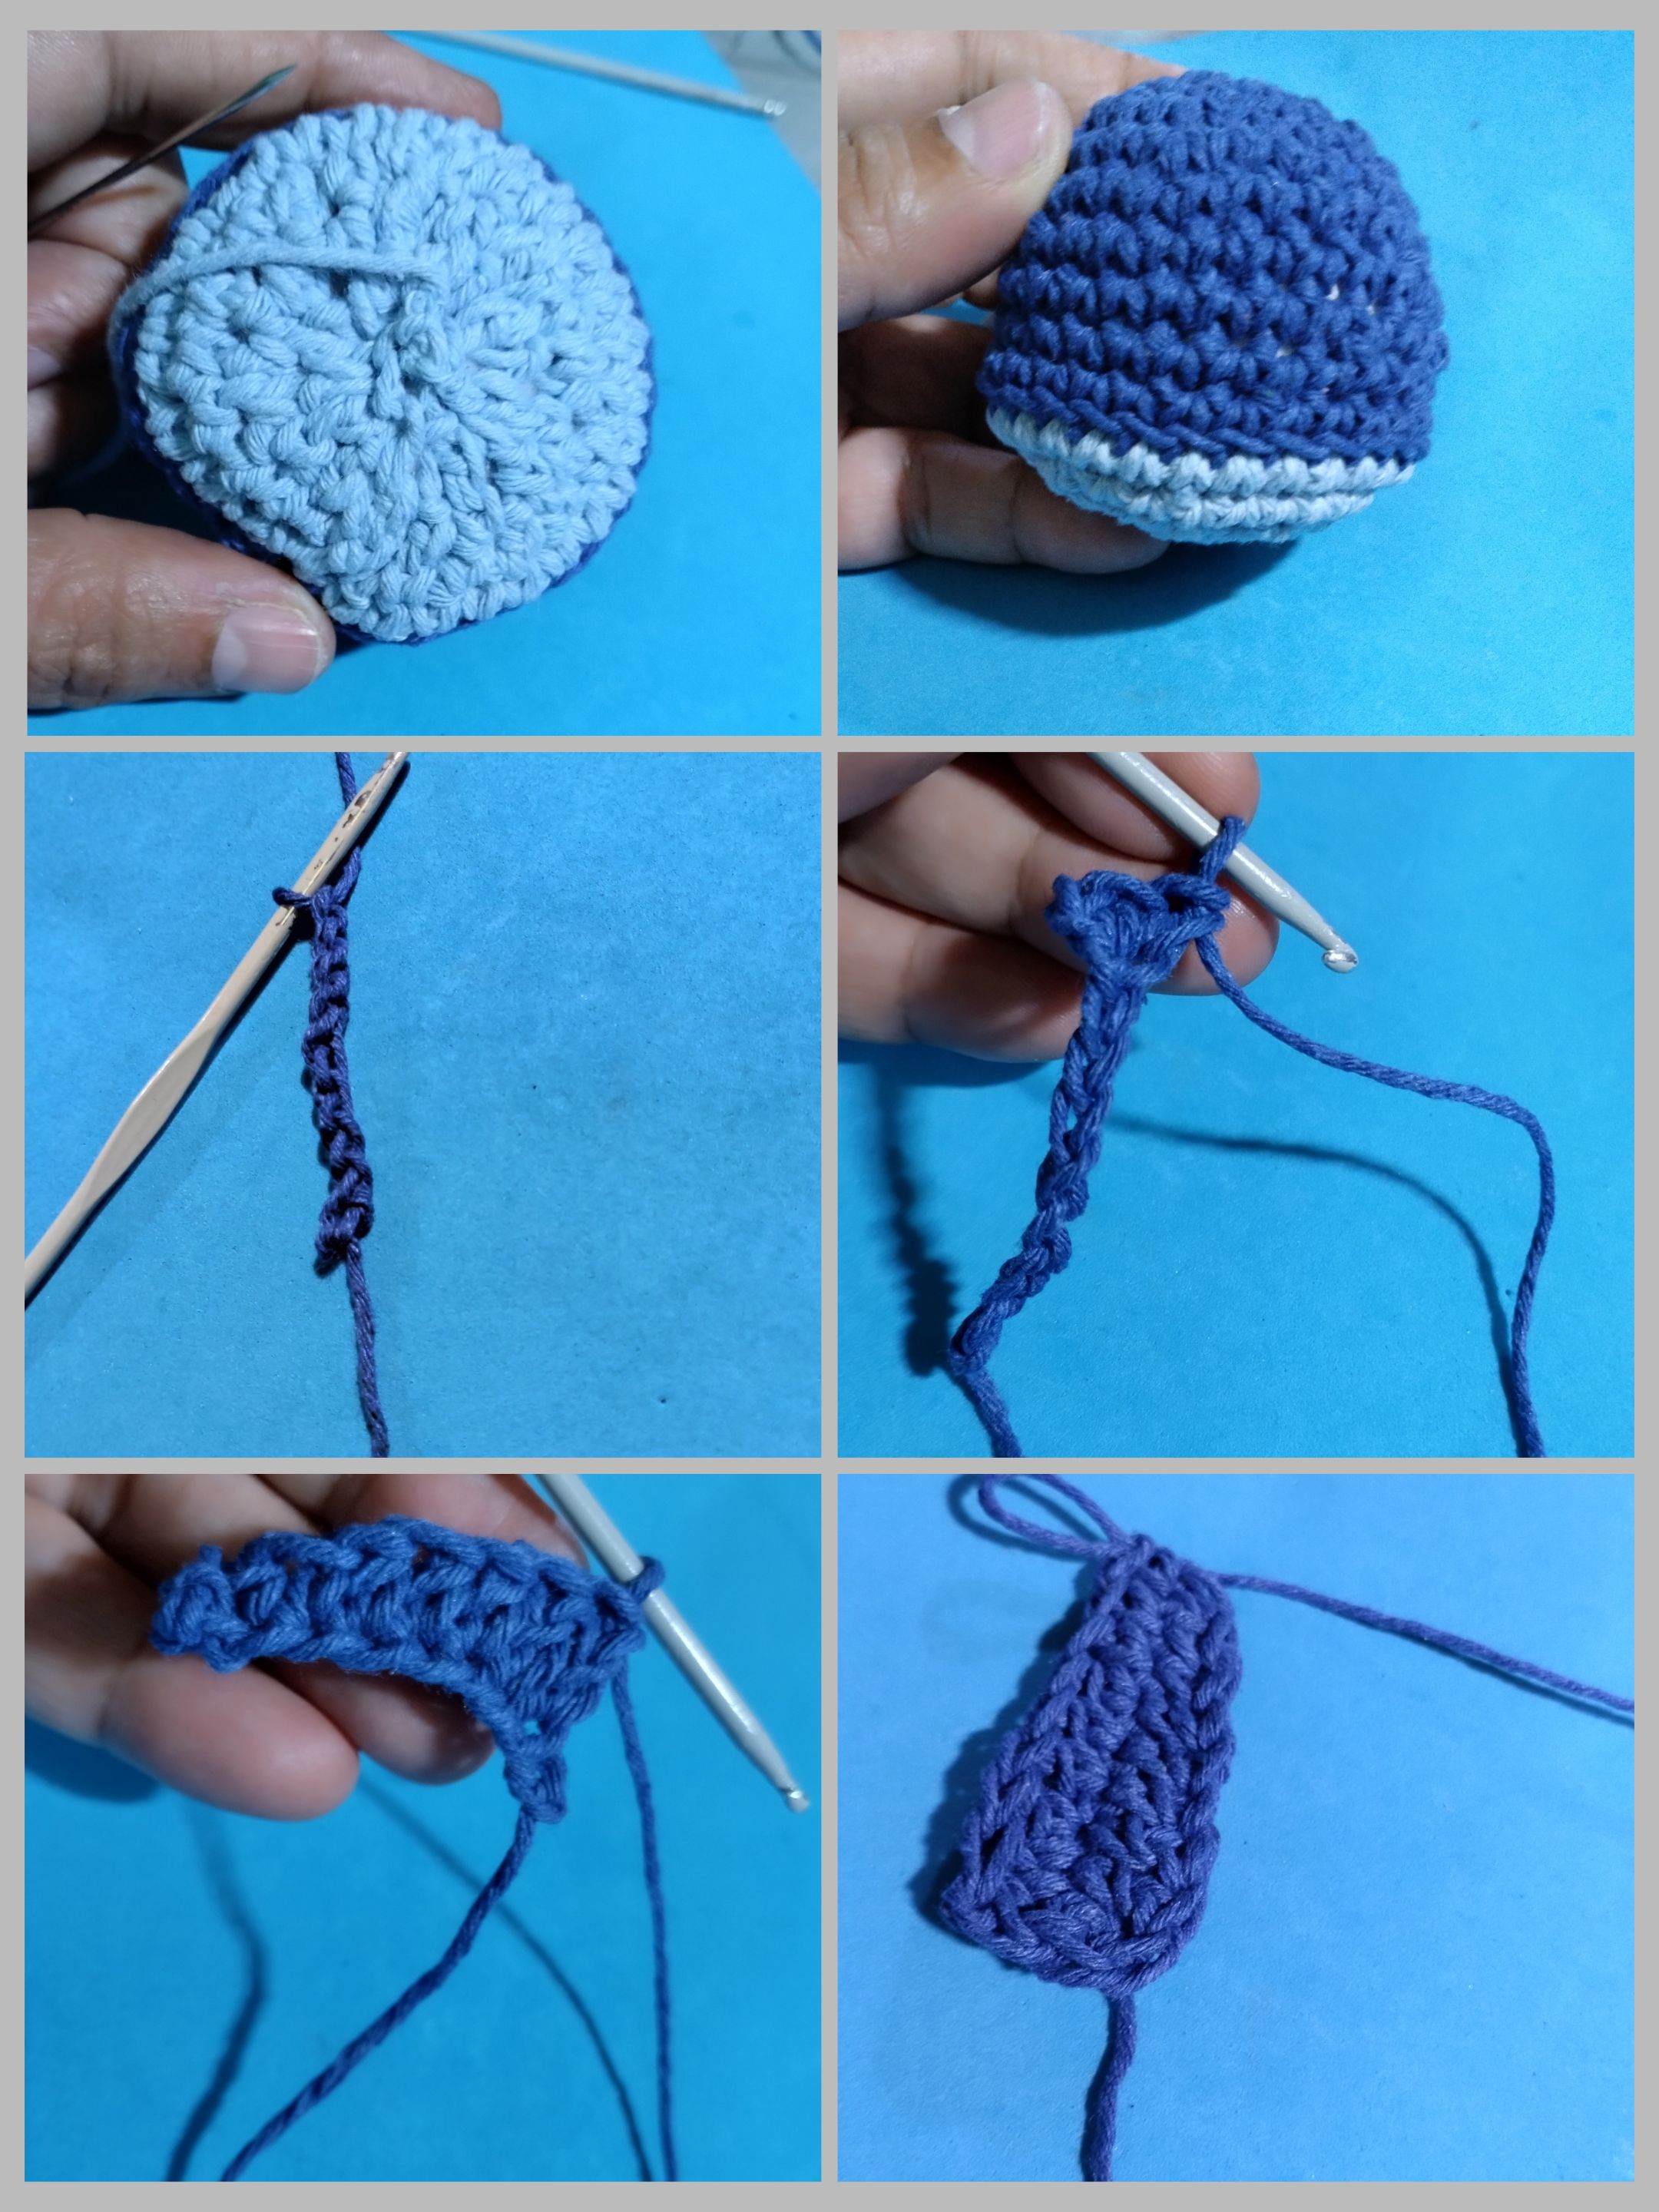
- Cambiamos de color , azul claro, comenzamos haciendo 18 puntos deslizados.
- Para la otra vuelta hacer un punto bajo y dos reducción.
- La otra vuelta hacer 3 reducciones y un punto bajo.
- Rellenar el motivo y coser la parte de abajo.
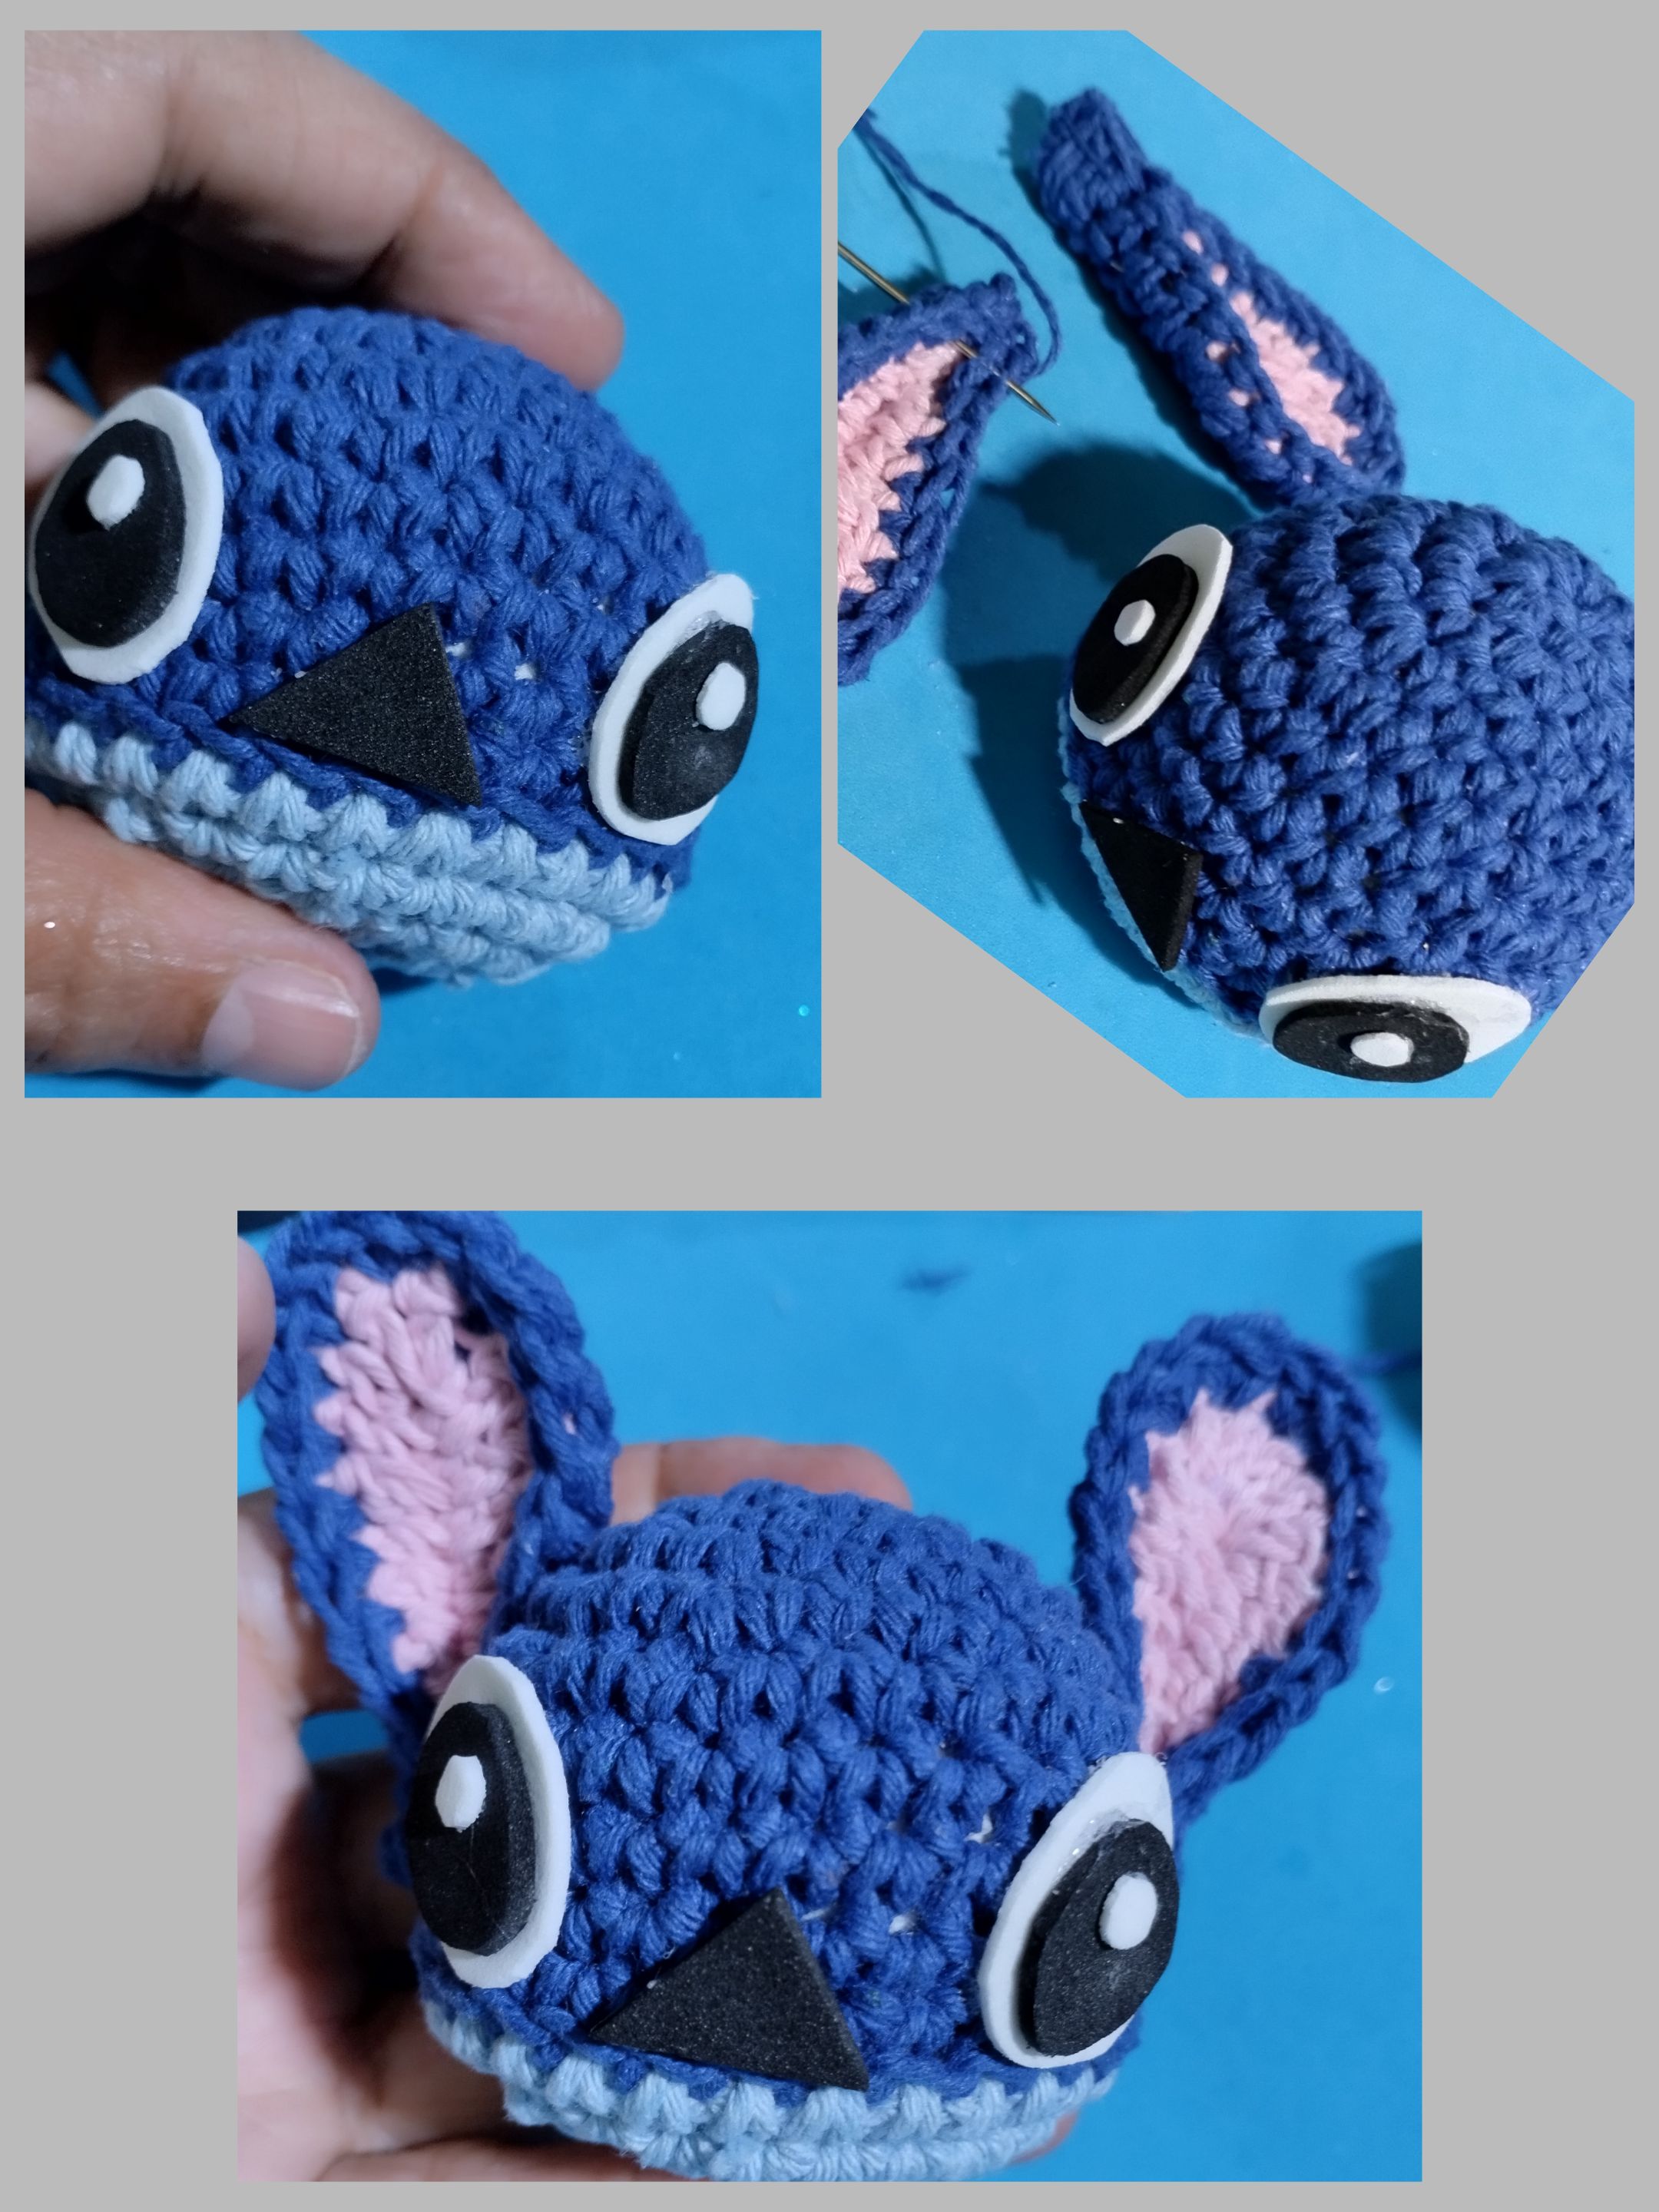
- Teniendo listo la cabeza de Stitch, ahora haremos las orejas.
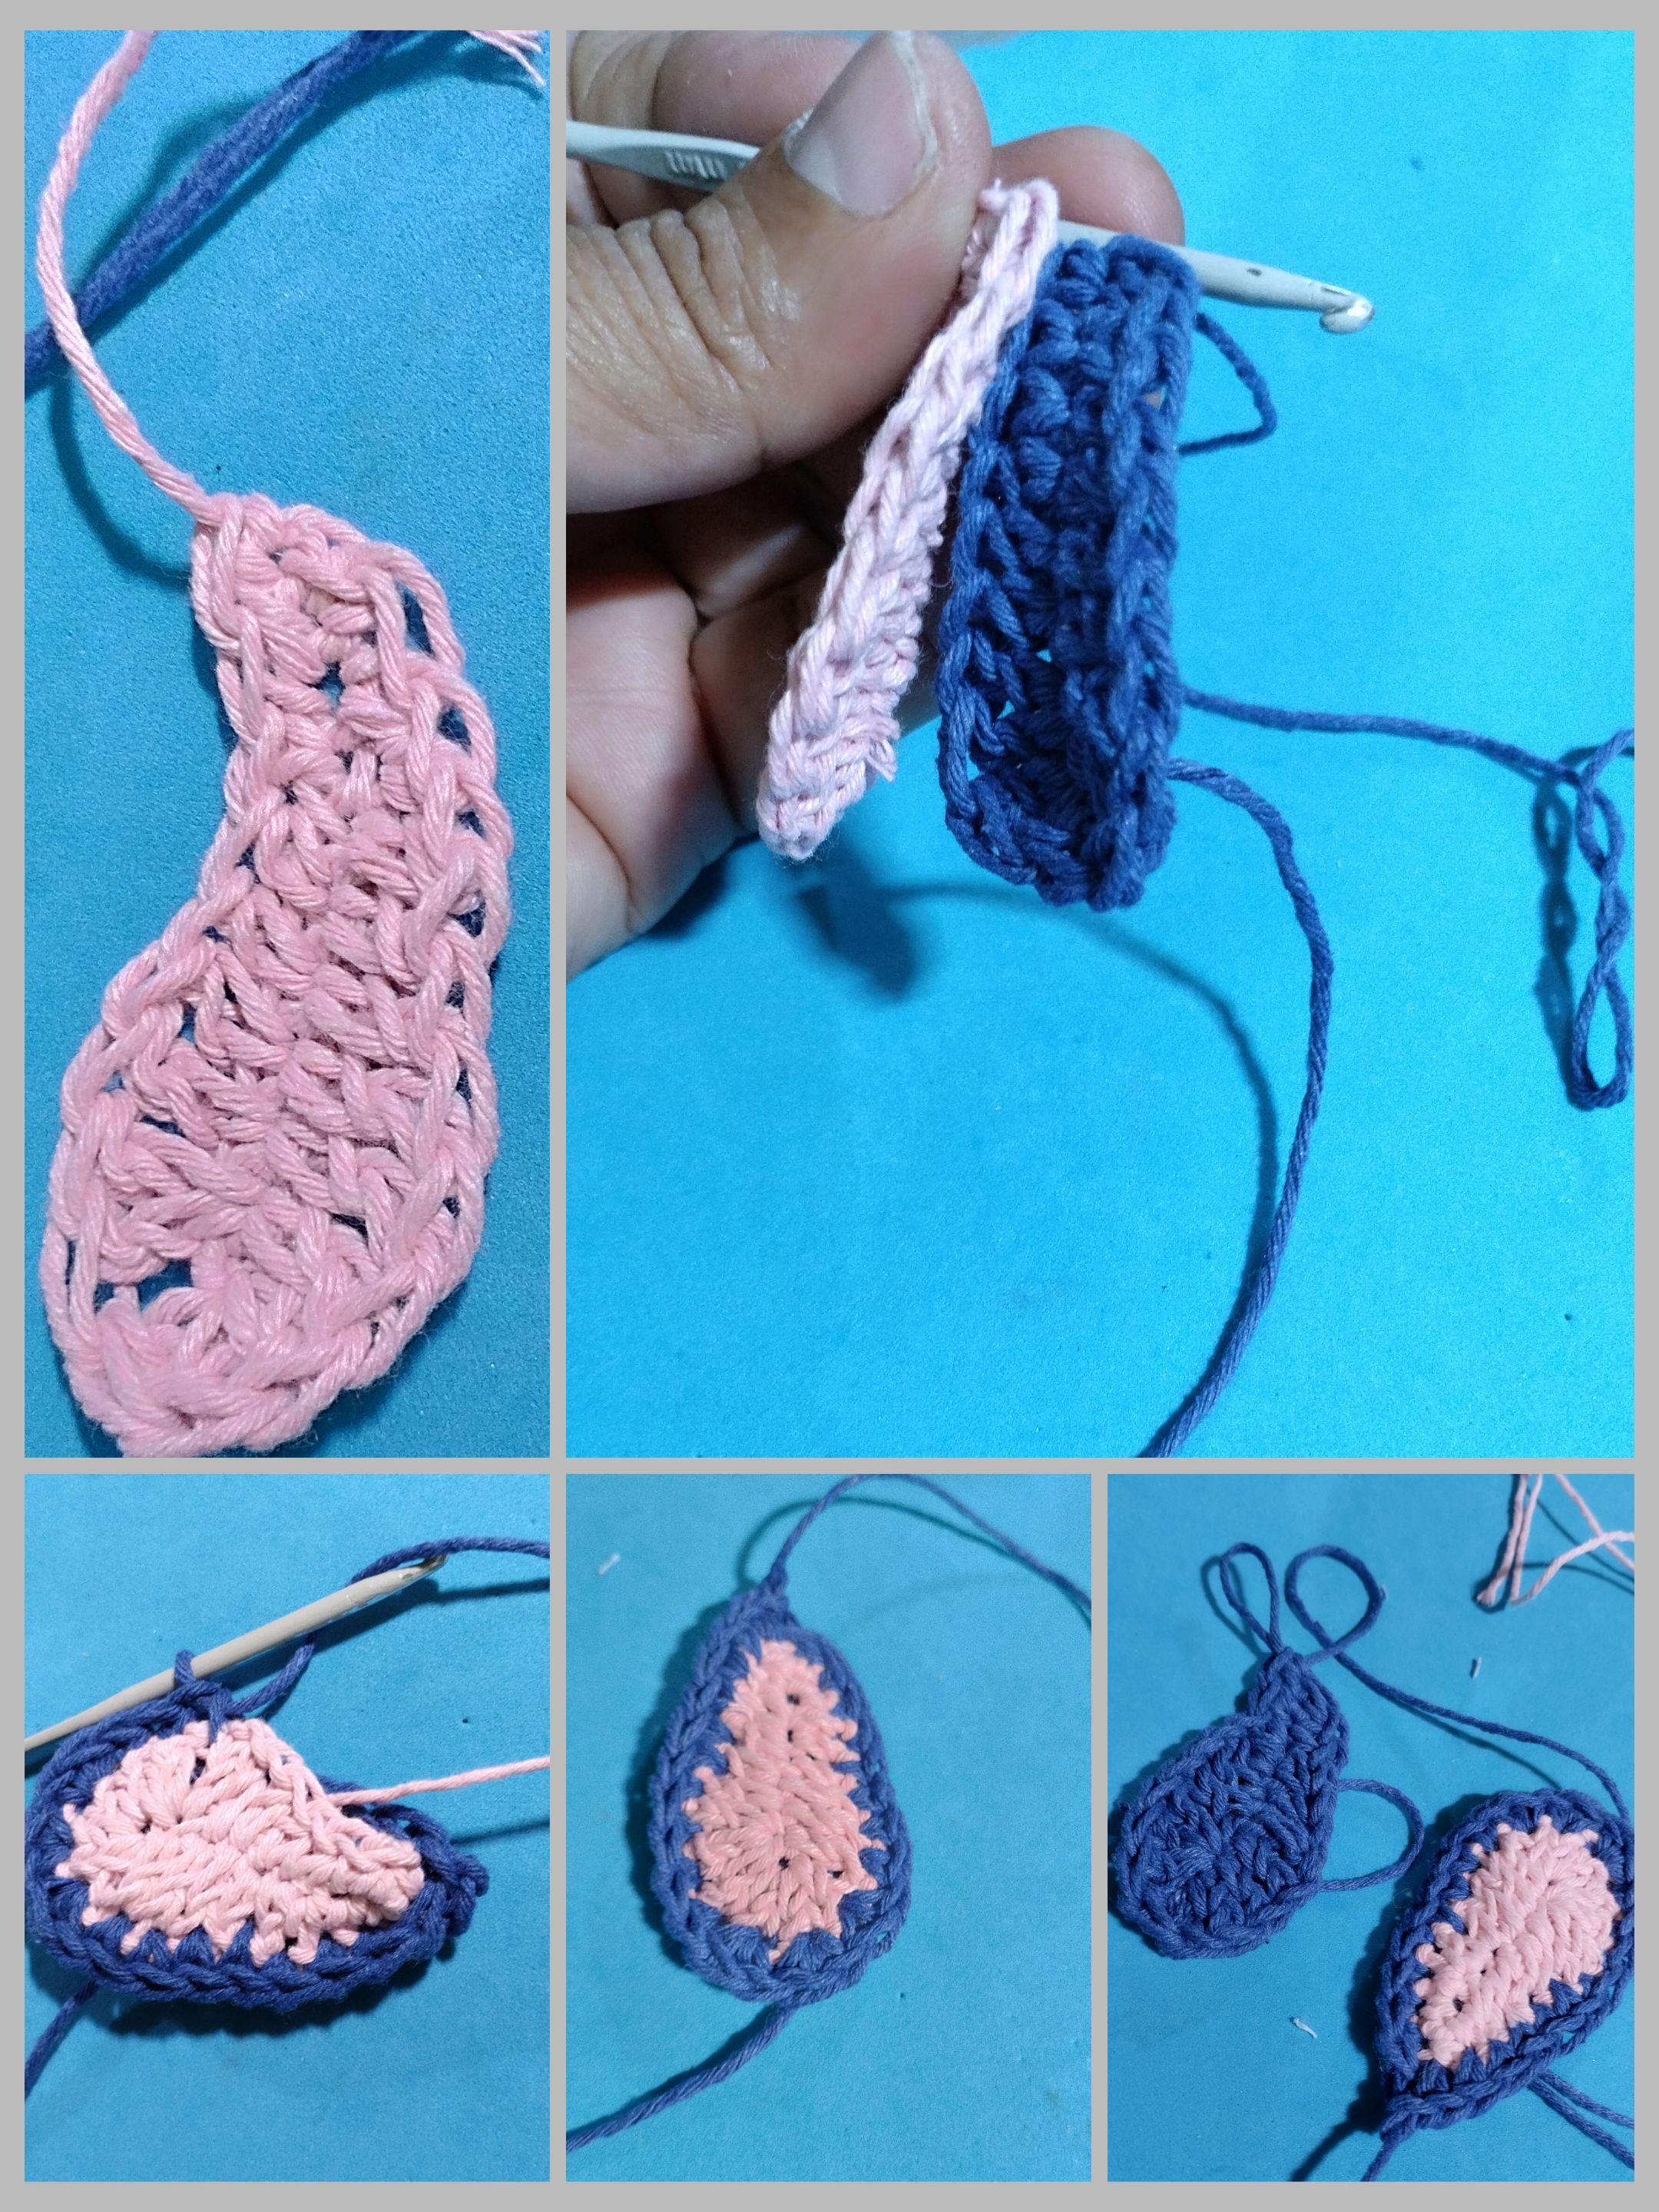
- Se hace una cadena de 10, luego tres puntos bajos, tres puntos altos medios y tres puntos altos.
- En el ultimo punto, tres puntos altos juntos. Del otro lado se hace lo mismo. De esta manera se tejen la orejas. Dos de color azul oscuro y dos de color rosado. Luego coser las dos orejas : la de color rosado y la azul oscuro.
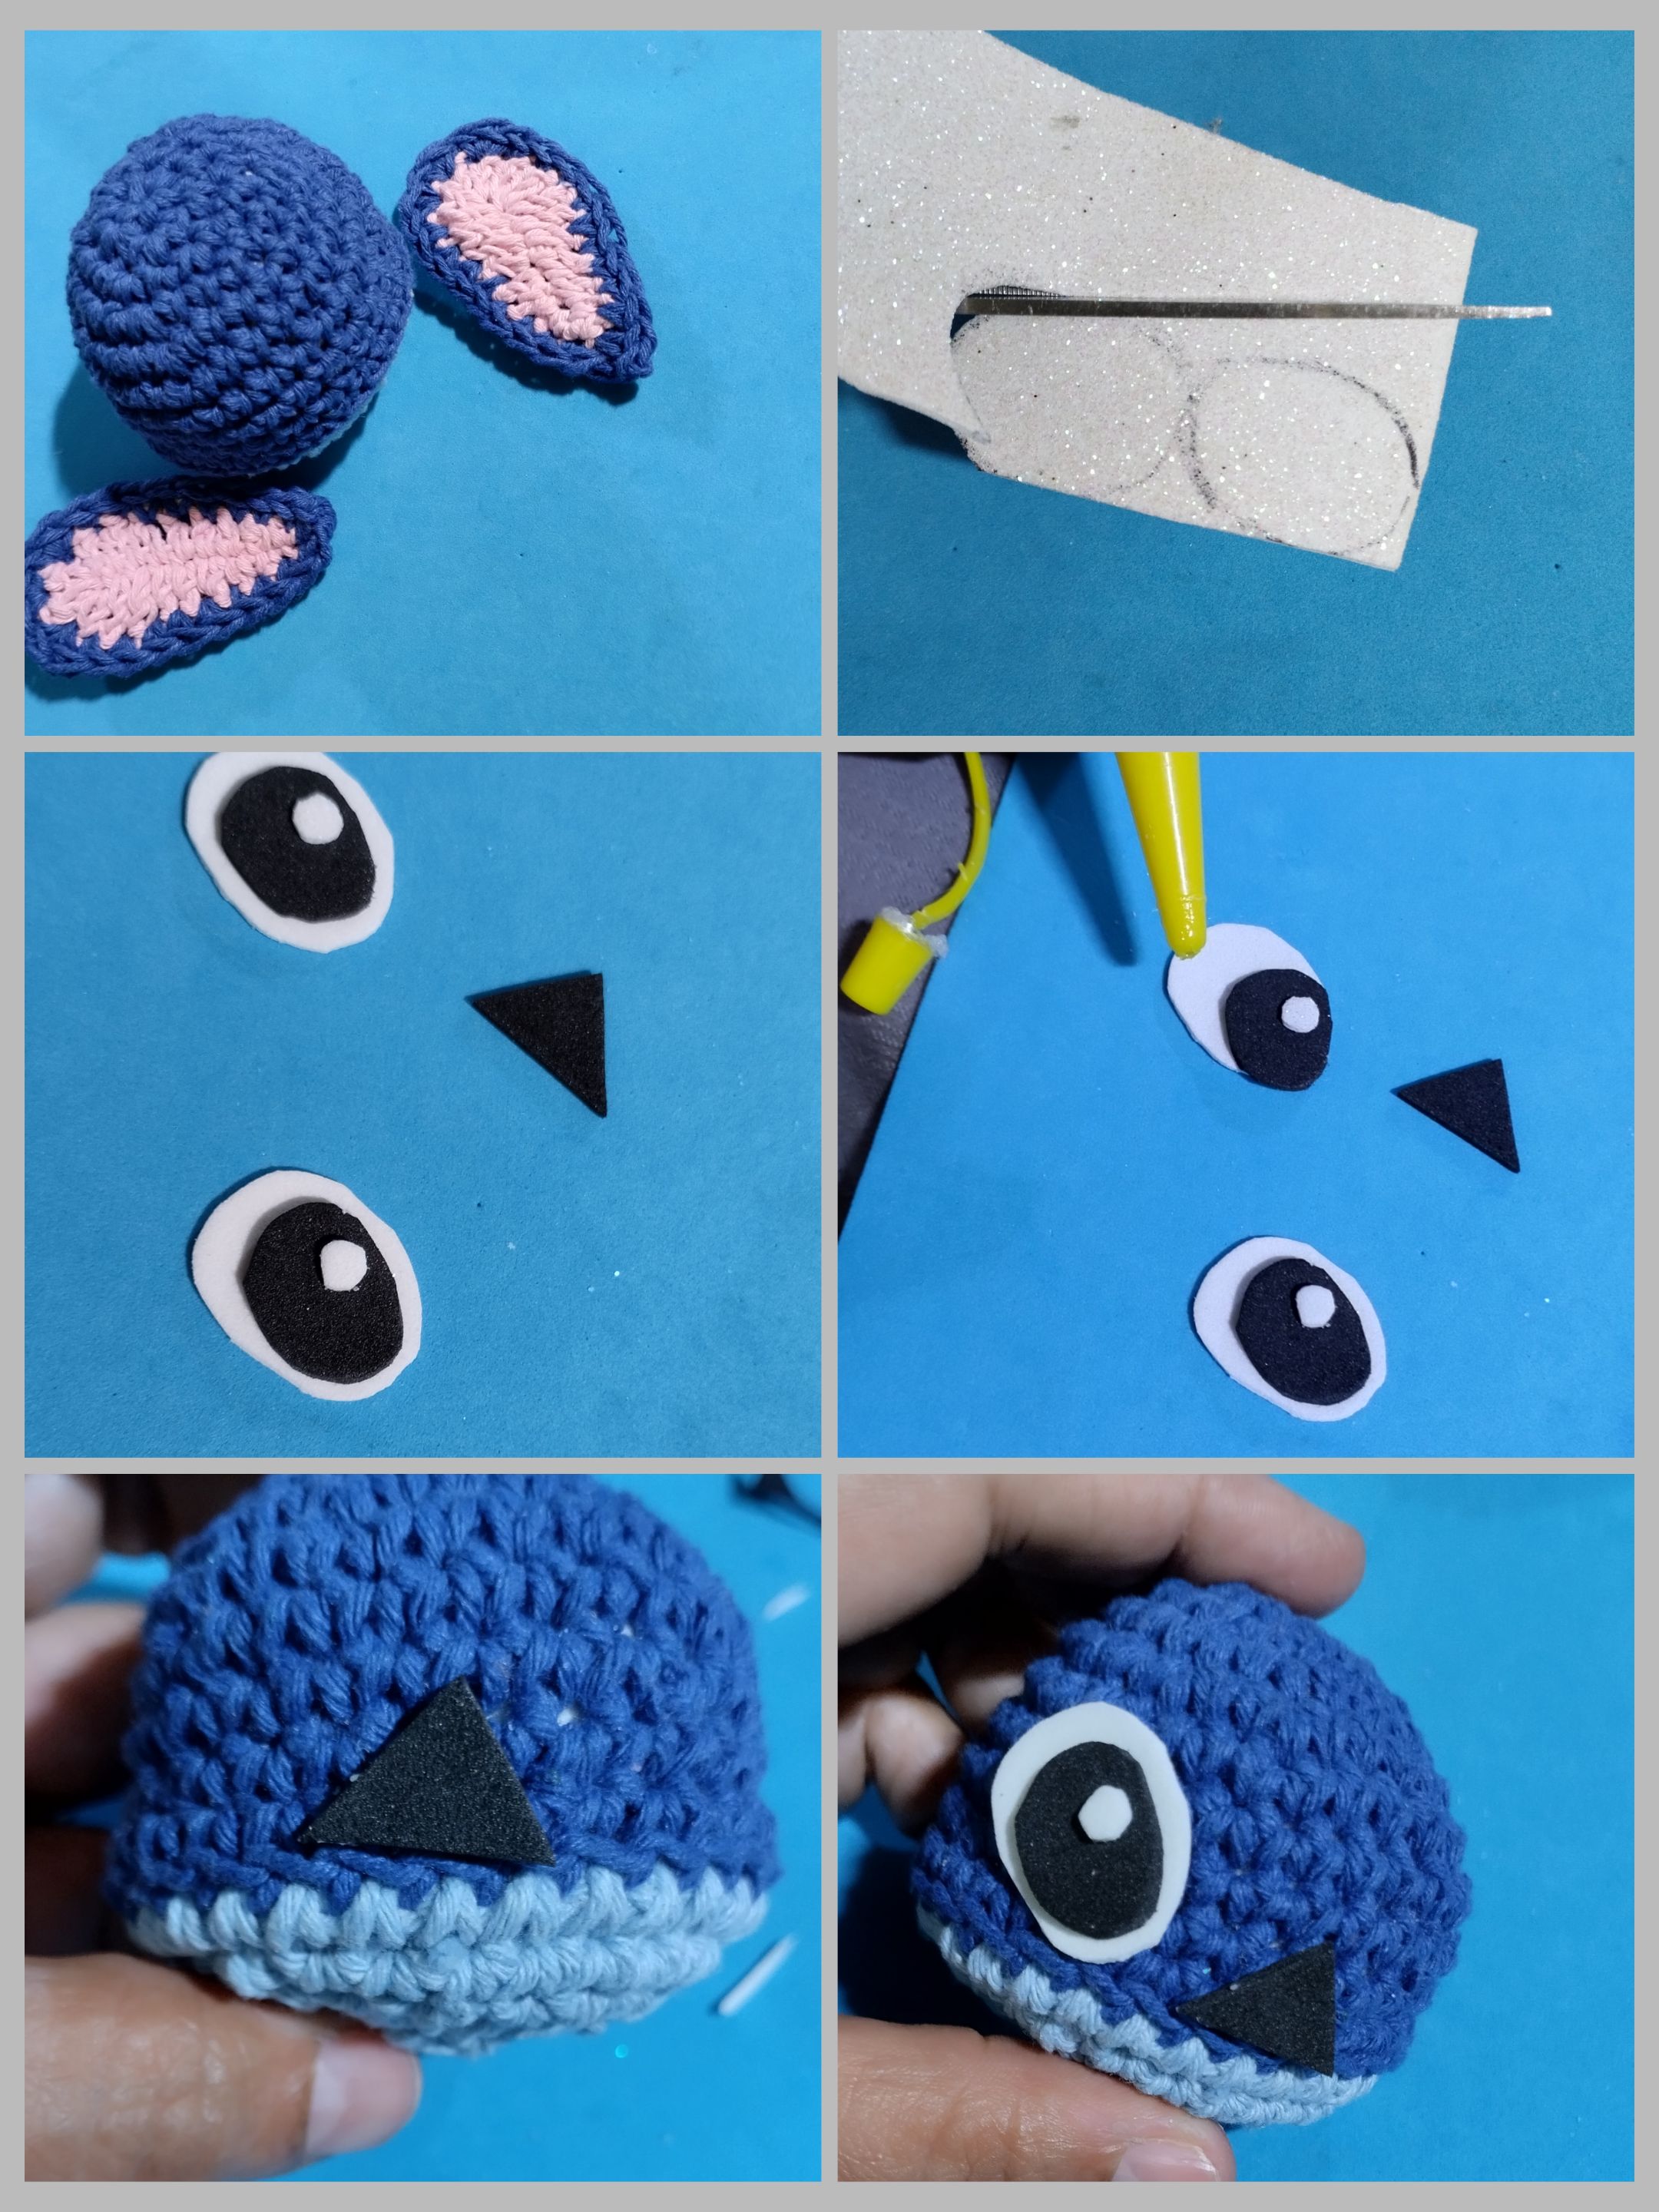
- Recortar con foami negro y blanco dos óvalos. Y un redondo blanco pequeño.
- Pegar con silicona. Además hacer un triángulo negro en foami para la boca.
- Ahora colocar cada parte en su lugar , los ojos, la boca y las orejas. Y el llavero.
>#### Step-by-step instructions for making the cute crocheted Stitch:
>- The first thing we need to do is make a magic ring.
>- Work 6 single crochet stitches into the ring.
>- For the second round, increase in each stitch for a total of 12 single crochet stitches.
>- For the third round: work one single crochet stitch and one increase for a total of 18 stitches. Now make 5 rounds of 18 stitches.
>- Change to light blue and start by making 18 slip stitches.
>- For the next round, make one single crochet and two decreases.
>- For the next round, make 3 decreases and one single crochet.
>- Stuff the motif and sew the bottom.
>- Now that Stitch's head is ready, we will make the ears.
>- Make a chain of 10, then three single crochets, three half double crochets, and three double crochets.
>- In the last stitch, make three double crochets together. Do the same on the other side. This is how you crochet the ears. Two dark blue and two pink. Then sew the two ears together: the pink one and the dark blue one.
>- Cut out two ovals from black and white foam. And a small white circle.
>- Glue them together with silicone. Also make a black triangle out of foam for the mouth.
>- Now place each part in its place: the eyes, the mouth, and the ears. And the keyring.

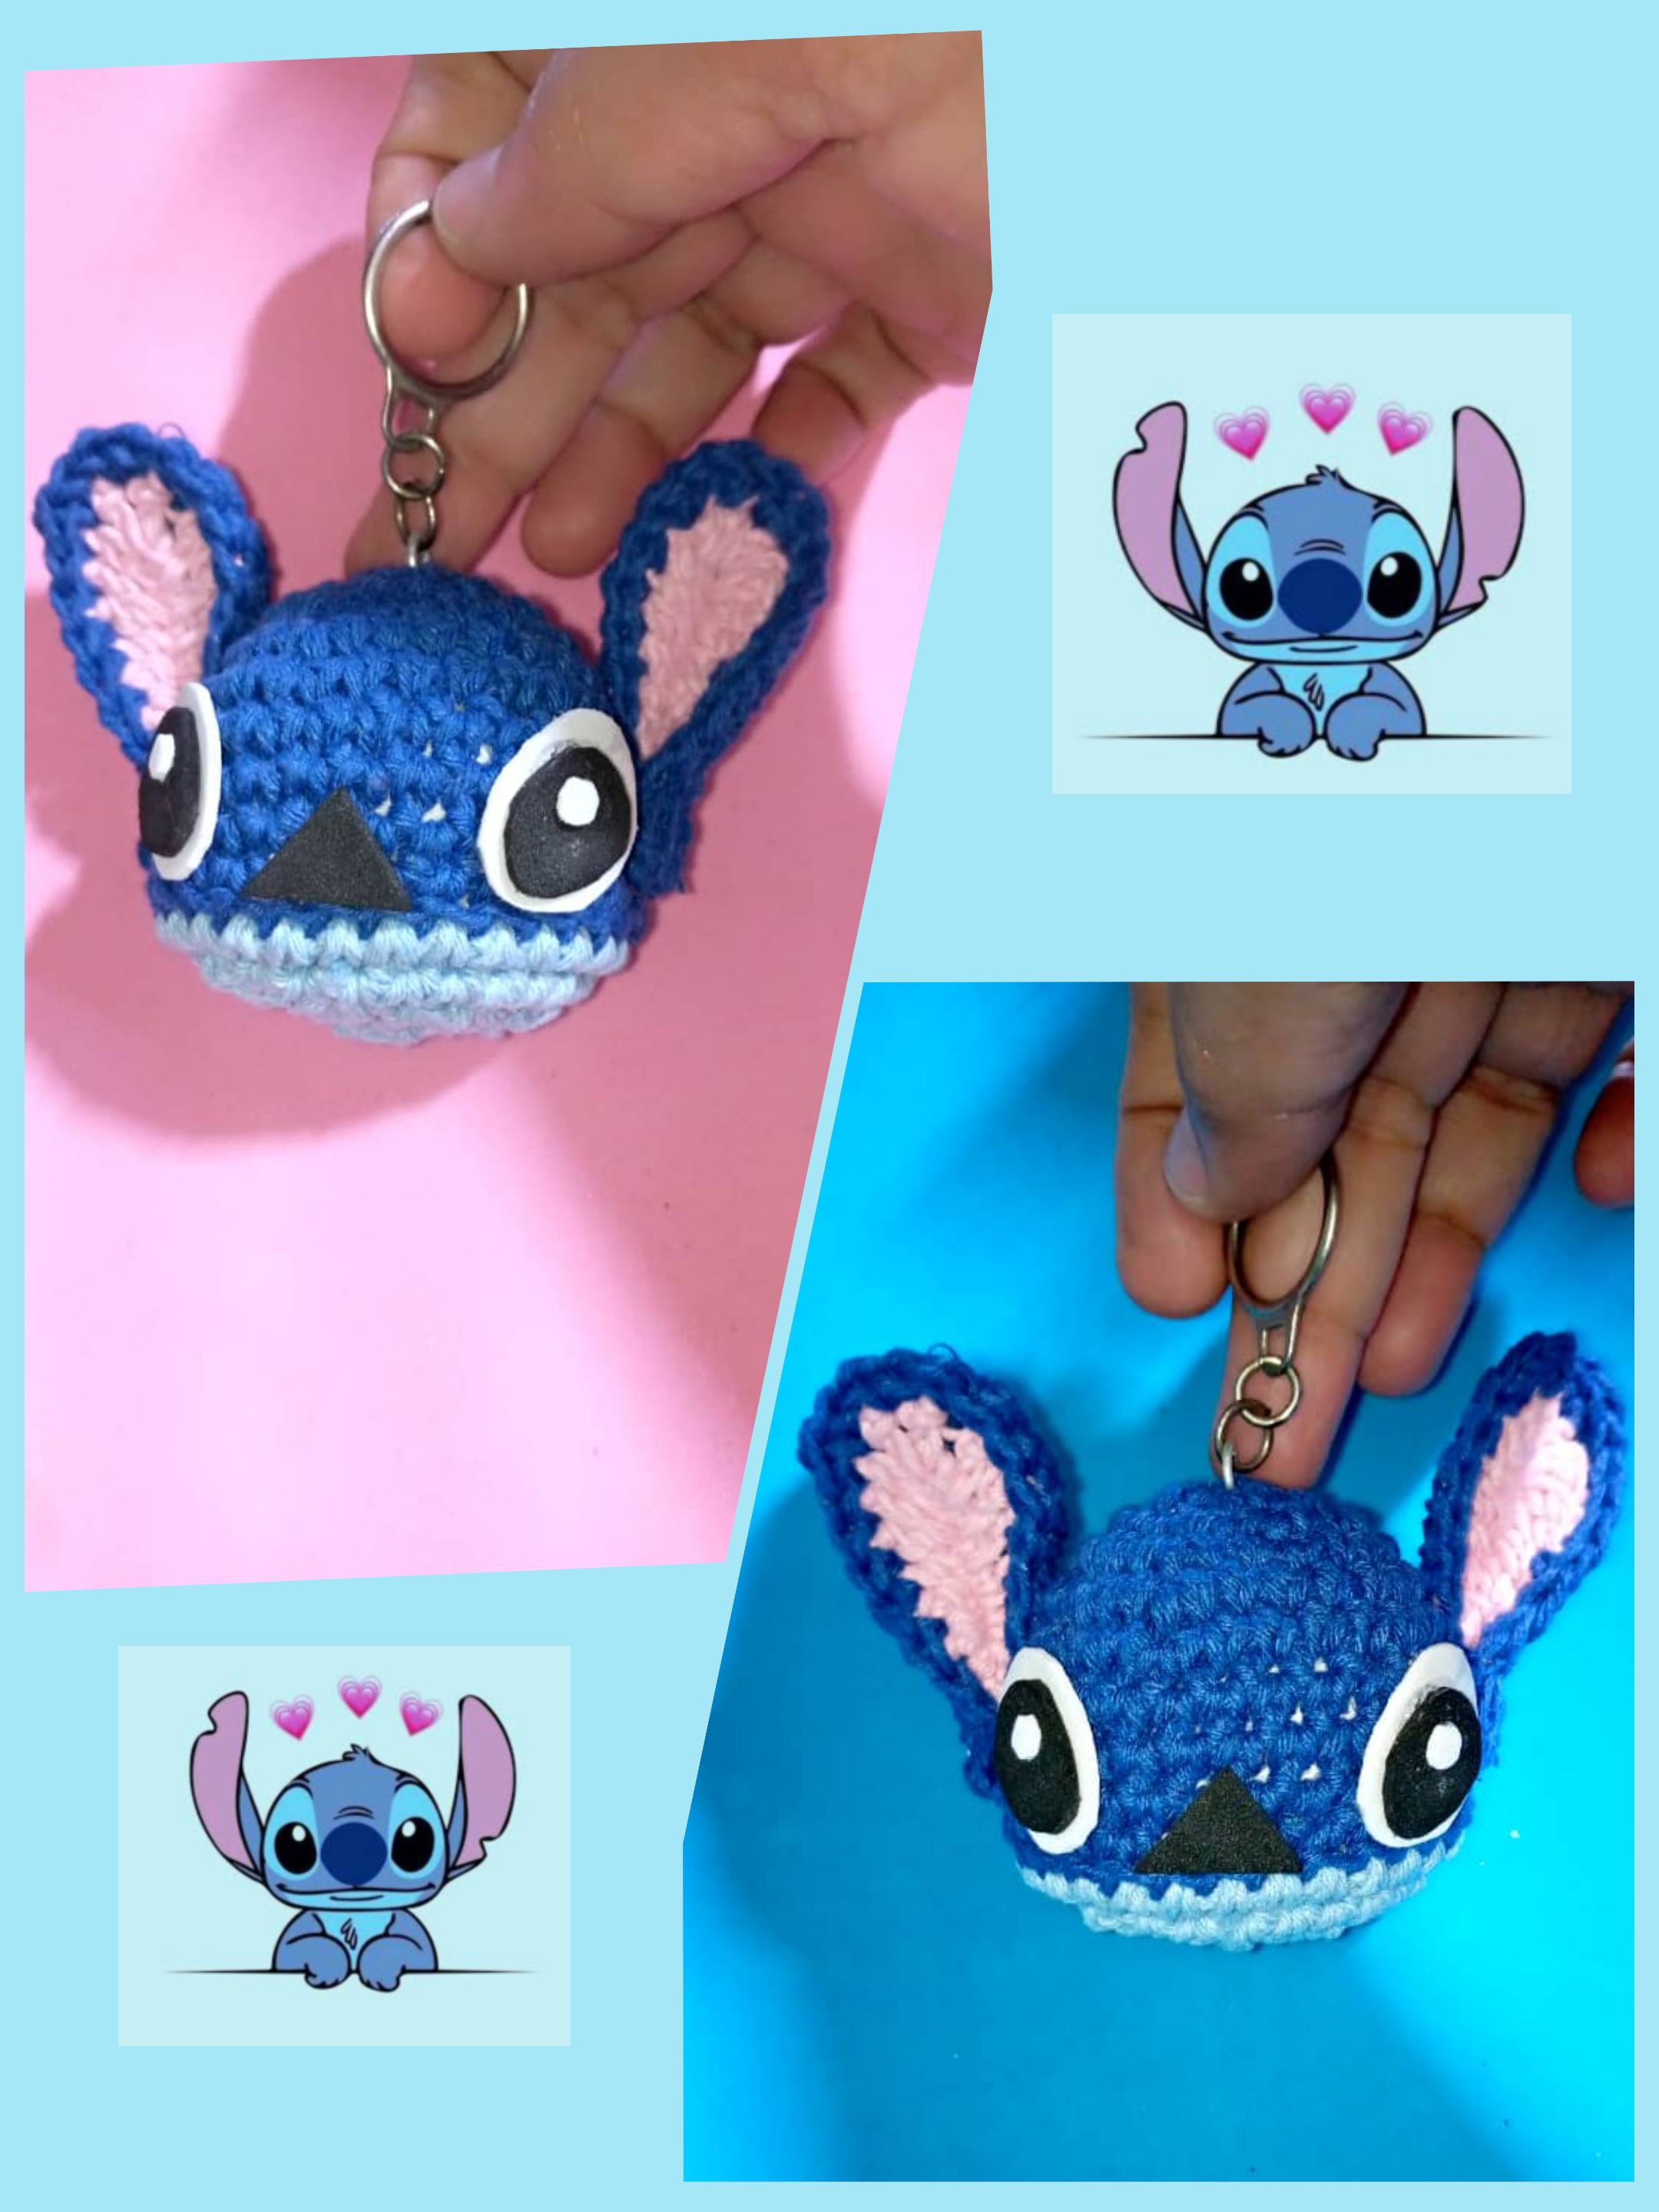
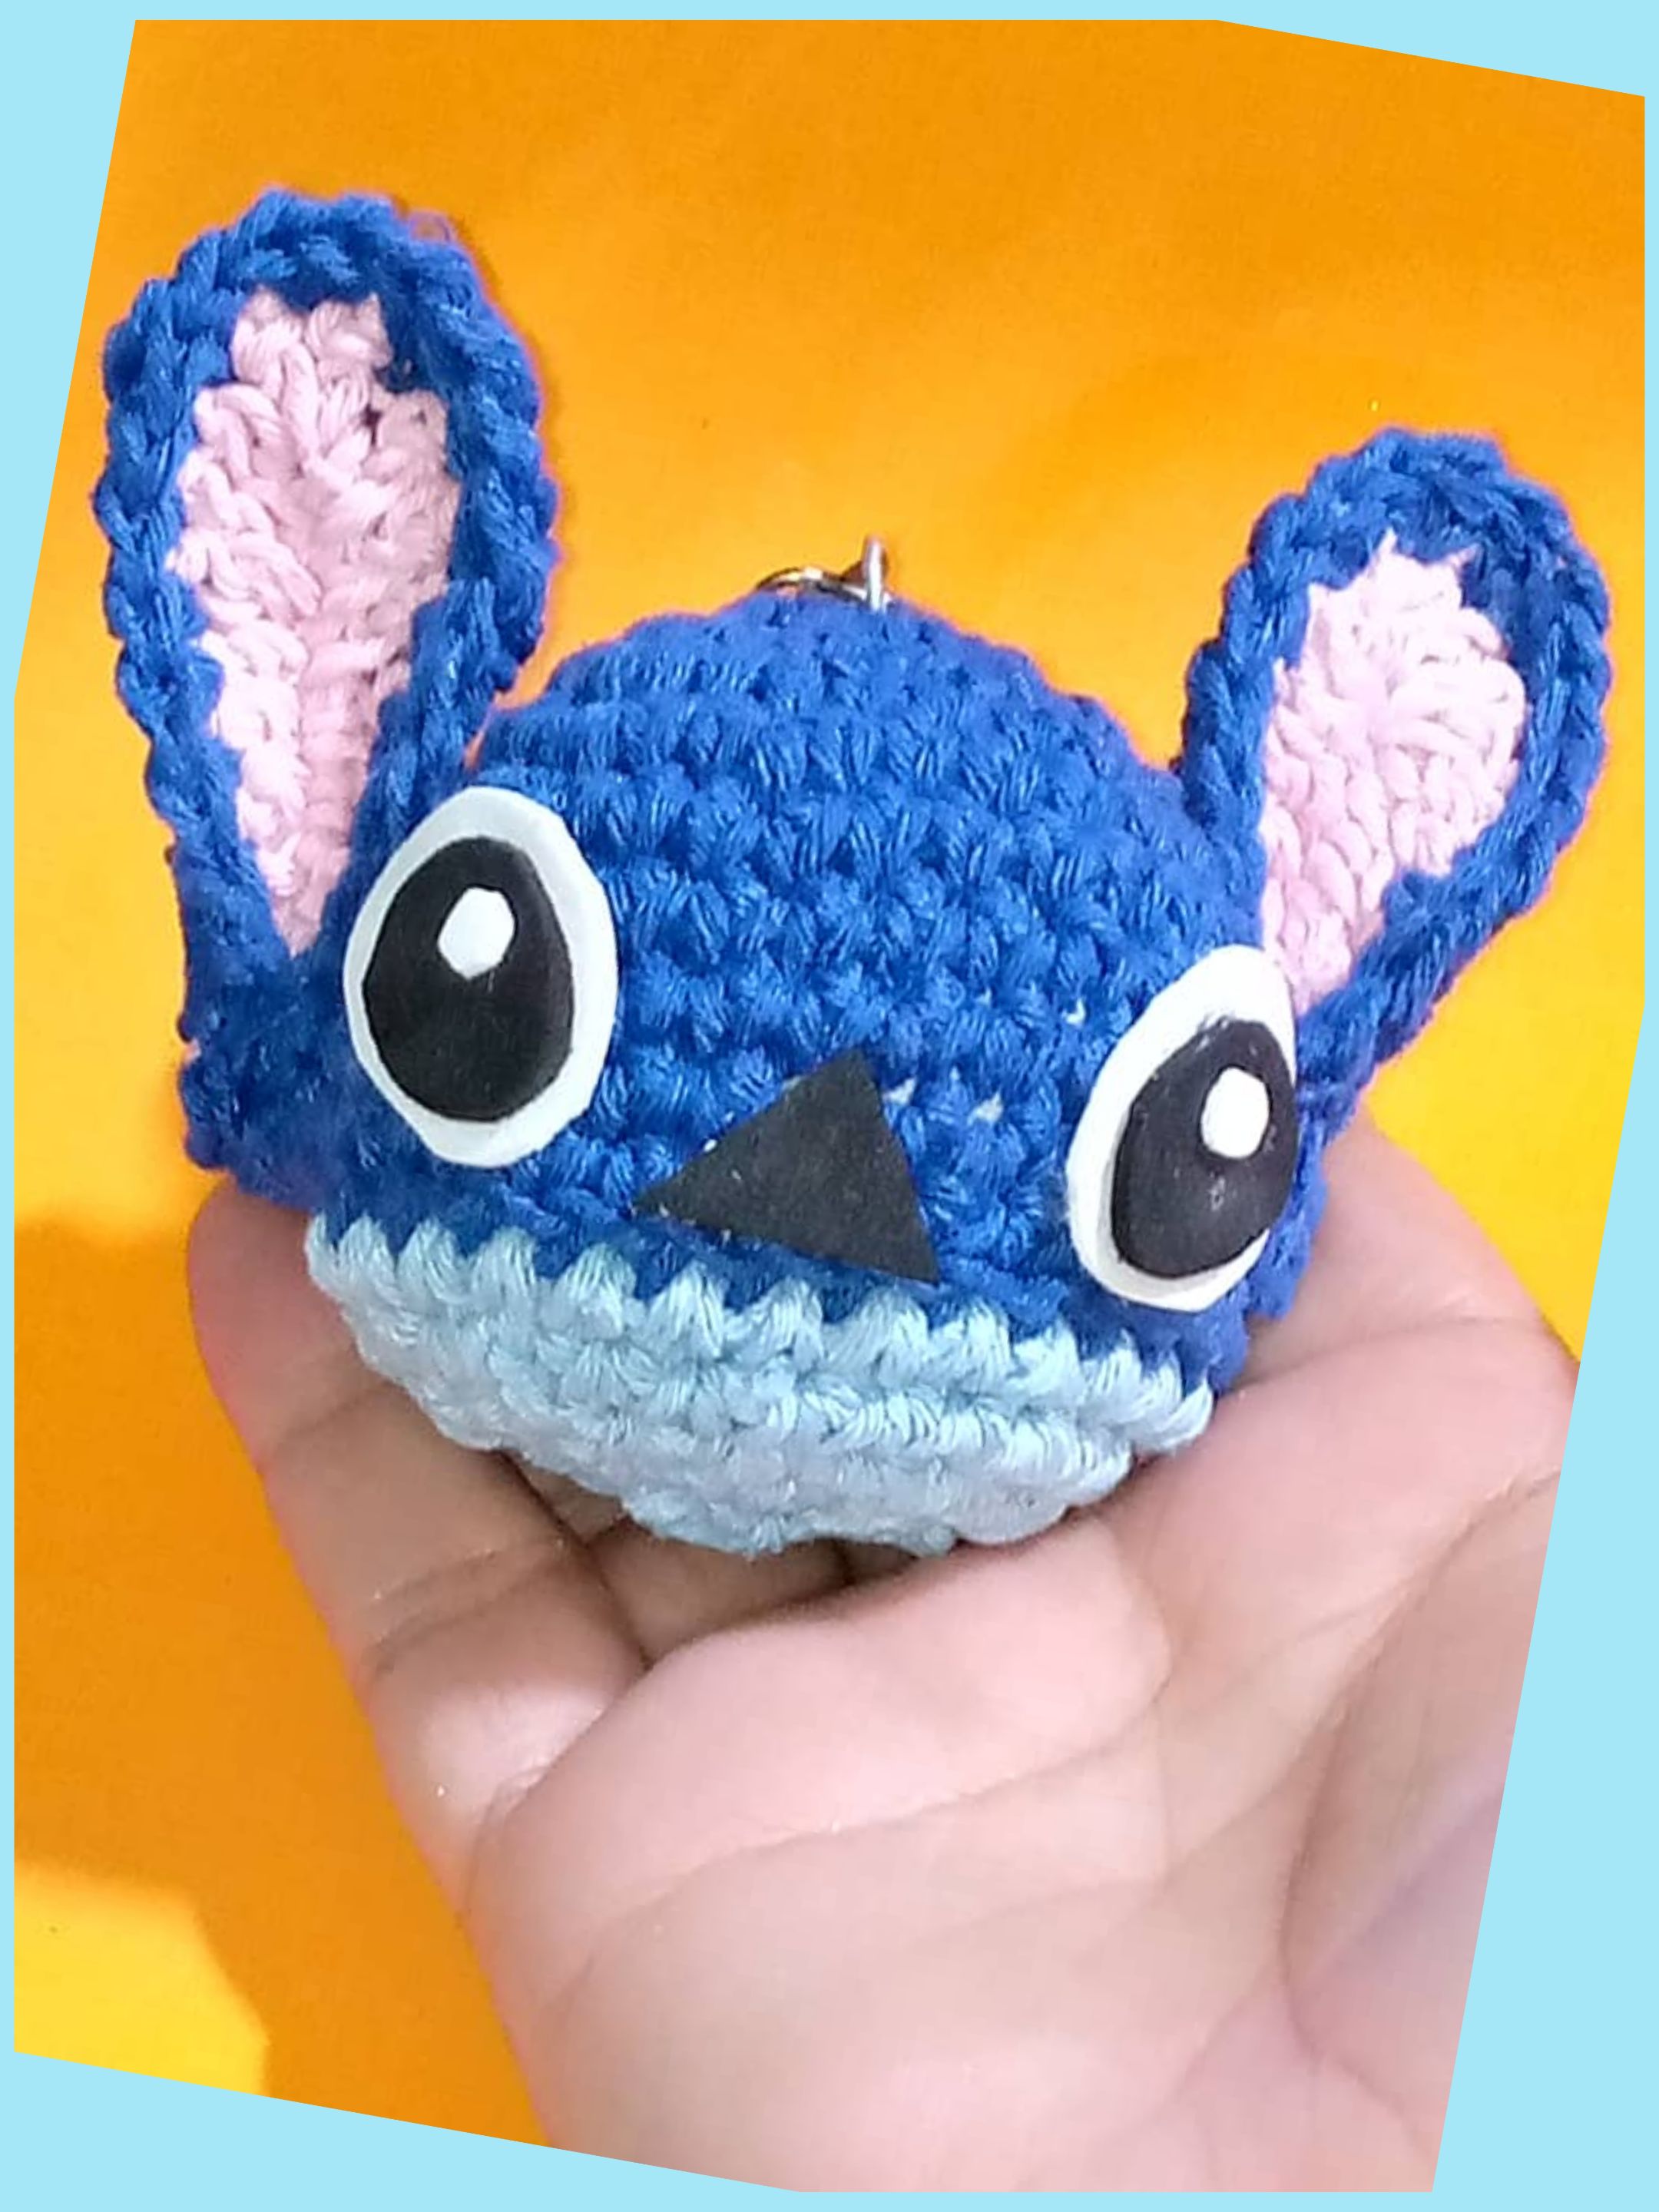
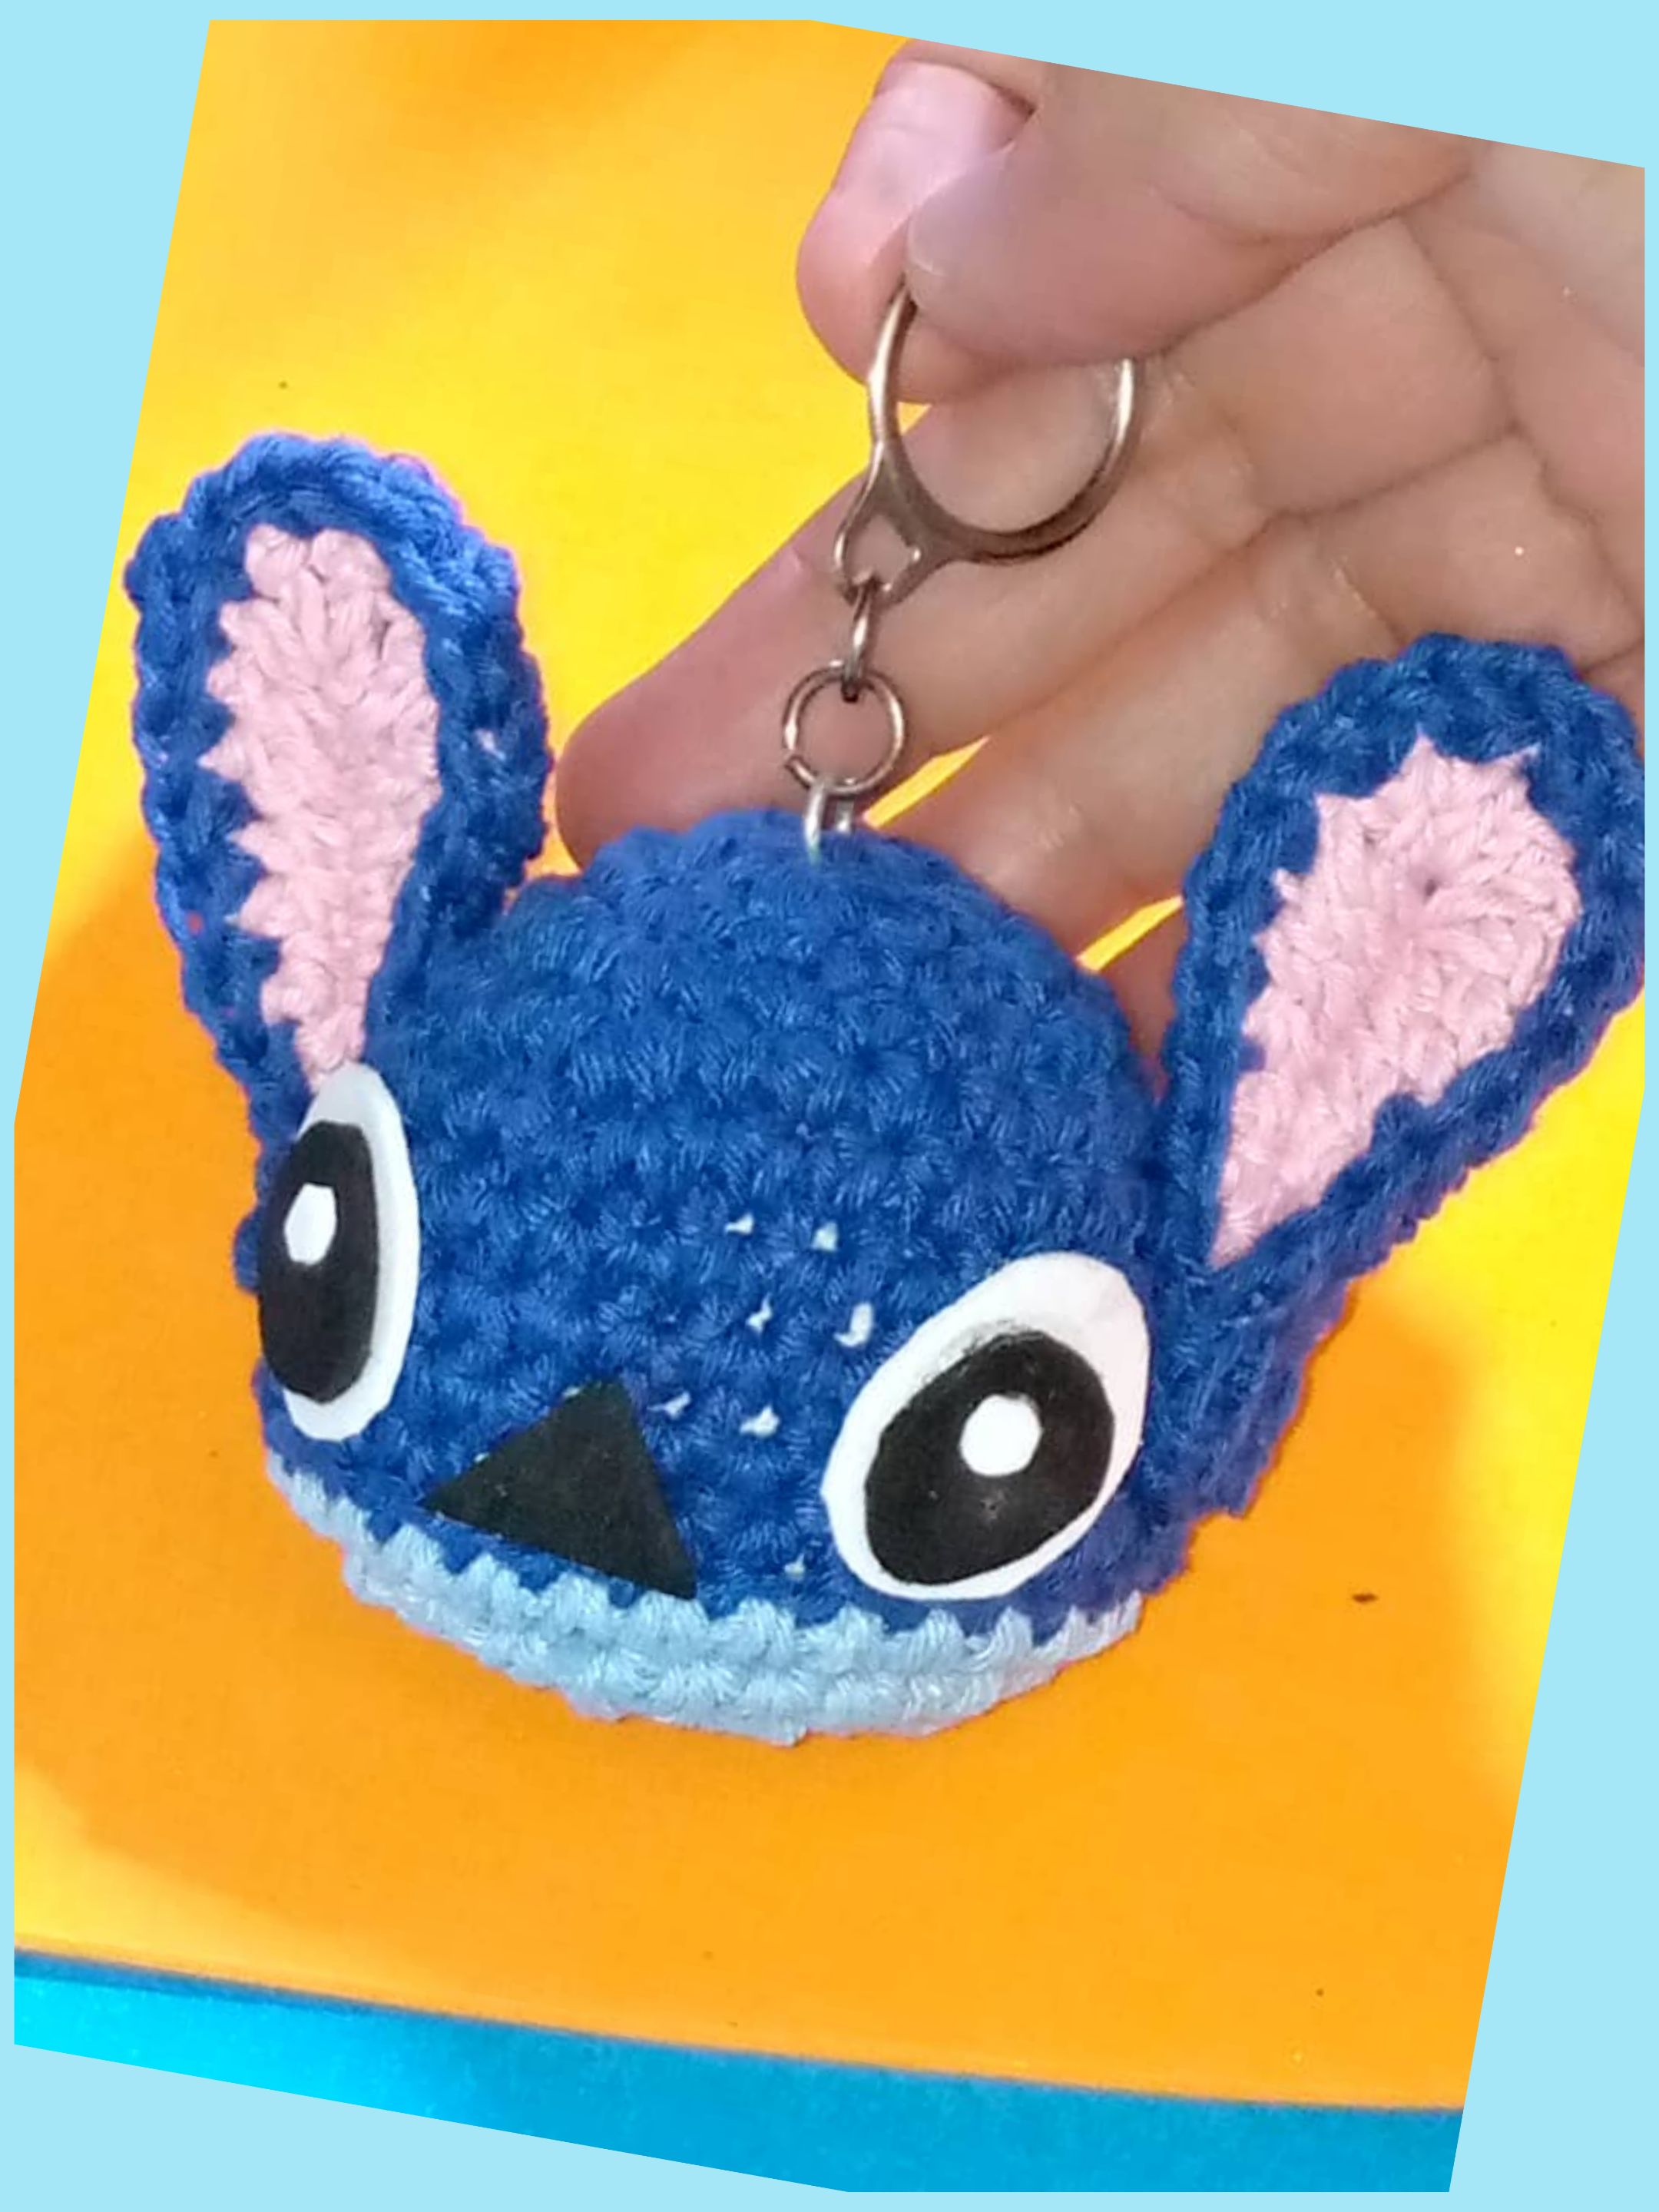
##### Aquí el resultado final del lindo Amigurumi de Stitch, tejido a crochet
>##### Aquí el resultado final del lindo Amigurumi de Stitch, tejido a crochet
Gracias por leer y comentar mi post, las fotos son mías , tomadas con teléfono Infinix, editadas con incollage y traducidas con Deepl.
>Thank you for reading and commenting on my post. The photos are mine, taken with an Infinix phone, edited with InCollage, and translated with Deepl.

(Esp/Eng) Lindo llavero Amigurumi de Stitch,tejido a crochet / Cute Stitch Amigurumi keychain, crocheted
@josdelmi
· 2025-10-26 02:59
· DIYHub
#diyhub
#spanish
#bricolaje
#tutorial
#creativo
#handmade
#creativecoin
#manualidades
Payout: 0.000 HBD
Votes: 316
More interactions (upvote, reblog, reply) coming soon.