(ENG)
Hello beautiful people, creator and lover of El Bricolage, I am pleased today to be with all of you in, @diyhub, I show you, a very funny and very fun ideas, of how rear, beautiful pendants or keychains, using the amigurumis technique. Great for hanging in wallet bags or placing and making the keys to our house, car, loker, etc. Without more I invite you to see, the creative process.
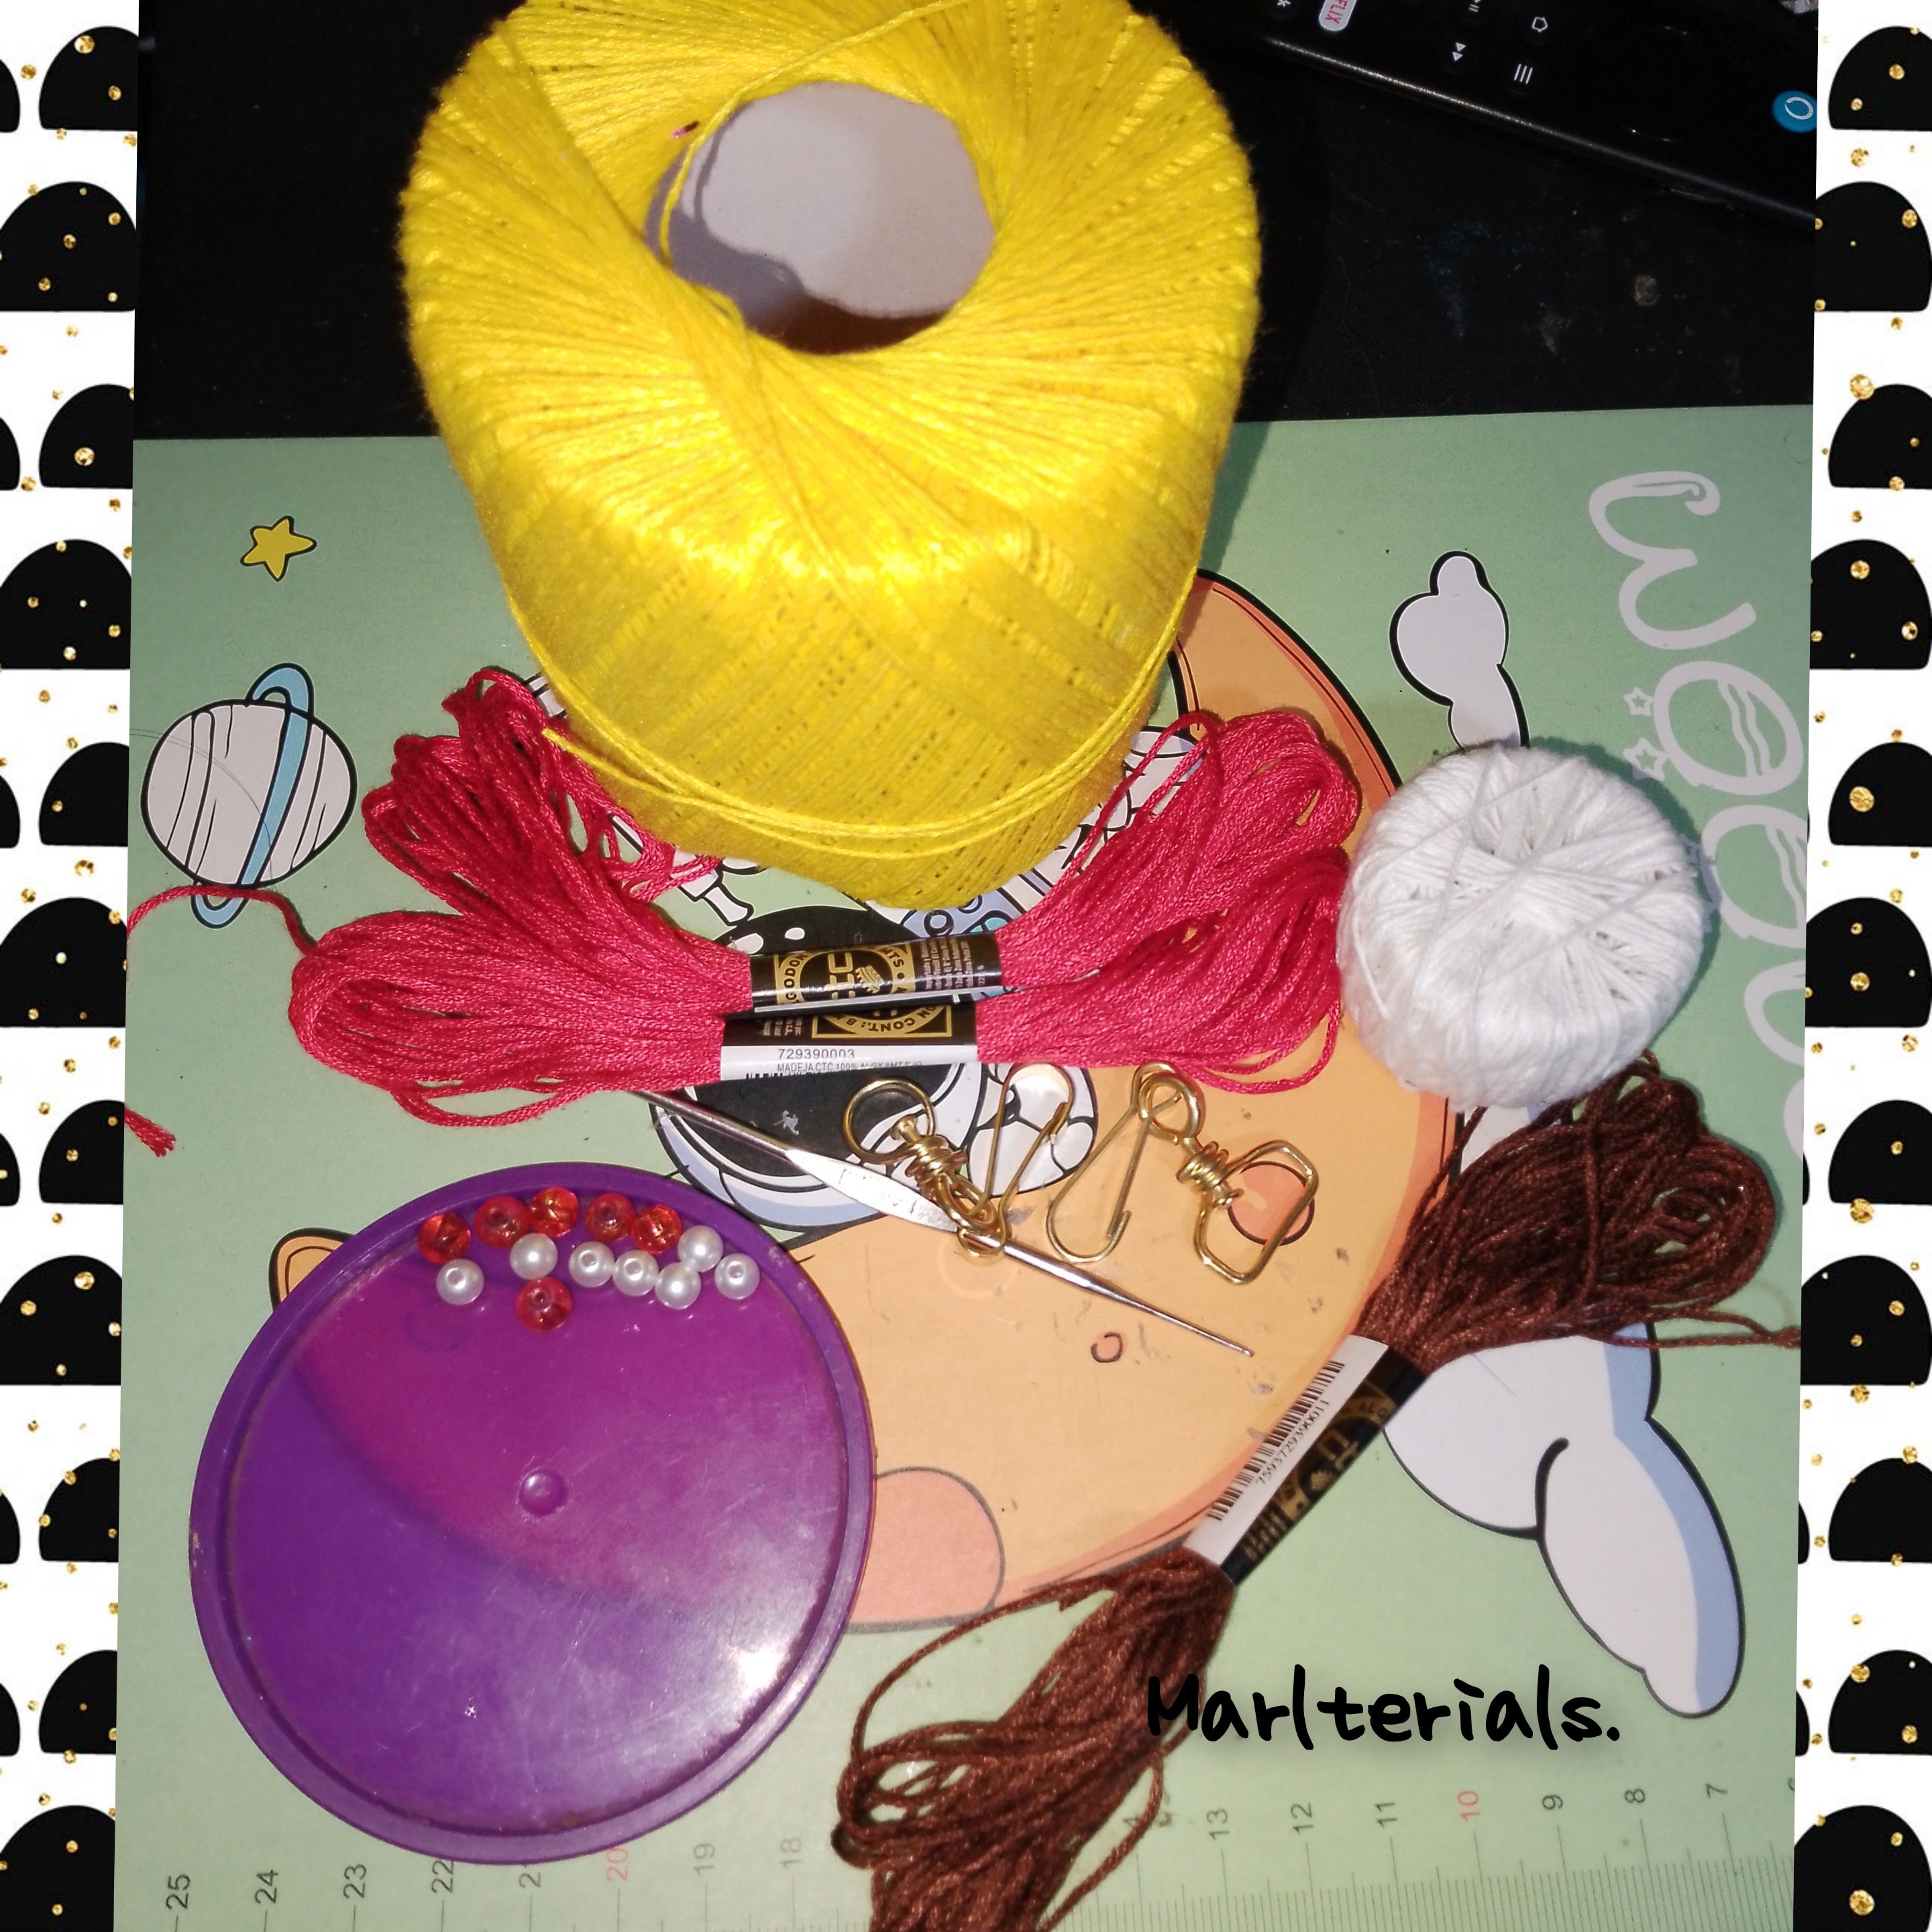
Used materials:
. Threads for weaving, colors, (yellow, green, red, white). . Brown and purple skein . Needle to weave . Waterfall. . Stuffed. . Black Mosts. . Scissors. .Conds, (white wood, . Steel hooks
Steps to follow.
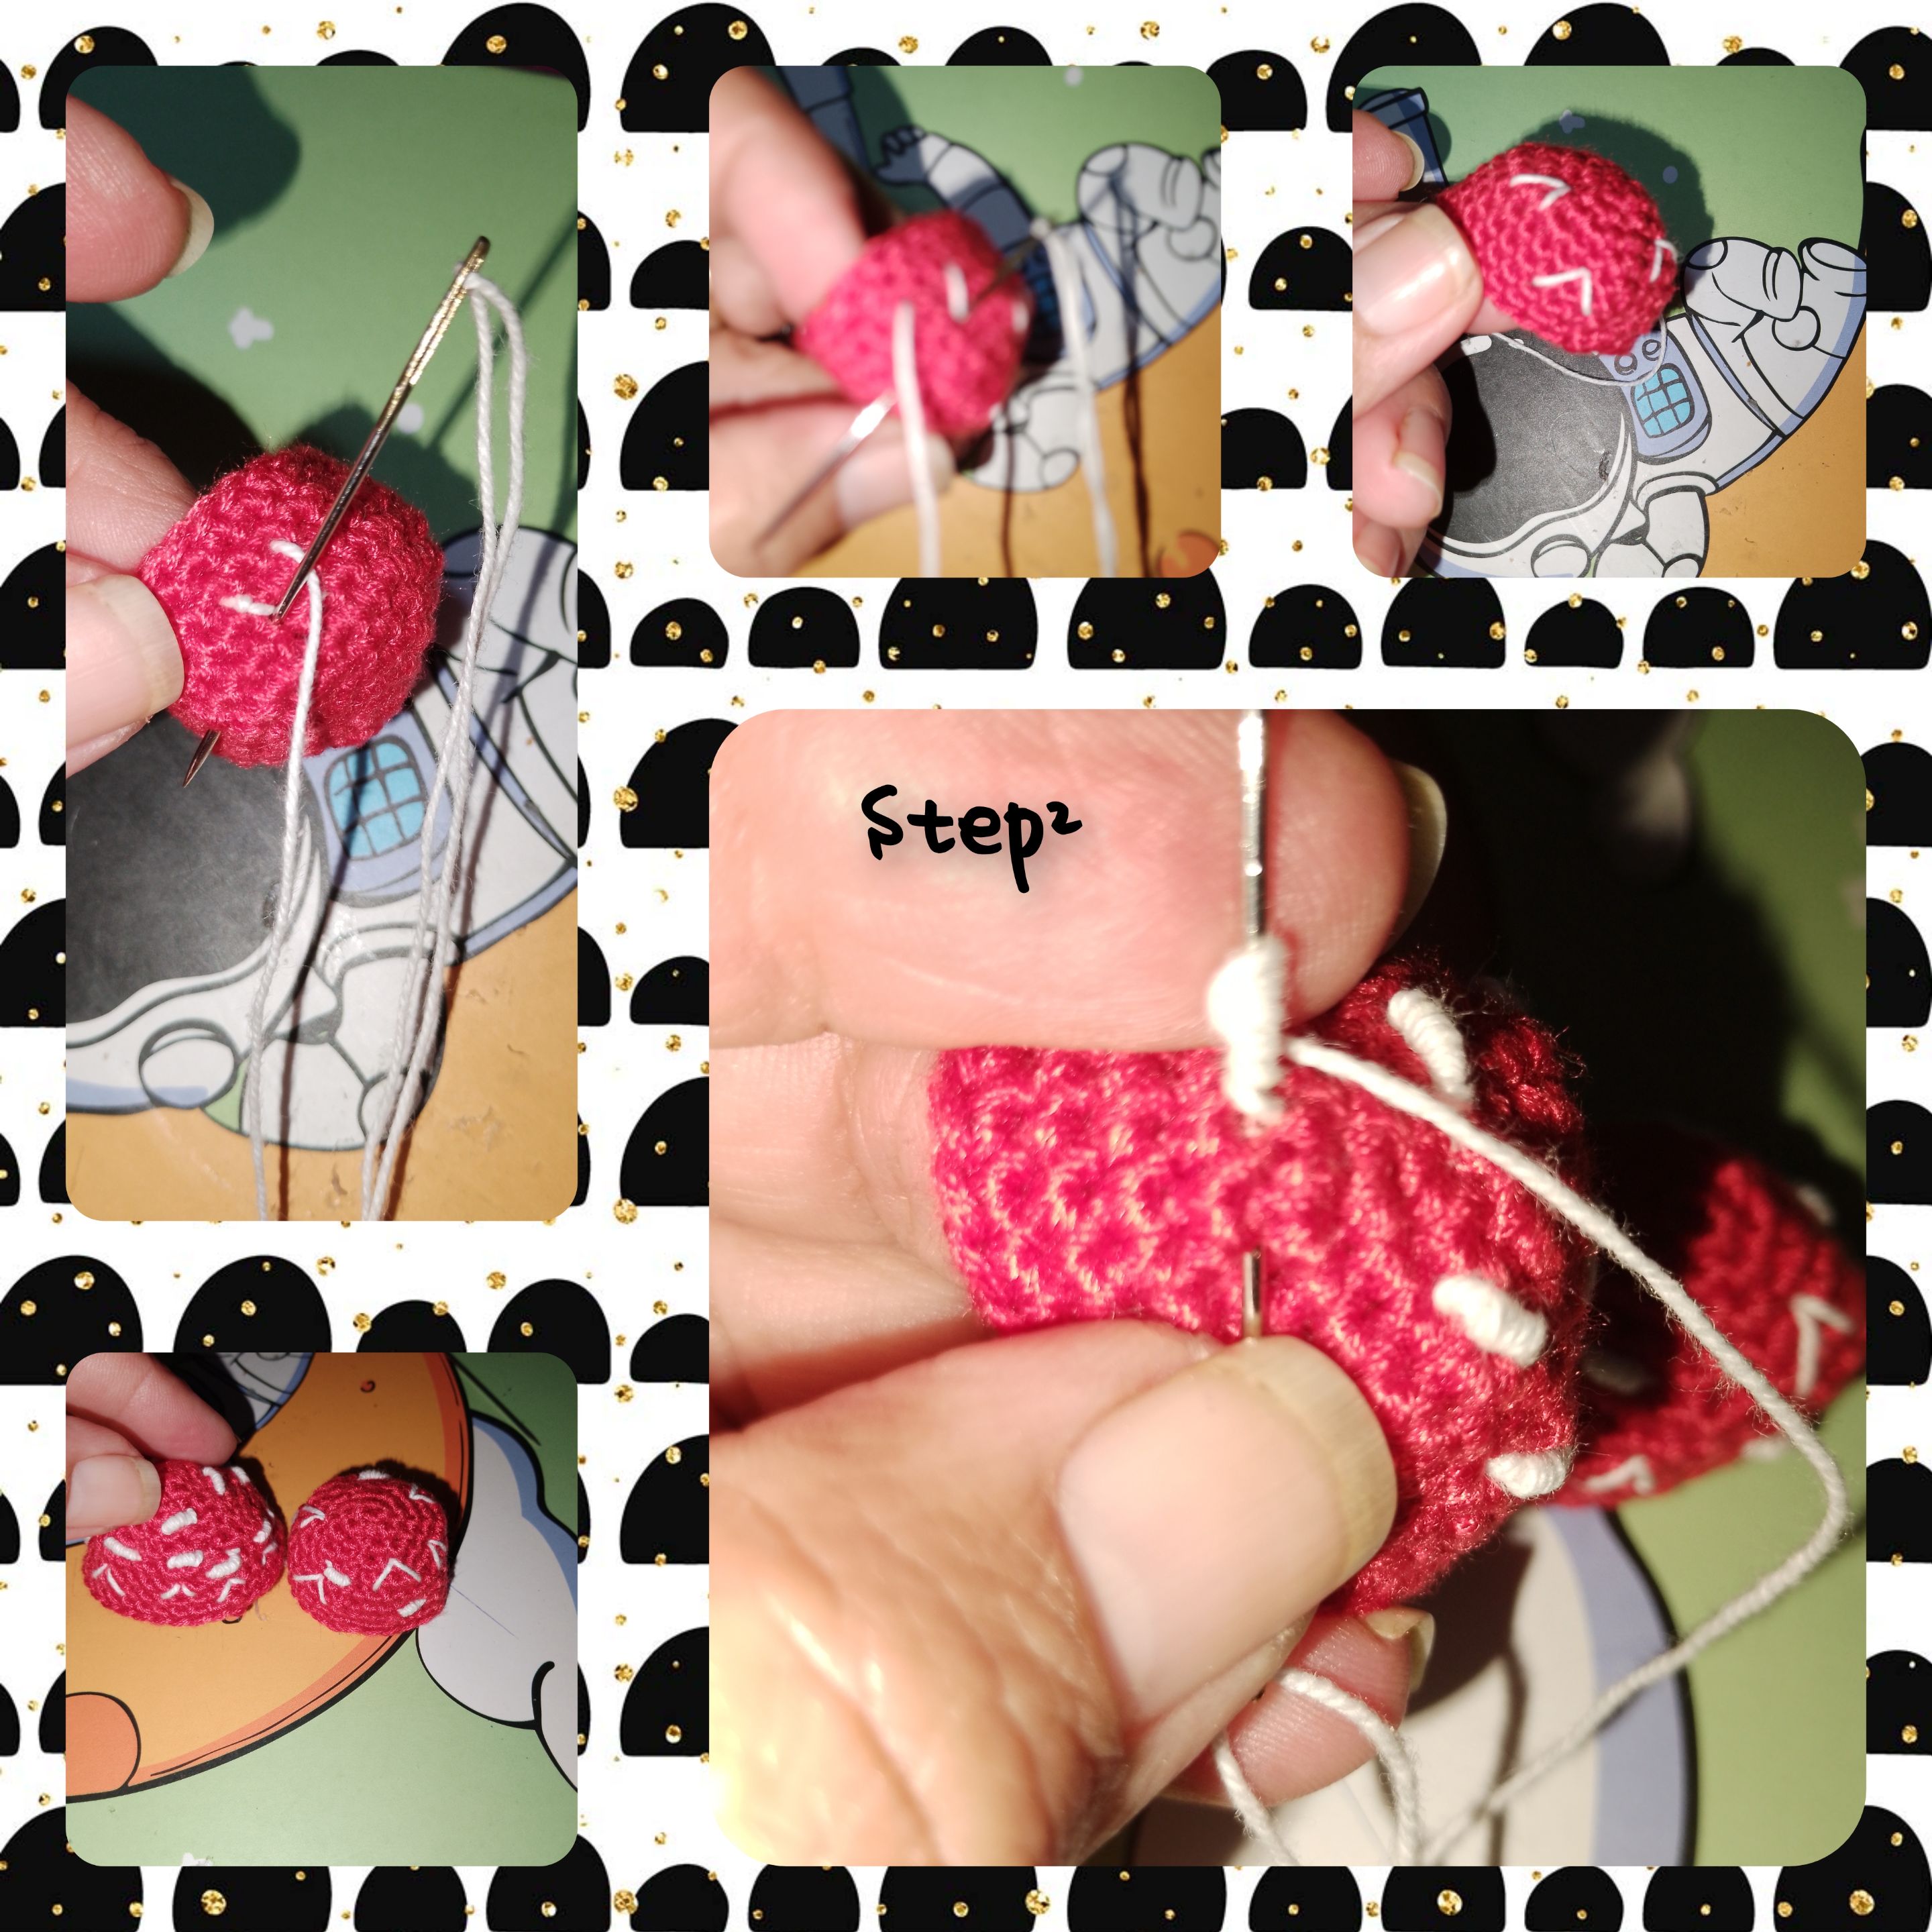
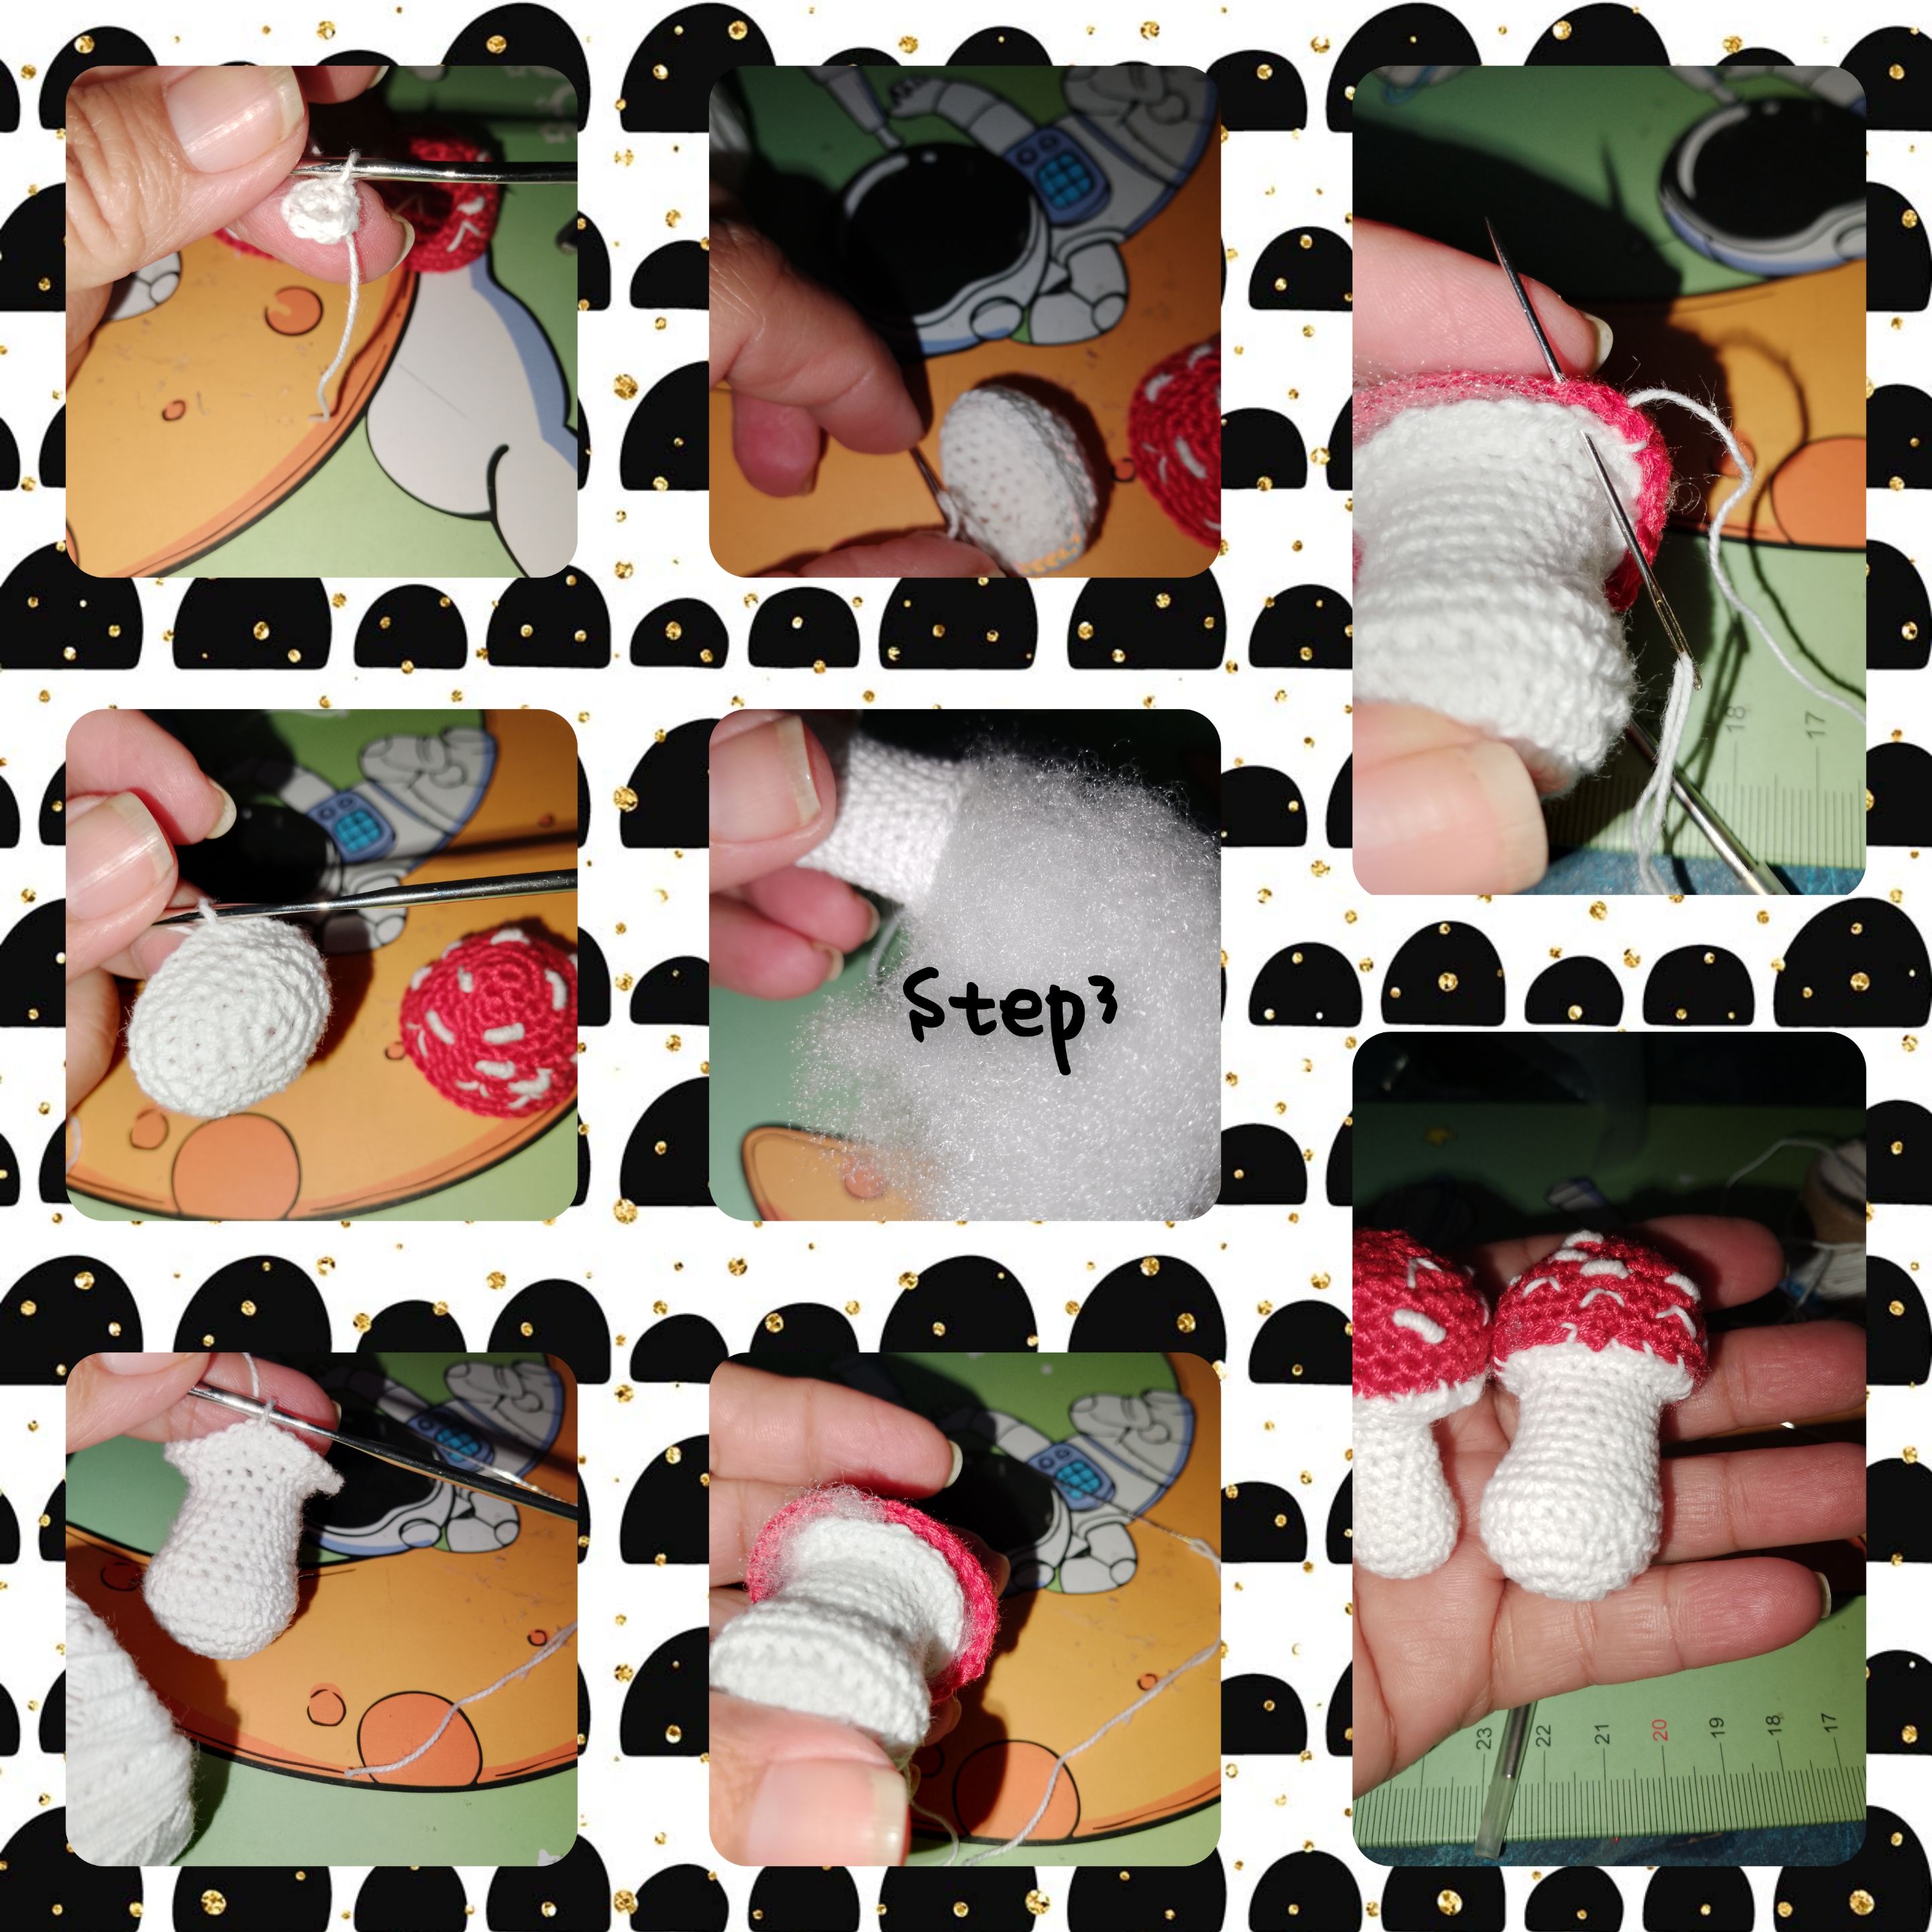
1.) For the pendant or keychain, inspired by a delicate fungus. I make a magical ring, within this weave six half points, I close the ring and give a second pass of six increases for twelve media points. Continuous and I take a third round, increasing, after a half point, the next round, after two media points, and the next after three media points, to obtain thirty media points. I make a stop and we have four laps of thirty media points. I refer and short the thread.
2.) White thread to the needle and start, at the edge of some white points, through the woven piece in the previous passage, which will simulate, the fungus hat.
3.) For the foot of the Tejo fungus in a magical ring six media points, in the next pass, weigh six increases and then an increase after half a point, to obtain 18 media points, weigh six laps of 18 points to give height, and in the following laps Tejere Tejere eighteen increase. Obtained thirty -six points, I take two laps with the same number of points. I place filling the woven pieces in step one and 2/3, and with the needle lanera, and one the pieces to form the fungus.
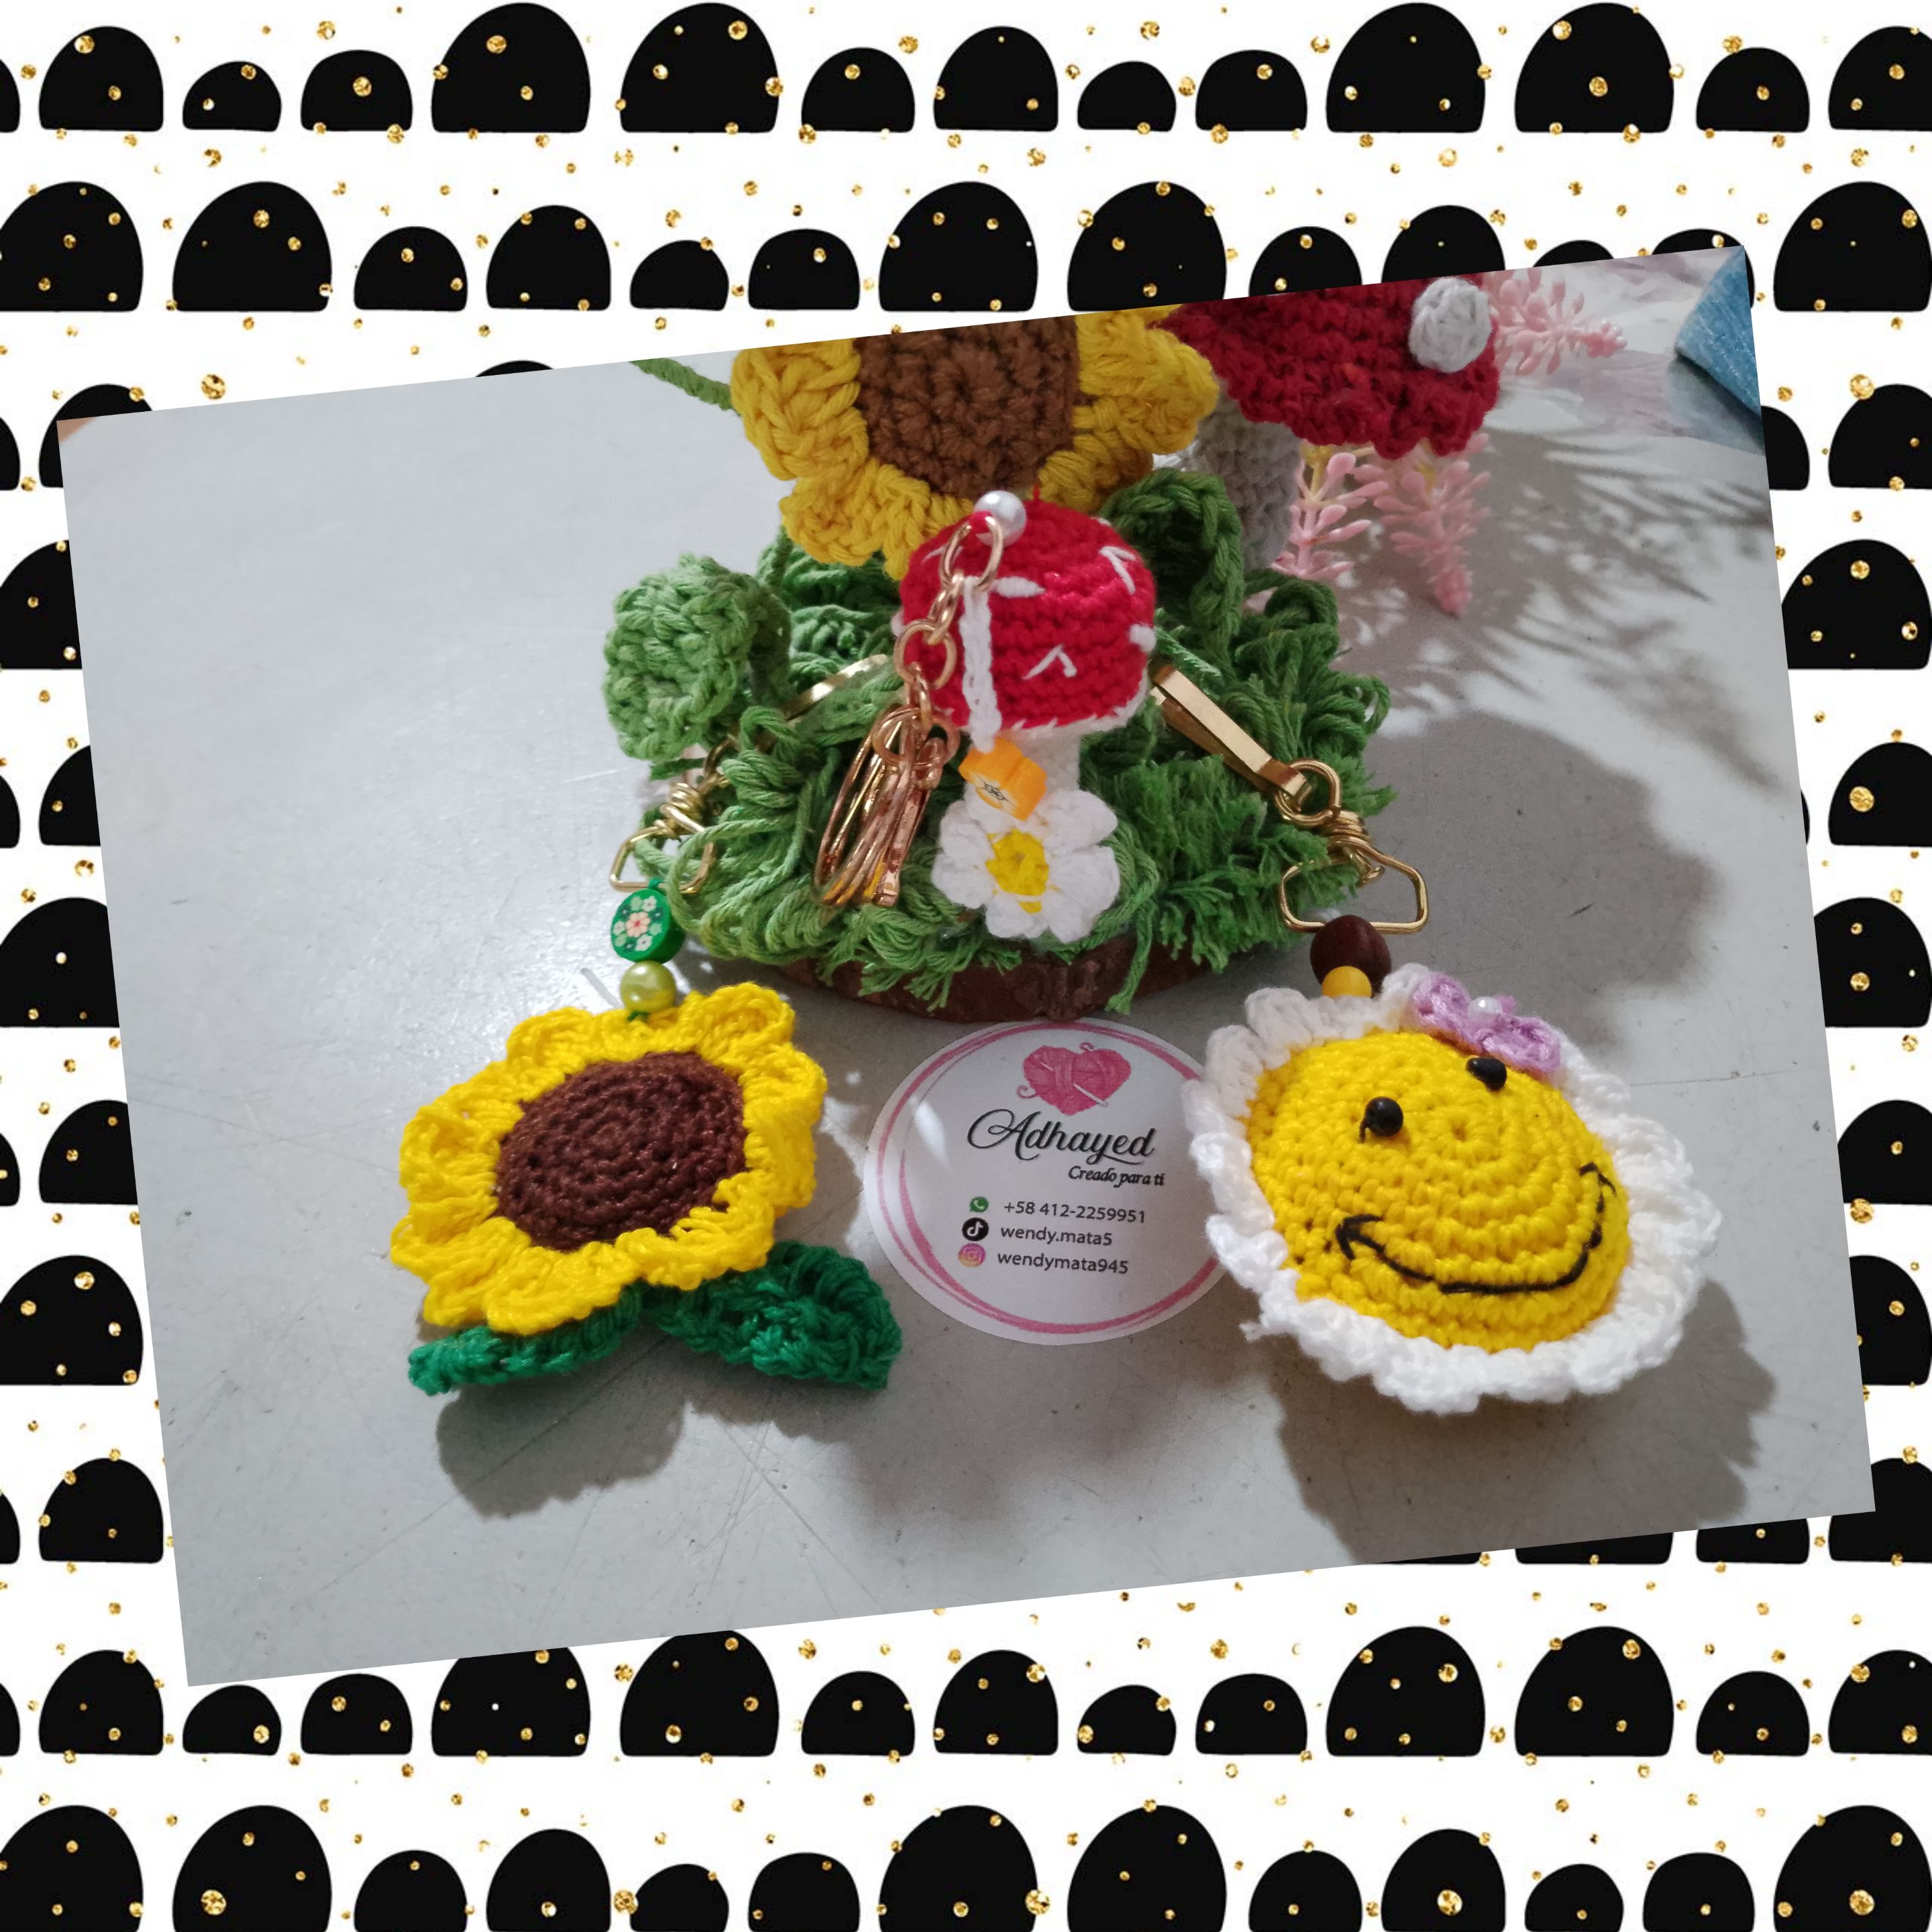
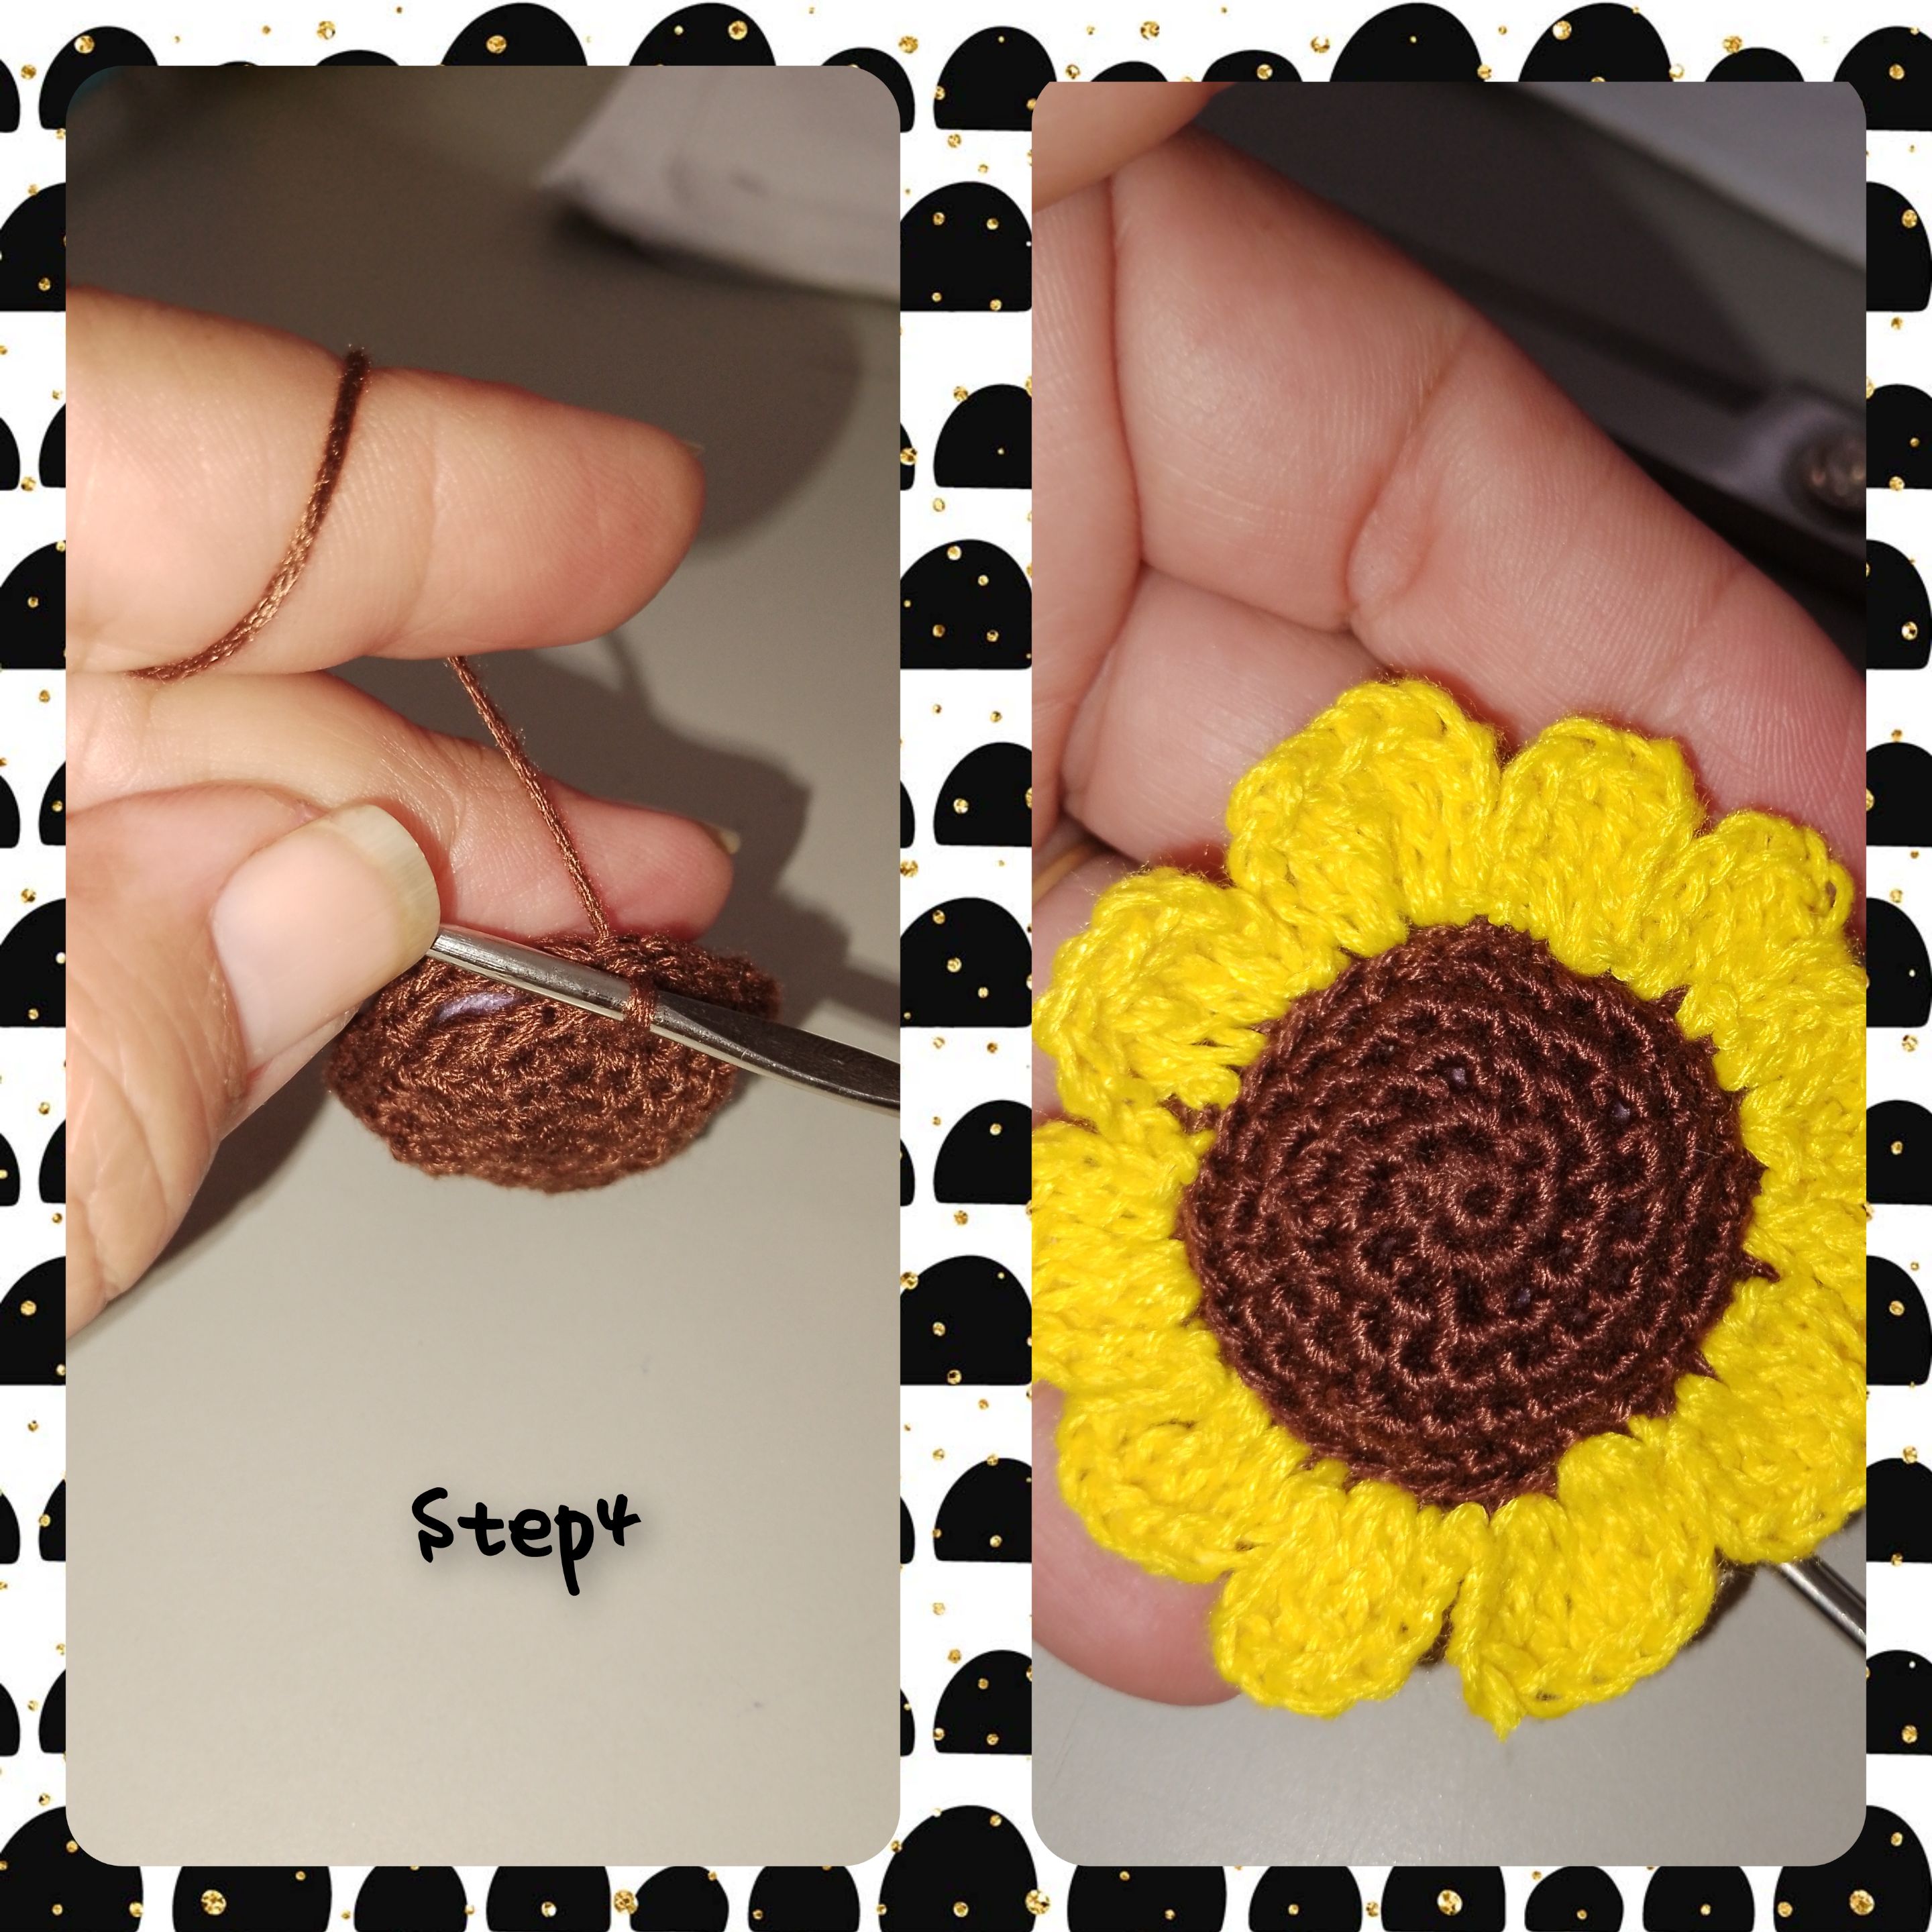
4.) In a magical ring, using the brown skein, weighing six half points in a magical ring, weighing six increases, and continuous in the next one weaving an increase after half a point. And I get an almost perfect circle, I repeat for a second circle, to hit him with him with the needle and thread, also placing some filling., Change the color of thread and with the color thread, yellow, start knitting small petals, throughout the route of the circle. Using the green thread, weigh two small leaves, which I hit with the same thread color, on the back of the sunflower.
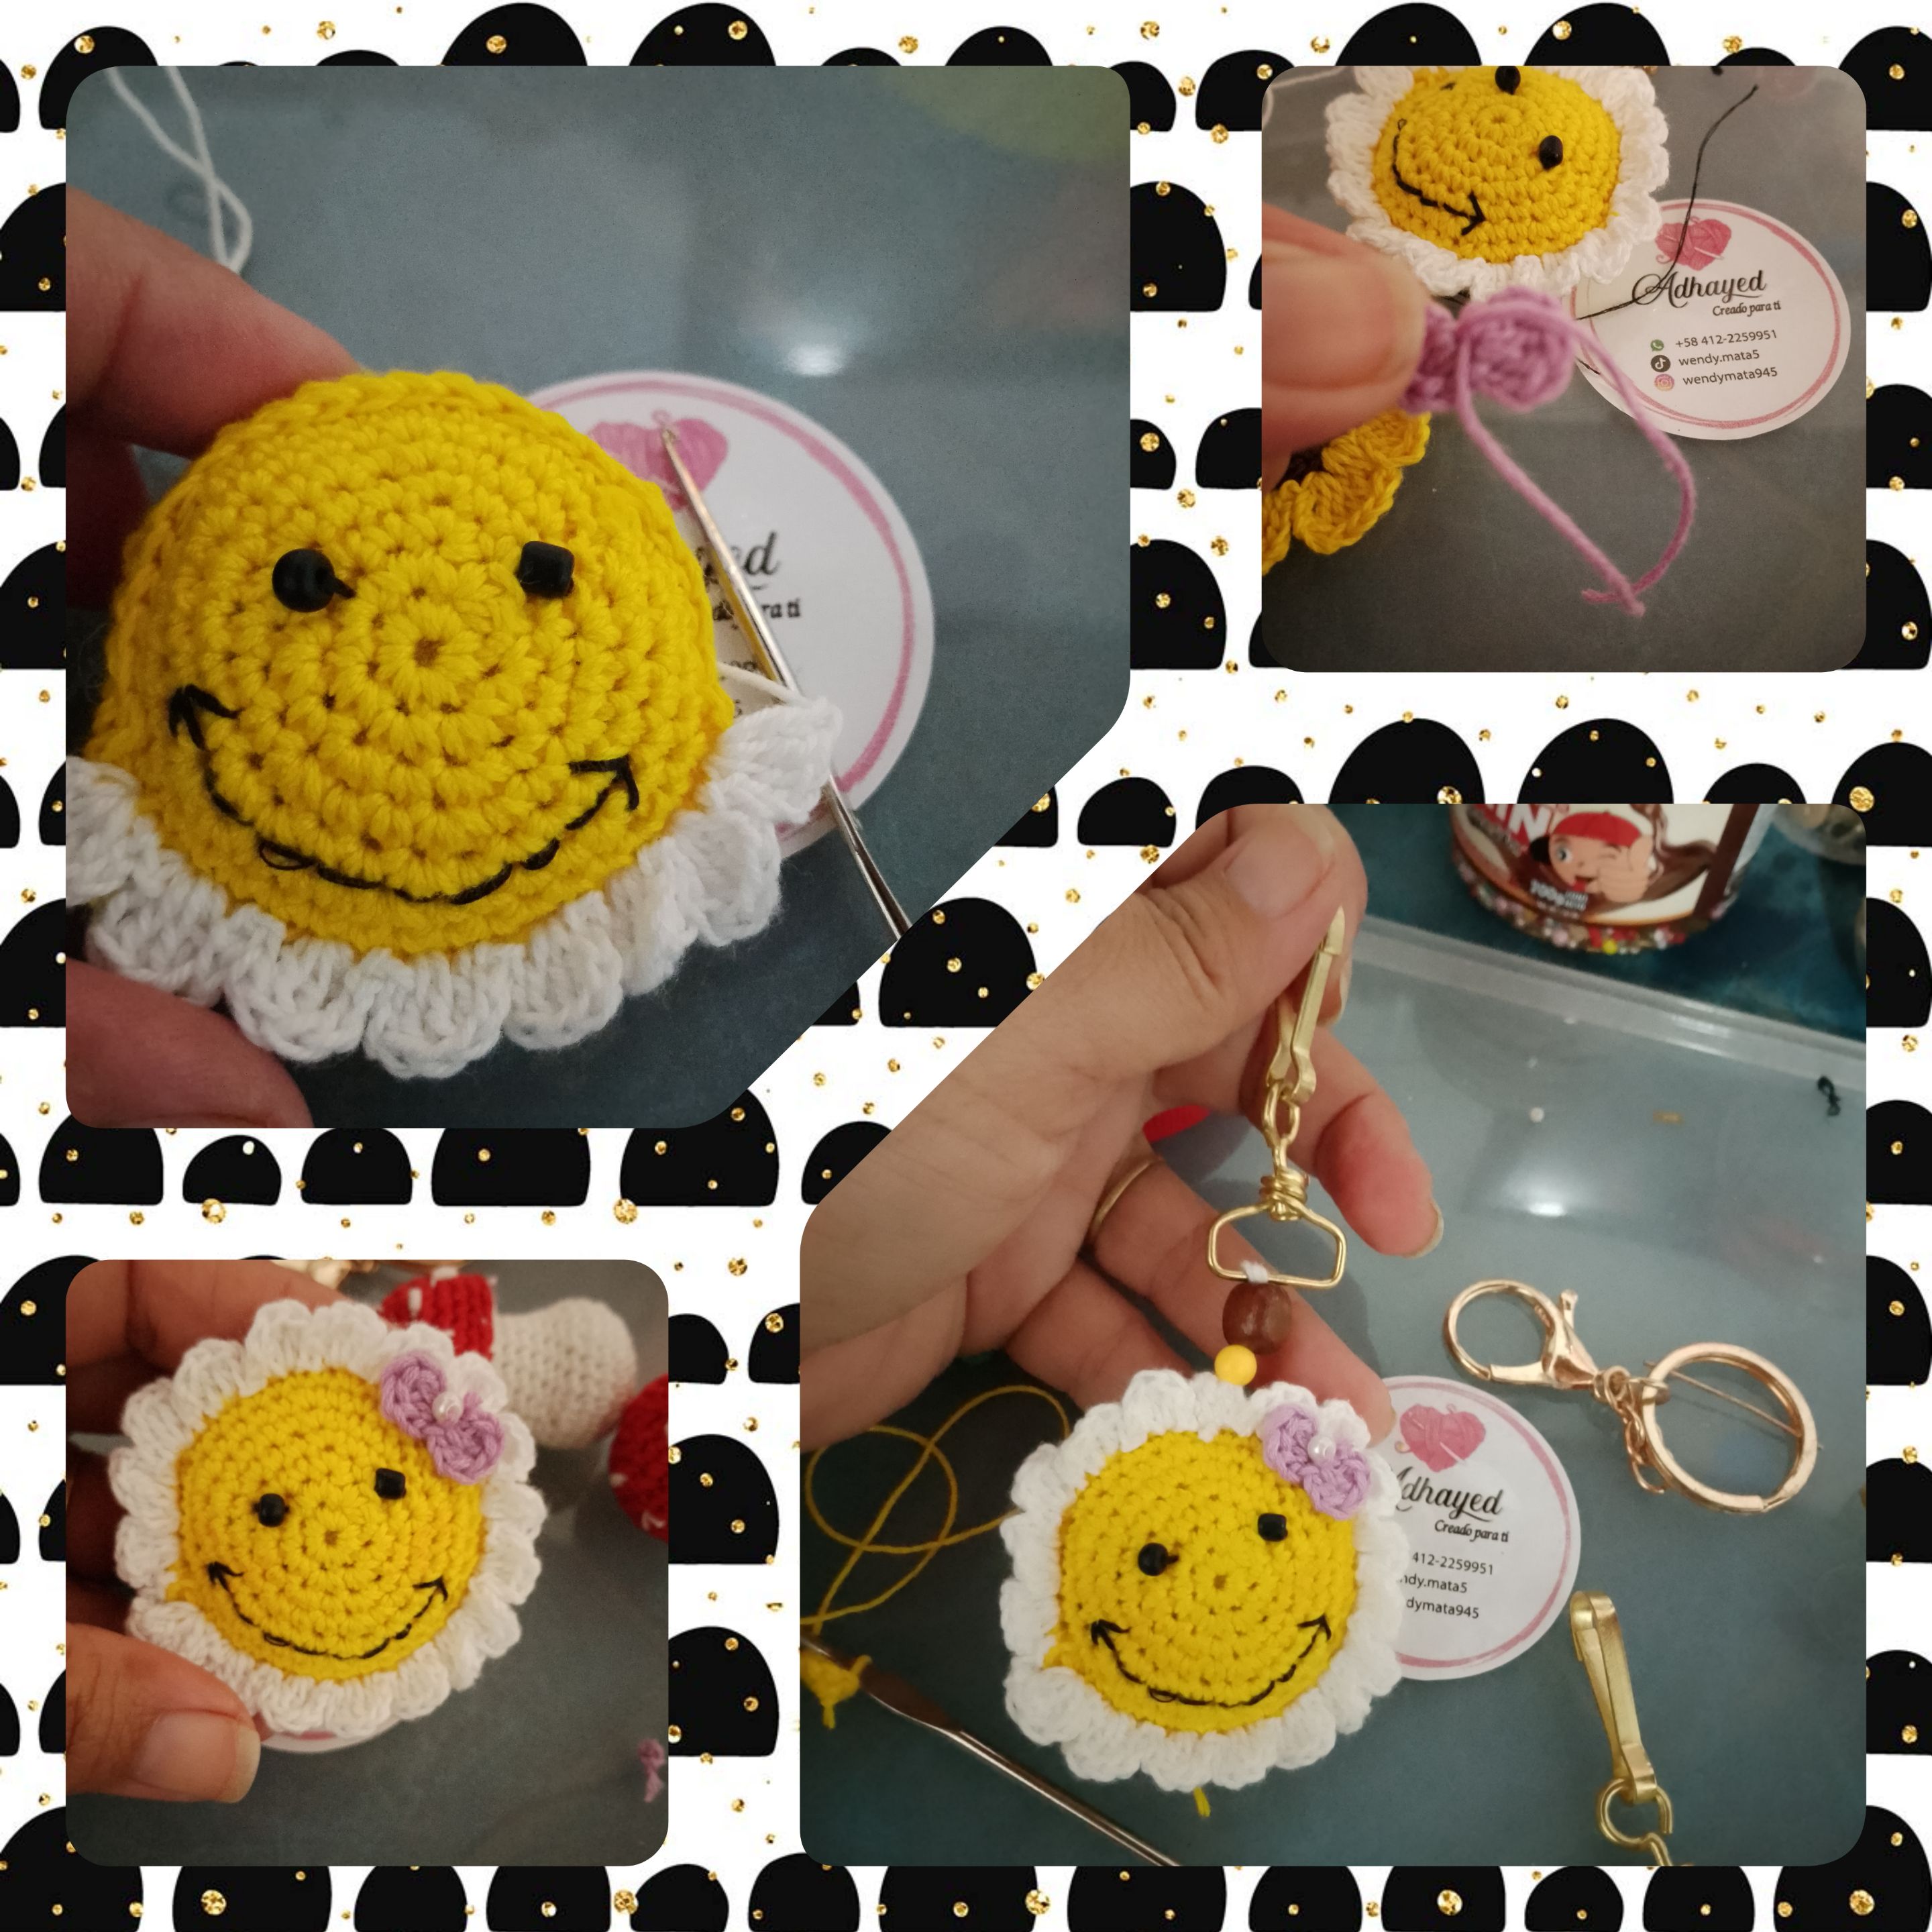
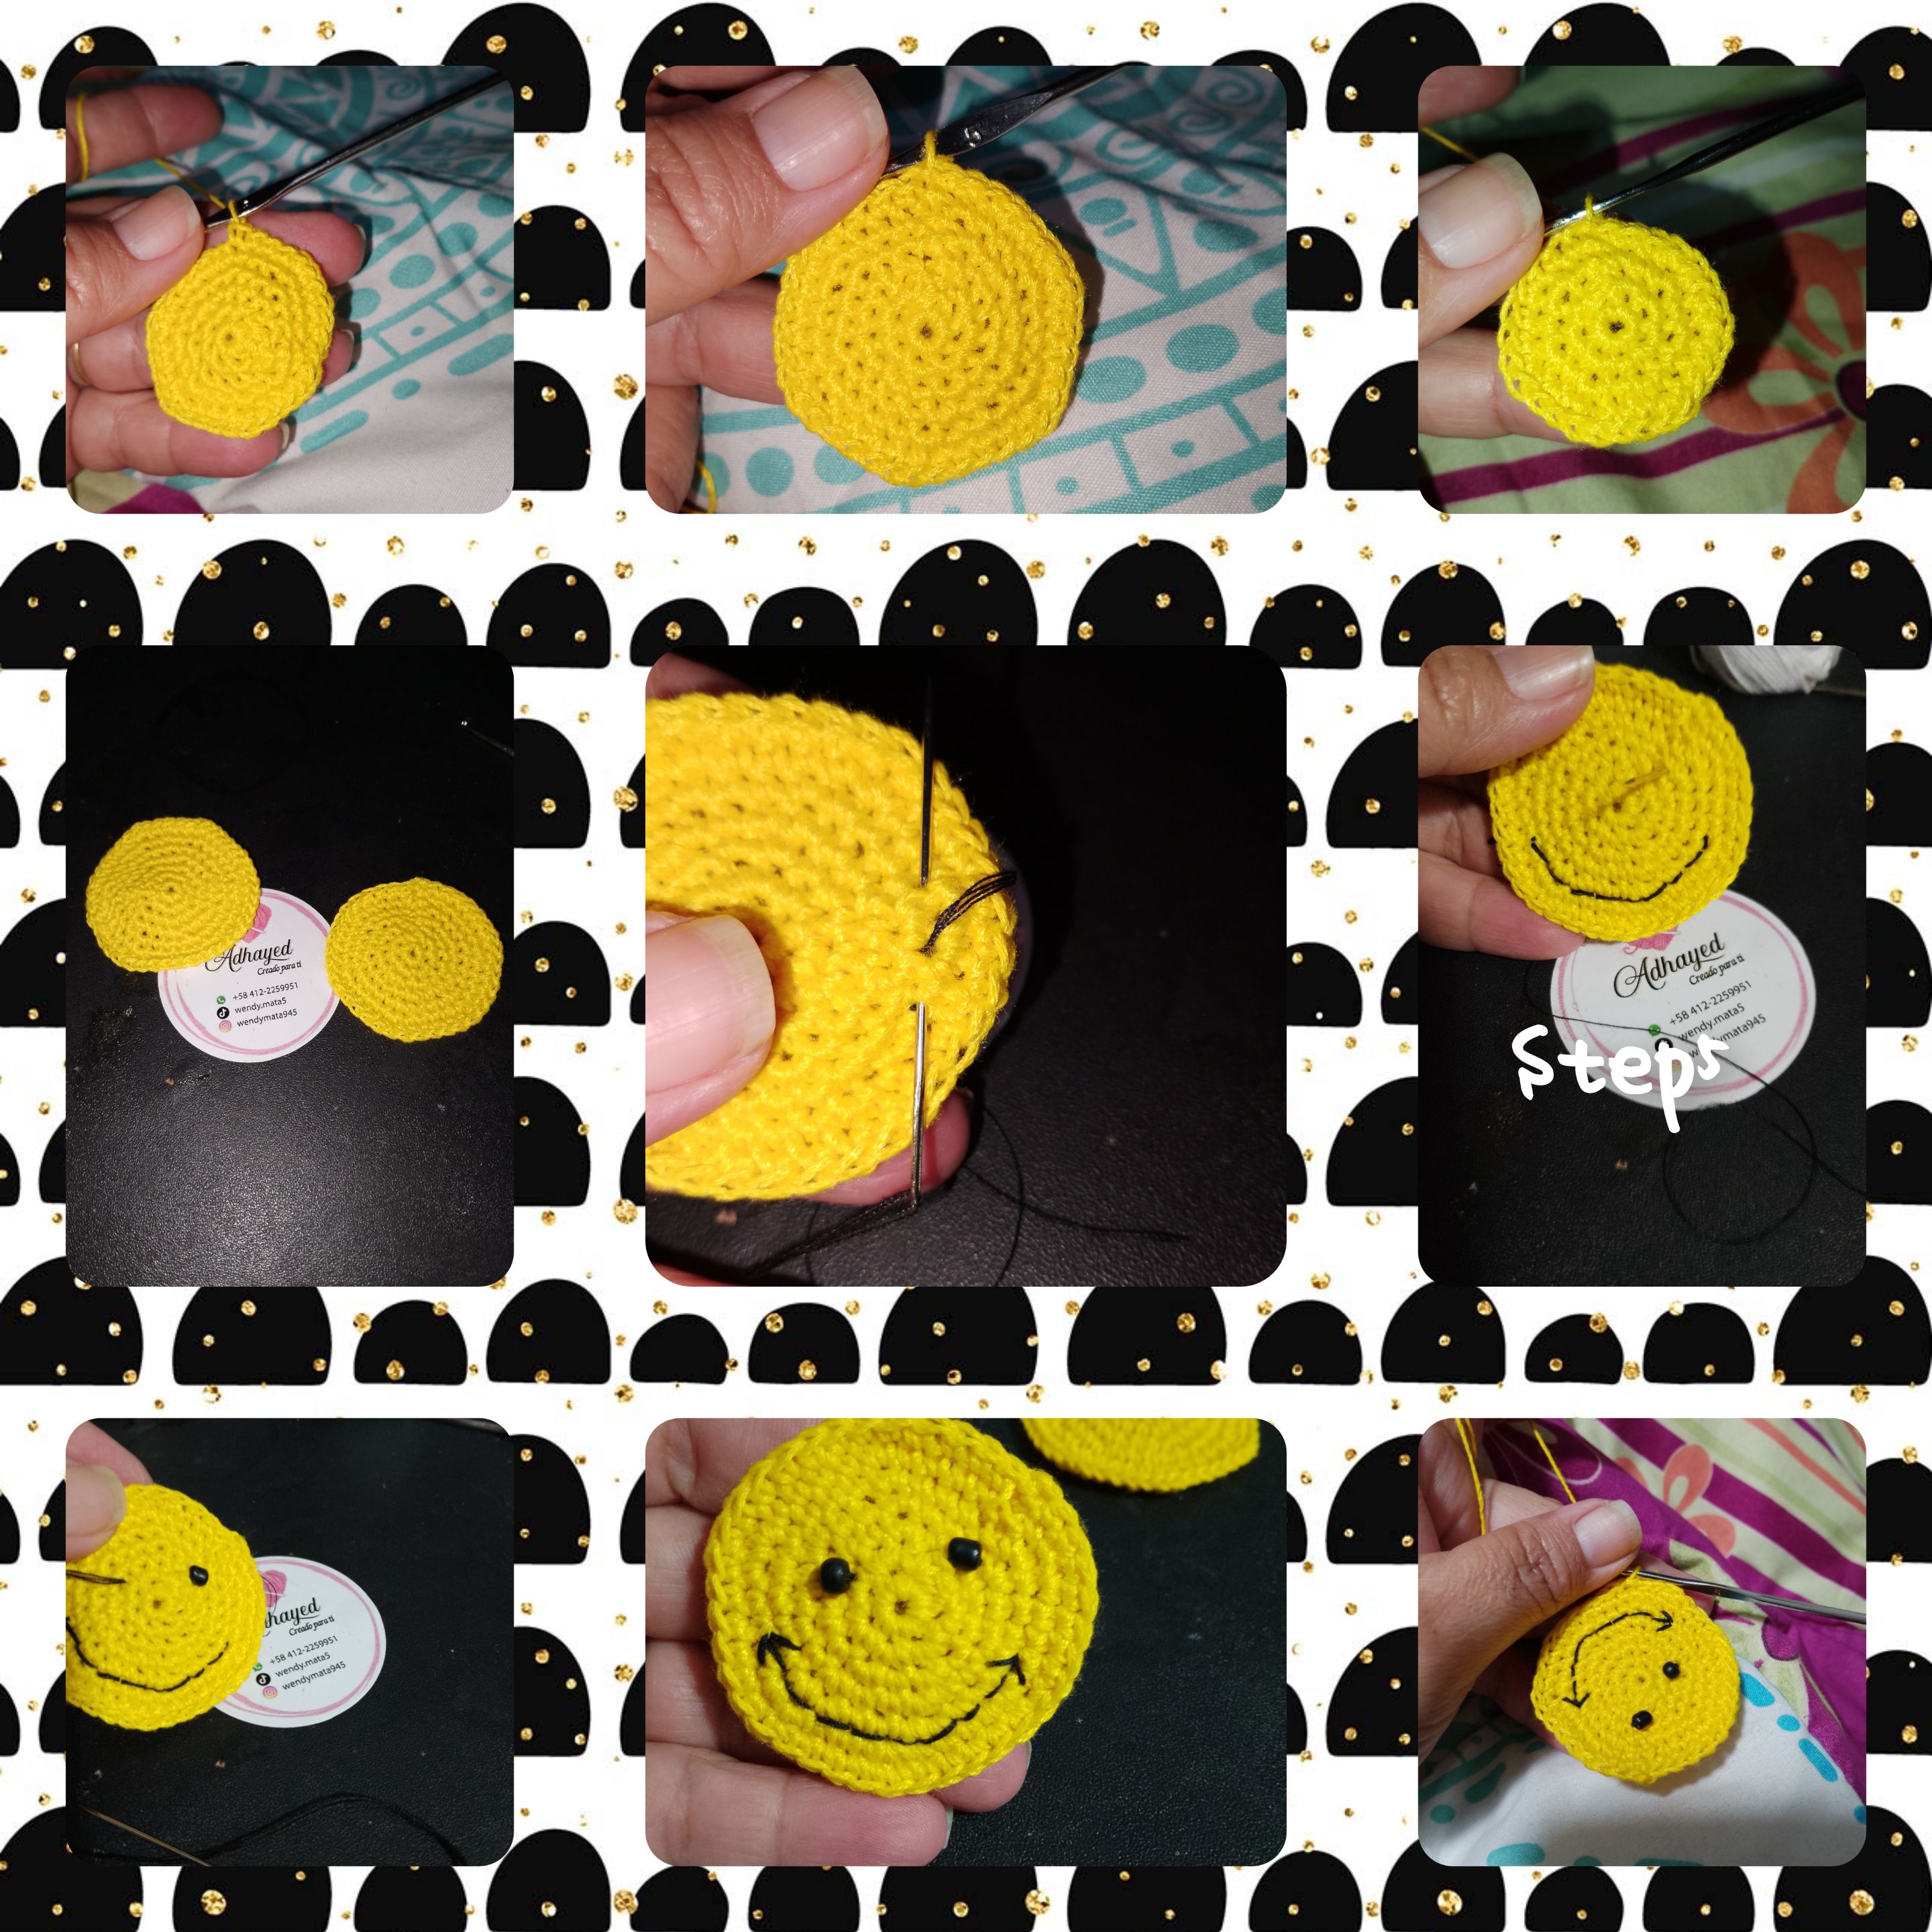
5.) For the next image of pendant or keychain, weigh two yellow circles, until reaching, forty -eight half points. I repeat and weave two circles of equal size, to the latter, in the turn number seven, using black thread andNeedle, board a big smile, and hit the mustacillas, to simulate the eyes.
6.) Continuous, hitting both circles with stitches, colo some filling, and seal, continuous, placing the white thread and weighing small petals, all over. Likewise with the purple skein, he puts a small bow, which I place on one side. Done this and I have nothing more, to place the steel hooks.
. Todas las fotos son de mí propiedad. . Use incollage para mostrar los pasos. . Use traductor lenguaje.
Agradecida me hayas seguido hasta el final, será hasta una próxima oportunidad.
(Esp)
Hola gente bonita, creadora y amante de el bricolage, me complace el día de hoy estar con todos ustedes en, @diyhub, paso a mostrarles, una ideas faciles y muy divertidas, de como rear, hermosos colgantes o llaveros, usando la técnica de amigurumis. Genial para colgar en bolsos carteras o colocar y hacer más visibles las llaves de nuestra casa, carro, loker, etc. Sin más les invito a ver, el proceso creativo.
Materiales usados:
. Hilos para tejer, colores, (amarillo, verde, rojo, blanco). . Madeja color marrón y morado . Aguja para tejer . Aguja lanera. . Relleno. . Mostacillas de color negro. . Tijeras. .cuentas, (blancas madera, . Ganchos de acero
Pasos a Seguir.
1.) para el colgante o llavero, inspirado en un delicado hongo. Hago un anillo mágico, dentro de este tejere seis medios puntos, cierro el anillo y doy una segunda pasada de seis aumentos para doce medios puntos. Continuo y doy una tercera vuelta, haciendo aumento, luego de un medio punto, la siguiente vuelta, luego de dos medios puntos,y la siguiente luego de tres medios puntos, para obtener treinta medios puntos. Hago un alto y tejo cuatro vueltas de treinta medios puntos. Remato y corto el hilo.
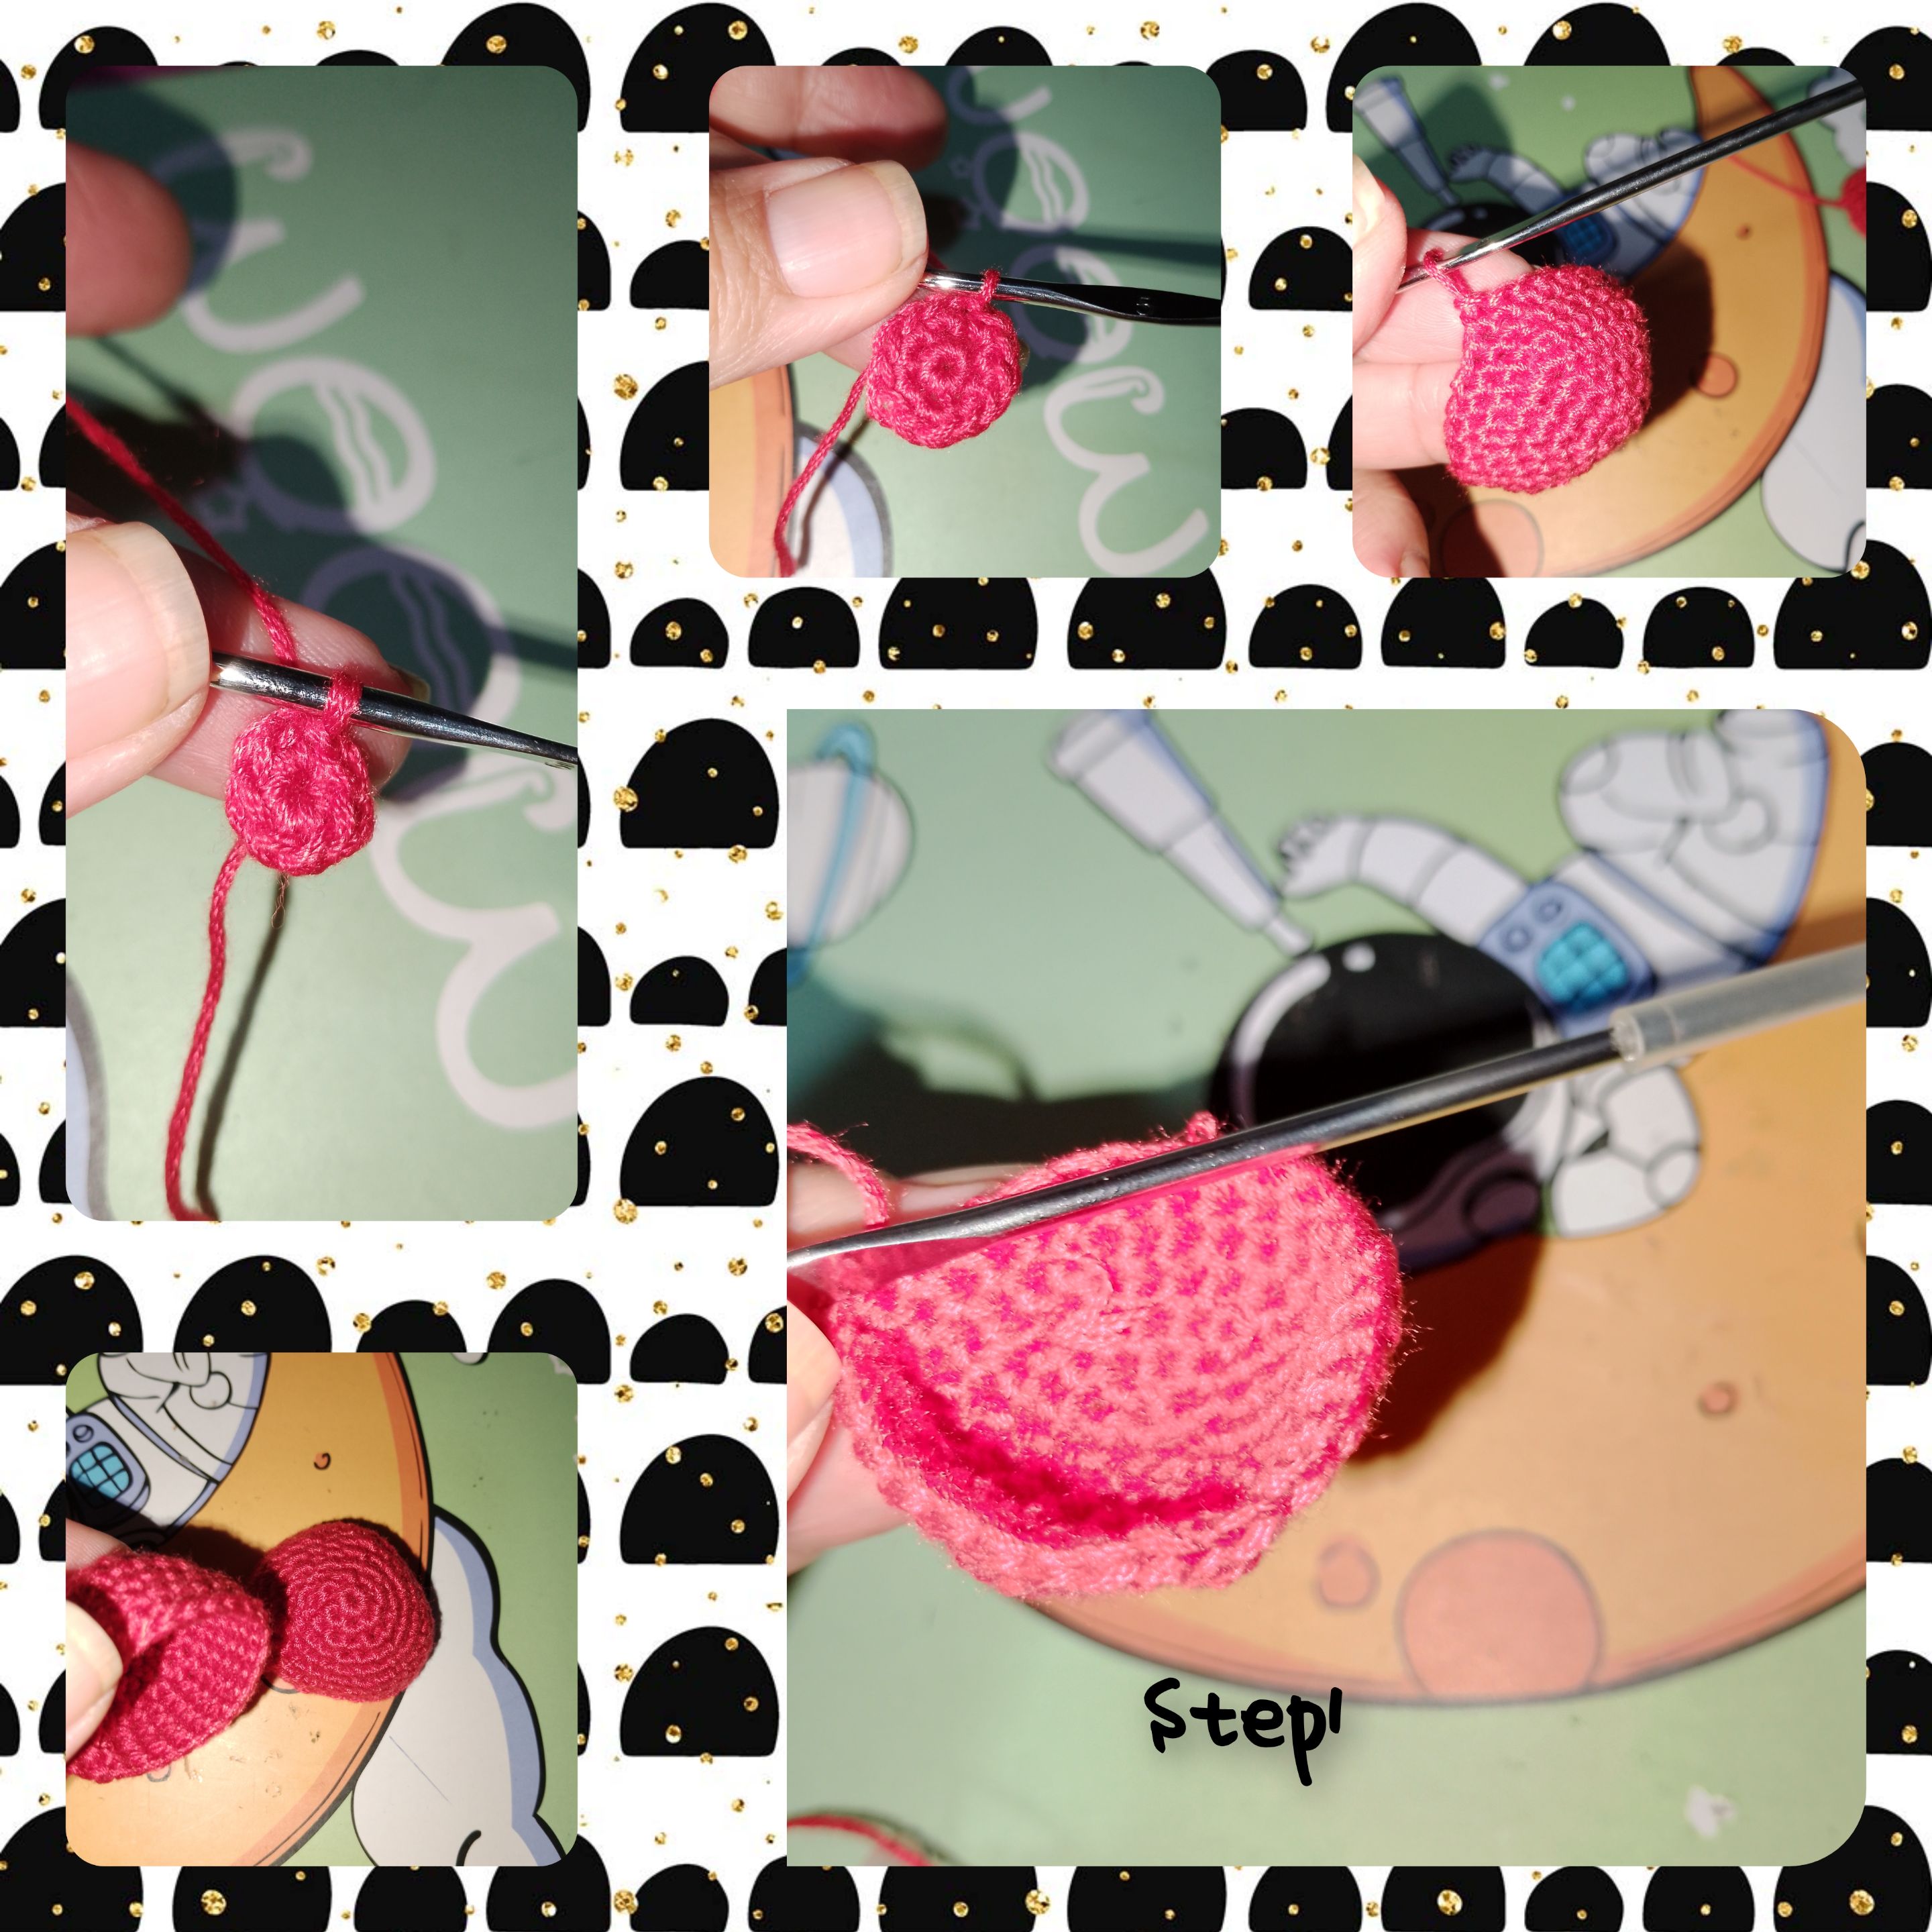
2.) Coloco hilo de color blanco a la aguja y comienzo, a borde algunos puntos de color blanco, por el alrededor de la pieza tejida en el paso anterior, que simularán, el sombrero de el hongo.
3.) Para el pie de el hongo tejo en un anillo mágico seis medios puntos, en la siguiente pasada, tejo seis aumentos y seguidamente un aumento luego de medio punto, para obtener 18 medios puntos, tejo seis vueltas de 18 puntos para dar altura, y en las siguientes vueltas tejere dieciocho aumento. Obtenido los treinta y seis puntos, doy dos vueltas con igual número de puntos. Coloco relleno a las piezas tejidas en paso uno y 2/3, y con la aguja lanera, y uno las piezas para formar el hongo.
4.) En un anillo mágico, usando, la madeja de color marrón, tejo seis medios puntos en un anillo mágico, tejo seis aumentos, y continuo en la siguiente tejiendo un aumento luego de medio punto. Y obtengo un círculo casi perfecto, repito para un segundo círculo, que pegarle junto a el primero con la aguja e hilo, colocando además un poco de relleno., cambio el color de hilo y con el hilo de color, amarillo, comienzo a tejer pequeños pétalos, en todo el recorrido de el circulo. Usando el hilo de color verde, tejo dos pequeñas hojas, a las que pego con mismo color de hilo, por la parte trasera de el girasol.
5.) para el siguiente imagen de colgante o llavero, tejo dos círculos de color amarillo, hasta alcanzar, cuarenta y ocho medios puntos. Repito y tejo dos círculos de igual tamaño, a este último, en la vuelta número siete, usando hilo de color negro y aguja, bordo una gran sonrisa, y pego las mostacillas, para simular los ojos.
6.) Continuo, pegando con puntadas ambos círculos, colo un poco de relleno, y sello, continuo, colocando el hilo de color blanco y tejo pequeños pétalos, por todo el alrededor. Así mismo con la madeja color morado, armo un pequeño lazo, que coloco en uno de los lados. Hecho esto y no me queda nada más, que colocar los ganchos de acero.