(ENG)
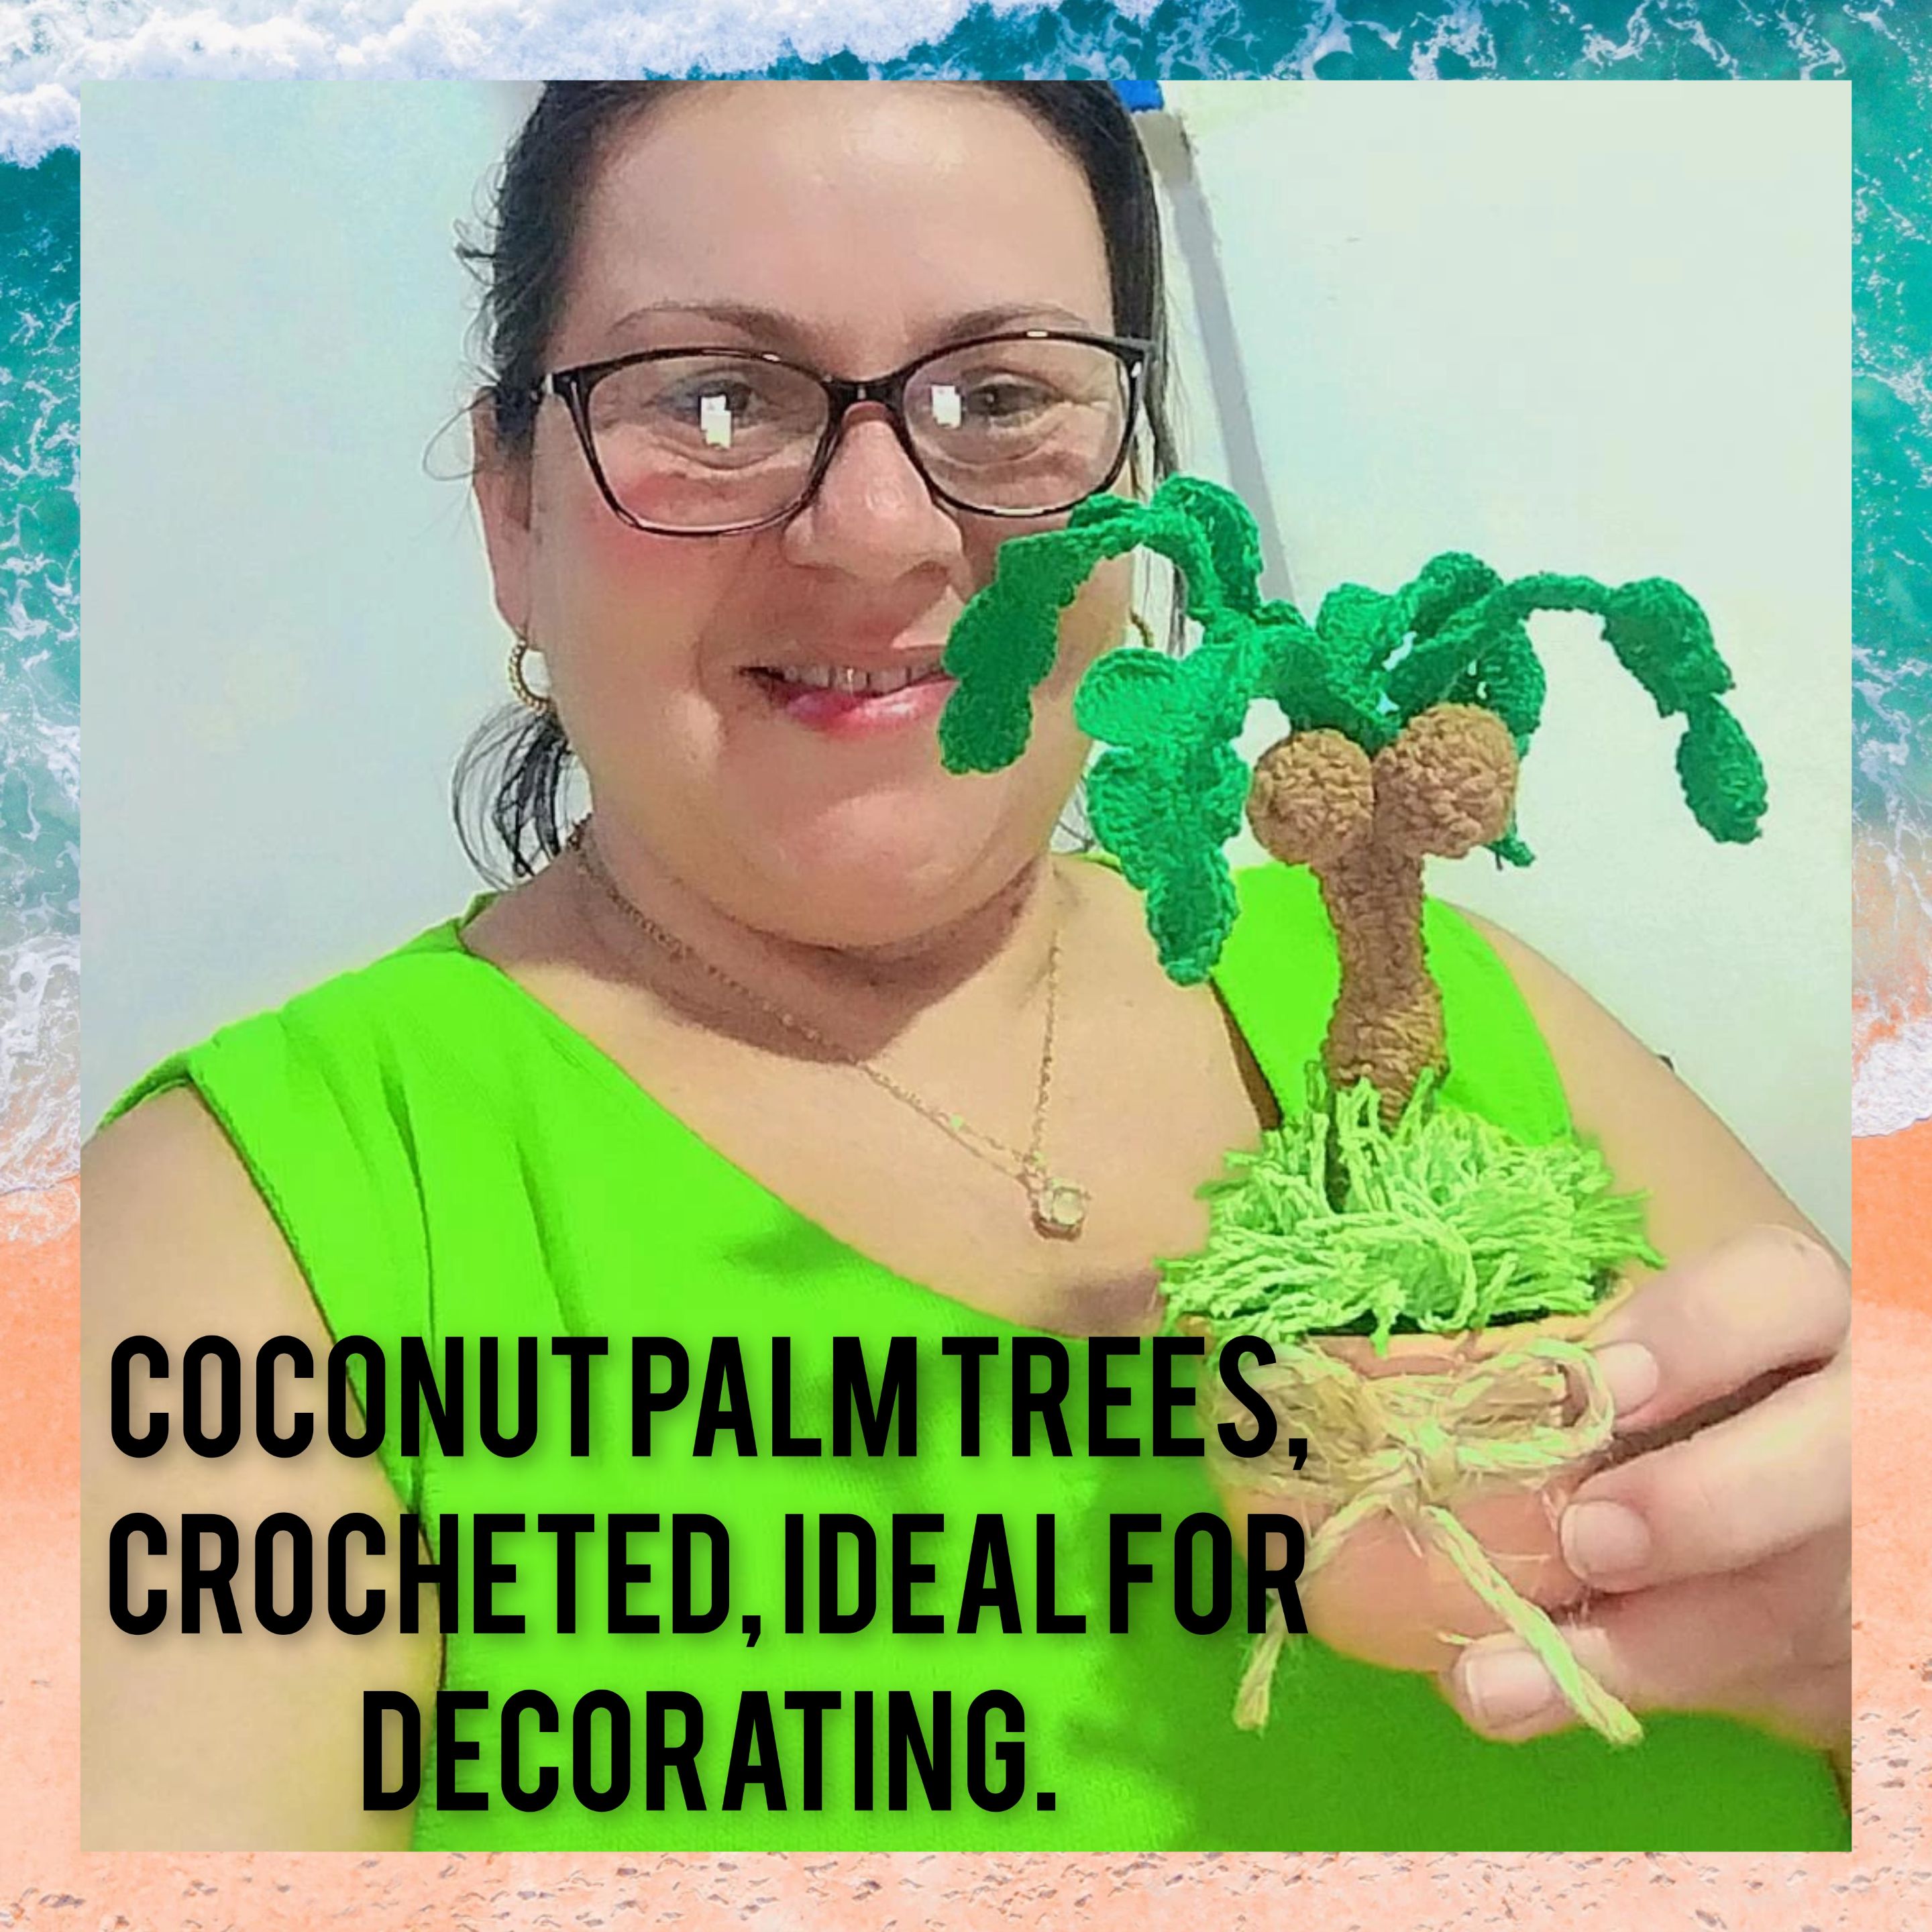
I hope this is a nice and very profitable day, today I am very happy to participate in the October Contest of this great community, @ diyhub. For my entry, I have made a very nice, manual project, where I used the crochet technique. Inspired by a beautiful tropical palm tree. I adore these plants and much more their fruit, and all the variety of foods and sweets that are made with them. I invite you to follow me, I hope you enjoy this creative process as much as I do. Before starting, I want to extend the invitation to my friends, @creacioneslelys and @lupasbra21.
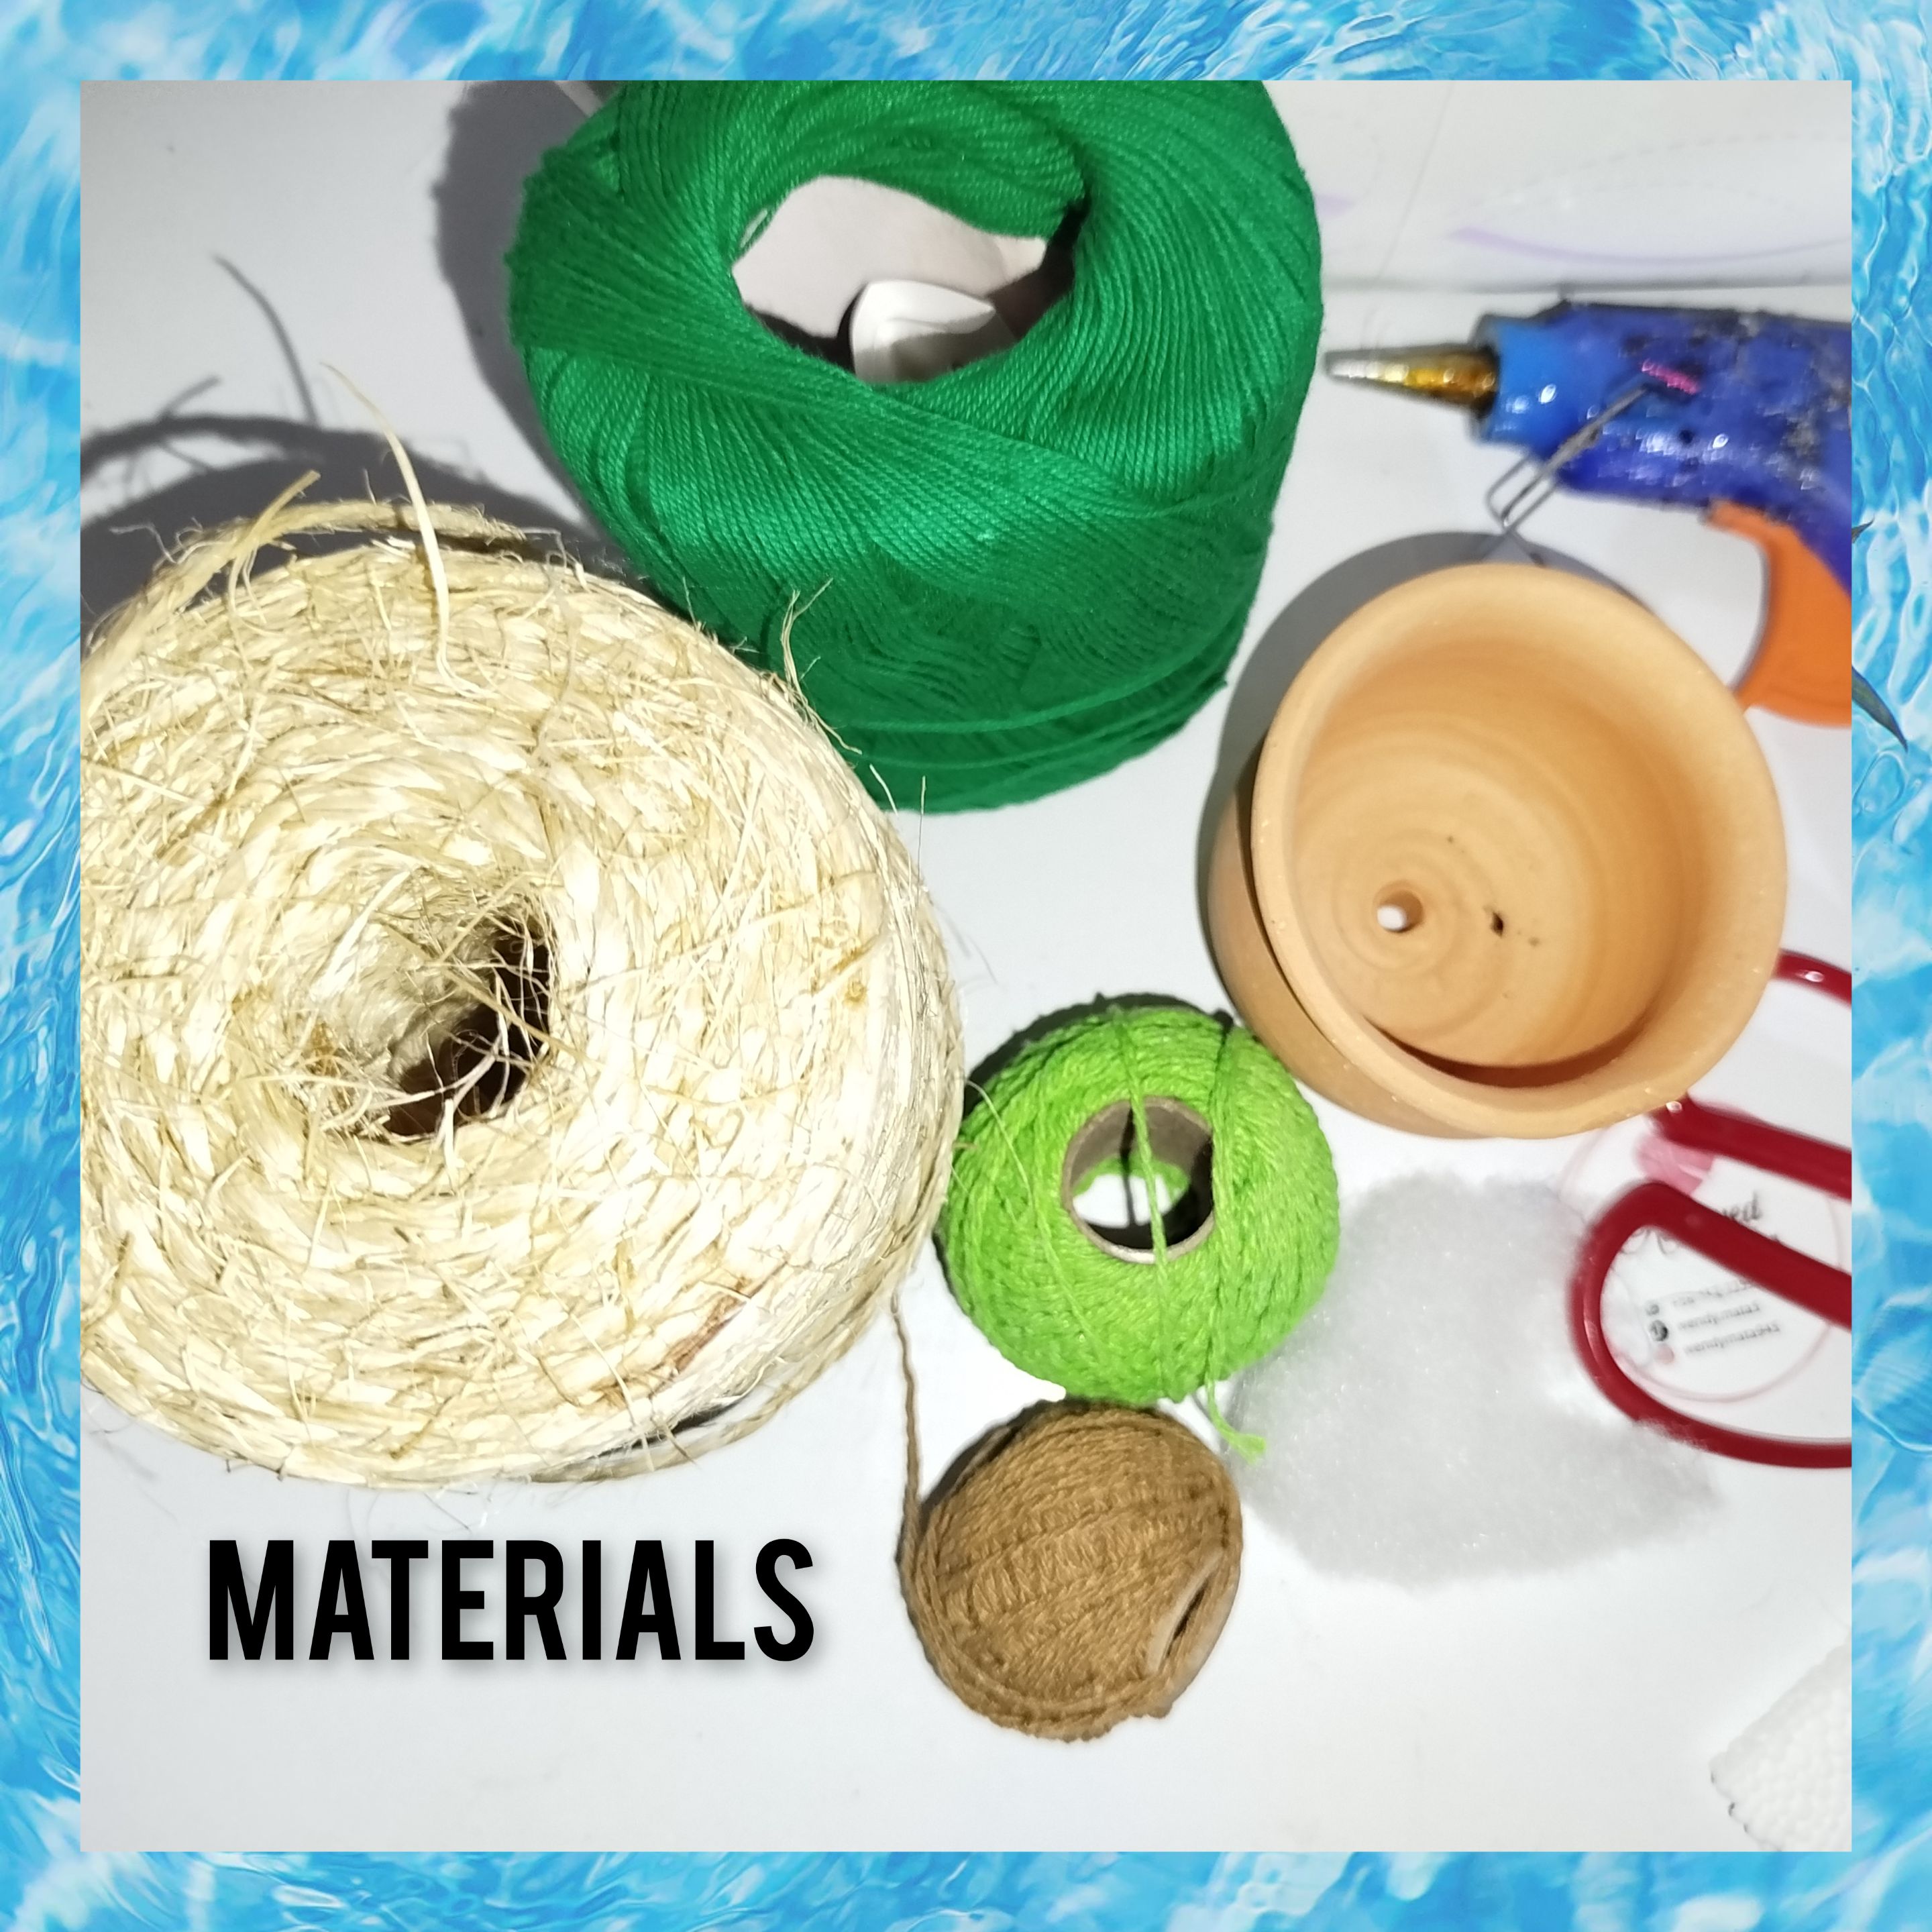
Materials used.
. Threads for knitting, colored (light green and grass green, brown). . knitting needle . Pieces of wire. . Scissors. . Mini clay pot. . Mecatillo, traditional color. . Piece of anime. . Glue. . Green felt.
Steps to follow:
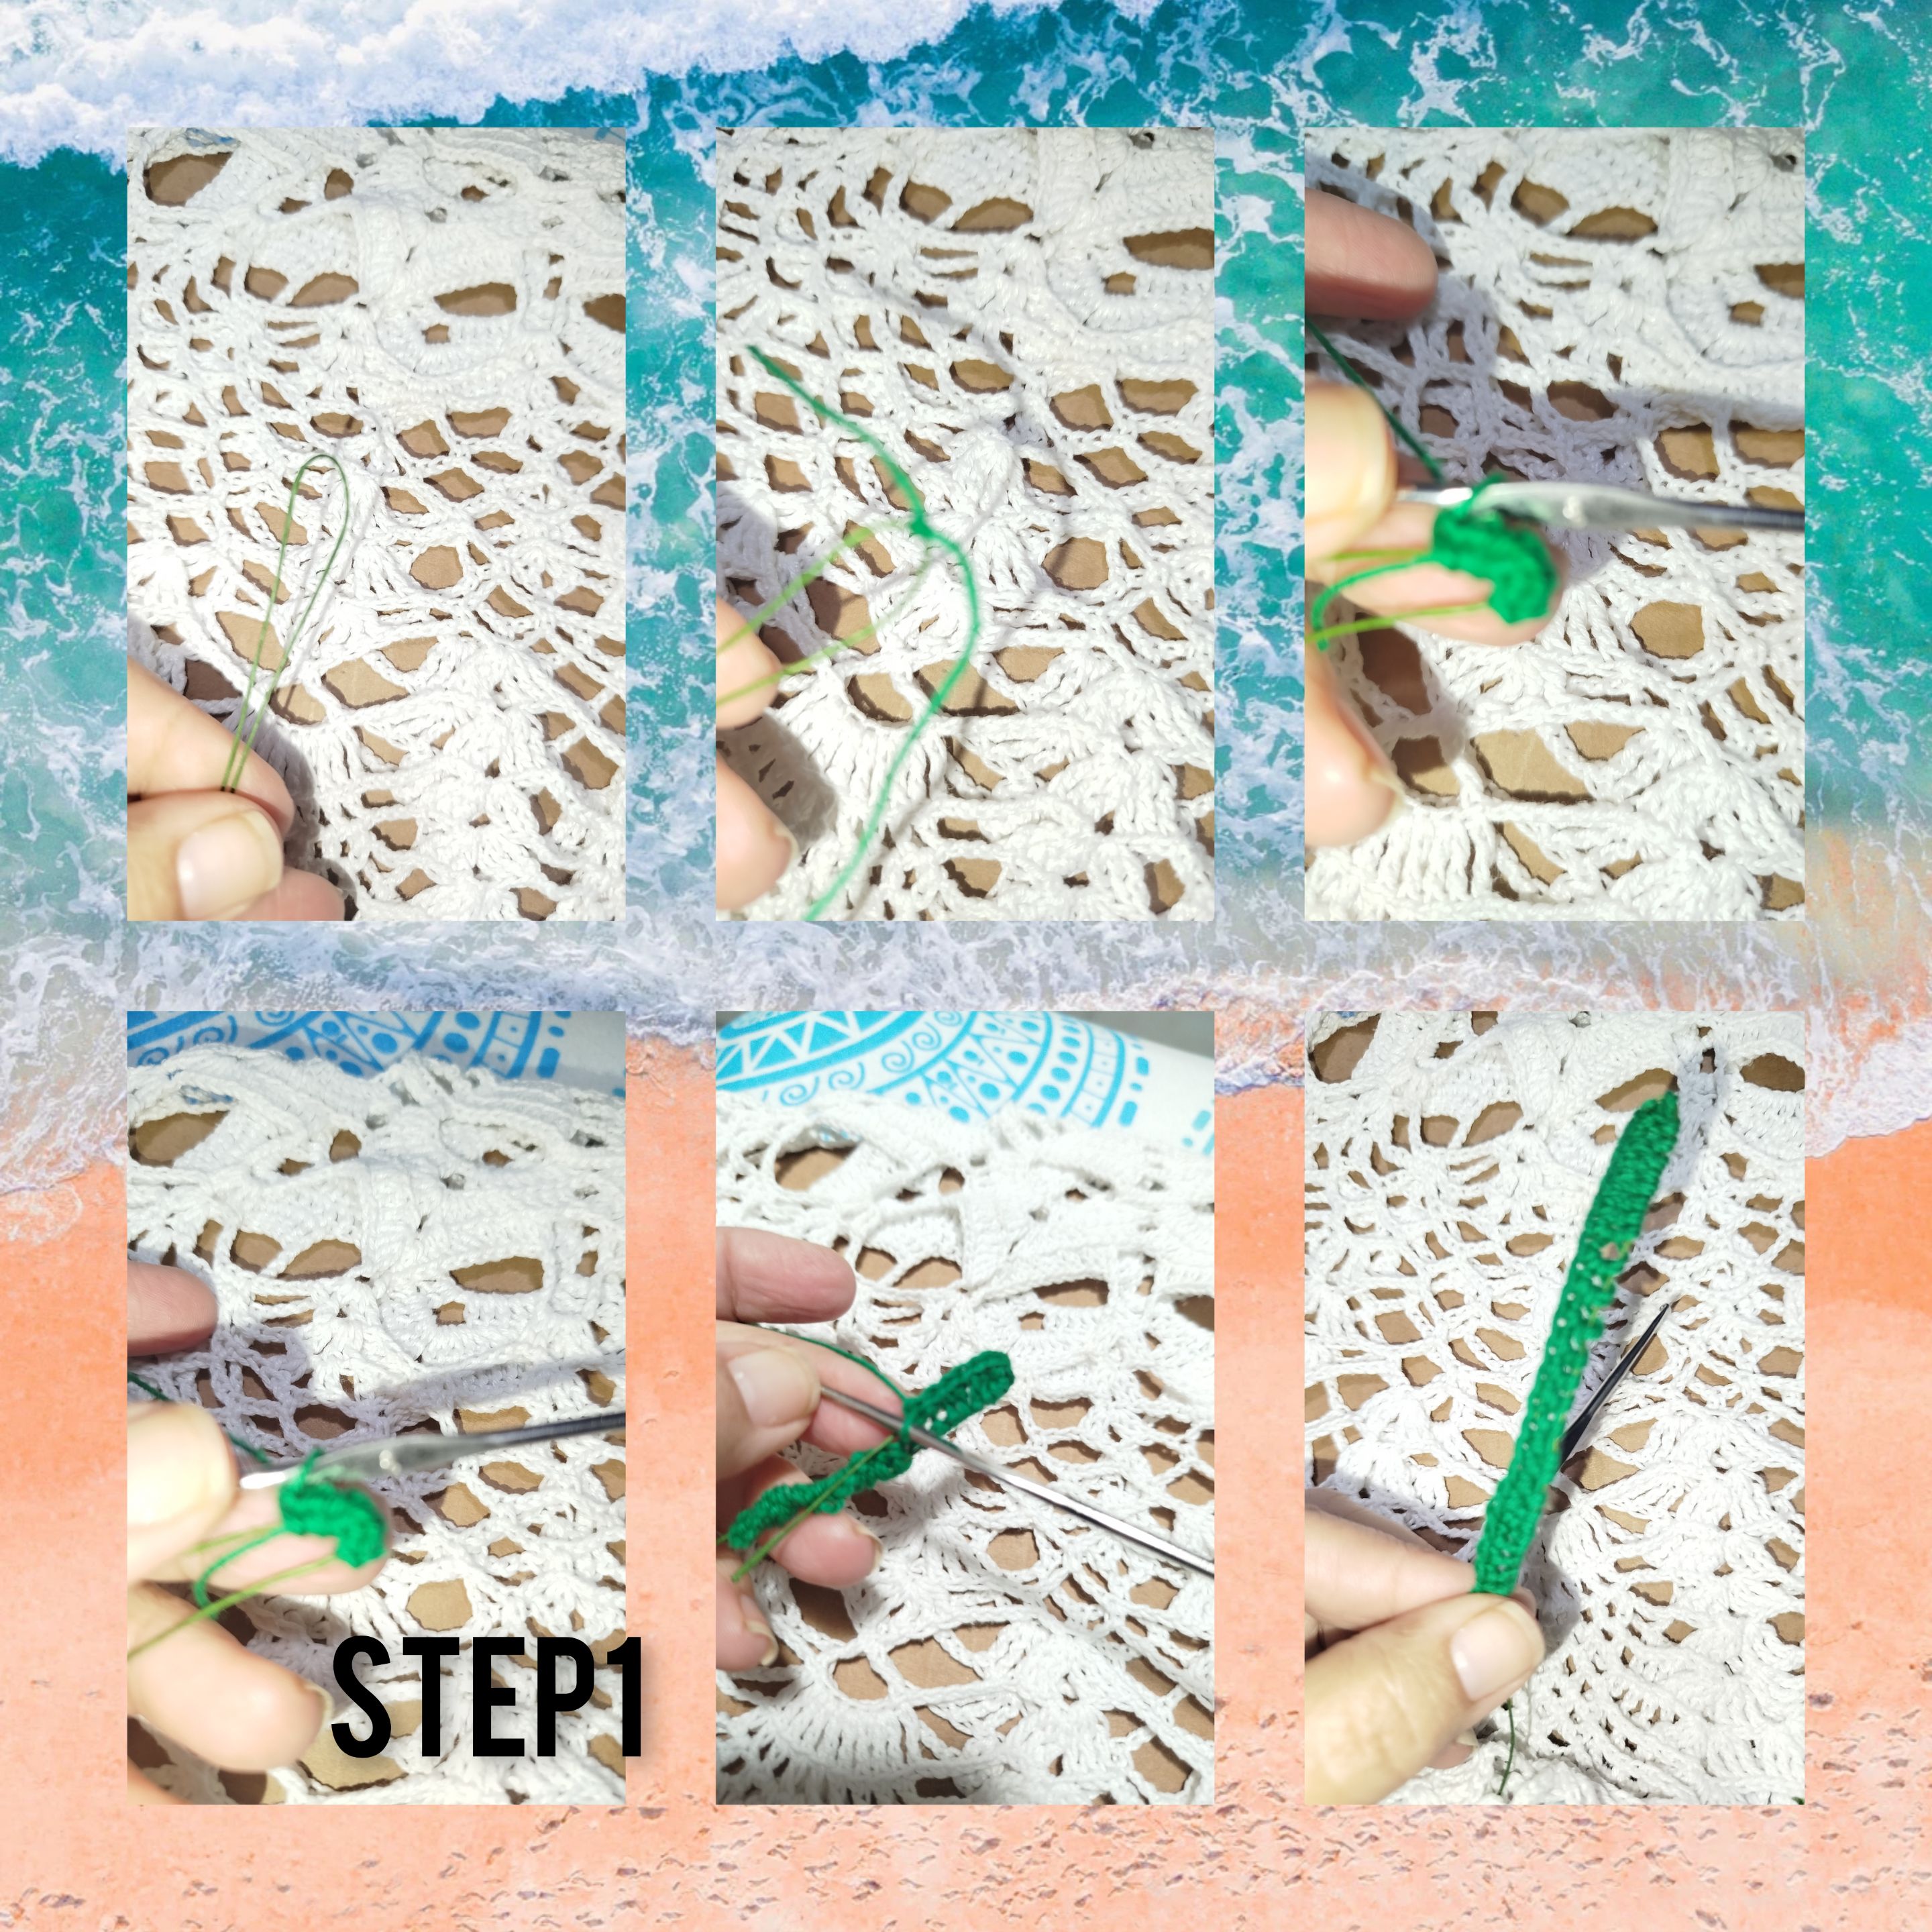
1.) I take a piece of wire, and with half stitches I begin to cover, first I must bend the wire, to avoid the stitches coming off, having made the journey on one side, I position myself on the next and repeat. In this way, he came full circle.
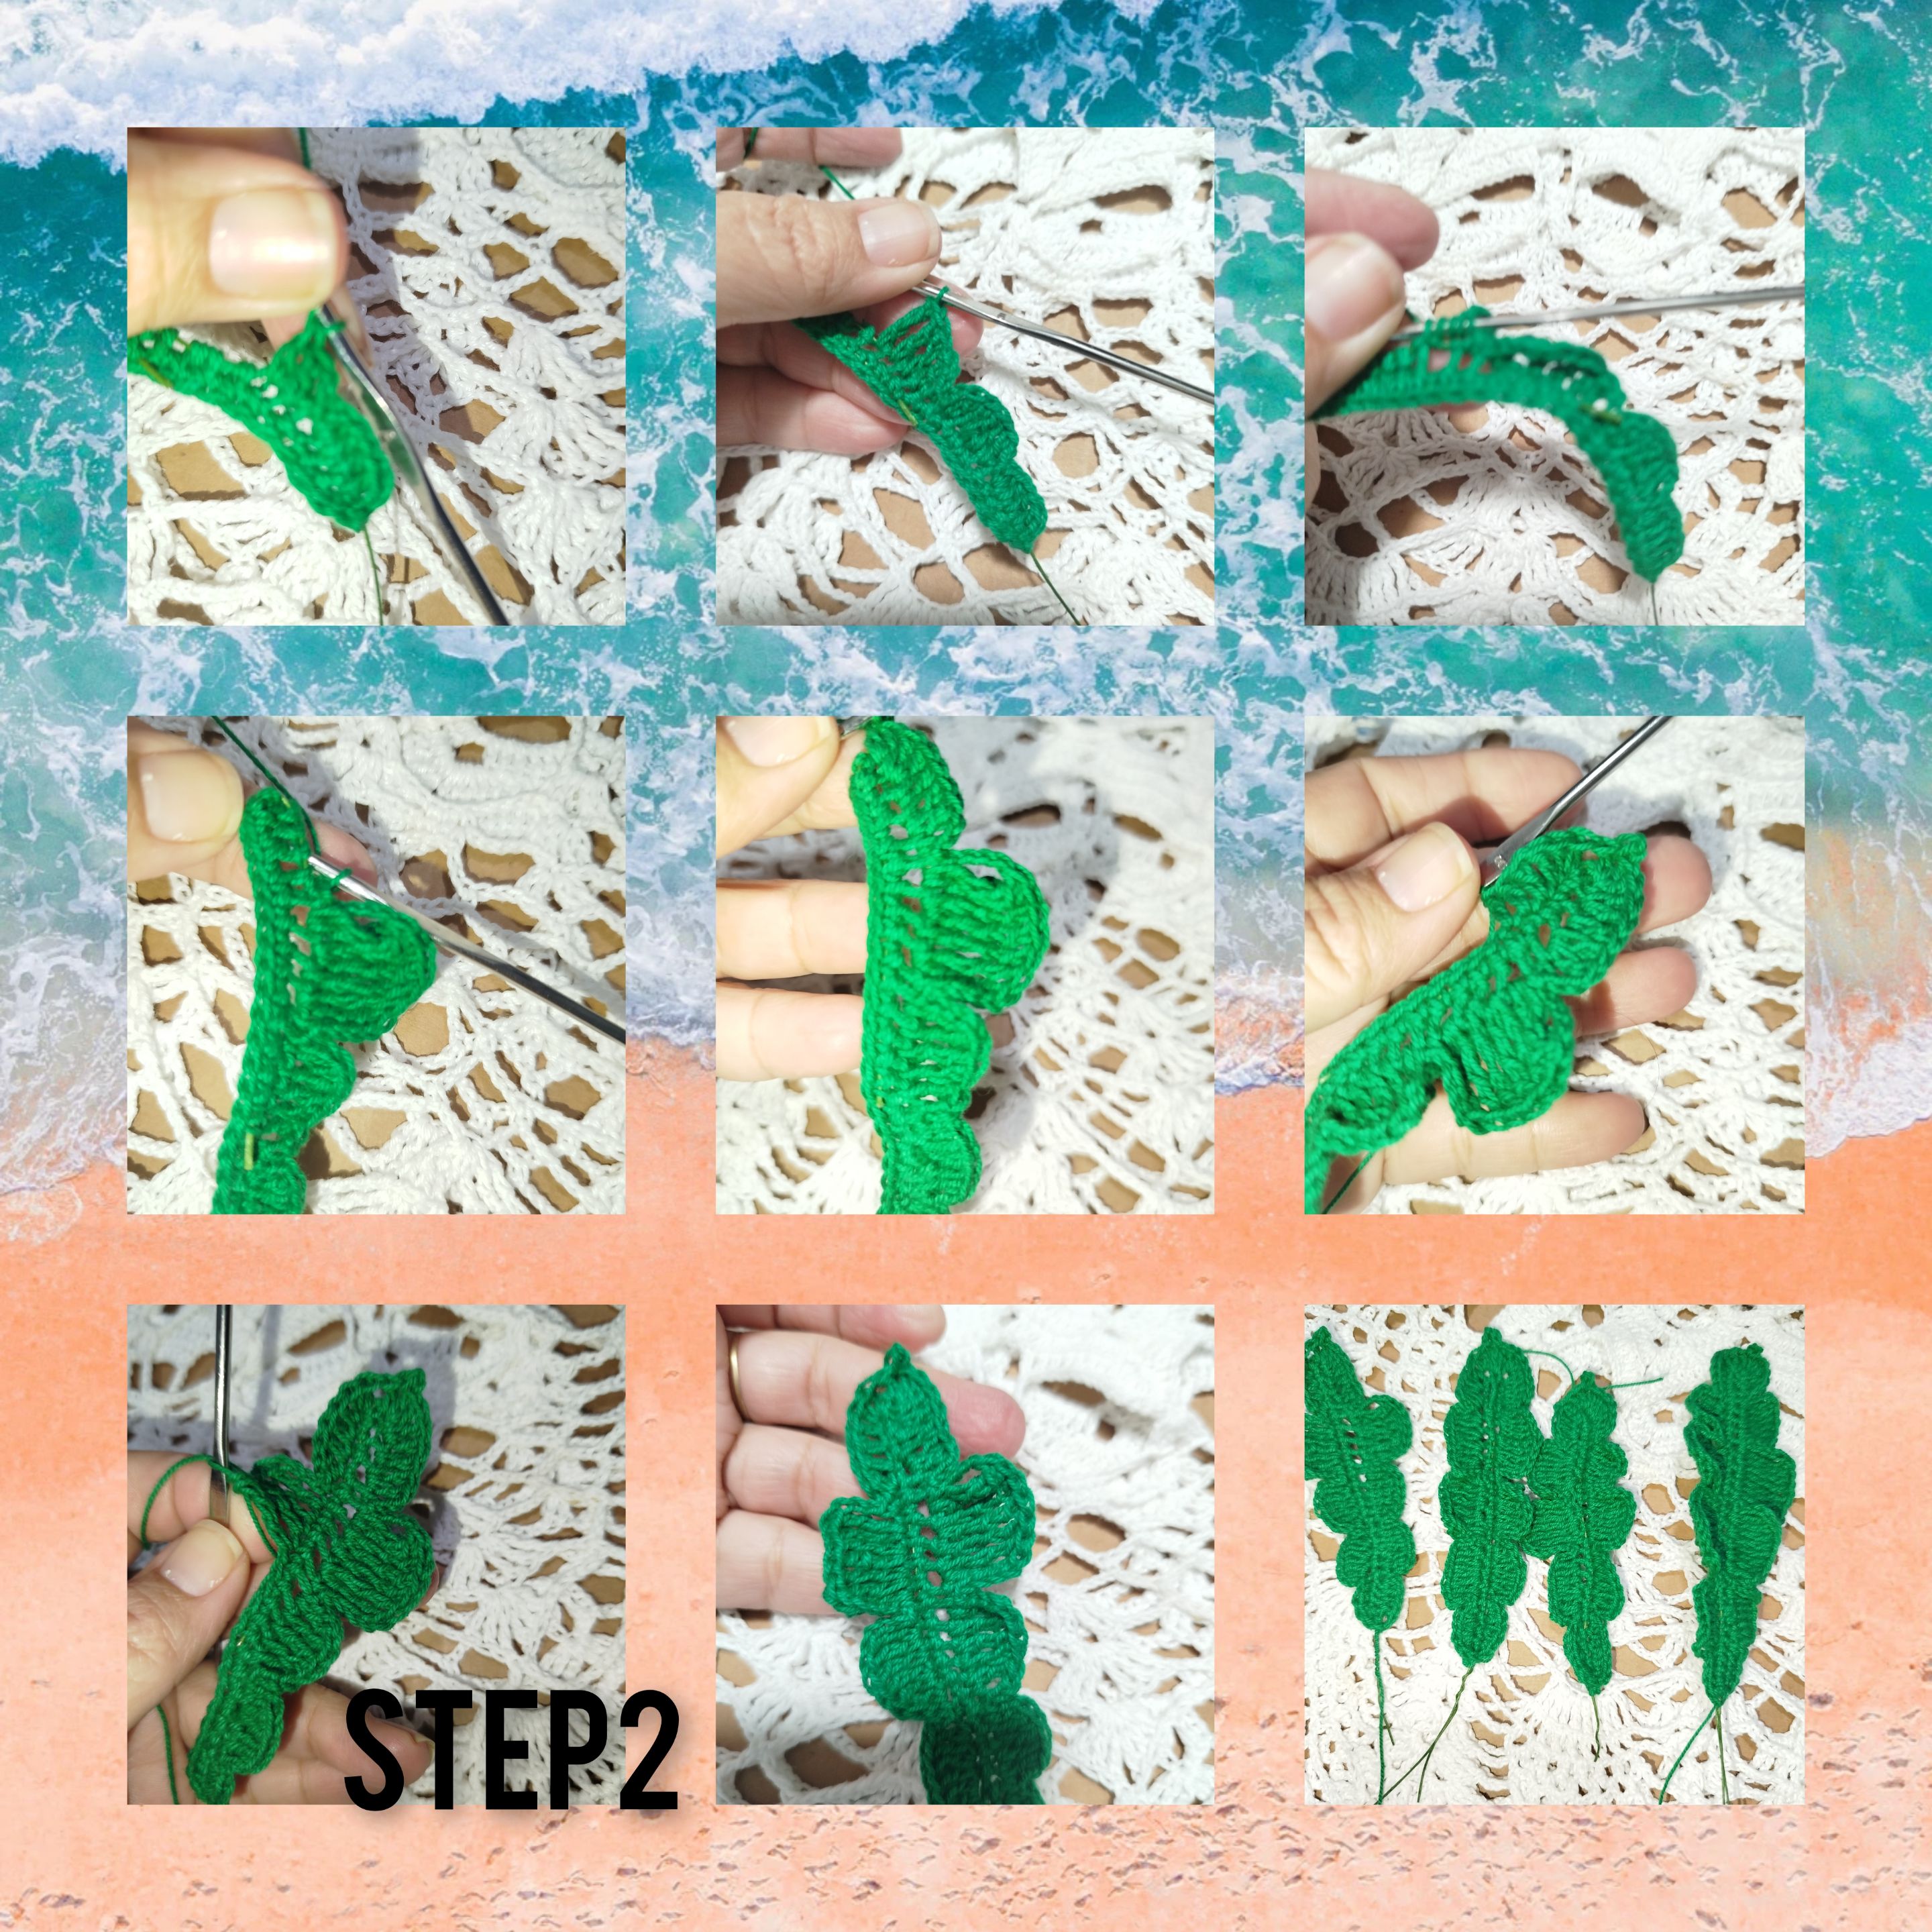
2.) I knit a new route, I knit a first group of seven single crochets, then a chain and go down to the last stitch, knitting a slipped stitch, leaving a space, I continue and knit the next group of double crochets, then one of double double crochets, and the next one, almost located at the top of single crochets. I continue, and repeat, on the next side. Forming in this way, a first palm leaf, in the same way I repeat and weave three more leaves.
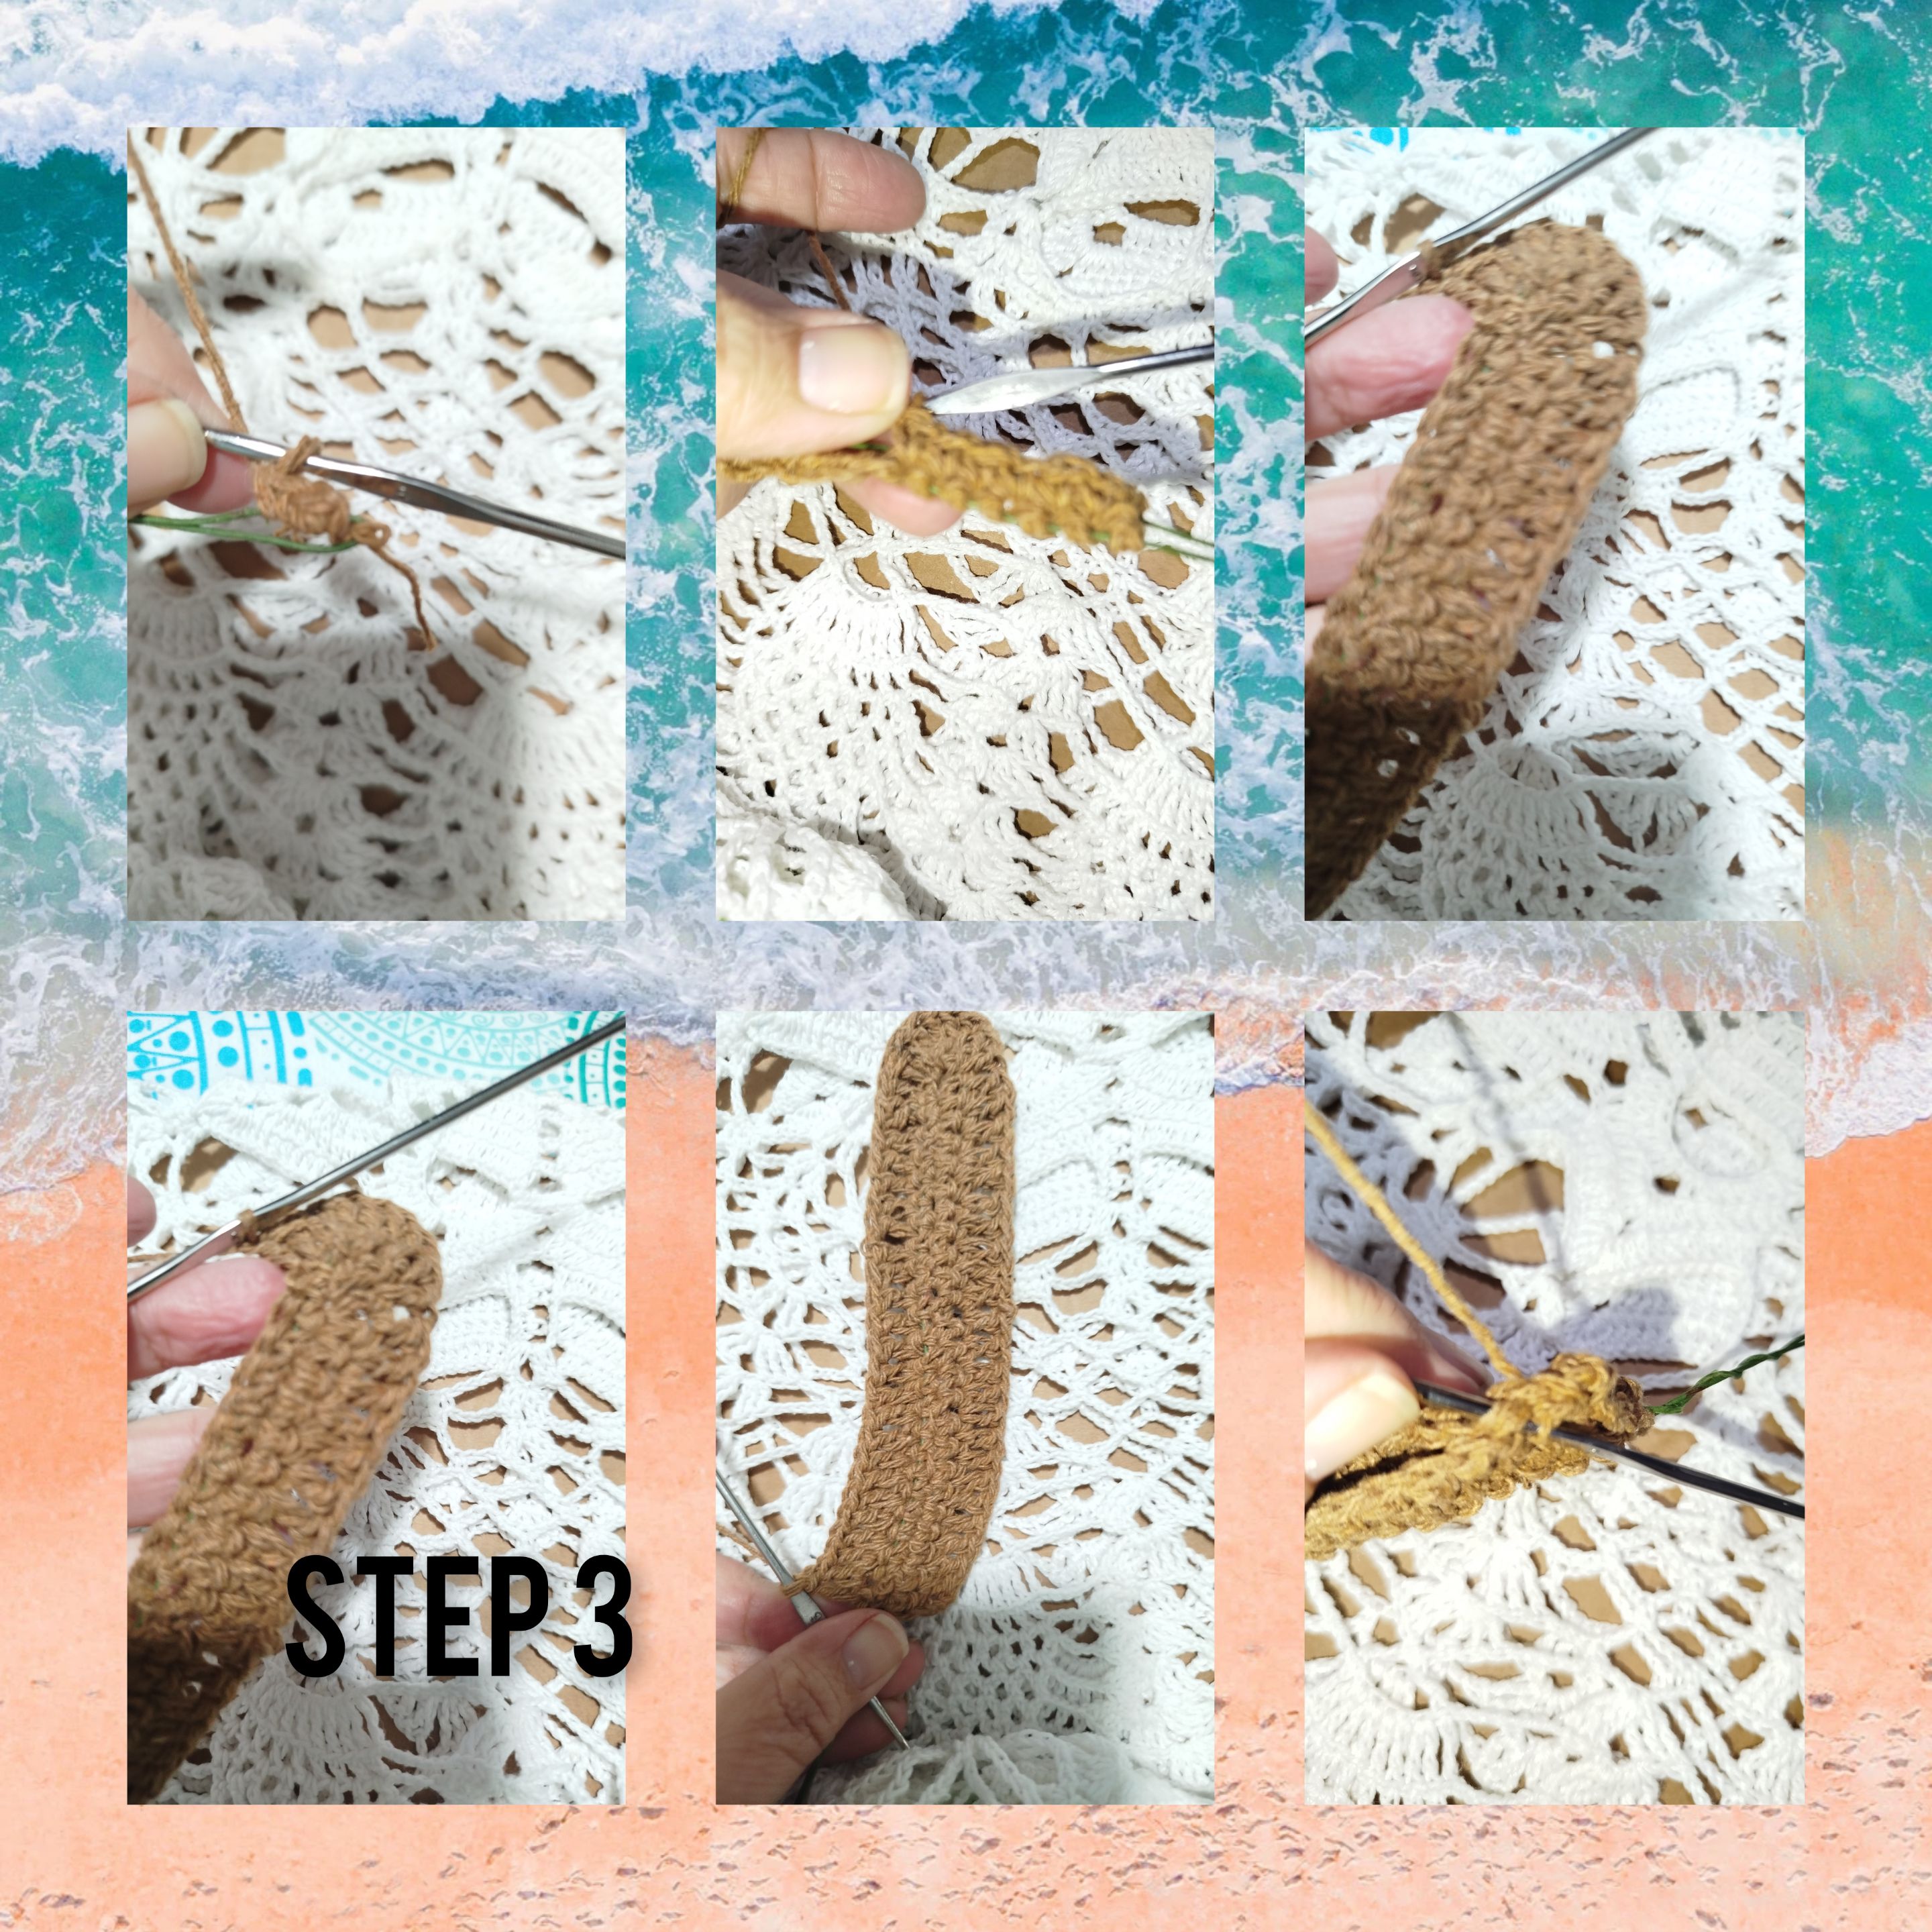
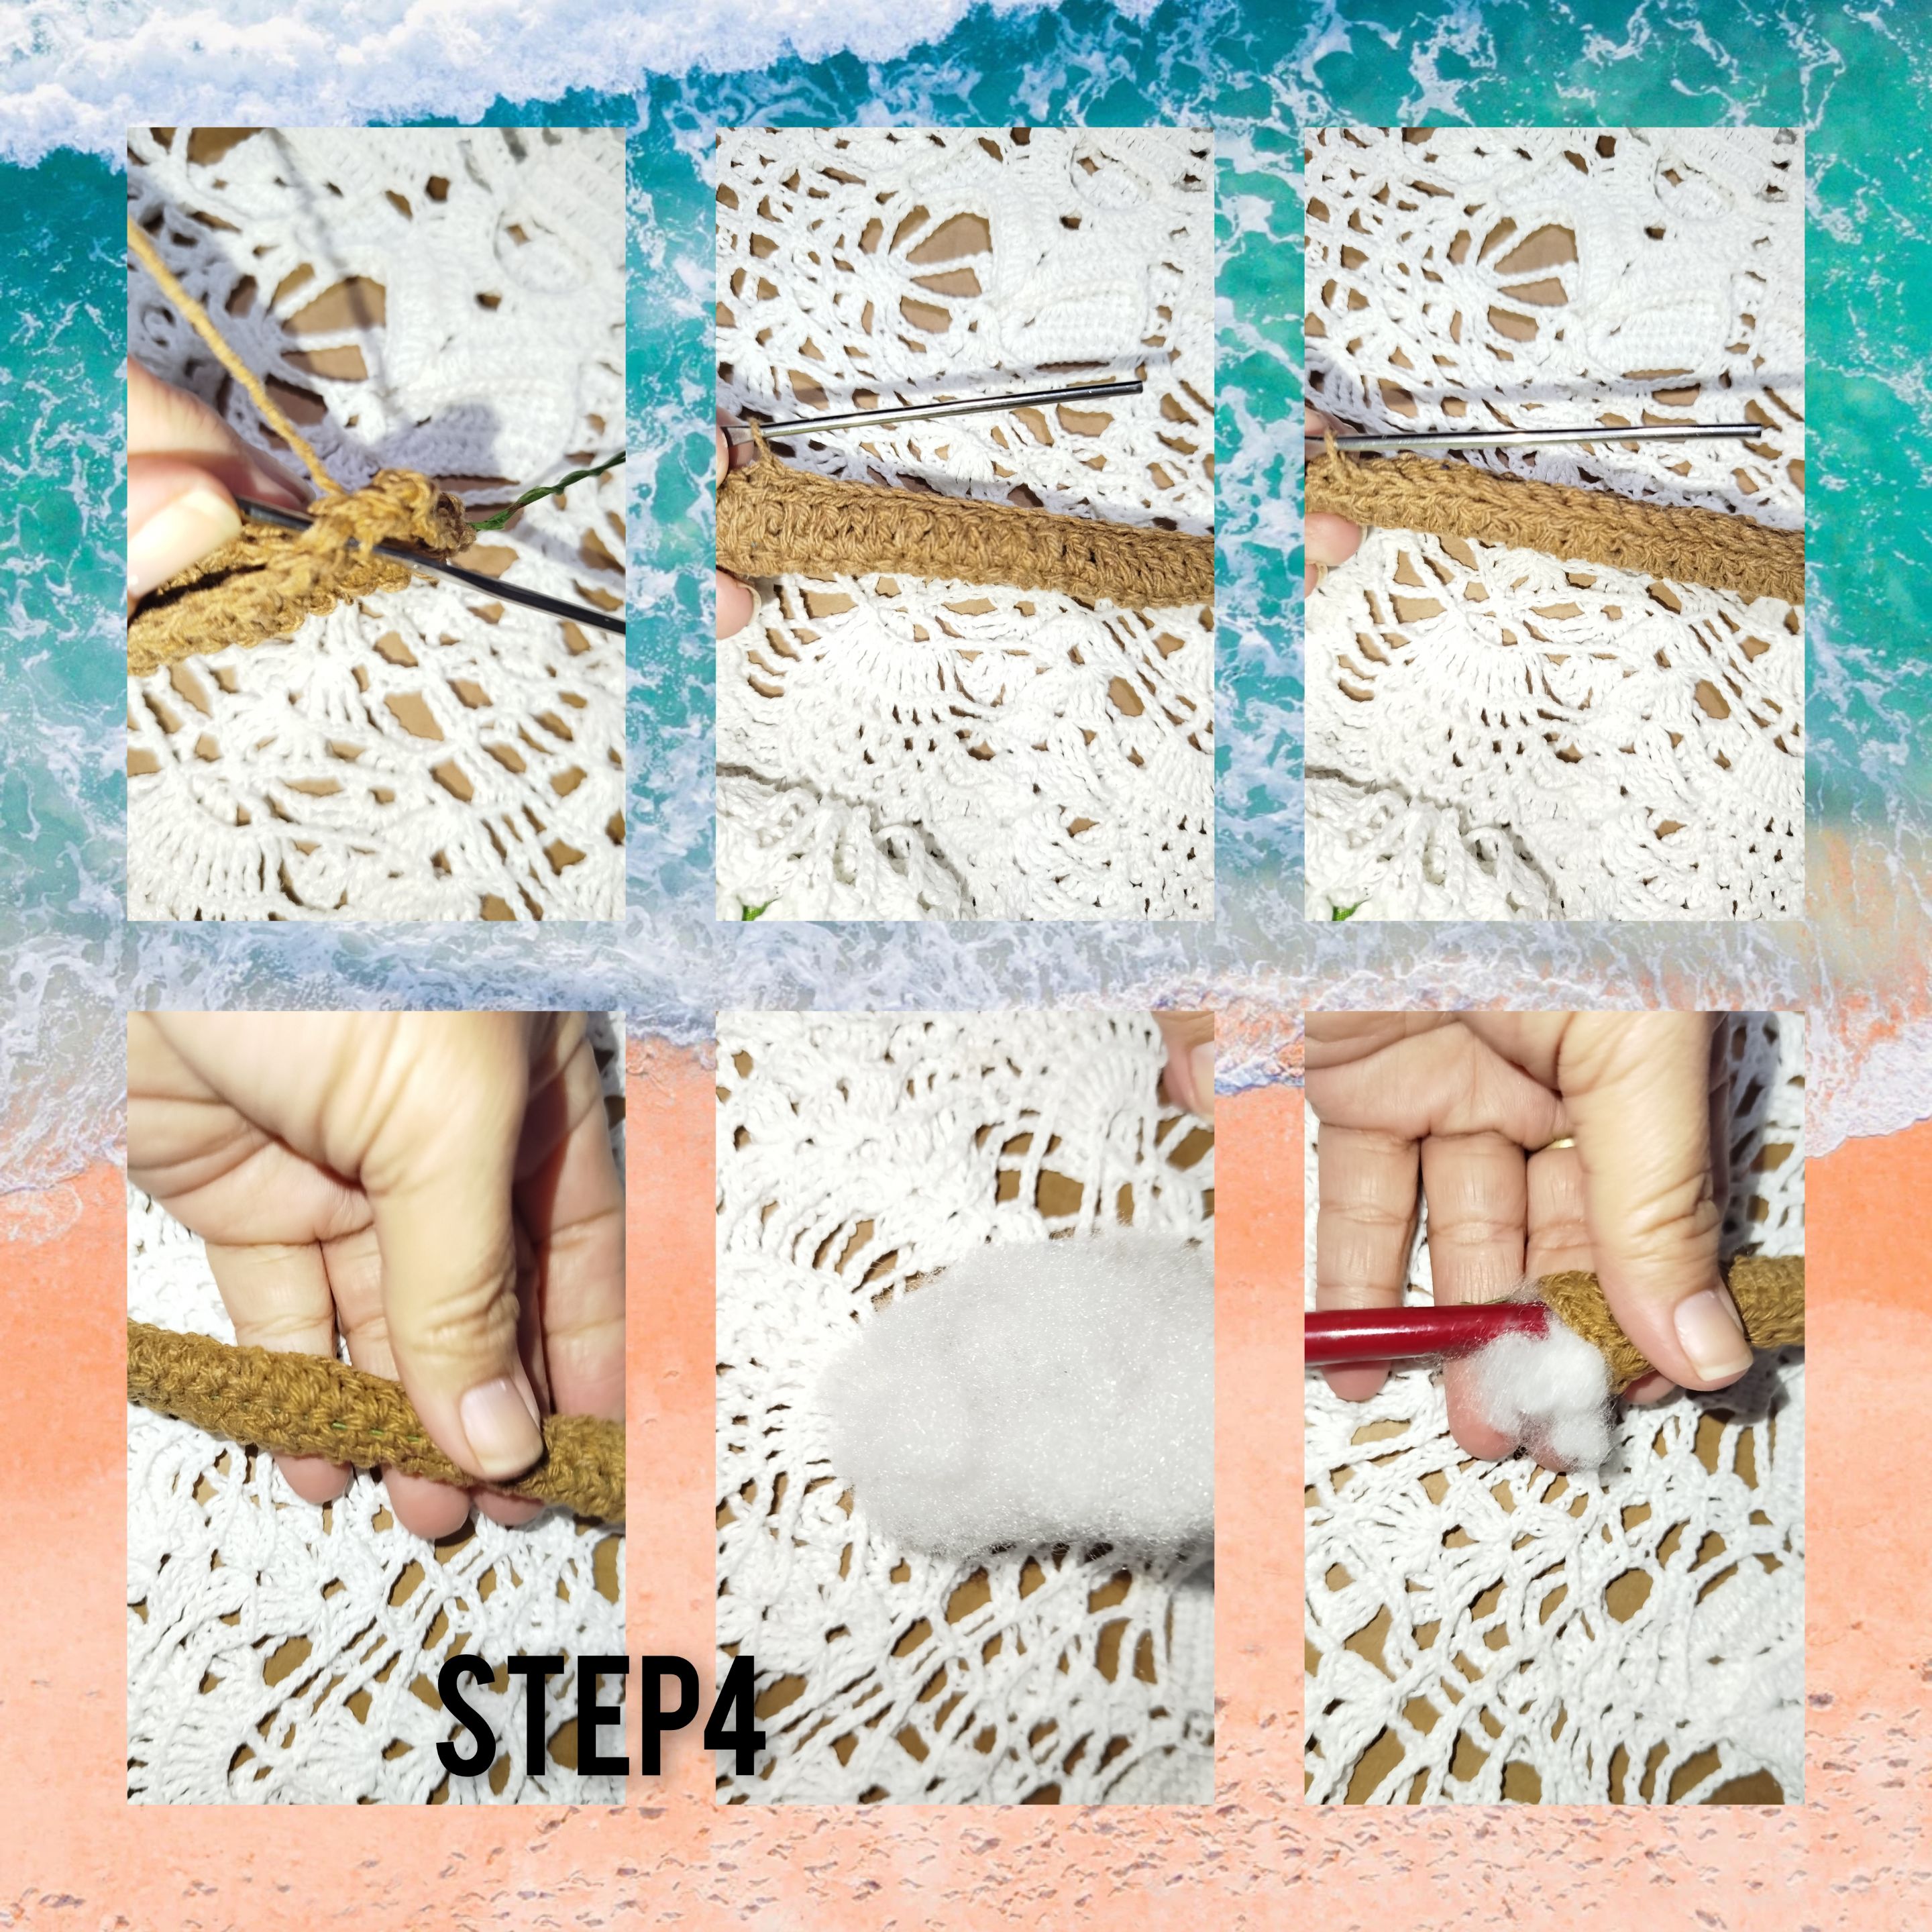
3.) For the trunk, I take a new piece of wire, this one larger, I cover it with half crochets on both sides, and I knit two more rounds of double crochets. Once this is done, one with running stitches on the ends forming a kind of tube.
4.) Next, I place a little filling inside the tube to give more stability and close the ends.
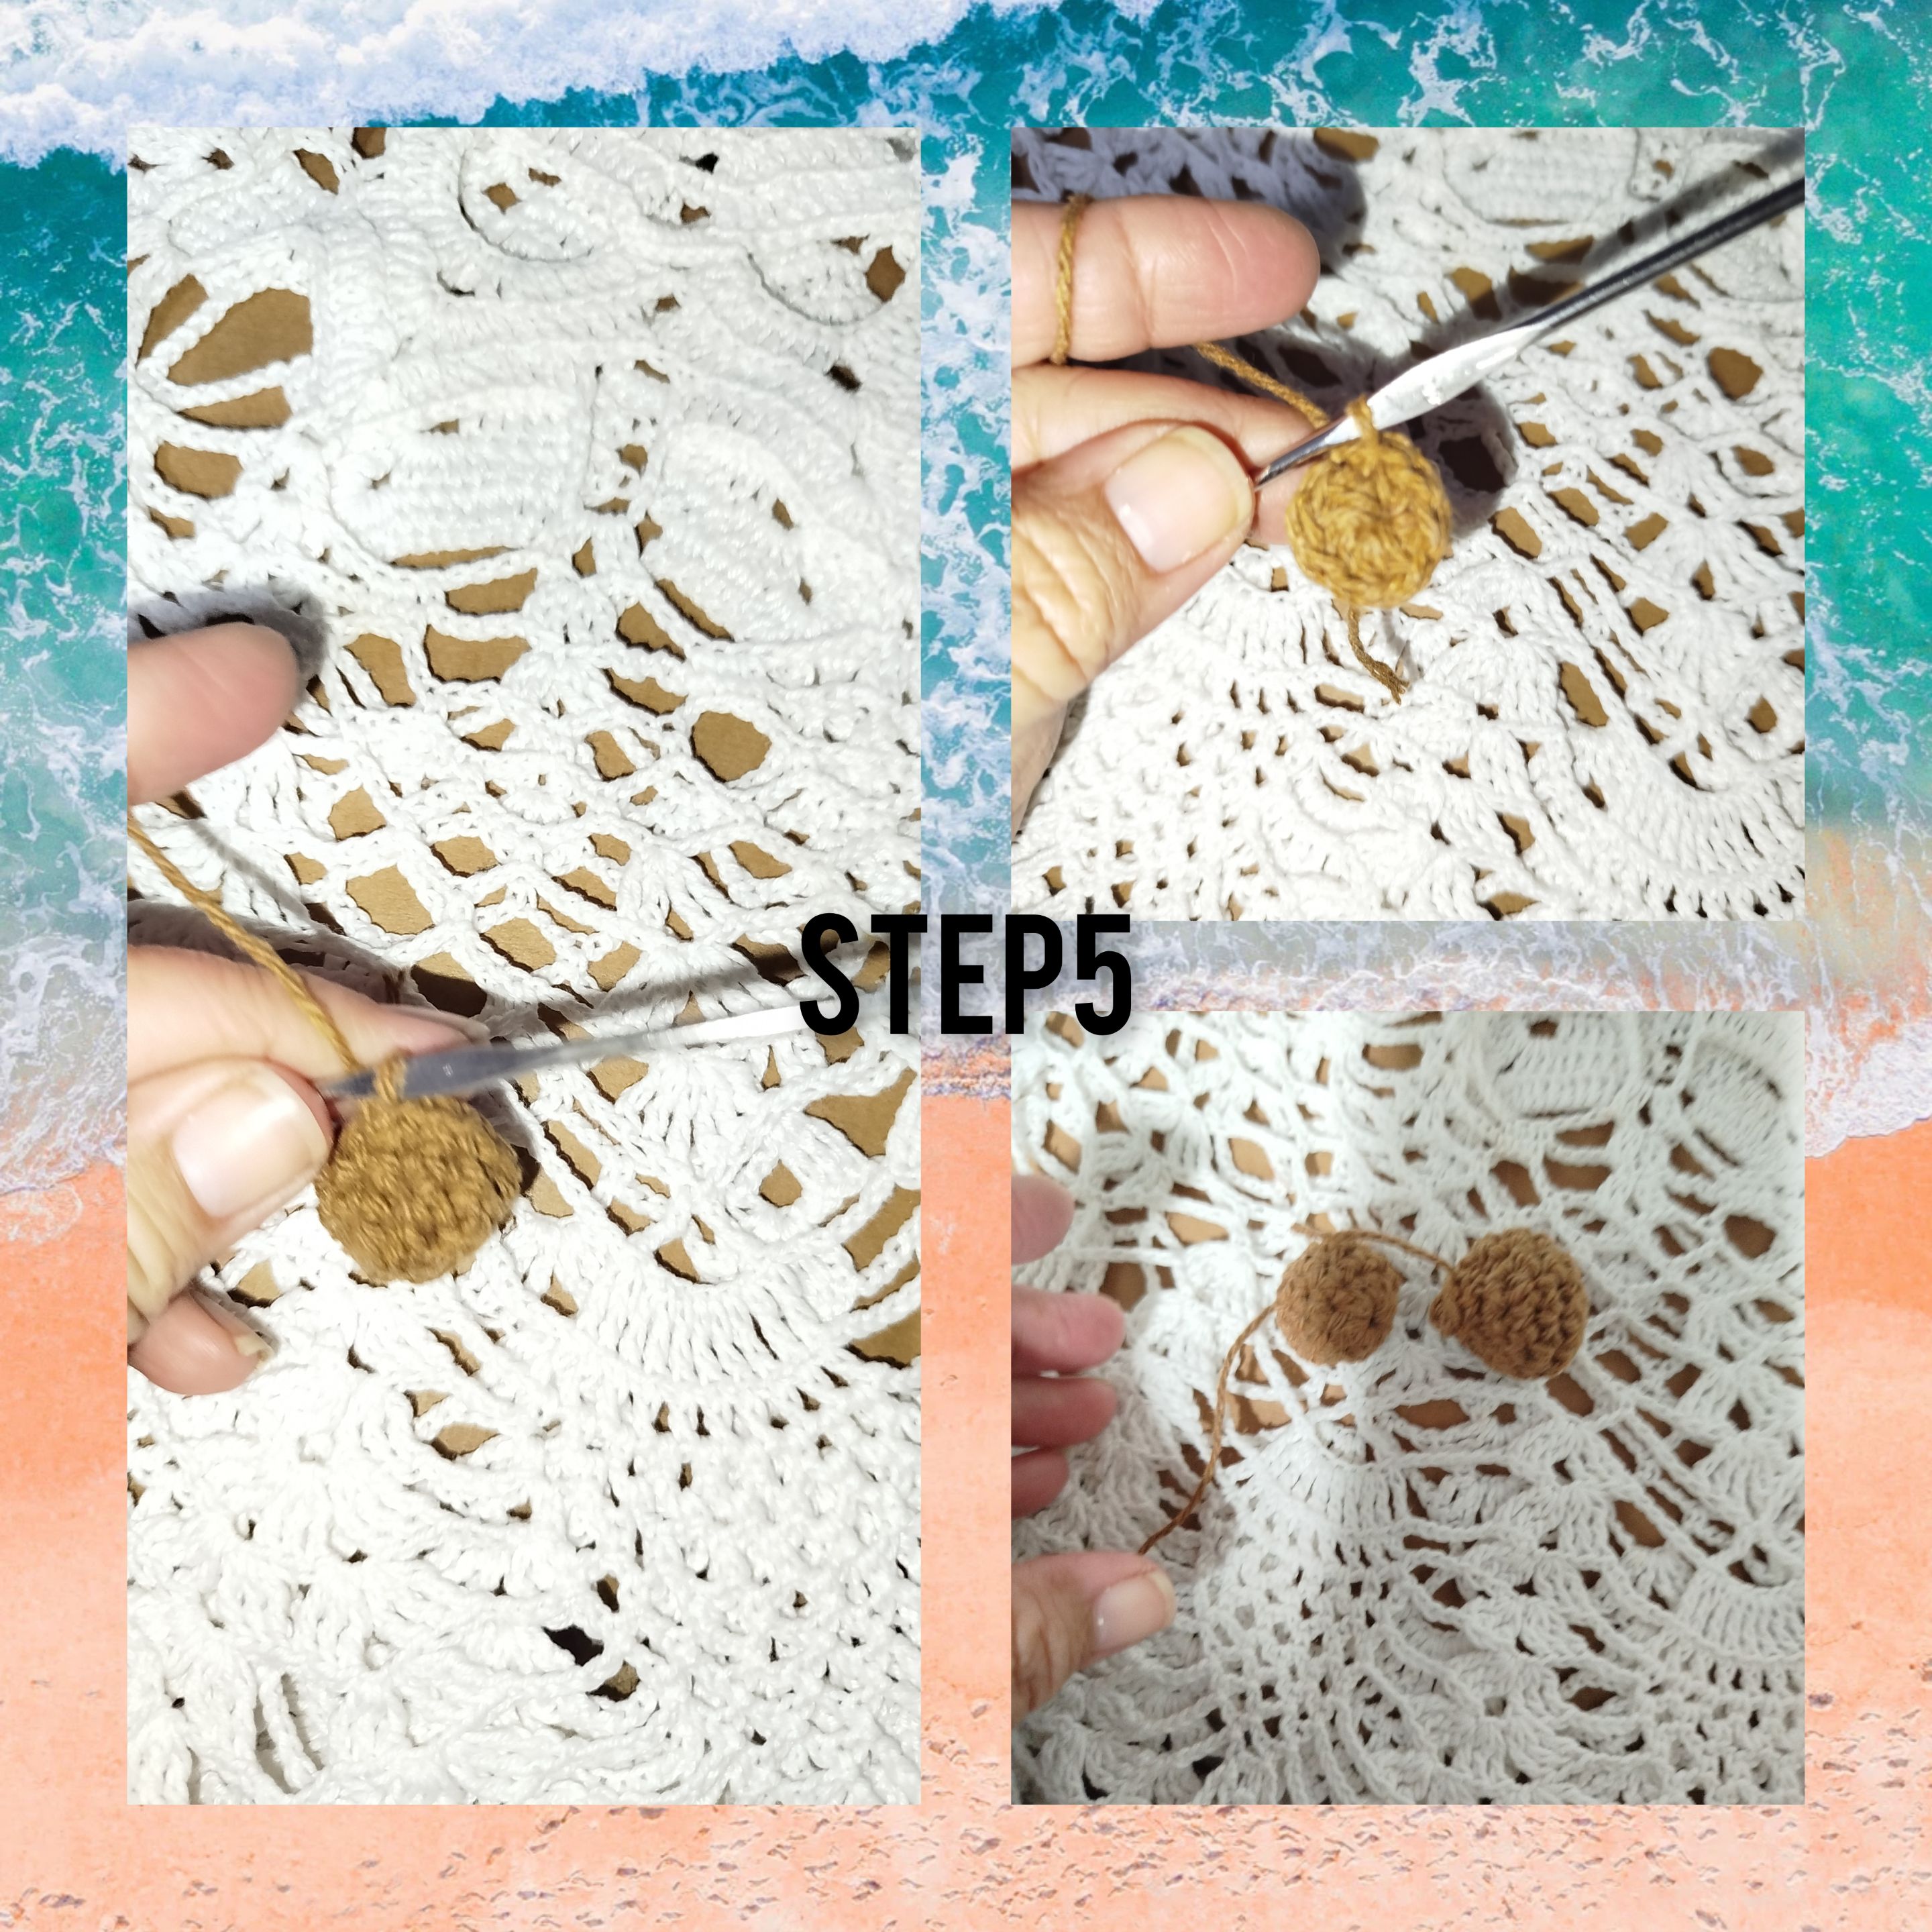
5.) I continue and in this step, I make a magic ring and inside the yew, eight single crochets, I knit the next run, and I knit sixteen half stitches, for the third and fourth round, I knit sixteen half stitches, I place a little fillings and I knit one round reducing and forming a small sphere. I repeat and knit one more sphere. These will simulate palm tree coconuts.
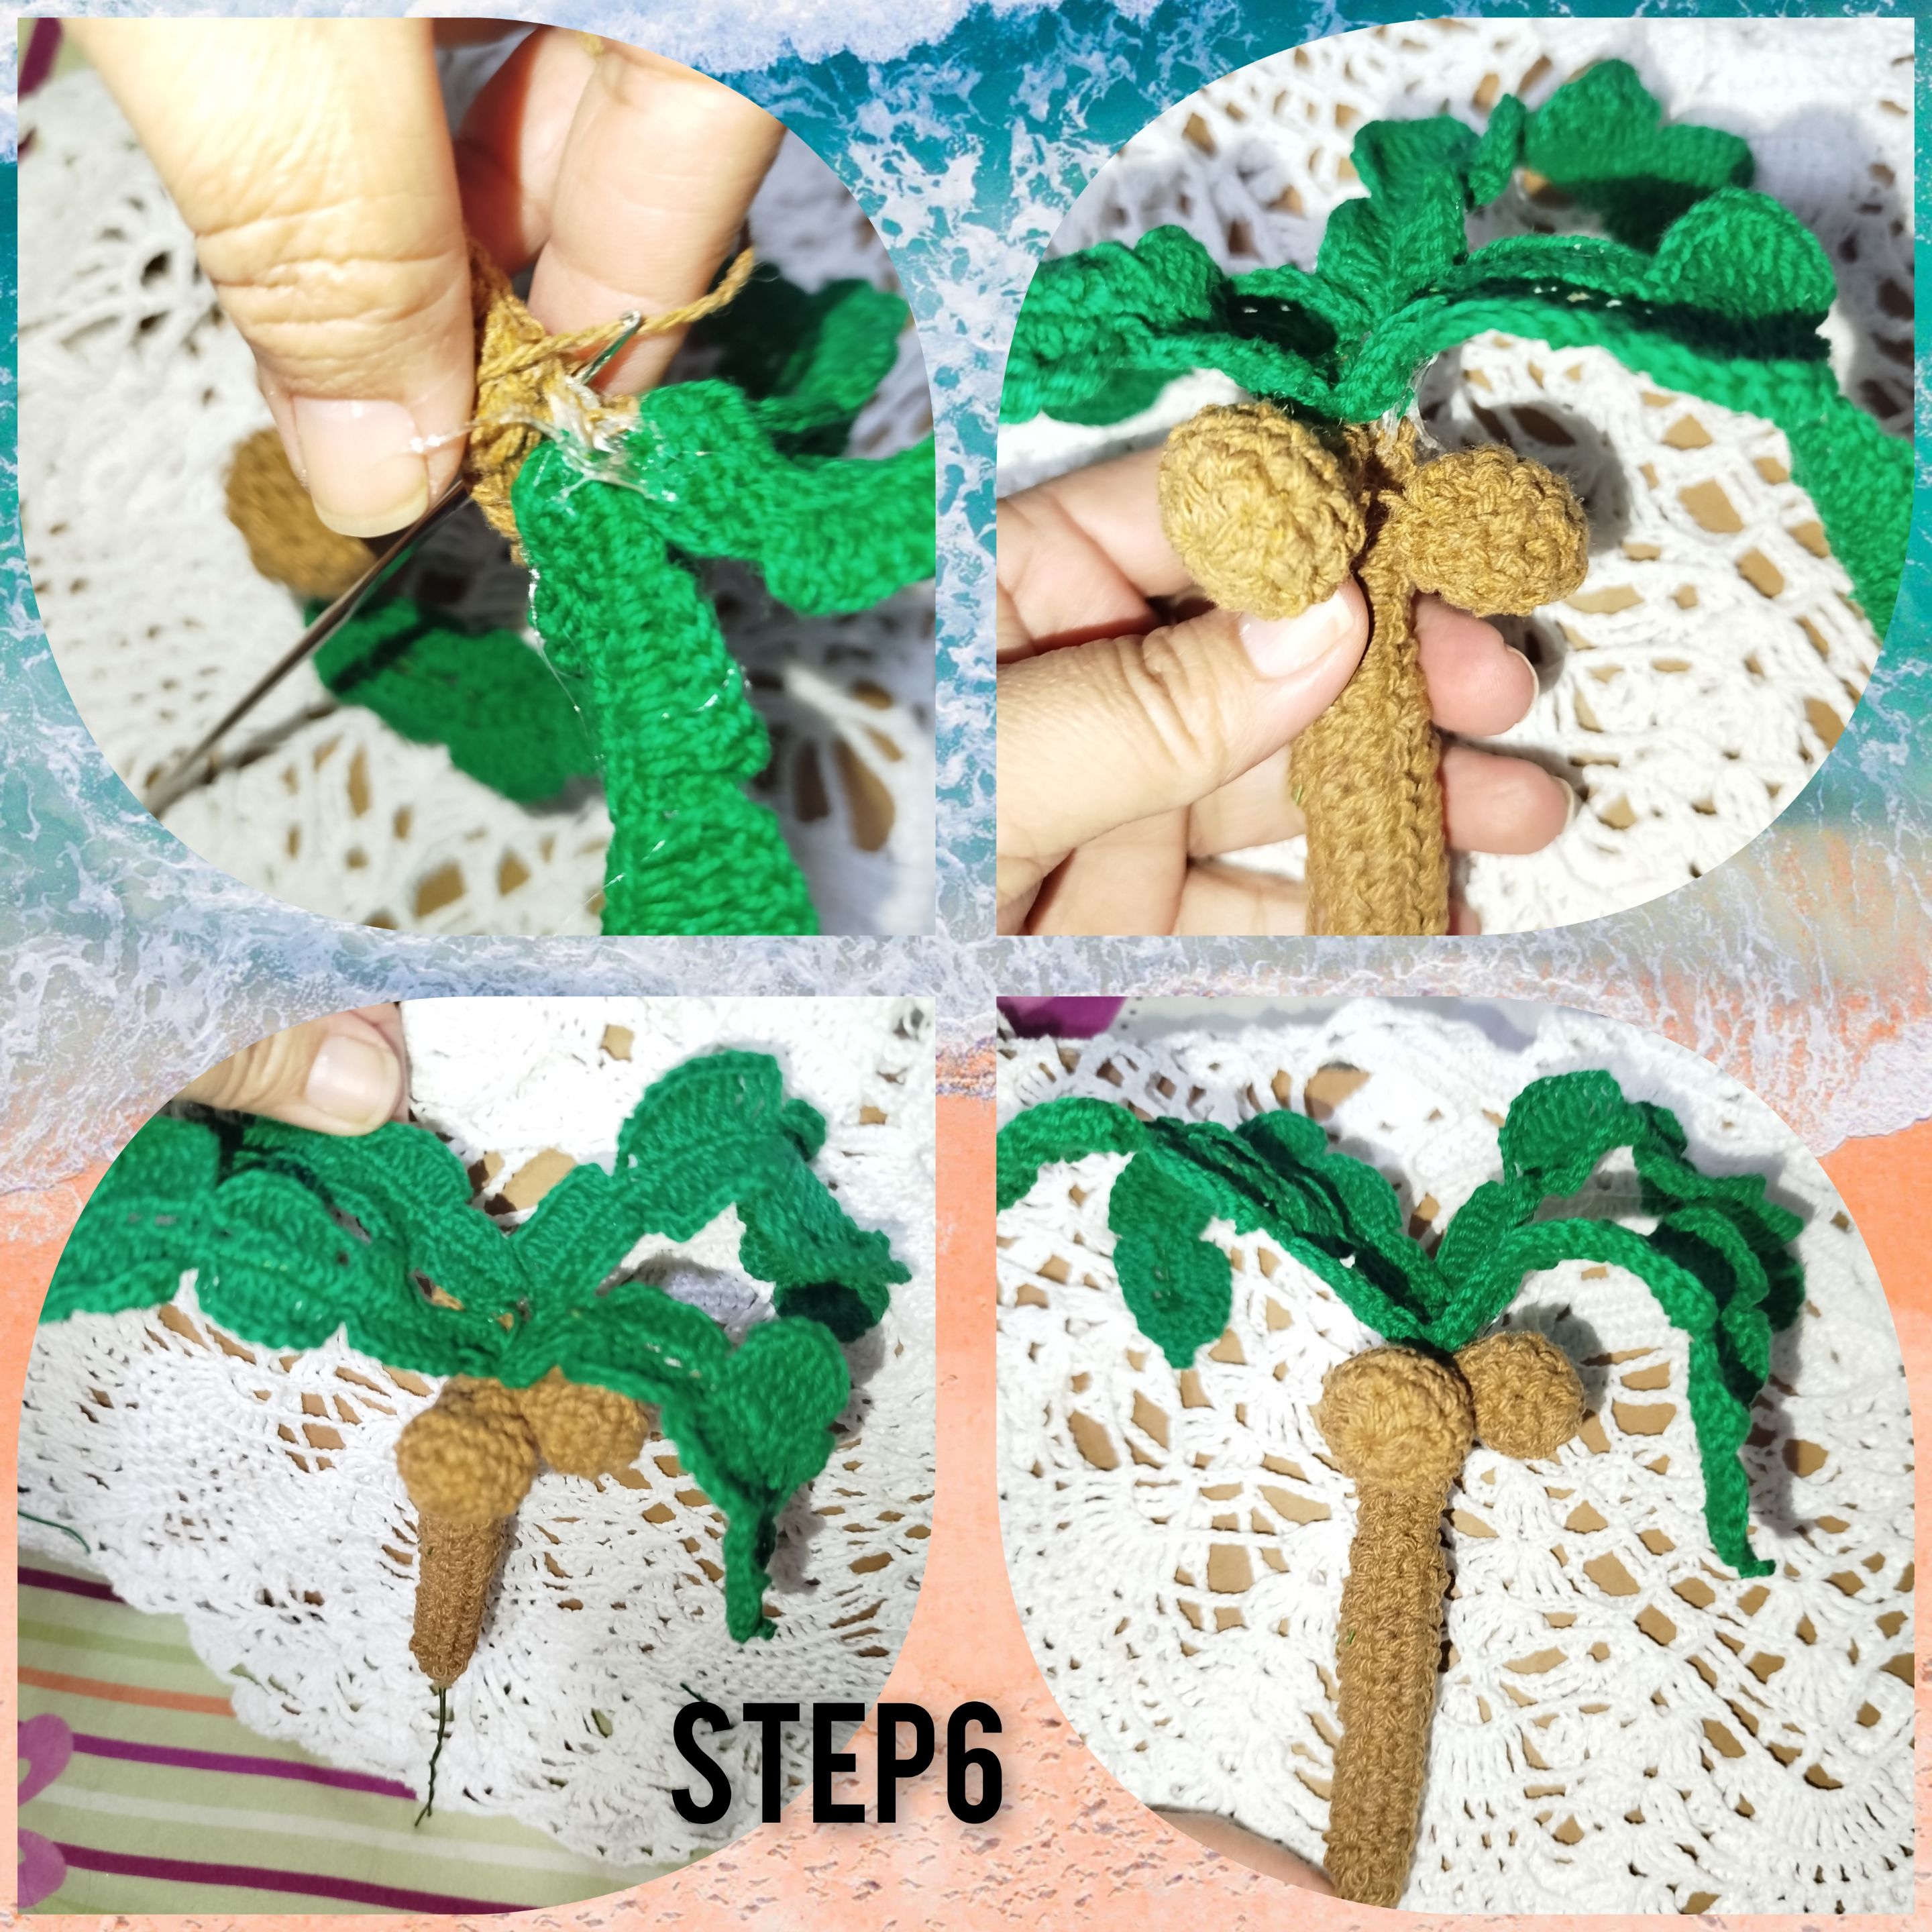
6.) In this step, I assembled the palm tree, placing a little glue and inserting the residual wire into the trunk, then under the palm trees with the help of the knitting needle, I placed the spheres.
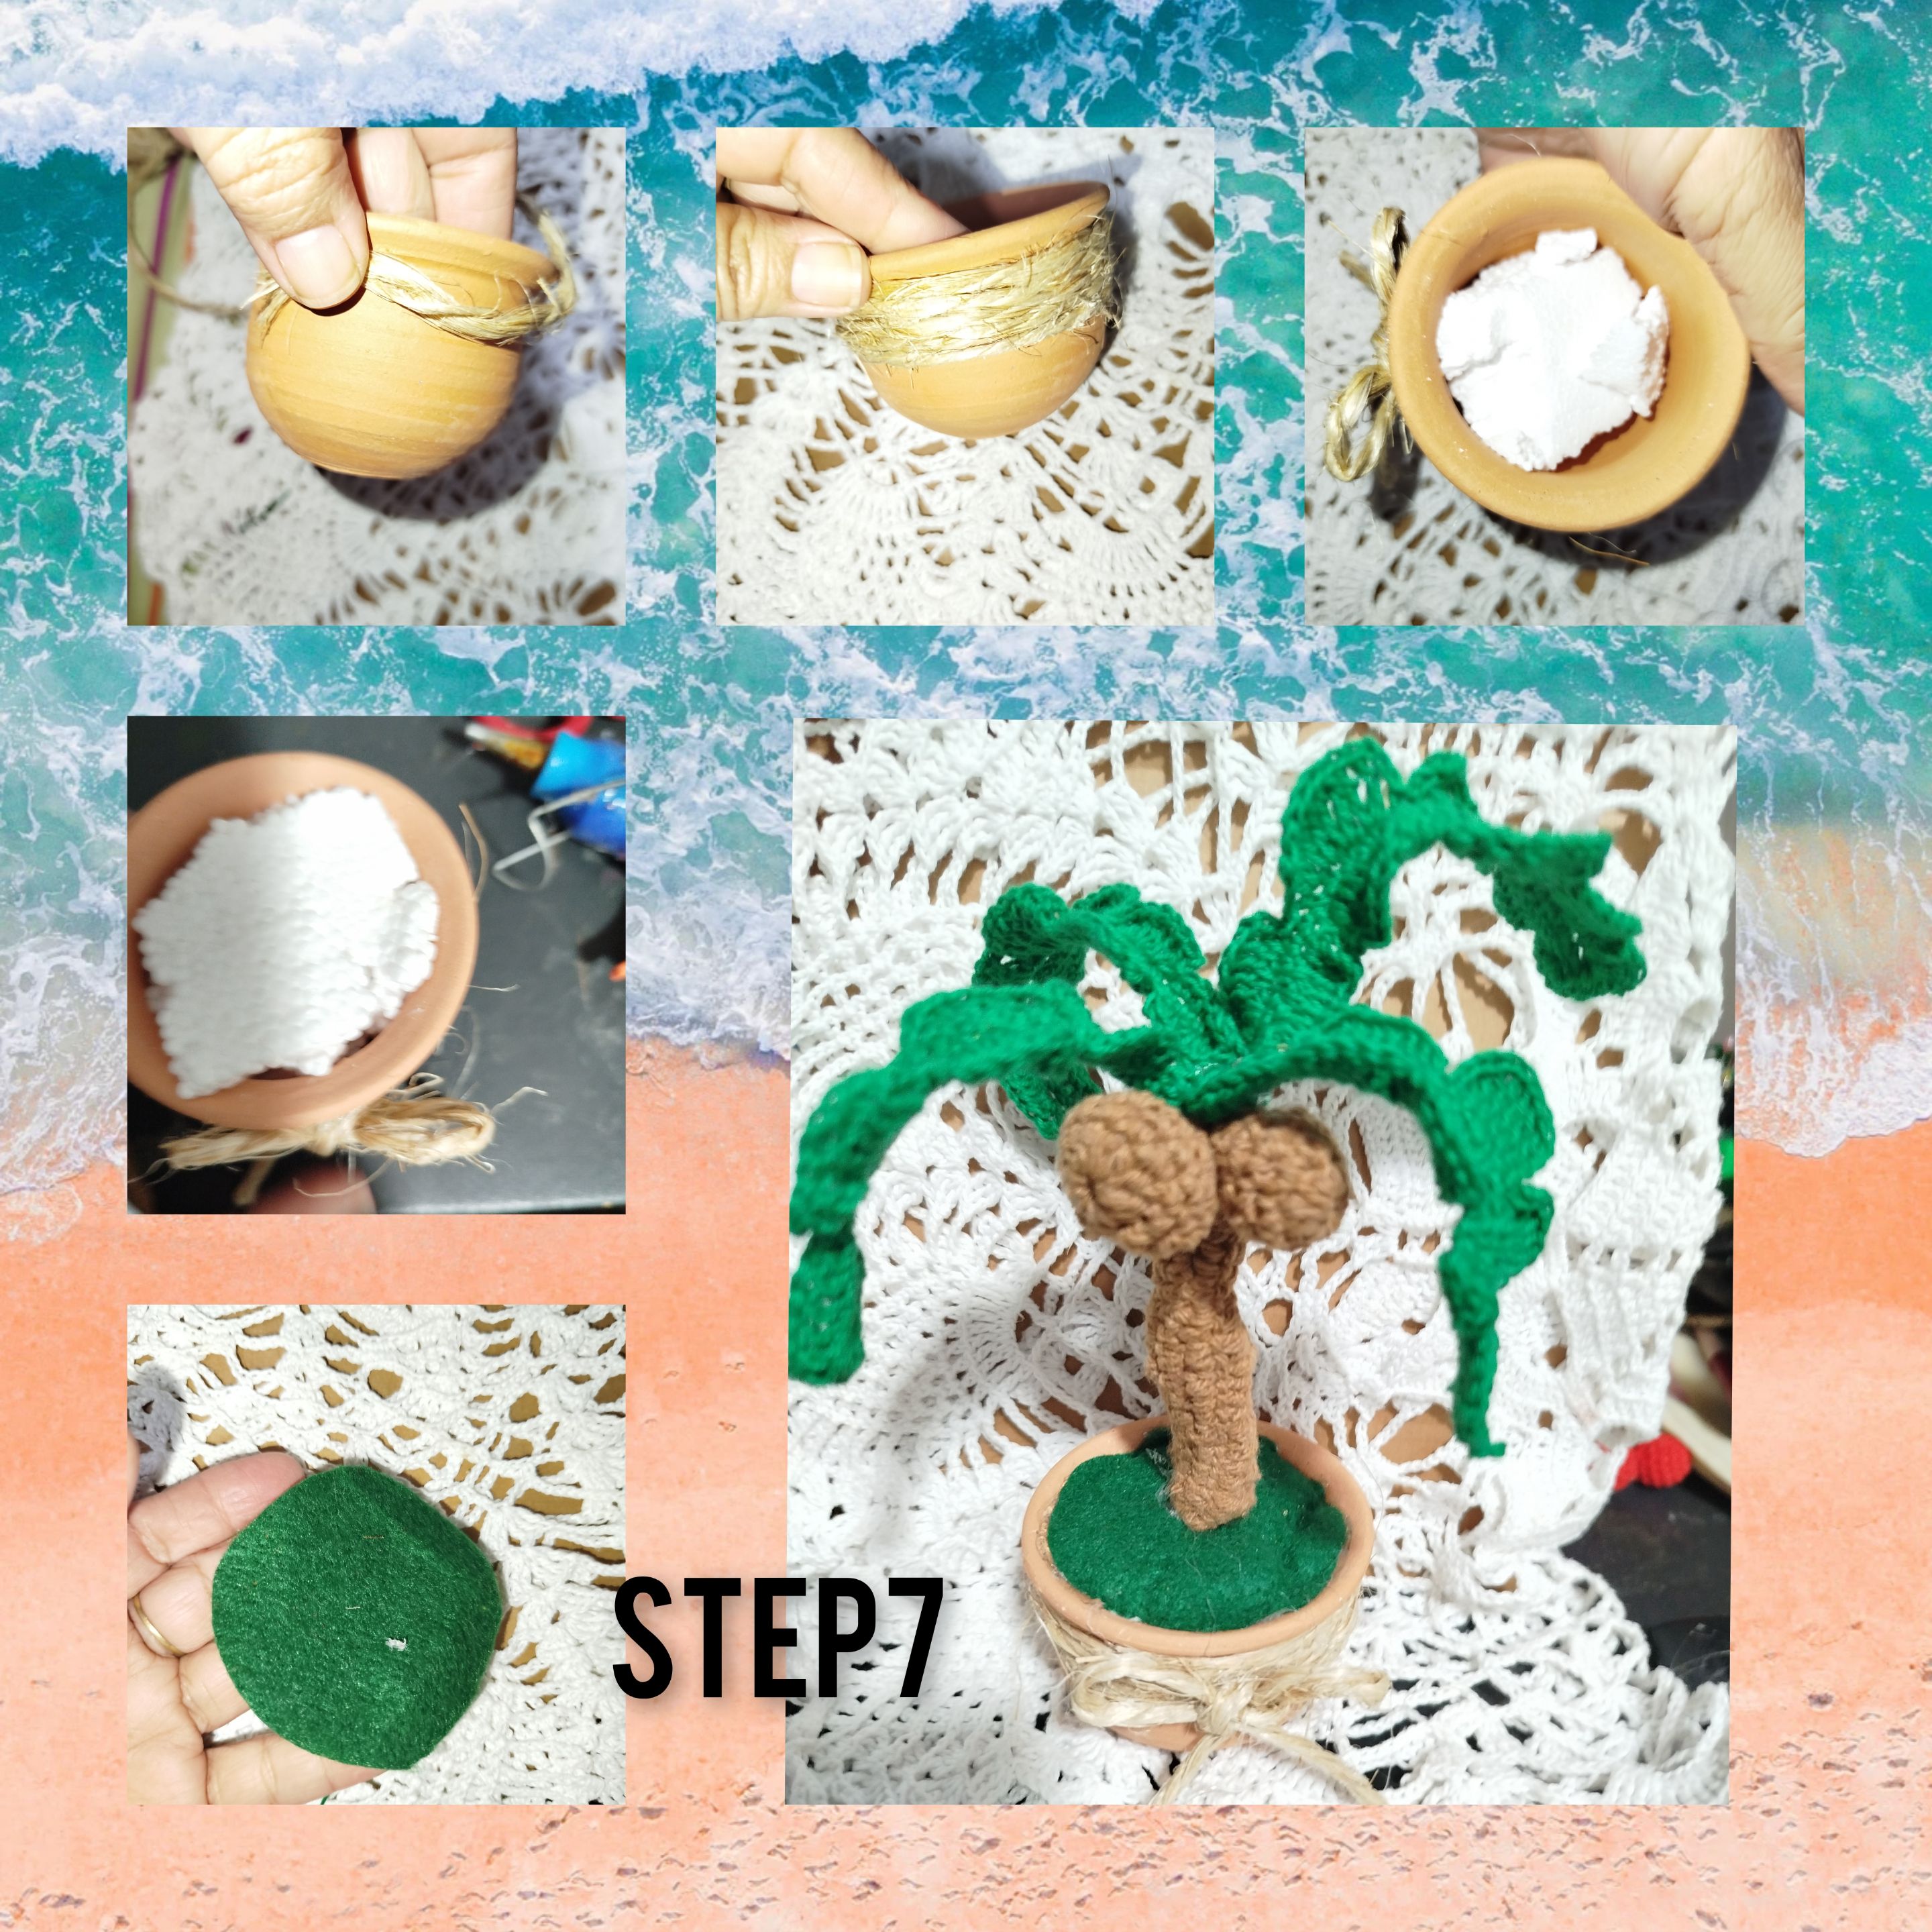
7.) I applied silicone and I make a few turns with the mecatillo, on the edge, I introduce the anime, on top of it I glue a circle of green felt andI introduce, the palm tree. I place a mecatillo bow on the front.
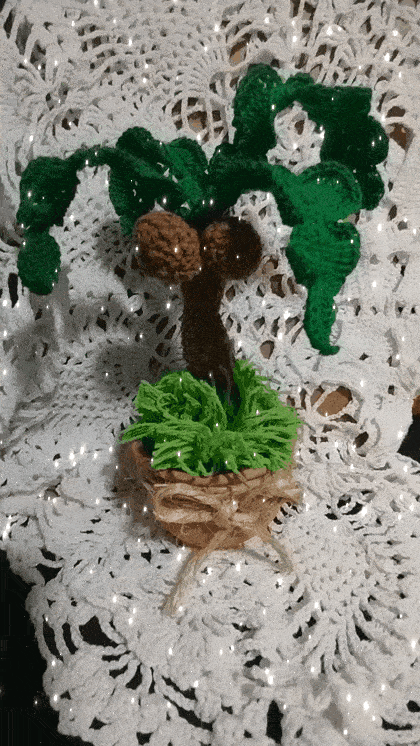
In this way, the small ornament has been completed, ideal for decorating any space, in the home, office, among others. I am very happy with the final result.
. All photos are my property. . Use incollage, to show the process and step by step. . Use gif video to show the finished product. . Use language translator.
Very grateful that you followed me until the end, until the next opportunity.
(Esp)
Deseo este sea un lindo y muy provechoso día, hoy muy contenta de participar, en el Concurso del mes Octubre,de esta gran comunidad,@ diyhub. para mí entrada, he realizado un muy bonito, proyecto manual, dónde use la técnica de crochet. Inspirada en un hermosa palmera tropical.adoro estás plantas y mucho más su fruto, y toda la variedad de alimentos y dulces que se hacen con ellos. Les invito a seguirme, deseo disfruten tanto como yo, este creativo proceso. Antes de iniciar, quiero extender la invitación a mis amigas, @creacioneslelys y a @lupasbra21.
Materiales usados.
. Hilos para tejer, de colores ( verde claro y verde grama, marrón). . Aguja para tejer . Trozos de alambre. . Tijeras. . Mini maceta de arcilla. . Mecatillo, color tradicional. . Trozo de anime. . Pegamento. . Fieltro de color verde.
Pasos a seguir:
1.) tomo un trozo de alambre, y con medios puntos comienzo a cubrir, antes debo doblar el alambre, par evitar, se salgan los puntos, hecho el recorrido en un primer lado, me ubico en el siguiente y repito. De esta manera, llegó a el punto de partida.
2.) Tejo un nuevo recorrido, tejo un primer grupo de siete puntos bajos, luego una cadenas y bajo a el último punto, tejiendo un punto deslizado, dejó un espació, continuo y tejo el siguiente grupo de puntos altos, luego uno de puntos altos dobles, y el siguiente, ya casi ubicado en la parte superior de puntos bajos. Continuo, y repito, en el siguiente lado. Formando de esta manera, una primera hoja de palmera, de la misma manera repito y tejo tres hojas más.
3.) Para el tronco, tomo un nuevo trozo de alambre, este de mayor tamaño, cubro con medios puntos por ambos lados, y tejo, dos recorridos más de puntos altos. Hecho esto, uno con puntos corridos los extremos formando una especie de tubo.
4.) Seguidamente, coloco un poco de relleno dentro de el tubo, para, dar más estabilidad y cierro los extremos.
5.) Continuo y en este paso, hago un anillo mágico y dentro de el tejo, ocho puntos bajos, tejo el siguiente corrido, y tejo dieciséis medios puntos, para la tercera y cuarta vuelta, tejo dieciséis medios puntos, coloco un poco de rellenos y tejo una vuelta reduciendo y formando una pequeña esfera. Repito y tejo una esfera más. Estás simularán cocos de palmeras.
6.) En este paso, armó la palmera, colocando un poco de pegamento e introduciendo, el alambre residual a el tronco, luego debajo las palmeras con ayuda de la aguja de tejer, coloco las esferas.
7.) aplicó silicón y doy unas vueltas con el mecatillo, en el borde, introduzco el anime, sobre de el pego un círculo de fieltro color verde e introduzco, la palmera. Coloco en la parte de el frente un lazo de mecatillo.
De esta manera, ha quedado, finalizado, el pequeño adorno, ideal para decorar cualquier espacio, en el hogar, oficina, entre otros. Yo muy contenta con el resultado final.
. Todas las fotos son de mí propiedad. . Use incollage, para mostrar el proceso y paso a paso. . Use gif video para, mostrar el producto terminado. . Use traductor lenguaje.
Muy agradecida me hayas, seguido hasta el final, será hasta una próxima oportunidad.